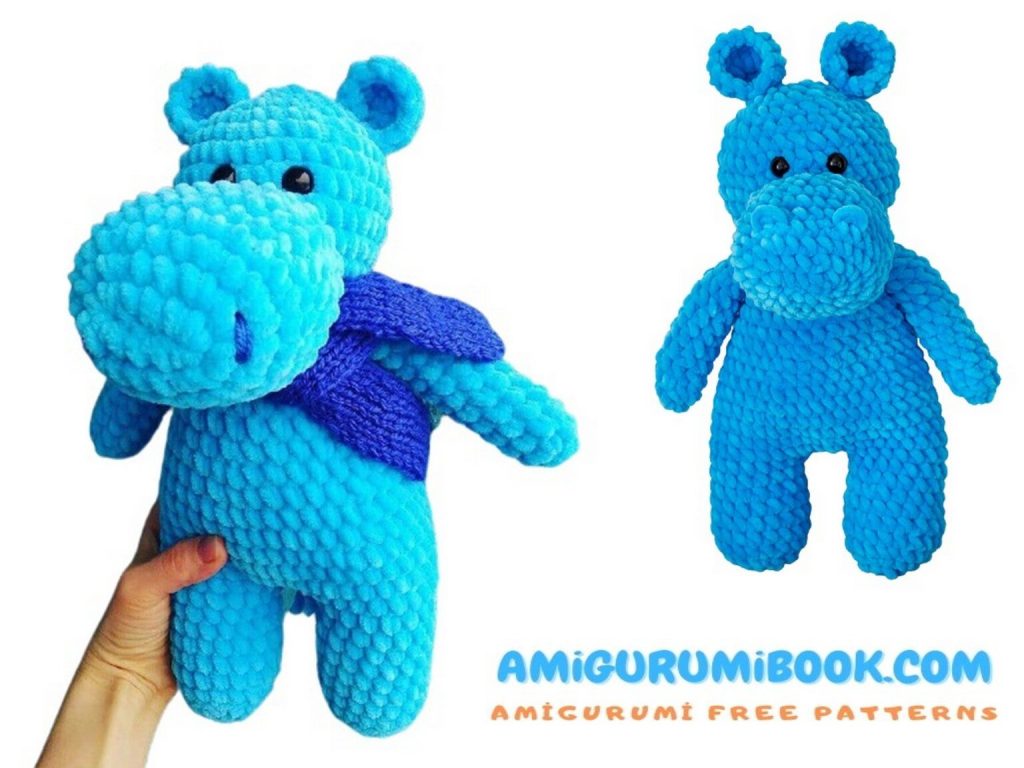
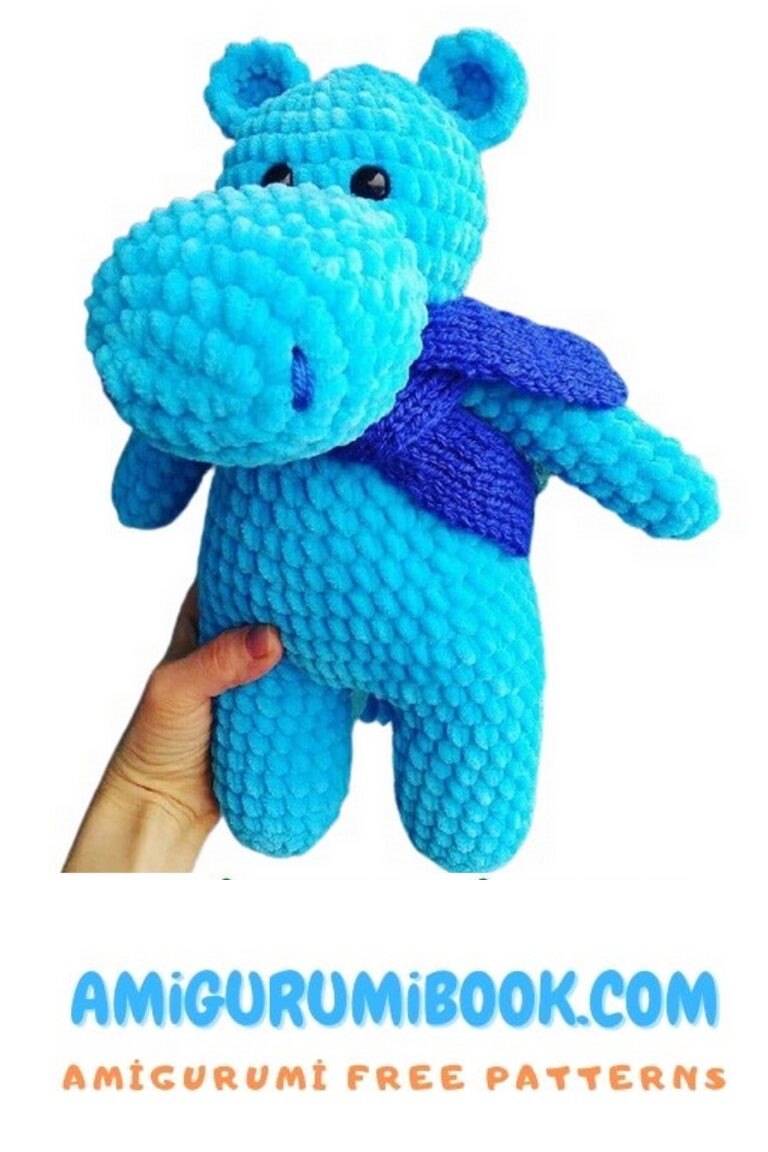
Blue Hippo Amigurumi Free Pattern
Wonderful amigurumi animal patterns are with you for free. You will love the amigurumi blue hippo pattern in this article.
ABBREVATİONS
CH – chain
SC – single crochet
DC – double crochet
İNC – increase
DEC – decrease
SL-ST – slip stitch
STAGE 1: LEGS + BODY
1 row: 2 CH, 6 SC in the 2nd from the hook loop
2 row: 6 İNC (12)
3 row: (1 SC, İNC) 6 (18)
4 row: 18 SC for the rear loop
5-10 rows (6 rows) 18 SC
Cut the thread, leaving a small end.
We knit the second part in the same way.
At the end of knitting the second part, the thread is not cut.
11 row: We knit 3 CH, connect with the second leg we knit 18 SC on the second leg, 3 SC on the chain of CH, 18 SC on the first leg, 3 SC on the chain of CH (42)
12 row: 17 SC, İNC, 1 SC, İNC, 1 SC, İNC, 17 SC, 3 SC (45)
13-15 rows: 45 SC
16 row: (7 SC, DEC) * 5 (40)
17 row: 40 SC
18 row: (6 SC, DEC) * 5 (35)
19 row: 35 SC
20 row: (5 SC, DEC) * 5 (30)
21-22 rows: 30 SC
23 row: (4SC, DEC) * 5 (25)
24 row: 25 SC
25 row: (3 SC, DEC) * 5 (20)
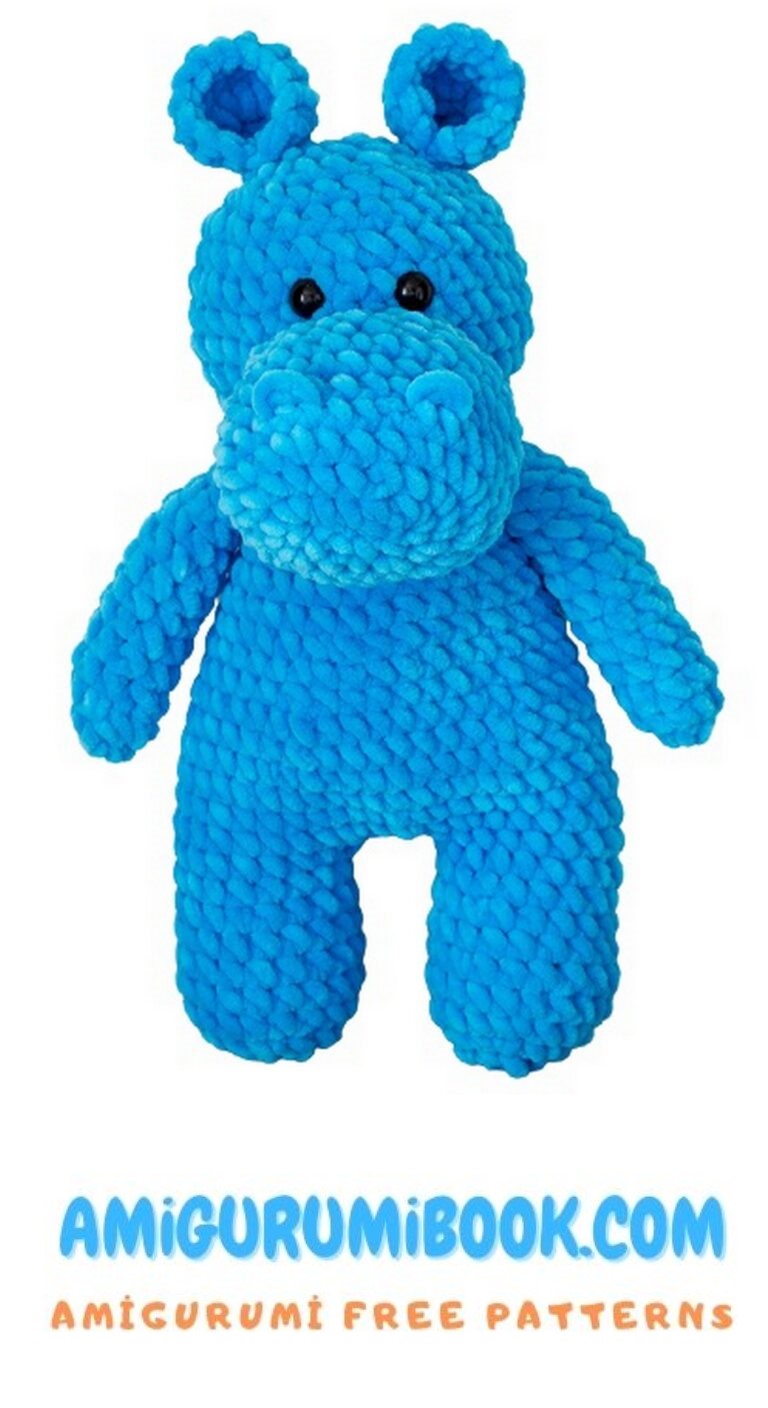
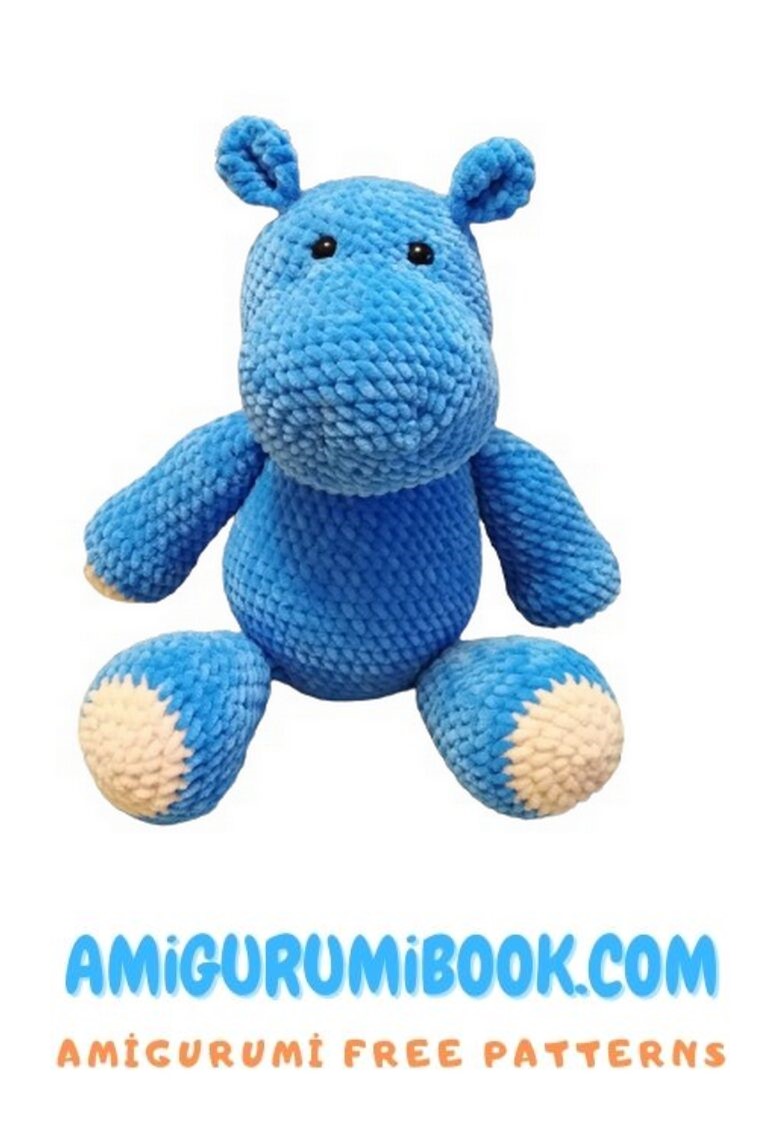
2 STAGE. HEAD.
1 row: 2CH, 6 SC in the 2nd loop (6)
2 row: 6 İNC (12)
3rd row: (1SC, İNC) * 6 (18)
4 row: (2 SC, İNC) * 6 (24)
5 row: (3SC, İNC) * 6 (30)
6 row: (4 SC, İNC) * 6 (36)
7-10 rows: 36 SC
If the eyes are on the mount – insert between the 7th and 8th rows.
We fill the part in the course of knitting.
11 row: (4 SC, DEC) * 6 (30)
12 row (3 SC, DEC) * 6 (24)
13 row (2 SC, DEC) * 6 (18)
We knit several SL-STs, cut the thread, leaving the end for stitching.
(The head will be small in relation to the body, do not be scared, it should be so) 😉🌹😄
STAGE 3: Muzzle.
1 row: We collect a chain of 6 CH. 2 SC to the second loop from the hook, 2 SC, 4 SC to the last loop of the chain, then we knit on the back of the chain 2 SC, 2 SC to the last loop (12)
2 row: 2 İNC, 2 SC, 4 İNC, 2 SC, 2 İNC (20)
3 row: (1 SC, İNC) * 2, 2 SC, (1 SC, İNC) * 4, 2 SC, (1 SC, İNC) * 2 (28)
4-7 rows (4 rows) 28 SC
8 row: (5 SC, DEC) * 4 (24)
9 row: 24 SC
10 row: (4SC, DEC) * 4 (20)
11 row: (3 SC, DEC) * 4 (16)
We knit several SL-STs, fill the part, leave the end of the thread for stitching.
Optionally, you can connect two halves of the nose (2CH, 6 SC in the second loop) and sew them between the 7th and 8th rows of the muzzle.
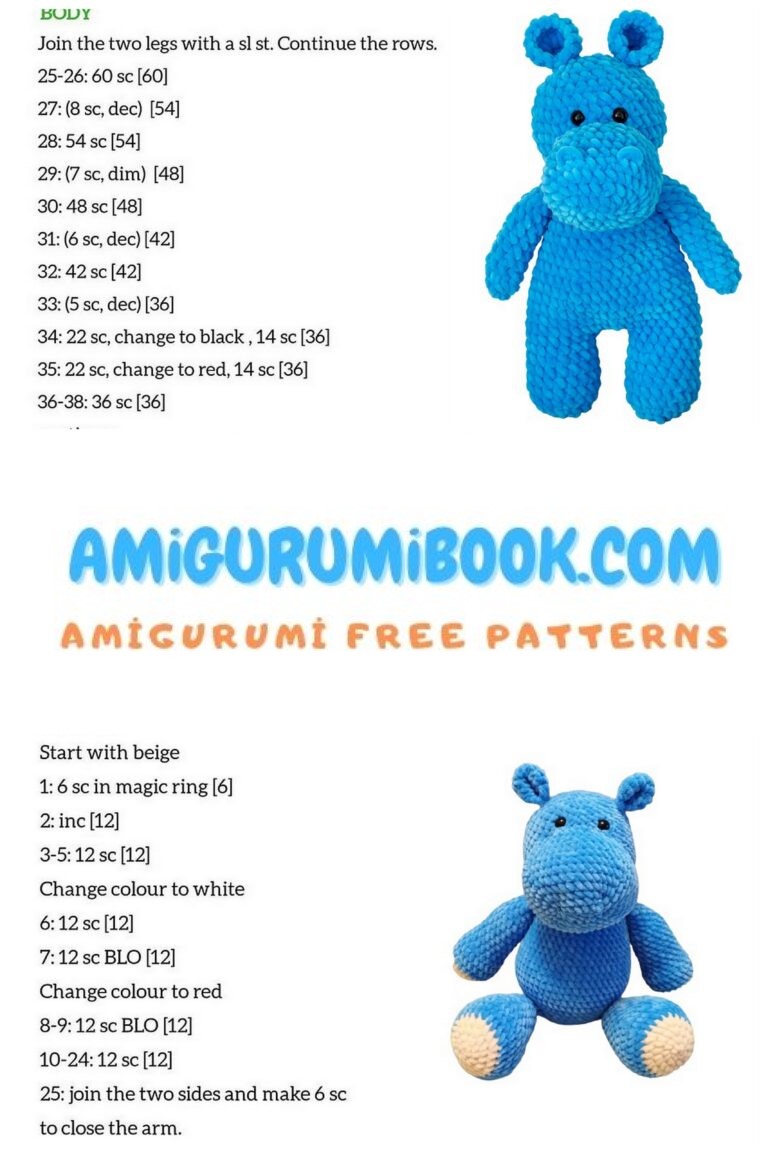
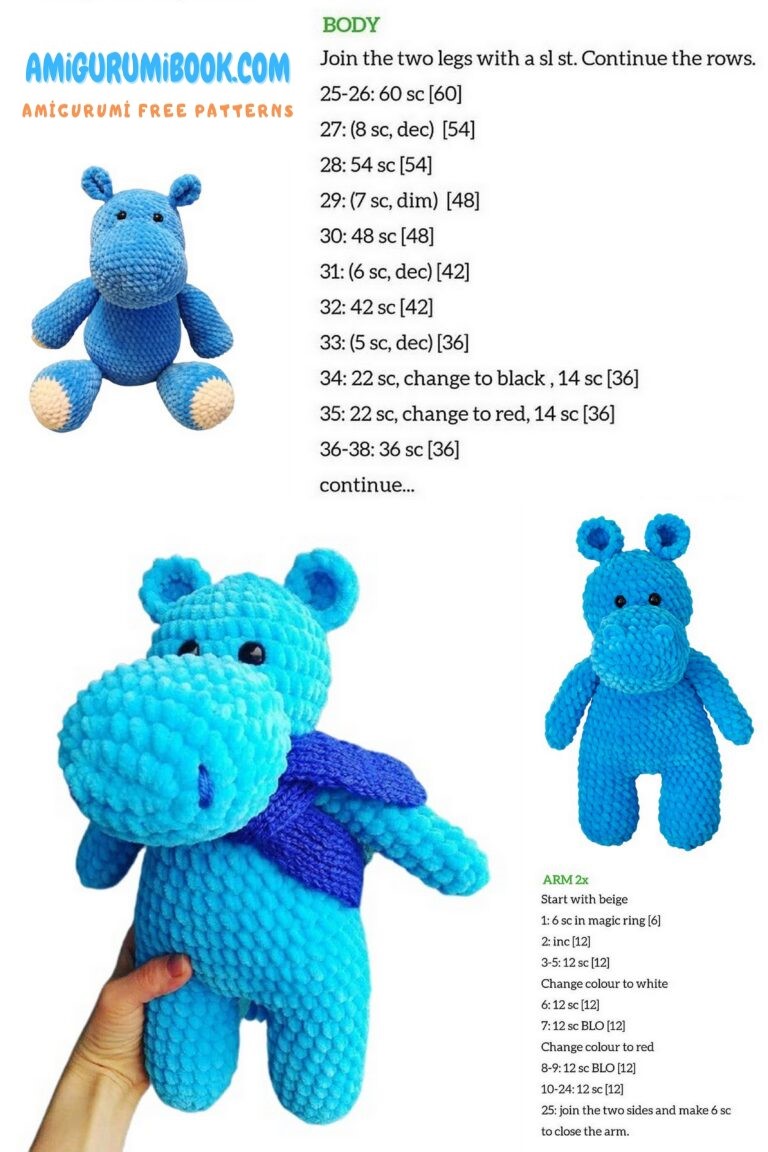
STAGE 4: USHI.RUKI. TAIL.
HANDLES (we knit two parts)
1 row: 2 CH, 6 Sc in the second loop.
2 row: (1 SC, İNC) * 3 (9)
3-13 rows (11 rows) 9 SC
We do not completely fill the part, fold it in half, knit 4 sc.
EARS (we knit two parts)
1 row: 2 CH, 6 SC in the second loop.
2 row: we unfold the knitting, do 3 lifting loops (3CH), we knit DC in the same SC, in each of the remaining 5 SC we knit 2 DC (12 DC)
we tie the part along the entire perimeter of SC.
Fold in half, knit 4 SC.
TAIL (we do as desired) cut 3 strings of the main yarn (15-20 cm), put them together, fasten to the butt with a hook, and braid a short pigtail (2-3 cm), make a knot, and cut the threads, leaving a small brush .
SKIRT AND BOW. ASSEMBLY,
SKIRT.
We knit a chain of CH (to tightly wrap around the tummy, everyone will have a different number of loops)
We connect the chain, knit in a circle.
1 row: 3 lifting loops (CH), DC into the same loop, then we knit 2 DC into each loop, SL-ST
2 row: 3 lifting loops, 1 DC in each DC, sl-st.
BOW:
In the amigurumi ring: 3 CH, 4 DC, 3 CH, sl-st, 3 CH, 4 DC, 3 CH, SL-ST.
Cut the thread, leave a small tip, wrap the bow in the center several times, tie a knot in the back.
All is ready!!! Now you can stitch the details.
I stitched in this sequence:
HEAD + BODY + HANDLES + Muzzle + EARS.
Then she sewed her eyes and designed her eyebrows with cilia.
That’s all!!! I wish you all pleasant knitting and even loops. Waiting for your work.