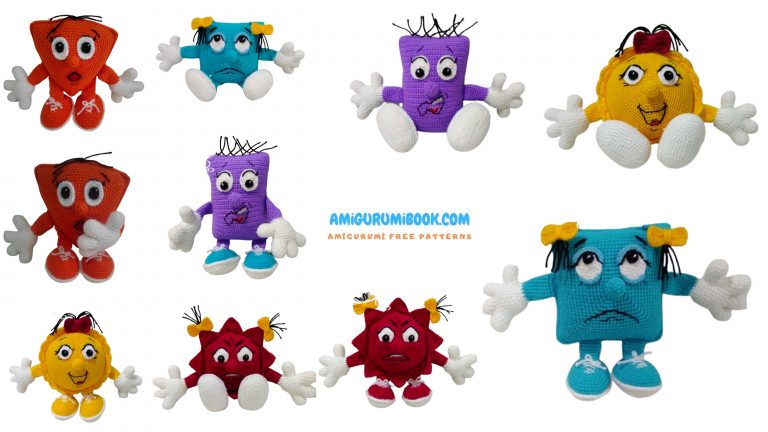
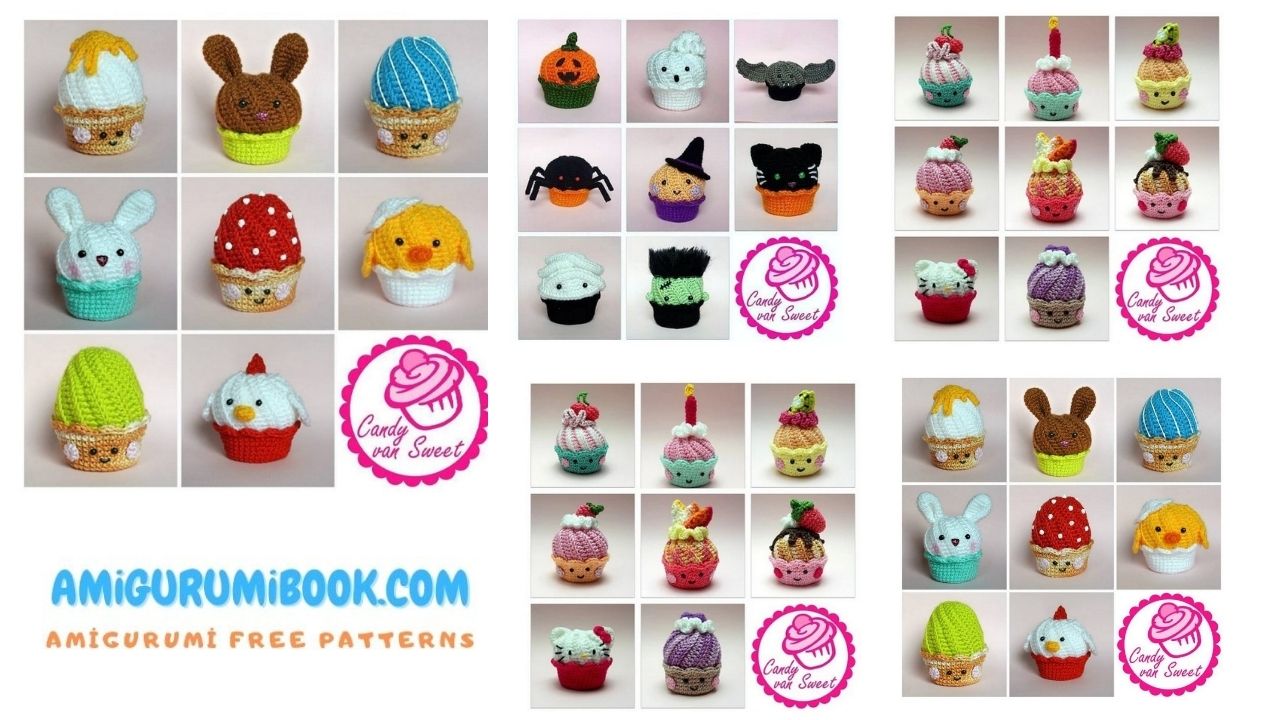
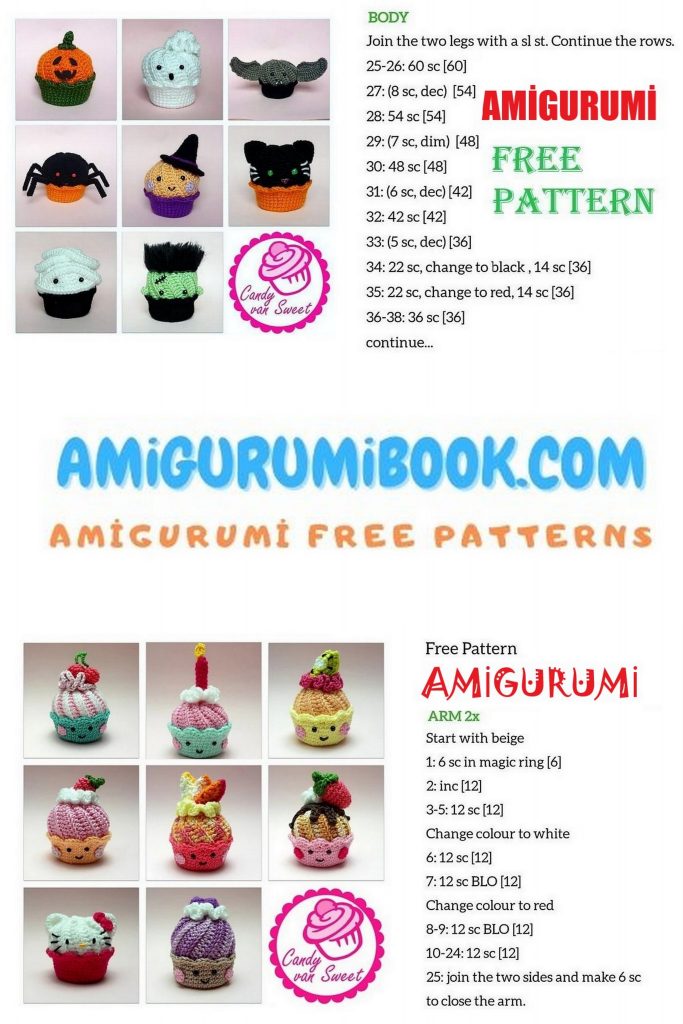
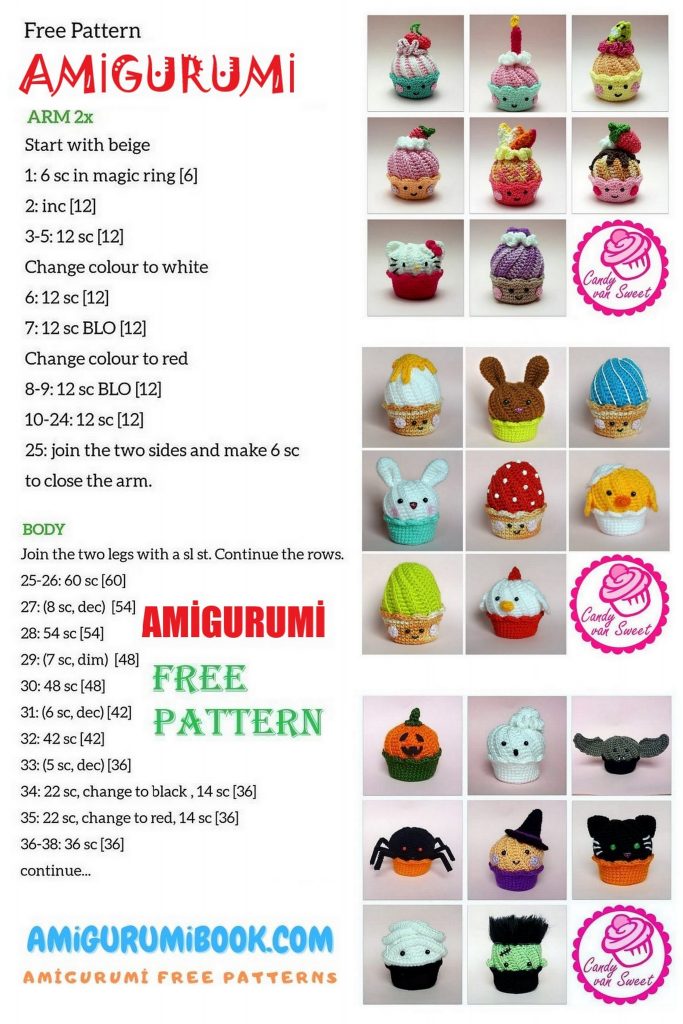
Cupcake Amigurumi Free Pattern
We share the latest free patterns with Amigurumi with you. In this article, amigurumi cupcake free crochet pattern is waiting for you.
Materials:
★ 3 mm crochet hook
★ Yarn
I used Schachenmayr Catania, Catania Color and Micro,
but you can use any yarn you want.
Just remember to adjust the size of your hook
★ Stuffing
★ Needle
★ Puff paint or safety eyes
★ If you’re a loser when it comes to sewing like me, than you also need a hot
glue gun
Abbreviations:
★ sl st: slip stitch
★ sk st: skip stitch
★ ch: chain
★ sc: single crochet
★ hdc: half double crochet
★ dc: double crochet
★ inc: increase
★ dec: decrease
★ BLO: back loops only
★ FLO: front loops only
★ hdc2tog: half double crochet decrease
Instructions
PATTERN

Cake:
1) round: 6 sc in magic ring, join, chain 1 (6)
2) round: 2 sc into each stitch, join, chain 1 (12)
3) round: 2 sc in first st, sc in next, repeat around, join, chain 1 (18)
4) round: 2 sc in first st, sc in next 2, repeat around, join, chain 1 (24)
5) round: 2 sc in first st, sc in next 3, repeat around, join, chain 1 (30)
6) round: 2 sc in first st, sc in next 4, repeat around, join, chain 1 (36)
7) round: BLO, 36 sc around, join, chain 1 (36)
8)10) round: make 36 sc around, join, chain 1 (36)
11) round: 2 sc in first st, sc in next 5, repeat around, join, chain 1 (42)
12)13) round: 42 sc around, join, chain 1 (42)
14) round: sk st, 4 hdc in next stitch, sk st, sl st repeat ** around, join and fasten off
Frosting:
Ch18
1) Row: sk first 2 stitches, (2 hdc), hdc in next 13 stitches, hdc2tog, ch 2, turn (16)
From now on BLO, except first and last stitch of each row
2) Row: hdc2tog, 13 hdc, (2hdc)
3) Row: (2hdc), 13 hdc, hdc2tog
4)22) Row: repeat row 2+3 ( ending with 2) row)
With sl st in BLO attach row 1 to row 22 to form a tube. Of course you can also sew the parts
together, but I like the texture more with sl st. And as you read above, I hate to sew. Leave a bit
of yarn to close your tube. Now turn it inside out.
Please take a look at the pictures on the next page, for how to close the ends. Weave the yarn
with your needle in and out of every second row.
When you have finished one side, fill your frosting with stuffing. Afterwards close your second
opening.
Cream Puff:
1) round: 6 sc in magic ring, join, chain 1 (6)
2) round: 2 sc into each stitch, join, chain 1 (12)
3) round: 2 sc in first st, sc in next, repeat around, join, chain 1 (18)
4) Round: FLO 5 hdc in each stitch around, join, fasten off
Cheekies:
1) round: 7 sc in magic ring, join, fasten off (7)
make 2
Chocolate:
1) Round: 5sc in magic ring, join, chain 1 (5)
2) Round: 2 sc into each stitch, join, chain 1 (10)
3) Round: 2 sc in first st, sc in next, repeat around, join, chain 1 (15)
4) Round: 2 sc in first st, sc in next 2, repeat around, join (20)
5) Round: ch 4, into second ch from hook work 1 sc in each of the 3 remaining ch, 2 sl st,
ch 2, into second ch from hook work 1 sc in each of the 1 remaining ch, 2 sl st,
ch 5, into second ch from hook work 1 sc in each of the 4 remaining ch, 2 sl st,
ch 6, into second ch from hook work 1 sc in each of the 5 remaining ch, 3 sl st,
ch 3, into second ch from hook work 1 sc in each of the 2 remaining ch, 3 sl st,
ch 5, into second ch from hook work 1 sc in each of the 4 remaining ch, 2 sl st,
ch 6, into second ch from hook work 1 sc in each of the 5 remaining ch, 2 sl st,
ch 5, into second ch from hook work 1 sc in each of the 4 remaining ch, 2 sl st,
and fasten off.
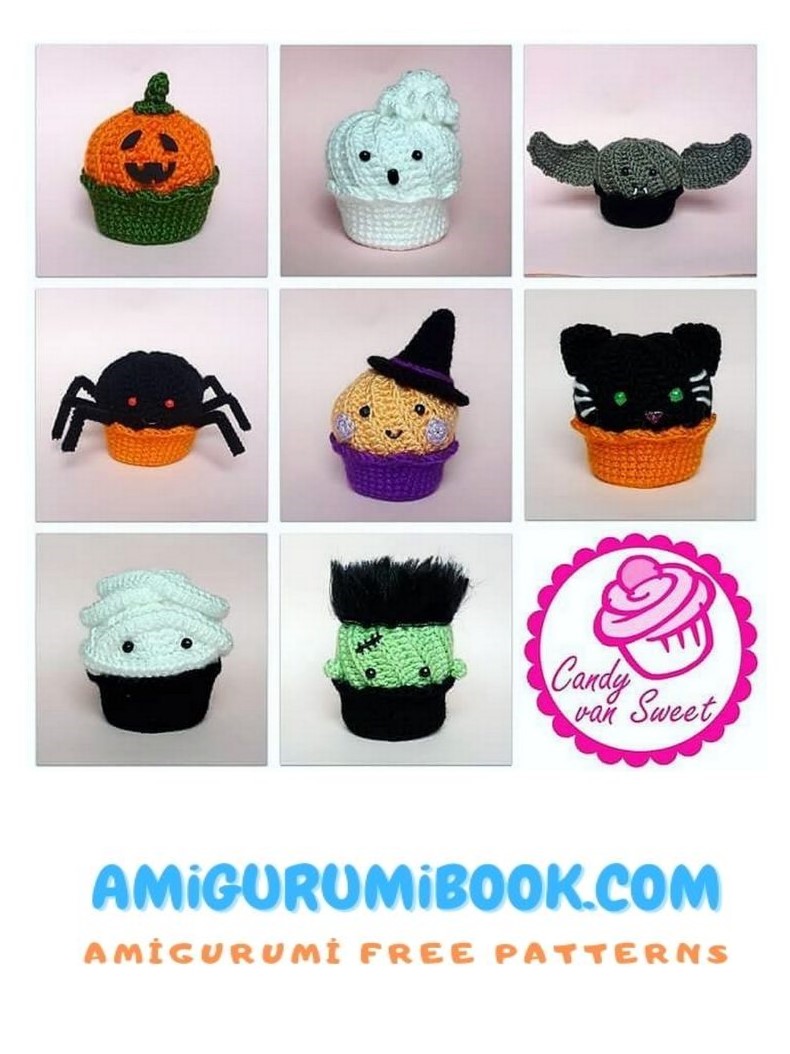
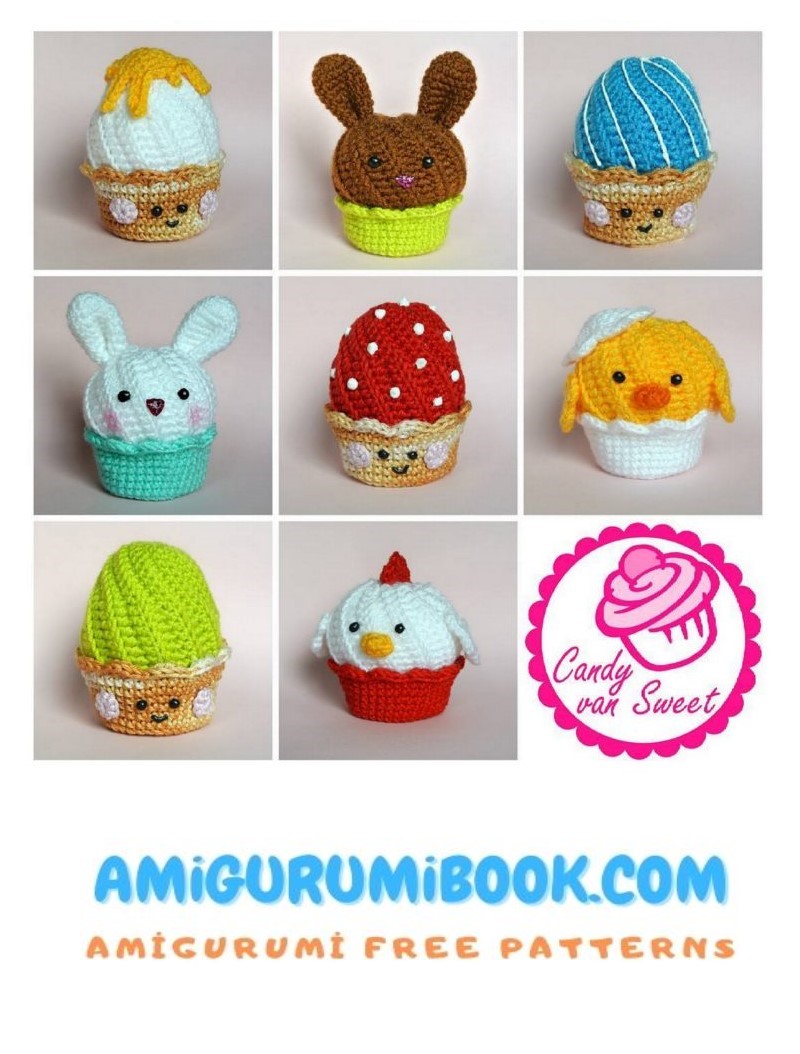
You now have all the basics for your sweet little cupcakes and there are millions of ways to decorate it.
At the end of this pattern I will show you some of my creations for inspiration. In the next part you will find
the pattern for two different fruit types. But feel free to google. As you know the internet is full of tons of
free fruit patterns. But don’t worry. At some point I will add some more fruit to this.
Fruit
Strawberry:
1) Round: 5 sc in magic ring, join, chain 1 (5)
2) Round: sc in each stitch around, join, chain (5)
3) Round: 2 sc into each stitch, join, chain 1 (10)
4) Round: sc in each stitch around, join, chain 1 (10)
5) Round: 2 sc in first st, sc in next 1, repeat around, join, chain 1 (15)
6) Round: sc in each stitch around, join, chain 1 (15)
7) Round: dec, sc in next repeat around, join, chain 1 (10)
8) Round: dec around, join, fasten off (5)
Stem:
1) Round: 5 sc in magic ring, join, (5)
2) Round: ch 2, sl st in 2) ch from hook, sl st in next repeat 4 more times
3) Round: ch 4, sc in 2) ch from hook and the last 2 ch, fasten off
Pull the yarn through the middle of the mr and your stam is ready to be put on your
strawberry
Lemon slice (make 2):
Start with light yellow
1) round: 6 sc in magic ring, join, chain 1 (6)
2) round: 2 sc into each stitch, join, chain 1 (12)
3) round: 2 sc in first st, sc in next, repeat around, join, chain 1 (18)
Change to dark yellow
4) round: 2 sc in first st, sc in next 2, repeat around, join, fasten off (24)
Now with white yarn stitch on the white stuff (sorry, but I don’t know the name of it. Let me know if
you do) of the lemon.
Align your two pieces with the right sides out and whipstitch them together with dark yellow.
If you want to make a segment, just make one piece, fold it in half and stitch the edges together.
For a kiwi slice, start with white yarn and change to green after the first round.
Congratulations! When you’re reading this, you mastered this pattern and I hope it was
understandable enough.
Now the only thing left is sewing all those parts together. Or as in my case, use your glue gun for
attaching the parts. Don’t forget the eyes and mouth. You can either use safety eyes or stitch
them on. I prefer using puff paint or pearl maker pens