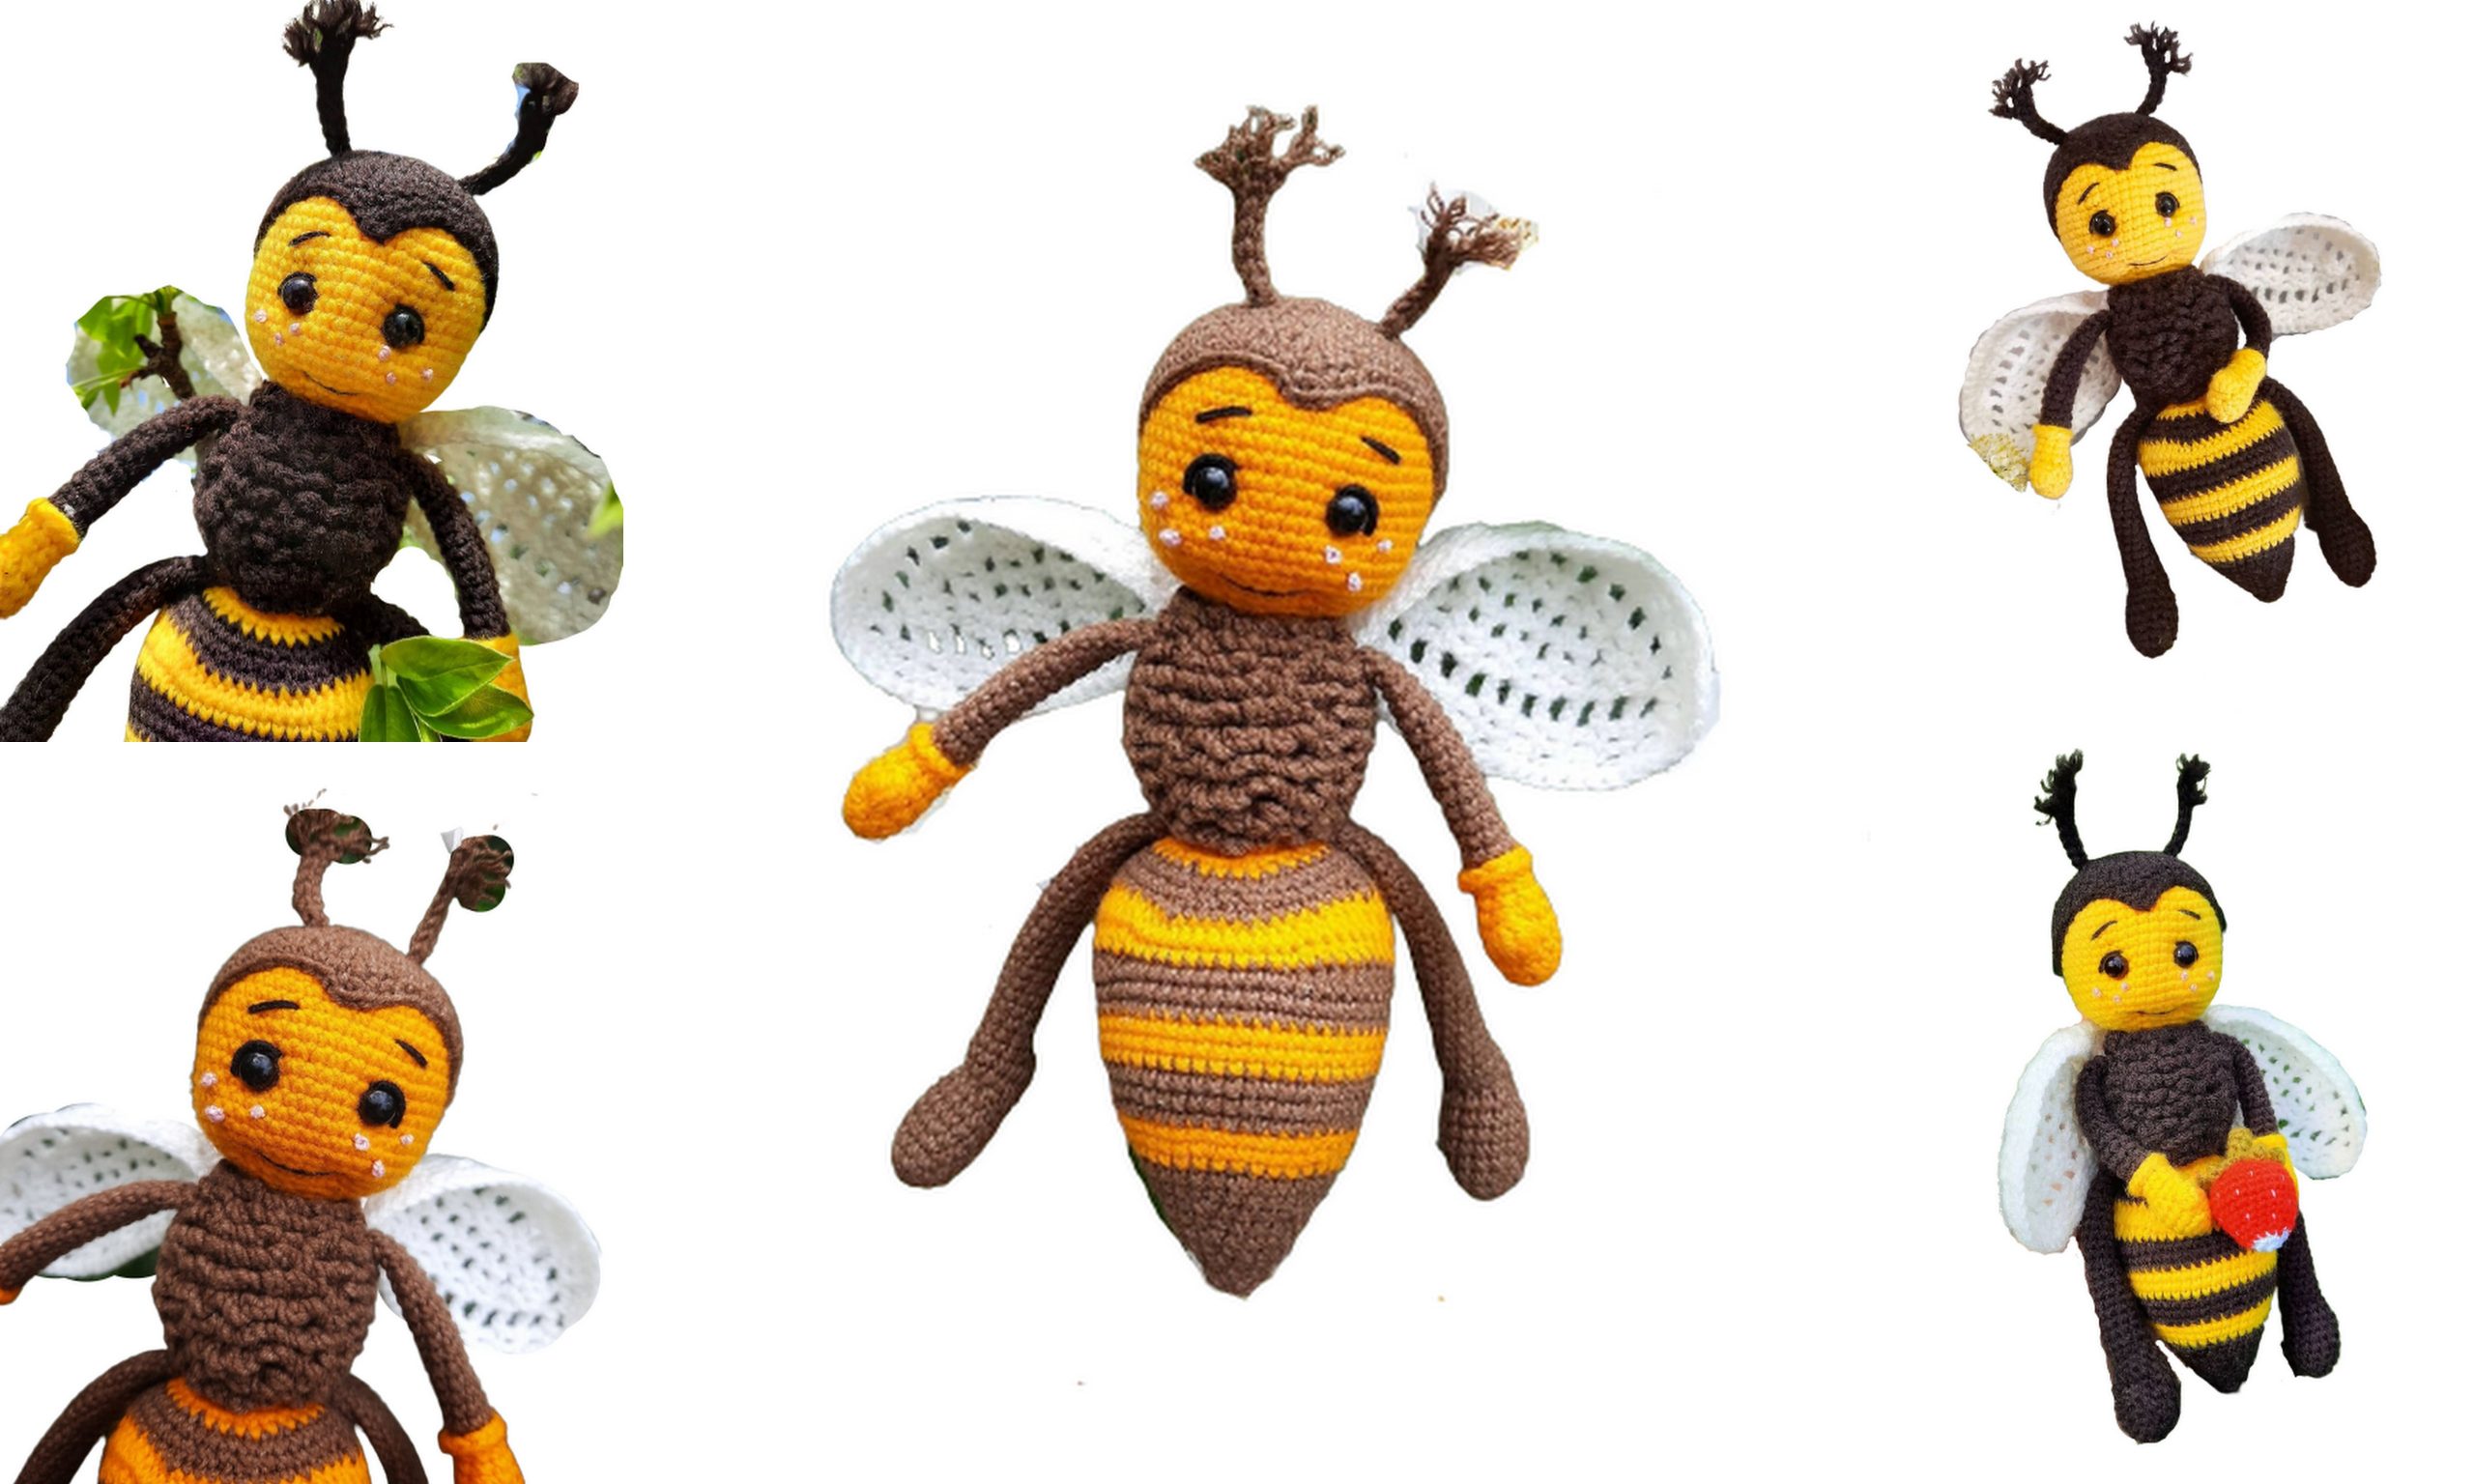
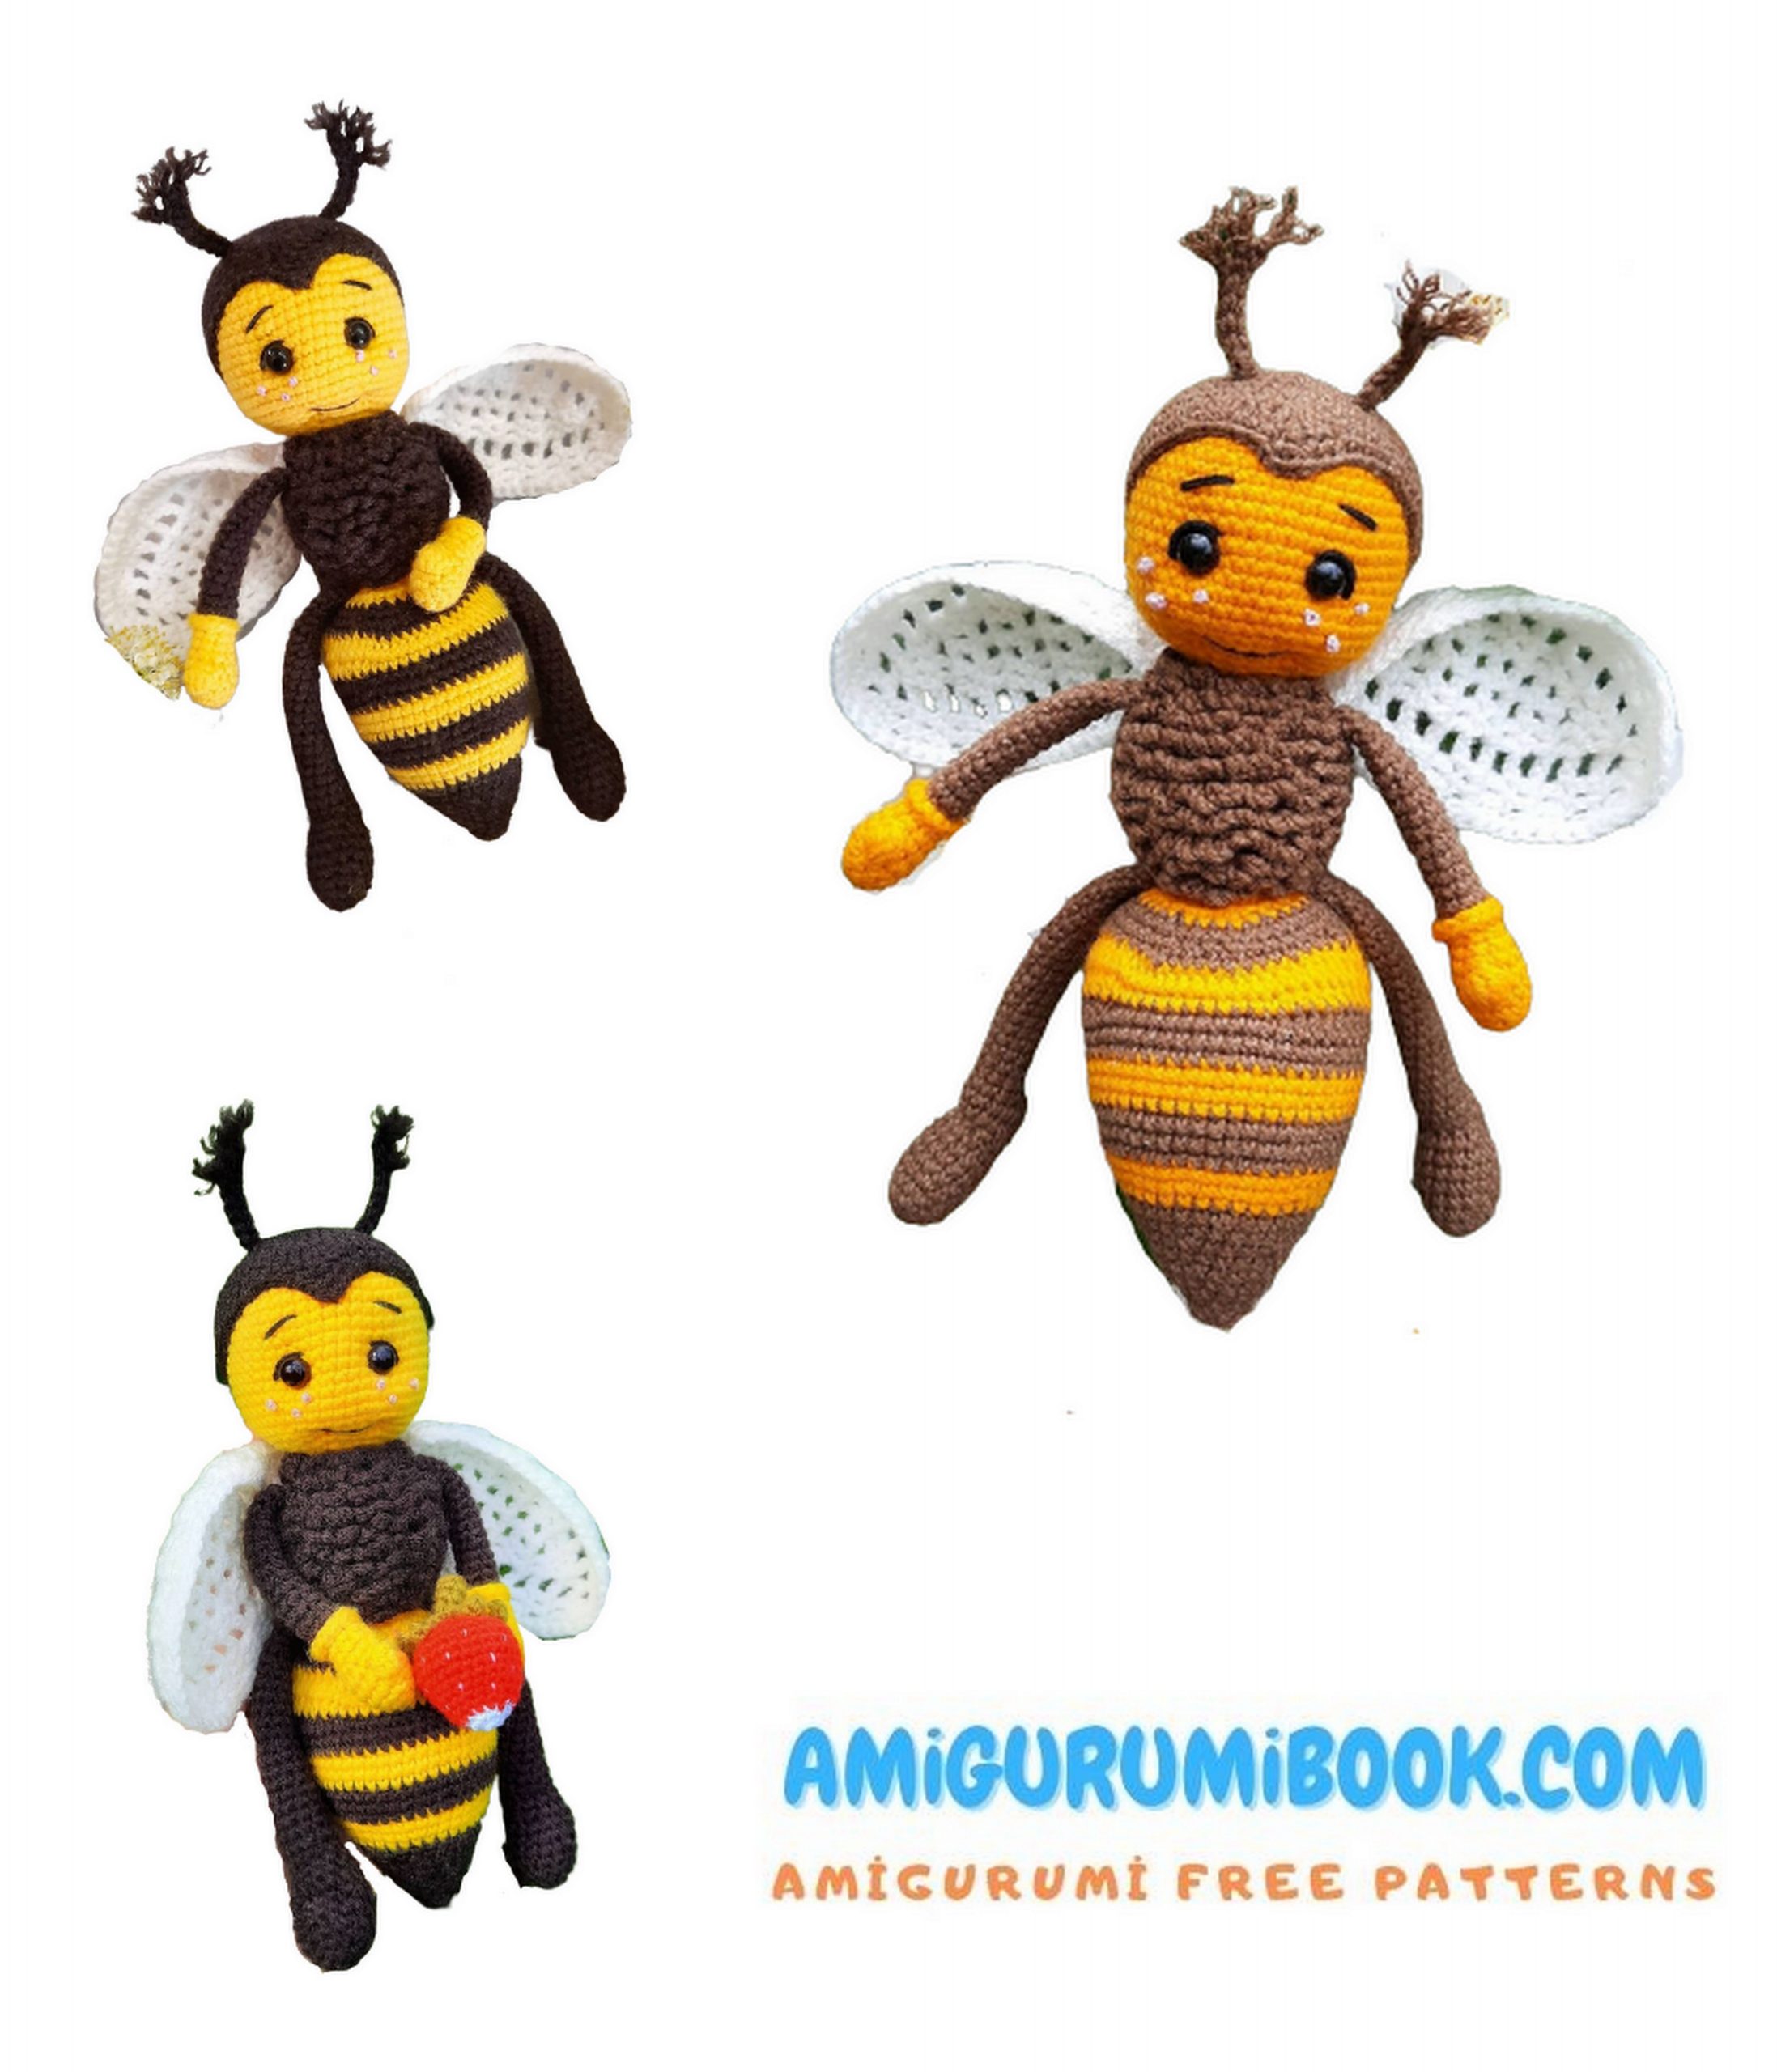
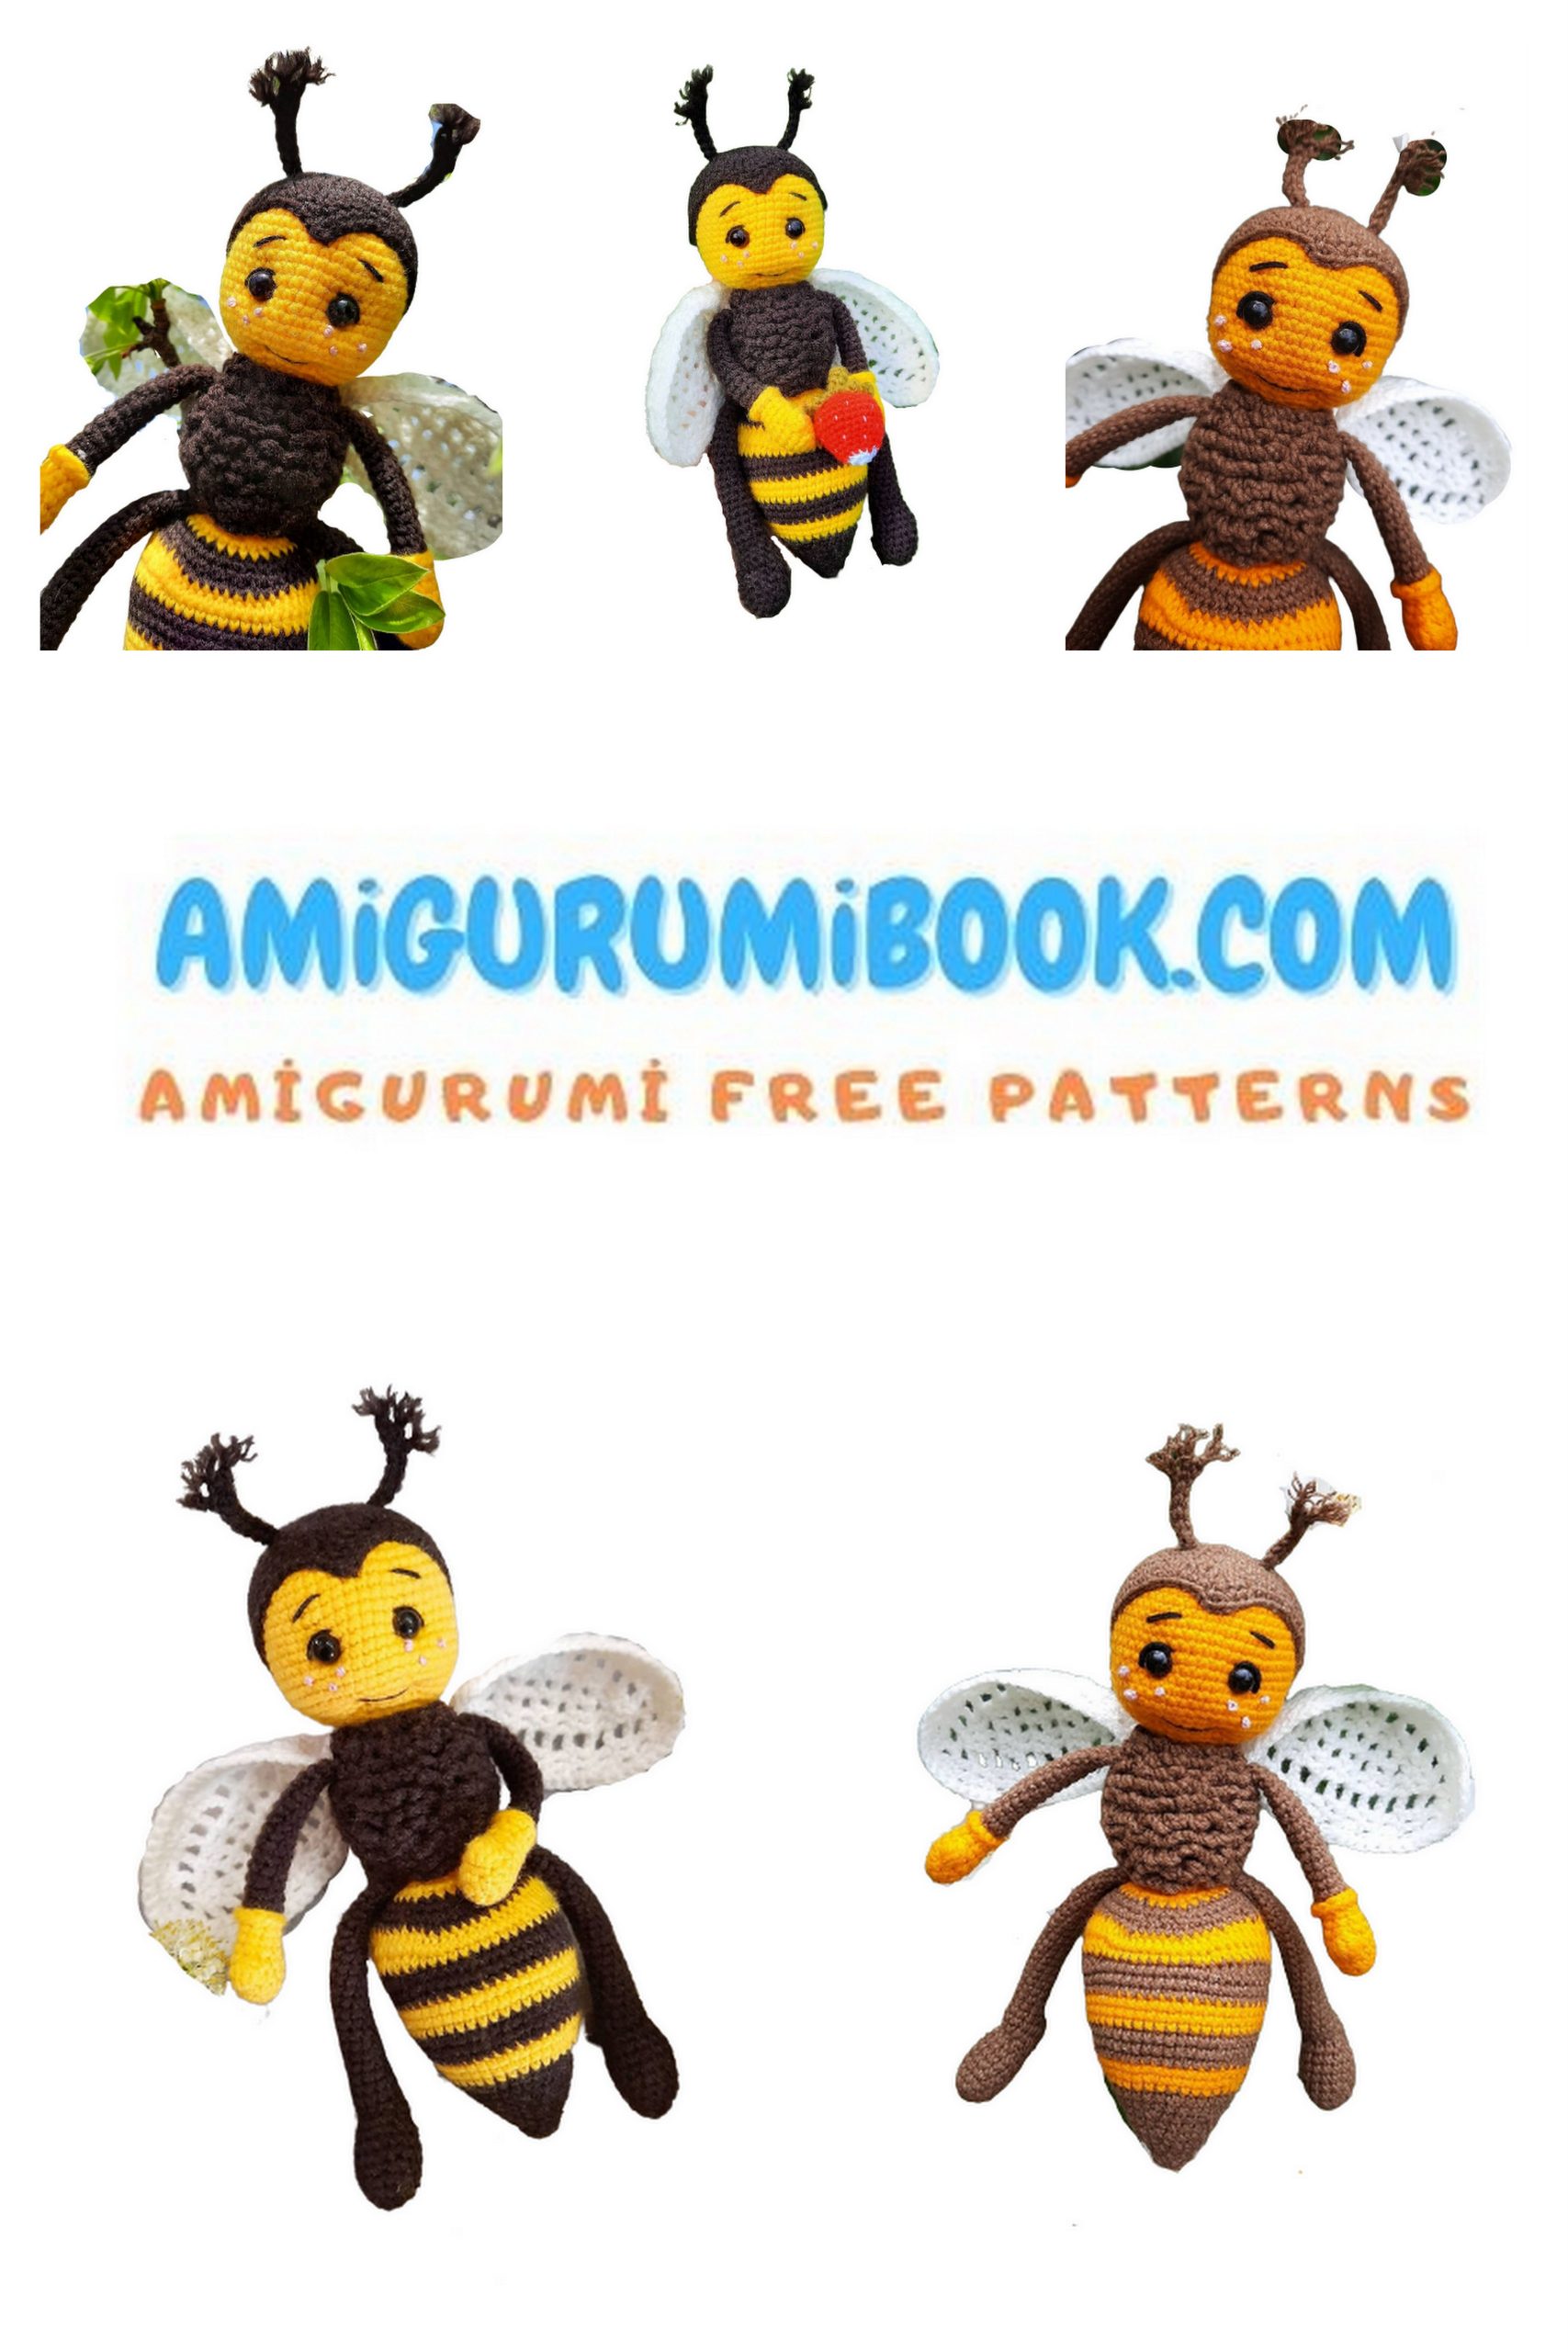
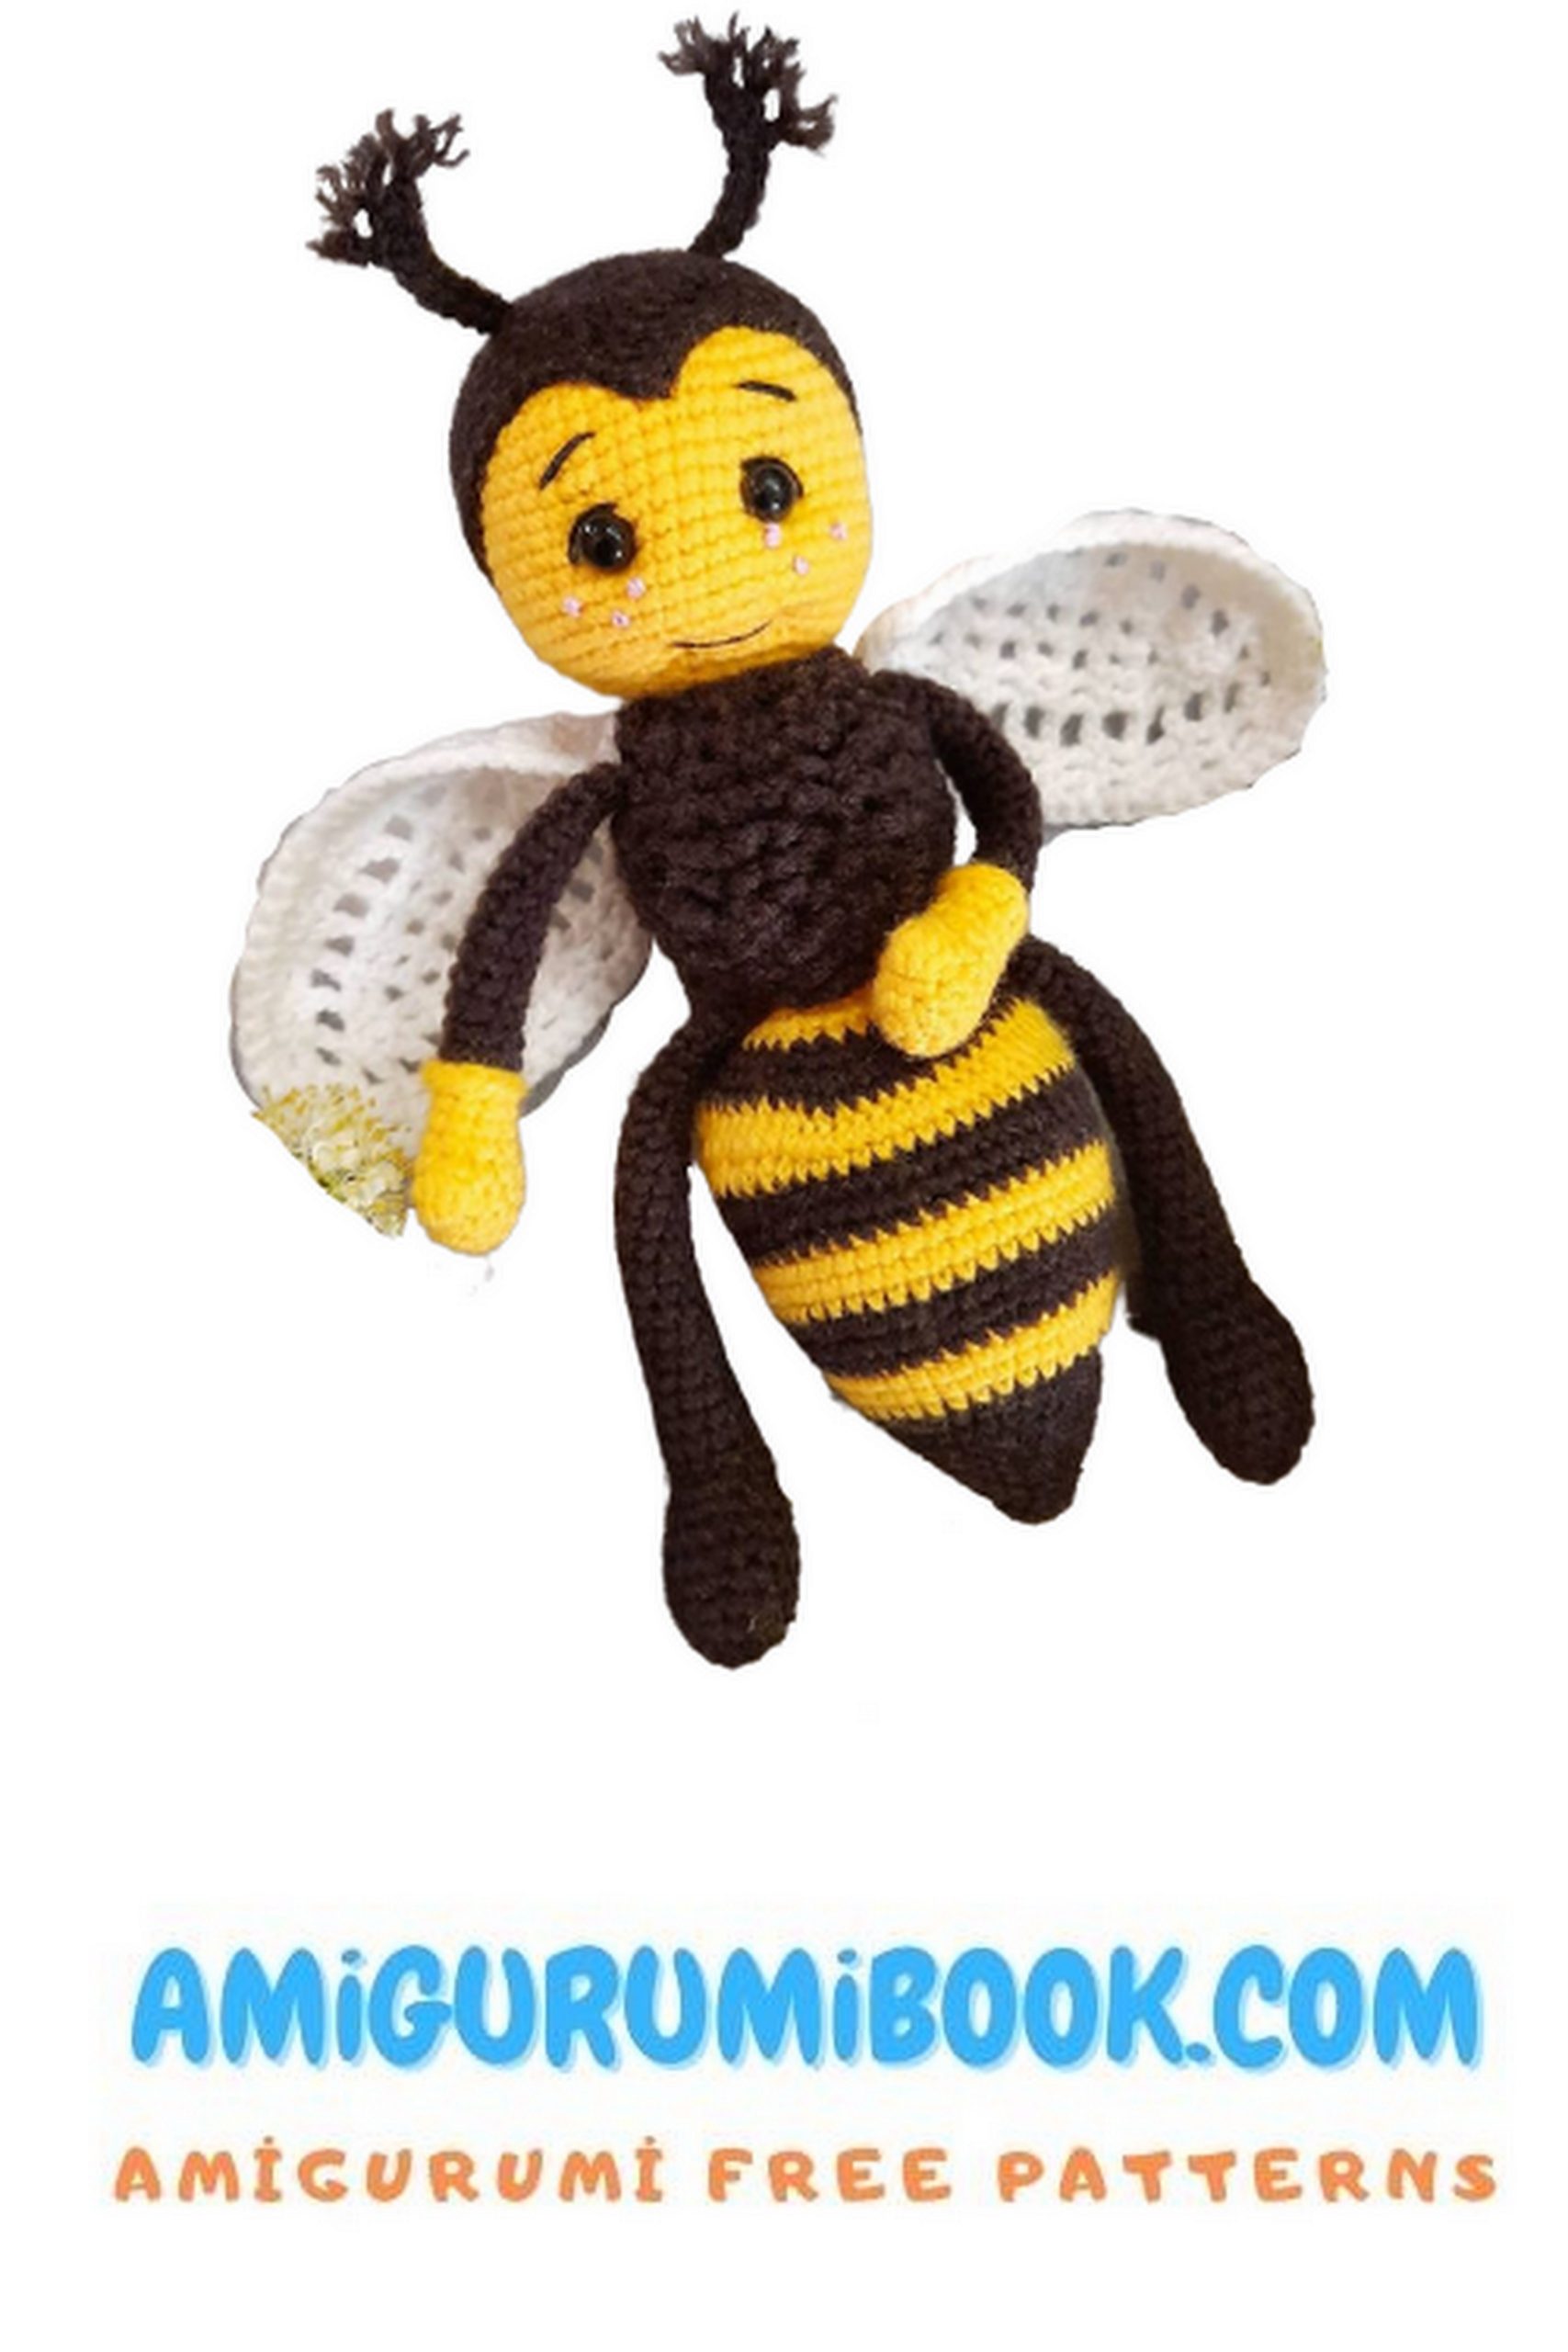
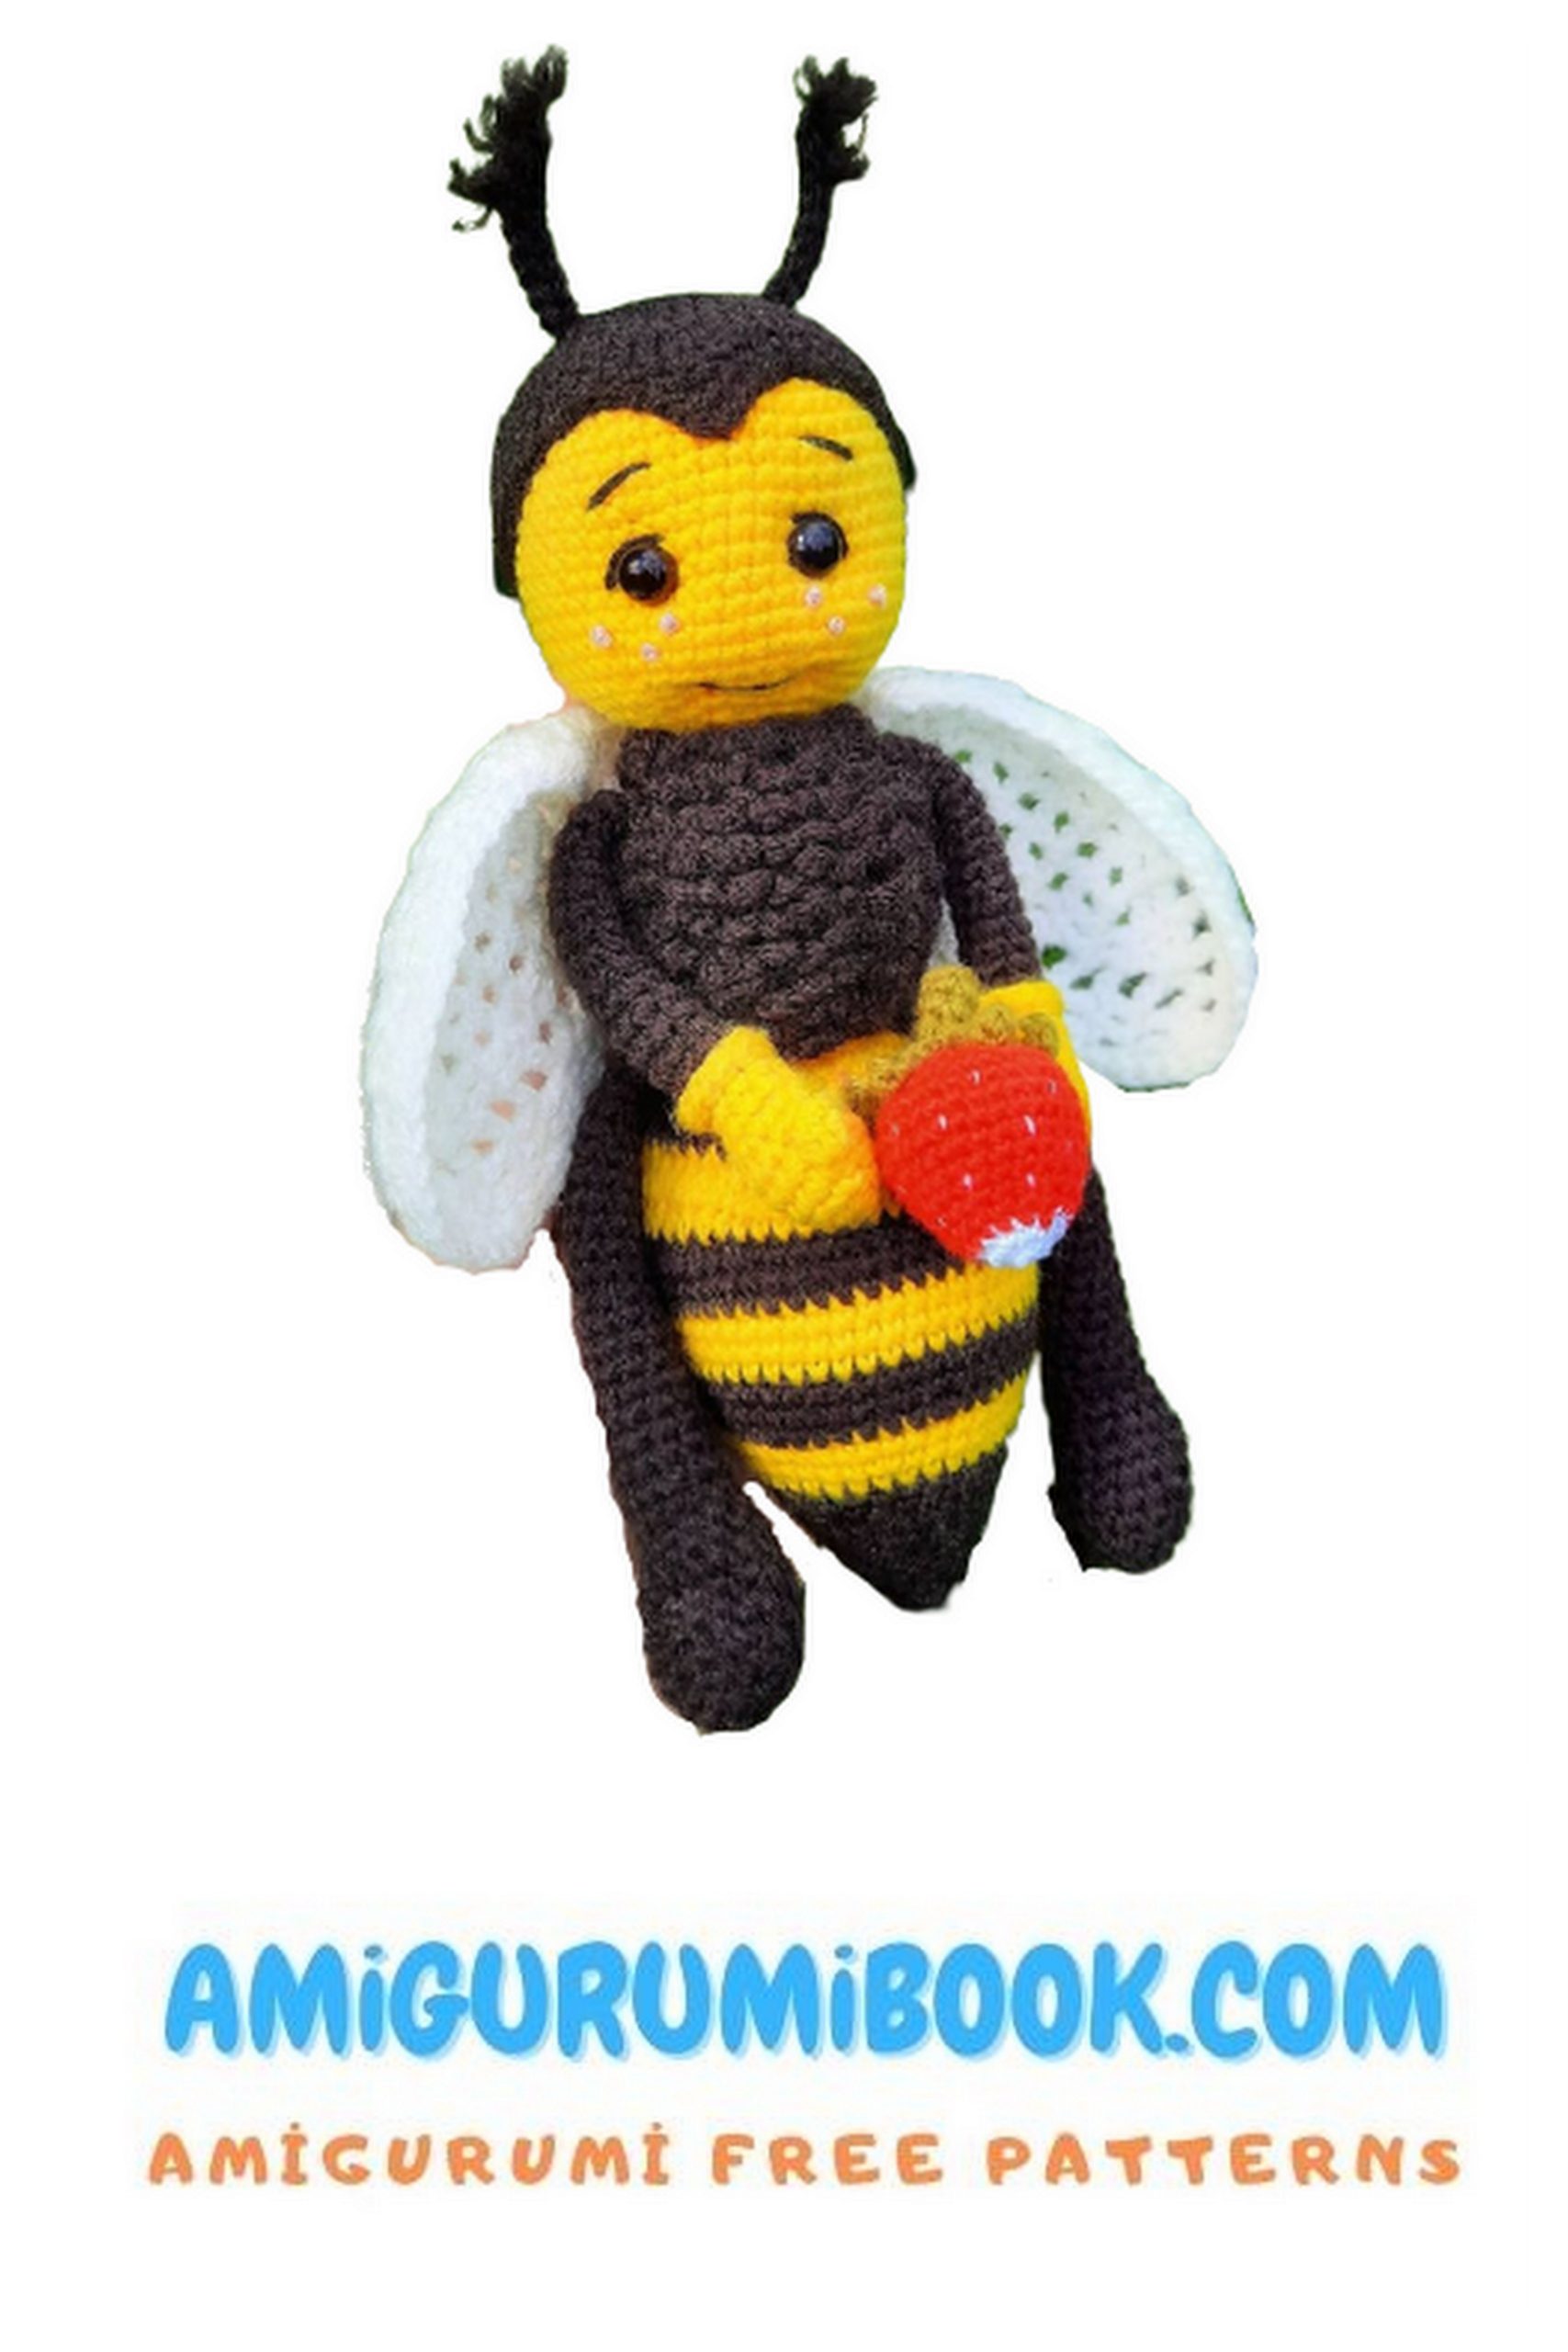
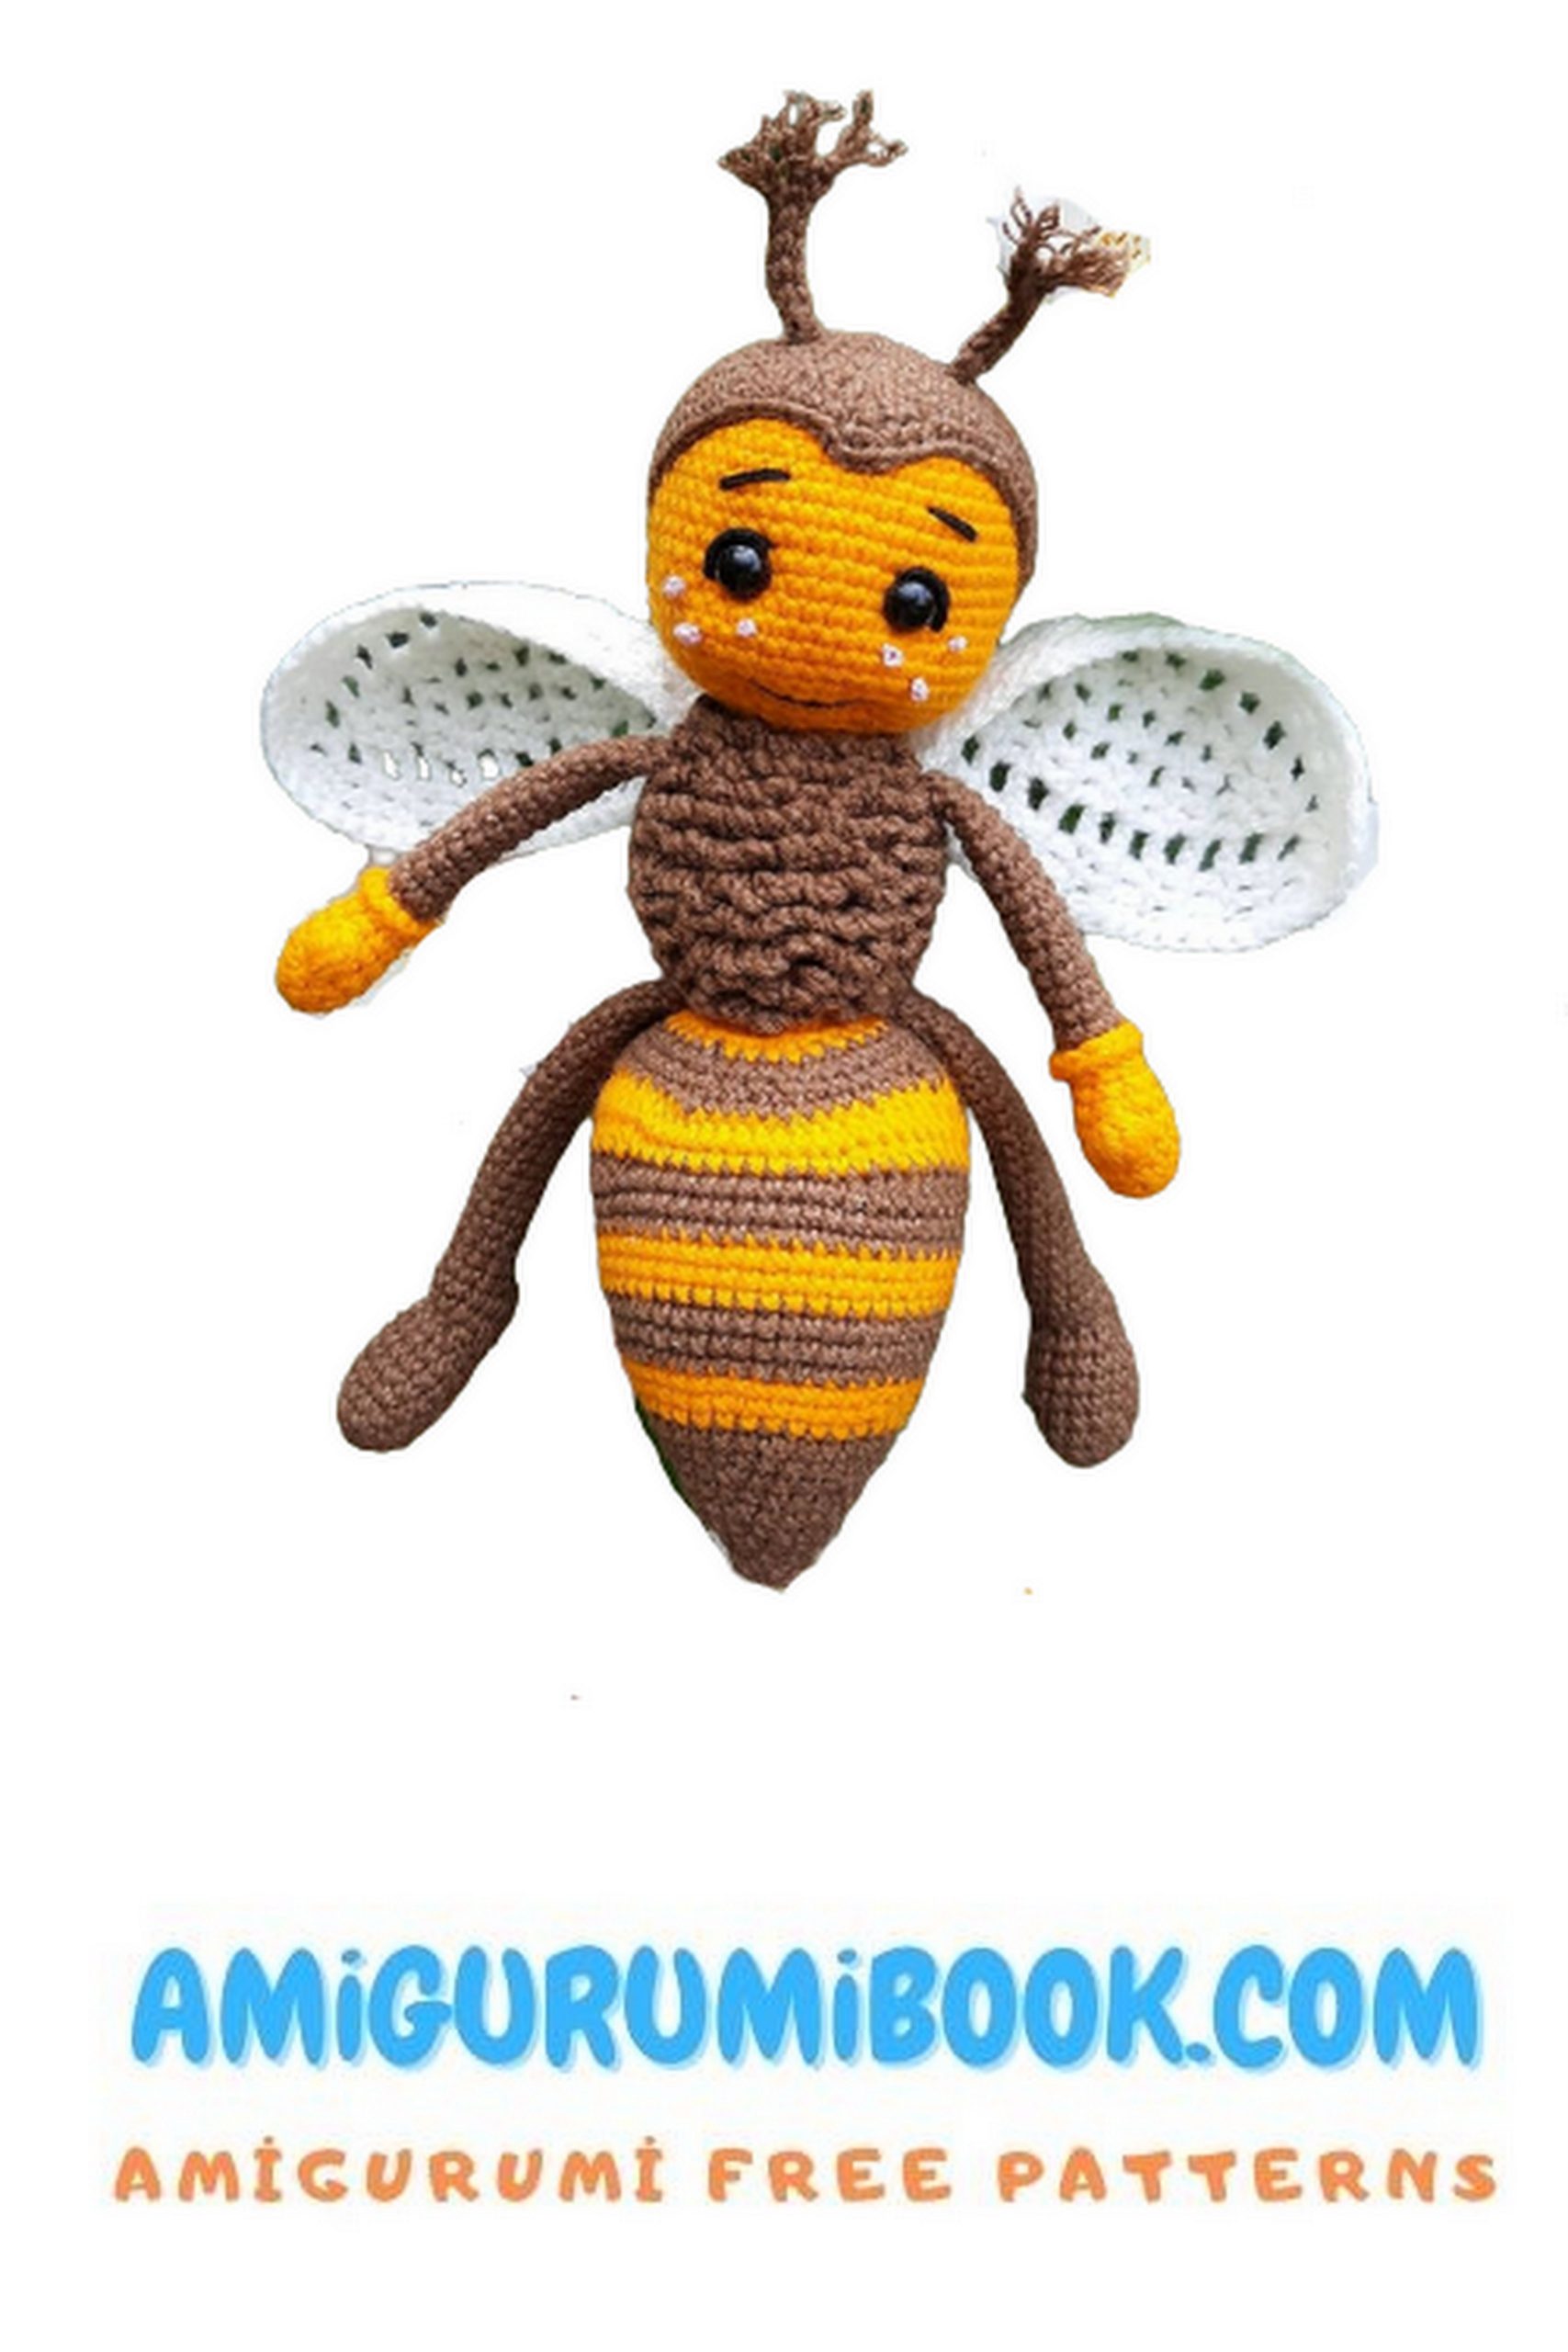
Cute Bee Amigurumi Free Pattern
I continue to share amigurumi free patterns. In this article, cute bee amigurumi free pattern is waiting for you.
ABBREVIATIONS
ch=chain
dc=double crochet
hdc=half double crochet
rnd= round
sc=single crochet
skp=skip sp=space
sl st=slip stitch
st(s) = stitch (es)
sc2tog = sc 2 together
tc=treble crochet yo=yarn over
dtr=double treble
BLO: back loop only
FLO: front loop only
( ) = repeat between () number of times indicated
“Fly Bee”
Author: @ so.ta.toy
Master Class
Table of contents
This master class is distributed
Materials
– YarnArt Jeans yarn (thread No. 1) No. 35 (yellow) 1 skein.
– Adelia Tina yarn (thread No. 2) No. 102 (brown) is less than half a skein.
– YarnArt Jeans yarn (thread No. 3) No. 01 (white) is less than half a skein.
– You will also need a little black and pink colors to decorate the face.
– Hook No. 2.5
– Eyes on a secure mount 8 mm
– Filler (I have holofiber)
– Needle (with a blunt end, for sewing parts)
– marker (to mark the beginning of the row)
– tailor needles (for face design)
– knitting needles (for symmetrical fastening of parts)
When using these materials, the size of the toy is approximately 20 cm (without antennae). Depends on your knitting density.
PATTERN
Head
We begin to knit with thread number 1.
1.6 SC into magic ring (6)
2.6 İNC (12)
3.1 SC, İNC × 6 (18)
4.1 SC, İNC (2 SC, İNC) × 5, 1 SC (24)
5.3 SC, İNC × 6 (30)
6.2 SC, İNC (4 SC, İNC) × 5, 2 SC (36)
7.5 SC, İNC × 6 (42)
8.3 SC, İNC (6 SC, İNC) × 5, 3 SC (48)
9. – 20.48 sc (48) 12 rows
Insert eyes between 15 and 16 rows,
between them 8 SC.
21.3 SC, DEC (6 SC, DEC) × 5, 3 SC (42)
22.5 SC, DEC × 6 (36)
23.2 SC, DEC (4 SC, DEC) × 5, 2 SC (30)
24.3 SC, DEC × 6 (24)
25.1 SC, DEC (2 SC, DEC) × 5, 1 SC (18)
We fasten the thread and leave 15-20 cm for sewing, cut it off.
Next, we fill the part tightly, according to the principle of filling a ball. First, we distribute the filler along the walls of the part, and then fill in the rest of the part.
Helmet
We start knitting with thread # 2.
1.6 SC into magic ring (6)
2.6 İNC (12)
3.1 SC, İNC × 6 (18)
4.1 SC, İNC (2 SC, İNC) × 5, 1 SC (24)
5.3 SC, İNC × 6 (30)
6.2 SC, İNC (4 SC, İNC) × 5, 2 SC (36)
7.5 SC, İNC × 6 (42)
8.3 SC, İNC (6 SC, İNC) × 5, 3 SC (48)
9.7 SC, İNC × 6 (54)
10. – 12.54 sc (54) 3 rows
13.24 SC, 1 HDC, 1 DC, then knit in one loop (1 DC, 1 DC, 1 DC), 1 DC, 1 HDC, 23 SC, 1 DEC (54)
14.27 SC, 1 SC to 28th loop, CH, and 1 SC to 28th loop, 27 SC (56)
We fix the thread, and leave 15 – 20 cm for sewing the part to the head, cut it off.
Horns
Knit with thread # 2 (2 parts)
Cast on 8 CH, then knit 7 SL-ST.
We fasten the thread, and leave 15-20 cm for sewing.
Then, we cut 6 threads of 5 cm, and tie in the first three loops, one thread at a time.
Once the threads are fixed, you can fluff them with a needle.
Assembly
We put on the part of the helmet on the head, fix it with tailor needles (see photo).
The edge of the helmet part begins in the 10th row from the beginning of the knitting of the head.
We look that the “wedge” of the helmet was exactly in the middle, between the eyes.
At the back, the detail of the helmet begins on the 5th row, from the end of the knitting of the head. There should be 5 SC from the eyes to the part of the helmet. We check the symmetry and if everything suits you, we sew.
As the helmet was sewn, we outline a place for the horns (see photo) and sew them on.
Outlined the helmet. Sew on as in the photo.
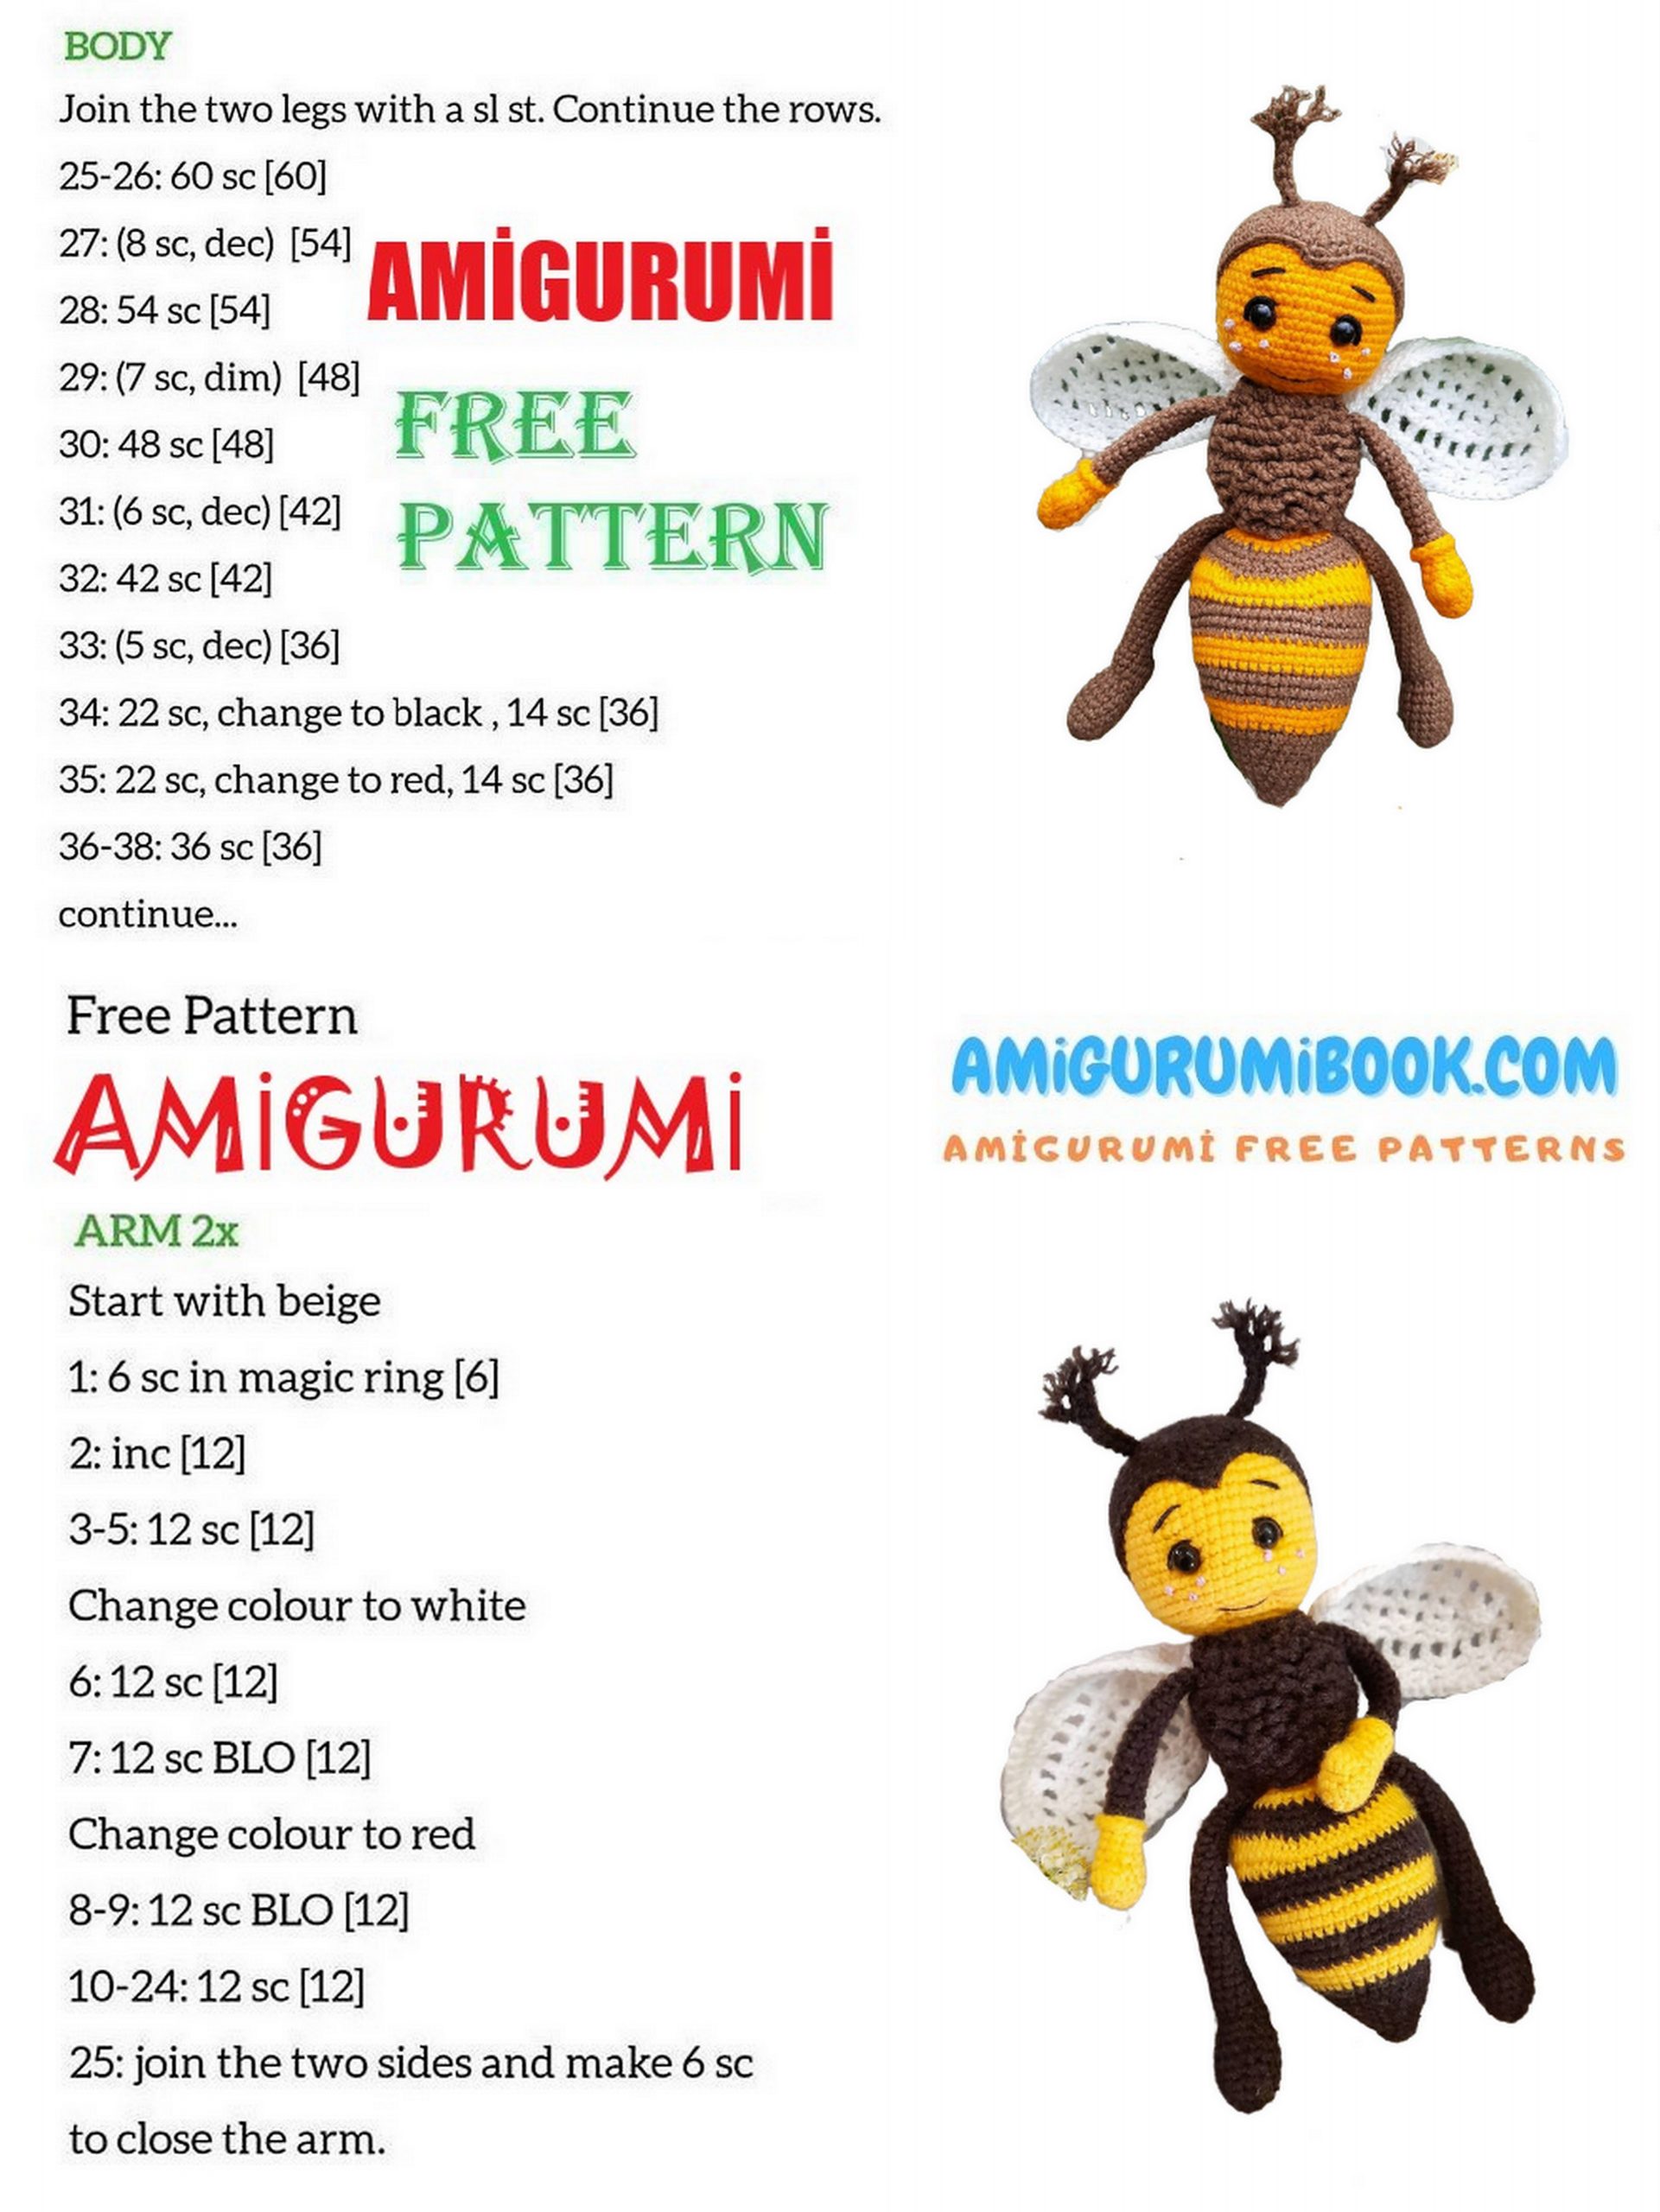
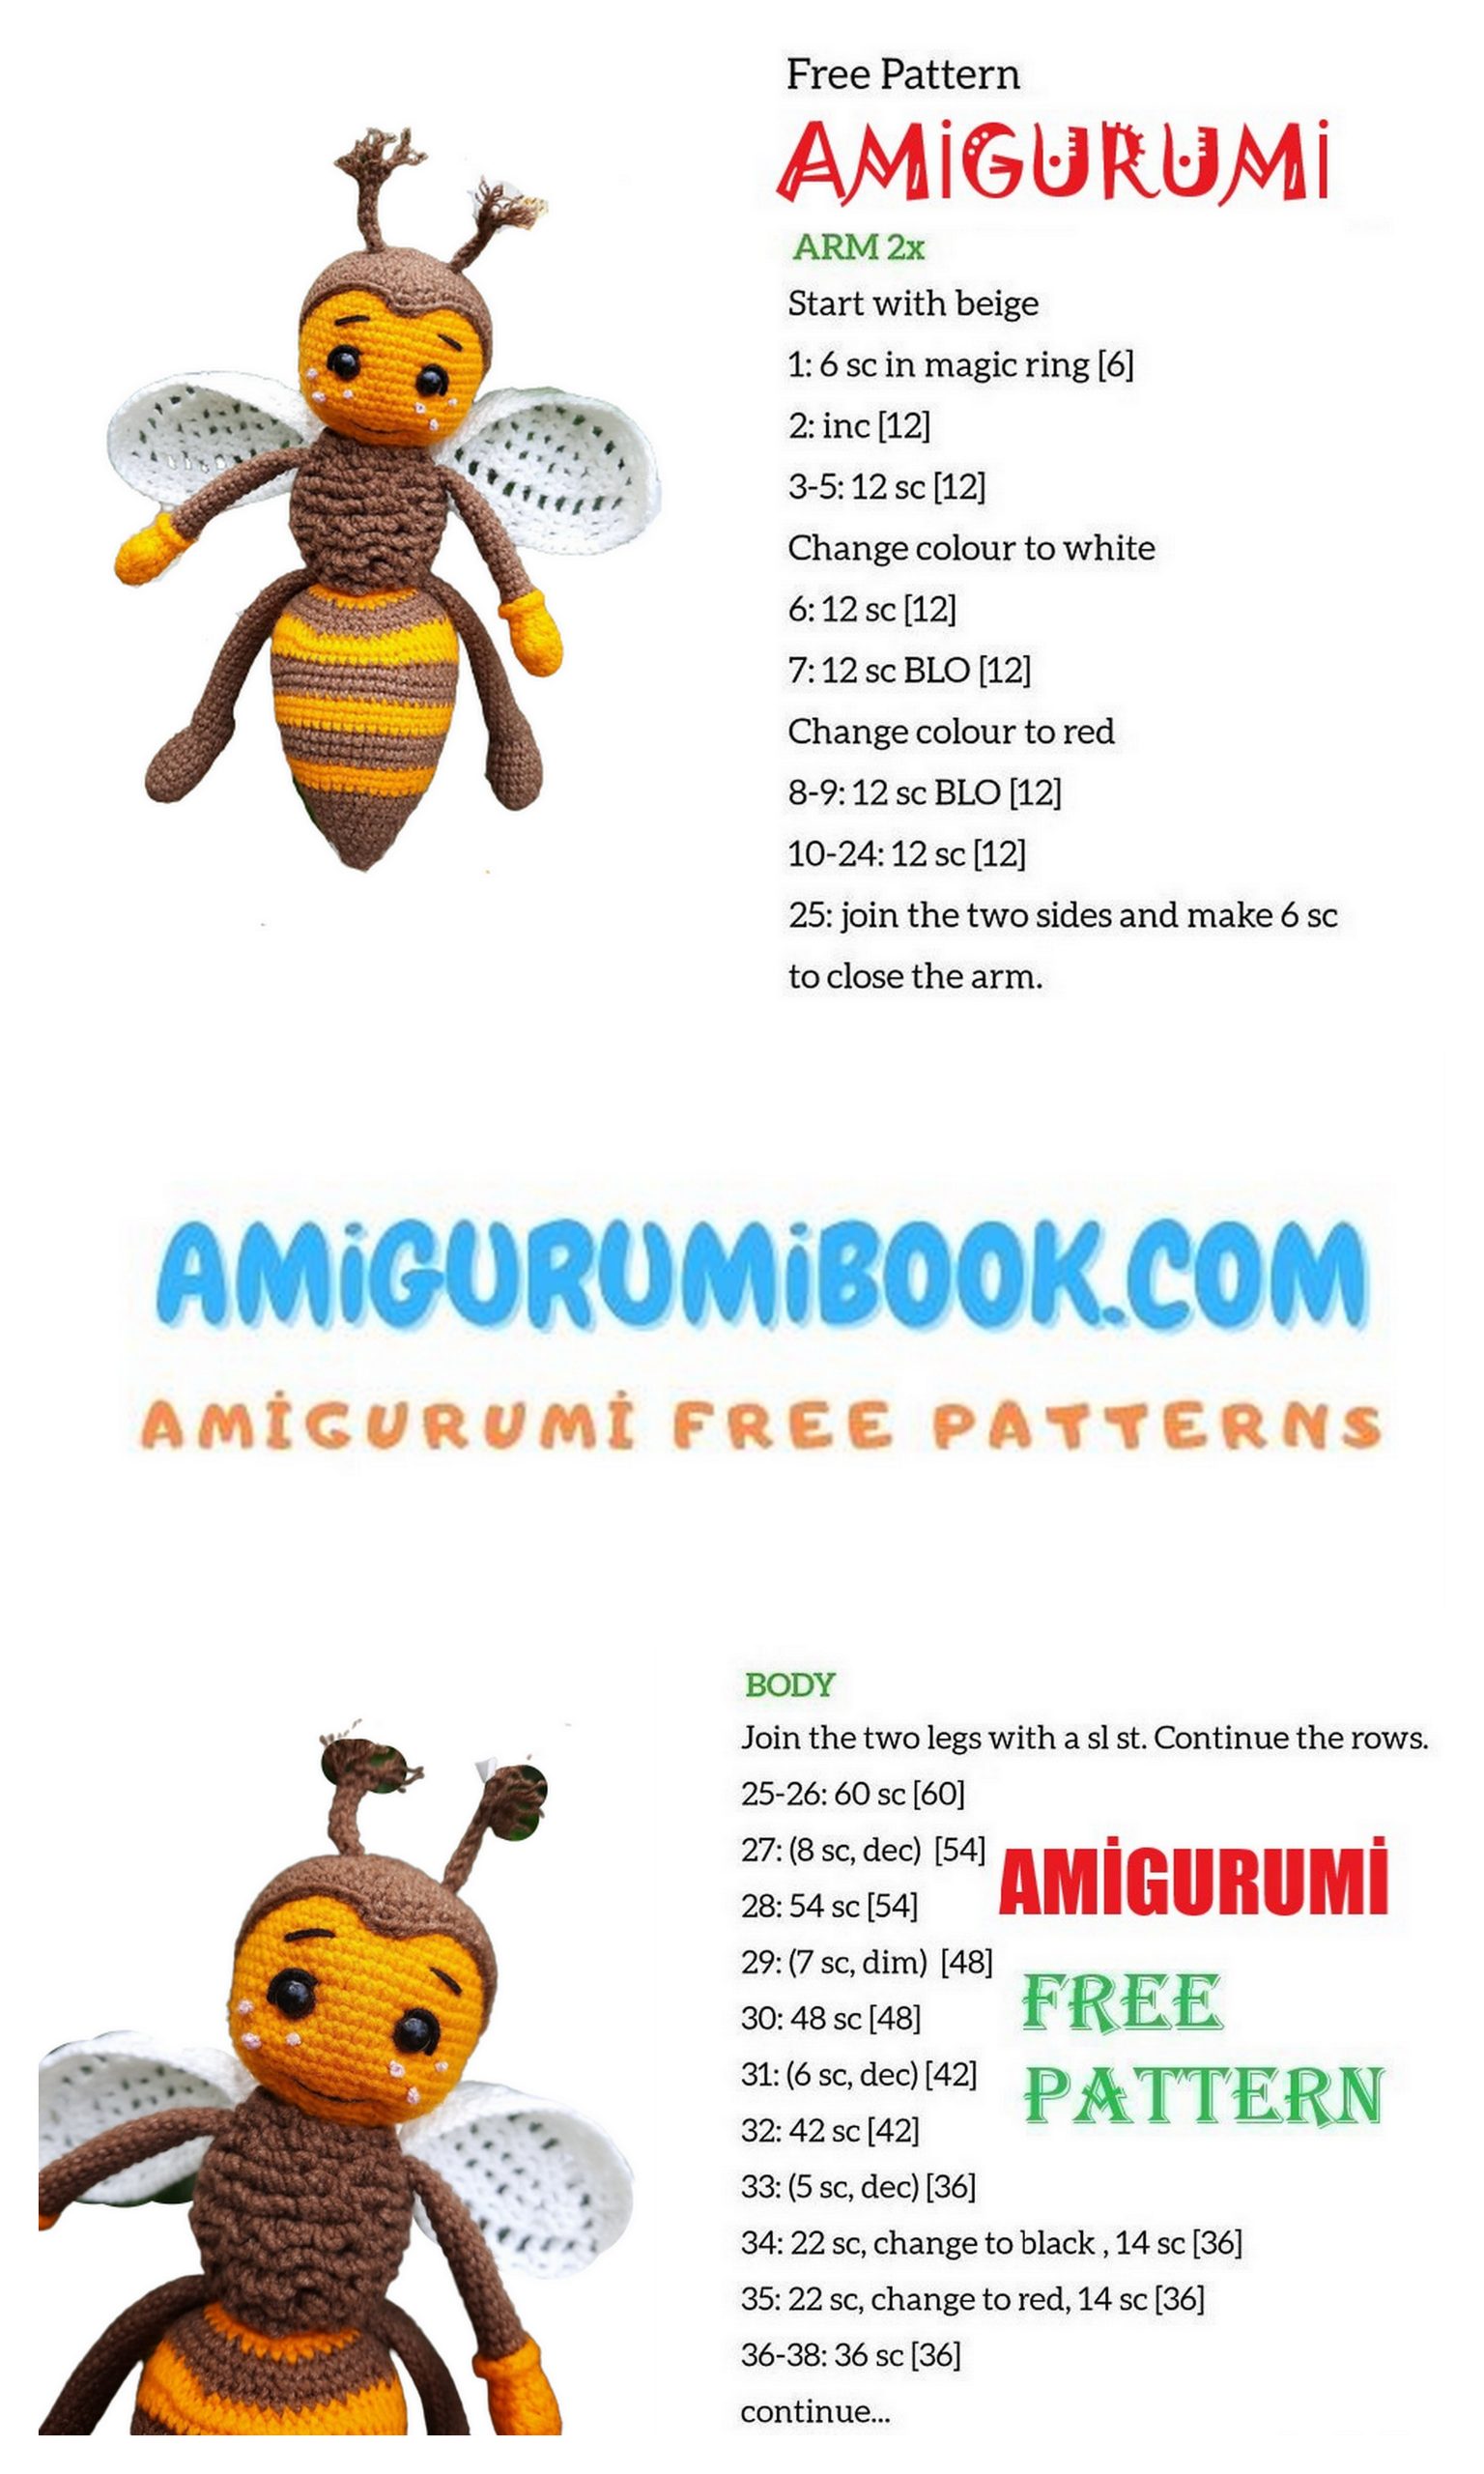
Body
We begin to knit with thread number 2, behind the back wall of the loop.
1.6 SC into magic ring (6)
2.6 İNC (12)
3.1 SC, İNC × 6 (18)
4.1 SC, İNC (2 SC, İNC) × 5, 1 SC (24)
5.3 SC, İNC × 6 (30)
6. – 11.30 sc (30) 6 rows
12.3 SC, DEC × 6 (24)
13.1 SC, DEC (2 SC, DEC) × 5, 1SC (18)
14. 18 sc (18) knit this row for both sides of the loop.
We fix the thread, but do not cut it, we stuff the part.
Next, in a spiral, we knit 3 CH, and we fix them to the part behind the remaining visible on the canvas, the right wall of the loop, with simple connecting posts.
Finish knitting in row 3 from the beginning of knitting (where in row 18 SC).
You can mark this row with a marker.
At the end, we fix the thread, cut it and hide it in the details.
We knit to the mark with a marker. Cut the thread and hide the ends.
Then we sew as in the photo.
This is how you should get it!
Ass
Start knitting with thread N ° 2.
1.6 SC into magic ring (6)
2.1 SC, İNC × 3 (9)
3.9sc (9)
4.2 SC, İNC × 3 (12)
5.1 SC, İNC × 6 (18)
6.18 sc (18)
7.2 SC, İNC × 6 (24)
8.24 sc (24)
9.3 SC, İNC × 6 (30)
10.30 sc (30)
11.2 SC, İNC, (4 SC, İNC) × 5, 2 SC (36)
Change the color to N ° 1 at the end of row 11.
12.36 sc (36)
13.5 SC, İNC × 6 (42)
14.42 sc (42)
Change the color to N ° 2 at the end of row 14.
15.3 SC, İNC, (6 SC, İNC) × 5, 3 SC (48)
16. – 17.48 sc (48)
Change the color to N ° 1 at the end of row 17.
18. – 20.48 sc (48)
Change the color to N ° 2, at the end of the 20th row
21. – 22.48 sc (48)
At the end of the 22nd row, check if
van need a loop offset then
we knit the amount you need,
so that the beginning of the next row is
exactly in the middle of the part.
23.18 HDC, 12 SC, 17 HDC, 1 SC (48)
Change the color to N ° 1 at the end of row 23.
24.18 HDC, 12 SC, 18 HDC (48)
25.18 HDC, 12 SC, 17 HDC, 1 SC (48) + 1PS.
26.12 HDC, 24 SL-ST, 11 HDC, 1 SC (48)
Change the color to N ° 2 at the end of row 26.
27.10 HDC, 1 DEC (from HDC), 3 SC, DEC, 3 SC, DEC, 4 SC, DEC, 3 SC, DEC, 3 SC, 1 DEC (from HDC), 9 HDC, 1 SC (42)
28.5 SC, DEC, 10 SC, 4 DEC, 10 SC, DEC, 5 SC (36)
29.36 sc (36)
Change color to N ° 1 at the end of row 29.
30.2 SC, DEC, (4 SC, DEC) × 5, 2 SC (30)
31.3 SC, DEC × 6 (24)
32.1 SC, DEC, (2 SC, DEC) × 5, 1 SC (18)
33.18 sc (18)
We fix the thread, leave 15 -20 cm for
sewing on the details, cut off.
We fill the part, tightly, but in moderation, because
we knit HDC (so that no gaps are formed in the canvas)
Next, we sew on the part as shown in the photo.
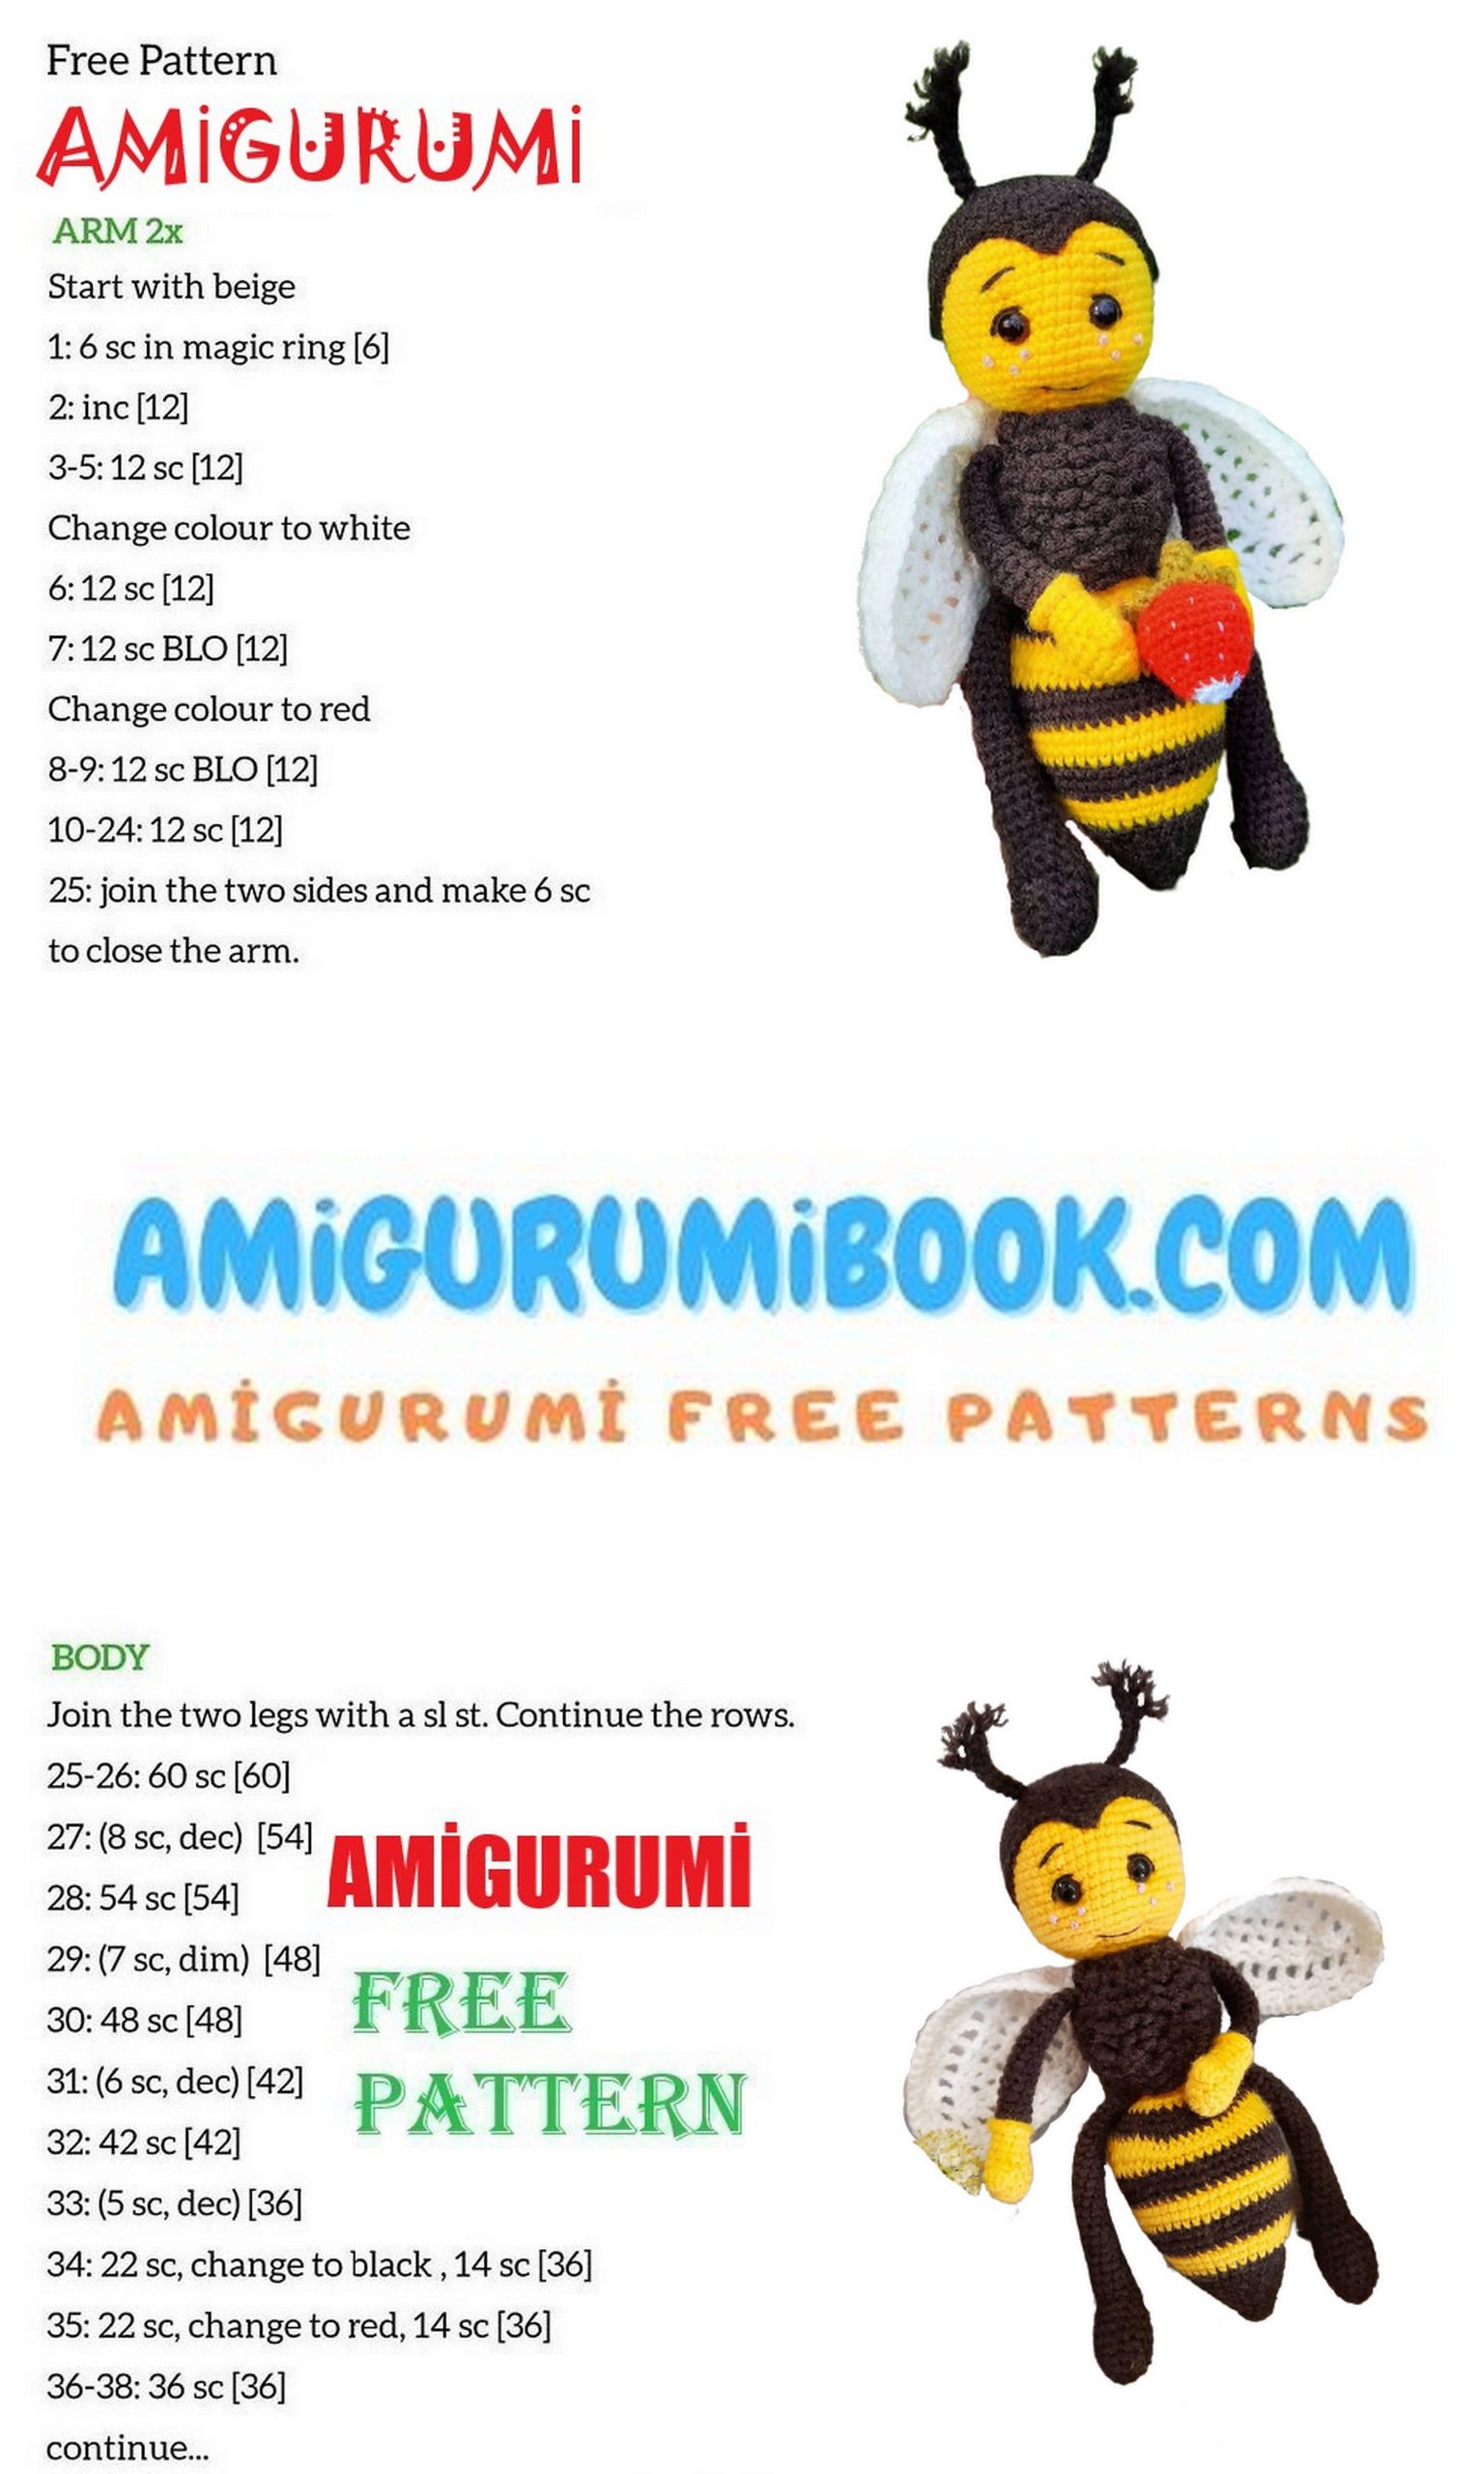
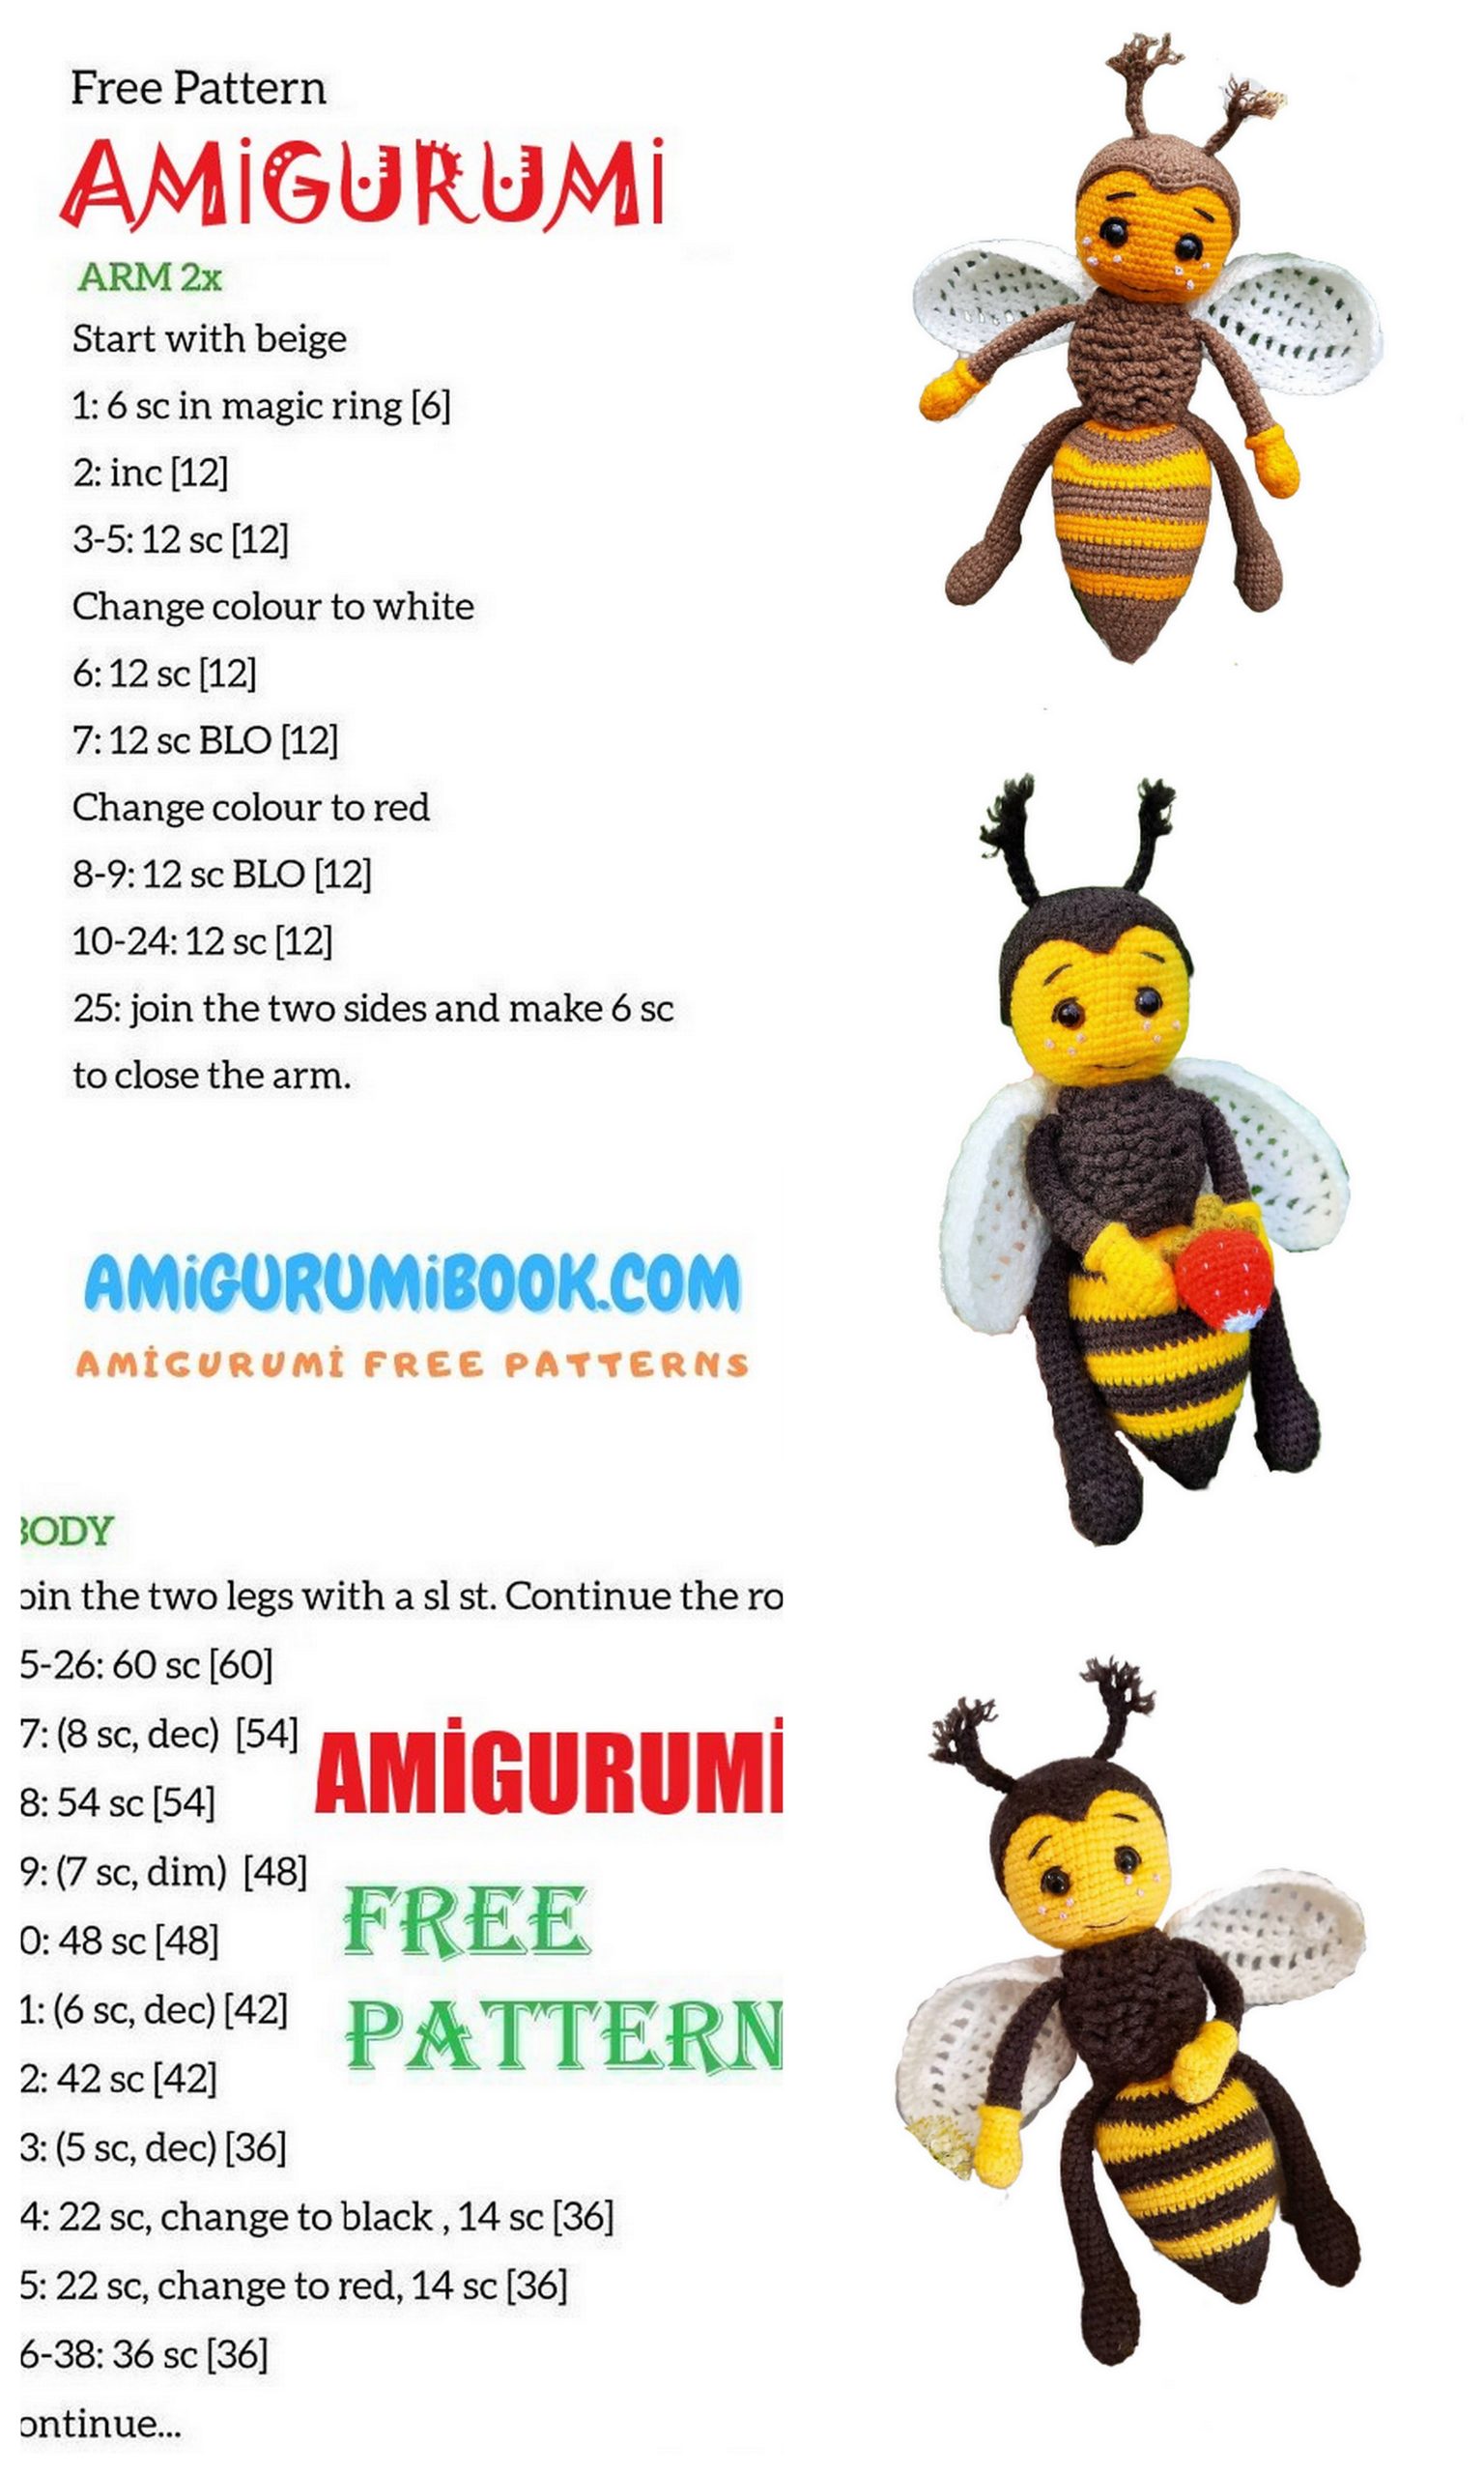
Hands
We knit 2 parts.
We start knitting with thread N ° 1.
1.6 SC into magic ring (6)
2.1 SC, İNC × 3 (9)
3.2 SC, İNC × 3 (12)
4.12 sc (12)
5.12 sc (12) In 7 loop from the beginning of the row, knit 4 DC from one loop, with the 1st vertex (this will be a finger)
6.2 SC, DEC × 3 (9)
7. – 8. 9 Sc (9)
9. 2 SC, İNC × 3 (12) We knit this row at the front wall of the loop.
We fill the part only in the zone
gloves, fasten the thread, cut it and hide it.
Next, change the thread to N ° 2, and knit the next row behind the remaining back wall of the loop from the previous row.
10.- 25.9 sc (9) 16 rows. (In the next row, fold the part in half, tying the walls of the part together)
26.4 SC (4)
We fix the thread, leave 15 – 20 cm
for sewing on the part, cut off.
We outline the details of the hands as you like, I do it with knitting needles. From the top
body details retreat 2 rows. I check the symmetry and sew. A thread
we fix and hide inside the part.
Fold the hand piece in half and knit 4 SC. We fix the thread and
leave 15-20 cm for sewing.
Legs
We knit 2 parts.
We start knitting with thread N ° 2.
1.6 SC into magic ring (6)
2.6 İNC (12)
3.12 sc (12)
4.3 SC, İNC × 3 (15)
5. – 7.15 sc (15)
8.3 SC, DEC × 3 (12)
9.12 sc (12)
10.5 SL-ST, 1 SC, 5 HDC, 1 SC (12)
11.6 SC, 1 HDC, 3 HDC (with one
apex), 1 HDC, 1 SC (10)
We fill the foot with filler, and
we continue knitting.
12.- 34.10 sc (10) 23 rows.
And in the next row we add
the part in half, knitting the walls of the part together. (If necessary, add offset loops, since the leg part needs to be tied parallel to the toe).
35.5 SC (5)
We fix the thread, leave 15 – 20 cm
for sewing, cut off the rest.
We outline the details of the legs as you like, I do it the same way with knitting needles.
I lay the knitting needle where the body and butt parts were sewn. I check the symmetry and sew. We fix the thread and hide it inside the part.
The offset loops are shown here (we don’t count them). Just after they have been knitted, we fold the leg part in half and knit parallel to the sock (leg details). We fix the thread and leave 15-20 cm for
sewing.
Wings
We knit 2 parts (scheme N ° 1) with color N ° 3.
On the following pages the wing knitting progress will be clearly shown. See
We tie the wing part 57 SB (not counting the last 15th row and its 5 SC).
We fasten the thread, leave 15-20 cm for sewing.
Next, we outline the wings with tailor pins, also retreat 2 rows from the beginning of the body part, and sew from the end of the hand to the middle of the part. We fasten the thread, cut it and hide the ends.
Registration
We begin the last stage of the design of the bee’s face.
The photo shows the stages of tightening the peephole. place the tailor’s needles as shown in the photo.
Then we start to insert the needle (with a blunt end) in the place where the numbers 1 are indicated (we place the numbers 1 and 4 between the 4 and 5 rows of the head part from the place where the body and the head are sewn)
After pulling out the ends, when tightening, we start the threads so that they would be between the part of the head and the bee’s eye (since the arrows show the direction of movement of the tightening in the photo)
PullingWe eat symmetrically on both sides, we tie the threads into knots, I have two of them, and we hide the ends of the threads inside the part, cut off the excess.
Next, we make a “side” tightening.
We pull the eyes closer to each other, looking at the photo tips, do the following:
Insert the thread where the number 1 is indicated (on the side) and bring the needle out in the place where the number 2 is indicated, make a loop and put it behind the eye (as in the first tightening), insert the needle to the same place where it was taken out (number 2), and display it in the place , where the number 1 is indicated. We leave the thread not tied yet, we repeat the same manipulation with the numbers on the other side – 3 and 4.
Next, we start pulling the ends of the threads at the same time until you like the placement of the eyes. Then we draw the thread from the back of the head part (as shown in the photo), tie it to a knot and hide the threads inside the part.
cut off the excess.
After you have made the tightening, the last stage of the face design remains, namely: embroider the eyes, eyebrows, mouth and cheeks. Of course, you can design the face at your discretion.
To embroider the eyelids and cheeks, I used the “rococo” embroidery style – which means curl. I am also attaching diagrams of how you can make this embroidery.
We embroider the eyes, (we take the length of the thread so that it is enough for embroidering the eyes and eyebrows), winding the needle behind the part, display it in the place where the number 1 is indicated, and immediately display it in the place where the number 2 is indicated (we use the hint in the photo of scheme 1), then we repeat also with the second eye, after that we embroider the eyebrows, I make two stitches. (I outline the eyebrows with tailor’s needles above the eye at 3 SC, and the length of the eyebrows is also 3 SC. After the eyebrows have been embroidered, we draw the thread out in the same way from behind, where we started it, tie two knots and hide the ends inside the part.
Then we embroider the mouth, I do it with black thread, you can take any.
And we proceed to the cheeks, I embroider freckles with pink thread (diagram 2). Same
I insert the thread from the back of the details, I bring it out in the place where the number 1 is indicated, and following the other numbers, I embroider them. At the end, I fasten and hide the thread.
Your face and the bee itself are ready !!! scheme 1 scheme 2 Your Little Bee Fly ready!