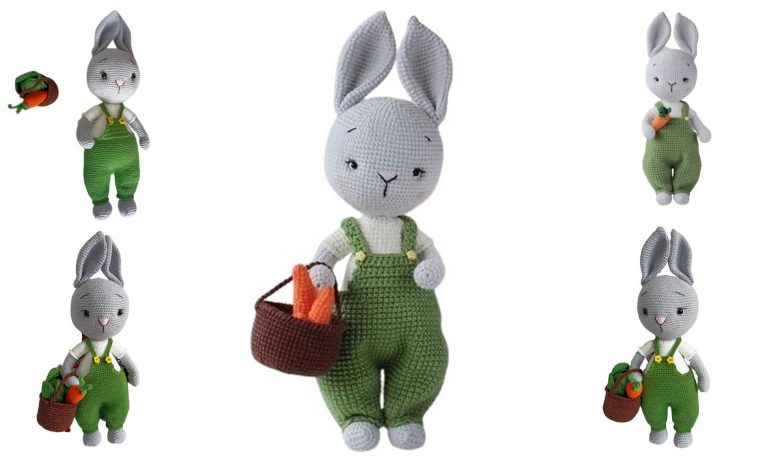
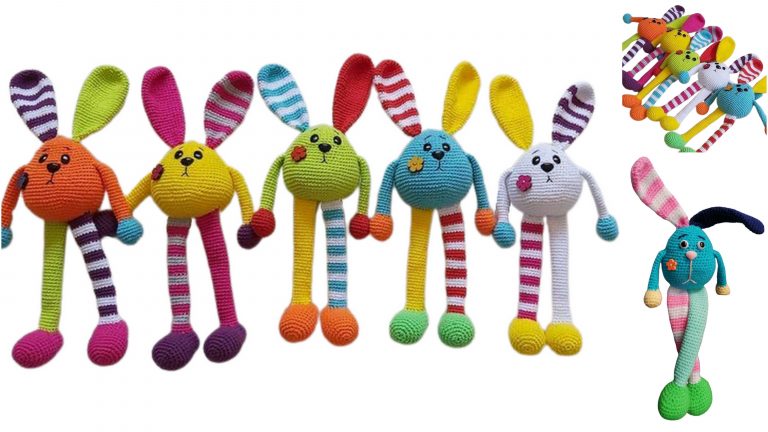
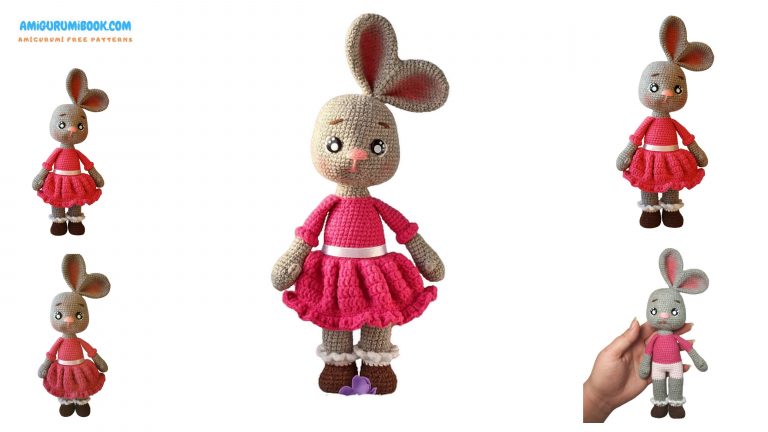
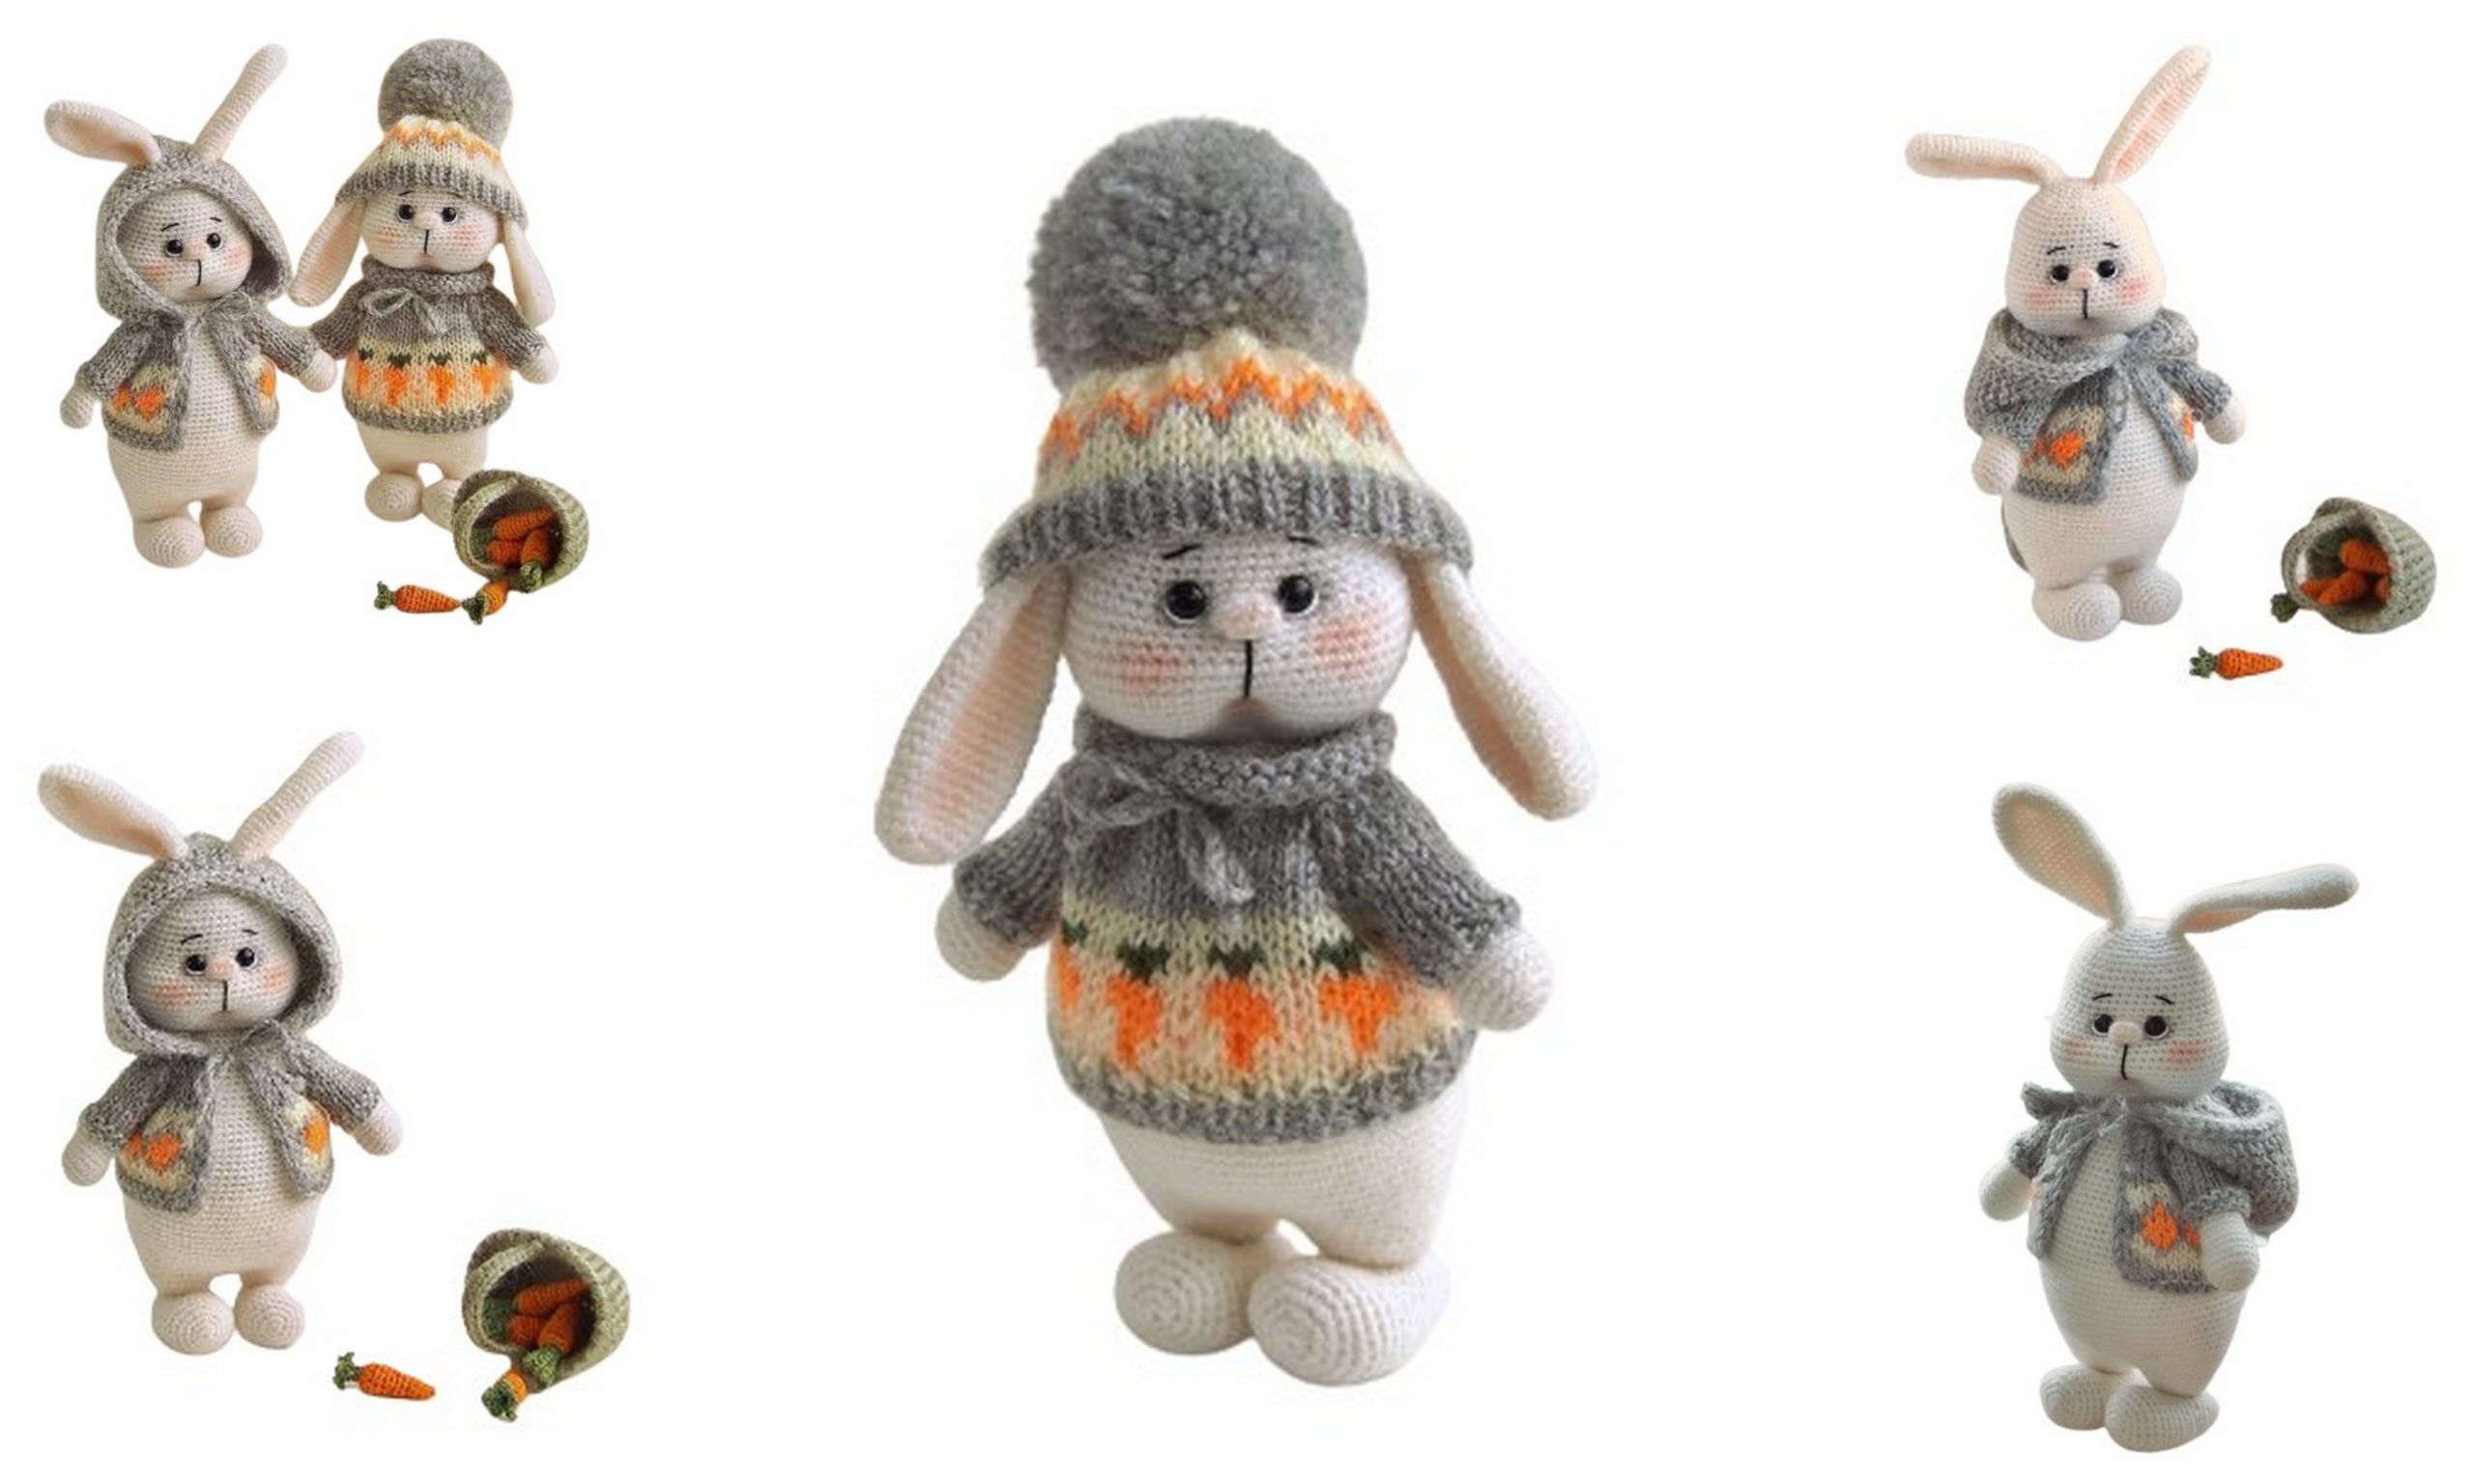
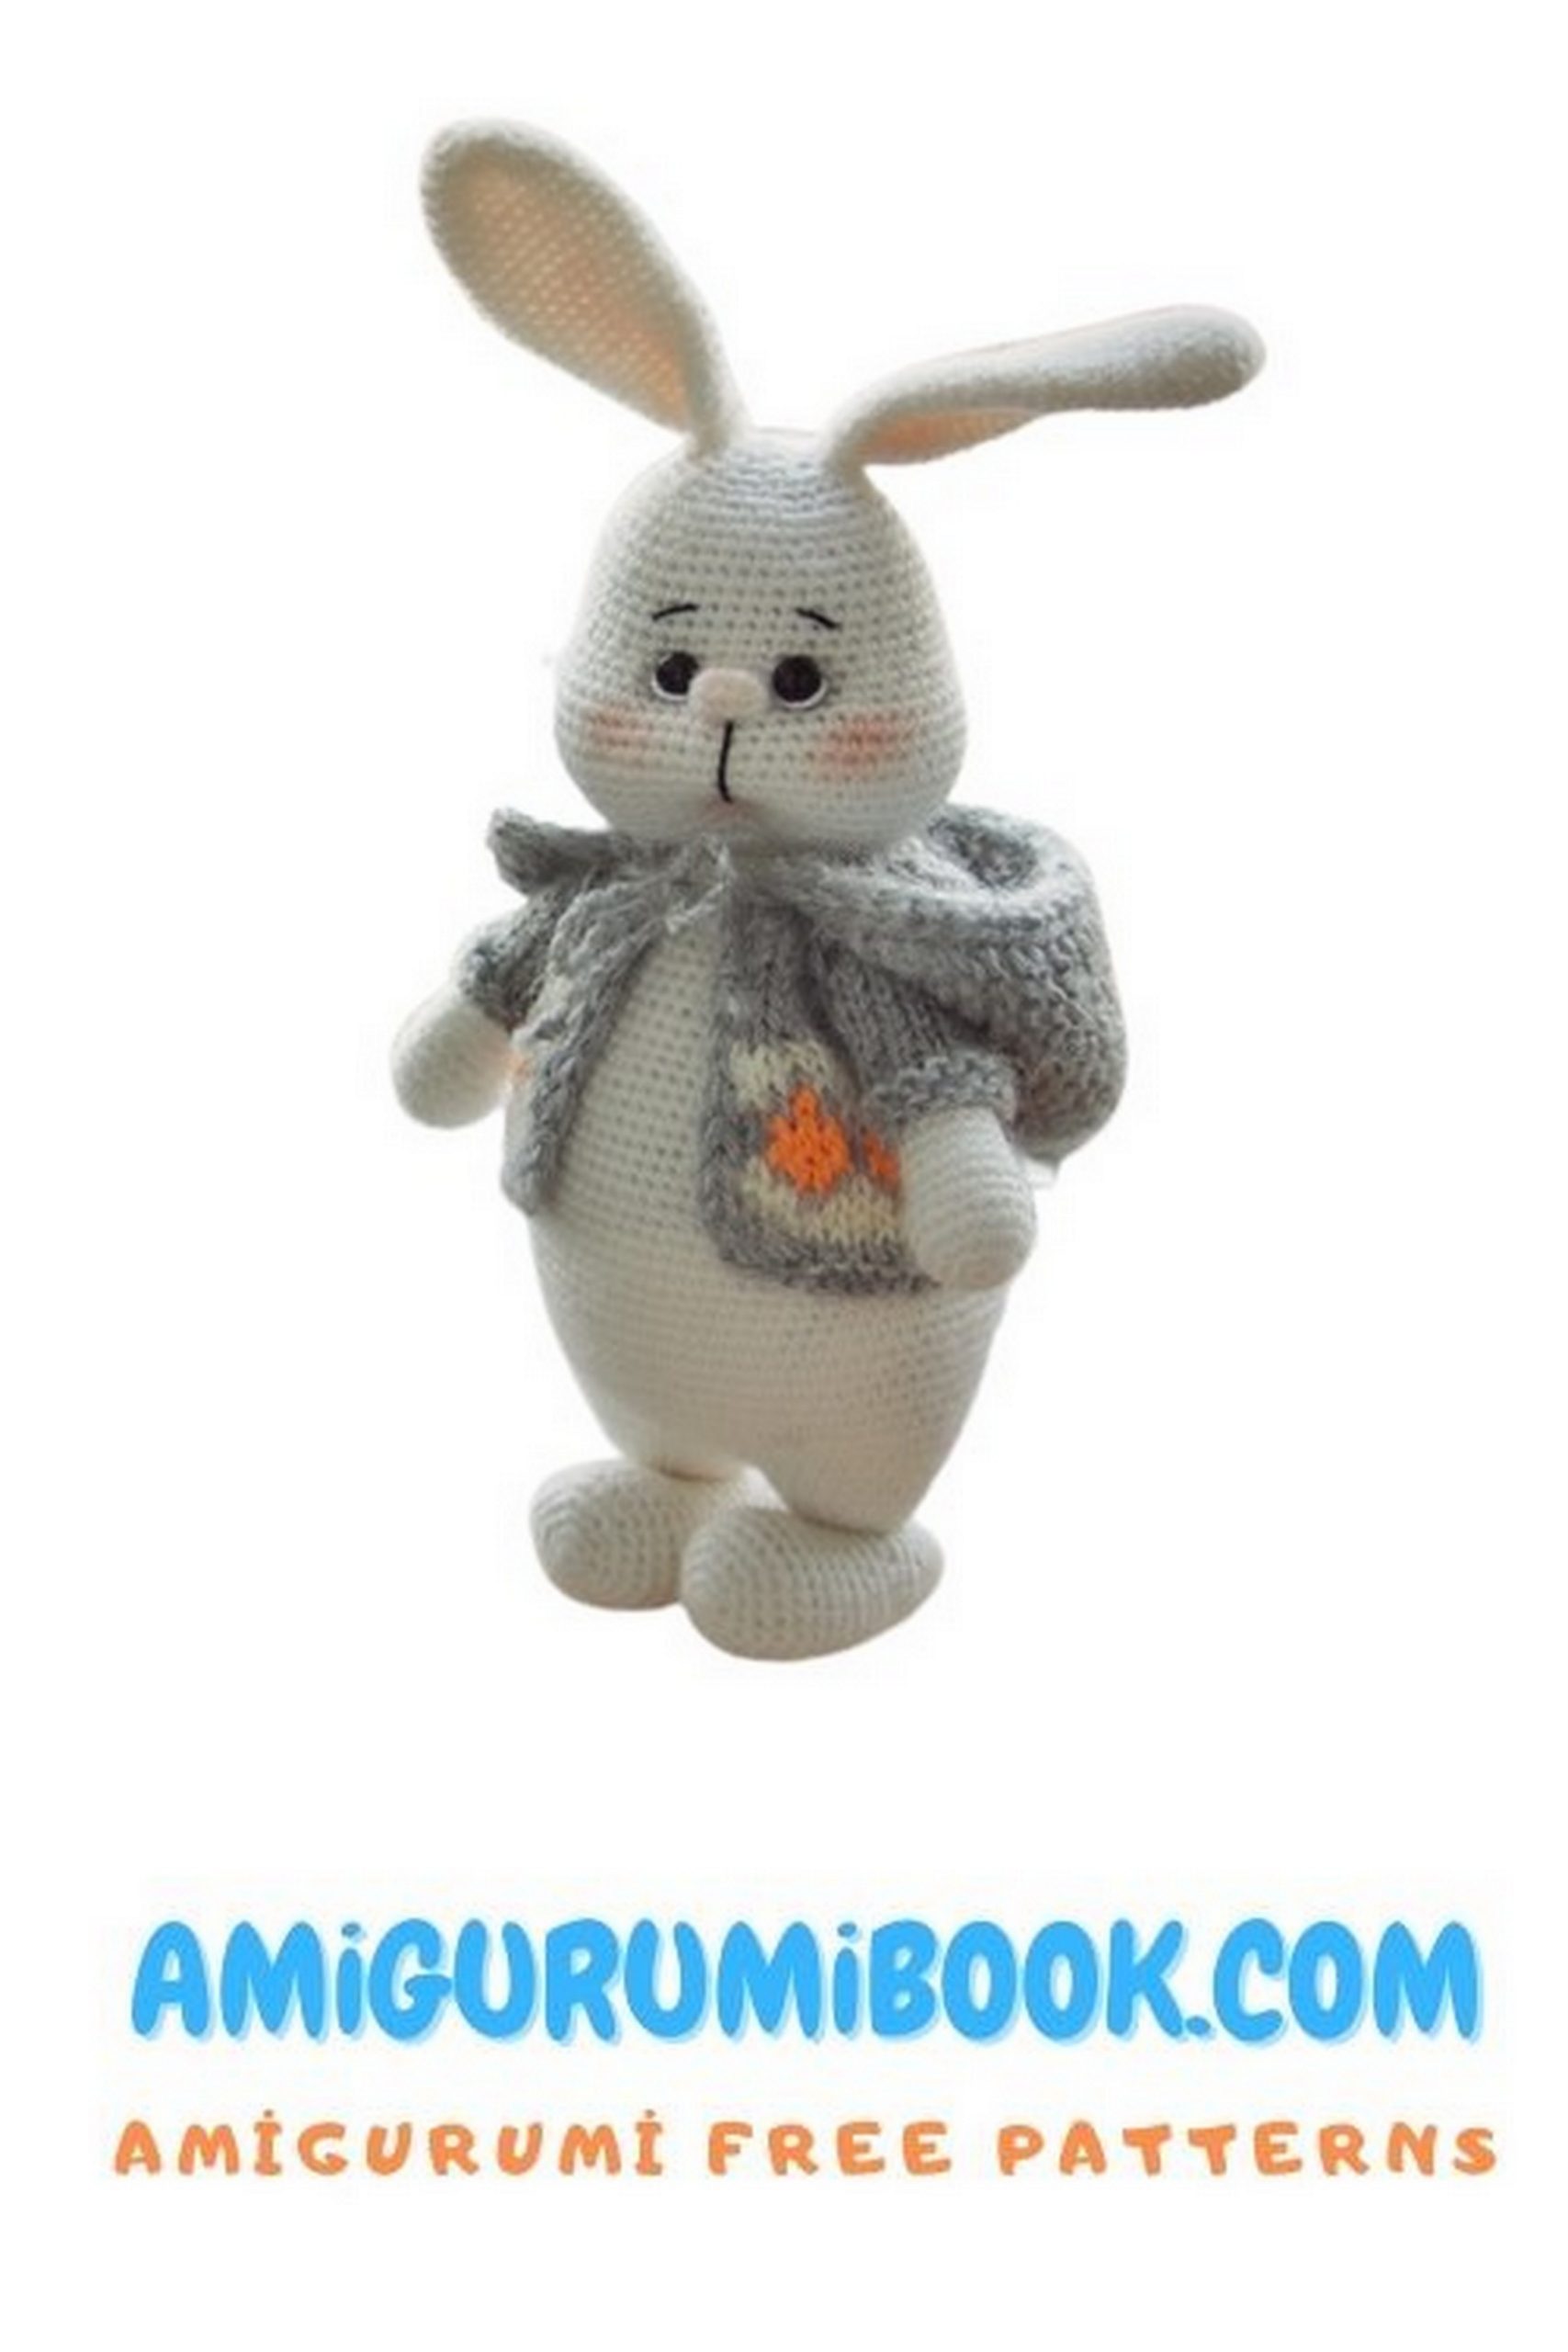
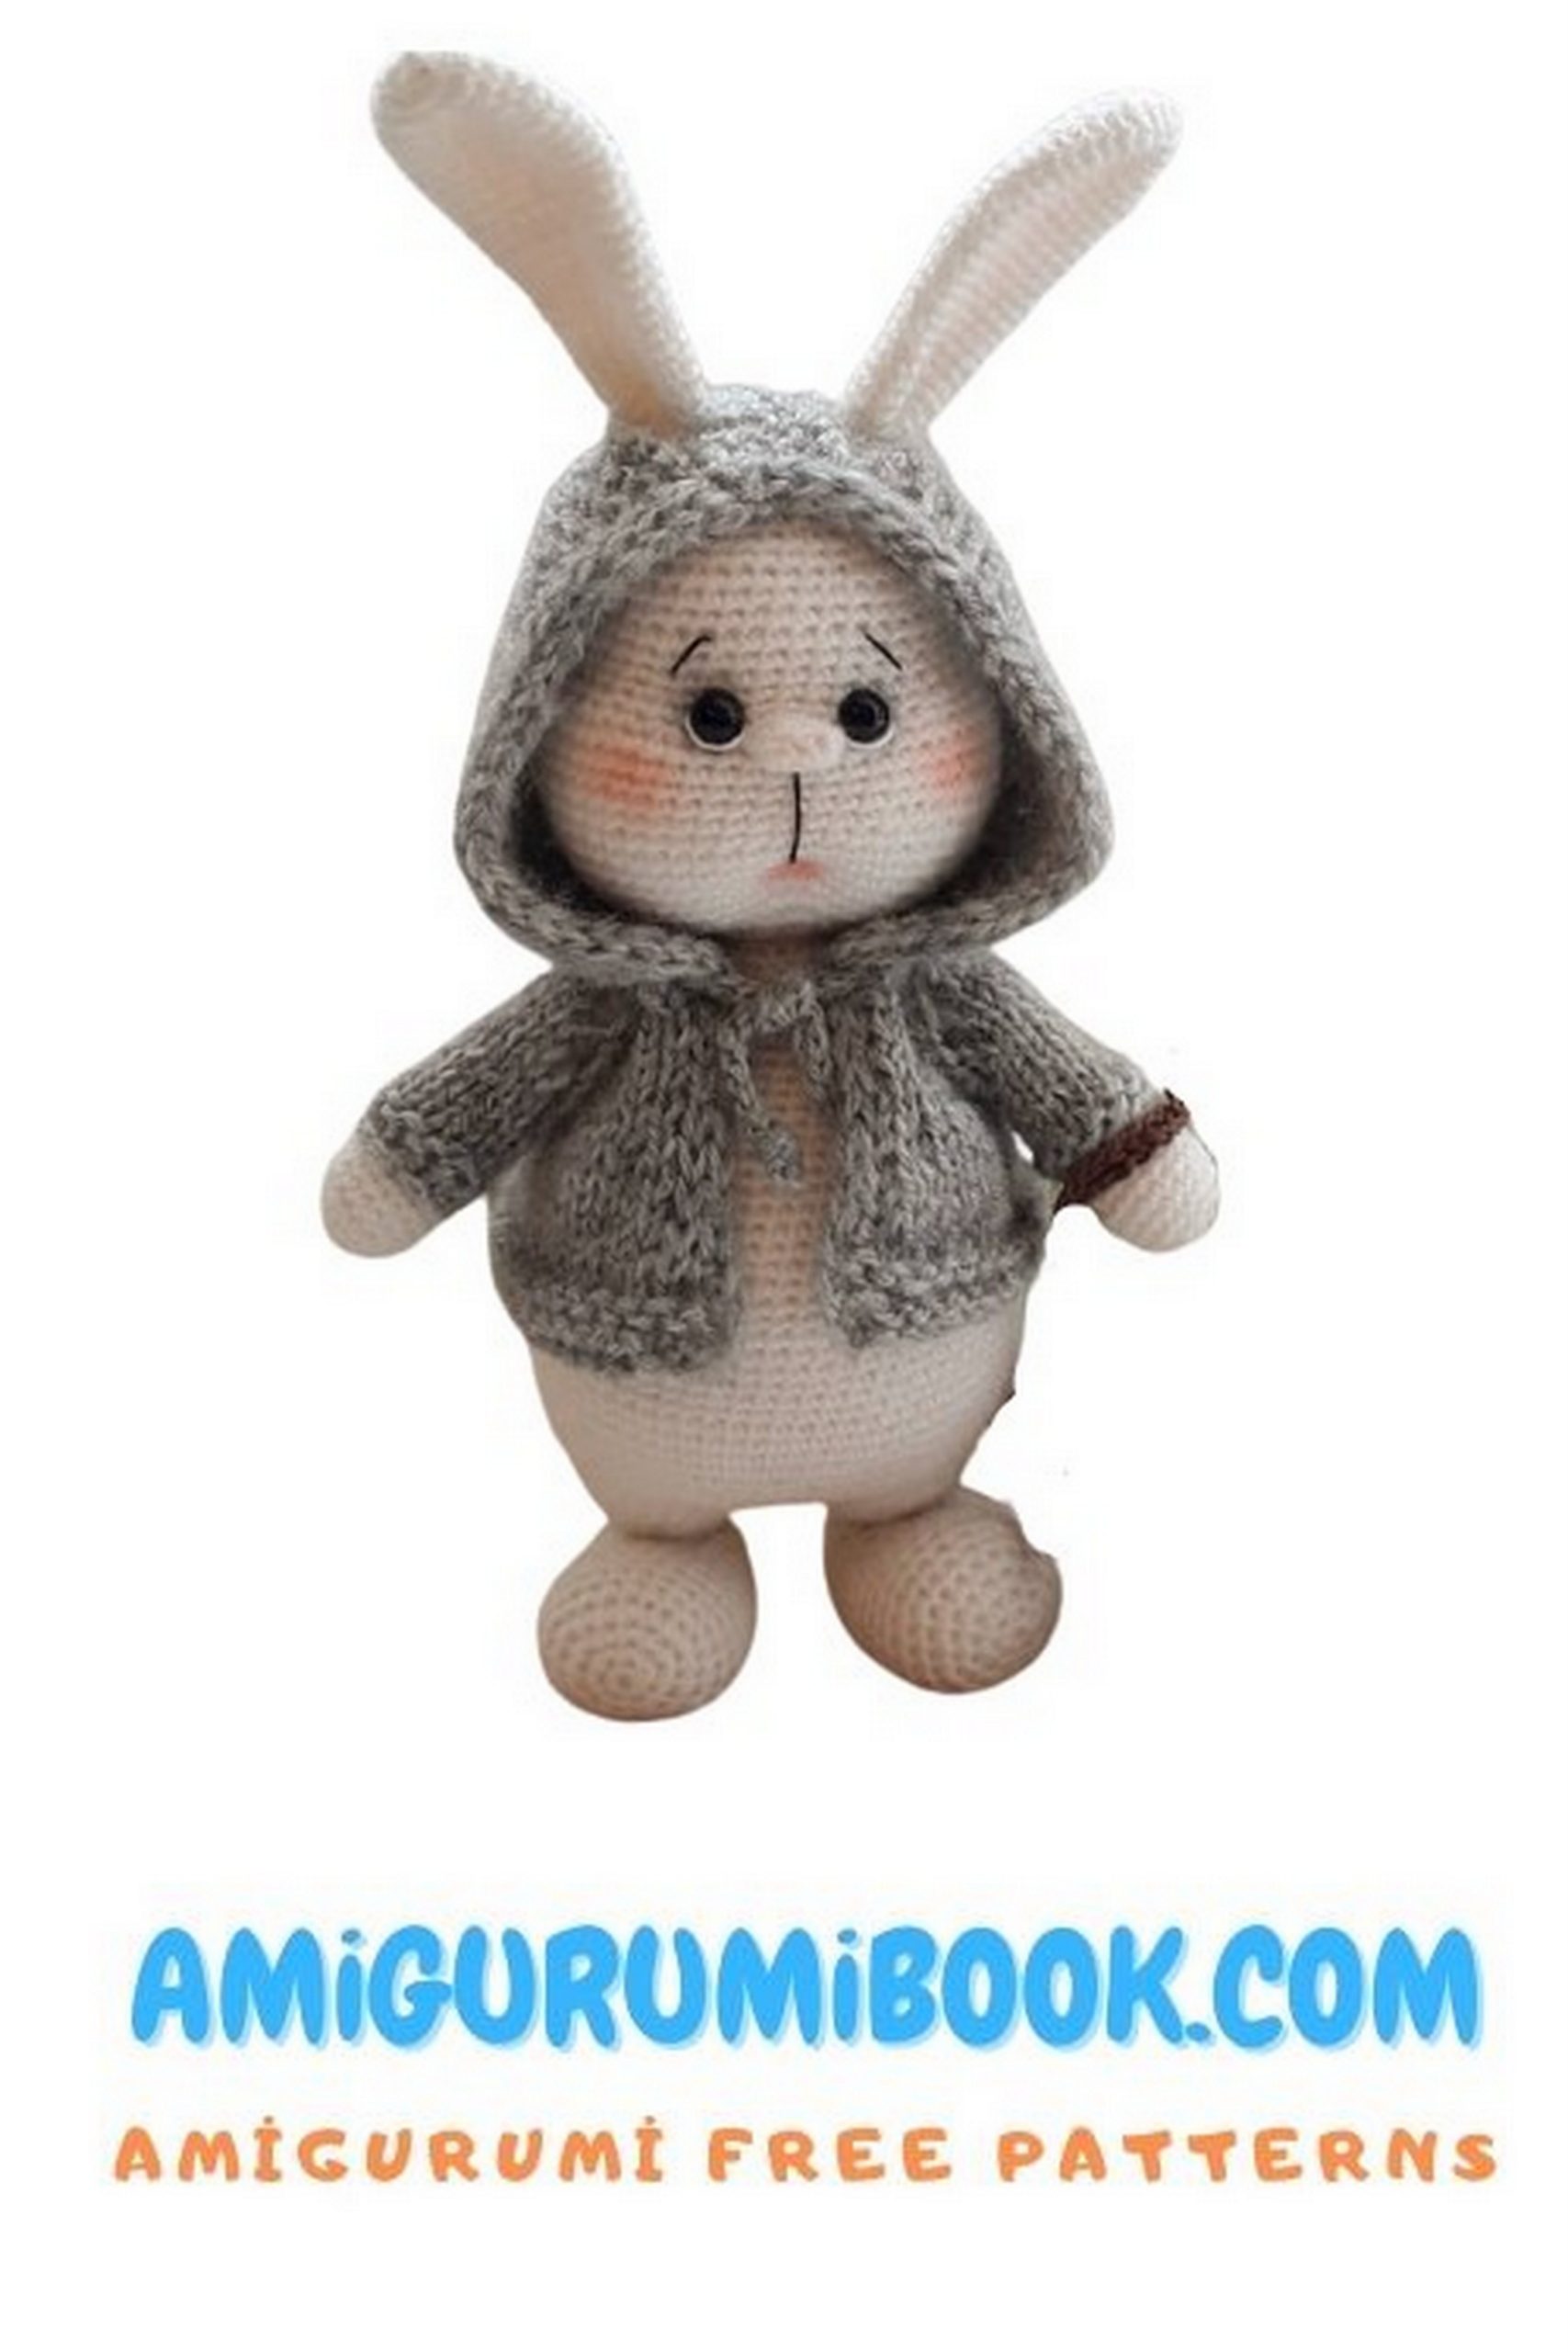
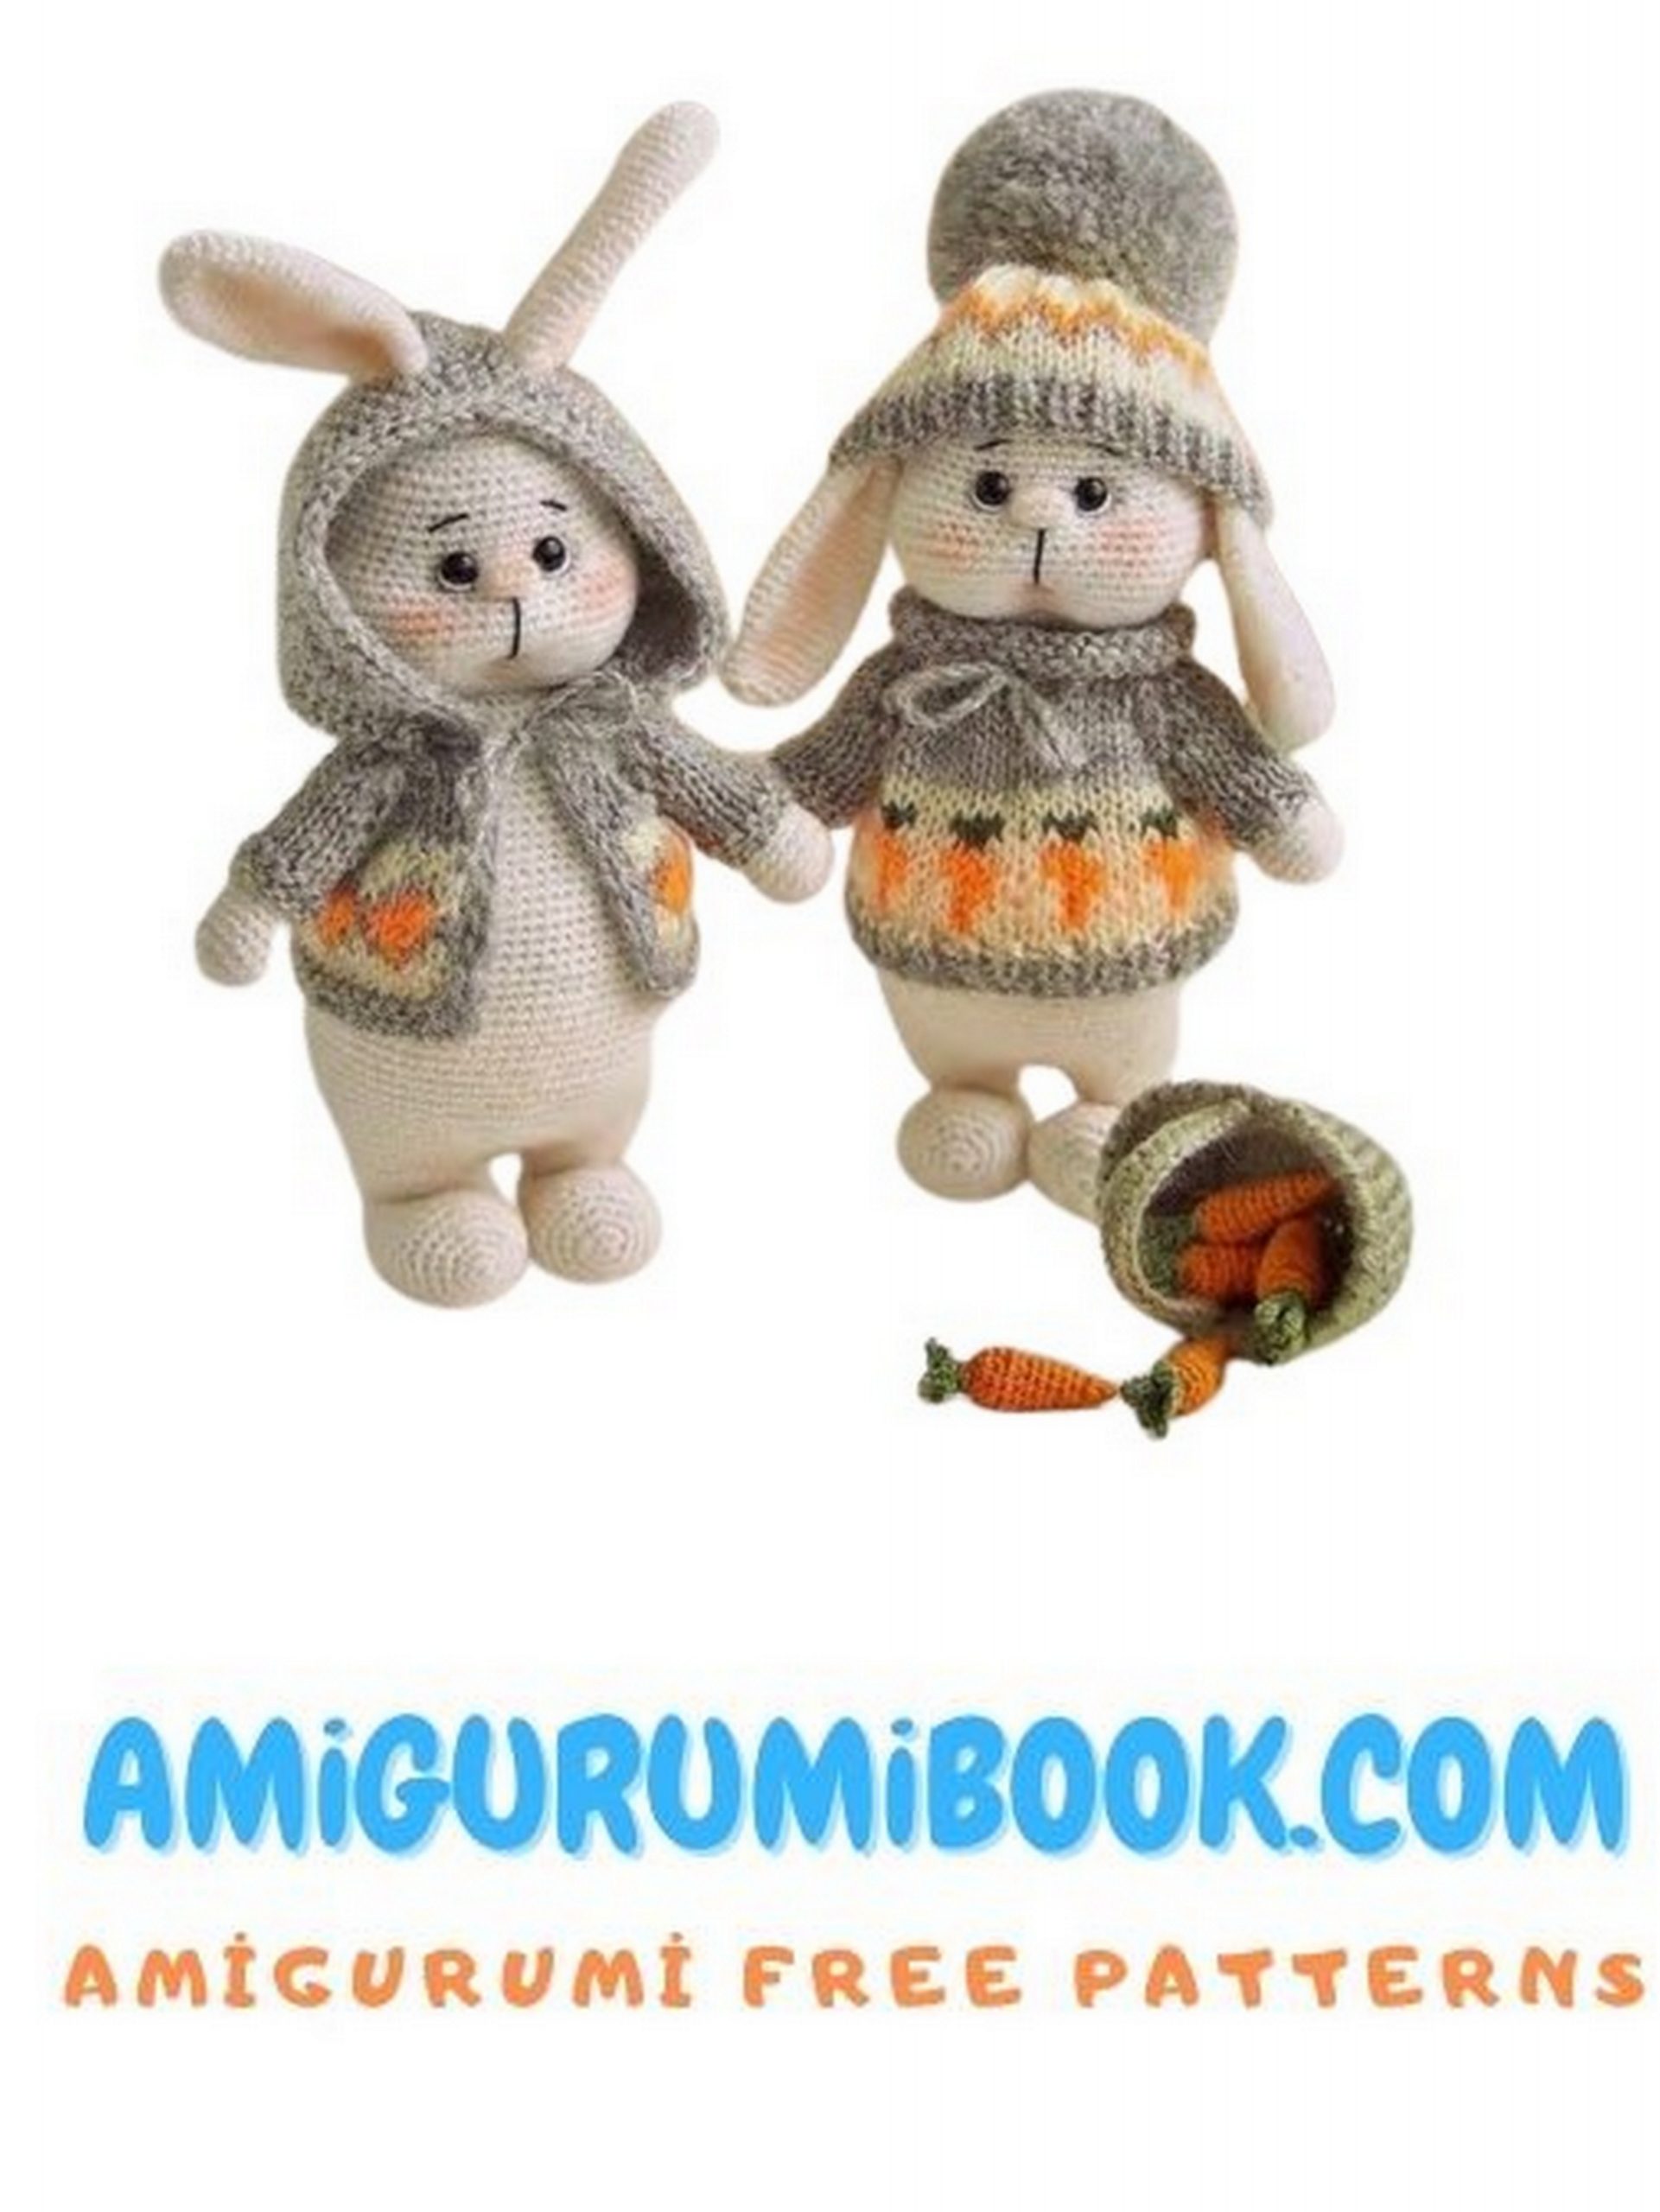
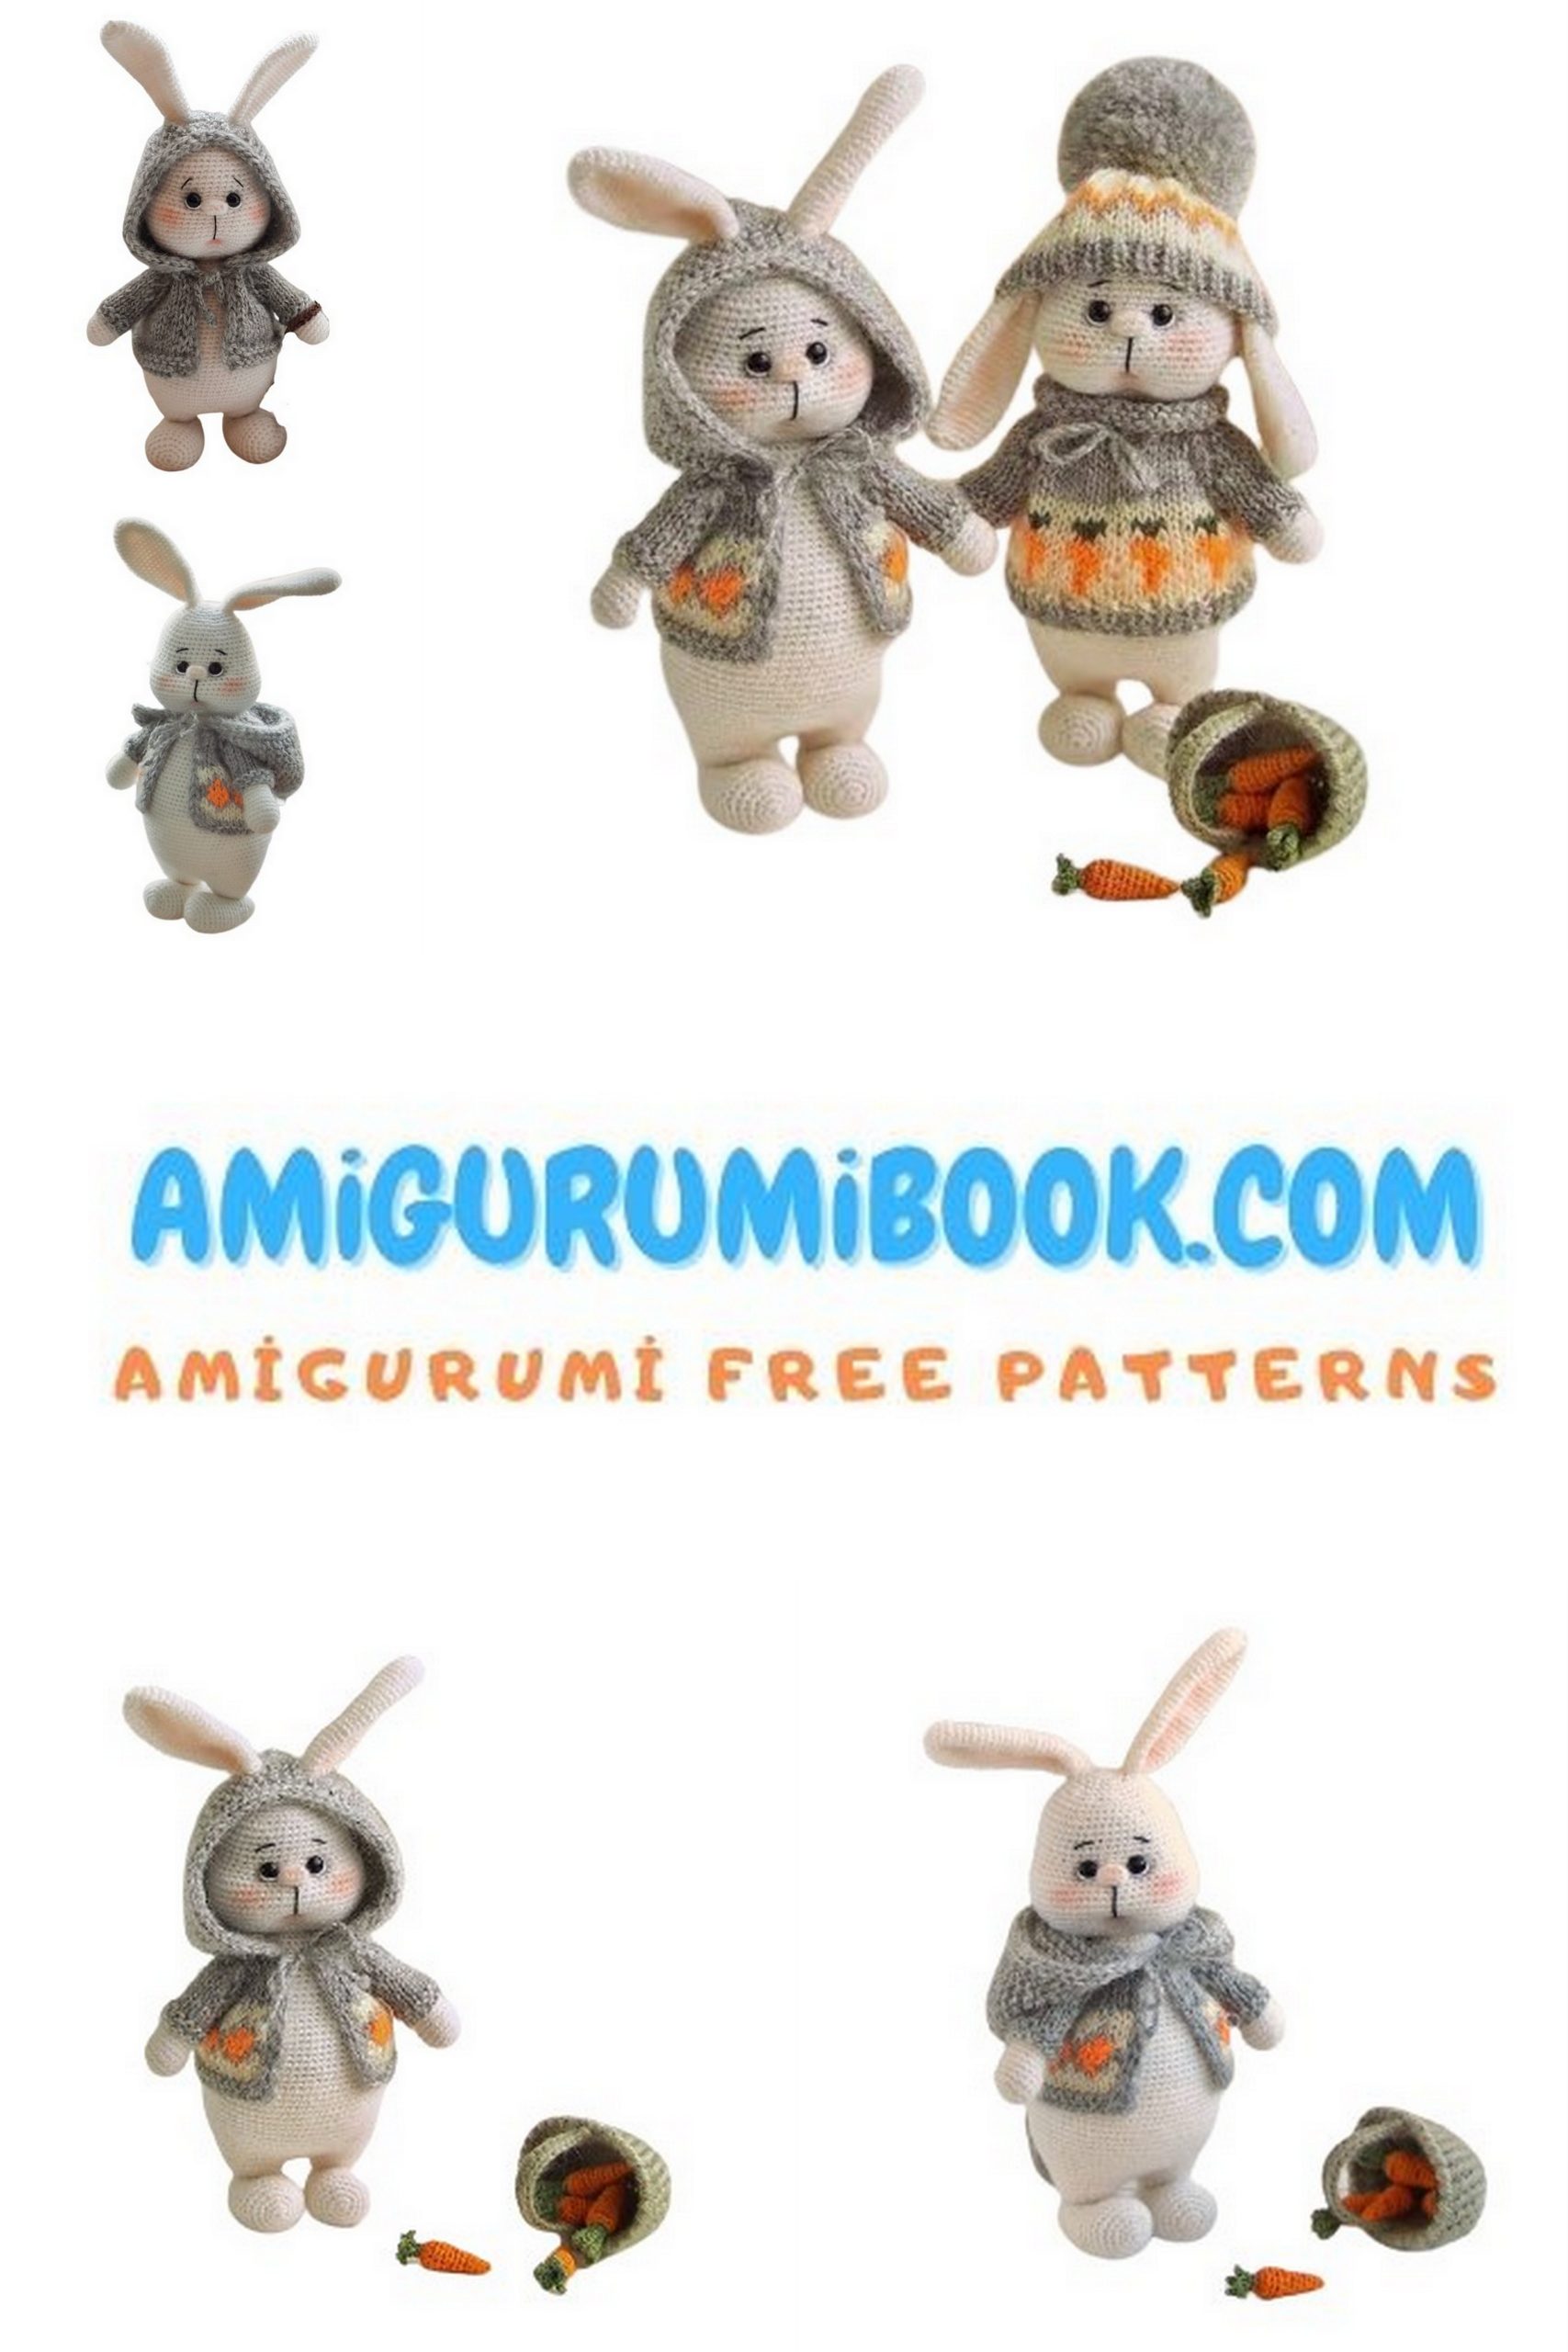
Cute Easter Bunny Amigurumi Free Pattern
Wonderful amigurumi bunny patterns are available on this site for free. I shared the amigurumi easter bunny pattern in this article.
General recommendations
The toy is knitted in a spiral. To see where a new row starts, it is convenient to use a marker.
The row ends before the loop where the marker is inserted. Any sufficiently thin and contrasting thread is suitable as a marker. The marker is alternately thrown on the front side, then on the wrong side.
Since when crocheting, the fabric tends to skew to the right and the beginning of the row is shifted, from time to time it is necessary to correct the position of the marker – the beginning of the row. To do this, knit an offset loop – one or more additional single crochet stitches at the end of the knitted row and move the marker. Now the first stitch in the row will be the one following the last knitted offset stitch. The offset loop is not involved in the description of the rows.
The toy is knitted on both sides of the loop, unless otherwise specified.
Make sure you knit tightly enough, otherwise the filler will show through the knitted fabric. To do this, use a hook that is much thinner than recommended by the yarn manufacturer.
You can choose any yarn and a suitable crochet hook. The thicker the yarn, the larger the toy will be. All other materials – cotter pin connection, eyes, you will need to choose yourself, in accordance with the size of the resulting toy.
Required materials and tools
basic yarn
– Nakolen 5 from Nako, 49% wool, 51% acrylic, 500m / 100g white.
It will take about 30 g.
Can be replaced with any smooth yarn (wool, semi-wool, acrylic, cotton, cotton with acrylic) with a thickness of 400-500 m / 100 g additional yarn for clothing
– Nakolen 5 from Nako, 49% wool, 51% acrylic, 500m / 100g.
Any color (quite a bit).
I have: gray, milk, orange, green yarn Iris for carrots, 100% cotton, 125m / 20g
– orange and green (quite a bit) yarn for a basket – 30% wool, 70% PAN, 125m / 50g, Slonim KPF, Belarus. Can be replaced with any smooth yarn (wool, semi-wool, acrylic, cotton, cotton with acrylic) 250-300 m / 100 g thick, or knit from the main yarn in 2 threads. Any color of your choice
crochet hook 1mm for knitting a rabbit, 0.7mm
– for carrots, 1.5 mm
– for a basket knitting needles sock or circular (on a fishing line) for clothes 2.25 mm synthetic filler tweezers or sticks for stuffing plastic or fiber discs for cotter pin fastening of the head and lower legs: 12 mm – 3 pcs (in the legs and neck), 15 mm – 2 pcs (in the lower legs), 20 mm – 1 pc (in the head), T-shaped cotter pin 2.0 * 20 mm – 3 pcs, metal washers – 6 pcs (only if you use cardboard or plywood discs)
Cotter driver or round nose pliers for tightening the cotter pins
glass eyes, black glossy 6 mm on a loop (or pin) or black half-beads for eyes – 2 pcs.
black and white thread for the decoration of the face and eyes. Suitable yarn Iris, 100% cotton, 125m / 20g
needle
scissors
materials you are used to for tinting and a brush or cotton swab (optional)
buttons, beads, etc. – for decoration
The specified yarn and materials will make a toy about 14 cm in size (up to the crown of the head). If you are planning to knit a rabbit with a different yarn, you may need discs and eyes in different sizes.
You can pick up discs as follows. Work 5 rows (up to 30 sc) for the base yarn pattern in the classic circle pattern.
disc for legs and neck is equal to a circle in 3 rows
the disc for the lower legs is equal to a circle in 4 rows
the disc for the head is slightly less than or equal to a 5-row circle.
Abbrevations
• sc – single crochet
• hdc – half double crochet
• dc – double crochet
• sl-st – slip stitch
• ch – chain
• inc – increase sc (2 sc in one loop)
• dec – decrease sc (knit 2 sc together)
• knit – front loop
• purl – purl loop
• inc knit – an increase in the front loop: knit two from one loop (preferably from the loop of the bottom row)
• dec knit – decrease with the front loop: knit two loops together with the front
• (…) * N – repeat what is indicated in brackets N times
• (…) in one loop – knit what is in brackets in one loop
• add. marker – additional marker (place an additional marker at the specified location).
Lower legs
The marker runs along the left side of the foot. When deflecting the marker, knit an offset loop. The description indicates after which row of the offset loop I did. If this does not work for you, adjust the position of the marker yourself.
1 p: 6 sc into magic ring
2 p: inc * 6 = 12 sc
3 p: (Sc, inc) * 6 = 18 sc
4 p: (2sc, inc) * 6 = 24 sc
5 p: (11 sc, inc) * 2 = 26 sc
6-9 p (4 rows): 26 sc, ch
10 p: 4 sc, dec, sc, dec, 17 sc = 24 sc
Row 10 decreases in the middle of the top of the foot. Make sure this is the case.
11 p: 24 sc
12 p: (dec, 10 sc) * 2 = 22 sc
13 p: 22 sc
14 p: (dec, 9 sc) * 2 = 20 sc
15 p: 5 sc, cotter pin marker, 15 sc = 20 sc
16 p: 20 sc
17 p: (dec, 8 sc) * 2 = 18 sc
18-19: 2 rows of 18 sc (photo 1-2)
Insert cotter pin. We begin to fill the part tightly. (photo 3)
20 p: dec * 9 = 9 sc
21 p: Dec * 3 (not a full row) = 6 sc
Pull off the remaining hinges. Cut the thread, fasten.
Upper legs
The marker runs along the inner side surface. When deflecting the marker, knit an offset loop. I didn’t need to knit the offset loops.
1 p: 6 sc into magic ring
2 p: Inc * 6 = 12 sc
3 p: (Sc, inc) * 6 = 18 sc
4-7 p (4 rows): 18 sc
8 p: 3 dec, 12 sc = 15 sc
9-10 p (2 rows): 15 sc
Fill in the tip of the foot, do not fill in the foot further. Decreases in the next rows should be in the middle of the inside of the foot.
11 p: 1 sc, dec, 12 sc = 14 sc
12-13 p (2 rows): 14 sc sc
14 p: 1 sc, dec, 11 sc = 13 sc
15-16 p (2 rows): 13 sc
17 p: 1 sc, dec, 10 sc = 12 sc
18-19 p (2 rows): 12 sc
20 p: 1 sc, dec, 9 sc = 11 sc
21-22 p (2 rows): 11 sc
23 p: 1 sc, dec, 8 sc = 10 sc
24 p: 10 sc
25 p: 4 sc, 5hdc, sc = 10 sc
Cut the thread, fasten Remove the main marker. Mark the fifth loop of the row with an additional marker.
Tail
You don’t have to follow the marker.
1 p: 6 sc into magic ring
2 p: Inc * 6 = 12 sc
3 p: (Sc, inc) * 6 = 18 sc
4 p: (2 sc, inc) * 6 = 24 sc
5-8 p (4 rows): 24 sc
9 p: (2 sc, dec) * 6 = 18 sc
10 p: (1 sc, dec) * 6 = 12 sc
Cut the thread. Anchor
Legs
You don’t have to follow the marker.
1 p: 6 sc into magic ring
2 p: inc * 6 = 12 sc
3 p: (1 sc, inc) * 6 = 18 sc
4 p: 18 sc
5 p: 1 sc, inc, (2 sc, inc) * 2, 10 sc = 21 sc
6 p: 2 sc, inc, (3 sc, inc) * 2, 10 sc = 24 sc
7 p: 24 sc Cut the thread at the first leg, fasten. Mark stitch 13 of row Do not cut the thread on the second leg!
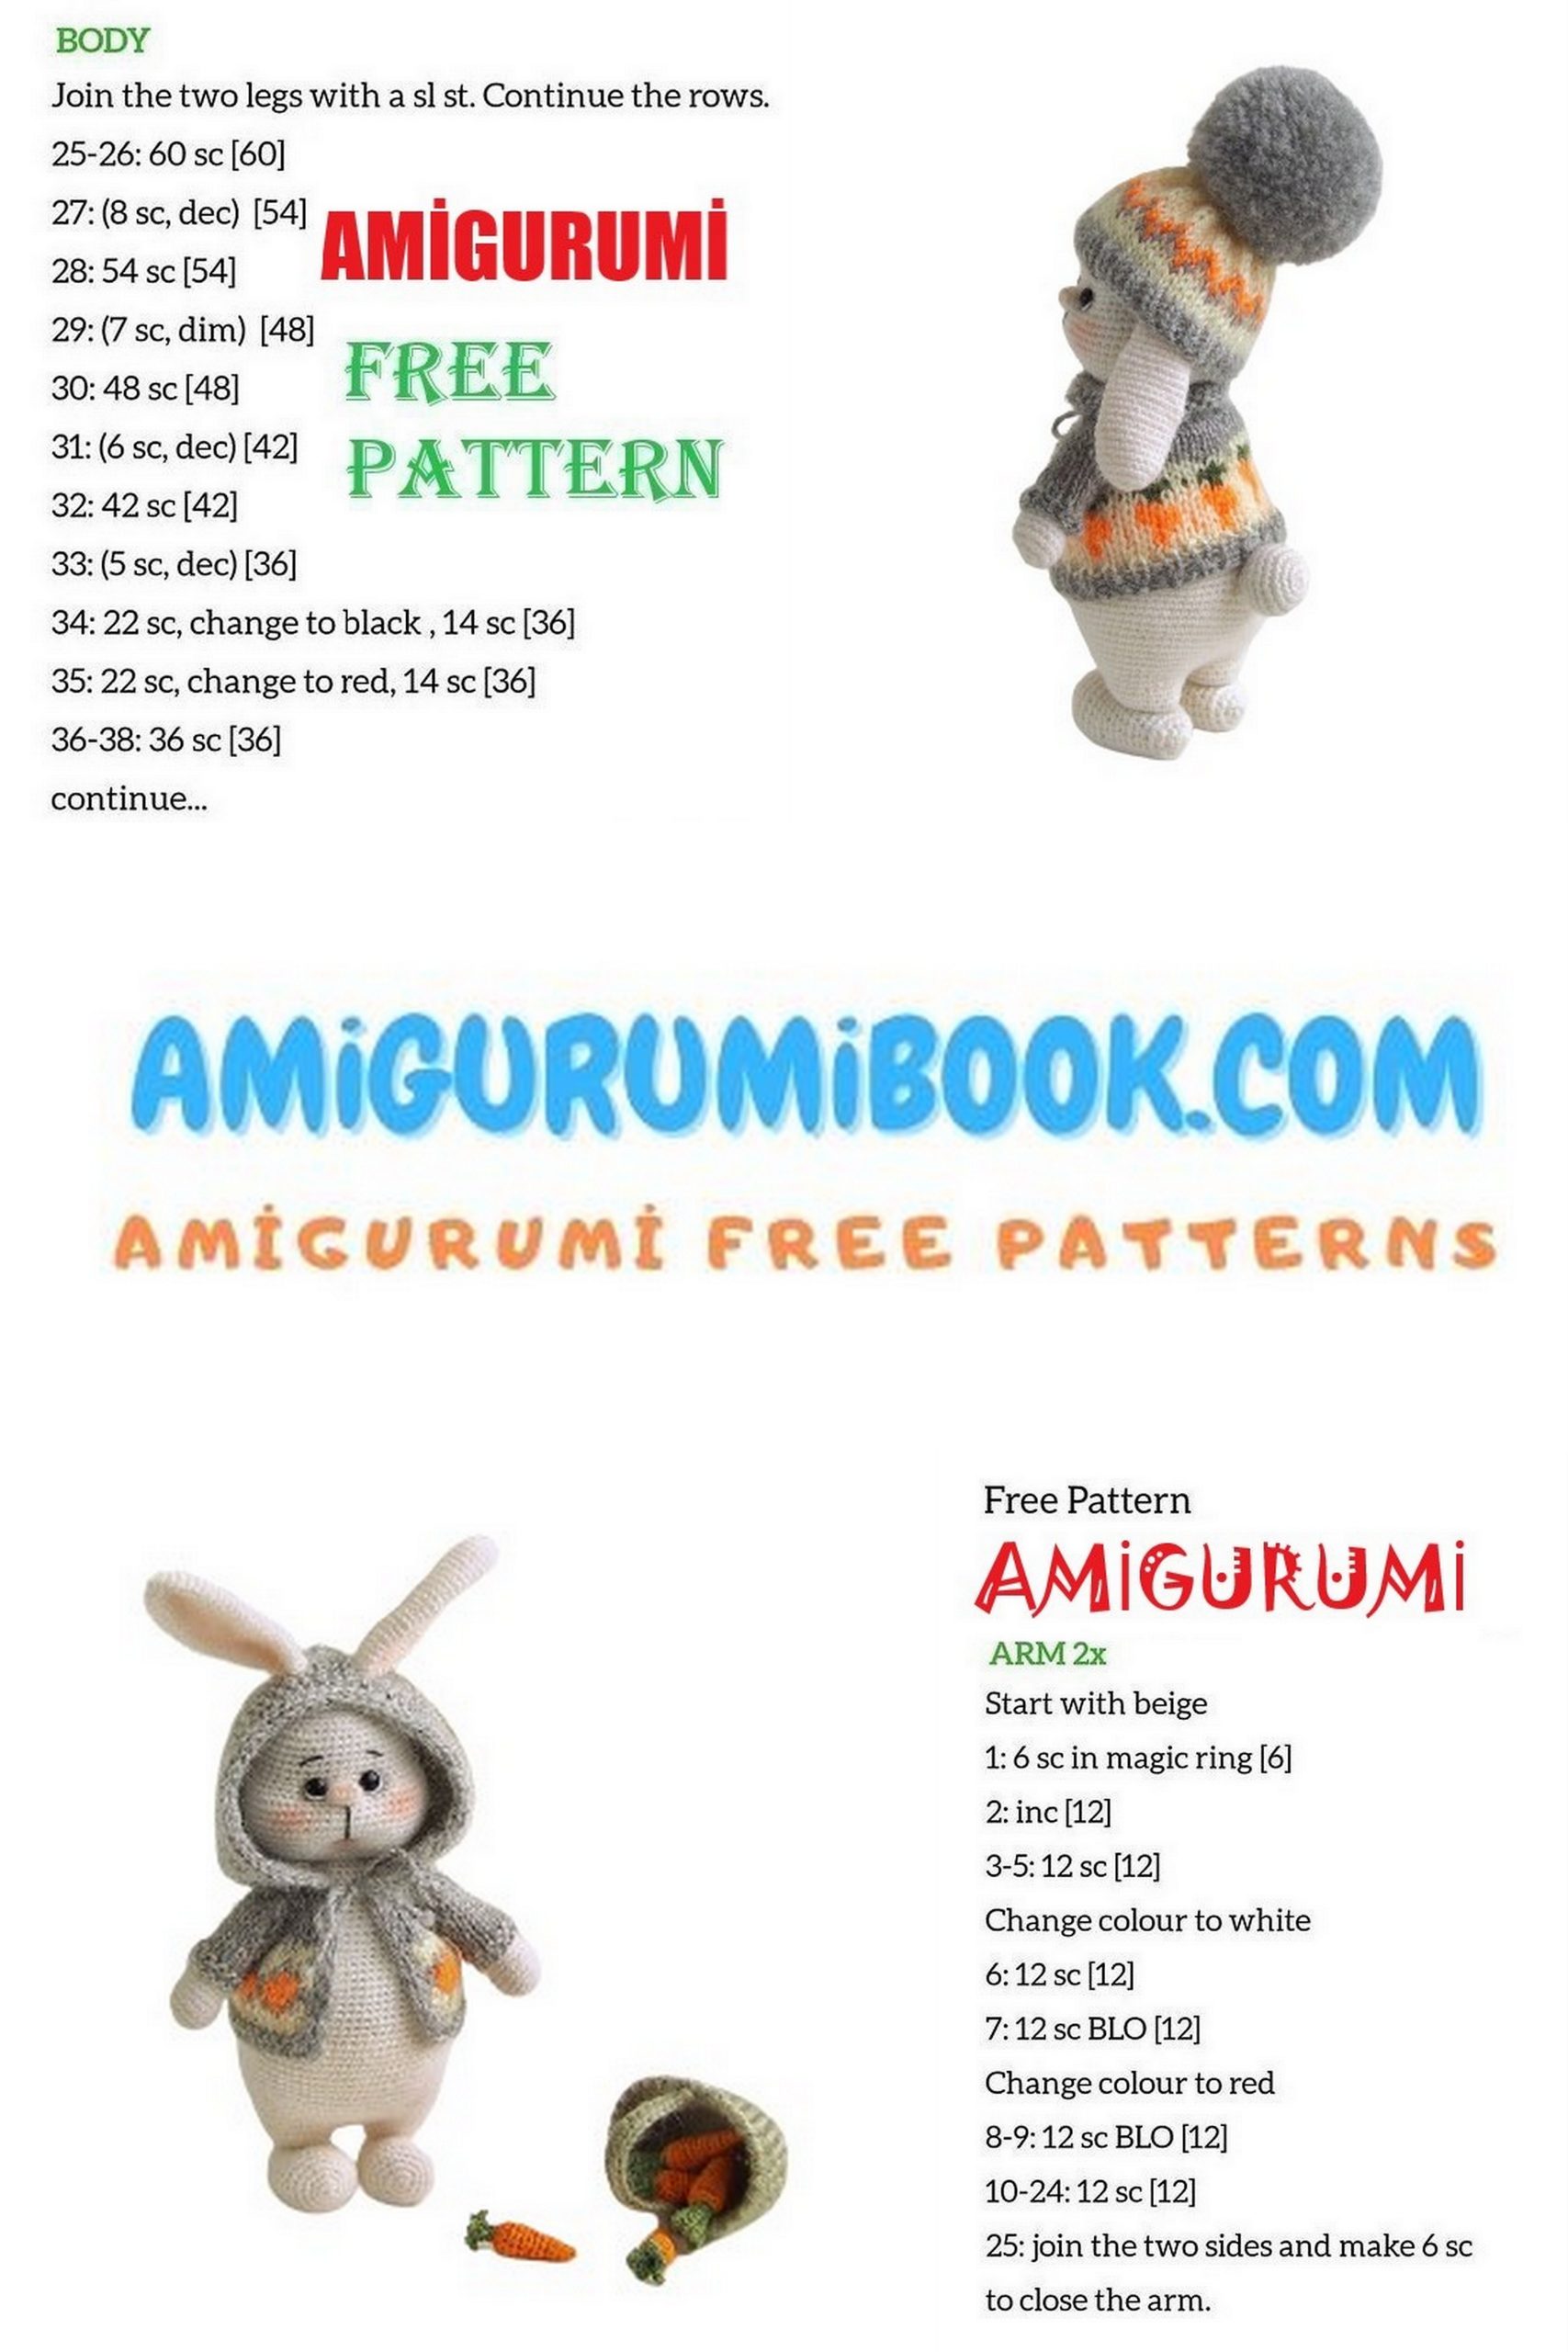
Torso
We continue to knit along the second leg in pivoting rows.
1 p: 5 sc, ch, turn,
2 p: 6 purl sc, ch, turn
3 p: 6 sc, ch, turn,
4 p: 6 purl sc, ch, turn
5 p: 6 sc
We apply the first leg (front side to front)
Starting from the marked stitch, knit 6 sc in two pieces. Remove the marker of the first leg.
6 p: 18 sc on the first leg, 6 sc on the bridge, 18 sc on the second leg, 3 sc on the bridge = 48 sc
Rearrange marker
Further, the marker runs along the middle of the back. If the marker is rejected, you need to knit an offset loop. The description indicates after which row of the offset loop I did. If this does not work for you, adjust the position of the marker yourself.
7 p: 3 sc across the jumper, 4 sc, inc, (7 sc, inc) * 5 = 54 sc
8 p: 54 sc
9 p: 7 sc, inc, (6 sc, inc) * 2, 10 sc, inc, (6 sc, inc) * 2, 7 sc = 60 sc
10 p: 3 sc, inc, (7 sc, inc) * 2, 6 sc, (inc, 2sc) * 3, 5sc, (inc, 7 sc) * 2, inc, 3 sc = 69 sc
11 p: 69 sc
12 p: 30 sc, (inc, 3sc) * 3, 27 sc = 72 sc, ch
13-18 (6 rows): 72 sc, 1 ch In the next row we knit a tail – check the position of the marker!
R19: 69 sc, attach ponytail – knit 3 sc ponytails and body together = 72 sc
R20: 3 sc ponytail and body together, 66 sc, 3 sc on loose ponytail loops = 72 sc
21 p: 3 sc on untied ponytail loops, 69 sc = 72 sc
22 p: 72 sc
Attach the lower legs
23 p: 2 sc, dec, 5 sc, dec, 50 sc, dec, 5 sc, dec, 2 sc = 68 sc
24 p: 68 sc, ch
25 p: 1 sc, dec, 3 sc, dec, 52 sc, dec, 3 sc, dec, 1 sc = 64 sc
26 p: 64 sc
27 p: 3 sc, dec, 5 sc, dec, 40 sc, dec, 5 sc, dec, 3 sc = 60 sc
28 p: 60 sc, ch
29 p: 2 sc, dec, 4 sc, dec, 40 sc, dec, 4 sc, dec, 2 sc = 56 sc
30 p: 56 sc
R 31: 15 sc, dec, 6 sc, dec, 6 sc, dec, 6 sc, dec, 15 sc = 52 sc
R 32: 52 sc
33 p: 15 sc, dec, 5 sc, dec, 4 sc, dec, 5 sc, dec, 15 sc = 48 sc
34-35 R (2 rows): 48 sc, ch
Begin to stuff the torso very tightly. Pay special attention to the legs, they should not be empty! If you didn’t stuff the ponytail before knitting, don’t forget to do it now. Then stuff the torso while knitting.
36 p: 3 sc, dec, (6 sc, dec) * 5, 3 sc = 42 sc
37 p: 42 sc
38 p: (5 sc, dec) * 6 = 36 sc
R 39: 36 sc
40 p: 2 sc, dec, (4 sc, dec) * 5, 2 sc = 30 sc, ch
In the next row we knit the upper legs – check the position of the marker!
R 41: 6 sc, 5 sc with upper foot loops starting at marked buttonhole, 8 sc, 5 sc with upper foot loops starting at marked buttonhole, 6 sc = 30 sc
Remove additional markers on the feet.
R 42: 6 sc, 5 sc on the remaining untied loops of the upper foot, 8 sc, 5 sc on the remaining loops of the upper foot, 6 sc = 30 sc
43 p: 30 sc
44 p: (dec, 3 sc) * 6 = 24 sc
45 p: 24 sc
46 p: (2 sc, dec) * 6 = 18 sc
Insert cotter pin with disc.
47 p: (1 sc, dec) * 6 = 12 sc
48 p: dec * 6
Cut the thread, fasten Remove the marker.
Ears
Ears for Zefirkin rabbit and Donut bunny in row 27 are knitted the same way. For the rabbit, you will need to knit an additional 28 row.
The marker runs along the side fold. If the marker is rejected, you need to knit an offset loop. The description indicates after which row of the offset loop I did. If this does not work for you, adjust the position of the marker yourself.
1 p: 6 sc
2 p: Inc * 6 = 12 sc
3 p: (Sc, inc) * 6 = 18 sc
4 p: 18 sc
5 p: (8sc, inc) * 2 = 20 sc
6 p: 20 sc
7 p: (9sc, inc) * 2 = 22 sc
8-14 p (7 rows): 22 sc, ch
15 p: (dec, 9 sc) * 2 = 20 sc
16-18 p (3 rows): 20 sc
19 p: (dec, 8 sc) * 2 = 18 sc
20-21 p (2 rows): 18 sc
22 p: (dec, 7 sc) * 2 = 16 sc
23-24 p (2 rows): 16 sc
25 p: (dec, 6 sc) * 2 = 14 sc
26 p: 8 sc, skip 6 sc (fold the ear in half, the missing columns remain inside) = 8 sc
27 p: 8 sc
For a bunny (with standing ears), cut the thread, fasten. Mark:
* for the right ear – the first loop
* for the left ear – the fourth loop
For the rabbit (with hanging ears), we continue to knit
* for the right ear:
28 p: 4 hdc, 4 sc = 8 sc
Cut the thread, fasten. Mark the first loop.
* for the left ear:
28 p: 4 sc, 4 hdc = 8 sc
Cut the thread, fasten. Mark the fourth loop
Spout
Dial 4 ch. From the second loop from the hook, knit:
1 p: 2 sc, 3 sc in the last loop, on the other side of the chain: 1 sc, inc = 8 sc
2 p: 8 sc
Cut the thread, fasten. Mark the fourth loop
Zefirkin rabbit head
The marker runs down the middle of the back of the head. If the marker is rejected, you need to knit an offset loop. The description indicates after which row of the offset loop I did. If this does not work for you, adjust the position of the marker yourself.
1 p: 6 sc into magic ring
Do not overtighten the hole. It will be needed to attach the head.
2 p: Inc * 6 = 12 sc
3 p: Inc * 12 = 24 sc
4 p: (sc, inc) * 12 = 36 sc
5 p: (5 sc, inc) * 6 = 42 sc
6 p: 3 sc, inc, (6 sc, inc) * 5, 3 sc = 48 sc
7 p: (7 sc, inc) * 6 = 54 sc
8 p: 4 sc, inc, (8 sc, inc) * 5, 4 sc = 60 sc
9 p: 29 sc, 2sc behind the front wall (mark back walls 30 and 31 sts with an additional marker), 29 sc = 60 sc
10-16 p (7 rows): 60 sc, 2ch
In the next row we knit a nose. Check the symmetry!
P 17: 28 sc, 4 sc with nose sts starting from the marked loop, 28 sc = 60 sc
18 p: 11 sc, (dec, 2 sc) * 4, dc for the marked back wall 30 loops of the 9th row (one more loop in the row was formed), 1 sc, 4sc along the remaining un-knitted nose loops, 1 sc, dc for the marked back wall of 31 loops of 9 rows (another loop in a row was formed), (2 sc, dec) * 4, 11 sc = 54 sc (52 sc + 2 loops were formed during the formation of the muzzle)
Remove add. P marker: 10 sc, 4 sc together with the left ear starting from the marked loop, 9 sc, dec, 4 sc, dec, 9 sc, 4sc together with the right ear starting from the marked loop, 10 sc = 52 sc
Remove add. lug markers
19 p: 10 sc, 4 sc on the ear, 1 sc (dec, 2 sc) * 2, 6 sc, (2 sc, dec) * 2, 1sc, 4 sc on the ear, 10 sc = 48, ch
21-26 p (6 rows): 48 sc, 1 ch
We attach the head to the body: in the hole left in the first row of the head, insert the cotter pin from the body, put on the disc, tighten the cotter pin. You don’t have to follow the marker further
27 p: 3sc, dec, (6 sc, dec) * 5, 3 sc = 42 sc
28 p: 42 sc
29 p: (5 sc, dec) * 6 = 36 sc
30 p: 2 sc, dec (4 sc, dec) * 5, 2 sc = 30 sc
Begin to fill the head moderately tightly. Pay special attention to the muzzle and cheeks. Be careful not to tear the yarn where the muzzle is formed. Stuff as you knit.
31 p: (3 sc, dec) * 6 = 24 sc
32 p: (2 sc, dec) * 6 = 18 sc
At this stage, you can put off knitting and finish the head after decoration. This makes it easier to hide all the threads and adjust the uniformity of the packing. Or continue knitting, if that’s more convenient for you.
33 p: (1 sc, dec) * 6 = 12 sc
34 p: dec * 6 = 6 sc
Cut the thread. Pull off the remaining loops, fasten
Donut Bunny Head
We knit up to 19 rows in the same way as the head of a rabbit. The marker runs down the middle of the back of the head. If the marker is rejected, you need to knit an offset loop. The description indicates after which row of the offset loop I did. If this does not work for you, adjust the position of the marker yourself.
1 p: 6 sc into magic ring
Do not overtighten the hole. It will be needed to attach the head.
2 p: Inc * 6 = 12 sc
3 p: Inc * 12 = 24 sc
4 p: (sc, inc) * 12 = 36 sc
5 p: (5 sc, inc) * 6 = 42 sc
6 p: 3 sc, inc, (6 sc, inc) * 5, 3 sc = 48 sc
7 p: (7 sc, inc) * 6 = 54 sc
8 p: 4 sc, inc, (8 sc, inc) * 5, 4 sc = 60 sc
9 p: 29 sc, 2sc behind the front wall (mark back walls 30 and 31 sts with an additional marker), 29 sc = 60 sc
10-16 p (7 rows): 60 sc, 2ch
In the next row we knit a nose. Check the symmetry!
P 17: 28 sc, 4 sc with nose sts starting from the marked loop, 28 sc = 60 sc
18 p: 11 sc, (dec, 2 sc) * 4, dc for the marked back wall 30 loops of the 9th row (another loop was formed in the row), 1 sc, 4sc along the remaining not knitted loops of the nose, 1 sc, dc for the marked back wall 31 loops of 9 rows (one more loop in a row formed), (2 sc, dec) * 4, 11 sc = 54 sc (52 sc + 2 loops were formed during the formation of the muzzle)
Remove add. marker
19 p: 23 sc, dec, 4 sc, dec, 23 sc = 52 sc
20 p: 15 sc, (dec, 2 sc) * 2, 6 sc, (2 sc, dec) * 2, 15sc = 48, ch
21-26 p (6 rows): 48 sc, 1 ch
We attach the head to the body: in the hole left in the first row of the head, insert the cotter pin from the body, put on the disc, tighten the cotter pin.
27 p: 3sc, dec, (6 sc, dec) * 5, 3 sc = 42 sc
28 p: 42 sc
29 p: (5 sc, dec) * 6 = 36 sc
30 p: 2 sc, dec (4 sc, dec) * 5, 2 sc = 30 sc, ch
In the next row we knit ears – check the symmetry!
Begin to fill the head moderately tightly. Pay special attention to the muzzle and cheeks. Be careful not to tear the yarn where the muzzle is formed. Stuff as you knit. 31 p: 3 sc. Attach the left ear. Knit together the marked eyelet loop and head decrease. 3 sc over the ear and head together. Further on the head: dec, 3 sc, dec, 3 sc, dec, 2 sc. Attach right eyelet, knit 1 sc across eyelet and head together, starting at marked loop. Knit the next sc of the eyelet together with the decrease on the head. 2 sc over the ear and head together. We finish knitting a row on the head: 1 sc, dec = 24
Remove add. lug markers.
32 p: 2 sc. Knit the next sc with the remaining un-knit ear loops, 2 sc along the remaining un-knitted ear loops, knit the next un-knit ear and head loops together, decrease. We continue on the head: (2 sc, dec) * 2, 2 sc. Along the remaining not knitted ear loops: dec, 2 sc. Again on the head: dec = 18 sc
At this stage, you can put off knitting and finish the head after decoration. This makes it easier to hide all the threads and adjust the uniformity of the packing. Or continue knitting, if that’s more convenient for you.
33 p: (1 sc, dec) * 6 = 12 sc
34 p: dec * 6 = 6 sc
Cut the thread. Pull off the remaining hinges, fasten.

Registration.
Before shaping the muzzle, check again if the head is well enough in the cheeks and the back of the head.
Pick up and try on the eyes of the hares. With a dark color, your usual means, tint the area under the eyes. Set the eyes next to the nose at a point just above the place where the dc was knitted. Guide the securing threads to the back of the head between sc. Tie together the ends of the threads from the adjacent eyes and hide in the head with Iris Yarn, embroider the line under the nose, eyebrows and whites of the eyes.
To do this, insert a long needle into the open hole of the head (or at the back of the head, between sc, if the head has already been tied), withdraw at the point of the mouth. Insert under the nose and out into the open opening of the head.
Fasten the threads, cut and hide in the head.
Sew the eyebrows and whites of the eyes in the same way.
Add filler and tie the head (if not tied before):
33 p: (1 sc, dec) * 6 = 12 sc
34 p: dec * 6 = 6 sc
Cut the thread. Pull off the remaining loops, secure.
Tint the cheeks, nose, mouth, inside of the ears
Congratulations, your eared is ready!
clothing
Clothes for a rabbit are crocheted of the same yarn as the toy itself.
In order not to be mistaken with the size, before starting work, determine your knitting density. Knit a small sample from the yarn and the knitting needles with which you are going to knit clothes.
Count how many stitches and rows of 1 cm you get. I have a knitting density: 3 loops and 4 rows in 1 cm
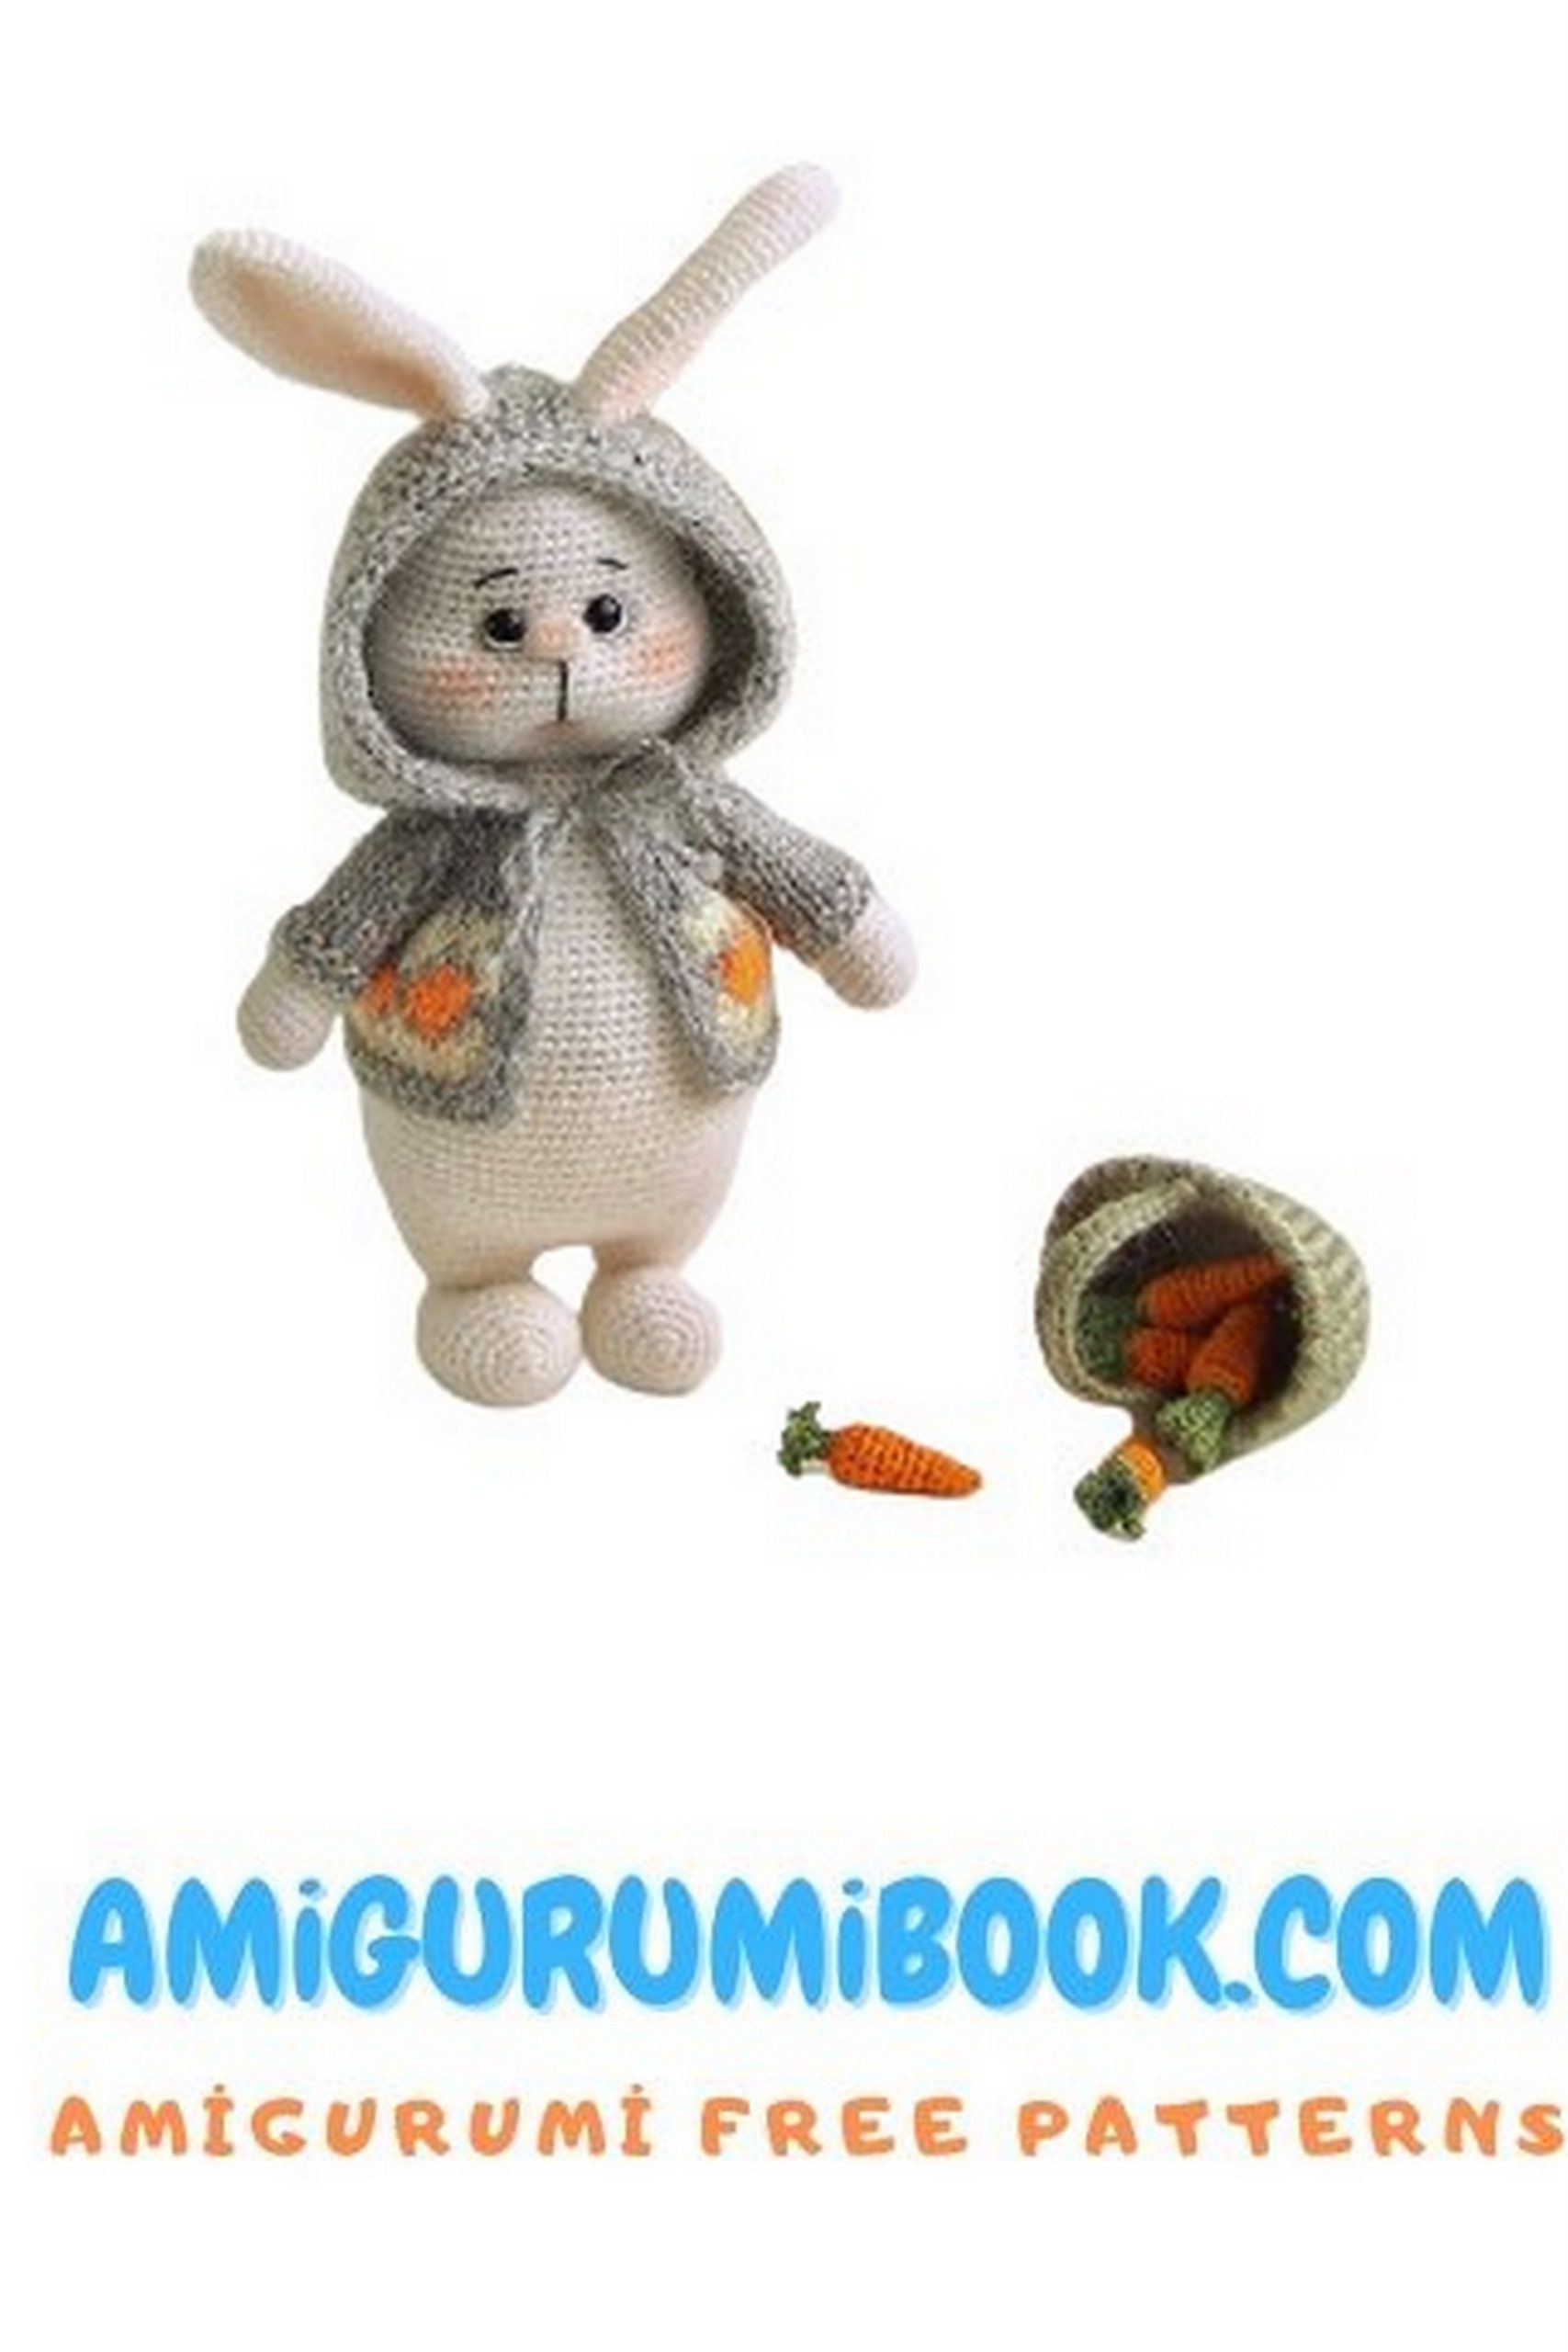
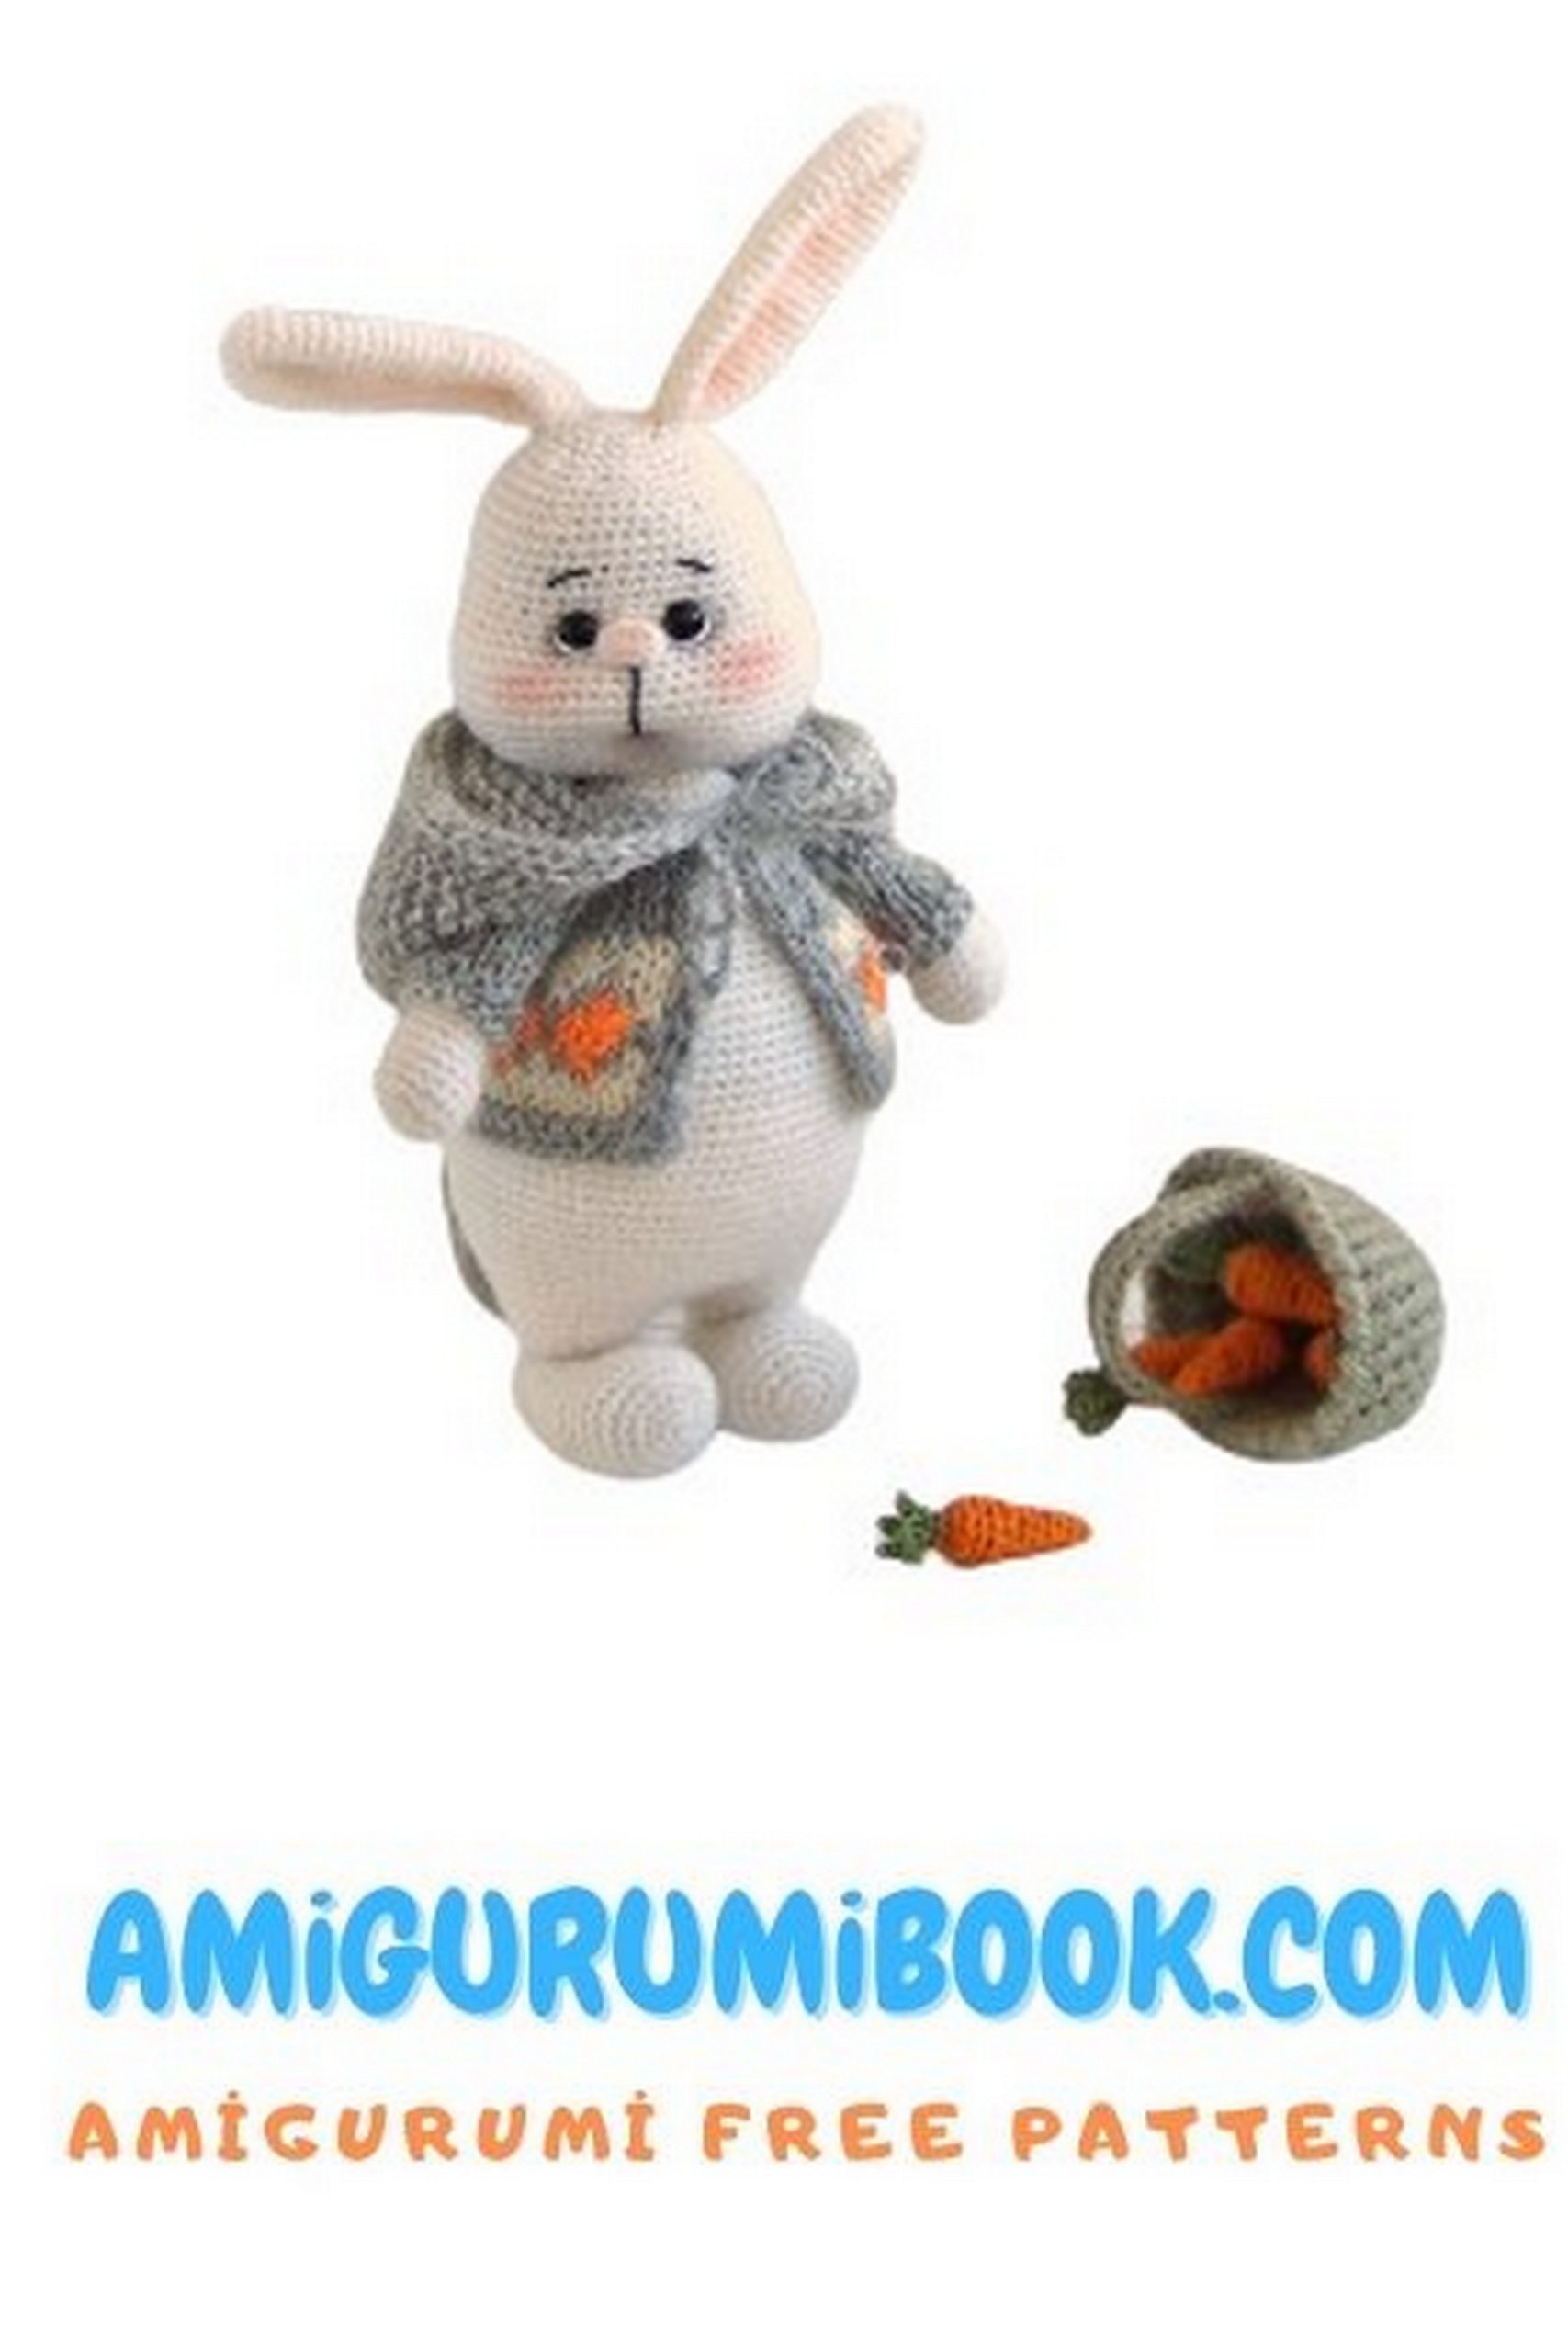
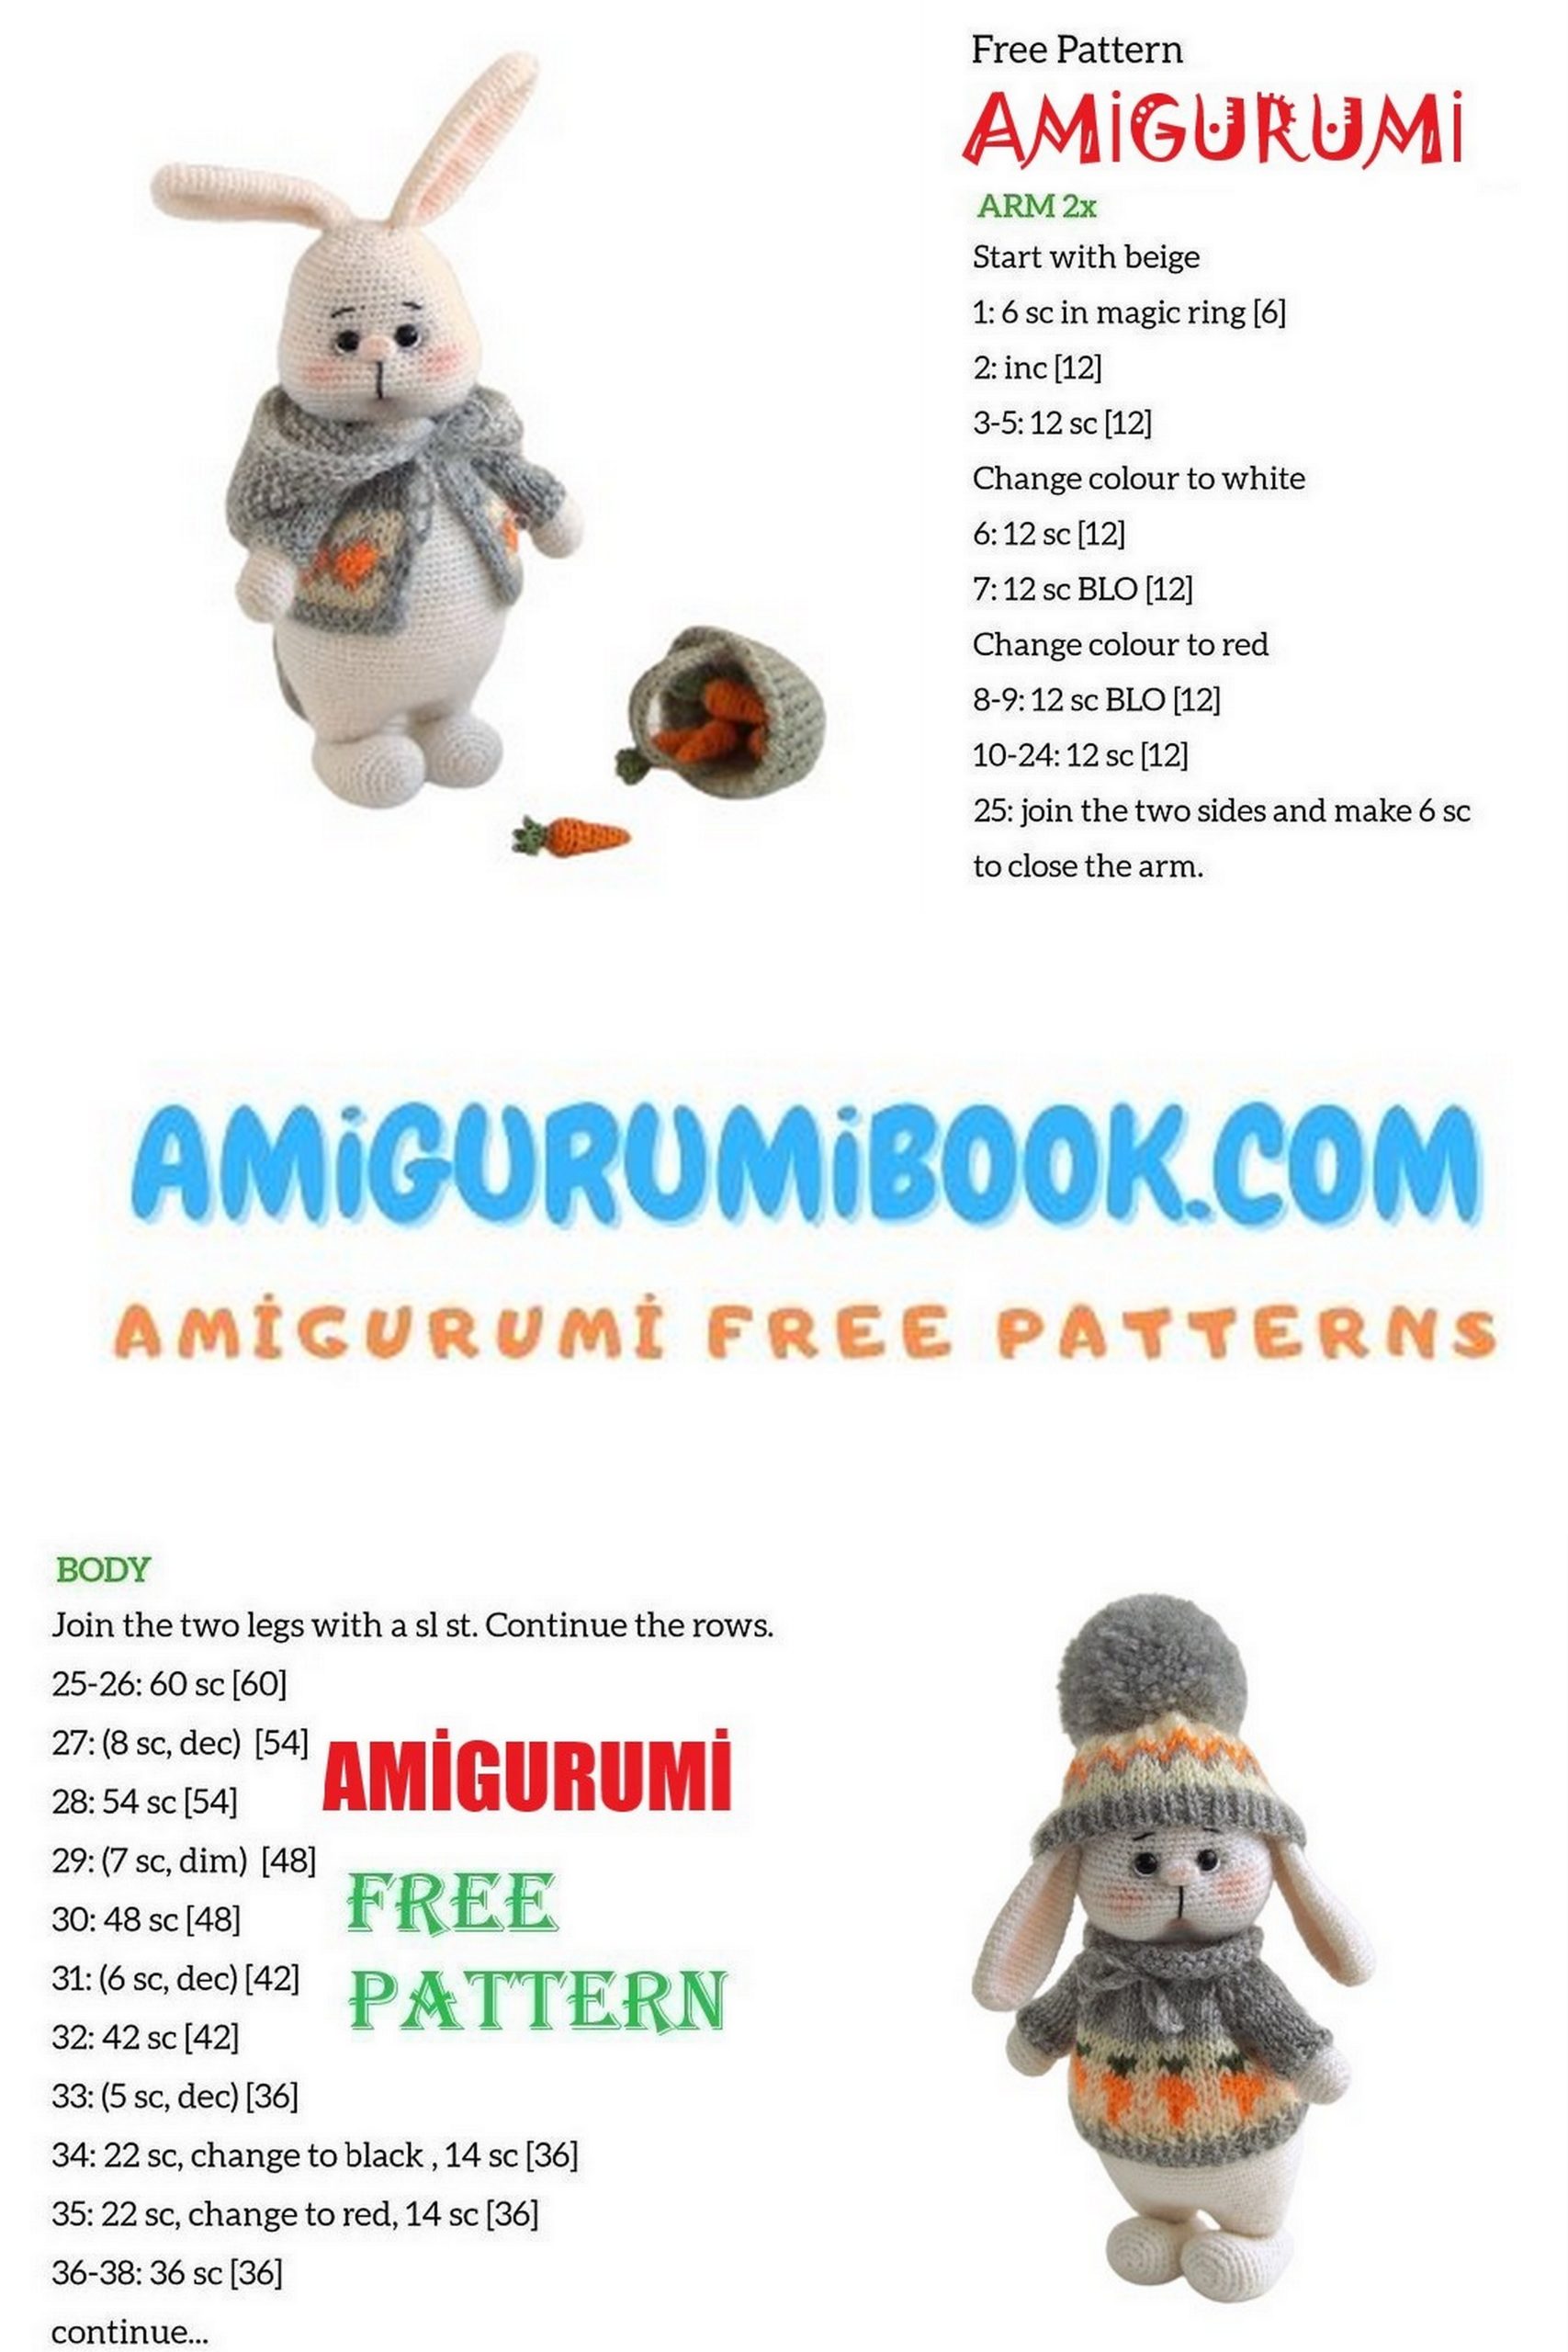
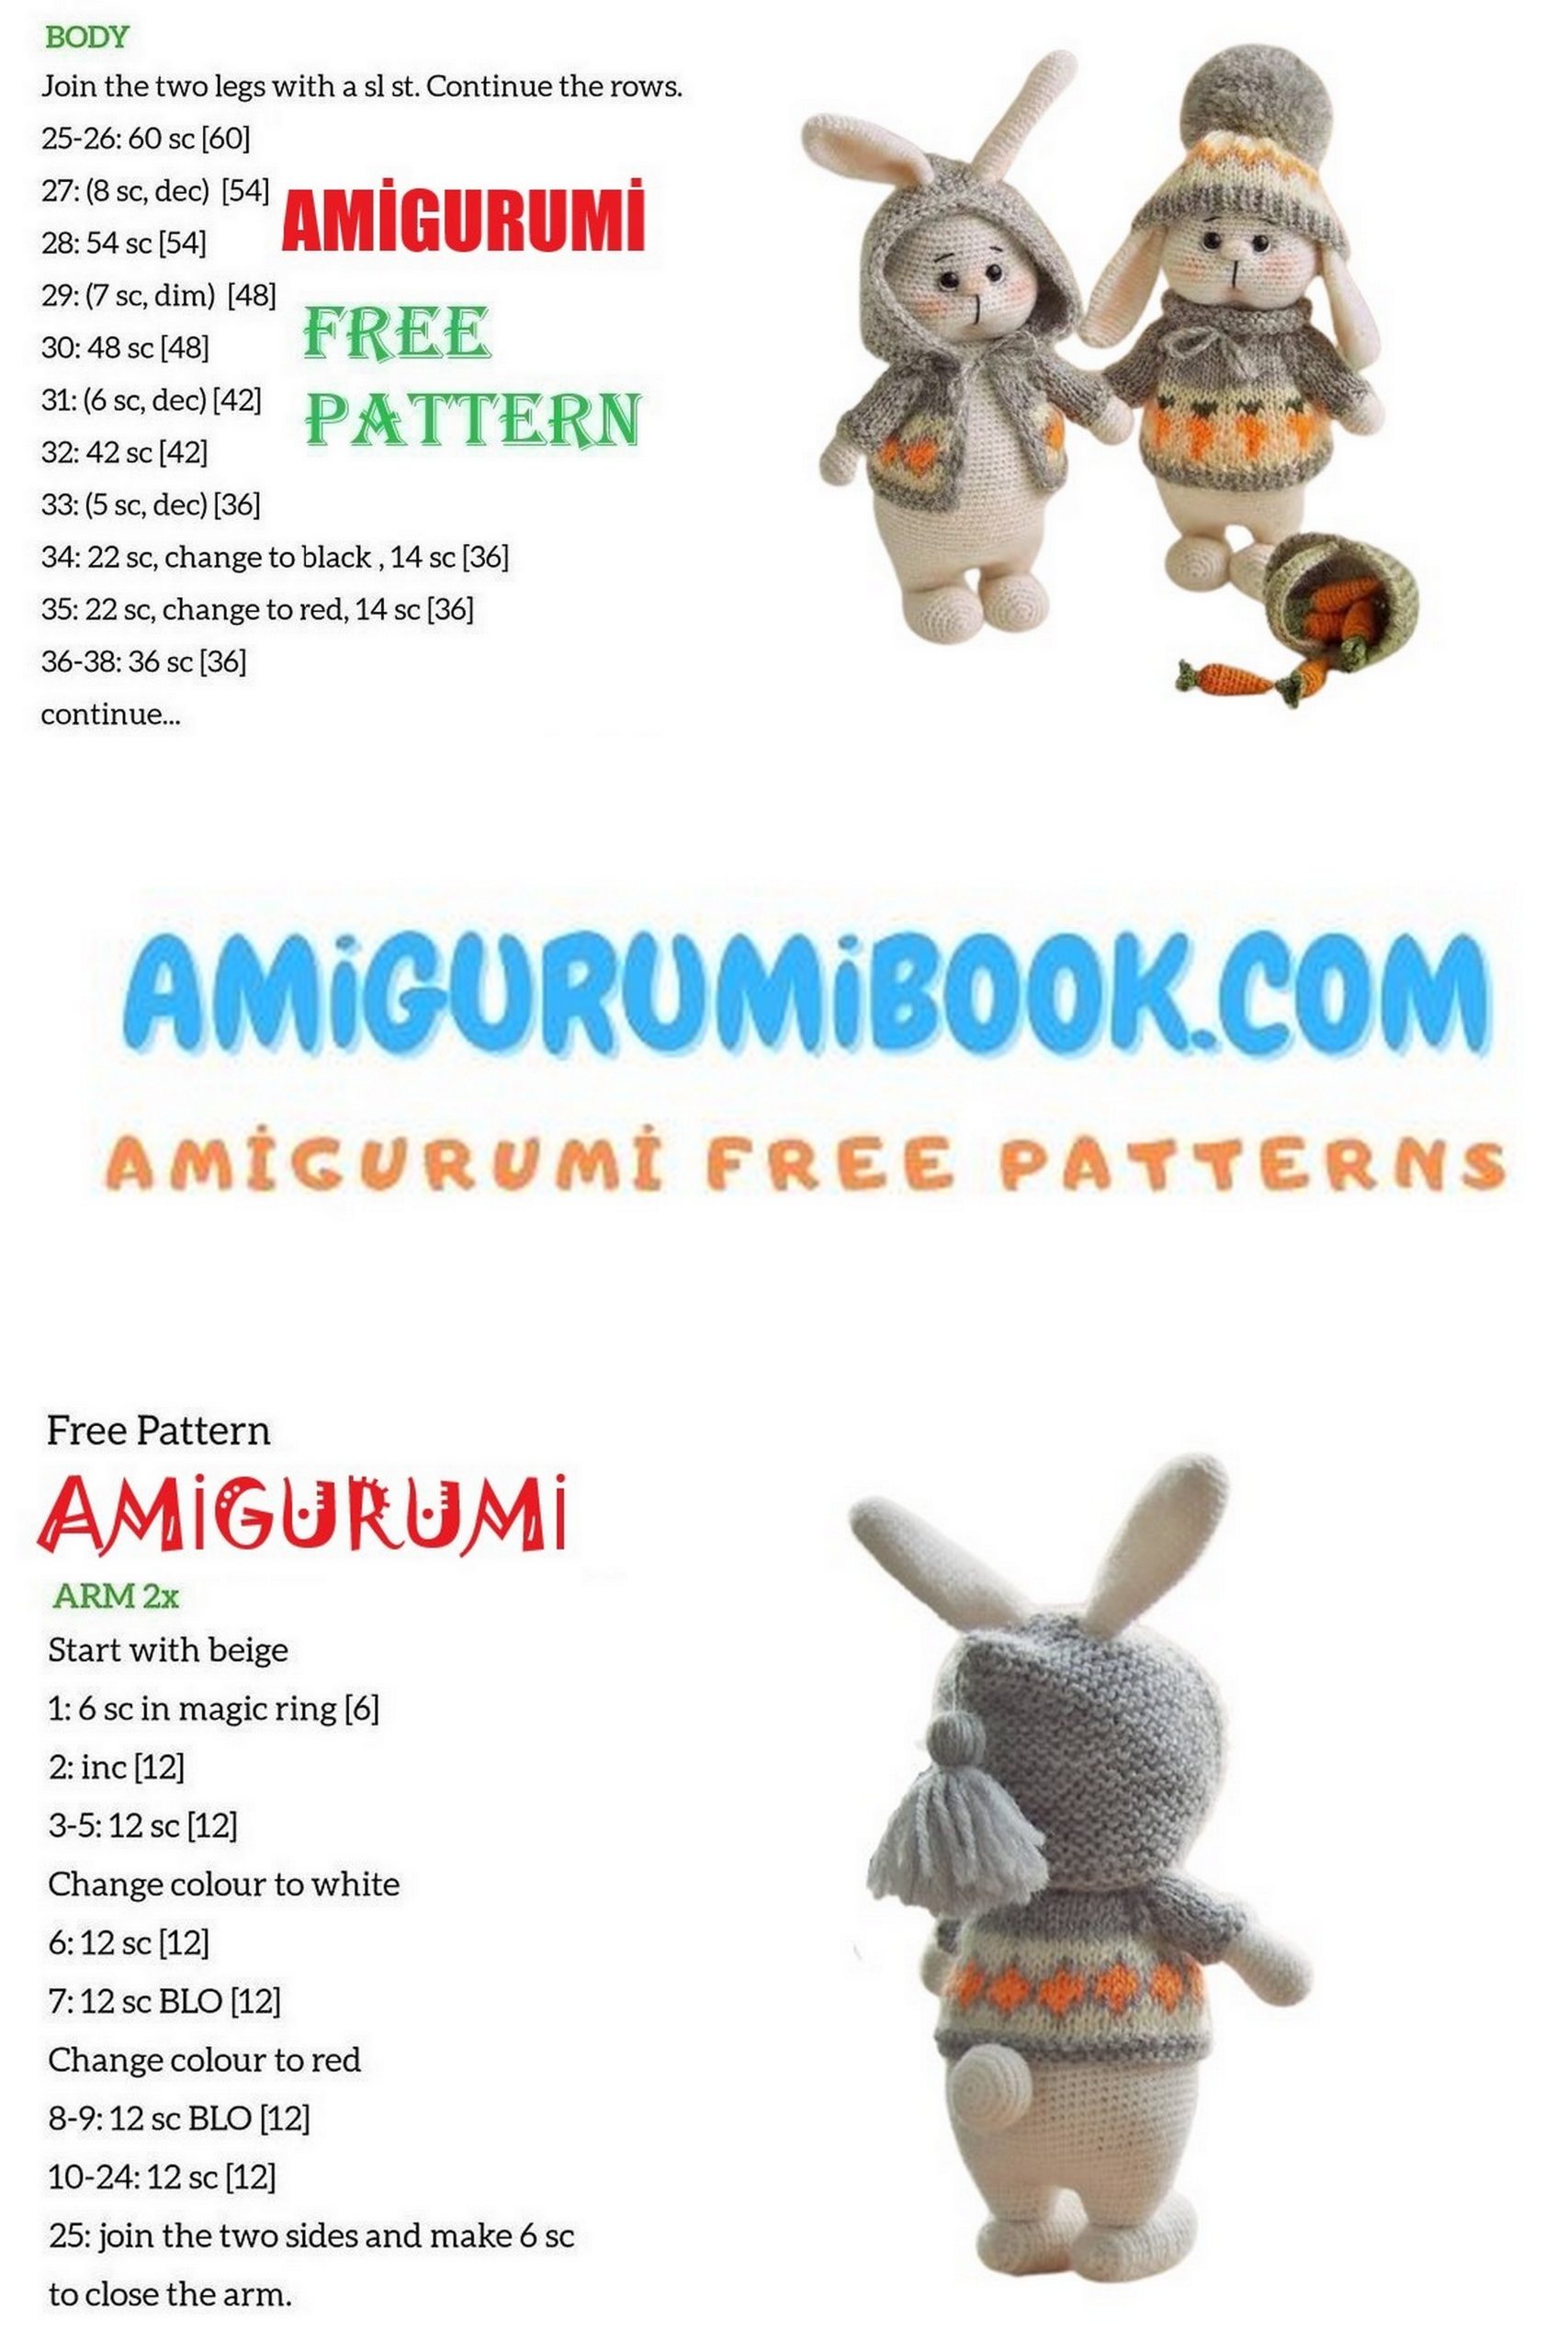
Sweater with carrots
The sweater is knitted using the “Raglan top” method.
To make the rabbit’s head go through the neck, we will calculate the loops.
* Measure the circumference of the head at its widest point. My rabbit has cheeks. The girth is 16 cm
* Measure the tied specimen stretched. Count how many loops are obtained in 1 cm.I have 2.25 loops in 1 cm
Therefore, you need to dial: 16 cm * 2.25 = 36 loops
For calculating raglan, it is more convenient if the number of loops dialed is a multiple of 3 (i.e. it will be divisible by 3 without a remainder). If you get a number that is not divisible by 3 without a remainder, round up to the nearest whole number.
Loosely cast on 36 stitches on circular or hosiery needles with gray yarn. We knit in a circle. The beginning of knitting is the back.
1-6 p (6 rows): 36 knit
Check if the rabbit’s head fits into the resulting neck.
7 p: (dec, yarn) * 18 = 36
8 p: 36 knit
Raglan calculation
We divide all the loops into 3 parts: two go to the front and back, the third to the raglan loops and 2 sleeves 36/3 = 12 loops.
If you have an odd number of loops in one part, it is better to add an extra loop from the third part to the front loops.
12/2 = 6 loops – half back.
Raglan lines are loops, on both sides of which yarns are knitted to expand the canvas. In this model, there is 1 loop for 1 raglan line.
We subtract raglan loops from 3 parts: 12 stitches – 4 = 8 stitches
Divide the remaining loops in half: 8/2 = 4 loops – falls on one sleeve.
We continue to knit:
9 p: 6 knit (half of the back), yarn, 1 knit (raglan line), yarn, 4 knit (right sleeve), yarn, 1 knit (raglan line), yarn, 12 knit, yarn, 1 knit (raglan line) , yarn, 4 knit (left sleeve), yarn, 1 knit (raglan line), yarn, 6 knit (half of the back) = 44
10 p: 44 knit
11 p: 7 knit, yarn, 1 knit, yarn, 6 knit, yarn, 1 knit, yarn, 14 knit, yarn, 1 knit, yarn, 6 knit, yarn, 1 knit, yarn, 7 knit = 52
12 p: 52 knit
13 p: 8 knit, yarn, 1 knit, yarn, 8 knit, yarn, 1 knit, yarn, 16 knit, yarn, 1 knit, yarn, 8 knit, yarn, 1 knit, yarn, 8 knit = 60
14 p: 60 knit
Try on the resulting detail on a rabbit. If the length is not enough, continue knitting, adding one loop on both sides of the raglan lines in every second row.
Change the thread to a milky thread.
15 p: 10 knit (including the raglan line), remove 10 loops of the sleeve per thread, dial 3 loops (armhole), 20 knit (including raglan lines), remove 10 loops of the sleeve per thread, dial 3 loops (armhole), 10 knit ( including raglan line) = 46
From the 17th to the 23rd row we knit the “Carrot” pattern. Rapport (repeating part) of the pattern – 5 loops.
Therefore, in order for the pattern to look beautiful and symmetrical, the number of loops in the canvas must be a multiple of 5.
I got 46 loops. The closest multiple of 5 is 50. Therefore, in the next row I will add 4 loops (I will make 4 increases from the loop of the bottom row). If you have a different number of loops, adjust it yourself.
Because hares have a plump tummy – here it is better to increase the number of loops, and not decrease. I do 3 raises on my stomach and one on my back.
16 p: 14 knit, inc, 7, inc, 8, inc, 13, inc = 50
17-23 r (7 rows): “Carrot” pattern
24-25 p (2 rows): 50 knit
Change thread to gray thread.
26-28 p (3 rows): (1 knit, 1 purl) * 25 Close the loops freely
Remove the loops of the right sleeve on the needles, cast on 2 loops in the armhole = 12
1-6 p (6 rows): 12 knit
Try it on – if the sleeve is not long enough, knit a few more rows.
7-8 p: (1 knit, 1 purl) * 6 = 12 Close the loops freely.
Tie the left sleeve in the same way. Hide all the ends of the threads. Insert a lace or ribbon into the holes of the neck.
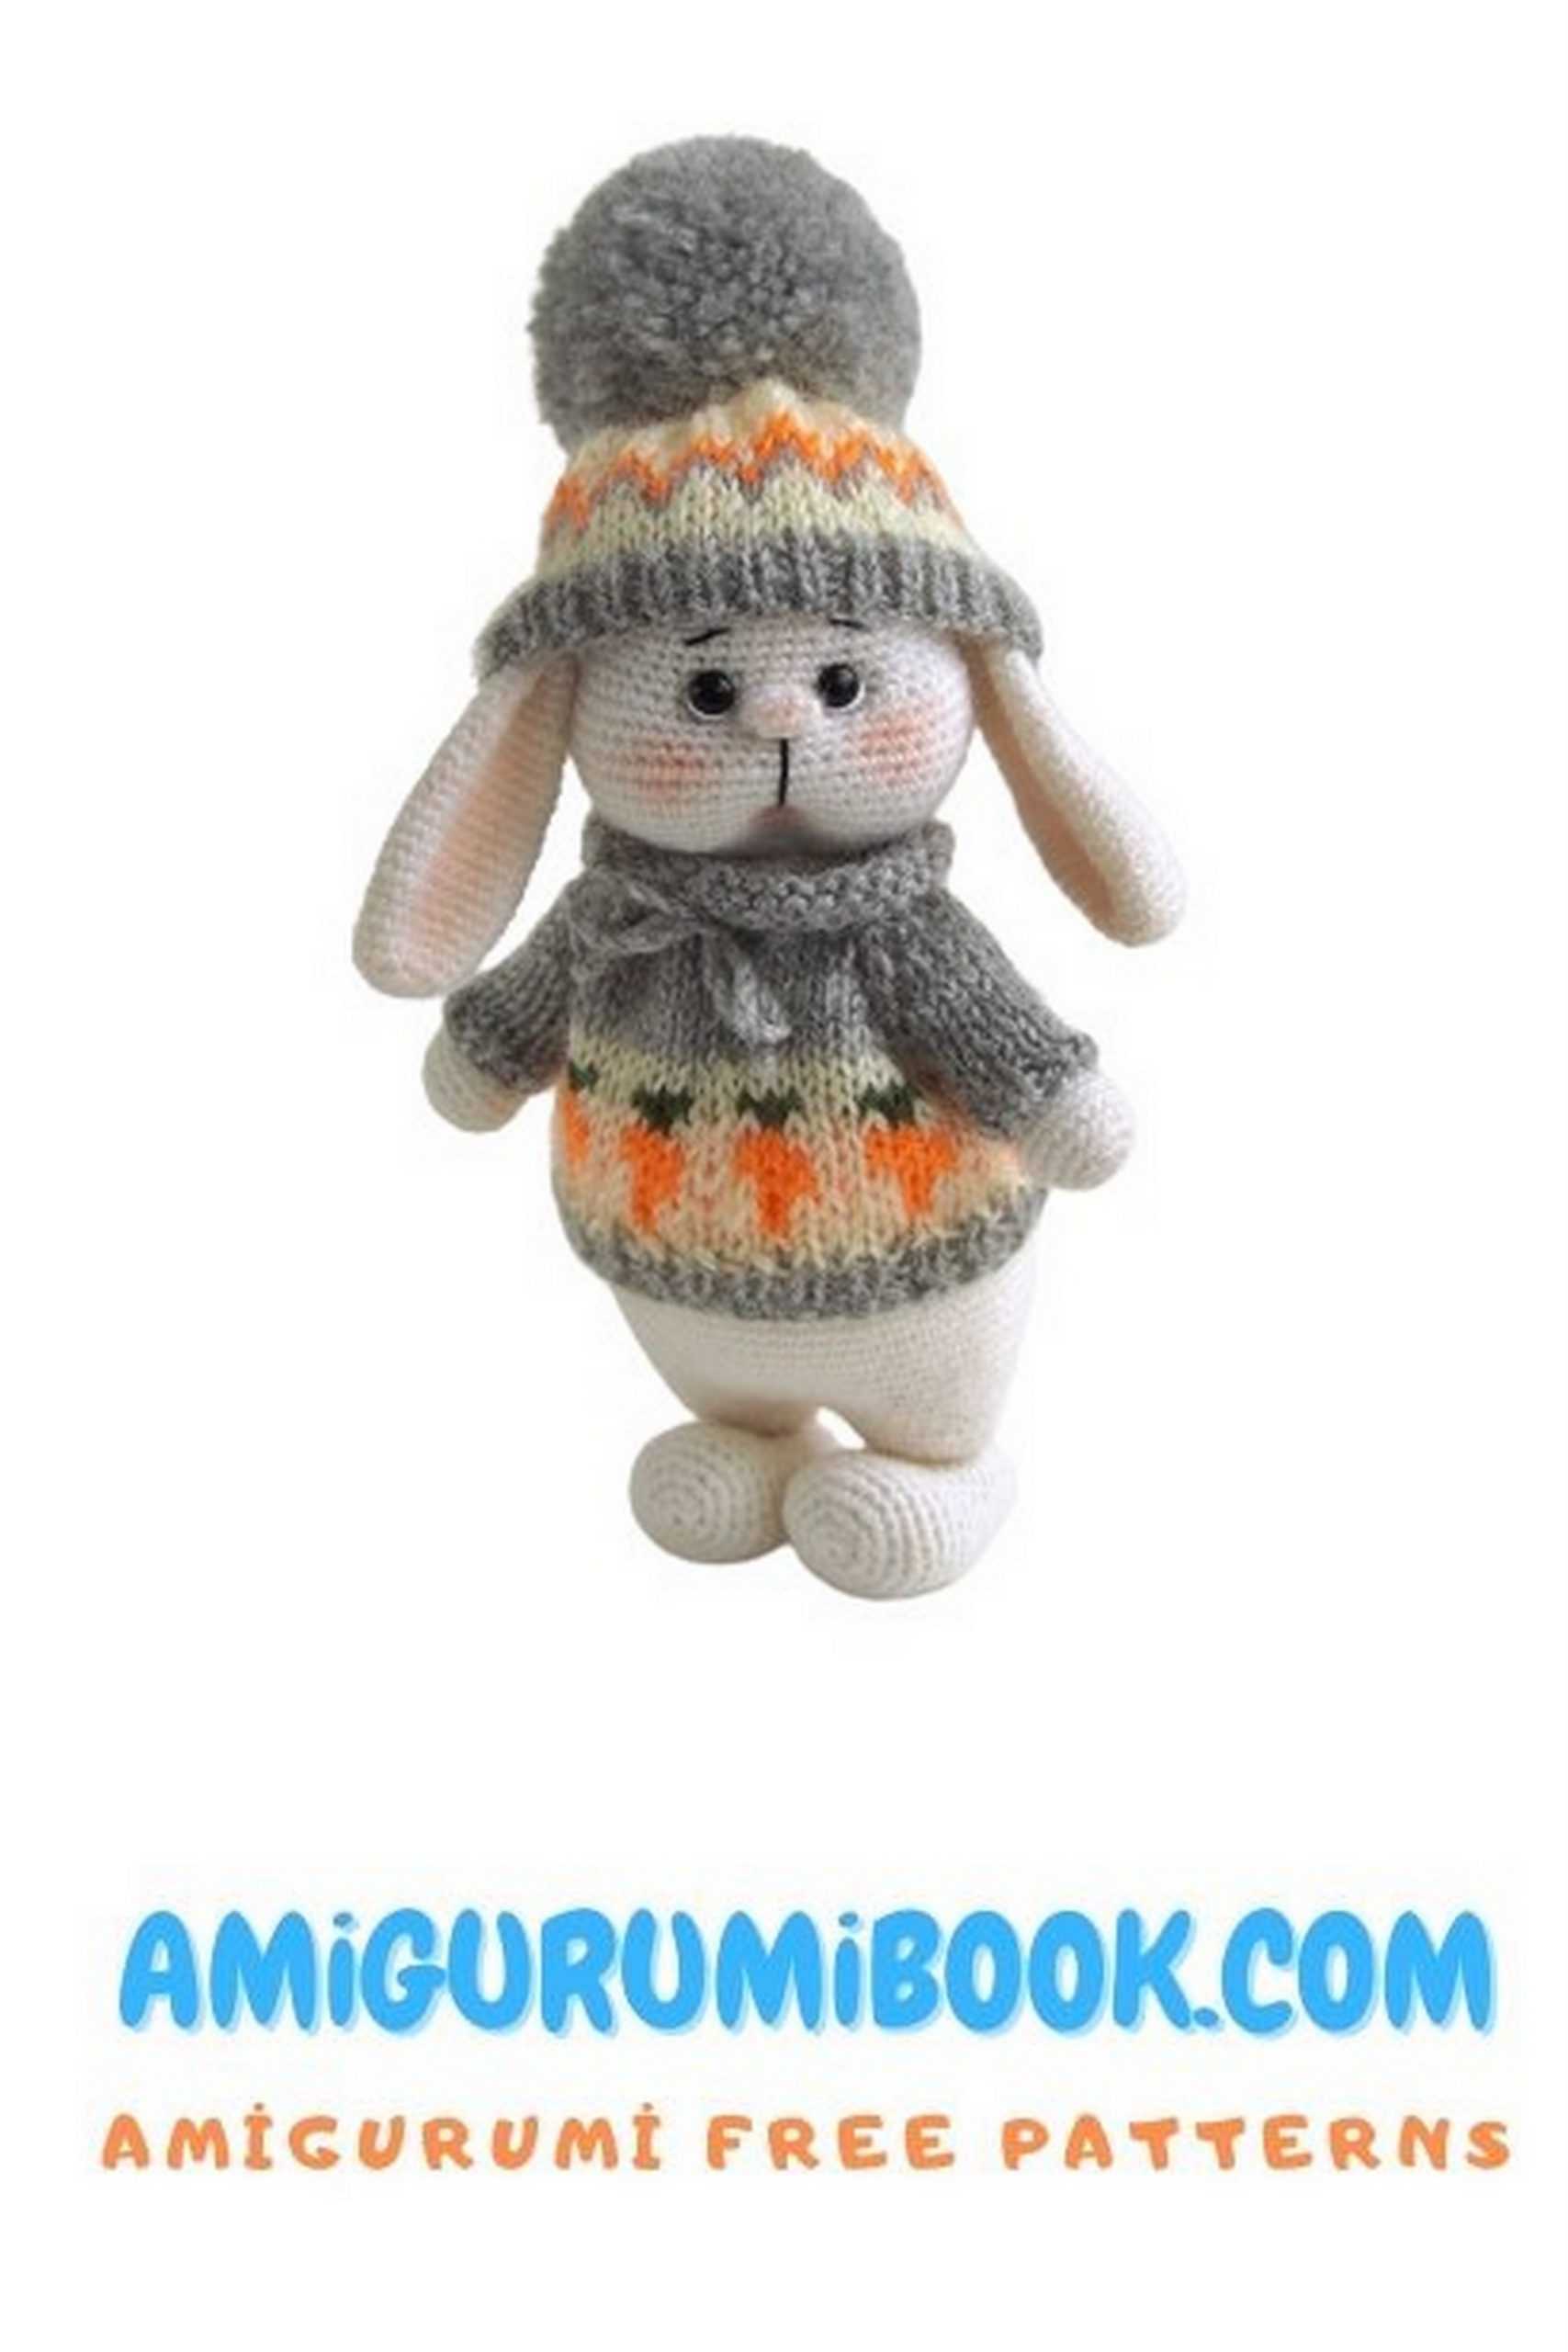
Beanie
Measure the circumference of the rabbit’s head as the hat will be worn. It is convenient to do this by a segment
yarn by marking the line to be measured with pins. The circumference of the head of my rabbit is 18 cm
We calculate the loops:
17 cm * 3 p (I have 1 cm) = 54 loops
Pattern repeat 4 loops. Therefore, in order for the pattern to look beautiful and symmetrical, the number of loops to be dialed should be a multiple of 4:
54 p / 4 p (rapport) = 13.5 – round to the nearest integer, we get
14. 14 * 4 p = 56 loops need to be dialed.
Cast on 56 stitches on circular or stocking needles with gray yarn. We knit in a circle.
1-4 p: (1knit, 1 purl) * 28 = 56
5 p: 56 knit
Try it on your rabbit
Change to a milky thread.
6-7 p (2 rows): 56 knit
8-11 r (4 rows): “Zigzag” pattern
Try not to tighten the fabric when knitting an ornament.
12-13 (2 rows): 56 knit
14 p: (2 knit, dec) * 14 = 42
15 p: 42 knit
16 p: (1 knit, dec) * 14 = 28
17 p: 28 knit
18 p: dec * 14 = 14
19 p: 14 knit
Cut the thread, thread through the remaining loops, pull off. Fasten all ends of the threads
With the help of a device or any method you are used to, make a pompom with a diameter of 5-6 cm from gray yarn. Sew on a hat
Jacket with a hood
The jacket is knitted in the “Raglan from above” method with a one-piece-knitted hood on circular needles in rotary rows.
The beginning of knitting is the top of the hood. Let’s calculate the required number of loops and rows.
Determine the depth of the hood – measure loosely the half-girth of the head at its widest point from cheek to cheek. For my hare it is 13.5 cm
The knitting density is 3 stitches and 4 rows in 1 cm.Therefore, for the desired depth of the hood, you need to dial: 13.5 cm * 3 stitches = 40.5 loops.
Because the hood is knitted without a seam, it is more convenient to dial an even number of loops. Round to the nearest even number – 40 stitches.
Measure the height of the hood from crown to shoulder. I have 10 cm. Calculate the required number of rows:
10 cm * 4 p = 40 p
The edge of this jacket model is decorated with 3 edge loops. This method gives the product a neat look – the edge looks like a lace.
Knits as follows. At the beginning of the row:
Remove the first loop like a regular edge loop.
We knit the 2nd st.
We remove the 3rd p., Without knitting, the thread before work.
At the end of the row we knit like this:
1st st. Knit front
We remove the 2nd p., Without knitting, the thread before work
We knit the 3rd p. Like a regular hem.
To keep the top of the hood without a seam, cast 40 loops on two knitting needles at once. For a set, use knitting needles one size larger than those with which you plan to knit.
If this method does not suit you, dial the required number of loops in the usual way. And at the end of the work, sew the two halves of the hood.
1-2 p (2 rows): 3 ch, 34 knit, 3 ch = 40
In rows 3 and 4, we form holes for the ears. Try it on your bunny and mark the locations of the holes.
3 p: 3 ch, 2 knit, bind off 5 loops, 20 knit, bind off 5 loops, 2 knit, 3ch
4 p: 3 ch, 2 knit, cast on 5 loops, 20 knit, cast on 5 loops, 2 knit, 3ch
5- 44 p (40-42 rows): 3 ch, 34 p knit, 3 ch = 40
Try on the hood over the toy. If the height is not enough, knit a few more rows.
The calculation of the loops for the neck and raglan is done in the same way as for the rabbit sweater
To get the required number of loops for the neckline, make several decreases evenly in the next row.
The neck of my toy needs 36 stitches. We get: 40 p – 36 p = 4 – the deductions need to be made.
45 p: 3 ch, 1 knit, dec knit, (8 knit, dec knit) * 3, 1 knit, 3 ch = 36
46 p: 3 ch p, 30 purl, 3 ch p = 36
47 p: 3 ch p, (dec knit, yarn) * 15, 3 ch p = 36 – holes for strings turned out. 48 p: 3 ch p, 30 purl, 3 ch p = 36
49 p: 3 ch p, 3 knit, yarn, 1 knit, yarn, 4 knit, yarn, 1 knit, yarn, 12 knit, yarn, 1 knit, yarn, 4knit, yarn, 1 knit, yarn, 3 knit, 3 ch n = 44
50 p: 3 ch p, 38 purl, 3 ch p = 44
51 p: 3 ch p, 4 knit, yarn, 1 knit, yarn, 6 knit, yarn, 1 knit, yarn, 14 knit, yarn, 1 knit, yarn, 6 knit, yarn, 1 knit, yarn, 4 knit, 3 ch n = 52
52 p: 3 ch p, 46 purl, 3 ch p = 52
53 p: 3 ch p, 5 knit, yarn, 1 knit, yarn, 8 knit, yarn, 1 knit, yarn, 16 knit, yarn, 1 knit, yarn, 8 knit, yarn, 1 knit, yarn, 5 knit, 3 ch n = 60
54 p: 3 ch p, 54 purl, 3 ch p = 60 purl
55 p: 3 ch p, 7 knit, remove 10 stitches of sleeves per thread, cast on 3 loops, 20 knit stitches, remove 10 stitches of sleeves per thread, cast on 3 loops, 7 knit, 3 ch p = 46
Change the thread to light. Keep crochet stitches in gray.
56 p: 3 ch p, 40 purl, 3 ch p = 46
57 In order for the shelves of the jacket to converge on the voluminous tummy of the bunny in the next row, you need to add several loops.
Tummy circumference 18 cm. 18 cm * 3 p = 54 p – you need to get. 6 of them are edging. In addition, from 58 to 62 we knit the “Rhombus” pattern. When calculating the loops, you need to take into account the pattern repeat.
We subtract 6 edge loops from the number of loops calculated above – they do not participate in knitting the pattern. 54 p – 6 ch = 48 p
Pattern rapport – 4 loops. Therefore, the number of loops in the canvas should be a multiple of 4. If the resulting number is not divisible by 4 without a remainder, round up to the nearest whole number.
48 p / 4 (pattern repeat) = 12 times
And one more loop needs to be added for symmetry, because knit in rotary rows: 48 + 1 = 49 p
Add edge loops: 49 + 6 = 55 loops
This means that in order for the size of the jacket to be a hare in time and the pattern is located symmetrically, in the next row you need to make evenly 9 increments: 55 p (should be) – 46 p (it turned out after 56 row) = 9
57 p: 3 ch p, 4 knit, inc, 5 knit, inc, 4 knit, inc, (5 knit, inc) * 4, 4 knit, inc, 5 knit, inc, 4 knit, inc, 3 ch p = 51
58-62 R: pattern “Rhombuses” with front satin stitch
RUB 63: 51 knit
64 p: 51 purl
Change the thread to gray.
65-67 R (3 rows): 51 knit
Close the hinges loosely. Hide all ends of the threads. Sleeves
We knit in a circle on circular or stocking needles.
Remove the sleeves on the knitting needles, cast on 2 loops in the armhole = 12
1-6 p (6 rows): 12 knit
7 p: 12 purl
8 p: 12 knit Close the loops.
Tie the second sleeve in the same way. If necessary, sew the two halves of the hood. Pass a decorative lace or ribbon through the opening of the neckline.
Make a tassel or pompom and attach to the corner of the hood.
Thank you for creating these cute eared ears with me!
I wish you success in your work!
Bonus material 1. Carrot
You don’t have to follow the marker. We start knitting with orange yarn.
Stuff the part while knitting.
1 p: 6 sc into magic ring
2 p for the back wall of the loop: inc * 6 = 12 sc
3-5 p (3 rows): 12 sc
6 p: (2 sc, dec) * 3 = 9 sc
7-9 p: (3 rows): 9 sc
10 p: (1 sc, dec) * 3 = 6sc
11-12 p (2 rows): 6 sc
Make another dec, pull off the remaining loops, hide the thread (photo 1)
We knit the “tail” of the carrot. For the half-loops left in the second row with green yarn:
1 p: 6 sc
2 p: sl-st, (4 ch, 3 sl-st back in the chain, sl-st) * 6
Cut the thread, fasten (Photo 2)
Using a brush with dry art bedding or light brown watercolor pencils, draw horizontal stripes on the carrot in random order
(Photo 3, 4)
Bonus material 2. Basket
You don’t have to follow the marker. Dial 7 ch. Knit around chain ch, starting at the second stitch from the hook:
1 p: 5 sc, 3 sc in the last loop, on the other side of the chain – 4 sc, inc = 14 sc
2 p: inc, 4 sc, 3 inc, 4 sc, 2 inc = 20 sc
3 p: sc, inc, 4 sc, (sc, inc) * 3, 4 sc, (sc, inc) * 2 = 26 sc
4 p: 2sc, inc, 4 sc, (2 sc, inc) * 3, 4 sc, (2 sc, inc) * 2 = 32 sc (photo 5)
The bottom of the basket is ready. Next, you need to make a transition from the bottom to the walls and tie the walls with the “Braid” pattern. The video below shows how to knit the 5th row, make a seamless connection and the Braid pattern.
5 p: behind the back wall of the loop and the bow of the loop of the previous row: 32 sc (photo 6, 7)
Make a seamless connection:
• pull out the loop, set it aside. Insert the hook into the next sc from the wrong side of the part (photo 8),
• pick up and pull the loop to the wrong side, pull it up (photo 9, 10), put the extended loop on the part counterclockwise (photo 11). Tighten
Then knit with the “Braid” pattern:
• insert the hook into the next sc, pull out the loop – there are 2 loops on the hook (photo 13)
• insert the hook into the base sc in the previous row, pull out the loop – there are 3 loops on the hook (photo 14, 15)
• knit all the loops on the hook at one time (photo 16)
Repeat to the end of the row (photo 17)
Knit 3 more rows (or more, if you want the basket deeper) with the Braid pattern. Finish each row with a seamless connection. In order not to get confused – carefully count the loops, there should be 32 of them in each row.
Mark with markers two loops at the points of attachment of the basket handle (photo 18, 19)
Tie the edge of the basket with “Rach step” up to the first marker (photo 20).
We knit a handle.
• knit 2 sl-st at the back of the loop,
• 20 ch;
• throw the chain from ch like a bridge to the opposite side,
• 2 sl-st for the inner half loop (inside the basket) on the opposite side (photo 21),
• 20 sl-st along a chain from ch – back to the beginning of knitting the handle (photo 22),
• continue to knit with crustacean steps along the edge of the basket. At the points of attachment of the handle, we knit in half-loops that remain outside the basket (photo 23)
The basket is ready. You can fold your knitted crop into it and enjoy the result