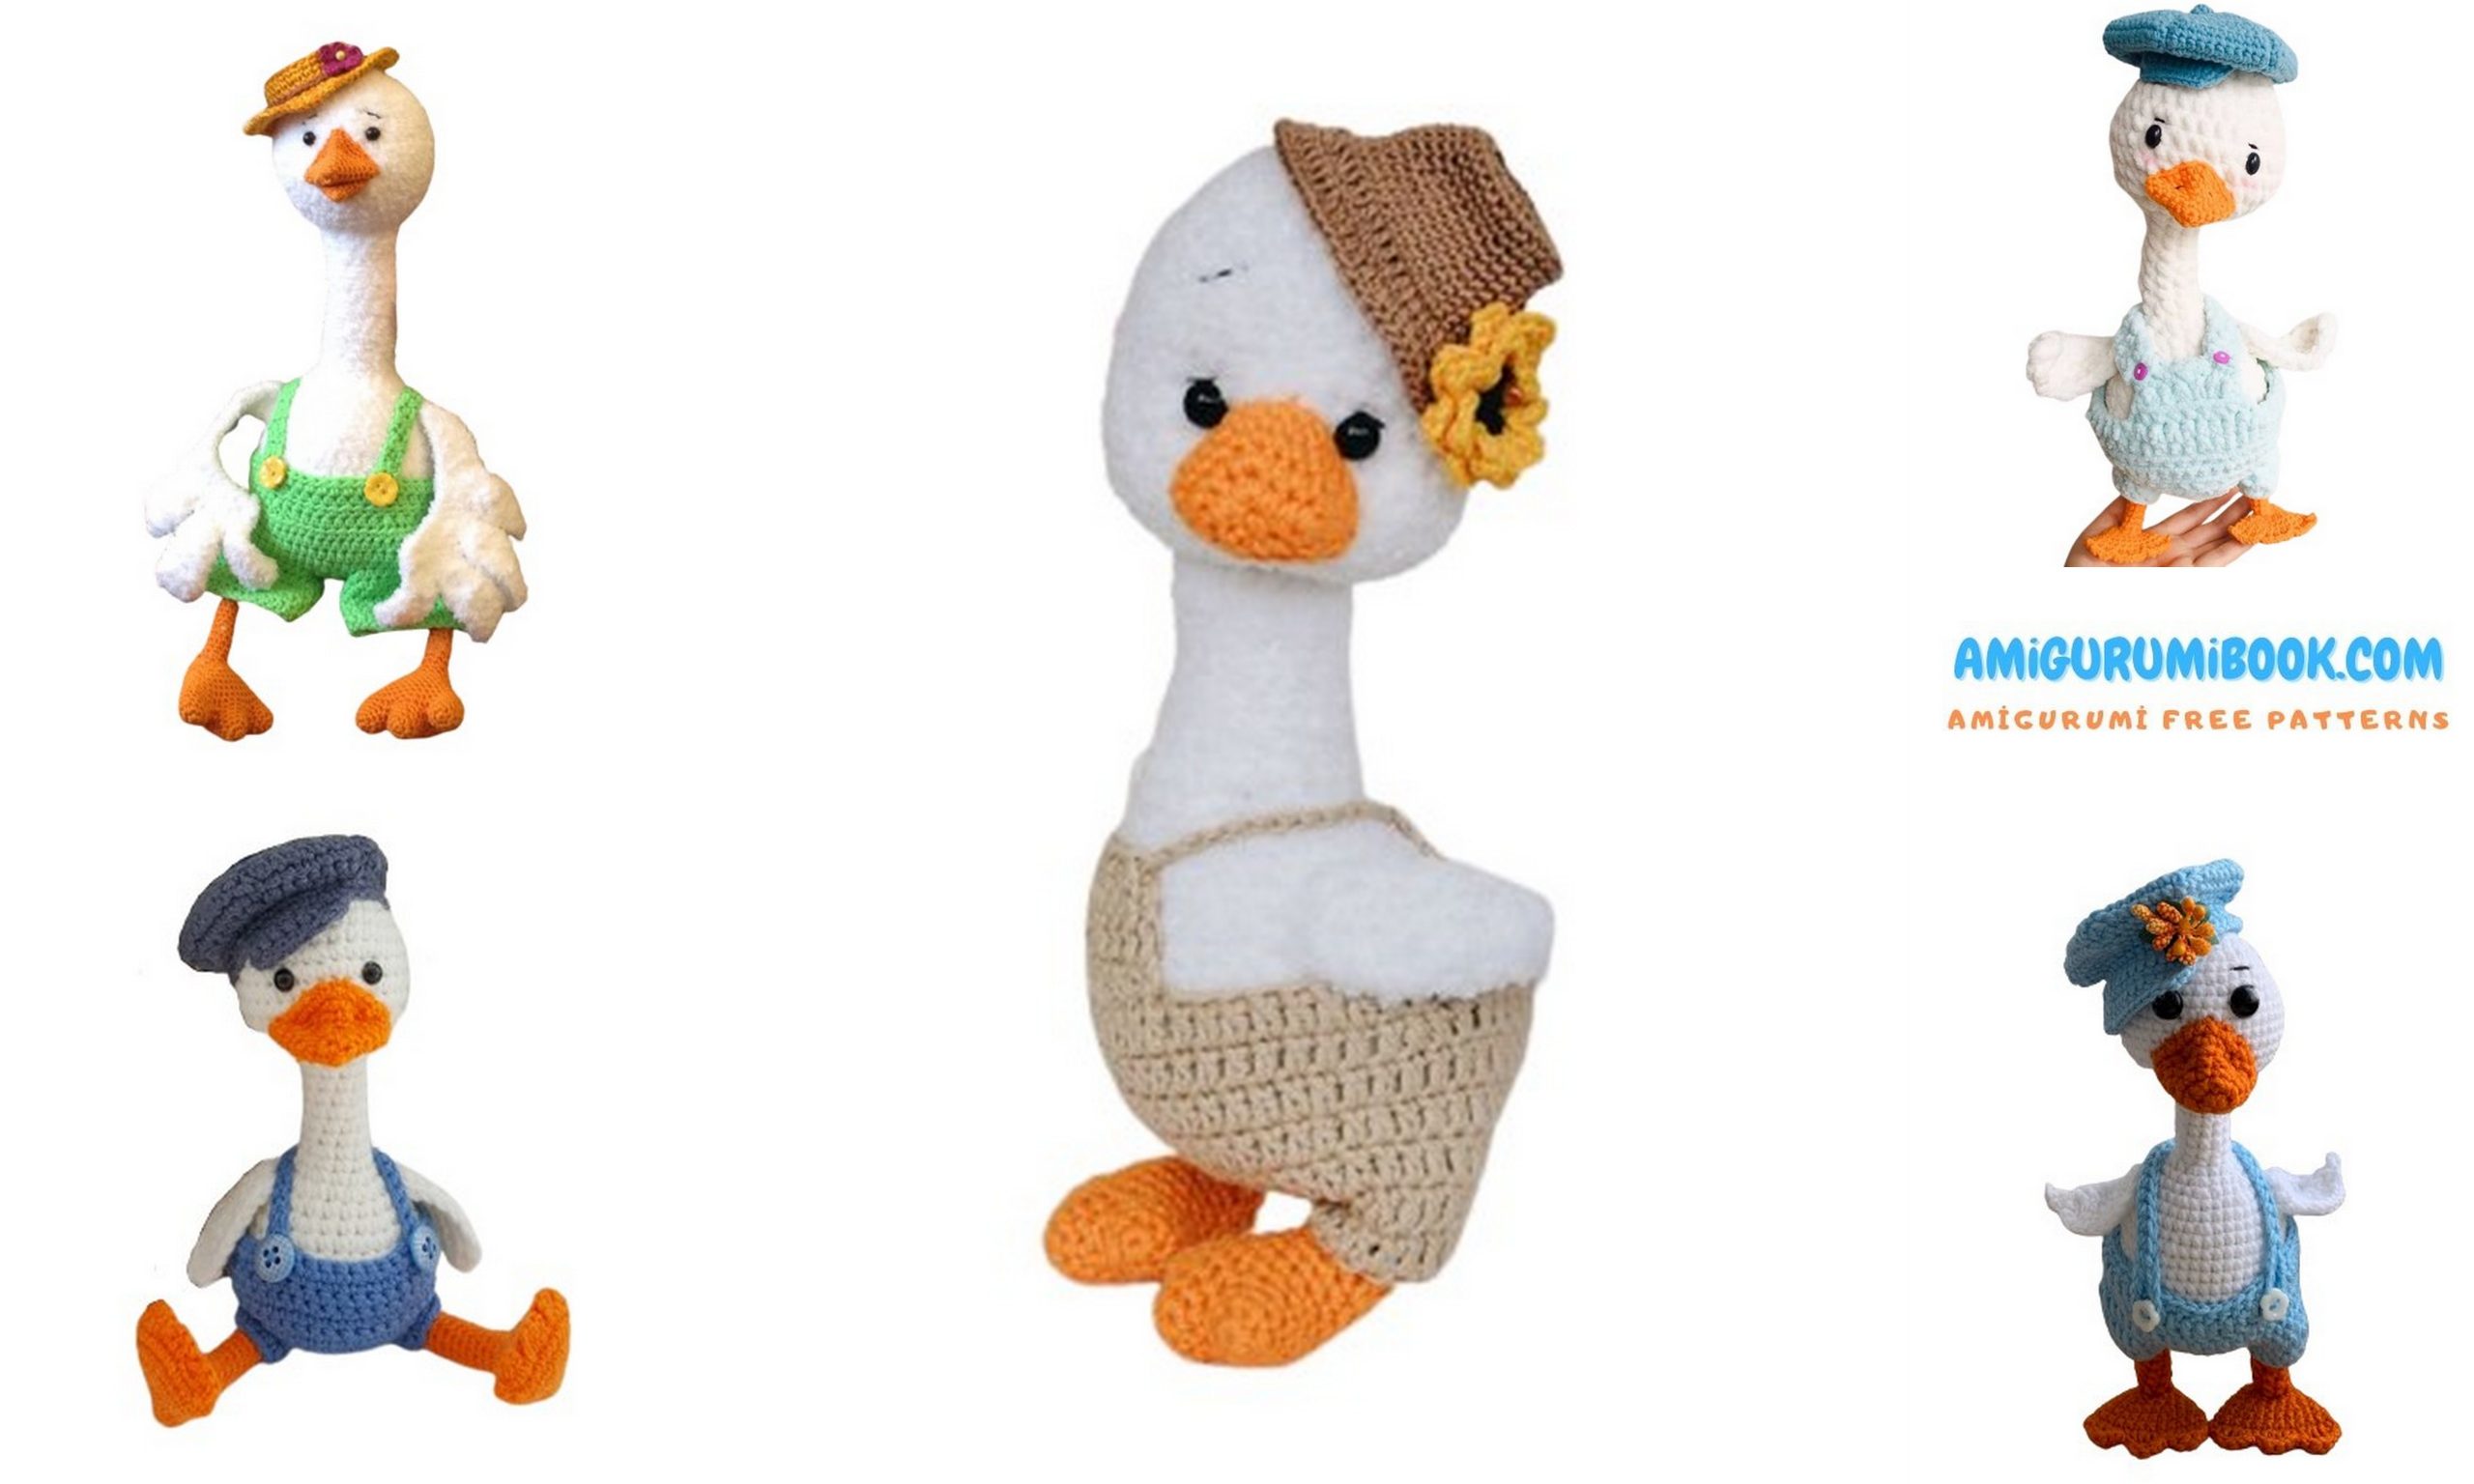
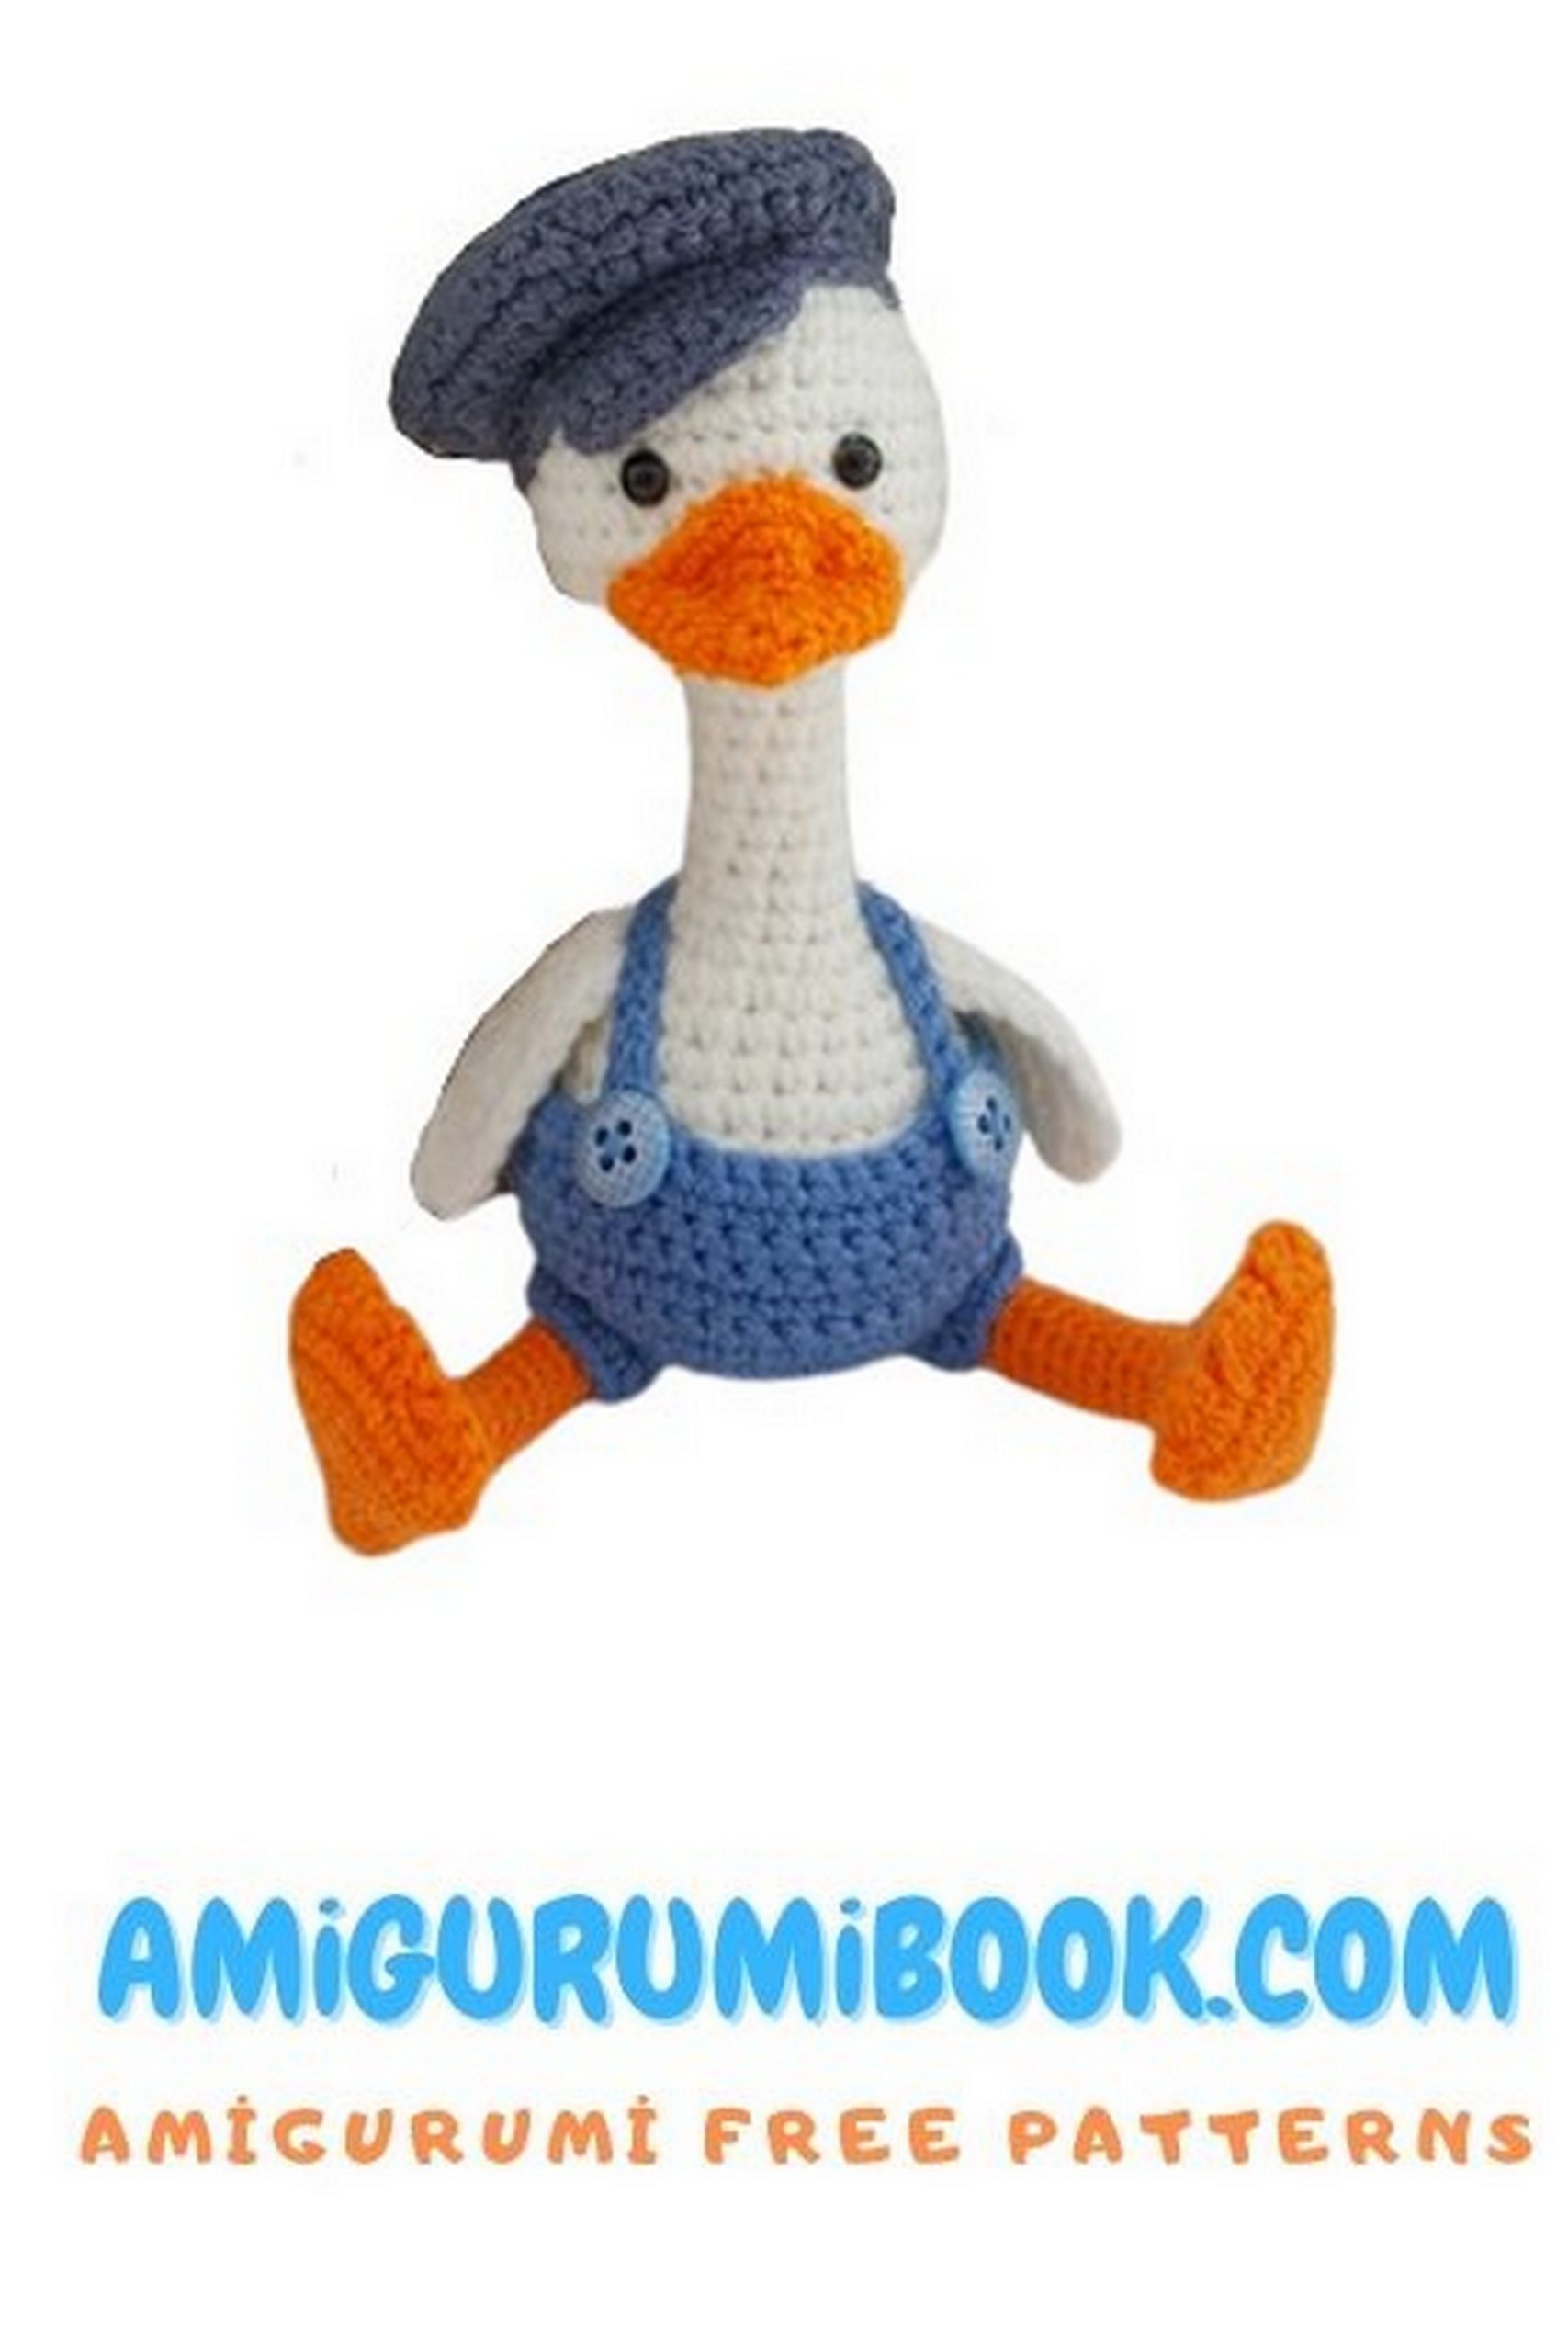
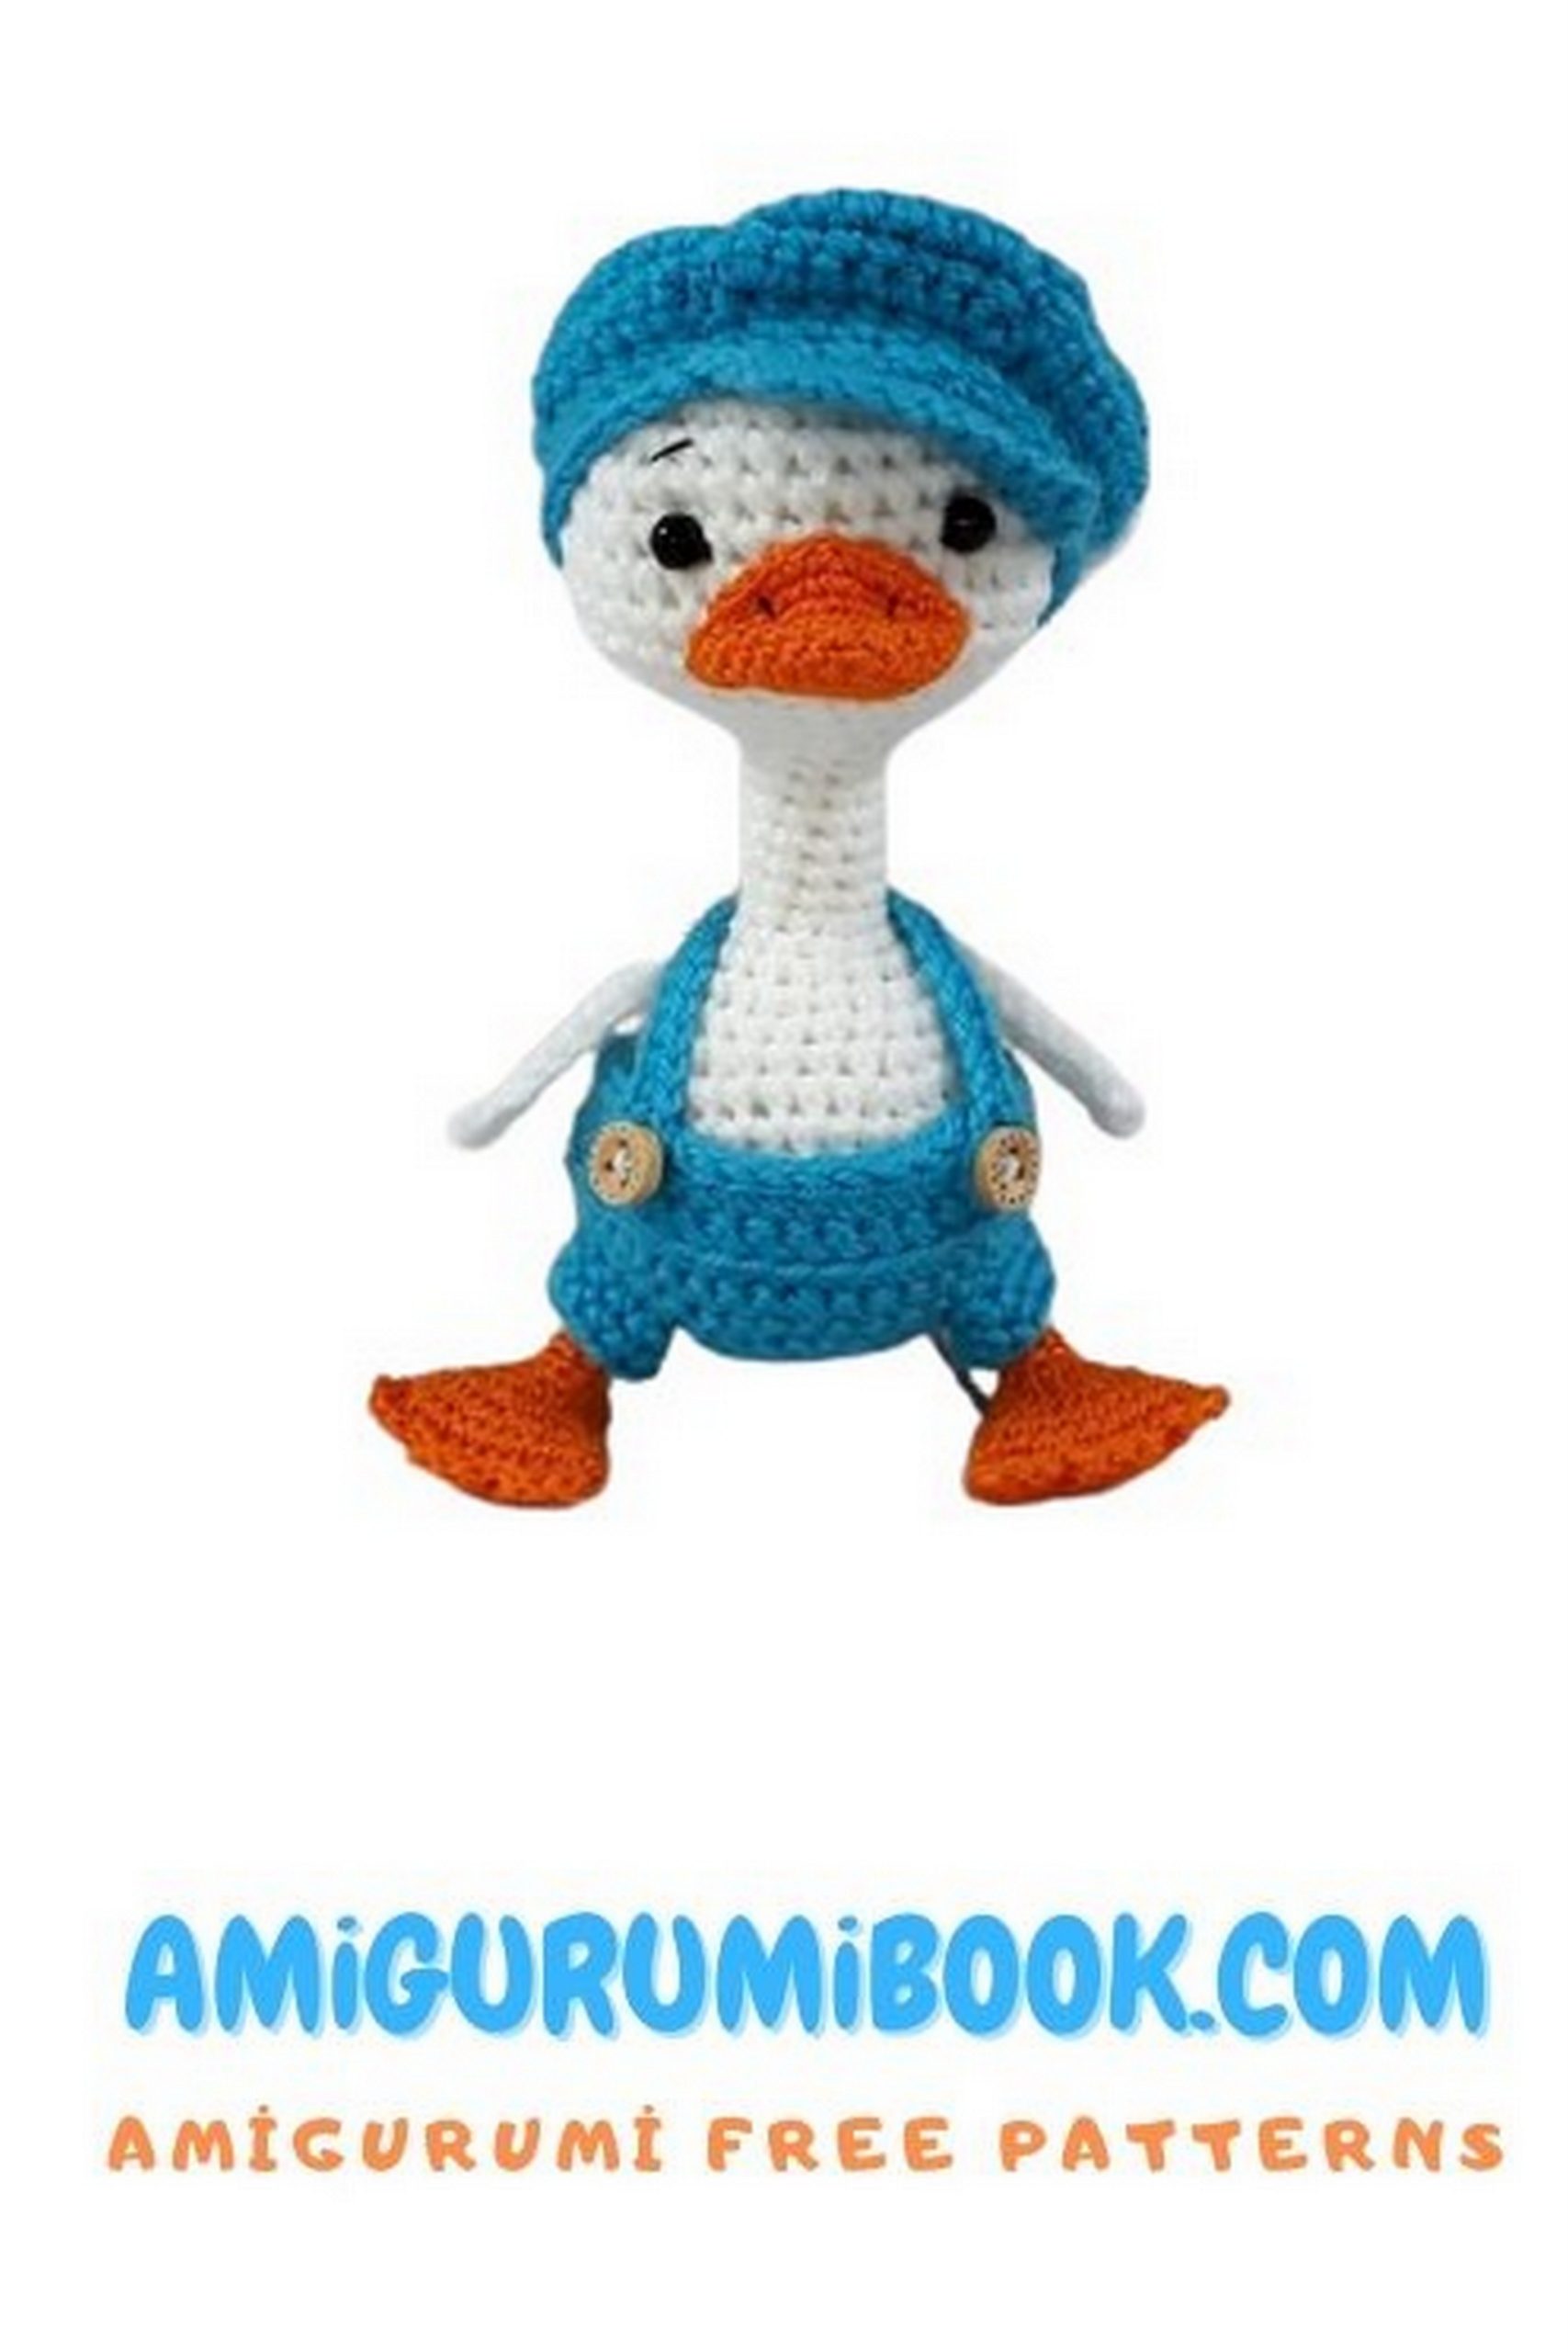
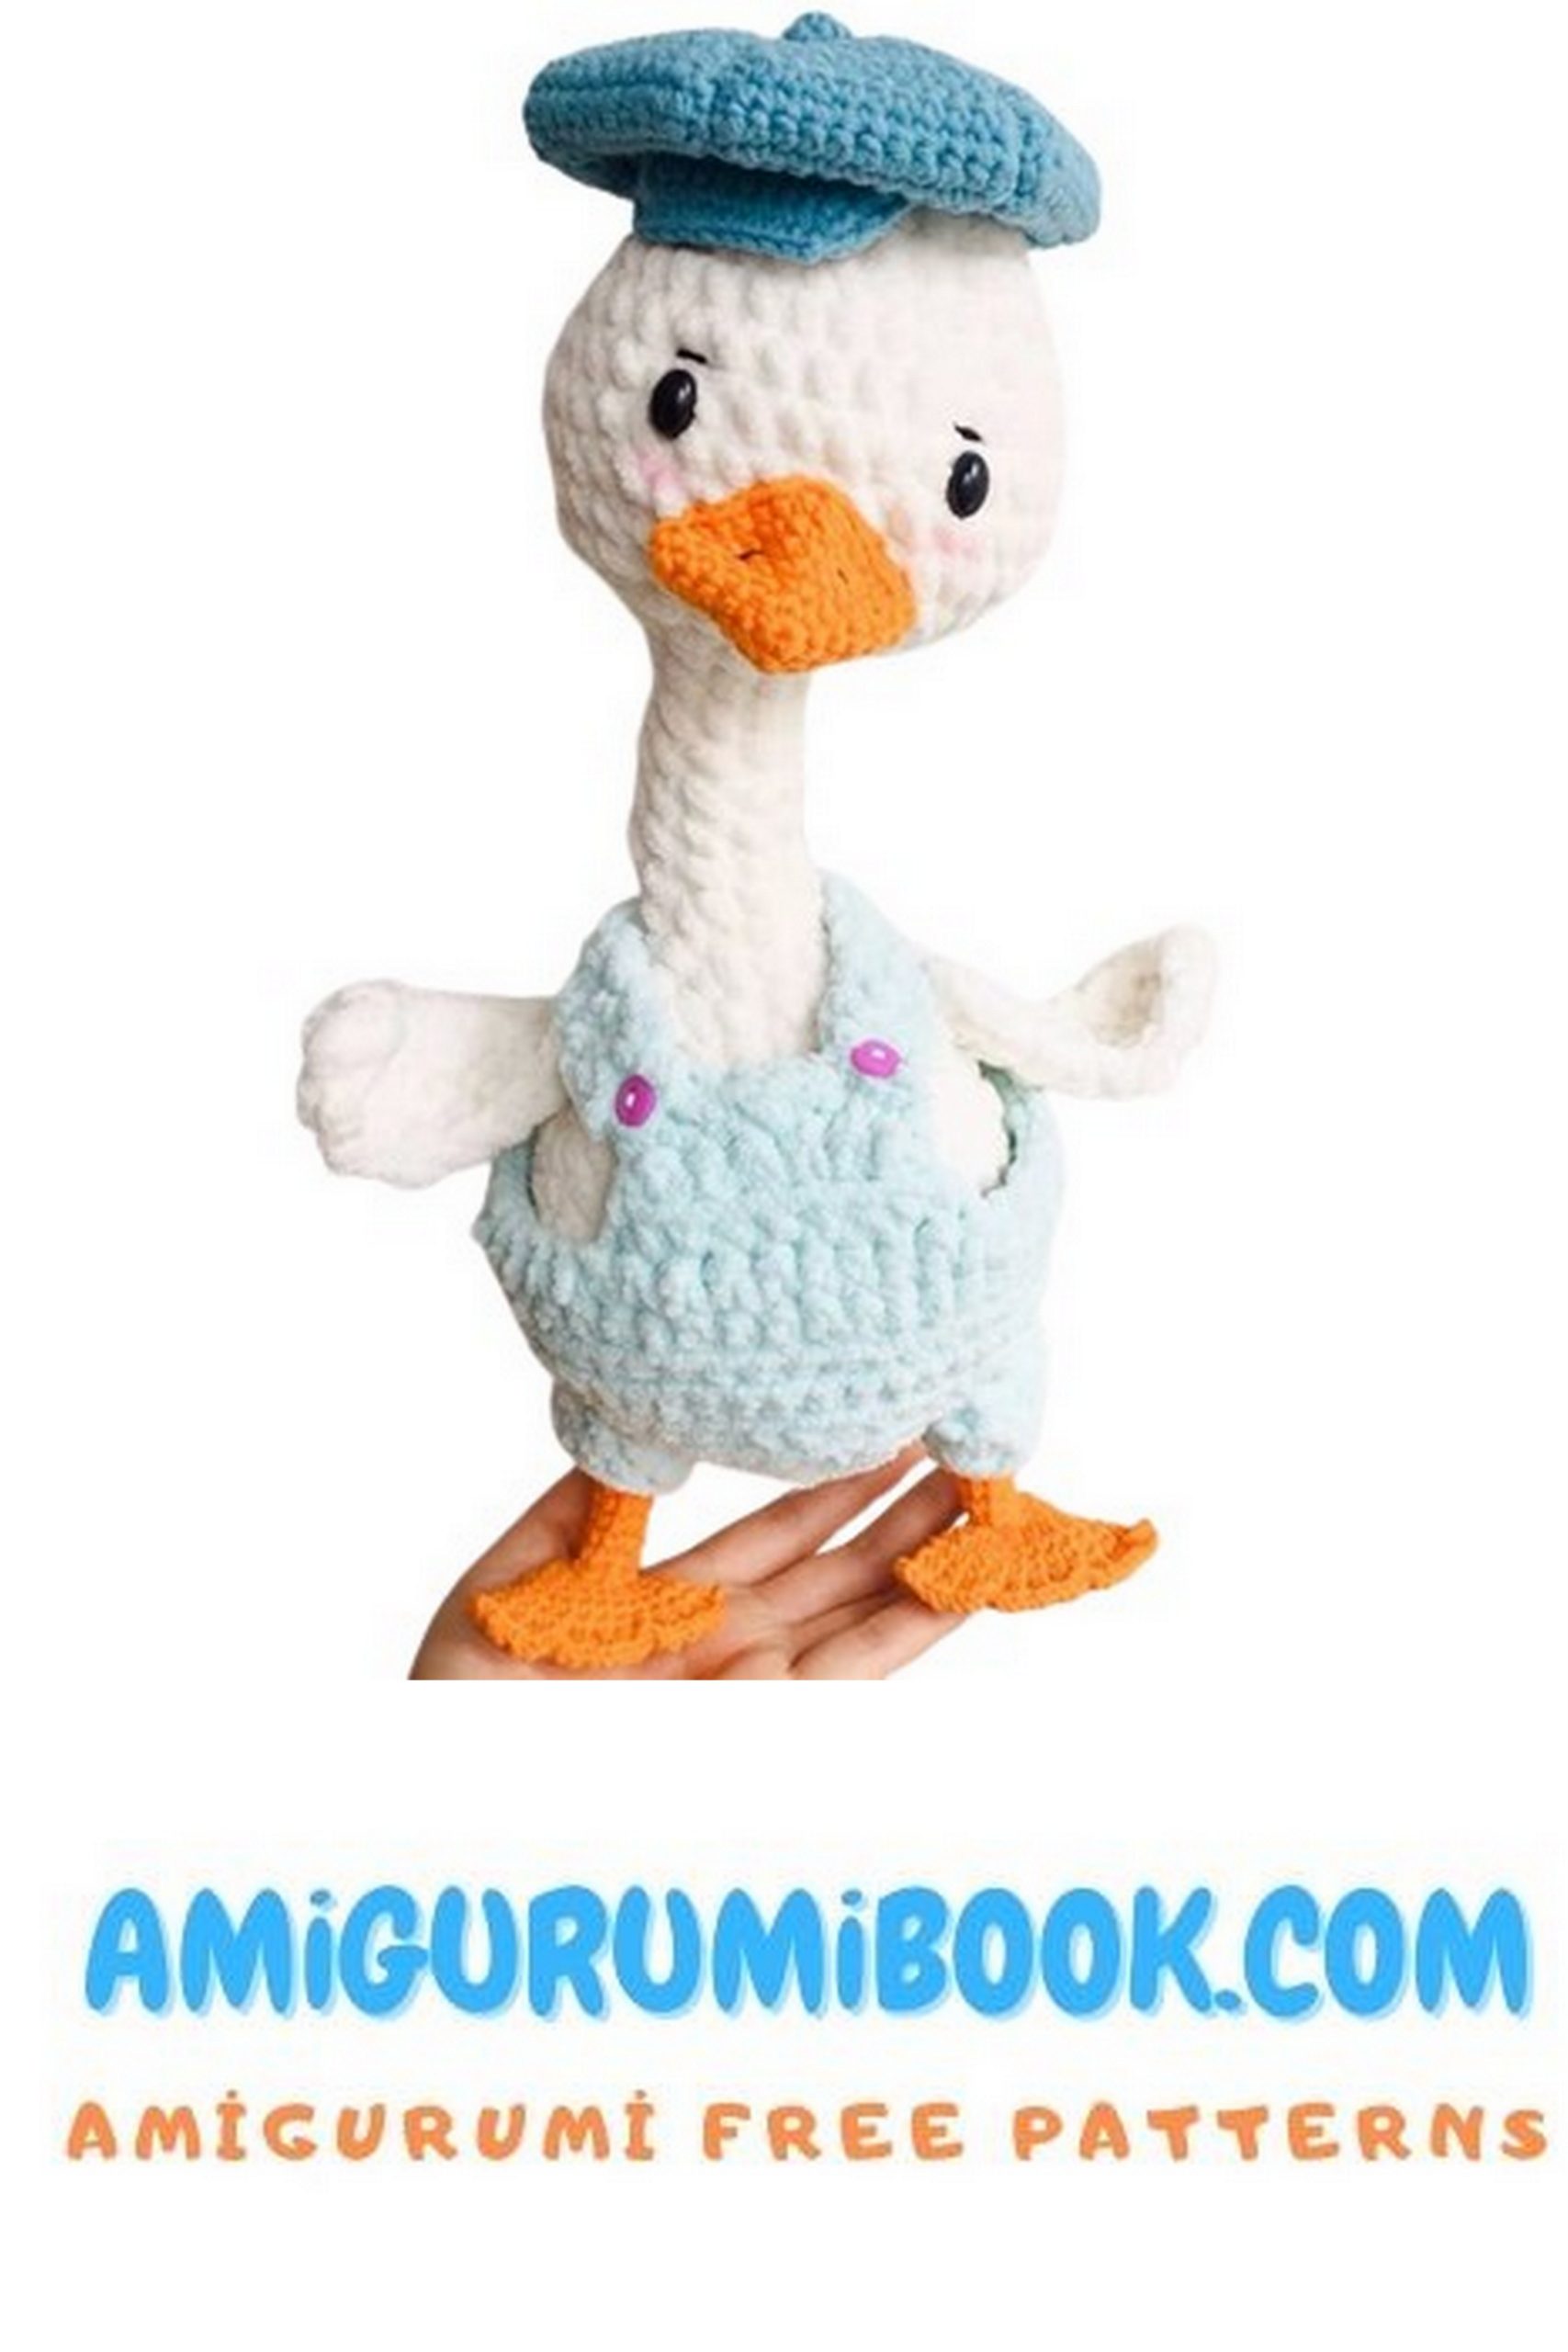
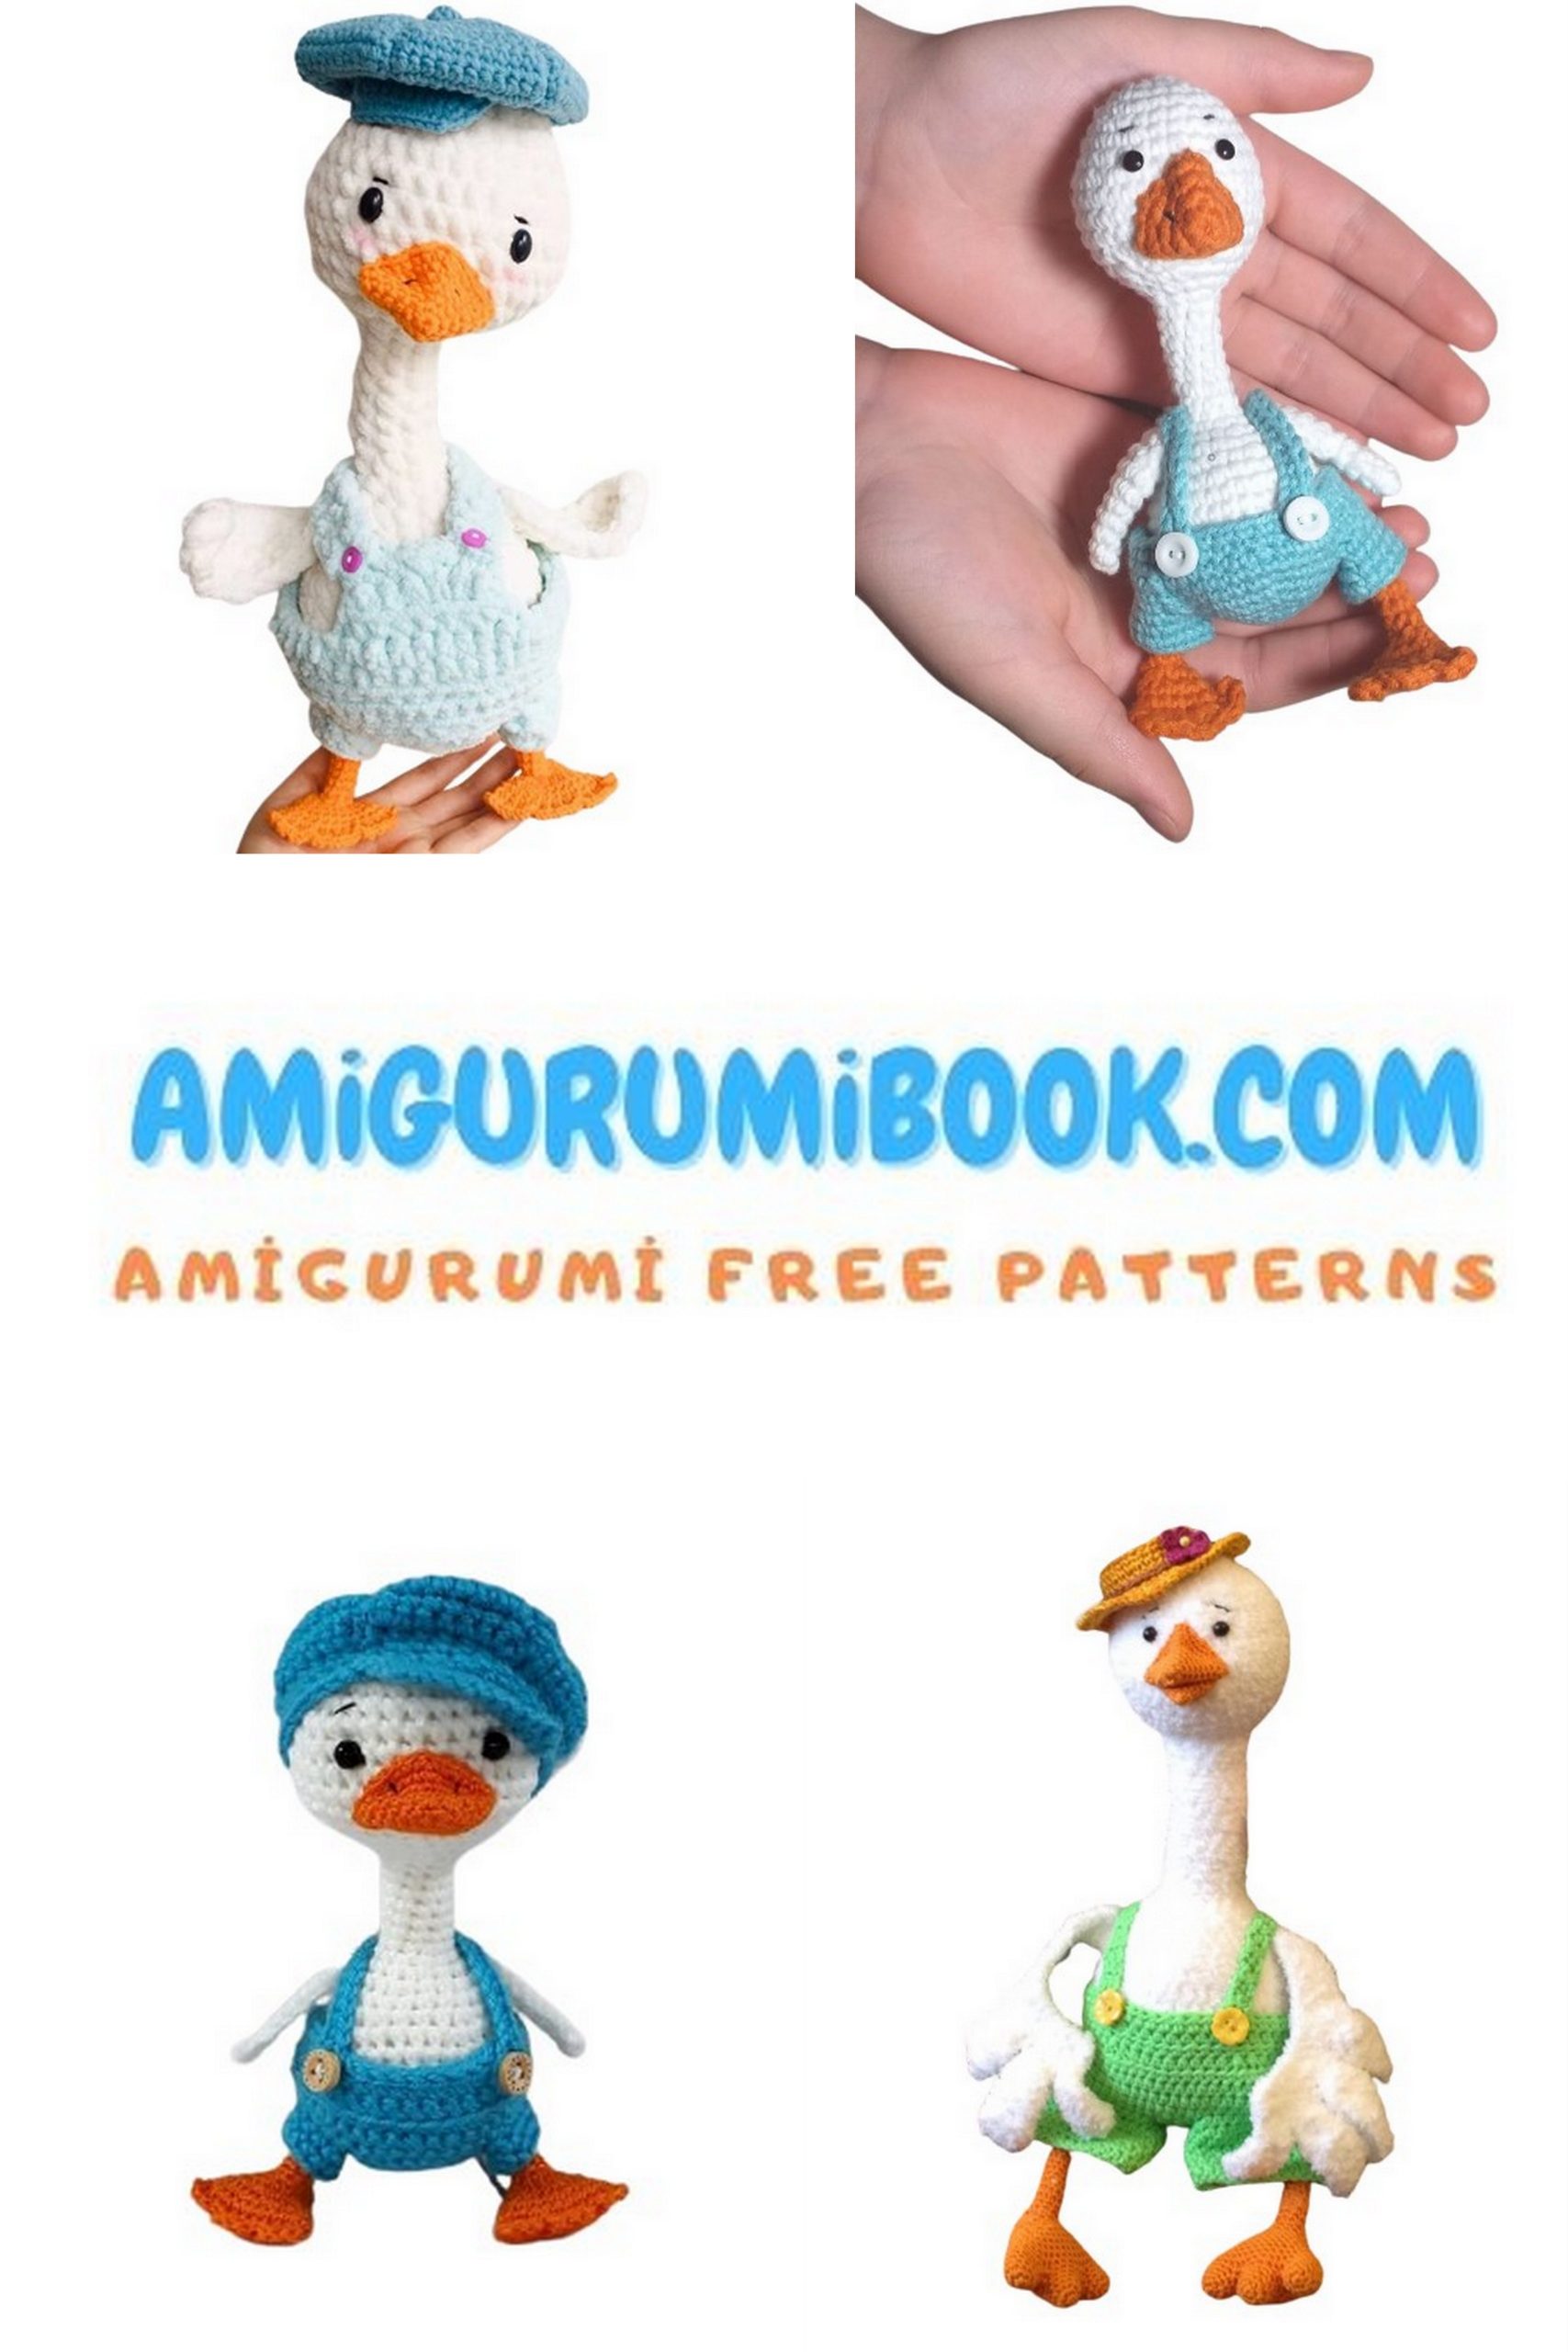
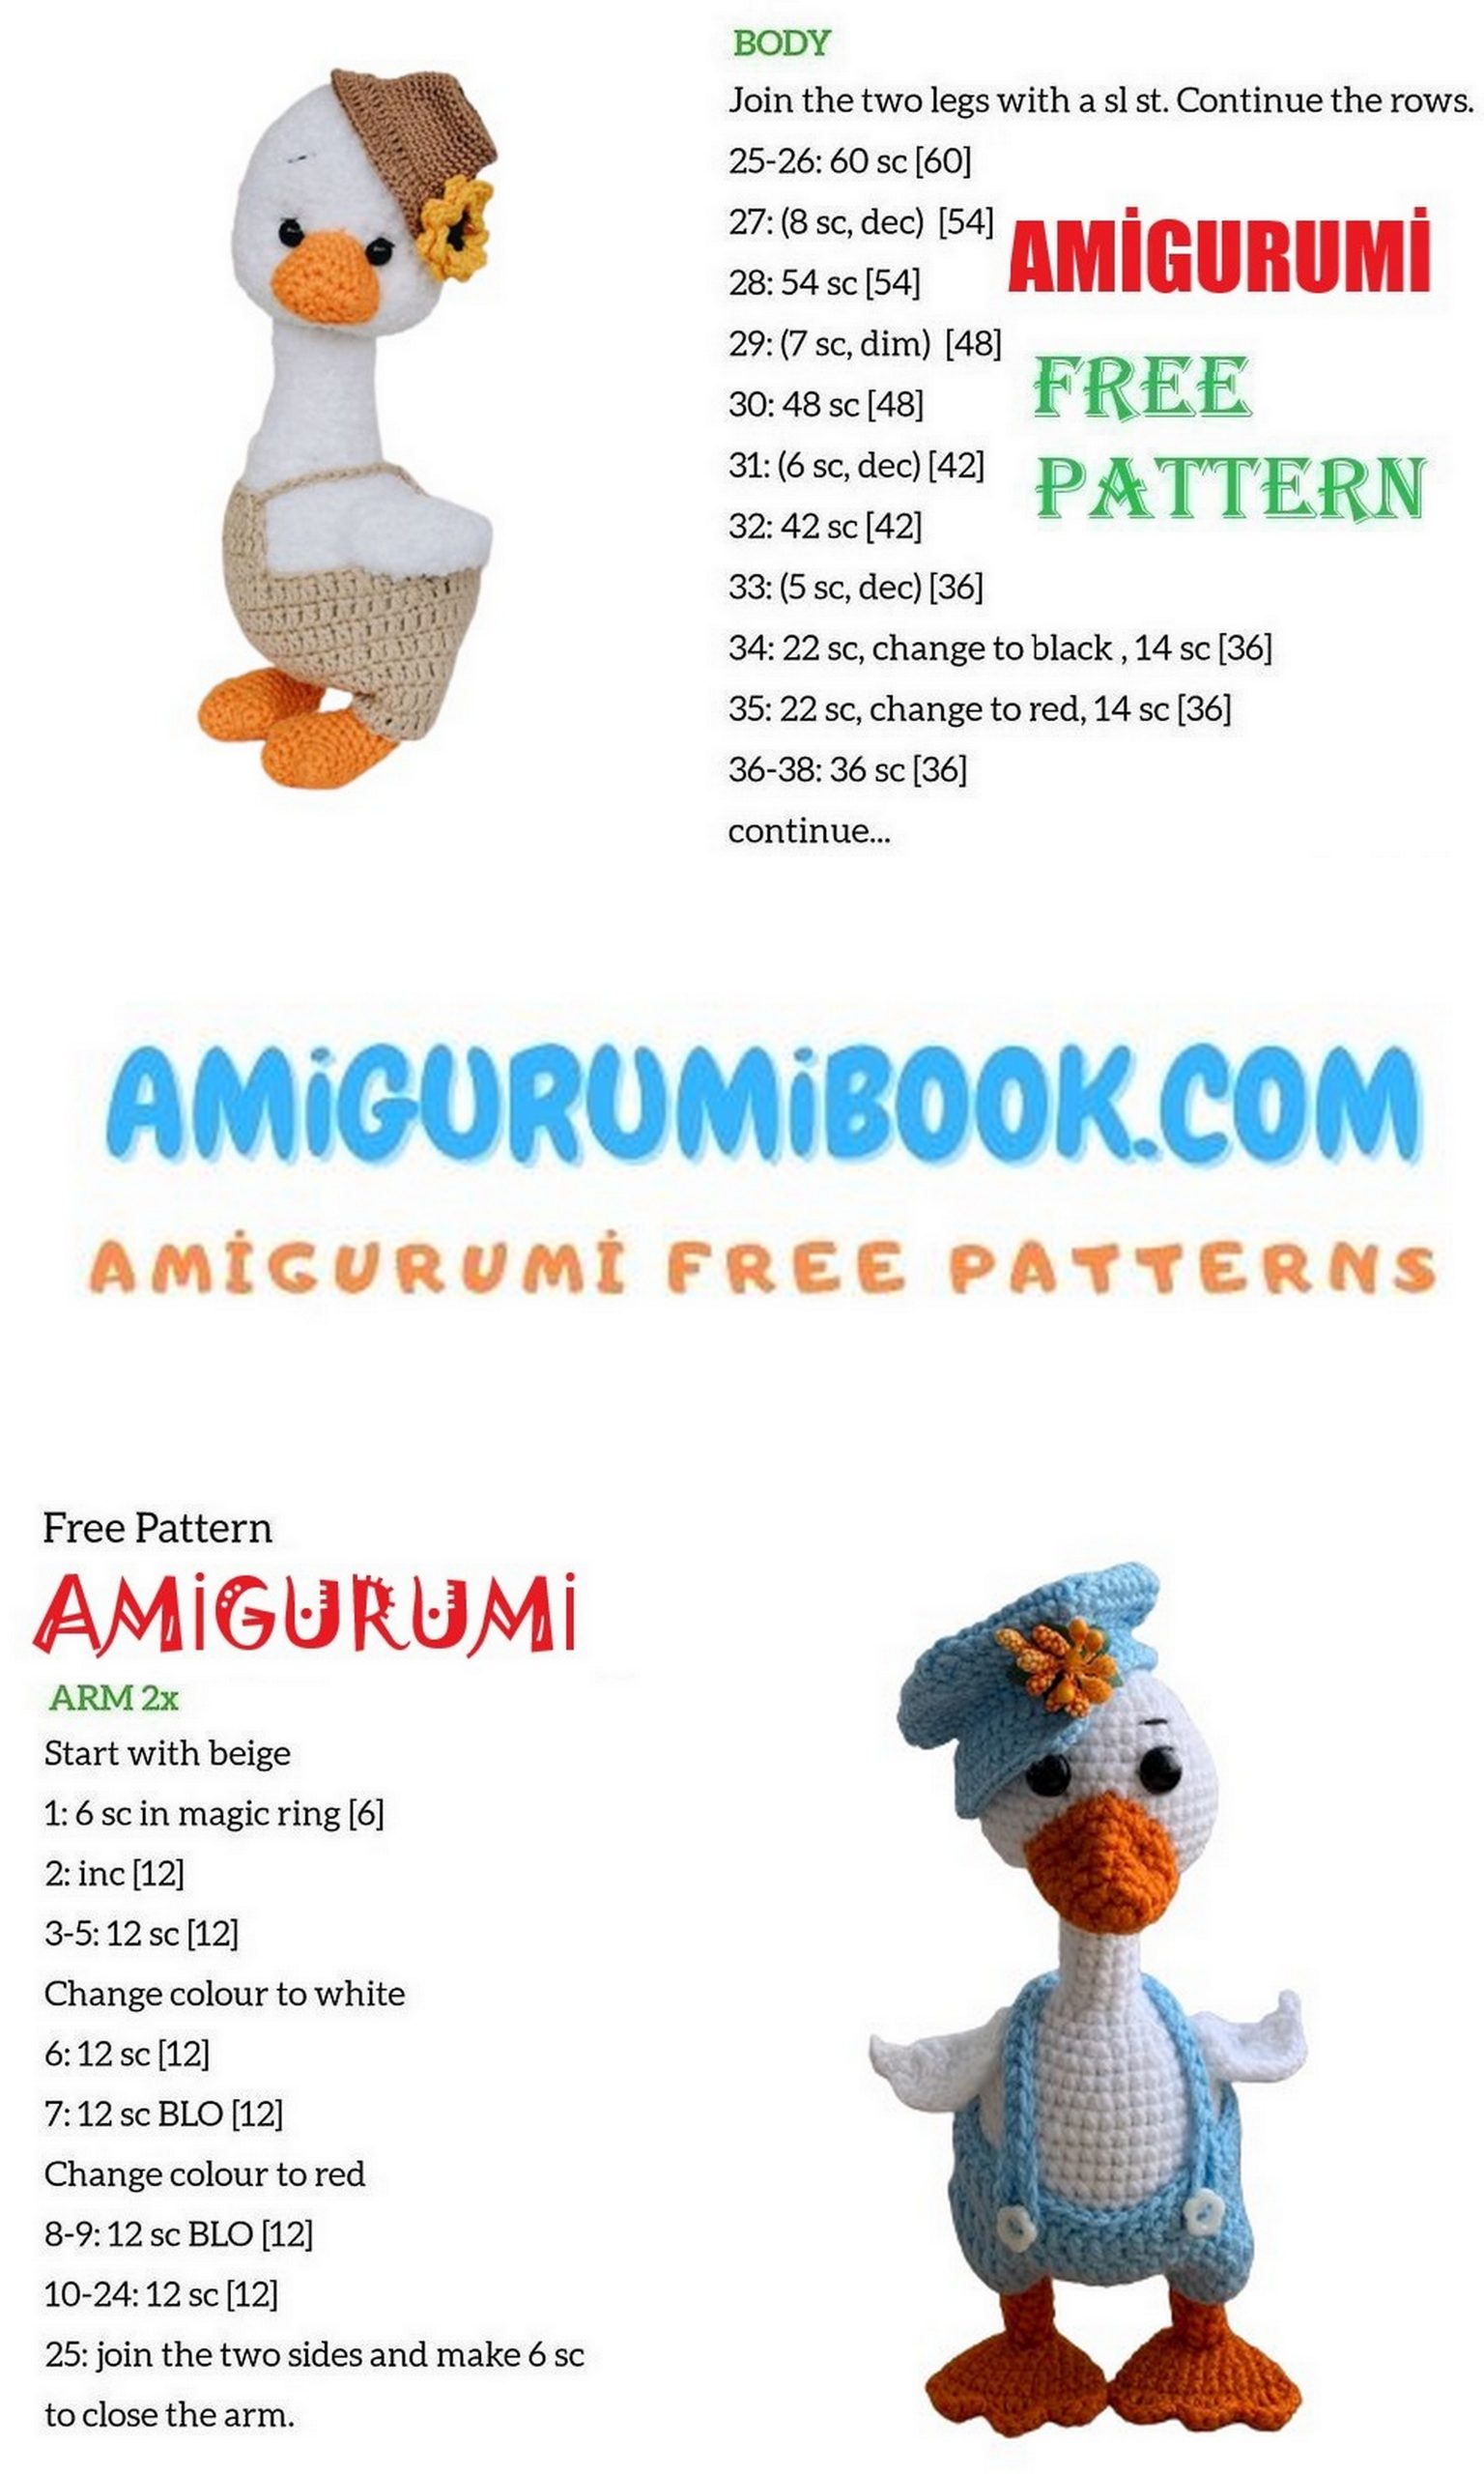
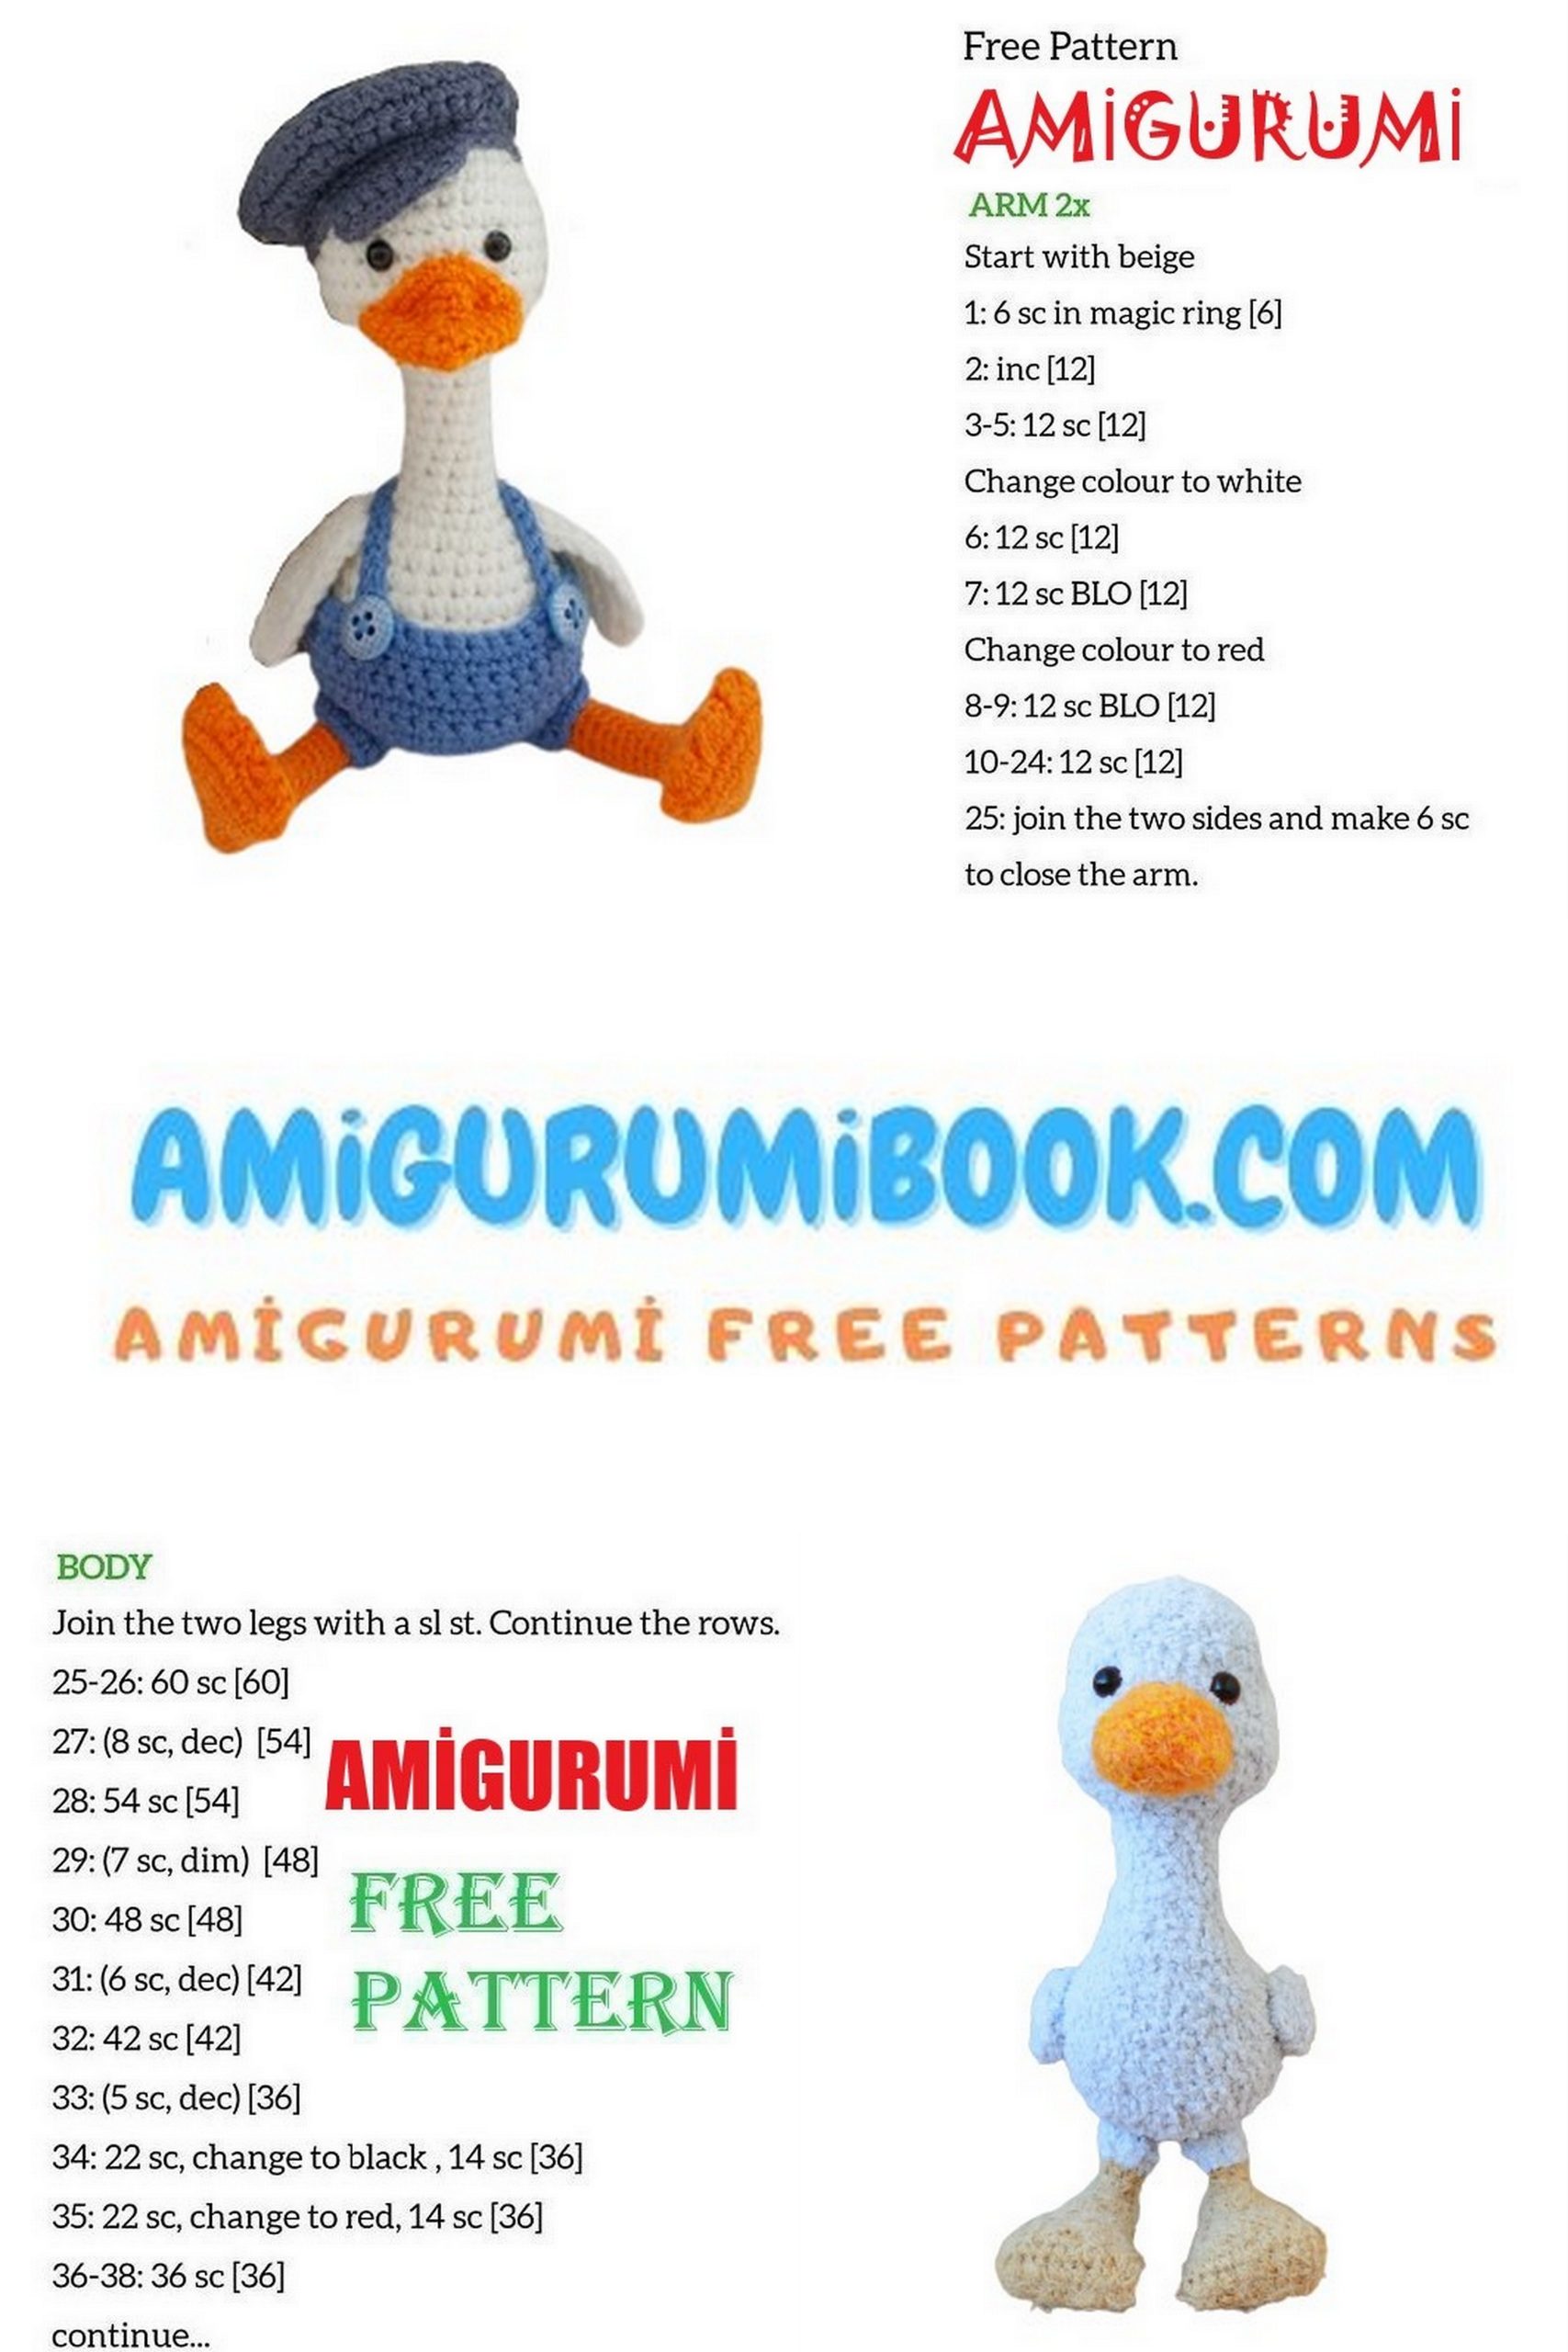
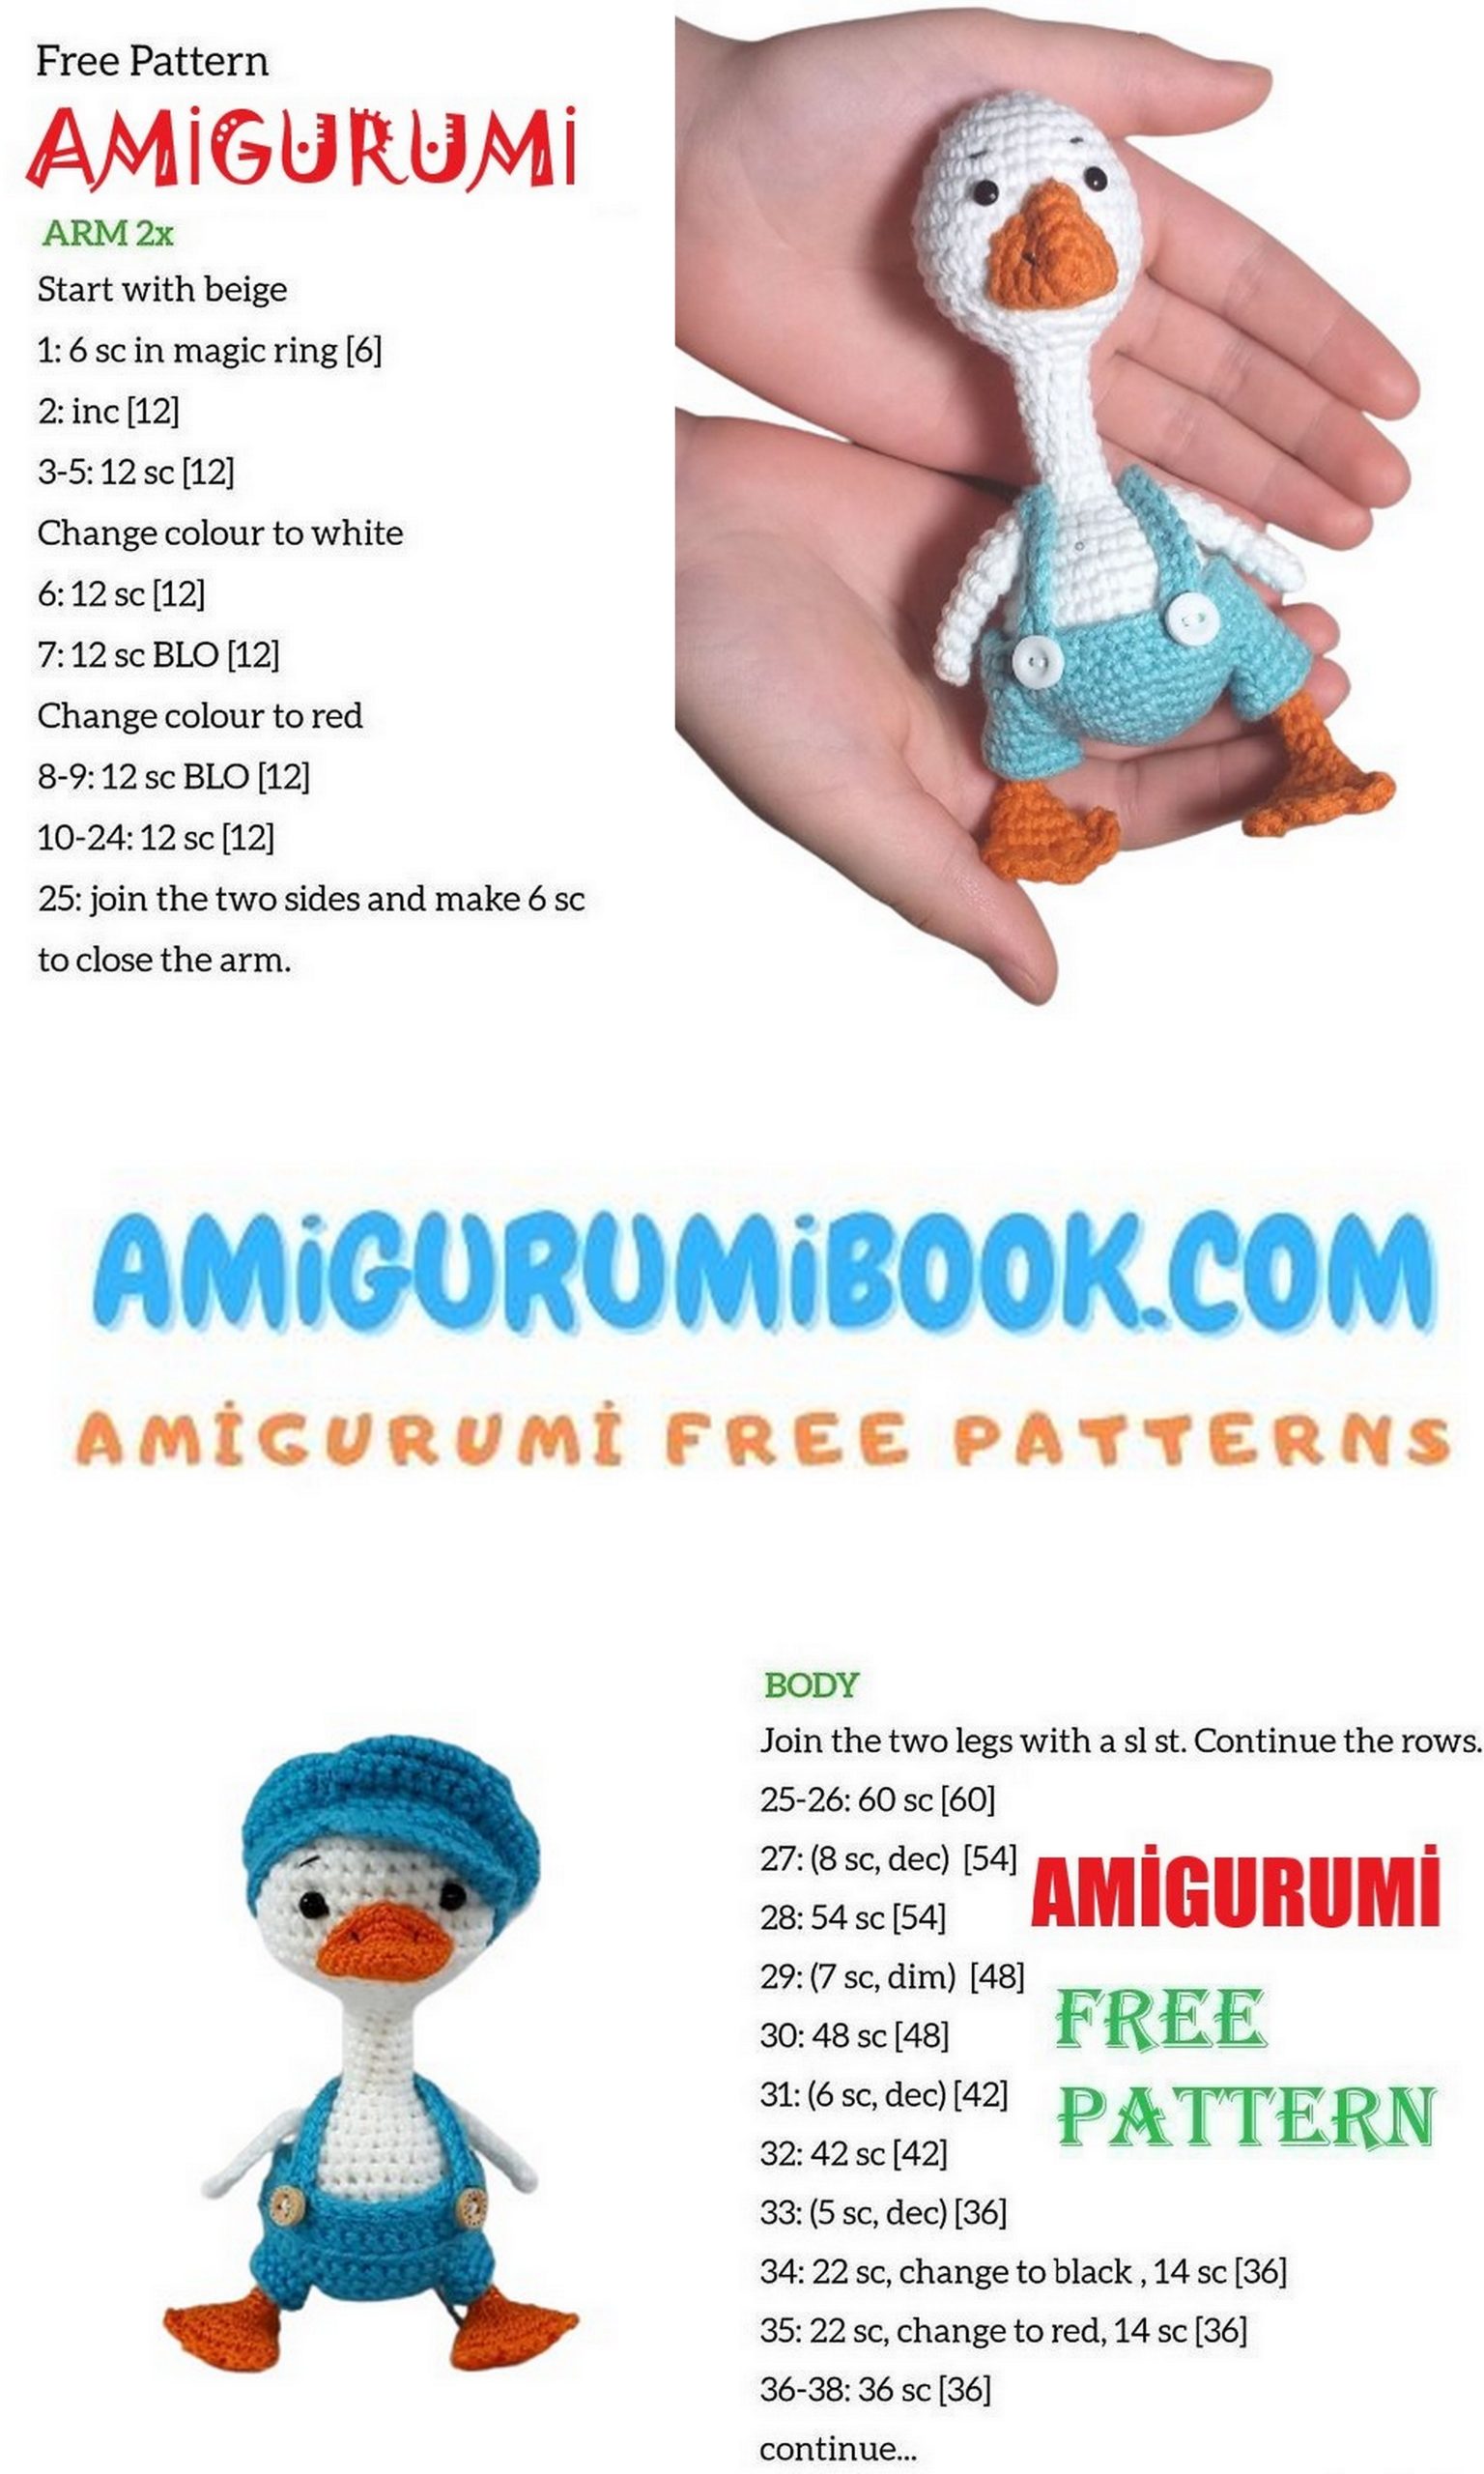
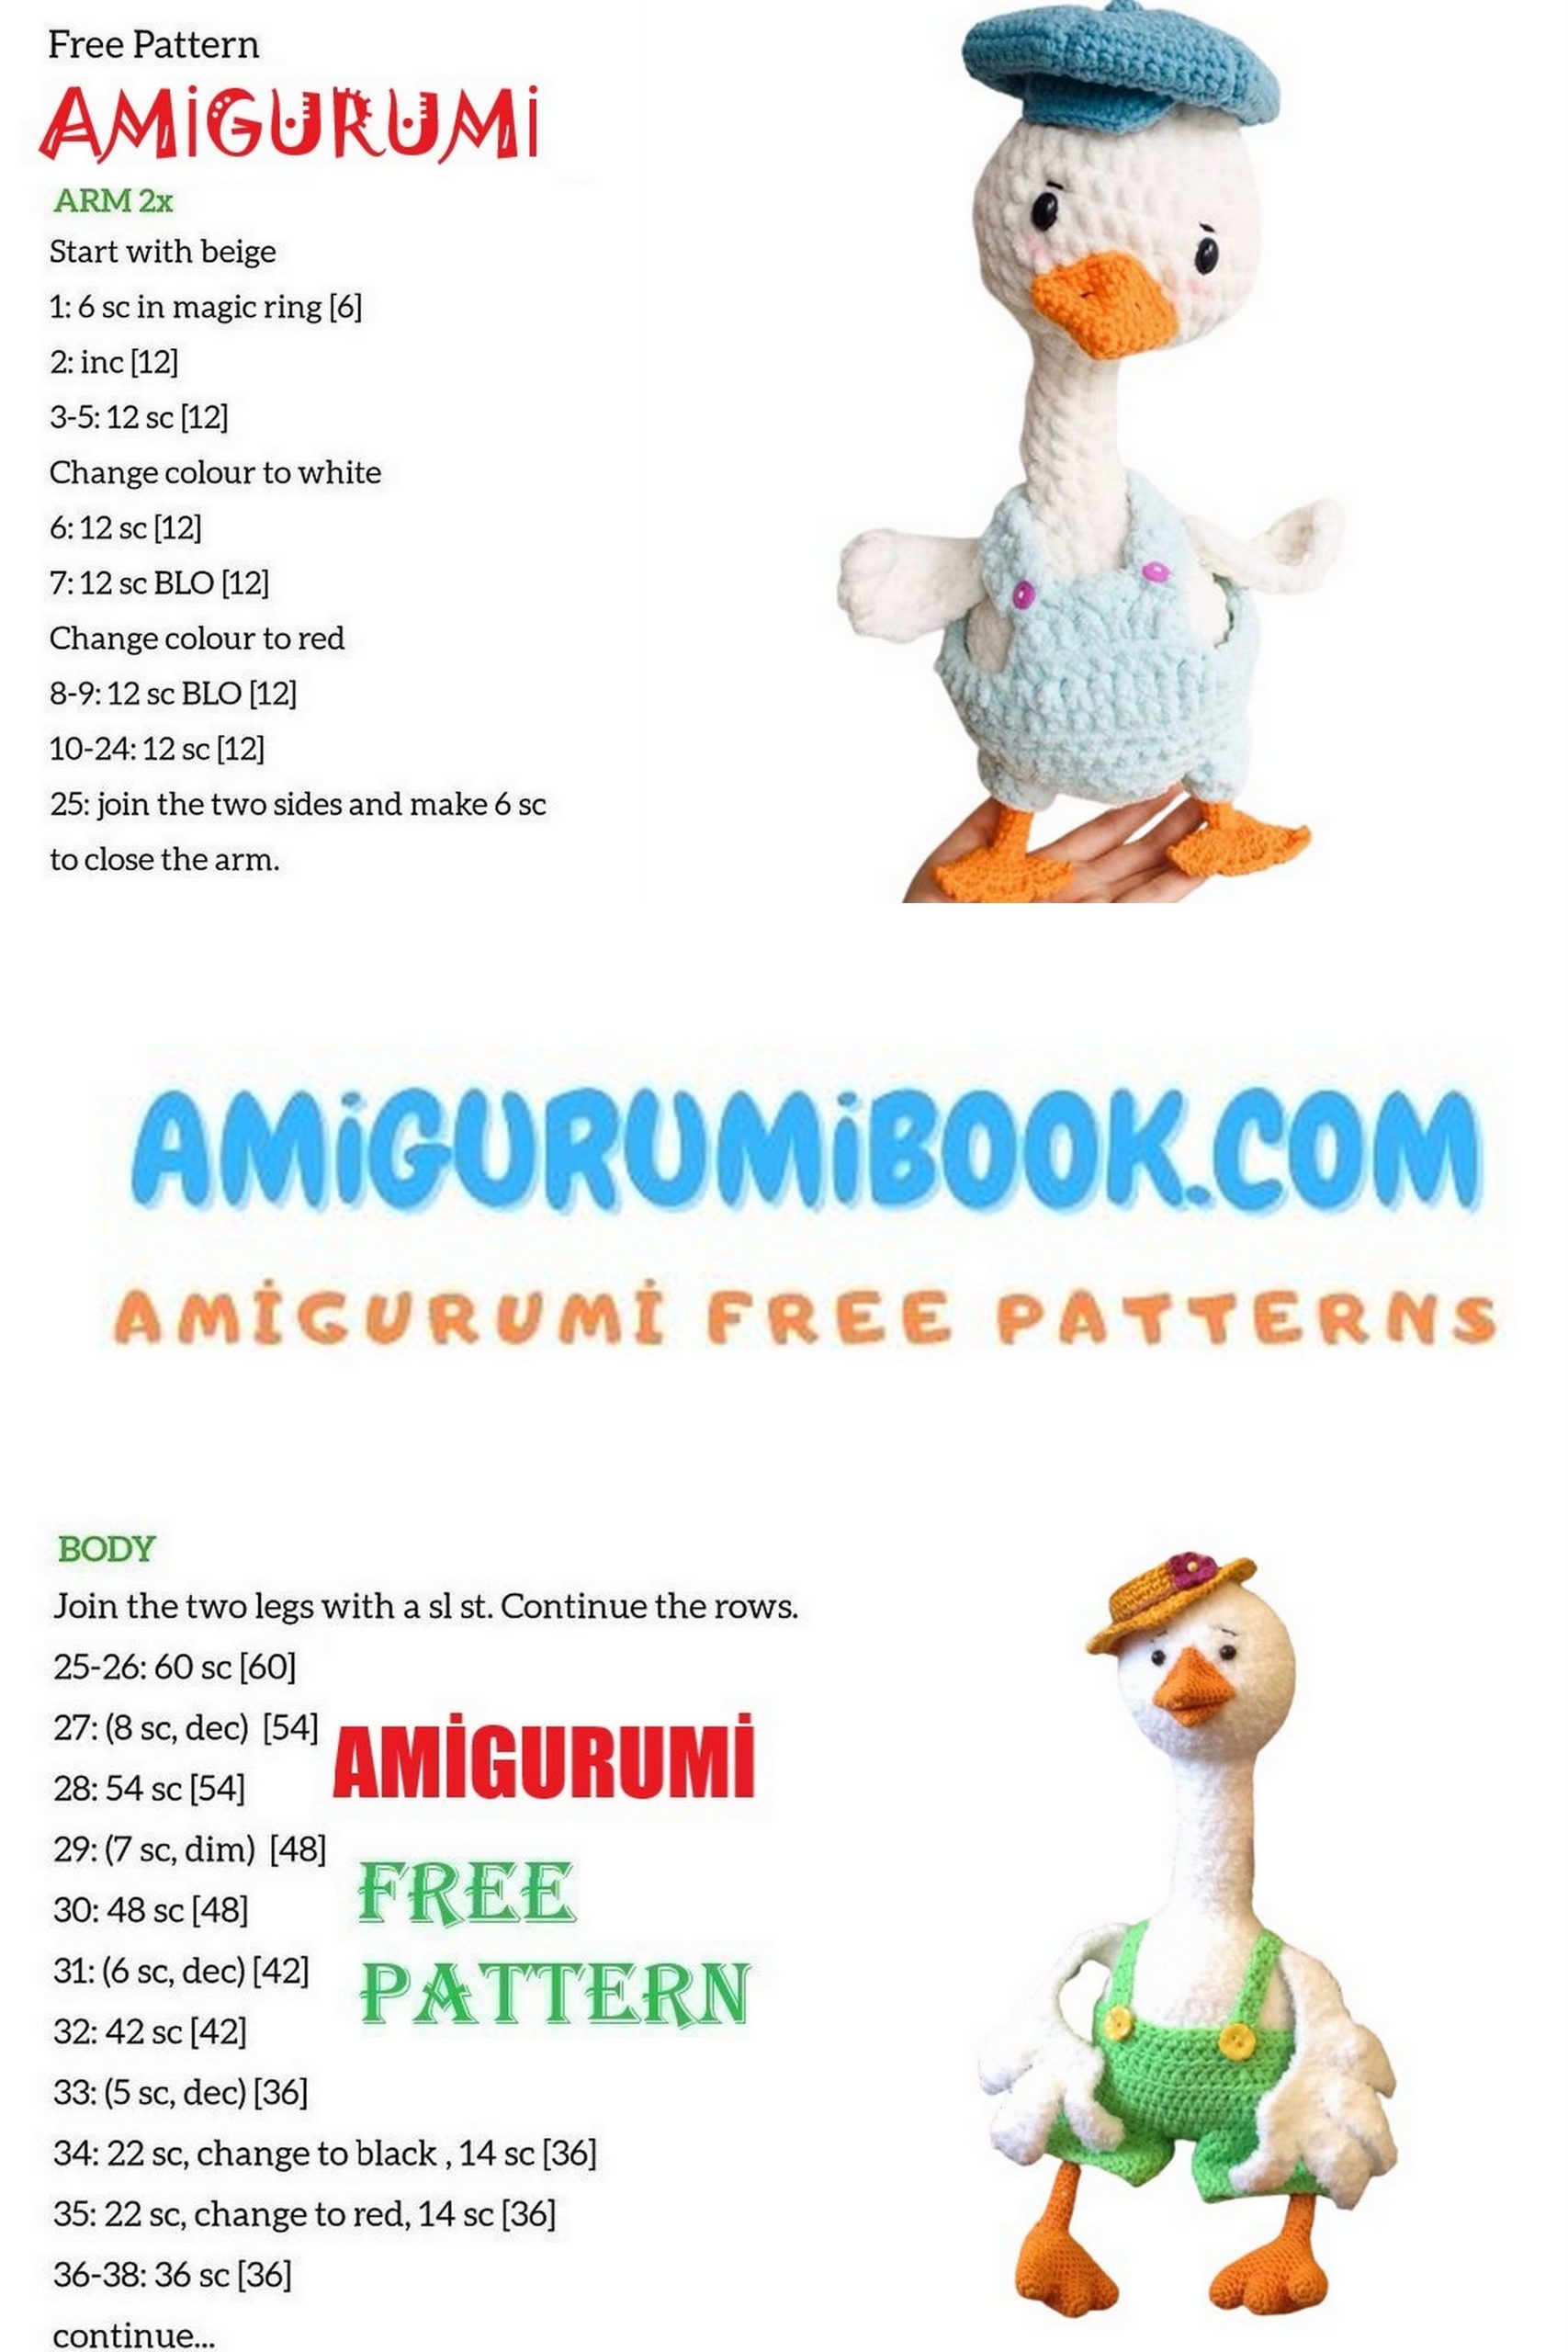
Cute Goose Amigurumi Free Pattern
You can find the best quality of Amigurumi free patterns here. In this content, we shared with you the amigurumi goose pattern.
Description of knitting Goose.
Necessary materials:
You can knit from absolutely any yarn in any combination.
You will need at least 2 colors (head, body + legs, beak)
Or 3 colors (head, body + beak + paws)
Colors for your taste and color.
Also, if you have a desire, you will need to buy cotter pins.
For toys made of yarn up to 400m / 100g. size 1.6 * 20mm, smaller footage, including bun 2 * 20 mm. In total, you will need 3 cotter pins (1 head and 2 wings)
They will need discs, their size depends on the yarn from which you plan to knit.
– thin yarn in the region of 500-600 m / 100 gr. in the fenders disks about 6- 8-9 mm (I have 8) – 4 pcs. And in the head-neck 18-20 (head) 15-18 (neck). 1 in head disk, 1 in the neck.
Accordingly, the less yarn you have, the more the size of the disks will be needed. In a bun, I take a combination of 35 (head) – 30 (neck).
For reinforcement, you will need wire, you will still need it for it medical plaster.
Well, do not forget about the eyes, filler, thread for tightening, needles, round nose pliers (for cotter pins). I’m sure you have a lot of it.
ATTENTION!!!
It is assumed that you have cotter pinning skills in toy!
In this description, the details of this and any other type of attachment!
Abbrevations
ch – chain
sc – single crochet
İNC – increase, from one sc, two are tied
DEC – two sc are knitted together with one
DC – double crochet
sl-st – slip stitch
Head:
İnto magic ring 6 sc
1row) İNC * 6 times = 12 sc
2row) (1 sc, İNC) * 6 times = 18 sc
3row) (2 sc, İNC) * 6 times = 24 sc
4row) (3 sc, İNC) * 6 times = 30 sc
5row) (4 sc, İNC) * 6 times = 36 sc
6-11row) straight 36 sc (6 rows)
12row) 8 sc, İNC * 4 times, (İNC, 1 sc) * 3 times, put extra.
Tie marker (center of muzzle), (1 sc, İNC) * 3 times, İNC * 4 times, 8 sc = 50 sc
13row) straight 50 sc
14row) (3 sc, DEC) * 10 times = 40 sc
15row) (8 sc, DEC) * 4 times = 36 sc
16row) (4 sc, DEC) * 6 times = 30 sc
17row) (3 sc, DEC) * 6 times = 24 sc
18row) (2 sc, DEC) * 6 times = 18 sc
19row) (1 sc, DEC) * 6 times = 12 sc
We stuff the head tightly enough, do not close it. If you knit without a cotter pin, then we will continue the body with the same thread, if you close, then we leave the thread long enough to close the hole.
I can’t help you about safe eyes, because I put my eyes after tightening, I think in the 10-12 row somewhere. We must look at the toy and the size of the peephole.
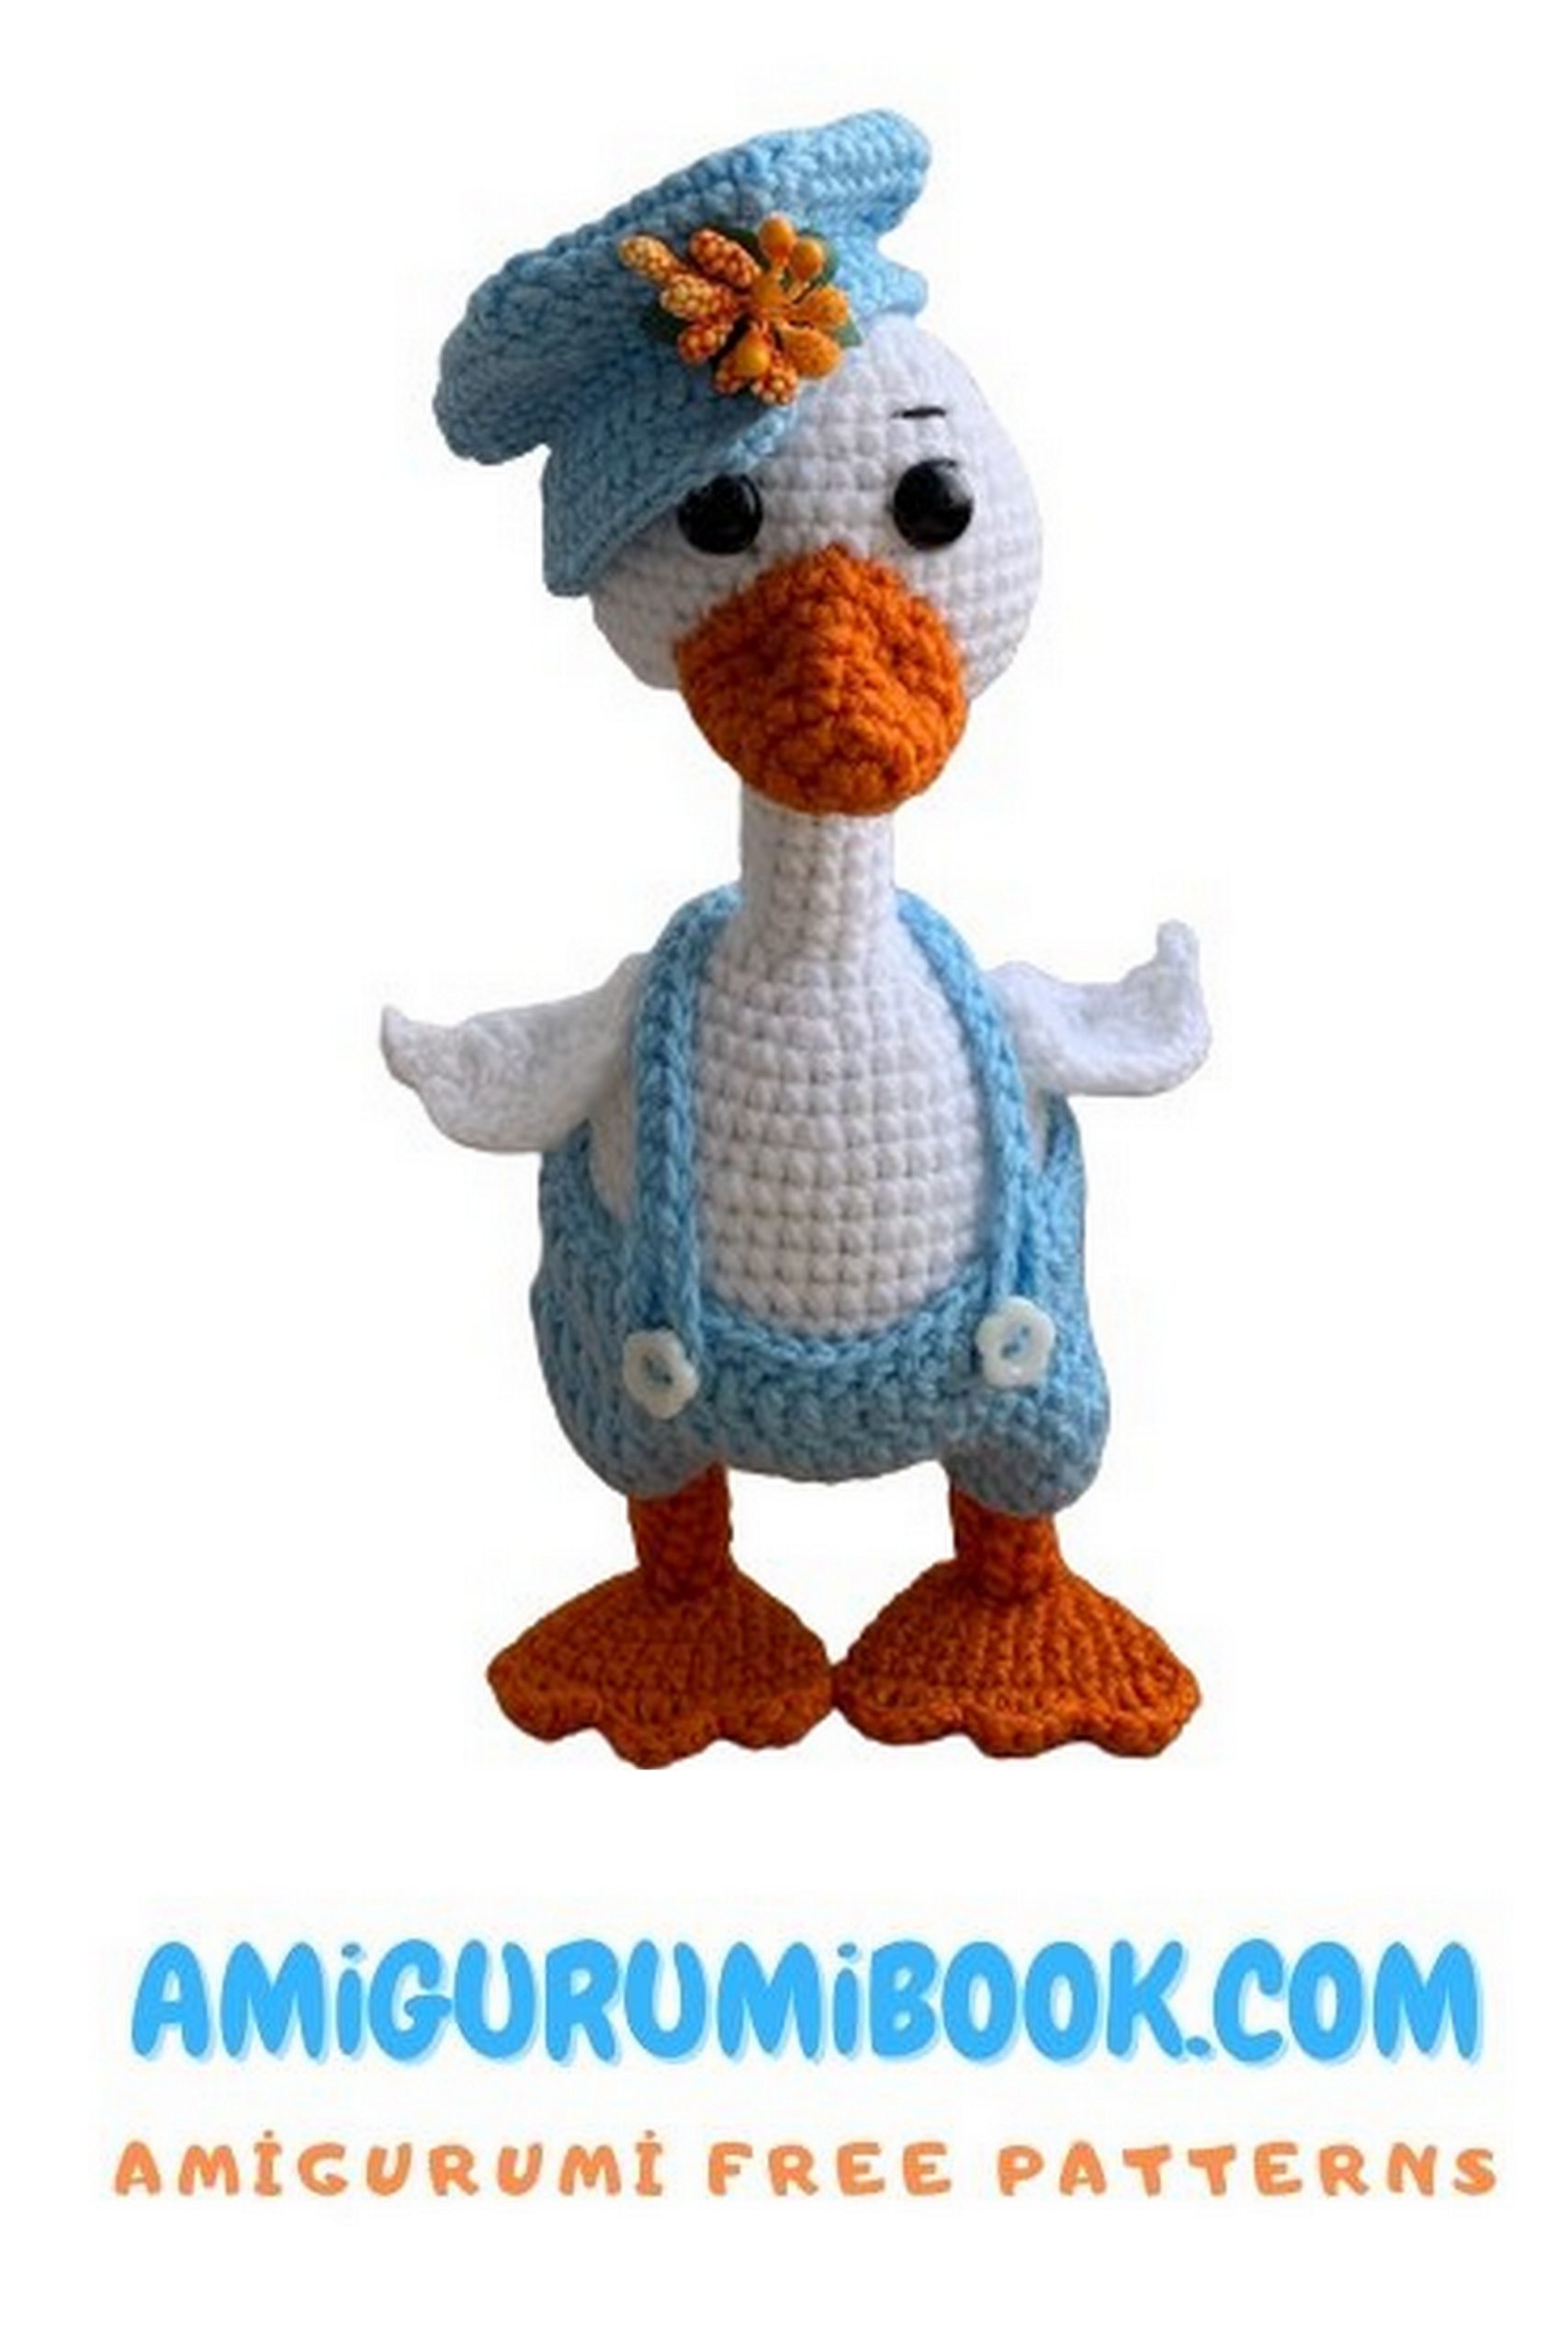
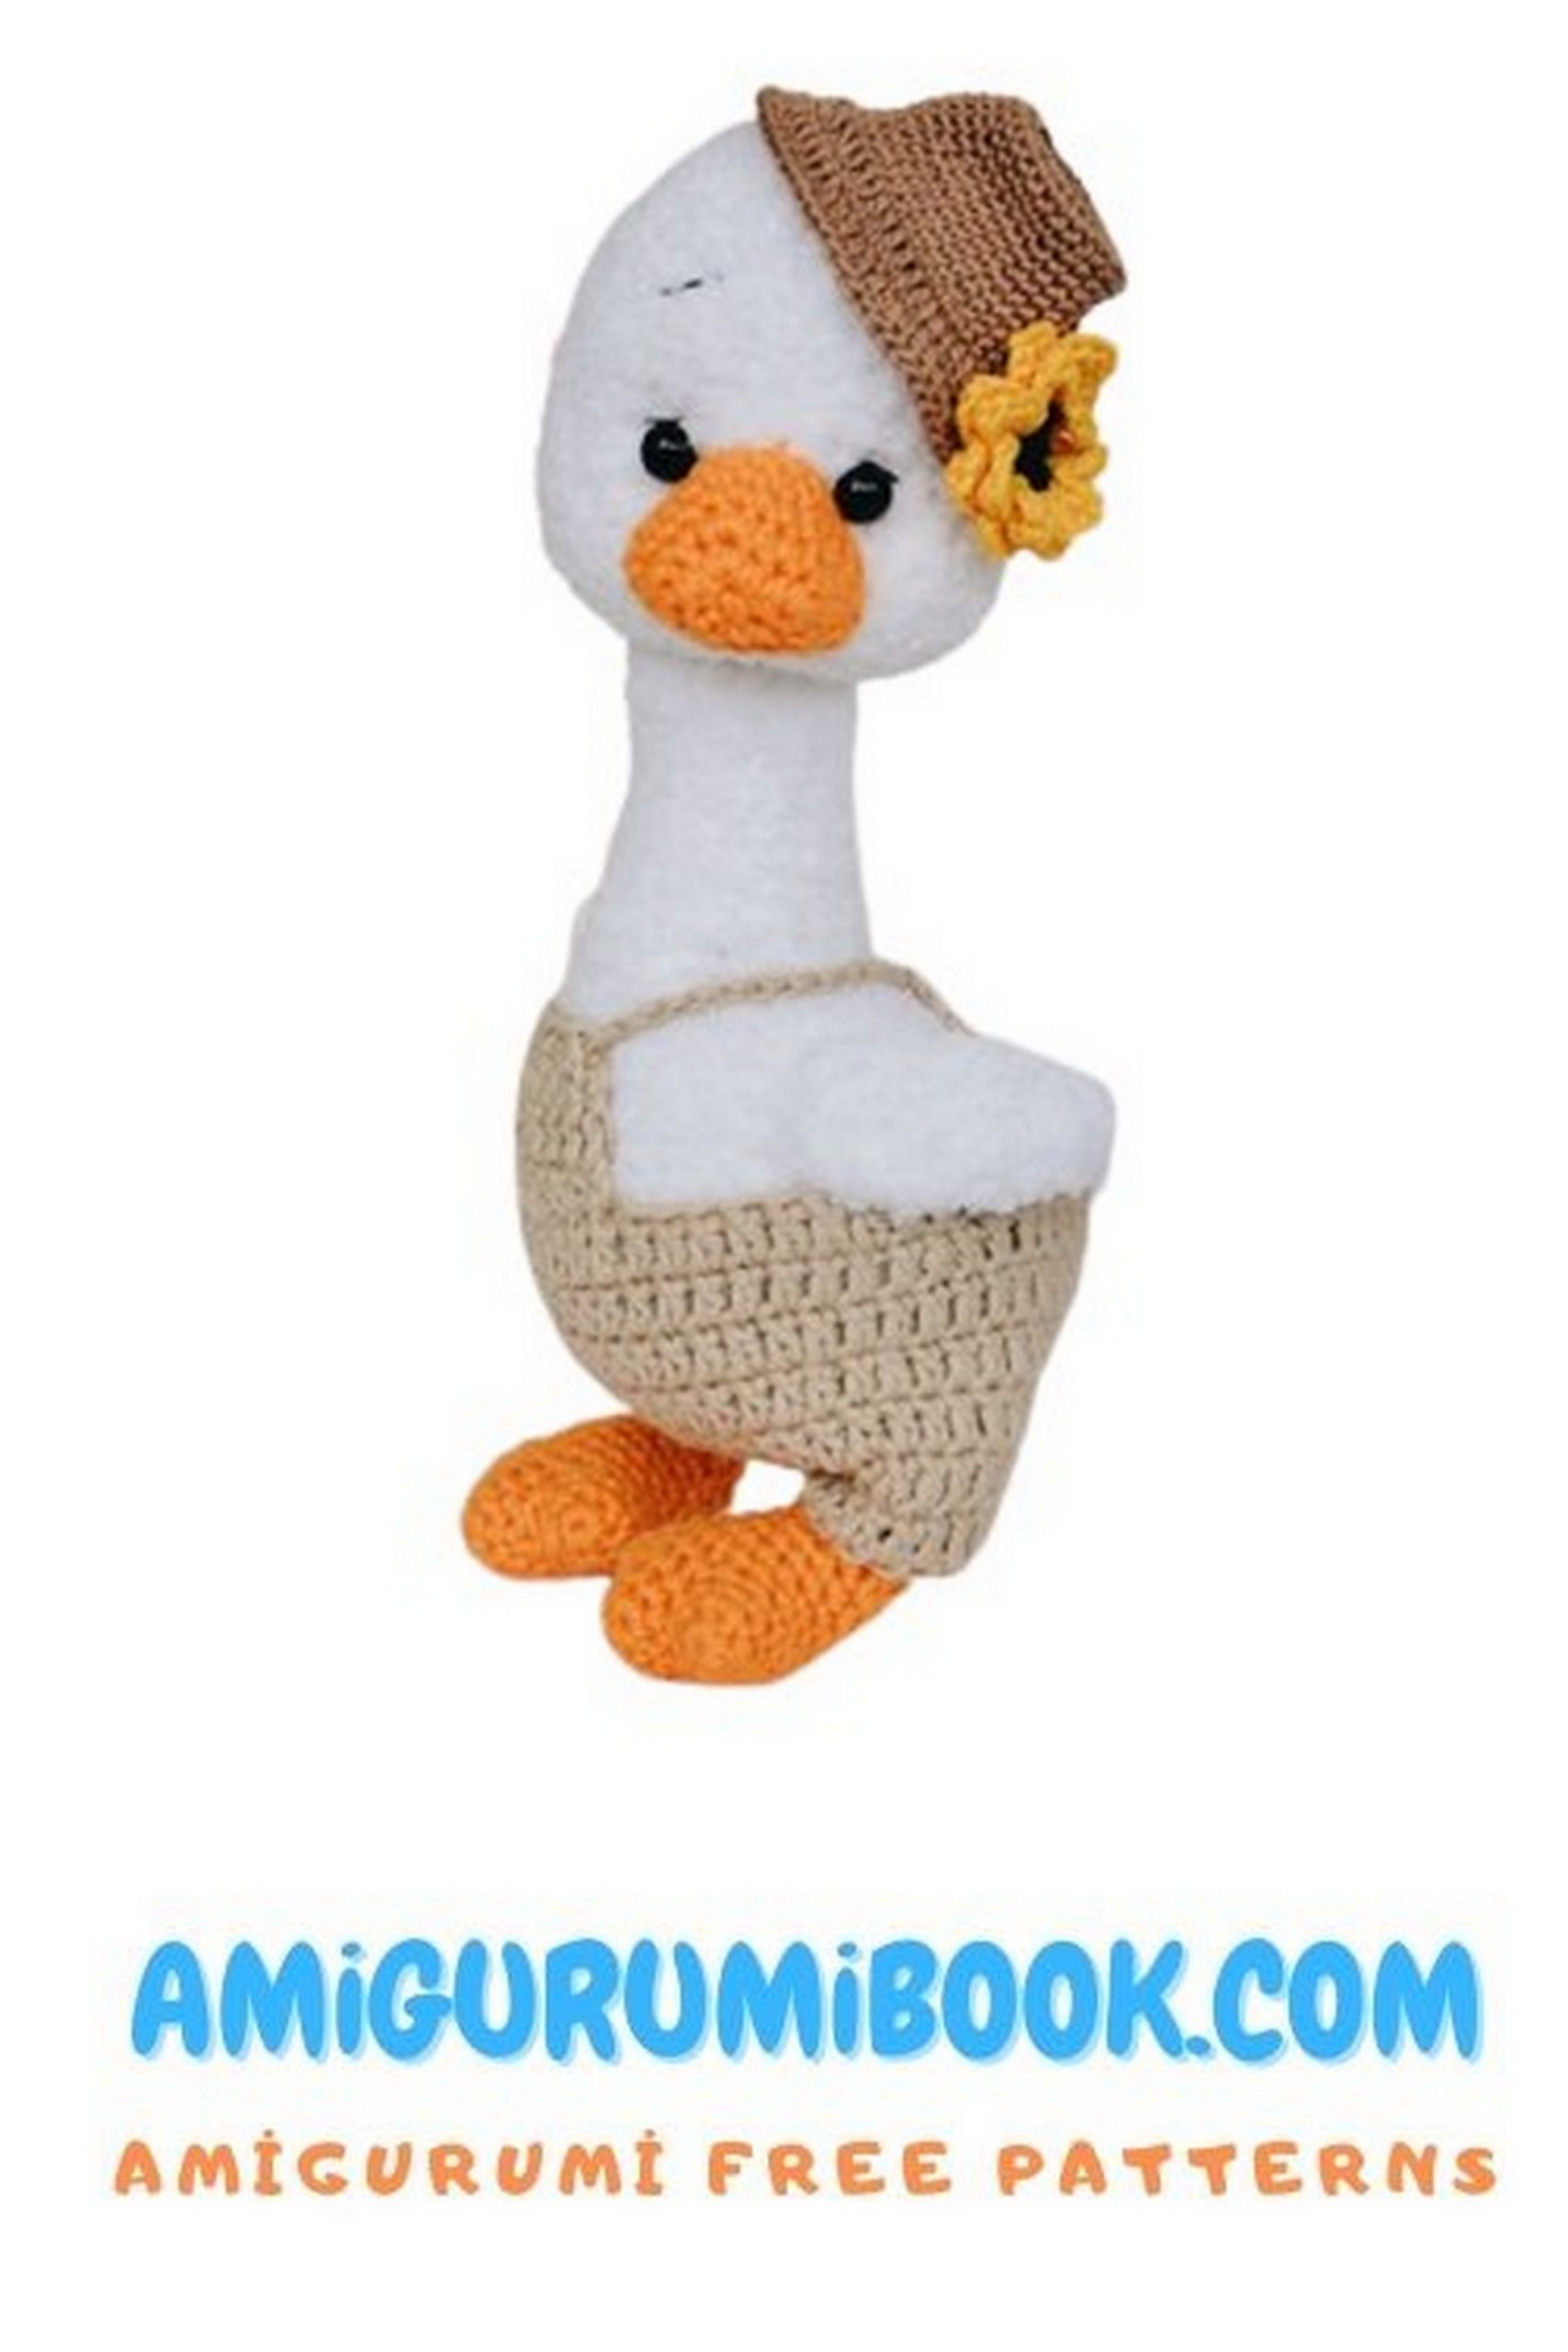

Beak:
6 ch chain
1row) İNC, 1 sc, 3 sc in 1 loop, 1 sc, 3 sc in the outer loop, on the other side of the chain 4 sc = 14 sc Instead of the traditional circle, you get a kind of triangle.
2row) İNC, 3 sc, 3 sc in 1 loop, 3 sc, İNC, 5 sc = 18 sc
3row) straight 18 sc
4row) 1 sc, 3 sc in 1 loop, 10 sc, 3 sc in 1 loop, 5 sc = 22 sc
5row) straight 22 sc
We leave the tail of the thread sufficient for sewing the beak to the head.
First, we sew the beak, by the end of the sewing it must be nailed. Add. the marker on the muzzle is hidden under the beak, this is the middle of the muzzle and when sewing on the beak we focus on it in order to sew exactly. The upper part of the beak must match the add. marker. After sewing, remove it. The tail from sewing on the beak, and into the head.
Next, we make tightening.
We place needles on the sides of the beak. We take a large needle with a strong thread, preferably the color of the head. I have brown so that you can see.
We fasten the thread at the bottom of the head under the chin, as close to the neck as possible, as close as possible.
We enter the needle at point 1 (under the chin), output it at point 2 (the edge of the eye tightening, the place marked with the needle), enter it at point 3 (the second edge of the tightening) and output at point 1 (under the chin). Pull the thread and fasten it at the bottom under the chin. You should have a dimple for the eye. We repeat the same with the second eye.
After the tightenings are made, insert the cotter pin down the head, with a slight forward offset (see photo). The cotter pin should be about 1/3 of the head, maybe a little more.
You should kind of tuck it under knitting, but a little, about 3 mm a little more, a little less.
After the head is completely filled, the cotter pin is inserted, we close the head with decreases to the end, the tail from the thread, and into the head.
If you make a head without a cotter pin, then make tightening and just leave the head open, then you just continue to knit the neck.
Neck, torso:
İnto magic ring 6 sc
1row) İNC * 6 times = 12 sc
2row) (1 sc, İNC) * 6 times = 18 sc
3-7row) straight 18 sc (5 rows) after 4 rows, you need to install a cotter pin, the marker thread goes back in the middle of the head. If you don’t have a cotter pin in your head, knit 1 row 12 sc onwards, starting with row 2 of the description.
8row) 5 sc, İNC, 7 sc, İNC, 4 sc = 20 sc
9row) straight 20 sc
10row) 7 sc, İNC, 7 sc, İNC, 5 sc = 22 sc
11row) straight 22 sc
12row) (5 sc , İNC) * 3 times, 4 sc = 25 sc
IMPORTANT!!! The marker should be at the back in the middle of the head, if it is displaced it is necessary to make an offset loop. Stuff the neck as needed.
Starting the body
13row) İNC * 2 times, 22 sc, İNC = 28 sc
14р) İNC * 4 times, 3sc, İNC, 15 sc, İNC,
2 sc, İNC * 2 times = 36 sc
15row) (1 sc, İNC) * 4 times, 24 sc, (1 sc, İNC) * 2 times = 42 sc
16row) straight 42 sc
Your marker thread will shift slightly to the side all the time due to increments (to the right), this is normal.
17row) İNC * 6 times, 36 sc = 48 sc
18row) (1 sc, İNC) * 6 times, 36 sc = 54 sc
19-21row) straight 54 sc (3 rows) if you attach the wings, they will need to be installed in the 18th row area. In which row the wings should be knitted, I do not know, since I did not do this, but I think that this is the same row as for the cotter pin.
Sew-on version of the wings, we do it after we fill in and completely close the body, we orient ourselves in this case visually.
22row) (DEC, 1 sc) * 5 times, DEC, 37 sc = 48 sc
23row) straight 48 sc (1 row) if you knit paws, then 23, the most successful row. Paws are tied in on the front of the body, in a row in one lyada.
24row) (6 sc, DEC) * 6 times = 42 sc
25row) (5 sc, DEC) * 6 times = 36 sc
26row) (4 sc, DEC) * 6 times = 30 sc
27row) (3 sc, DEC) * 6 times = 24 sc
28row) (2 sc, DEC) * 6 times = 18 sc
We stuff the body, pushing it tightly enough into the neck. If there is reinforcement of the paws, then the body does not close, it is not stuffed too much, so that it would be convenient to insert the wire.
29row) (1 sc, DEC) * 6 times = 12 sc
30row) DEC * to the end or close in any way convenient for you.
We leave a sufficiently large tail of the thread to knit the tail of the duck.

Wings:
İnto magic ring 5 sc
1row) 2 sc, 3 sc in 1 loop, 2 sc = 7 sc
2row) 3 sc, 3 sc in 1 loop, 3 sc = 9 sc
3row) straight 9 sc
4row) 4 sc, 3 sc in 1 loop, 4 sc = 11 sc
5row) straight 11 sc
6row) 5 sc, 3 sc in 1 loop, 5 sc = 13 sc
7row) straight 13 sc
8row) (1 sc, DEC) * 4 times, 1 sc = 9 sc
There are several options for closing the wings, it can be folded in half and knitted sc, in this case the wing will simply be sewn to the body. If you want to put the wings on the cotter pins, then the wing is closed in increments to the end, or simply pulled together after installing the disc and the cotter pin into it. The cotter pin is inserted from the top from the edge.
I did not stuff the wing of the velor geese. Perhaps, if the toy is knitted from a thicker yarn, padding will be necessary, you need to look.
Do not forget that the wings are right and left when installing the cotter pins.
The cotter pin is displayed in the 7th or 8th row, it depends on the size of the disc, which one will give, but better in 8.
Paws:
If you reinforce your legs, then this must be done during the process of knitting the legs, in this case the body is closed only after the reinforcement is carried out into it.
For toes we do
2 blanks
Extreme finger:
İnto magic ring 6 sc, straight 6 sc – 1 row
(we tear off the thread)
Middle finger
İnto magic ring 6 sc
1row) (1 sc, İNC) * 3 times = 9 sc
2row) straight 9 sc (tear off the thread)
We start knitting again
little finger
İnto magic ring 6 sc
1row) straight 6 sc
2row) We connect all the fingers together.
We put a marker thread at the beginning of the row.
3 sc (on the first finger, the one that started knitting), 5 sc (on the big middle finger), 6 sc on (the last, third finger), 4 sc (on the big middle finger) and 3 sc (on the first finger) = 21 sc
3row) straight 21 sc
4row) 9 sc, DEC, 8 sc, DEC = 19 sc
5row) 8 sc, DEC, 7 sc, DEC = 17 sc
6row) 7 sc, DEC, 8 sc = 16 sc
7row) (DEC, 6 sc) * 2 times = 14 sc
8row) (DEC, 5 sc) * 2 times = 12 sc
Now is the time to reinforce the foot, and fill it a little
(fingers)
We knit the heel in reverse rows
9row) 6 sc, ch – expand
10row) we begin to knit about the second from the edge of the loop 4 sc, ch – unfold
11row) again from the second from the edge of the loop 2 sc, ch – unfold.We transfer the marker thread to the beginning of the row, now we have to make 12 sc tying the heel in a circle
12row) 2 sc, (on the side), 6 sc, (on the front),
2 sc (second roll), 2 sc (behind the heel)
13row) DEC * 6 times = 6 sc
Now is the most convenient time to fill the leg to the end.
14-16r) straight 6 sc
Change the color to white or another color that the gosling is knitted with.
17row) (1 sc, İNC) * 3 times = 9 sc
18-19р) straight 9 sc (2 rows)
If you are making reinforcement, then now you need to insert the wire into the body (it should not be stuffed) and connect it together. If you have long ends of the reinforcement, then you can not bite them off, but twist them together and bring them into the ass, so that the gosling would keep its balance even better. Only after this, the body is stuffed and closed to the end, and then the paws are sewn to the body.
Any wire can be used for reinforcement. I wrap it with a medical tape. This will give her strength and small volume. If necessary, fill the leg, thigh additionally. It depends on the yarn from which you knit the goose.
Tail:
We withdraw the thread left after closing the body in the ass, in the middle.
We make 3 ch and turn the Goose head up and face to itself. We make 1 dc (double crochet) in a loop in the body just to the left of the exit point of the chain of air loops.
Now we fasten all this with a connecting post, putting everything that we have on the hook to the left.
Those. everything that you tied lay on its side and attach to the body.
We turn the Goose upside down, but still facing us. And we knit 6 dc at the base of the initially dialed ch. We fix with a connecting post, putting the posts in the other now side. We hide the tail of the thread from the tail of the Geese in the body.
To make it clearer, the ponytail is tied on the body.