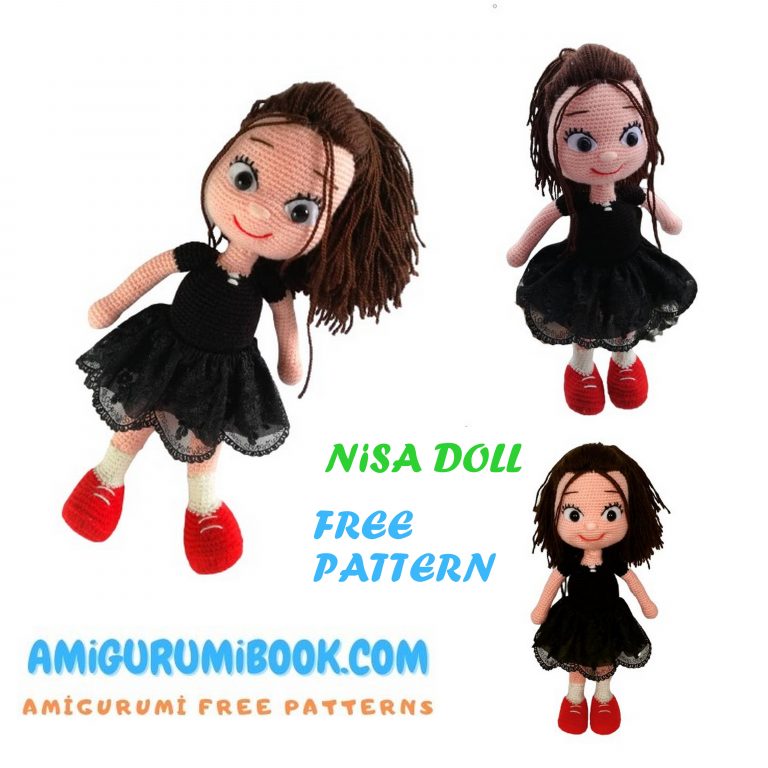
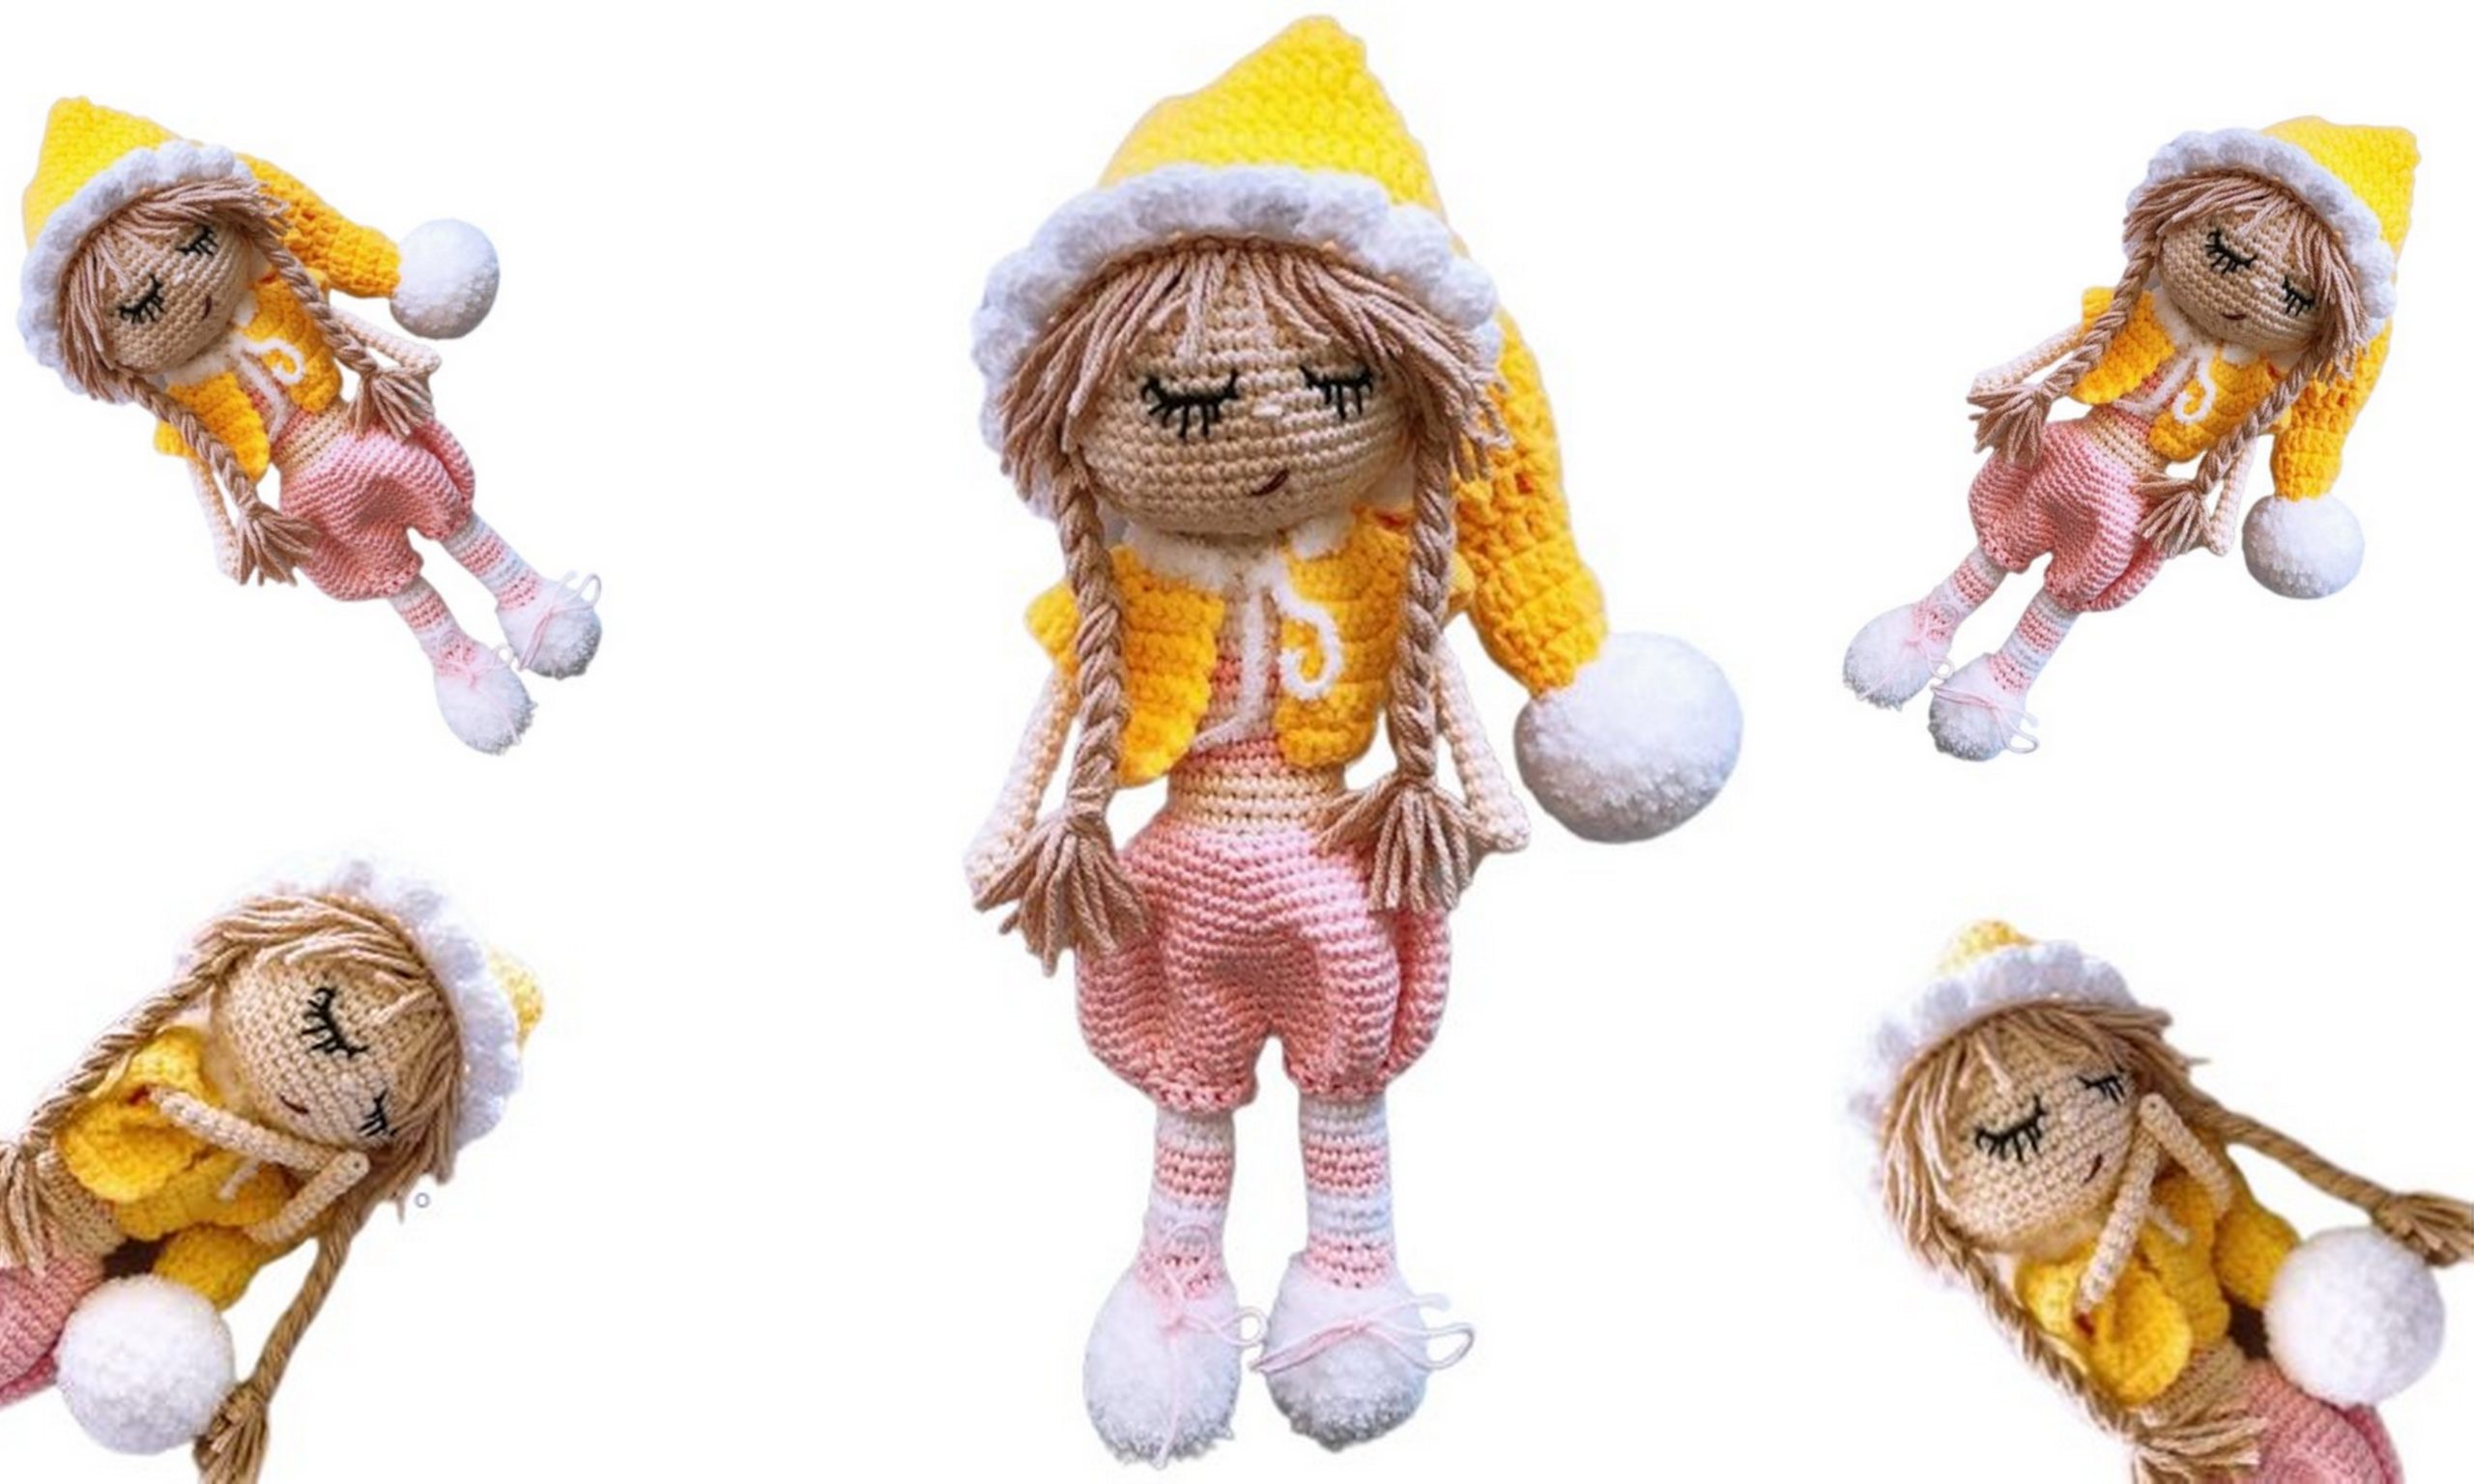
Doll Henrietta Amigurumi Free Pattern
Welcome to our website where you can find the most beautiful and highest quality samples of Amigurumi patterns. All the amigurumi patterns you can’t find are available on our website. Every day we continue to share new amigurumi patterns for you. Stay tuned to reach these amigurumi patterns before anyone else
Abbreviations:
slst – slip stitch
ch – chain
sc – single crochet
inc – increase
dec – decrease
Materials
Yarn:
• Alize Softy color 55 (white) for slippers and pompom
• YarnArt Jeans color 62 or 01 (white)
• Alpina Anabel color 59 (pink)
• Alpina Anabel color 172 or 174 (beige, for body)
• Alpina Vera 05 (yellow). Can be replaced by YarnArt Jeans
• Alize Cotton Gold color 262 (beige, for hair)
Hook 2 mm, filler, needle, scissors.
Mouline thread (black and brown) for face design. Can replace with “Iris” from Gamma.
Other colors and yarn analogues may be used.
The whole toy is knitted in a spiral.
The height of the doll with the indicated materials is 26 cm.
Pens (2 parts).
Beige color:
1row. 5 sc into magic ring
2 row. 5 sc
3 row. 5 sc
We continue to knit the handle about 6-7 cm long.
Do not fill. Cut the thread. Hide the tips.
Similarly, tie the second handle.
Feet (2 parts)
We start with Alize Softy slippers:
1row. 6 sc into magic ring
2 row. 6 inc (12)
3 row. (sc, inc) x 6 (18)
4-6row. 18 sc
7 row. (sc, dec) x 6 (12)
8-9row. 12 sc
Change the thread to pink
10-12) 12 sc
Change the thread to white. We do not cut pink.
13-15) 12 sc
Change the thread to pink
16-18) 12 sc
Change the thread to white
19-21) 12 sc
Change the thread to pink
22-24) 12 sc
Change the thread to white
25-27) 12 sc + 3 sc to the middle of the leg (only for the first leg)
Cut the thread.
Similarly, we knit the second leg, but we do not cut the thread. Fill up legs.
Joint of the legs
We continue with a white thread.
From the second leg, knit 2ch to the first leg
28 row. On the first leg, knit 12sc + 2 sc according to ch. Next 12 sc by second leg + 2 sc by ch. (28 sc)
29 ROW. 9 sc, inc, 6 sc, inc, 11 sc (30 sc)
30 ROW. 6sc, inc, 2sc, 2 inc, 6 sc, 2inc, 3 sc, inc, 7sc. (36 sc).
31 ROW. 10 sc, 3 inc, 8 sc, 3 inc, 12 sc (42)
32 ROW. 13 sc, dec, 9sc, dec, 16 sc (40)
33 ROW. 12 sc, 2 dec, 8 sc, 2 dec, 12 sc (36)
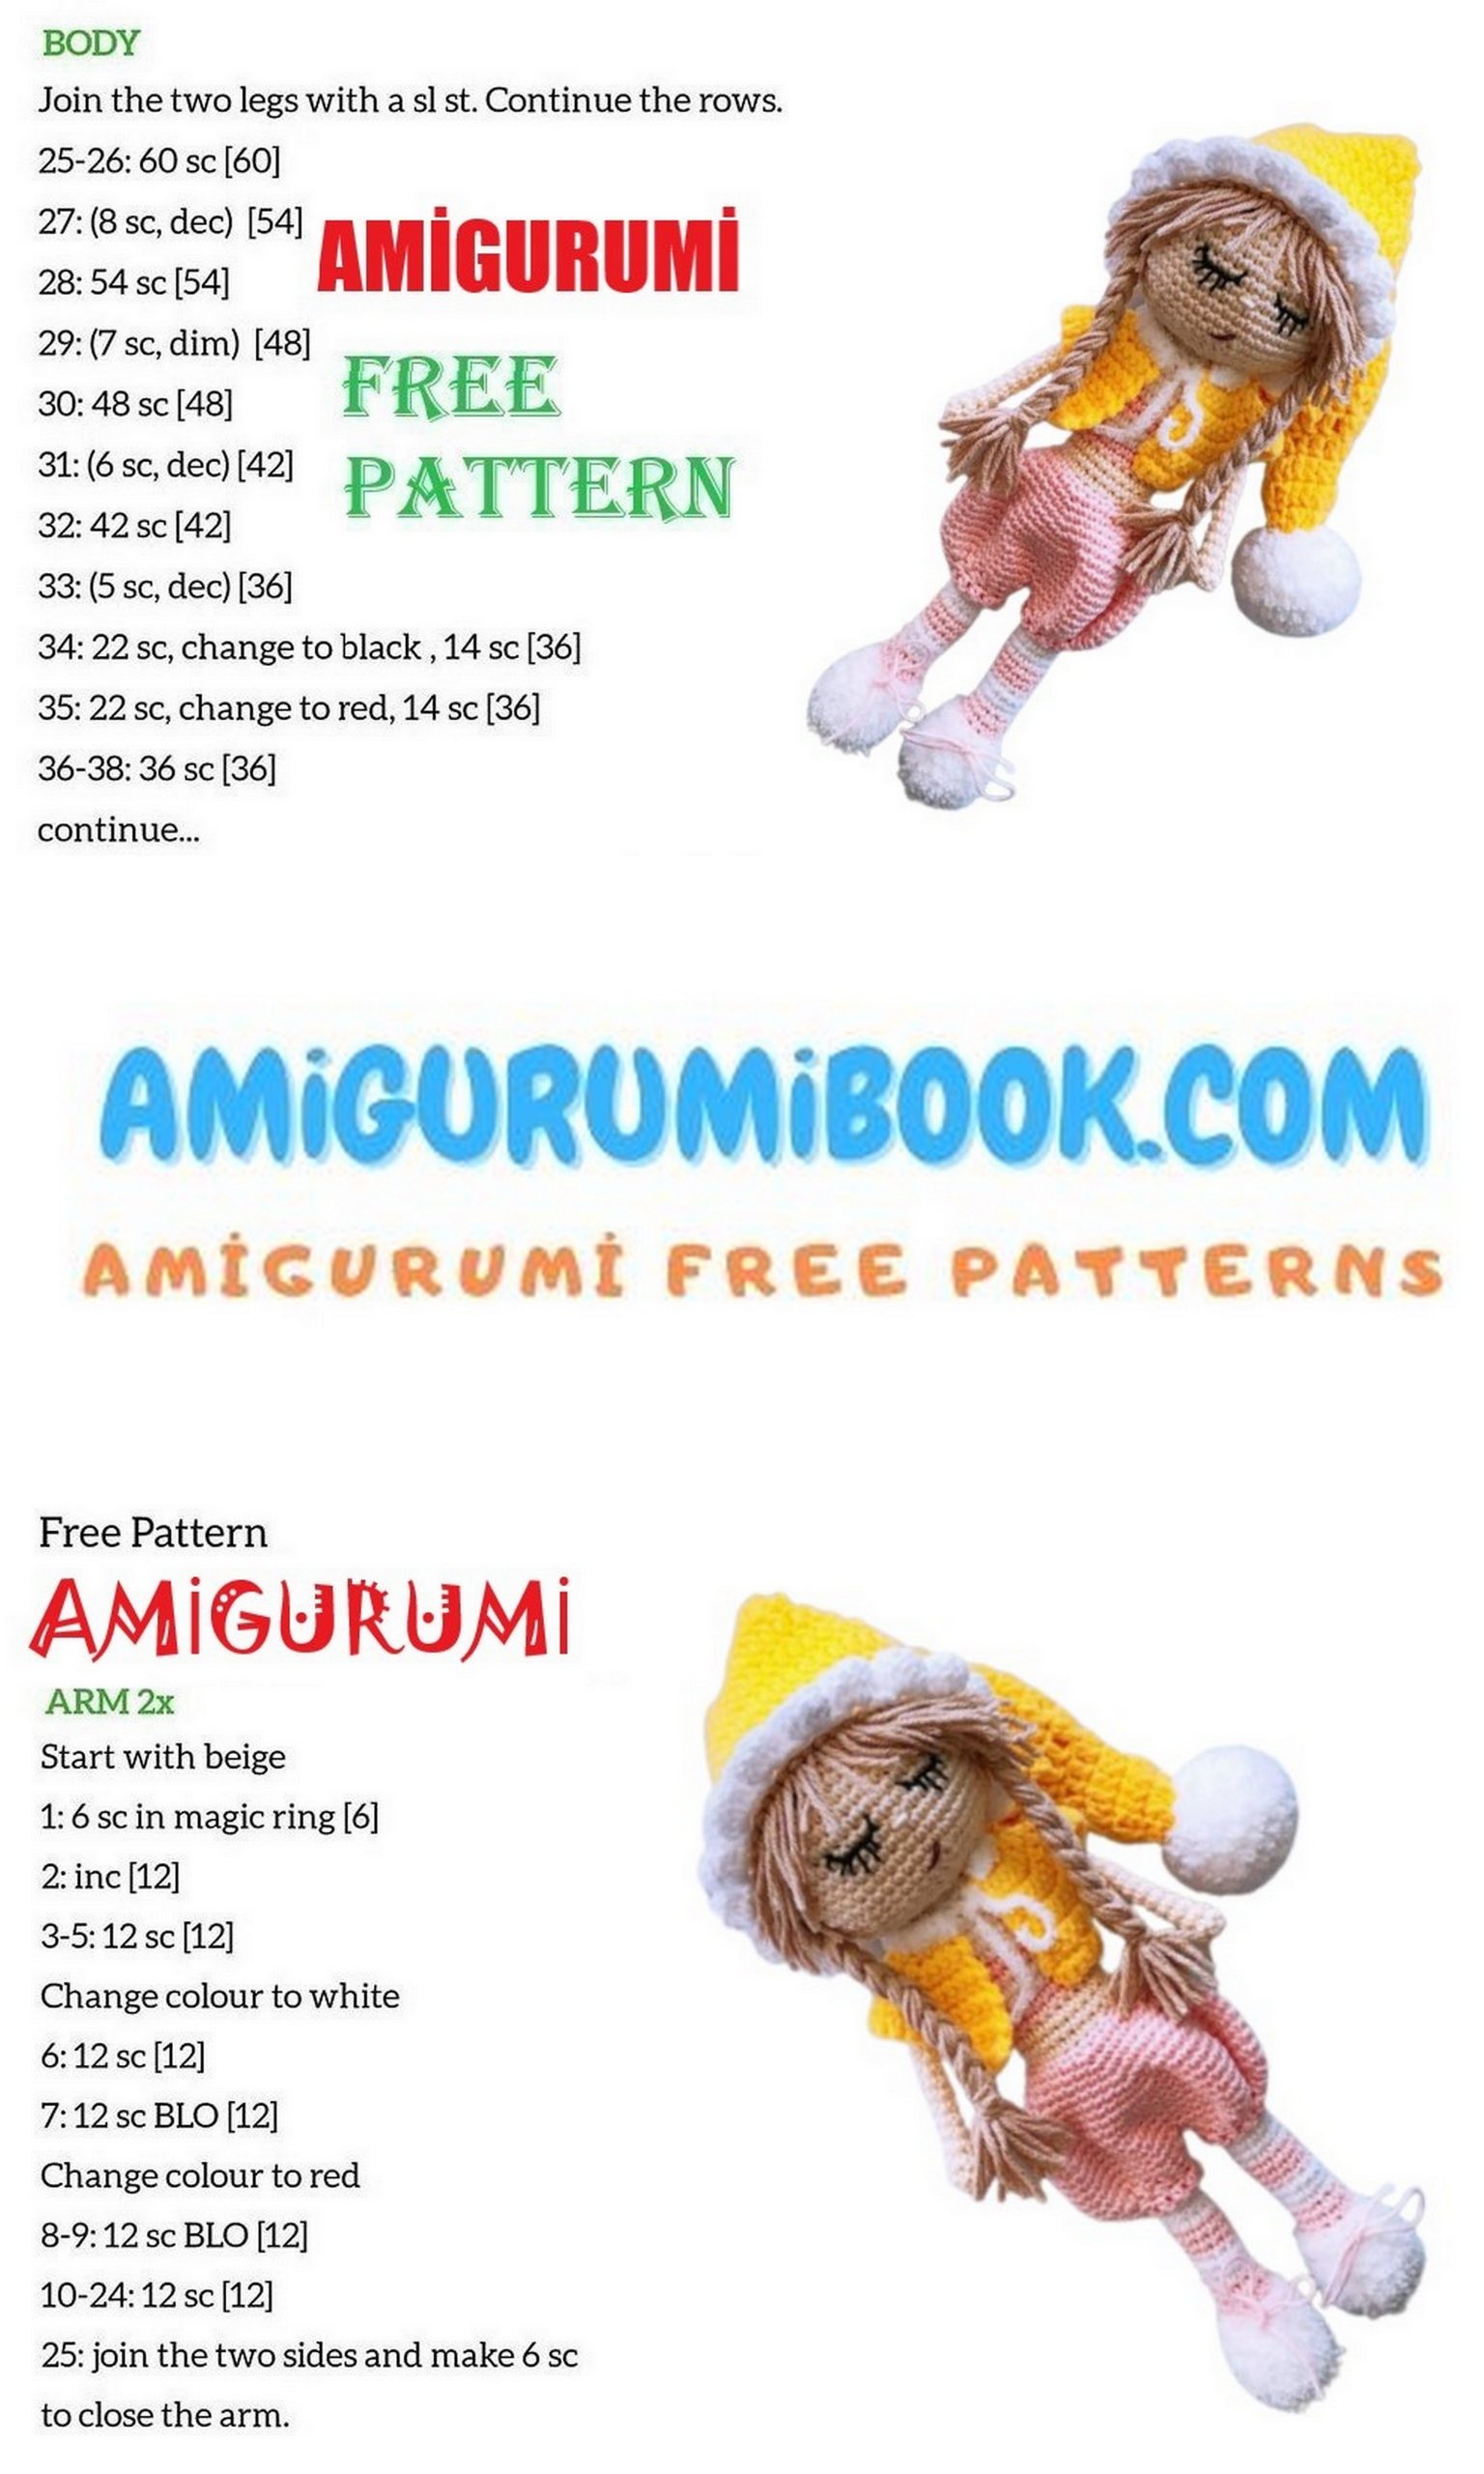
34 ROW. 6sc, dec, 4 sc, dec, 7 sc, dec, 2 sc, dec, 9 sc (32)
35 ROW. 10 sc, dec, 2 sc, 2 dec, 2 sc, dec, 10sc (28)
36 row. 9 sc, dec, 1sc, 2 dec, 1sc, dec, 9 sc (24) + 11 sc to the back
Change the thread to flesh color.
Fill up.
Sewing threads, make a couple of stitches to form the buttocks.
37 ROW. 24 sc (bodily)
38 row. 24 sc for the rear hsc
39-40row. 24 sc
We turn to the shorts.
Take a pink thread and attach to 38row. behind the front hsc
1row. 24sc
2 row. (3sc. Inc) x 6 (30)
3 row. (4 sc. Inc) x 6 (36)
4 row. (5 sc. Inc) x 6 (42)
5 row. (6 sc. Inc) x 6 (48)
6 row. (7 sc. Inc) x 6 (54)
7 row. (8 sc. Inc) x 6 (60)
8 row. (9 sc. Inc) x 6 (66)
9-13row. 66 sc
We form a trouser leg.
14 row. Knit 33 sc + 3ch, attach to the opposite side short between legs (in 1 sc 13th row) (36 sc)
15 row. 36 sc
16 row. (4sc, dec) x6 (30)
17 ROW. (1sc, dec) x10 (20)
18 row. decx10 (10)
19 row. 2ch lift. 10 dc. Sl-st. Thread cut
Similarly tie the second leg.
Attach the pink thread, knit
33 sc + 3 sc in the same air chain.
We continue to knit the body.
To the 40th row we attach the pink thread
41-42row. 24 sc
Change the thread to white
43-44row. 24 sc
Change the thread to pink
45-46row. 24 sc
Change the thread to white
47-48row. 24 sc
We knit handles.
We continue to knit with a white thread
1row. 6 sc, attach the handle, 5 sc on the arm. 12sc across the chest.
Attach the handle, 5 sc on the arm. Next 6 sc on the back (34)
2 row. 6 sc, 2dec, 13sc, 2dec, 7 sc (30)
3 row. (3sc, dec) x6 (24)
4 row. (1sc, dec) x8 (16)
5 row. Dec x 8 (8)
Cut the thread. Fill as you knit Getting to the head

Take a beige thread:
1row. 6 sc
2 row. 6 inc (12)
3 row. (1 sc. Inc) x 6 (18)
4 row. (2 sc. Inc) x 6 (24)
5 row. (3 sc. Inc) x 6 (30)
6 row. (4 sc. Inc) x 6 (36)
7 row. (5 sc. Inc) x 6 (42)
8 row. (6 sc. Inc) x 6 (48)
9 row. (7 sc. Inc) x 6 (54)
10-18row. 54 sc
19 row. (7sc. Dec) x6 (48)
20 ROW. (6 sc. Dec) x6 (42)
21 ROW. (5 sc. Dec) x6 (36)
22 row. (4 sc. Dec) x6 (30)
23 ROW. (3 sc. Dec) x6 (24)
24 ROW. (Sc, dec) x8 (16)
25 ROW. Dec x 8 (8)
Leave a long thread for sewing.
Stuff your head.
Embroider a little face. Sew the head to the body.
Blouse.
In yellow.
We knit in rotary rows. (Do not forget about the lifting loop)
Dial 25 ch.
In the second loop from the hook 3sc, inc, 3 sc, inc, 8 sc, inc, 3 sc, inc, 3 sc. (28) turn
We knit 4 rows, making one increase over each increase previous row. (ragged lines)
We form a sleeve.
We knit sc on the front shelf of the blouse. Sleeve not knit. We connect in front of the back. We knit the back of sc to ragged line. And in the same way we connect the back to the front shelf and tie the shelf.
Turn. And already without changes we knit 5-6 rows to the desired length blouses.
If desired, you can make a collar harness.
Pompon.
Take Softy
1row. 6 sc
2 row. 6 i nc (12)
3 row. (1 sc. Inc) x 6 (18)
4 row. (2 sc. Inc) x 6 (24)
5-7row. 24 sc
8 row. (2sc, dec) x 6 (18)
9 row. (Sc, dec) x 6 (12)
To fill.
Cap.
In yellow.
Dial a chain of 58 ch
Pick the length you need.
We close the chain in the ring Sl-st
We knit 1 row 58 sc
Next 4-5 rows 58 dc. (Do not forget to loop in each row lifting)
Then we knit a cap of the right size, making decreases on the sides.
We knit a cap frill.
We attach the white thread and knit 58 sc for the front hsc.
Ryushechki.
2ch + 5 dc in one loop, dec
2ch + 5 dc in one loop, dec ..
We continue along the edge of the cap. Can be done like everything else diameter, just the front of the cap.
Sew the pompom to the cap.
Getting to the formation of hairstyles.
Cut the hair.
We need short hair for bangs. And long for pigtails. For convenience, you can wrap yarn on cardboard and cut threads of the same length.
We attach each thread for the remaining rear hsc yellow cap.
Sew a cap with a haircut to the head.
We dress a blouse.
Our doll is ready!