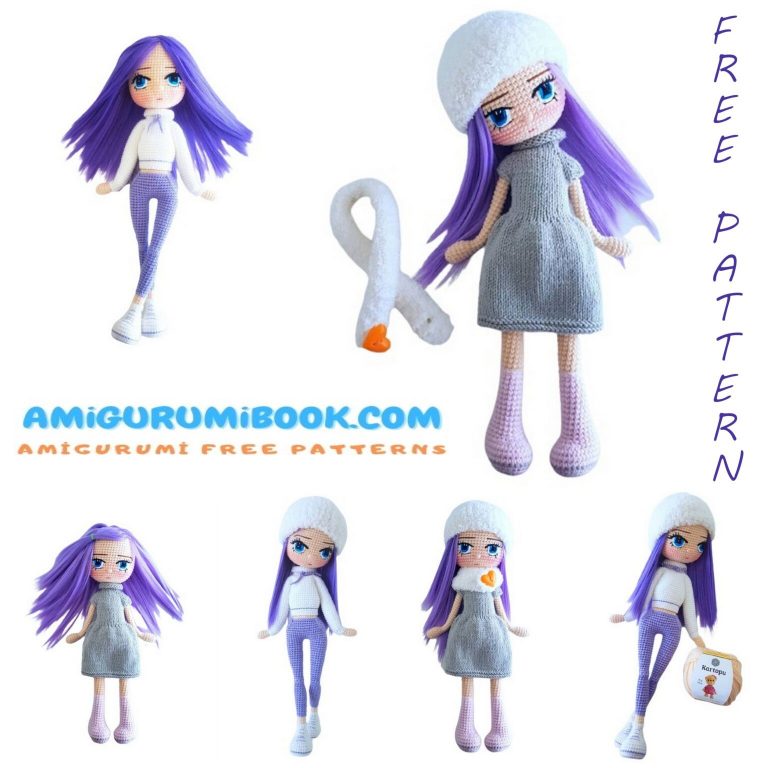
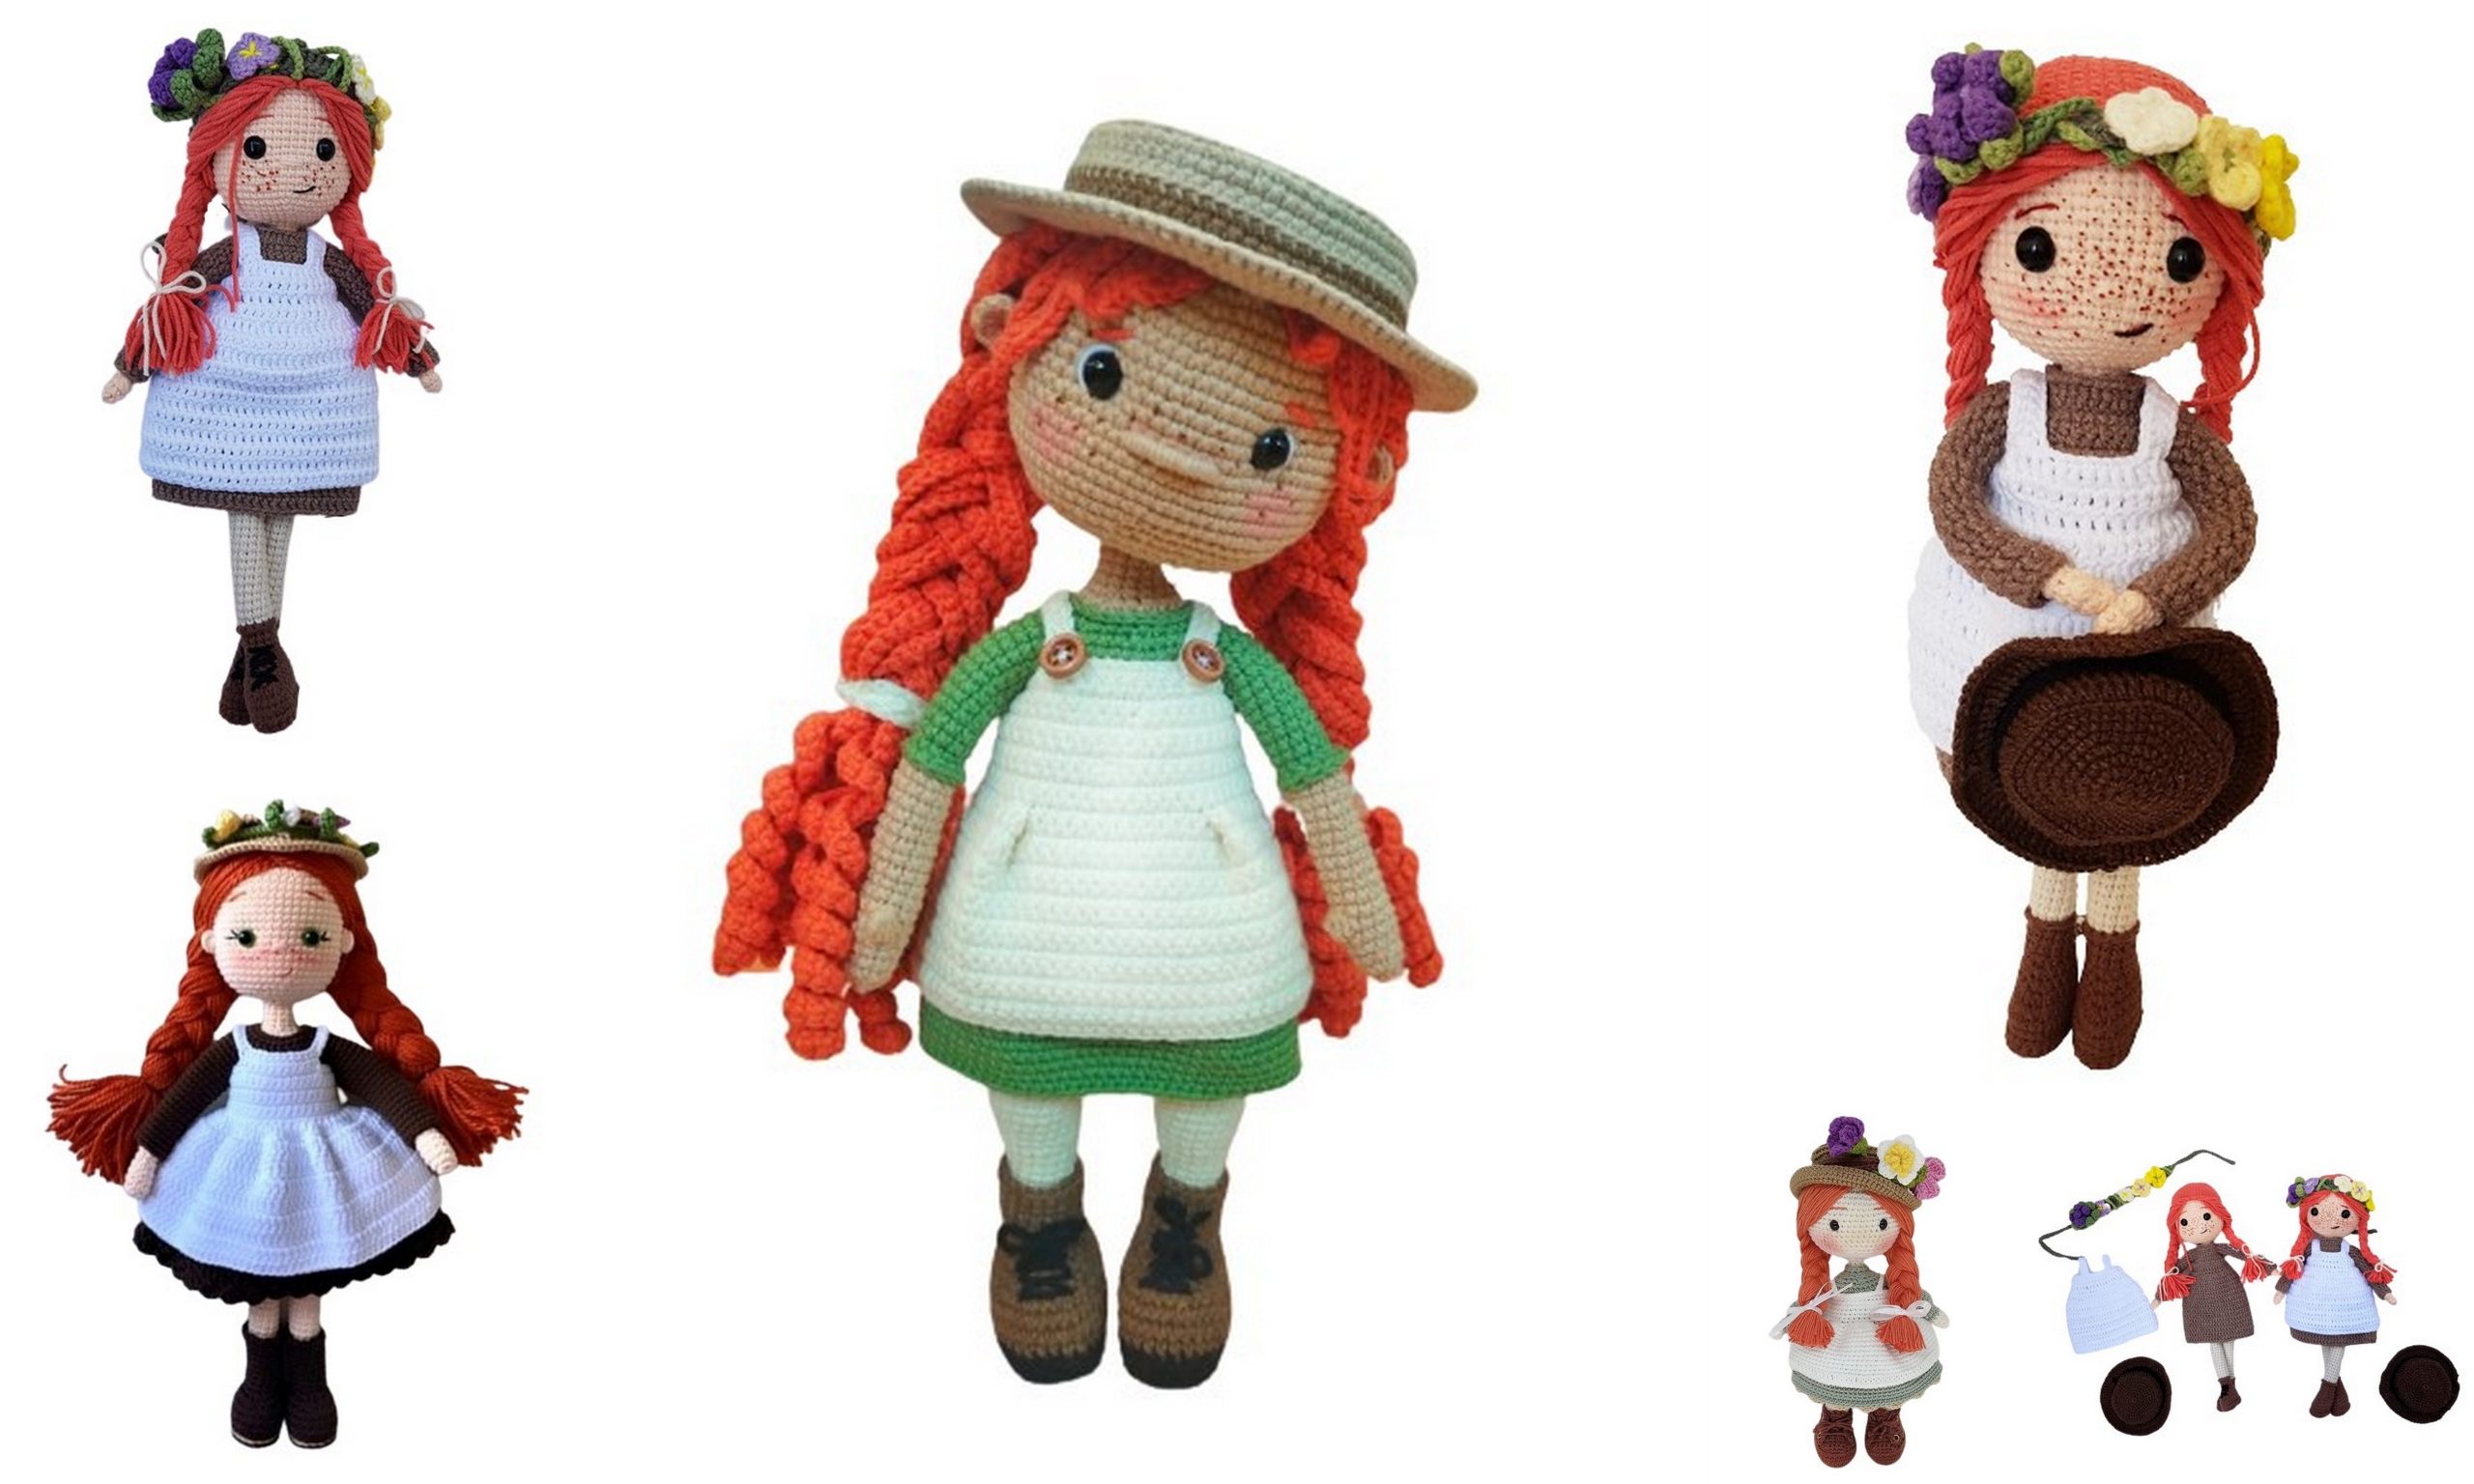
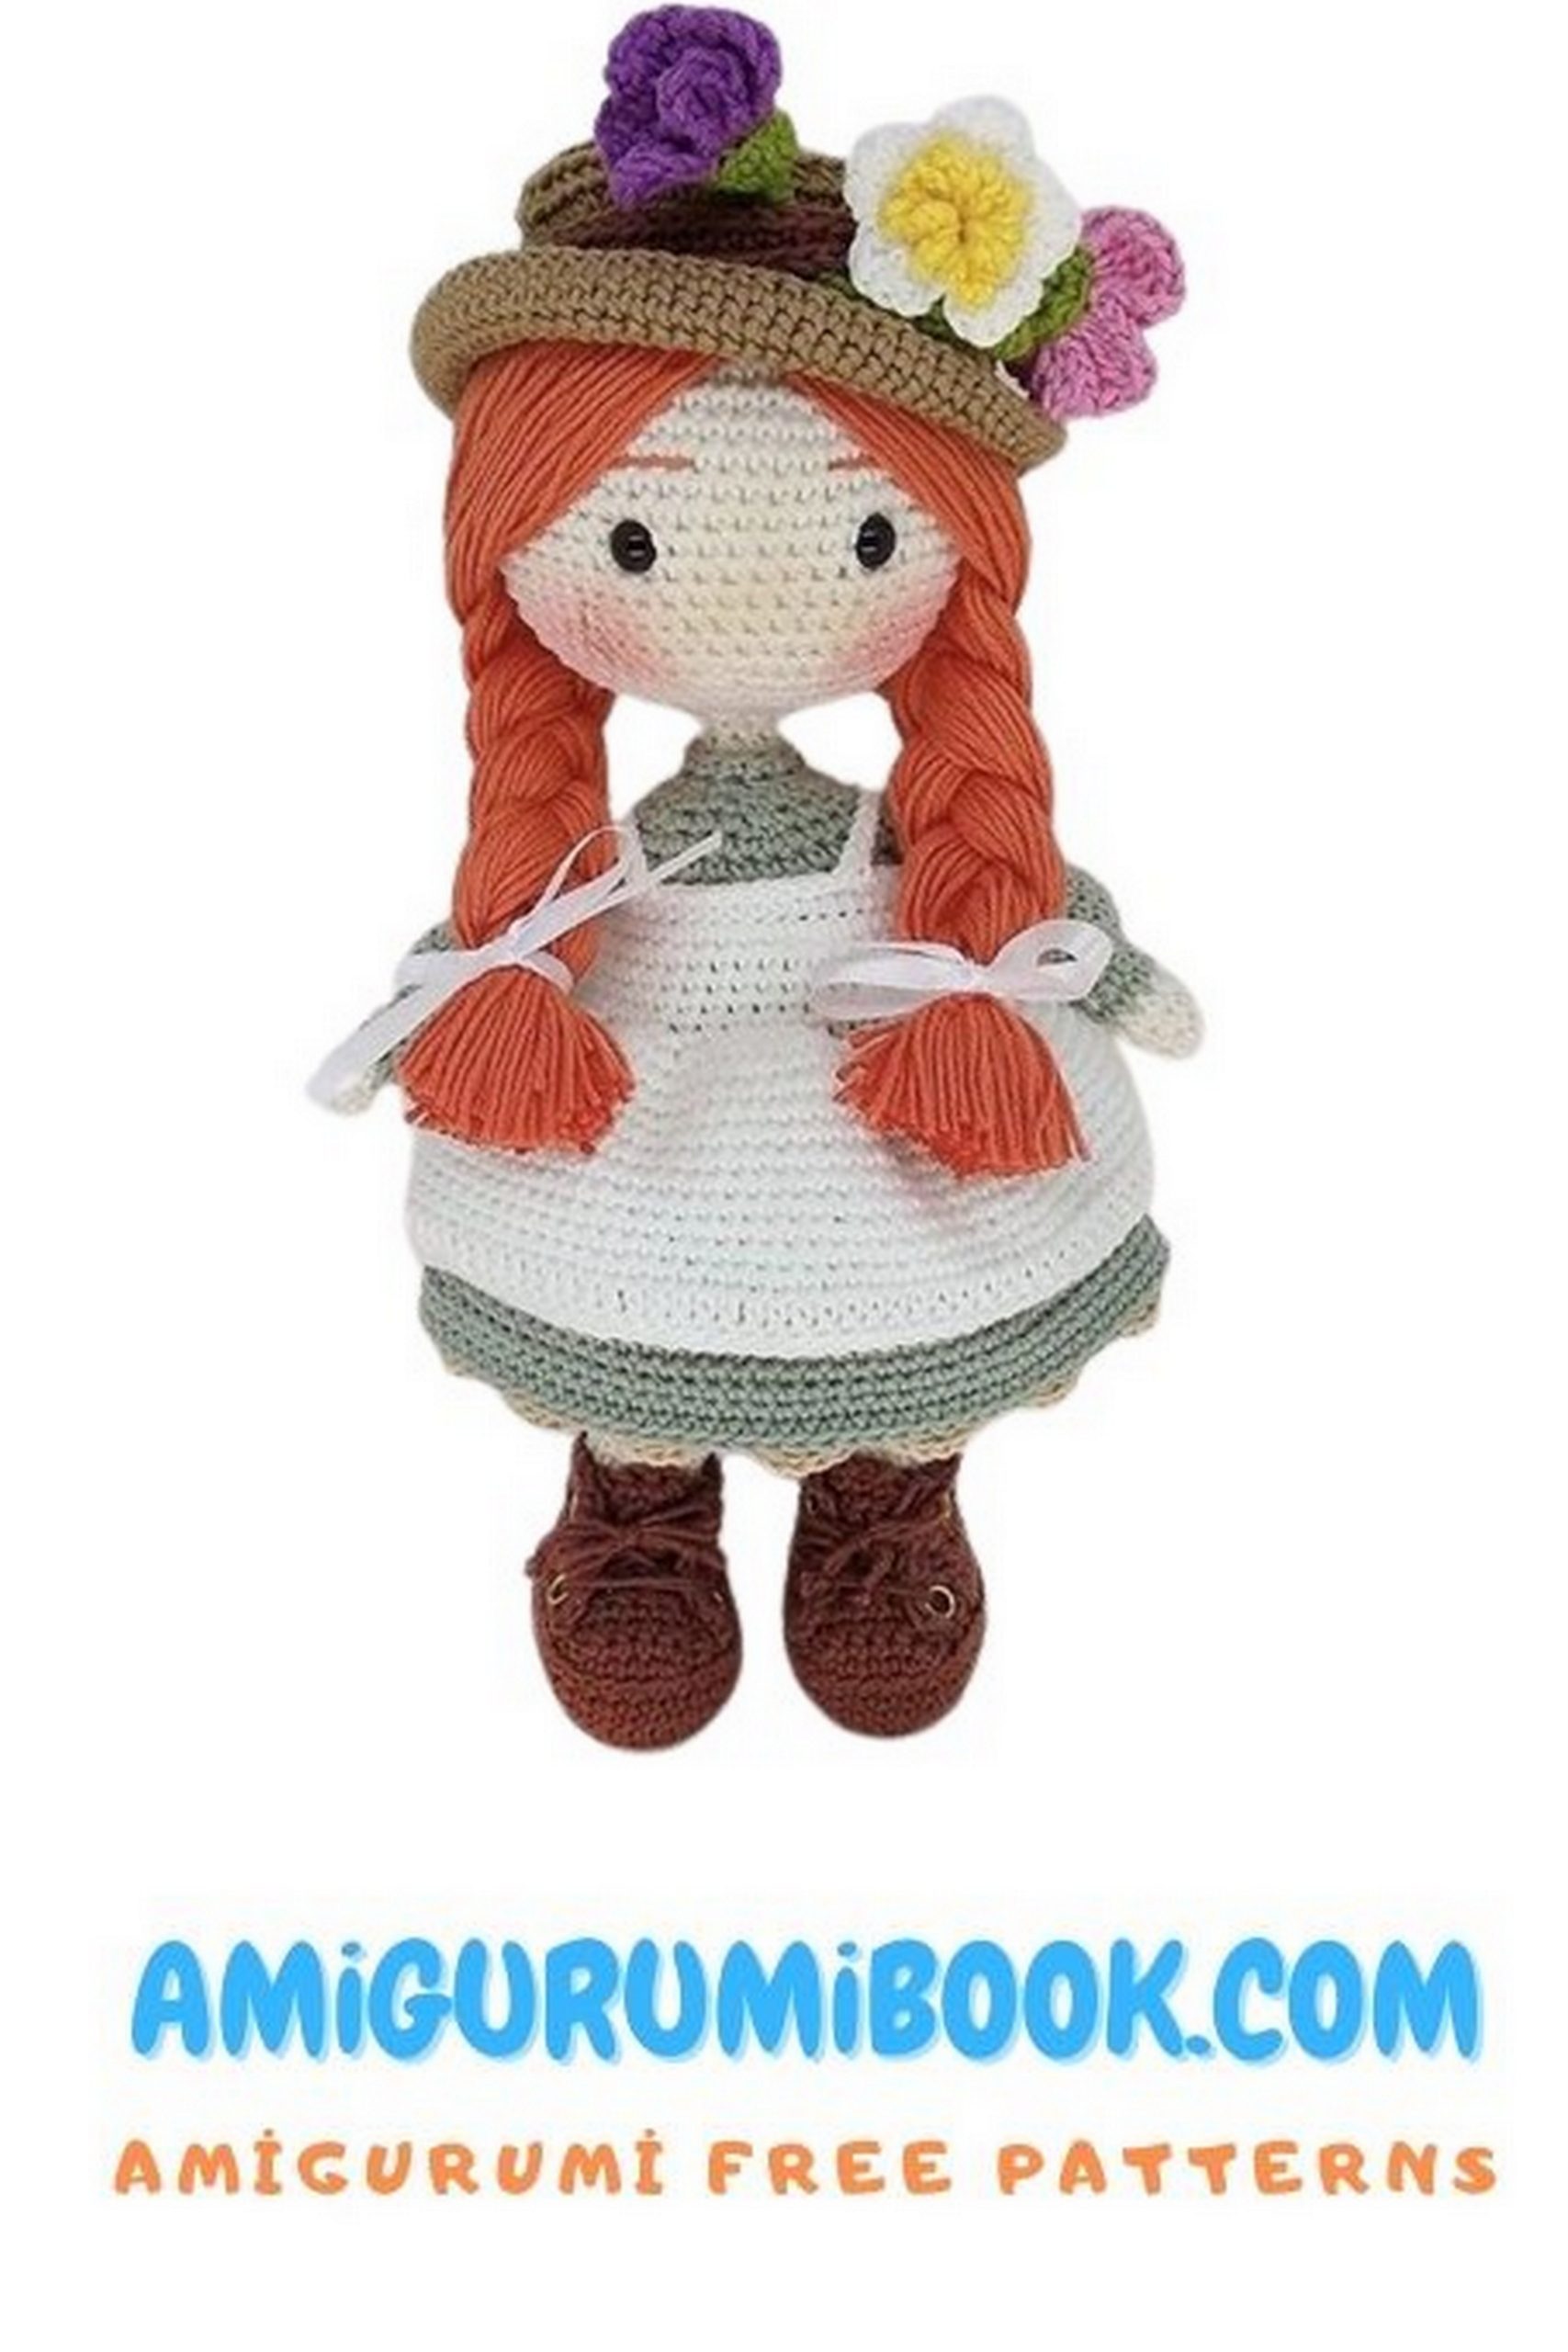
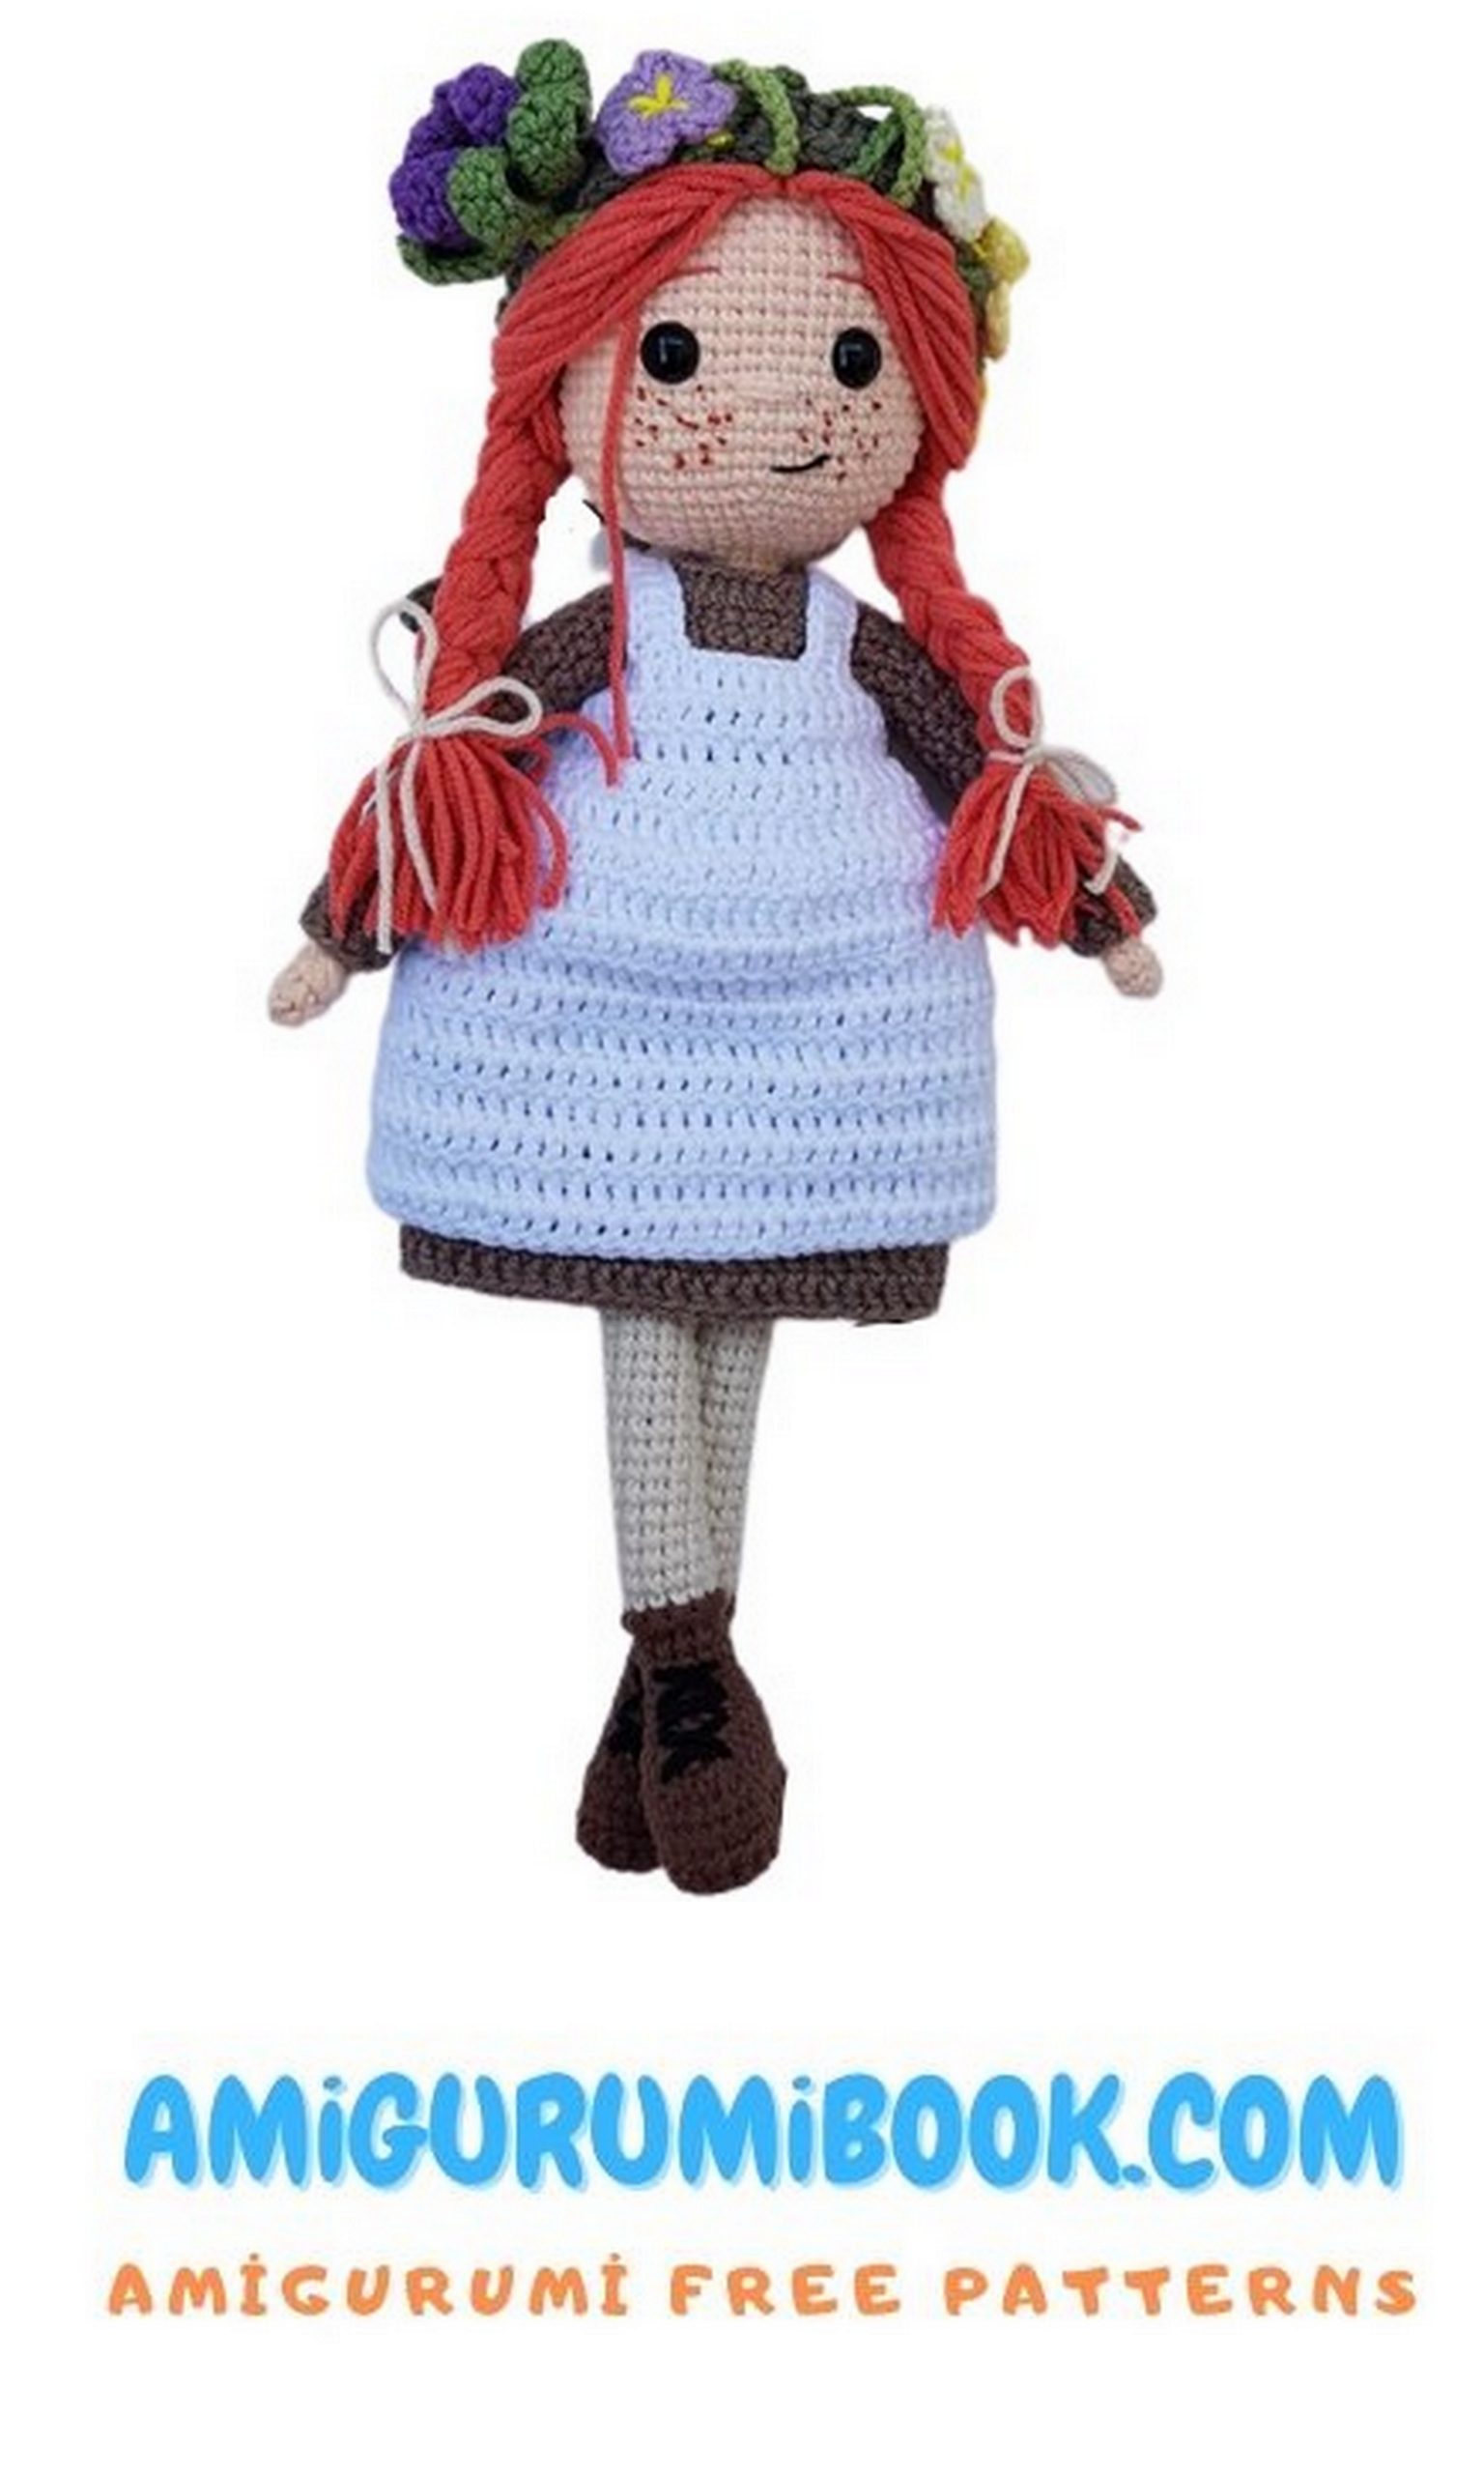
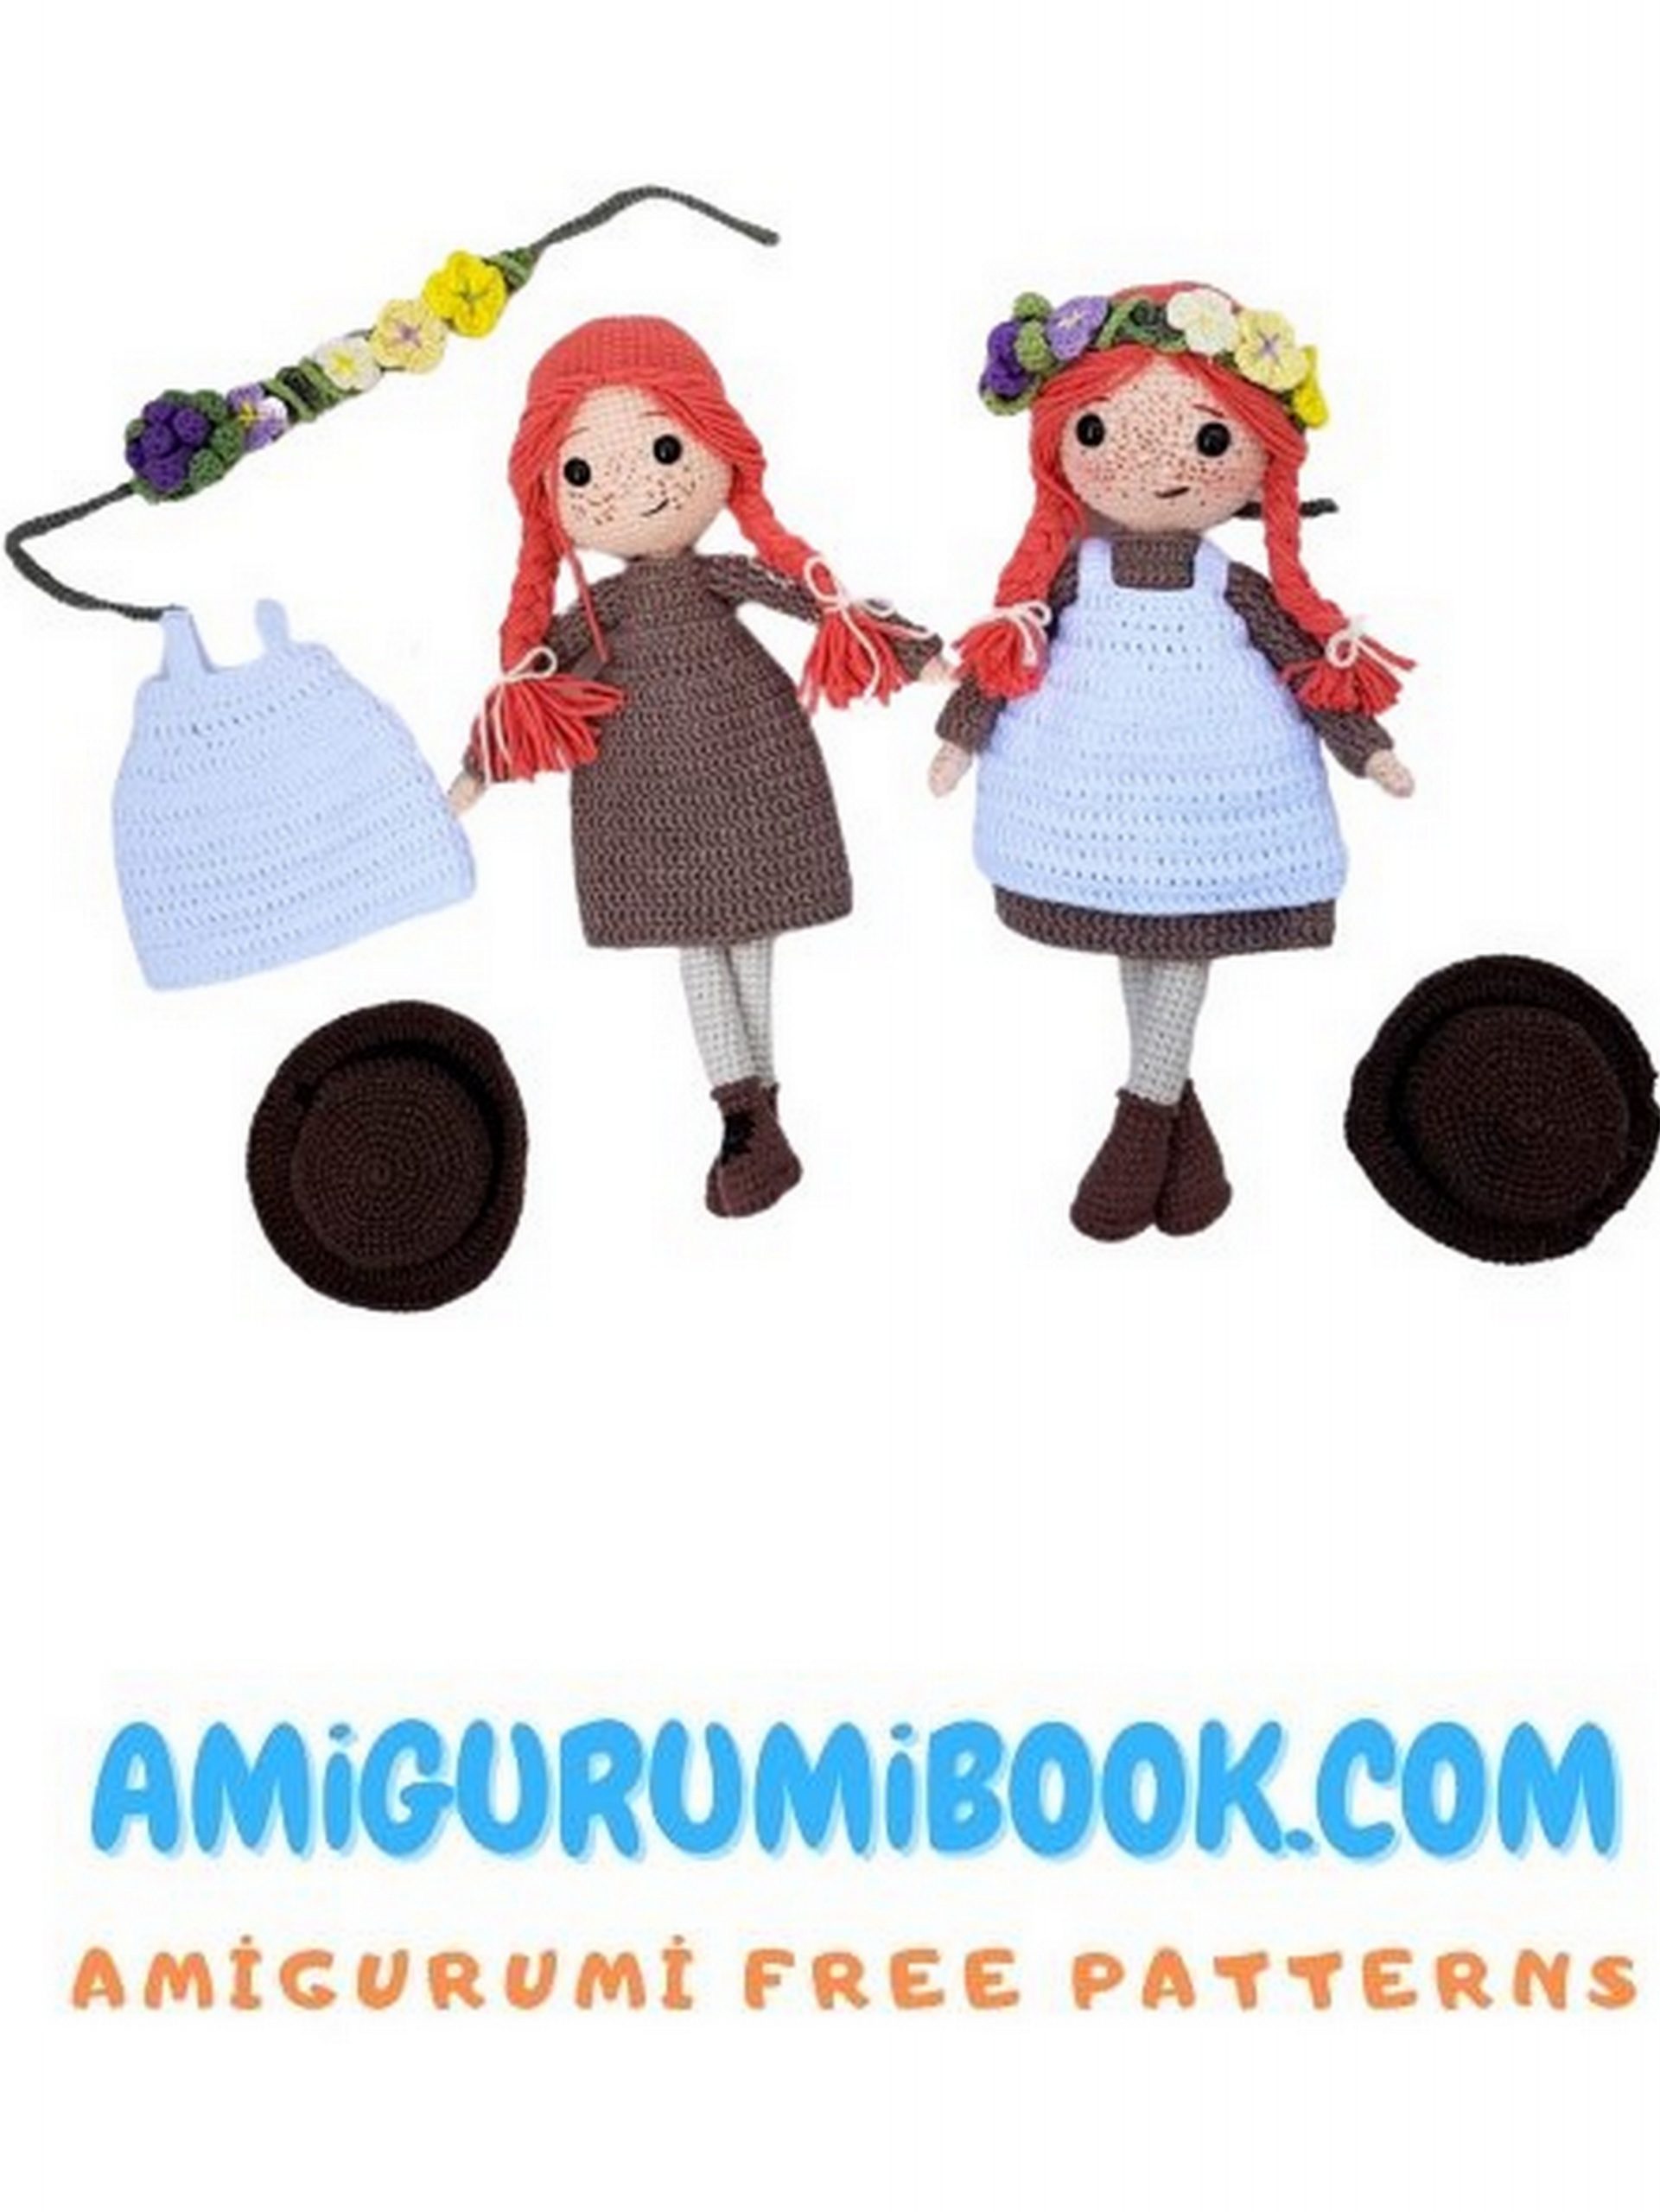
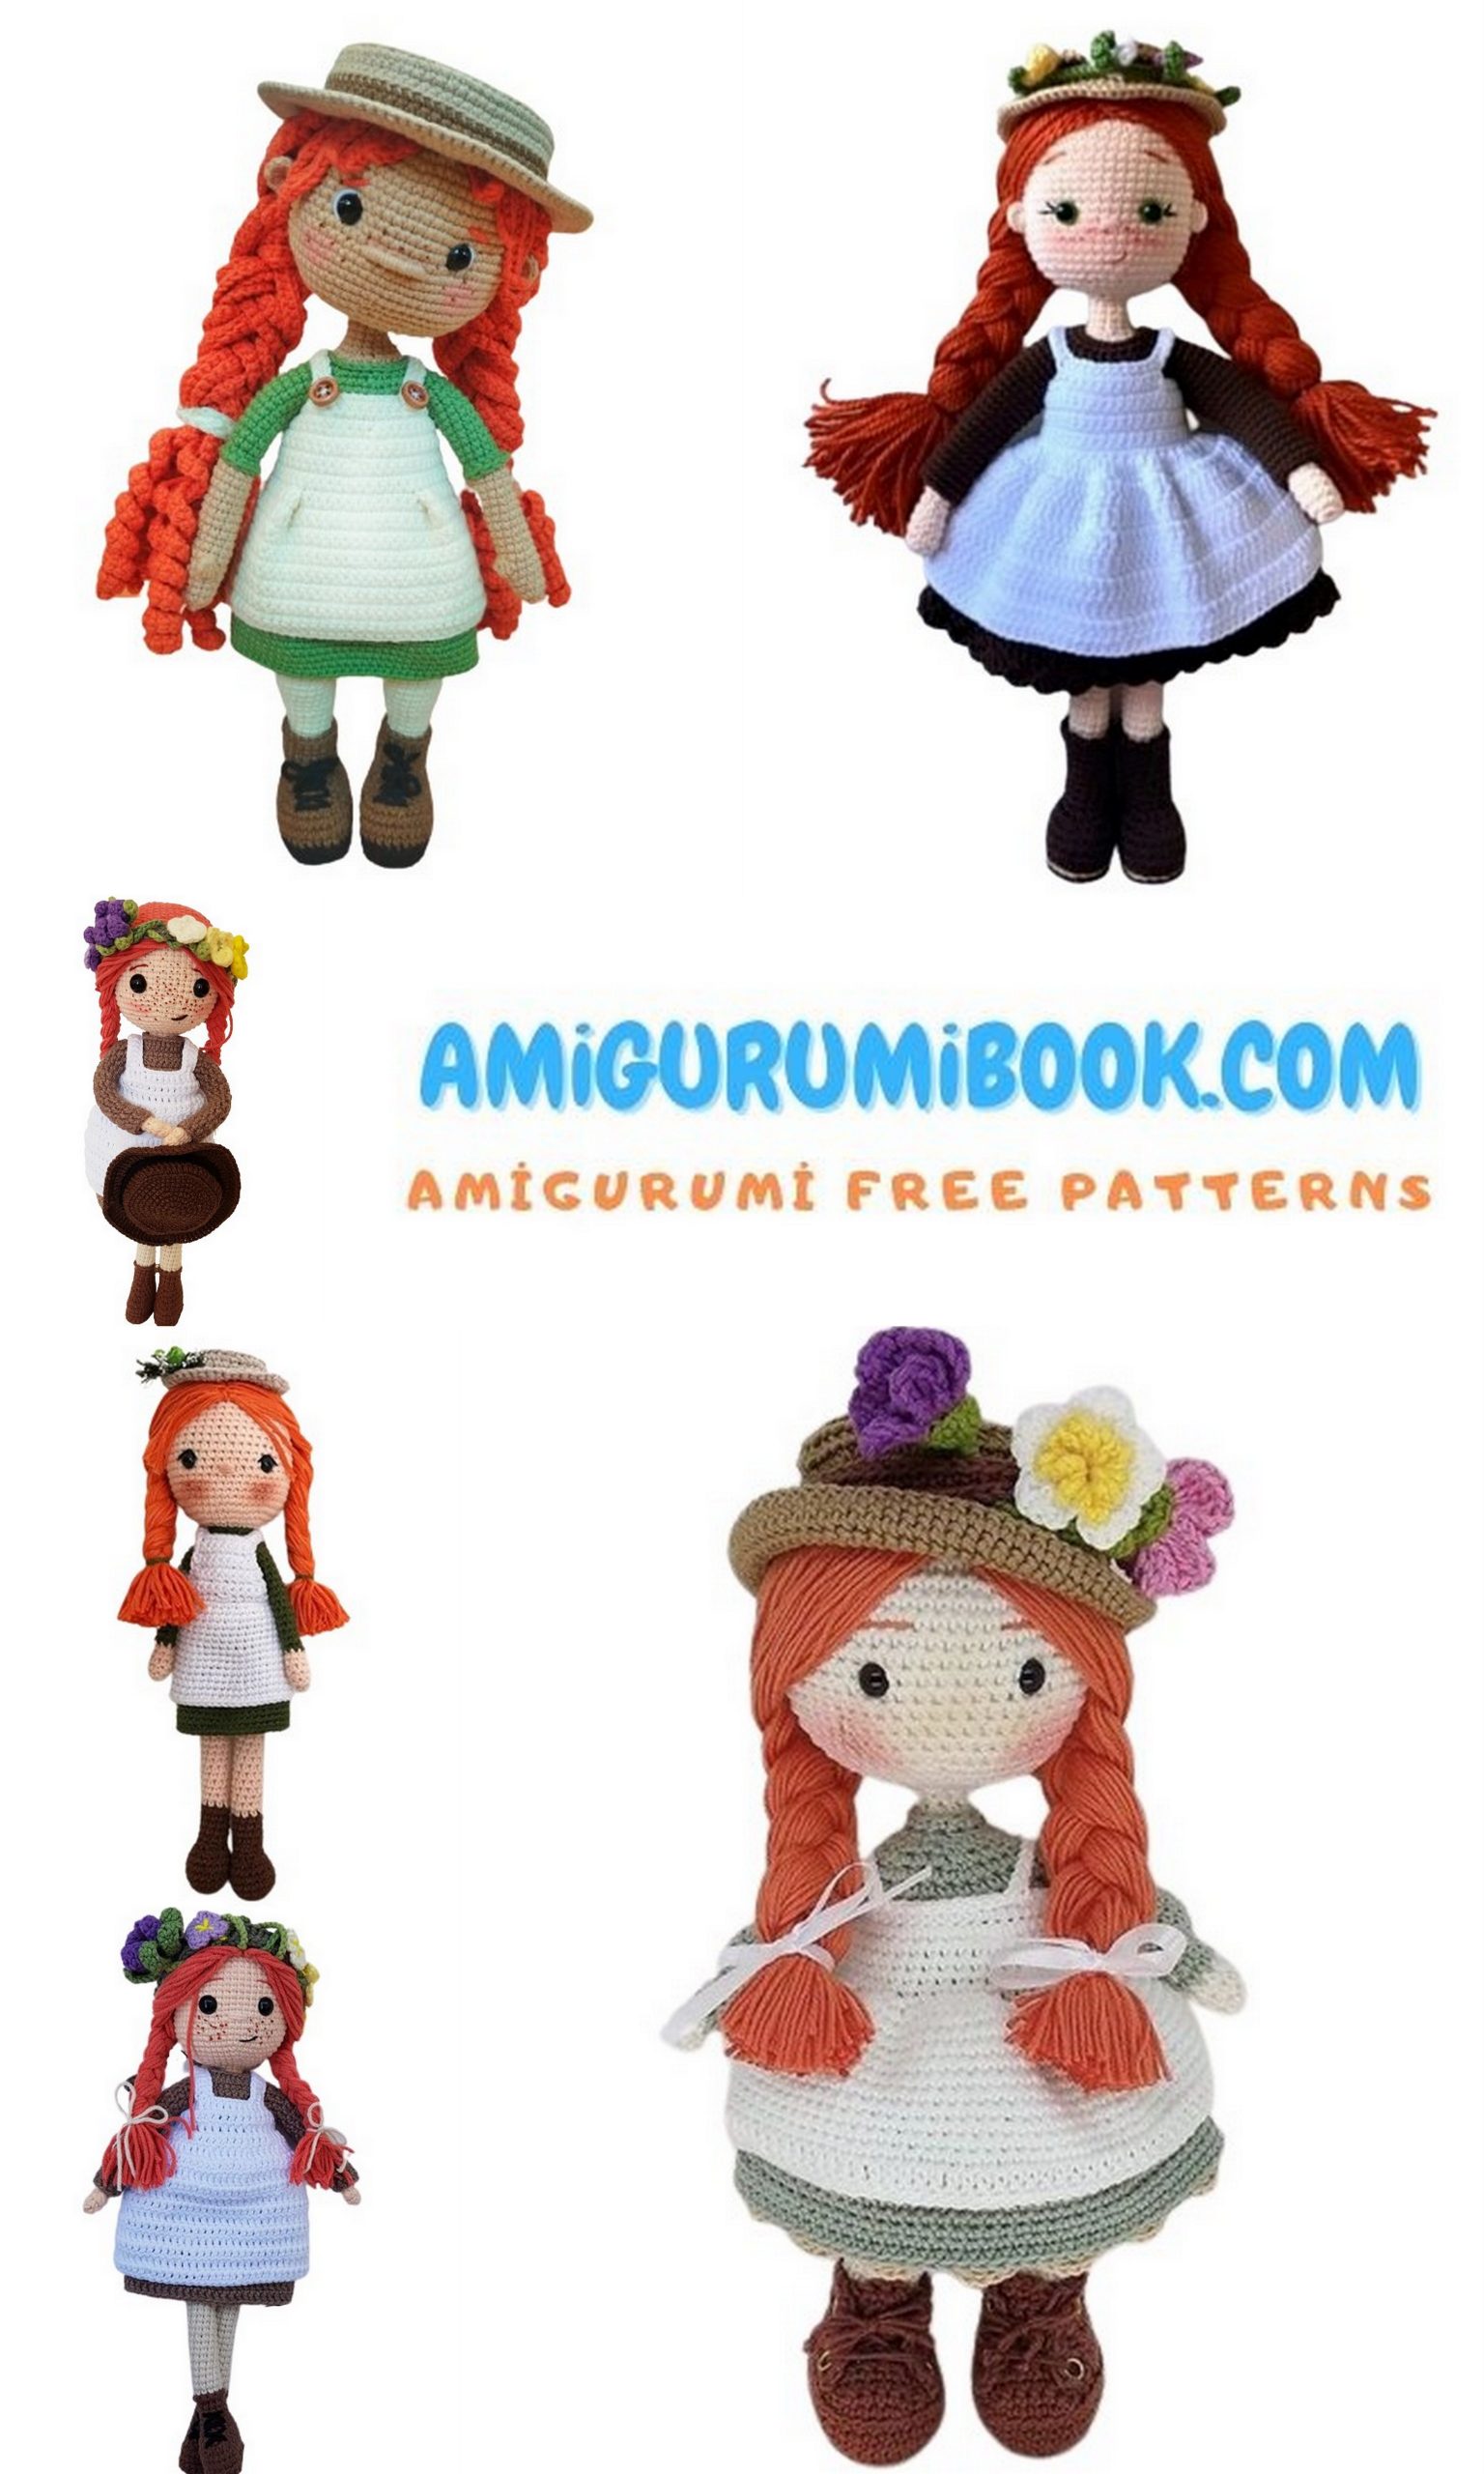
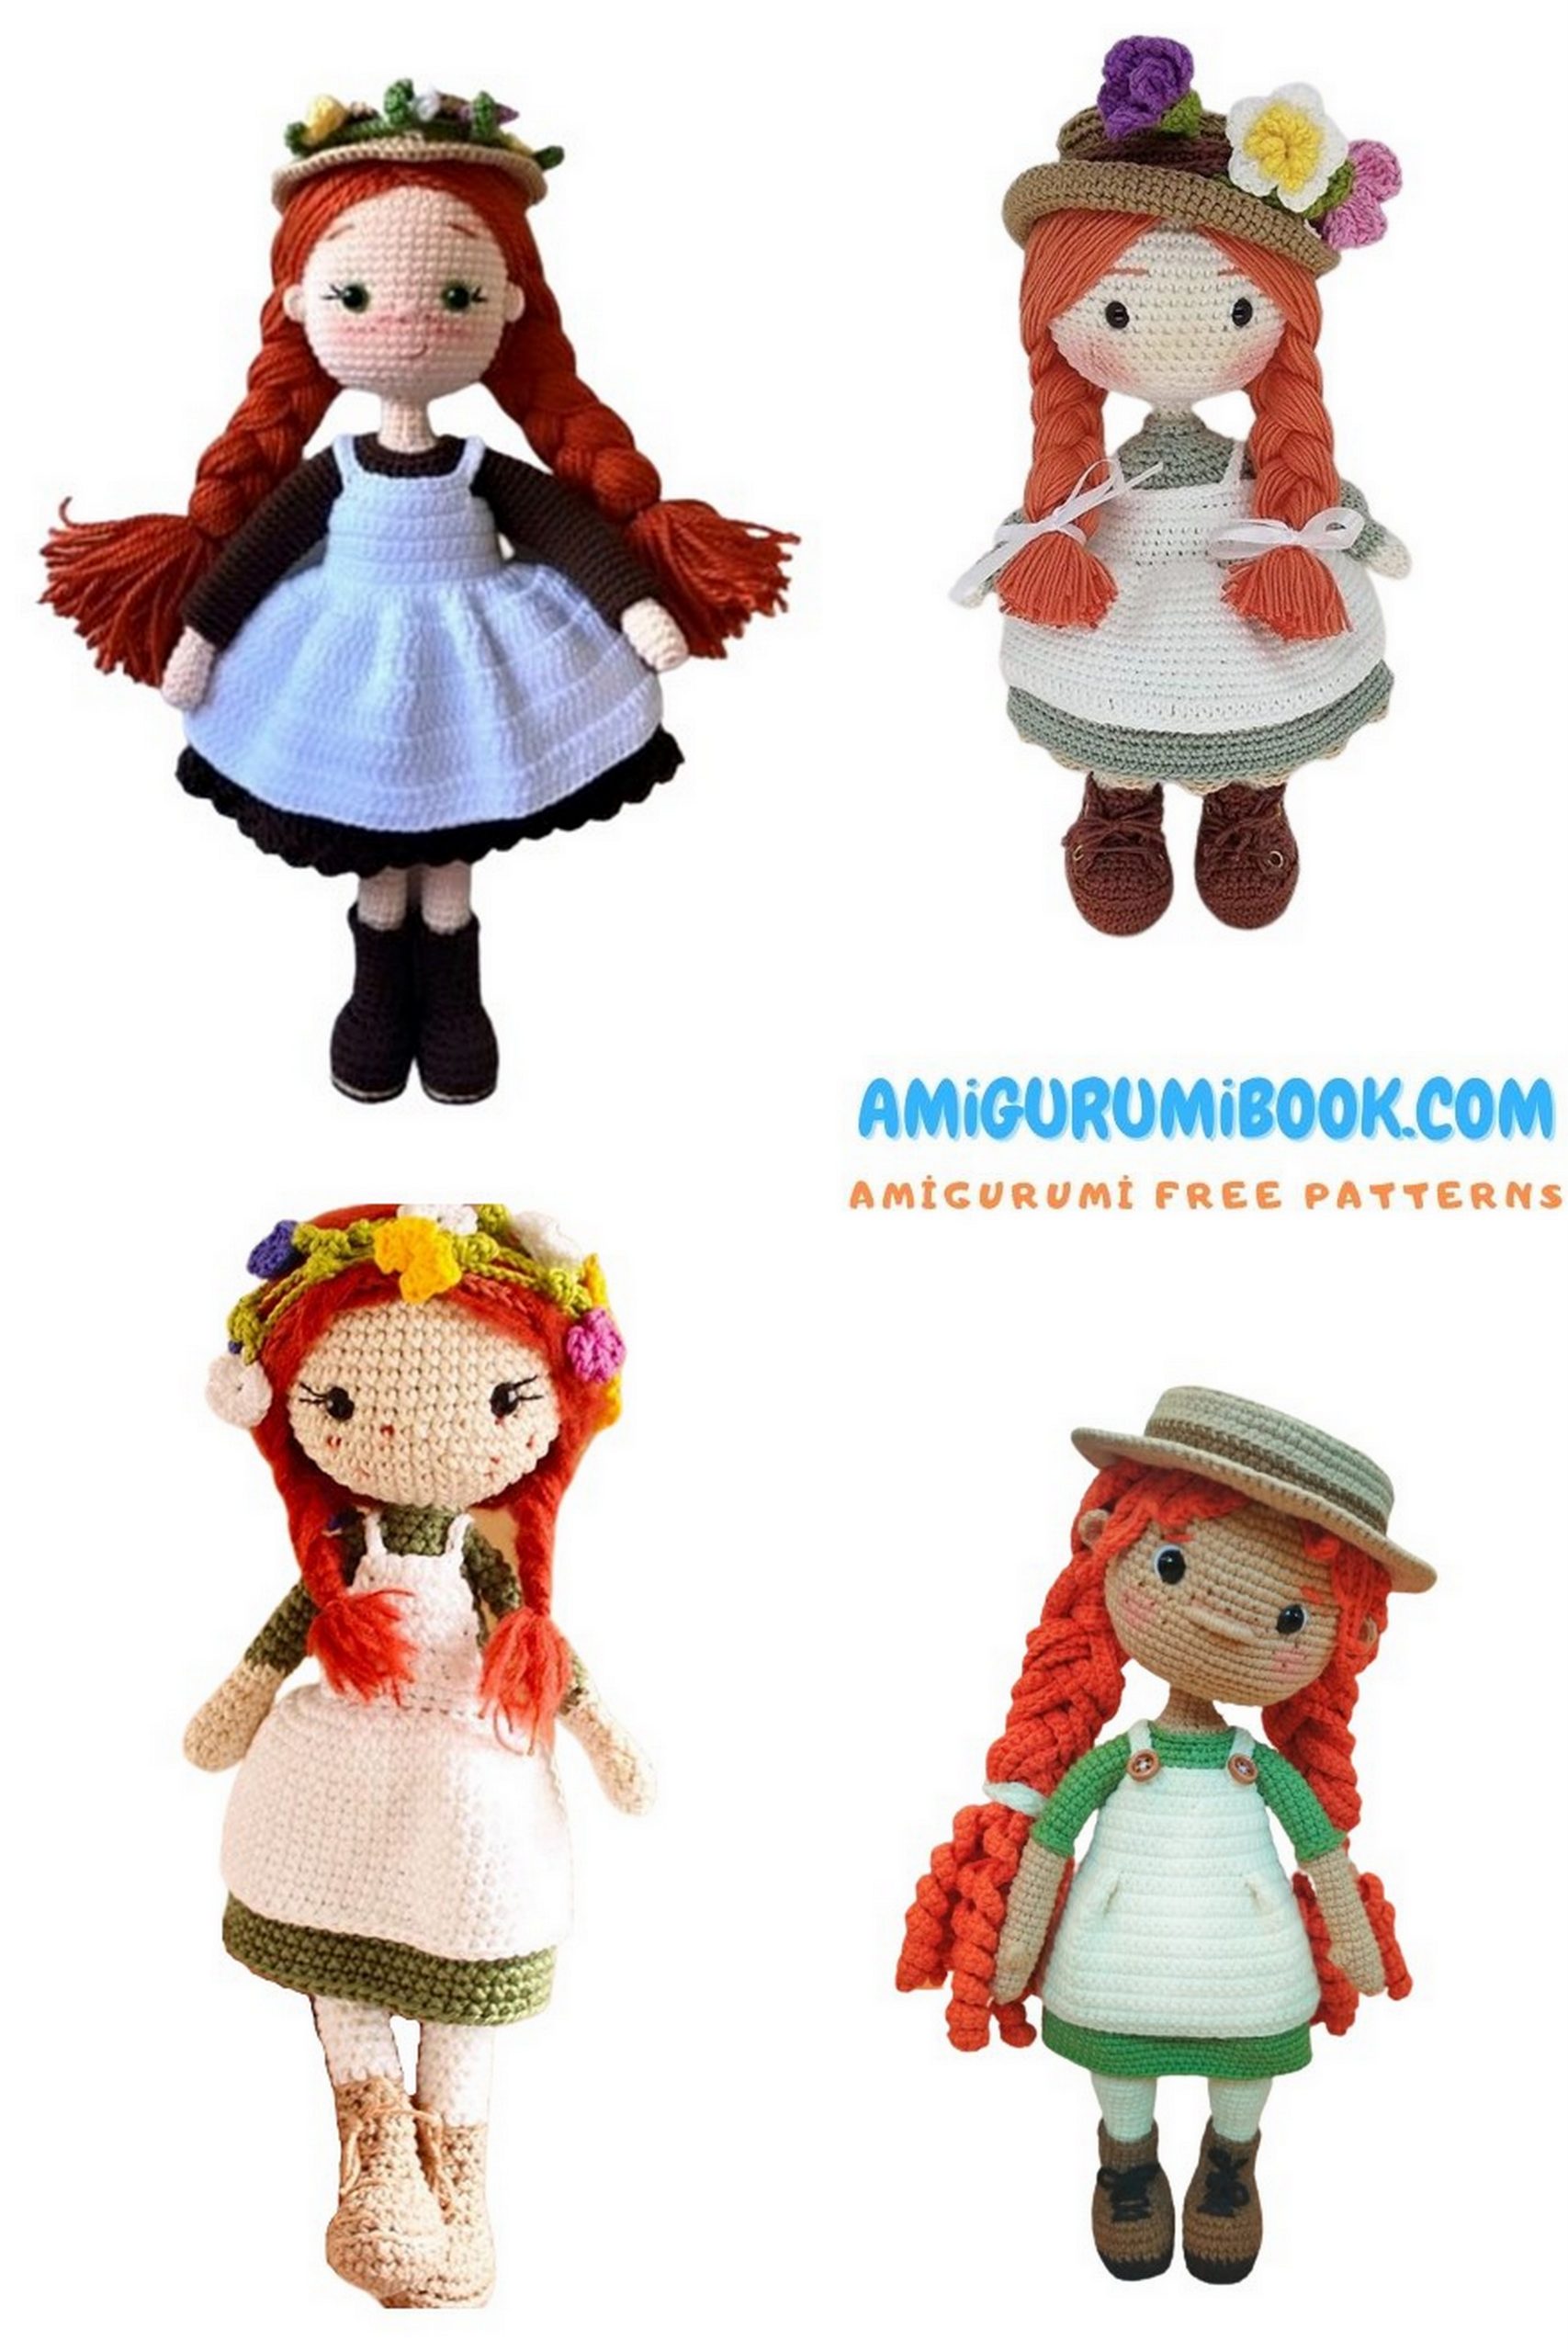
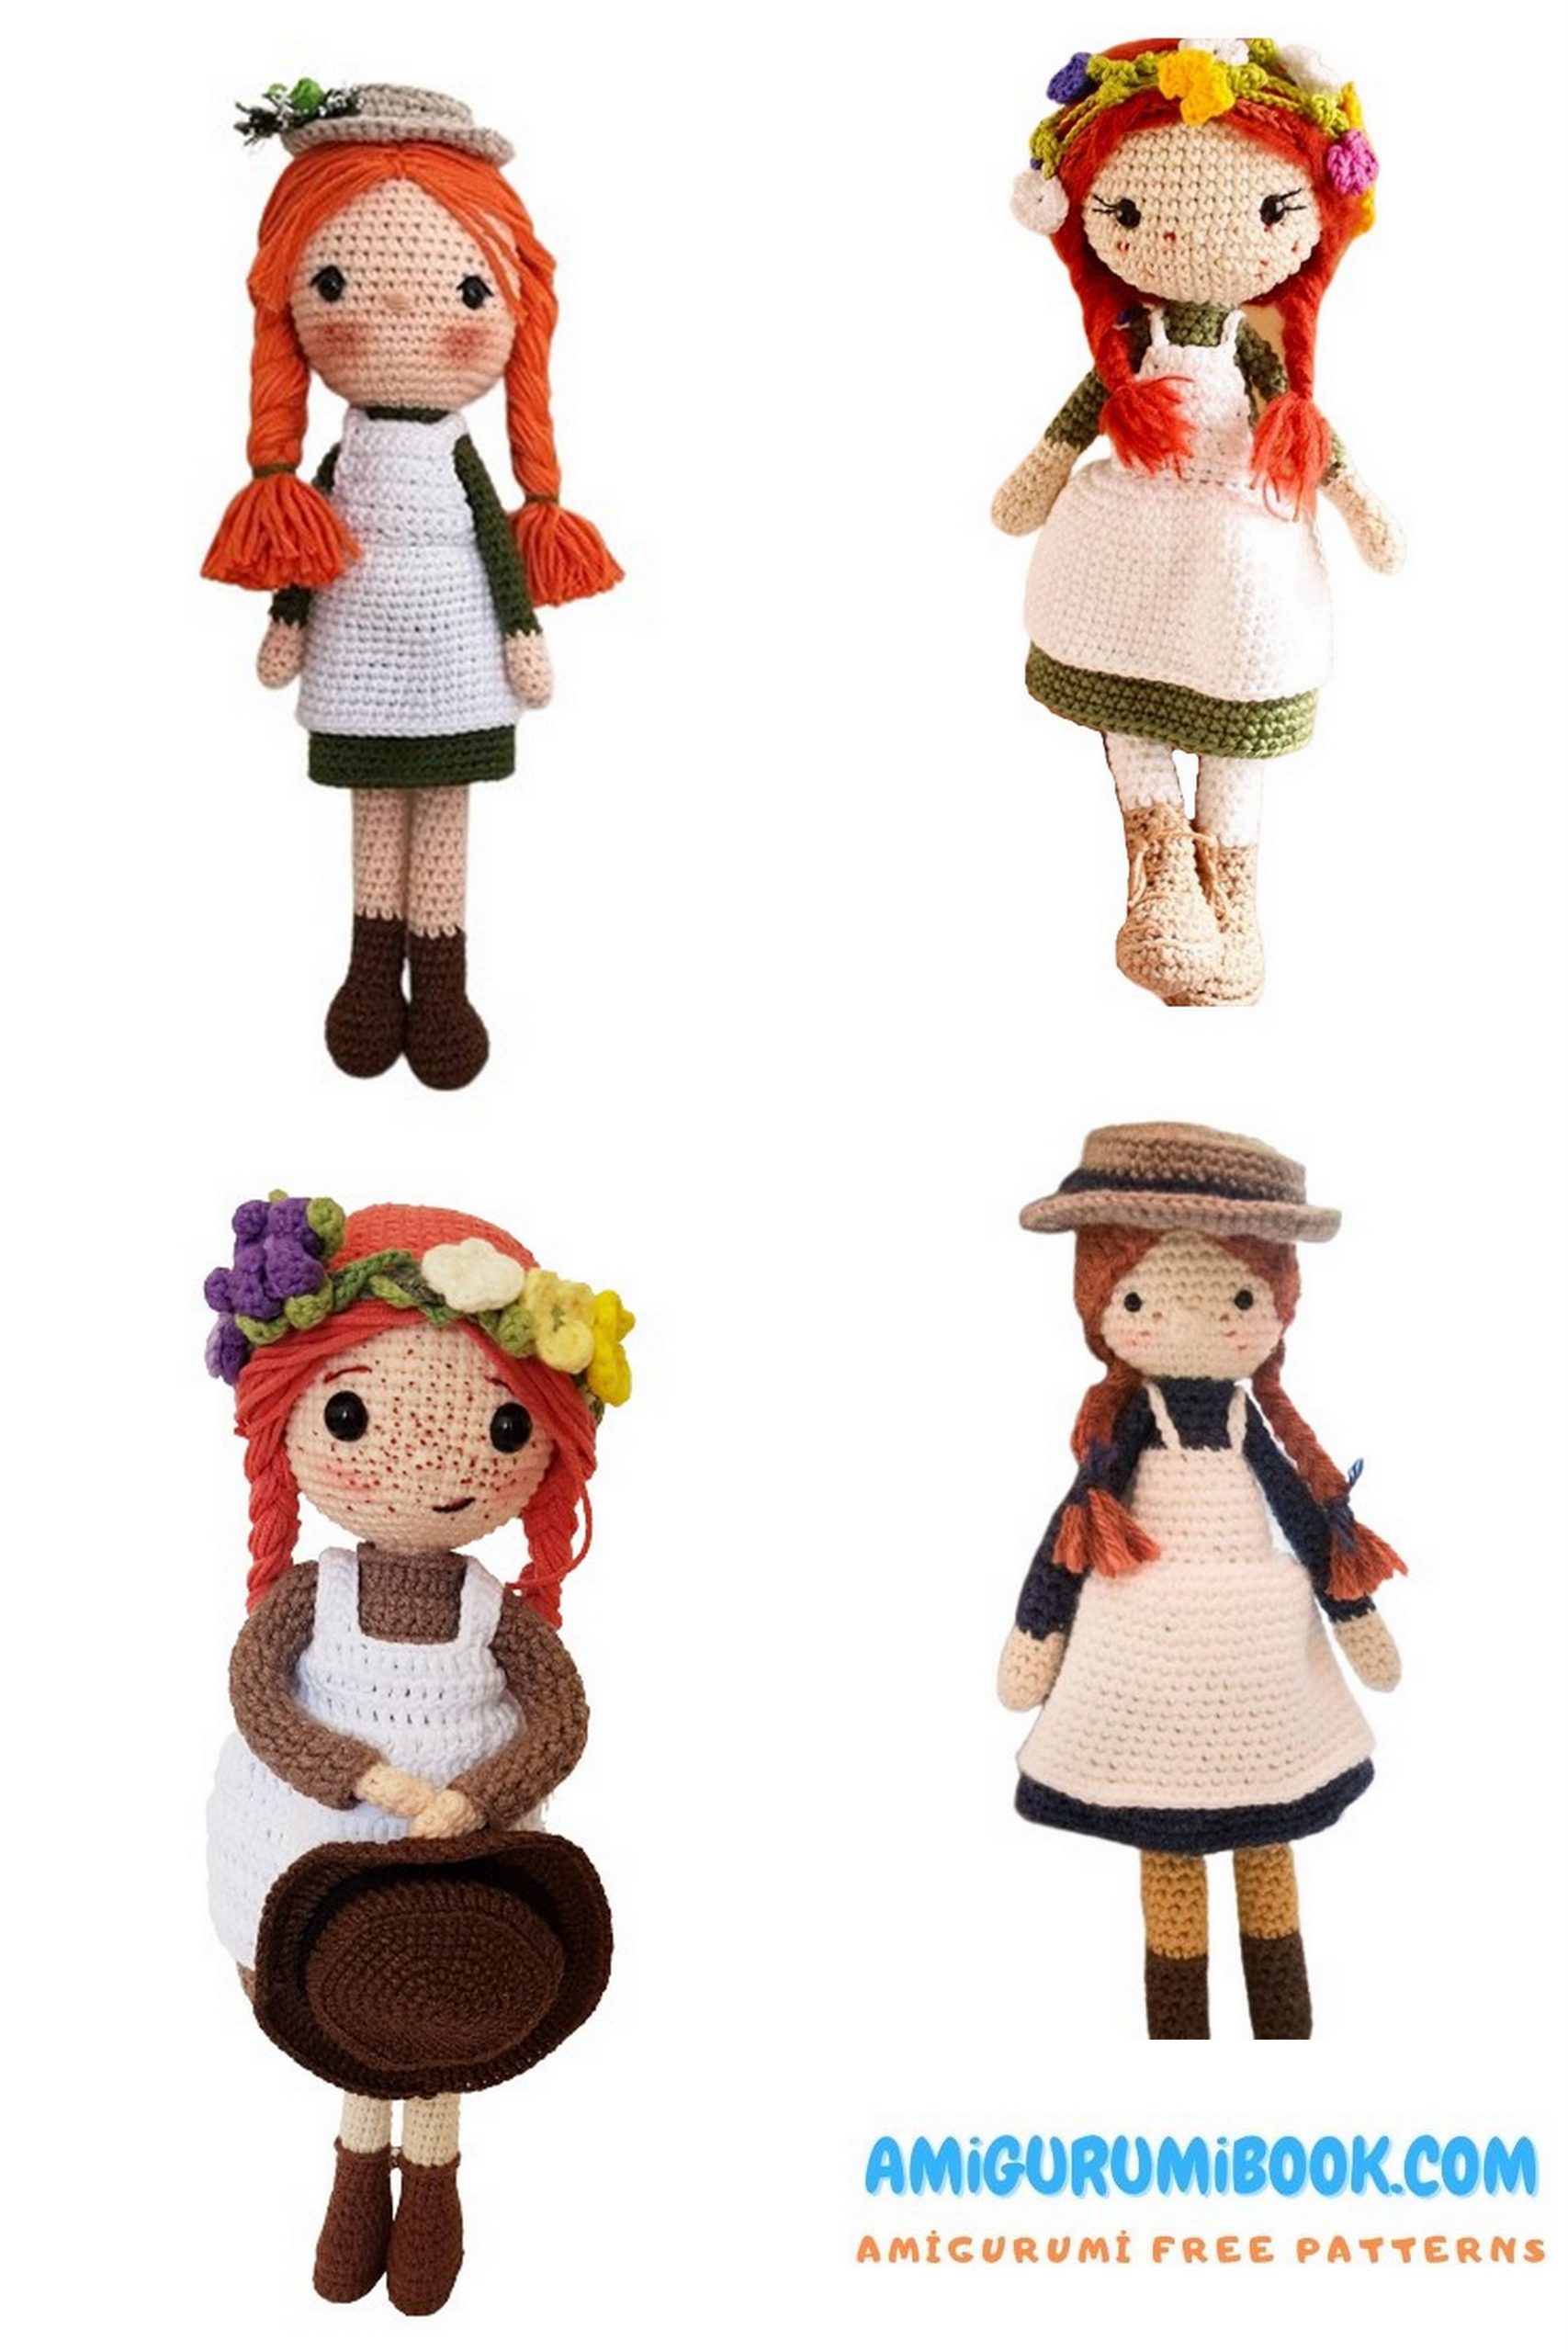
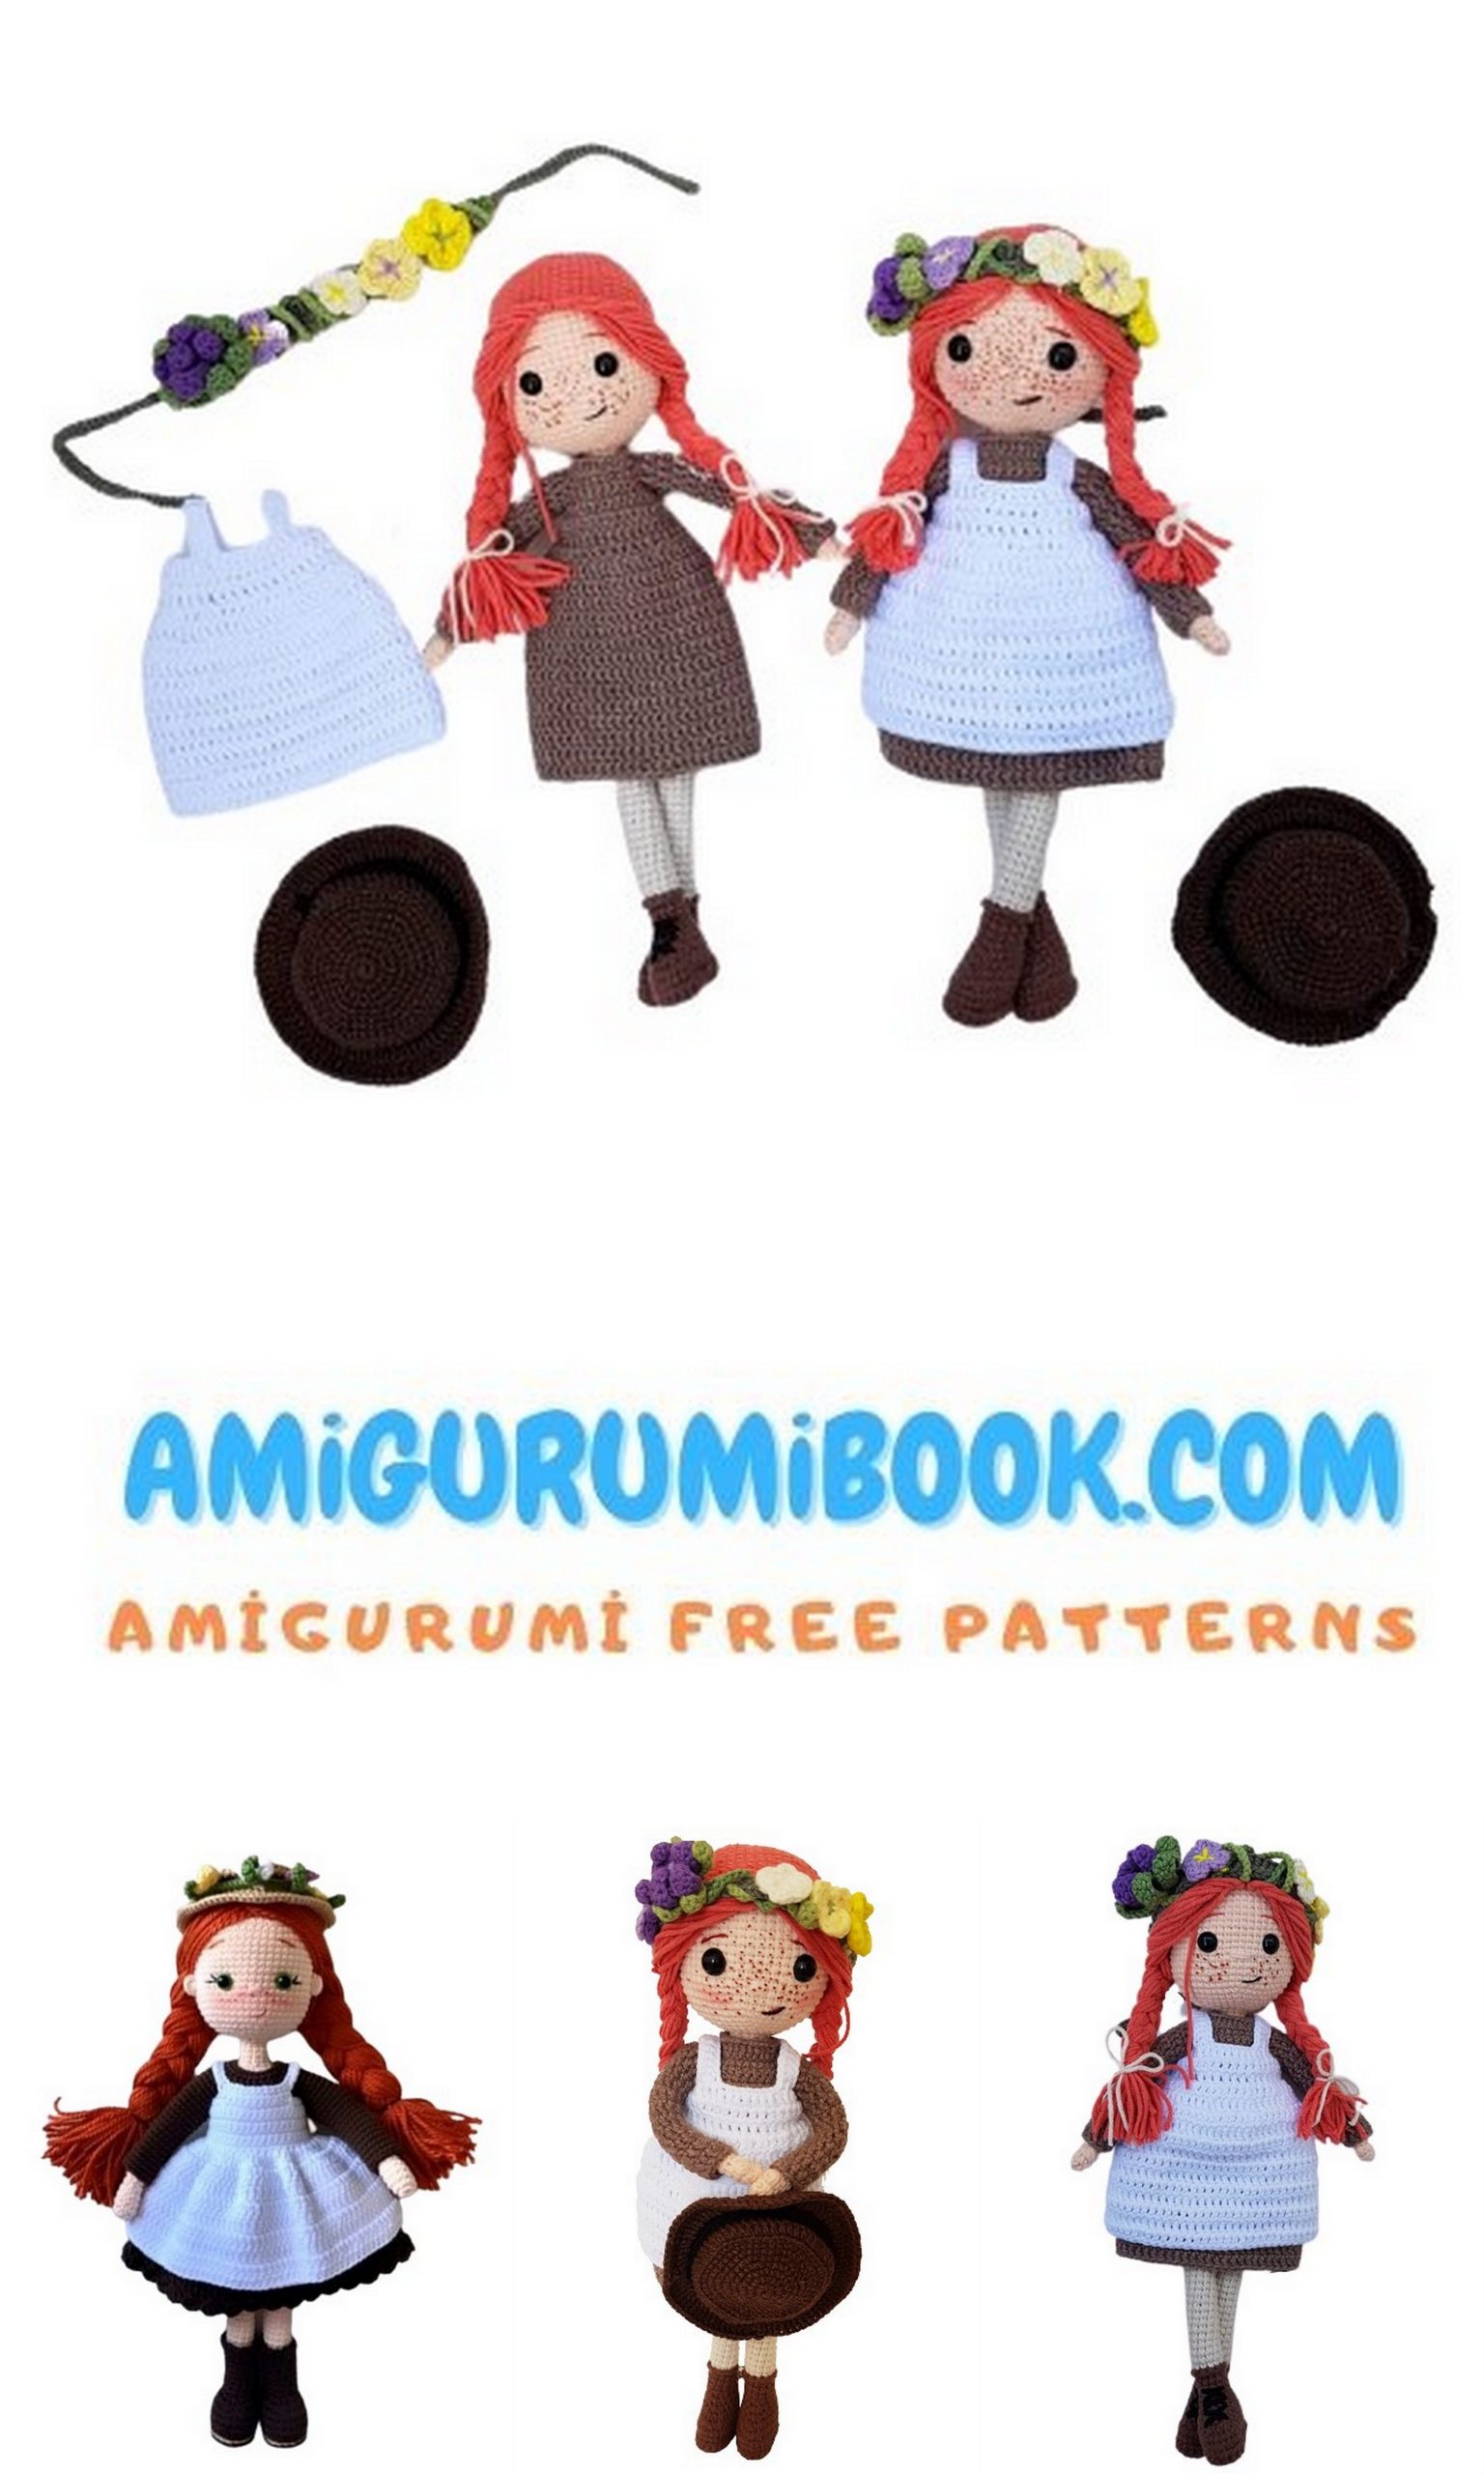
Farm Girl Amigurumi Free Pattern
The best quality amigurumi patterns are on this site for free. In this article, we shared with you the amigurumi farm girl pattern.
MATERIALS
YARNS THAT I USE
In this model, since their finest weight and estimated length are suitable to each other; I used Alize Cotton Gold (100g, 330m) and YarnArt Jeans (50g, 160m) brand yarns together. In this way, the variety of colors that I can choose has increased. However, when making amigurumi, if you use two yarns of unsuitable thickness together, the end product will be shapeless. So be careful when you choose yarns.
With these yarns I used 2 mm crochet hook and 8mm safety eyes.
Color Codes of Yarns I Used
If you use same or similar yarns,
Freckled Doll will be approx 26 cm tall.
ABBREVIATIONS
sc: single crochet
ch: chain
inc: increase (two single crochet in the same stitch)
dec: decrease (single crochet two stitches together)
BLO: back loop only
FLO: front loop only
In BLO: crochet the entire round in BLO
In FLO: crochet the entire round in FLO
sc3tog: single crochet three stitches together
sc4tog: single crochet four stitches together
HDC: half double crochet
DC: double crochet
TR: triple crochet
incTR: increasing triple crochet (two triple crochet in the same stitch)
incDC: increasing double crochet (two double crochet in the same stitch)
sl st: slip stitch
( )*… : repeat instructions in the brackets
… times
Suitable colored Yarn
Crochet hook
Safety eyes
Polyester fiber fill
1,5 mm wire (44 cm)
Plaster band
Orange permanent marker
Skin color: YarnArt Jeans 73
Sock: YarnArt Jeans 05
Hat: YarnArt Jeans 70 and
YarnArt Jeans 53
Dress: Alize Cotton Gold 688
Boot: Alize Cotton Gold 493
Apron: Alize Cotton Gold 01
Hair: Alize Cotton Gold 38
Coronet: Alize Cotton Gold
485-270-126-187-44-166 (a little from each one)
BOOTS
(with brown yarn) (2 piece)
1 ➢ Start with 8ch , 6sc from the second ch, 3sc in next ch, now on the other side of the chain; 4SC, 2inc =17
2 ➢ 2inc, 3SC, 5inc, 4SC, 3inc =27
3 ➢ in BLO 27SC =27
4 ➢ 27SC =27
5 ➢ 8SC, 5dec, 9SC =22
6 ➢ 8SC, 3dec, 8SC =19
7 ➢ 7SC, sc4tog, 8SC =16
8 ➢ 6SC, sc3tog, 7SC =14
9 ➢ 5SC, sx3tog, 6SC =12
10-12 ➢ 12SC (3 rounds)
13 ➢ (When starting this round, insert a stitch marker into the BLO of the first stitch to easily find it in the next round) In FLO 12SC =12
Fasten off and weave in the yarn tail.
Boot Sole
(With brown yarn, two pieces)
1 ➢ Start with 8ch, 6sc from the second ch, 3sc in next ch, now on the other side of the chain; 4SC, 2inc =17
2 ➢ 2inc, 3SC, 5inc, 4SC, 3inc =27
3 ➢ 27SC fasten off and leave a long tail for sewing.
Turn the bottom of the boot sole.
Sew it to the BLO’s of the 3rd round of the shoe (ph.1-3).
The boot is ok. Fill it tightly.
Embroider lace with black yarn
NOTE:
IF you want to put wire inside doll, you
have to put now before stuffing bots.
After putting wire you can stuff it.
LEGS
(With sock color)
Stuff as you progress.
When you have finished the first leg, fasten off and weave in the yarn tail. But don’t fasten off at the second leg.
First Leg
Thread to 13th round of the boot.
(To the BLO stitch you marked)
1 ➢ in BLO 12SC =12
2-28 ➢ 12SC =12 (27 rounds)
29 ➢ 8SC, fasten off and weave in the yarn tail
Second Leg
Thread to 13th round of the boot.
(to the BLO stitch you marked)
1 ➢ in BLO 12SC =12
2-29 ➢ 12SC =12 (28 rounds)
30 ➢ 1SC, 3 ch join with the right leg
When you have finished the second leg continue with the body without cutting the yarn.
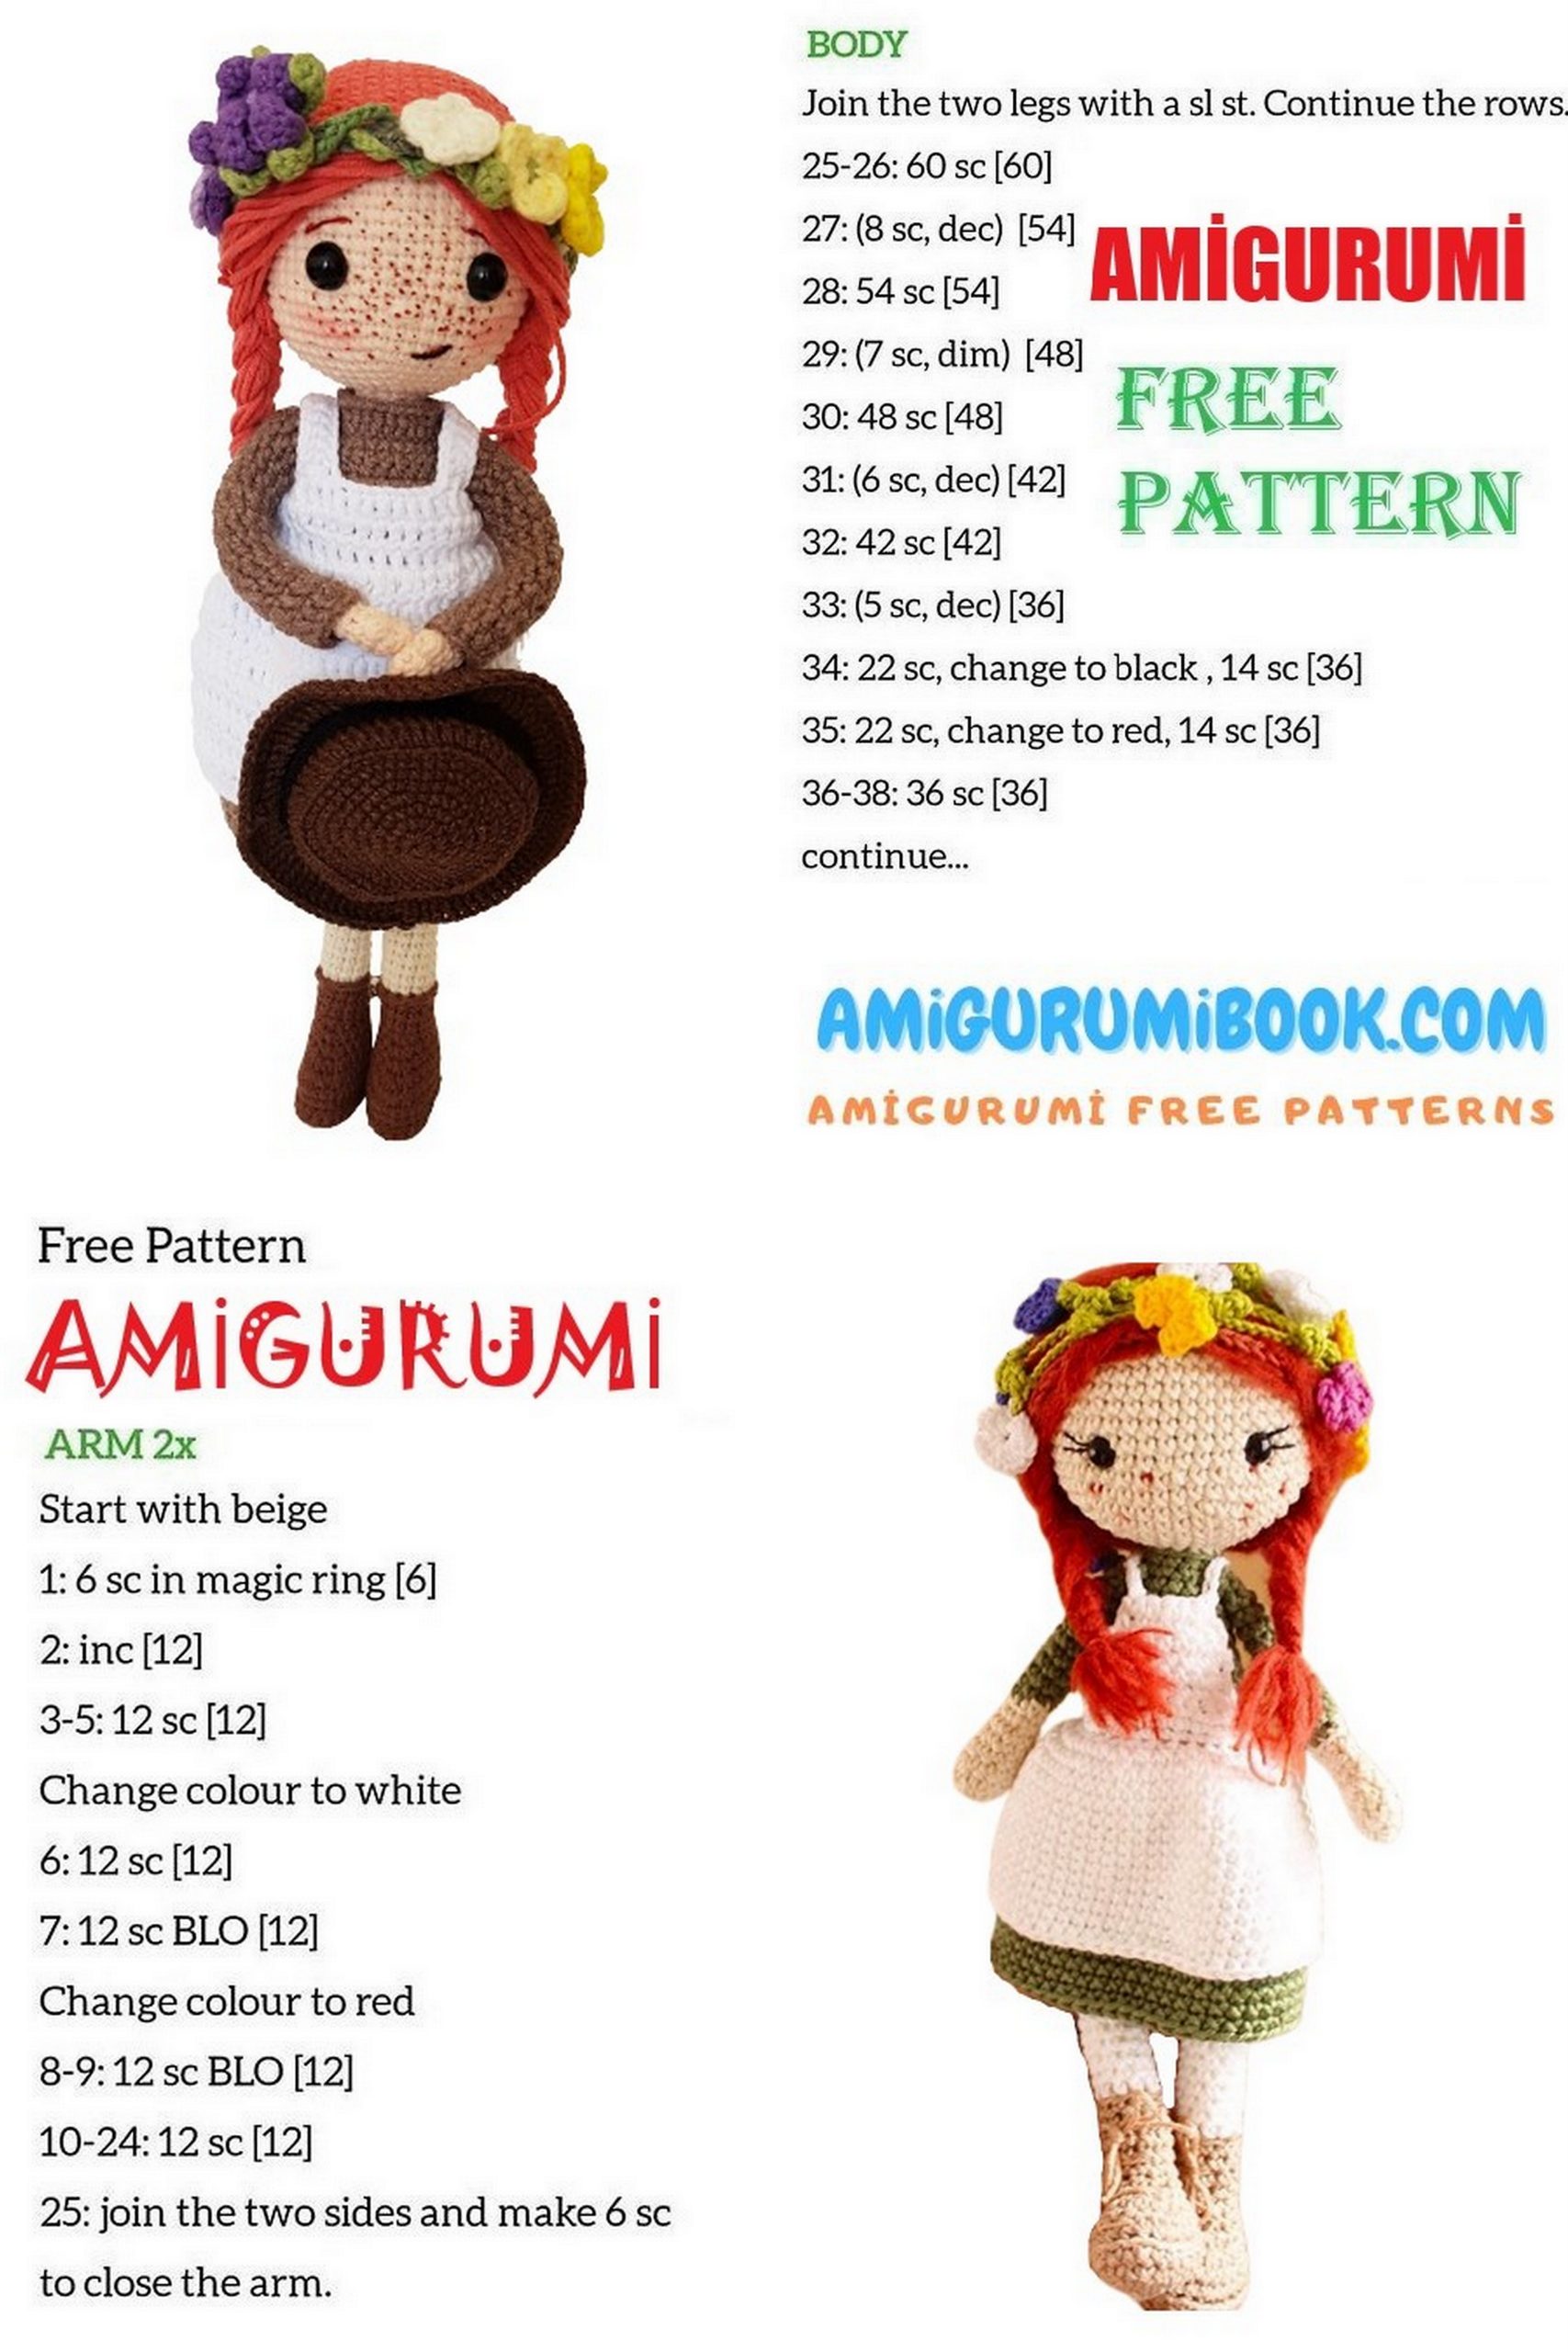
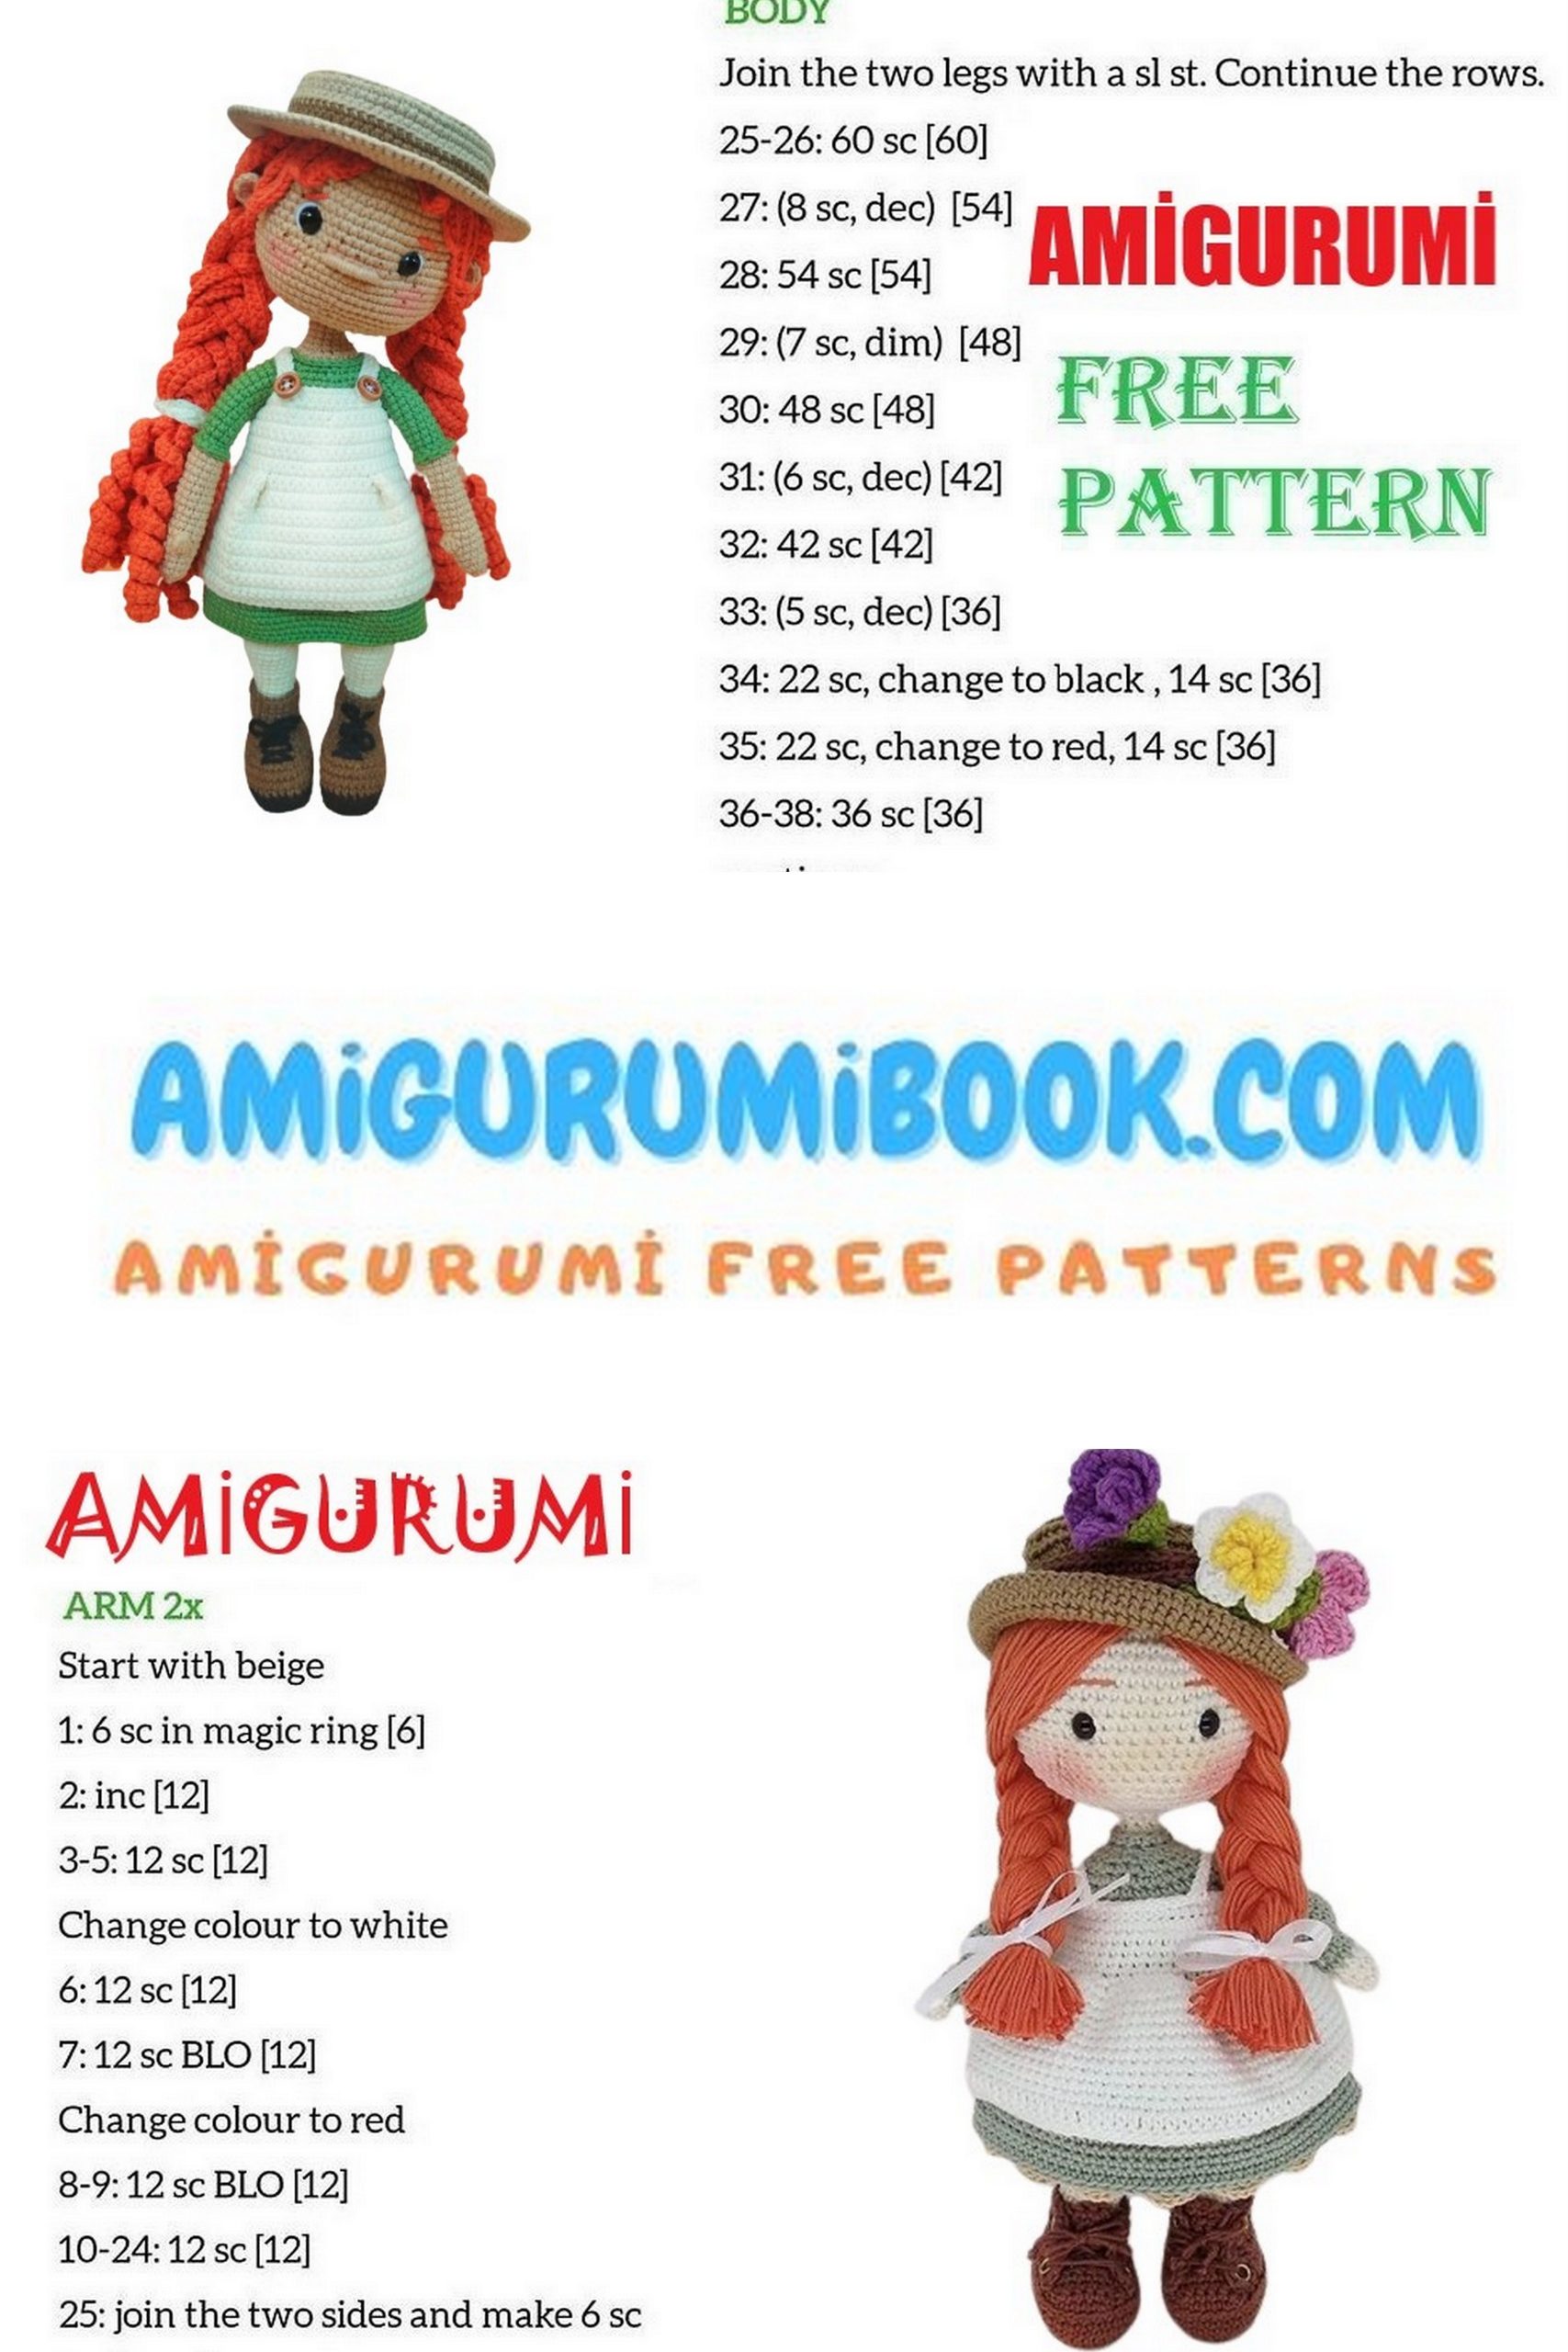
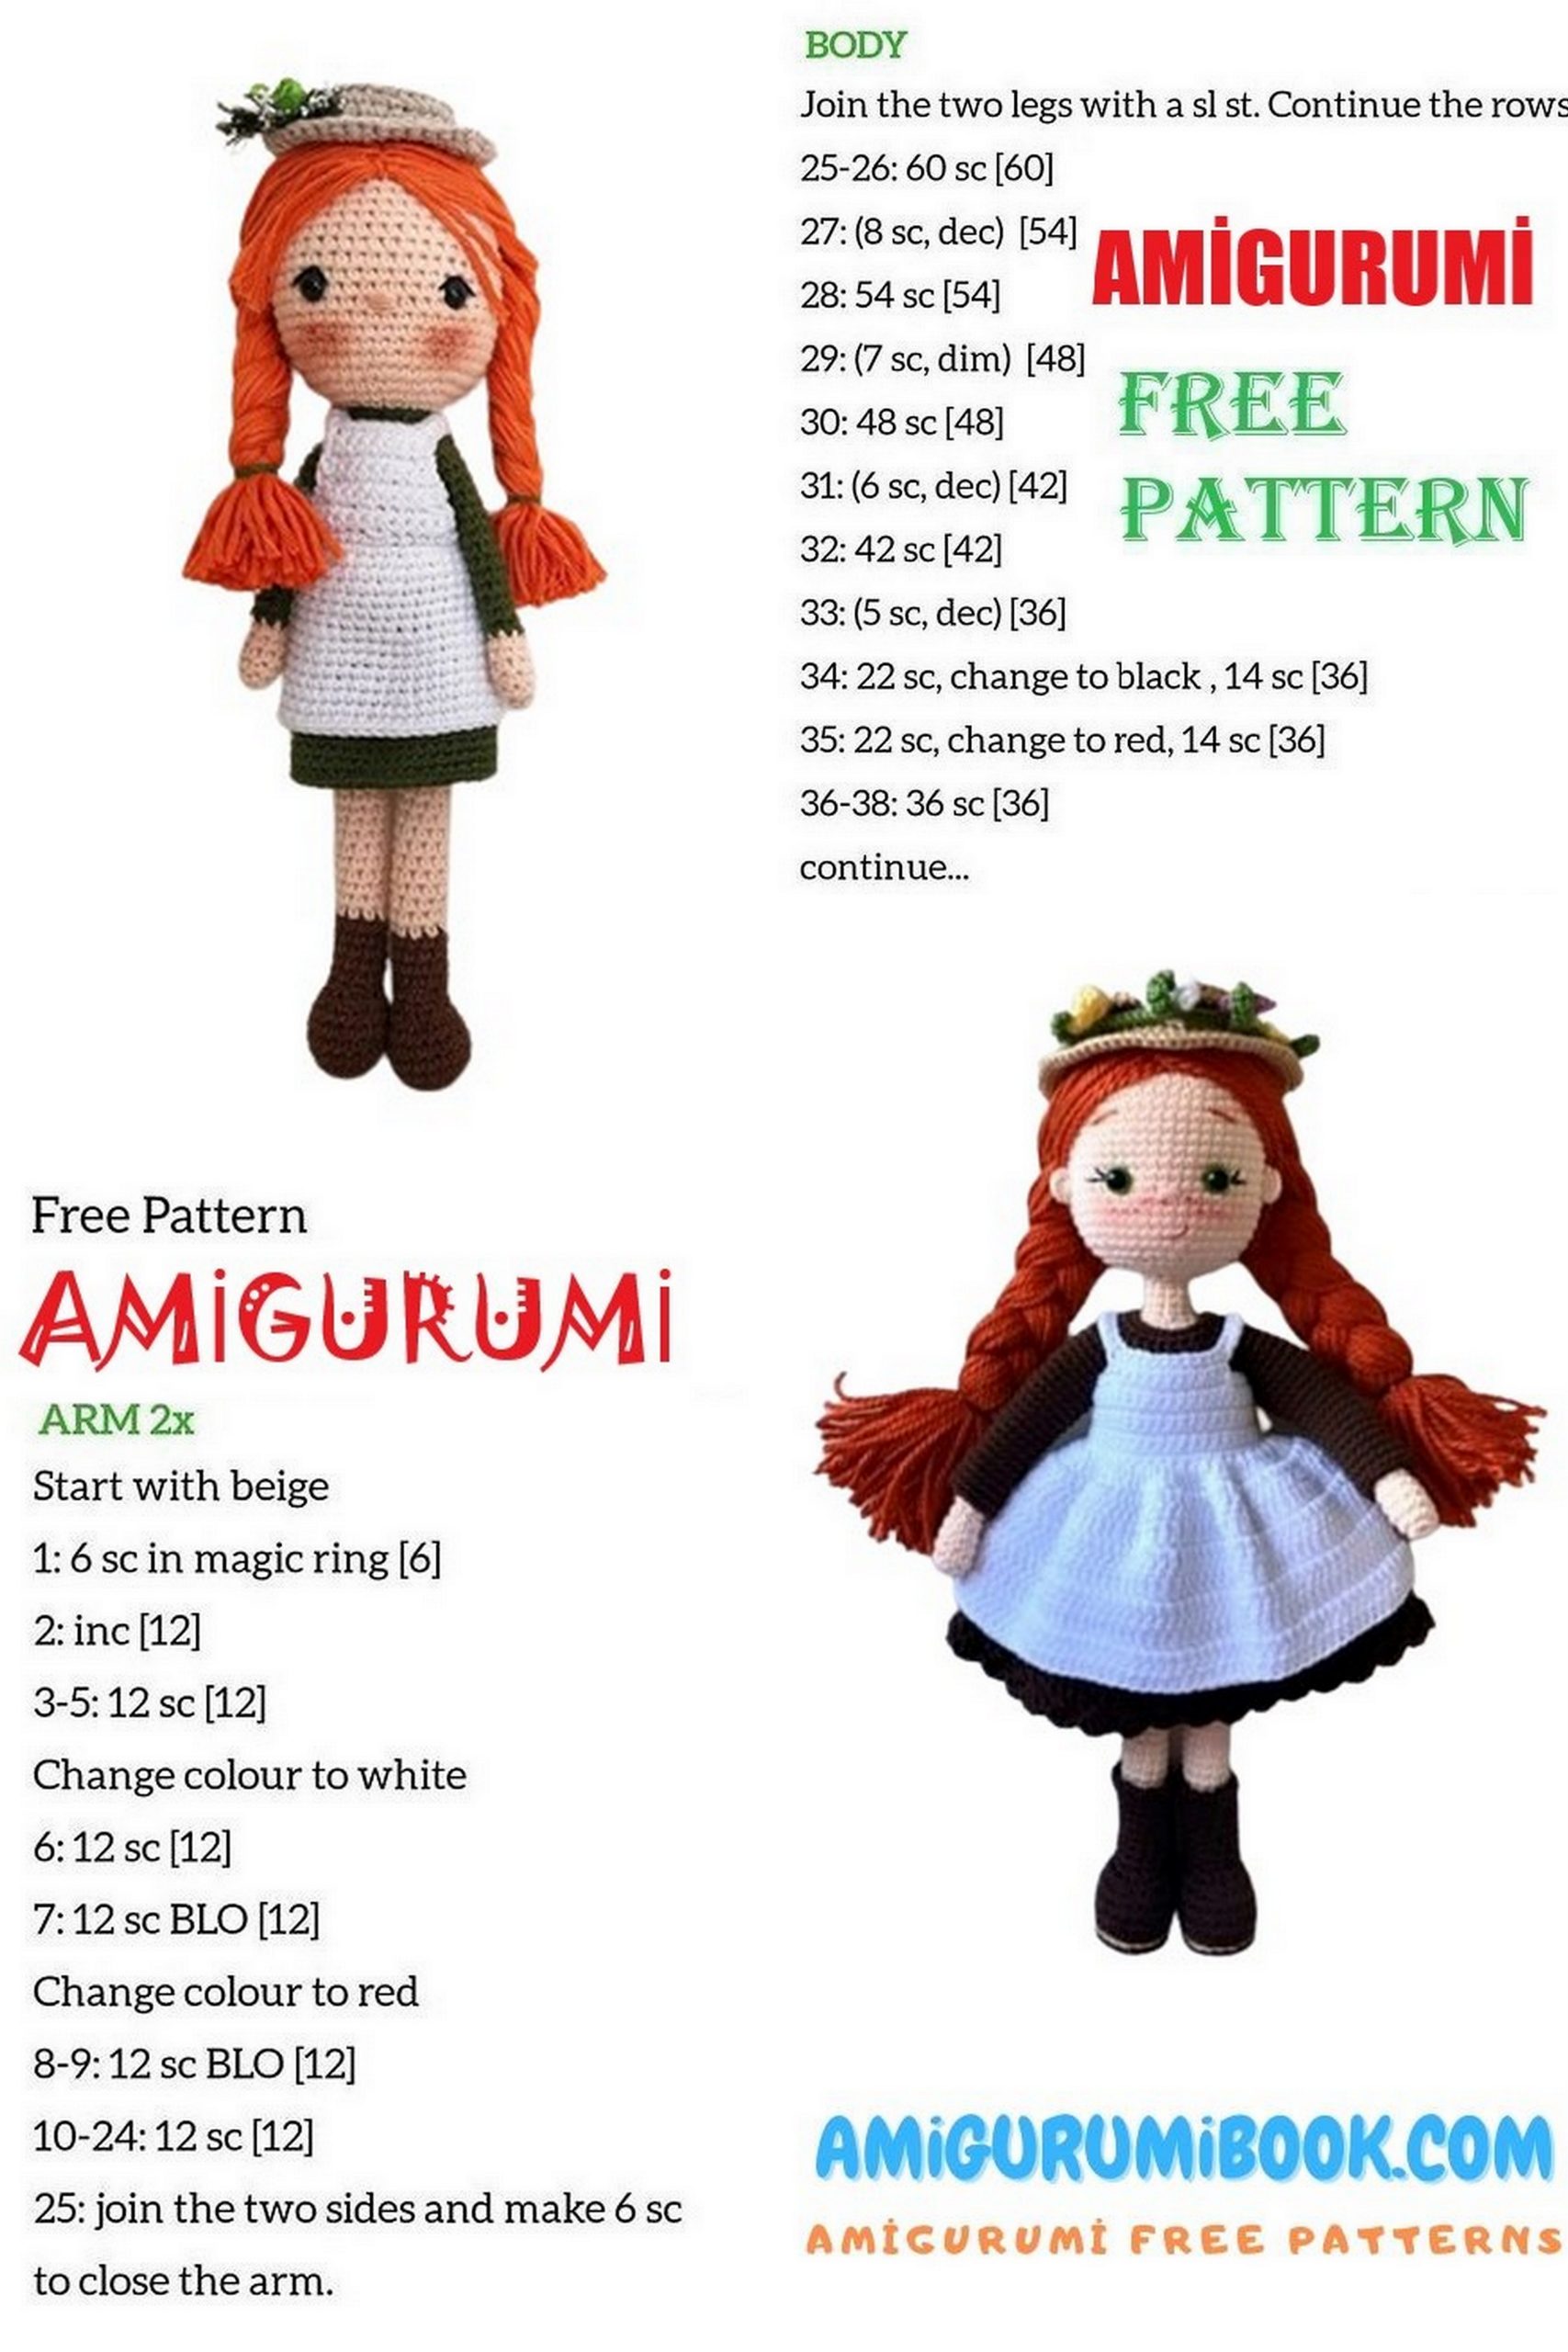
BODY
Stuff as you progress.
Connect the left leg with a sc to the last stitch of the right leg.
(Ensure that both feet are pointing forward in to the same direction. If it is not looking in the right direction, make some ( one or two may be three sc) single crochet over the second leg to adjust that part.)
1 ➢ chain 3 to join two legs and make sc into each stitch around, total 30 stitch (for beginners: sc in each of next 12 stitch from right leg, sc in each of next 3 stitch on chain, sc in each of next 12 stitch from left leg, sc in each of next 3 stitch on chain =30)
2 ➢ 12sc (now it is the backside of the body). This is the new beginning of the round. If you are using a stitch marker, place it here.
3-11 ➢ 30SC =30 (9 round)
12 ➢ in FLO 30SC, cut the yarn and weave in the yarn tail
13 ➢ (with skin color) Thread to 12th round in BLO stitches. 30SC =30
14-19 ➢ 30SC =30 (6 rounds)
20 ➢ dec, 5SC, dec, 12SC, dec, 7SC =27
21 ➢ 8SC, dec, 10SC, dec, 3SC, dec =24
22 ➢ 24SC
23 ➢ (2SC, 1dec)*6 =18SC
24 ➢ 18SC
25 ➢ (1SC, 1dec)*6 =12SC
26 -28➢ 12sc (3 rounds)
Don’t fasten off the yarn, now we will start making the head.
HEAD
1 ➢ (1SC, 1inc)*6 =18SC
2 ➢ (2SC, 1inc)*6 =24SC
3 ➢ (3SC, 1inc)*6 =30SC
4 ➢ (4SC, 1inc)*6 =36SC
5 ➢ (5SC, 1inc)*6 =42SC
6 ➢ (6SC, 1inc)*6 =48SC
7 ➢ (7SC, 1inc)*6 =54SC
8-23 ➢ 54SC (16 rounds)
İnsert the safety eyes between rounds 14 and 15. Leave a space of 10 stitch between the eyes.
Cut approximately 22 cm wire, fold it in half, tape ends of it together, put it into the neck till the end of the body and fill the neck tightly.
24 ➢ (7SC, 1dec)*6 =48SC
25 ➢ (6SC, 1dec)*6 =42SC
26 ➢ (5SC, 1dec)*6 =36SC
Start to stuff the head
27 ➢ (4SC, 1dec)*6 =30SC
28 ➢ (3SC, 1dec)*6 =24SC
29 ➢ (2SC, 1dec)*6 =18SC
30 ➢ (1SC, 1dec)*6 =12SC
31 ➢ 6dec =6
Fasten off, leaving a long tail to embroider the nose (to 2 rounds under the eyes)
ARMS
(with skin color)
Do not stuff them
1 ➢ 4sc in the magic ring
2 ➢ 4inc =8SC
3-26 ➢ 8SC (24 round)
Cut wire as long as arm twist the ends of the wire by one cm. tape the ends. place the wire in the arm Close the arm by 4sc.
Sew the arms to the body as seen in the photo.
DRESS
warning: If you didn’t put wire in the arms, it will be very difficult to dress the sleeves to the doll. In this case, you need to dress up the doll and then knit the sleeves.
With dress color.
“Make 1 chain and turn” at the end of each row until you get to the 9th round.
1 ➢ start with 27 chain, 26sc from the second ch =26
2 ➢ 4SC, make 6 ch and skip 4SC, 10SC, make 6 ch and skip 4sc, 4SC =30
3 ➢ 4SC, 6sc (in the chain), 10SC, 6sc (in the chain), 4sc =30
4 ➢ 4SC, 1inc, 5SC, 1inc, 8SC, 1inc, 5SC, 1inc, 4SC =34
5 ➢ 4SC, 1inc, 5SC, 1inc, 11SC, 1inc, 6SC, 1inc, 4SC =38
6-8 ➢ 38DC (3 rounds)
9 ➢ (1DC, 1incDC)*19 =57DC
At the end of round 9 (and all the other following rounds) end each round with a slip stitch in the first DC. At the beginning of each new round begin with 2 chain-this doesn’t count as the first DCmake the first DC in the same stitch as you made the sl st.
10-22 ➢ 57DC (ph.5 and 6) fasten off and weave in the yarn tail.
Sleeves of the Dress
Join the yarn to one of the stitches at the back of the dress. There should be 4 sc on the skip 4 from row 2 of the dress, 6 sc on the ch6 from row 2 of the dress and 1 sc on each side of the sleeve.
(4+6+1+1=12)
1 ➢ 2ch, 12DC
2-13 ➢ 12DC (12 rounds)
Fasten off and weave in the yarn tail.
Collar of the Dress
Join the yarn to first stitch at the back of the dress collar (on left side).
1 ➢ 26HDC , make 1 ch, turn.
2 ➢ 26 sl st
Fasten off and leave the yarn tail long for sewing.
Dress up the doll. Sew the back of the dress with the long yarn tail you cut.
APRON
1 ➢ start with 31 chain , 20DC in third ch from the hook, 29 chain, 20DC in third ch from the hook , 12 ch and turn (we created the main part of the aprons top part)
2 ➢ 10DC in third ch from the hook, 3DC (under the strap), 7DC, 3DC (under the strap), 10DC, Make 2 ch and turn.
3 ➢ 33DC, 36 ch and turn, 35sl st from the second ch (this is the strap part of the apron)
4 ➢ 33DC, 36 ch and turn, 35sl st from the second ch (piece two of the apron strap), 2 ch
5 ➢ (2DC, 1incDC)*11 =44DC at the end of this round (and all the other following rounds) end each round make 2 ch and turn.
6 ➢ (4DC, 1incDC)*8 =3DC, 1incDC=53
7 ➢ (5DC, 1incDC)*8, 4DC, 1incDC =62
8-17 ➢ 62DC (9 rounds) fasten off and weave in the yarn tail.
Thread to the first loop of the 17th row of the apron. Make single crochet in each of next 26 stitch from the lateral side (upwards).
Thread to the first loop of the third row of the apron. Make single crochet in each of next 26 stitch from the lateral side (downwards).
Sew the apron straps according to the photo.
HAİR
1 ➢ 9sc in magic ring
2 ➢ 9inc =18SC
3 ➢ (1SC, 1inc)*9 =27SC
4 ➢ (2SC, 1inc)*9 =36SC
5 ➢ (5SC, 1inc)*6 =42
6 ➢ (6SC, 1inc)*6 =48
7 ➢ (7SC, 1inc)*6 =54
8-17 ➢ 54SC (10 round)
Cut 20 piece of 50 cm long and 20 piece of 40 cm long strands of yarn.
Attach one strand of hair to each 20 stitch on the front of the head (Use 50 cm strands)
Attach the remaining hair strands by skipping a stitch (use 40cm strands)
Put the wig on the doll’s head
Make two braid on two sides
Make ribbon at the ends of the braids with sock colored yarn.
Sew the wig on the head (7 rows above the eyes).
.
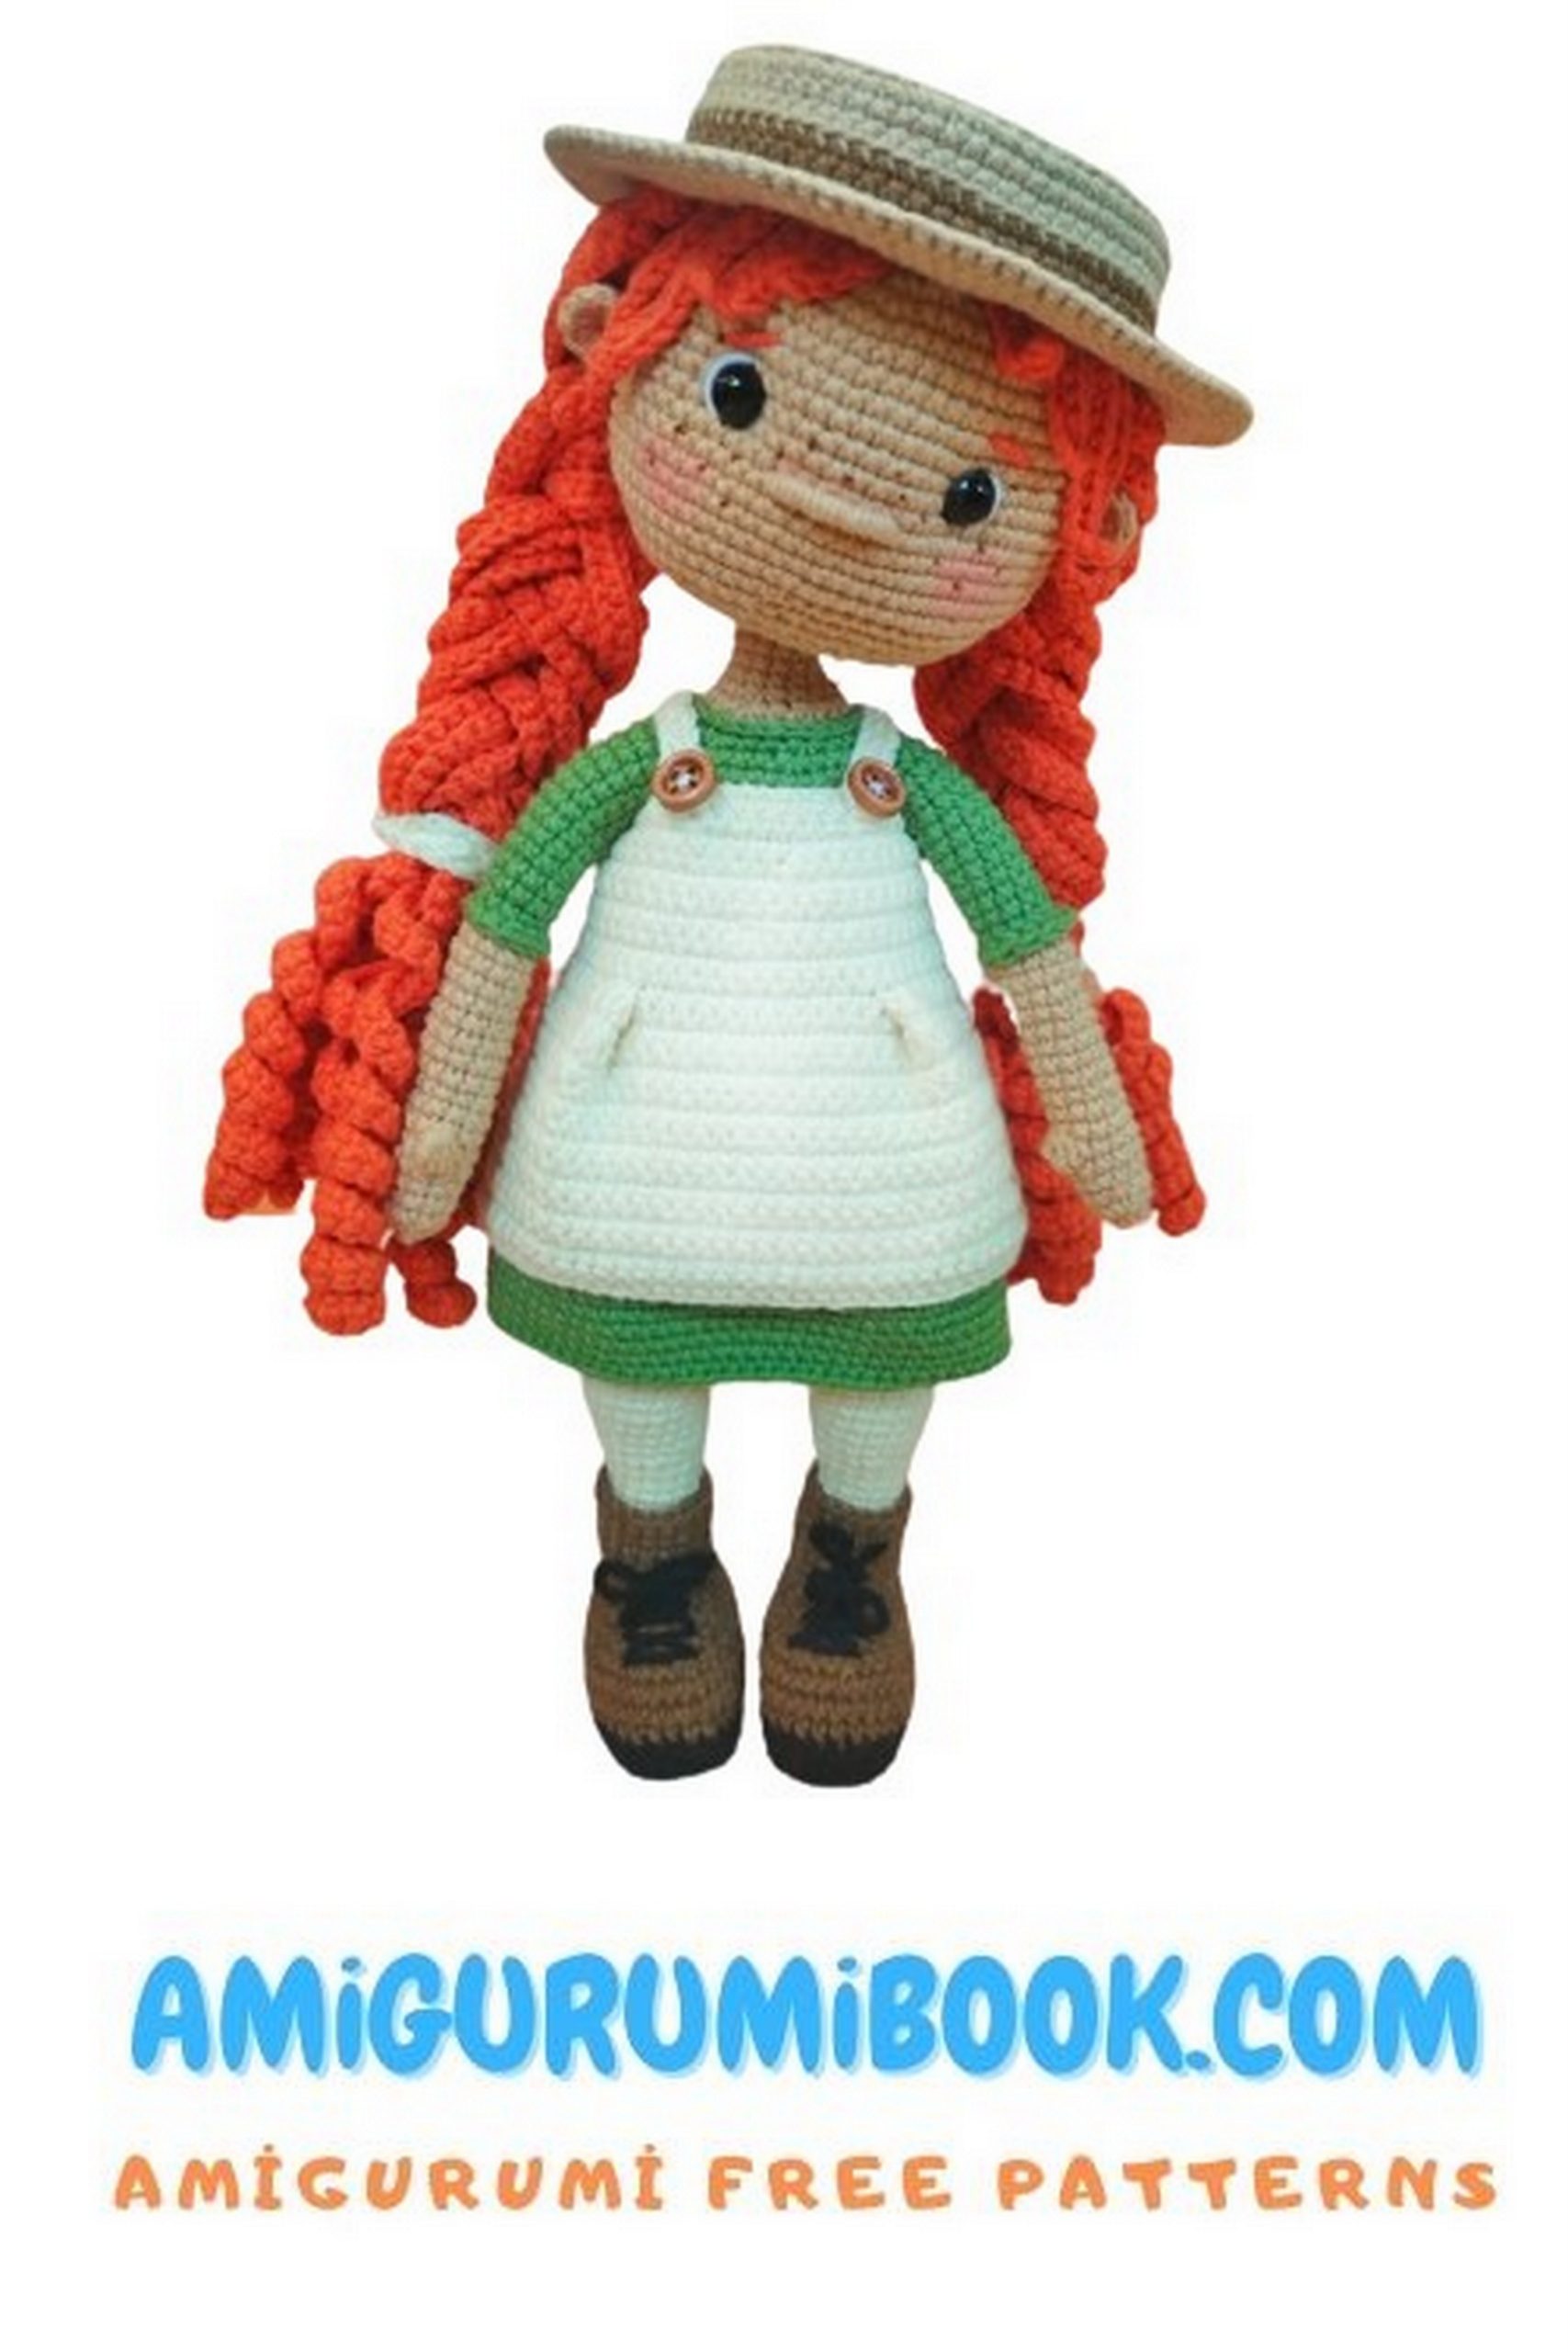
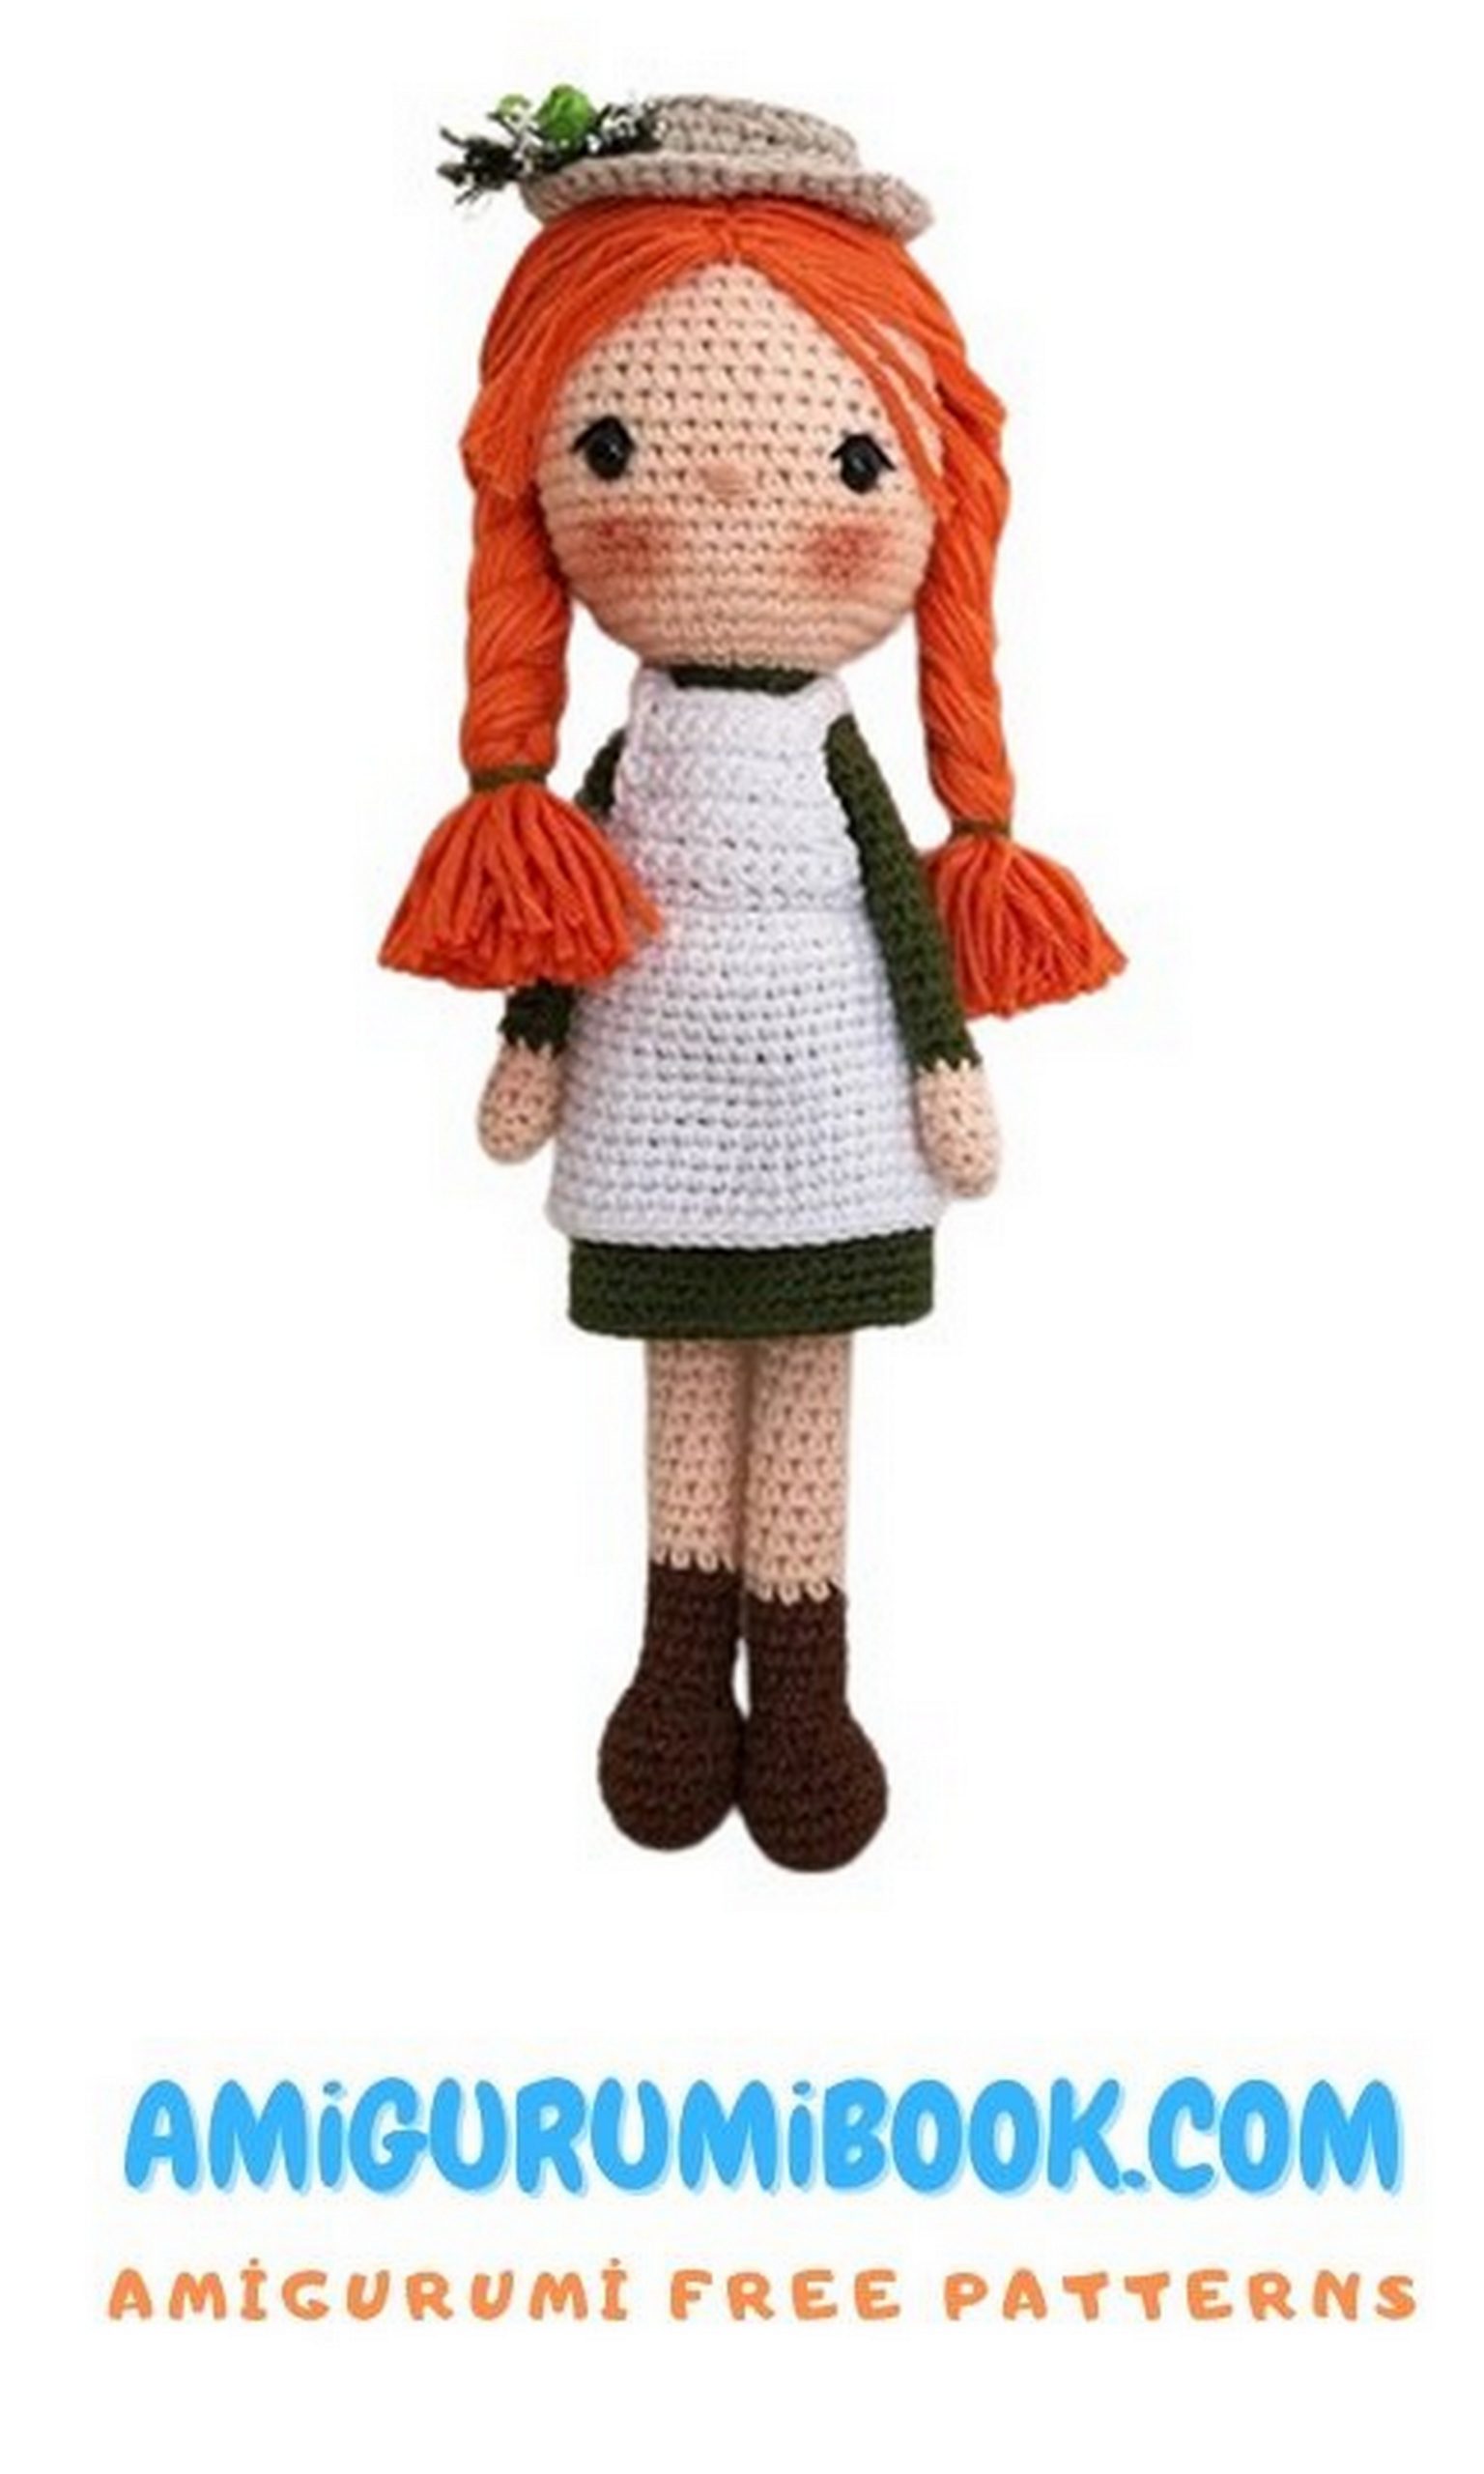
HAT
1 ➢ 8sc in magic ring
2 ➢ 8inc =16SC
3 ➢ (1SC, 1inc)*3 =24
4 ➢ (3SC, 1inc)*6 =30
5 ➢ (4SC, 1inc)*6 =36
6 ➢ (5SC, 1inc)*6 =42
7 ➢ (6SC, 1inc)*6 =48
8 ➢ (7SC, 1inc)*6 =54
At the end of this round (and all the other following rounds) end each round with a slip stitch in the first sc. At the beginning of each new round begin with 1 chain -this doesn’t count as the first sc- make the first sc in the same stitch as you made the sl st.
9 ➢in BLO 54DC
10 ➢ thread the black yarn (do not break the brown yarn) 54SC
11-12 ➢ 54SC (2 round)
13 ➢ Continue with brown yarn (cut the black yarn) in FLO (1TR, 1 incTR)*27 =81TR
Fasten off and weave in the yarn tail.
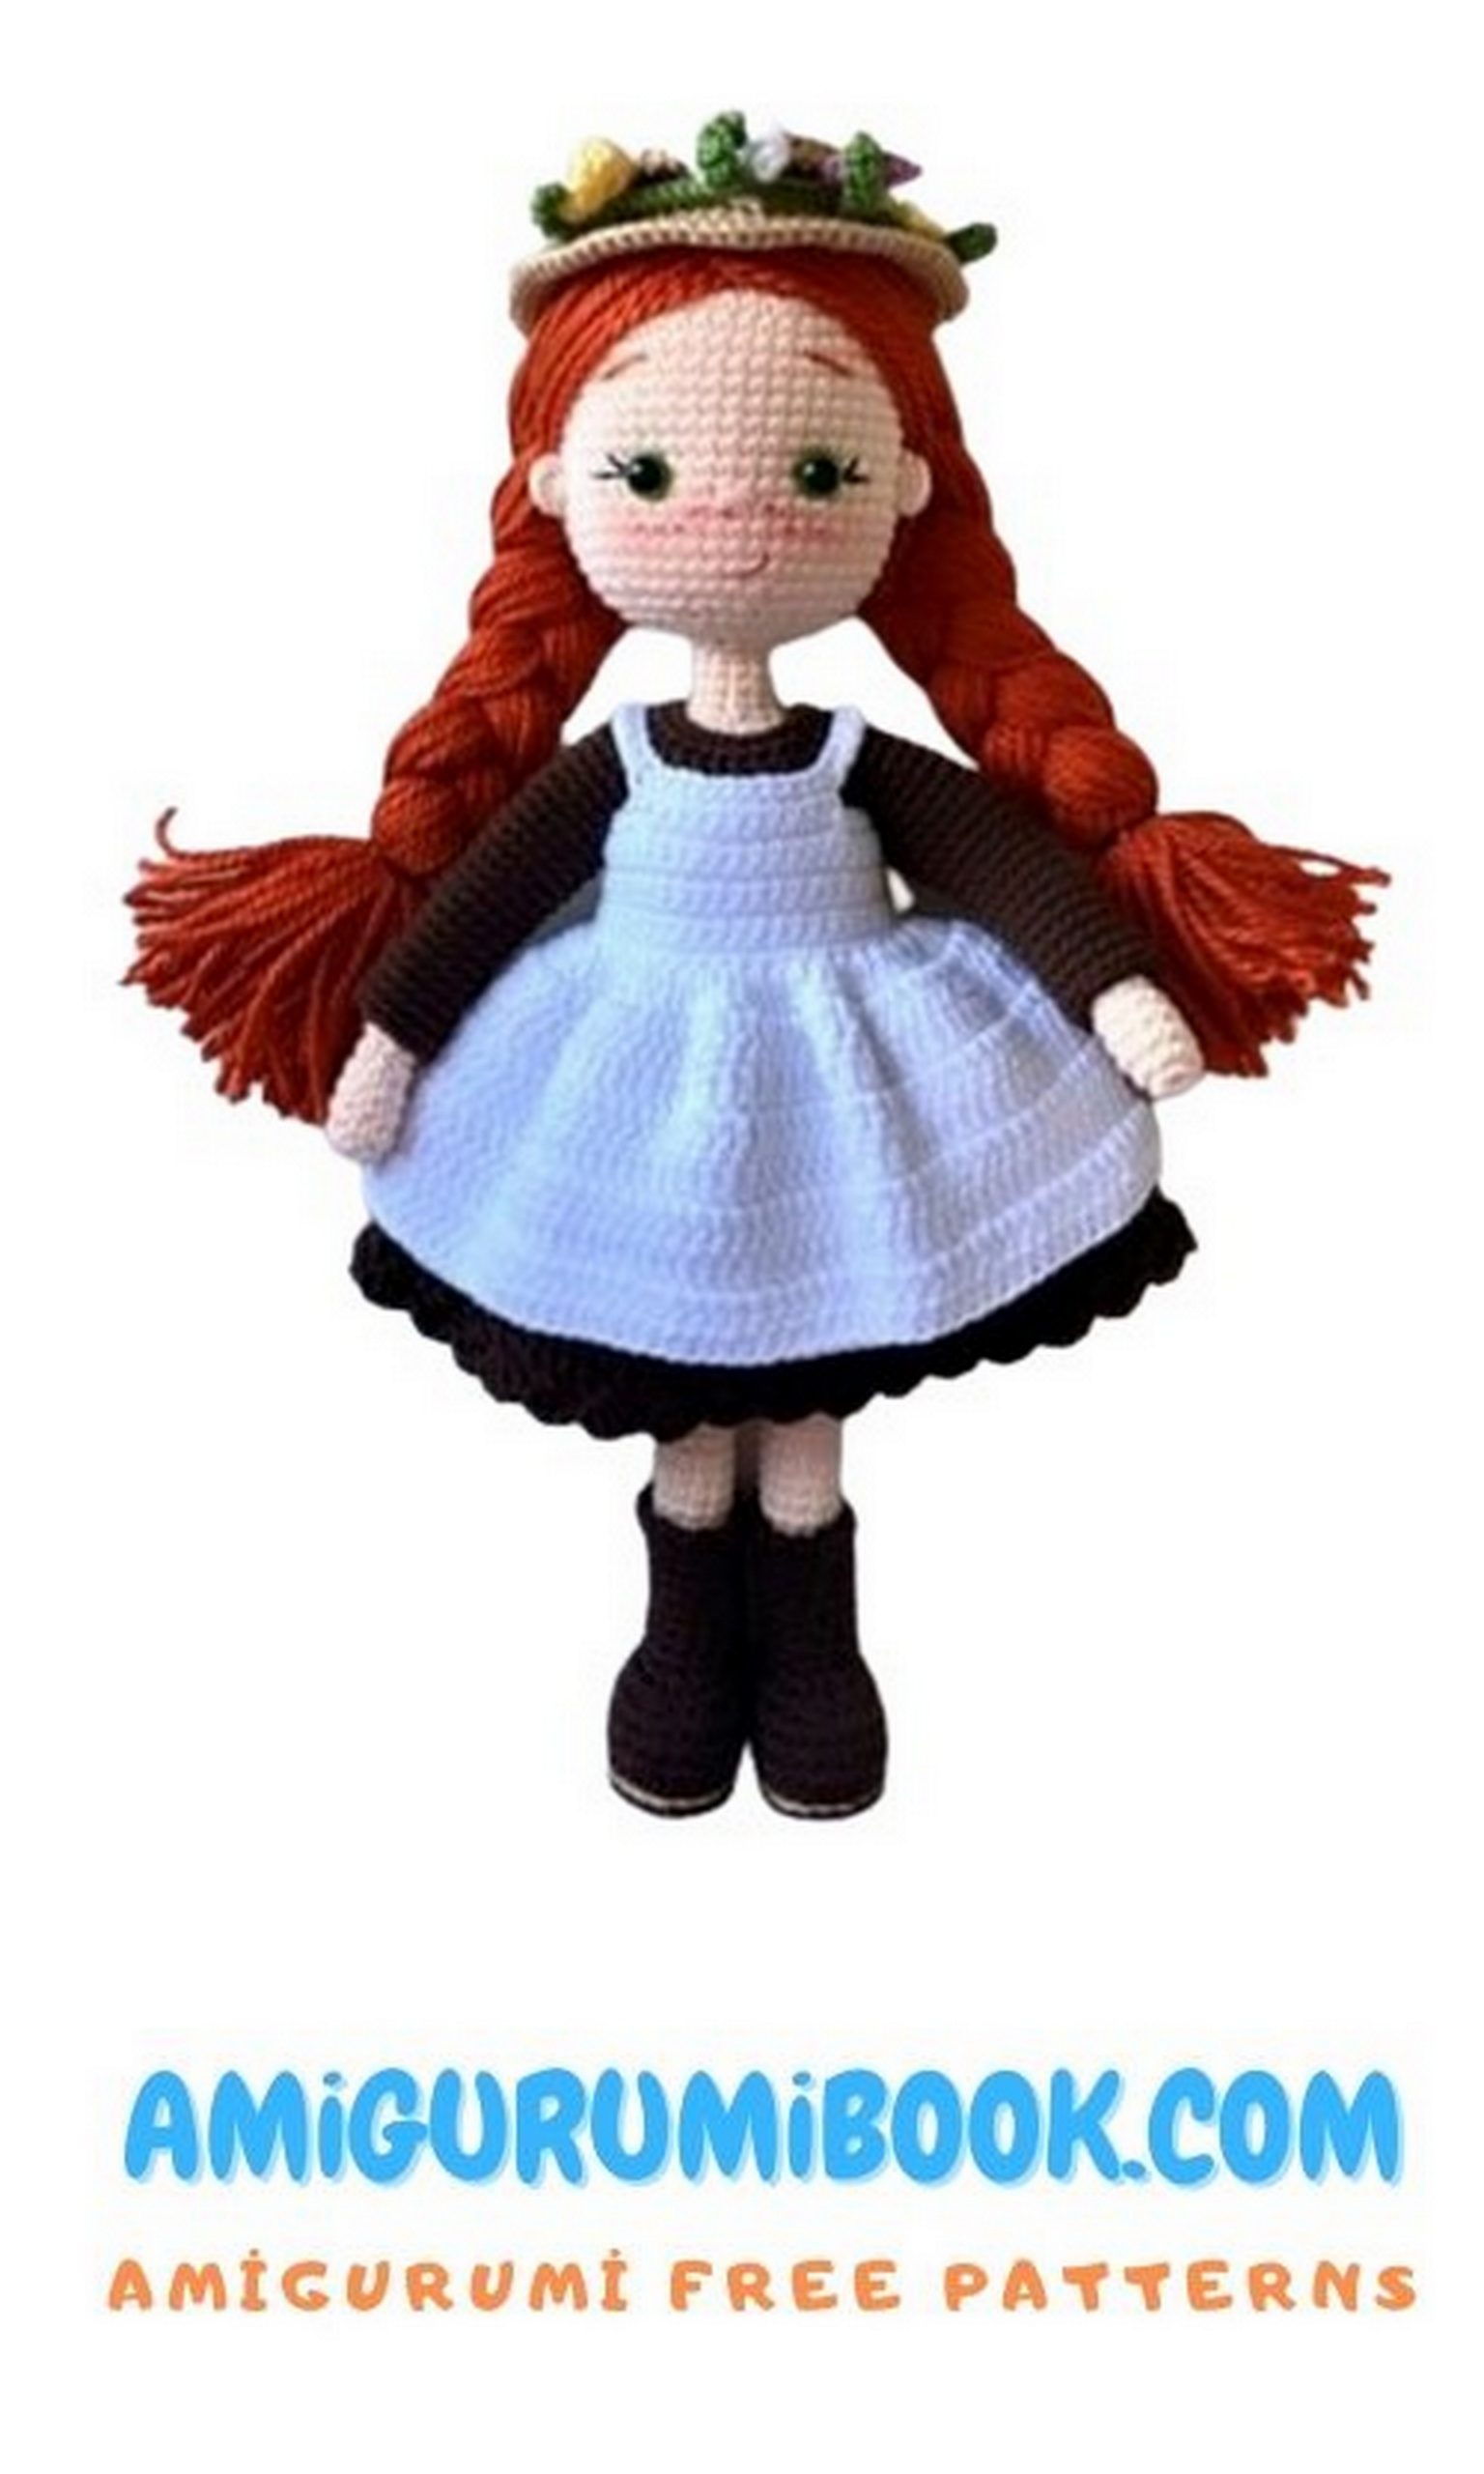
CORONET
1st piece
(Alize Cotton Gold 270)
make 121ch and turn, 40sl st, 1ch, 40HDC, 1 ch, 40sl st, we continue from the other side of the chain, 39sl st, 1 ch, 40HDC, 1 ch, 39sl st,fasten off and weave in the yarn tail..
2nd piece
(Alize Cotton Gold 485)
make 100 ch and fasten off
3rd piece
(Alize Cotton Gold 126)
make 100 ch and fasten off
Give a shape like in the photo.
Sepal
(Alize Cotton Gold 485)
In the magic ring;
1-5 ➢ make 10 ch, from the second ch; 1sc, 1HDC, 5DC, 1HDC, 1sc, 1sl st
Fasten off and leave a long tail for sewing
1 st flower
(Alize Cotton Gold 44)
In the magic ring;
1-5 ➢ make 8 ch, from the second ch; 7DC, 1sl st
Fasten off and leave a long tail for sewing
2 nd flower
(Alize Cotton Gold 44)
In the magic ring;
1-4 ➢ 2ch, 2DC, 2ch 1sl st
Fasten off and leave a long tail for sewing
Combine all three as in the photo.
3 rd flower
(Alize Cotton Gold 682)
In the magic ring;
1-4 ➢ 2ch, 3DC, 2ch 1sl st
Fasten off and leave a long tail for sewing
4 th flower
(Alize Cotton Gold 187)
In the magic ring;
1-5 ➢ 2ch, 3DC, 2ch 1sl st
Fasten off and leave a long tail for sewing
5 th flower
(Alize Cotton Gold 110)
In the magic ring;
1-4 ➢ 3ch, 3TR, 3ch 1sl st
Fasten off and leave a long tail for sewing
6 th flower
(Alize Cotton Gold 216)
In the magic ring;
1-4 ➢ 3ch, 4TR, 3ch 1sl st
Fasten off and leave a long tail for sewing
Follow the photos to give the crown its final shape. I sewed the flowers. If you want, you can stick it with hot glue.
Now, you can make mouth and freckles as seen in the photos.
Ready..