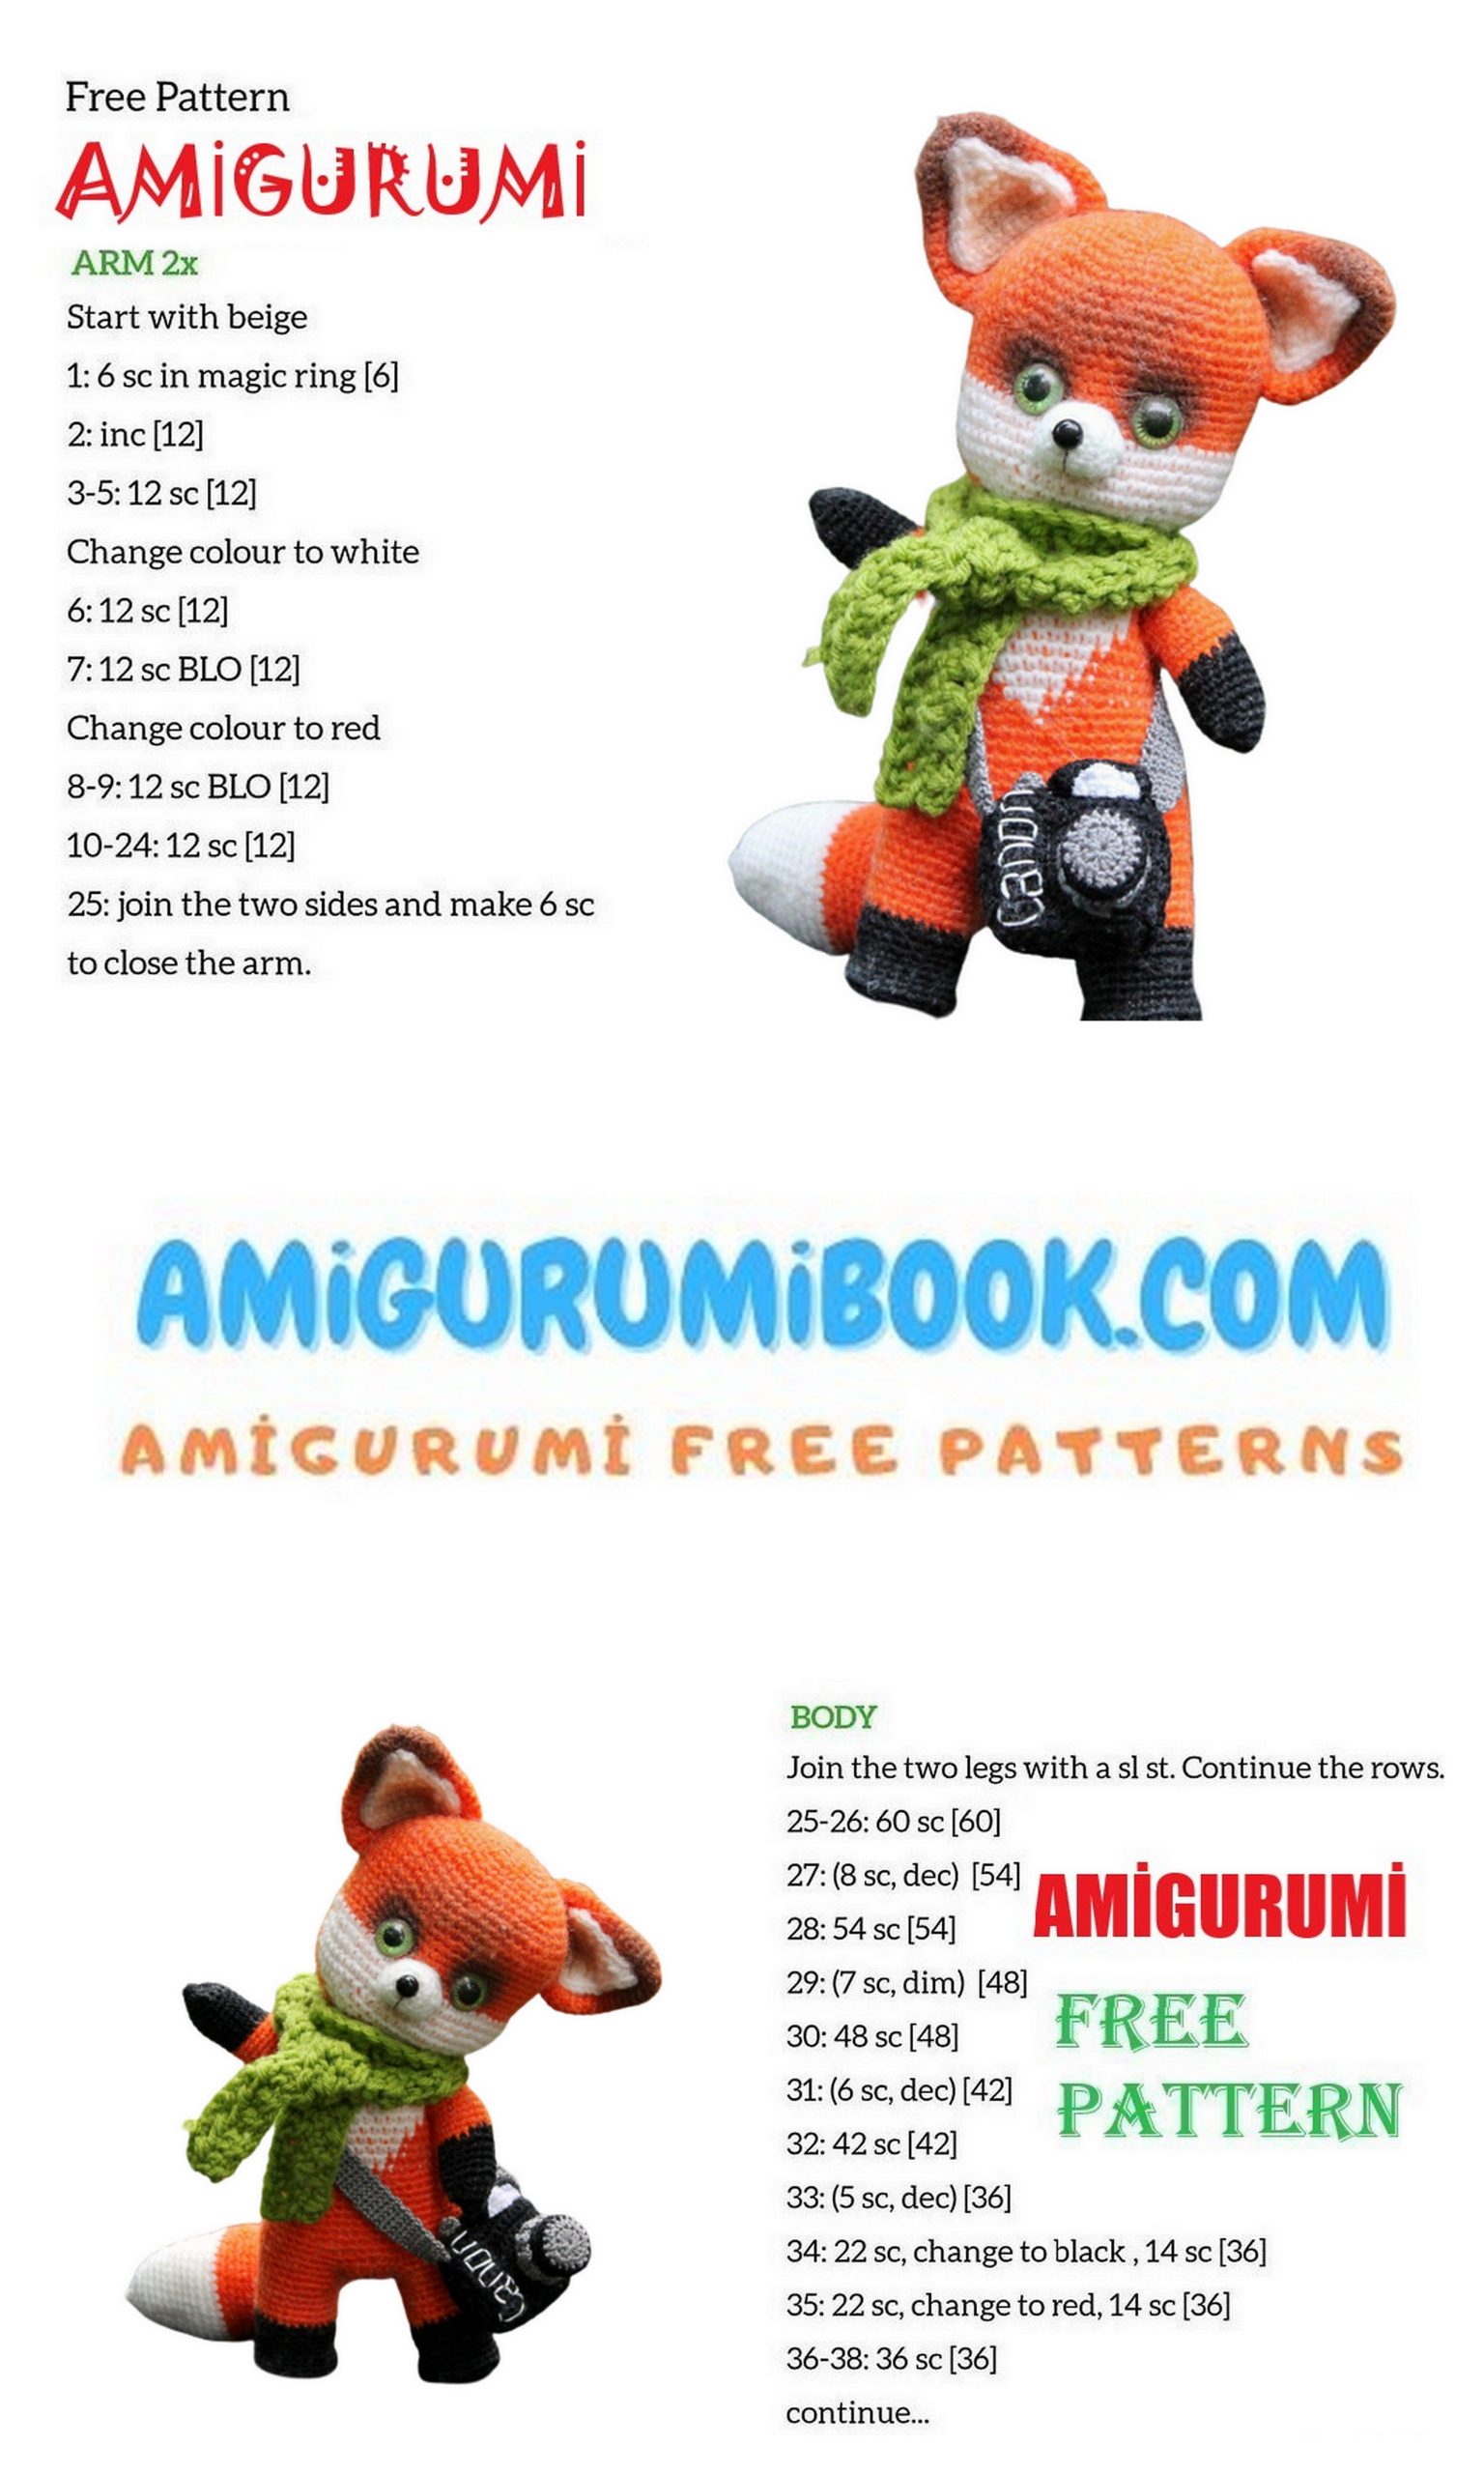
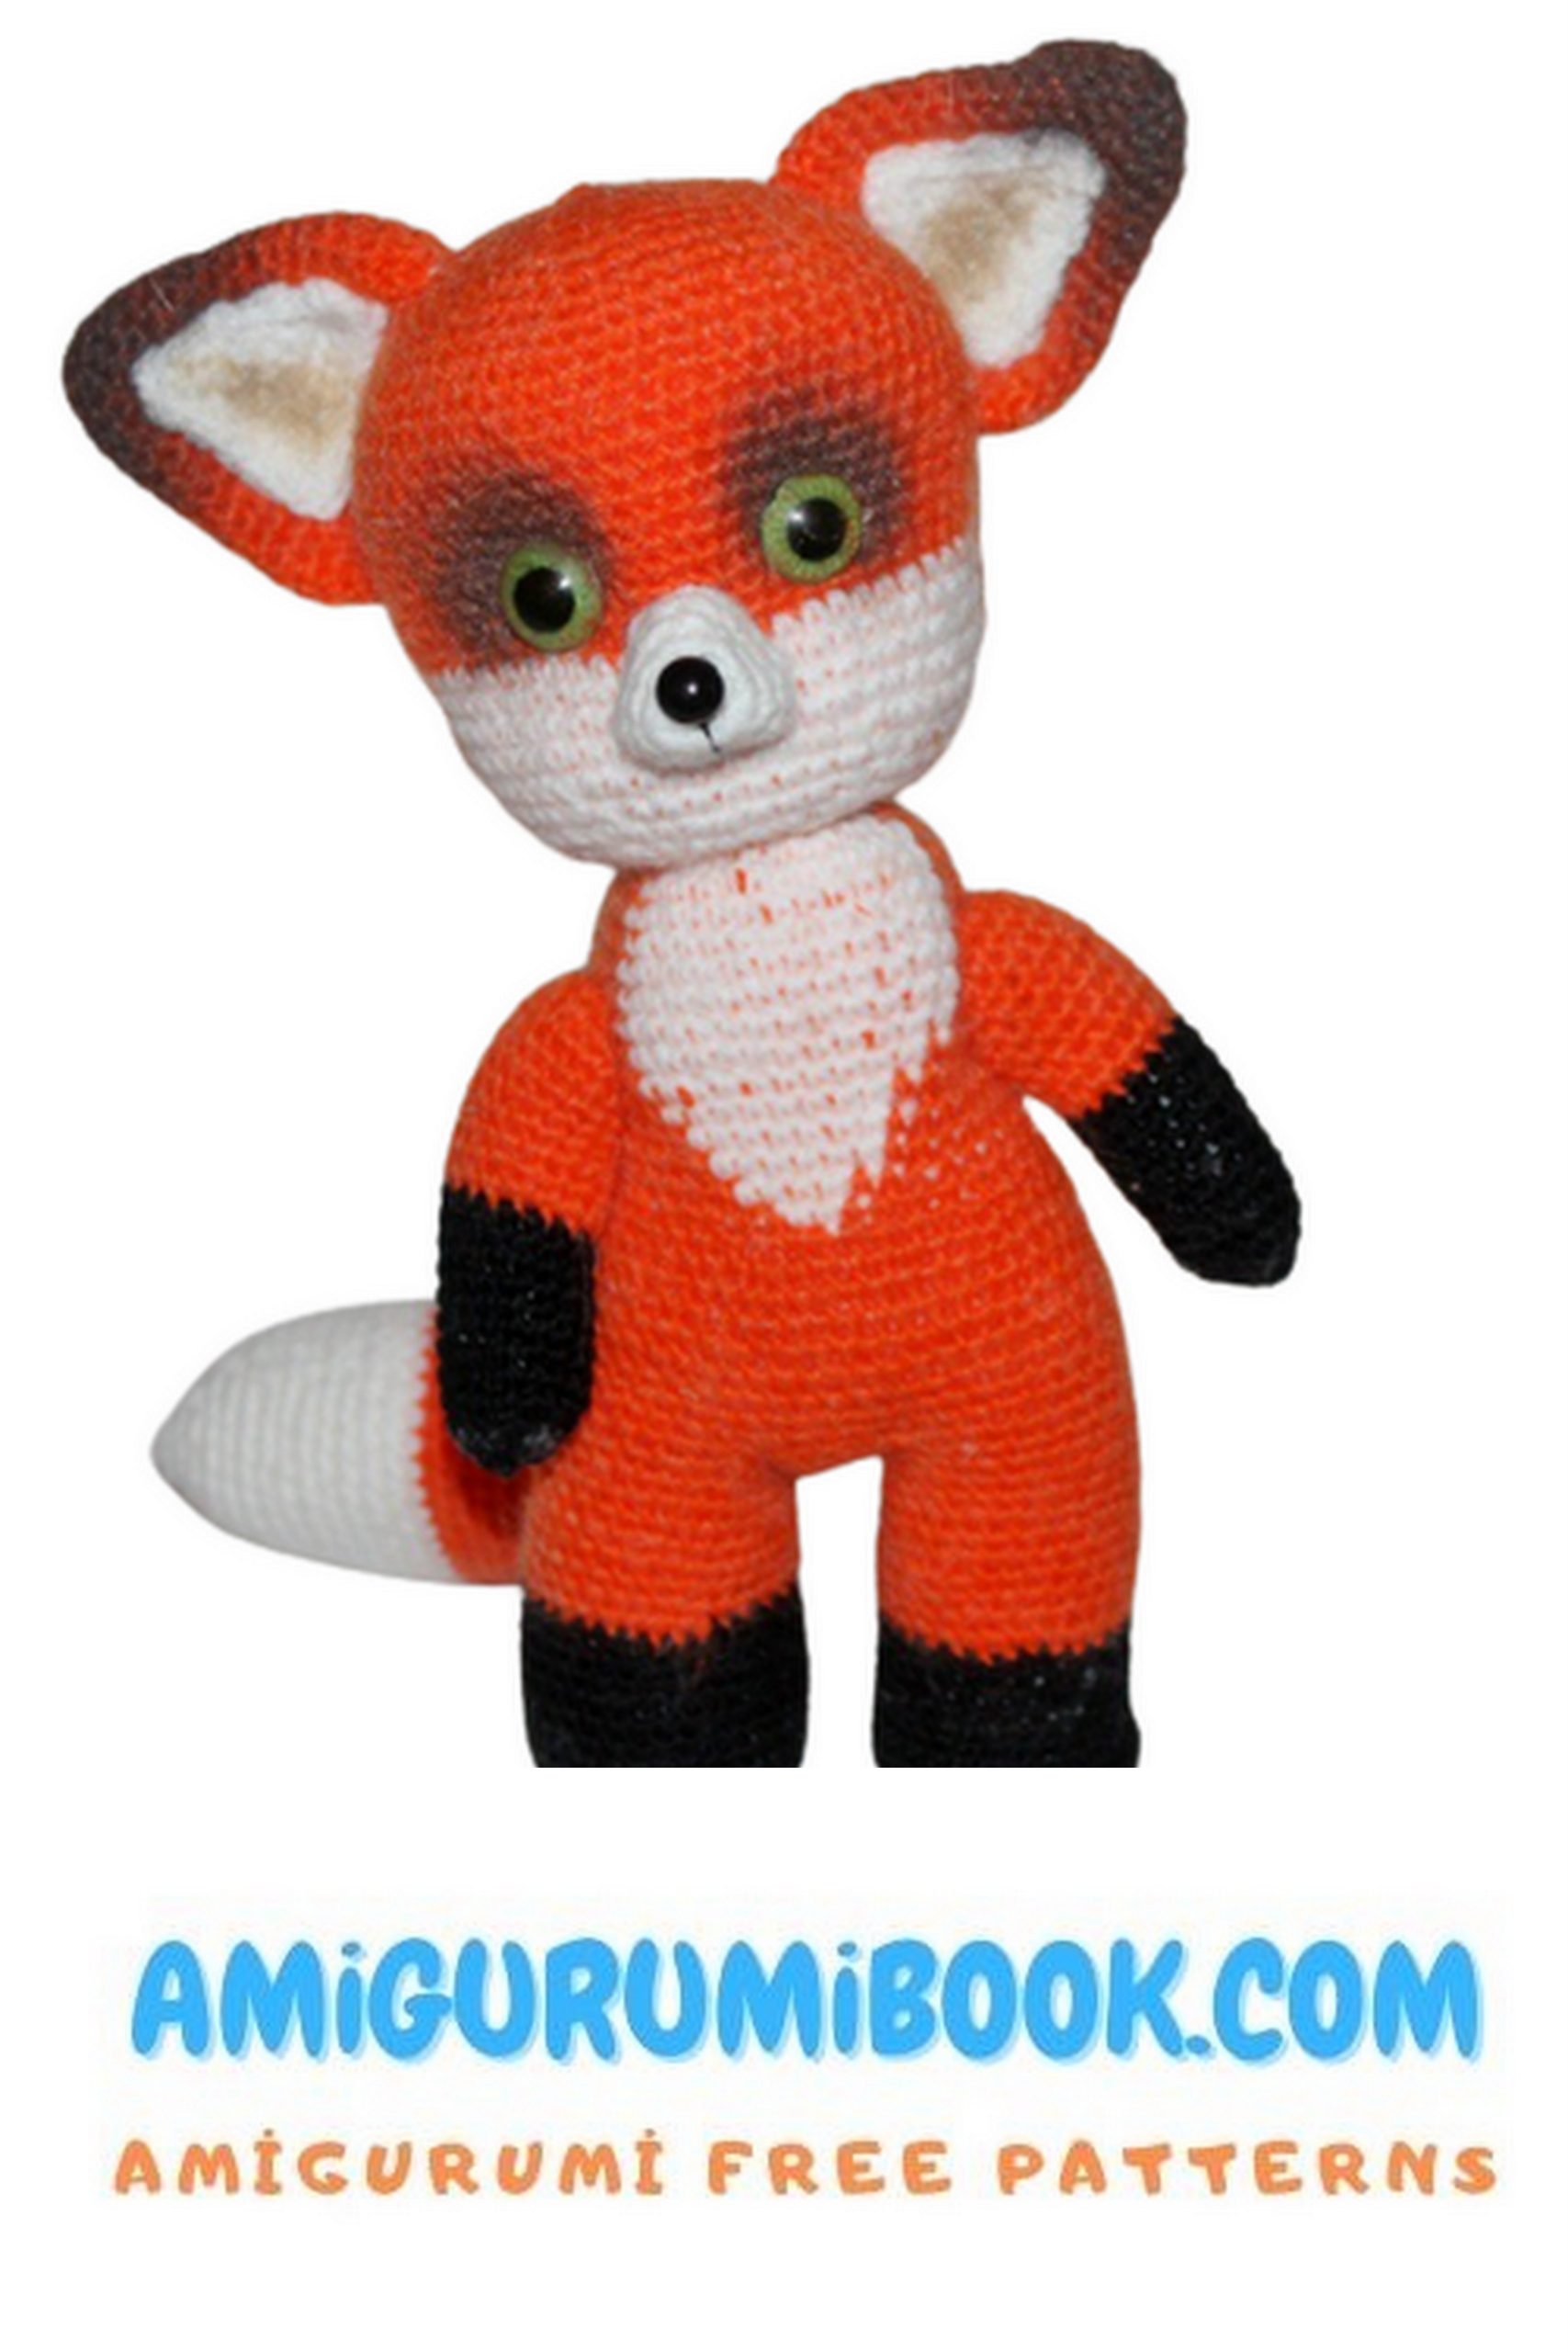
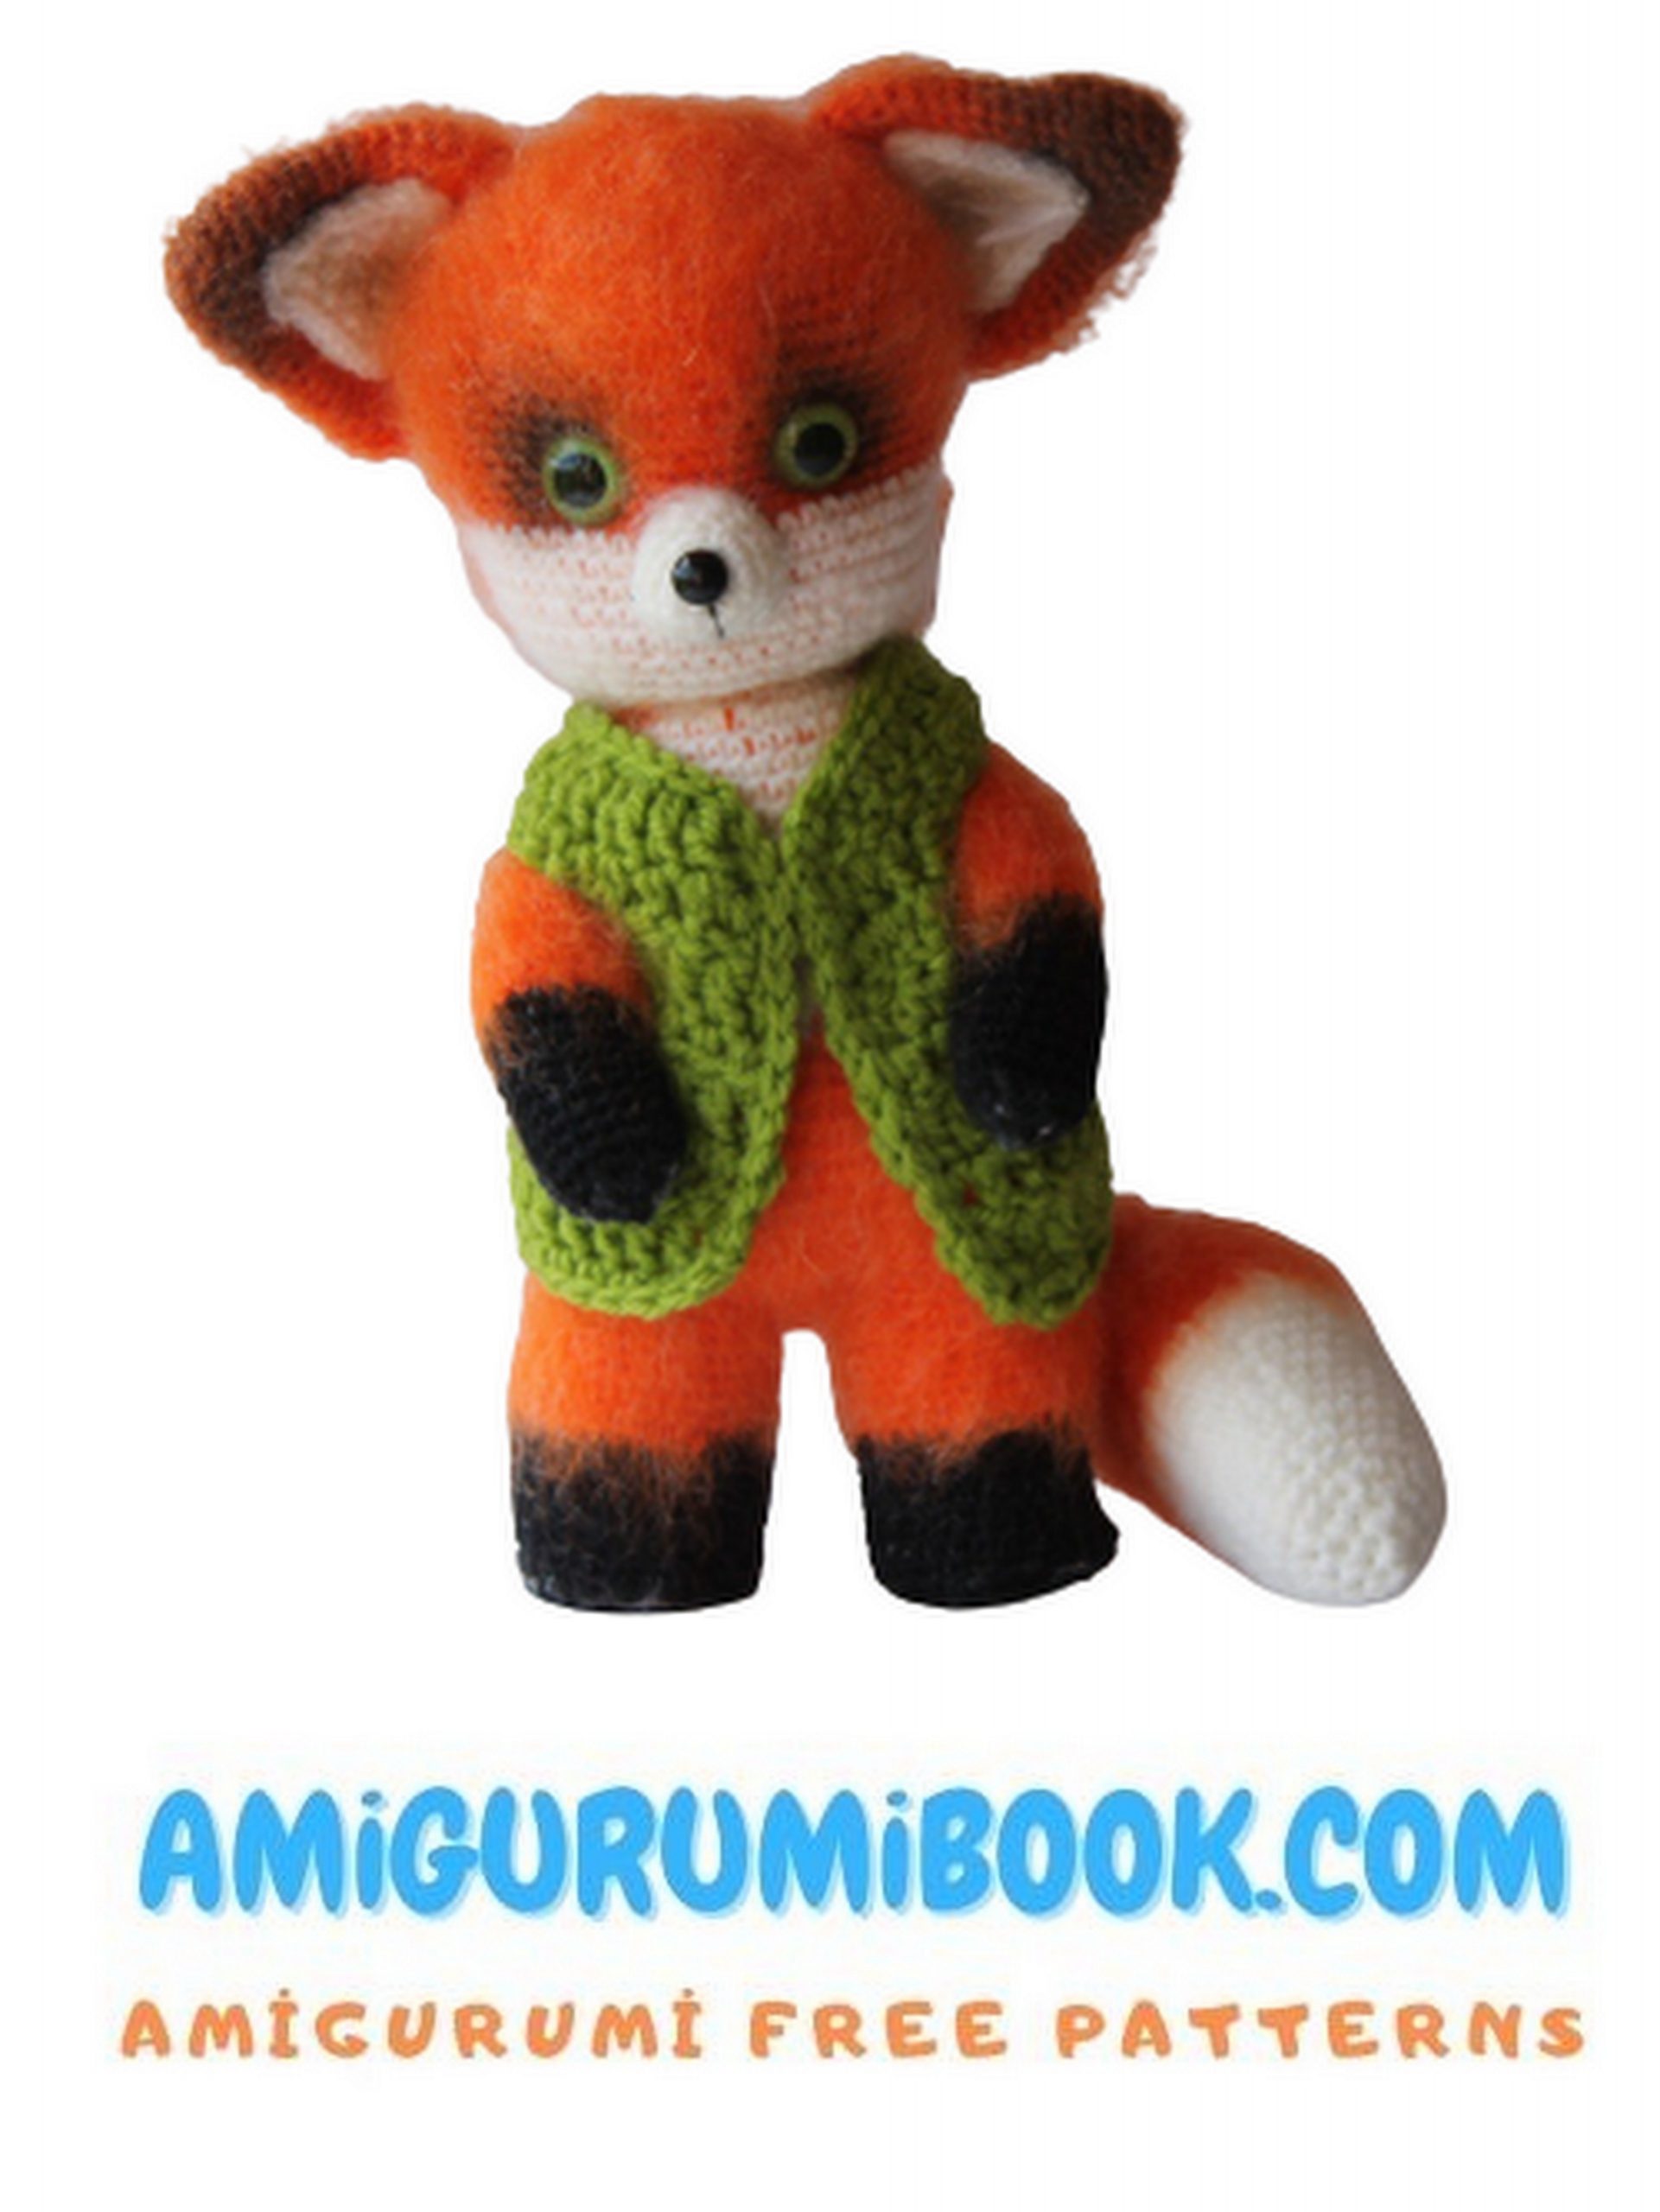
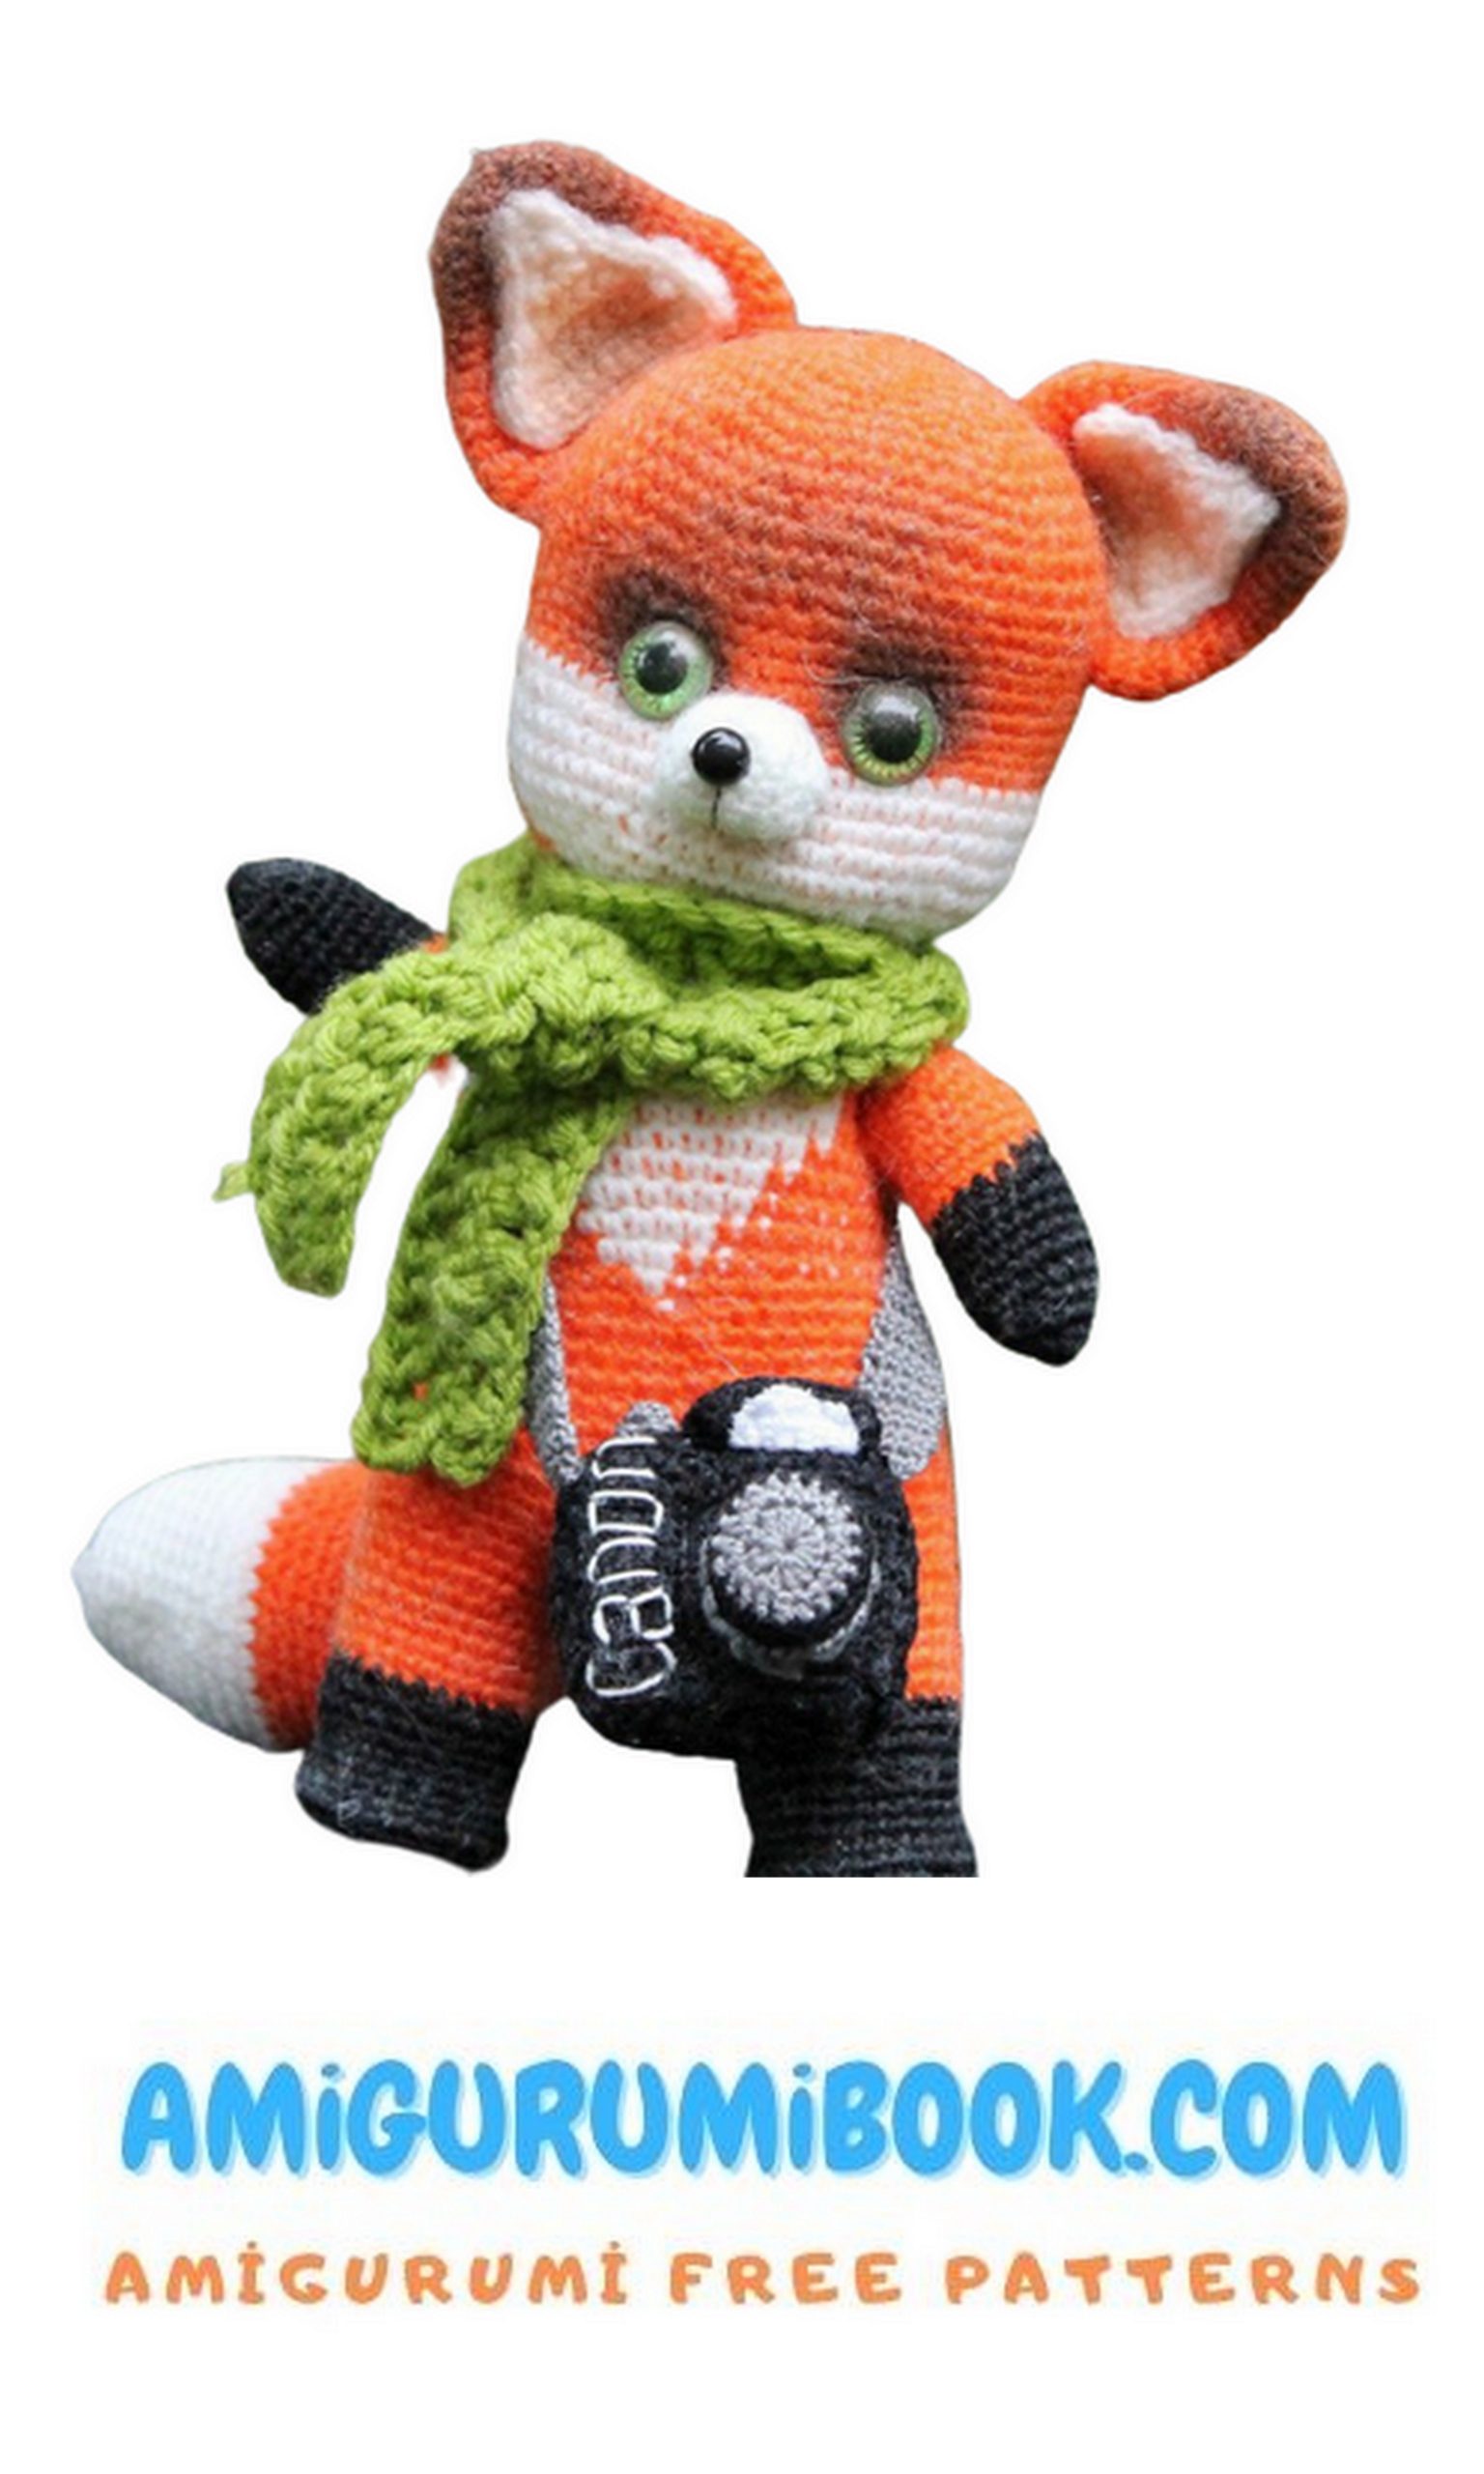
Fox Philip Amigurumi Free Pattern
In this article, fox philip amigurumi free pattern is waiting for you. I continue to share amigurumi free patterns.
Materials :
Yarn “Magic” from Yarn from Troitsk orange mohair acrylic “”, 30%, 70%, 450, 100. 20 m g It will take about g
Children’s novelty yarn from Pekhorka white color acrylic m g “” “”, 100%, 200, 50. It will take about 10 g
Classic yarn from black mercerized cotton m « » «LAMA» , 100% , 235 , 50 . 10 g It will take about g
Eyes and spout for toys
Filler for toys
Frame wire
Pliers
Thread needle for sewing details,
Glue moment universal transparent
Contrasting thread as a marker
Shadows for toning toys or acrylic paints ( )
Abbreviations:
ch-chain
sl-st – slip stitch
sc – single crochet
dec – decrease two sc together
inc – increase from one loop two sc
Difficulty: medium
PATTERN

Head
Orange thread:
1 : 6 (6) row sc into magic ring
2 : 6 (12) row inc
We mark the beginning of the row with a contrasting thread
3 : (1 , 1 )*6 (18) row sc inc
4 : (2 , 1 )*6 (24) row sc inc
5 : (3 , 1 )*6 (30) row sc inc
6 : (4 , 1 )*6 (36) row sc inc
7 : (5 , 1 )*6 (42) row sc inc
8 : (6 , 1 )*6 (48) row sc inc
9 : (7 , 1 )*6 (54) row sc inc
10 : (8 , 1 )*6 (60) row sc inc
11-23 : 60 (60) sc rows
24-27 : 28 , rows sc in white other sc in orange 32 .
You can knit without cutting the orange thread, but hiding it, “” inside the knitting with a white thread and vice versa. The picture shows how. , it is done. (60)
Next, knit white under white, orange under orange:
28 : (8 , 1 )*6 (54) row sc dec
29 : (7 , 1 )*6 (48) row sc dec
30 : (6 , 1 )*6 (42) row sc dec
31 : (5 , 1 )*6 (36) row sc dec
32 : (4 , 1 )*6 (30) row sc dec
33 : (3 , 1 )*6 (24) row sc dec
34 : (2 , 1 )*6 (18) row sc dec
35 : (1 , 1 )*6 (12) row sc dec
Stuff your head
36 : 6 (6) row dec
We make the frame, measure the wire with a length of cm in: 76 (depending on the threads used, the length of the wire will be different. Bend in half, twist At the level of cm). , . 7, 5 we spread to the sides by cm and then again (7.5), we twist it together and leave it as it is,.
We wrap the tip of the wire frame with a piece of filler and insert it into the head through the bottom hole:
We knit a muzzle row sc into magic ring row inc row:
1:6sc
2 : 6inc (12sc),
3 : 12 sc row sc inc row sc Finish (12sc),
4 : 1 ( , 1 )*6 (18sc),
5 : 18sc (18sc).
fasten and cut the thread with a connecting column,.
We attach the muzzle with needles and try on the eyes, after which we mark the places chosen for them with tailor’s pins.
We make tightenings to the point under the number to introduce a needle and thread:
1, then we bring it to point No. go to point No. and 2, 3 return to the th point, tightening the thread not very much but not 1,, weakly Repeat this trajectory several times and fix the thread. next to the th point 1 .
Glue the eyes with transparent glue.
Now let’s take care of the muzzle, sew it on without forgetting at the end of it:,
stuff with filler.
Glue on the nose.
It turns out pretty cute muzzle)

Ears details (4):
Orange det (2 .):
1 : 6 row sc into magic ring
2 : 6 (12) row inc
3 : 12 row sc
4 : (1 , 1 )*6 (18) row sc inc
5 – 7: 18 rows sc
8 : (2 , 1 )*6 (24) row sc inc
9–10: 24 sc rows
11 : (3 , 1 )*6 (30) row sc inc
12:30 row sc
13 : (4 , 1 )*6 (36) row sc inc
14 : 36 row sc
15 : (5 , 1 )*6 (42) row sc inc
16 – 17: 42 rows sc
Row finish sl-st thread fasten, White turning rows ( ) 2
details:
1:10. .+ 1 . . (11) Row ch lift ch
2 : 10 ( row sc at the end of each row
don’t forget to make ch rise . . !)
3 : 1 , 6 , 1 (8) row dec sc dec
4 : 1 , 4 , 1 (6) row dec sc dec
5 : 6 row sc
6 : 1 , 2 , 1 (4) row dec sc dec
7 : 4th row sc
8 : 2 (2) row dec
9 : 1 (1) row dec
We tie the triangle sl-st around the perimeter, you can sc (, even more aesthetically pleasing).
We outline the places on the head where the ears will be sewn
Sew the details and sew the ears to the head
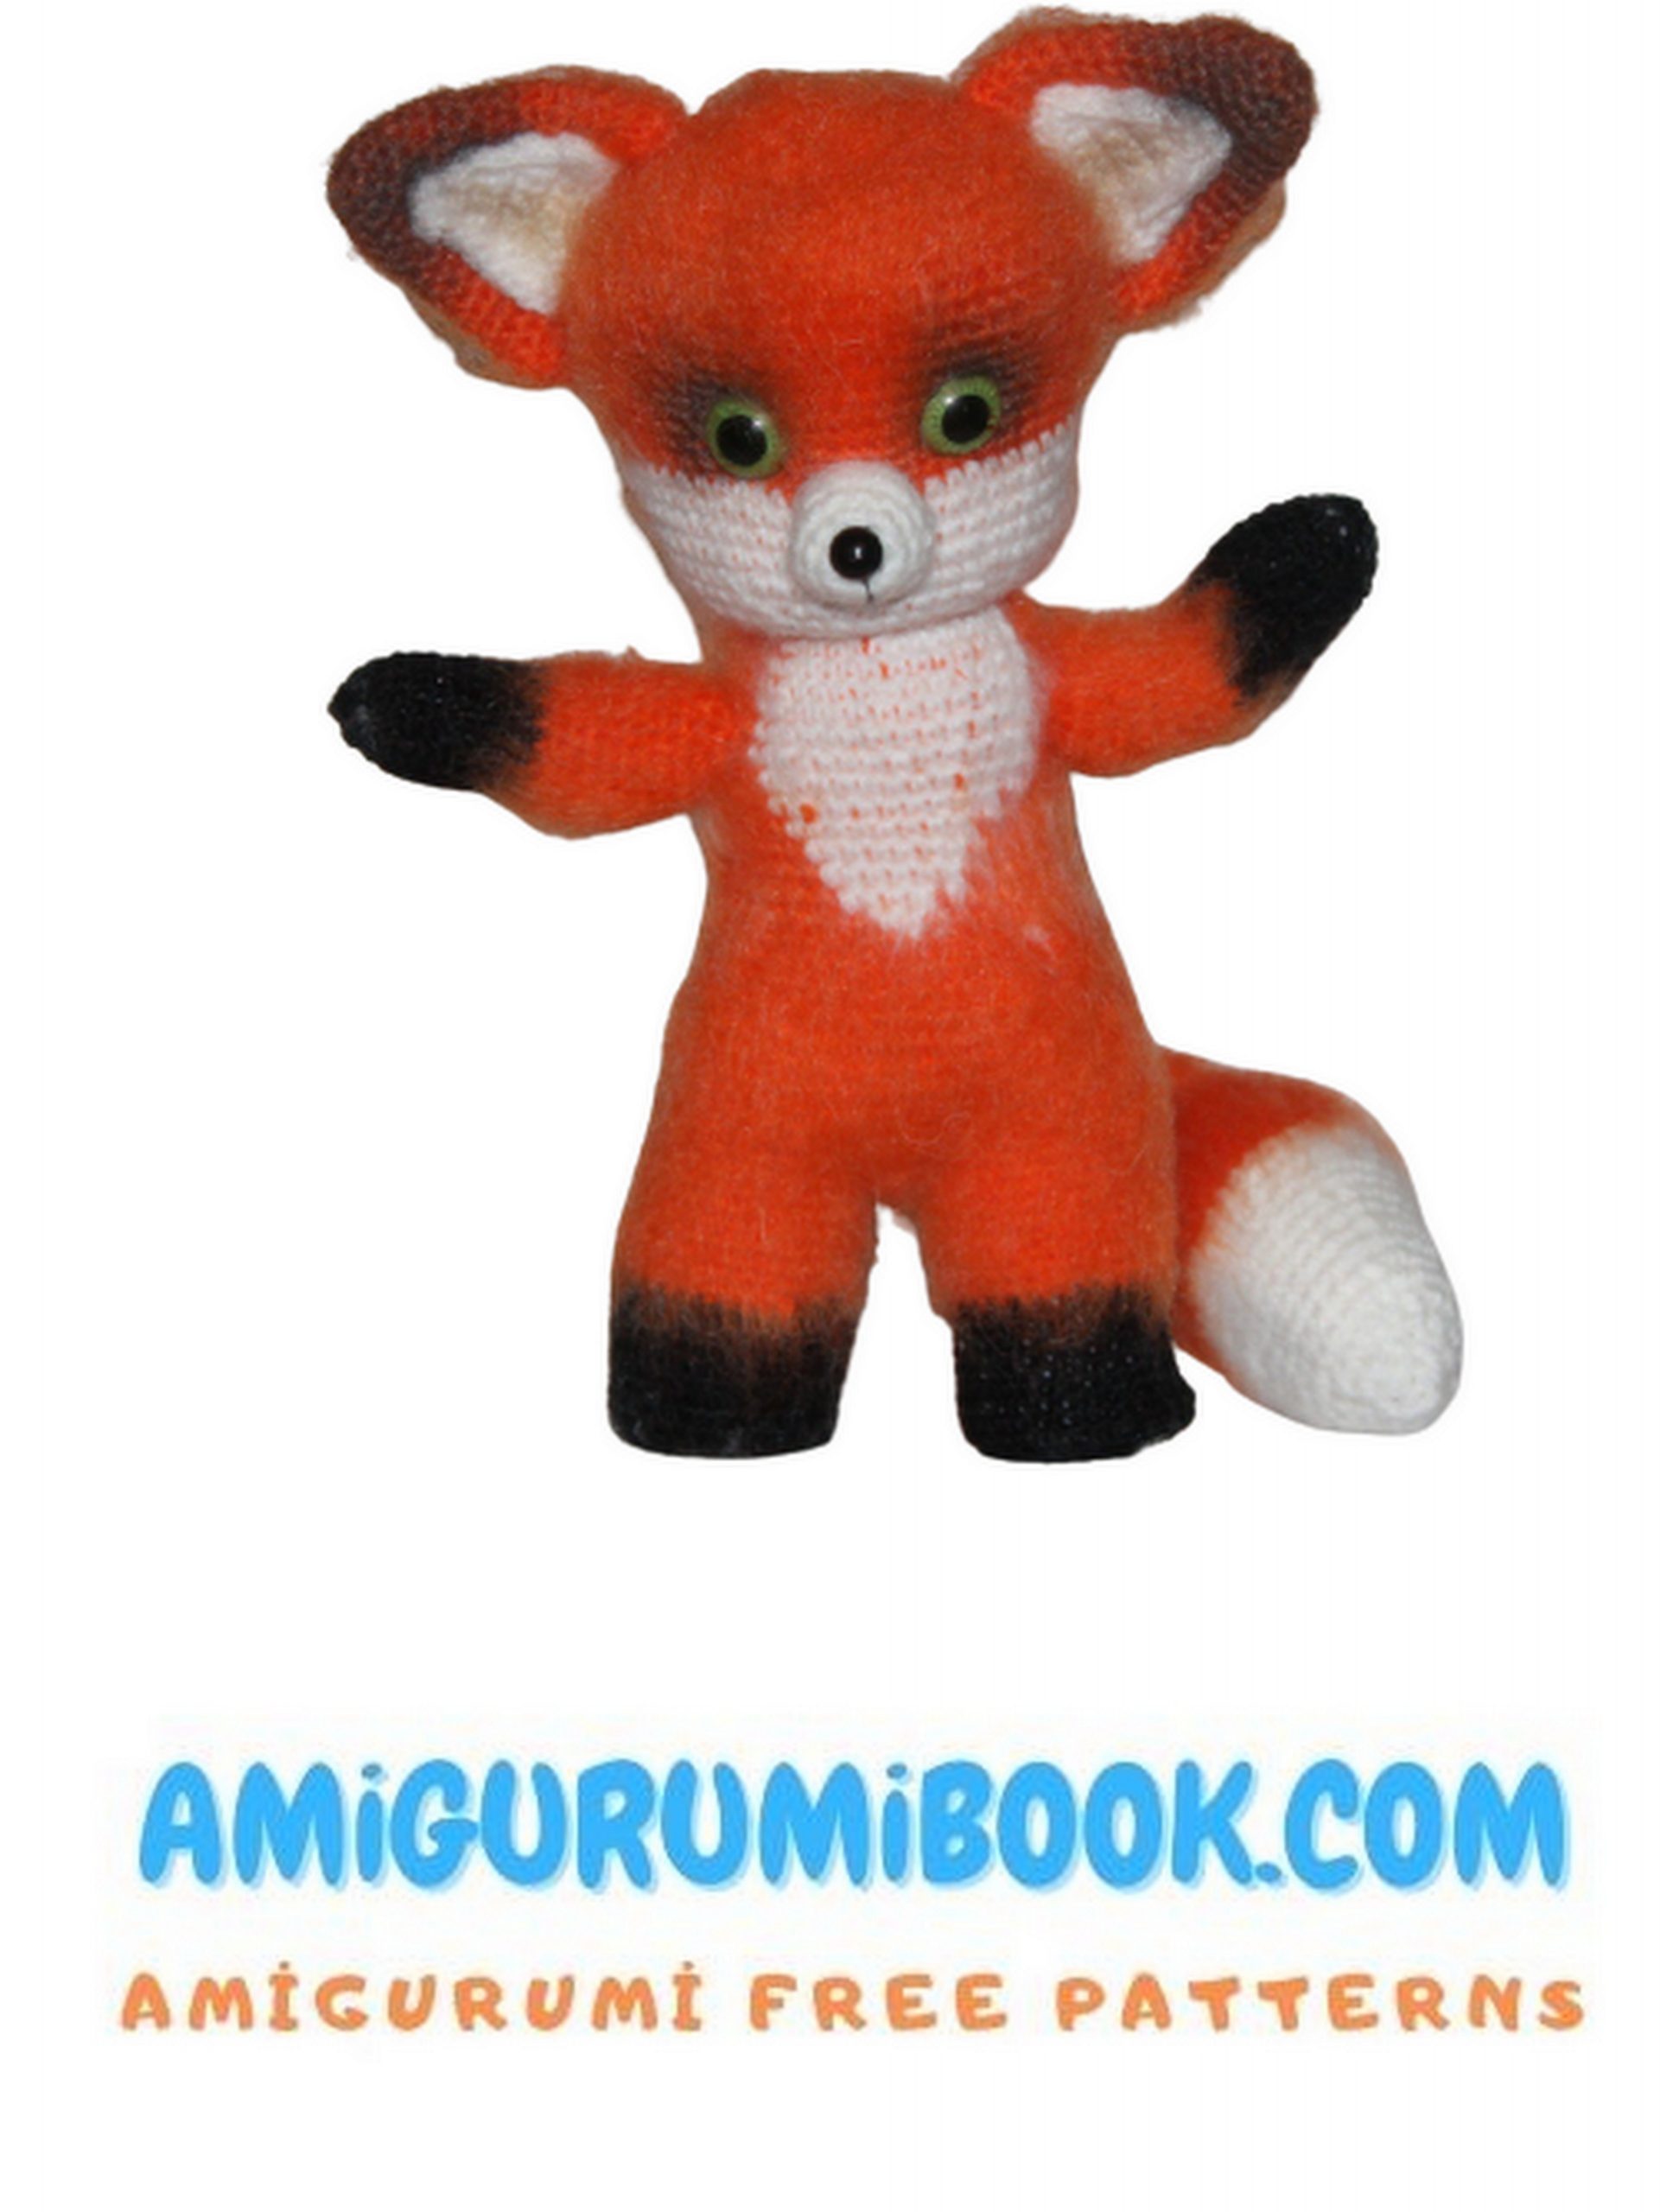
Body
1 : 6 row sc into magic ring
2 :6 (12) row inc
3 : 12 (24) row inc
4 : : (1 , 1 )*4; row with white thread sc inc orange thread sc inc: (1, 1) * 8 (36)
5 : : (6 , 1 )*2; row with white thread sc inc orange thread sc inc: (6, 1) * 4 (42)
6 – 11:: 13, a row of white thread sc orange sc: 29 (42)
12: 1, row sc in orange 11, sc with white thread again with orange thread sc – 30 (42)
13: 2, row sc in orange 9, sc with white thread with orange thread sc – 31 (42)
14: 3, 7 row with orange thread sc sc with white thread sc, 32 in orange (42)
15: 4, 5 row with orange thread sc sc white thread orange, color sc 33 (42)
16 : : 5 , row with orange thread sc white sc orange sc – 3 , – 34 (42)
17: – 6, row with orange thread sc white sc orange sc – 1, – 35 (42)
18 : (7 , 1 )*6 (48) row sc inc
19 : (8 , 1 )*6 (54) row sc inc
20 – 27: 54 (54) sc rows
Next, we dress our body on the frame, having previously pressed the frame handles at the seams.
We mark the exit points of the handles with tailor’s pins.
We pull out the wire arms through the marked holes.
We stuff the body with sintepuh.
We fill the filler quite tightly, we do not regret that it was not, , loose.
We form the legs from wire, taking into account the fact that each of them should reach a length of cm, I repeat that the length depends on 5.5 (we bend the yarn you use and isolate it with a plaster or), with electrical tape.
Next, we cut off the wire for the tail and fasten it in our 19 frame.
We also isolate the tip of the tail:
Outlining the legs:
1: 10, row sc then count in the opposite direction 21 loops mark it with some kind of marker, for example ( ), type ch and with sl-st 6 . . we fasten to the marked loop, we knit sc along this 6 side again, we count, 21 loops are only now in front, we also mark the th loop with a marker 21, we type ch and sl-st, 6. . fasten to the marked loop, knit on this side sc 7 (25)
We knit the middle between the legs:
2: 6 rows knit sc in the chain in the front half loop sc, 1, 3 dec sc in the front, 6 half loop in the second chain, 3 dec (19)
3: and subsequent rows of solid decreases to the very end, we fix the thread,, cut off.
Legs details (2):
We fasten the thread with orange yarn sc row: 1 – 10: 27 (27), cut off with black yarn sc row: 11 – 21: 27 (27)
We stuff both legs with sintepuh And now a little secret of the stability of the legs I came up with it myself), I have never seen anything like this from anyone. We take two flat buttons.
of a suitable diameter and sew one to each leg a, namely to the wire frame There is just a loop at the end and.
it is very convenient to hook a thread on it to sew a button to it,:
Now it remains only to tie the legs, and we do it as follows, alternating sc dec until there is: (1, 1), a small hole and then you will need to pull it off to complete,, knitting by securing the thread The number of decreasing rows for everyone will be,. different depending on the diameter of the buttons, the thickness of the yarn, etc. .
It turns out this beauty:
Hands details (2):
Orange yarn:
1 : 6 row sc into magic ring
2 : 6 (12) row inc
3 : (1 , 1 )*6 (18) row sc inc
4 – 11 : 18 sc rows
Black yarn:
12 – 20: 18 sc
We insert into the wire frame stuffed with sintepuh,
21: (1 , 1 )*6 (12) sc dec
22:6(6)dec
We finish knitting, fasten and cut the thread
Tail:
Orange thread:
1 : 6 row sc into magic ring
2 : 6 (12) row inc
3 – 5 : 12 rows sc
6: (3 , 1 )*3 (15) sc inc
7 – 9: 15 sc rows
10 : (4 , 1 )*3 (18) row sc inc
11 – 13: 18 sc rows
14 : (5 , 1 )*3 (21) row sc inc
15 – 17: 21 rows sc
18 : (6 , 1 )*3 (24) row sc inc
19 – 21: 24 rows sc
22 : (3 , 1 )*6 (30) row sc inc
23 : 30 row sc
24 : (4 , 1 )*6 (36) row sc inc
25 – 30 : 36 sc rows
White thread:
31 – 32: 36 sc rows
33 : (10 , 1 )*3 (33) row sc dec
34 : 33 row sc
35 : (9 , 1 )*3 (30) row sc dec
36 : 30 row sc
37 : (8 , 1 )*3 (27) row sc dec
38 : 27 row sc
39 : (7 , 1 )*3 (24) row sc dec
40 : 24 row sc
We put the tail on the frame, stuff it with filler
41 : (2 , 1 )*6 (18) row sc dec
42 : (1 , 1 )*6 (12) row sc dec
43 : 6 (6) row dec
Decor:
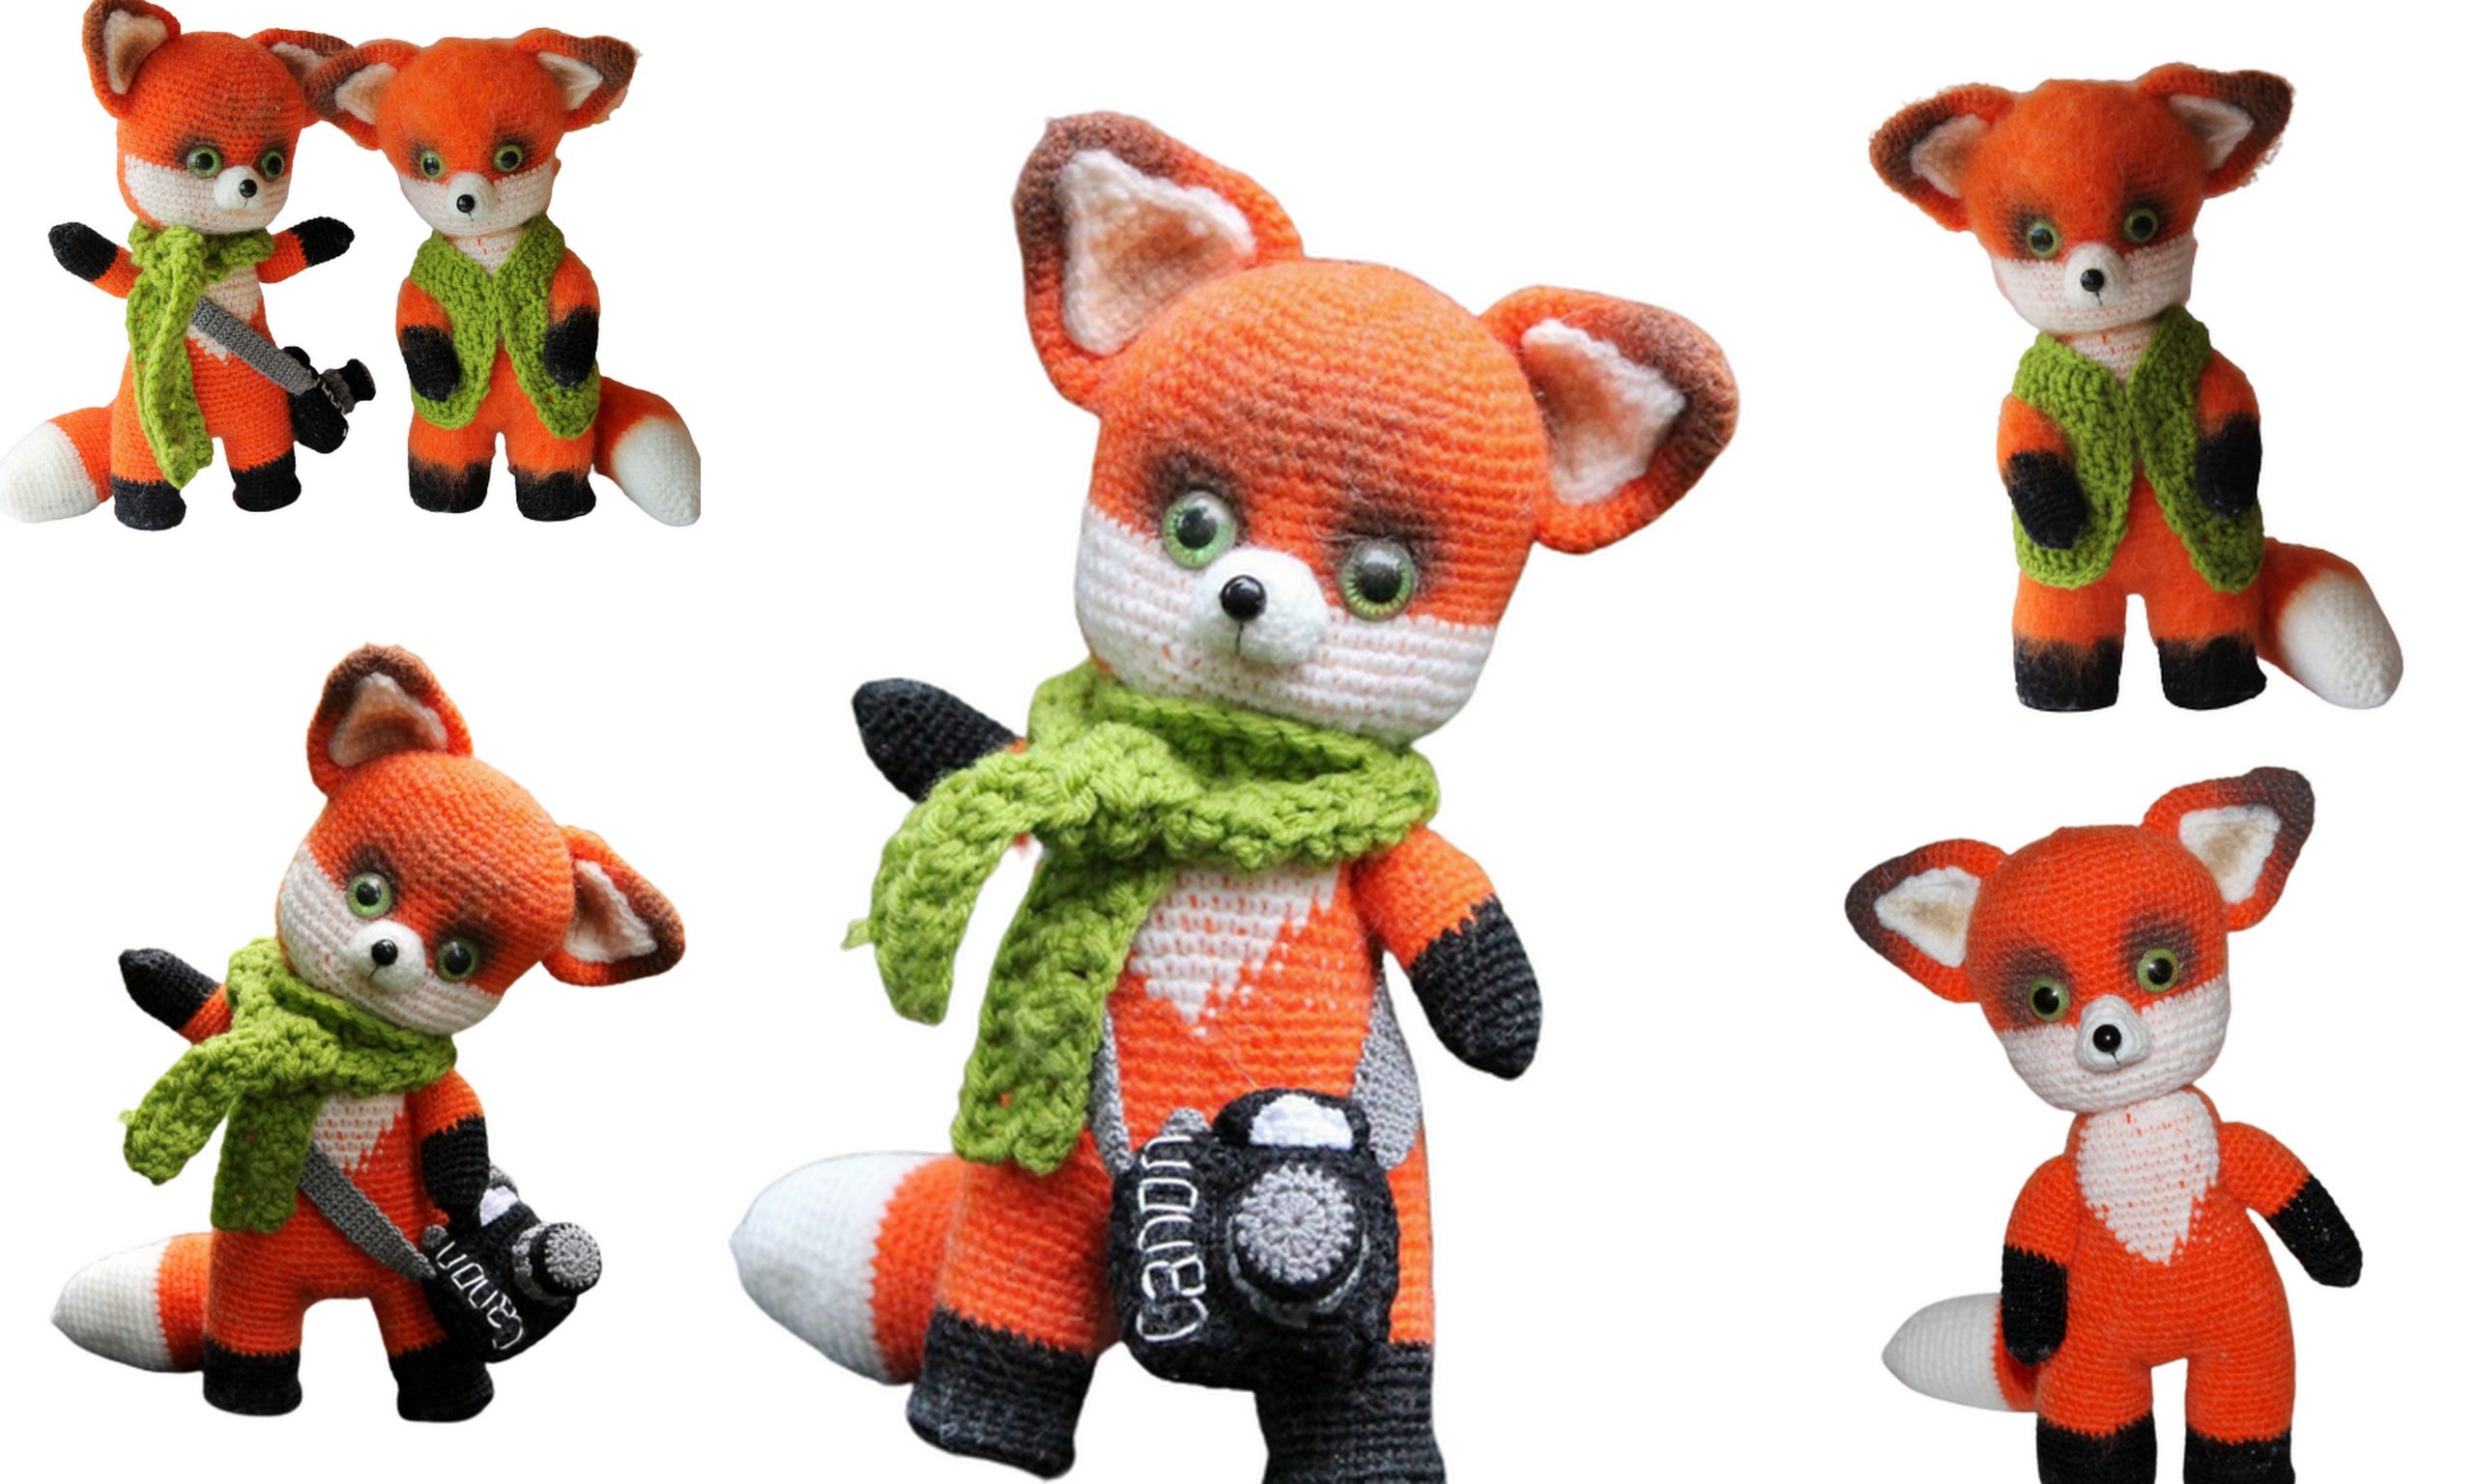
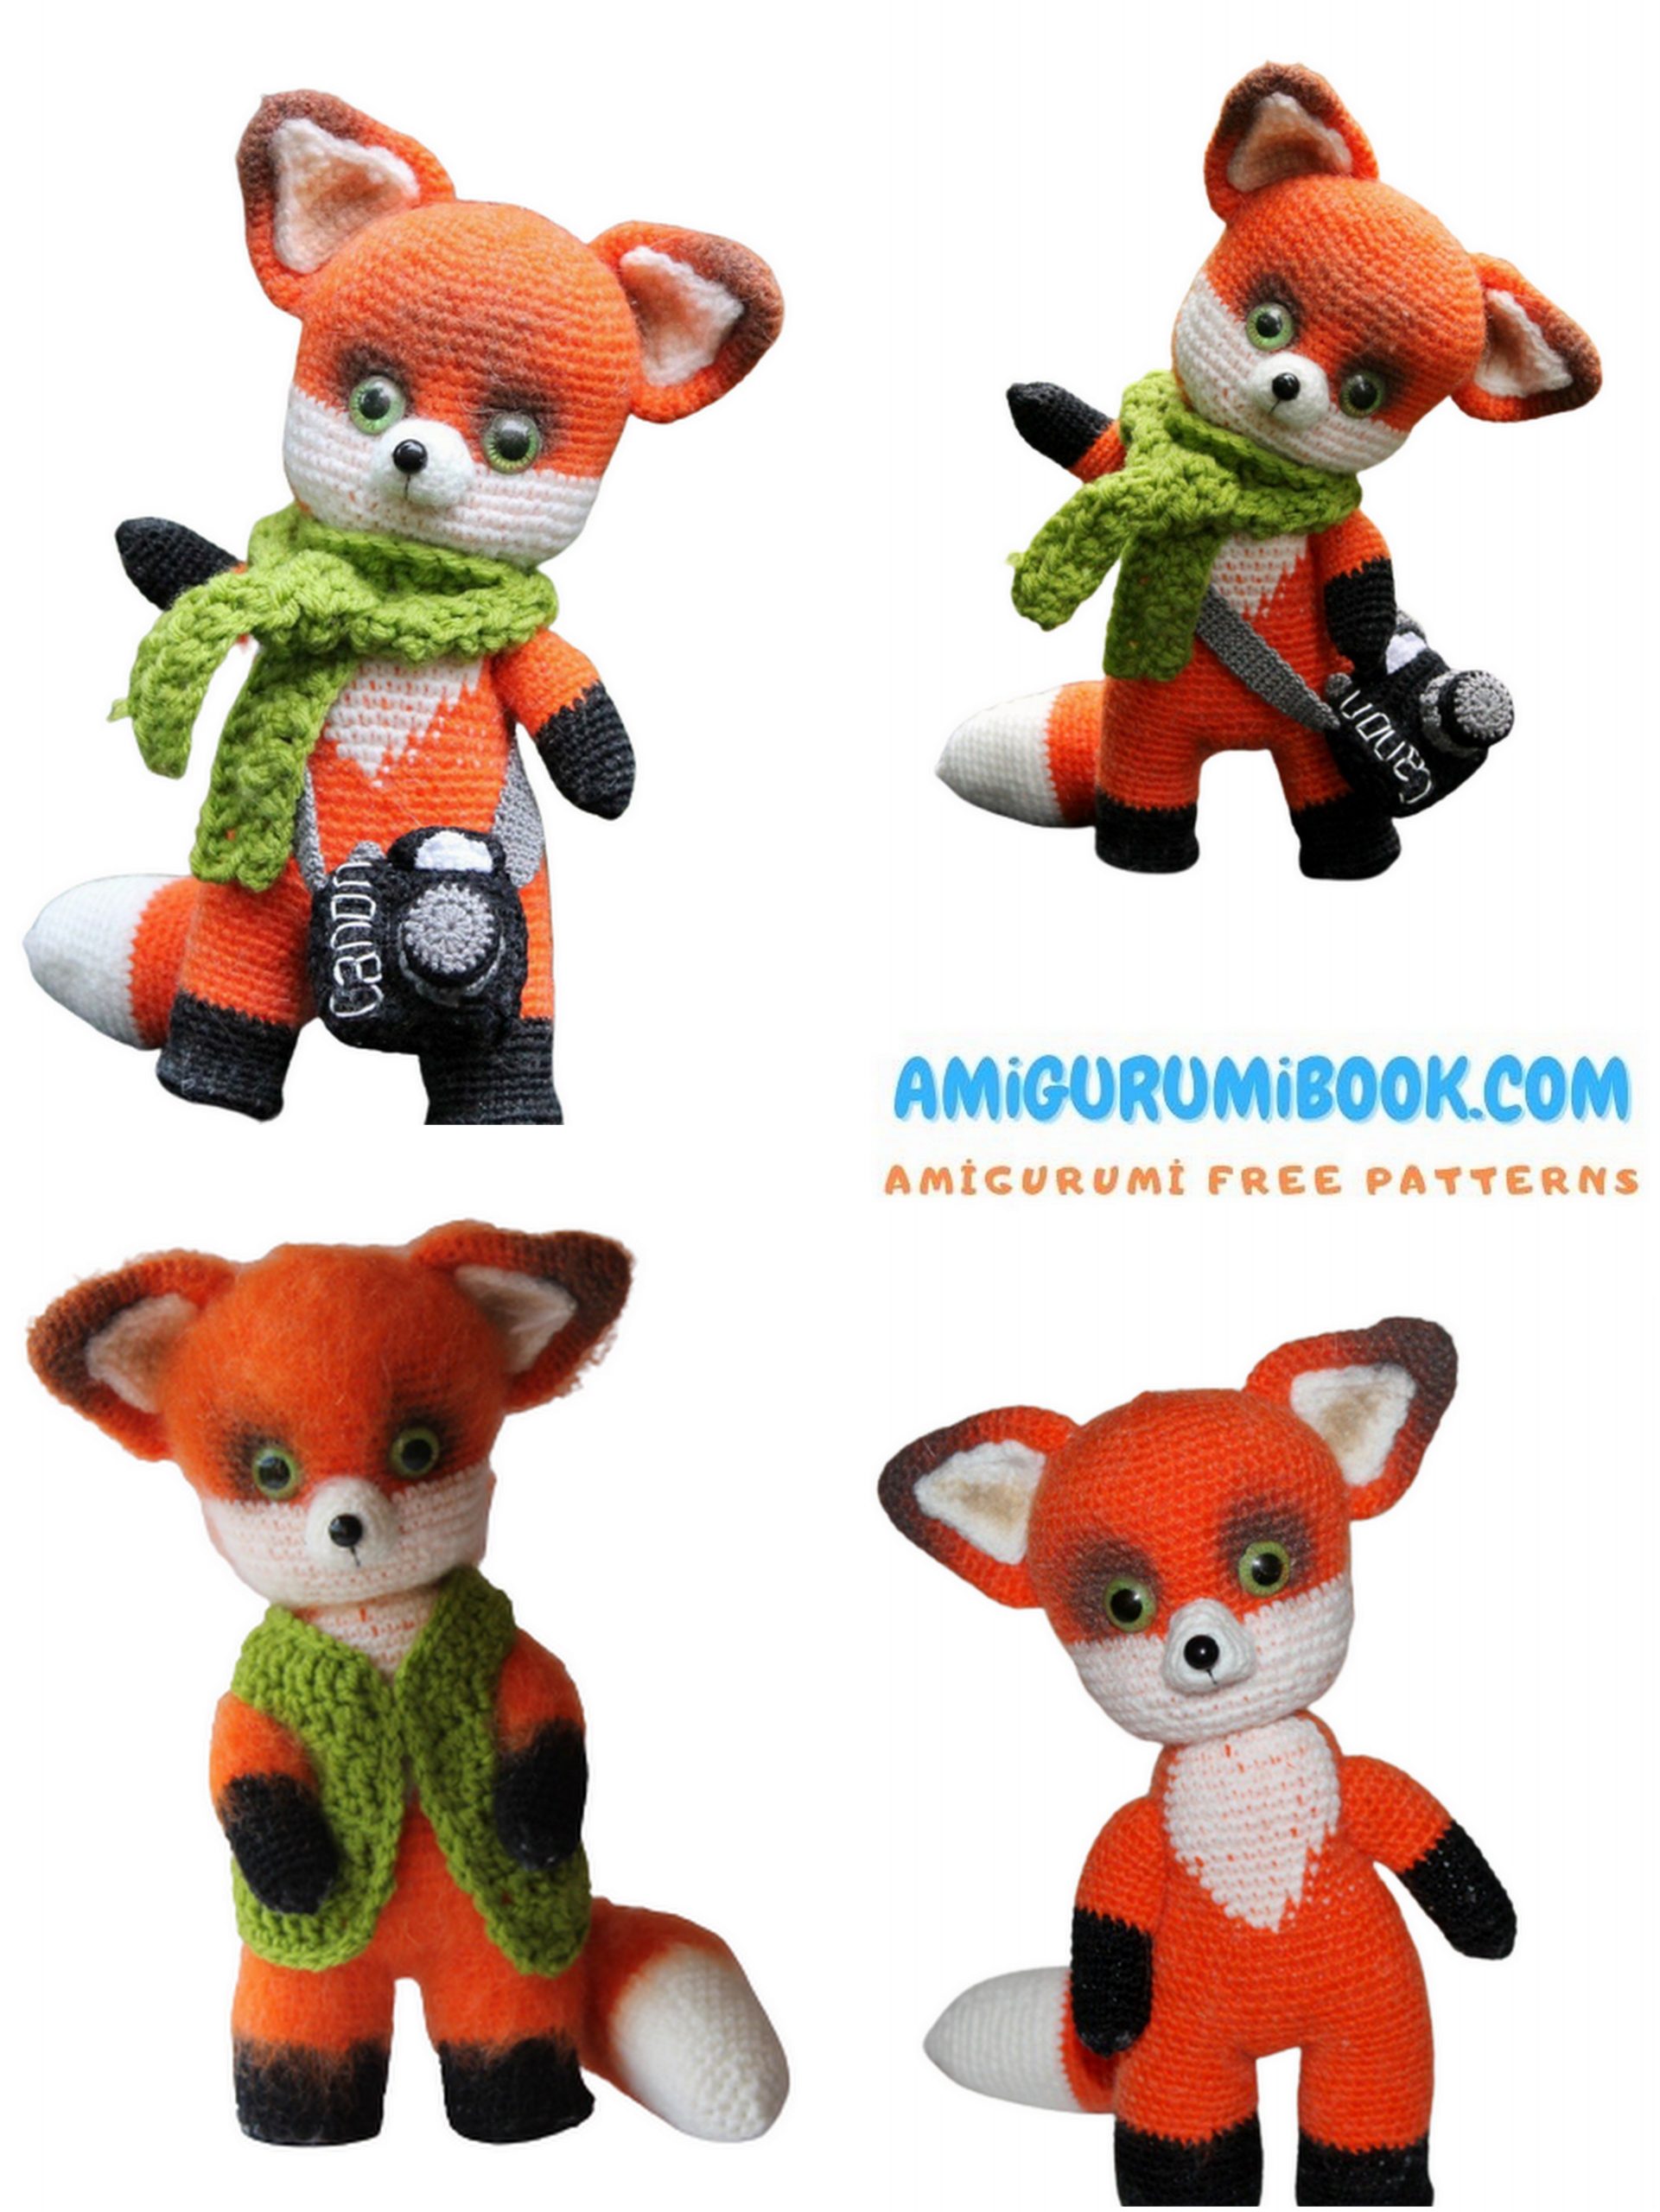
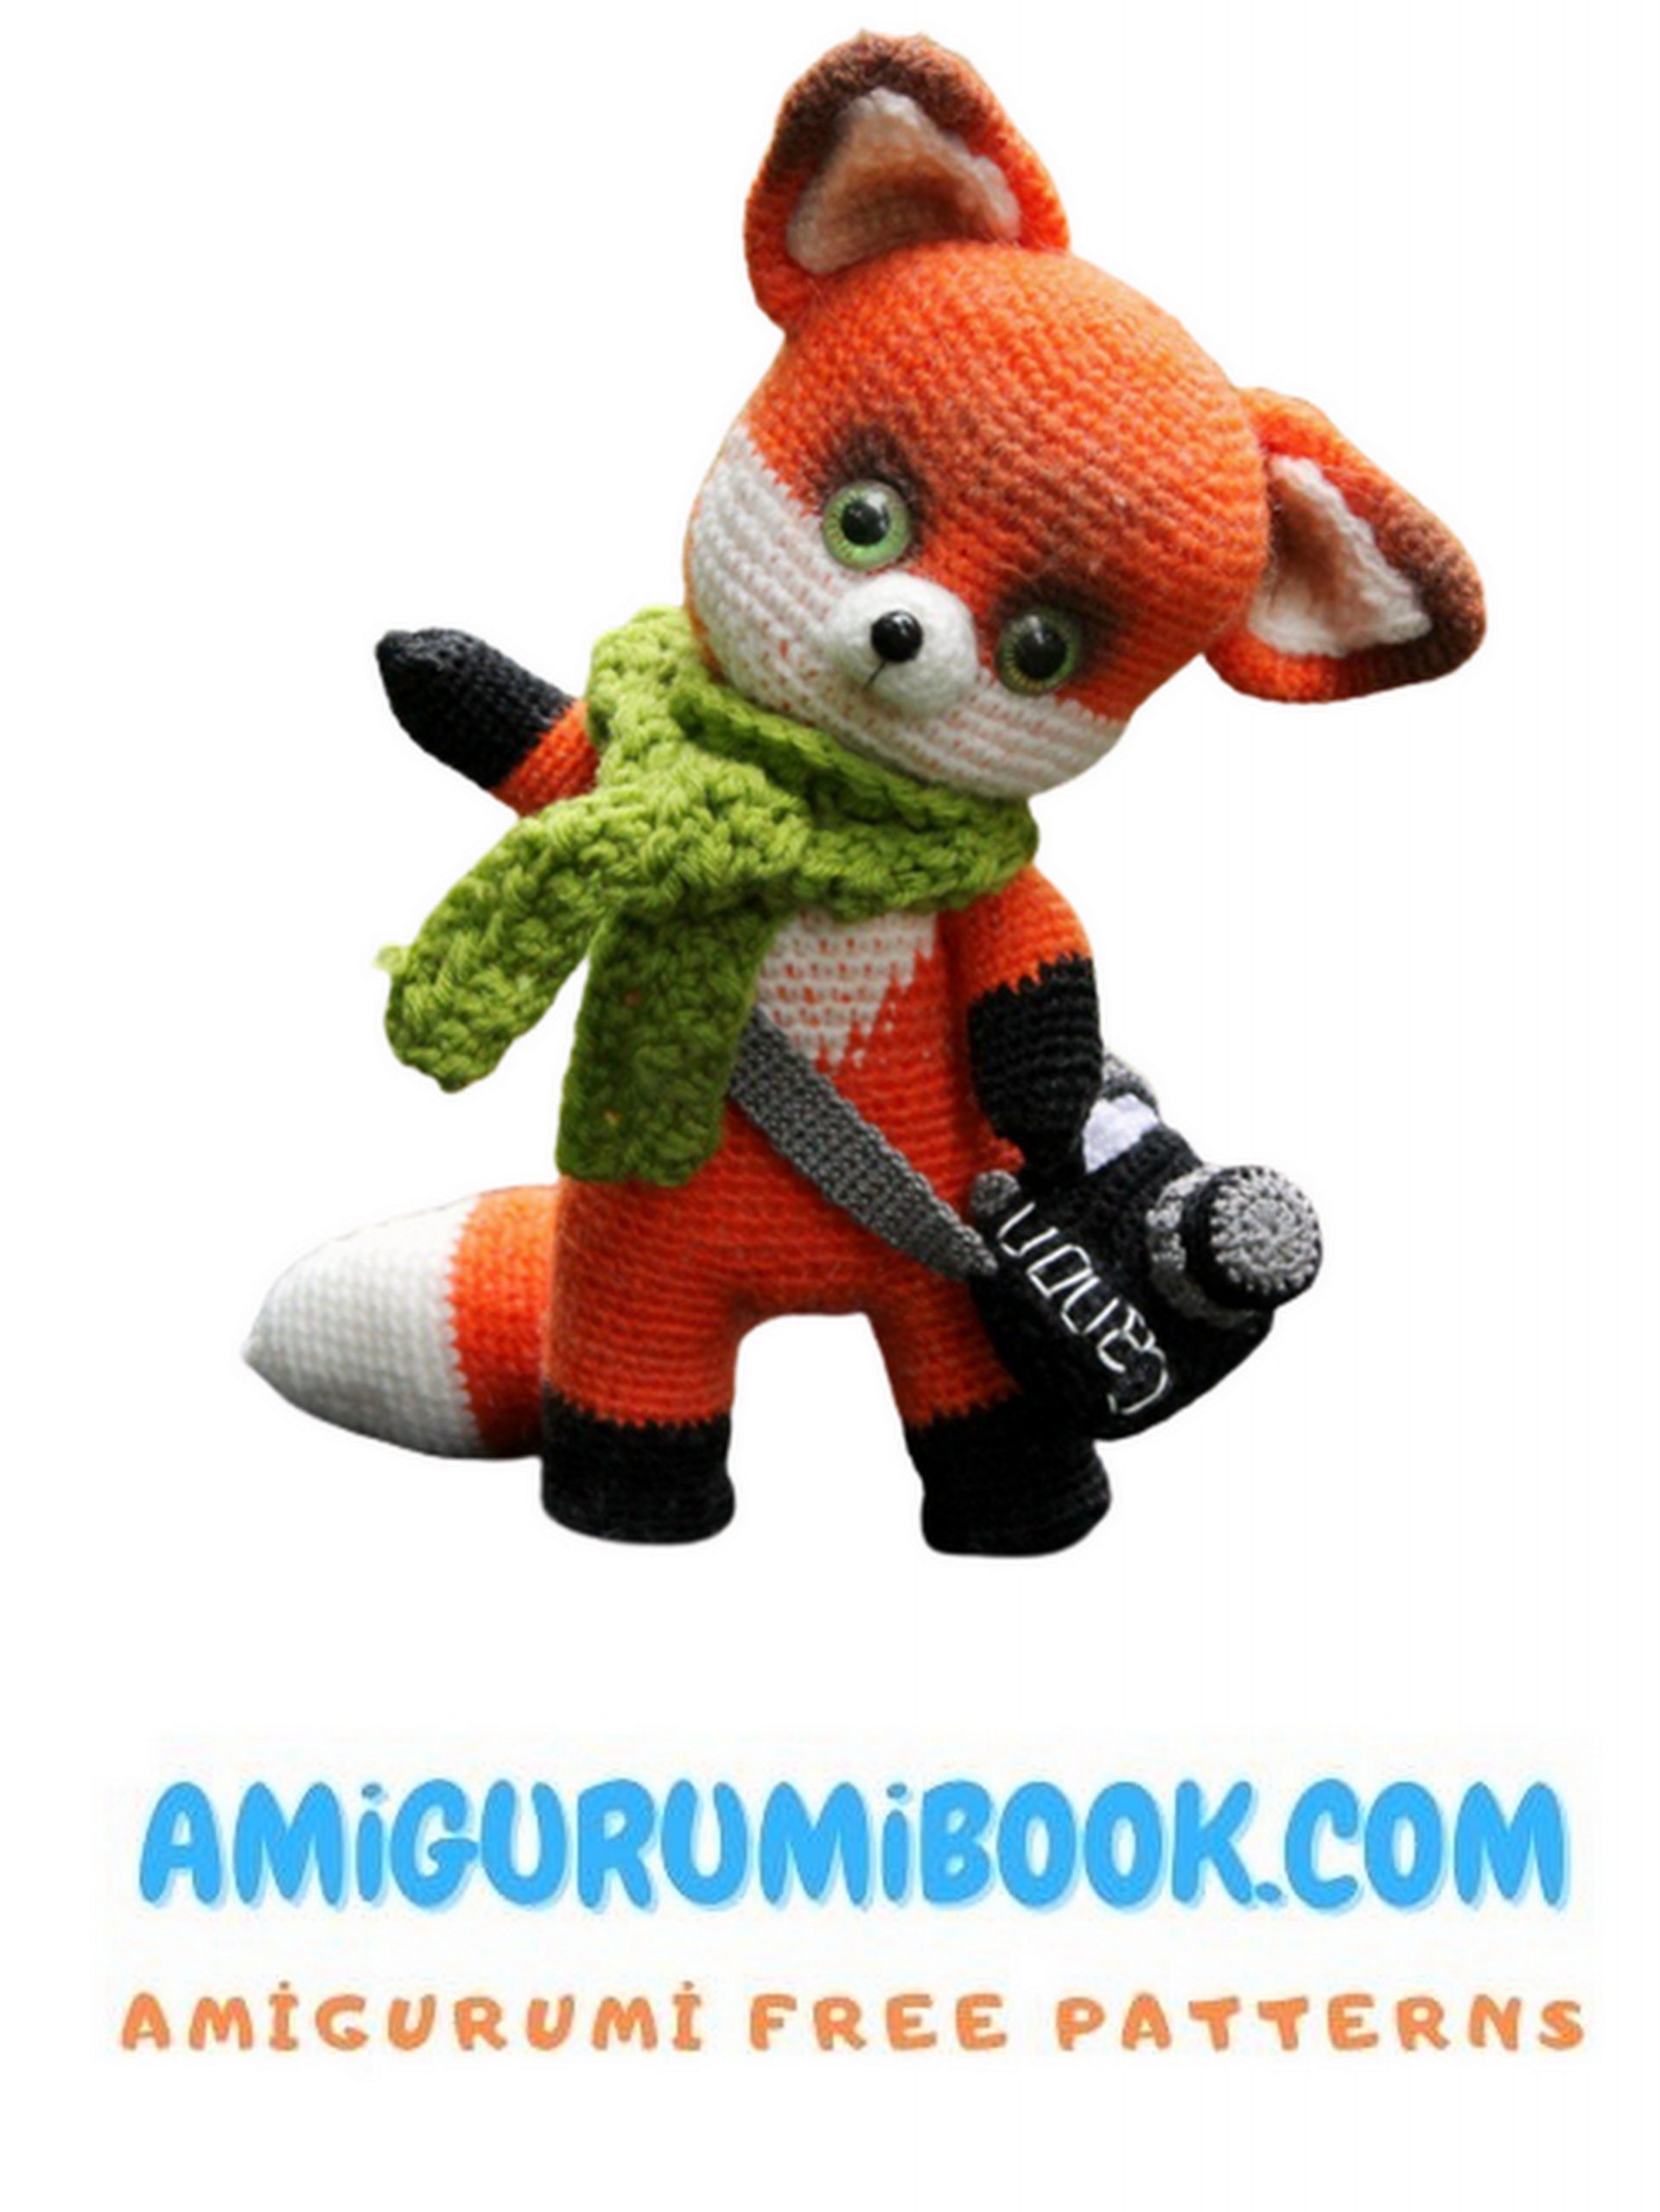
To tint the muzzle, we use eye shadow. I used.
dark brown for the area around the eyes and dark gray – – for the tips of the ears Also slightly tinted in the middle of the ears.
pale yellow – .
You can comb the toy with Velcro:
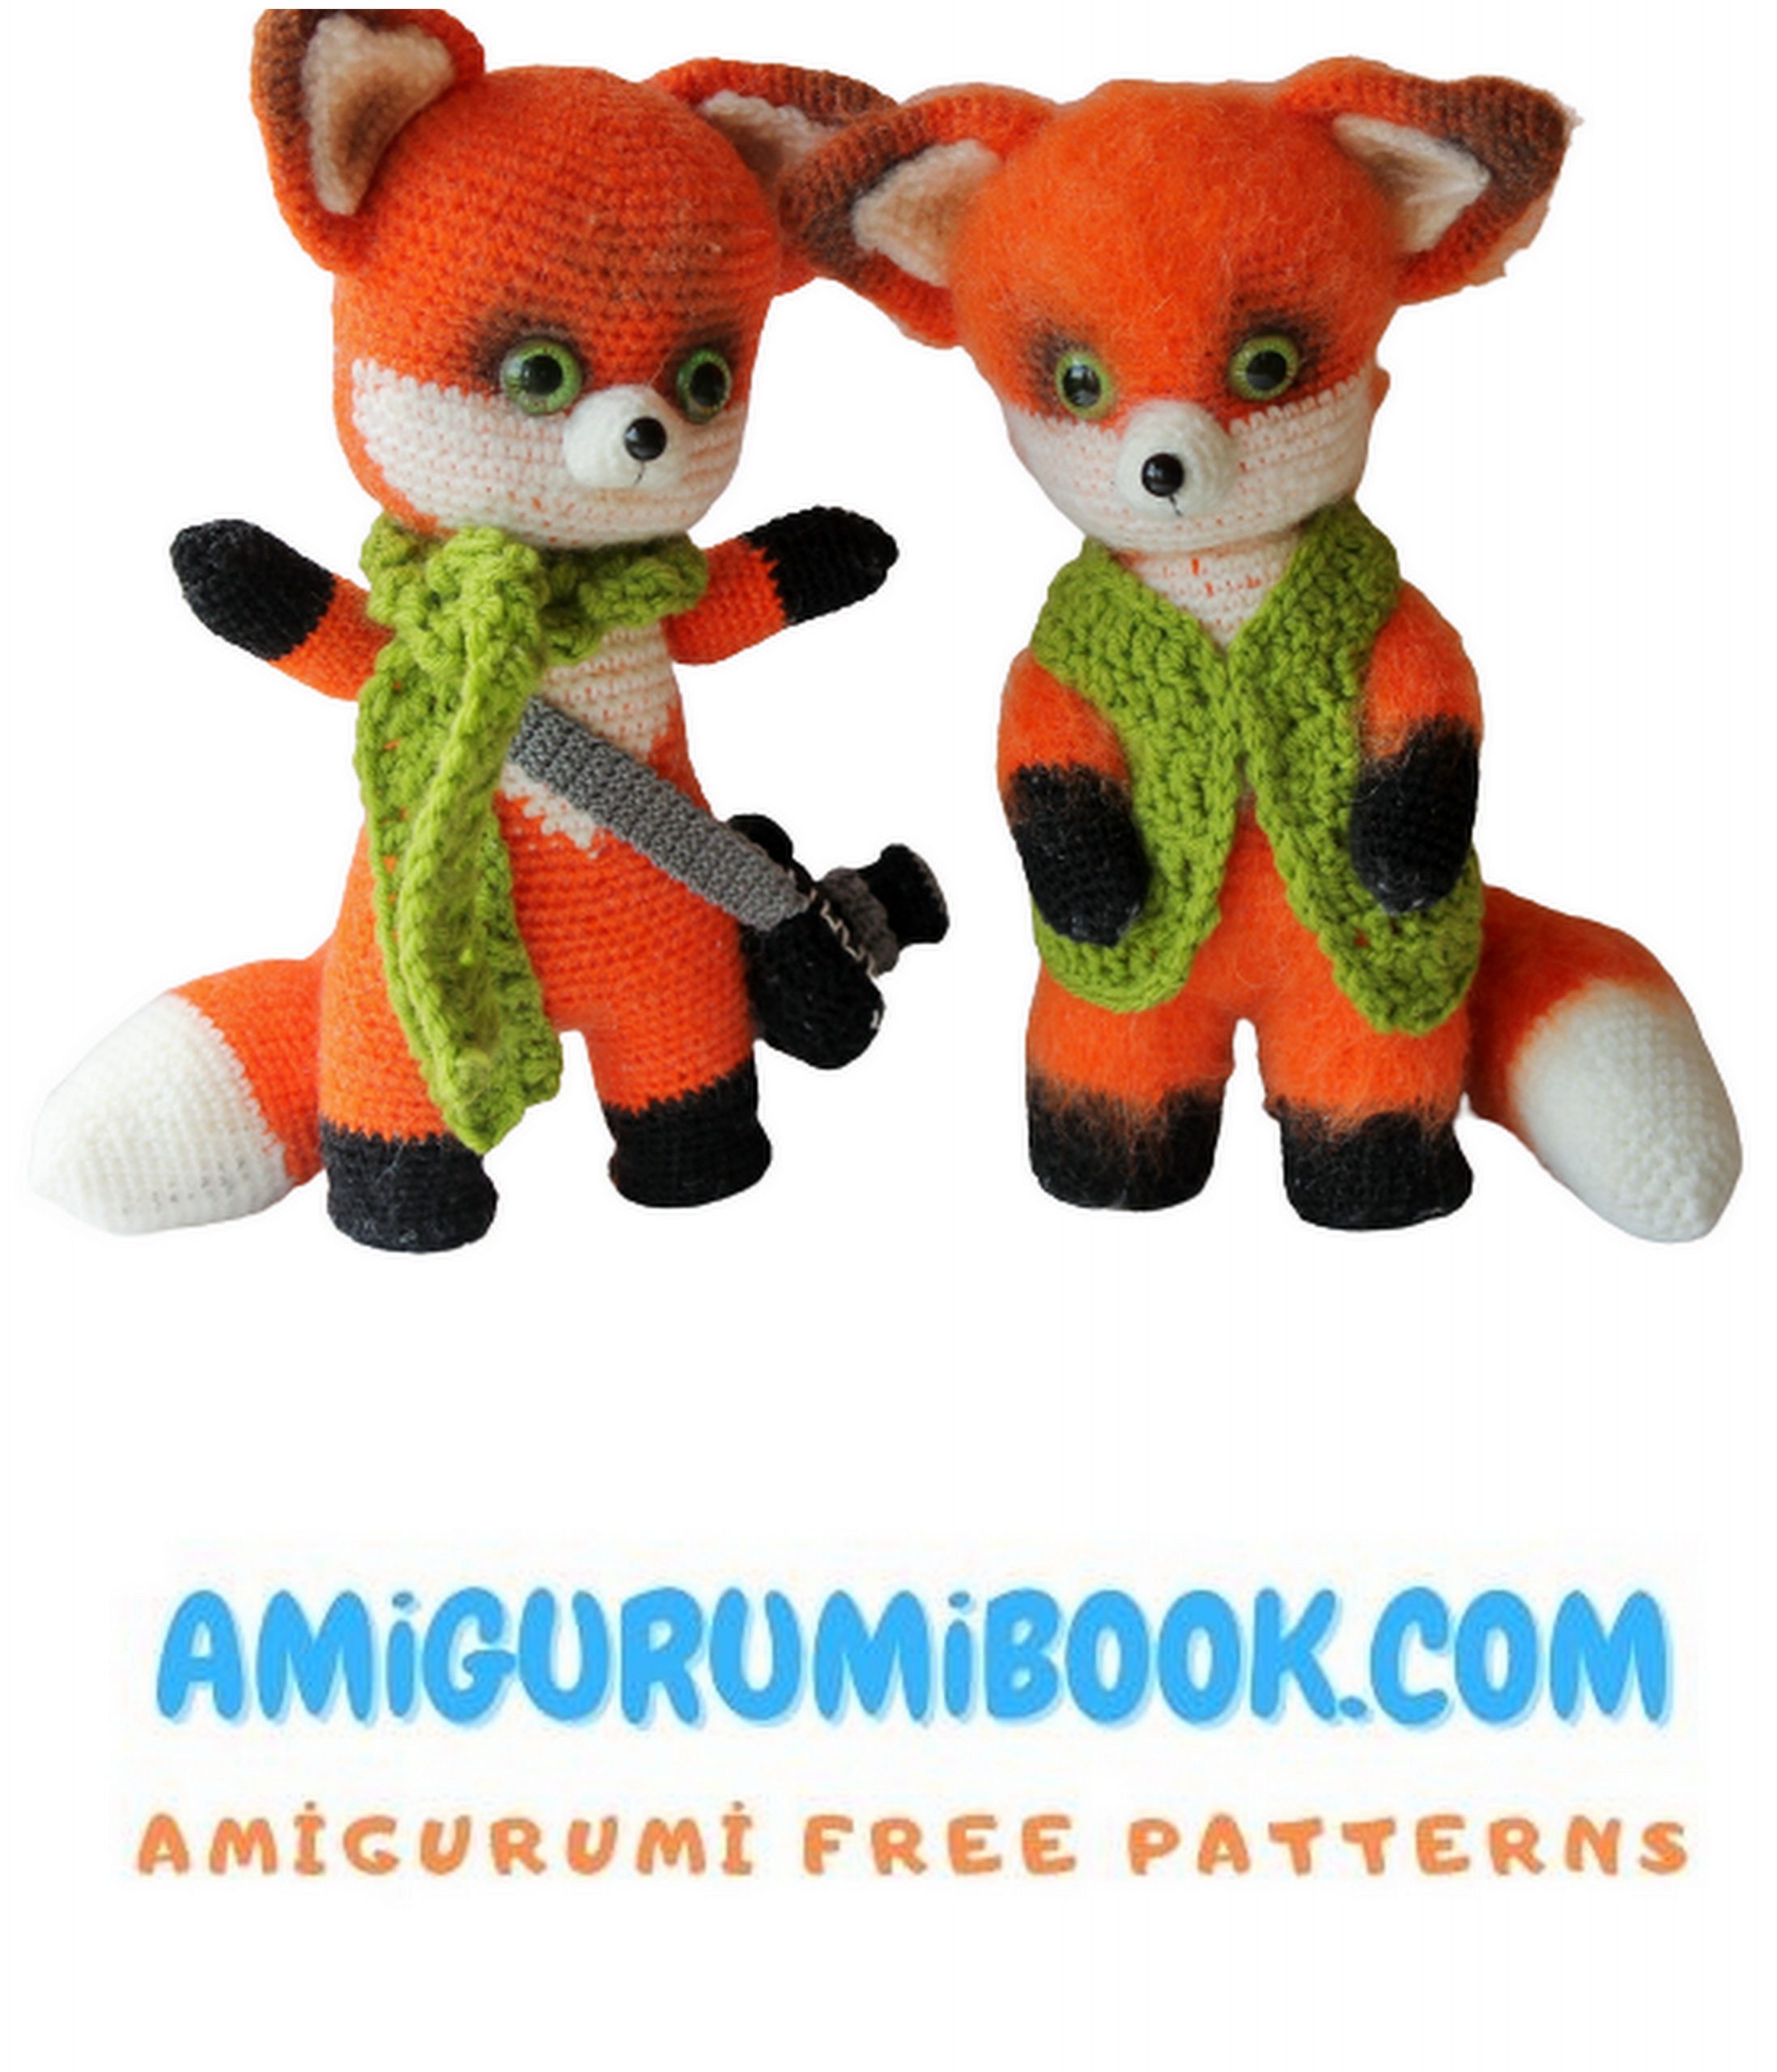
You can knit a scarf or vest in any color (I picked green for the color of my eyes):
All work behind!
Here are the cubs that turned out according to this description: