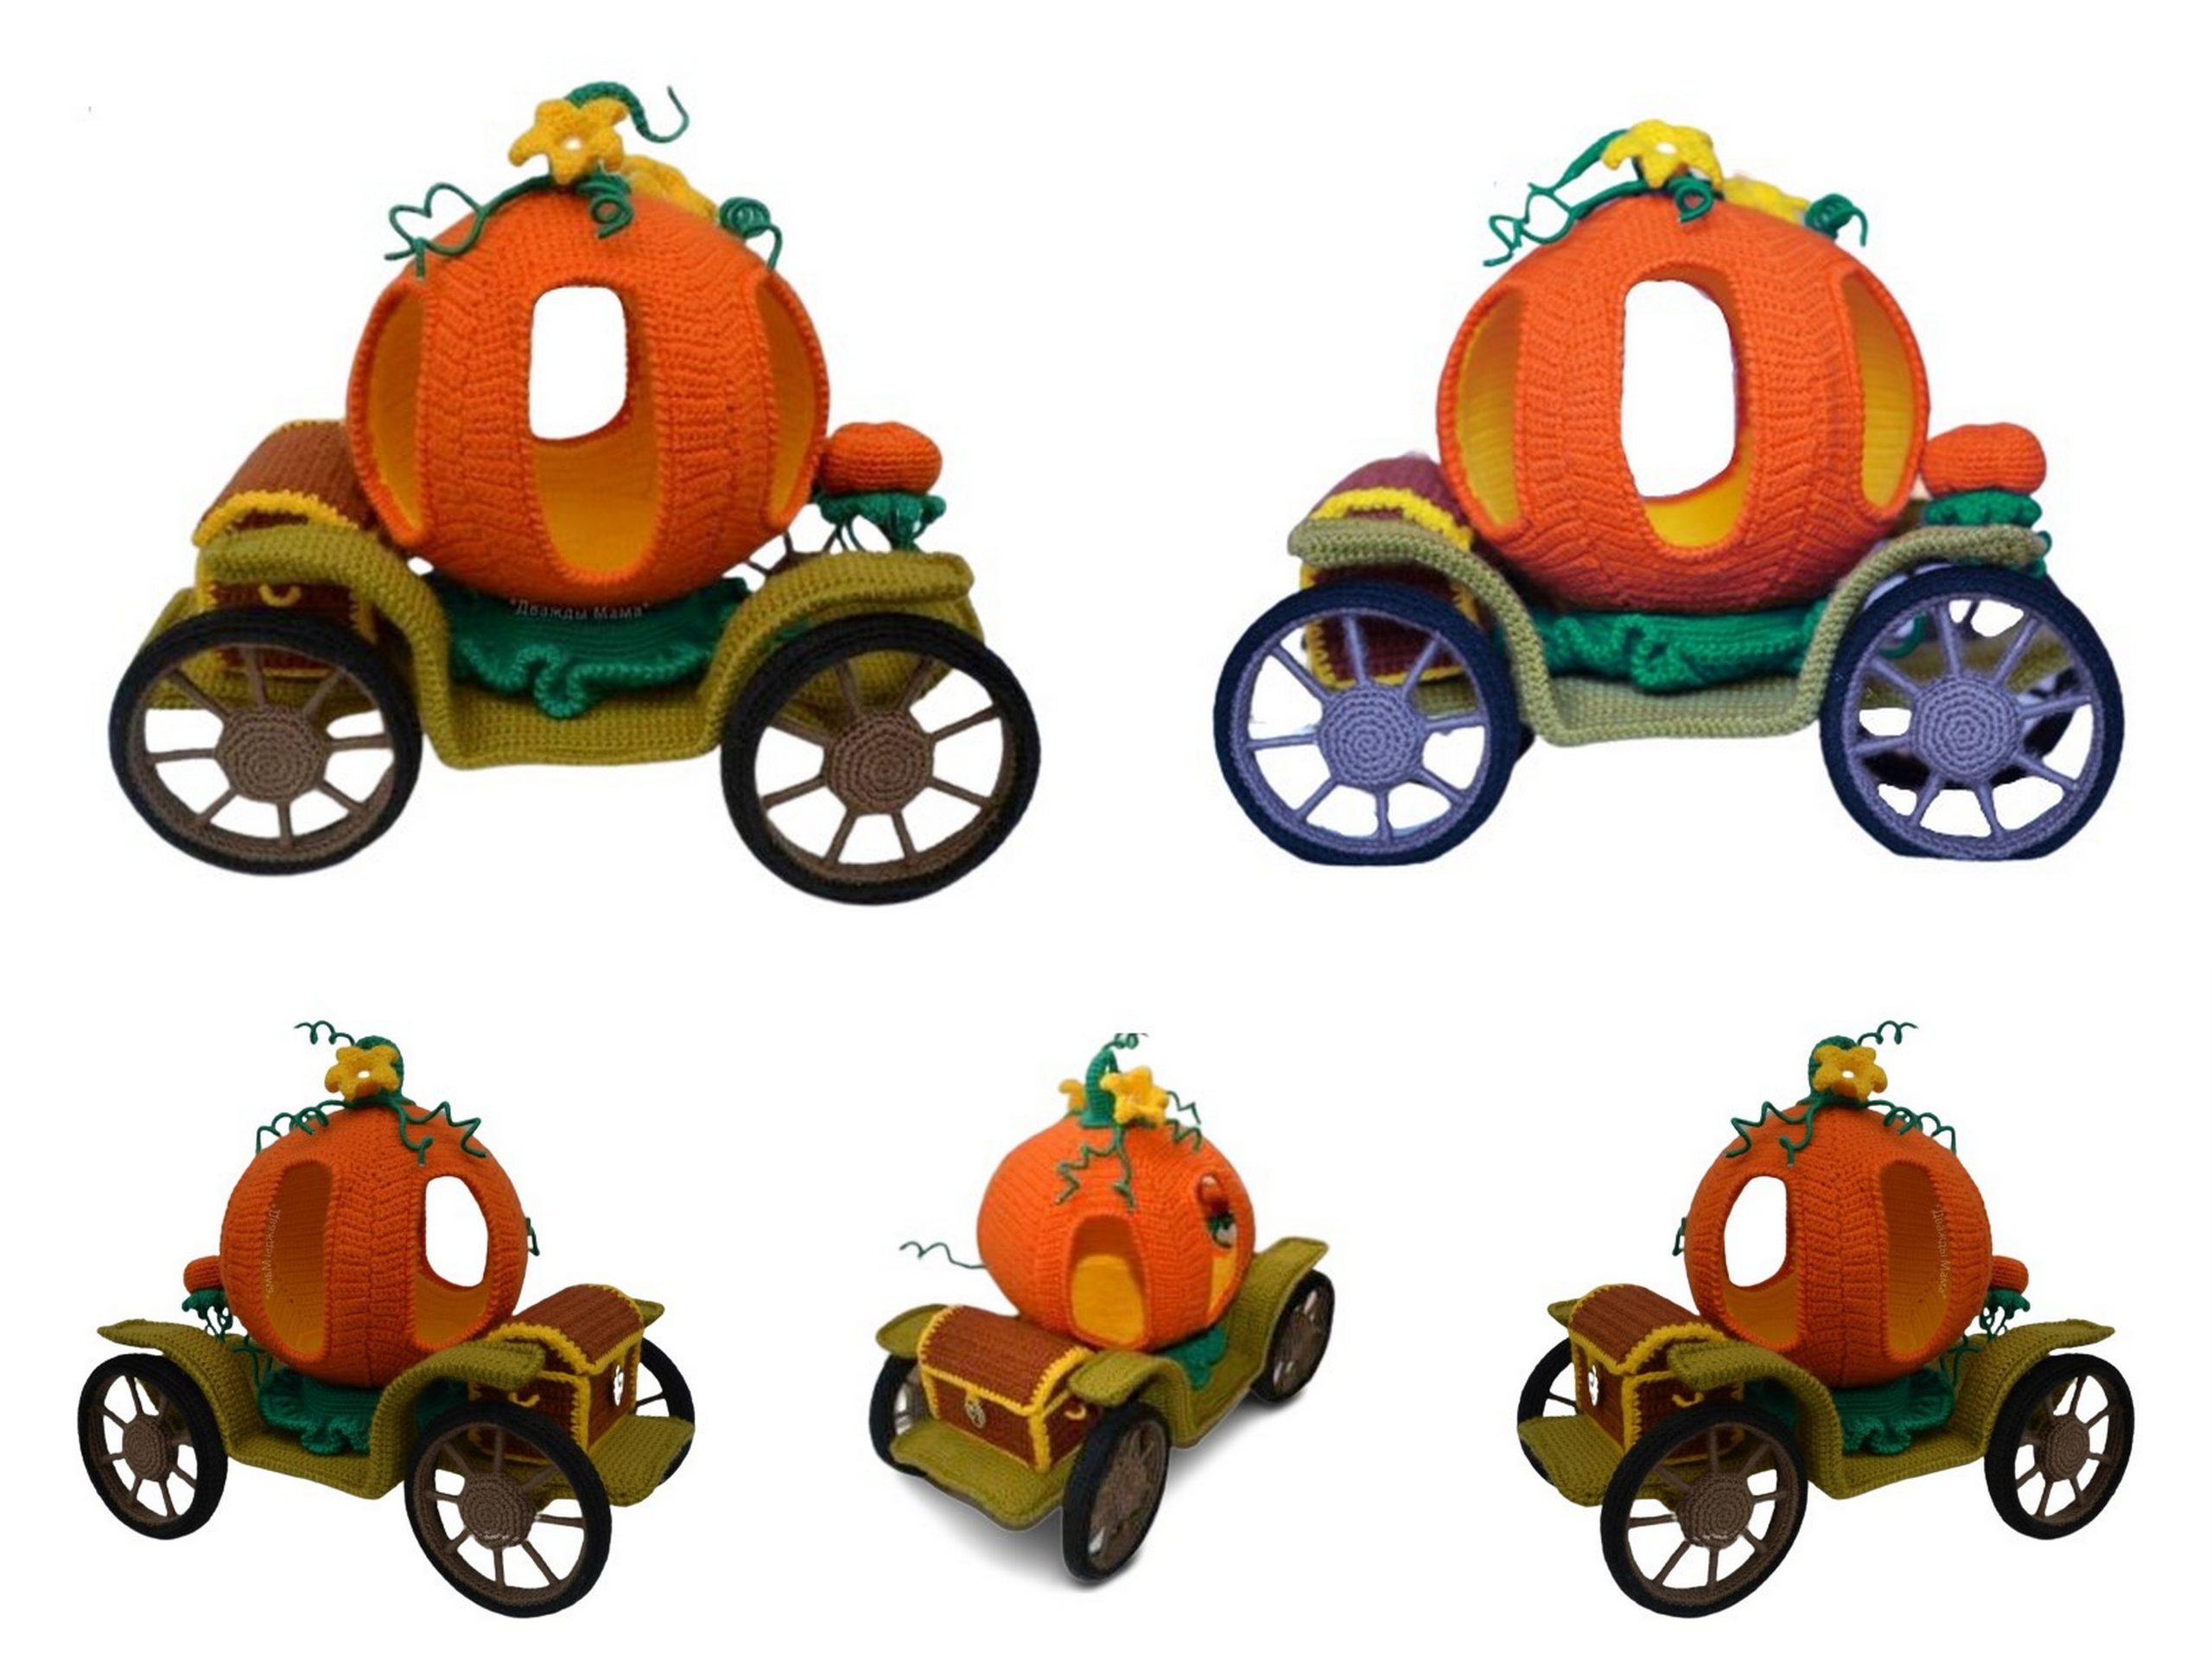
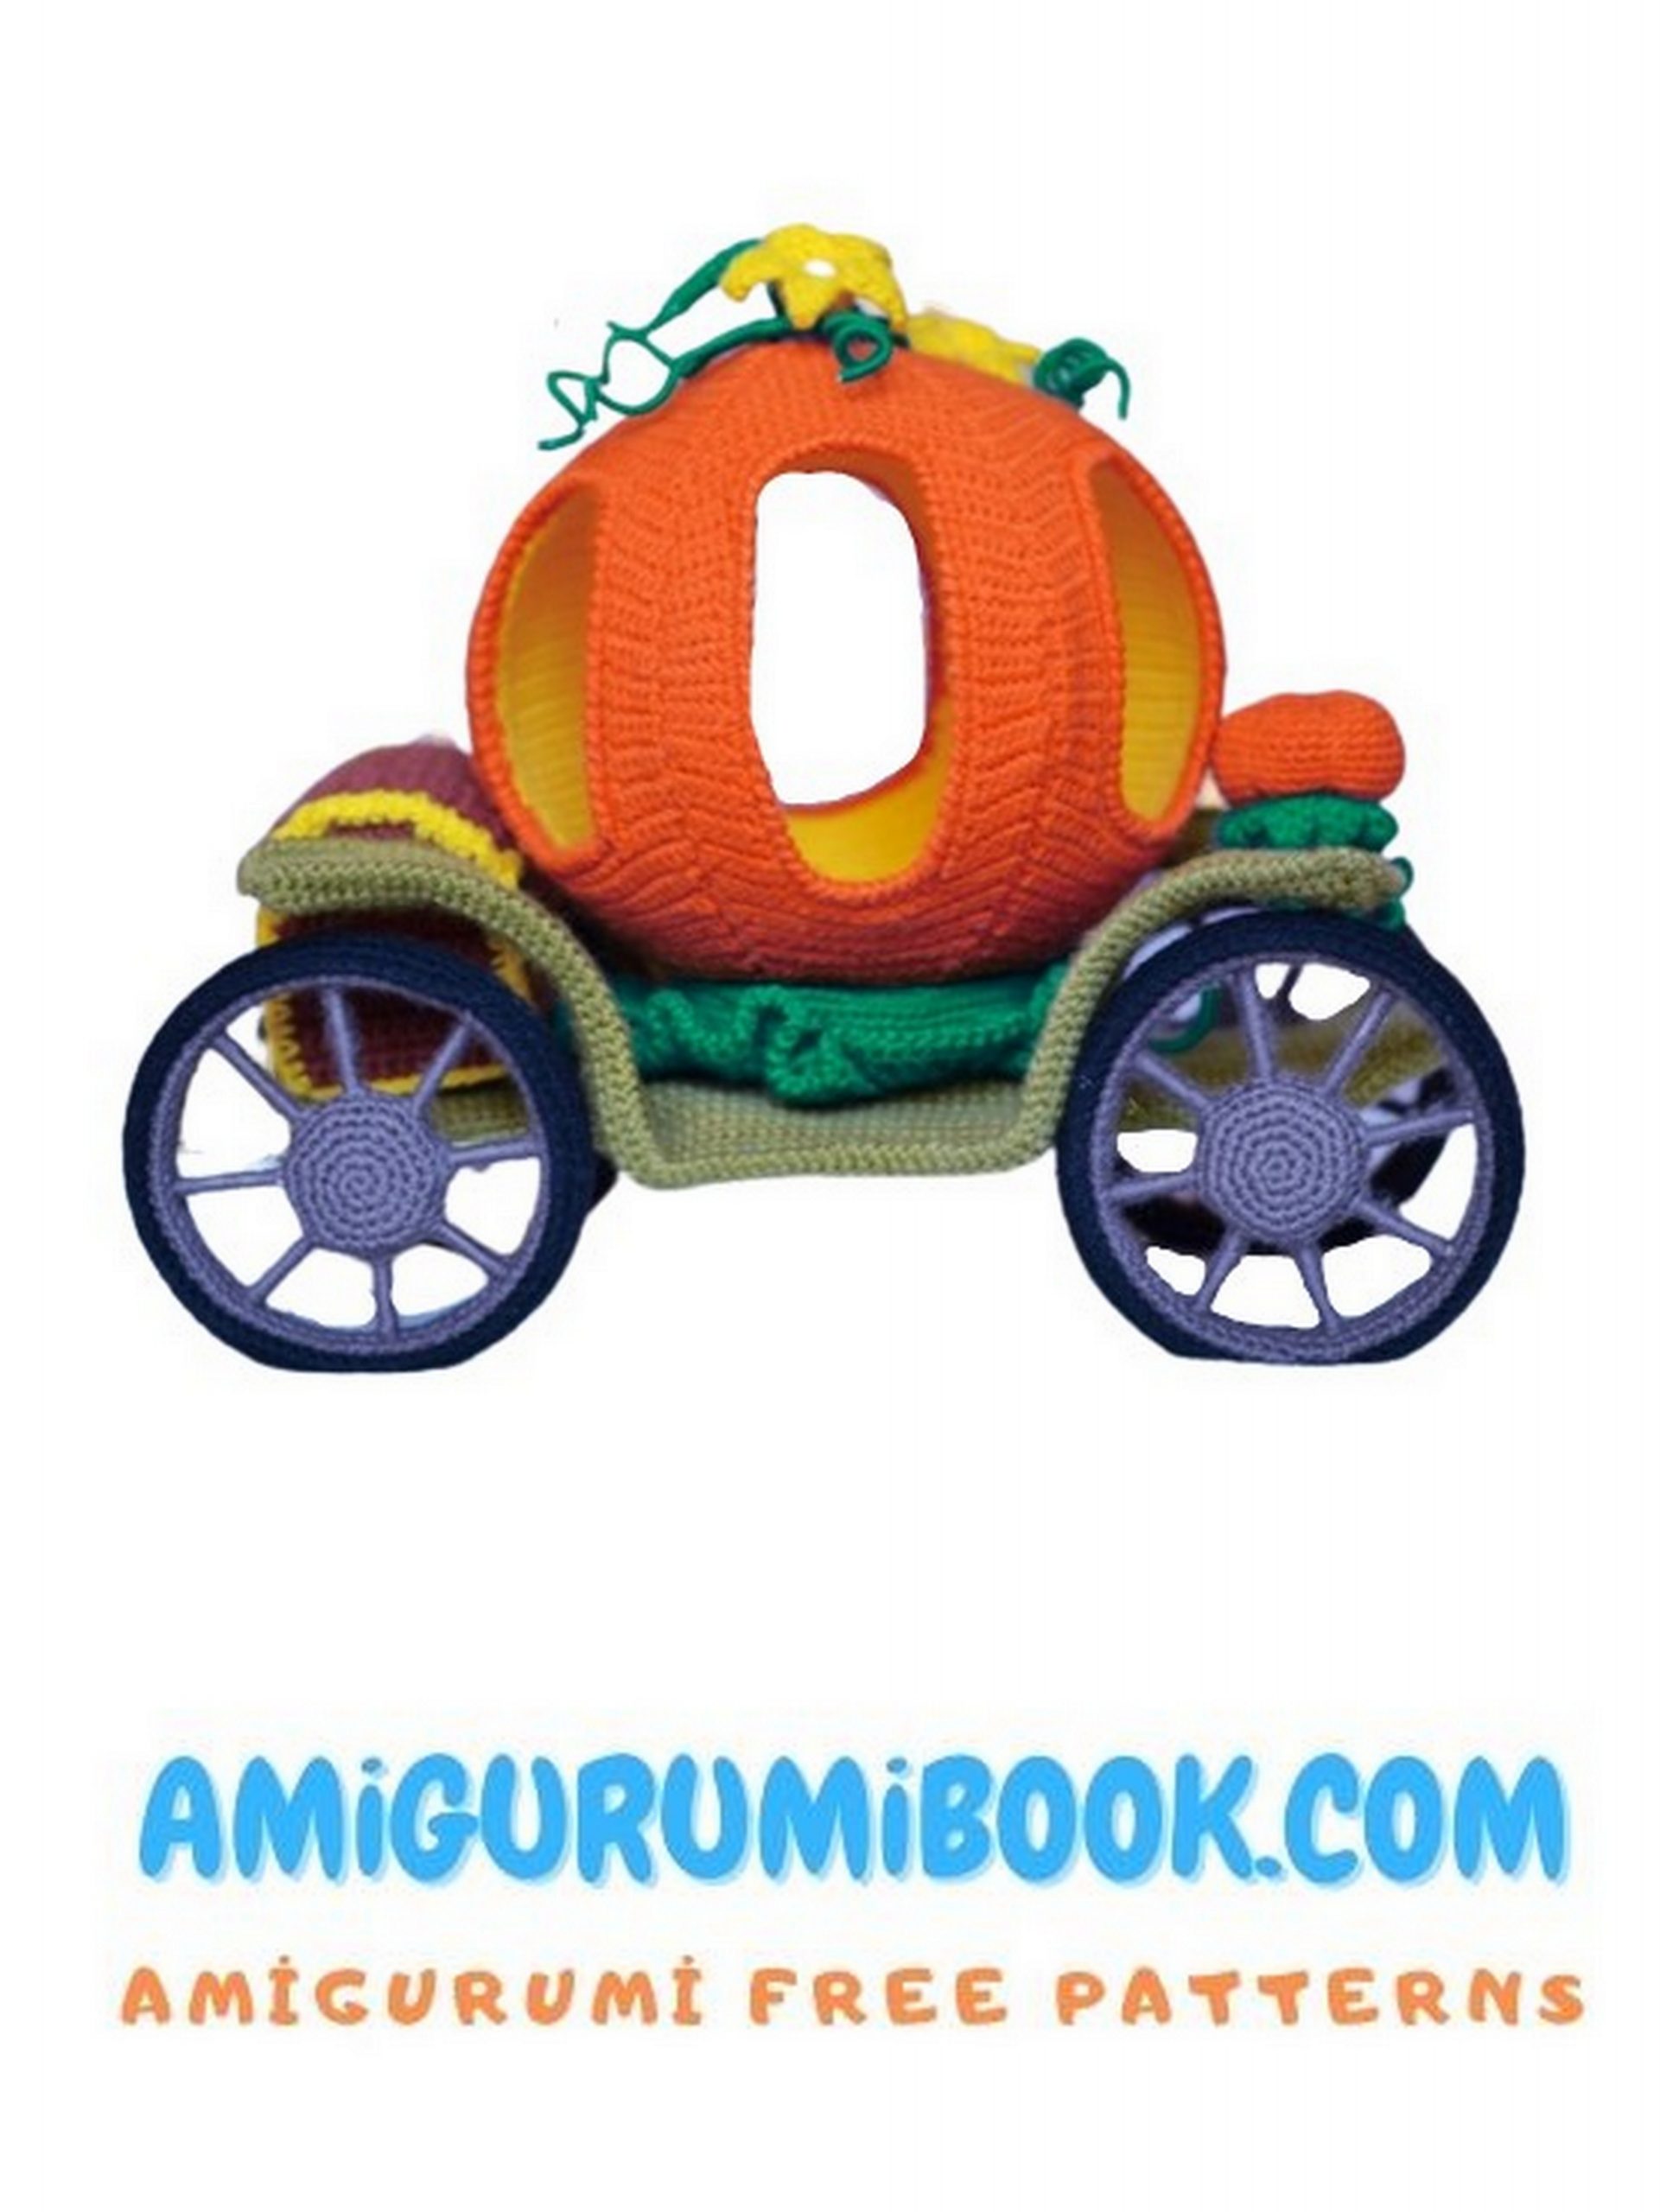
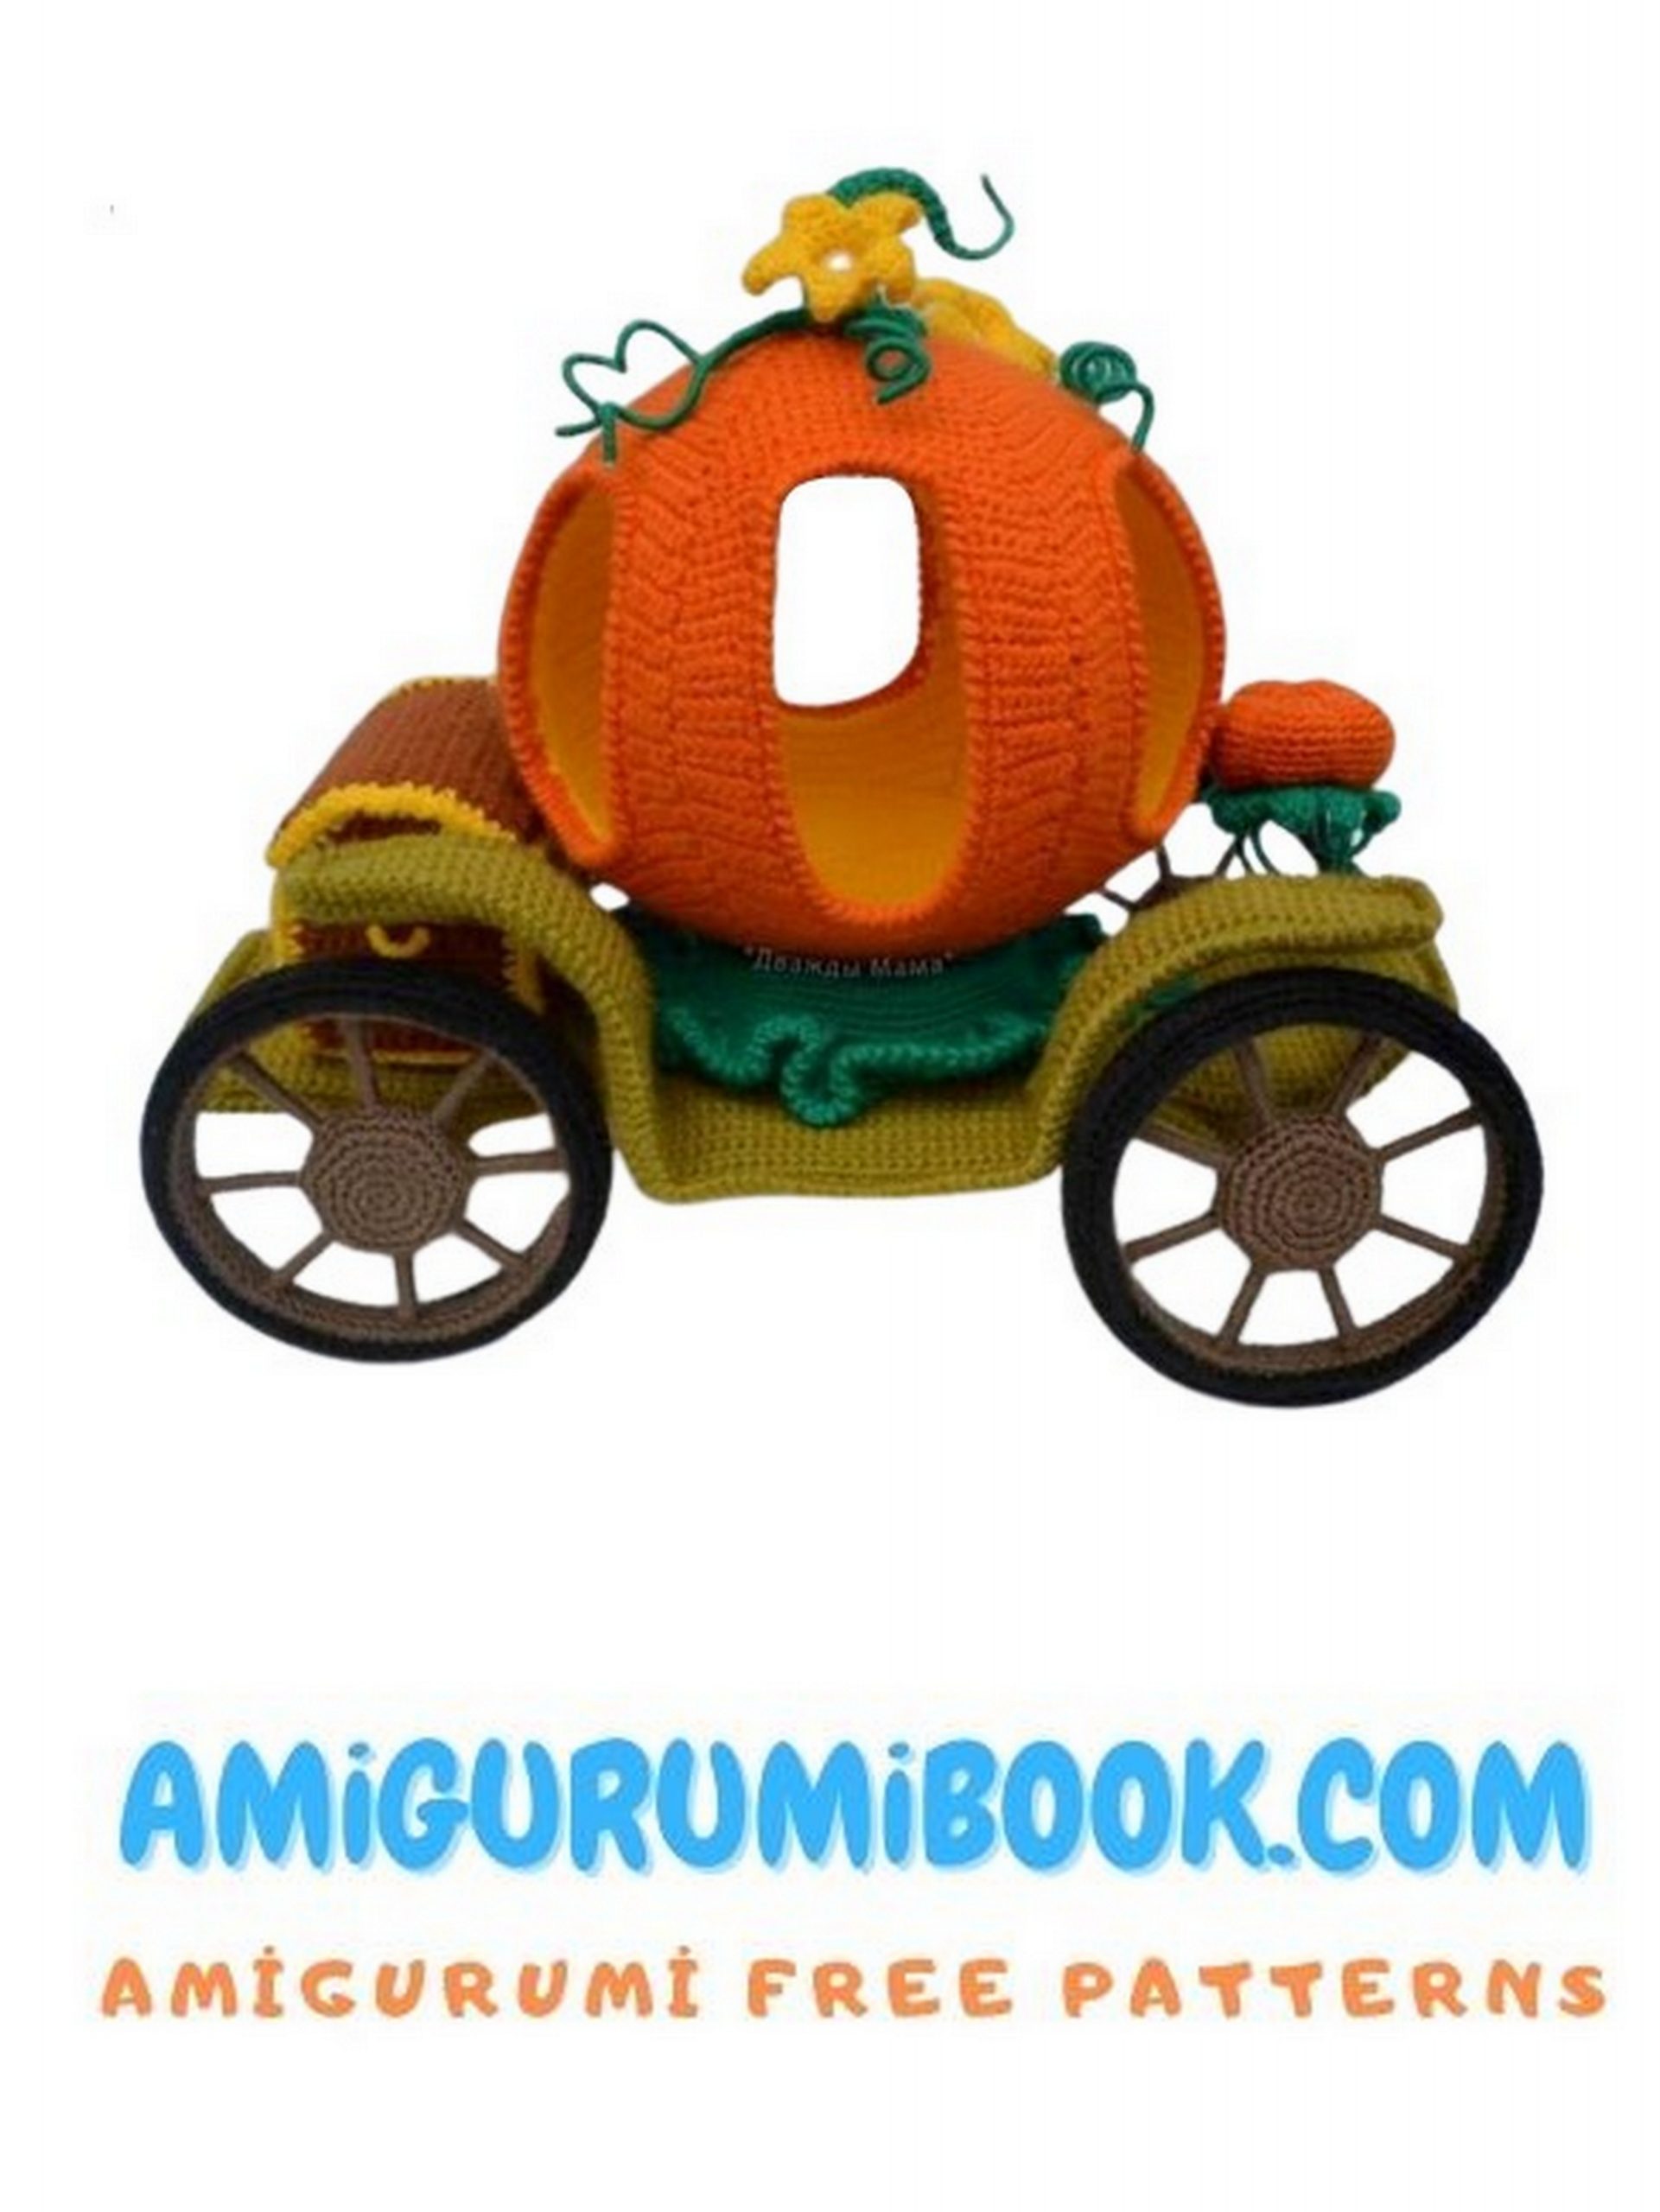
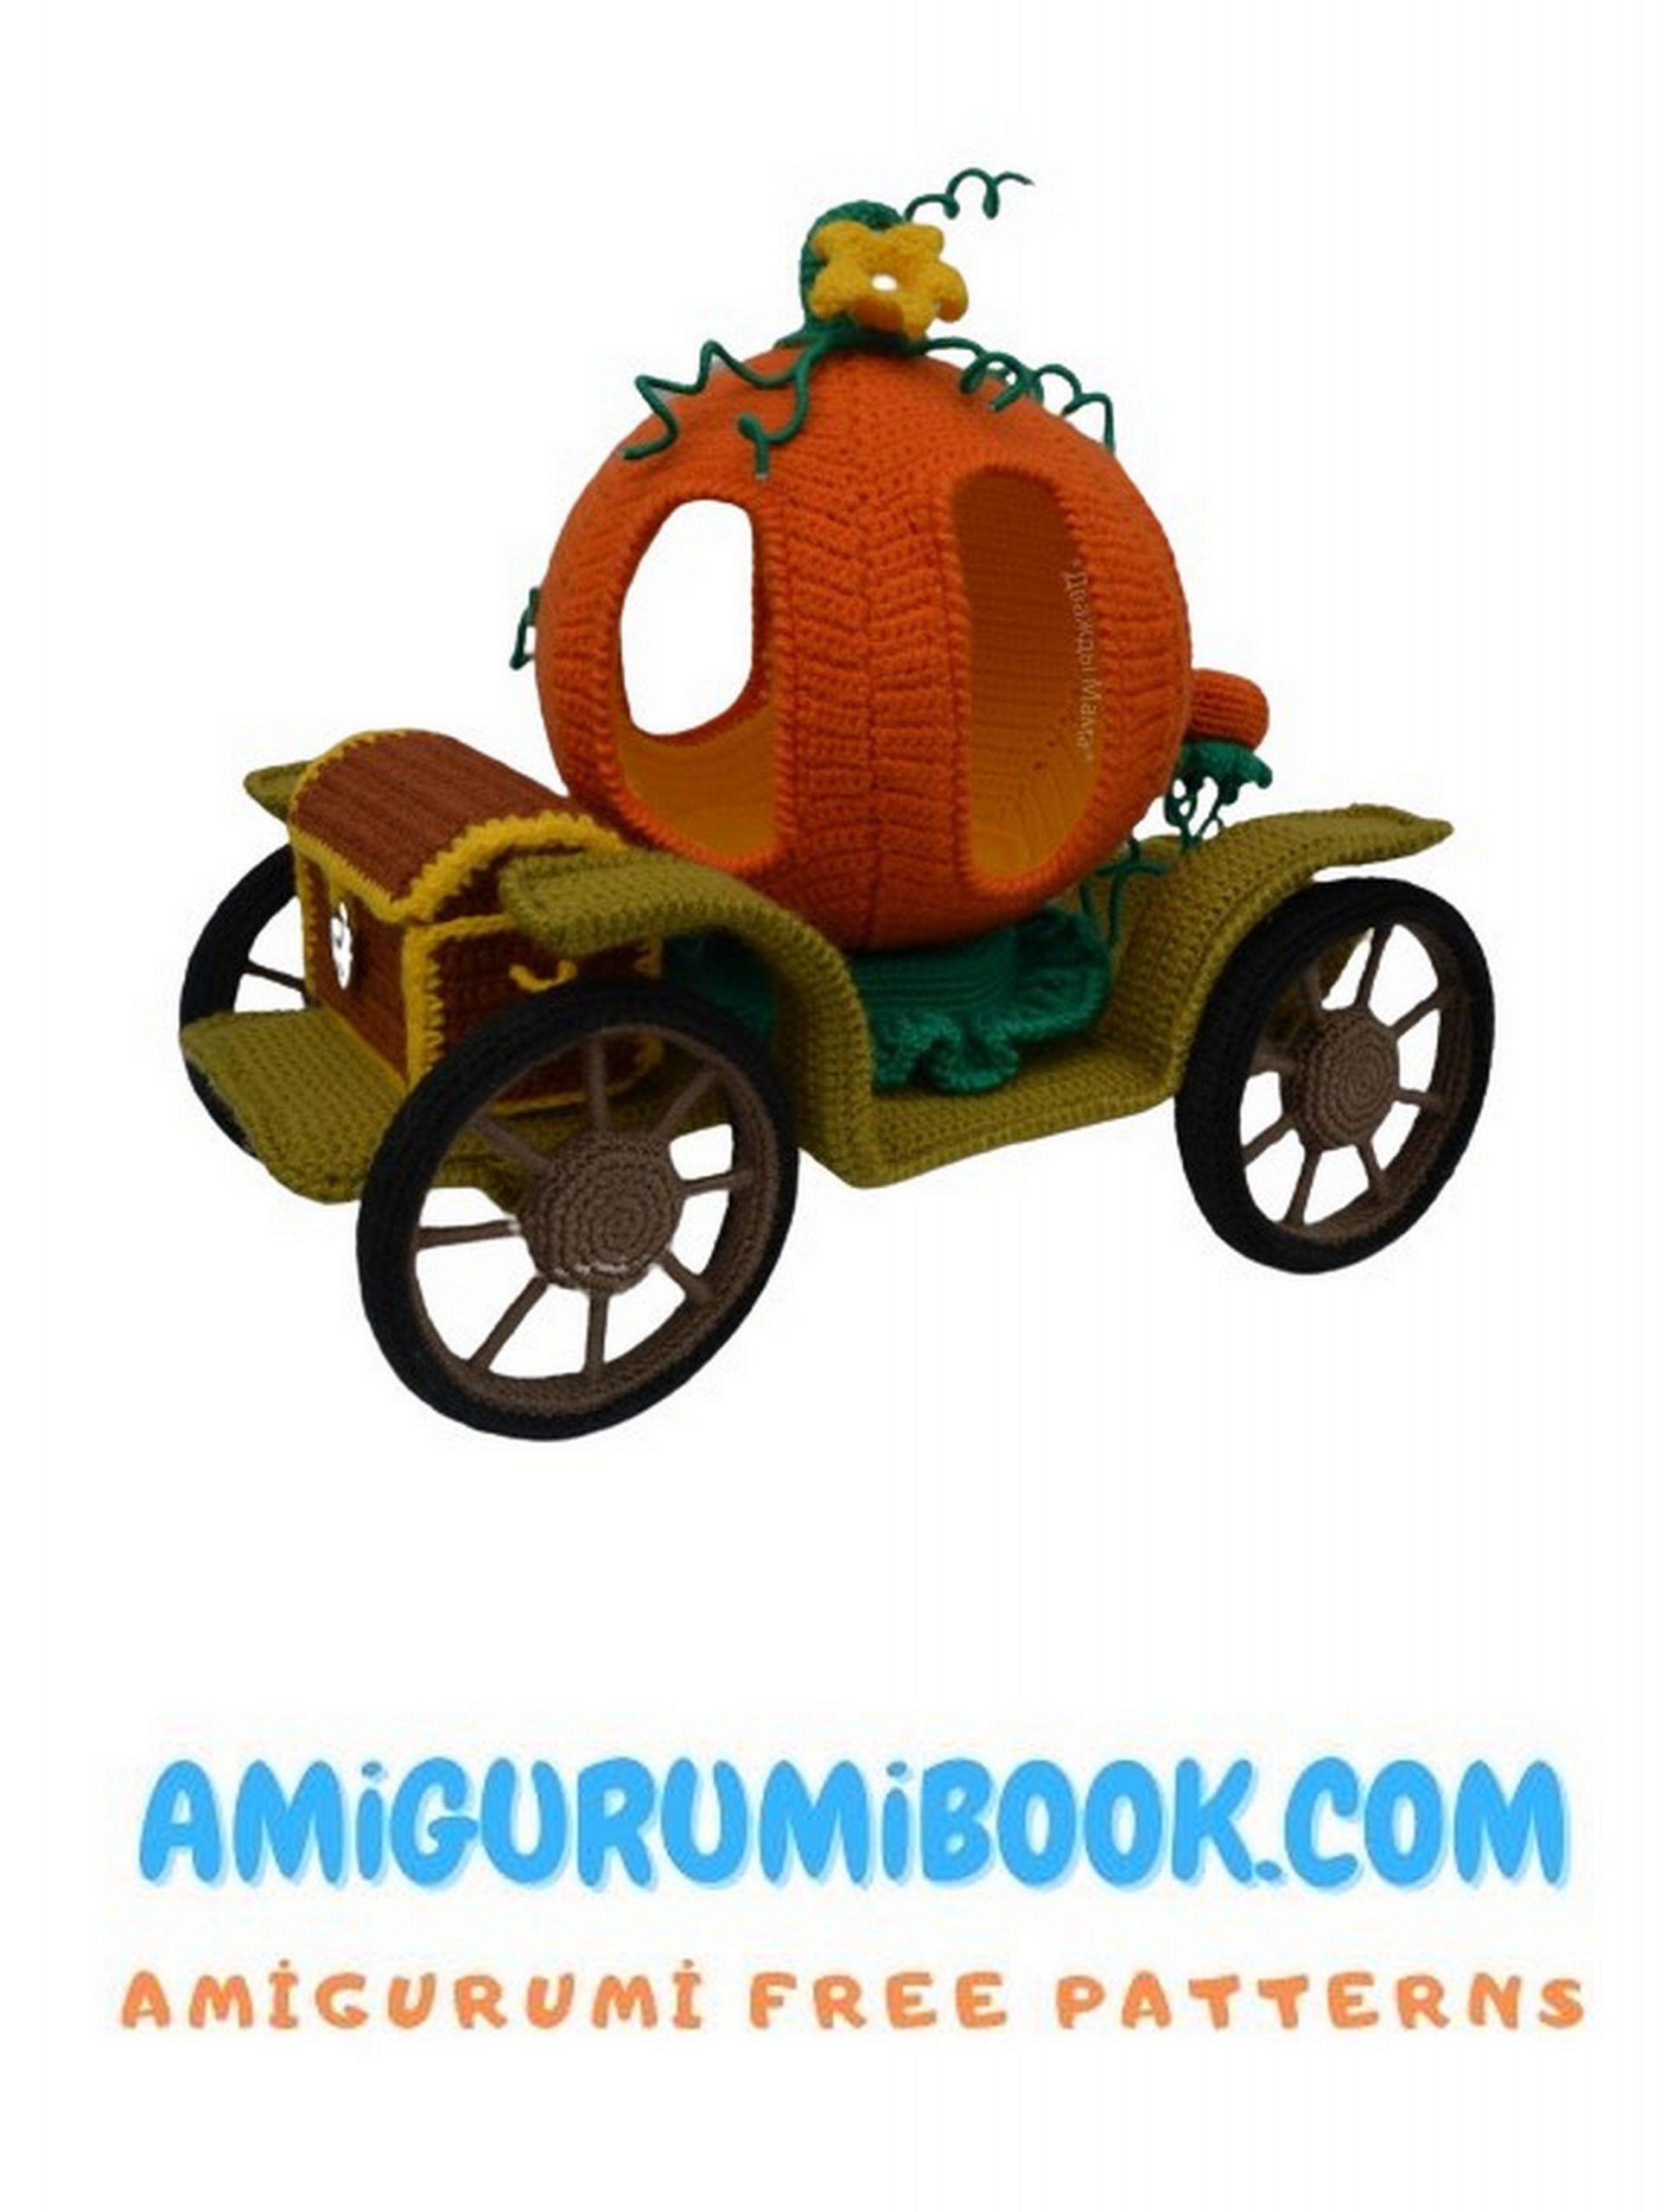
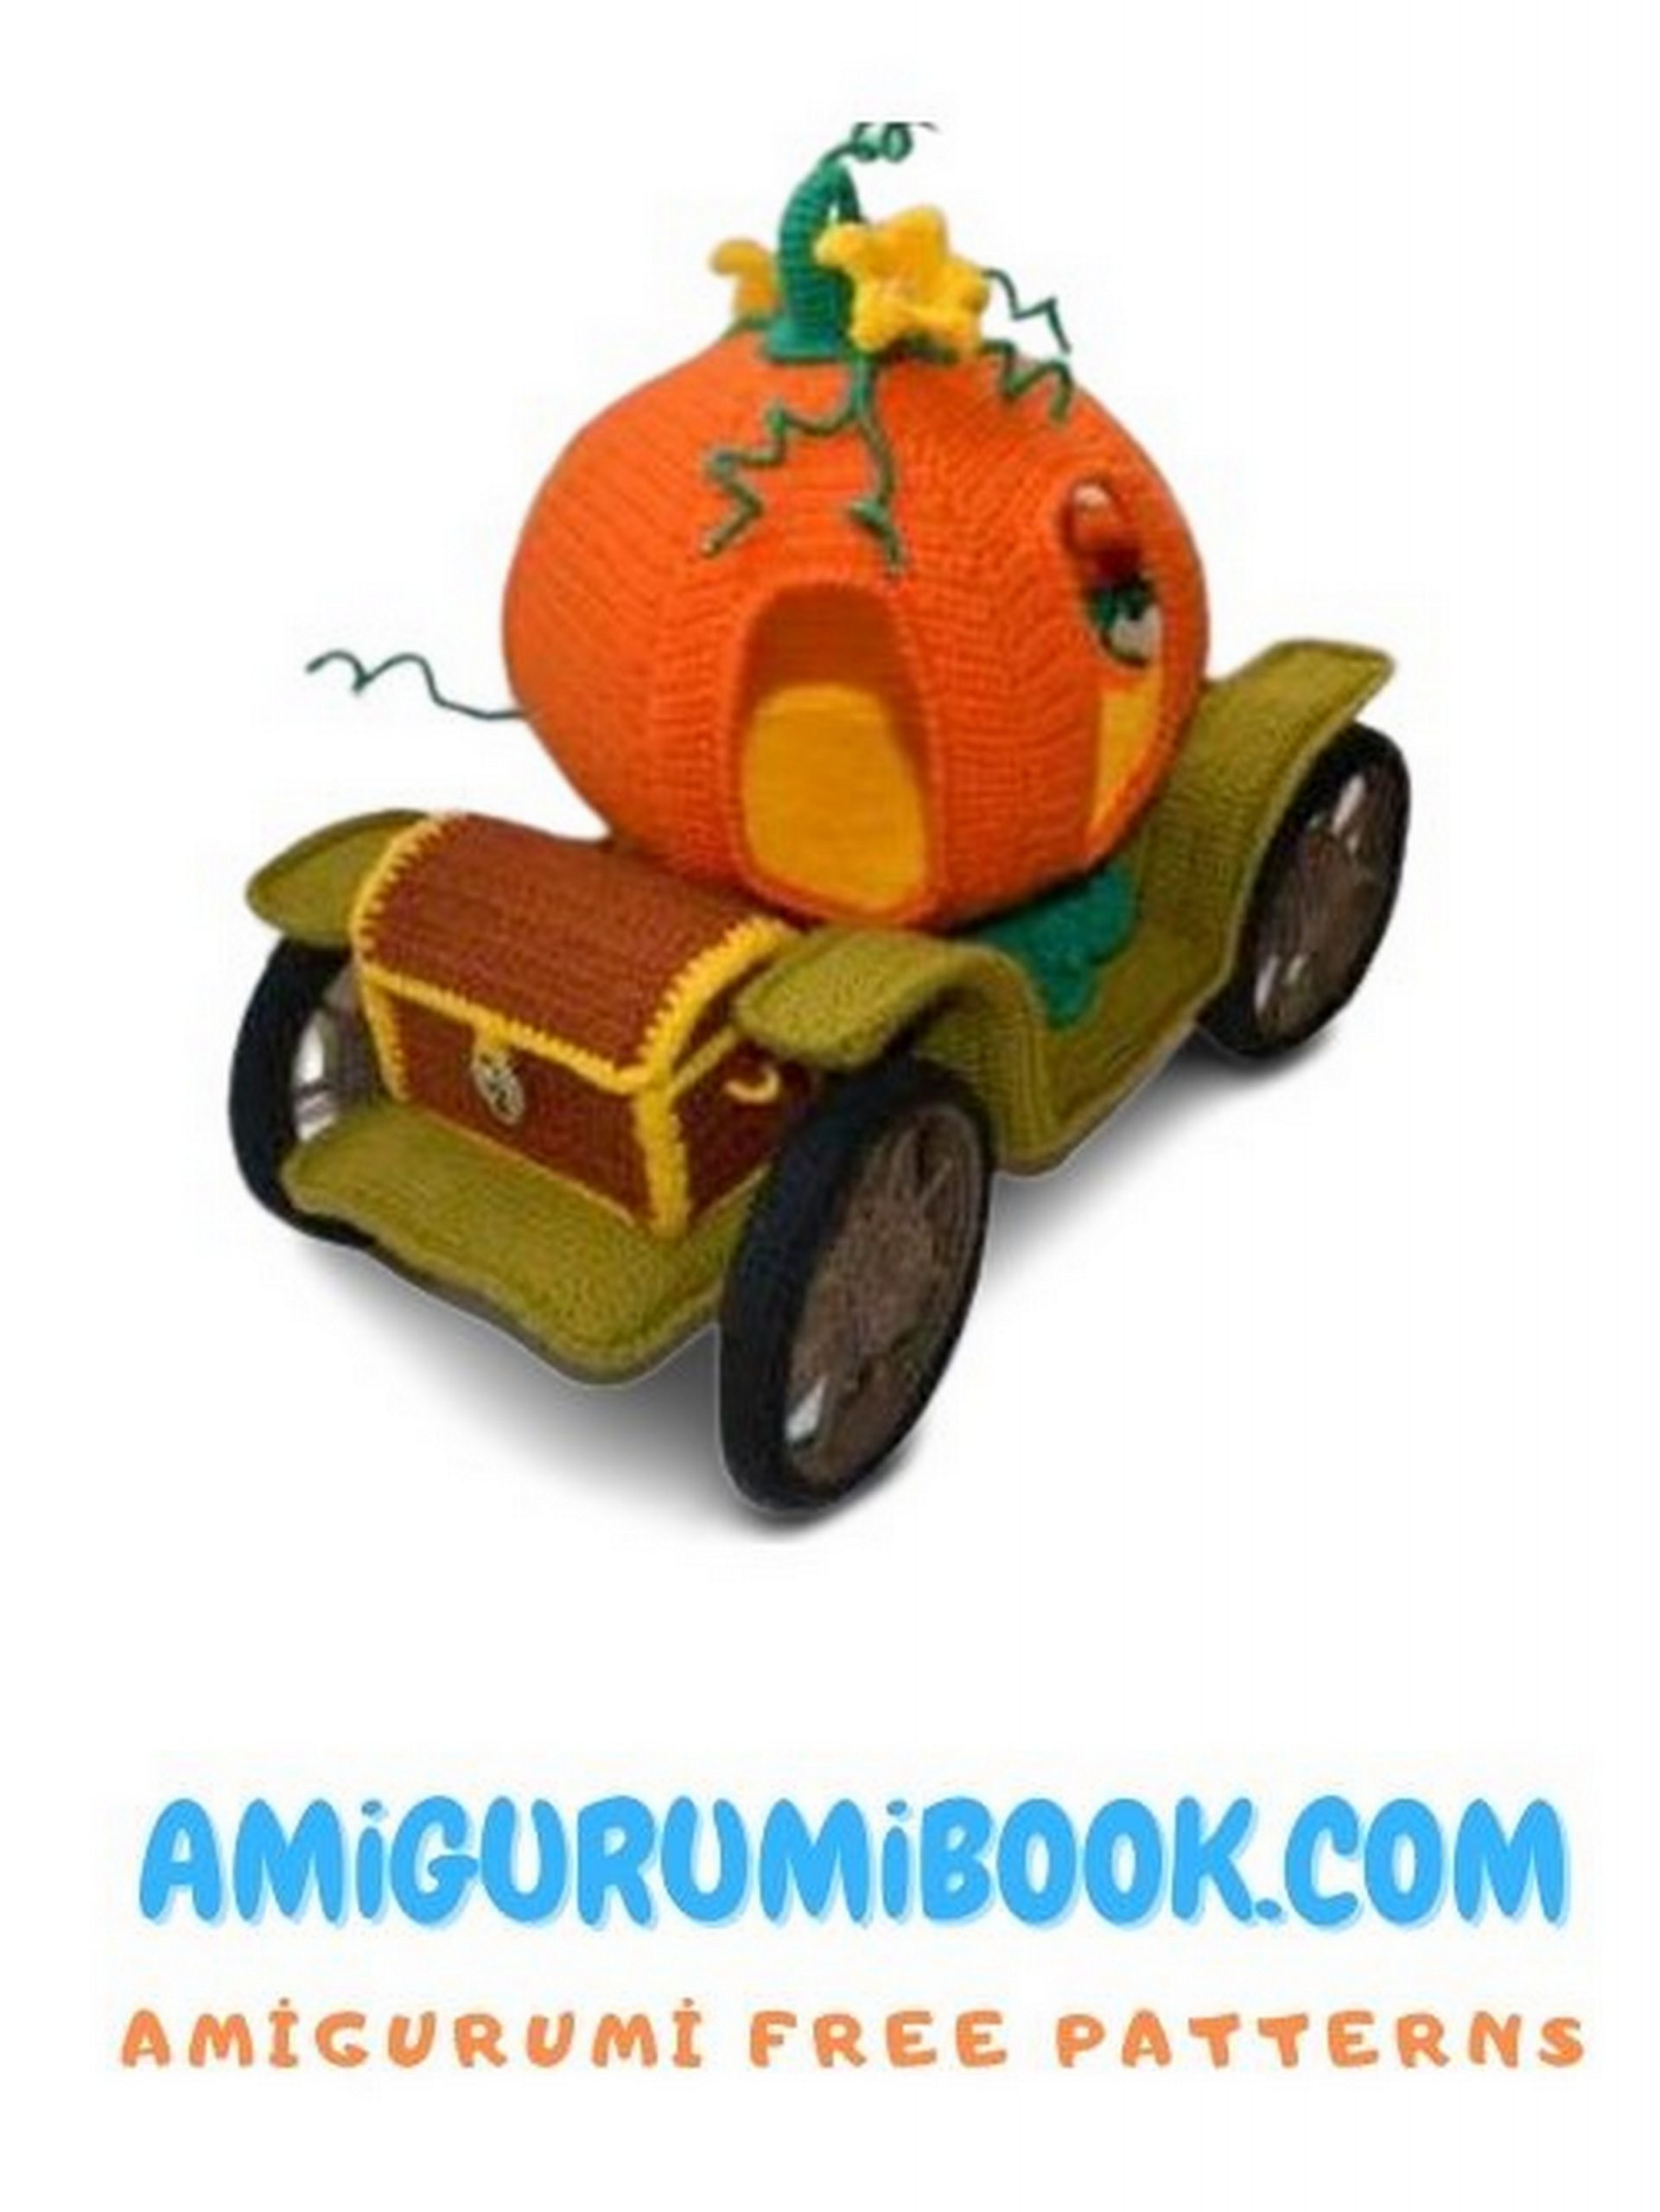
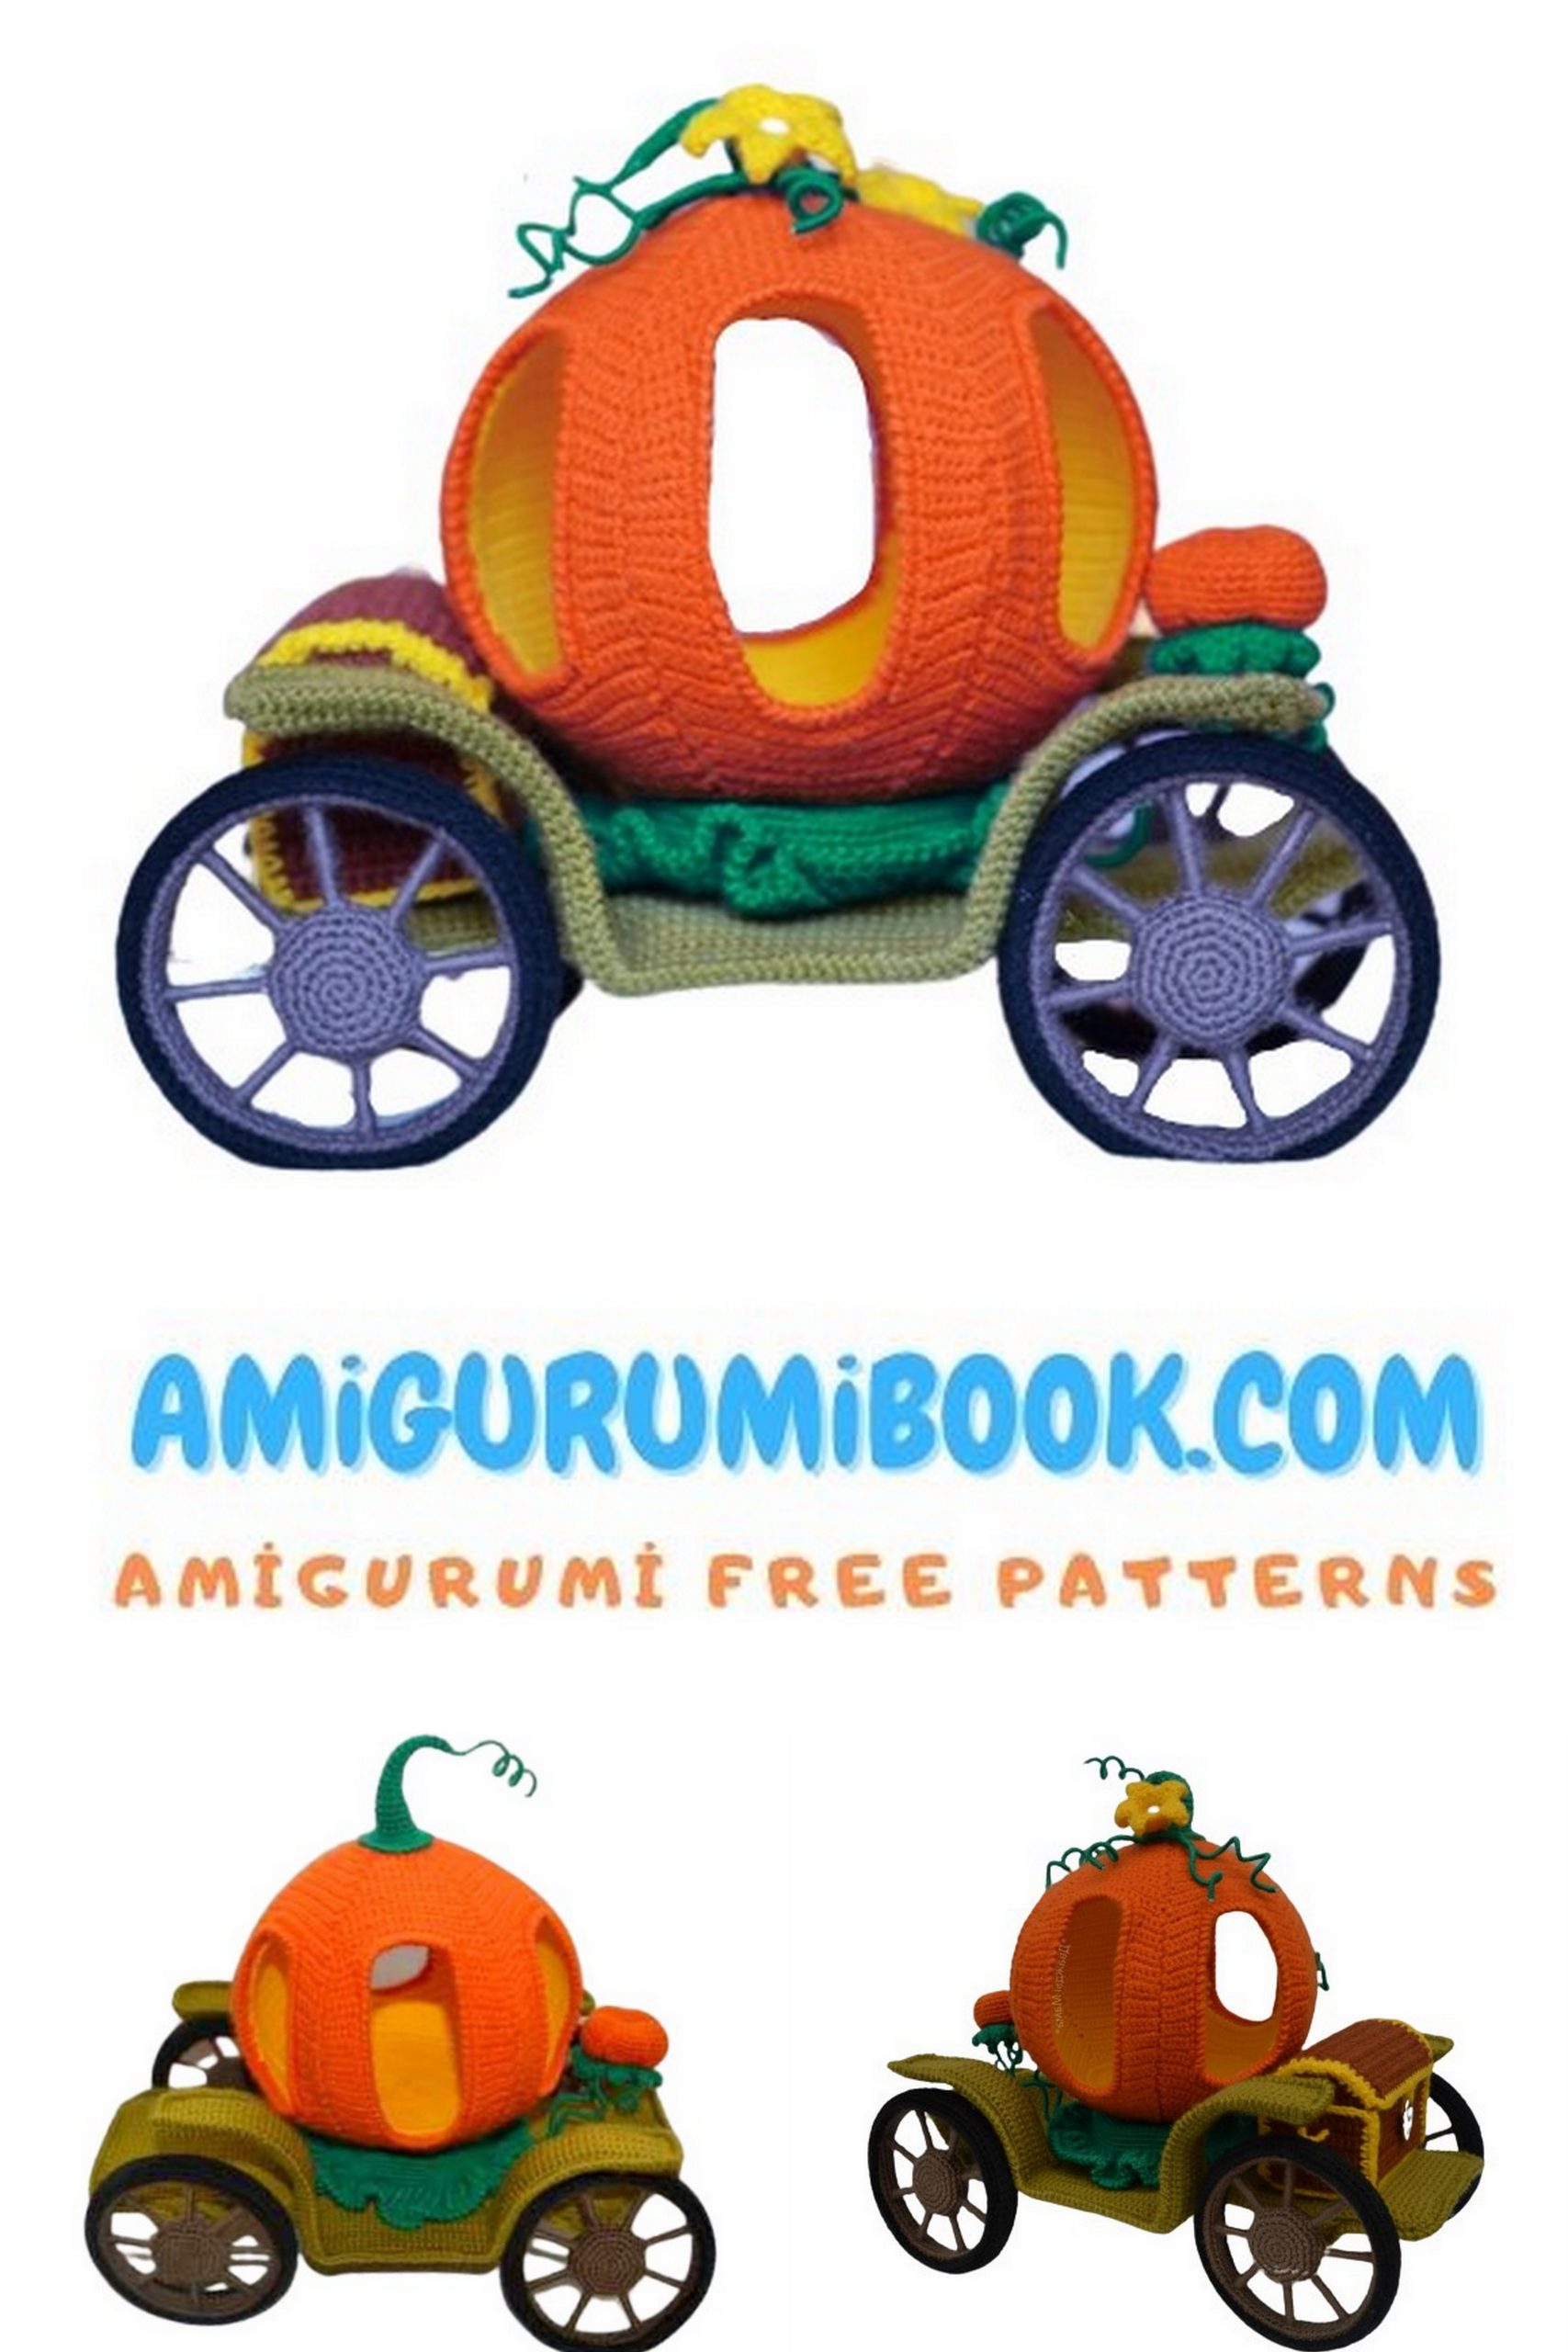
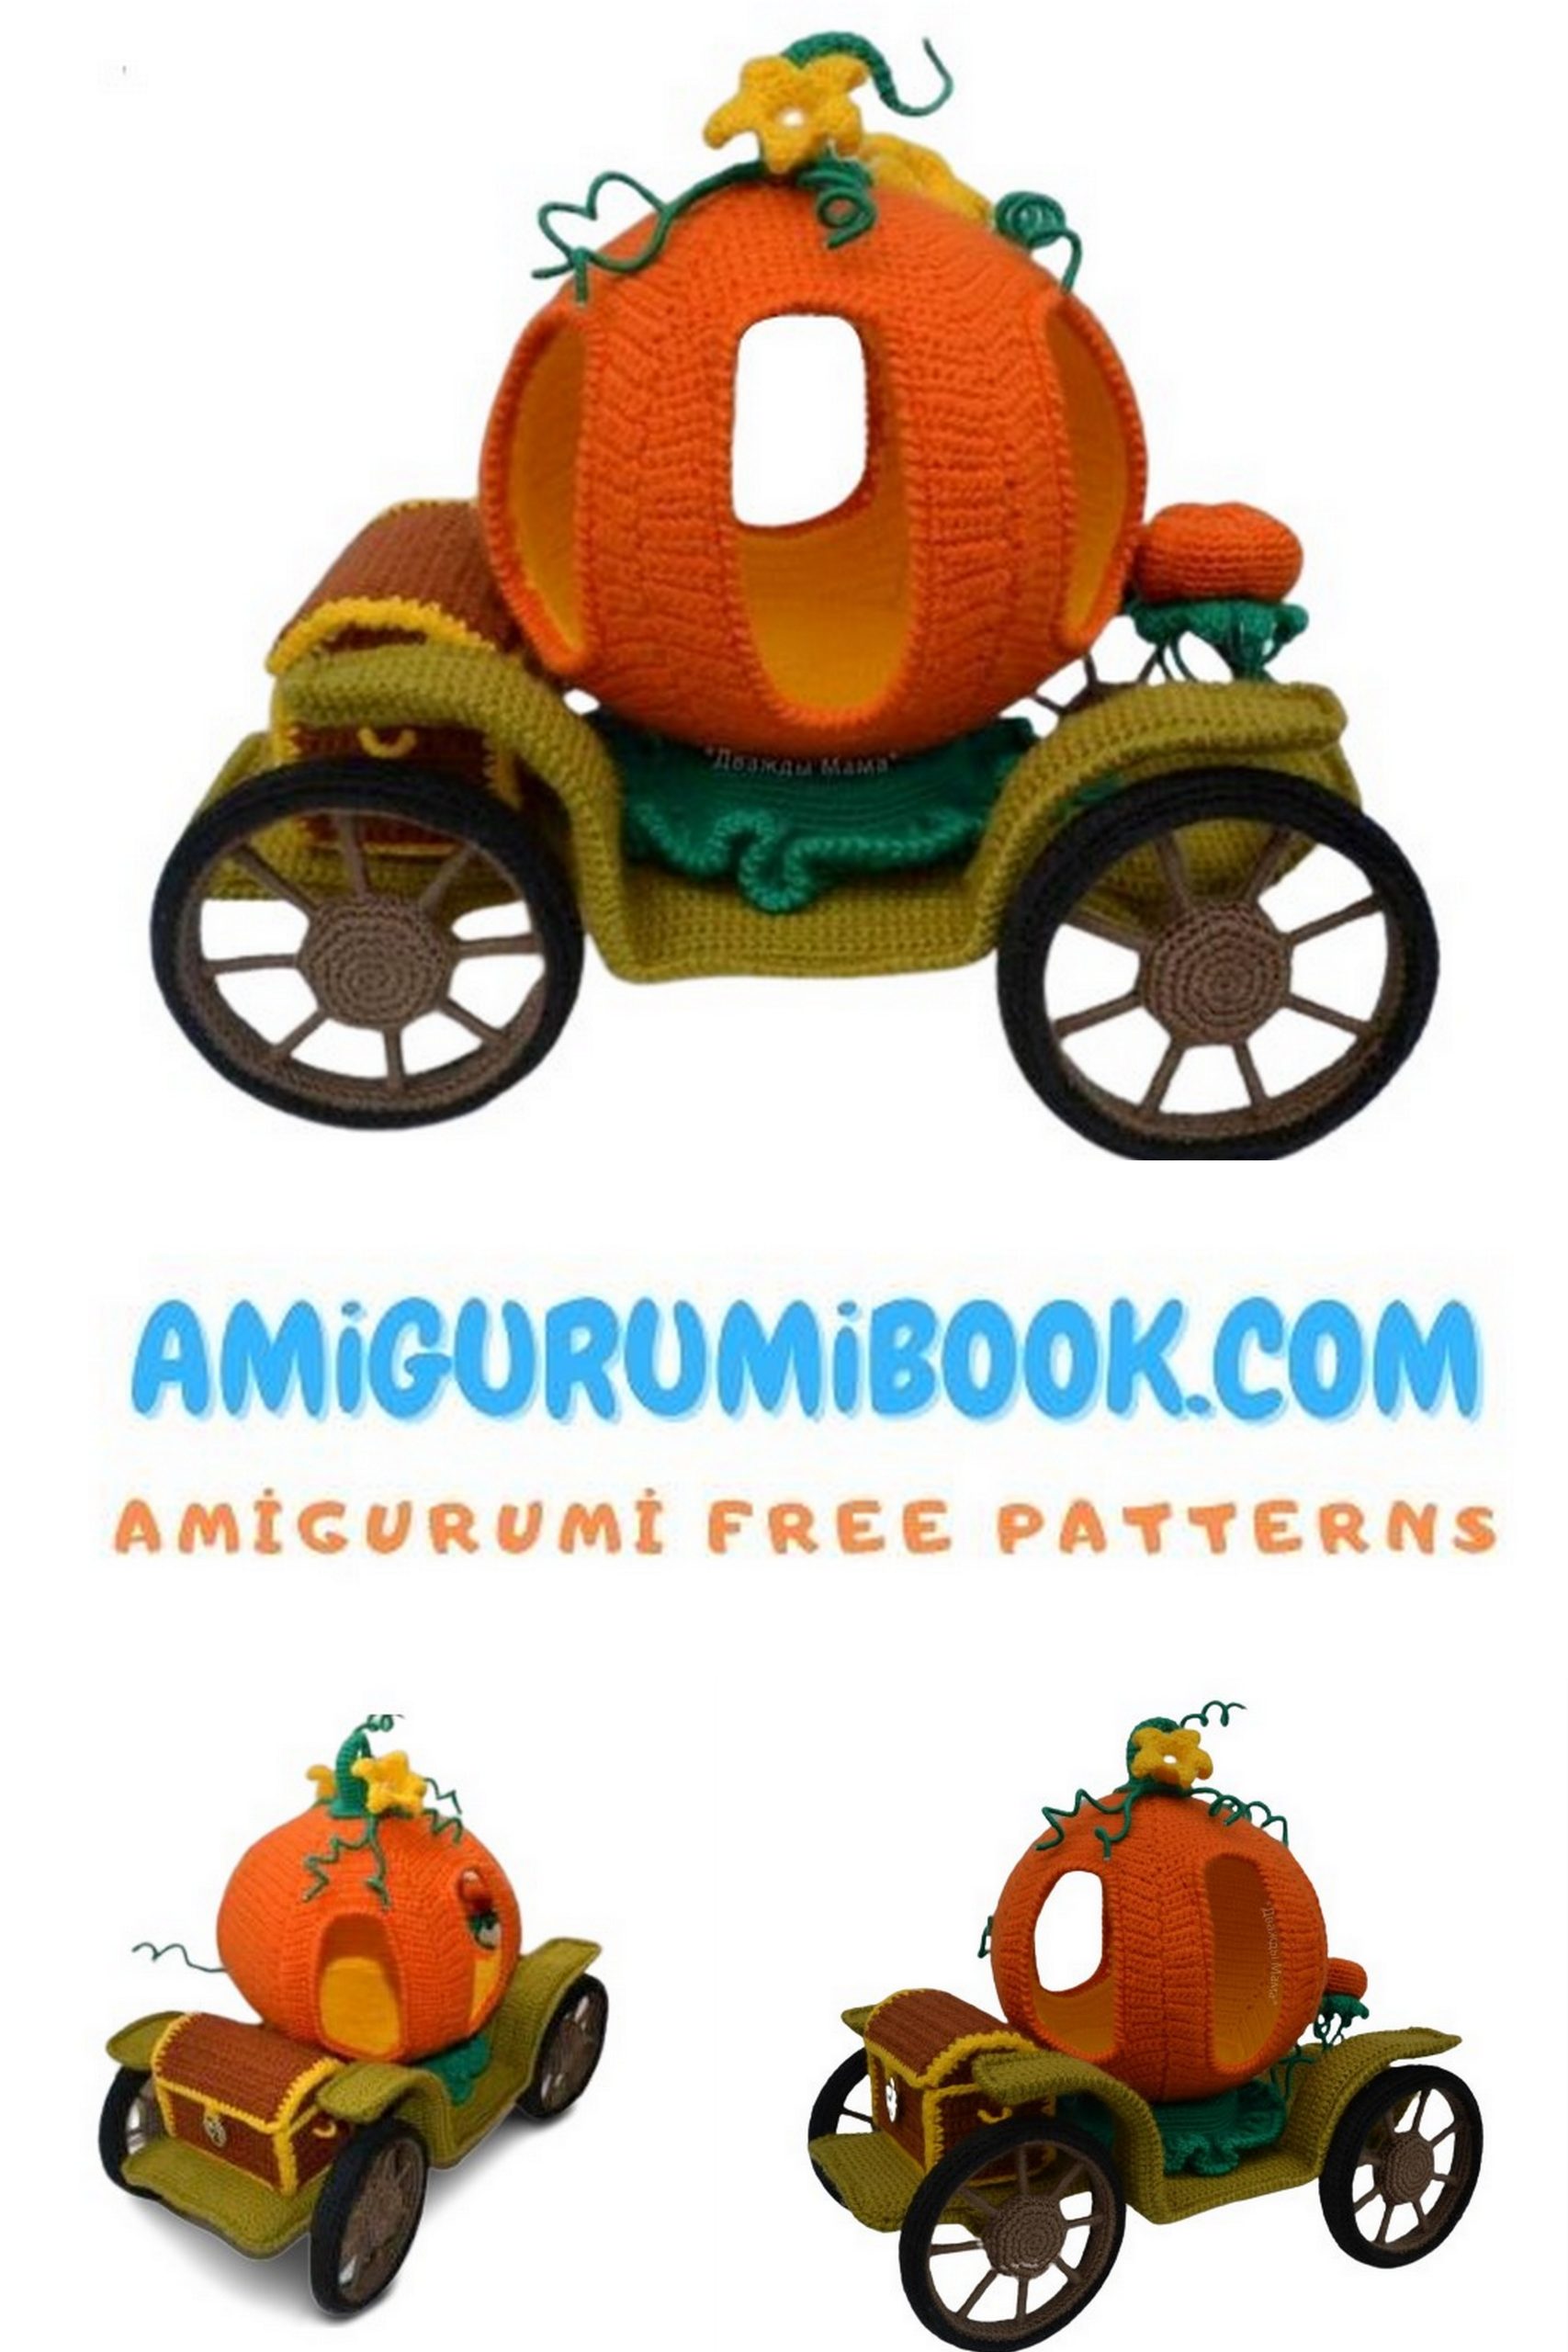
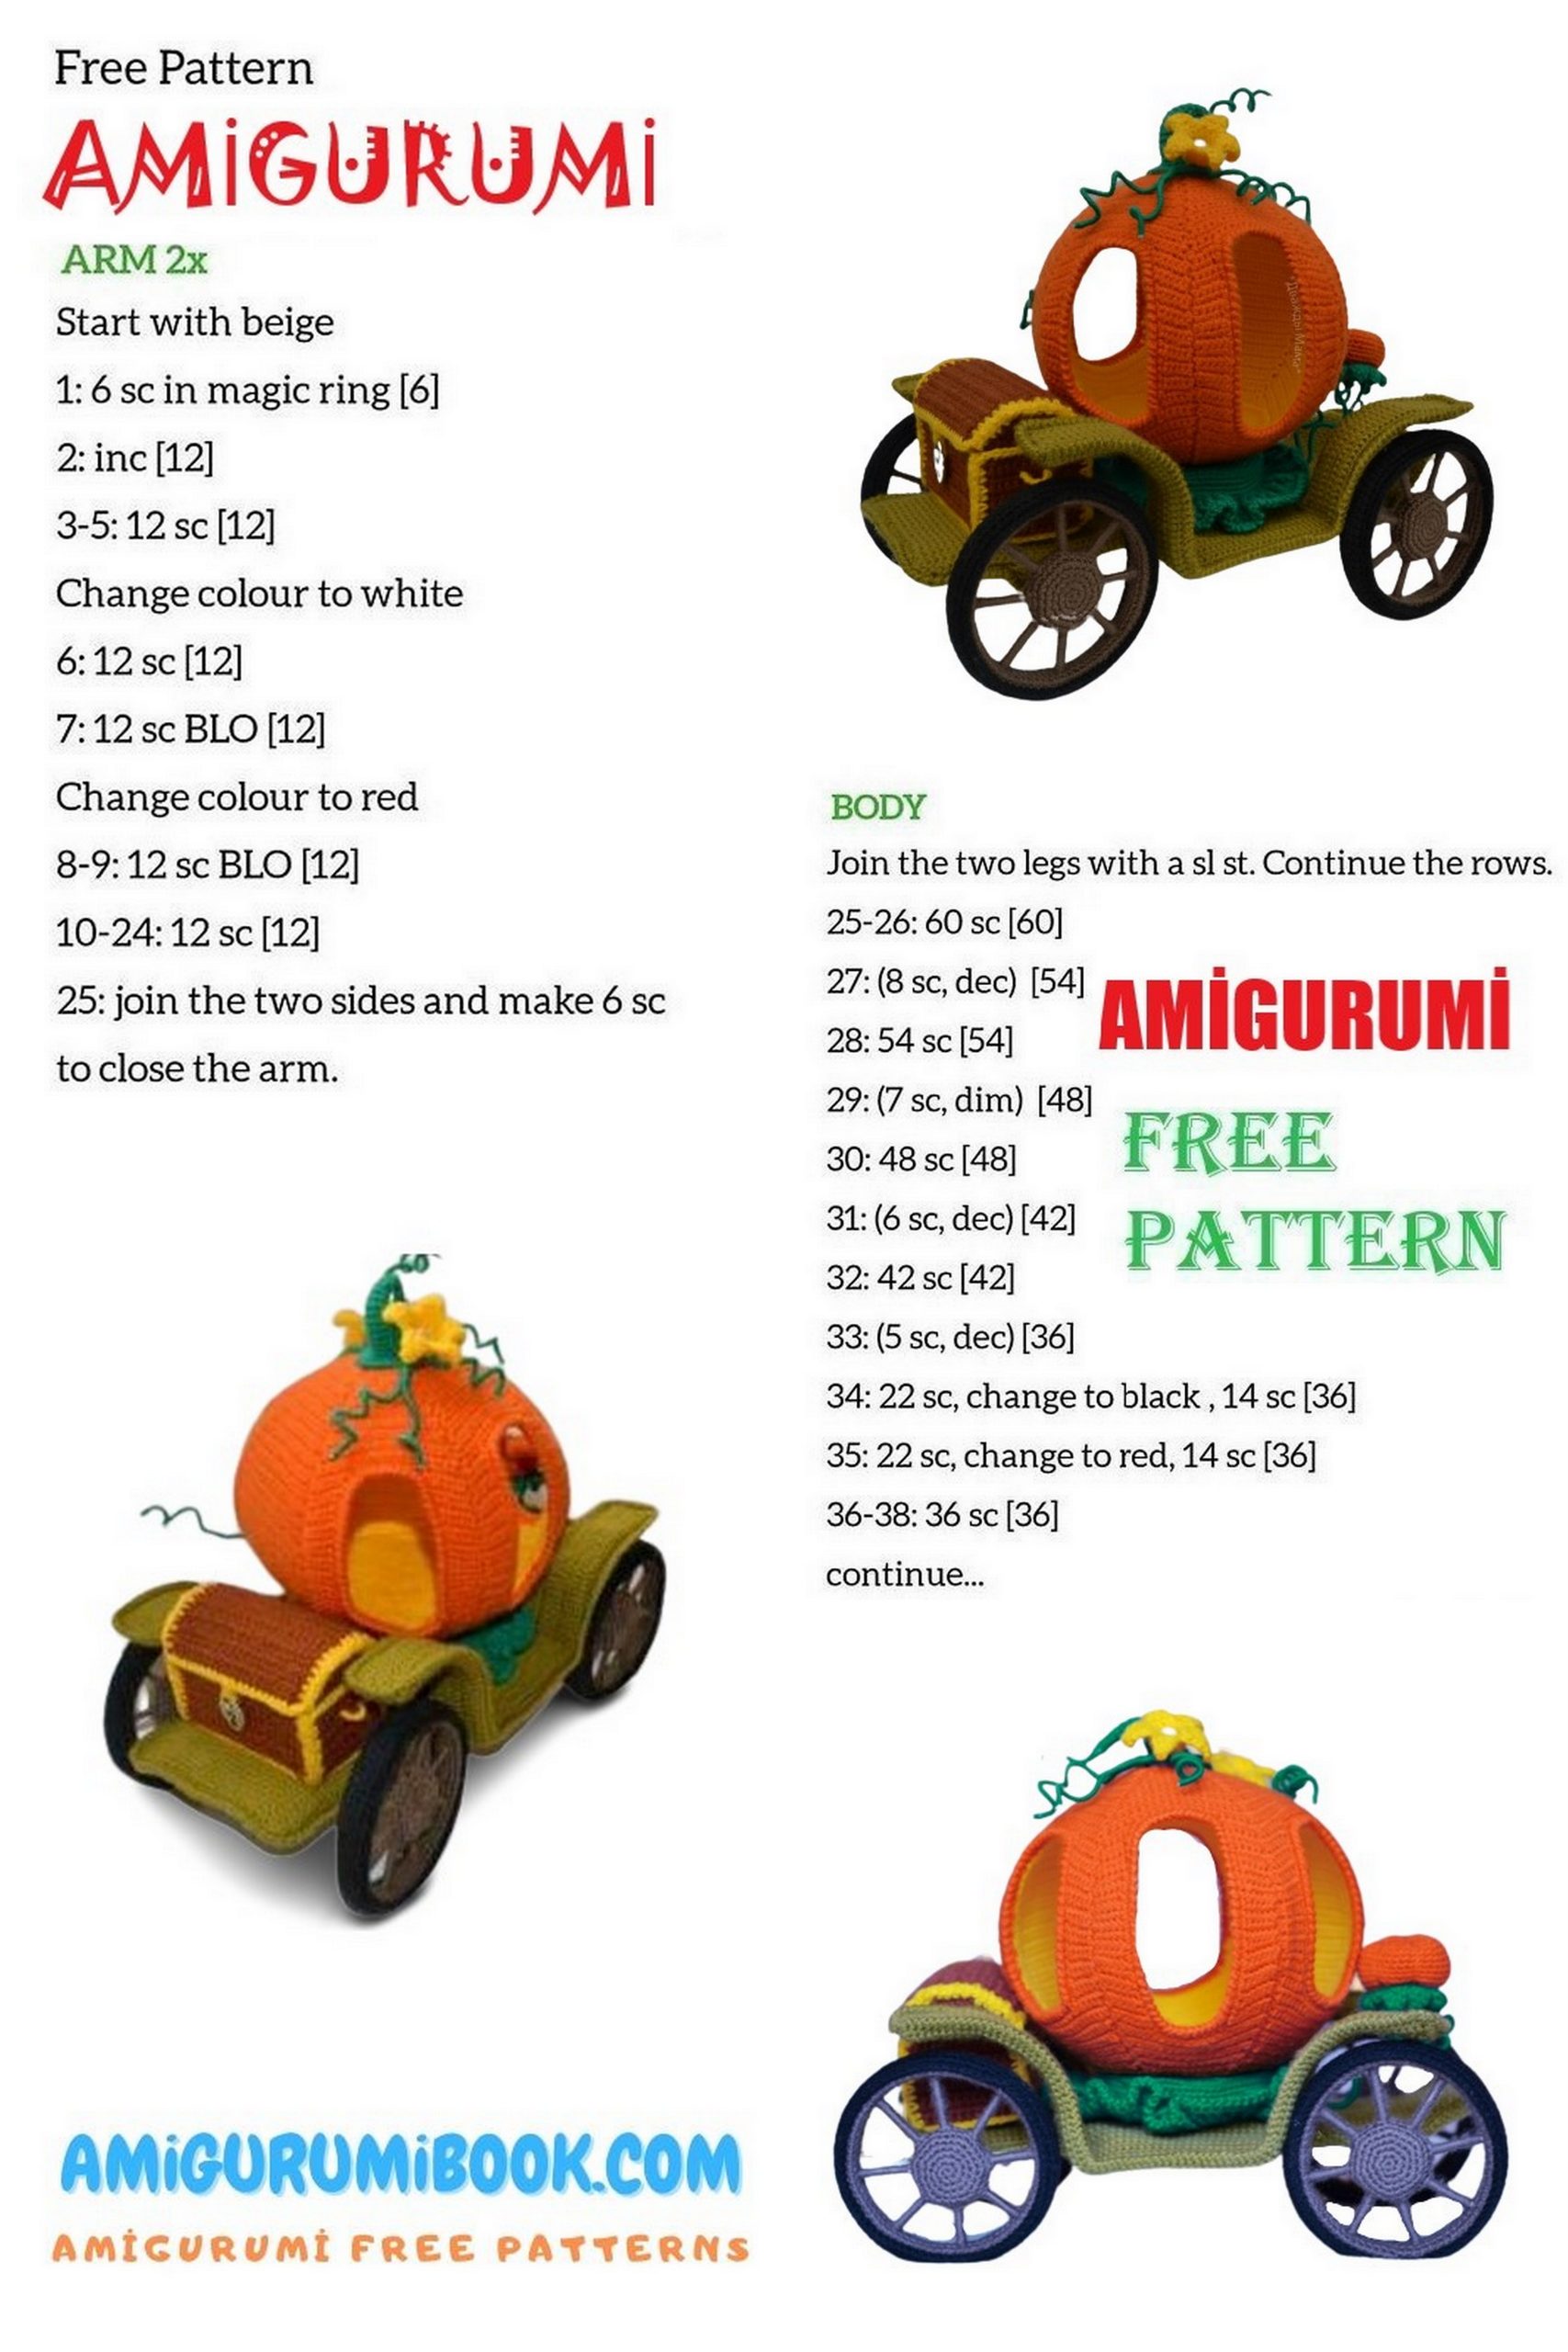
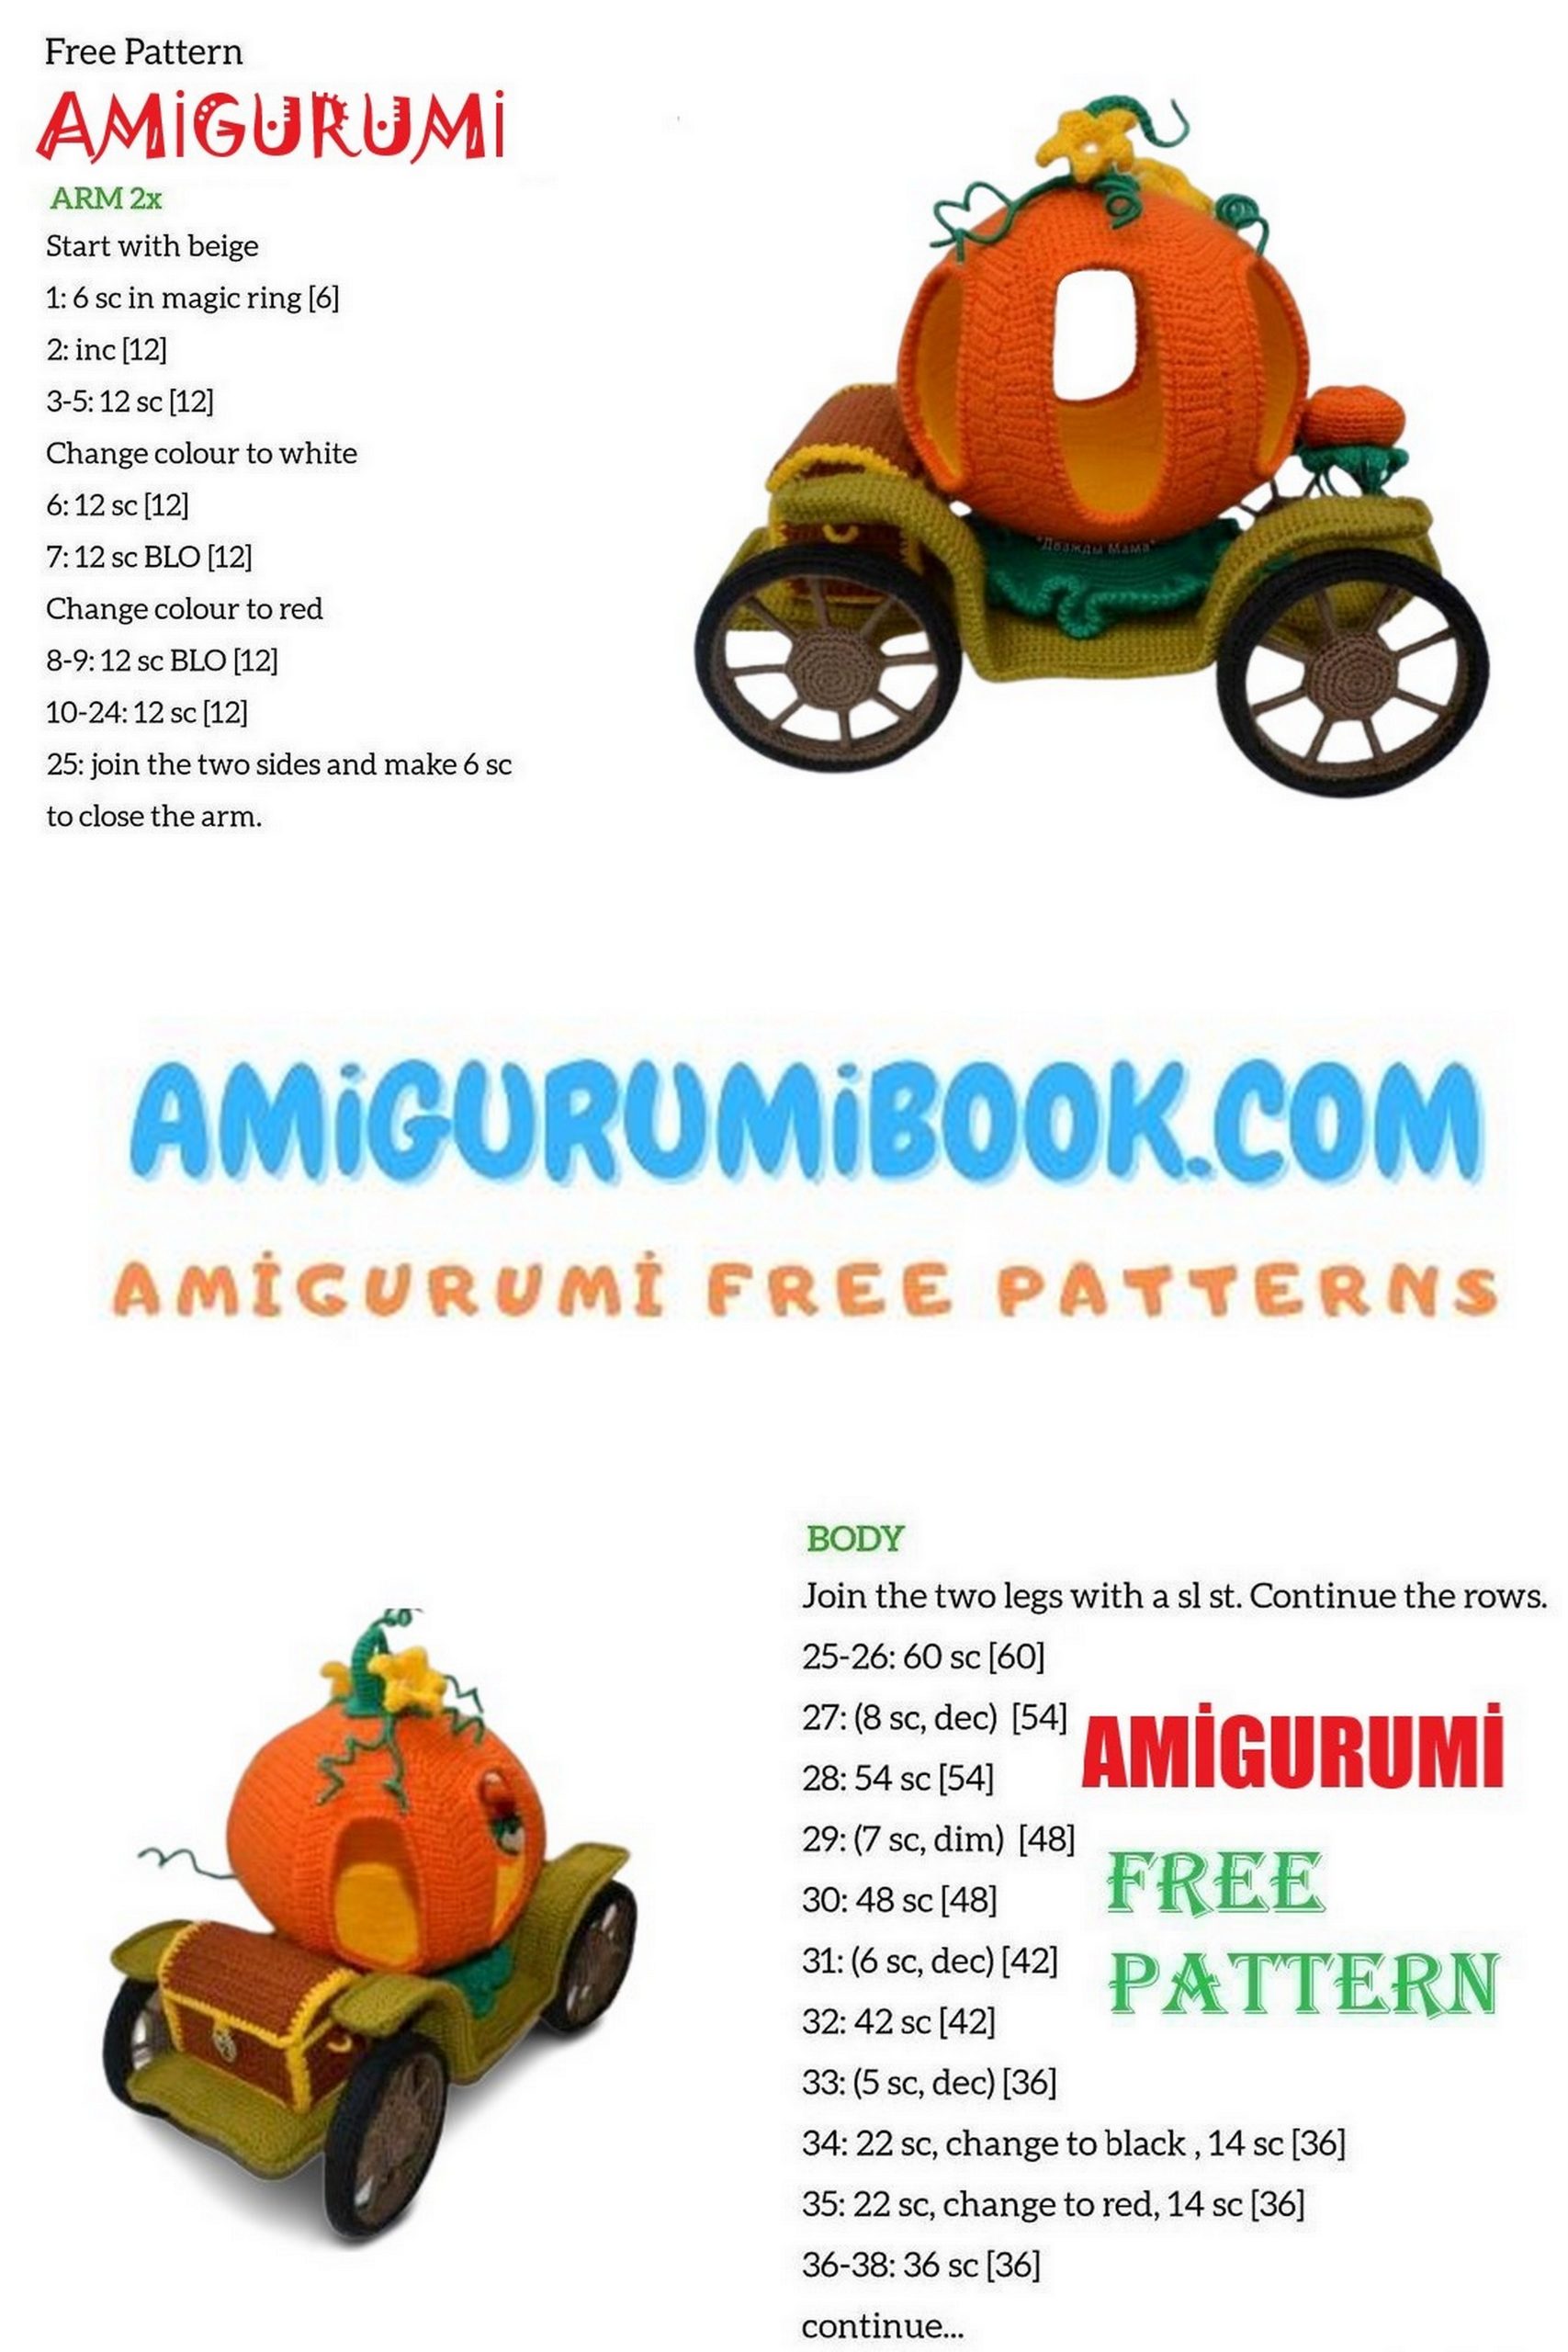
Halloween Car Amigurumi Free Pattern
We continue to share the best quality and beautiful amigurumi free patterns for you. In this content, we shared the amigurumi halloween car pattern for free.
Yarn:
1. Pekhorka “Children’s novelty”, composition: 100% acrylic
high-volume, 200m / 50gr, color: 02- black, 12- yolk, 33-
golden olive, 79- calendula, 187- cappuccino, 742- billiards,
2. Troitskaya “Baby”, composition: 20% wool and 80% acrylic,
135m / 50gr color 1290 – golden (for knitting a chest)
Hook No. 1.4
Note: For knitting decor, you can use the rest of the yarn,
which you have
We also need:
Filling: synthetic winterizer, holofiber, etc.
Wire diameter 1.5mm
Hot melt gun
PVA glue
A piece of plastic or thick cardboard
A piece of plastic water pipe with a diameter of 9cm
A piece of flexible metal (can be replaced with thick cardboard, but
cardboard will lack in a part of the even bend of the wing)
A piece of wooden cutting or branch with a diameter of 2.5-3 cm (you can
replace with foam)
Skewers of different thicknesses
Pearl color beads 3 pcs. diameter 1 cm
Screwdriver
Drills for 2 and 3 mm
Nippers (these are pliers with a cutting working surface,
used for cutting wires, nails, etc.)
Scissors
Metal scissors
Hacksaw for metal
Needle
Decorative small lock
Balloon
Finished carriage height ≈ 23 cm, width 30 cm
Abbrevations:
sc – single crochet
dc – half-column
hdc – half double crochet
d2c – double crochet
d4c – column with four crochets
hd2c – double crochet half-column
sl-st – connecting post
inc – 2 single crochet in one loop
dec – 2 single crochets, knitted together
ch – air loop
ch – lifting loop (also lifting loop can be denoted as ch –
air loop, both at the beginning of the row and at the end)
= (equal sign) – indicates the total number of loops in a row
Pumpkin
Yarn: Pekhorka “Children’s novelty”, color – yolk and calendula
Two pieces of calendula color and two pieces of yolk color.
Dense wall.
We knit in rotary rows.
1st row: 4 ch
2nd row: starting from the 2nd loop from the hook, knit inc, sc, inc = 5 sc
3rd row: ch, 5sc
4th row: ch, inc, 3 sc, inc = 7 sc
5 row: ch, 7 sc
6 row: ch, inc, 5 sc, inc = 9 sc
7 row: ch, 9 sc
8 row: ch, inc, 7 sc, inc = 11 sc
9 row: ch, 11 sc
10 row: ch, inc, 9 sc, inc = 13 sc
11 row: ch, 13 sc
12th row: ch, inc, 11 sc, inc = 15 sc
13 row: ch, 15 sc
Row 14: ch, inc, 13 sc, inc = 17 sc
15 row: ch, 17 sc
16 row: ch, inc, 15 sc, inc = 19 sc
17 row: ch, 19 sc
Row 18: ch, inc, 17 sc, inc = 21 sc
19 row: ch, 21 sc
20th row: ch, inc, 19 sc, inc = 23 sc
21 row: ch, 23 sc
22 row: ch, inc, 21 sc, inc = 25sc
23 row: ch, 25 sc
24 row: ch, inc, 23 sc, inc = 27 sc
25 row: ch, 27 sc
26 row: ch, inc, 25 sc, inc = 29 sc
27 row: ch, 29 sc
27 row: ch, inc, 27 sc, inc = 31 sc
Rows 28-33: 31 sc
34 row: ch, dec, 27 sc, dec = 29 sc
35 row: ch, 29 sc
36 row: ch, dec, 25sc, dec = 27 sc
37 row: ch, 27 sc
38 row: ch, dec, 23sc, dec = 25sc
Row 39: ch, 25sc
40 row: ch, dec, 21sc, dec = 23sc
Row 41: ch, 23sc
42 row: ch, dec, 19sc, dec = 21sc
Row 43: ch, 21sc
44 row: ch, dec, 17sc, dec = 19sc
45 row: ch, 19sc
46 row: ch, dec, 15sc, dec = 17sc
47 row: ch, 17sc
48 row: ch, dec, 13sc, dec = 15sc
Row 49: ch, 15sc
50 row: ch, dec, 11sc, dec = 13sc
Row 51: ch, 13sc
52 row: ch, dec, 9sc, dec = 11sc
Row 53: ch, 11sc
54 row: ch, dec, 7sc, dec = 9sc
55 row: ch, 9sc
56 row: ch, dec, 5sc, dec = 7sc
Row 57: ch, 7sc
58 row: ch, dec, 3sc, dec = 5sc
Row 59: ch, 5sc
60 row: ch, dec, sc, dec
Fasten knitting, cut the working thread and hide the end of the thread in the product.
Carriage door
One calendula detail and one yolk detail.
We knit in rotary rows.
1st row: 4 ch
2nd row: starting from the 2nd loop from the hook, knit inc, sc, inc = 5 sc
3rd row: ch, 5sc
4th row: ch, inc, 3 sc, inc = 7 sc
5 row: ch, 7 sc
6 row: ch, inc, 5 sc, inc = 9 sc
7 row: ch, 9 sc
8 row: ch, inc, 7 sc, inc = 11 sc
9 row: ch, 11 sc
10 row: ch, inc, 9 sc, inc = 13 sc
11 row: ch, 13 sc
12th row: ch, inc, 11 sc, inc = 15 sc
13 row: ch, 15 sc
Row 14: ch, inc, 13 sc, inc = 17 sc
15 row: ch, 17 sc
16 row: ch, inc, 15 sc, inc = 19 sc
17 row: ch, 19 sc
Row 18: ch, inc, 3sc = 5sc, turn knitting
Row 19: ch, 5sc
20 row: ch, inc, 2sc, dec = 5sc
Row 21: ch, 5sc
22 row: ch, inc, 4sc = 6sc
23 row: ch, 6sc
24th row: ch, inc, 3sc, dec = 6sc
25 row: ch, 6sc
26th row: ch, inc, 3sc, dec = 6sc
27 – 35 rows: ch, 6sc
36 row: ch, dec, 3sc, inc = 6sc
37 row: ch, 6sc
38 row: ch, dec, 3sc, inc = 6sc
Row 39: ch, 6sc
40 row: ch, dec, 3sc, inc = 6sc
41 row: ch, 6sc
We do not cut the working thread!
We turn to knitting the second wall. We count 10 loops from the connected wall, join in the 11th and from the 12th loop we knit the 18th row.
18th row: ch, 3sc, inc = 5sc
Row 19: ch, 5sc
20 row: ch, dec, 2sc, inc = 5sc
Row 21: ch, 5sc
22 row: ch, 4sc, inc = 6sc
23 row: ch, 6sc
24 row: ch, dec, 3sc, inc = 6sc
25 row: ch, 6sc
26th row: ch, dec, 3sc, inc = 6sc
27 – 35 rows: ch, 6sc
36 row: ch, inc, 3sc, dec = 6sc
37 row: ch, 6sc
38 row: ch, inc, 3sc, dec = 6sc
Row 39: ch, 6sc
40 row: ch, inc, 3sc, dec = 6sc
41 row: ch, 6sc
Fasten knitting, cut the working thread and hide the tip of the thread in the product.
We connect both walls.
42 row: ch, dec, 3sc, inc, 9ch (join the other wall) inc, 3sc, dec = 21sc
43 row: ch, 21sc (ie: 6sc along one wall + 9sc along a chain of ch + 6sc along the other wall)
44 row: ch, dec, 17sc, dec = 19sc
45 row: ch, 19sc
46 row: ch, dec, 15sc, dec = 17sc
47 row: ch, 17sc
48 row: ch, dec, 13sc, dec = 15sc
Row 49: ch, 15sc
50 row: ch, dec, 11sc, dec = 13sc
Row 51: ch, 13sc
52 row: ch, dec, 9sc, dec = 11sc
Row 53: ch, 11sc
54 row: ch, dec, 7sc, dec = 9sc
55 row: ch, 9sc
56 row: ch, dec, 5sc, dec = 7sc
Row 57: ch, 7sc
58 row: ch, dec, 3sc, dec = 5sc
Row 59: ch, 5sc
60 row: ch, dec, sc, dec
Fasten knitting, cut the working thread and hide the end of the thread in the product.
Window
Three pieces of calendula color and three pieces of yolk color.
We knit in rotary rows.
1st row: 4 ch
2nd row: starting from the 2nd loop from the hook, knit inc, sc, inc = 5 sc
3rd row: ch, 5sc
4th row: ch, inc, 3 sc, inc = 7 sc
5 row: ch, 7 sc
6 row: ch, inc, 5 sc, inc = 9 sc
7 row: ch, 9 sc
8 row: ch, inc, 7 sc, inc = 11 sc
9 row: ch, 11 sc
10 row: ch, inc, 9 sc, inc = 13 sc
11 row: ch, 13 sc
12th row: ch, inc, 11 sc, inc = 15 sc
13 row: ch, 15 sc
Row 14: ch, inc, 13 sc, inc = 17 sc
15 row: ch, 17 sc
16 row: ch, inc, 15 sc, inc = 19 sc
17 row: ch, 19 sc
Row 18: ch, inc, 17 sc, inc = 21 sc
19 row: ch, 21 sc
20th row: ch, inc, 19 sc, inc = 23 sc
21 row: ch, 23 sc
22 row: ch, inc, 21 sc, inc = 25sc
23 row: ch, 25 sc
24 row: ch, inc, 23 sc, inc = 27 sc
25 row: ch, 27 sc
26 row: ch, 6sc, turn knitting
27 row: ch, dec, 3sc, inc = 6sc
28 row: ch, 6sc
Row 29: ch, dec, 3sc, inc = 6sc
30 – 34 rows: ch, 6sc
35 row: ch, inc, 3sc, dec = 6sc
Row 36: ch, 6sc
37 row: ch, inc, 3sc, dec = 6sc
38 row: ch, 6sc
Row 39: ch, inc, 3sc, dec = 6sc
40 row: ch, 6sc
41 row: ch, inc, 3sc, dec = 6sc
We do not cut the working thread!
We turn to knitting the second wall. We count 14 loops from the connected wall, join in the 15th and from the 16th loop we knit the 26th row.
26 row: 6sc
27 row: ch, inc, 3sc, dec = 6sc
28 row: ch, 6sc
Row 29: ch, inc, 3sc, dec = 6sc
30 – 34 rows: ch, 6sc
35 row: ch, dec, 3sc, inc = 6sc
Row 36: ch, 6sc
37 row: ch, dec, 3sc, inc = 6sc
38 row: ch, 6sc
Row 39: ch, dec, 3sc, inc = 6sc
40 row: ch, 6sc
41 row: ch, dec, 3sc, inc = 6sc
Fasten knitting, cut the working thread and hide the end of the thread in the product.
We knit with a thread from the first wall:
42 row: ch, 6sc, 9ch (join the other wall) 6 sc = 21sc
43 row: ch, 21sc (ie: 6sc along one wall + 9sc along a chain of ch + 6sc along the other wall)
44 row: ch, dec, 17sc, dec = 19sc
45 row: ch, 19sc
46 row: ch, dec, 15sc, dec = 17sc
47 row: ch, 17sc
48 row: ch, dec, 13sc, dec = 15sc
Row 49: ch, 15sc
50 row: ch, dec, 11sc, dec = 13sc
Row 51: ch, 13sc
52 row: ch, dec, 9sc, dec = 11sc
Row 53: ch, 11sc
54 row: ch, dec, 7sc, dec = 9sc
55 row: ch, 9sc
56 row: ch, dec, 5sc, dec = 7sc
Row 57: ch, 7sc
58 row: ch, dec, 3sc, dec = 5sc
Row 59: ch, 5sc
60 row: ch, dec, sc, dec
Fasten knitting, cut the working thread and hide the tip of the thread in the product.
Sew the parts with a simple seam over the edge separately 6 pieces in yellow and separately 6 pieces in orange.
When stitching, we alternate: window, solid wall, window, solid wall, window, door.
Insert the resulting yellow part inside the orange part, with the seams inside (seam to seam).
Tie the armholes of the windows and doors sc, and then a crustacean step
Sew the remaining seams. First on the yellow part, and then on the orange one.
In a container with warm water, dilute the PVA glue, moisten the resulting part of the carriage base completely. Remove from the container, wait until the water drains (do not squeeze), insert a balloon inside and inflate it, straighten the product. This way we will give the shape. Leave the product in this form until completely dry, then pierce the ball.
Pumpkin top plug
Yarn: Pekhorka “Children’s novelty”, color – yolk
1st row: 6 sc in amigurumi ring
2nd row: (inc) – 6 times = 12 sc
3rd row: (sc, inc) – 6 times = 18 sc
4th row: (2 sc, inc) – 6 times = 24 sc
Tie with a crustacean step. Fasten knitting, cut the working thread and hide the end of the thread in the product.
Apply glue to the wrong side of the part and glue the pumpkin from the inside to the top, so we decorate the hole.
Bottom for pumpkin
Yarn: Pekhorka “Children’s novelty”, color – yolk
1st row: 6 sc in amigurumi ring
2nd row: (inc) – 6 times = 12 sc
3rd row: (sc, inc) – 6 times = 18 sc
4th row: (2 sc, inc) – 6 times = 24 sc
5 row: (3 sc, inc) – 6 times = 30 sc
6 row: (4 sc, inc) – 6 times = 36 sc
7 row: (5 sc, inc) – 6 times = 42 sc
8 row: (6 sc, inc) – 6 times = 48 sc
9th row: (7 sc, inc) – 6 times = 54 sc
10 row: (8 sc, inc) – 6 times = 60 sc
11 row: (9 sc, inc) – 6 times = 66 sc
12th row: (10 sc, inc) – 6 times = 72 sc
Row 13: (11 sc, inc) – 6 times = 78 sc
Row 14: (12 sc, inc) – 6 times = 84 sc
Tie with a crustacean step. Fasten knitting, cut the working thread and hide the end of the thread in the product.
Cut a circle with a diameter of ≈ 5 mm smaller than the connected circle from plastic or thick cardboard. Apply a small amount of glue to one side of the cut out circle and glue the knitted bottom for the pumpkin.
Apply glue from the wrong side of the bottom and glue to the bottom of the pumpkin.
Pumpkin tail
Yarn: Pekhorka “Children’s novelty”, color – billiards
1st row: 24ch in a circle
2nd row: 24sc
3rd row: (2sc, dec) – 6p = 18sc
4th row: 18sc
5 row: (sc, dec) – 6p = 12sc
6 row: 12sc
Then we knit in a circle: 40sc, dec, 5sc, dec, 5sc, dec, 10sc, dec, 10sc, dec, 10sc, dec.
Fasten knitting. Cut the working thread according to the length required to wrap the wire end.
Insert a wire into the product so that its tip with a length of ≈ 15 cm sticks out of the product, wrap the tip with the remaining working thread, fix the end of the thread with glue. Wind the wire around the pencil, making it look like a spiral. Bend the other end of the wire into a loop so that it does not jump out of the product. Fill the product with padding polyester.
Glue the ponytail to the top of the pumpkin
“Eyelet” for the frame
Yarn: Pekhorka “Children’s novelty”, color – golden olive It will be necessary to knit 4 such “ears”, 2 for each knitted frame detail.
1st row: 4ch
2nd row: inc, sc, ch
3rd row: inc, 3sc, inc, ch
4th row: 2sc, 3ch, skip 3 loops and starting from 4th knit 2sc, ch
5 row: 7sc
Fasten knitting, cut and hide the working thread.
Frame (base for the carriage)
Yarn: Pekhorka “Children’s novelty”, color – golden olive
It is necessary to knit 2 identical parts.
We knit in reverse rows, do not forget to knit a lifting loop at the end of each row, further in the description it is given only in difficult moments and is indicated by (+ ch).
1 row: 91ch starting from the 2nd loop from the hook, knit 90sc
Row 2 – Row 9: 90sc
Fasten knitting, cut off the working thread.
10 row: retreat 30 loops; starting from the 31st loop we attach the working thread and knit 30sc
11-14 rows: 30sc, ch
14th row: 10ch, attach the “eyelet”, knitting 7sc, 10ch (+ ch)
15 row: 57sc, 10ch, attach the “eyelet”, knitting 7sc, 10ch (+ ch)
16 row: 84sc, ch (+ ch)
17th row: 85sc, ch (+ ch)
Rows 18 – 47: 86sc
48 row: dec, 84sc = 85sc
49 row: dec, 83sc = 84sc
50 row: 17sc (+ ch),
we turn knitting, we will knit an “ear”:
1st row: 2sc, 3ch, skip 3 loops and starting from 4th loop we knit 2sc (+ ch)
2nd row: dec, 3sc, dec
3rd row: dec, sc, dec
Fasten knitting, cut and hide the working thread.
50 row: attach the working thread to the 18th loop of the frame (near the “ear”),
57sc (+ ch), we turn knitting, we will knit the second “ear”:
1st row: 2sc, 3ch, skip 3 loops and starting from 4th loop we knit 2sc (+ ch)
2nd row: dec, 3sc, dec
3rd row: dec, sc, dec
Fasten knitting, cut the working thread.
Row 50: attach a working thread near the base of the “ear” and knit 10sc for a row.
51 row: counting from the edgeproducts 27 loops, attach the working
thread in the 28th loop and knit 30sc
Rows 52 – 55: 30sc
Without breaking the thread, we type 30ch (+ ch)
56 row: 60sc, 30ch (+ ch)
Rows 57 – 64: 90sc
Cut the frame out of flexible metal or thick cardboard. Thick cardboard will have the disadvantage of having the fenders fold evenly over the wheels, so it’s better to find flexible metal. I used leftovers from the ebb when installing the window.
I attached a knitted frame, leveled it and circled it with a marker. Carved with scissors for metal. It was very difficult, but I managed it Attention! the frame should be slightly smaller in volume than knitted parts.
Here’s what you should get
Now we assemble the frame. It is necessary to combine these parts into one.
To do this, we connect both knitted frame parts, insert a frame between them and tie around the edges sc, and then with a crustacean step.
Wheels
Yarn: Pekhorka “Children’s novelty”, color – black, cappuccino
(hereinafter I refer to it as brown)
“Tire” and “rim”
4 parts each
We collect 76ch from brown yarn, close it in a ring, then knit in a circle 76 sc 4 rows. Fasten knitting, cut the working thread.
Black yarn will also need to knit 4 parts, but we do not cut the working thread. Cast on 76ch, close into a ring, then knit 76 sc 5 rows in a circle.
We connect the brown and black pieces by knitting along the edge sc, passing the hook through both pieces like a loop into a loop. Details should be placed seamy sides to each other. Fasten knitting, cut and hide the working thread.
To assemble the wheels, you need to prepare individual parts. For this we need a plastic pipe (I used the remains of a new plastic water pipe) with a diameter of 90 mm.
Mark 4 pieces 1 cm wide. I sawed off with a hacksaw for metal. Here’s what happened. In each ring you need to make holes for the needles as shown in the photo. To do this, it is necessary to apply a marking for 8 knitting needles, placing them at an equal distance from each other. Then I used male help, since I needed a screwdriver and a drill with a diameter of 2 mm. Drilling 8 holes
We also need a base for the wheel disc. For this I used an old rake handle, having cut 4 “tablets”
1 cm wide and ≈ 2.5 cm in diameter.
Next, we apply the markings for cutting out the holes for the knitting needles.
We drill 8 holes with a 2mm drill, and in the center we cut a through central axial hole with a 3mm drill as shown in photo 39.
We take a thin skewer and try it on, cut the knitting needles of the required length.
These are the skewers I used, I bought them in the Fix Price chain store. Thin for the spokes (you can use toothpicks here), and thick for connecting a pair of wheels.
We pull the knitted product of the wheel onto the plastic base, insert the skewers, as shown in the photo. I did not attach the skewers to glue, I just inserted
We connect the brown and black knitted parts, knitting with black yarn along the edge sc, threading the hook through both parts according to the loop-to-loop principle. Fasten knitting, cut and hide the working thread. Wrap the knitting needles with brown yarn.
We knit disks on the wheel.
8 pieces
1st row: 6 sc in amigurumi ring
2nd row: (inc) – 6 times = 12 sc
3rd row: (sc, inc) – 6 times = 18 sc
4th row: (2 sc, inc) – 6 times = 24 sc
5 row: (3 sc, inc) – 6 times = 30 sc
6 row: (4 sc, inc) – 6 times = 36 sc
Fasten knitting, cut off the working thread. On 4 parts, cut the working thread taking into account the length required to stitch the two parts together.
We sew discs with a needle as shown in the photo
We make an axle for wheels. Cut off 2 thick skewers 15cm long.
We wrap the skewers with brown yarn, fix the ends with glue.
We insert one end of the skewer into the center of the wheel disk, first apply glue to the tip of the skewer.
Next, we pass the skewer through the “ears” on the frame. Previously, on the frame, it is necessary to bend the wings, giving them the shape of a ¼ circle, and it is also necessary to bend the “ears” to the bottom of the frame.
We put the second wheel on the other end of the skewer, first apply glue to the tip of the skewer.
Do the same with the remaining two wheels.
Pumpkin stand
Yarn: Pekhorka “Children’s novelty”, color – billiards
1st row: 6 sc in amigurumi ring
2nd row: (inc) – 6 times = 12 sc
3rd row: (sc, inc) – 6 times = 18 sc
4th row: (2 sc, inc) – 6 times = 24 sc
5 row: (3 sc, inc) – 6 times = 30 sc
6 row: (4 sc, inc) – 6 times = 36 sc
7 row: (5 sc, inc) – 6 times = 42 sc
8 row: (6 sc, inc) – 6 times = 48 sc
9th row: (7 sc, inc) – 6 times = 54 sc
10 row: (8 sc, inc) – 6 times = 60 sc
11 row: (9 sc, inc) – 6 times = 66 sc
12th row: (10 sc, inc) – 6 times = 72 sc
Row 13: (11 sc, inc) – 6 times = 78 sc
14 row: for the back walls of the loops we knit 78sc
15-19 rows: 78sc
We do not cut the working thread.
Cut two circles out of plastic or cardboard equal to the diameter of the connected circle. I got a circle with a diameter of 7cm
Apply a small amount of glue to one side of the cut out circle and glue it to the bottom of the knitted part. Fill the part with padding polyester or you can do it like me – with strips of cardboard. To do this, you need to cut strips of thick cardboard 1 cm wide, ≈ 95 cm long (I have 3.5 strips 38 cm long).
Apply glue to the bottom of the part
Twist the cardboard strips in a spiral into a circle and insert into the part.
We knit a “cover” for the stand
1st row: 6 sc in amigurumi ring
2nd row: (inc) – 6 times = 12 sc
3rd row: (sc, inc) – 6 times = 18 sc
4th row: (2 sc, inc) – 6 times = 24 sc
5 row: (3 sc, inc) – 6 times = 30 sc
6 row: (4 sc, inc) – 6 times = 36 sc
7 row: (5 sc, inc) – 6 times = 42 sc
8 row: (6 sc, inc) – 6 times = 48 sc
9th row: (7 sc, inc) – 6 times = 54 sc
10 row: (8 sc, inc) – 6 times = 60 sc
11 row: (9 sc, inc) – 6 times = 66 sc
12th row: (10 sc, inc) – 6 times = 72 sc
Row 13: (11 sc, inc) – 6 times = 78 sc
Fasten knitting, cut the working thread and hide the tip into the product.
Apply a small amount of glue to one side of the cut out circle and glue the “cover”.
We connect both parts by tying along the edge sc, according to the loop-to-loop principle.
Without cutting off the working thread, we knit a ruffle: from one loop we knit two
d4c andso around the entire perimeter of the product. When finished, tie the edges:
sl-st, ch, sl-st, ch – repeat to the end.
For carriage decor
Chest
Yarn: Troitskaya “Baby”, color – golden
Bottom of the chest
1st row: 21ch
2 row: starting from the 2nd loop from the hook, knit 20 sc
3-14 rows: 20sc
Fasten knitting, cut the working thread and hide the tip in the product.
Chest walls
2 details
1st row: 21ch
2 row: starting from the 2nd loop from the hook, knit 20 sc
3rd – 12th rows: 20sc
Fasten knitting, cut the working thread and hide the tip in the product.
Small chest walls
2 details
1st row: 13ch
2 row: starting from the 2nd loop from the hook, knit 12 sc
3 – 12 rows: 12sc
Fasten knitting, cut the working thread and hide the tip in the product.
We tie on three sides of the chest wall with yellow yarn Pekhorka “Children’s novelty”, color – yolk, sc, at the corners we knit 2sc from one loop.
We cut out blanks from thick cardboard to seal the chest, 1 cm less in volume than related products.
We connect the bottom and sides of the chest by knitting both sc parts according to the loop-to-loop principle. The walls of the chest are sewn together.
Chest lid
1st row: 21ch
2 row: starting from the 2nd loop from the hook, knit 20 sc
3 – 19 rows: 20sc
Fasten knitting, cut the working thread and hide the tip in the product.
Lid side walls
1st row: 13ch
2 row: starting from the 2nd loop from the hook, knit 12 sc, ch
3rd row: dec, 8sc, dec, ch
4th row: dec, 6sc, dec, ch
5 row: dec, 4, dec, ch
6 row: dec, 2sc, dec
Fasten knitting, cut the working thread and hide the tip in the product.
We tie the lid on all sides with yellow yarn Pekhorka “Children’s novelty”, color – yolk, sc, at the corners we knit 2sc from one loop.
Tie the side walls of the lid on three sides.
We cut out blanks from thick cardboard to seal the chest lid, 1 cm less in volume than related products. Bend the cardboard part of the lid as shown in the photo
Sew the details of the chest lid.
Side handles on the chest: use a needle and thread to sew a stitch and wrap with thread.
We knit a bolt for the lock: 6ch, starting from the 2nd loop from the hook we knit along the chain 5sc. Fasten knitting, cut the working thread, insert the ends of the thread into the lid and secure them. Use a needle and thread to secure the clasp. From the seamy side, apply glue to the bolt and glue it to the wall of the chest.
Chair for the coachman
Yarn: Pekhorka “Children’s novelty”, color – billiards
1st row: 6sc in amigurumi ring
2nd row: (inc) – 6 times = 12sc
3rd row: (sc, inc) – 6 times = 18sc
4th row: (2sc, inc) – 6 times = 24sc
5 row: (3sc, inc) – 6 times = 30sc
Without cutting off the working thread, we knit the petals: * 6ch, along this chain,
starting from the 2nd loop from the hook we knit sc, hdc, dc, hd2c, d2c,
join sl-st in the 3rd loop of the flower base *. Repeat knitting from * to * 9 more times. A total of 10 petals are obtained.
Small pumpkin
We knit with yarn “Pekhorka” “Children’s novelty” calendula color.
1st row: 6sc in amigurumi ring
2nd row: (inc) – 6 times = 12sc
3rd row: (sc, inc) – 6 times = 18sc
4th row: (2sc, inc) – 6 times = 24sc
5 row: (3sc, inc) – 6 times = 30sc
6-11 row: 30sc
12 row: (3sc, dec) – 6 times = 24sc
13 row: (2sc, dec) – 6 times = 18sc
14th row: (sc, dec) – 6 times = 12sc
Loosely fill with filler
15 row: dec – until the end of knitting.
Fasten knitting, cut off the working thread, taking into account the required length for pulling (dividing the pumpkin into slices). Thread the thread into the needle and through the center of the pumpkin we make tightening forming slices, slightly flattening the pumpkin. The number of slices – at your request, I got 5 of them.
Glue the pumpkin to the green base.
Wrap the pieces of wire with green yarn, twist the ends of the wire on one side. Form the legs for the highchair and glue them to the green base.
Flower
Yarn: Pekhorka “Children’s novelty”, color – yolk
3 pieces
1st row: 6 sc in amigurumi ring
2nd row: 6sc
3rd row: (inc) – 6 times = 12 sc
4th row: 12 sc
5th row: (inc, 3sc) – 3 times = 15 sc
6-7 rows: 15sc
Without cutting off the working thread, we knit the petals: * 6ch, along this chain, starting from the 2nd loop from the hook we knit sc, hdc, dc, hd2c, d2c, join sl-st in the 3rd loop of the flower base *. Repeat knitting from * to * 4 more times. A total of 5 petals are obtained. Glue a bead with a diameter of ≈ 1cm inside the flower
Wrap the pieces of wire with green yarn, connect them into a twig and twist the ends with a pencil into a spiral.
Assembling the carriage
I did not glue all the details of the carriage with hot melt glue, in the sequence as indicated in the photo, namely: glue the pumpkin stand in the middle of the frame, then apply glue to the tip of the wire and a little on the bottom of the wire of the coachman’s chair, glue it so that the tip is hidden under the shuttlecock of the stand for the pumpkin, then glue the pumpkin itself and the chest. Trying on a twig of wire, experimenting: laying it down, bending it in different directions, also trying on flowers. There is plenty of space for your imagination. I am a twig fixed at three points: on the top of the head, near the pumpkin’s tail, in the middle, and the tip, which she hid under the pumpkin. I decorated the place of gluing with flowers.