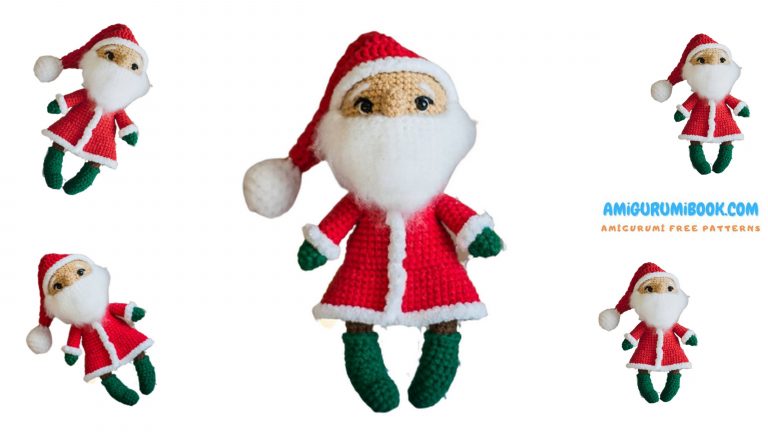
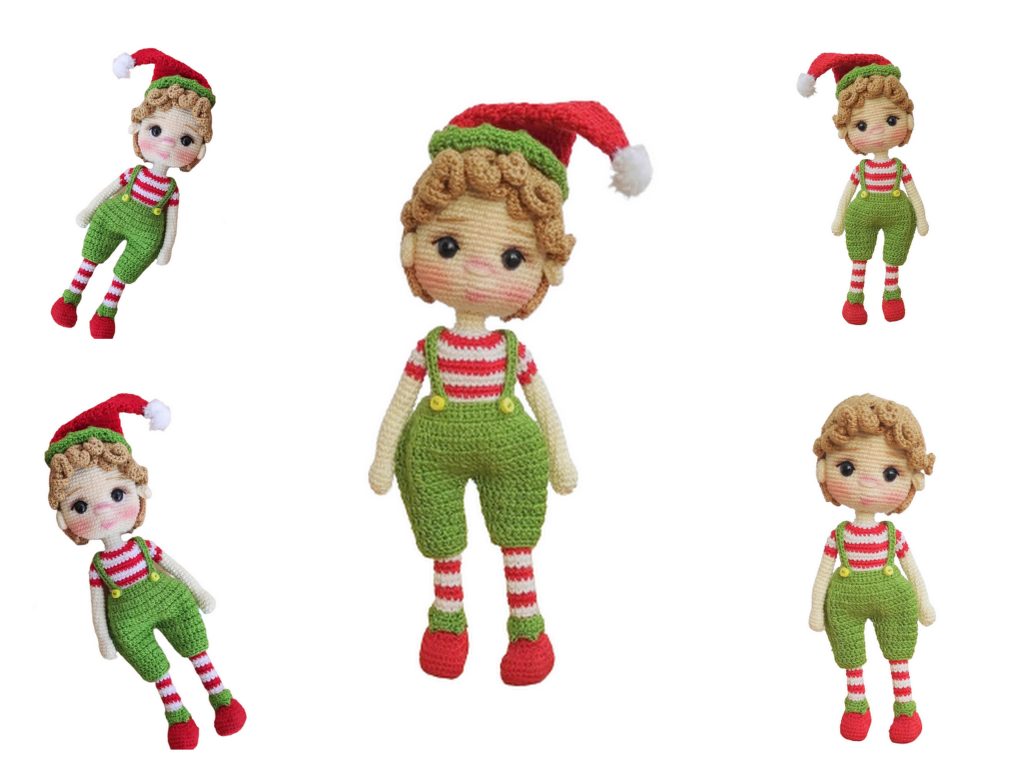
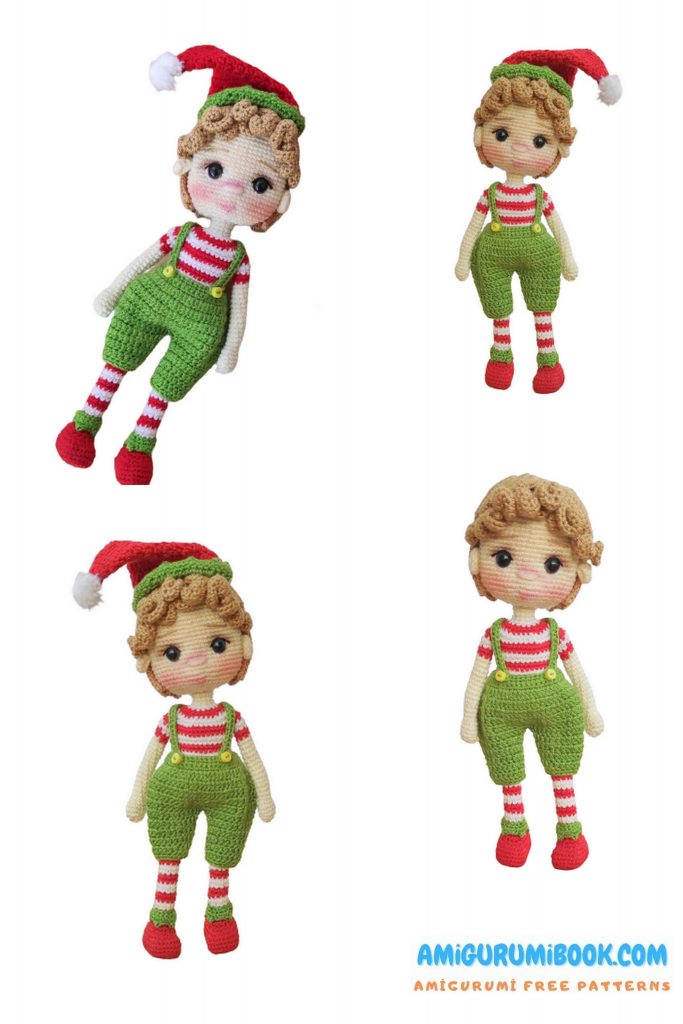
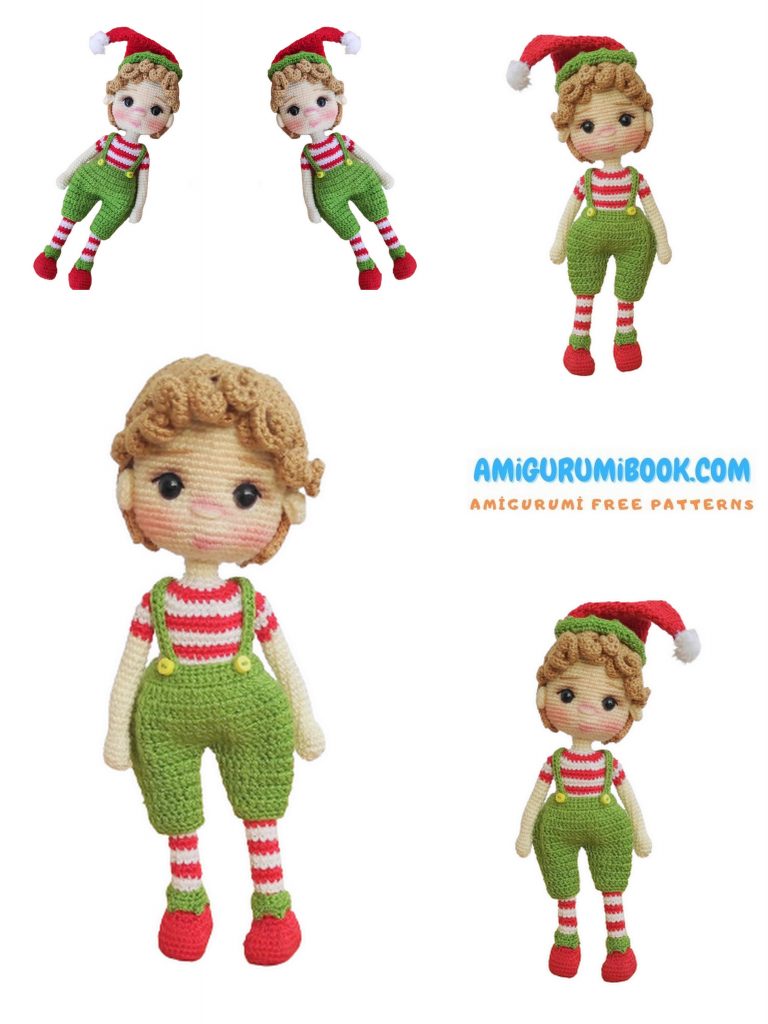
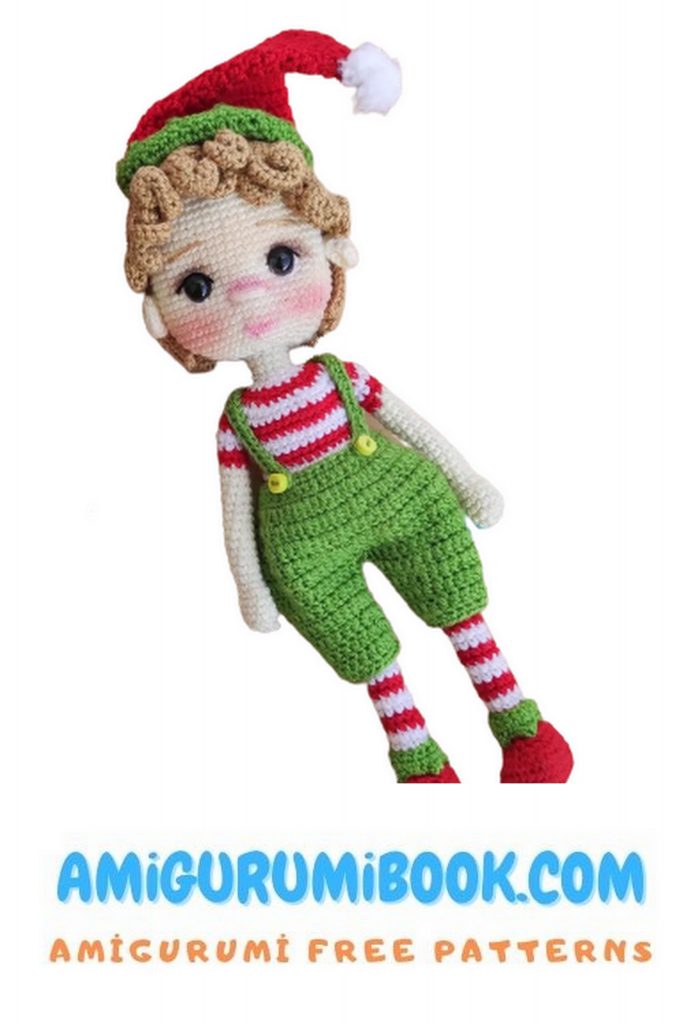
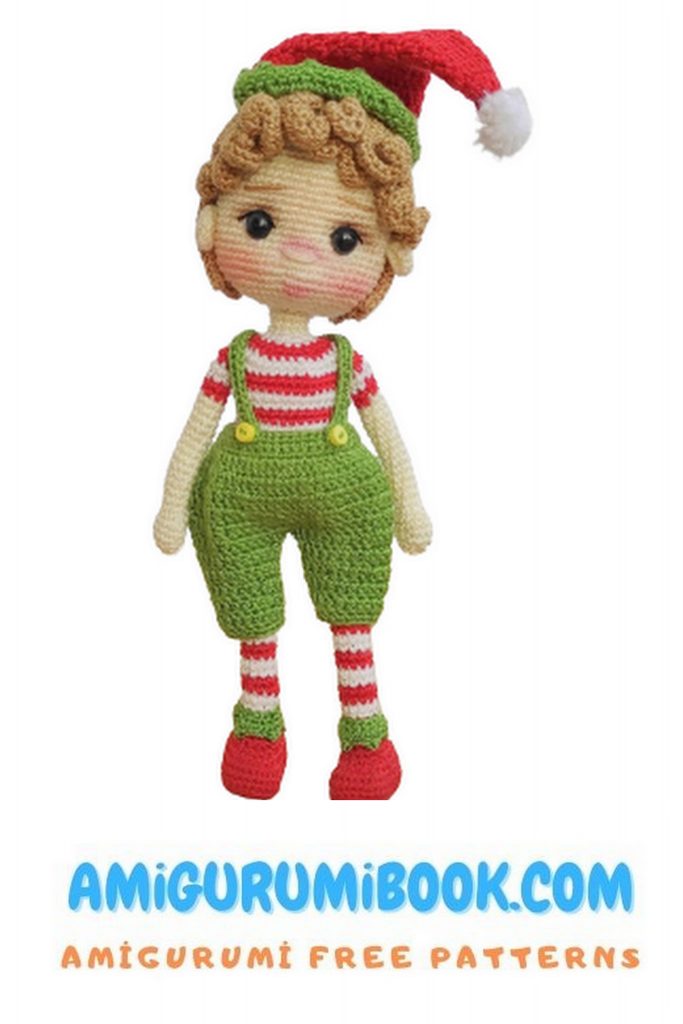
Overalls Christmas Elf Amigurumi Free Pattern
Overrals christmas elf amigurumi free pattern is waiting for you in this article. You can find Amigurumi free patterns on our website.
Materials:
Yarn:
For the body:
Cream: Alize Diva No. 01
For hair:
Alize Diva camel color No. 368
For the outfit:
Green : Alize Diva No. 210
Red: Alize Diva No. 106
White: Alize Diva No.
Hook: 1.25 (or in accordance with the yarn you use)
Fiberfill for stuffing
Embroidery needle, purple and green embroidery thread.
Tapestry needle
Scissors
30 cm of crafting wire (1.5 mm)
12 mm Safety eyes
Soft pastel: brown and pink
3 buttons
TERMS USED:
Ch = chain
sc = single crochet.
st(s) = stitch (es)
dc = double crochet
hdc = half double crochet
Dec = sc 2 together (decrease)
Inc = 2sc in the same st (increase)
Inhdc= 2hdc in the same st (increase)
Incdc= 2dc in the same st (increase)
BLO = back loop only
FLO = front loop only
( ) = repeat between () number of times
Slst: slip stitch
F/O: fasten off
MR: Magic ring
Picot st: Sc, ch2, 1sc in the 2nd ch from the hook, 1sc.
Finished doll size 27 cm with Alize Diva yarn and 1.5 mm hook
Important notes:
** Work in spirals. Do not join, slip stitch or turn unless otherwise stated in the
pattern.
**make invisible decrease and invisible increase to avoid holes in your work.
** Use a stitch marker in the beginning of each round. This will help to mark the
first stitch of every round.
** Alternative for stitch marker: You can use different colored yarn for stitch
markers too. Just place it into the first stitch of every row/round as you go.
**Stuff after every 3 or 4 rounds, use a screw or any tool that helps you to
distribute Stuffing equally.
** Yarn suggestions: If you cannot find the same yarn, you can buy a different
brand of yarn. It must be anti-piling yarn. I use the same weight yarn for the
body, outfit and hair.
PATTERN:
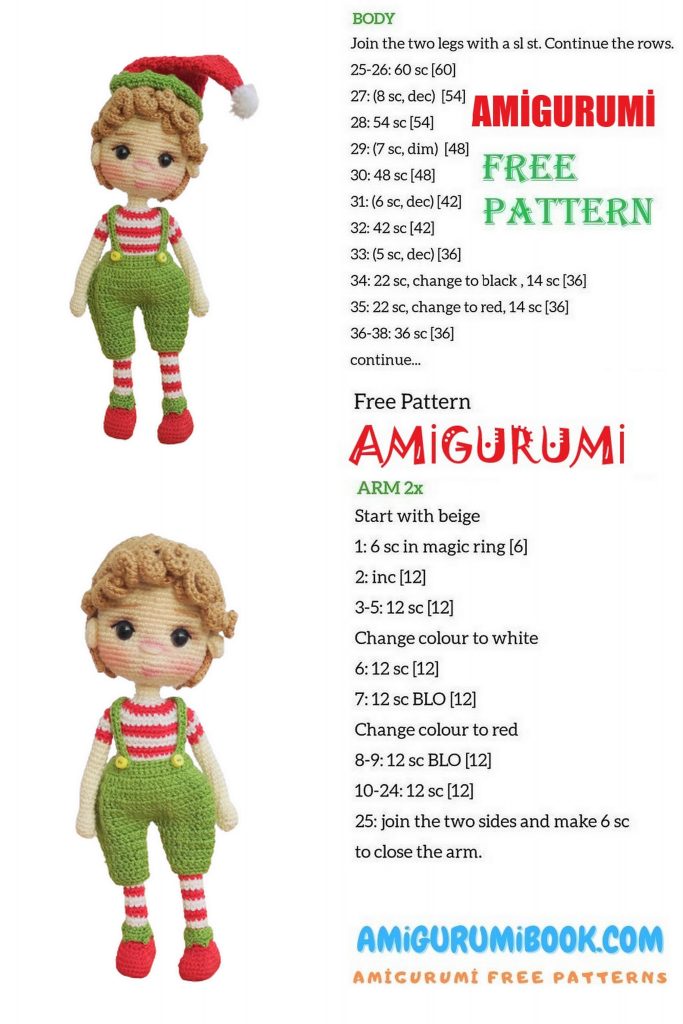
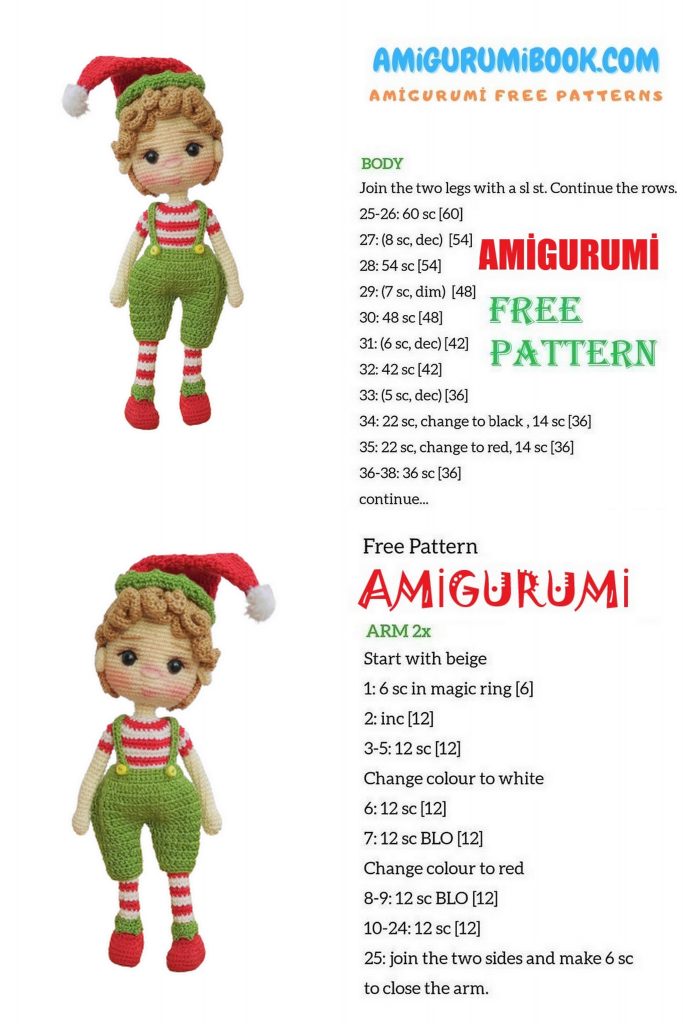
Arms:
Make two
Rnd1: 6sc in a Magic ring. (6)
Rnd2: 6inc. (12)
Rnd 3-5(3 rnds): 1sc in all 12 sts. (12)
Rnd 6: (1sc, 1dec)×4. (8)
Rnd 7-20 (14rnds): 1sc in all 8sts.9(8)
Change to red
Rnd 21-22: 1sc in all 8 sts. (8)
Change to white
Rnd 23-24: 1sc in all 8 sts. (8)
Don’t stuff the arm.

The left foot and Leg:
With Red
Ch 8
Rnd 1: starting from the 2nd ch from the hook, 6sc, 4sc in the
last ch, continue to work along the opposite side of the ch, 5sc,
3sc in the last ch. (18)
Rnd 2: 1inc, 5sc, (inc)×4, 5sc, (inc)×3. (26)
Rnd 3: 1sc, 1inc, 6sc, 1inc, (1sc, inc)×3, 6sv, inc, (1sc, inc)×2. (34)
Cut a plastic piece same size as the sole.
Rnd 4: BLO 1sc in all 34 sts. (34)
Rnd 5-6 (2rnds): 1sc in all 34 sts. (34) Place the plastic piece in
the foot.
(Amiville tip: make sure to cut the plastic piece to fit the sole
perfectly, this will give you a perfectly flattened sole which is
one of the factors that help the doll to stand without support).
Rnd 8: 8sc, 6dec ,14sc. (28)
Rnd 9: 5sc, 6dec, 7sc, 2dec. (20)
Rnd 10: 4sc, (1dec,1sc)×3, 3sc, 2dec. (15)
Rnd 11: 2sc, 2dec,1sc, 2dec, 4sc.(11)
Rnd 12-13: 1sc in all 11 sts. (11)
Change to white color,
Rnd 14: BLo 1sc in all 11 sts. (11)
Rnd 15: 1sc in all 11 sts. (11)
Change to Red
Rnd 16-17: 1sc in all 11 sts. (11)
Change to white
Rnd 18-19: 1sc in all 11 sts. (11)
Change to Red
Rnd 20-21 1sc in all 11 sts. (11)
Change to white
Rnd 22-23 1sc in all 11 sts. (11)
Change to Red
Rnd 24-25 1sc in all 11 sts. (11)
Change to white
Rnd 26-27 1sc in all 11 sts. (11)
Change to Red
Rnd 28-29: 1sc in all 11 sts. (11)
Change to white
Rnd 30-34: 1sc in all 11 sts. (11)
Slst, (no need to fasten off you can hide the tail later when joining the Legs)
Amiville tip: work till Rnd 12 without stuffing, then stuff the foot well,
this way the dec sts are easier to crochet and tighter.
The right foot and Leg: Crochet the Right leg just like the
Left one till Rnd 34.
Rnd 35: make 1sc in every sc till you reach the joining st, ch8,
1sc in the joining st in the left Leg.
To determine the joining st, place the two legs in the proper
position where the foot is looking forward. The st in the middle
of the inner side of the Leg is the joining st.
(This means that you may need to make a few sts more or less
in the Rnd 33)

The body:
Rnd 1: 1sc in all 11 sts of the left Leg, 1sc in the next 8
chs, 1sc in the all 11 st of the right Leg, 1sc in the opposite side of the
ch 8. Place your marker here (38)
Rnd 2: 10sc, 1inc, 8sc, 1inc, 10sc, 8sc.(40)
Rnd 3-9 (7 rnds): 1sc in all 40sts. (40)
Rnd 10: (8sc, 1dec) ×4. (36)
Change to red
Rnd 11: 1sc in all 36 sts. (36)
Rnd 12: (7sc, 1dec)×4. (32)
Change to white
Rnd 13-14: 1sc in all 32 sts. (32).
Change to red
Rnd 15-16: 1sc in all 32 sts. (32)
Change to white
Rnd 17-18: 1sc in all 32sts. (32)
Attach the arms to the body
** Determine the place for the arms as the st right in the middle of
both sides, count 8 sts backwards from the attaching sts and mark it as
the beginning of your round.
With red,
Rnd 19: 8sc in the body, 8sc around the arm,16sc in the body, 8sc
around the arm, 8sc in the body. (48)
Rnd 20: 1sc in all 48 sts. (48)
Rnd 21: (6sc, 1dec)×6. (42)
Rnd 22: (5sc, 1dec)×6. (36)
Rnd 23: (4sc, 1dec)× 6. (30)
Rnd 24: (3sc, 1dec)× 6. (24)
Rnd 25: (2sc, 1dec)× 6. (18)
Rnd 26: (1sc, 1dec)× 6. (12)
Rnd 27-30 (4rnds): 1sc in all 12 sts. (12)
Rnd 31: BLO 1sc in all 12sts. (12)
Rnd 32-47 (17 rnd) : 1sc in all 12 st. (12)
Stuff the neck firmly
The head:
Back to the FL of Rnd 30, insert your hook in the st in the middle of the
back , ch1
Rnd 1: 12 inc. (24)
Rnd 2: (1sc, 1inc)×12. (36)
Rnd 3: (5sc, 1inc)×6. (42)
Rnd 4: (6sc, 1inc)×6. (48)
Rnd 5: (7sc, 1inc)×6.(54)
Rnd 6: (8sc, 1inc)×6.(60)
Rnd 7-12: (6rnds): 1sc in all 60 sts. (60)
Do more or less stitches in order for the beginning of the next rnd to
start at the middle back of the head.
Rnd 13: 24sc, ch1, skip st, 10sc, ch1, skip st, 24sc. (58 st+2ch)
The skipped st hole is the place for the safety eye.
The safety eyes are placed between Rnd 12 and Rnd 13 with 10 sts in
between.
Rnd 14-24(11 rnds): 1sc in all 60 sts. (60)
Place your safety eyes now
Rnd 25: (8sc, dec)×6. (54)
Rnd 26: (7sc, dec)×6. (48)
Cut the excess wire. Wrap it with medical tape, bend it, the wire length
should pass the middle of the head.
Rnd 27: (6sc, dec)×6. (42)
Rnd 28: (5sc, dec)×6. (36)
Start stuffing the head, don’t over Stuff the head.
Rnd 29: (4sc, dec)×6.(30)
Rnd 30: (3sc, dec)×6. (24)
Rnd 31: (2sc, dec)×6. (18)
Rnd 32: (1sc, dec)×6. (12)
Stuff the Top of the head well.
Rnd 34: (dec)×6. (6)
Slst, F/O
The face:
Step 1: sculpting the eye cavity:
With body color yarn, insert embroidery needle in the back of
the head (Photo1), come out from the first st next to the
middle of the safety eye. (Photo2, 3) Pass the yarn under the eye,
insert the needle in the first st next to the middle of the left side.
(Photo 4), come out from the same point in the back of head where you
inserted your needle.
There should be two strands of yarn coming out of the same point in
the back of the head when you pull them the eyes cavity is sculpted.
Leave the two strands for now and pick them up again after finishing all
the eyes steps.
Step 2: With white embroidery yarn and embroidery needle. Make a
semi-circle around the outer half of the eyes.
Step 3: The eyelashes:
Now pick up the strands you left in step 1, pull them tight,
make a knot to secure the sculpted cavity, F/O.
The nose:
The nose is located one row below the eyes, the four sts in the
middle of the face.
The ears:
Rnd 1: 5sc in a MR. (5)
Rnd 2: 1inc, 1inchdc, 1incdc, 1inchdc, 1inc.(10)
Fold the base and seam it to maintain the ear shape.
Count 5 sts from the corner of the eye (Photo 1) and seam it in
this spot.
The eyebrows:
The hair wig:
With black color
Rnd 1: 6sc in a MR. (6)
Rnd 2: 6inc. (12)
Rnd 3: (1sc, 1inc)×6. (18)
Rnd 4 : (2sc, 1inc)×6. (24)
Begin to make hair strands, at the end of every strand, slst in
the BL of the next st, except in strand 27, slst in the FL of the
same st where you made strand 1.
Strand 1,2,3: ch21, starting from the 3rd ch from the hook,
5inchdc, 14hdc,slst in the BL of the next st. (24)
Strand 4: ch23, starting from the 3rd ch from the hook, 5inchdc,
16hdc,slst in the BL of the next st. (26)
Strand 5-20 (16strand): ch28 starting from the 3rd ch from the
hook, 26hdc, slst in the BL of the next st. (26)
Strand 21: ch23, starting from the 3rd ch from the hook,
5inchdc, 16hdc,slst in the BL of the next st. (26)
Strand 22-25: ch21, starting from the 3rd ch from the hook,
5inchdc, 14hdc,slst in the BL of the next st. (24)
Note: strands 1 & 25 are connected to the same st, in strand 1
slst of the BL and strand 27 slst to the FL of the same st.
🌸pin the hair to the head wrong side facing upward.
🌸Use fabric glue to glue it to the head.
Coil the curls with your hand yo take it shape as in photos, wrap the
head with cling film for a day . This will keep the curls in shape .
Overall:
Ch 49
Row 1: starting from the 7
th ch from the hook (skipped sts atre for the
buttonhole, you may make more or less according to button size), 1sc
in all 42 chs, ch1 and turn .
Row 2: 1sc in all 42 sts, ch1 and turn.(42)
Row 3: 1sc in all 42 sts, slst in the 1sc.(42)
Continue to work in rounds , don’t turn
Rnd 4: (6dc, 1inc)× 6. (48)
Rnd 5-6: 1dc in all 48 sts. (48)
Continue to make right leg
Right leg:
Rnd 7: 22dc, slst joining the next sts with the opposite st.
Rnd 8: 1dc in all 22 sts. (22)
Rnd 9: 1dec, 9dc, 1dec, 9dc. (20)
Rnd 10: 1dc in all 20 sts. (20)
Rnd 11: 1dec, 8dc, 1dec, 8dc. (18)
Rnd 12_13: 1dc in all 18 sts. (18)
Rnd 14: 1sc in all 18 sts. (18)
Leg leg
Join the two opposite sts in the middle with a slst, ch1.
Rnd 1 : 22dc. (22)
Rnd 2: 22dc. (22)
Rnd 3: 9dc, 1dec, 9dc, 1dec. (20)
Rnd 4: 1dc in all 20 sts. (20)
Rnd 5: 8dc, 1dec, 8dc, 1dec. (18)
Rnd 6-7: 1dc in all 18 sts. (18)
Rnd 8: 1sc in all 18 sts. (18)
The straps:
Make two, attach yarn 4sts from the center of the back, ch 38
Row 1: starting from the 6thch from the hook, 1sc in all 33sts sl st into
the overall. 33)
Sew buttons im the front.
Note: make a alonger or shorter starting ch according to the desired
strap length .
The hat:
Rnd1: 4dc in a MR. (4)
Rnd 2: 1dc in all 4sts. (4)
Rnd 3: 4incdc. (8)
Rnd 4: 1dc in all 8 sts. (8)
Rnd 5: (1dc, 1incdc)×4. (12)
Rnd 6: 1dc in all 12. (12)
Rnd 7: (2dc, 1incdc)×4. (16)
Rnd 8: 1dc in all 16 sts. (16)
Rnd 9: (3dc, 1incdc)،×4. (20)
Rnd 10: dc in all 20 sts. (20)
Rnd 11: (4dc, 1incdc)،×4. (24)
Rnd 12: dc in all 24vsts. (24)
Rnd 13: (5dc, 1incdc)،×4. (28)
Rnd 14: dc in all 28 sts. (28)
Rnd 15: (5dc, 1incdc)،×4. (32)
Rnd 16: dc in all 32 sts. (32)
Rnd 17: (6dc, 1incdc)،×4. (36)
Rnd 18: dc in all 32 sts. (36)
Rnd 19: (6dc, 1incdc)،×4. (36)
Rnd 20: dc in all 32 sts. (36)
Rnd 21: (7dc, 1incdc)،×4. (40)
Rnd 22: dc in all 40 sts. (40)
Change to green
Rnd 23: 1dc in all 40 sts.(40)
Rnd 24: (8dc, 1incdc)،×4. (44)
Rnd 25: (1 picot st, 3sc ) ×10.
Pompom:
This video tutorial shows how to make easy pompom
Shoe decorations:
Make 2, Ch 15
Row 1: starting from the 2nd ch from the hook, 14 sc, ch1 and turn .(14)
Row 2: (1picot st, 3sc) × 4, 2sc.
Sew it to Rnd 13 of the foot.
The final touch:
🌸 Color the cheeks, and mouth with pink soft pastel.
🌸 add some brown eye shadow above the eye for adeeper
look.