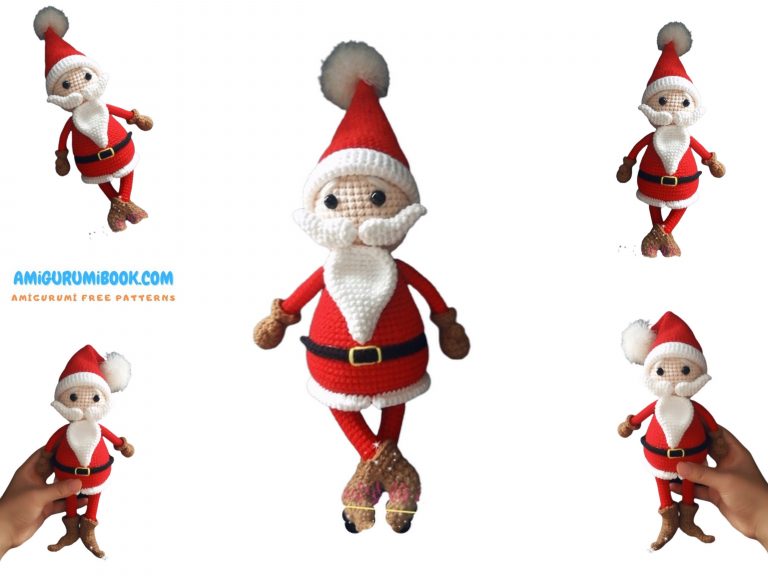
Santa Claus Peter Amigurumi Free Pattern
Santa claus peter amigurumi free pattern is waiting for you in this article. You can find Amigurumi free patterns on our website.
Materials:
• yarn of medium thickness (100% cotton, 240-370 m/100 g sport weight) in red, beige, brown and white colors;
• hook number 2.5;
• black cotton thread for embroidery;
• safety eyes or 2 black beads (5 mm);
• red bead for the nose;
• a small piece of black felt;
• 2 white buttons;
•knitting needle;
•filler.
Abbreviations:
ch – chain
sc- single crochet
dec- decrease
inc – increase
dc – double crochet
PATTERN
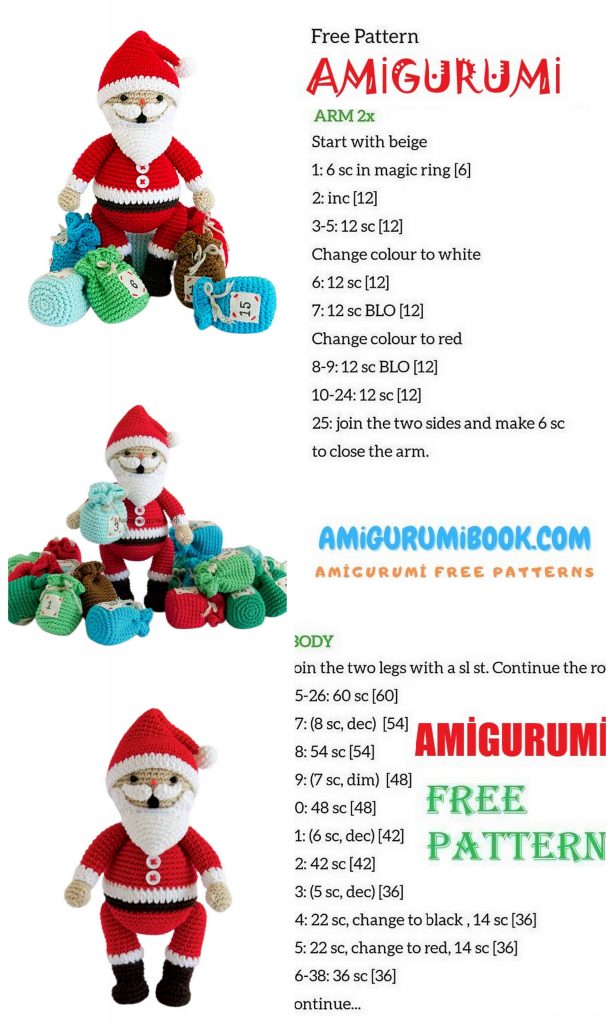
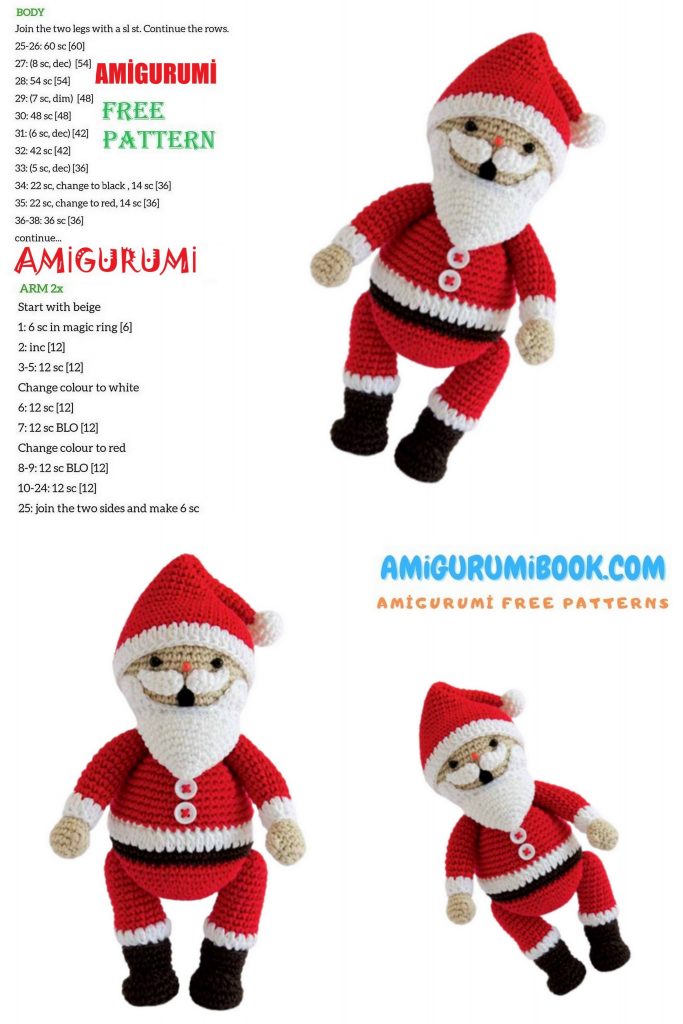
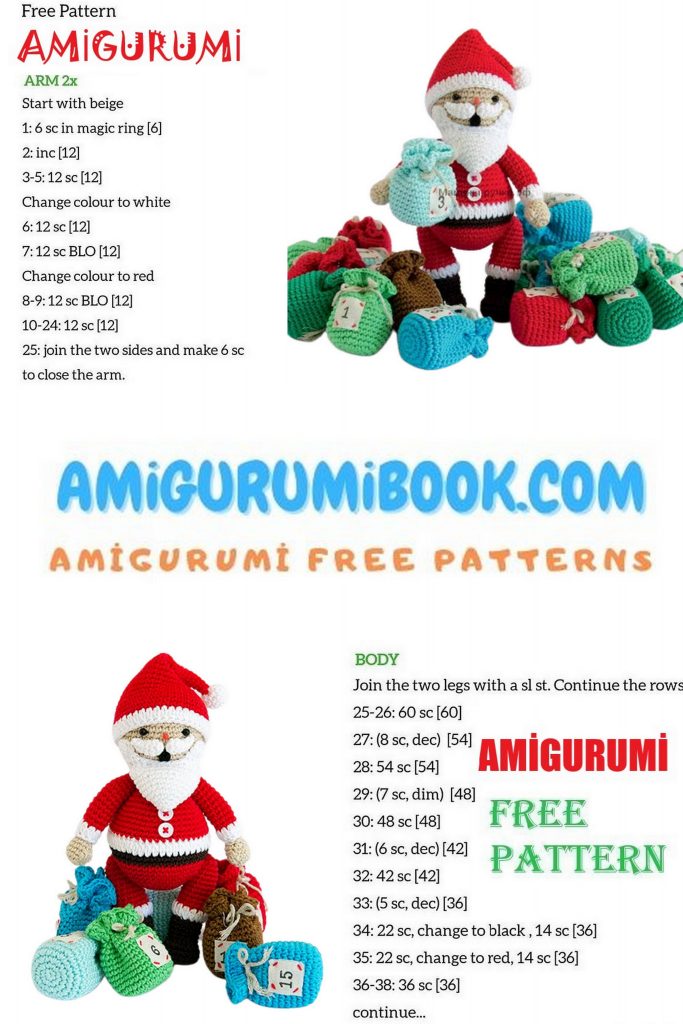
We knit the body and head of Santa
(start with a red thread)
Row 1: 6 sc into magic ring [6]
Row 2: inc x 6 [12]
Row 3: (1 sc, inc) x 6 [18]
Row 4: (2 sc, inc) x 6 [24]
Row 5: (3 sc, inc) x 6 [30]
Row 6: 30 sc [30]
Row 7: (4 sc, inc) x 6 [36]
Row 8: (5 sc, inc) x 6 [42]
Row 9: (6 sc, inc) x 6 [48]
Row 10–11: 48 sc [48]
Change thread to brown
Row 12–13: 48 sc [48]
Change thread to white
Row 14: 2 ch, dc in the same st, on the lush st. from 2-dc to next. 47 p. [48]
Change thread to red
Row 15–18: 48 sc [48]
Row 19: (dec, 6 sc) x 6 [42]
Row 20: 42 sc [42]
Row 21: (dec, 5 sc) x 6 [36]
Row 22: 36 sc [36]
Row 23: (dec, 4 sc) x 6 [30]
Row 24: (dec, 3 sc) x 6 [24]
Row 25: (dec, 2 sc) x 6 [18]
Row 26: (dec, 1 sc) x 6 [12]
Change the thread to beige. Stuff the body with filler.
Row 27: 12 sc in front. wall p. [12]
Row 28: (1 sc, inc) x 6 [18]
Row 29: (2 sc, inc) x 6 [24]
Row 30: (3 sc, inc) x 6 [30]
Row 31: (4 sc, inc) x 6 [36]
Row 32: 36 sc [36]
Row 33: (5 sc, inc) x 6 [42]
Row 34–41: 42 sc [42]
Row 42: (dec, 5 sc) x 6 [36]
Row 43: (dec, 4 sc) x 6 [30]
Row 44: (dec, 3 sc) x 6 [24]
Row 45: (dec, 2 sc) x 6 [18]
Fasten the eyes between the 37th and 38th rows of the head at a distance of approx. 7 art. from each other.
Stuff your head with filler.
Row 46: (dec, 1 sc) x 6 [12]
Row 47: dec x 6 [6]
Finish knitting, hide the end of the thread.
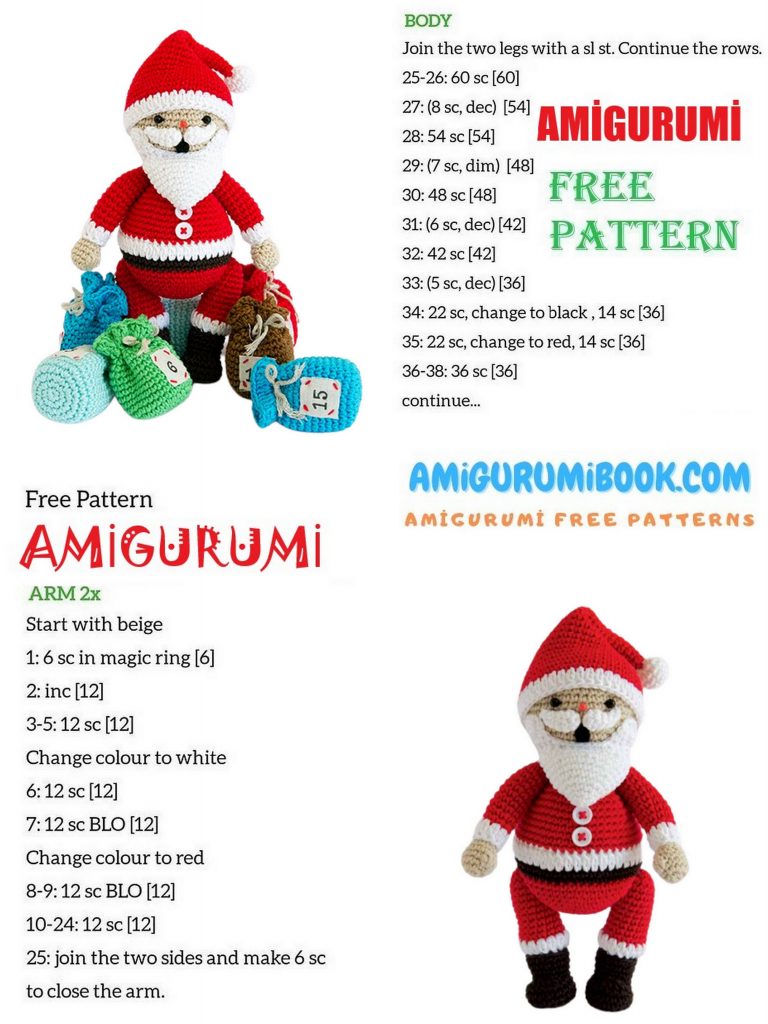
We knit a Santa hat
(start with a red thread)
Row 1: 4 sc into magic ring [6]
Row 2: inc x 6 [12] [4]
Row 2: inc, 3 sc [5]
Row 3: inc, 4 sc [6]
Row 4: inc, 5 sc [7]
Row 5: inc, 6 sc [8]
Row 6: inc, 7 sc [9]
Row 7: inc, 8 sc [10]
Row 8: (inc, 4 sc) x 2 [12]
Row 9: (inc, 5 sc) x 2 [14]
Row 10: (inc, 6 sc) x 2 [16]
Row 11: (inc, 7 sc) x 2 [18]
Row 12: (inc, 8 sc) x 2 [20]
Row 13: (inc, 9 sc) x 2 [22]
Row 14: (inc, 10 sc) x 2 [24]
Row 15: (inc, 11 sc) x 2 [26]
Row 16: (inc, 12 sc) x 2 [28]
Row 17: (inc, 13 sc) x 2 [30]
Row 18: (inc, 14 sc) x 2 [32]
Row 19: (inc, 15 sc) x 2 [34]
Row 20: (inc, 16 sc) x 2 [36]
Row 21: (inc, 17 sc) x 2 [38]
Row 22: (inc, 18 sc) x 2 [40]
Row 23: (inc, 19 sc) x 2 [42]
Row 24–27: 42 sc [42]
Row 28: 2 ch, dc in the same st. from 2-dc to next. 41 p. [42]
Comm. Art. in a trace. P.
Finish knitting, leaving a long end of the thread for sewing a hat on the head.
We knit a pompom for Santa’s hat
(knit with white thread)
Row 1: 6 sc into magic ring [6]
Row 2: inc x 6 [12]
Row 3–5: 12 sc [12]
Row 6: dec x 6 [6]
Fill with filler. Finish knitting, leaving a long end of the thread for sewing.
Sew the pom-pom to the top of the hat.
We knit a mustache
(knit 2 stitches with white thread)
Row 1: 5 sc into magic ring [5]
Row 2: inc, 4 sc [6]
Row 3: 6 sc [6]
Row 4: Skip 1 st, 5 sc [5]
Row 5: 2 ch, dc next. p., skip 1 p., dc in the next. P.
Fill with filler.
Wrap the tip of the mustache up and fix in this position.
Finish knitting, leaving a long end of the thread for sewing.
Knit Santa’s beard
(knit with white thread)
Row 1: 6 sc into magic ring [6]
Row 2: (inc, 2 sc) x 2 [8]
Row 3: (inc, 3 sc) x 2 [10]
Row 4: (inc, sc in the next p.) x 5 [15]
Row 5: (inc, 2 sc) x 5 [20]
Row 6: 20 sc [20]
Row 7: (inc, 4 sc) x 4 [24]
Row 8: 24 sc [24]
Row 9: (inc, 3 sc) x 6 [30]
Row 10: 3 dc, 9 sc, 3 dc, 15 sc [30]
Continue knitting in straight and reverse rows. Lightly fill the beard with filler and continue knitting through both edges.
Row 11: 2 ch, 4 dc, 7 sc, 4 dc, turn [15]
Row 12: 2 ch, dc next. p., leaf from 2-dc, rotate [2]
Row 13: 2 ch, leaf from 2-dc [1]
Finish knitting and hide the end of the thread.
With a white thread, pick up the loops on the other side of the beard and repeat rows 12 and 13.
Finish knitting, leaving a long end of the thread for sewing.
We knit sleeves (tie 2 pieces, start with a red thread)
Row 1: 5 sc into magic ring [5]
Row 2: inc x 5 [10]
Row 3: (inc, 4 sc) x 2 [12]
Row 4-13: 12 sc [12]
Row 14: (dec, 4 sc) x 2 [10]
Change the thread to white.
Row 15: 2 ch, dc in the same st. from 2-dc to next. 9 p. [10]
Finish knitting, leaving a long end of the thread for sewing. Fill with filler.
We knit hands (tie 2 pieces, start with a beige thread)
Row 1: 6 sc into magic ring [6]
Row 2: inc x 6 [12]
Row 3: 12 sc [12]
Row 4: curvy st. from 3-dc, 11 sc [12]
Row 5: (dec, 4 sc) x 2 [10]
Row 6: 10 sc [10]
Finish knitting, leaving a long end of the thread for sewing. Fill with filler.
Sew arms to sleeves.
We knit legs
(tie 2 pieces, start with a red thread)
Row 1: 5 sc into magic ring [5]
Row 2: inc x 5 [10]
Row 3: (inc, 1 sc) x 5 [15]
Row 4–12: 15 sc [15]
Change the thread to white.
Row 13: 2 ch, dc in the same st. from 2-dc to next. 14 p. [15]
Finish knitting. Fill with filler.
We knit boots (tie 2 pieces in black)
Row 1: 6 sc into magic ring [6]
Row 2: inc x 6 [12]
Row 3: (1 sc, inc) x 6 [18]
Row 4: 18 sc behind st [18]
Row 5: 18 sc [18]
Row 6: 5 sc, 3-dc leaf, 2-dc leaf, 3-dc leaf, 5 sc [13]
Row 7: 13 sc [13]
Row 8: 1 sc, (inc, 5 sc) x 2 [15]
Row 9–10: 15 sc [15]
Comm. Art. in a trace. P.
Finish knitting, leaving a long end of the thread for sewing. Fill with filler. Sew shoes to feet.
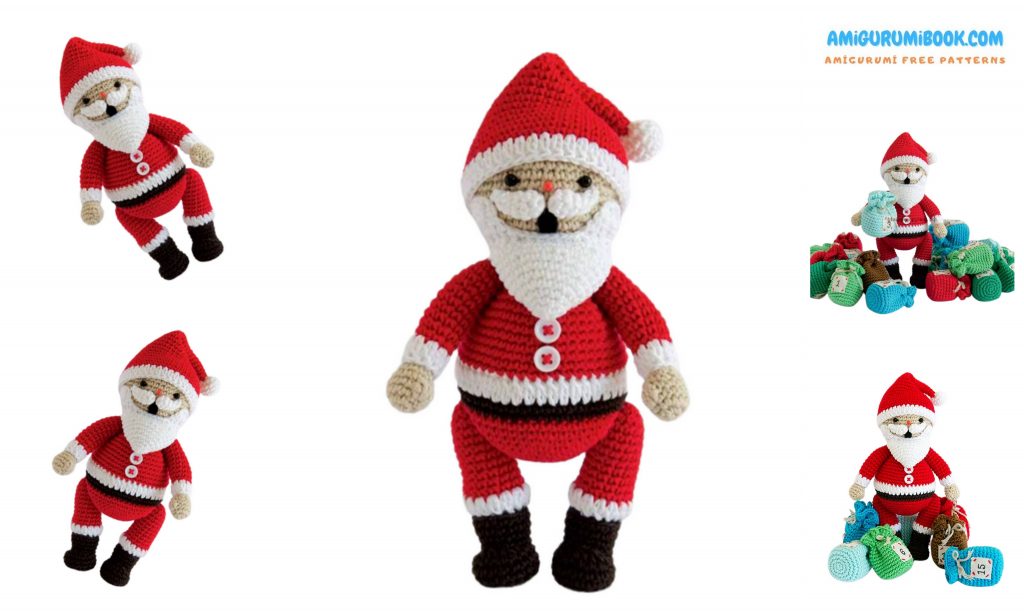
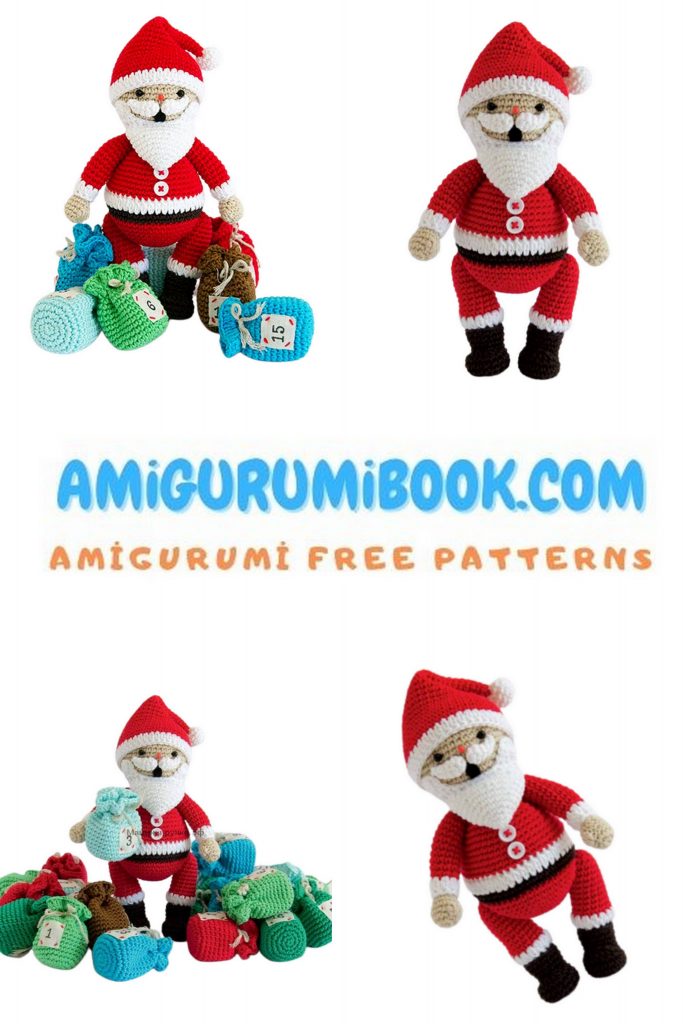
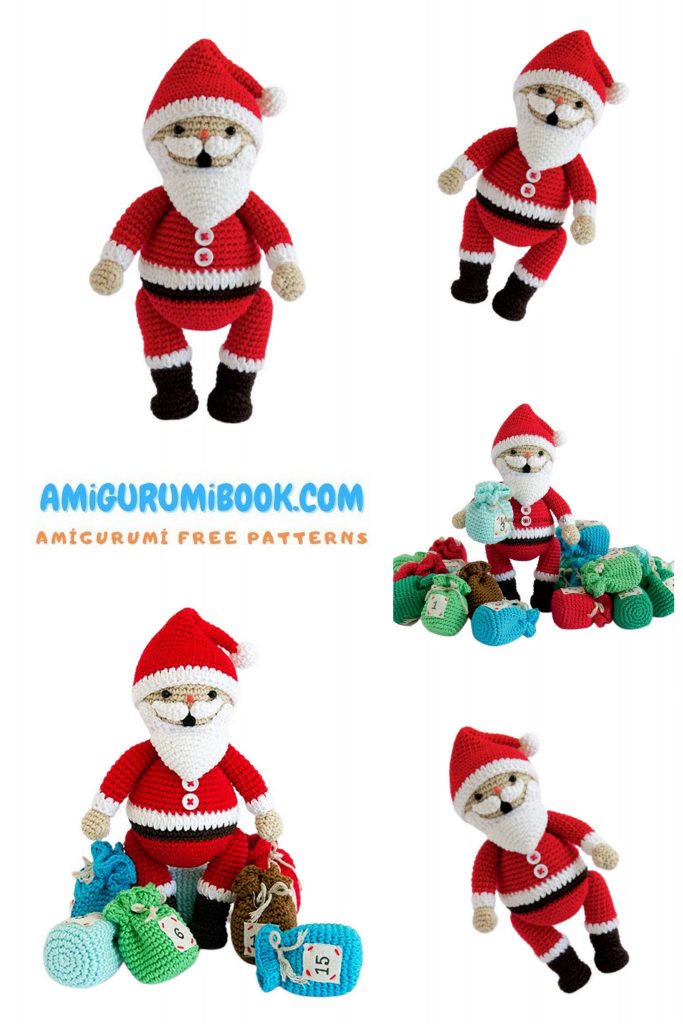
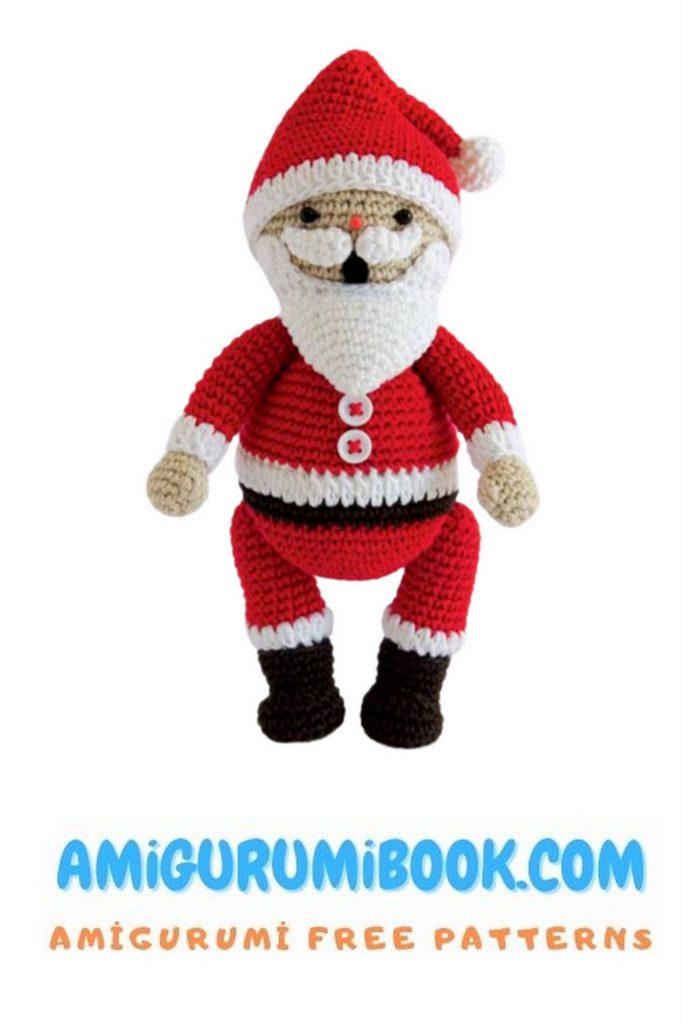
Assembly
Sew a red bead for the nose to the head between 36 and 37 rows.
Sew a mustache to the head between 34 and 36 rows.
Cut out a small oval from the felt and sew it under the mustache (this will be the mouth).
Sew beard to face.
Sew a hat on top of your head.
Sew buttons on coat.
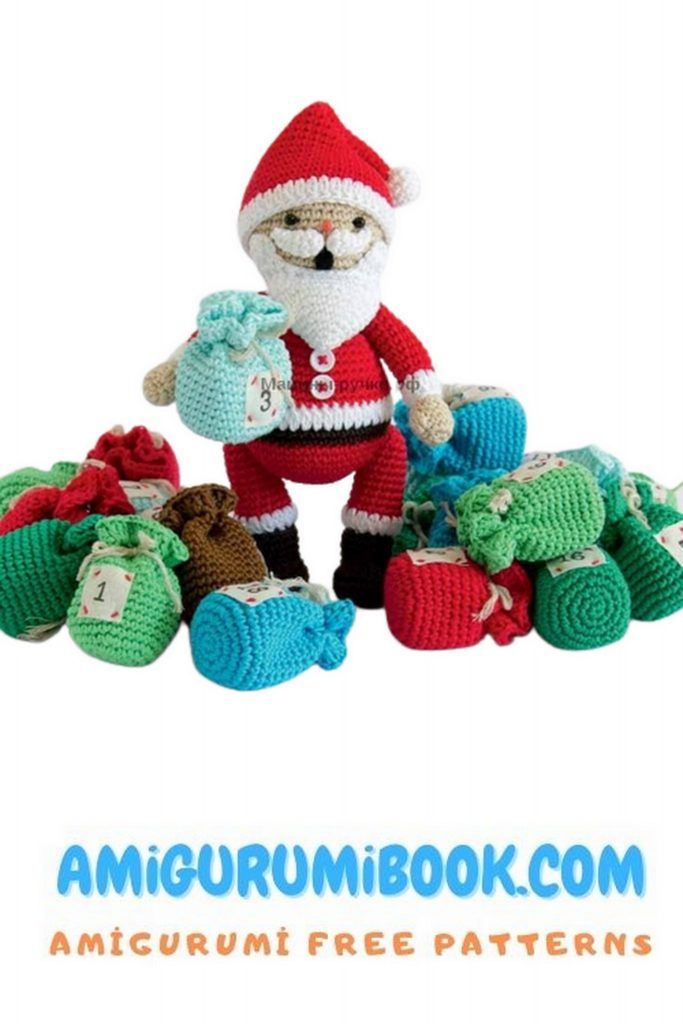
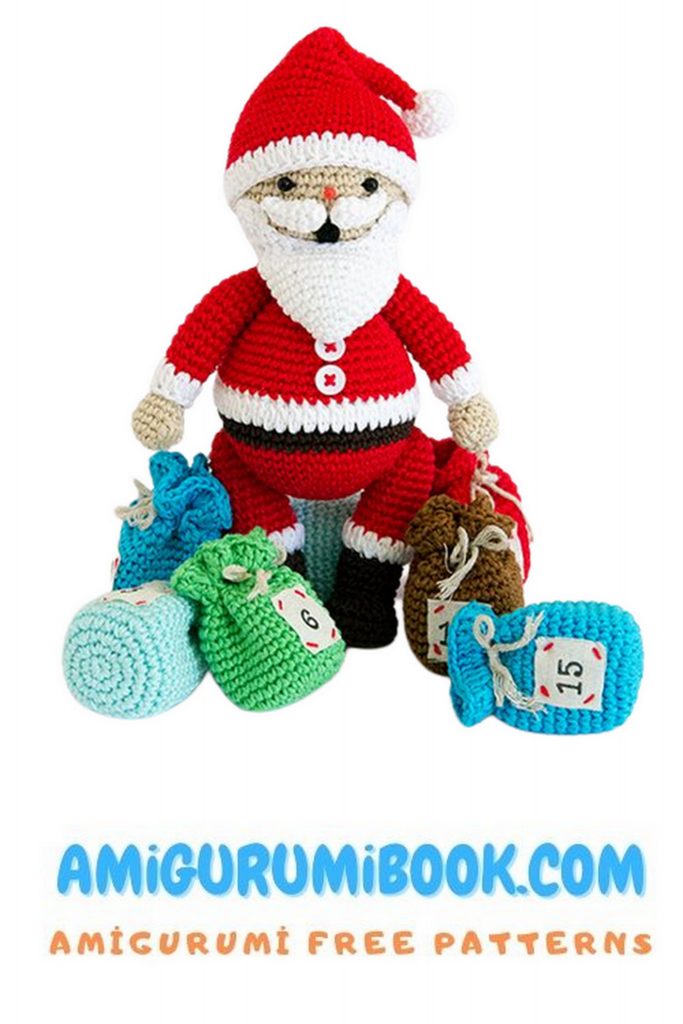
Sew on the arms and legs as shown in the photo, repeat this several times until the limbs are tightly sewn.
Crocheted Santa Claus is ready!