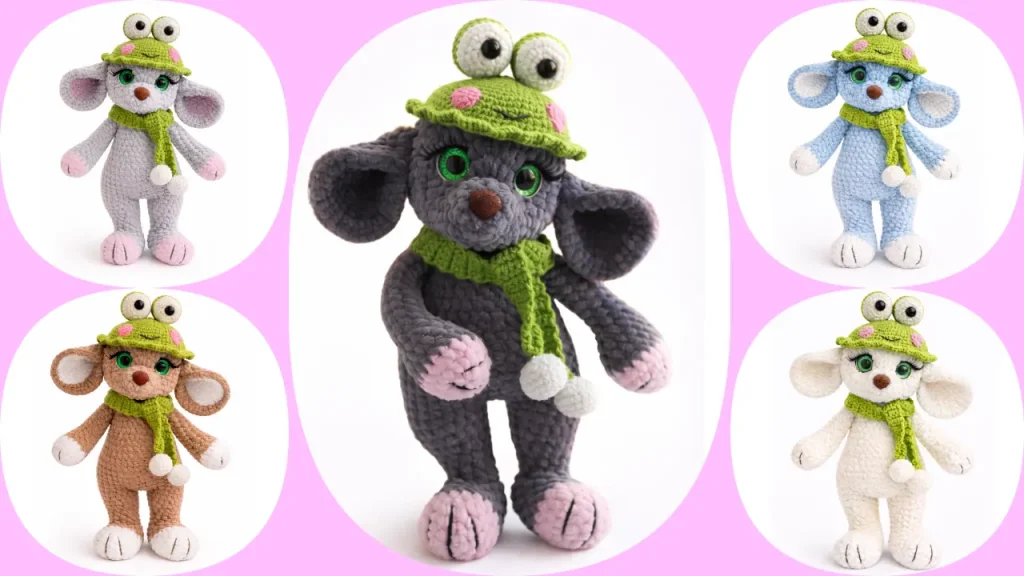
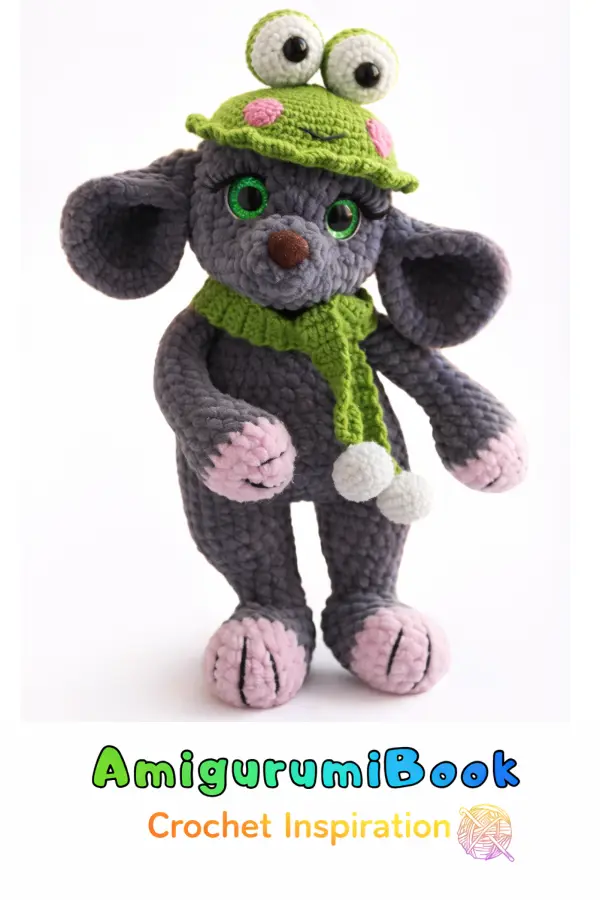
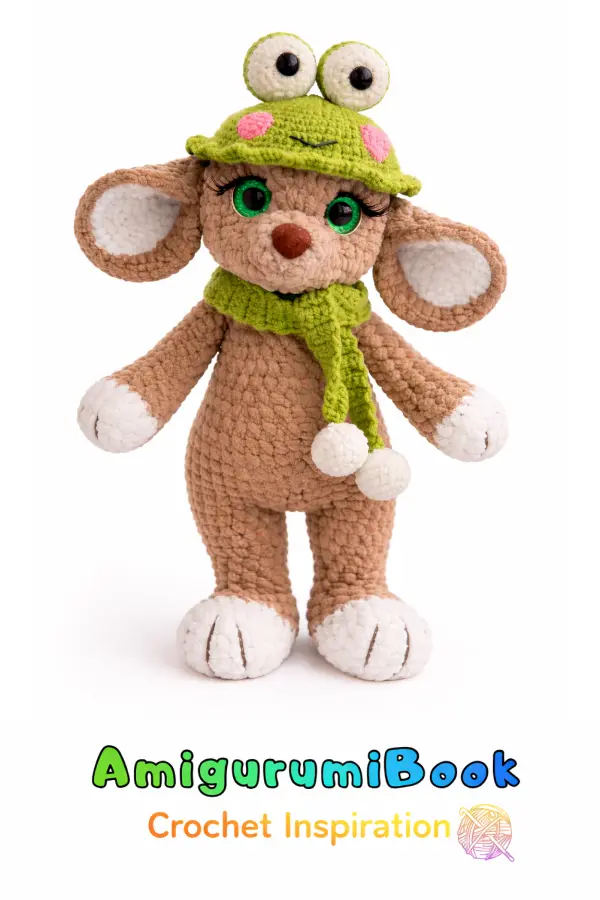
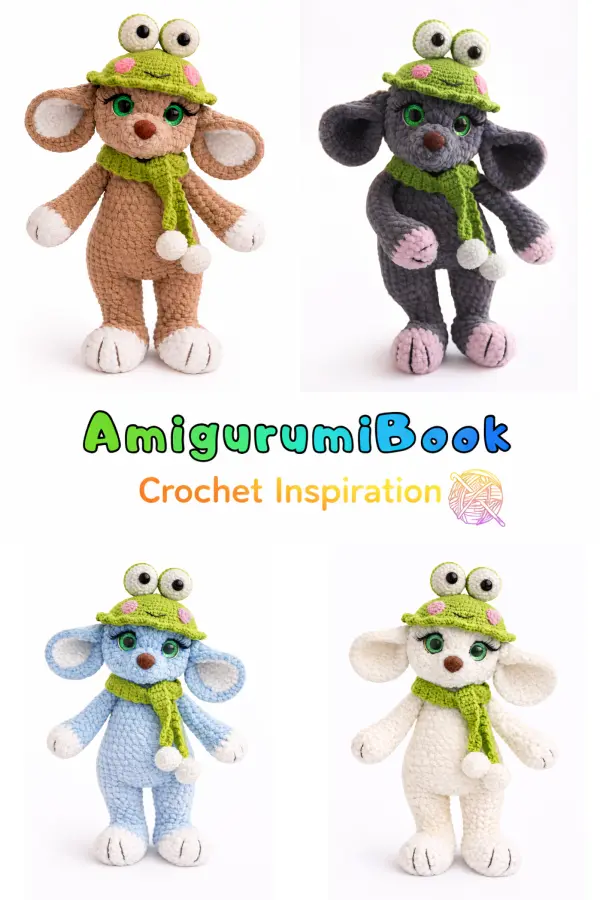
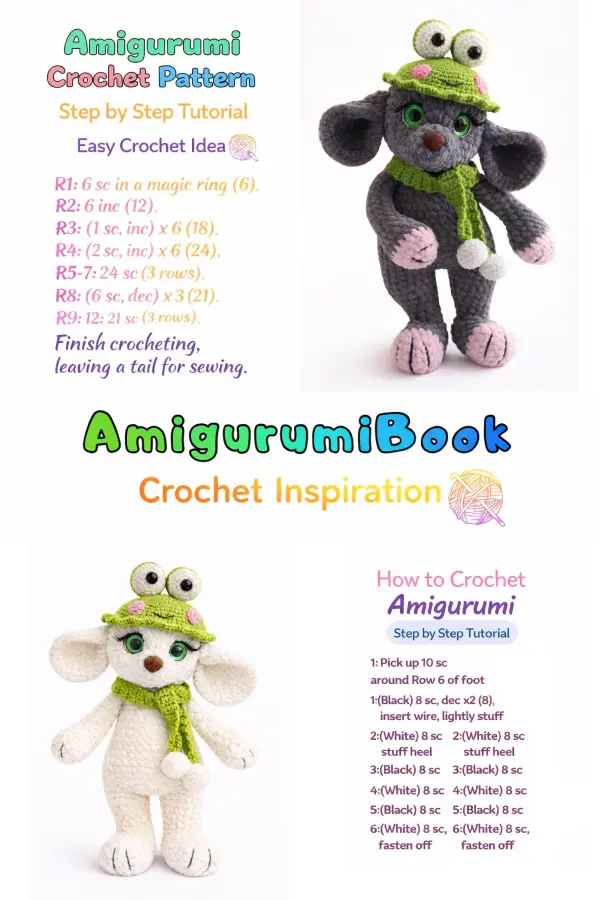
If you love cute handmade toys, this Mouse Mary amigurumi free pattern is a perfect project to try. This adorable plush mouse doll features sweet little ears, a cozy scarf, and a charming frog hat that makes the design truly unique and fun to crochet.
The pattern includes step-by-step instructions for crocheting the arms, legs, body, head, ears, tail, frog hat, scarf, and decorative details. With its soft plush yarn and expressive face, Mouse Mary becomes a wonderful handmade gift, nursery decoration, or a lovely addition to any amigurumi collection.
Whether you are looking for a fun crochet project or a cute toy to make for someone special, this mouse amigurumi crochet pattern is sure to become one of your favorites.
If you want to access 1000+ free amigurumi patterns, you can download our application from this link!
Materials
- Plush yarn Himalaya Dolphin Baby (80320)
- Additional plush yarn Lavitayarn (4005)
- Crochet hook 3–3.5 mm
- Cotton or semi-cotton thread for sculpting and sewing
- Safety eyes 16 mm
- Safety nose 14–16 mm
- Fiberfill stuffing
- Sewing pins
- Scissors
For accessories:
- YarnArt Jeans yarn
- white (01)
- green (69)
- pink (20)
- Crochet hook 2 mm
- Safety eyes 8 mm for the hat
Abbreviations
MR – Magic Ring
SC – Single Crochet
INC – Increase
DEC – Decrease
CH – Chain
SLST – Slip Stitch
HDC – Half Double Crochet
FLO – Front Loop Only
BLO – Back Loop Only
Arms (Make 2)
Start with additional color
1: 6 SC in MR
2: INC x6 (12)
3: (1 SC, INC) x6 (18)
4: 18 SC
Change to body color
5: 18 SC
6: 4 SC, DEC, 7 SC, DEC, 3 SC (16)
7: DEC, 12 SC, DEC (14)
Lightly stuff the arms until round 7.
8: 2 DEC, 6 SC, 2 DEC (10)
9–17: 10 SC
Work a few extra stitches if needed to align the piece.
Fold the arm in half and crochet 4 SC through both sides.
Fasten off and hide the yarn inside.
Legs (Make 2)
Start with additional color
1: 6 SC in MR
2: INC x6 (12)
3: (1 SC, INC) x6 (18)
4–5: 18 SC
Change to body color
6: (7 SC, DEC) x2 (16)
7: (6 SC, DEC) x2 (14)
8–9: 14 SC
10: (5 SC, DEC) x2 (12)
11: 12 SC
12: DEC x6
Close the opening and fasten off.
Body
Mark the leg positions with pins.
1: 10 SC
2: 2 SC, INC, 4 SC, INC, 2 SC (12)
3: 12 SC
4: 3 SC, INC, 4 SC, INC, 3 SC (14)
5: 14 SC
6: 5 SC, 4 INC, 5 SC (18)
7–8: 18 SC
Cut yarn on one leg but leave yarn on the other.
Join Legs
Hold the legs facing away from you.
From the right leg:
CH 1 and place a marker.
CH 1 again and attach to the left leg.
Work:
18 SC around left leg
2 SC along the chain
18 SC around right leg
1 SC along the chain
Total: 40 stitches
Continue Body
2: INC, 18 SC, 2 INC, 18 SC, INC (44)
3: 44 SC
4: 18 SC, (1 SC, INC) x4, 18 SC (48)
5–7: 48 SC
8: 15 SC, (1 SC, DEC) x6, 15 SC (42)
9–10: 42 SC
Stuff the body gradually.
11: (5 SC, DEC) x6 (36)
12–13: 36 SC
14: (4 SC, DEC) x6 (30)
15: (3 SC, DEC) x6 (24)
16: 24 SC
Stuff the neck firmly.
Attach Arms
Place arms so the palms face inward.
17: 4 SC, 4 SC with arm, 8 SC, 4 SC with arm, 4 SC (24)
18: (2 SC, DEC) x6 (18)
19–20: 18 SC
SLST and fasten off.
Head
1: 6 SC in MR
2: (1 SC, INC) x3 (9)
3: 9 SC
4: (2 SC, INC) x3 (12)
5: 12 SC
6: (1 SC, INC) x6 (18)
7: 6 SC, 6 HDC INC, 6 SC (24)
8: 6 SC, (1 HDC, HDC INC) x6, 6 SC (30)
9: 6 SC, (2 HDC, HDC INC) x6, 6 SC (36)
10: 6 SC, (3 HDC, HDC INC) x6, 6 SC (42)
11: 6 SC, (4 HDC, HDC INC) x6, 6 SC (48)
12–13: 48 SC
Insert nose in round 2.
Insert eyes in round 7.
Distance between eyes: 12 stitches.
Head Decreases
14: (6 SC, DEC) x6 (42)
15: (5 SC, DEC) x6 (36)
16: 36 SC
17: (4 SC, DEC) x6 (30)
18: (3 SC, DEC) x6 (24)
19: (2 SC, DEC) x6 (18)
20: (1 SC, DEC) x6 (12)
21: DEC x6
Close opening.
Ears (Make 2)
1: 6 SC in MR
2: INC x6 (12)
3: (1 SC, INC) x6 (18)
4: 1 SC, INC, (2 SC, INC) x5, 1 SC (24)
5: (3 SC, INC) x6 (30)
6: 2 SC, INC, (4 SC, INC) x5, 2 SC (36)
Fold ear and crochet 3 SC through both sides.
Eye Sculpting
Insert needle from the bottom of the head.
Bring it out at the outer corner of the eye.
Insert at the inner corner and return to the bottom.
Repeat for the second eye.
Pull the threads to create indentation and secure.
Nose Sculpting
Insert needle from the bottom center of the head.
Bring it out near the inner eye corner.
Lay thread across the nose and insert near the other eye.
Return to the bottom and tighten slightly.
Eye Embroidery
Using white yarn, embroider the eye whites along the lower outer edge of each eye.
Eyelashes
Embroider along the upper edge of the eyes.
Optional: attach small false eyelashes.
Eyebrows
Embroider eyebrows 2 rows above the eyes.
Tail
Attach yarn to the body with SLST.
CH 20.
Fasten off.
Frog Hat
Use green yarn
1: 6 SC in MR
2: INC x6 (12)
3: (1 SC, INC) x6 (18)
4: (2 SC, INC) x6 (24)
5: (3 SC, INC) x6 (30)
6: (4 SC, INC) x6 (36)
7: (5 SC, INC) x6 (42)
8: (6 SC, INC) x6 (48)
9: (7 SC, INC) x6 (54)
10: (8 SC, INC) x6 (60)
11–13: 60 SC
14–15: work in FLO
14: (1 SC, INC) repeat around (90)
15: (2 SC, INC) repeat around (120)
Fasten off.
Hat Eyes (Make 2)
Start with white yarn
1: 6 SC in MR
2: INC x6 (12)
3: (1 SC, INC) x6 (18)
4: (2 SC, INC) x6 (24)
Insert 8 mm eyes in round 2.
Change to green.
5: 24 SC in BLO
6–7: 24 SC
8: (2 SC, DEC) x6 (18)
9: (1 SC, DEC) x6 (12)
10: DEC x6
Hat Cheeks
1: 6 SC in MR
2: INC x6 (12)
Sew onto the hat.
Scarf
1: CH 5
From 2nd chain: 4 SC
2: Turn, CH 1, 4 SC
3–86: repeat 4 SC rows
Adjust length if needed.
Pom-Poms (Make 2)
1: 6 SC in MR
2: INC x6 (12)
3: (1 SC, INC) x6 (18)
4–5: 18 SC
6: (1 SC, DEC) x6 (12)
7: DEC x6
Close opening.
Final Assembly
- Sew the head to the body.
- Sew the ears onto the head.
- Attach the tail to the back.
- Embroider paw details on arms and legs.
- Put on the frog hat and scarf.
- Attach the pom-poms to the scarf.
Your Mouse Mary amigurumi doll is ready.