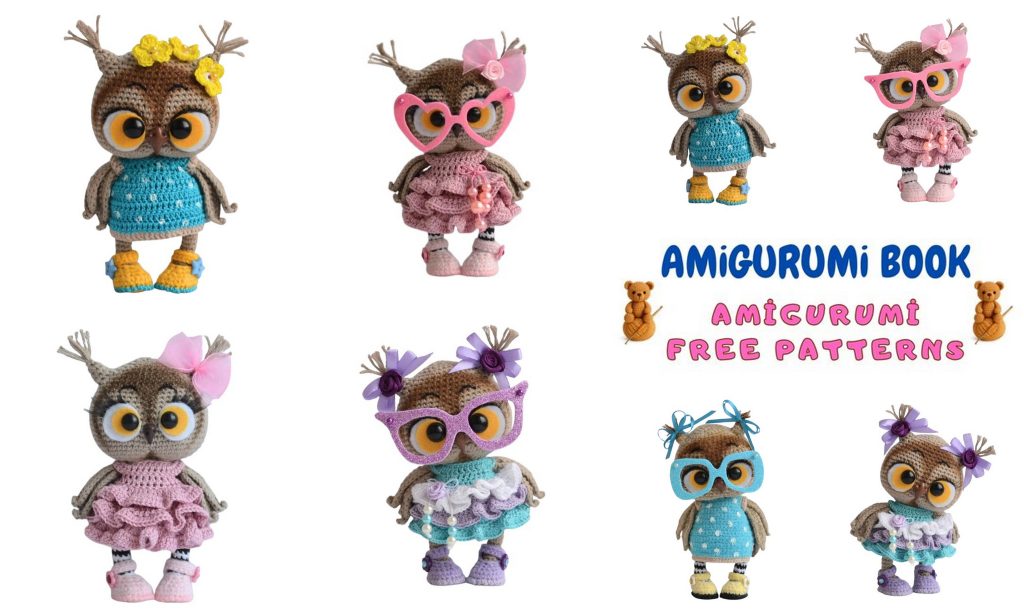
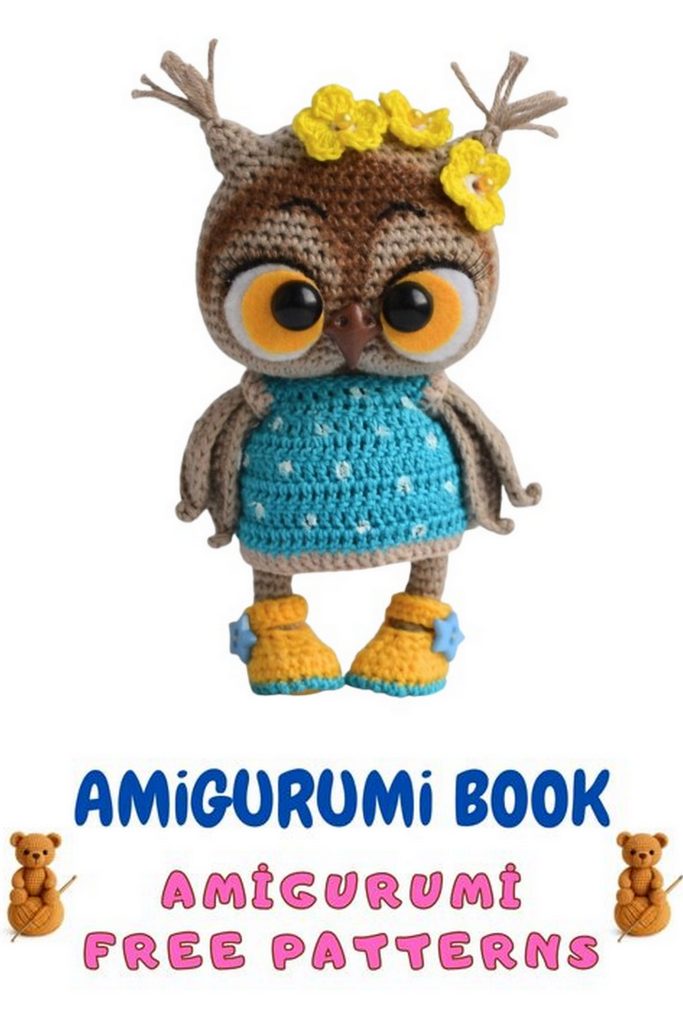
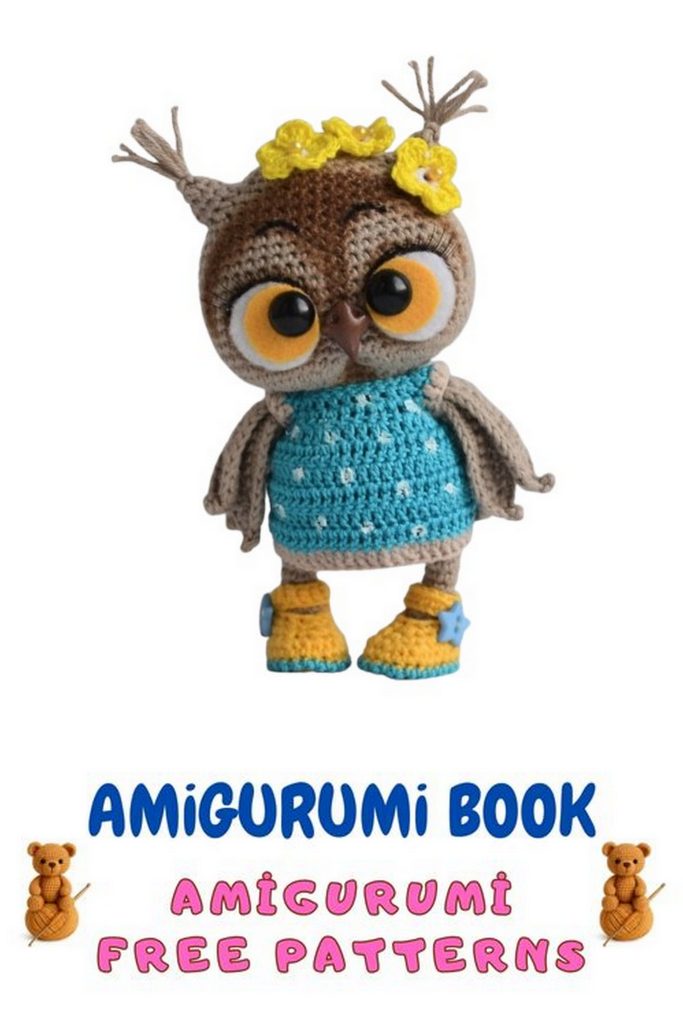
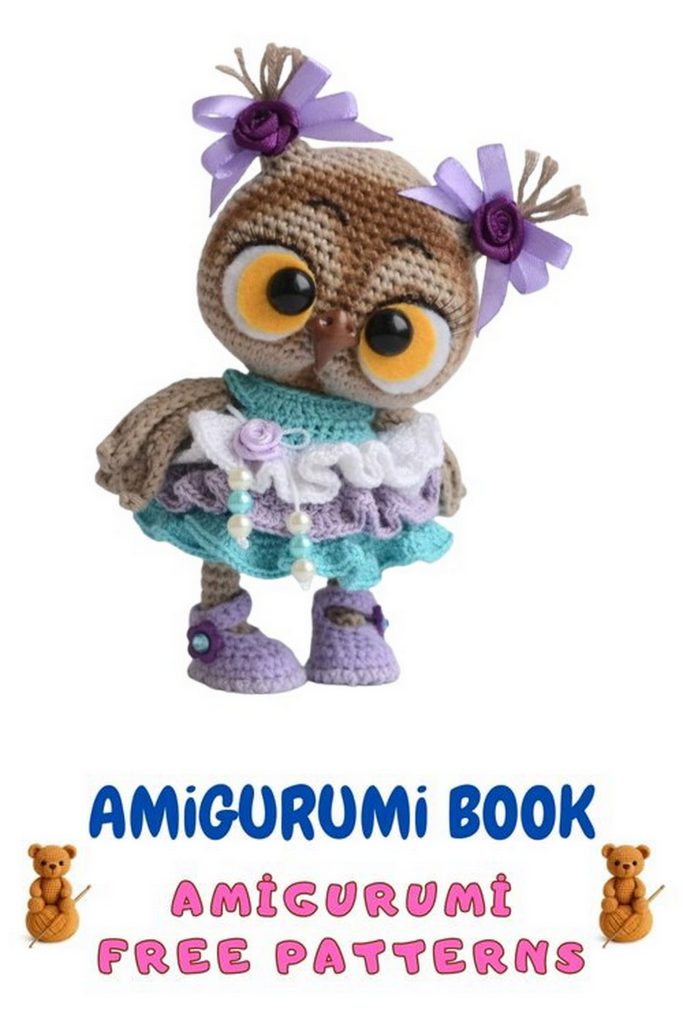
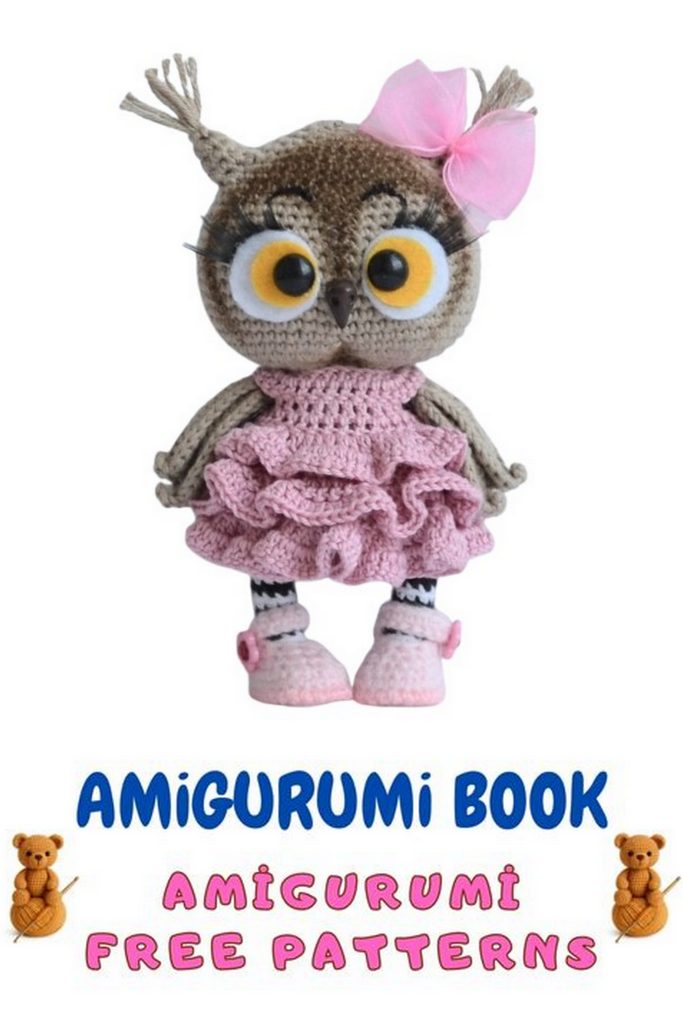
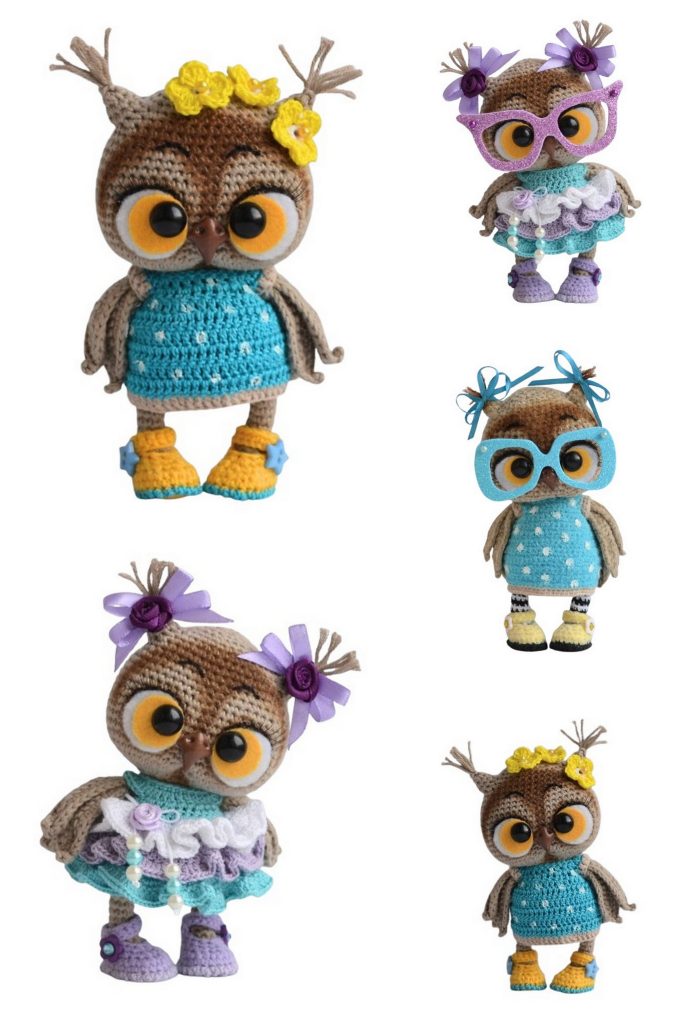
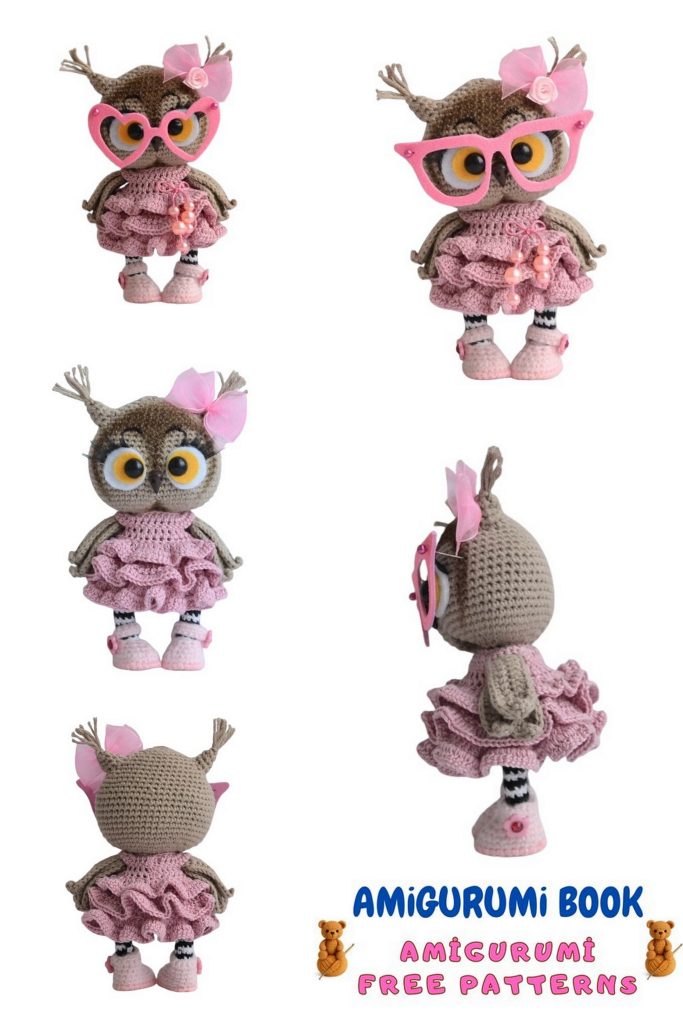
Looking for the cutest crochet owl to add to your amigurumi collection?
This Puffy Owl Amigurumi Pattern is a beautifully detailed, fully guided tutorial that shows you how to crochet an adorable owl with soft feathers, expressive eyes, and even three different dress options. Whether you’re an experienced crocheter or just starting out, this pattern gives you clear, step-by-step instructions to create a charming handmade toy that makes a perfect gift, decor piece, or collectible. If you love unique, character-filled amigurumi designs, this sweet little owl will quickly become one of your favorites!
If you want to access 1000+ free amigurumi patterns, you can download our application from this link!
Finished size: approx. 15 cm (using materials from the original pattern)
Materials
- Cotton or cotton-acrylic yarn for the body, shoes, stockings:
YarnArt Ideal, YarnArt Baby Cotton, Vita Soft Cotton, Vita Lira - Yarn for dress:
Vita Coco or Alize Forever - Hook: 1.5 mm
- Eyes: half-beads 10–12 mm + felt + eyelashes
- Wire for body frame (1.5 mm)
- Thin wire (0.4 mm) for wings
- Fiberfill
- Fabric tape
- Glue
- Oil paints for shading
- Polymer clay for the beak
Abbreviations
sc – single crochet
inc – increase
dec – decrease
ch – chain
dc – double crochet
hdc – half double crochet
sl st – slip stitch
FLO – front loop only
BLO – back loop only
MR – magic ring
FEET – Puffy Owl
Foot (white)
1: Ch 4, starting in 2nd ch → inc, 1 sc, 3 sc in last ch, on other side 1 sc, inc (9)
2: 9 sc
3: 8 sc, inc (10)
4: 10 sc
5: 10 sc
6: 1 sc, ch 5, skip 5 sts, 4 sc (10)
7: (1 sc, dec) ×3, 1 sc (7)
8: Close with decreases, fasten off.
Leg (striped)
From Row 2 onward → BLO
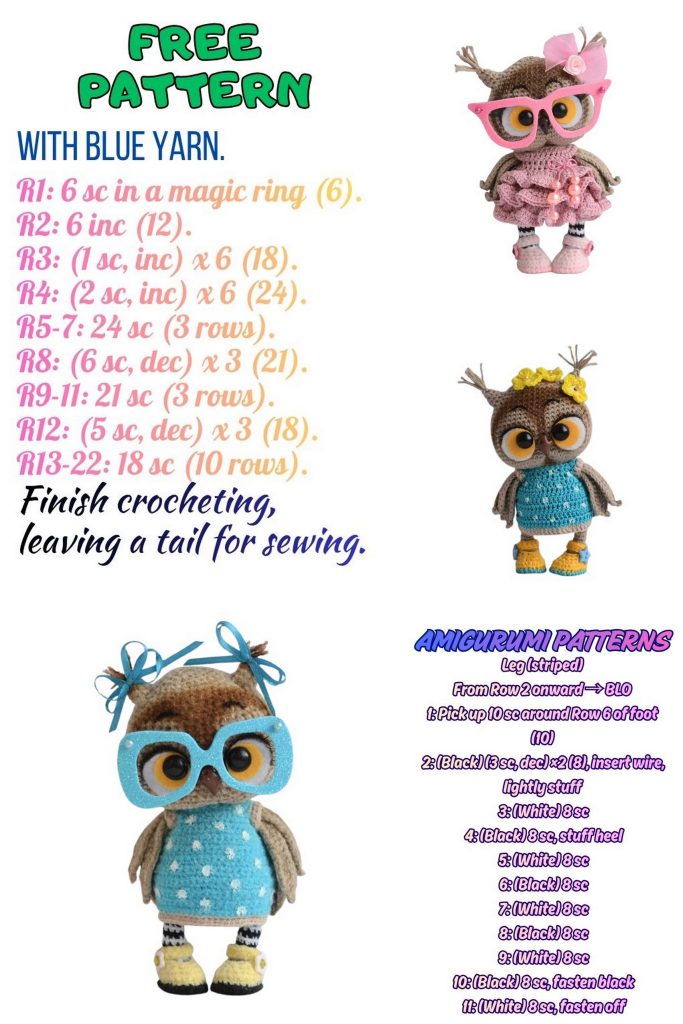
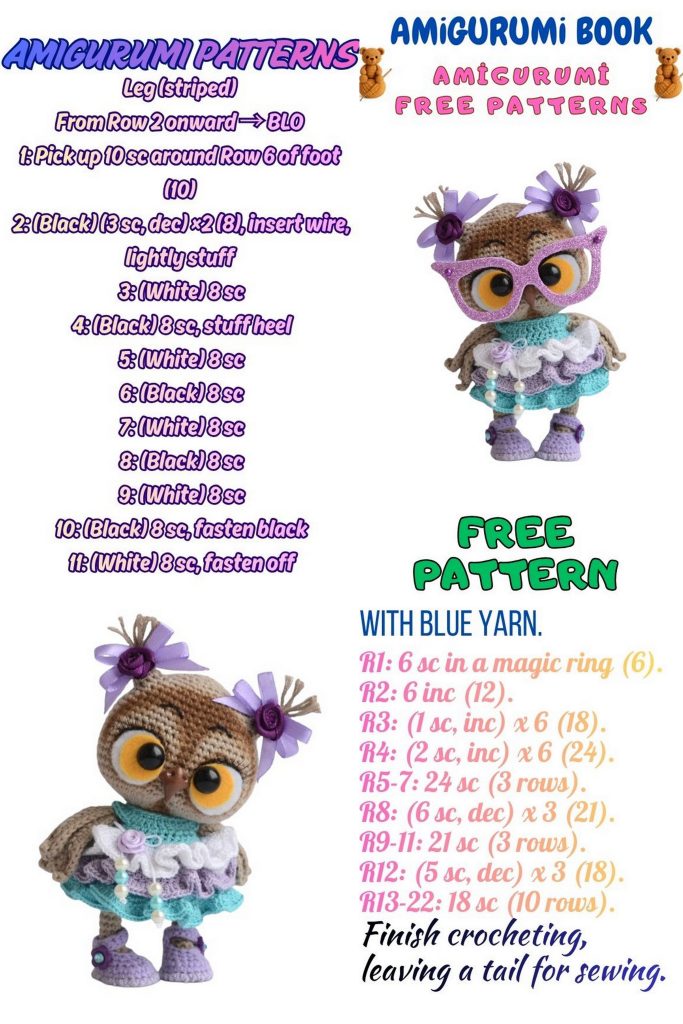
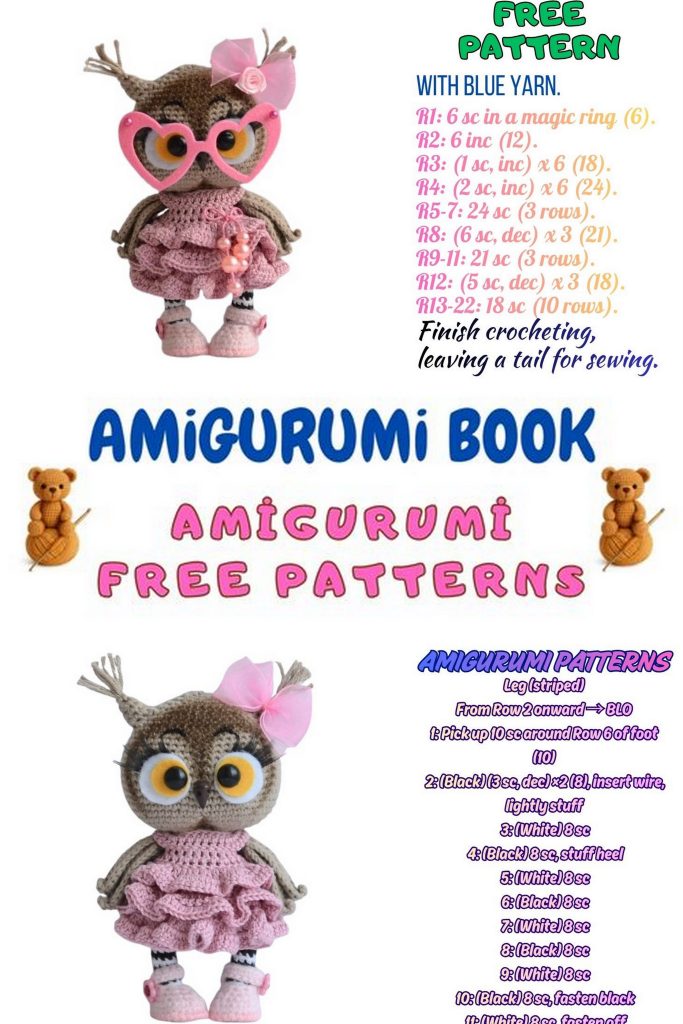
1: Pick up 10 sc around Row 6 of foot (10)
2: (Black) (3 sc, dec) ×2 (8), insert wire, lightly stuff
3: (White) 8 sc
4: (Black) 8 sc, stuff heel
5: (White) 8 sc
6: (Black) 8 sc
7: (White) 8 sc
8: (Black) 8 sc
9: (White) 8 sc
10: (Black) 8 sc, fasten black
11: (White) 8 sc, fasten off

Puffy Owl – SHOES (Black sole)
1: Ch 5 → inc, 2 sc, 4 sc in last ch, other side 2 sc, inc (12)
2: 1 sc, inc, 2 sc, 4 inc, 3 sc, inc (18), +1 sc shift
3: 1 sc, inc, 3 sc, (1 sc, inc) ×4, 3 sc, inc, 1 sc (24)
4: BLO 24 sc
5: 6 sc, (dec, 1 sc) ×4, 6 sc (20)
6: 4 sc, (dec, 1 sc) ×4, 4 sc (16)
7: 6 sc, 2 dec, 6 sc (14)
Right shoe strap
8: 3 sc, ch 9, return with 8 sc, 2 sc, 5 sc → fasten
Left shoe strap
8: 4 sc, turn, ch 1, 3 sc, 4 sc, ch 9, return with 8 sc, 3 sc → fasten
WINGS – Puffy Owl
Feather
1: Ch 12 → 10 sc, 3 sc in last, 10 sc (23)
2: With wire: 7 sc, 4 hdc, 1 sc, ch 3, return 2 sc, 1 sc, 4 hdc, 7 sc
Make 6 feathers. Keep yarn on feather 3 and 6.
Assemble
1: Crochet 3 feathers together → 3 sc each side (6)
2: 6 sc → fasten off
Attach wire ends.
Puffy Owl – BODY
1: MR 6 sc
2: 6 inc (12)
3: (1 sc, inc) ×6 (18)
4: 1 sc, inc, (2 sc, inc) ×5, 1 sc (24)
5: (3 sc, inc) ×6 (30)
6: 2 sc, inc, 3 sc, attach leg: 4 sc through leg + body, (inc, 2 sc) ×3, inc, attach leg: 4 sc through leg + body, 3 sc, inc, 2 sc (36)
7: 3 sc, inc, 3 sc, on left leg: inc, 2 sc, inc, 14 sc, on right leg: inc, 2 sc, inc, 3 sc, inc, 3 sc (42)
8: 42 sc
9: 42 sc
10: 42 sc
11: 42 sc (+1 shift)
12: (dec, 5 sc) ×6 (36)
13: 36 sc
14: 2 sc, (dec, 4 sc) ×5, dec, 2 sc (30)
15: 30 sc
16: (dec, 3 sc) ×6 (24)
Attach wings
17: 4 sc, 3 sc through wing, 10 sc, 3 sc through wing, 4 sc (24)
18: 4 sc, 3 sc on wing, 10 sc, 3 sc on wing, 4 sc (24)
19: 1 sc, (dec, 2 sc) ×5, dec, 1 sc (18)
20: 18 sc → stuff, head begins
Puffy Owl – HEAD
21: FLO (1 sc, inc) ×9 (27)
22: 1 sc, inc, (2 sc, inc) ×8, 1 sc (36)
23: 4 sc, inc, 5 sc, 5 inc, 6 sc, 5 inc, 5 sc, inc, 4 sc (48)
24: 3 sc, inc, 5 sc, (1 sc, inc) ×6, 1 sc, skip 4 (inside fold), 1 sc, (inc, 1 sc) ×6, 5 sc, inc, 3 sc (58)
25: 58 sc + 1 shift
26: 27 sc, skip 4, 27 sc (54)
27: 54 sc
28: 54 sc
29: 54 sc
30: 54 sc
31: 54 sc
32: 54 sc
33: 54 sc (+1 shift)
34: (dec, 7 sc) ×6 (48)
35: 48 sc
36: 48 sc
37: 7 sc, (dec, 2 sc) ×3, 10 sc, (2 sc, dec) ×3, 7 sc (42)
38: 42 sc + shift
39: 6 sc, (dec, 1 sc) ×3, 12 sc, (1 sc, dec) ×3, 6 sc (36)
40: 36 sc
41: 5 sc, (dec, 1 sc) ×3, 8 sc, (1 sc, dec) ×3, 5 sc (30)
42: 4 sc, 3 dec, 10 sc, 3 dec, 4 sc (24)
43: 1 sc, dec, (2 sc, dec) ×5, 1 sc (18)
44: (1 sc, dec) ×6 (12)
45: 6 dec → fasten off

Puffy Owl – EARS
1: Pick up 12 sc around tuft
2: (dec, 4 sc) ×2 (10)
3: (dec, 3 sc) ×2 (8)
4: 4 dec → fasten off
Trim tufts.
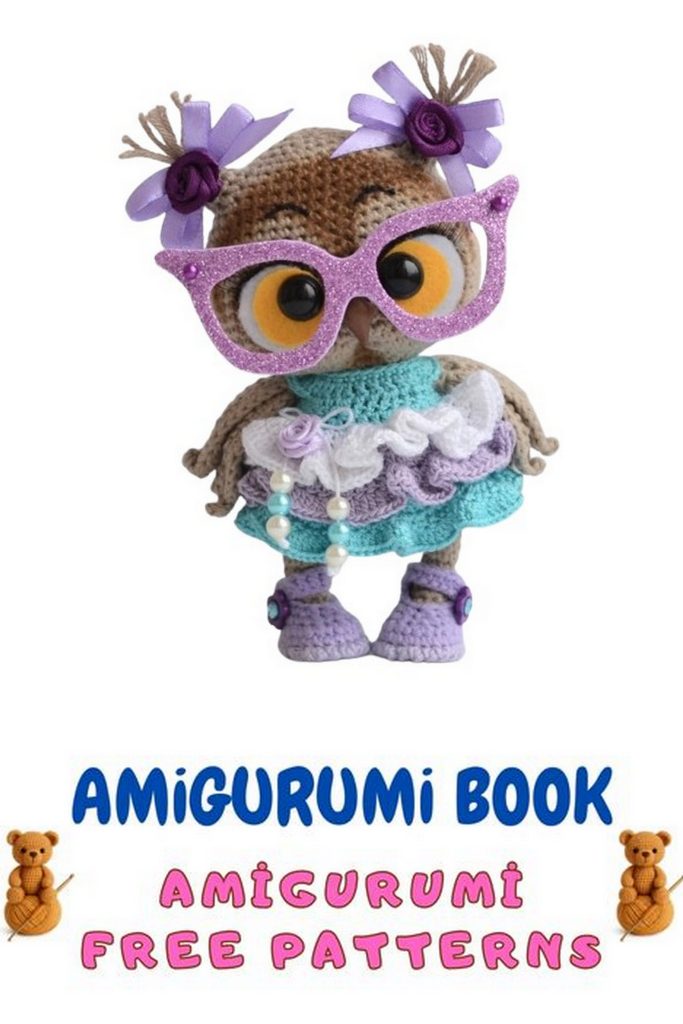
DRESS MODEL 1
1: Ch 25, 24 sc
2: Ch 2, 3 dc, 6 dc inc, 6 dc, 6 dc inc, 3 dc (36)
3: Ch 2, 5 dc, ch 4 skip 8, (1 dc, dc inc) ×2, 2 dc, (dc inc, 1 dc) ×2, ch 4 skip 8, 5 dc (32)
4: Ch 2, 1 dc, (dc inc, 3 dc) ×7, dc inc, 2 dc (40)
5: Lilac, FLO: 2 dc, (dc inc, 4 dc) ×7, dc inc, 2 dc (48)
6: 2 dc, (dc inc, 5 dc) ×7, dc inc, 3 dc (56)
7: Mint, FLO: 3 dc, (dc inc, 6 dc) ×7, dc inc, 3 dc (64)
8: 3 dc, (dc inc, 7 dc) ×7, dc inc, 4 dc (72)
9: (1 dc, dc inc) ×35, 2 dc (107)
10: 106 dc inc, 1 dc (213)
Ruffles
Ruffle 1 (White, FLO Row 4):
1: 40 dc
2: (1 dc, dc inc) ×20
3: dc inc all across
Ruffle 2 (Lilac, FLO Row 6):
1: (1 dc, dc inc) ×28
2: dc inc across
DRESS MODEL 2
1: Ch 25, 24 sc
2: 3 dc, 6 dc inc, 6 dc, 6 dc inc, 3 dc (36)
3: 5 dc, ch 4 skip 8, (1 dc, dc inc) ×2, 2 dc, (dc inc, 1 dc) ×2, ch 4 skip 8, 5 dc (32)
4: 1 dc, (dc inc, 3 dc) ×7, dc inc, 2 dc (40)
5: FLO: 2 dc, (dc inc, 4 dc) ×7, dc inc, 2 dc (48)
6: 5 dc, (dc inc, 11 dc) ×3, dc inc, 6 dc (52)
7: 52 dc
8: 52 dc
9: 52 dc
10: Change color: 5 dc, (dc dec, 6 dc) ×5, dc dec, 5 dc (46)
Sleeves: 14 dc around opening.
DRESS MODEL 3
1: Ch 25, 24 sc
2: 3 dc, 6 dc inc, 6 dc, 6 dc inc, 3 dc (36)
3: 5 dc, ch 4 skip 8, (1 dc, dc inc) ×2, 2 dc, (dc inc, 1 dc) ×2, ch 4 skip 8, 5 dc (32)
4: 1 dc, (dc inc, 3 dc) ×7, dc inc, 2 dc (40)
5: FLO: 2 dc, (dc inc, 4 dc) ×7, dc inc, 2 dc (48)
6: 2 dc, (dc inc, 5 dc) ×7, dc inc, 3 dc (56)
7: FLO: 3 dc, (dc inc, 6 dc) ×7, dc inc, 3 dc (64)
8: 3 dc, (dc inc, 7 dc) ×7, dc inc, 4 dc (72)
9: (1 dc, dc inc) ×35, 2 dc (107)
10: 106 dc inc, 1 dc (213)
Ruffle 1 (FLO Row 4):
1: (1 dc, dc inc) ×20
2: dc inc across
Ruffle 2 (FLO Row 6):
1: (1 dc, dc inc) ×28
2: dc inc across
DECORATION / FACE DETAILS
EYES
1: Cut felt circles:
• White circle: 2.3 cm diameter
• Yellow circle: 1.7 cm diameter
• Black half-beads 10–12 mm
2: Test the size on your owl’s head — if needed, trim smaller or cut larger.
3: Glue the felt circles together using “Moment Crystal” or any clear craft glue.
4: Attach the eyelashes to the black half-beads.
5: Glue the completed eyes to the head.
BEAK (Polymer clay)
1: Take a small piece of oven-bake polymer clay (FIMO, Cernit, Sculpey, etc.).
2: Knead the clay until soft and smooth.
3: Shape the beak like a small pyramid.
4: Make two nostril indentations using a needle or toothpick.
5: Preheat oven to 130°C.
6: Bake the beak for 10 minutes (adjust time if your beak is larger).
7: Let it cool completely.
8: Apply a thin layer of varnish for polymer clay.
9: Glue the beak between the eyes.
SHADING / TONING (Oil Paints)
1: Squeeze a tiny amount of oil paint onto a sheet of clean white paper.
2: Allow it to sit for 1 hour (or overnight) so the extra oil is absorbed, leaving a drier pigment.
3: Work in daylight for best color accuracy.
4: Take very little paint on a brush → rub it into the paper first until only a faint tint remains.
5: Apply shading to the toy by rubbing lightly in small circular motions.
6: Start with soft color — add more if needed (oil paint dries very slowly, so you can continue the next day).
7: Recommended shading areas:
• Around eyes
• On cheeks
• Inside head indentation (Rows 24 + 26)
• Ear tassels
• Feather tips
• Eyebrows and eye contour
8: Don’t over-saturate — oil paint becomes lighter when dry.
GLASSES (Foamiran)
1: First create a paper template for the glasses.
2: Cut out the shape and test it on the owl’s face.
3: When satisfied, place template on glitter foamiran and cut out.
4: Attach glasses using pins — simply push the pins through the foamiran and into the head.
(This allows the glasses to stay on without glue.)