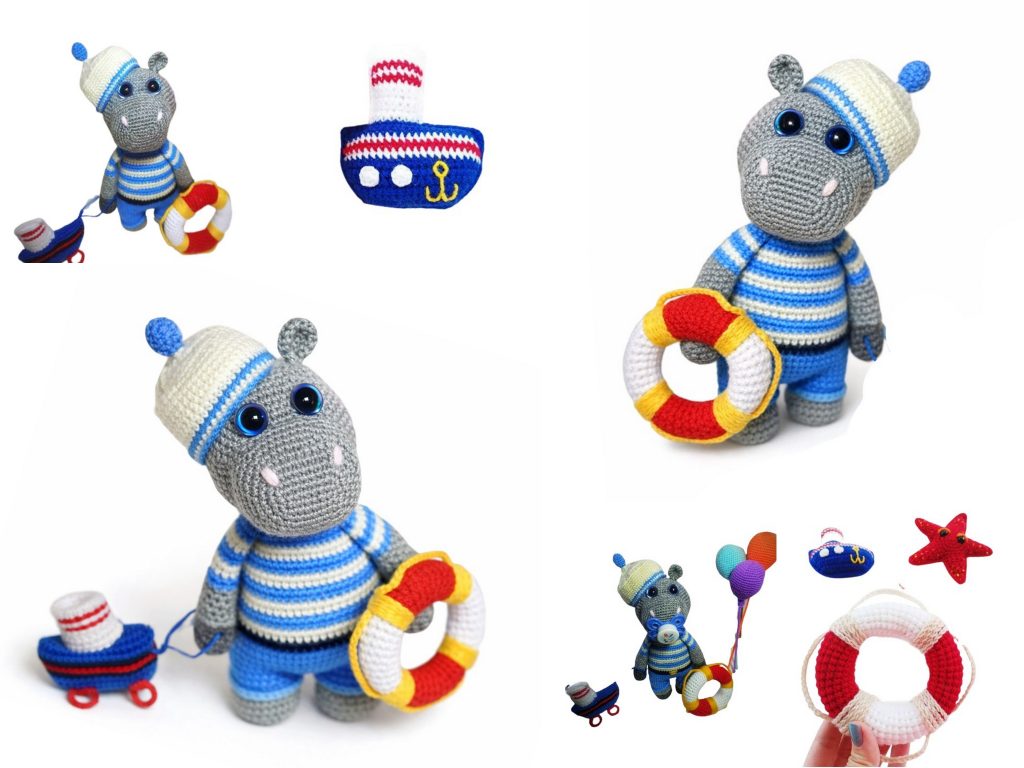
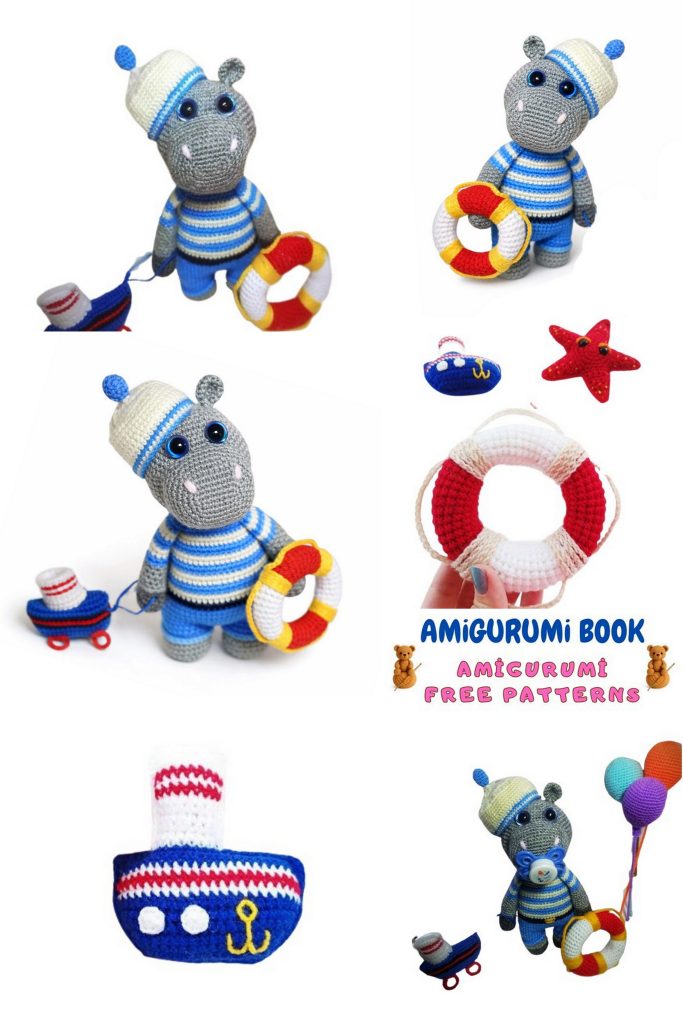
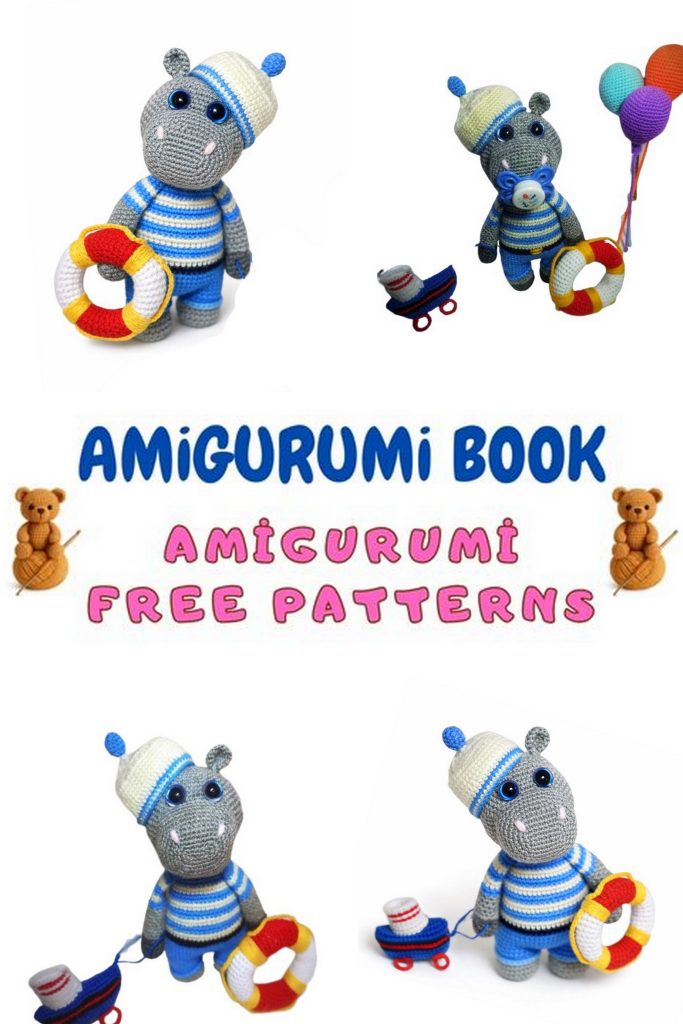
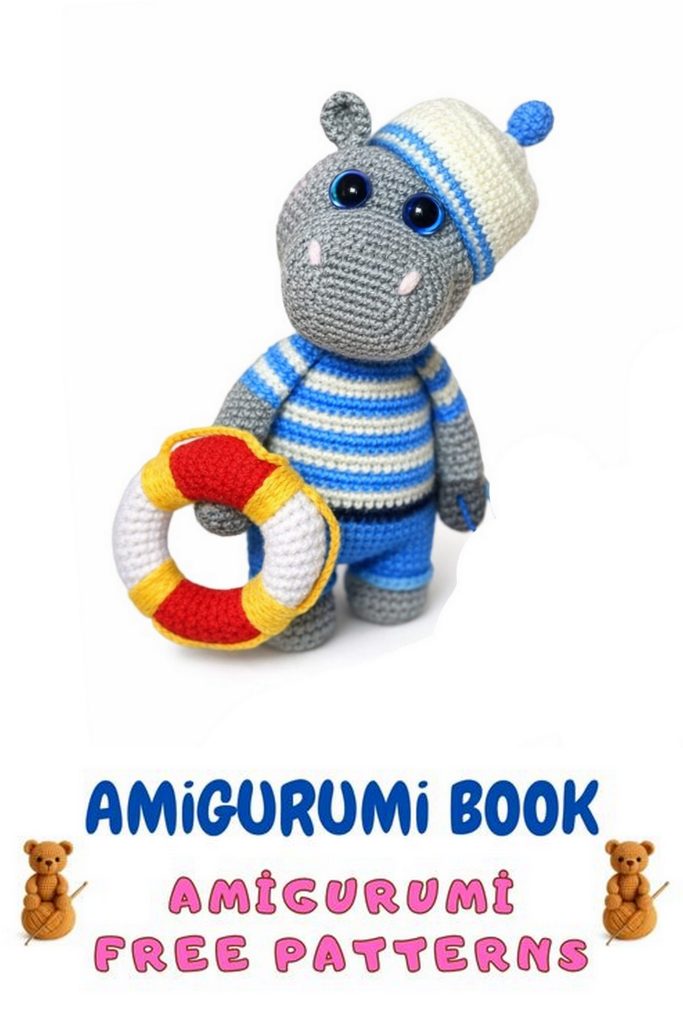
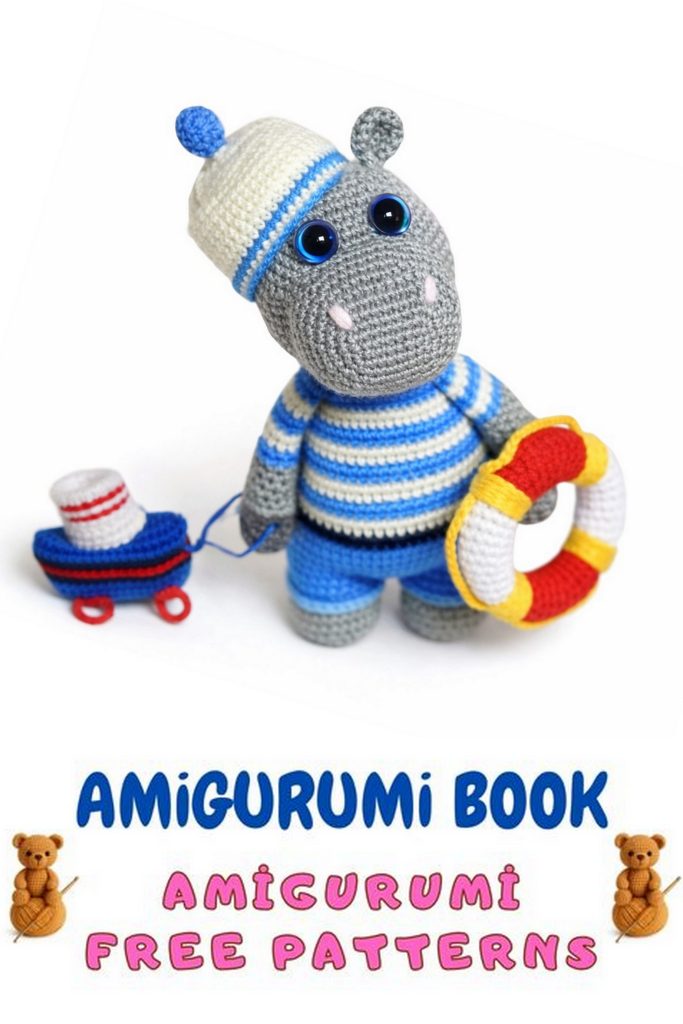
Discover the charm of creating your own Sailor Hippo Amigurumi with this free crochet pattern, perfect for adding a touch of whimsy to your handmade toy collection. This cute hippo design combines adorable details with easy-to-follow instructions, making it an ideal project for crocheters of all skill levels. free crochet patterns – Cute Velvet Bunny Amigurumi Free Pattern
You may also like more amigurumi patterns.
If you are looking for a fun and adorable hippo amigurumi free pattern, this Sailor Hippo crochet design is a perfect project for your collection. With its cute sailor outfit, soft texture, and charming details, this crochet hippo makes a wonderful handmade toy, nursery decoration, or gift.
This Sailor Hippo amigurumi free pattern includes clear, step-by-step instructions written with standard US crochet abbreviations. The pattern covers all parts of the toy, including the body, head, arms, legs, clothes, and accessories, making it easy to follow for confident beginners and intermediate crocheters.
Create your own cute sailor hippo and enjoy a relaxing crochet project with this free amigurumi pattern.
If you want to access 1000+ free amigurumi patterns, you can download our application from this link!
Finished Size
Approx. 24 cm (9.5 inches) tall.
Materials
- YarnArt Dolce – main body color (color code 747), approx. 1 skein
- YarnArt Jeans – for dress (color 73), white and black
- Crochet hook 4.0 mm – for Dolce yarn
- Crochet hook 2.0 mm – for Jeans yarn
- Safety eyes: 10–12 mm
- Fiberfill stuffing
- Yarn needle
- Scissors
Abbreviations (US terms)
- MR – magic ring
- ch – chain
- ch1 / ch3 – turning chain
- sc – single crochet
- dc – double crochet
- sl st – slip stitch
- inc – increase
- dec – decrease
- ( ) × n – repeat instructions in brackets n times
- ( ) – total stitch count at the end of the round/row
Notes
- The toy is crocheted mostly in continuous spirals, unless stated otherwise.
- Stuff parts gradually as you crochet.
- Use a stitch marker to mark the beginning of each round.
- Numbers at the end of each round indicate total stitch count.
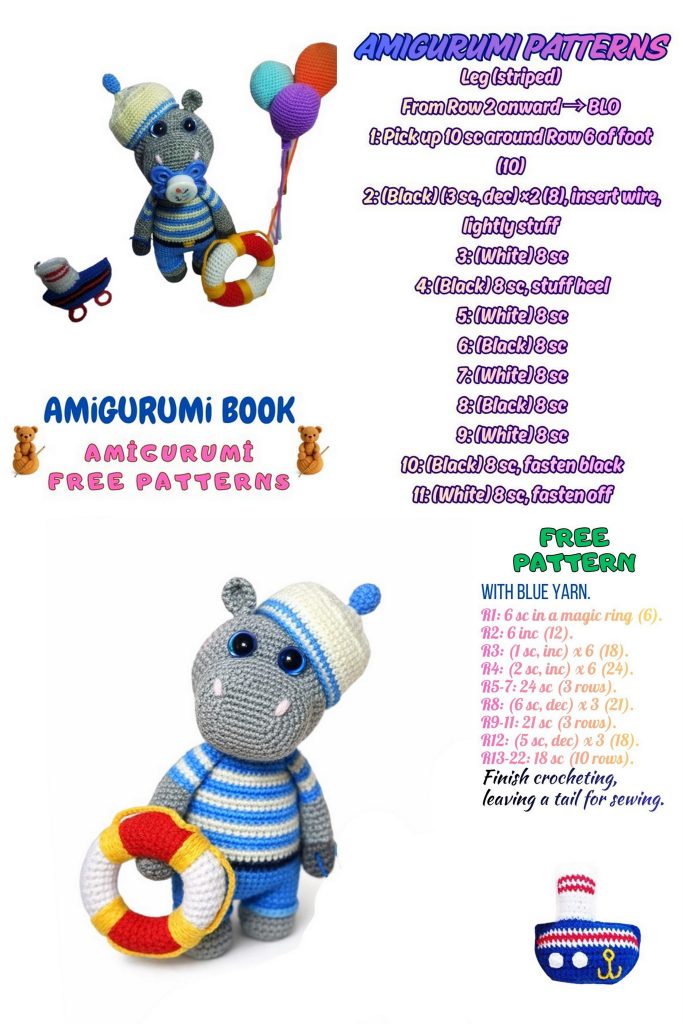
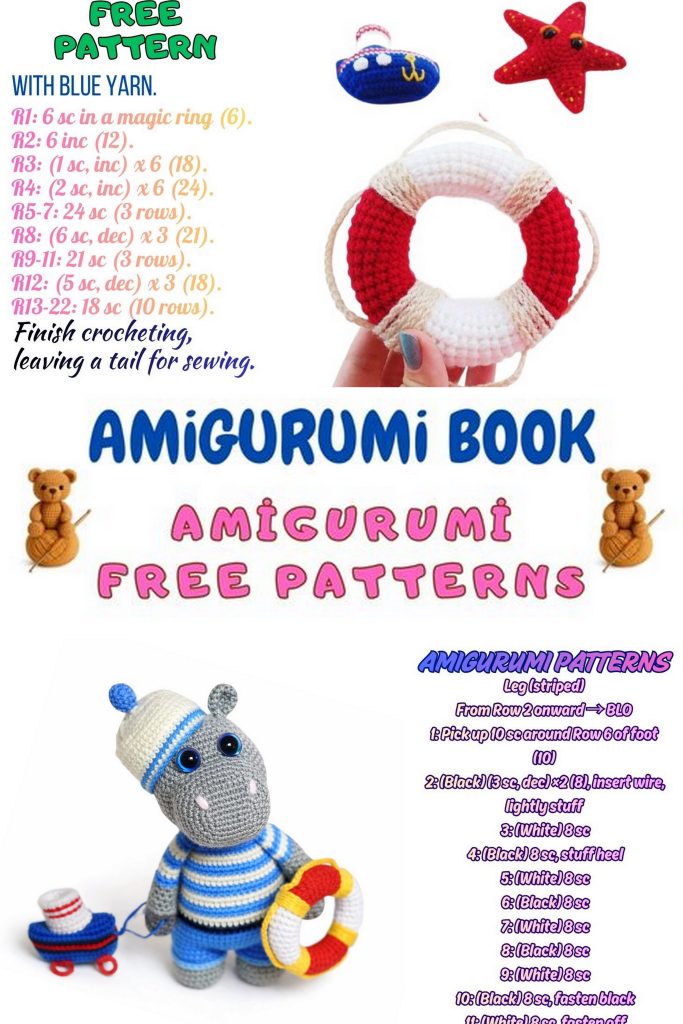
Legs (Make 2)
- 6 sc in MR (6)
- inc ×6 (12)
- (1 sc, inc) ×6 (18)
4–5. 18 sc - 3 sc, dec ×6, 3 sc (12)
7–12. 12 sc (6 rounds)
➡️ Stuff the leg halfway.
Fold the piece in half and crochet through both sides with 6 sc to close.
Fasten off, secure the yarn, and hide the tail.
Arms (Make 2)
- 6 sc in MR (6)
- inc ×6 (12)
3–4. 12 sc - 3 sc, dec ×3, 3 sc (9)
6–10. 9 sc (5 rounds)
➡️ Work 1 additional sc to align the stitches.
Stuff the arm halfway.
Fold in half and crochet through both sides with 4 sc.
Fasten off, secure and hide the yarn tail.
Body
- 6 sc in MR
- inc ×6 (12)
- (1 sc, inc) ×6 (18)
- (2 sc, inc) ×6 (24)
- (3 sc, inc) ×6 (30)
- Attach the legs:
- 4 sc,
- 6 sc together with first leg,
- 9 sc,
- 6 sc together with second leg,
- 5 sc
(30)
7–9. 30 sc (3 rounds)
- (8 sc, dec) ×3 (27)
- (7 sc, dec) ×3 (24)
- (6 sc, dec) ×3 (21)
- (5 sc, dec) ×3 (18)
➡️ Next, we will attach the arms.
Make sure the arms are positioned level with the legs.
If needed, shift stitches slightly for symmetry.
- 4 sc, 4 sc together with arm, 5 sc, 4 sc together with arm, 1 sc (18)
- (1 sc, dec) ×6 (12)
- 12 sc
Head
Continue without interruption after the body workout.
- inc ×12 (24)
- (3 sc, inc) ×6 (30)
- (4 sc, inc) ×6 (36)
20–26. 36 sc (7 rounds)
➡️ Eyes placement:
Insert safety eyes between rounds 23 and 24, with 6 sc between them.
- (4 sc, dec) ×6 (30)
- (3 sc, dec) ×6 (24)
- (2 sc, dec) ×6 (18)
- dec ×9 (9)
➡️ Add stuffing firmly.
Work 1 more decrease, pull the stitches tight, fasten off and hide the yarn tail.
Ears (Make 2)
- 6 sc in MR
- inc ×6 (12)
- 12 sc
Fold in half and crochet through both sides with 6 sc.
Fasten off, leave a tail for sewing.
Muzzle (Yarn: YarnArt Jeans)
- 6 sc in MR
- inc ×6 (12)
- (1 sc, inc) ×6 (18)
- (2 sc, inc) ×6 (24)
- 24 sc
Leave a long tail for sewing.
➡️ Sew the muzzle to the head.
➡️ Make a slight indent (sculpting) if desired.
➡️ Embroider the nose with black YarnArt Jeans yarn.
Dress
Work with YarnArt Jeans and 2.0 mm hook.
The dress is worked in rows, then joined and continued in the round.
- ch 36, from 4th ch from hook:
4 dc, inc from 3 dc,
5 dc, inc from 3 dc,
10 dc, inc from 3 dc,
5 dc, inc from 3 dc,
5 dc - Turn, ch 1,
6 sc, inc from 3 sc,
7 sc, inc from 3 sc,
12 sc, inc from 3 sc,
7 sc, inc from 3 sc,
6 sc - Turn, ch 3,
6 dc, inc from 3 dc,
9 dc, inc from 3 dc,
14 dc, inc from 3 dc,
9 dc, inc from 3 dc,
7 dc - Turn, ch 1,
8 sc, inc from 3 sc,
11 sc, inc from 3 sc,
16 sc, inc from 3 sc,
11 sc, inc from 3 sc,
8 sc - Turn, ch 3,
8 dc, inc from 3 dc,
13 dc, inc from 3 dc,
18 dc, inc from 3 dc,
13 dc, inc from 3 dc,
9 dc - Turn, ch 1,
10 sc, skip 17 sts (armhole),
20 sc, skip 17 sts (armhole),
10 sc - 48 inc worked in dc
- Join and work (1 dc, inc) ×48 in the round.
Continue crocheting 3 more rounds evenly in dc.
Finish the sleeves and hem in back loops only:
(sl st, ch) repeat to the end.
Make a small chain loop at the back for a button.
Shorts
- ch 56, from 4th ch from hook:
7 dc, inc, (8 dc, inc) ×5 - Turn, ch 3, 59 dc
- Turn, ch 3, 59 dc
- Join, ch 3, 59 dc
5–8. Continue working in the round:
ch 3, 59 dc (4 rounds)
- ch 3,
7 dc, dec, (8 dc, dec) ×5
Fold the piece in half and sew the center seam on both sides.
Each leg opening has 25 stitches.
Work 25 sc around each leg opening.
Finish legs in back loops only:
(sl st, ch) ×25
Bow
Worked in rows.
- ch 31, from 2nd ch from hook: 30 sc
2–8. Turn, ch 1, 30 sc (7 rows)
Fold in half and sew the sides together.
Wrap yarn around the center to shape the bow.
Headband
- ch 66, from 2nd ch from hook: 65 sc
- Sew the bow to the headband.
Dress Bow
- ch 30
- Shape into a small bow and sew onto the dress.
Assembly & Finishing
- Sew the muzzle to the head.
- Lightly shape the face while sewing.
- Make a small indentation if desired for a cuter expression.
- Embroider the nose using black YarnArt Jeans yarn.
- Secure and hide yarn ends inside the head.
- Attach the ears to the head.
- Position them symmetrically on the sides of the head.
- Sew firmly.
- Sew the head to the body.
- Make sure the head is centered and straight.
- Dress the toy:
- Put on the shorts.
- Add the dress on top.
- Fasten the button at the back using the chain loop.
- Attach the headband and adjust the bow placement.
- Final touches:
- Check that all parts are firmly sewn.
- Adjust stuffing if needed.
- Hide all yarn tails inside the body.
✅ Pattern Completed!
Your Sailor Hippo Amigurumi is now finished 🎉
This cute crochet character makes a wonderful handmade gift, nursery decoration, or collectible toy.