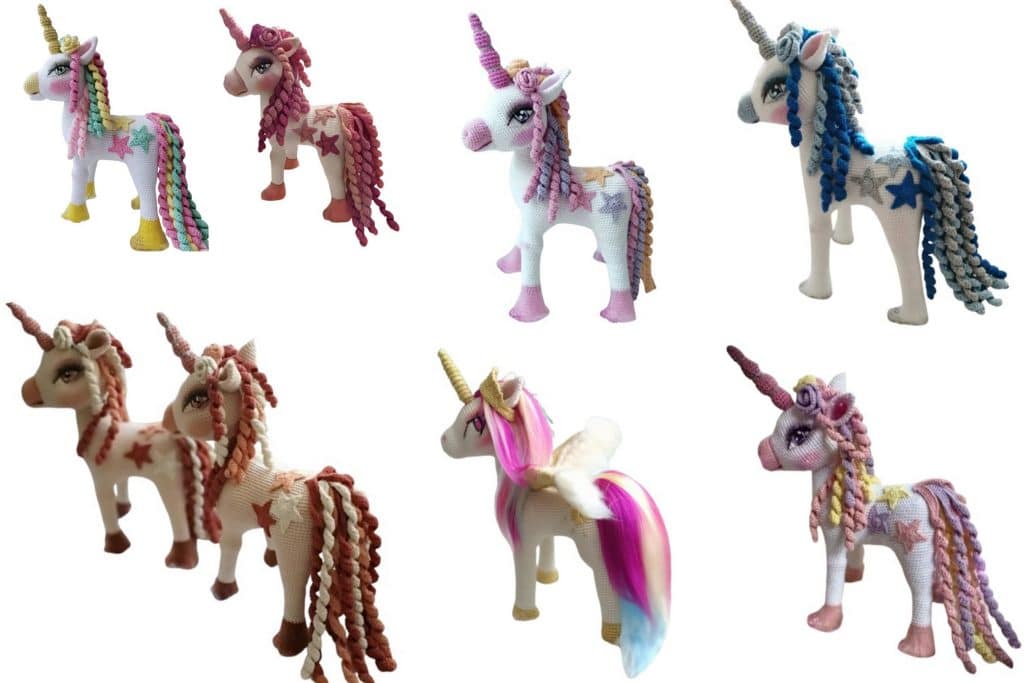
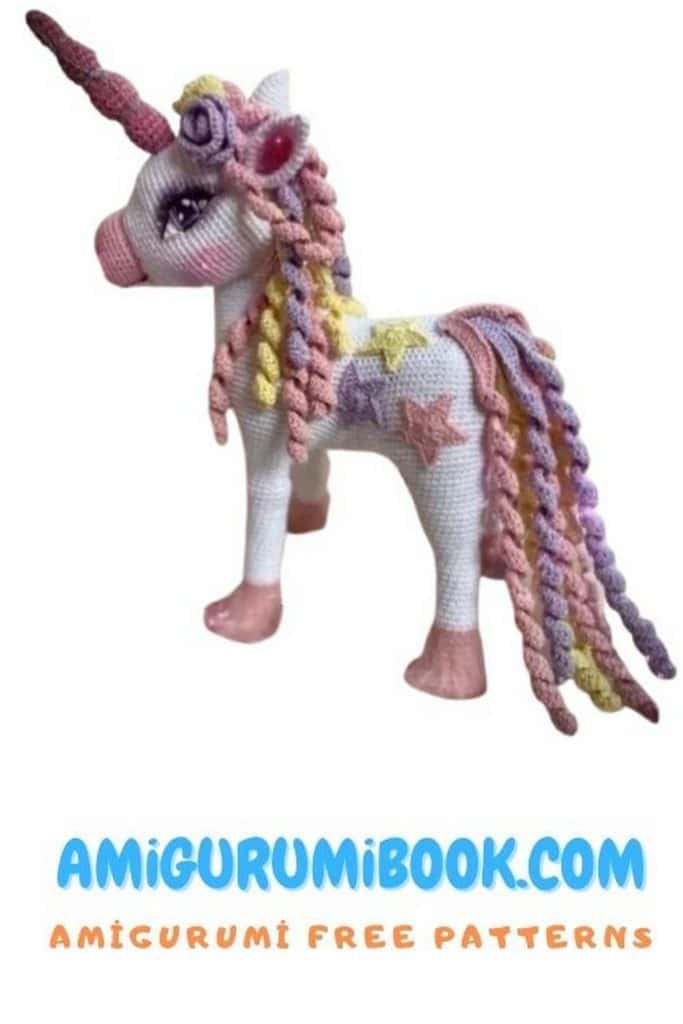
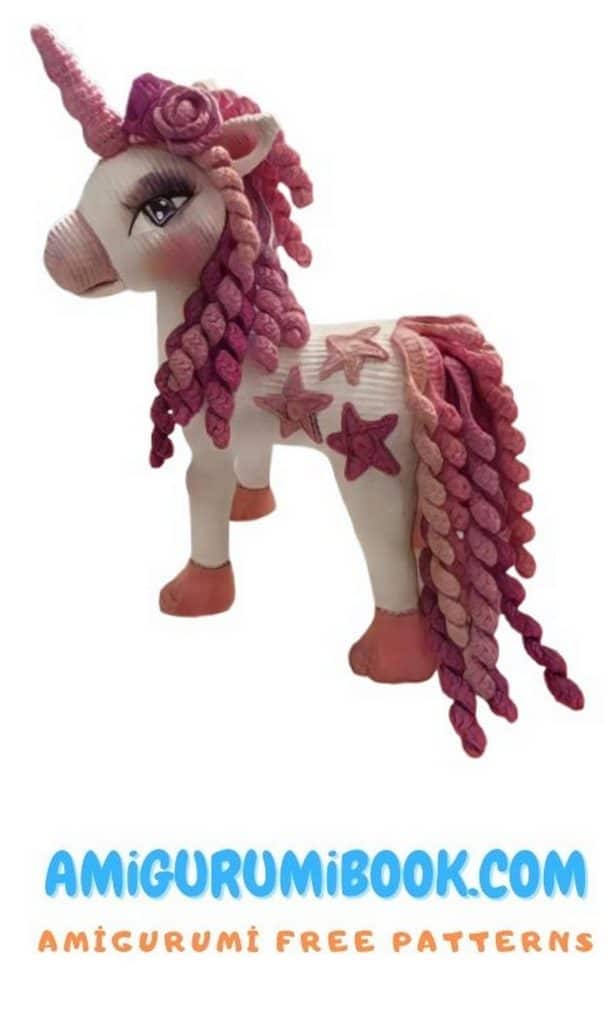
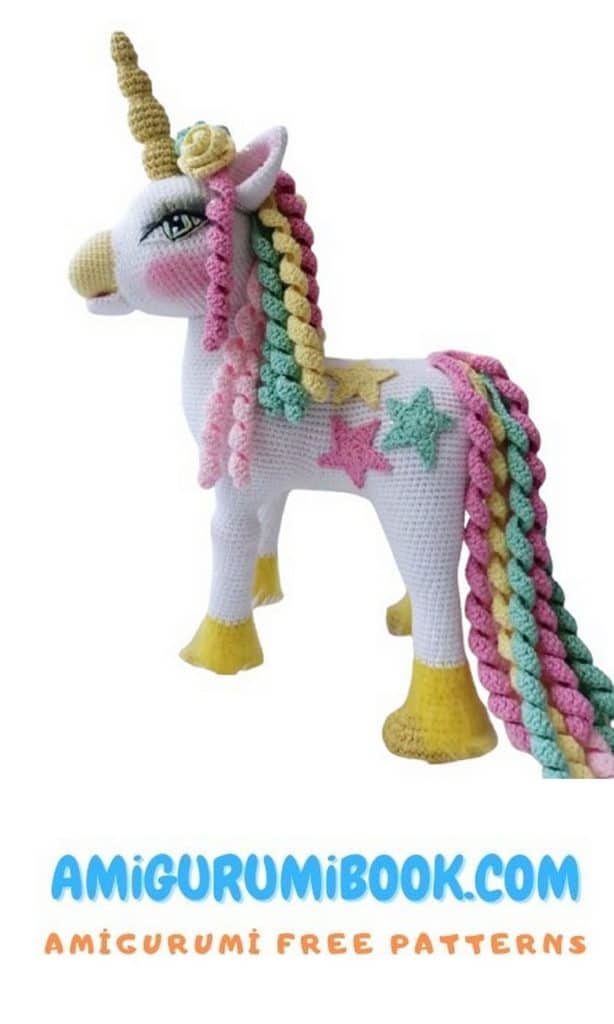
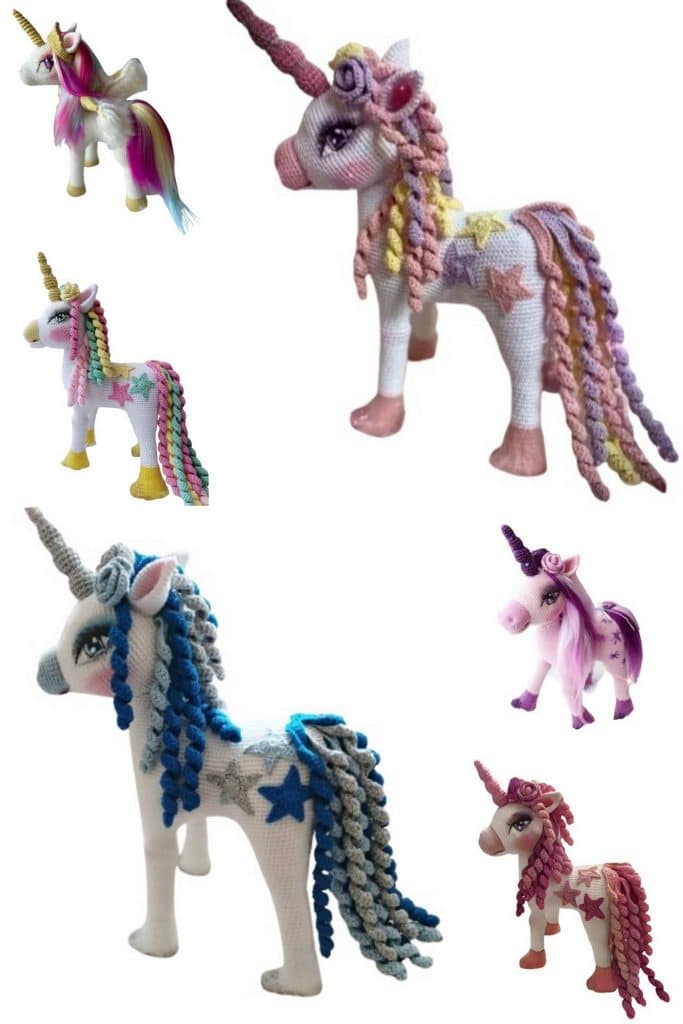
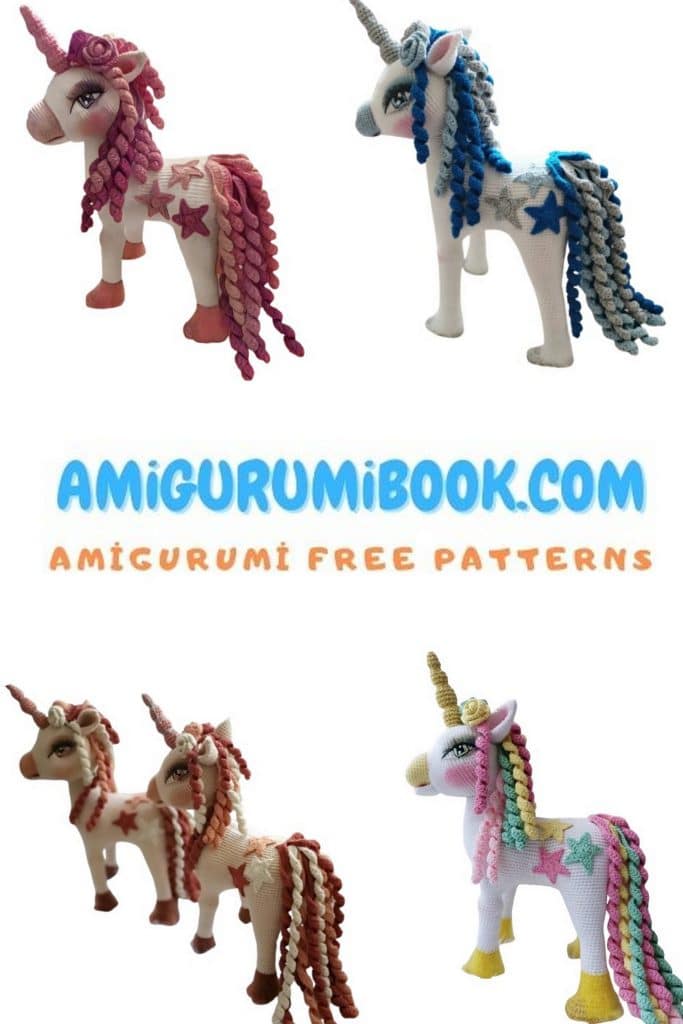
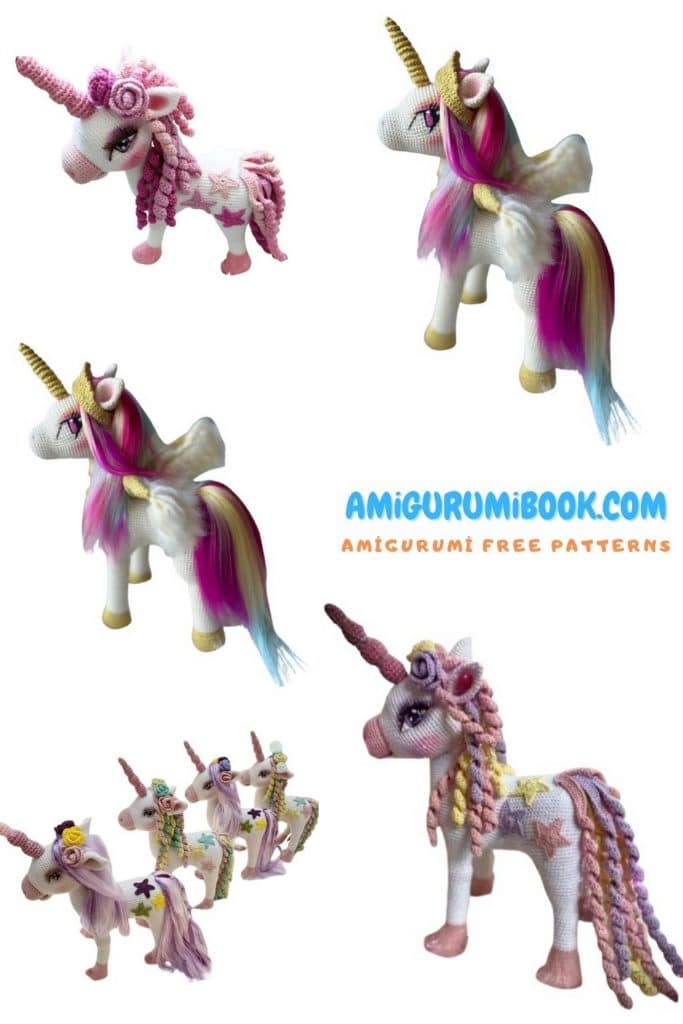
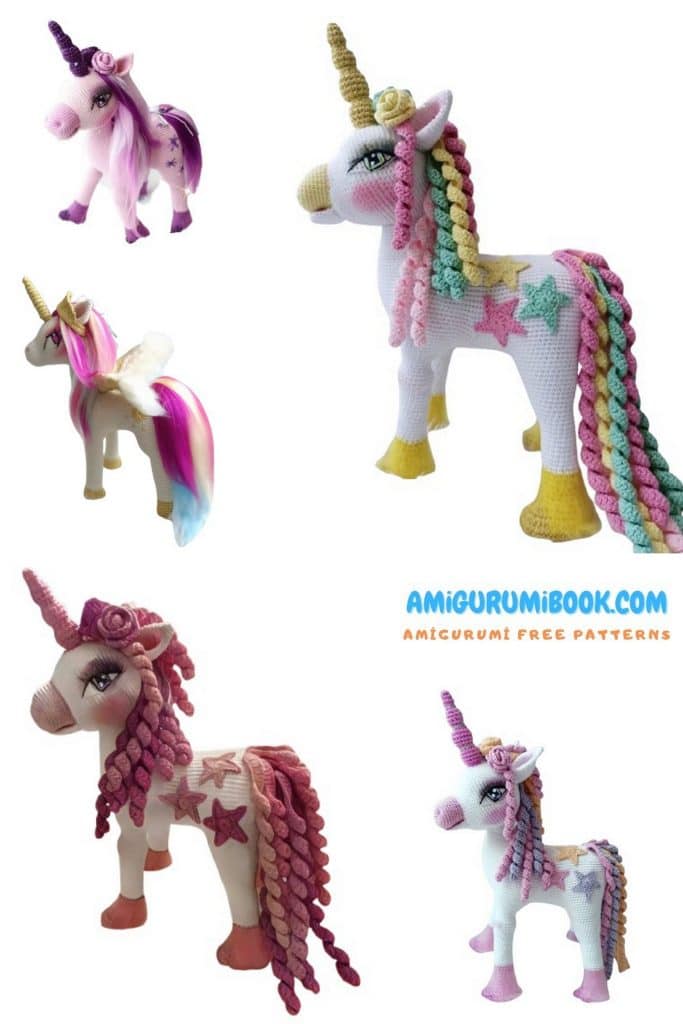
Step into a world of magic and color with this Star Unicorn Amigurumi Free Pattern! Perfect for unicorn lovers and crochet enthusiasts alike, this delightful amigurumi project features sparkling details, pastel tones, and a touch of stardust charm. Whether you’re creating a whimsical gift for a child, a cute room decoration, or simply adding to your free amigurumi collection, this free crochet tutorial will guide you through every stitch with ease. Grab your hook and favorite yarn colors to bring this enchanting unicorn plushie to life—ideal for both beginners and experienced crocheters!
If you want to access 1000+ free amigurumi patterns, you can download our application from this link!
Materials:
1. PERIA COTTON white No.13 – 3 skeins
2. PERIA COTTON yellow No.03 – 1 skein
3. PERIA COTTON mint No.20 – 1 skein
4. GAZZAL COTTON pink No.3444 – 1 skein
5. LANOSO SIMSIM pink No.933 (lurex) – 1 skein
6. NAKO PARIS pink No.5408 – 1 skein
7. KARTOPU BABY ONE lilac No.019 – 1 skein
8. KARTOPU BABY ONE pink No.782 – 1 skein
9. Black or brown eyelashes
10. Safety eyes or thread for embroidering them
11. Clear glue
12. White ribbon – 20 cm
13. Wide lilac ribbon – 50 cm (optional)
14. Stuffing – approximately 500 g
15. Needle for embroidery and sewing parts together
16. Brush for the tail and mane
Use thread the same color as the muzzle (in my case, pink) to create indentations for the nostrils.
Insert and bring out the thread from the bottom, as if from inside the unicorn’s mouth.
You can optionally shade the nostrils with dry pastel or any other method of your choice.
The eyes can be made in any way that works for you:
attach safety eyes, glue them on, embroider, or paint them.
It all depends on who or what the finished toy is for.
Eyelashes can also be glued on or embroidered.
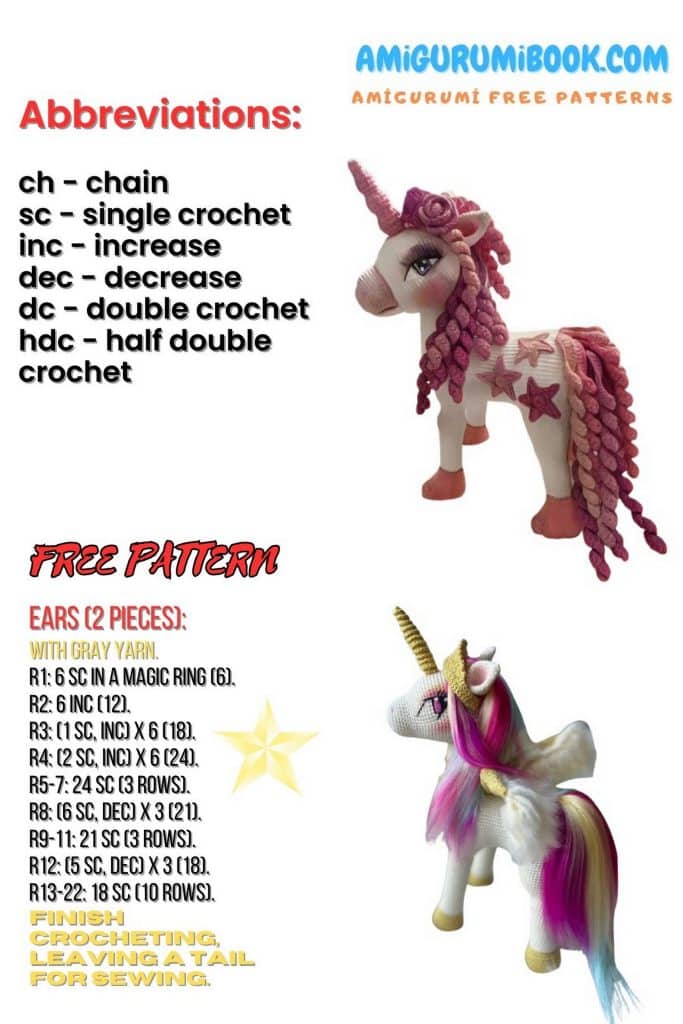
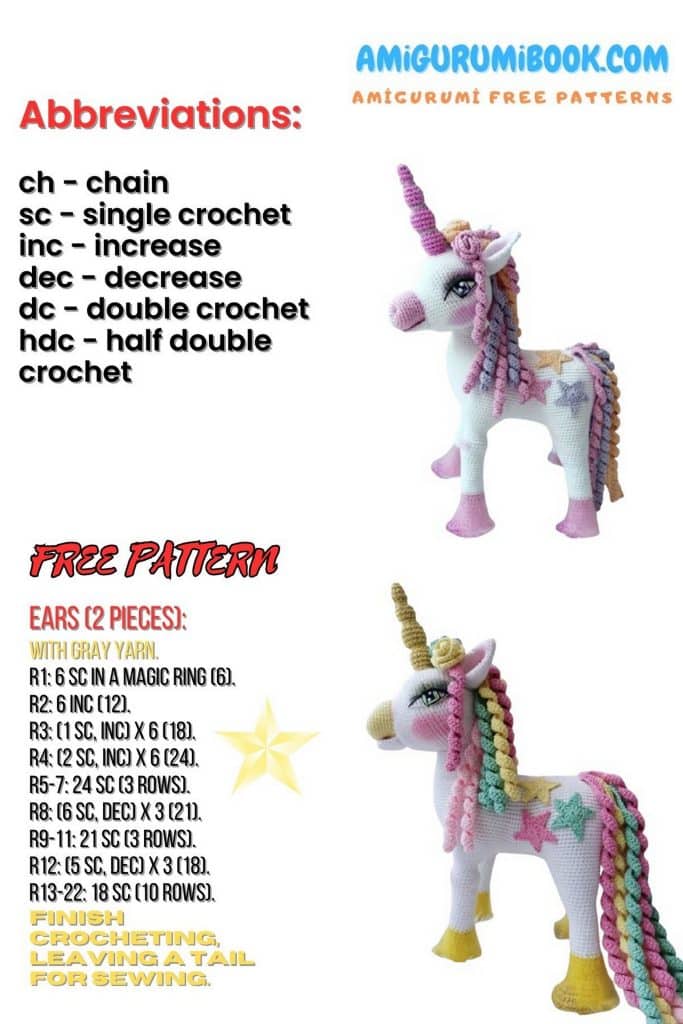
Abbreviations
sc – single crochet
inc – increase
dec – decrease
FLO – front loop only
dc – double crochet
MR – magic ring
ch – chain
A – pink yarn
B – yarn with lurex
General Recommendations
Keep an eye on the stitch marker
Carefully follow the row instructions and stitch counts
Ensure precise finishing of the final rows of the legs – any mistake here will result in incorrect leg placement on the body.
PATTERN – Amigurumi Unicorn
Legs (make 4) – Amigurumi Unicorn
Use two types of yarn, starting with yarn A:
Start: ch 10, then start in the 2nd ch from hook
1: inc, 6 sc, 3 sc in 1 st, 7 sc = 18
2: inc x2, 6 sc, inc x3, 7 sc, inc = 25
3: FLO 10 sc, inc x6, 9 sc = 32
4: 32 sc
5: Add yarn B without cutting off yarn A:
(B) 10 sc, (A) 12 sc, (B) 10 sc = 32 (place marker)
6: (B) 10 sc, (A) 6 dec, (B) 10 sc = 26
7: (B) 10 sc, (A) 6 sc together at top, (B) 10 sc = 21
8: 21 sc (cut off yarn A)
9–10: 21 sc
11: 5 sc, dec, 3 sc, dec, 3 sc, dec, 4 sc = 18
12–14: 18 sc (place marker)
Front Legs (in white yarn)
1–15: 18 sc
16: (2 sc, inc) x6 = 24
17–19: 24 sc
20: (2 sc, dec) x6 = 18
21–23: 18 sc
24: 5 sc, inc x3, 8 sc, inc x2 = 23
25: 20 sc, inc, 2 sc = 24
26: 6 sc, inc, 3 sc, inc, 10 sc, inc, 2 sc = 27
27: 7 sc, inc, 4 sc, inc, 11 sc, inc, 2 sc = 30
28: 8 sc, inc, 2 sc, inc, 2 sc, inc, 12 sc, inc, 2 sc = 34

Back Legs:
1–23: Repeat rows 1–23 of the front legs
24: 2 sc, inc x3, 7 sc, inc x2, 4 sc = 23
25: 18 sc, inc, 4 sc = 24
26: 3 sc, inc, 3 sc, inc, 11 sc, inc, 4 sc = 27
27: 4 sc, inc, 4 sc, inc, 12 sc, inc, 4 sc = 30
28: 5 sc, inc, 2 sc, inc, 2 sc, inc, 13 sc, inc, 4 sc = 34
29: 15 sc, now start crocheting the left back leg:
Left Back Leg:
Continue in white yarn:
1–12: 18 sc
13: 12 sc, inc x3, 3 sc = 21
14: 21 sc
15: 3 sc, inc x3, 9 sc, inc, 5 sc = 25
16: 25 sc
17: 6 sc, inc, 12 sc, inc, 5 sc = 27
18: 27 sc
19: 7 sc, inc, 13 sc, inc, 5 sc = 29
20: 29 sc
21: 8 sc, inc, 14 sc, inc, 5 sc = 31
22: 31 sc
23: 9 sc, inc, 15 sc, inc, 5 sc = 33
24: 33 sc
25: 10 sc, inc, 16 sc, inc, 5 sc = 35
26: 35 sc
27: 11 sc, inc, 17 sc, inc, 5 sc = 37
Lower Body: – Amigurumi Unicorn
1: ch 12, start in 2nd ch from hook, 10 sc
2–36: 10 sc with 1 turning ch at the end of each row
Right Back Leg and Joining Legs to Body:
After row 27 (11 sc, inc, 2 sc), crochet along the lower body, starting with the back legs:
– Around outer edge of leg: 10 sc
– Along belly: 5 sc, inc, 17 sc, inc, 1 sc, 9 sc
– Left back leg outer edge: 10 sc, 16 sc along belly
– Front left leg: 10 sc outer edge, 9 sc belly
– Front right leg: 10 sc outer edge, 16 sc belly
From the inside of the first attached leg, crochet slip stitches to end of leg and place a marker. This is now the body marker.
Body: – Amigurumi Unicorn
1: (dec, 7 sc, dec), 1 sc, inc, 23 sc, (dec, 13 sc, dec), 23 sc, (dec, 7 sc, dec), 23 sc, (dec, 13 sc, dec), 23 sc, inc, 1 sc
2: (dec, 6 sc, dec), 2 sc, inc, 18 sc, inc, 4 sc, (dec, 11 sc, dec), 5 sc, inc, 14 sc,
(inc, 2 sc) x6, 13 sc, inc, 4 sc, (dec, 11 sc, dec), 4 sc, inc, 18 sc, inc, 2 sc
3: (dec, 4 sc, dec), 3 sc, inc, 19 sc, inc, 4 sc, (dec, 9 sc, dec), 5 sc, inc, 15 sc, inc,
20 sc, inc, 14 sc, inc, 4 sc, (dec, 9 sc, dec), 5 sc, inc, 18 sc, inc, 3 sc
4: (dec, 2 sc, dec), 25 sc, inc, 4 sc, (dec, 7 sc, dec), 5 sc, inc, 17 sc, inc, 5 sc,
(inc, 4 sc) x2, 5 sc, inc, 15 sc, inc, 4 sc, (dec, 7 sc, dec), 5 sc, inc, 24 sc
5: dec x2, 4 sc, inc, 21 sc, inc, 4 sc, (dec, 5 sc, dec), 73 sc, (dec, 5 sc, dec), 5 sc, inc,
20 sc, inc, 4 sc
6: dec, 32 sc, dec, 5 sc, dec (don’t worry, follow exactly), 71 sc, dec, 5 sc, dec, 32 sc
7: 32 sc, (dec, 5 sc, dec), 69 sc, (dec, 5 sc, dec), 31 sc
8: 31 sc, (dec, 5 sc, dec), 67 sc, (dec, 5 sc, dec), 30 sc
9: 30 sc, (dec, 5 sc, dec), 65 sc, (dec, 5 sc, dec), 29 sc
10) 29 sc, (dec, 5 sc, dec), 31 sc, inc, 31 sc, (dec, 5 sc, dec), 28 sc
11) dec, 133 sc
12–16) 133 sc
17) 43 sc, dec, 44 sc, dec, 43 sc
18) 43 sc, dec, 42 sc, dec, 42 sc
19) 43 sc, dec, 40 sc, dec, 28 sc, move the marker
20) dec, 8 sc, dec, 10 sc, dec, 8 sc, dec, 24 sc, dec, 38 sc, dec, 28 sc
21) dec, 7 sc, dec, 8 sc, dec, 7 sc, dec, 24 sc, dec, 36 sc, dec, 28 sc
22) dec, 6 sc, dec, 6 sc, dec, 6 sc, dec, 90 sc
23) dec, 5 sc, dec, 4 sc, dec, 5 sc, dec, 90 sc
24) dec, 4 sc, dec, 2 sc, dec, 4 sc, dec, 90 sc
25) dec, 3 sc, 2 dec, 3 sc, dec, 90 sc
26) dec, 6 sc, dec, 90 sc
27) dec, 1 sc, dec, 1 sc, dec, 90 sc, then 6 sc together in one stitch.
Leave a long tail for sewing.
Stuff the legs firmly, but not so much that holes appear.
After finishing and sewing the body, crochet 5 rounds of the remaining 30 sc at the neck.
Make decreases over 2 rounds. Stuff gently.
When attaching the head, start sewing from Round 1 and go down to Round 3 at the back of the head.
Then return to Round 1 as you sew toward the face.
Stuff while sewing.
Muzzle (with pink yarn): – Amigurumi Unicorn
1) Ch 10, in second ch from hook: inc, 6 sc, (3 sc in same stitch), 7 sc = 18 sc, finish with sl st.
2) Ch 1, inc x2, 6 sc, inc x4, 5 sc, inc x2 = 27 sc, place marker
3) (1 sc, inc, 1 sc, inc), 7 sc, (inc, 1 sc, inc, 1 sc, inc, 1 sc, inc), 6 sc, (inc, 1 sc, inc) = 35 sc
4–5) 35 sc
6) 10 sc, inc, 24 sc = 36 sc
7–11) 36 sc
Finish off, leaving a long tail for sewing.

Lower jaw (with white yarn):
1) 6 sc
2) 6 inc = 12 sc
3) (1 sc, inc) x6 = 18 sc
4) (2 sc, inc) x6 = 24 sc
5–8) 24 sc, fold in half and crochet 12 sc across. Leave yarn for sewing.
Sew the mouth to Round 30 of the head, as well as along the 5 decreases in Round 24.
First, sew the jaw to the muzzle, then sew the entire piece to the head.
Adjust the position as needed, pin in place, and stuff as you go. Weave in ends.
Head: – Amigurumi Unicorn
1) 6 sc in MR
2) 6 inc = 12 sc
3) (1 sc, inc) x6 = 18 sc
4) (2 sc, inc) x6 = 24 sc
5) (3 sc, inc) x6 = 30 sc
6) (4 sc, inc) x6 = 36 sc
7) (5 sc, inc) x6 = 42 sc
8) (6 sc, inc) x6 = 48 sc
9) (7 sc, inc) x6 = 54 sc
10) (8 sc, inc) x6 = 60 sc
11–17) 60 sc
18) 9 sc, (inc, 1 sc) x6, 19 sc, (inc, 1 sc) x6, 10 sc = 72 sc
19–21) 72 sc
22) 7 sc, dec, 55 sc, dec, 6 sc = 70 sc
23) 7 sc, dec, 53 sc, dec, 6 sc = 68 sc
24) 7 sc, dec, 15 sc, 5 dec, 1 sc, 5 dec, 15 sc, dec, 6 sc = 56 sc
25) 7 sc, dec, 39 sc, dec, 6 sc = 54 sc
26) 7 sc, dec, 37 sc, dec, 6 sc = 52 sc
27) 7 sc, dec, 35 sc, dec, 6 sc = 50 sc
28) 7 sc, dec, 33 sc, dec, 6 sc = 48 sc
29) 7 sc, dec, 31 sc, dec, 6 sc = 46 sc
30) 17 sc, dec, 10 sc, dec, 15 sc = 44 sc
31) 17 sc, dec, 8 sc, dec, 14 sc = 42 sc
32) (5 sc, dec) x6 = 36 sc
33) (4 sc, dec) x6 = 30 sc
34) (3 sc, dec) x6 = 24 sc
35) (2 sc, dec) x6 = 18 sc
36) (1 sc, dec) x6 = 12 sc
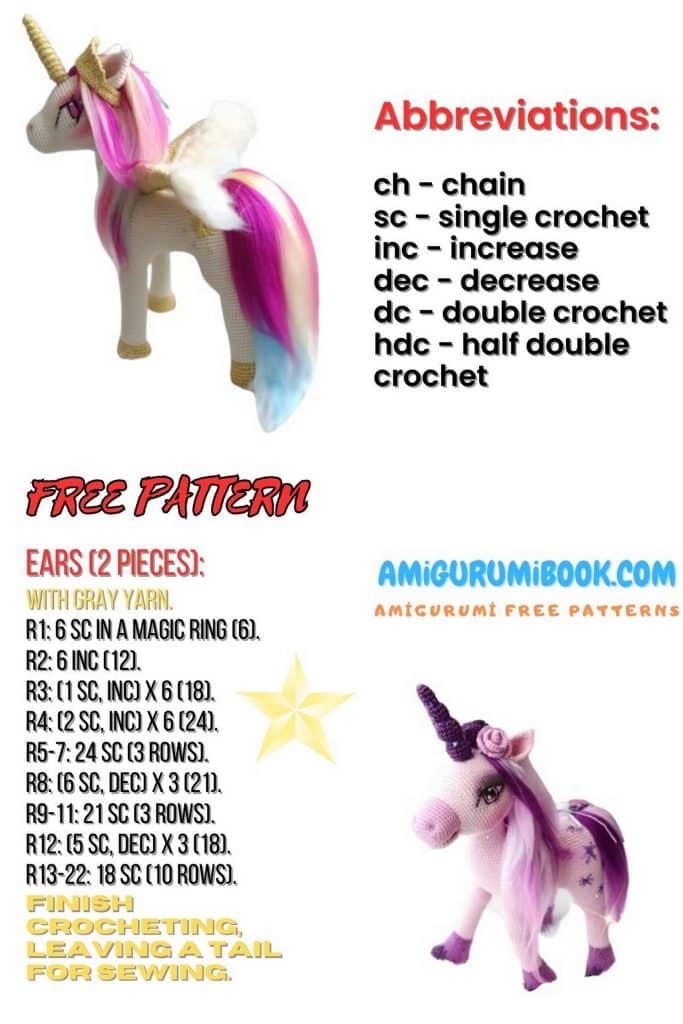
Ears (make 2): – Amigurumi Unicorn
1) 6 sc
2) 6 sc
3) 6 inc = 12 sc
4) 12 sc
5) (1 sc, inc) x6 = 18 sc
6) 18 sc
7) (2 sc, inc) x6 = 24 sc
8) 24 sc
9) (3 sc, inc) x6 = 30 sc
10–12) 30 sc
13) 5 sc, dec, 23 sc = 29 sc
14) 5 sc, dec, 22 sc = 28 sc
15) 5 sc, dec, 21 sc = 27 sc
16) 12 sc, leave a long tail for sewing
Long Horn: – Amigurumi Unicorn
1) 6 sc in MR
2) 6 sc
3) 1 sc, inc, 1 sc, inc, 1 sc, inc = 9 sc
4) 9 sc
5) 1 sc, dec, 1 sc, dec, 1 sc, dec = 6 sc
6) 6 inc = 12 sc
7–9) 12 sc
10) 1 sc, dec, 1 sc, dec, 1 sc, dec, 1 sc, dec = 8 sc
11) 8 inc = 16 sc
12–15) 16 sc
16) 8 dec = 8 sc
17) 8 inc = 16 sc
18–21) 16 sc
22) (dec, 1 sc) repeat to end. Leave a long tail
Star: – Amigurumi Unicorn
10 sc in MR, pull tight. Ch 5, from second ch from hook: 1 sc, 2 dc, skip 2 sc on MR and join the ray to MR with sl st. Make 5 rays.
Flowers: – Amigurumi Unicorn
Crochet according to the diagram below. You can adjust the size of the flower by adding repeats.
I made 9 petals. Fold and secure the flower by sewing through it several times.
Sew the flowers to the ribbon or directly to the head.
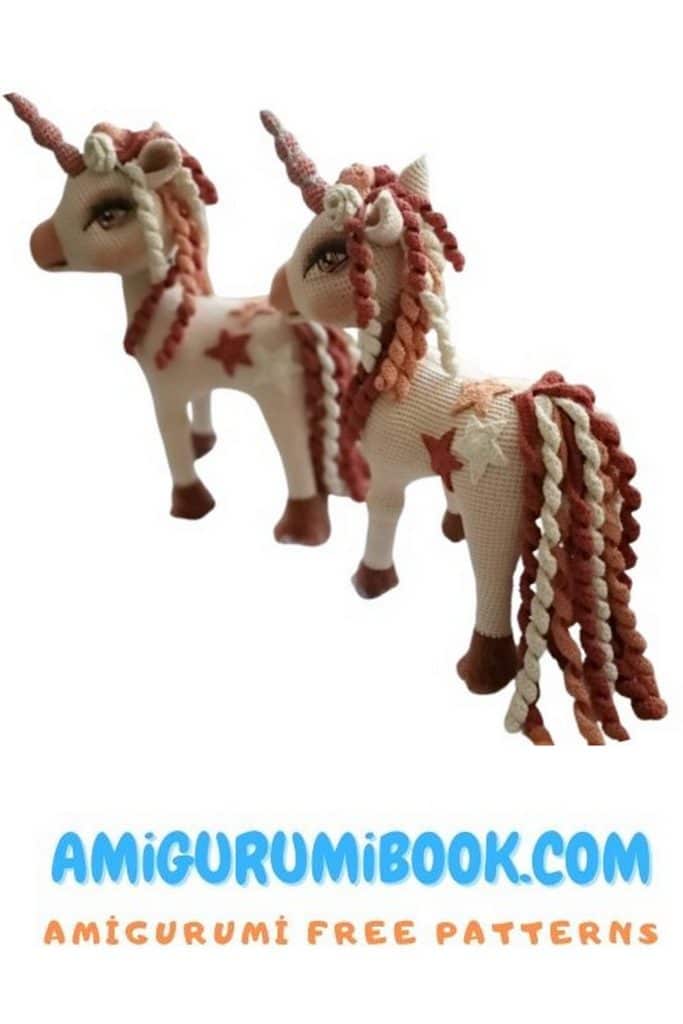
Tail: – Amigurumi Unicorn
Chain 70, turn your work, and crochet 2 dc into each chain stitch along the foundation chain.
To make a more tightly curled spiral, crochet 3 dc into each stitch instead of 2.
Make 3 spirals in different colors.
You can vary the length and thickness of the spirals.
For example, make the yellow spirals 75 chains long, and the pink ones 80 chains long, using double treble crochet (trtr) instead of dc.
Mane: – Amigurumi Unicorn
Chain 60 and follow the same pattern as the tail.
You can also adjust the length and thickness here.
There should be a gap of at least 5 rounds between the horn and the mane.
You may also leave small gaps between each colored “layer” (see photo). Keep this in mind when sewing.
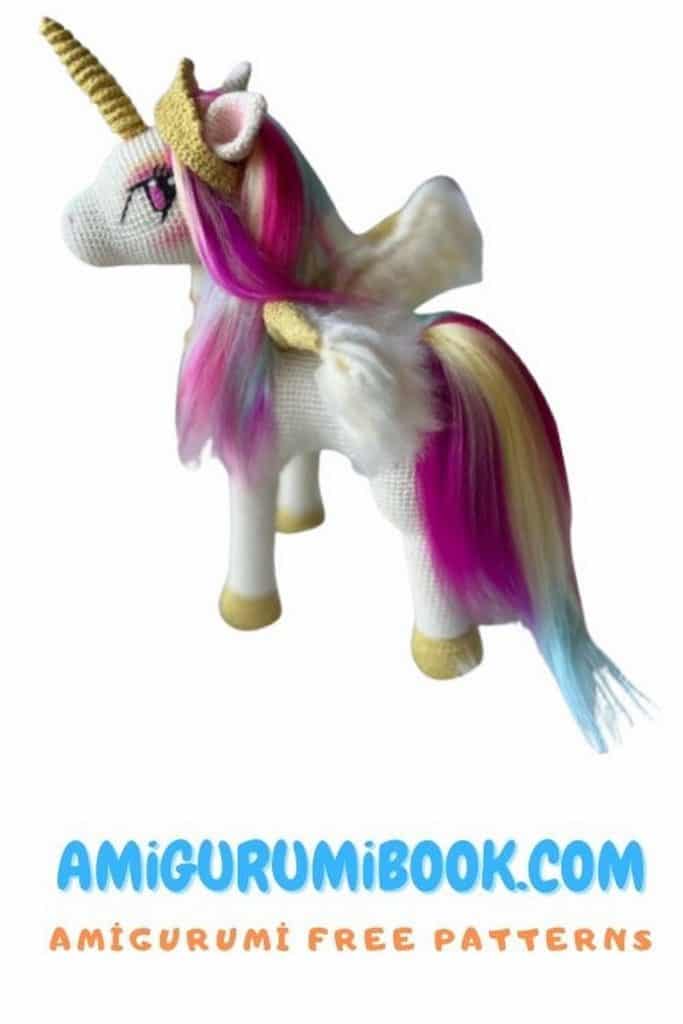
Alternative Mane and Tail:
Instead of crocheted spirals, you can make the tail and mane out of yarn and then brush it out. This will make it look more like real hair.
Cut yarn to your desired length, fold it in half, and attach it to the body using a loop method.
Mix yarn colors for a more vibrant result. After shaping the mane and tail, brush the yarn with a comb.
You can wrap the horn several times with sparkly yarn for a glittery effect.