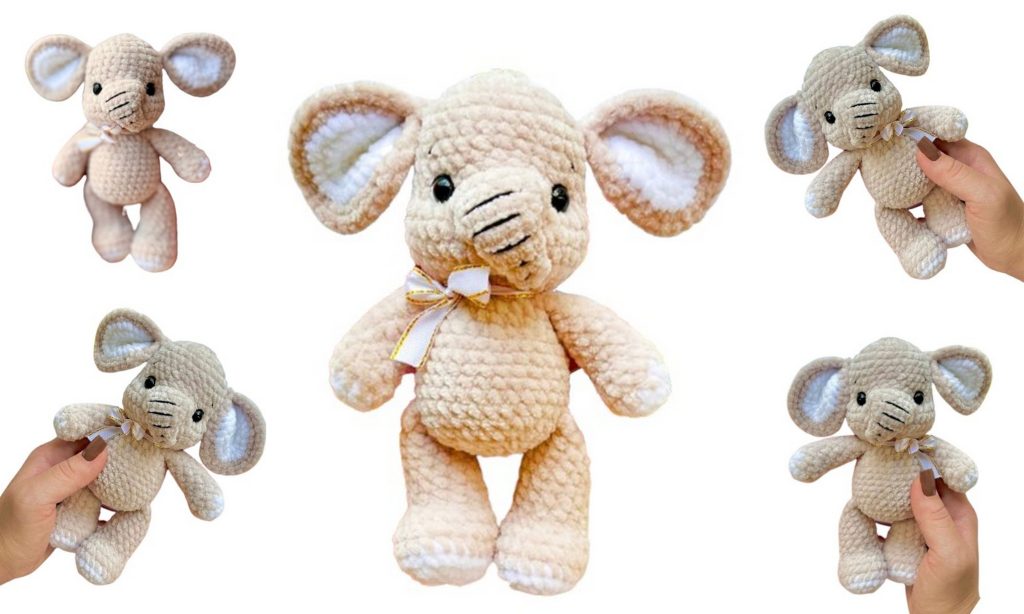
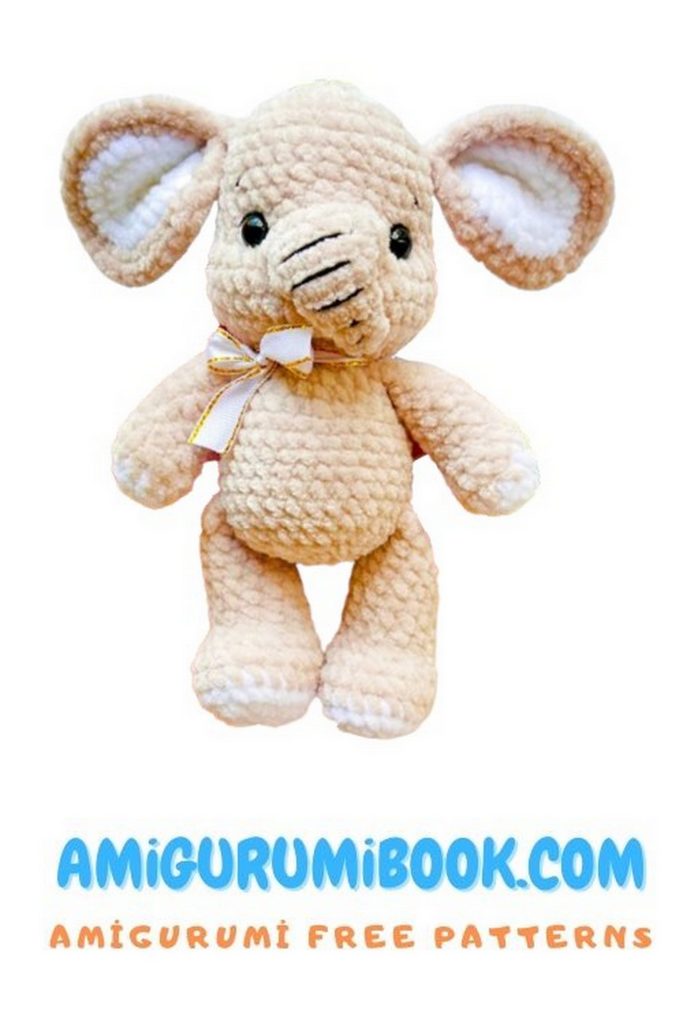
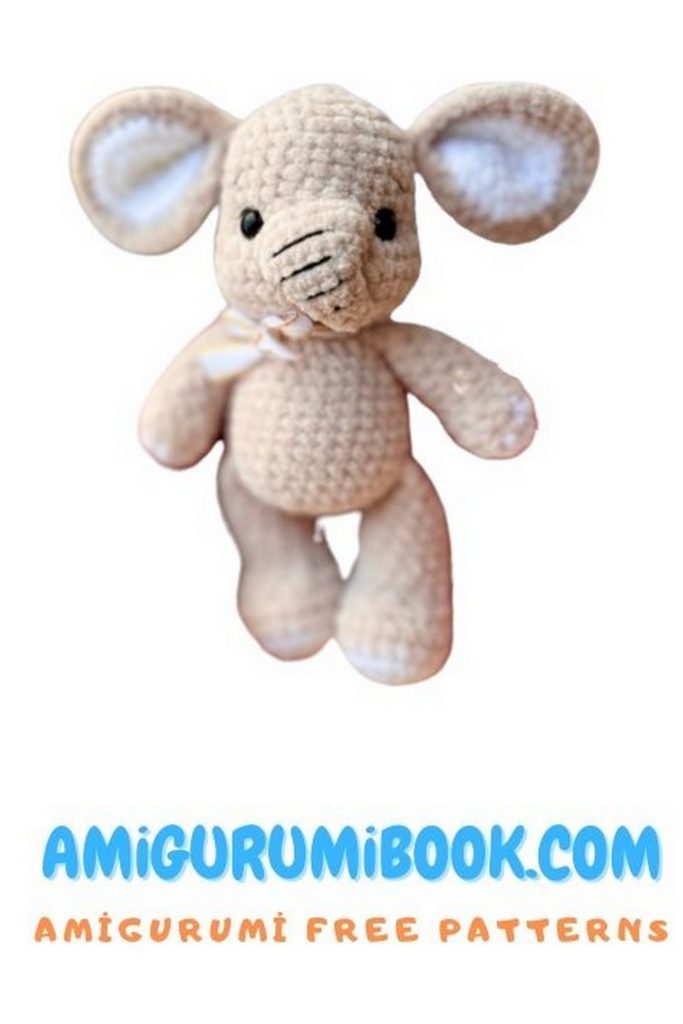
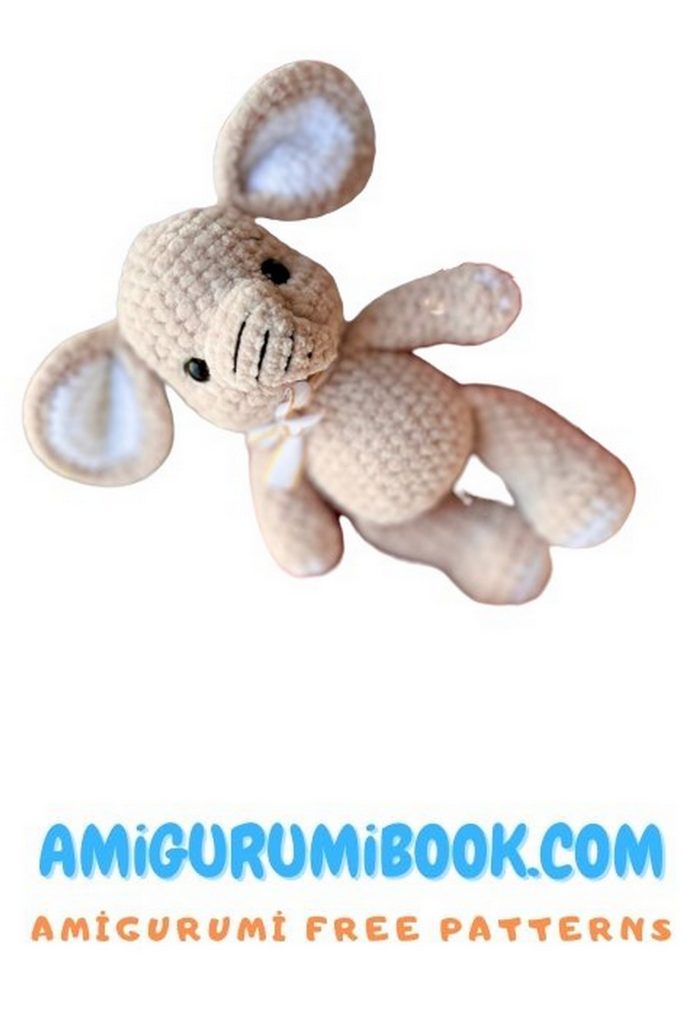
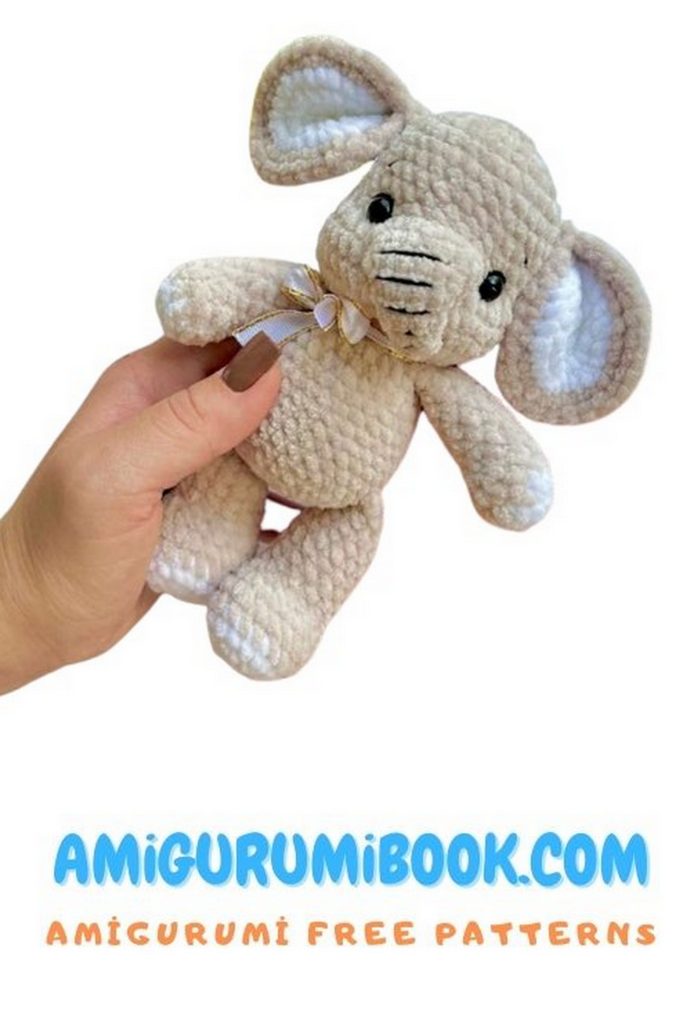
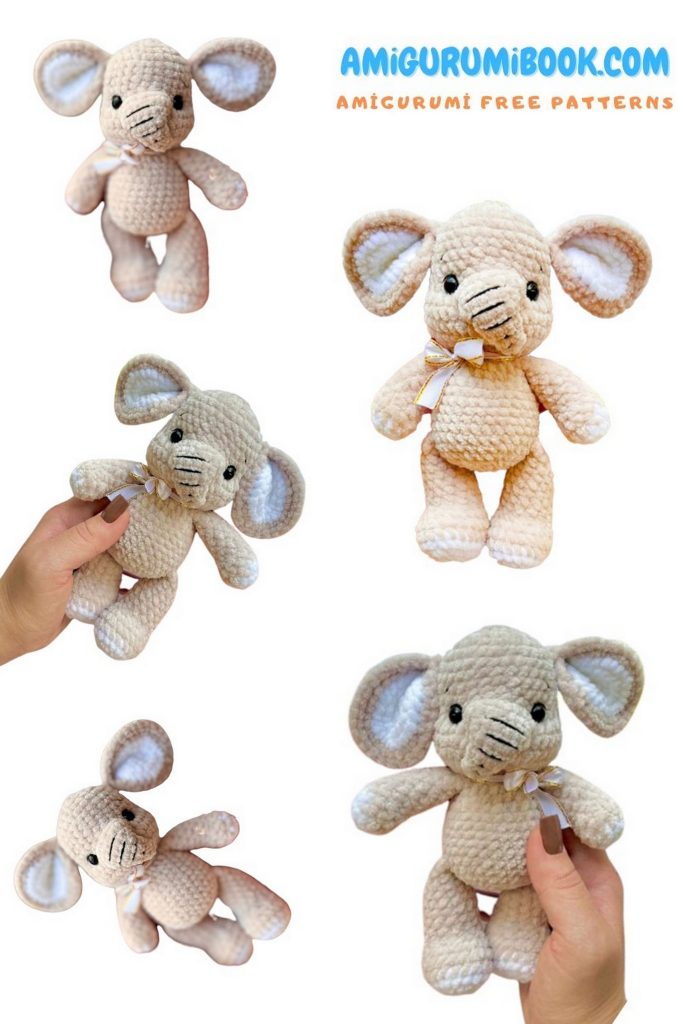
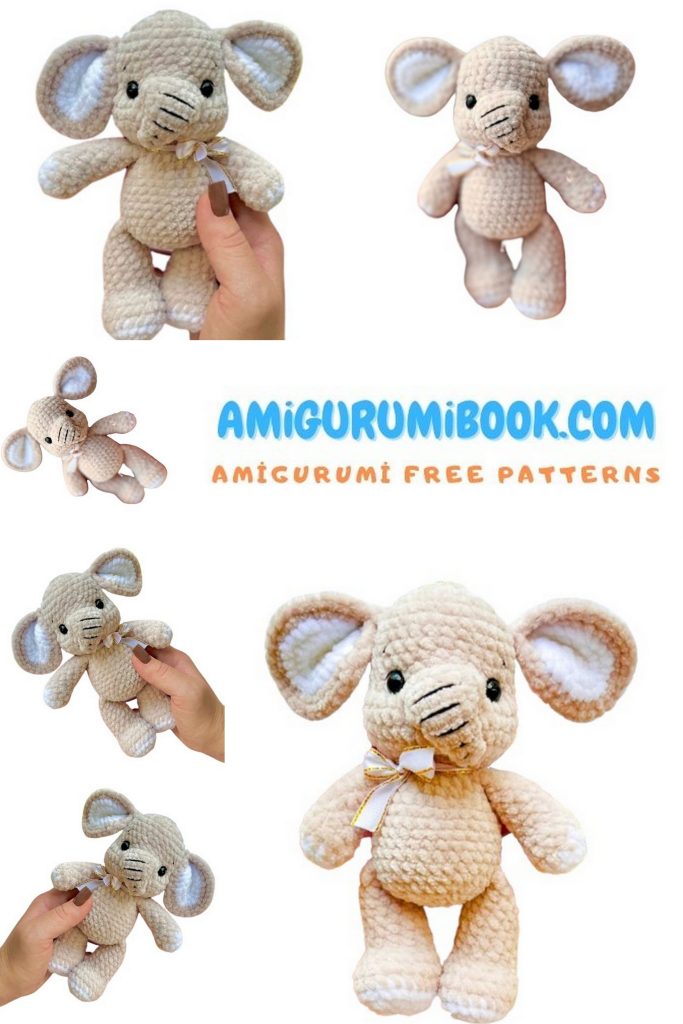
Looking for a Cute Baby Elephant Amigurumi Free Pattern? You’ve come to the right place! This easy and adorable crochet elephant pattern is perfect for both beginners and experienced amigurumi lovers. Whether you’re making a handmade gift for a baby shower or adding a sweet new friend to your crochet collection, this free pattern will help you create a soft, lovable baby elephant step by step. Grab your hook and yarn, and let’s bring this charming little elephant to life!
If you want to access 1000+ free amigurumi patterns, you can download our application from this link!
Recommended materials
thin plush yarn (I used Himalaya dolphin fine 175m/100g, an ordinary plush will make a big elephant)
cotton yarn for tightening, face decoration
hook 2.75-3
filler
eyes 8-10mm
satin ribbon
needle for sewing on parts and tightening
scissors
The toy is knitted in one piece, ears are sewn on
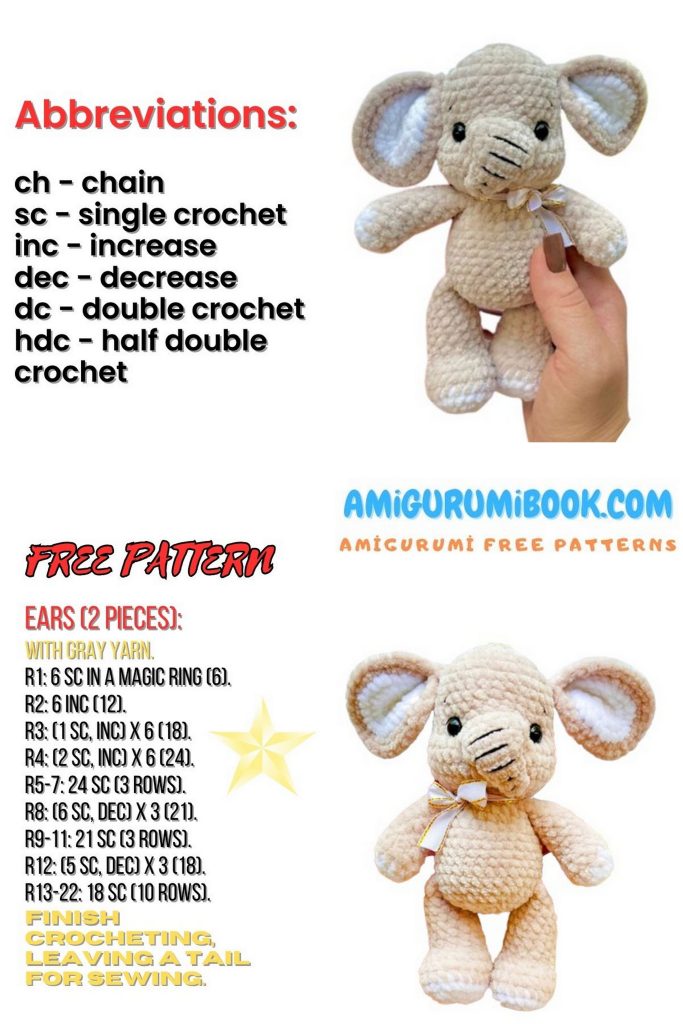
Abbrevations:
Sc – single crochet
Inc – increase
Dec – decrease
Ch – air loop
(…)×n – knit n-th number of times
Amigurumi Elephant Pattern
Legs 2 pcs – Amigurumi Elephant
We start with an additional color:
1) 6ch, from the second loop from the hook 4 sc, in the last loop 3sc in 1, on the other side 3 sc, inc
2) inc, 3sc, 3inc, 3sc, 2inc (18)
3) 1sc, inc, 4sc, inc, 3sc, inc, 4sc, inc, 2sc (22)
Change the thread to the main color:
4) 22sc
5) 22sc
6) 6sc, (dec, 1sc)*4, 4sc (18)
7) 5sc, 4dec, 5sc (14)
8) 14sc
9) 14sc
10) 14sc
11) 14sc
12) 14sc
13) (5sc, dec)*2 (12)
14) 12sc
15) 12sc
Fill the leg with medium density, do not fill the top of the leg. Fold the leg in half, knit shift loops if necessary so that the nose of the leg looks forward. Connect by both walls 6sc
Handles 2 pcs – Amigurumi Elephant
Start with an additional color:
1) 6 into magic ring
2) 6inc (12)
Change the thread to the main color:
3) 12sc
4) 12sc
5) 2dec, 8sc (10)
6) 10sc
7) 10sc
8) 10sc
9) 10sc
10) 10sc
11) 10sc
12) 10sc
Fill the handle with medium density, do not fill the top of the handle. Fold the handle in half, knit the shift loops if necessary. Connect both walls 5sc
Tail – Amigurumi Elephant
Cast a chain of 9ch, from the second loop from the hook knit 8sc
Before casting on CH leave a small tip, after knitting sc also leave a small tip
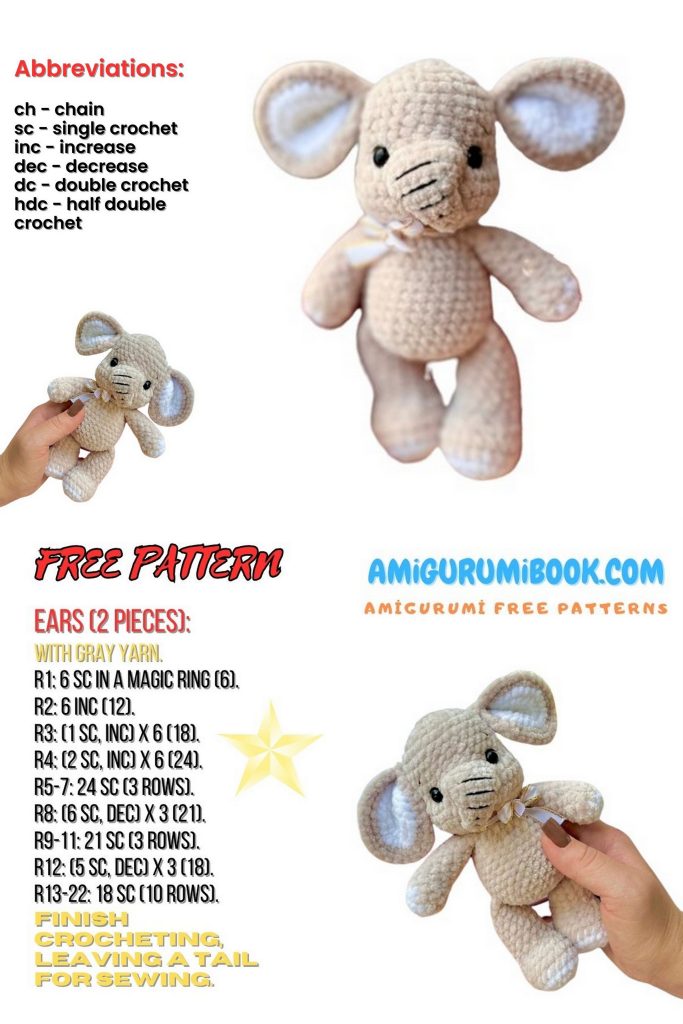
Ears 2pcs
Knit two parts of the ear, the first part of the additional color, the second – the main
1) 7sc into magic ring
2) 7inc (14)
3) (1sc, inc)*7 (21)
4) (2sc, inc)*7 (28)
Do not cut the thread of the second part. Fold the two parts of the ear with the wrong sides facing each other and knit in a circle for both parts using HDC.
Leave a thread for sewing.
Body-head – Amigurumi Elephant
1) 6 into magic ring
2) 6inc (12)
3) (1sc, inc)*6 (18)
4) (2sc, inc)*6 (24)
5) (3sc, inc)*6 (30)
6) 30sc
7) 30sc
8) 30sc
9) 30sc
10) 30sc
11) 10sc, inc, 2sc, 4ch, 4sc skip, 2sc, inc, 10sc (32)
12) 10sc, inc, inc, 2sc, 4sc by ch, 2sc, inc, inc, 10sc (36)
13) 36sc
14) 36sc
15) (4sc, dec)*6 (30)
16) (3sc, dec)*6 (24)
17) (2sc, dec)*6 (18)
18) (1sc, dec)*6 (12) leave knitting
19) knit the trunk, attach the thread from the bottom (the bottom is the side where you stopped knitting) in the resulting hole. I do not reset the row count, it is easier for me not to get tangled further in the body. For the trunk, I will mark the rows (1p, 2p, etc.)
20) (1p) 2sc, inc in corner, 4sc, inc in corner, 2sc (12)
21) (2p) dec, 11sc
22) (3p) dec, 10sc
23) (4p) dec, 9sc
24) (5p) dec, 8sc
25) (6p) dec, 7sc
26) (7p) dec, 6sc
27) (8p) dec, 5sc
28) (9p) dec, 4sc
Pull the hole together, do not fill the trunk. Return to the head, where you left the knitting. You can also knit the trunk after you knit and close the toy, the principle will not change.
Insert eyes in row 10 or along the edges of the trunk, stuff the head
Continue knitting the body
29) (1sc, inc) * 6 (18)
30) 18sc, knit handles, 4-5sc in front between handles
31) (2sc, inc) * 6 (24)
32) 24sc
33) (3sc, inc) * 6 (30)
34) 30sc
35) 30sc
36) 30sc
37) 30sc, knit tail. Find the middle of the back and tie the tail with the remaining threads between the posts
38) 30sc, knit legs, 9sc between the legs. If your knitting has shifted, then orient yourself so that the legs are exactly under the handles
39) 30sc
40) 30sc
41) (3sc, dec)*6 (24)
42) (2sc, dec)*6 (18)
Fill the toy completely
43) (1sc, dec)*6 (12)
44) 6dec
Pull and close the hole, hide the thread
Design – Amigurumi Elephant
Make a convenient tightening, embroider whites, eyelashes, eyebrows, contrasting stripes on the trunk.
Sew on the ears in the 6th row from the KA at a distance of 4sc from the eye. Before sewing, fold the ear in half and connect the two sides with two stitches.
The end of the trunk can be sewn or glued a little so that it doesn’t stick out.
Tie a bow.
Congratulations!
Your toy is ready!