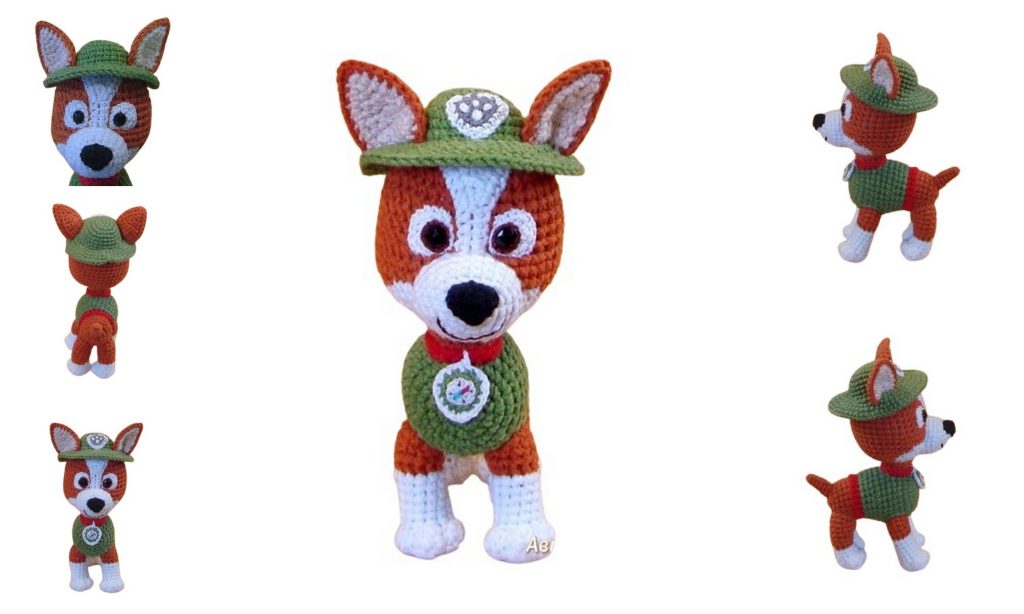
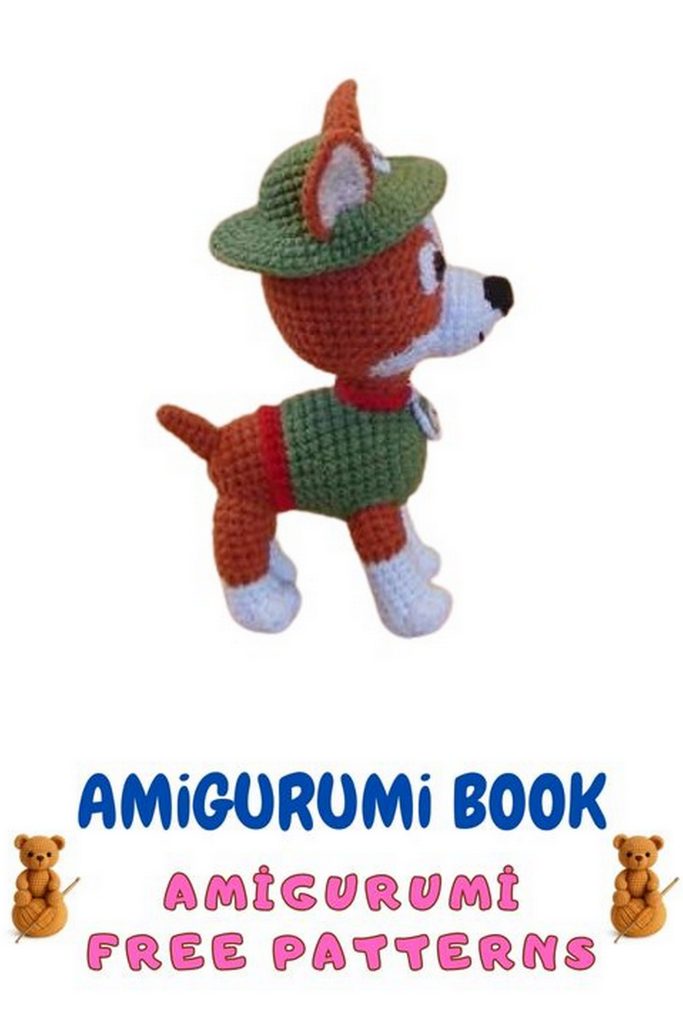
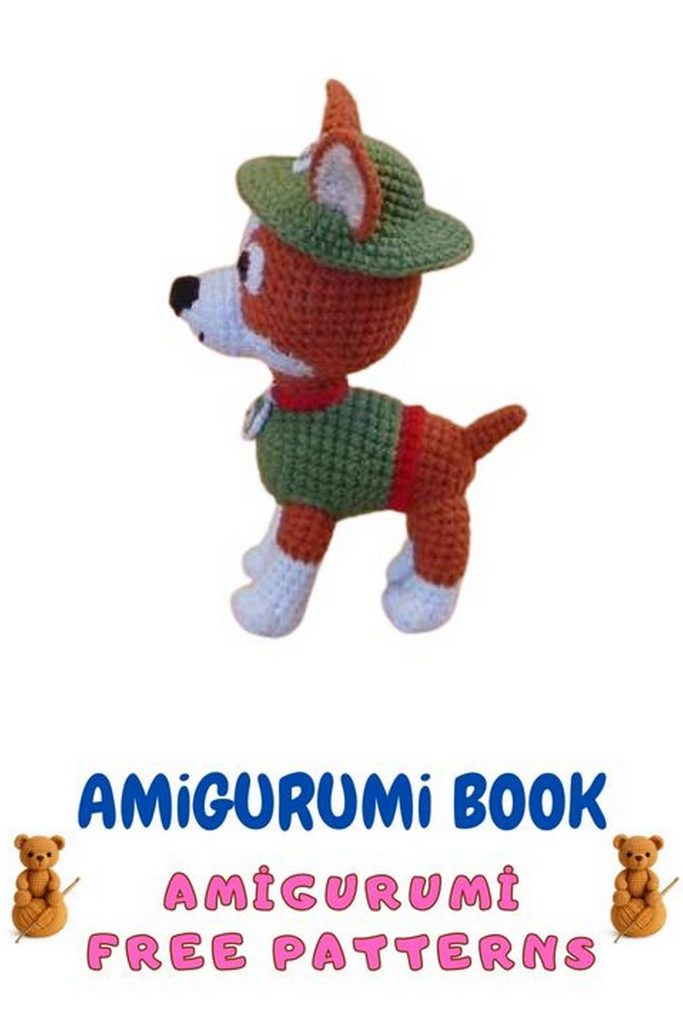
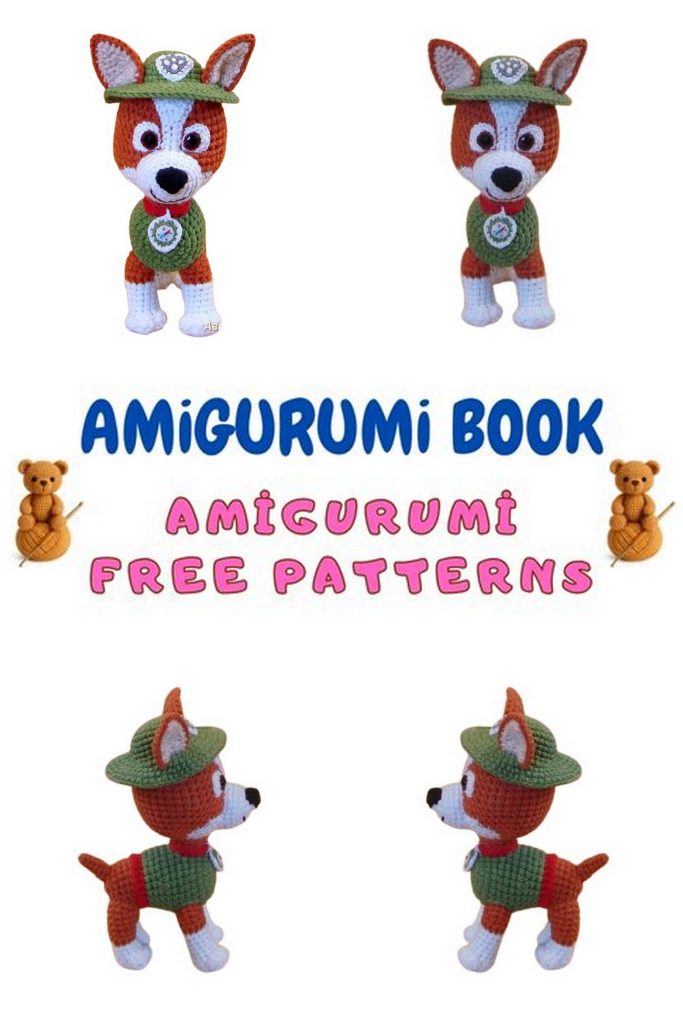
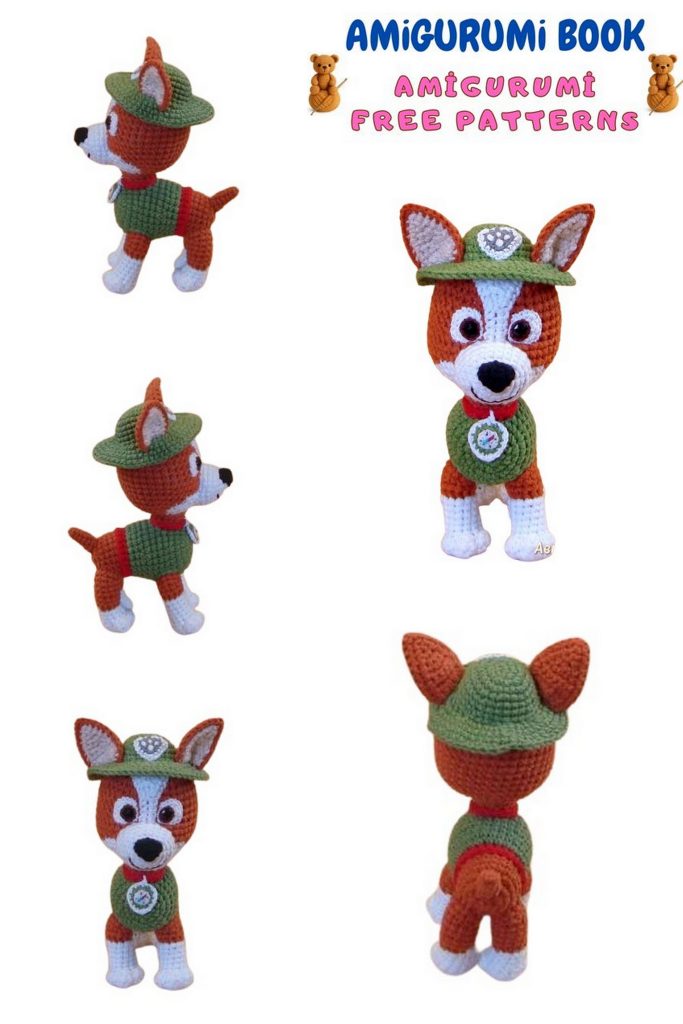
If you love creating character-inspired amigurumi toys, this adorable Paw Patrol Tracker crochet pattern will be a perfect addition to your collection. This jungle-pup design captures Tracker’s signature green hat, vest, and expressive face, making it a fun and rewarding project for crocheters of all levels. Whether you’re crafting it for a child, a fan of Paw Patrol, or simply expanding your amigurumi portfolio, this step-by-step pattern helps you bring Tracker to life with clean shaping, charming details, and vibrant colors.
If you want to access 1000+ free amigurumi patterns, you can download our application from this link!
🧶 Materials
Finished size: 17 cm
Crochet hook 2.0 or 2.5 mm
Small crochet hook 1.5 or 1.25 mm for eyes and emblems
Stuffing: Hollowfiber / polyester fiberfill
Yarn: ALIZE Cotton Gold (55% cotton, 45% acrylic, 330 m / 100 g)
Alternative: YarnArt Jeans
Yarn colors:
Brown
White
Green
A little red
Beige
Smooth black yarn for the nose (e.g., VITA Cotton Lira, Gazzal Baby Cotton)
Thin yarn for embroidery:
Black (for mouth outline)
White (for eye details)
Brown (or embroidery floss) for iris
Grey for emblem
Blue, red, and shirt-matching color for emblem details
You can also split the main yarn in half to obtain thinner threads.
Sew-on rhinestones 8 mm (for eyes)
Yarn needle, scissors, stitch marker
Pins for positioning pieces
🔤 Abbreviations (US Crochet Terms)
ch – chain
sc – single crochet
sl st – slip stitch
inc – increase (2 sc in same stitch)
dec – decrease (single crochet two stitches together)
3-in-1 sc – 3 single crochets worked into the same stitch
hdc – half double crochet
3-in-1 hdc inc – 3 hdc worked into the same stitch
3-in-1 hdc dec – 3 hdc worked together (hdc decrease cluster)
( ) × n – repeat instructions inside parentheses n times
✨ Notes
All parts are crocheted in a continuous spiral, unless otherwise stated.
Use a stitch marker to mark the first stitch of each round.
Stuff pieces firmly but not too tight for a smooth shape.
Paw Patrol Tracker – BODY
(green, brown, red)
Start with green yarn.
- 6 sc in MR
- 6 inc = 12 sc
- (inc, 1 sc)*6 = 18 sc
- (2 sc, inc)*6 = 24 sc
- (inc, 3 sc)*6 = 30 sc
6–11. 30 sc - (dec, 8 sc)*3 = 27 sc
- 27 sc
- 4 sc, (dec, 7 sc)*2, dec, 2 sc, sl st = 24
Cut the yarn and fasten off.
Continue with red yarn.
Round 15 is crocheted using front post single crochet (FP sc).
- 24 FP sc
Pull the working loop longer so it doesn’t slip. Do not cut the yarn. Leave it in front.
Continue with brown yarn.
- Working in back loops of the red round: (6 sc, dec)*3 = 21 sc
- 21 sc
Pull the loop long again and leave the brown yarn aside.
Edge the red round:
Using remaining front loops of the red round:
23 sc, and the 24th stitch = sl st.
Do not secure the yarn; cut it and pull the end out.
Hide the tail inside the next stitch and secure it.
Continue with brown yarn:
18–20. 21 sc
Begin stuffing the body.
- (dec, 1 sc)*7 = 14 sc
- 7 dec = 7 sc
Finish stuffing, cut the yarn, and pull the opening closed.


Paw Patrol Tracker – LEGS
(white & brown), 4 pieces
All legs start the same with white yarn.
General Part (for all 4 legs – white section)
- 6 sc in MR
- 6 inc = 12 sc
- sl st, (3-in-1 hdc inc, sl st)*3, 5 sc = 18
- sl st, (3 hdc, sl st)*3, 5 sc = 18
- sl st, (3-in-1 hdc dec, sl st)*3, 5 sc = 12
Note: To make a 3-in-1 hdc decrease, yarn over, insert hook into the next stitch 3 times, pull through all loops at once and tighten gently to avoid a hole.
RIGHT BACK LEG
White section continues:
- 12 sc
- 12 sc
- 11 sc, sl st, fasten off white yarn
Switch to brown
You will need two working ends of brown yarn (from 2 balls or inside/outside of one ball).
Round 9 is crocheted with front post single crochet (FP sc).
Start 3 stitches forward from where you ended, join brown yarn between stitch 3 & 4, ch 1.
- 12 FP sc
10–13. 12 sc
Creating side shaping using secondary yarn:
Pull main loop long so it doesn’t slip.
Count forward 4 stitches, join second brown yarn to stitch 5.
Work: 2 sc, sl st, cut yarn and pull out the tail.
Go back to the first join, count back 1 stitch, join (secondary yarn).
Work: 6 sc, sl st, cut yarn and pull out the tail.
Finish with main yarn:
- 12 sc, sl st, fasten off leaving a long tail for sewing.
Tie the secondary yarn tails inside the leg (beginning tails together, ending tails together).
RIGHT FRONT LEG
White section:
6–10. 12 sc
- 11 sc, sl st, fasten off white yarn
Brown yarn:
Start 2 stitches forward from where you ended.
- 12 FP sc
- 12 sc
Side shaping:
Pull loop long.
Count forward 5 stitches, join second brown yarn at stitch 6.
Work: 2 sc, sl st, cut yarn, pull out tail.
Go back 1 stitch from the first join.
Join brown again (other end).
Work: 6 sc, sl st, cut yarn, pull out tail.
Finish:
- 12 sc, sl st, fasten off leaving tail for sewing.
Tie secondary yarn tails inside.
LEFT BACK LEG
White part:
- 12 sc
- 12 sc
- 11 sc, sl st, fasten off white yarn
Brown part:
This time count 3 stitches backward (counter-clockwise).
Join brown yarn between stitch 3 and 4 (going backward).
- 12 FP sc
10–13. 12 sc
Side shaping:
Pull loop.
Count forward 4 stitches, join second brown yarn at stitch 5:
2 sc, sl st, cut yarn, pull out tail.
Count back 1 stitch from first join:
Join yarn, 6 sc, sl st, cut yarn.
Finish:
- 12 sc, sl st, fasten off leaving tail for sewing.
Tie secondary yarn tails inside.
LEFT FRONT LEG
White part:
6–10. 12 sc
- 11 sc, sl st, fasten off white yarn
Brown part:
This time count 4 stitches backward and join between 4 and 5.
- 12 FP sc
- 12 sc
Side shaping:
Pull loop.
Count forward 5 stitches, join second yarn at stitch 6:
2 sc, sl st, cut yarn.
Count back 1 stitch from first join:
Join yarn, 6 sc, sl st, cut yarn.
Finish:
- 12 sc, sl st, fasten off leaving tail for sewing.
Tie all secondary yarn tails inside the leg.
ASSEMBLY NOTES
Stuff legs and sew them to the body.
Front legs: the white “sock” should sit slightly higher.
When sewing, lift the higher side upward so the leg sits smoothly without a bump.
After sewing all legs, do not cut the last sewing thread—
use it to pull or adjust any legs that aren’t aligned perfectly.
Embroider around the front legs with green yarn using chain stitch along the body edge.
Paw Patrol Tracker – TAIL (brown)
- 5 sc in MR
- inc, 4 sc = 6
- 6 sc
- inc, 5 sc = 7
- 7 sc
- 4 sc, inc, 2 sc = 8
- 8 sc
Fasten off, leaving a long tail for sewing. Stuff lightly and sew the tail to the body.
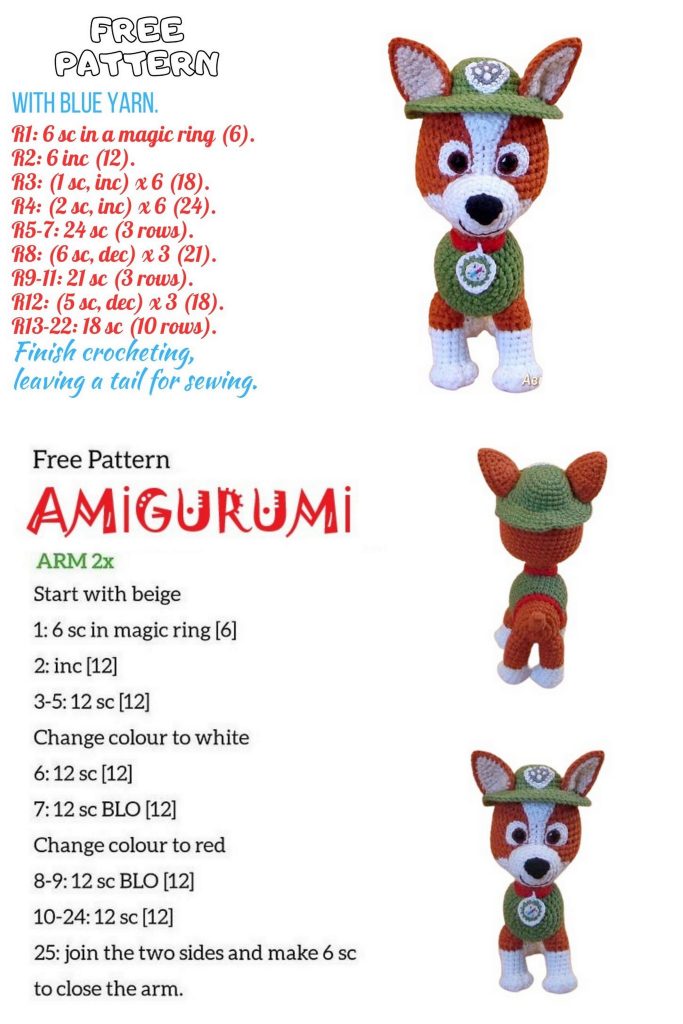
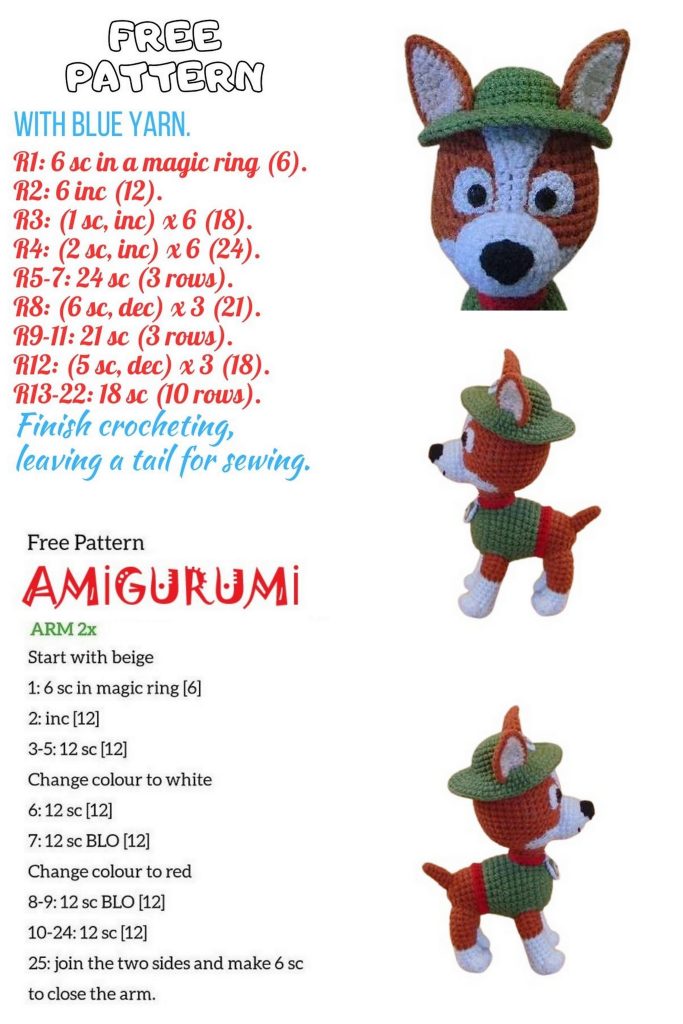
Paw Patrol Tracker – HEAD
(brown & white)
The pattern says “start with lilac color,” but the line above says brown/white.
Ben “brown” olarak çevirdim; istersen lilac yazayım kanka.
Start with brown yarn:
- 6 sc in MR
- 6 inc = 12
- (inc, 1 sc)*6 = 18
- (2 sc, inc)*6 = 24
- (inc, 3 sc)*6 = 30
- 3 sc, (inc, 4 sc)*5, inc, 1 sc = 36
7–12. 36 sc
🎨 **From next rounds, we begin forming the white muzzle.
Color changes must be very clean.
Color change always happens on the LAST pull-through of the previous stitch.**
FP sc = front post single crochet (used earlier on legs & sweater).
HEAD – Colorwork Section
- brown: (inc, 1 sc)2, inc, 1 sc white: 2 sc brown: 1 sc, (inc, 1 sc)2, inc, 22 sc = 42
Keep floats loose on the inside—tight floats will pull and distort the shape.
- brown: 7 sc
white: 6 sc
brown: 29 sc = 42 - brown: 6 sc
white: 8 sc
brown: 28 sc = 42 - brown: 3 sc
white: 3 FP sc, 8 sc, 4 FP sc
brown: 24 sc = 42 - brown: 1 sc
white: 2 FP sc, 15 sc, 2 FP sc
brown: 22 sc = 42 - white: 1 FP sc, 19 sc, 1 FP sc
brown: 1 sc, dec, 15 sc, dec, 1 sc = 40 - white: (2 sc, dec, 1 sc)4, 1 sc brown: 1 sc, dec, 1 sc, (2 sc, dec, 1 sc)3 = 32
- white: (dec, 2 sc)4, 1 sc brown: dec, 1 sc, (dec, 2 sc)3 = 24
🧵 Turn head inside out
Tighten all floats from both sides so gaps disappear.
Turn back to the right side.
Stuff the head firmly.
Cut white yarn. Continue only with brown.
🧶 Close the head
- (1 sc, dec)*8 = 16
22–24. 16 sc
sl st, fasten off leaving a long tail for sewing.
If any white transitions look uneven, you can fix them with tiny surface stitches using white yarn (the top will be covered by muzzle anyway).
NECK SUPPORT (VERY IMPORTANT)
Because the head is large, the neck must be reinforced.
Insert two cotton swabs (or wooden sticks) straight up into the body,
about 6 rounds from the top of the body, spacing them inside the stitch holes.
Then insert five more cotton swabs angled backward for stability.
ASSEMBLING THE HEAD
Stuff head firmly, especially the cheeks.
Press a small dent into the center of the stuffing with your finger.
Place the head onto the sticks and begin sewing around the neck.
While the head is almost sewn, add more stuffing around the sticks (use blunt scissors).
Finish sewing and make sure the muzzle faces forward.
Paw Patrol Tracker – COLLAR (red)
- Work approximately 16 sc directly around the neck on the body.
The exact number is not critical — +/- 1–2 stitches is fine. - Crochet 1 more round of sc over the stitches you just made, then sl st.
Cut the yarn, pull the tail out, pass it through the next stitch into the inside of the collar,
tie it together with the starting tail, and hide both ends inside the work.
MUZZLE (white) – Paw Patrol Tracker
- 6 sc in MR
- 6 inc = 12 sc
- 1 sc, inc, 4 sc, inc, 1 sc, inc, 2 sc, inc = 16 sc
- 1 sc, inc, 6 sc, inc, 3 sc, 2 inc, 2 sc = 20 sc
- 1 sc, inc, 8 sc, inc, 9 sc = 22 sc
- 3 sc, inc, 6 sc, inc, 11 sc = 24 sc
7–8. 24 sc
sl st, cut the yarn leaving a long tail for sewing.
Assembly
Lightly stuff the muzzle.
Pin it in place so it doesn’t shift while sewing.
Sew around, and when a small opening remains, add a bit more stuffing.
Finish sewing and shape the muzzle with your fingers.
HEAD STRIPE (white)
Make a chain of 4.
- Starting from the 2nd ch from the hook, crochet around the chain using both sides:
2 sc, 4 sc in the last chain (turning point), 2 sc.
Sl st into the middle side, ch 3. - Crochet around:
4 sc, 3-in-1 sc inc, 2 sc, 3-in-1 sc inc, 4 sc.
Sl st into the center, ch 5. - Crochet around:
9 sc, 3-in-1 sc inc, 4 sc, 3-in-1 sc inc, 8 sc, sl st.
Fasten off, leaving a long tail for sewing.
Assembly
Sew starting from the top of the muzzle upward.
At the top, stretch the piece slightly sideways to shape it.
The upper edge should sit about 3 rounds above the magic ring on the head.
Paw Patrol Tracker – NOSE (black)
Use smoother yarn for a clean result.
- 6 sc in MR
- (3-in-1 sc inc, 1 sc)*2, 3-in-1 sc inc, sl st = 12 sc
Fasten off, leaving a tail for sewing.
Assembly
Sew the nose starting from the center of the muzzle’s first round and slightly upward.
Shape gently with your fingers.
EYES (white), make 2
Use a thin yarn and a small hook (1.25–1.5 mm).
- 6 sc in MR
- 6 inc = 12 sc
- inc, 1 sc, inc, 2 sc, inc, 1 sc, inc (the second stitch of the last inc is a sl st)
→ incomplete round
Fasten off, leaving a long tail for sewing.
Notes:
The open/incomplete side is the bottom of the eye.
Sew very close to the muzzle and the forehead stripe.
Sew-on rhinestones (8 mm) should be attached diagonally down/inside.
Use strong sewing thread double-stranded and pull firmly each stitch so the rhinestone sits tight.
You can anchor the thread on the black nose so it remains invisible.
Paw Patrol Tracker – HAT (green)
Make a chain of 3.
Starting from the 2nd ch from the hook, crochet in a round:
- 2 sc in 1st ch, 4 sc in 2nd ch, 2 sc in 1st ch = 8 sc
- 8 inc = 16 sc
- 2 inc, 4 sc, 4 inc, 4 sc, 2 inc = 24 sc
- (inc, 3 sc)*6 = 30 sc
5–7. 30 sc - (8 sc, inc, 6 sc)*2 = 32 sc
- FP sc around: (inc, 3 sc)*8 = 40 sc
- (3 sc, inc, 1 sc)*8 = 48 sc
- (inc, 7 sc)*6 = 54 sc
- (5 sc, inc, 3 sc)*6 = 60 sc
- 60 sc
sl st, fasten off, leave a tail for sewing.
Notes:
Hide the yarn tail inside the hat using small stitches.
Lightly stuff the hat.
Pin it to the top of the head (preferably forming a rectangle shape).
Sew through the round indicated in the pattern (the pattern shows an arrow “sew along this round”).
EARS – Paw Patrol Tracker
(beige & brown), make 2
The light-colored piece is worked first.
Light color:
- 2 sc in MR (do NOT join; we will work in rows)
ch 1, turn - inc, 1 sc = 3 sc
ch 1, turn - inc, 2 sc = 4 sc
ch 1, turn - 1 sc, inc, 2 sc = 5 sc
ch 1, turn - 1 sc, inc, 3 sc = 6 sc
ch 1, turn - 6 sc
ch 1, turn - 1 sc, dec, 3 sc = 5 sc
ch 1, turn - 1 sc, dec, 2 sc = 4 sc
Edge the piece:
Crochet single crochets along both sides following the original increases.
Make a second identical piece in brown.
Assembly:
Place pieces wrong sides together, light piece facing you.
Crochet them together with sc around the edge.
At the top of the ear, work a 3-in-1 sc inc to create a rounded tip.
Do NOT join at the bottom (keep it open for sewing).
Sewing the ears:
Sew the front part of the ear along the edge where the hat meets the head.
Rotate the back part of the ear almost 90° and sew it through the hat into the head so the ear stands naturally.
Iris embroidery:
Use thin brown thread (embroidery floss 4 strands ok).
Work a chain stitch (tambour stitch) around the rhinestone, tiny stitches.
Keep the stitches close but not too tight, otherwise the chain will slip under the rhinestone.
COLLAR EMBLEM (green & white)
Use a 1.25–1.5 mm hook and thin yarn matching the shirt color
(in this pattern the main green yarn is split into 2 strands).
Green pieces (make 2):
- 6 sc in MR
- inc, 1 sc, 3-in-1 sc inc, 1 sc, inc, 1 sc = 10 sc
- 1 sc, inc, 2 sc, 3-in-1 sc inc, 2 sc, inc, sl st (incomplete round)
White piece (thin white yarn):
- 6 sc in MR
- inc, 1 sc, inc, 1 sc, inc, sl st
Fasten off, leaving a tail for sewing.
Embroidery on the white piece:
Sew the white piece onto one of the green pieces.
Using red and blue thin yarn, work 1 chain stitch (“tambour stitch”) from the edge toward the center.
With thin grey yarn, embroider 4 small straight stitches.
Trim all threads very short so they do not stick out.
Joining the green pieces (outer emblem)
Place both green pieces wrong sides together.
Using thin white yarn, crochet around them according to Round 4:
- 6 sc in MR
- inc, 1 sc, 3-in-1 sc inc, 1 sc, inc, 1 sc = 10 sc (same as before)
- 1 sc, inc, 2 sc, 3-in-1 sc inc, 2 sc, inc, sl st
- 2 sc, 2 inc, 3 sc, 3-in-1 sc inc, 3 sc, 2 inc, 1 sc, sl st = (outer edge)
Notes:
Hide all thread ends inside while joining.
The final sl st goes into the stitch where the first stitch was attached.
Pull the piece through the loop to secure, and leave a long tail for attaching.
🔗 Attaching the emblem to the collar
Sew the emblem to the collar with three stitches, catching both the collar and the emblem.
Wrap the yarn around the collar a couple of times above the emblem to prevent spreading.
Pull the yarn down through the neck area and make a final small securing stitch.
Fasten securely and hide the tail inside the body.
HEAD EMBLEM (grey)
Use thin grey yarn and a 1.25–1.5 mm hook.
Make one piece using the green emblem Rounds 1–3 instructions:
- 6 sc in MR
- inc, 1 sc, 3-in-1 sc inc, 1 sc, inc, 1 sc = 10 sc
- 1 sc, inc, 2 sc, 3-in-1 sc inc, 2 sc, inc, sl st
Embroidery on the grey emblem:
Using thin grey yarn, work 3 chain stitches (tambour stitches) from the bottom upward, skipping 1.5 rounds between them.
Then, again with tambour stitch:
2 stitches vertically upward (skipping 1 round)
2 small diagonal stitches toward the top corners.
Edge with white yarn:
Work Round 4 (same outer edging as green emblem) in thin white yarn.
Cut the yarn, leaving a long tail.
Fasten off.
Attach:
Sew the grey emblem to the front of the hat.
FINAL TOUCH: MOUTH EMBROIDERY
With thin black thread, embroider a small mouth using chain stitch
approximately 2 rounds below the nose.
🎉 DOG IS FINISHED!