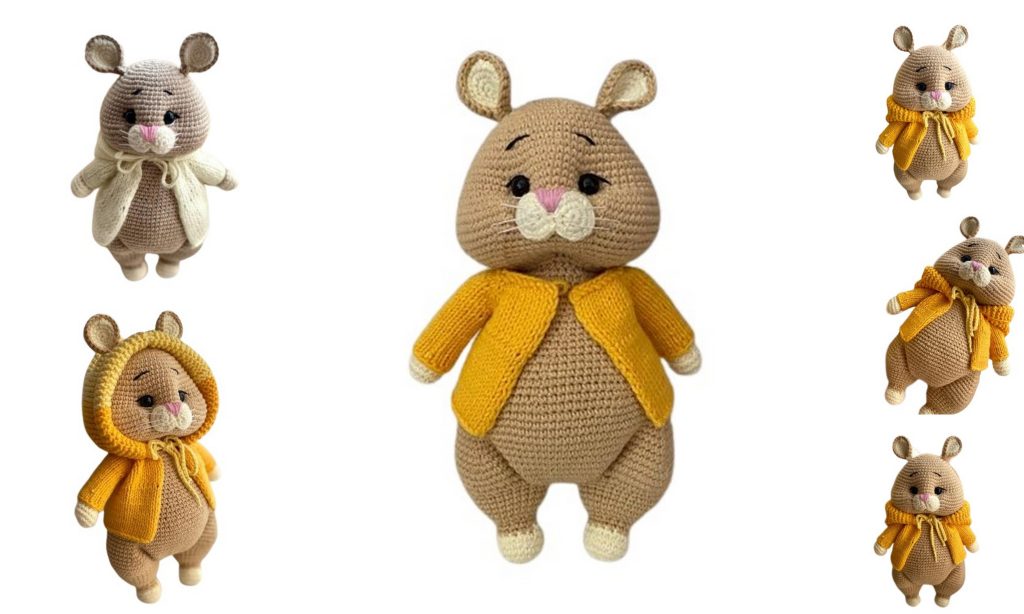
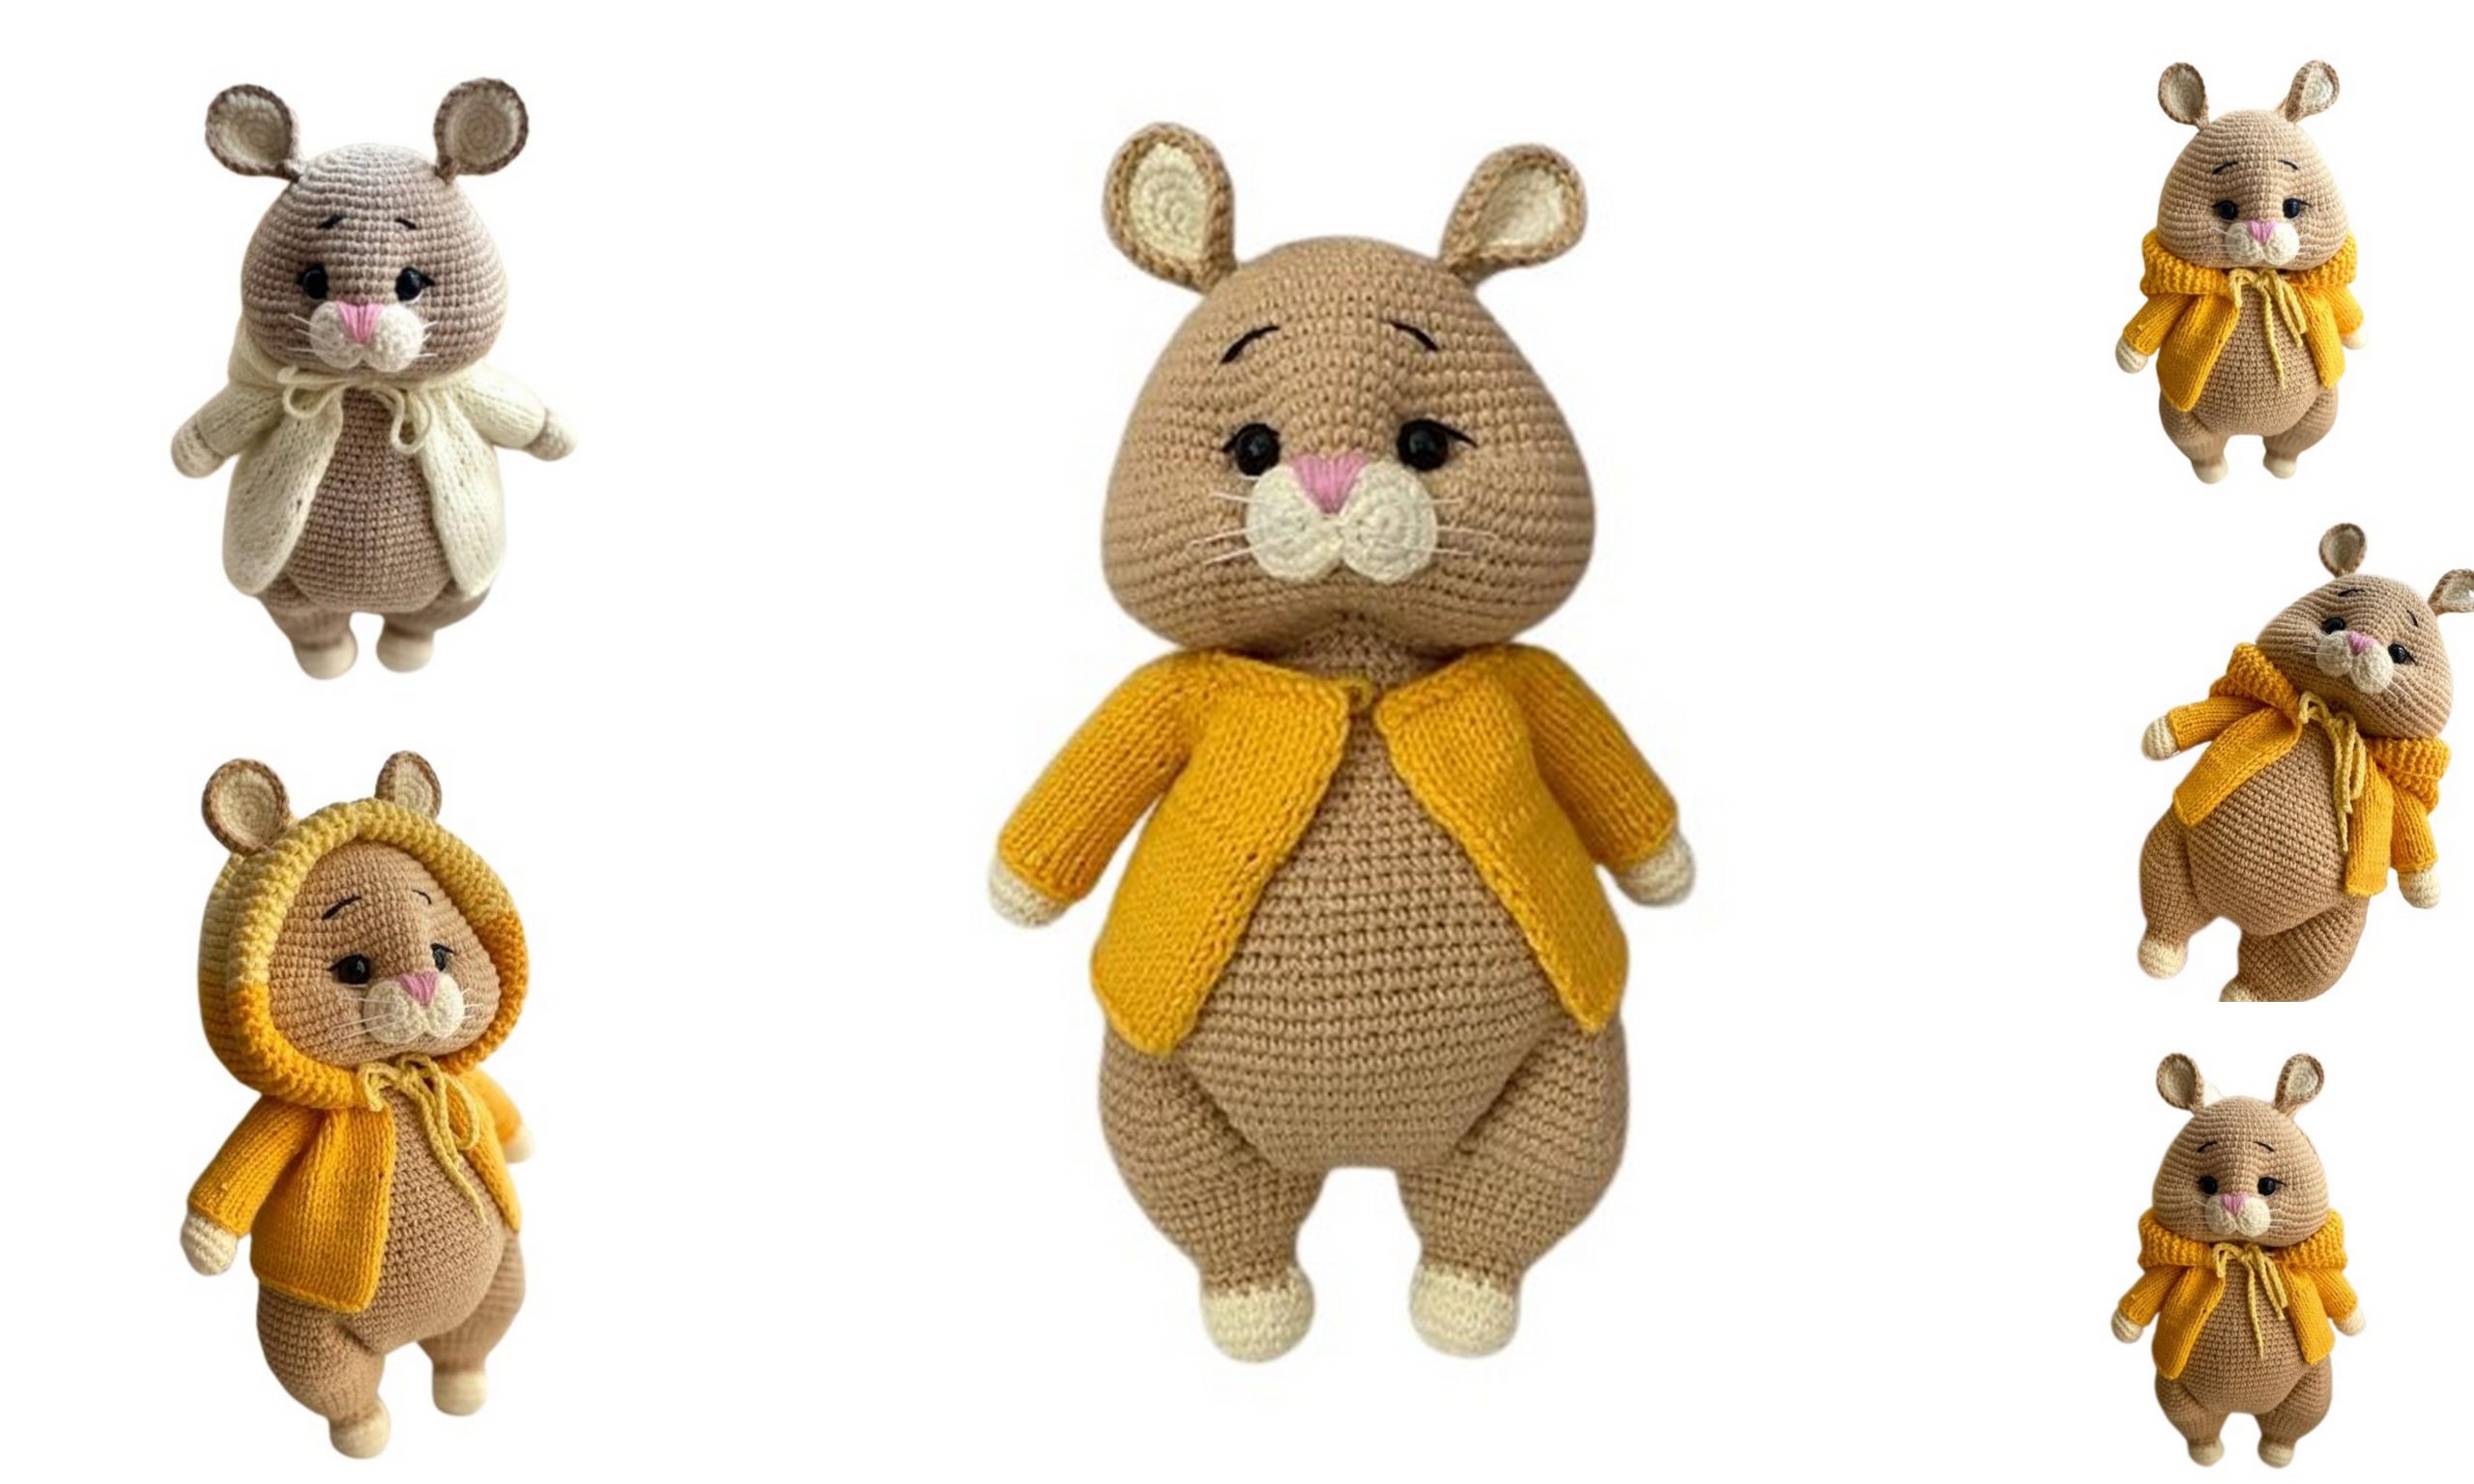
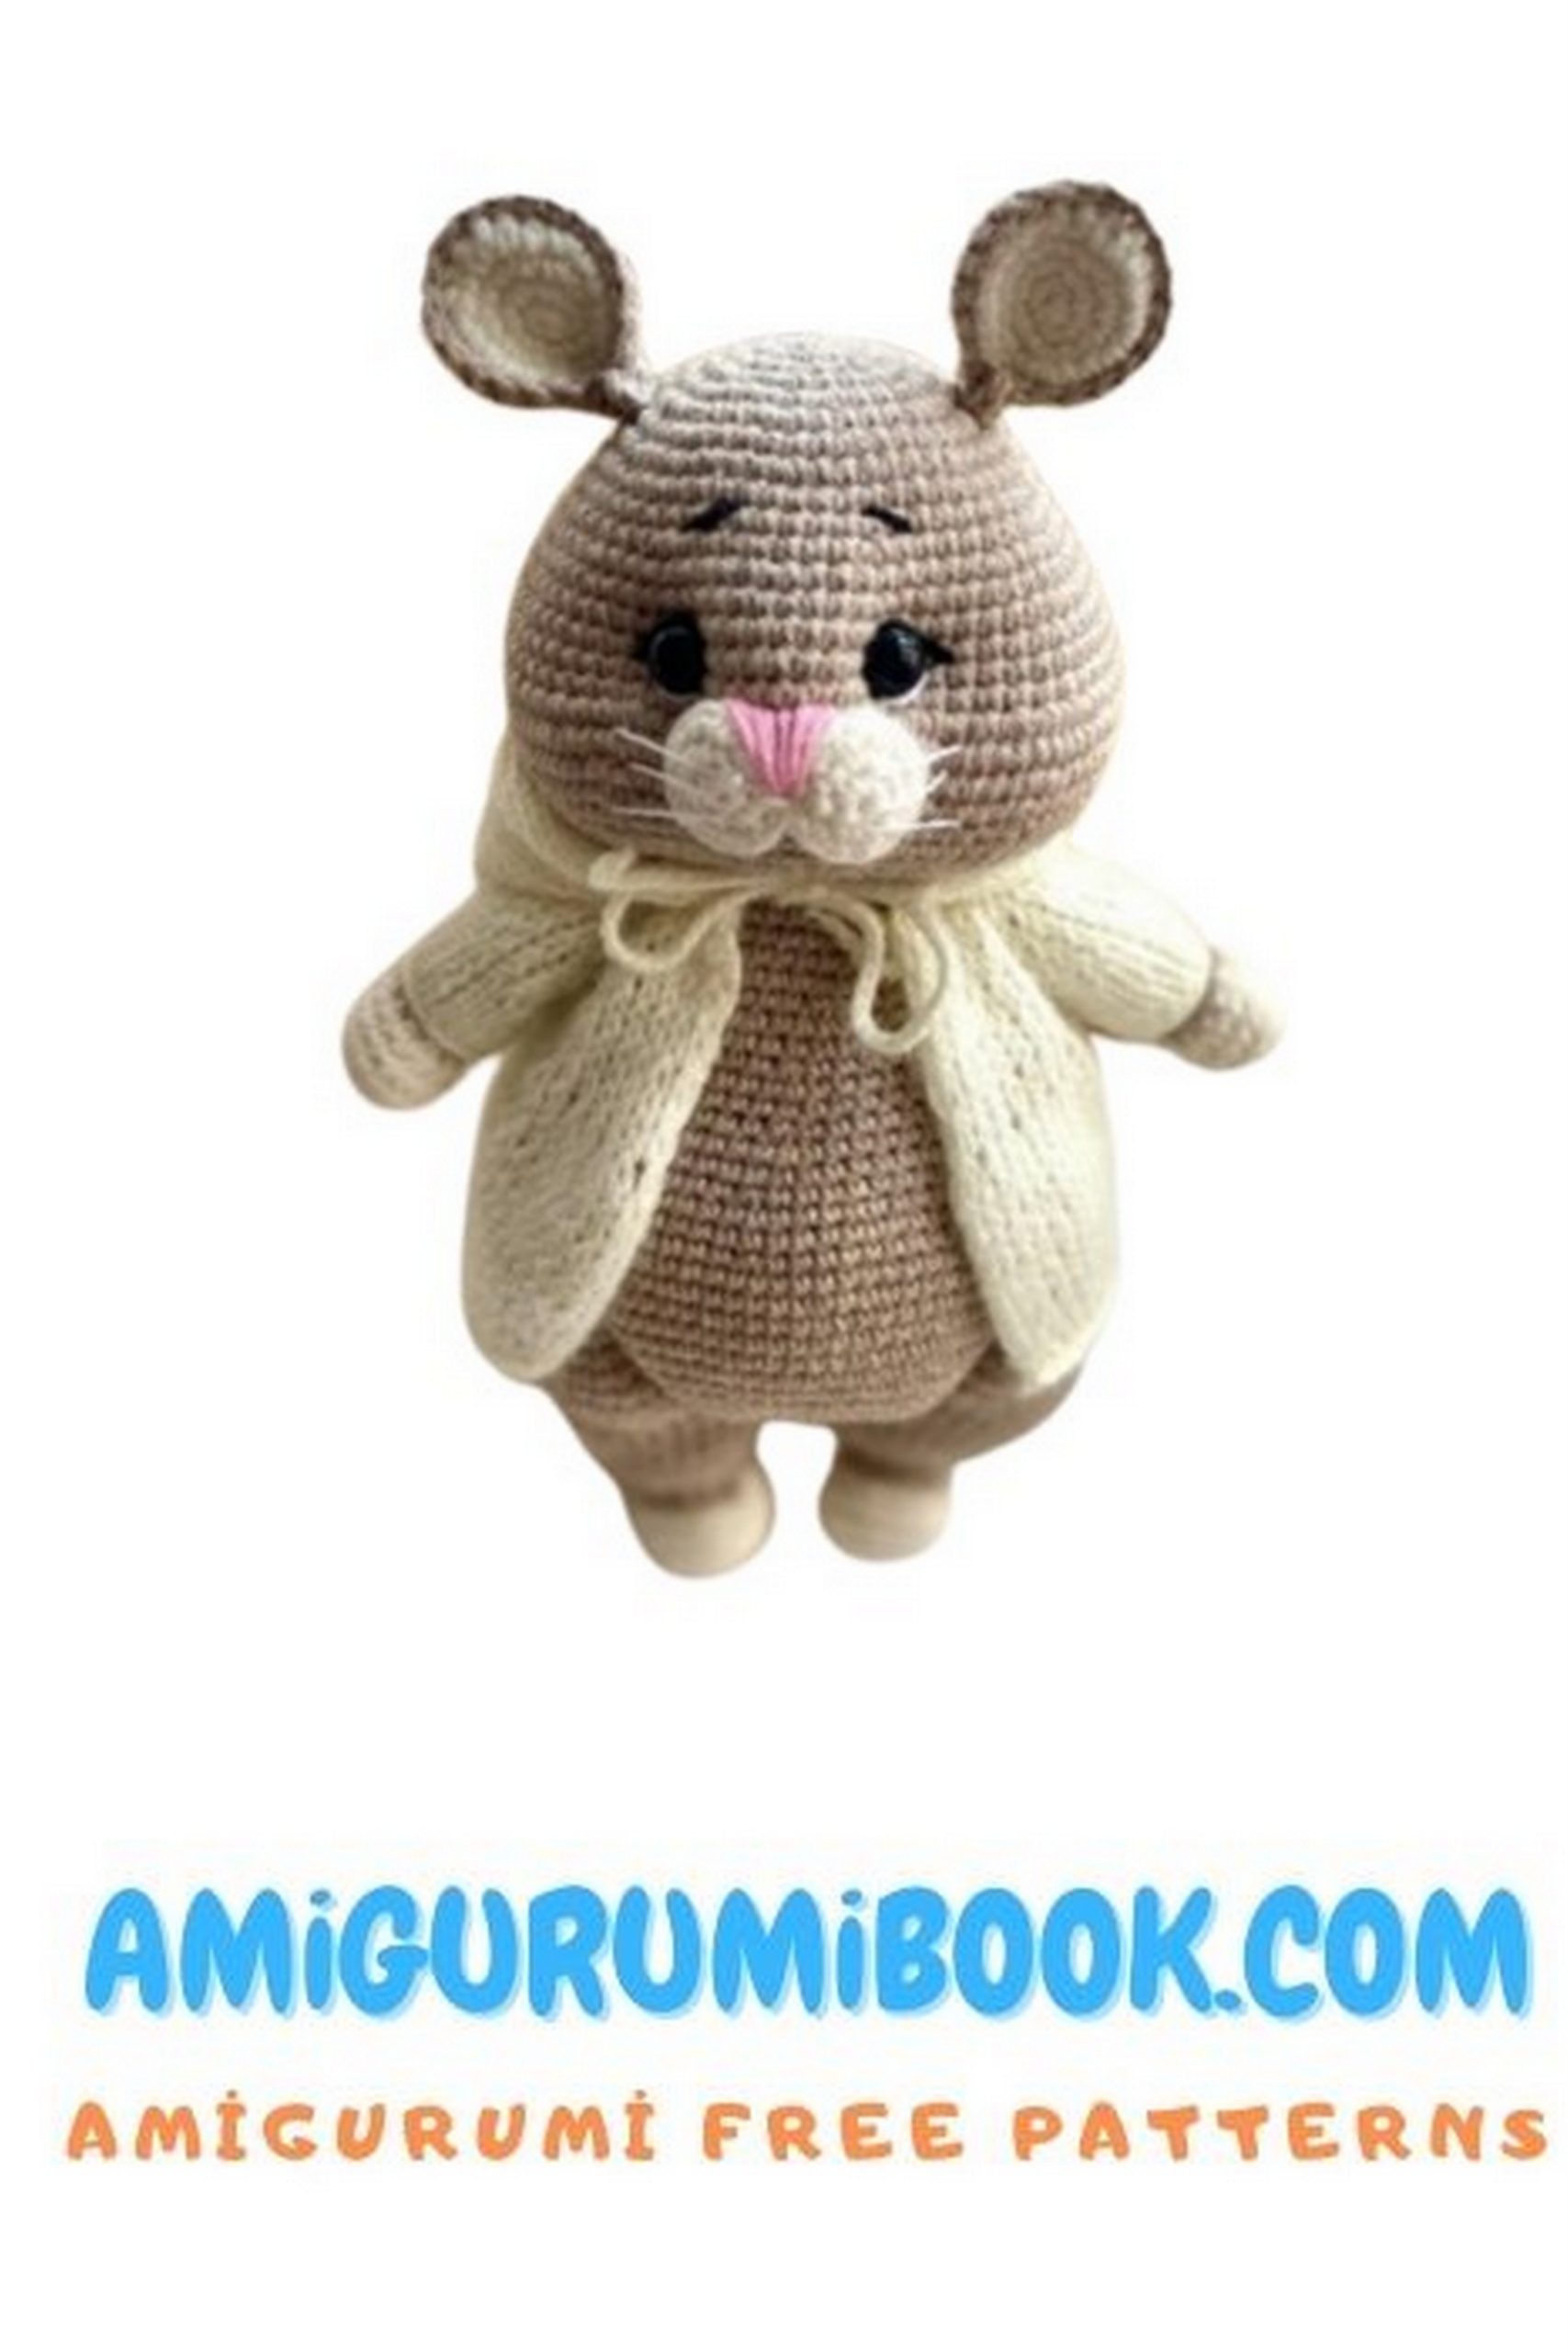
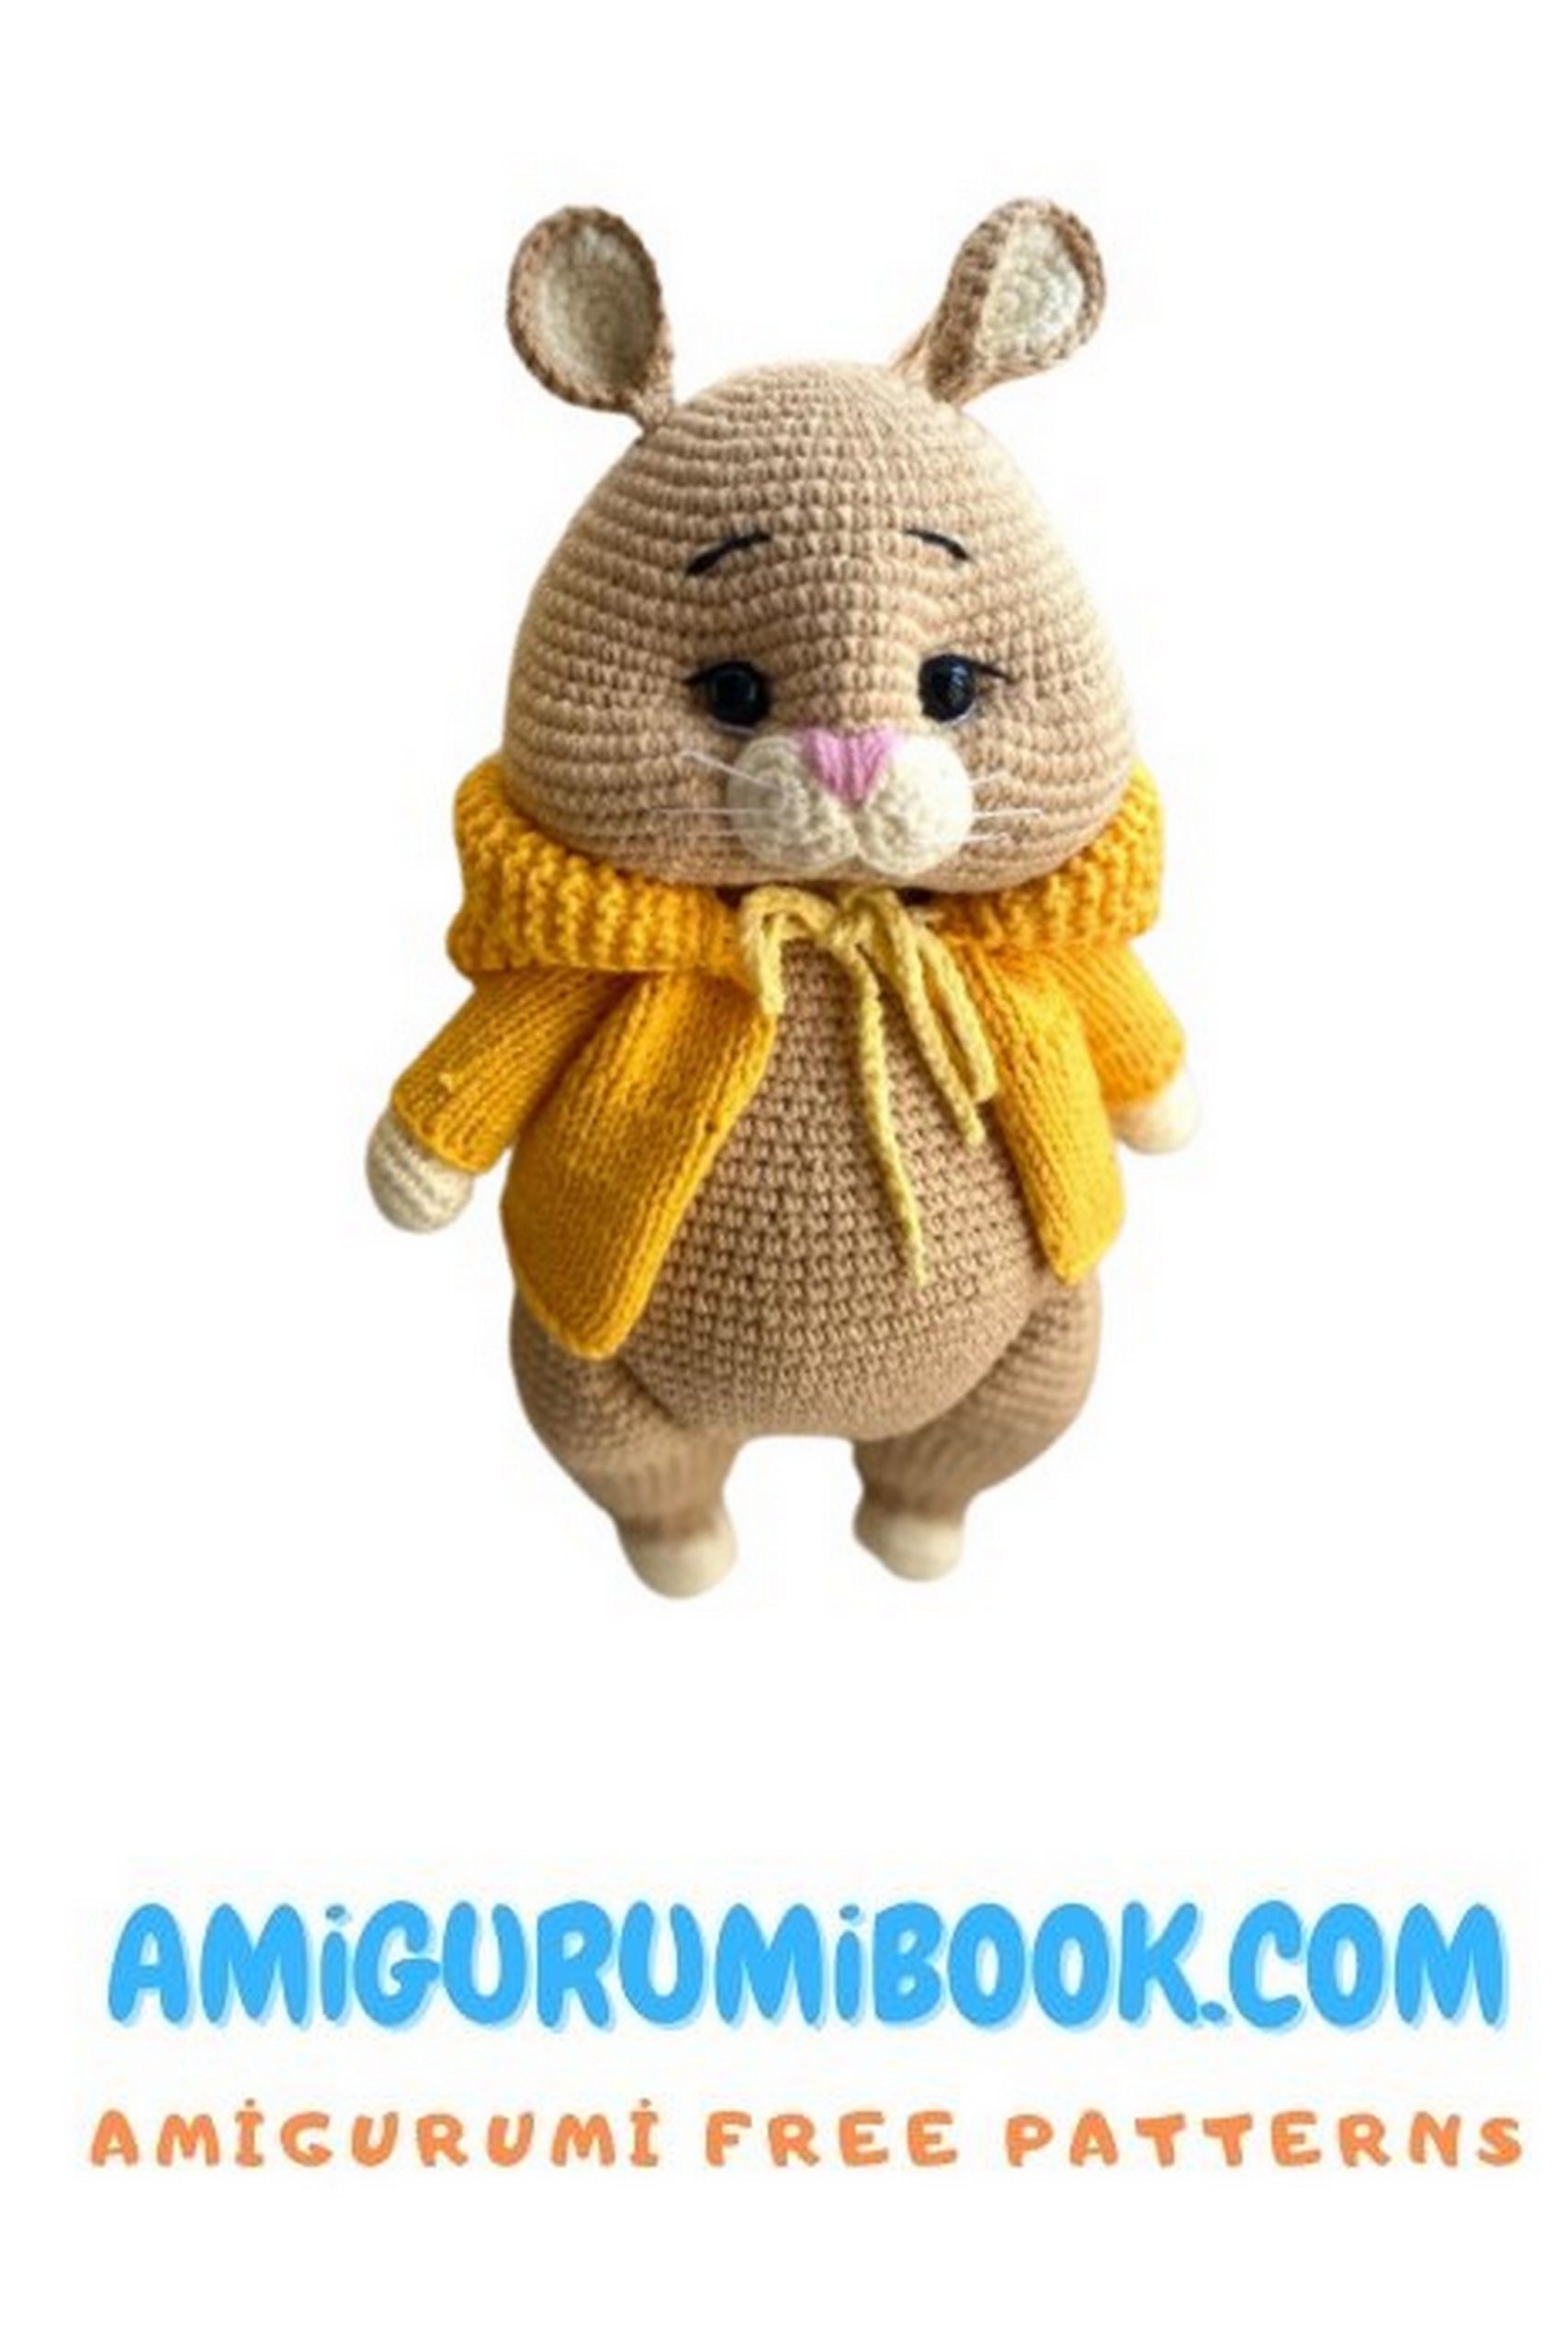
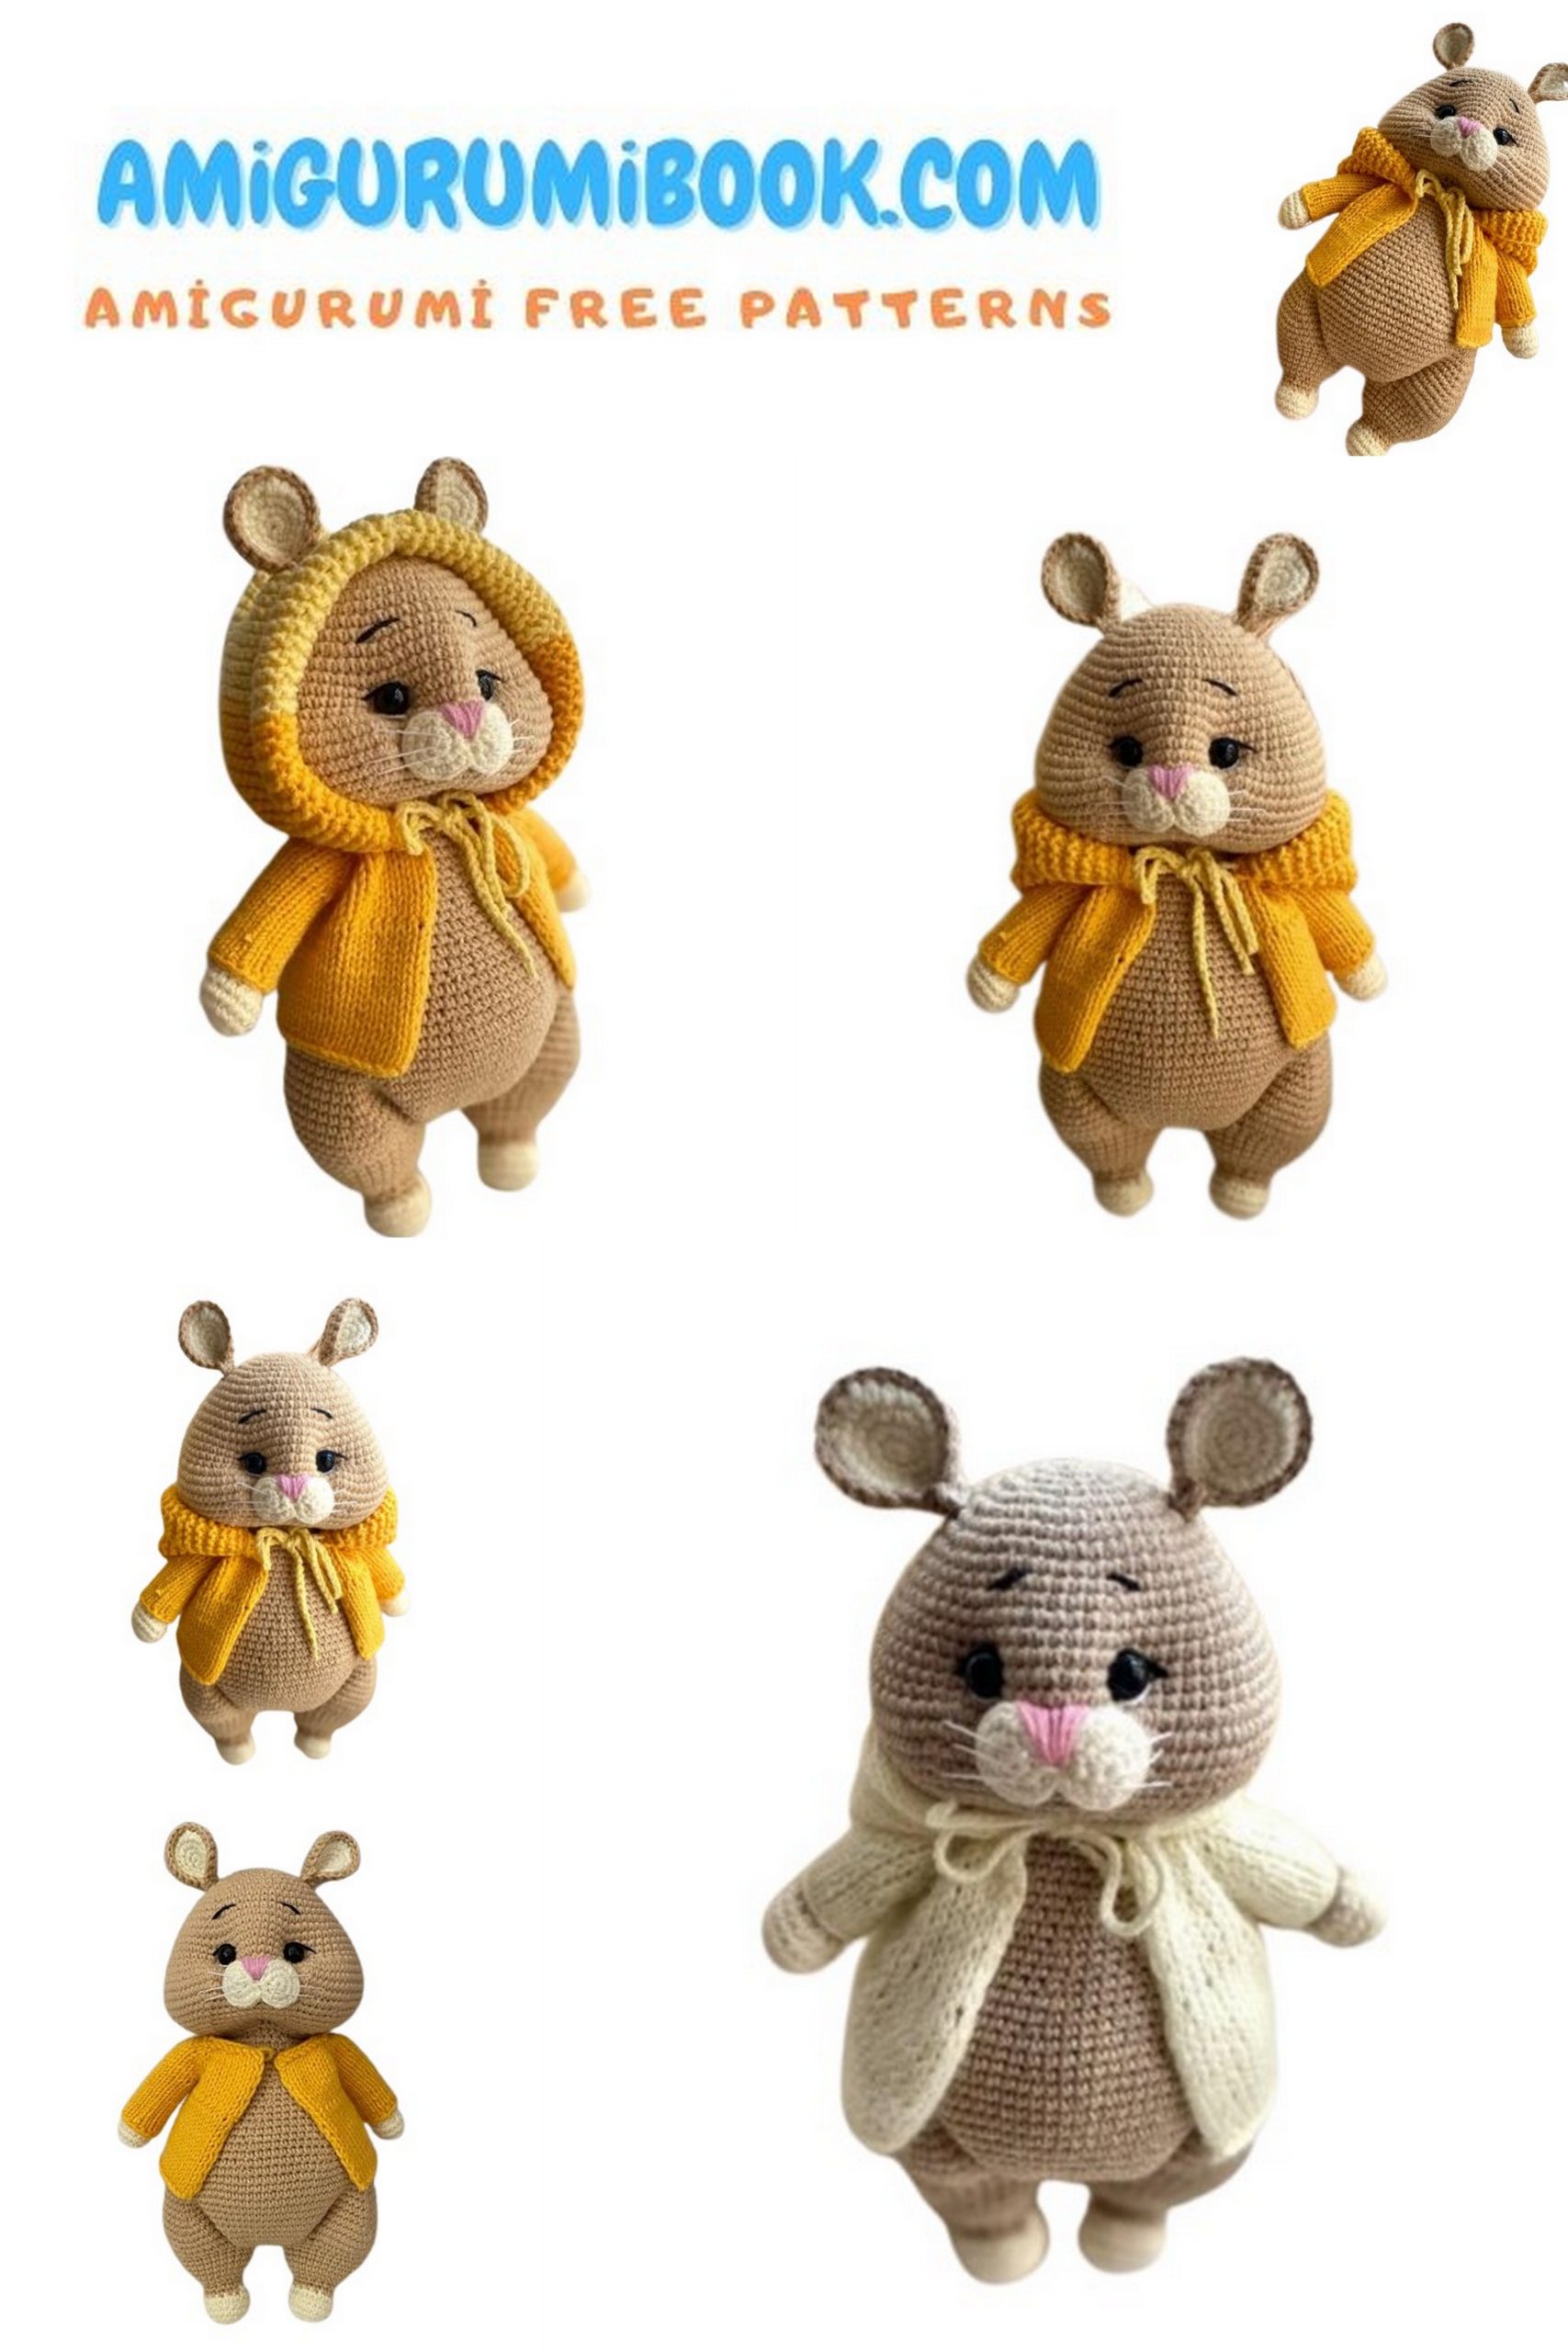
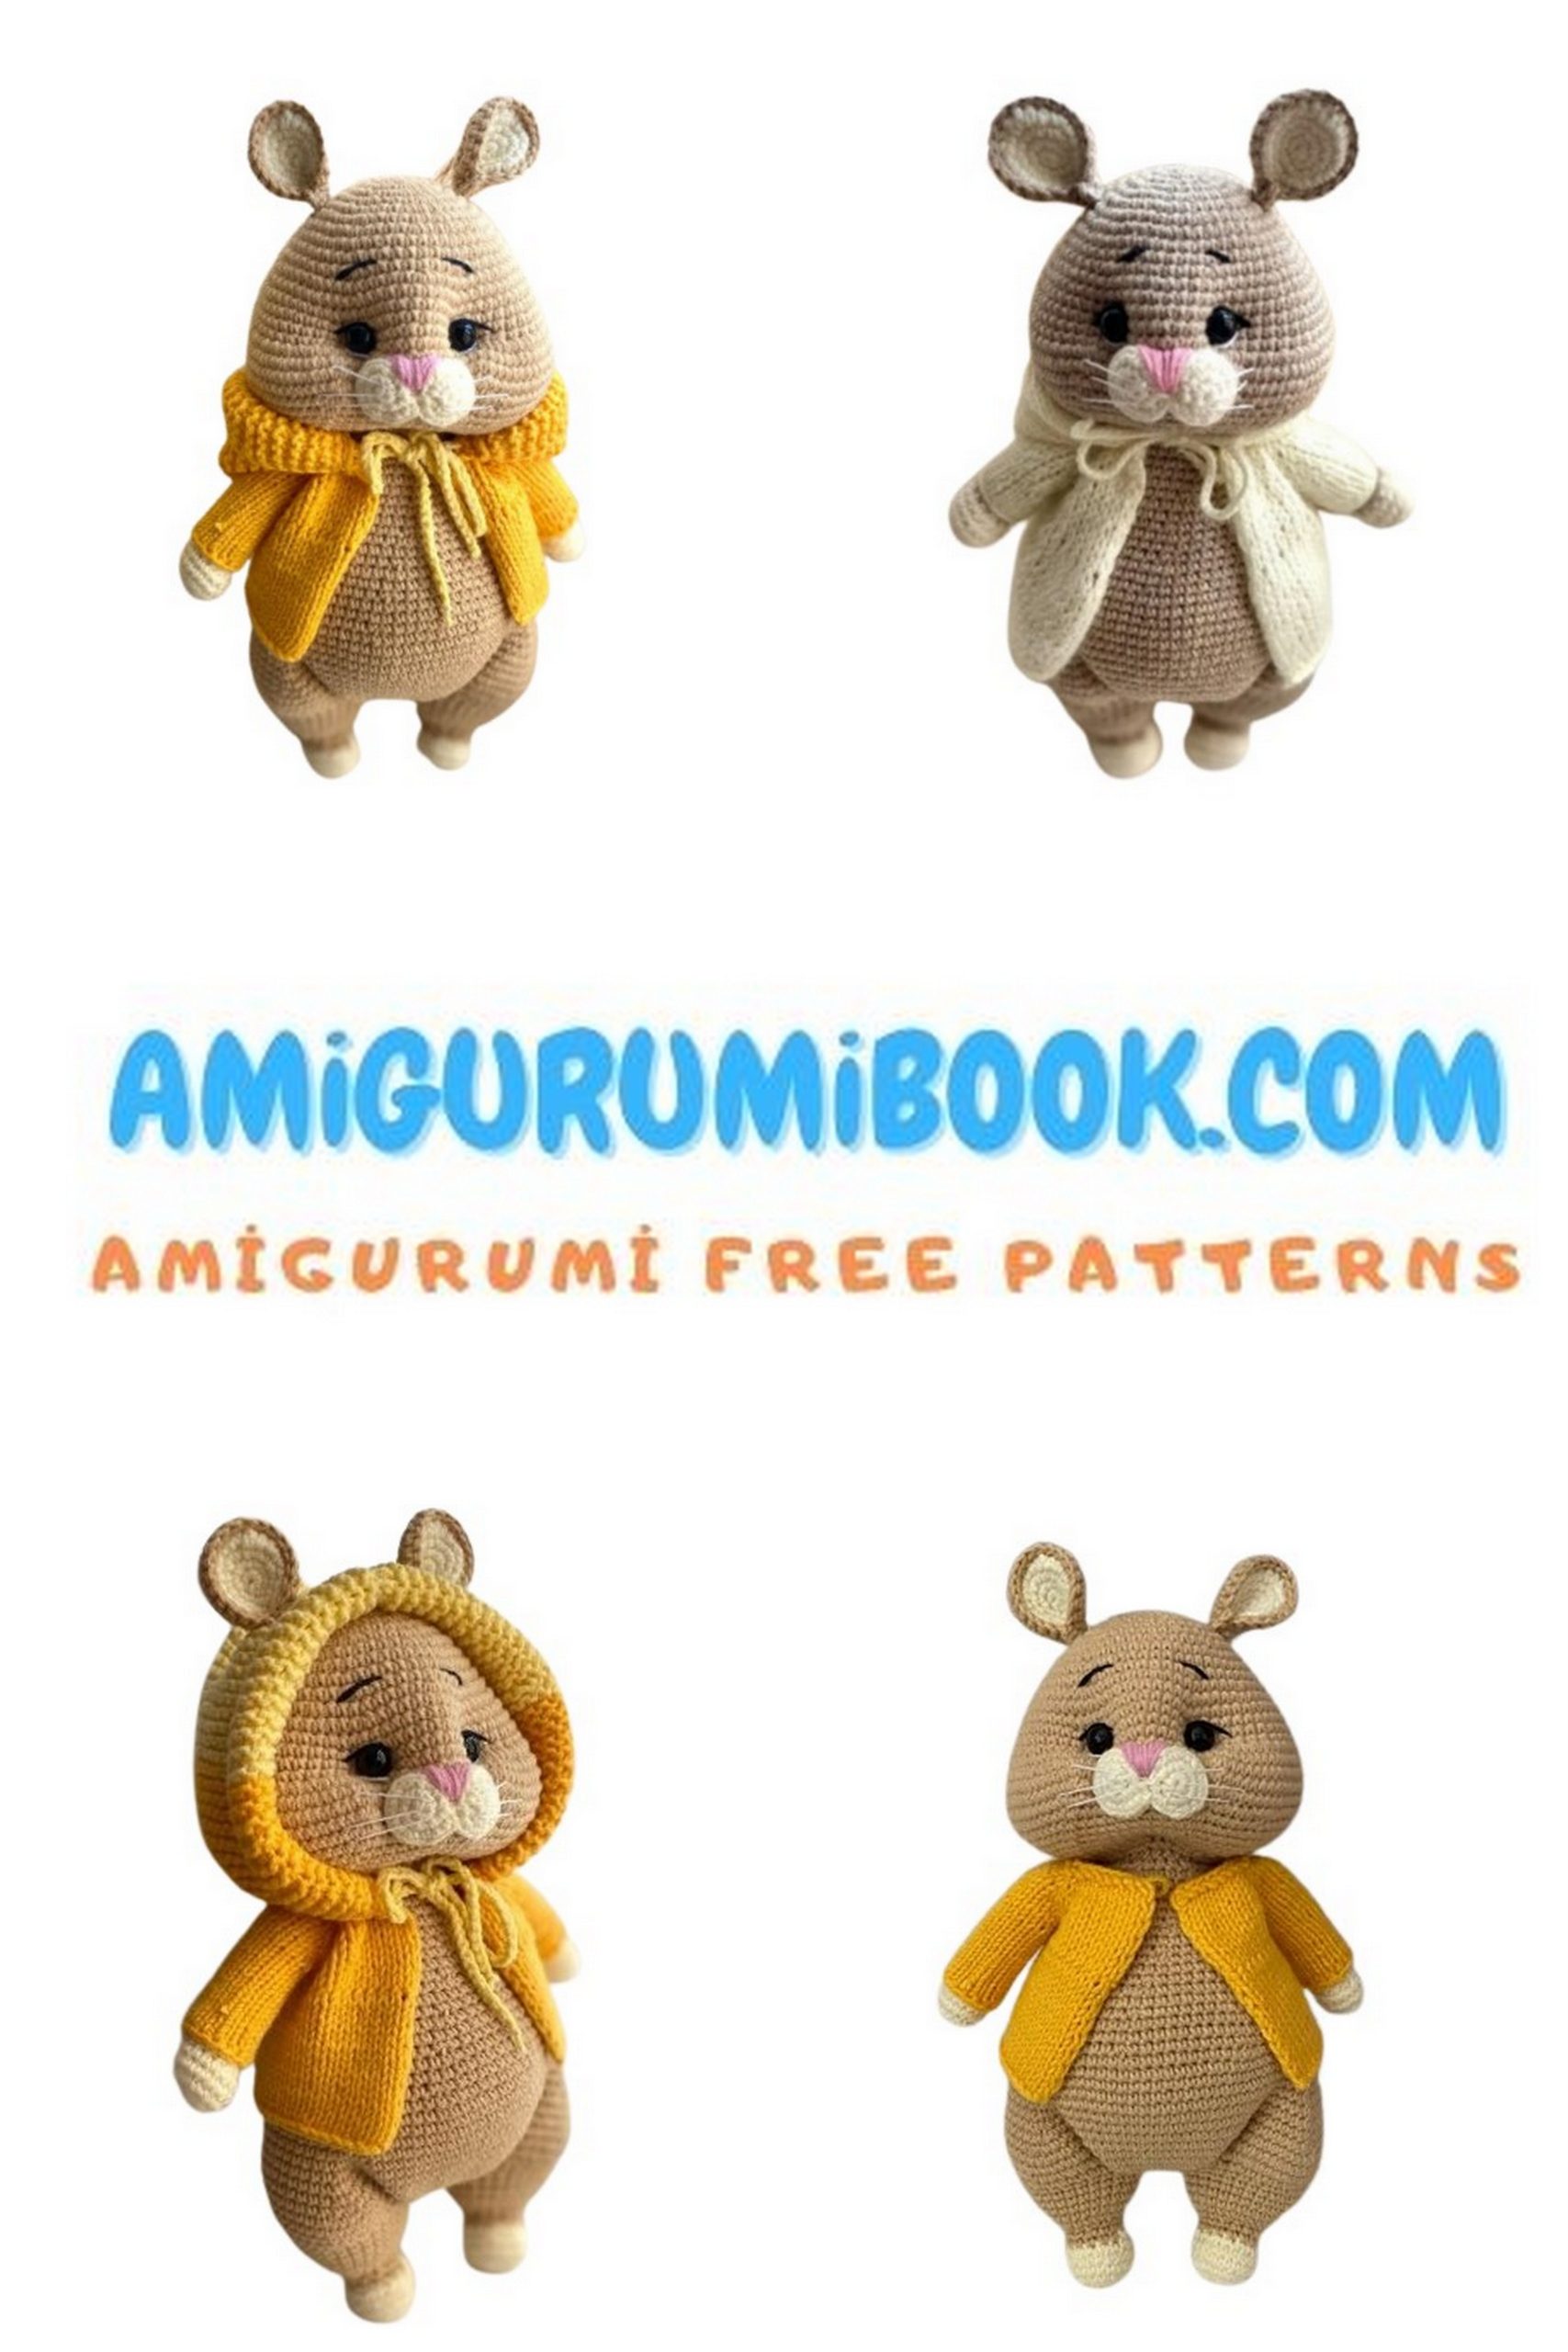
If you love crocheting adorable animals, this amigurumi hamster free pattern is a perfect project to try. With its round cheeks, tiny ears, and soft cuddly body, this cute crochet hamster will quickly become one of your favorite handmade toys.
This step-by-step crochet tutorial guides you through every part of the pattern, from the head and body shaping to the tiny details like the muzzle, ears, and sweater. Even if you are an intermediate crocheter, you can easily follow the instructions and create your own charming hamster.
Grab your yarn and hook and start crocheting this sweet amigurumi hamster that makes a wonderful handmade gift, nursery decoration, or collectible toy for any amigurumi lover.
If you want to access 1000+ free amigurumi patterns, you can download our application from this link!
Materials
- YarnArt Jeans yarn
- Alize Cotton Gold Hobby yarn
- White, black, and pink thread for decorating the eyes and nose
- 2–2.25 mm crochet hook
- Sewing needle (preferably blunt)
- Long needle for tightening
- 10 mm safety eyes
- Polyester fiberfill or holofiber stuffing
- Scissors
- Contrasting thread for stitch marking
- 2 mm knitting needles (double-pointed needles, 40 cm)
Finished Size:
Using these materials, the finished amigurumi toy will be approximately 24.5 cm (9.6 inches) tall.
Tip:
If you crochet tightly, use a 2.25 mm hook. If your tension is looser, use a 1.75–2 mm hook.
Abbreviations
CA – Amigurumi Ring
SC – Single Crochet
INC – Increase
DEC – Decrease
CH – Chain
SL ST – Slip Stitch
FO – Fasten Off
Head
1: 7 sc in CA (7)
2: inc in each st (14)
3: (1 sc, inc) ×7 (21)
4: 1 sc, inc, (2 sc, inc) ×6, 1 sc (28)
5: (3 sc, inc) ×7 (35)
6: 2 sc, inc, (4 sc, inc) ×6, 2 sc (42)
7: (5 sc, inc) ×7 (49)
8: 3 sc, inc, (6 sc, inc) ×6, 3 sc (56)
9–10: sc in each st around (56)
11: (7 sc, inc) ×7 (63)
12: 4 sc, inc, (8 sc, inc) ×6, 4 sc (70)
13: (9 sc, inc) ×7 (77)
14–17: sc in each st around (77)
Face Shaping
18:
10 sc,
(inc, 1 sc) ×7,
7 inc,
15 sc,
7 inc,
(1 sc, inc) ×7,
10 sc
(105)
19–20: sc in each st around (105)
21: 43 sc, dec, 15 sc, dec, 43 sc (103)
22: 42 sc, dec, 15 sc, dec, 42 sc (101)
23: 41 sc, dec, 6 sc, dec, 7 sc, dec, 41 sc (98)
Head Shaping
24: (5 sc, dec) ×14 (84)
25: (10 sc, dec) ×7 (77)
26: (9 sc, dec) ×7 (70)
27: (8 sc, dec) ×7 (63)
28: (7 sc, dec) ×7 (56)
29: (6 sc, dec) ×7 (49)
30: (5 sc, dec) ×7 (42)
31: (4 sc, dec) ×7 (35)
32: (3 sc, dec) ×7 (28)
Leave a long yarn tail for sewing.
Eyes
Insert 10 mm safety eyes between Rows 15–16.
Distance between the eyes: 9–10 stitches.
Tip for placement:
In Row 18, crochet 7 sc, then place the first eye after the next 2 stitches.
Place the second eye symmetrically on the opposite side.
Stuffing
Stuff the head lightly.
Do not overstuff, as the face shaping and tightening will not form correctly if the head is too firm.
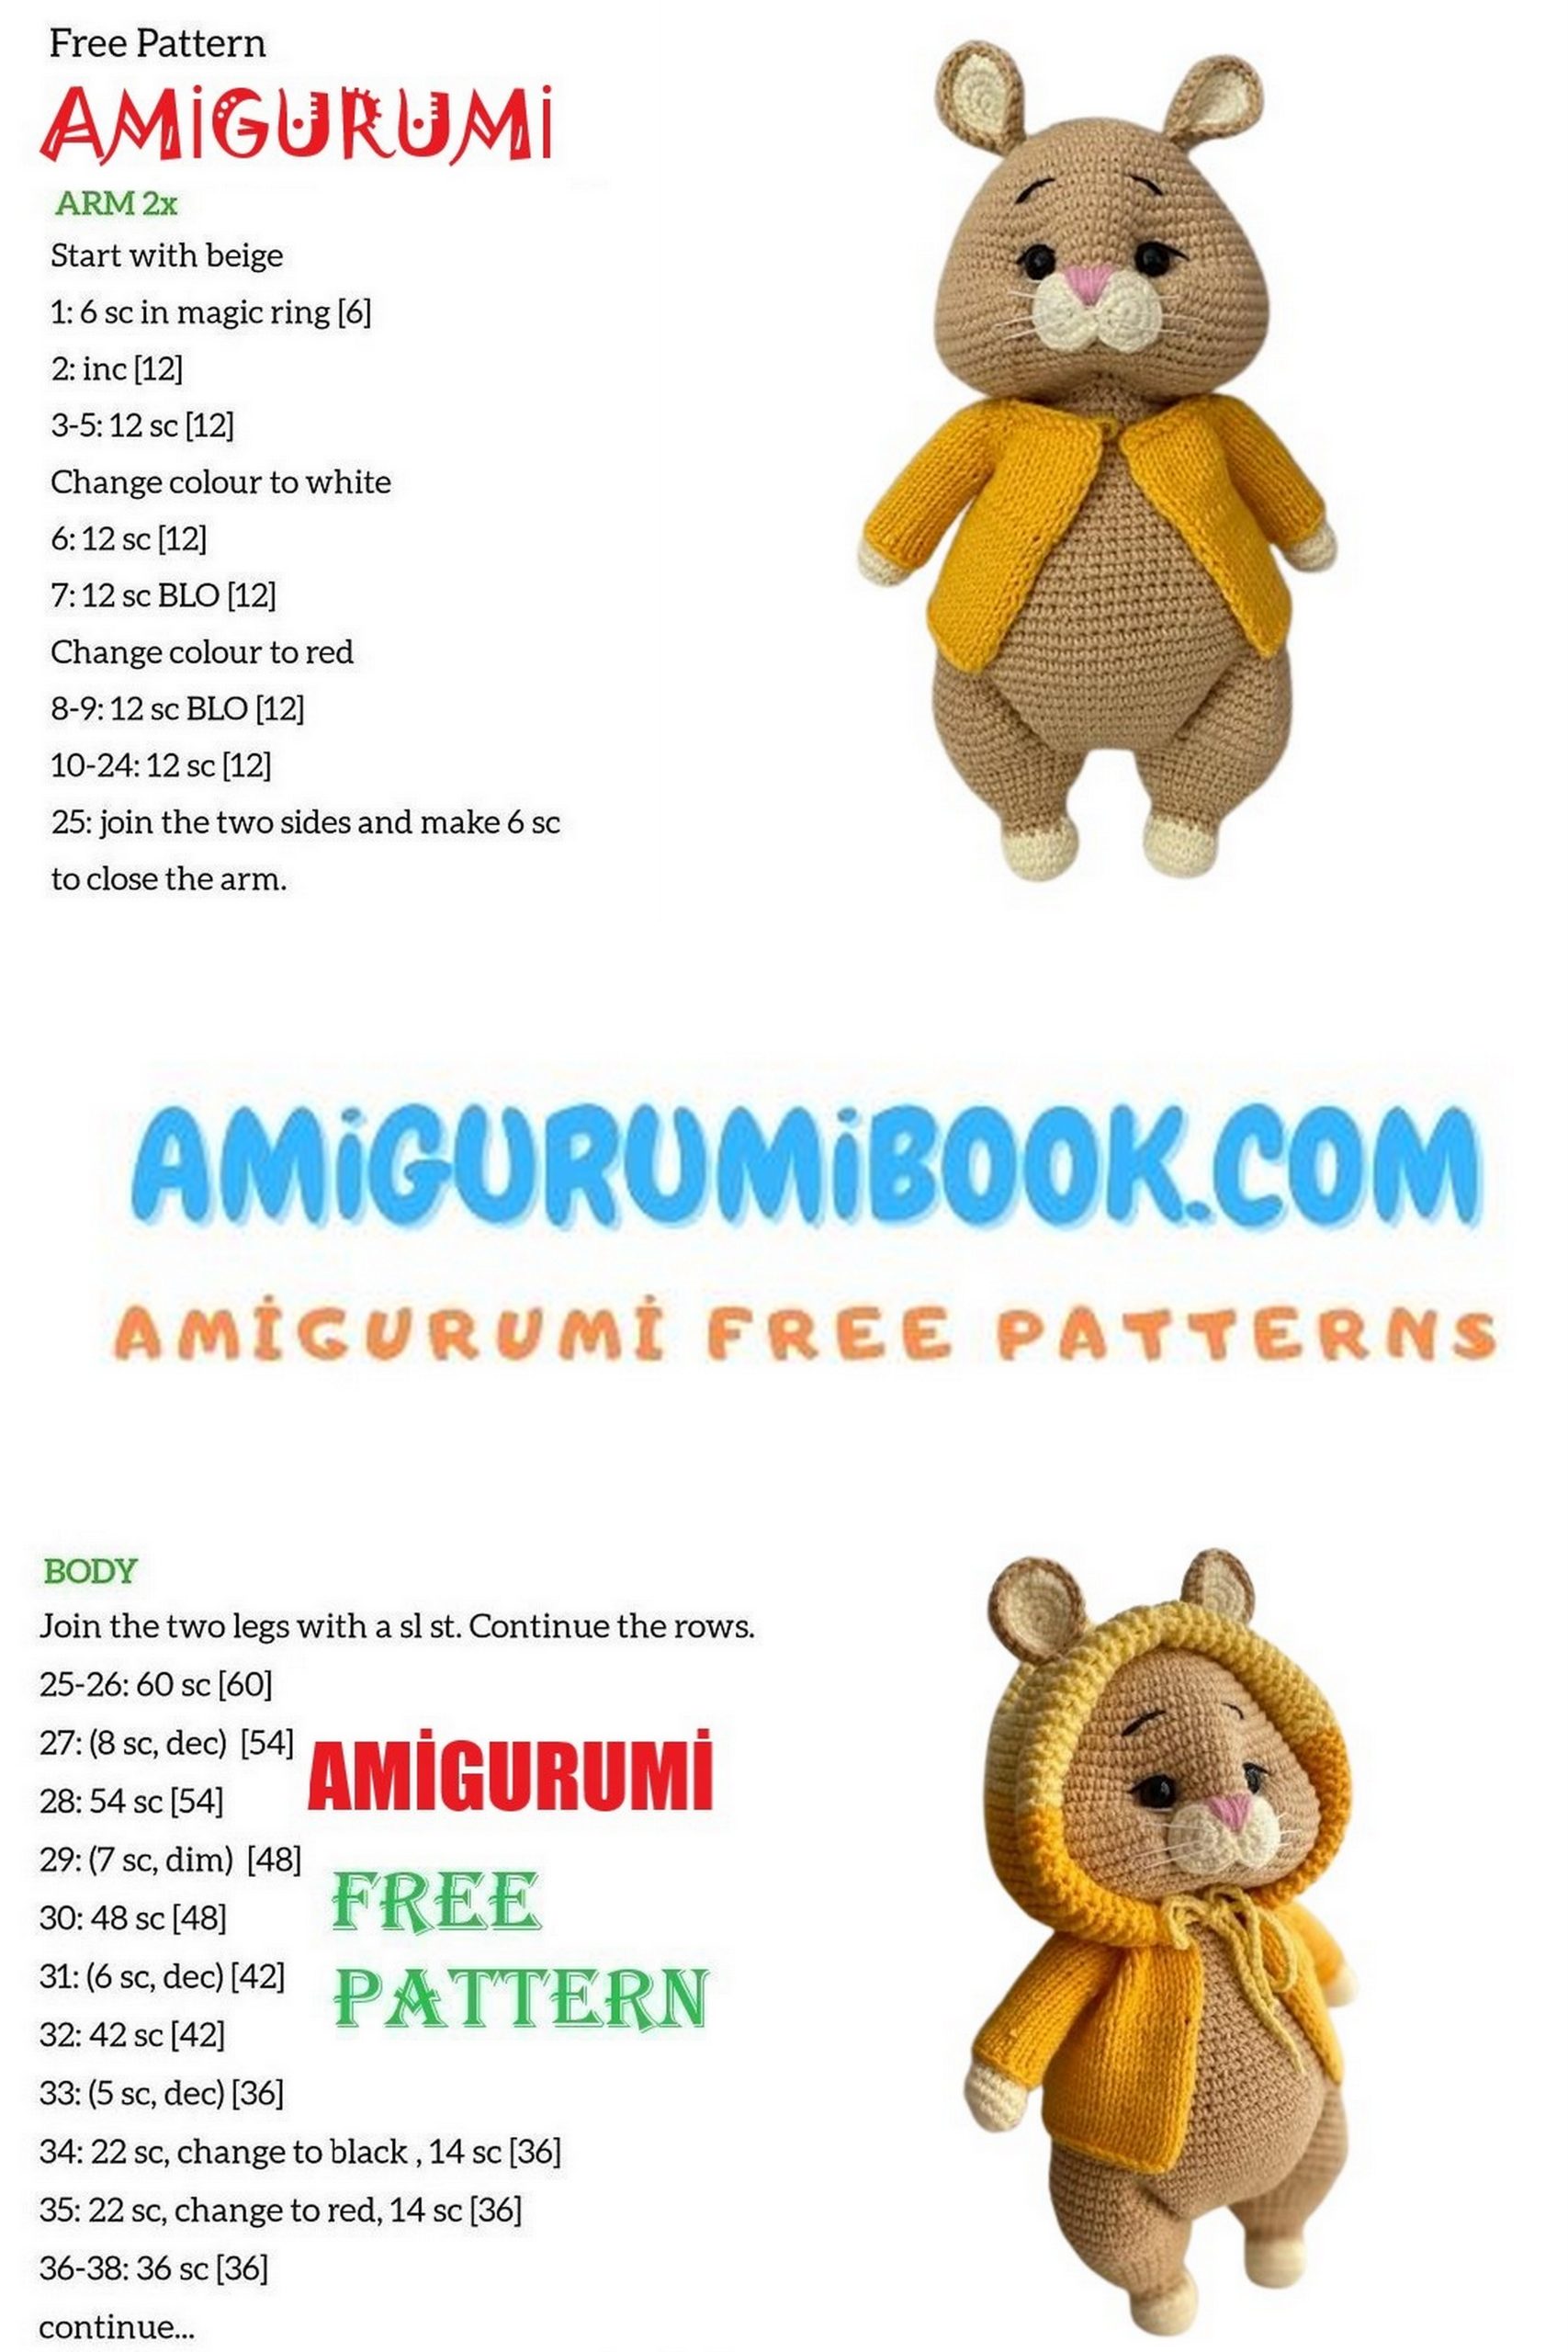
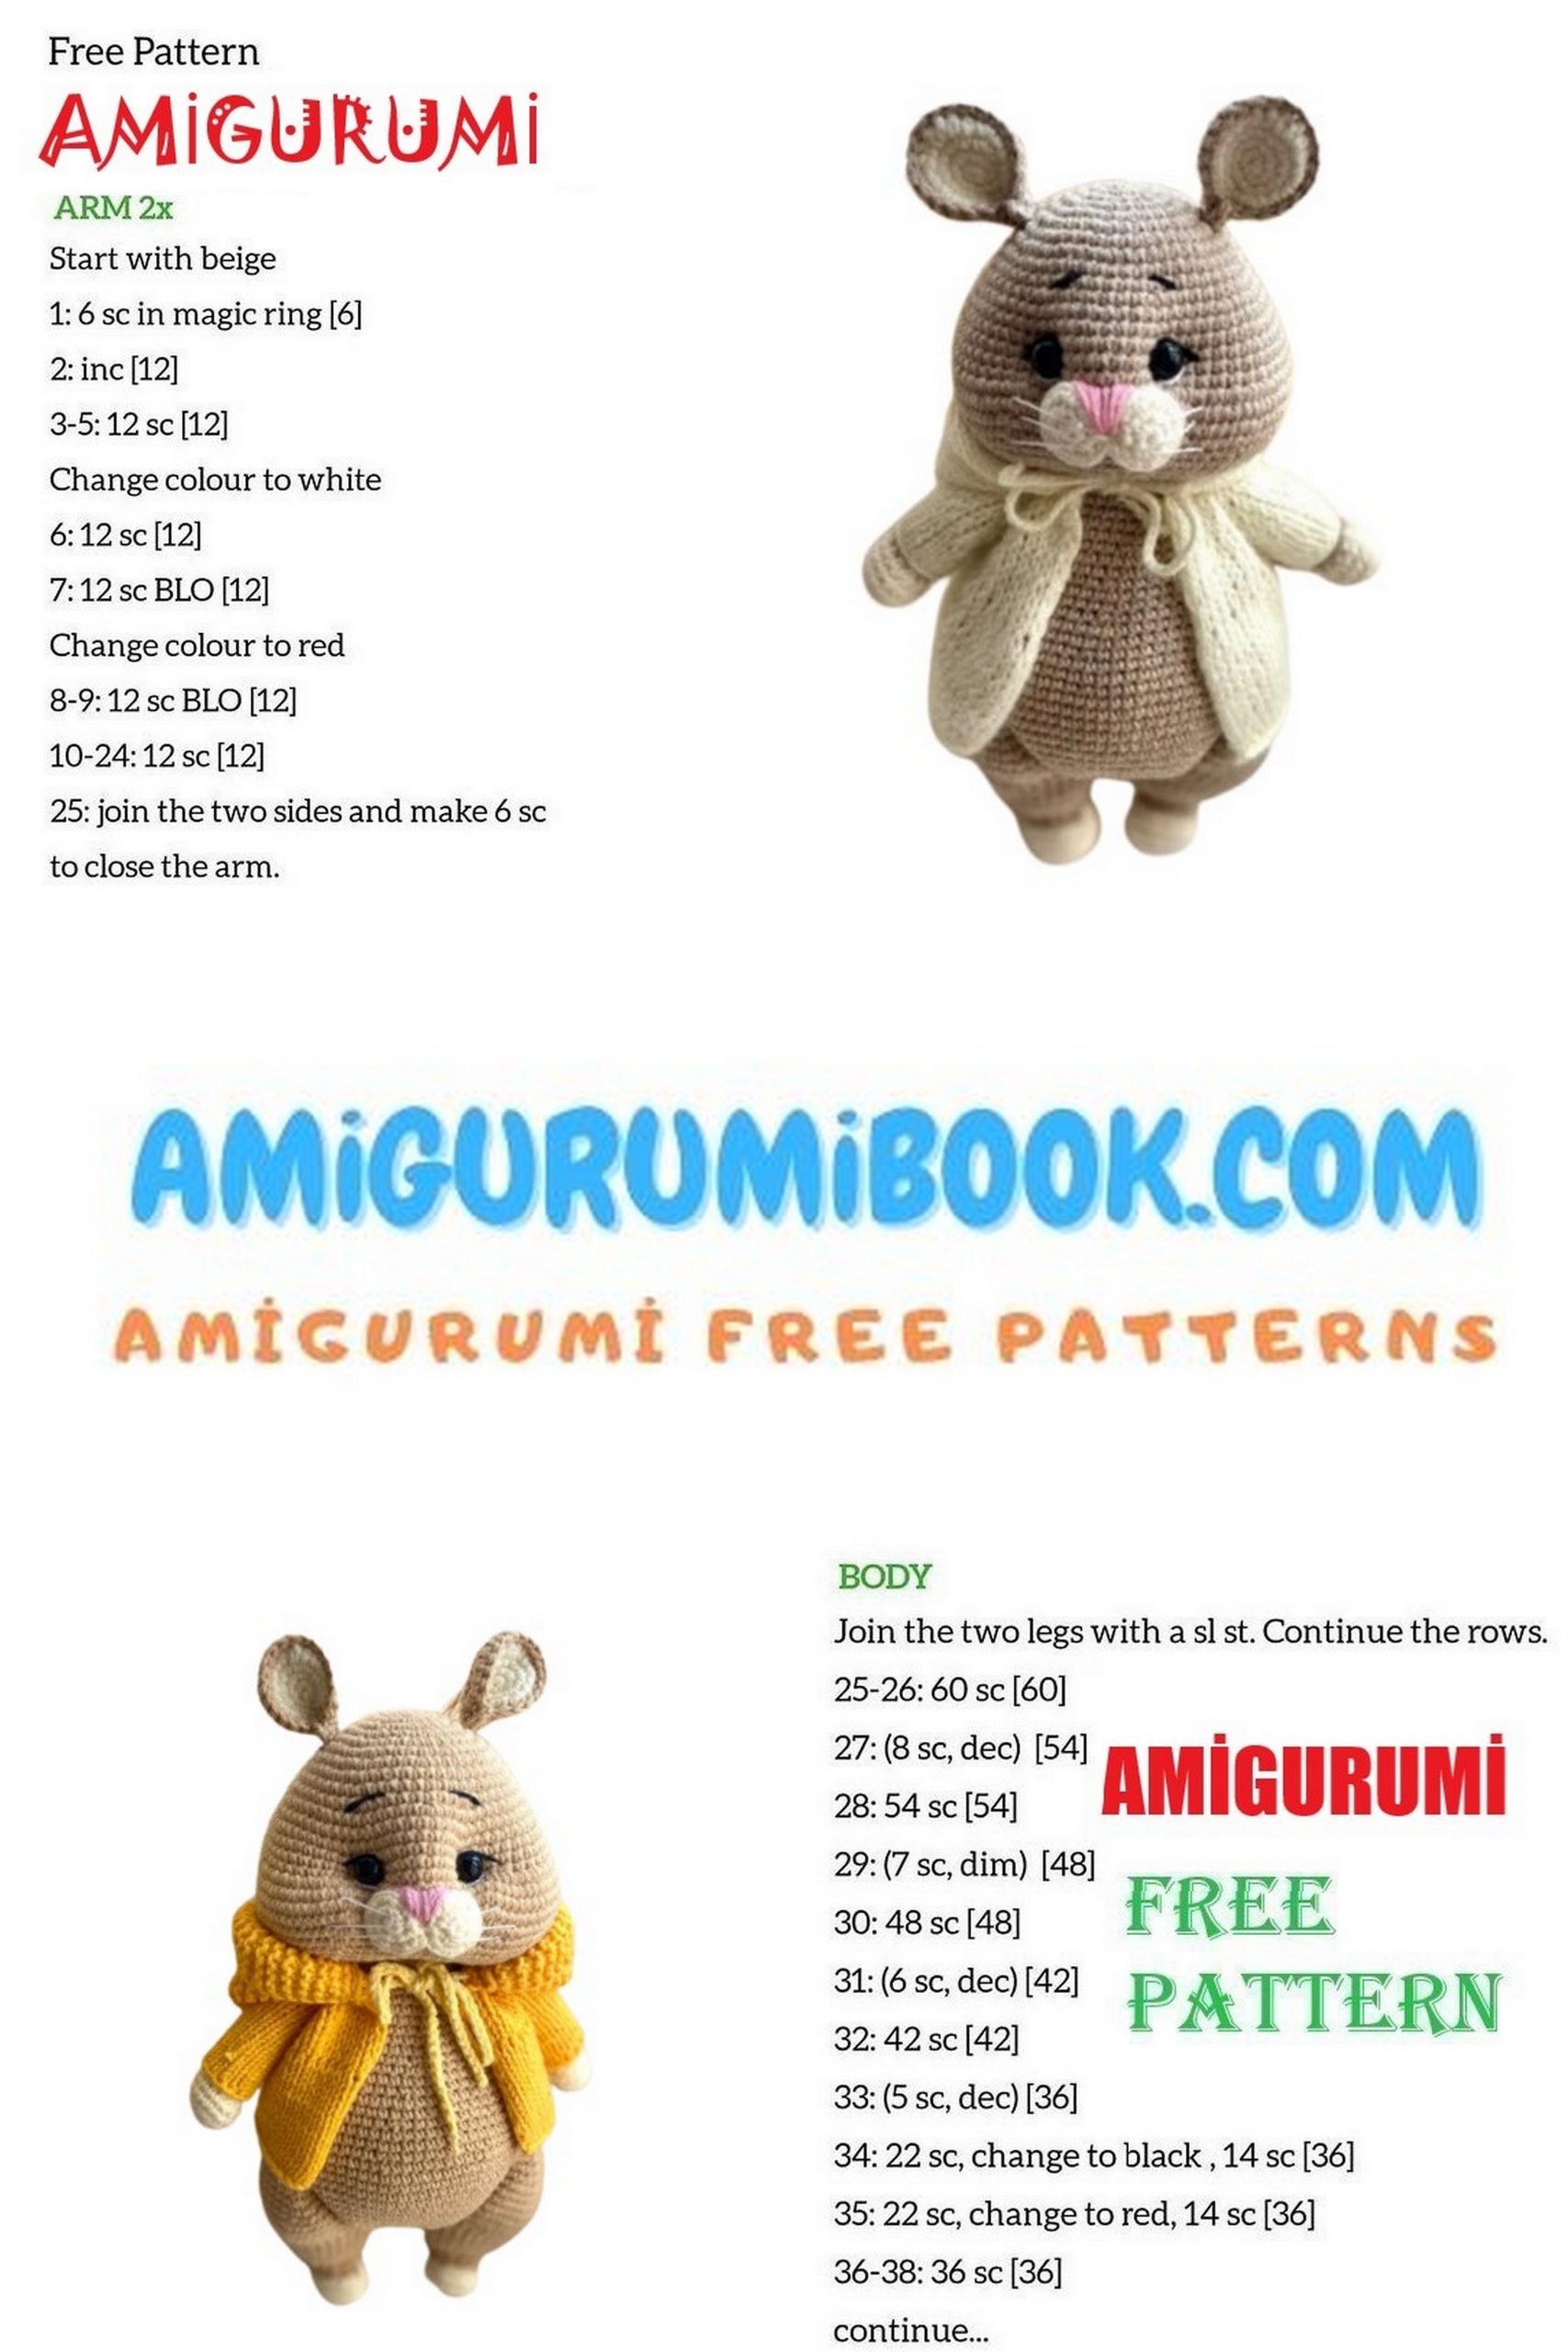
Arms (Make 2)
Start with color #03.
1: 6 sc in CA (6)
2: inc in each st (12)
3: (1 sc, inc) ×6 (18)
4: sc in each st around (18)
5: sc in each st around (18)
6: 6 sc, 3 dec, 6 sc (15)
On the last stitch change to the main color.
7: (3 sc, dec) ×3 (12)
8–20: sc in each st around (12) – 13 rows
21: 6 dec (6)
Stuffing:
Stuff the color #03 section firmly, and stuff the remaining part lightly.
Finishing options:
- If sewing: pull tight through the front loops of the stitches.
- If crocheting closed: fold in half and crochet 3 sc.
Legs (Make 2)
Right Leg
Start with color #03.
1: 7 sc in CA (7)
2: inc in each st (14)
3: (1 sc, inc) ×7 (21)
4–5: sc in each st around (21)
6: (1 sc, dec) ×7 (14)
On the last stitch change to the main color.
7–8: sc in each st around (14)
9: (1 sc, inc) ×7 (21)
10: 1 sc, inc, (2 sc, inc) ×6, 1 sc (28)
11–12: sc in each st around (28)
13: 14 sc, 4 inc, 10 sc (32)
14: sc in each st around (32)
Fasten off.
Left Leg
Work the same as the right leg, except Row 13.
13: 10 sc, 4 inc, 14 sc (32)
14: sc in each st around (32)
Do not cut the yarn.
Joining the Legs (Body Start)
Ch 2 and attach the right leg.
Continue crocheting:
32 sc on the right leg
2 sc in the chain
32 sc on the left leg
2 sc in the chain
Total: 68 stitches
From here, continue crocheting the body according to the pattern.
Body
1: sc in each st around (68)
2: inc, 21 sc, (1 sc, inc) ×10, 23 sc, inc, 2 sc (80)
3: 29 sc, 19 inc, 32 sc (99)
4: 24 sc, dec, 44 sc, dec, 27 sc (97)
5: 24 sc, 2 dec, 38 sc, 2 dec, 27 sc (93)
6: 25 sc, dec, 36 sc, dec, 28 sc (91)
7: 25 sc, dec, 34 sc, dec, 28 sc (89)
8: 25 sc, dec, 32 sc, dec, 28 sc (87)
9: 25 sc, dec, 30 sc, dec, 28 sc (85)
💡 At this stage the shape may look a bit unusual. Don’t worry — once you start stuffing the toy, the hamster’s body shape will form properly.
10: 25 sc, dec, 28 sc, dec, 28 sc (83)
11: 25 sc, dec, 26 sc, dec, 28 sc (81)
12: 25 sc, dec, 24 sc, dec, 28 sc (79)
13: 25 sc, dec, 22 sc, dec, 28 sc (77)
14: sc in each st around (77)
👉 Start stuffing gradually, especially shaping the cheeks and tummy.
15: (9 sc, dec) ×7 (70)
16–17: sc in each st around (70)
18: (8 sc, dec) ×7 (63)
19–20: sc in each st around (63)
21: (7 sc, dec) ×7 (56)
22–23: sc in each st around (56)
24: (6 sc, dec) ×7 (49)
25–26: sc in each st around (49)
27: (5 sc, dec) ×7 (42)
28–29: sc in each st around (42)
30: (4 sc, dec) ×7 (35)
31: sc in each st around (35)
Attaching the Arms
32:
11 sc,
3 sc together with arm,
14 sc,
3 sc together with arm,
4 sc
(35)
33: (3 sc, dec) ×7 (28)
Stuff the body firmly.
Ears (Make 4)
First crochet 2 pieces with color #03, then 2 pieces with the main color.
1: 6 sc in MR (6)
2: inc in each st (12)
3: (1 sc, inc) ×6 (18)
4: (2 sc, inc) ×2,
2 hdc,
inc in dc,
2 hdc,
inc,
(2 sc, inc) ×2
(24)
On the color #03 pieces, finish with a sl st and fasten off.
On the main color pieces, do not cut the yarn — continue with the next instructions of the pattern.
Ear Assembly
After finishing the last increase with the main color, pull up a loop.
Place the two ear pieces wrong sides together.
Insert the hook into the last stitch of the color #03 piece (where the slip stitch was made), then:
- Ch 1
- Work sc around the edge to join the two pieces
- Finish with a sc in the first stitch where the chain started
Fold the ear in half and crochet 3 sc.
Make the first sc around the bridge (chain).
Ch 1 and cut the yarn, leaving a long tail for sewing.
Pull the yarn through to secure.
Muzzle (Make 2)
1: 6 sc in MR (6)
2: inc in each st (12)
For the first piece
- Close with sl st
- Cut yarn and hide the end
For the second piece
- Do not cut the yarn
Muzzle Assembly
Join the second piece with a sl st in the last sc of the first piece.
Then crochet:
(1 sc, inc) ×5
sl st
Continue on the second piece:
sl st
(inc, 1 sc) ×5
sl st
Finish with an invisible closing stitch.
This creates the upper part of the muzzle.
Assembly
Now assemble and decorate the hamster.
Muzzle Tightening
Tighten the muzzle 3–5 times until you achieve the desired shape.
You may also use an alternative tightening method, again repeating 3–5 times.
Sewing Parts
- Sew the ears between rows 6–8
- Sew the muzzle behind the back loops and bridge
- Sew the arms between rows 32–33
- Attach the head to the body in the center behind the bridge
Face Decoration
Add:
- Nose
- Eyes
- Eyebrows
Separate white yarn into thin strands and embroider the whiskers.
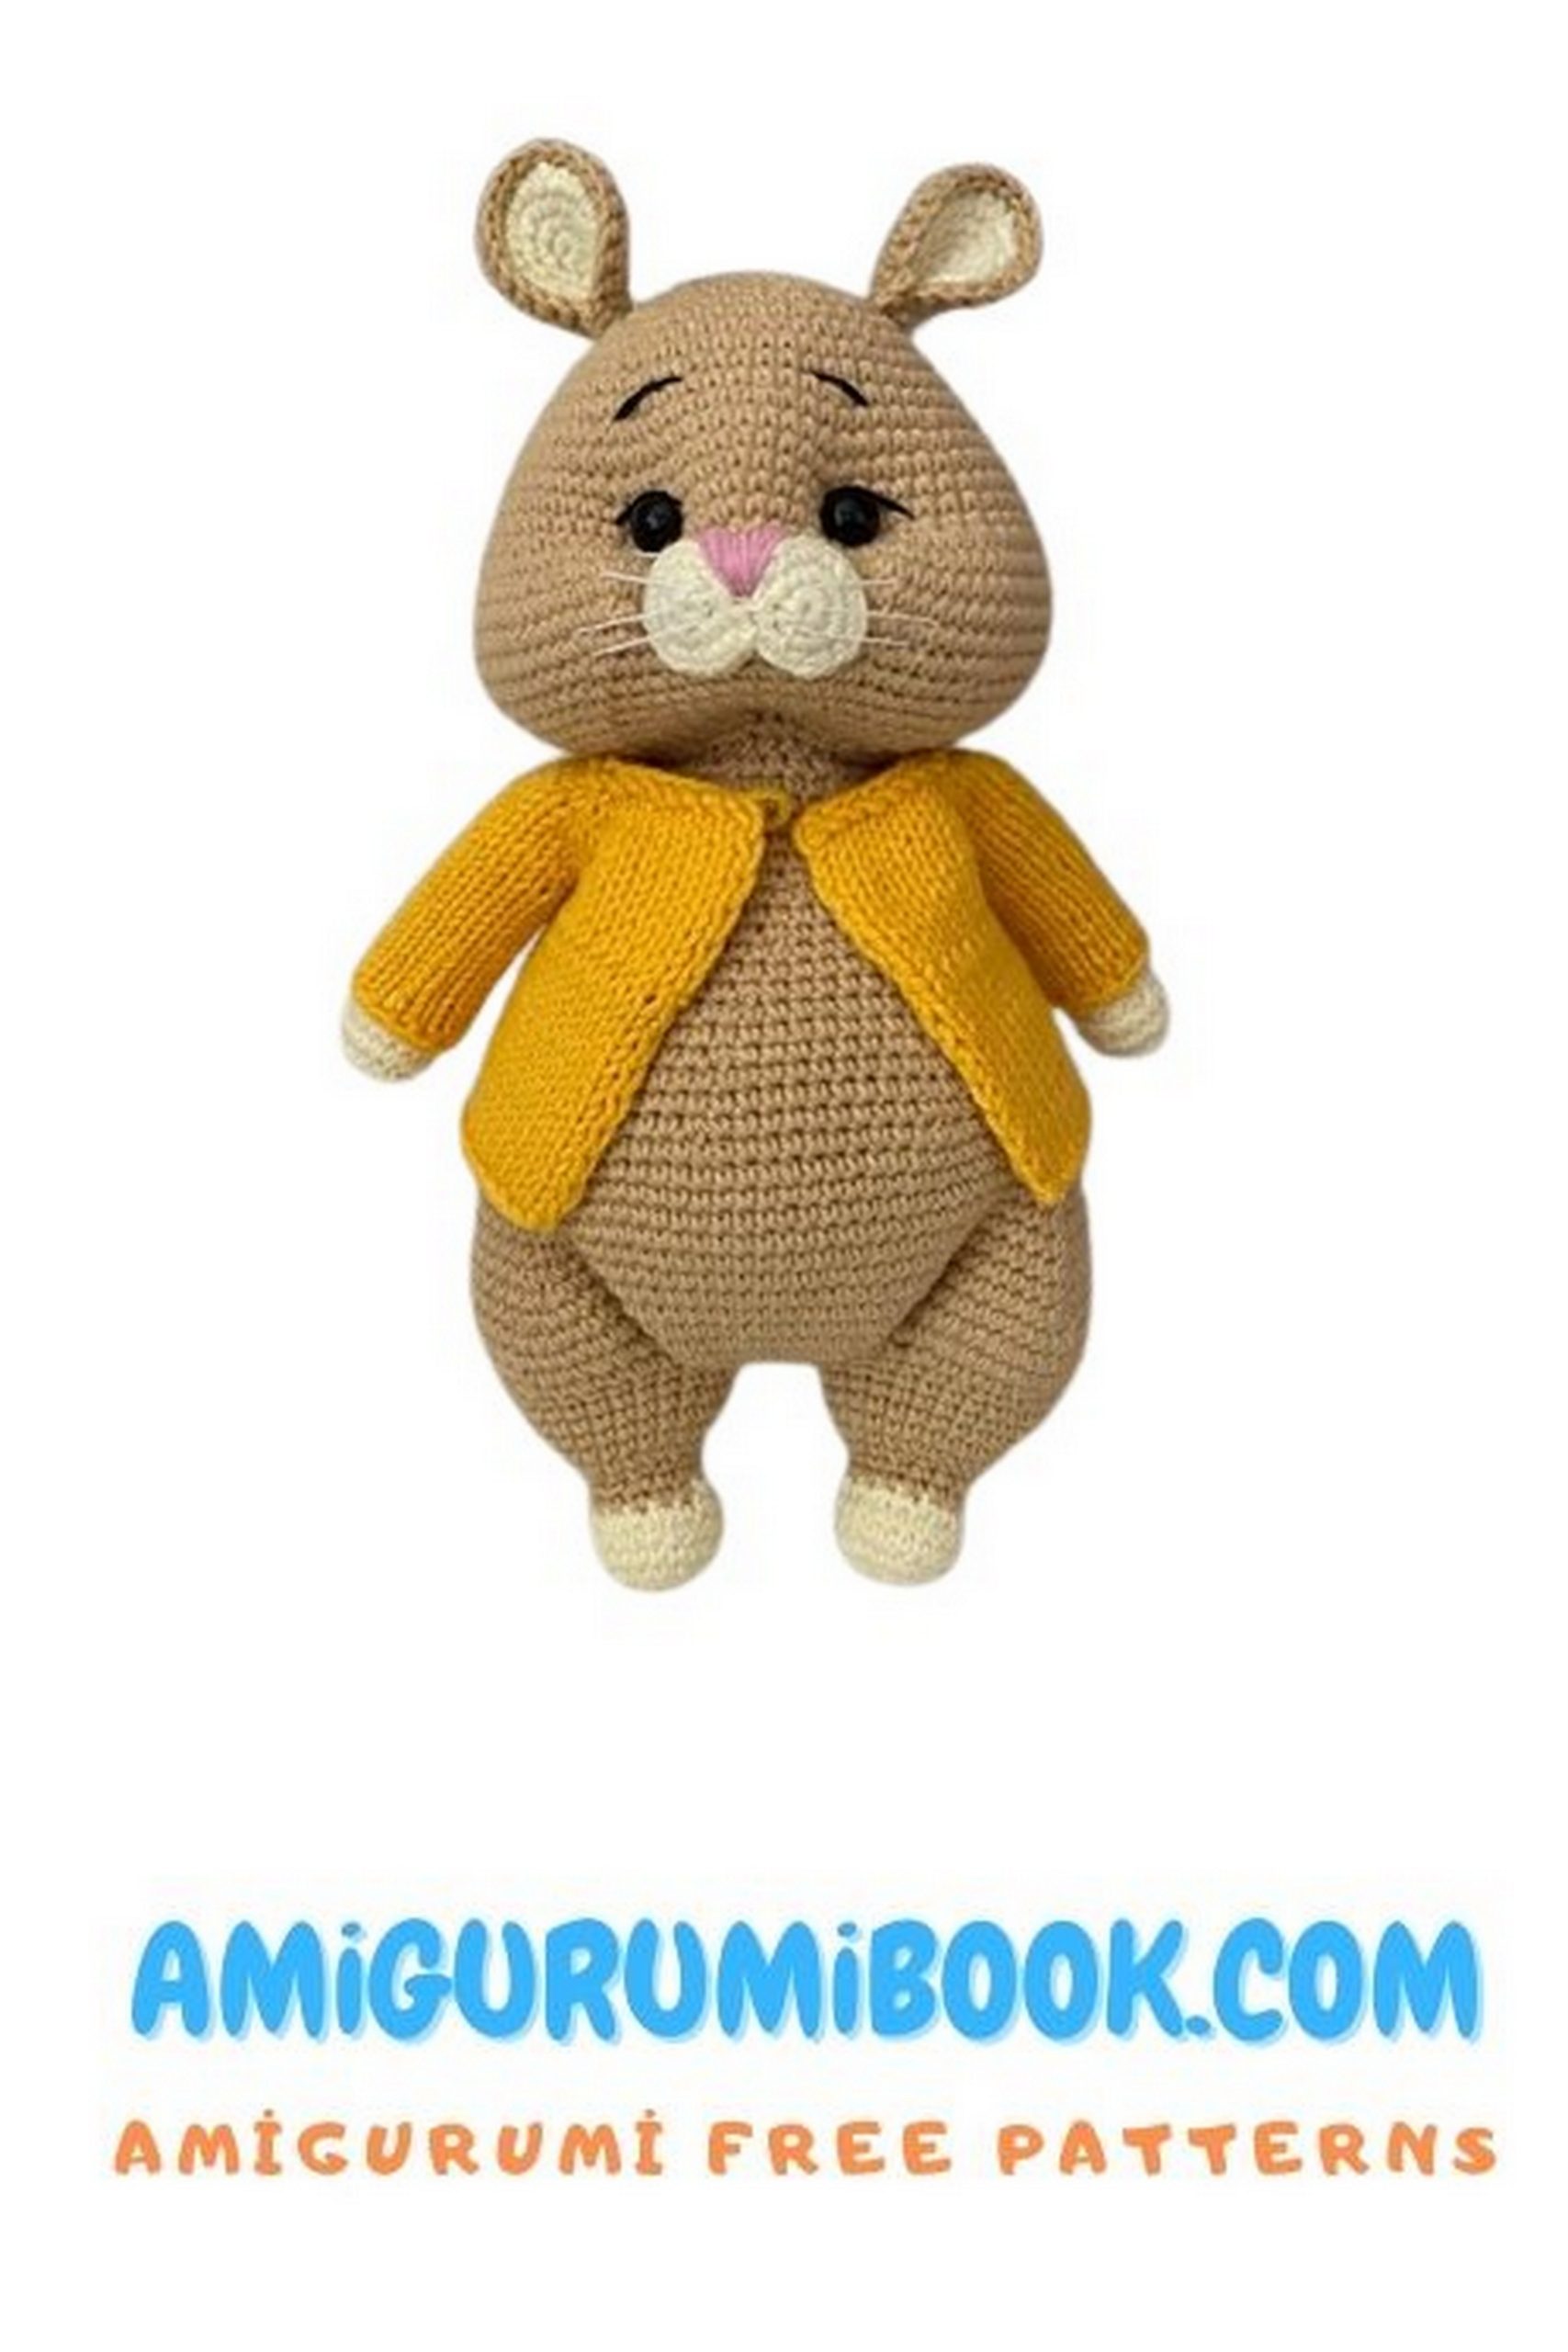
Sweater
Abbreviations
LP – front loop
BP – back loop
CH – chain stitch (increase)
Edging – edge stitch
Cast on 44 stitches.
At the start of each row make a slip stitch.
Edge stitches are always worked in the back loop.
Rows
1: BP, 42 LP, BP (44)
2: BP, 7 LP, CH, LP, CH, LP,
6 LP, CH, LP, CH, LP,
12 LP, CH, LP, CH, LP,
6 LP, CH, LP, CH, LP,
7 LP, BP (52)
3: BP, 50 BP, BP (52)
4: BP, 8 LP, CH, LP, CH, LP,
8 LP, CH, LP, CH, LP,
14 LP, CH, LP, CH, LP,
8 LP, CH, LP, CH, LP,
8 LP, BP (60)
5: BP, 58 BP, BP (60)
6: BP, 9 LP, CH, LP, CH, LP,
10 LP, CH, LP, CH, LP,
16 LP, CH, LP, CH, LP,
10 LP, CH, LP, CH, LP,
9 LP, BP (68)
7: BP, 66 BP, BP (68)
8: BP, 10 LP, CH, LP, CH, LP,
12 LP, CH, LP, CH, LP,
18 LP, CH, LP, CH, LP,
12 LP, CH, LP, CH, LP,
10 LP, BP (76)
9: BP, 74 BP, BP (76)
10: BP, 11 LP, CH, LP, CH, LP,
14 LP, CH, LP, CH, LP,
20 LP, CH, LP, CH, LP,
14 LP, CH, LP, CH, LP,
11 LP, BP (84)
11: BP, 82 LP, BP (84)
12: BP, 13 LP, (2 sc together) ×12, 14 LP, BP
💡 For short sleeves, close the stitches here instead of placing them on extra thread.
13: BP, 50 BP, BP
14: BP, 12 LP, (2 LP, BP) ×12, 14 LP, BP
15: BP, 62 BP, BP
Continue crocheting front loops only for the desired sweater length
(about 12 rows in the original design).
Sleeves
Using double-pointed knitting needles:
- Pick up the sleeve stitches
- Attach new yarn
Knit stockinette stitch:
- 1 row knit
- 1 row purl
Repeat until the sleeve length is correct
(about 17 rows).
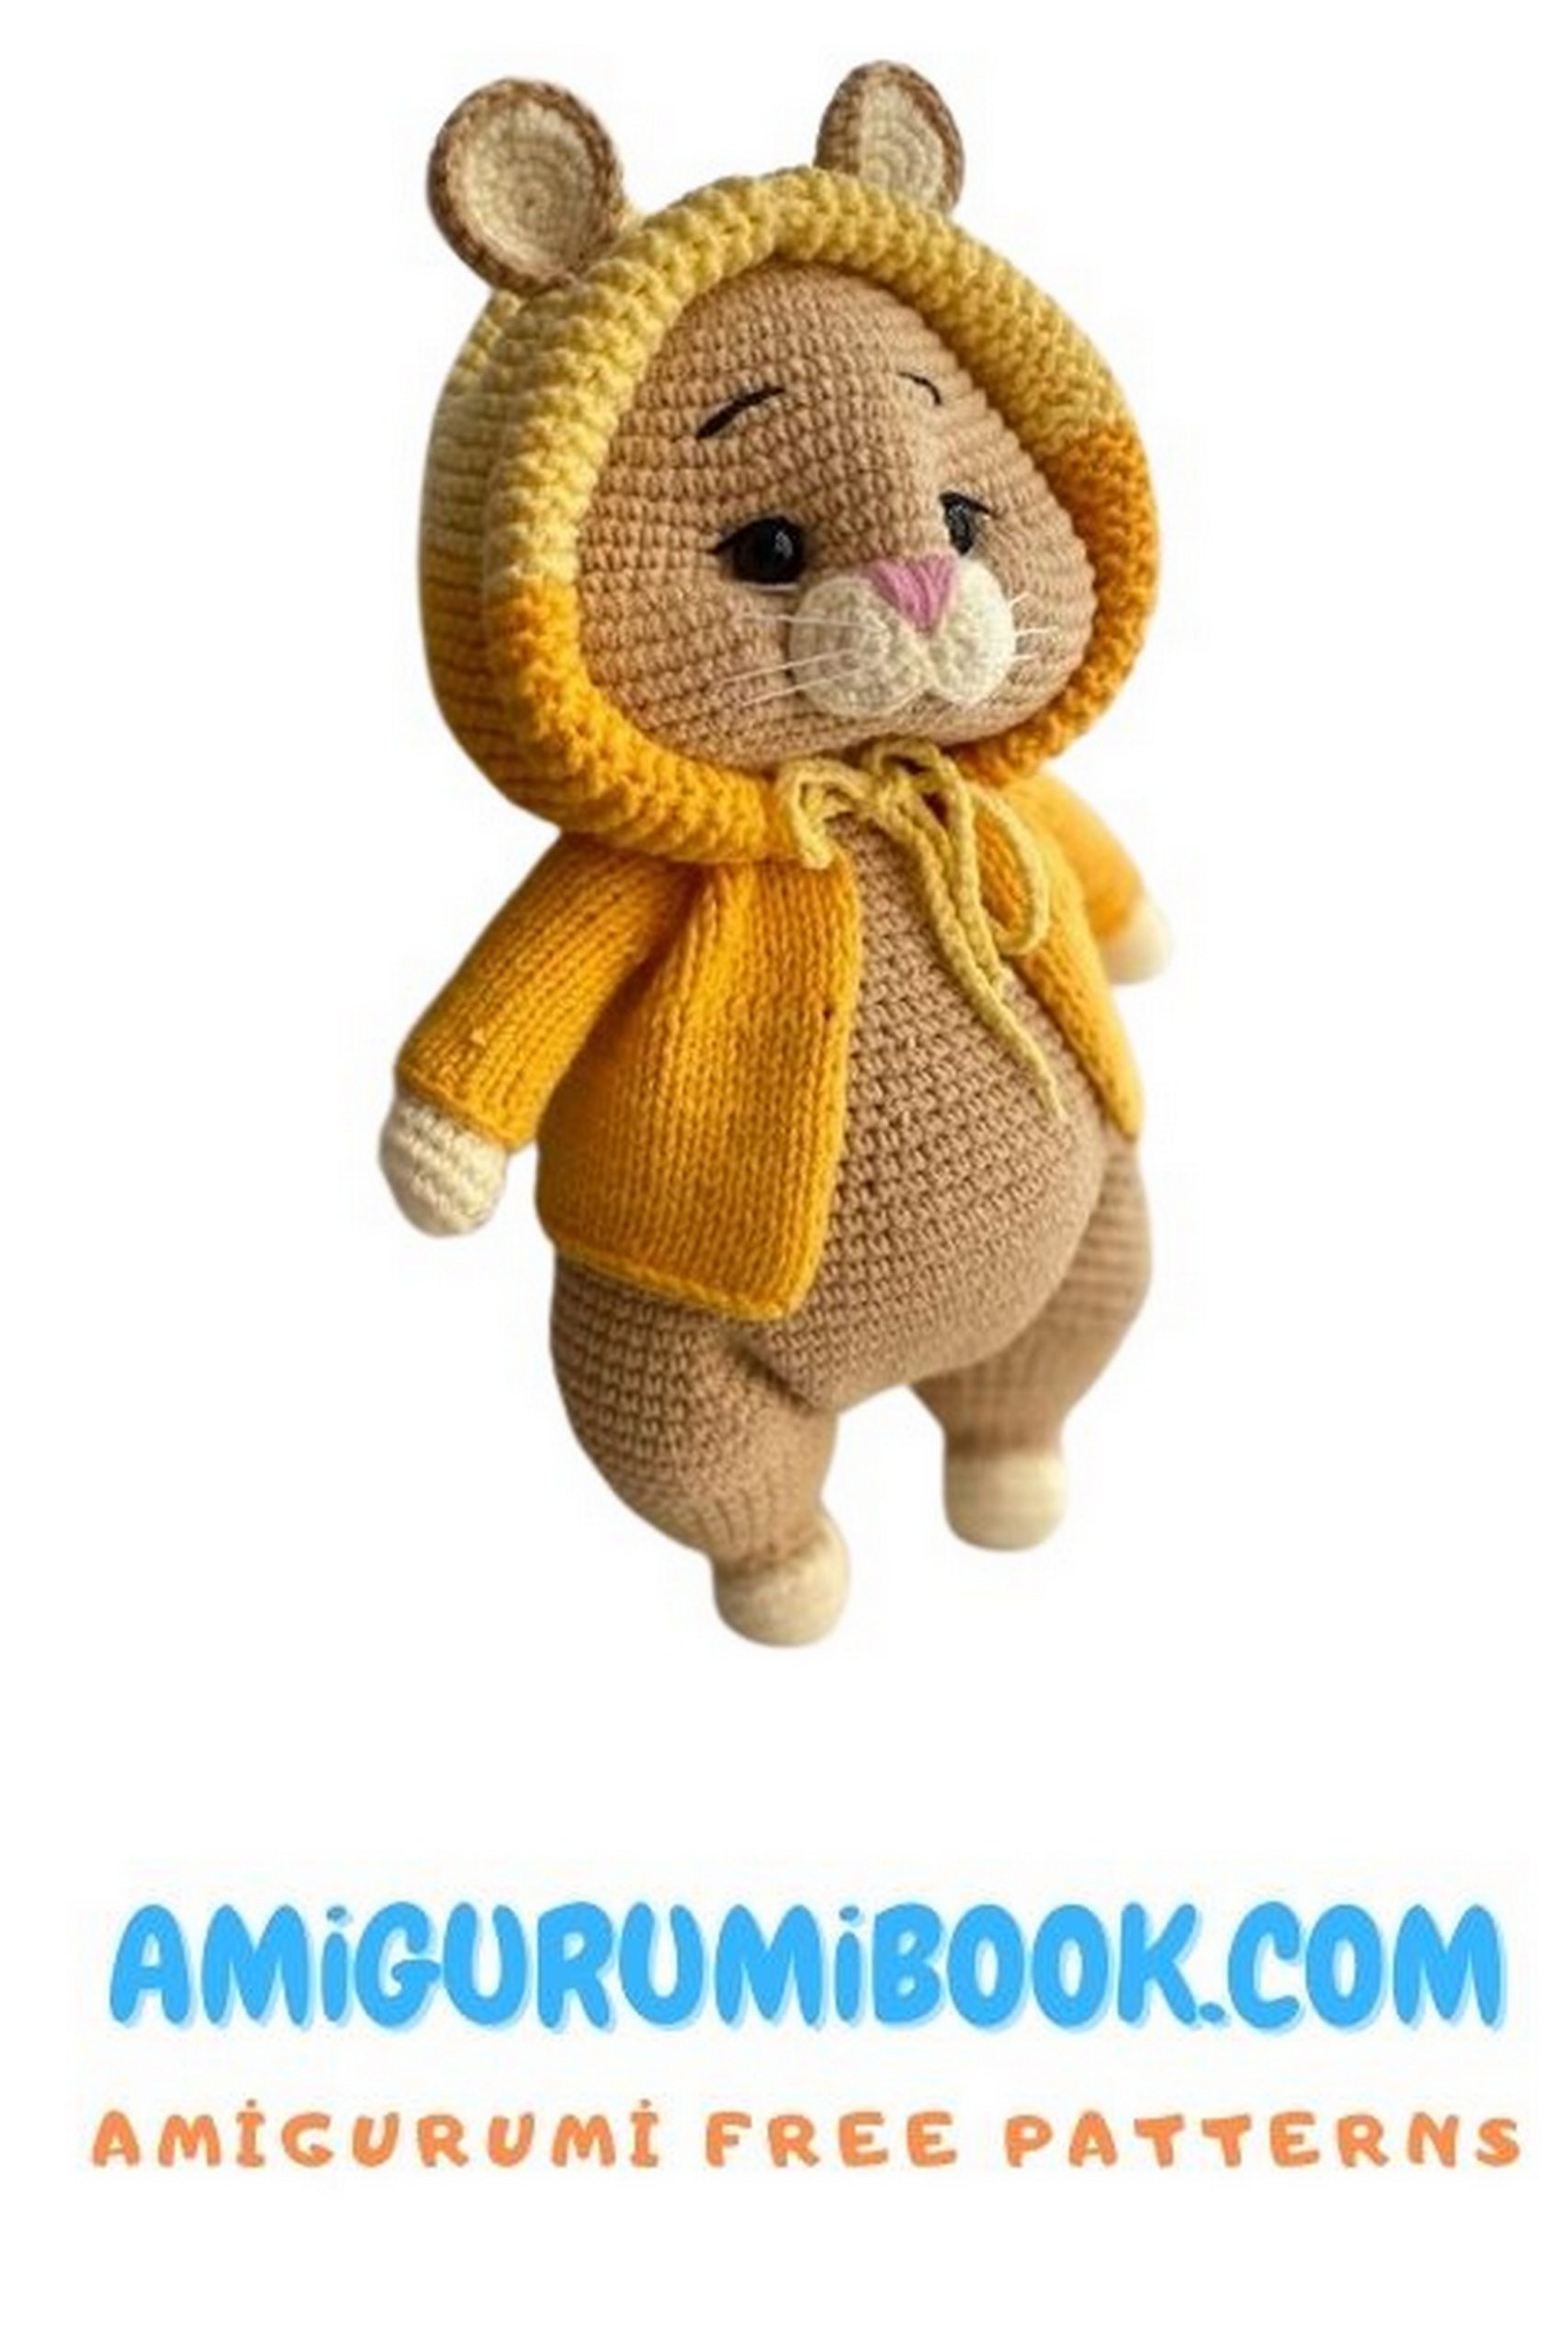
Hood
Pick up 44 stitches along the neckline.
1: BP, CH 1, LP, CH, (2 LP, BP) ×20, CH 1, LP, CH (65)
2: BP, 63 LP, BP
Continue knitting garter stitch (knit every row) until the hood closes over the head.
Close with a jersey seam.
Make a chain tie for the hood using slip stitches.
🎉 Congratulations! Your hamster amigurumi is ready.