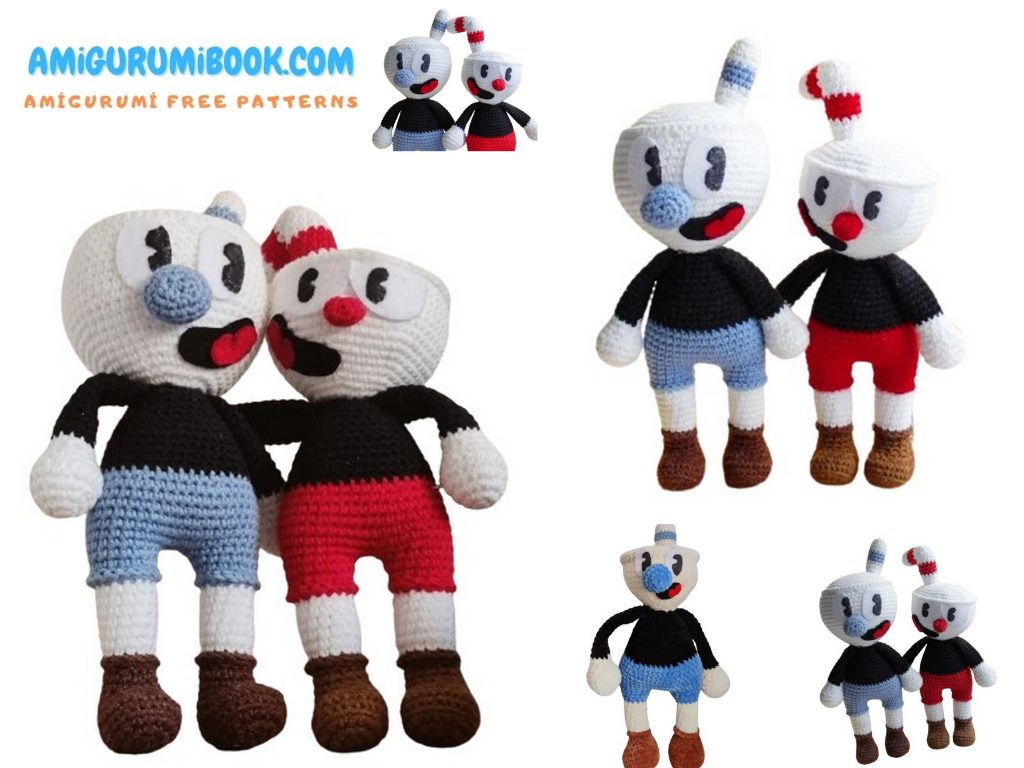
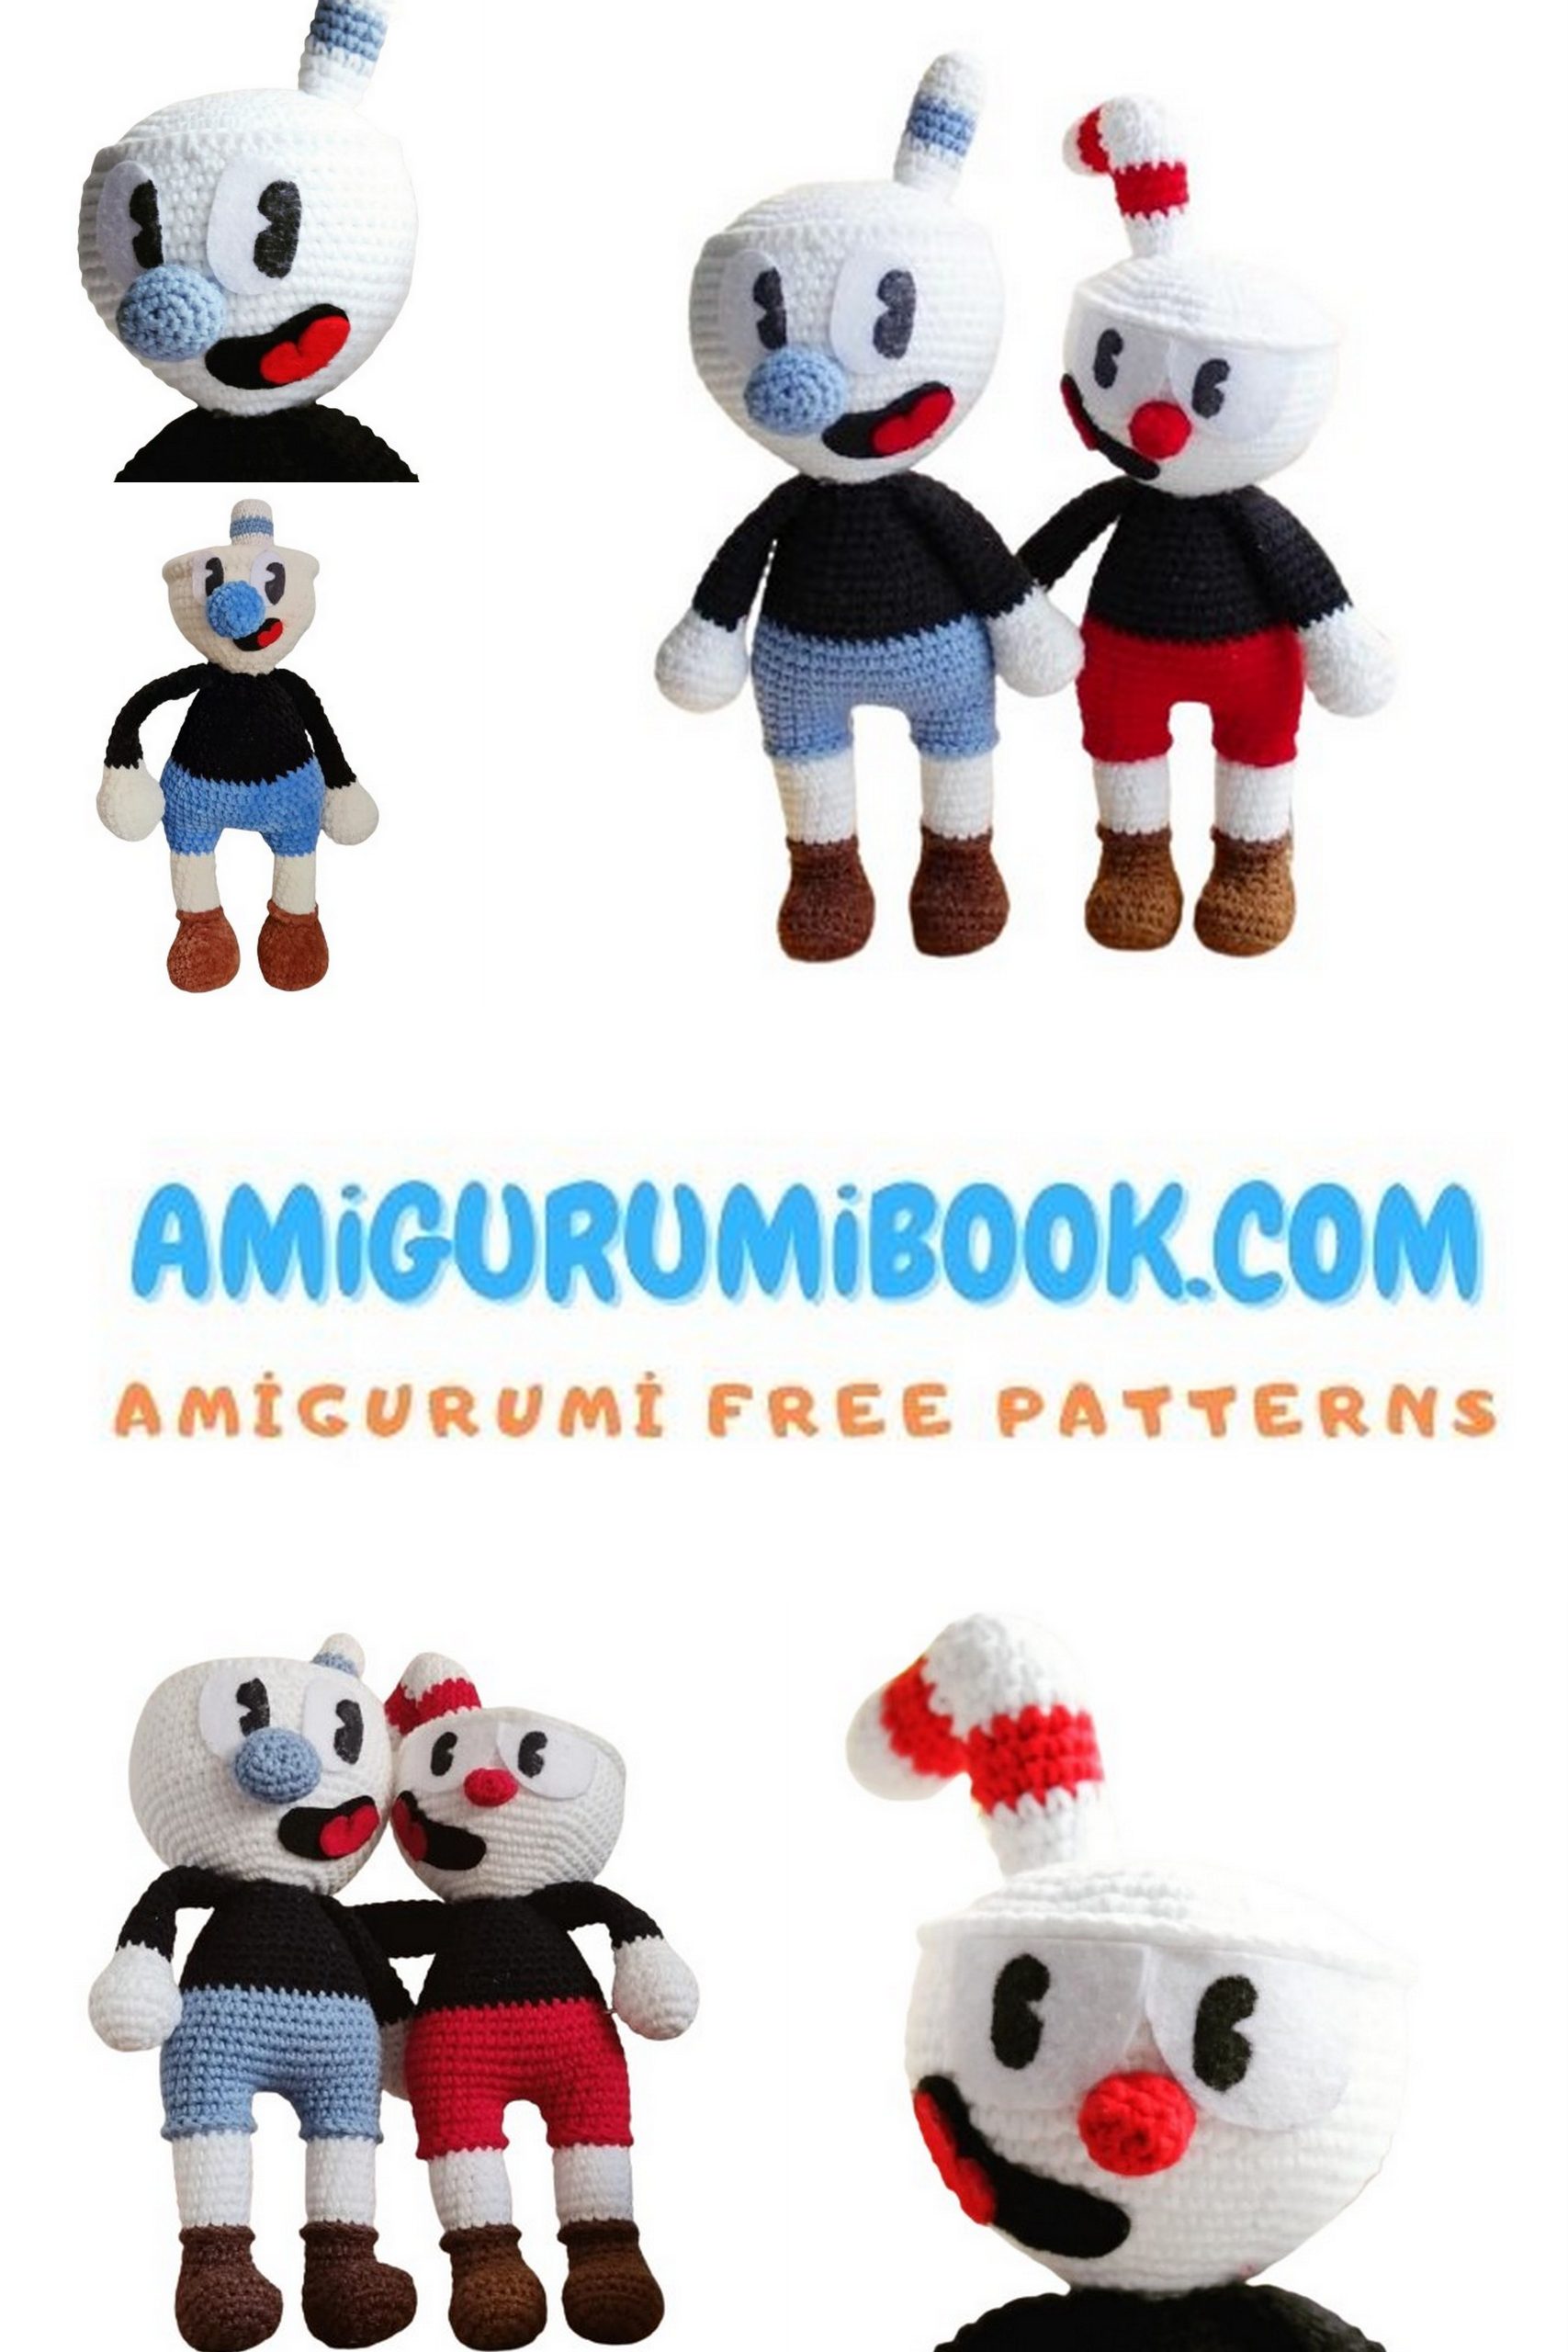
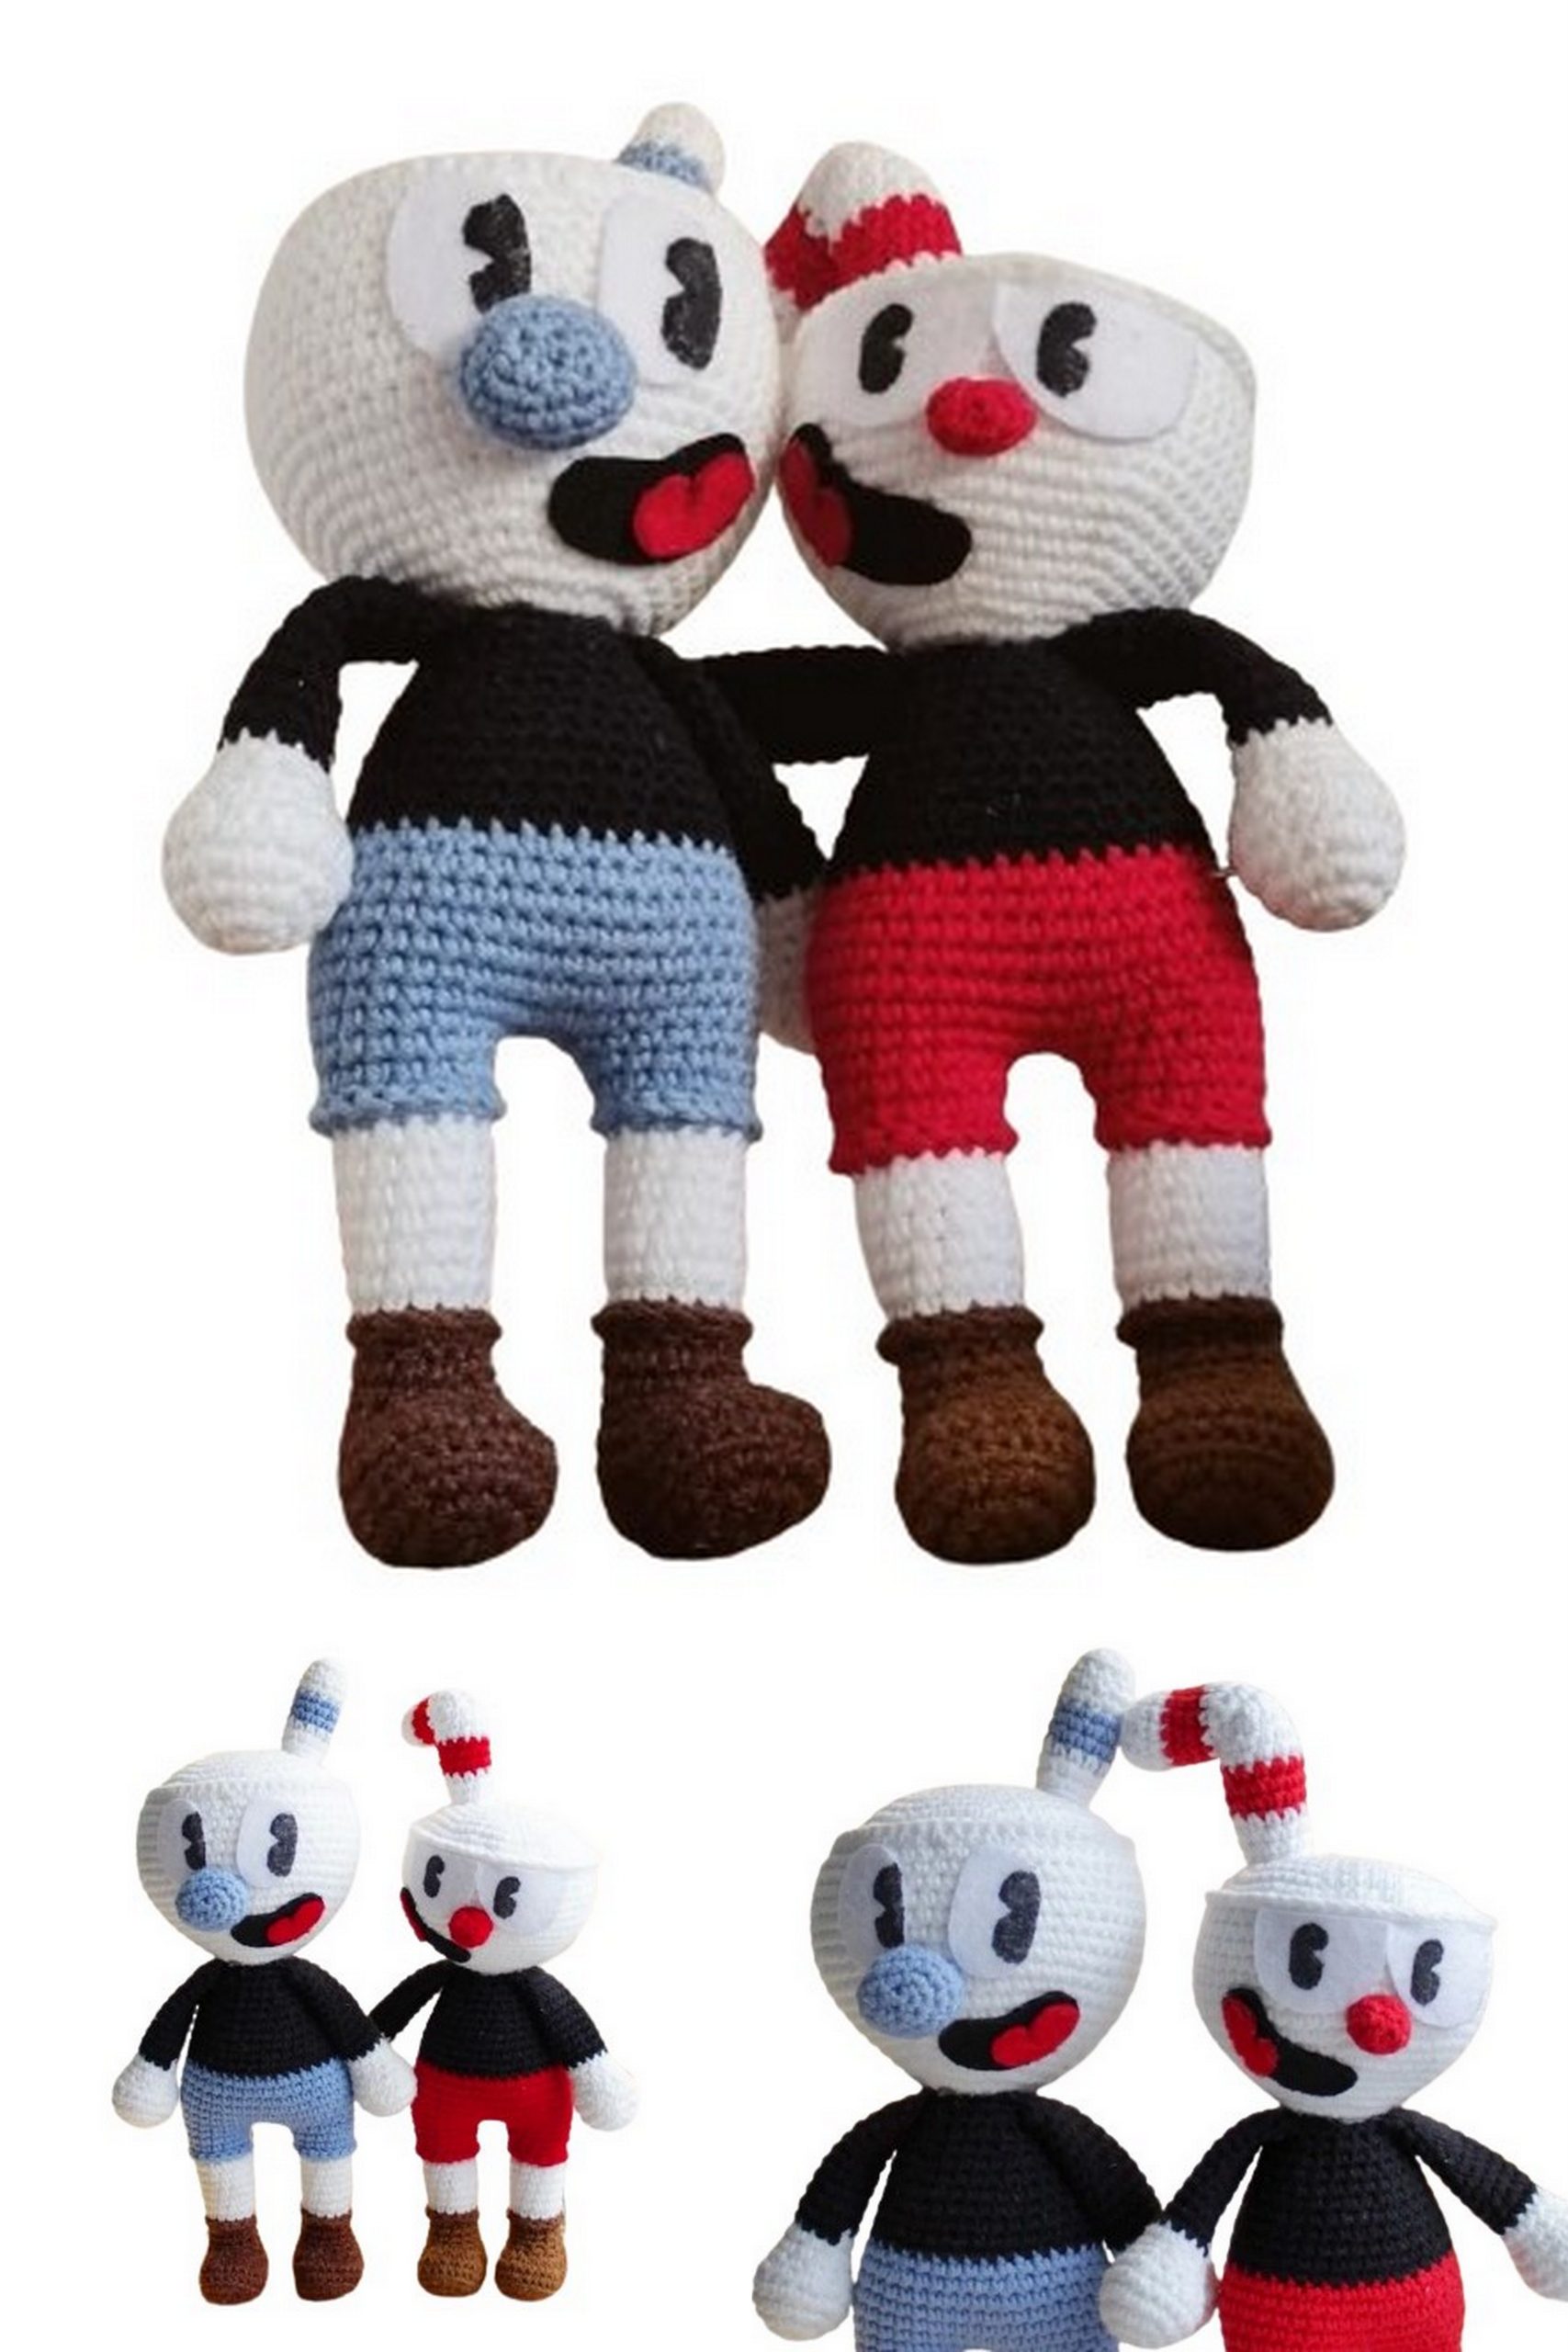
Step into the whimsical world of Cuphead with our free amigurumi pattern! Whether you’re a seasoned crocheter or just starting out, this pattern is perfect for bringing the charming video game character to life. With easy-to-follow instructions and basic crochet stitches, you’ll have your own adorable amigurumi Cuphead in no time. Get your yarn and hook ready, and let’s crochet some gaming magic!
If you want to access 1000+ free amigurumi patterns, you can download our application from this link!
Materials:
YarnArt Jeans – one skein of each color required.
Main colors are: white, black, brown, red, and blue.
Felt for eyes.
Toy stuffing.
Fabric paints.
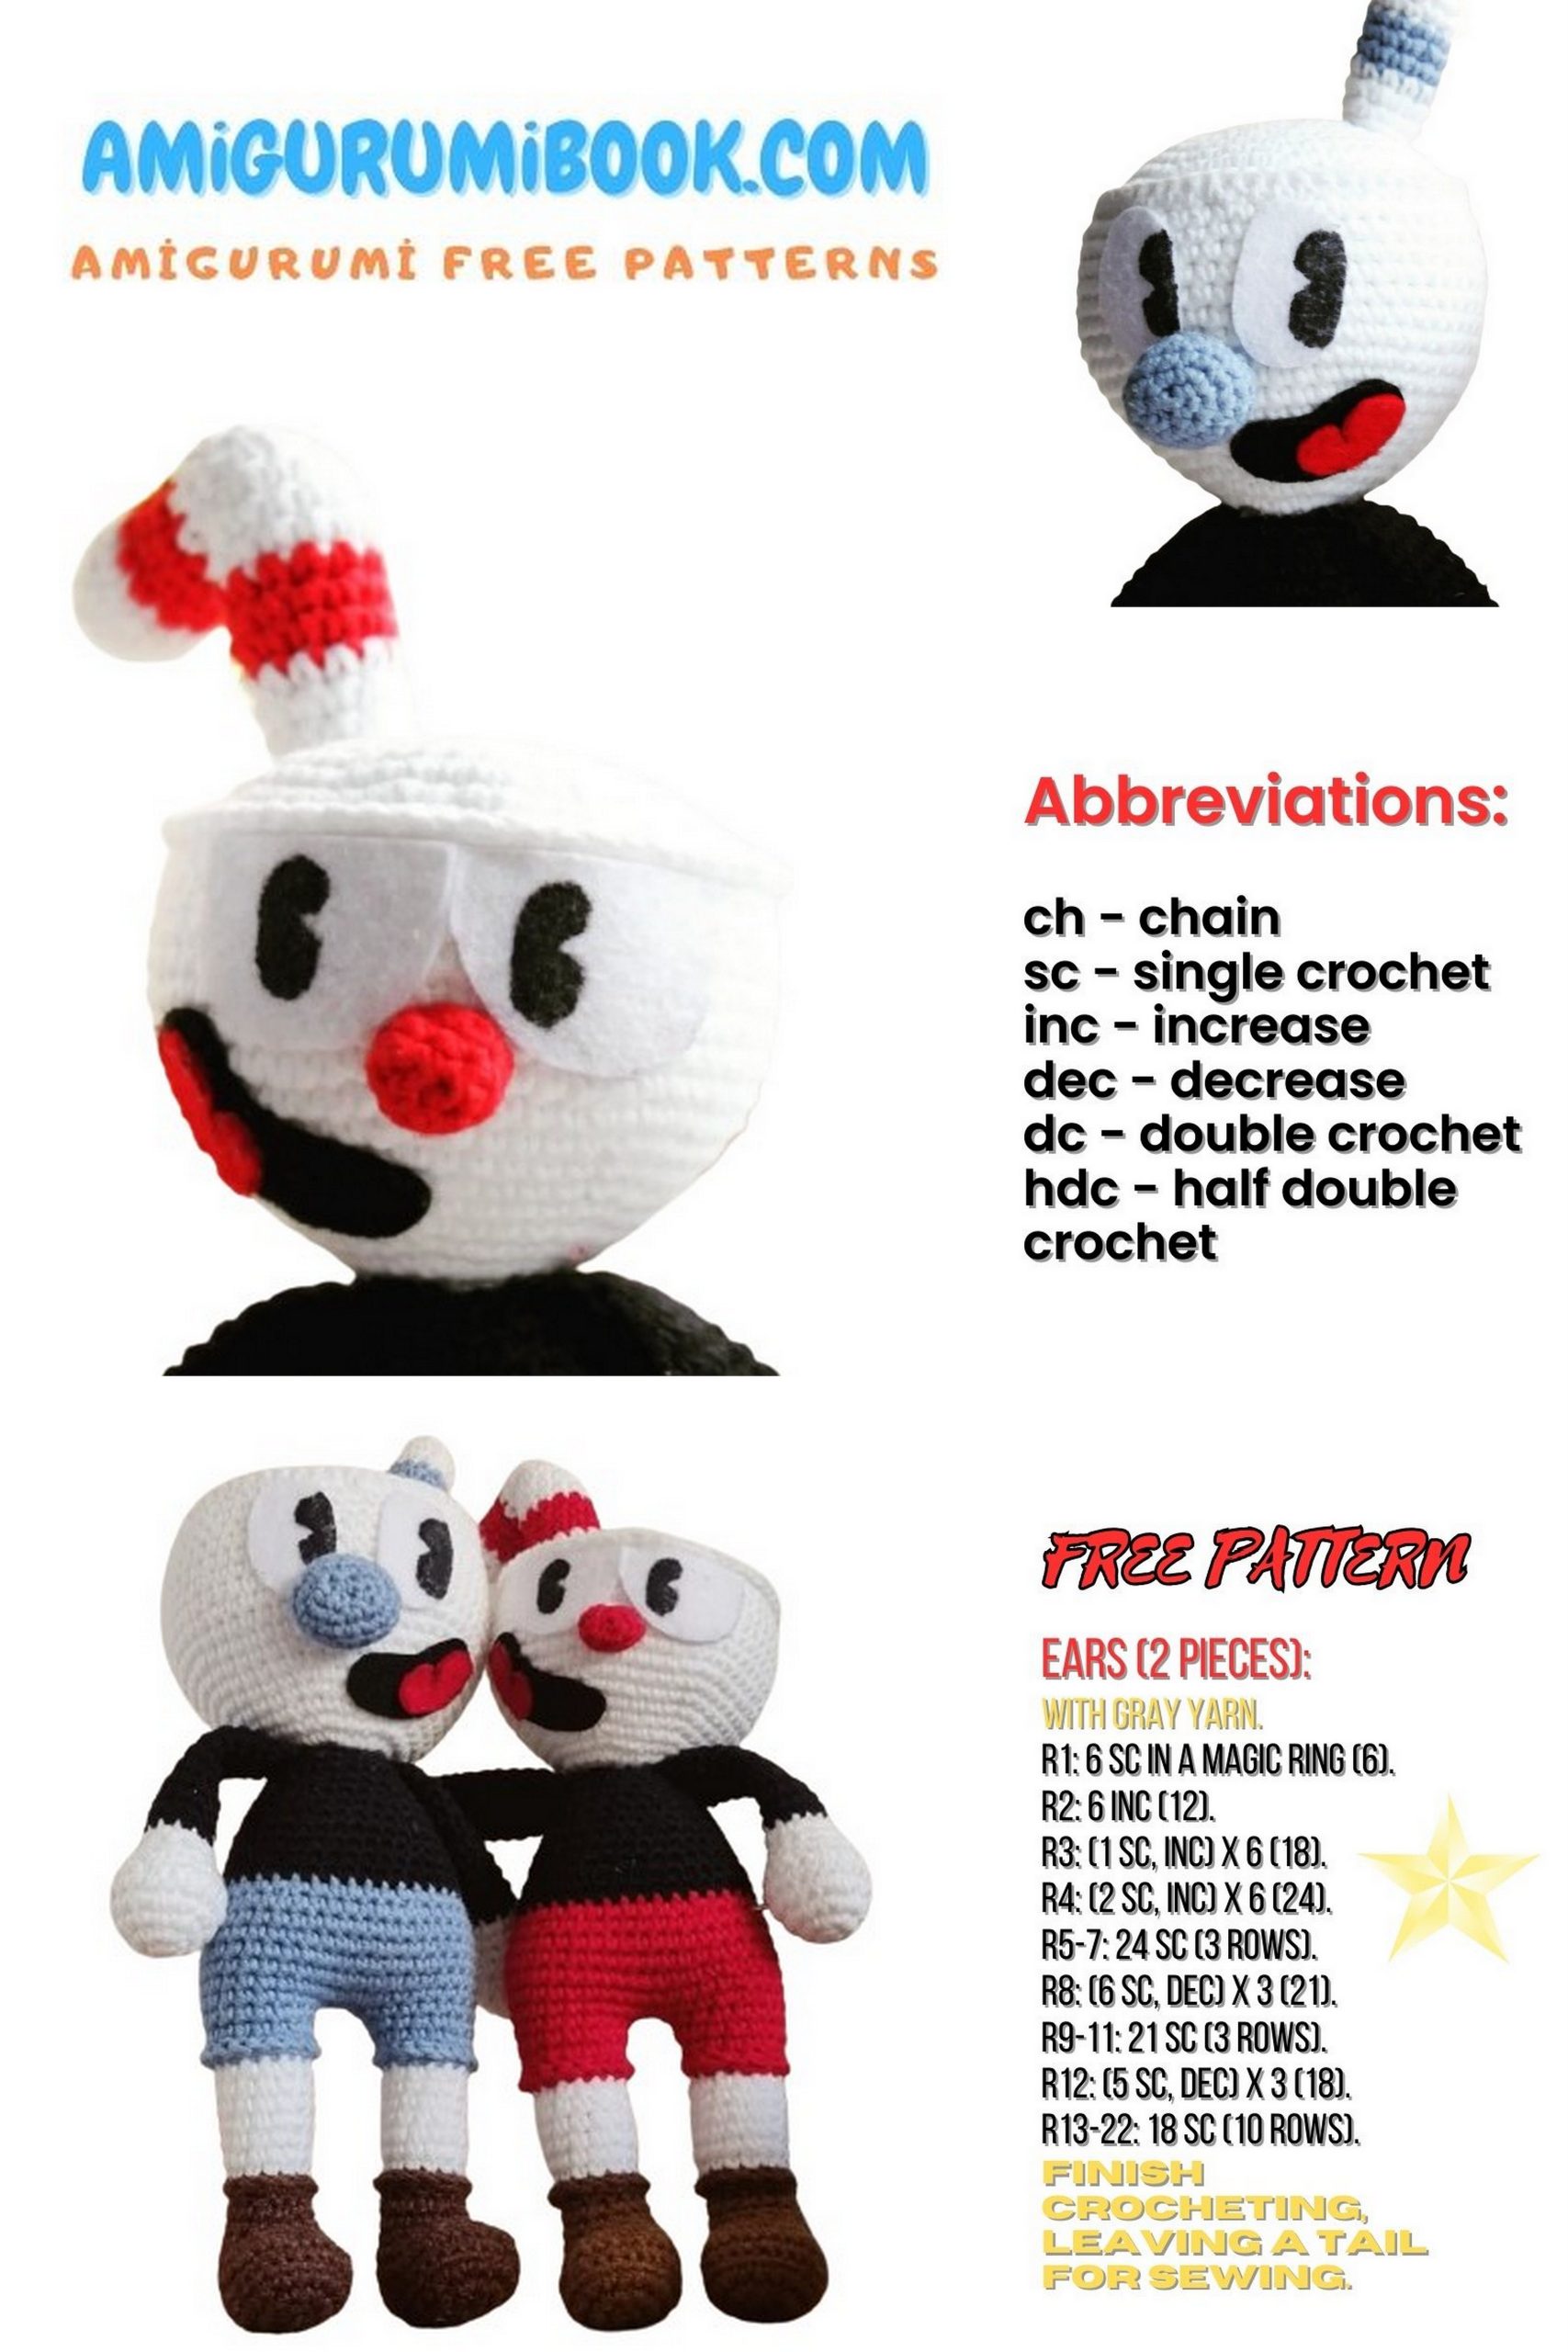
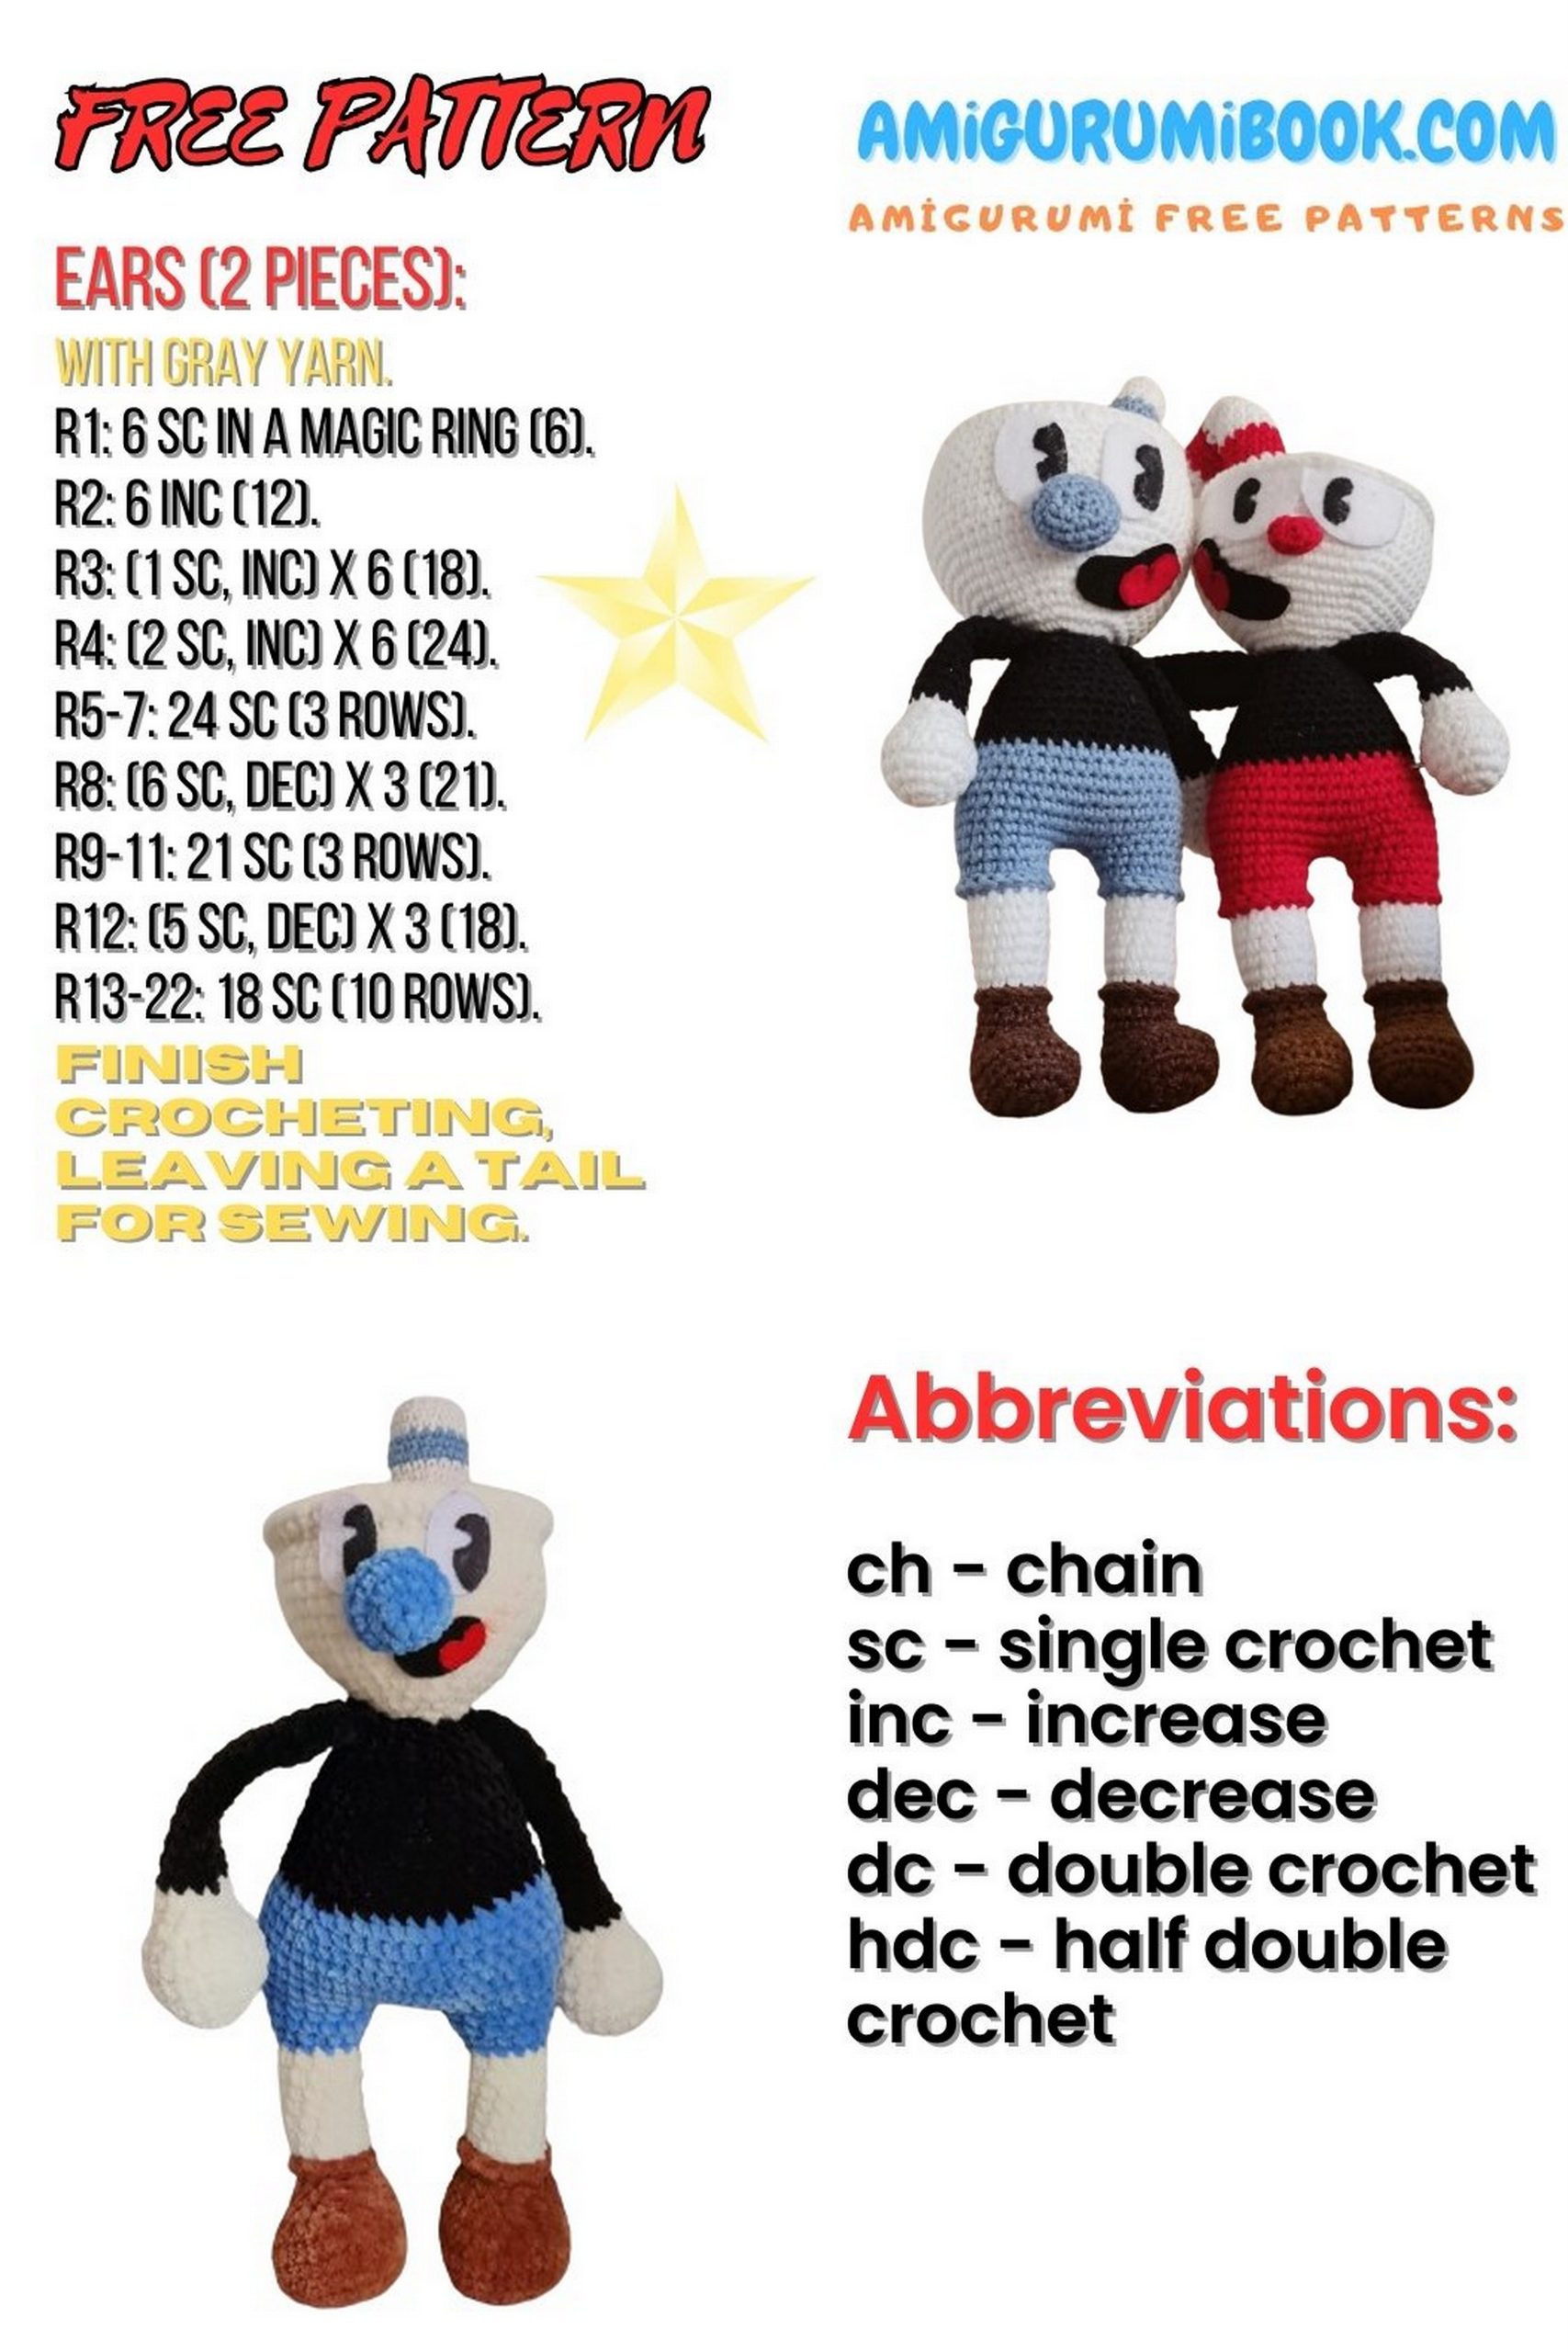
Abbreviations:
ch – chain stitch
sc – single crochet
inc – increase
dec – decrease
sl st – slip stitch
PATTERN

Handles (4 pieces) Amigurumi Cuphead
for two heroes:
Start with white:
1: 6 ch
2: 6 sc = 12
3: (1 sc, inc)*6 = 12
4: (2 sc, inc)*6 = 18
5: (5 sc, inc)*3 = 21
6: 21 sc
7: (5 sc, inc)*3 = 18
8: (1 sc, inc)*6 = 12
9: 12 sc
10: 12 sc – switch to black and crochet 10 rows of 12 sc, fold in half and crochet together on both sides. Cut the yarn and hide, leaving the end if it’s more convenient for you to sew.
Cup Lid (2 pieces): Amigurumi Cuphead
1: 8 ch
2: 8 sc = 16
3: (1 sc, inc)*8 = 24
4: (2 sc, inc)*8 = 32
5: (3 sc, inc)*8 = 40
6: (4 sc, inc)*8 = 48
7: (5 sc, inc)*8 = 56 – fasten off and cut the yarn.
Handle (2 pieces): Amigurumi Cuphead
1: 6 ch
2: (2 sc, inc)*2 = 8 – crochet 18 rows of 8 sc, decrease until closed, and hide the yarn. I don’t stuff.

Blue Straw (start with white): Amigurumi Cuphead
1: 6 ch
2: 6 sc = 12
3: 12 sc in back loops only
4: 12 sc
5: 12 sc – switch to blue
6: 12 sc
7: 12 sc
8: 12 sc – switch to white
9: 12 sc
10: 12 sc
11: 12 sc – fasten off and leave a tail for sewing.
Red Straw (start with white):
1: 6 ch
2: 6 sc = 12
3: 12 sc in back loops only
4: 12 sc
5: 12 sc – switch to red
6: 12 sc
7: 12 sc
8: 12 sc – switch to white
9: 12 sc
10: 12 sc
11: 12 sc
12: 12 sc
13: 12 sc
14: 12 sc
15: 12 sc – switch to red
16: 12 sc
17: 12 sc
18: 12 sc – switch to white
19: 12 sc
20: 12 sc
21: 12 sc – fasten off and leave a tail for sewing.
Where 6 rows were crocheted in white, fold and sew the sides to create the bend of the straw.
Red Nose: Amigurumi Cuphead
1: 6 ch
2: 6 sc
3: 6 sc
4: 6 sc – fasten off and leave a tail for sewing.
Blue Nose: Amigurumi Cuphead
1: 4 ch, inc, 1 sc, inc in last, 2 sc = 8
2: (1 sc, inc)*4 = 12
3: (2 sc, inc)*4 = 16
4: 16 sc
5: 16 sc
6: (2 sc, dec)*4 = 12, fasten off and leave a tail for sewing.
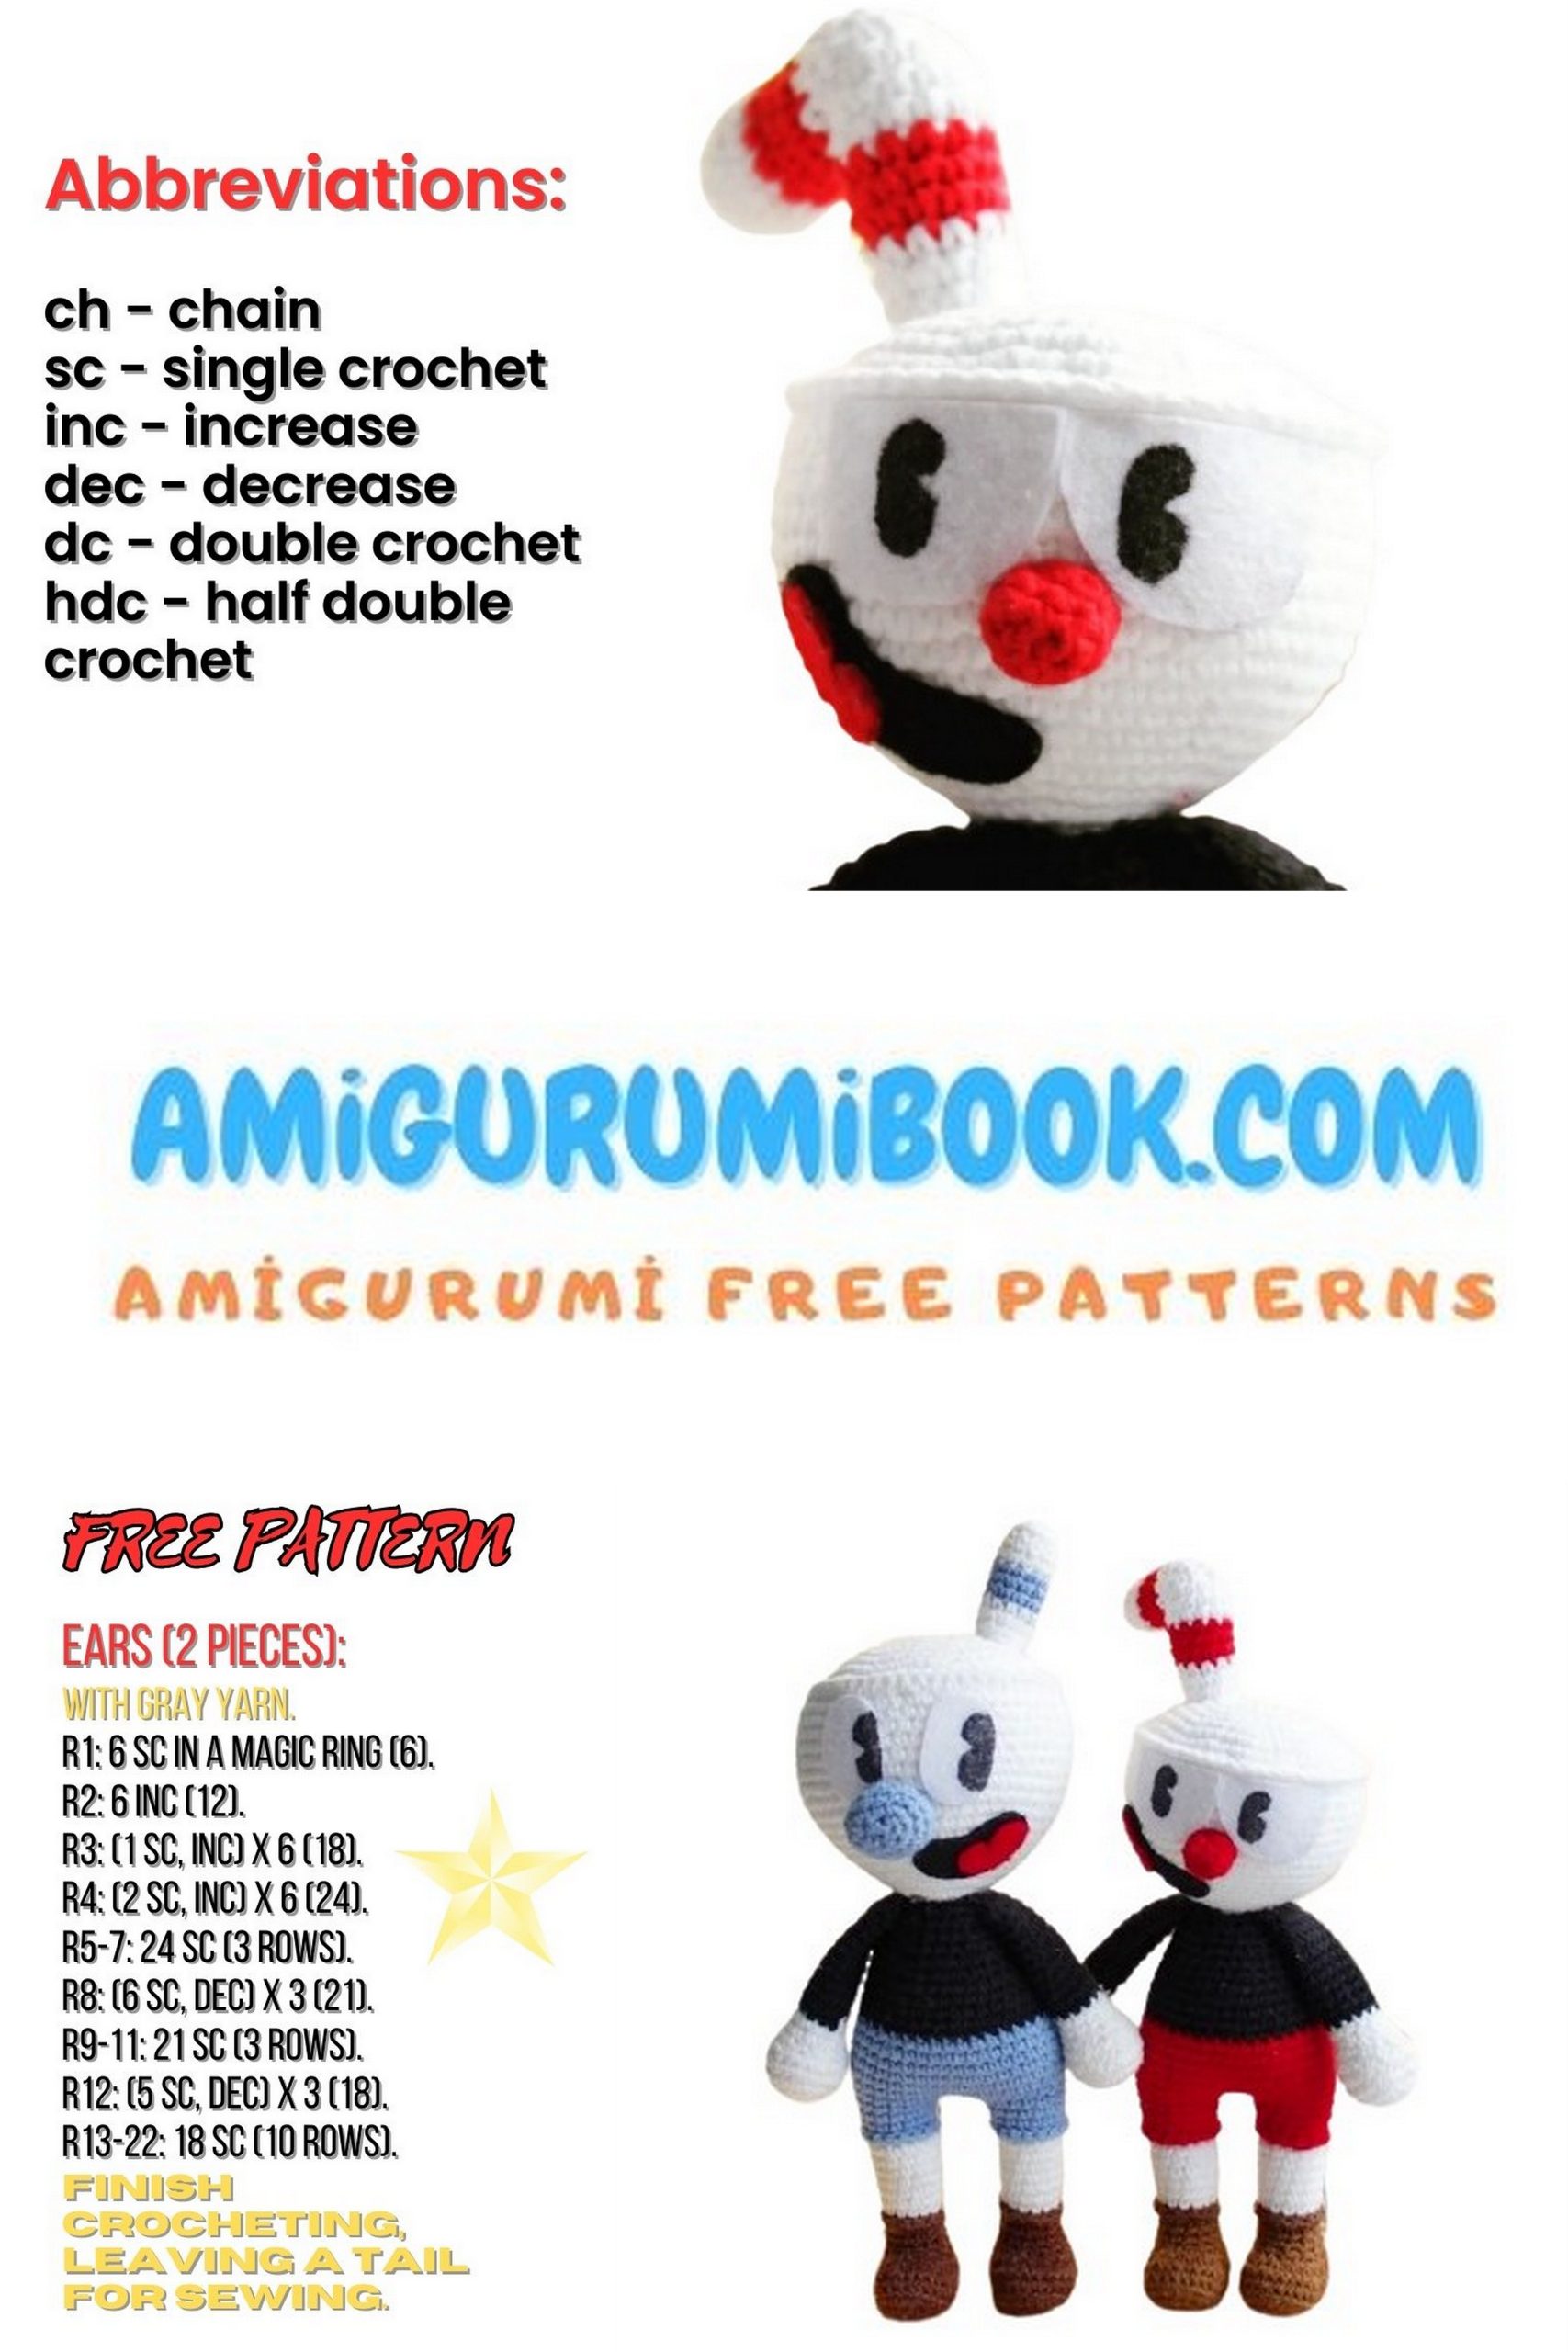
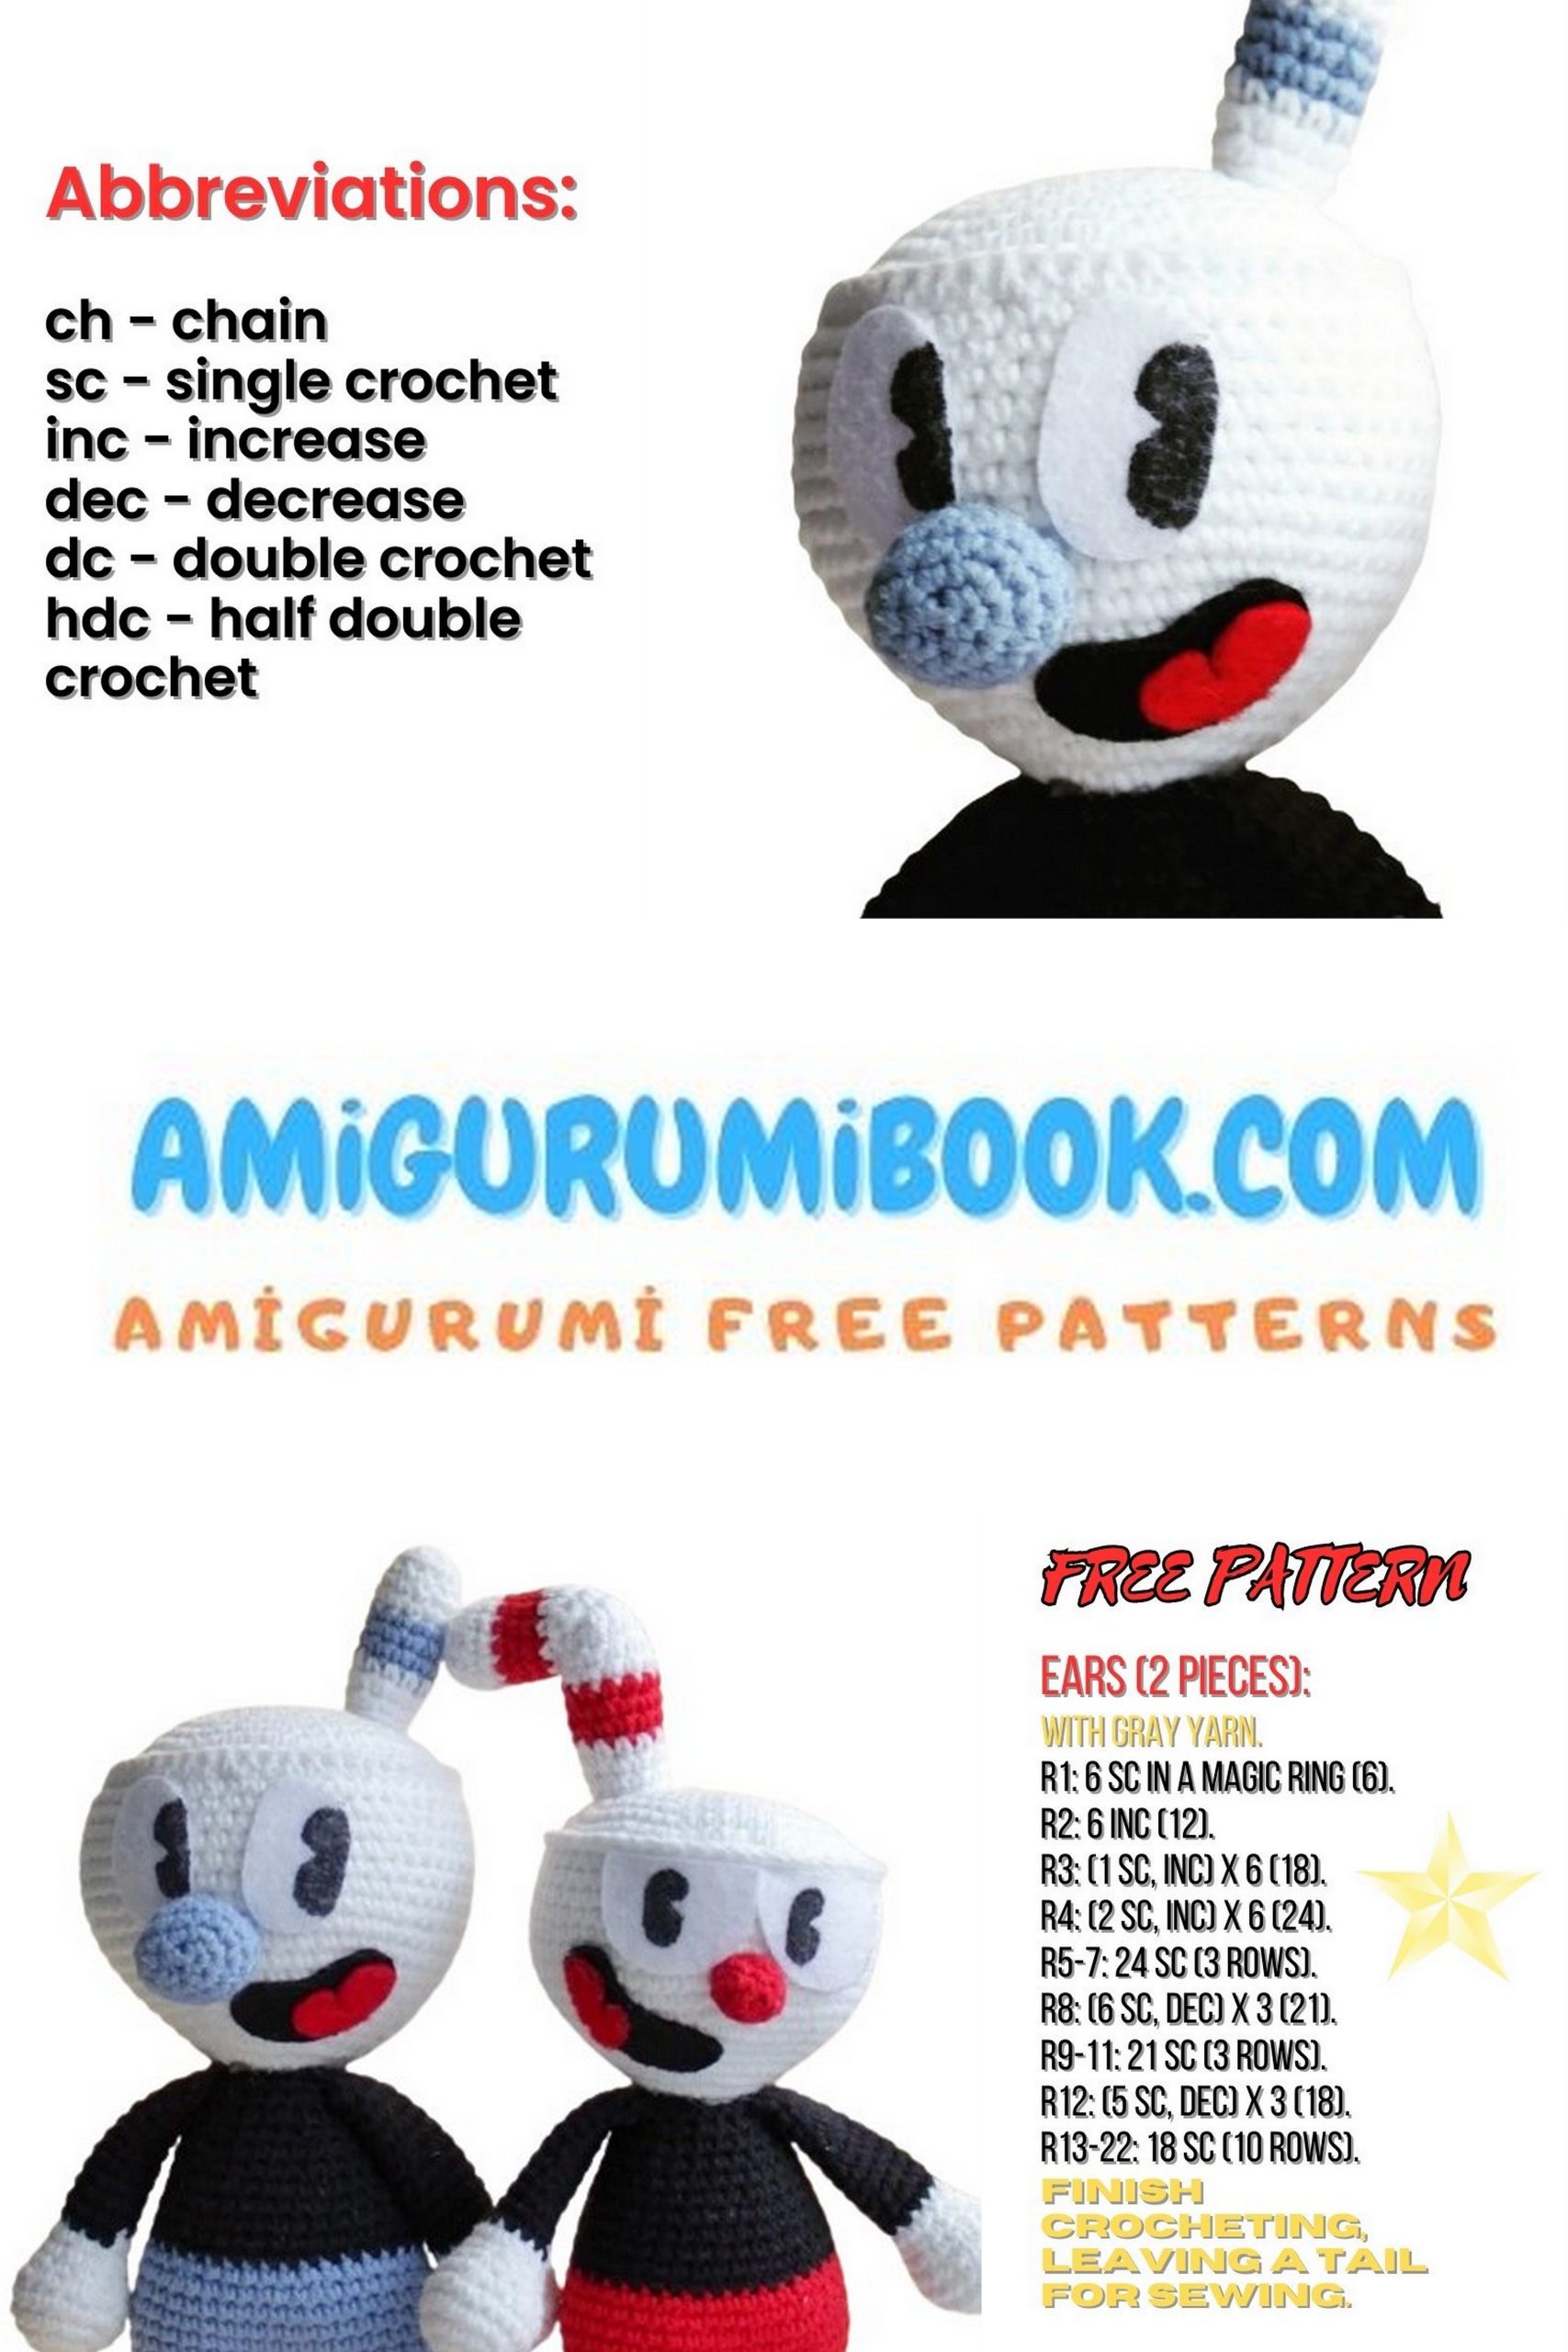
Make eyes from white felt:
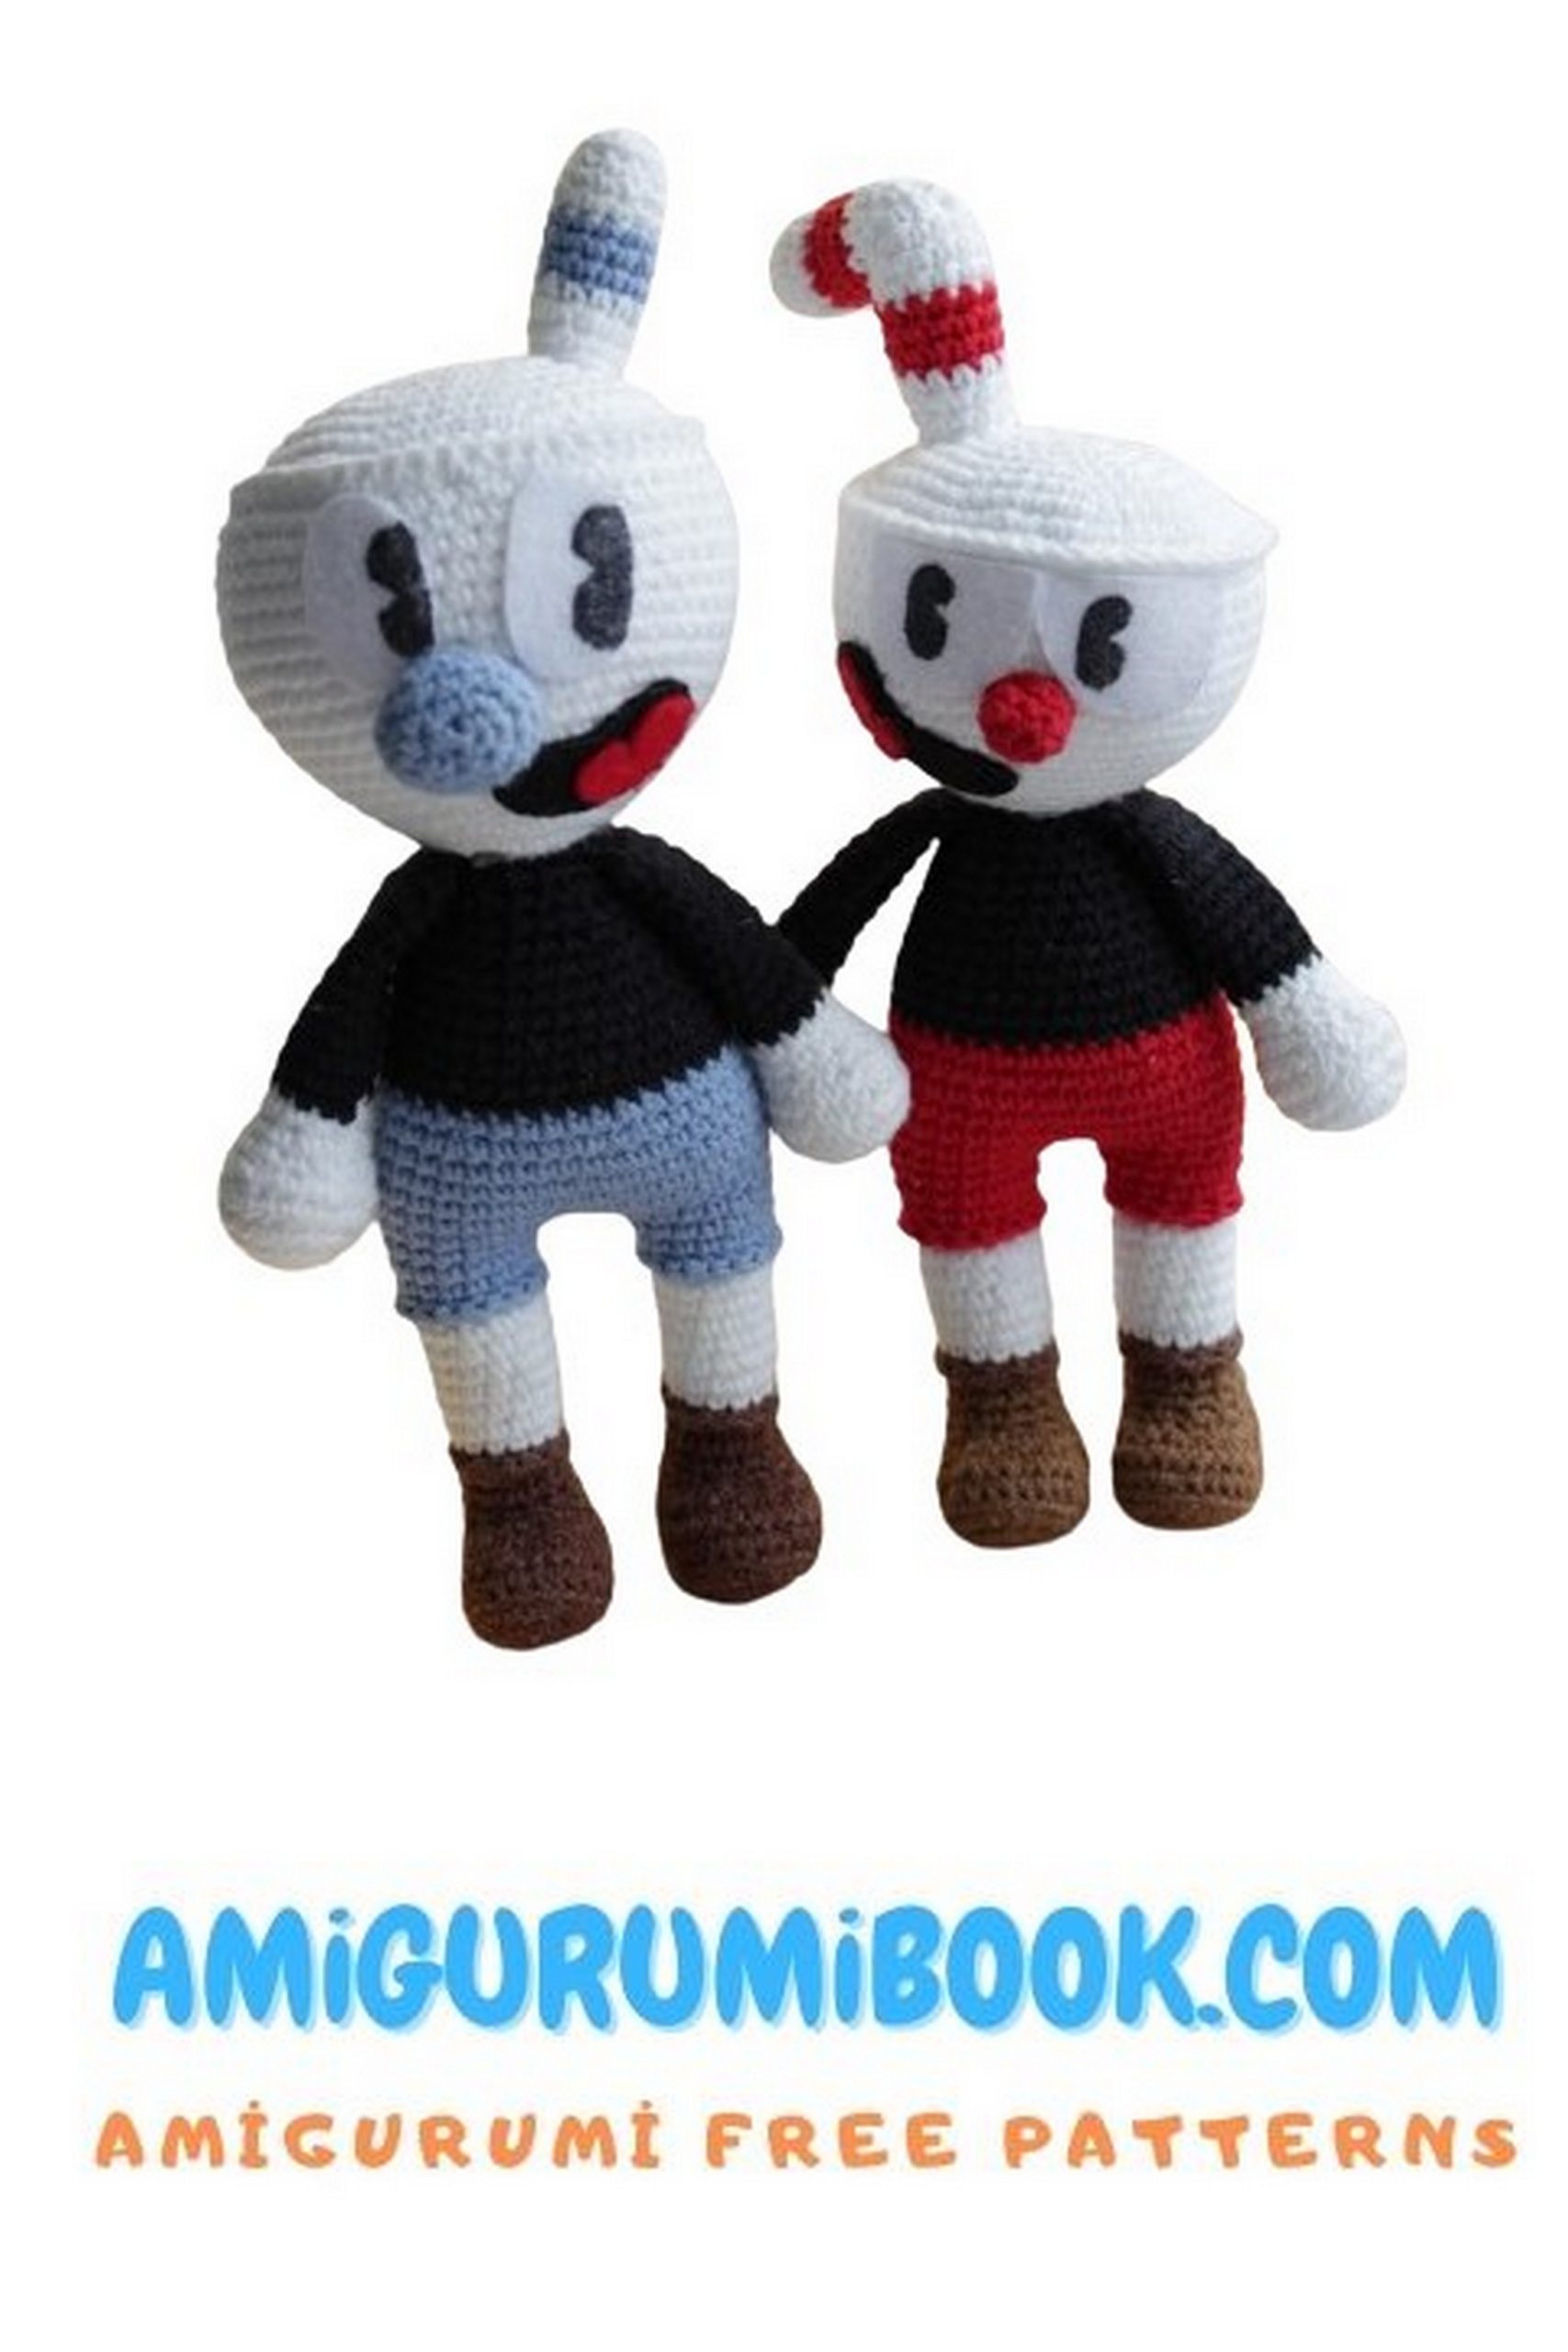
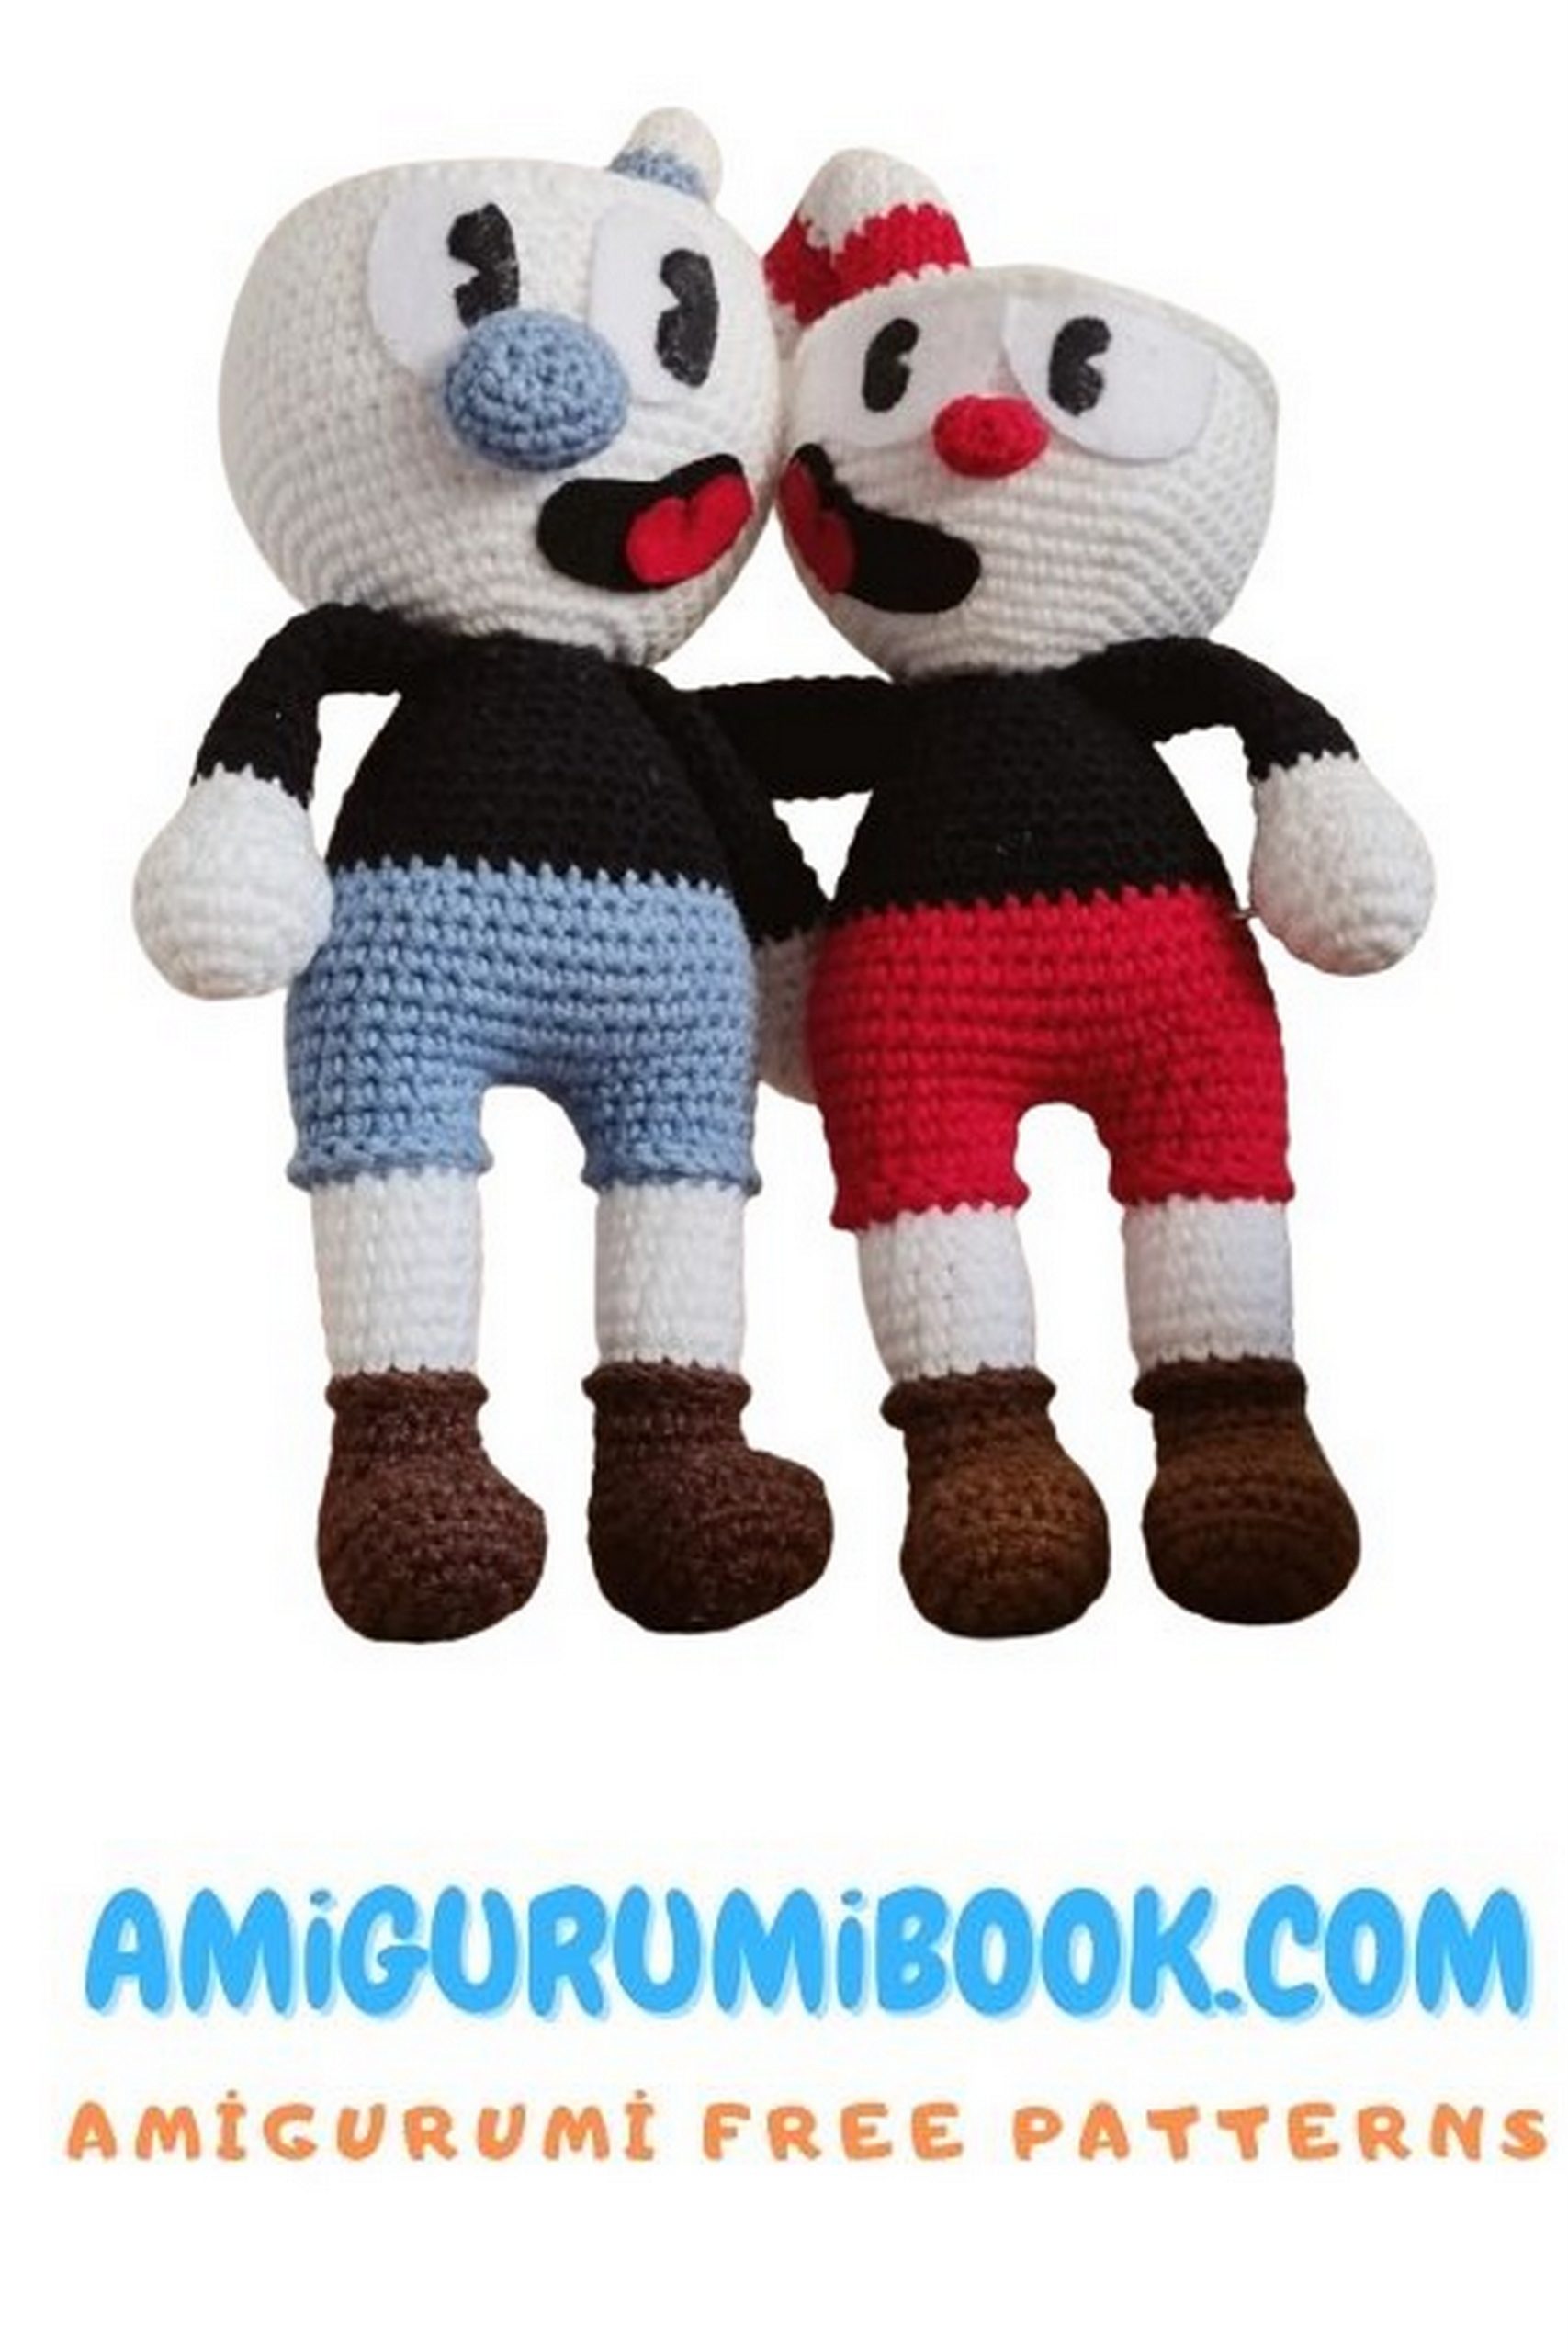
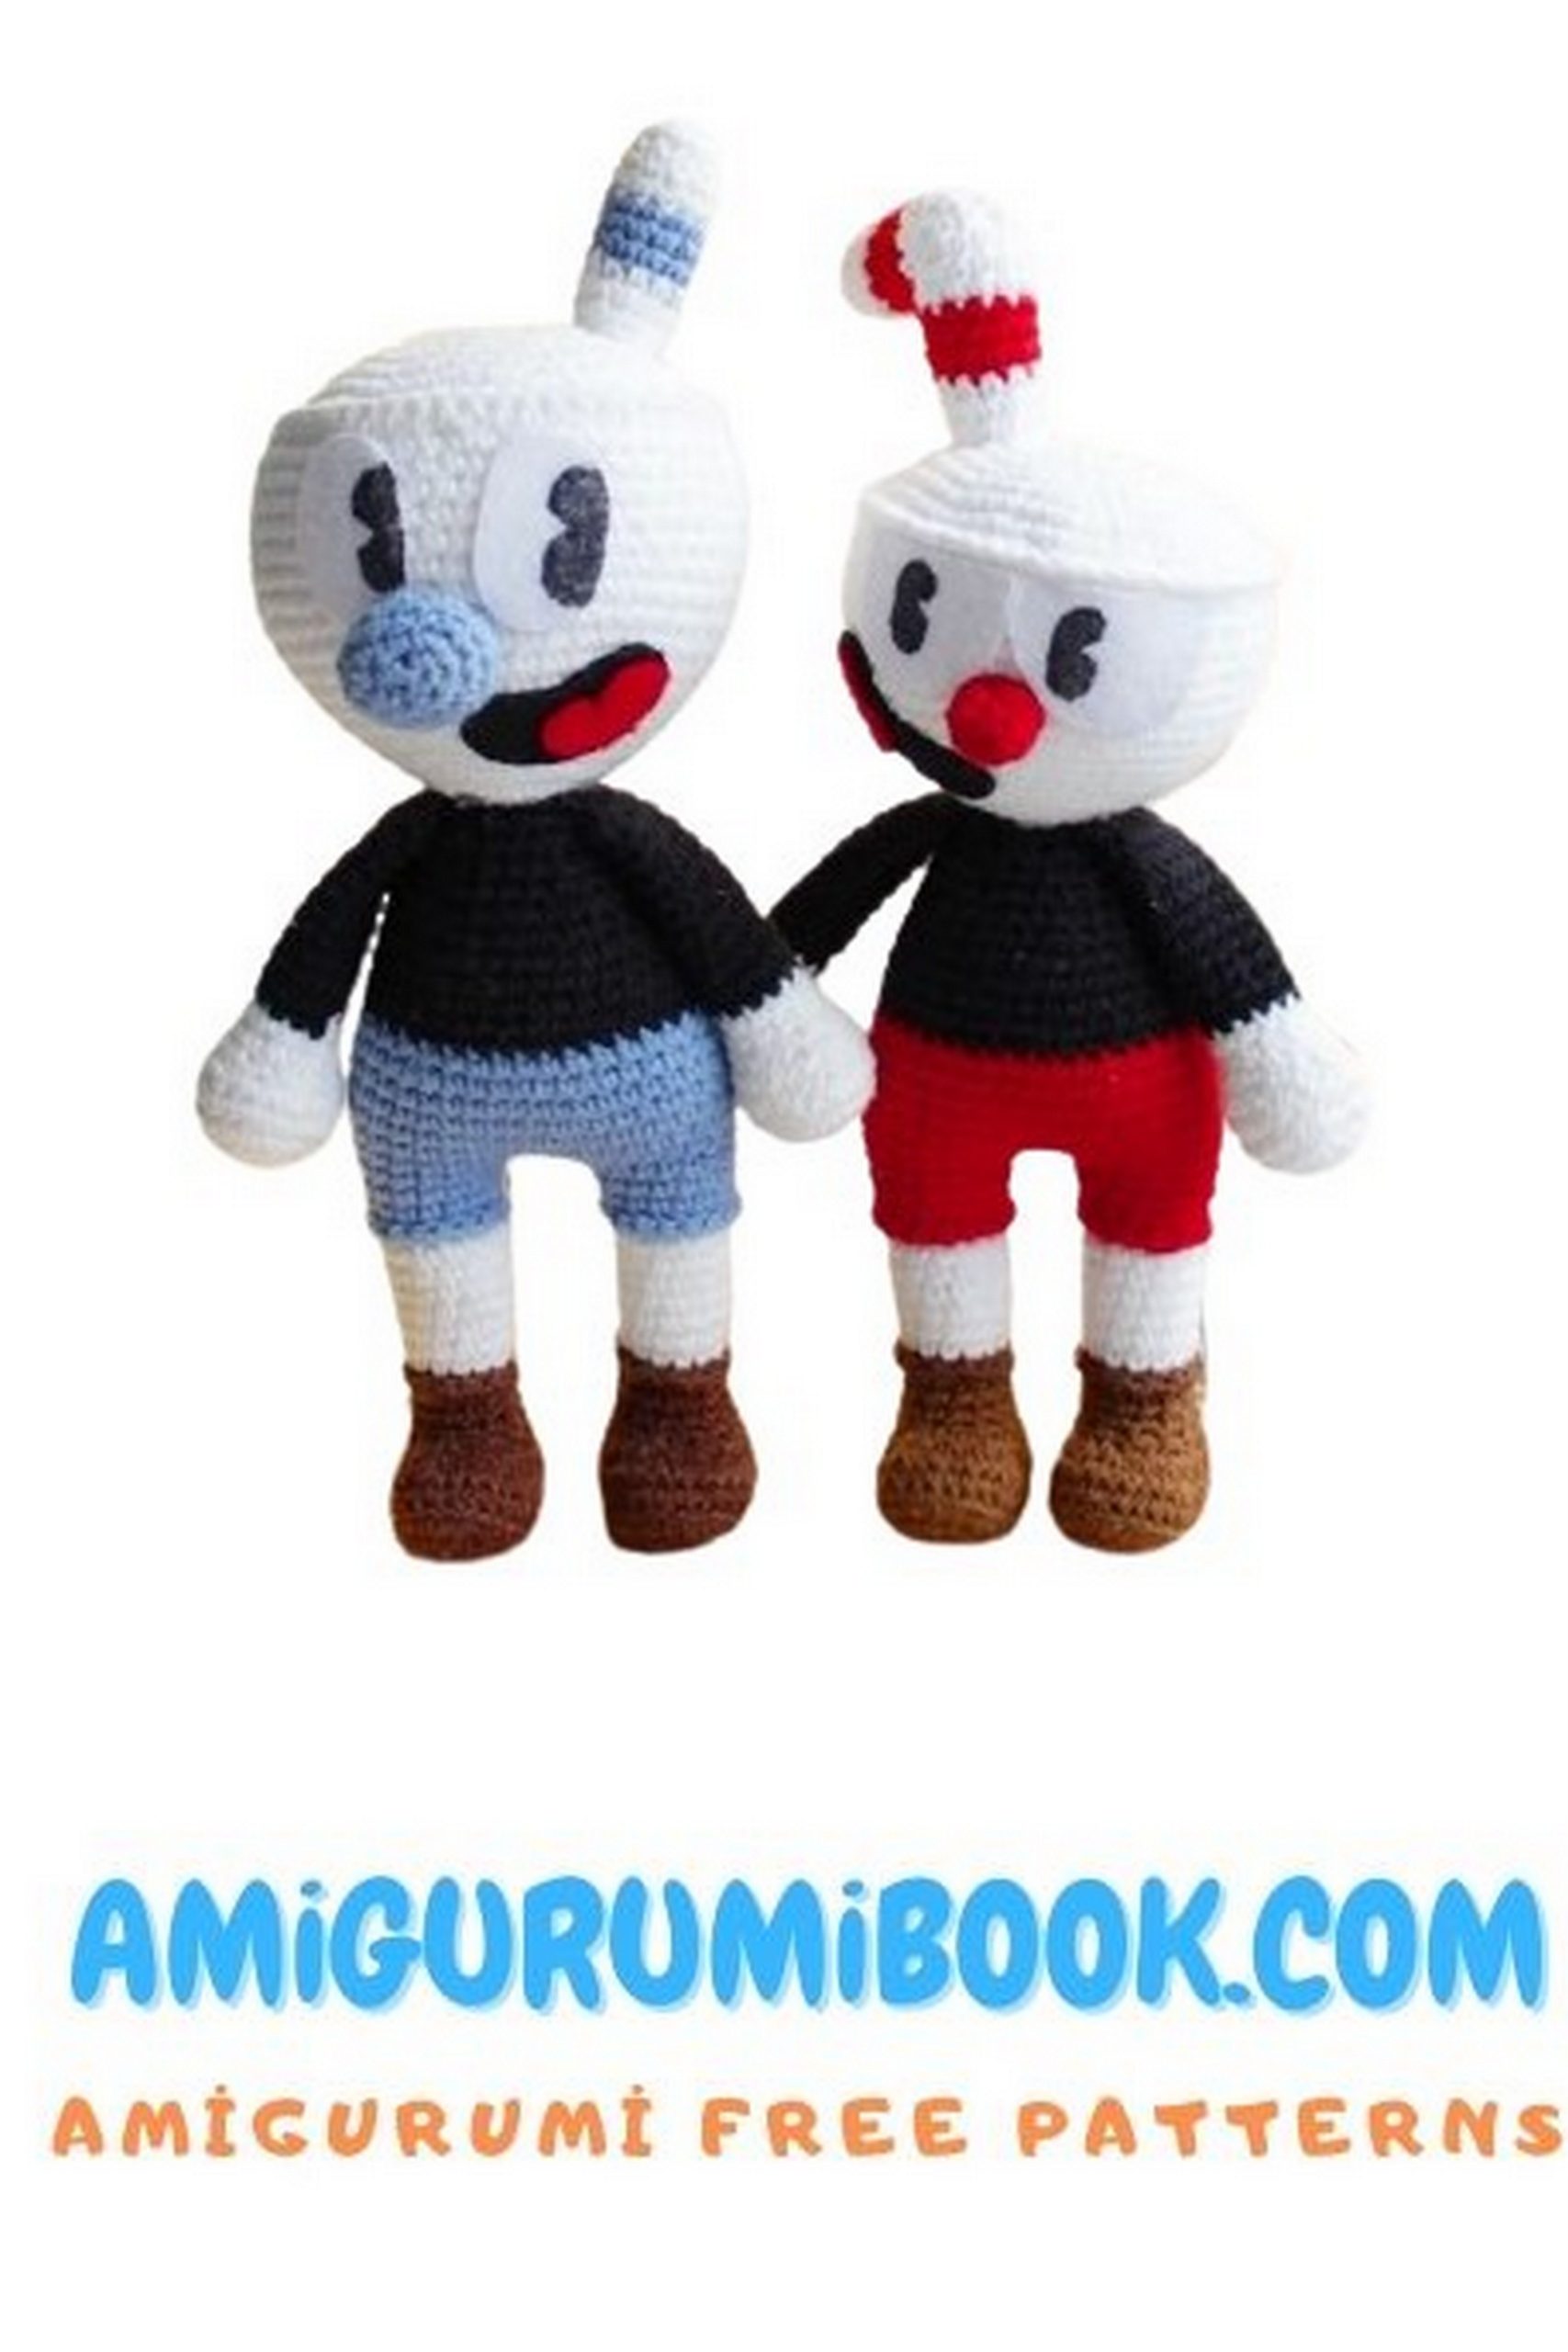
Cups: Red eyes are large and semicircular, sewn to the very top of the cup.
Circles: Blue eyes, like many Disney characters, are oval, sewn in the middle.
Draw pupils with black fabric paints (or cut out of felt).
The mouth for both is shaped like a bean, with a red tongue on one side. I cut everything by eye and glued it with hot glue.
Hero Head Cup – Amigurumi Cuphead
(in red shorts):
1: 7 ch
2: 7 inc = 14
3: (1 sc, inc)*7 = 21
4: (2 sc, inc)*7 = 28
5: 28 sc
6: (3 sc, inc)*7 = 35
7: 35 sc
8: (4 sc, inc)*7 = 42
8: (5 sc, inc)*7 = 49
Row 9: (6 sc, inc)*7 = 56, then crochet 7 rows of 56 sc. Attach the lid on top, remembering to stuff as you go.
Hero Head Circle – Amigurumi Cuphead
(in blue pants):
1: 6 ch
2: 6 inc = 12
3: (1 sc, inc)*6 = 18
4: (2 sc, inc)*6 = 24
5: (3 sc, inc)*6 = 30
6: 30 sc
7: (4 sc, inc)*6 = 36
8: (5 sc, inc)*6 = 42
9: 42 sc
10: (6 sc, inc)*6 = 48
11: (7 sc, inc)*6 = 54
12: (26 sc, inc)*2 = 56, then crochet 8 rows of 56 sc. Attach the lid on top, remembering to stuff as you go.
The handles on the cups are located at the back, on the red straw to the right, and on the blue one to the left (from the side of the cups). Sew all the pieces and finish off the cups.
Legs and Body. – Amigurumi Cuphead
Start with brown:
1: 8 ch, from the 2nd loop 6 sc, 4 inc in the last loop, 6 sc = 16
2: 1 inc, 5 sc, 4 inc, 5 sc, 1 inc = 22
3: 1 sc, 1 inc, 5 sc, (1 sc, 1 inc, 1 sc)*2, 5 sc, 1 inc, 1 sc = 28
4: 28 sc in back loops only
5: 28 sc
6: 6 sc, 8 dec, 6 sc = 20
7: 4 sc, 4 dec, 4 sc = 14
8: 14 sc
9: 14 sc
10: 14 sc – switch to white
11: 14 sc
12: 14 sc
13: 14 sc
14: 14 sc
15: 14 sc
16: 14 sc
17: 14 sc – switch to blue/red
18: 1 sc, (3 sc, inc)*3, 1 sc = 17
19: 17 sc
20: 17 sc – on one leg, cut the yarn, on the second continue: 4 ch and join with the first leg: 17 sc individually, +4 sc in ch, 17 sc individually, +4 sc in ch = 38 sc
21: 1 sc, (8 sc, inc)*4, 1 sc = 42
22-27: 42 sc
28: 1 sc, (6 sc, dec)*5, 1 sc = 37 – switch to black
29-31: 37 sc
32: 6 sc, dec, 16 sc, dec, 11 sc = 35
33: 35 sc
34: (5 sc, dec)*5 = 30
35: 30 sc
36: (4 sc, dec)*5 = 25
37: 25 sc
38: (3 sc, dec)*5 = 20
39: 20 sc – on this row, attach the arms
40: (2 sc, dec)*5 = 15 – cut the yarn, leaving a long tail for attaching the head, stuff the body completely.
You can crochet booties and the bottom of the pants.
Now sew the head to the body and your heroes are ready!