Discover the joy of creating your own adorable amigurumi donkey with this easy-to-follow free pattern. Perfect for beginners and experienced crafters alike, this tutorial guides you step-by-step to make a charming handmade toy. free crochet patterns
You may also like more amigurumi patterns.
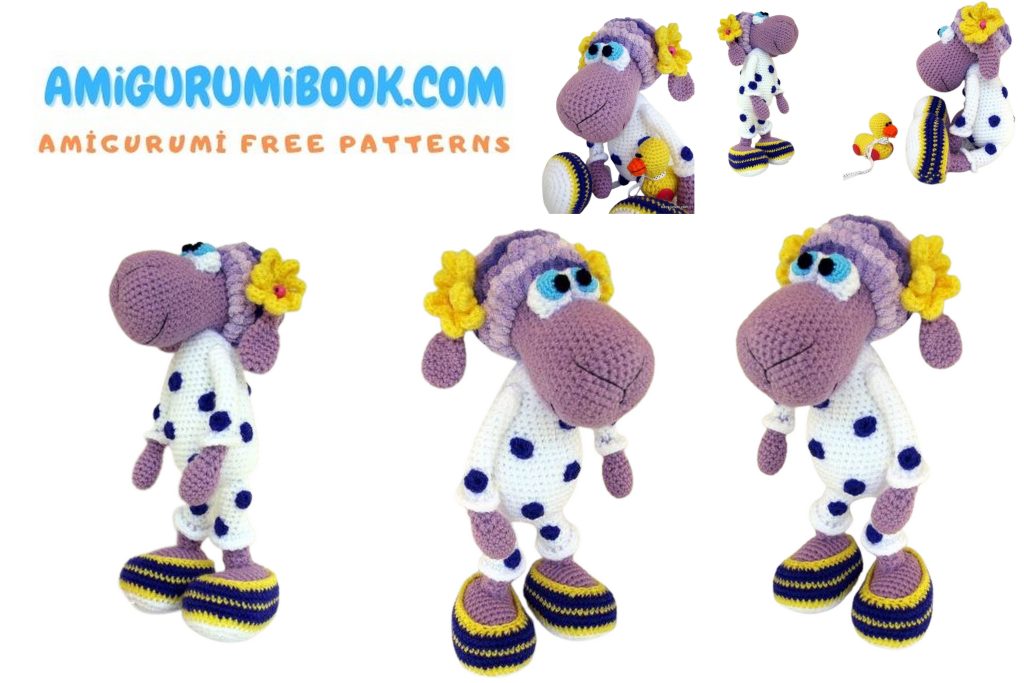
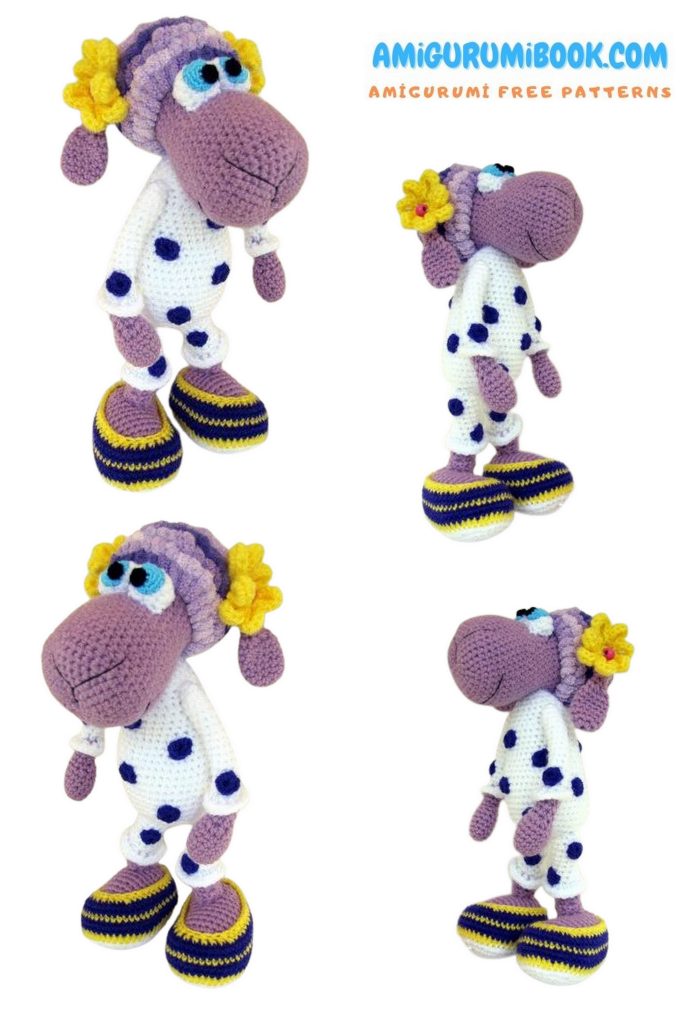
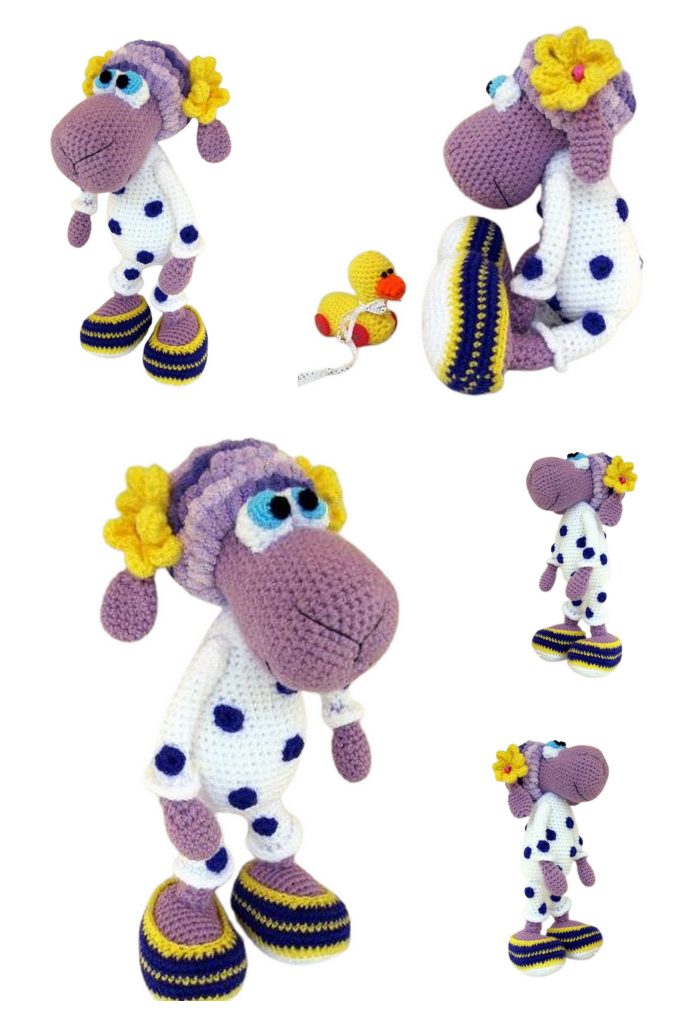
Create a cute donkey with this free amigurumi pattern. Easy step-by-step instructions and template. Make your handmade donkey toys.
The world of amigurumi is rapidly gaining popularity among those who love adorable handmade toys. This time, we’re bringing you a free pattern for creating a cute amigurumi donkey. This simple and fun project caters to both experienced and novice crocheters. Get your materials ready and follow our step-by-step instructions to make your very own adorable amigurumi donkey. If you’re ready, let’s get started!
Materials:
“Babbles” yarn – this yarn has small pompoms, approximately 2 cm each, with a bit of practice, you can achieve very interesting results.
Acrylic yarn: white, purple, dark purple, bright yellow
For the eyes: a bit of blue-black yarn
3-millimeter crochet hook, polyester stuffing, needles, scissors.
Abbreviations:
ch – chain
sc – single crochet
inc – increase (two single crochets in the same stitch)
dec – decrease (single crochet two stitches together)
sl st – slip stitch
The approximate height of the sheep is 28 cm.
PATTERN
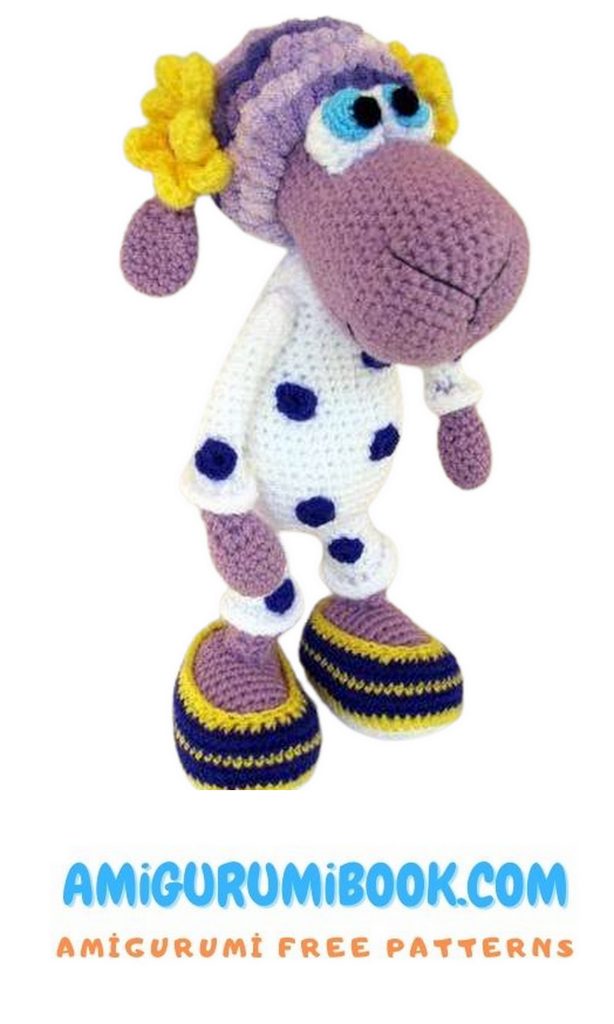
Head:
Starting with the face part, with purple yarn, ch 4, join to form a ring. 6 sc in the ring.
1: (inc)* – 12
2: (sc, inc)* – 18
3: (2 sc, inc)* – 24
4: (3 sc, inc)* – 30
5: (4 sc, inc)* – 36
6: (5 sc, inc)* – 42
7-14: 42
15: (12 sc, dec) x 3 times – 39
16: (11 sc, dec) x 3 times – 36
17: 36
18: (10 sc, dec) x 3 times – 33
19: 33
20: (9 sc, dec) x 3 times – 30
21: 30
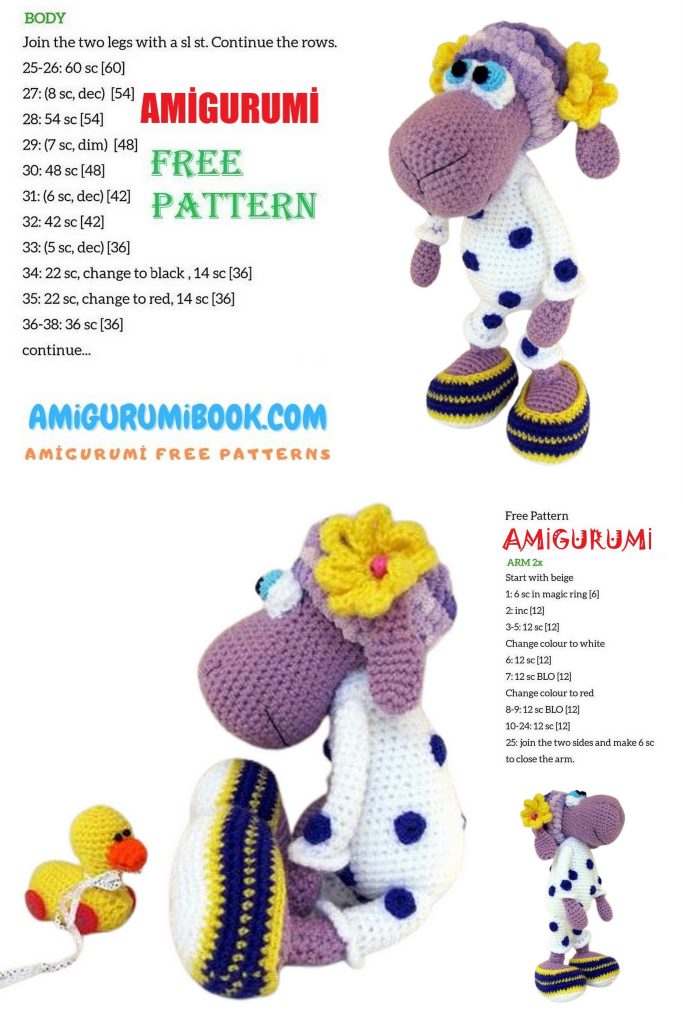
22-30: 30 sc
31: (2 sc, dec) *
32: (sc, dec) *
33: (dec) *
Body (Pyjama):
With white yarn, ch 4, join to form a ring. 6 sc in the ring.
1: (inc)* – 12
2: (sc, inc)* – 18
3: (2 sc, inc)* – 24
4: (3 sc, inc)* – 30
5: (4 sc, inc)* – 36
6: (5 sc, inc)* – 42
7-14: 42
15: (5 sc, dec) * – 36
16-17: 36
18: (4 sc, dec) * – 30
19-20: 30
21: (3 sc, dec) * – 24
22-24: 24
25: (2 sc, dec) * – 18
26: 18
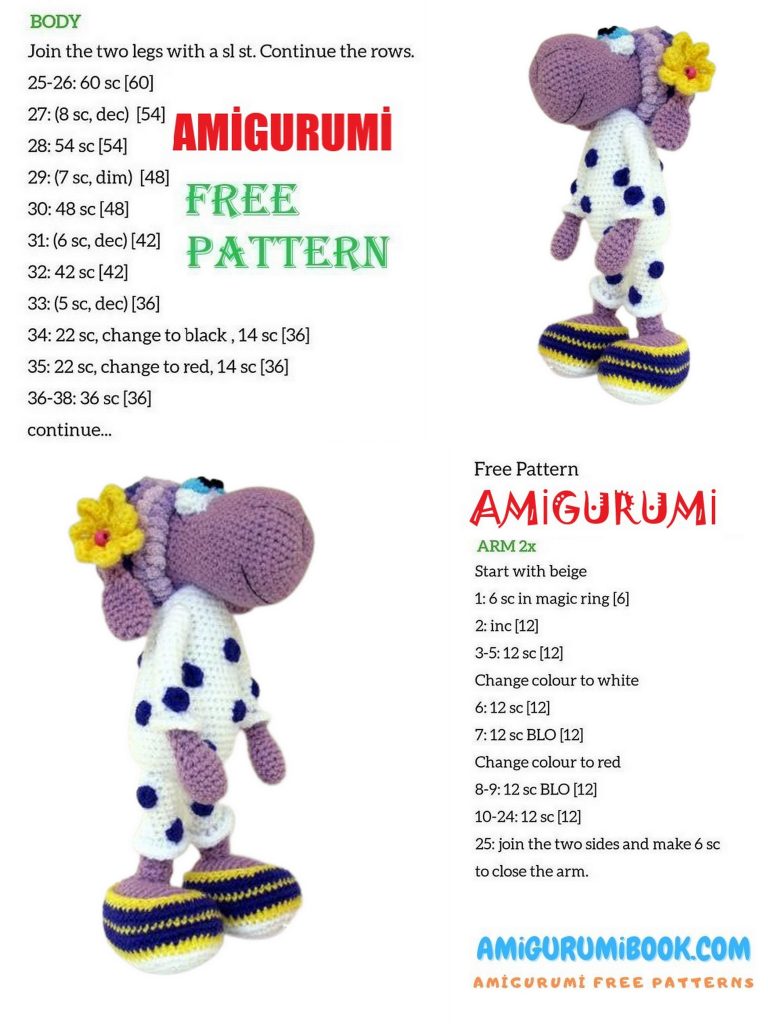
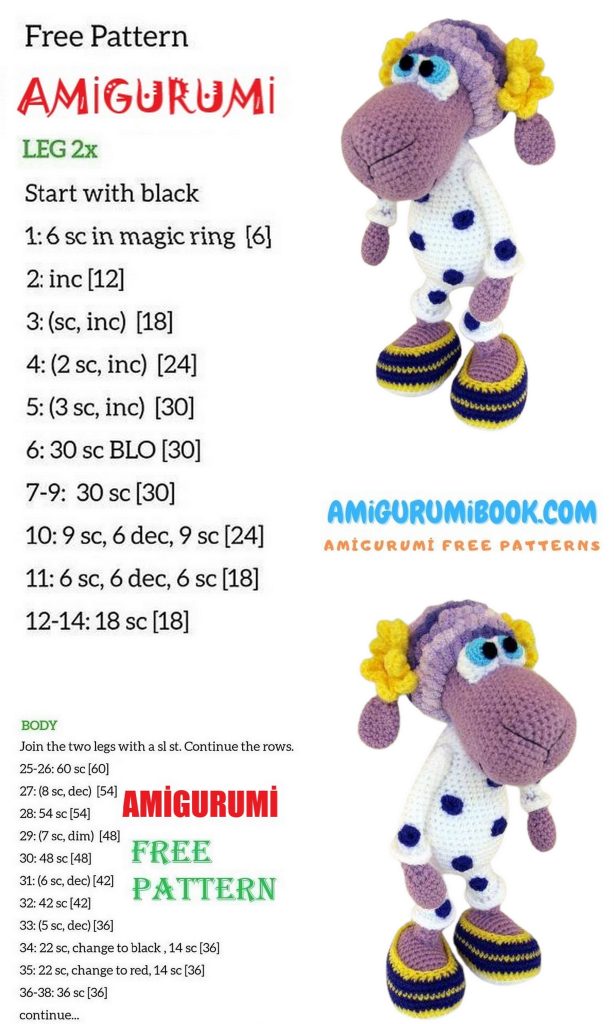
Ears:
With purple yarn, ch 4, join to form a ring. 6 sc in the ring.
1: (inc)* – 12
2: (sc, inc)* – 18
3-5: 18
Row 6: Decrease on both sides – (1 and 2 sc together, 8 and 9 st together) – 16
Row 7: Decrease on both sides – (1 and 2 sc together, 7 and 8 st together) – 14
Row 8: Decrease on both sides – (1 and 2 sc together, 6 and 7 st together) – 12
Row 9: (2 and 3 st together) x 4 times – 8
10-13: 8
Cut the yarn, leaving a long end for assembly.
Pyjama Points:
With dark purple yarn, ch 4, join to form a ring. 6 sc in the ring.
Make approximately 20 points.
Eyes:
White:
With white yarn, ch 8 + 1
1: 3 sc in the second ch from the hook, 6 sc, 3 ch, turn to the other side of the ch, 6 sc – 18 sc
2: (3 inc, 6 sc) * – 24
3: [(1 sc, inc) x 3 times, 6 sc] * – 30
4: 30
Cut the yarn, leaving a long end for assembly.
Blue Iris:
(Make two)
Ch 4, join to form a ring. 6 sc in the ring.
1: (inc)* – 12
Dark:
(Make two)
Ch 4, join to form a ring. 6 sc in the ring.
Attach the eyes in place.
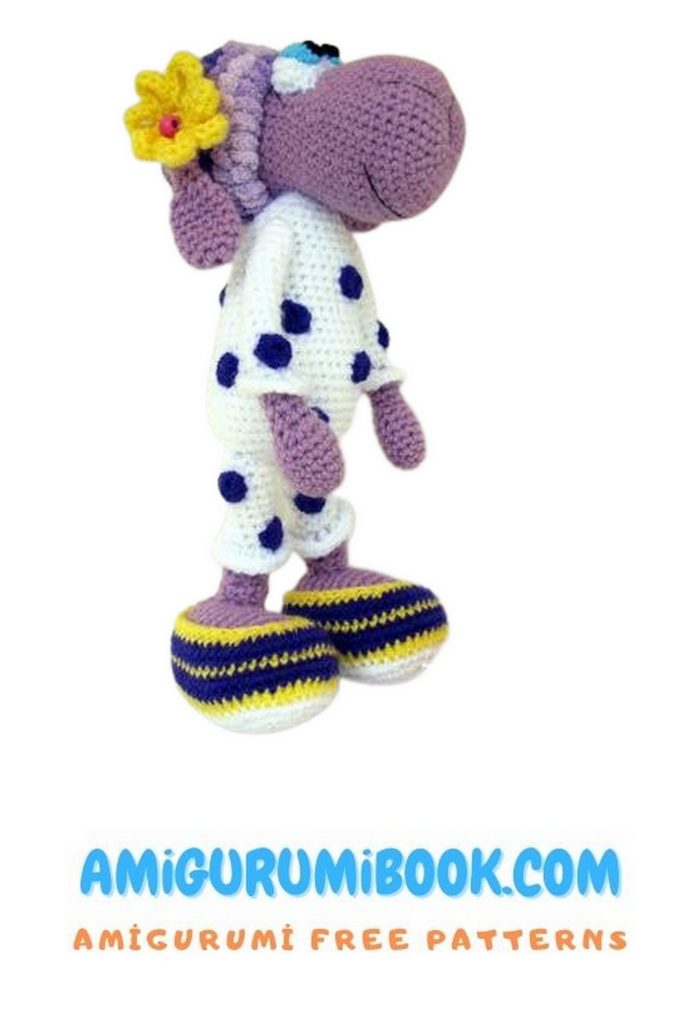
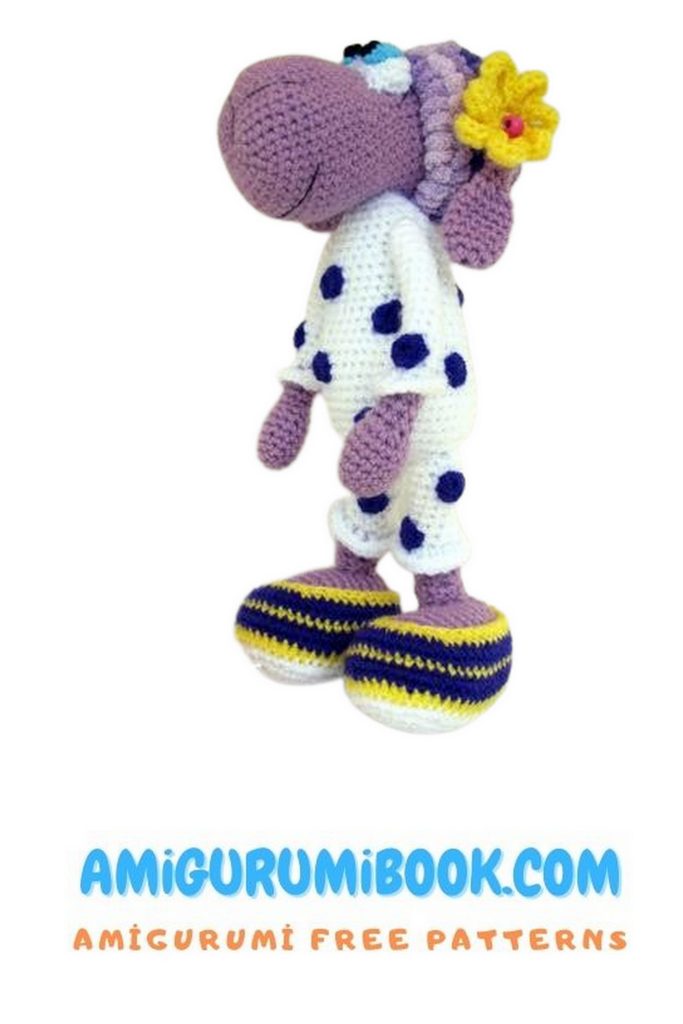

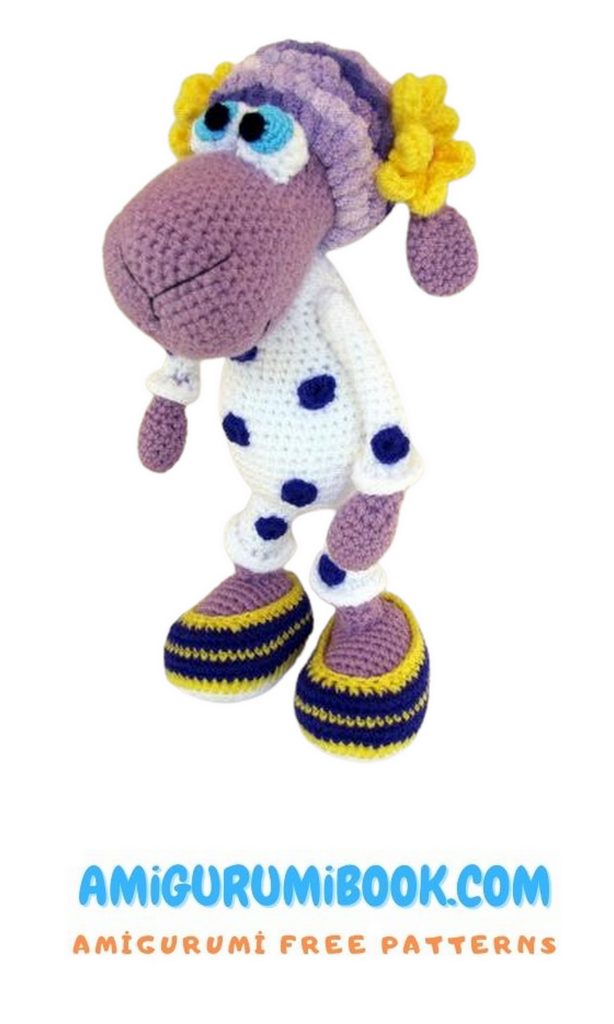
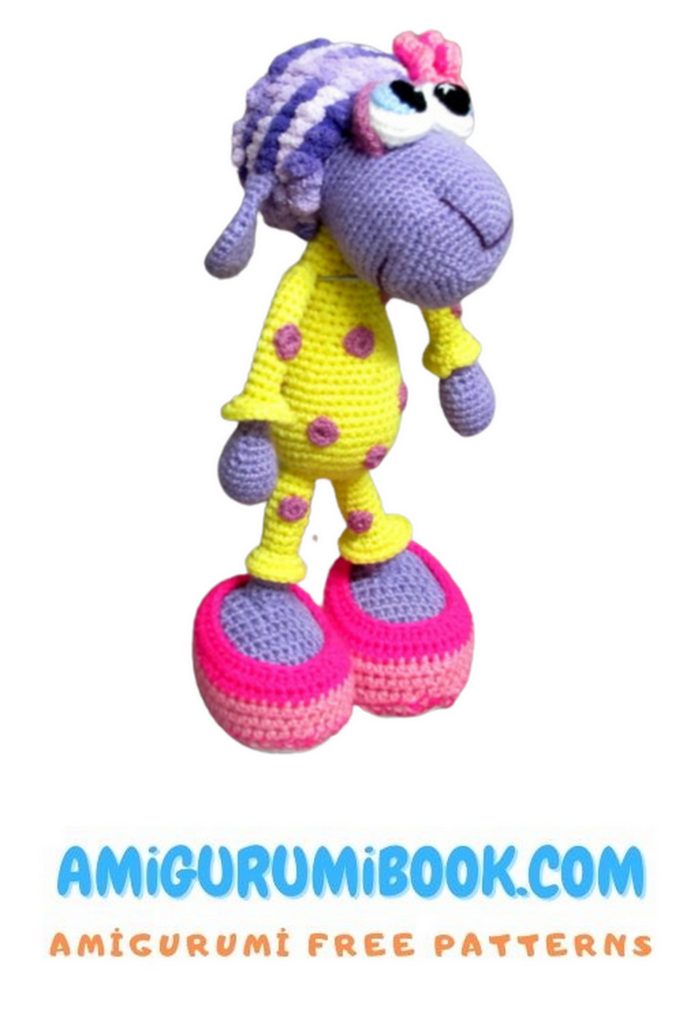
Arms:
With purple yarn, ch 4, join to form a ring. 6 sc in the ring.
1: (inc)* – 12
2: (sc, inc)* – 18
3-5: 18
Row 6: Decrease on both sides – (1 and 2 sc together, 8 and 9 st together) – 16
Row 7: Decrease on both sides – (1 and 2 sc together, 7 and 8 st together) – 14
Row 8: Decrease on both sides – (1 and 2 sc together, 6 and 7 st together) – 12
Row 9: (2 and 3 st together) x 4 times – 8
10-24: 8 sc (*Row 14 – change the yarn to white)
Cut the yarn, leaving a long end for assembly.
Legs:
(Make two)
See the photo below. Start with flat rows! (Back and forth, not around)
With dark purple yarn, ch 8 + 1
1-5: 8 sc
Make a tube out of this rectangle (see photo).
Now continue working in rounds. Make 9 rounds of sc with white yarn. Cut the yarn, leaving a long end for assembly.
Cuffs:
Make a round of sc along the line between the white and purple color (see photo).
The next round: 2 sc in each sc around. Cut the yarn.
Soles:
With white yarn, ch 4, join to form a ring. 6 sc in the ring.
1: (inc)* – 12
2: (sc, inc)* – 18
3: (2 sc, inc)* – 24
4: (3 sc, inc)* – 30
5-7: 30
Row 8: 1 and 2 sc together, 15, 15 and 16 sc together – 28
9: 28
Row 10: 1 and 2 sc together, 13, 13 and 14 sc together – 26
11-12: 26
Row 13: 1 and 2 sc together, 25, 25 and 26 sc together – 24
Row 14: 1 and 2 sc together, 23, 23, and 24 sc together – 22
15-16: 22
17: (3 sc, dec) * – 18
Stuff firmly.
18: (1 sc, dec) * – 12
19: (dec) * – 6
Sandals:
With white yarn, ch 10 + 1
1: 3 sc in the second ch from the hook, 8 sc, 3 sc in the next ch, turn to the other side of the ch, 8 sc – 22 sc
2: (inc 3 sc, 8 sc) repeat – 29
3: [(1 sc, inc) x 3 times, 8 sc] repeat – 35
4: [(2 sc, inc) x 3 times, 8 sc] repeat – 41
5: the row remains unfinished! (1 sc, inc) x 5 times – 46
Cut the yarn and hide the tail (photo 1 – finished sole). Continue working from the middle of the heel (photo 2).
1: with yellow yarn, work sc – 46 sc (photo 3)
2-3: with dark purple yarn, work sc – 46 sc (photo 4)
4: with yellow yarn, work sc – 46 sc
5-6: with dark purple yarn, work sc – 46 sc (photo 5)
Try on the shoes (photo 6).
7: 14 sc, (dec) x times, 14 sc – 37
8: 11 sc, (dec) x 7 times, 12 sc – 30
Embroider the nose and mouth with black thread (see photo). You can also add a flower.
Here’s a link to a flower tutorial:
Pattern Start from Point A:
Ch 9, join to form a ring.
1: 18 sc
2: (1 sc, ch 3) x 6 times
3: (1 sc, 1 sl st, 3 ch 2) x 6 times
4: (sl st in the sc from the previous row, ch 5) x 6 times
5: (1 sc, sl st, 5 ch 2) x 6 times
6: (sl st in the sc from the previous row, ch 7) x 6 times
7: (1 sc, 1 sl st, 9 ch 2) x 6 times
Tiny Duck:
Materials:
Acrylic yarn – yellow and a bit of orange, 2 black beads, 4 large buttons
Ribbon, approximately 50 cm
Body:
Ch 4, join to form a ring. 6 sc in the ring.
1: (inc) – 12
2: (sc, inc) * – 18
3: (2 sc, inc) * – 24
4-15: 24
16: (2 sc, dec) * – 18
17: (sc, dec) * – 12
18: (dec) * – 6
Head:
Ch 4, join to form a ring. 6 sc in the ring.
1: (inc) * – 12
2: (sc, inc) * – 18
3: (2 sc, inc) * – 24
4-7: 24
8: (2 sc, dec) * – 18
9: (sc, dec) * – 12
10-11: 12
Cut the yarn, leaving a long end for assembly.
Beak:
With orange yarn, ch 4, join to form a ring. 6 sc in the ring.
1: 2 inc, 3 sc – 8
2-3: 8 sc
Cut the yarn, leaving a long end for assembly.
Sew the beak to the head and add two eyes (black beads). Attach the head to the body, sew.
Attach buttons (as wheels). Tie a ribbon around the duck’s neck.
Note: This is a rough translation, and it’s essential to follow the original pattern and any accompanying images carefully for accuracy.