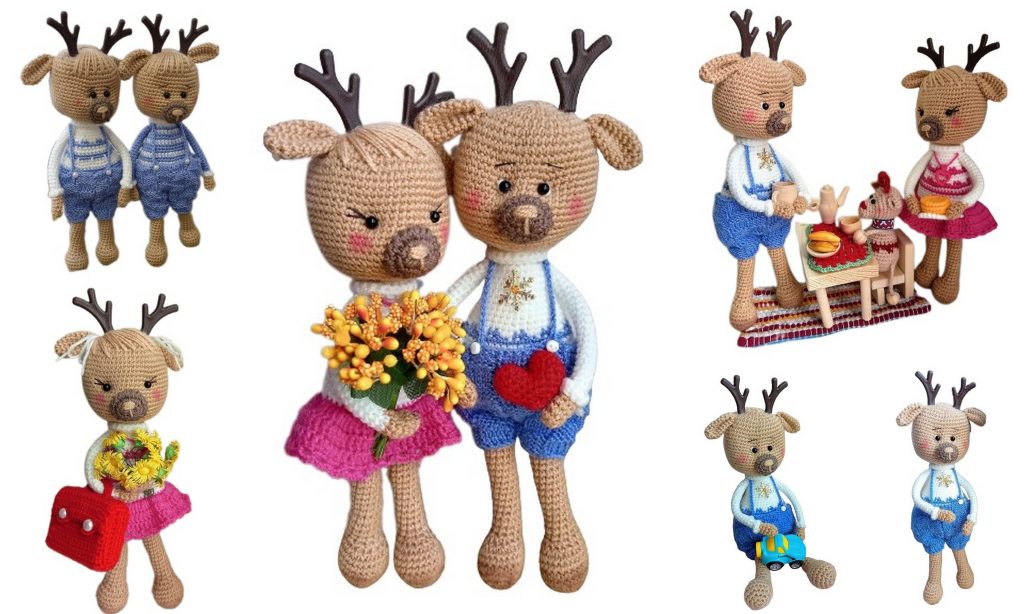
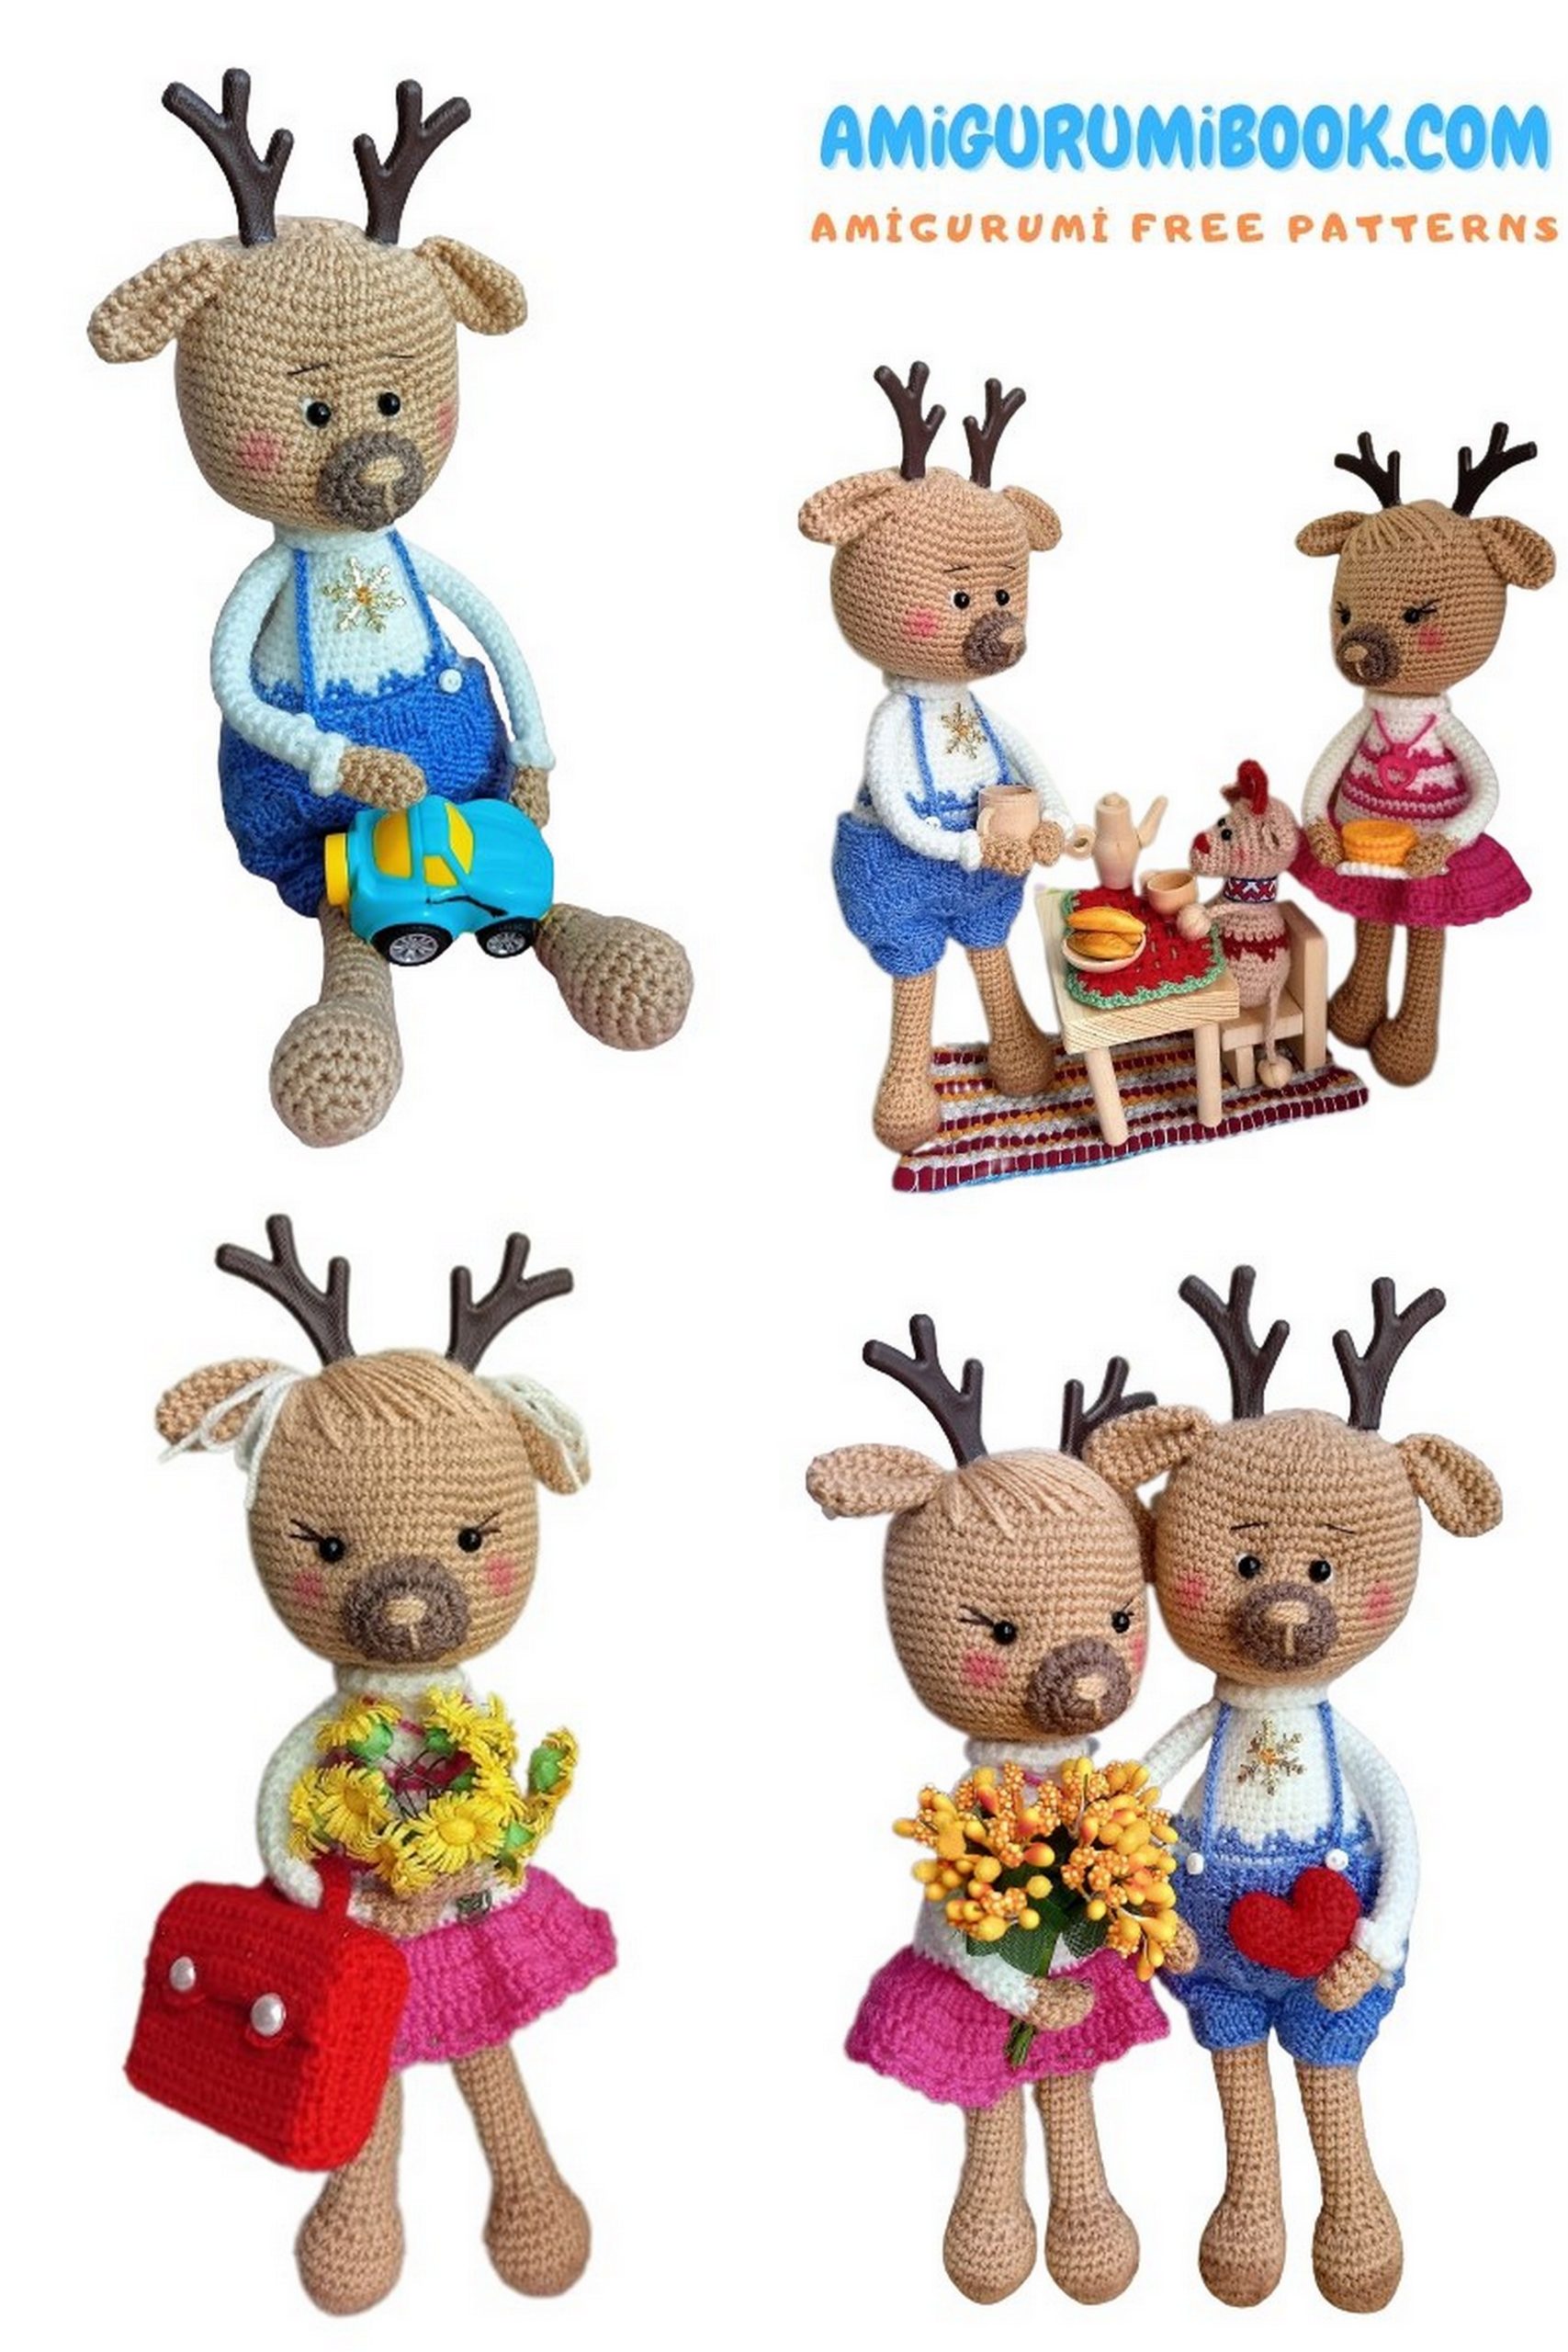
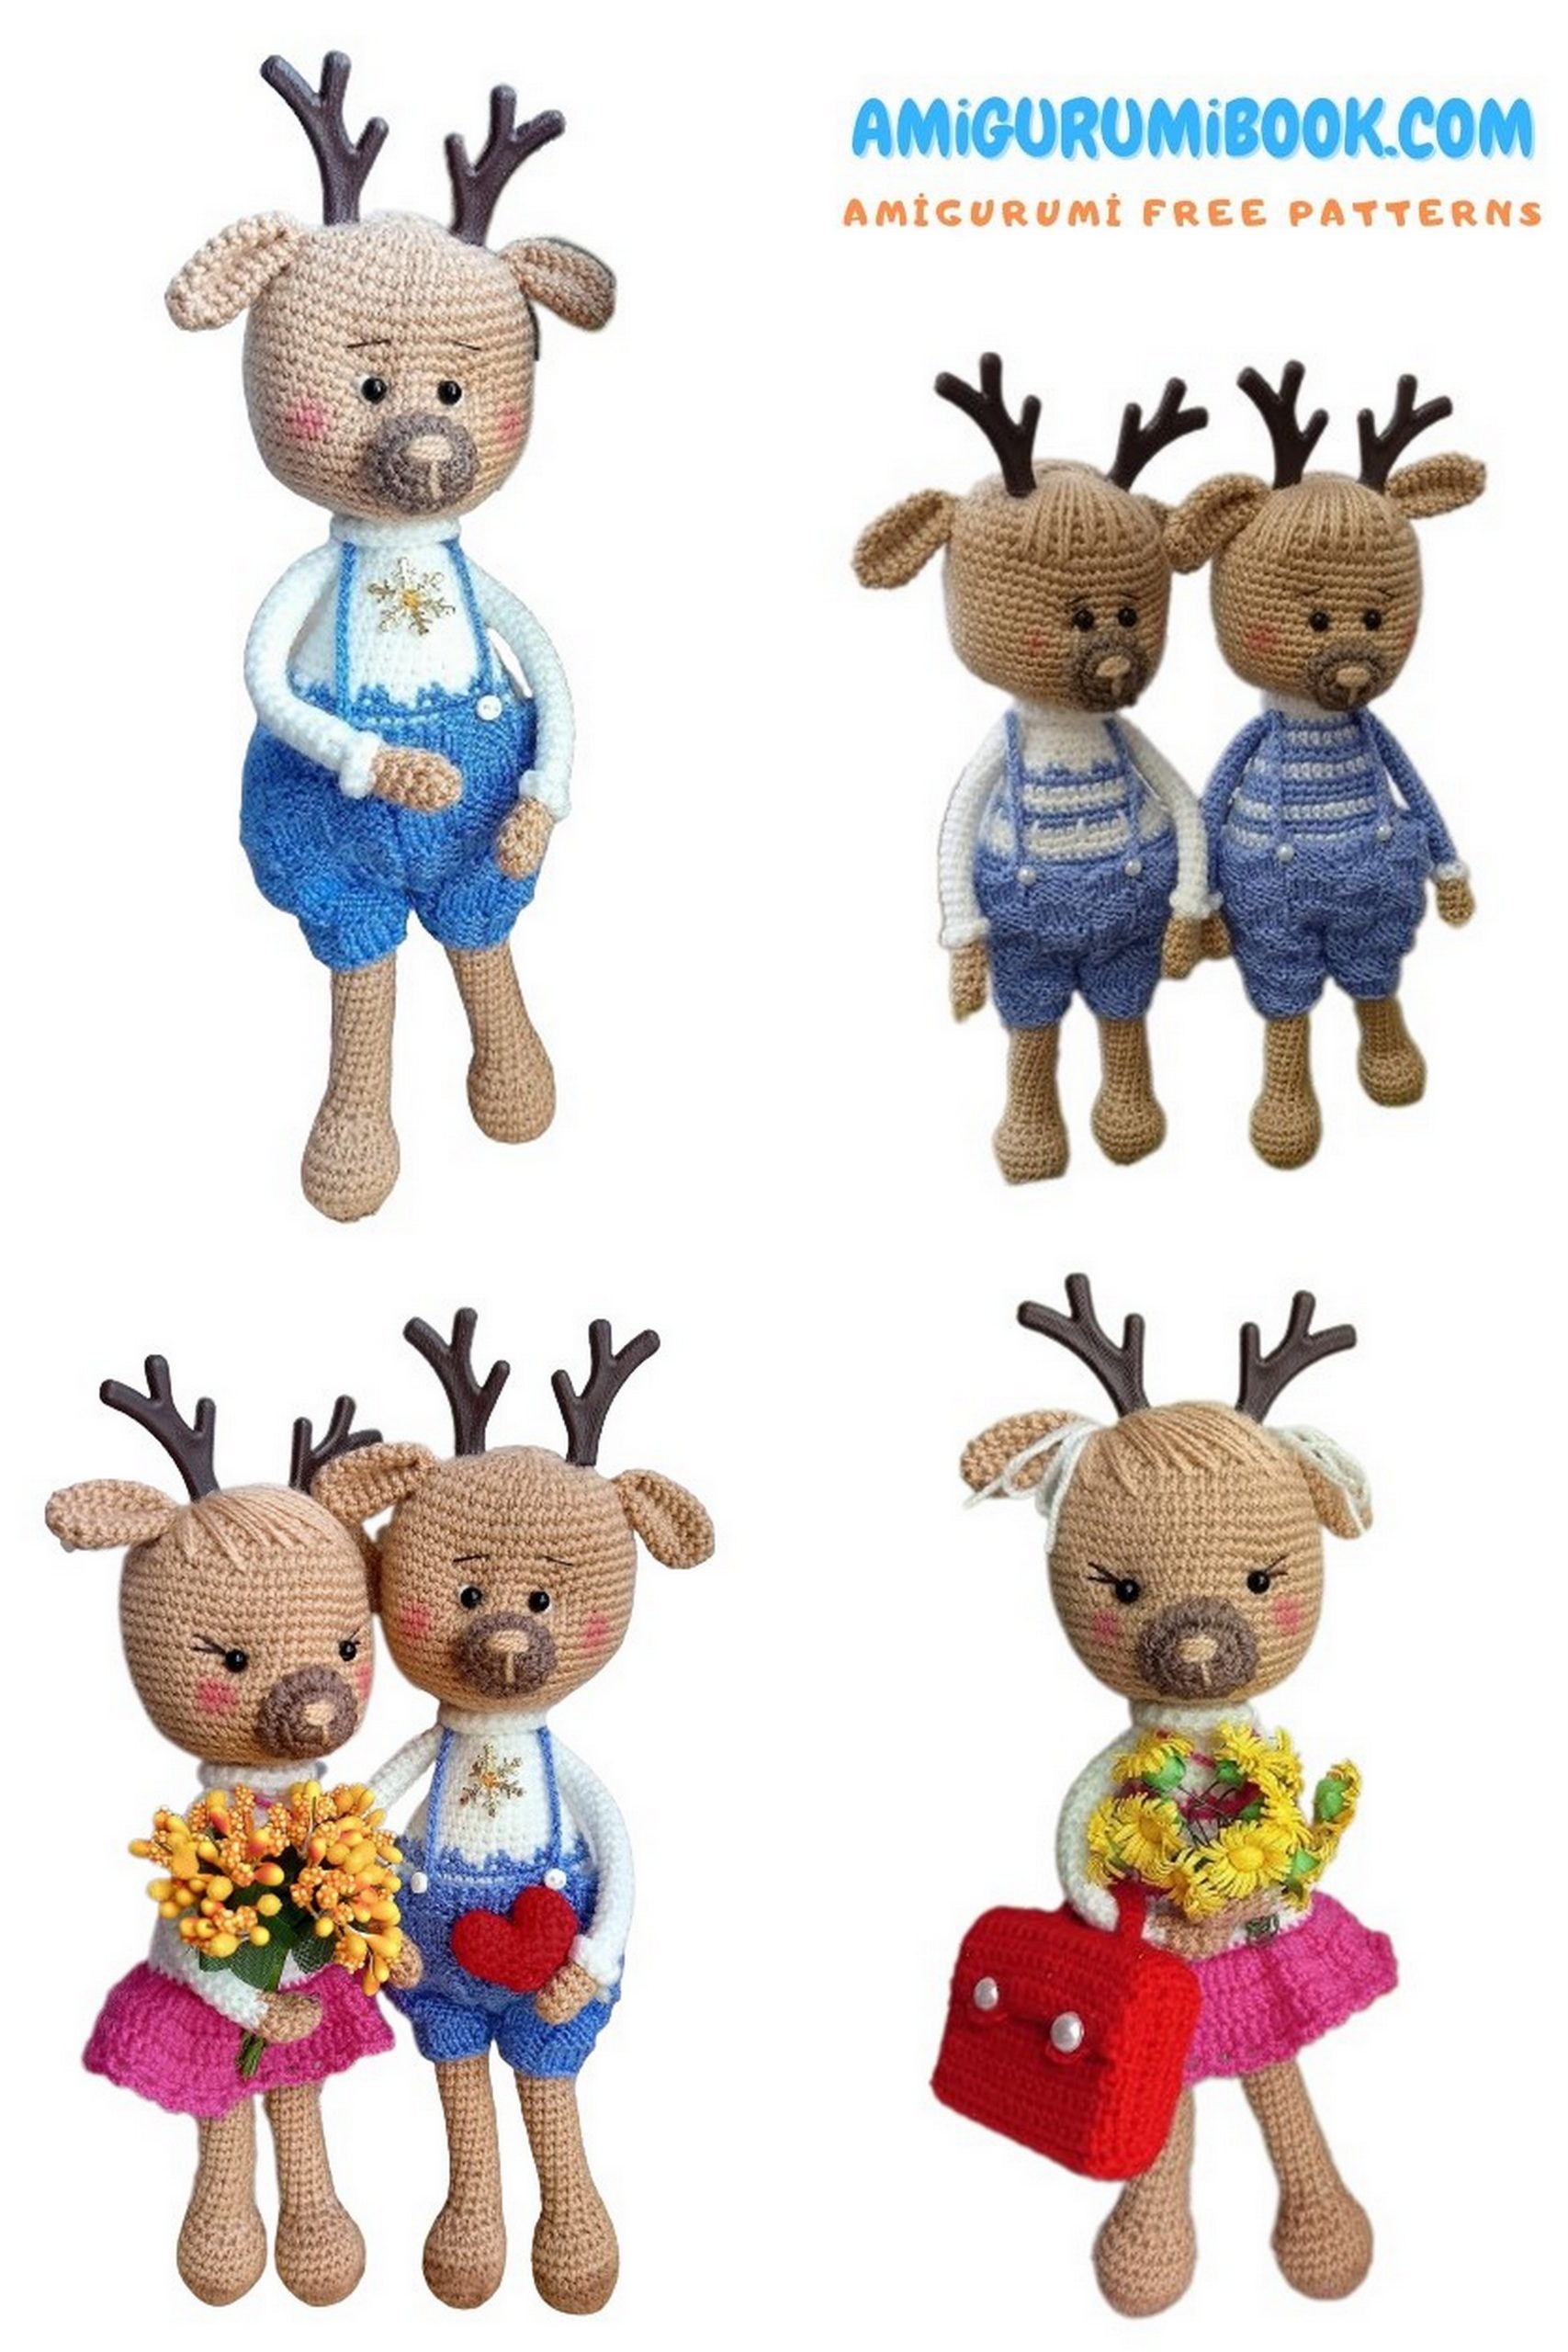
Discover the joy of crafting with this adorable amigurumi deer free pattern, perfect for both beginners and experienced crocheters. Create your own charming crochet deer friend to brighten up your home or gift to someone special. free crochet patterns
You may also like more amigurumi patterns.
Welcome to our Amigurumi Deer Free Pattern tutorial, where creativity and crochet come together to bring you a charming and cuddly deer friend. If you’re a fan of amigurumi and looking to add a touch of woodland magic to your collection, this pattern is the perfect fit for you. Whether you’re an experienced crocheter or just starting out, our step-by-step instructions, along with clear stitch guides, will help you create a delightful amigurumi deer that’s as huggable as it is adorable. Join us on this crafting journey and bring a piece of nature into your own hands.
Materials:
Pekhorka “Beaded” yarn (100g–450m), stuffing,
safety eyes, ready-made horns, Chenille wire, knitting needles, buttons, crochet hook № 1.5.
Abbreviations:
MR – Magic Ring (amigurumi ring)
ch – chain
sc – single crochet
hdc – half double crochet
dc – double crochet
Head (beige color):
Row 1 – 8 sc in MR
Row 2 – 8 increases (16)
Row 3 – (2 sc, increase) x 8 times (24)
Row 4 – (3 sc, increase) x 6 times (30)
Row 5 – (4 sc, increase) x 6 times (36)
Row 6 – (5 sc, increase) x 6 times (42)
Row 7 – (6 sc, increase) x 6 times (48)
Row 8 – (7 sc, increase) x 6 times (54)
Row 9 – (8 sc, increase) x 6 times (60)
Rows 10-18 – 60 sc (9 rows)
Row 19 – 29 sc, increase, 4 hdc in one stitch, increase, 28 sc (65)
Row 20 – 65 sc
Row 21 – 29 sc, decrease, 4 sc, decrease, 28 sc (63)
Row 22 – 28 sc, decrease, sc, decrease, sc, decrease, 27 sc (60)
Row 23 – 4 sc, decrease, 8 sc, decrease, (8 sc, decrease) x 3 times, 8 sc, decrease, 4 sc (54)
Row 24 – (7 sc, decrease) x 6 times (48)
Row 25 – (4 sc, decrease) x 8 times (40)
Row 26 – (3 sc, decrease) x 8 times (32)
Row 27 – (2 sc, decrease) x 8 times (24)
Row 28 – (2 sc, decrease) x 6 times (18)
Row 29 – 18 sc, stuff, cut the yarn leaving a long tail, switch to white color
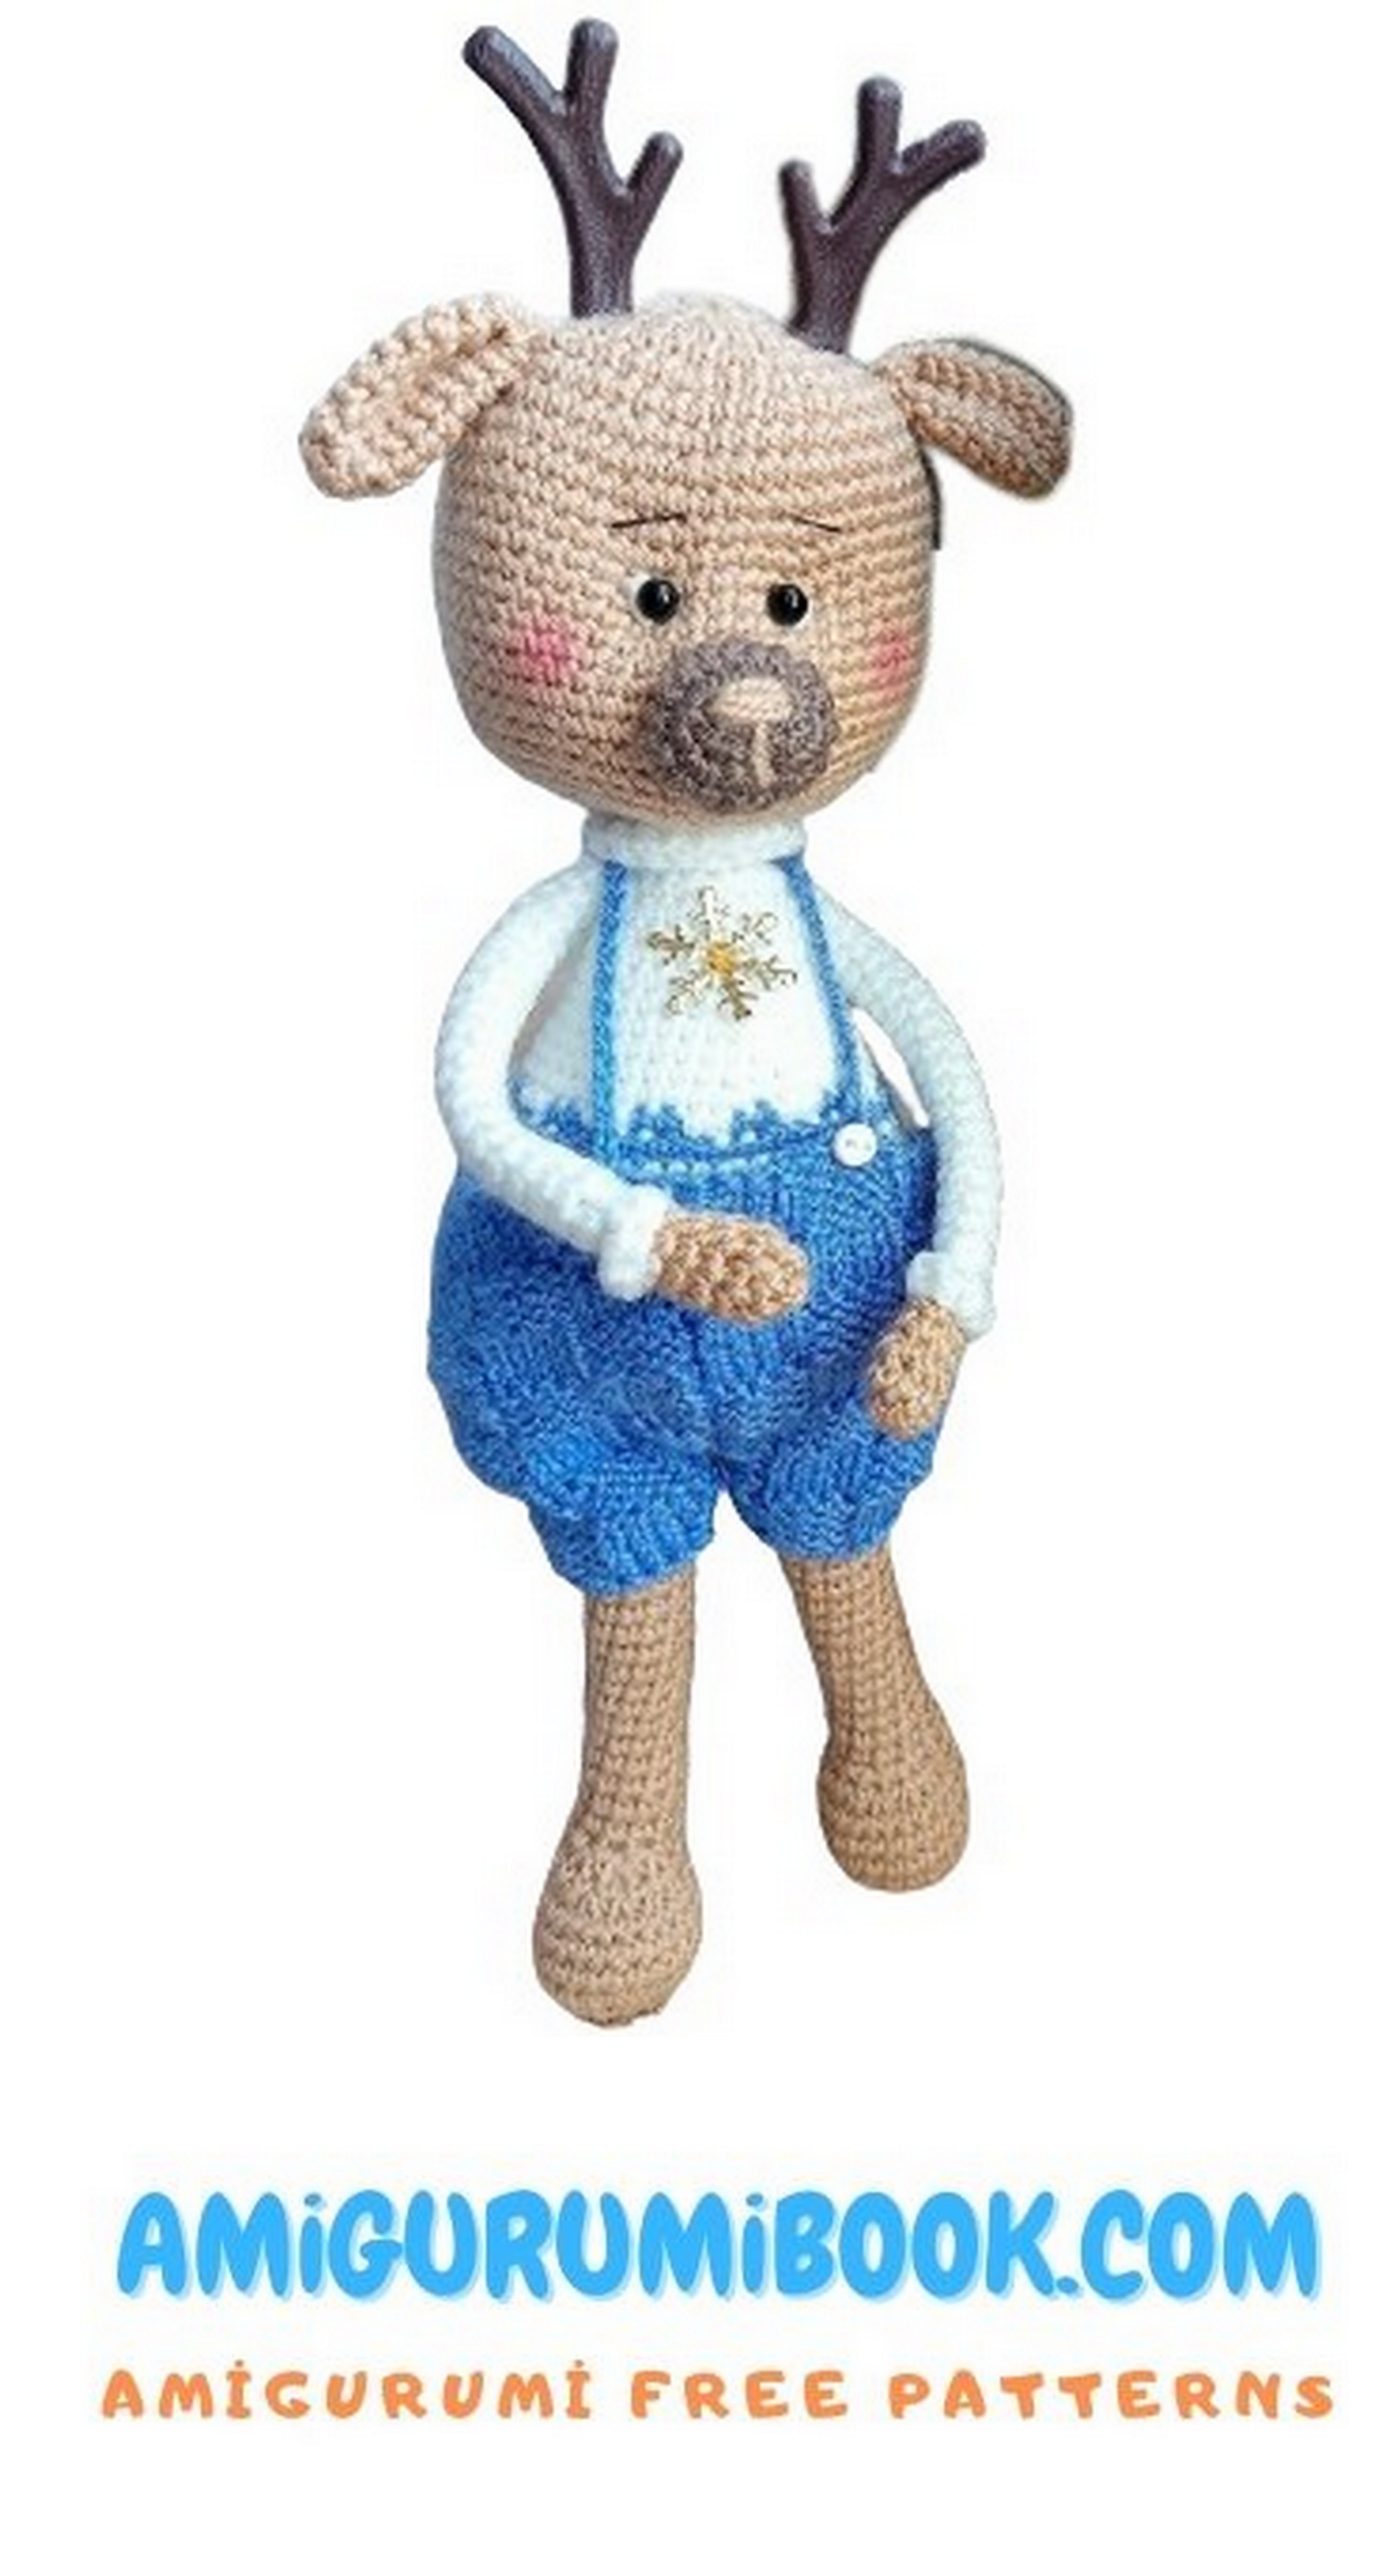
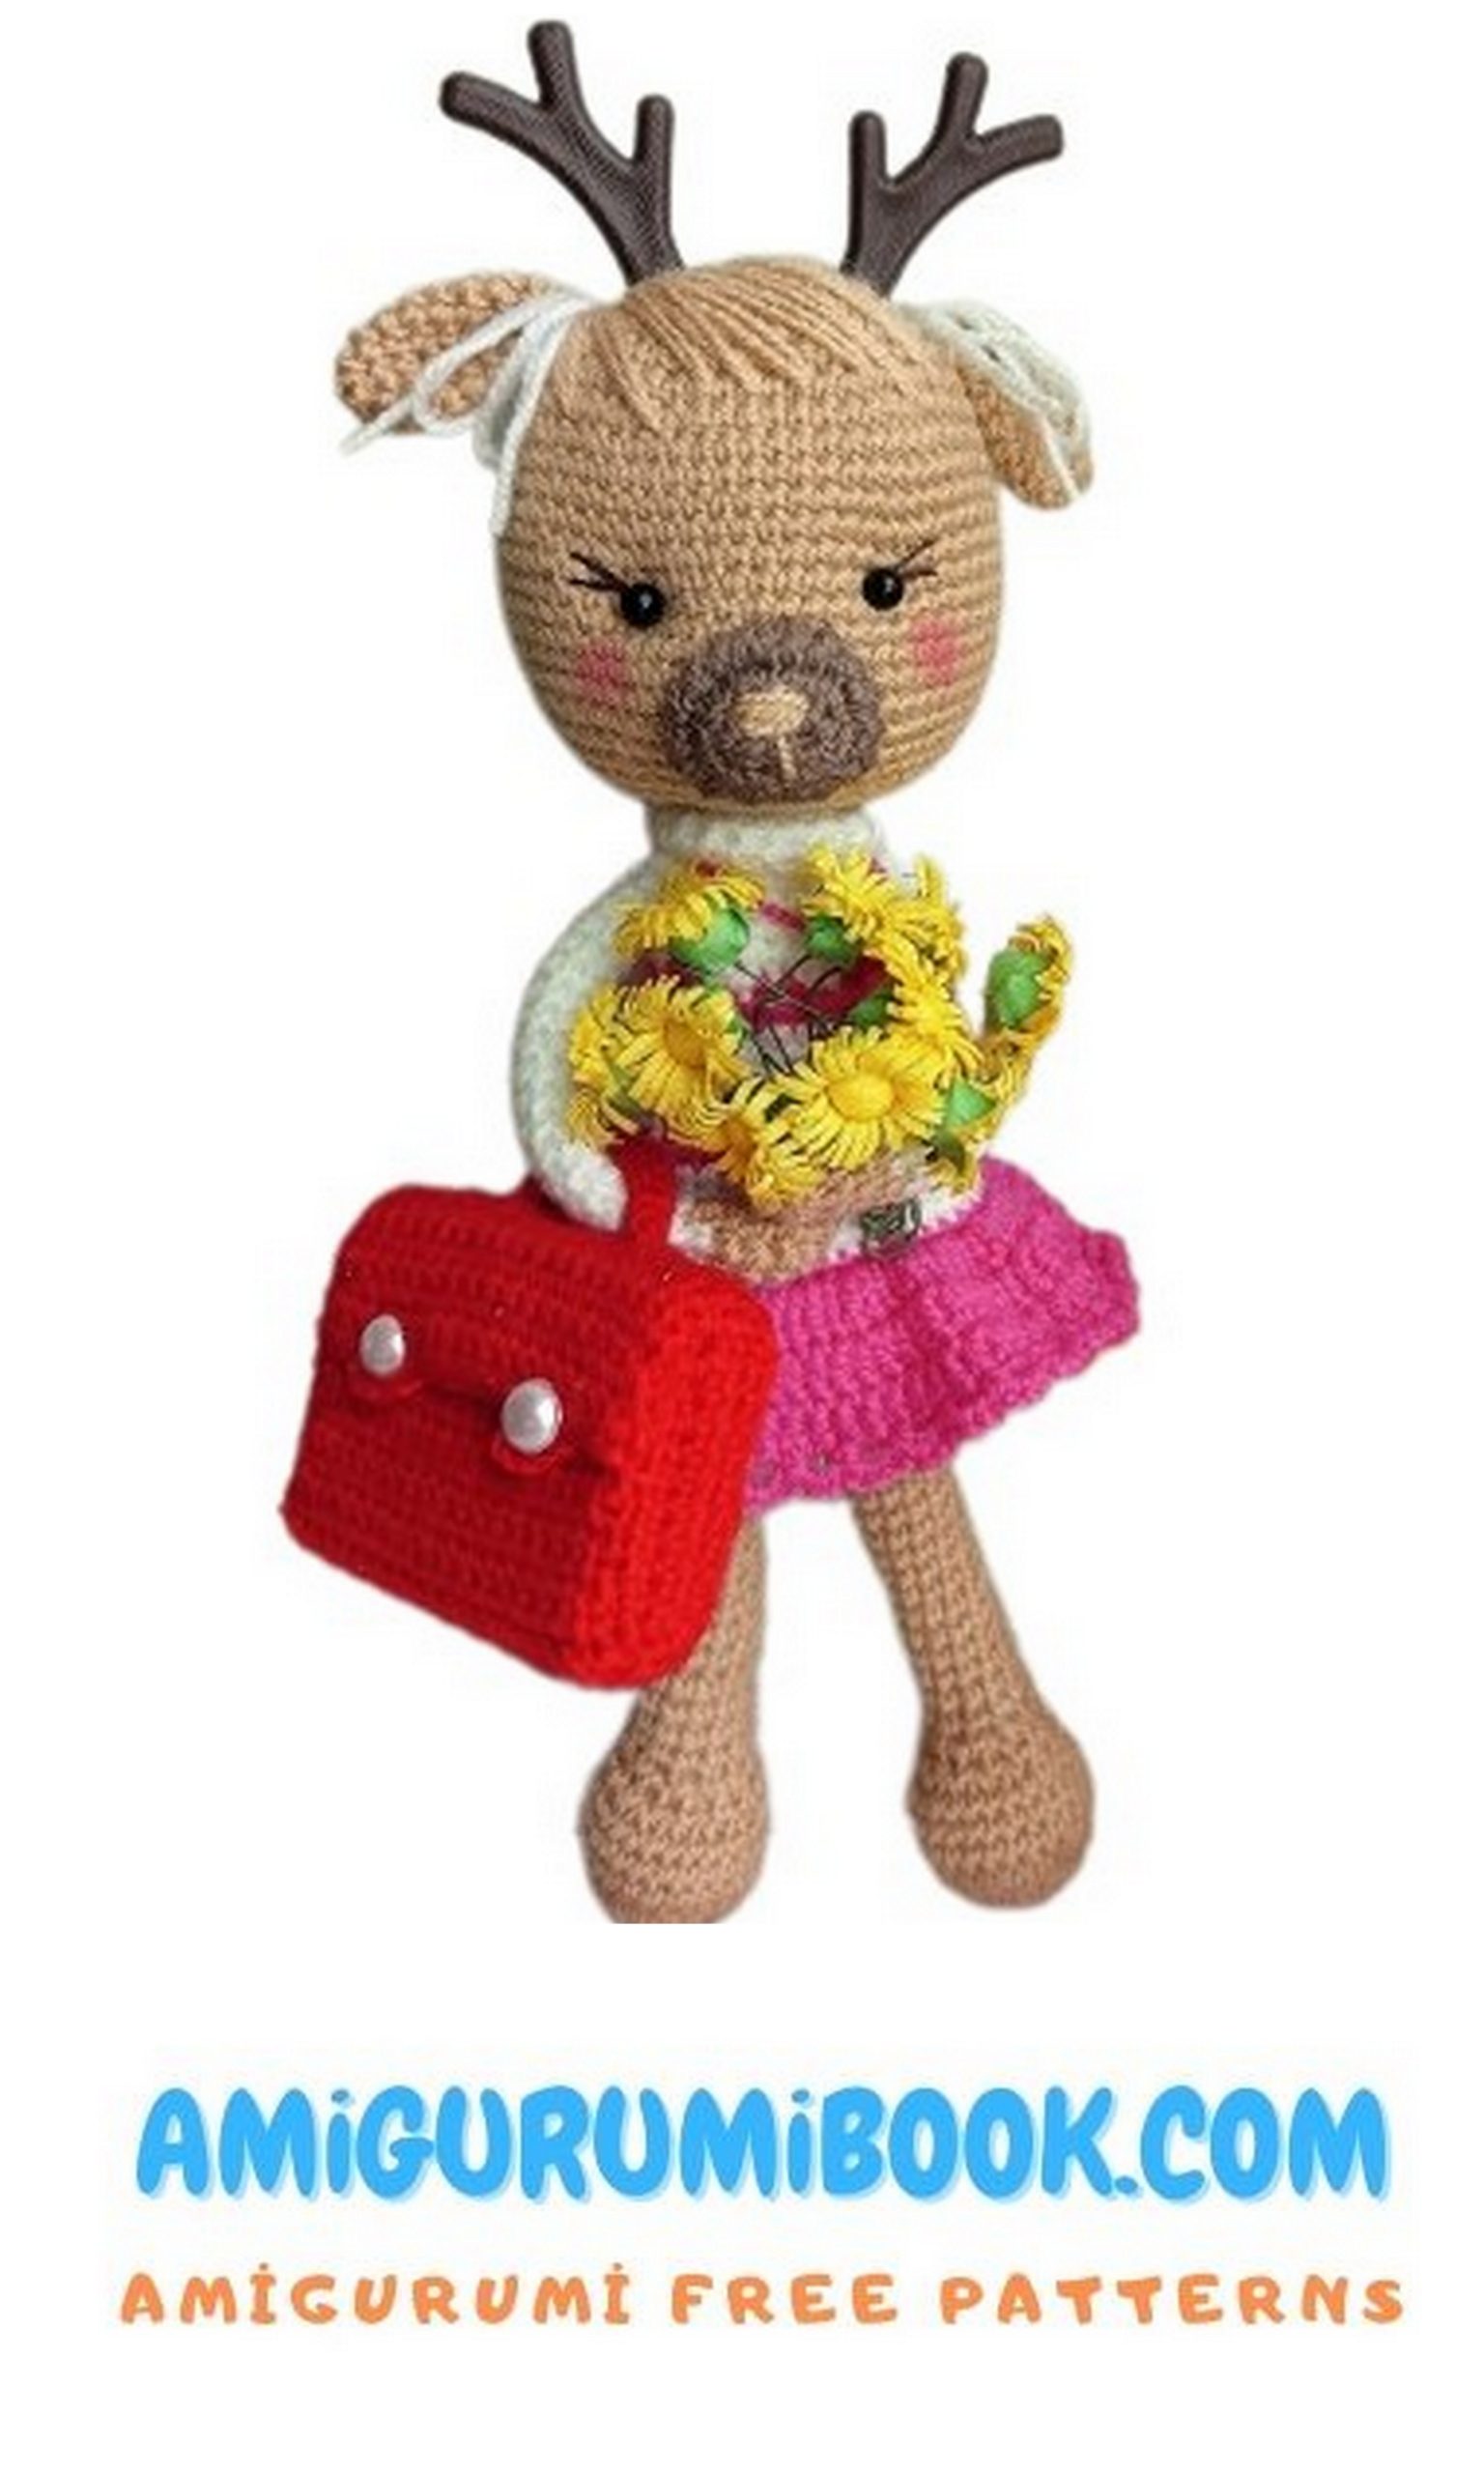

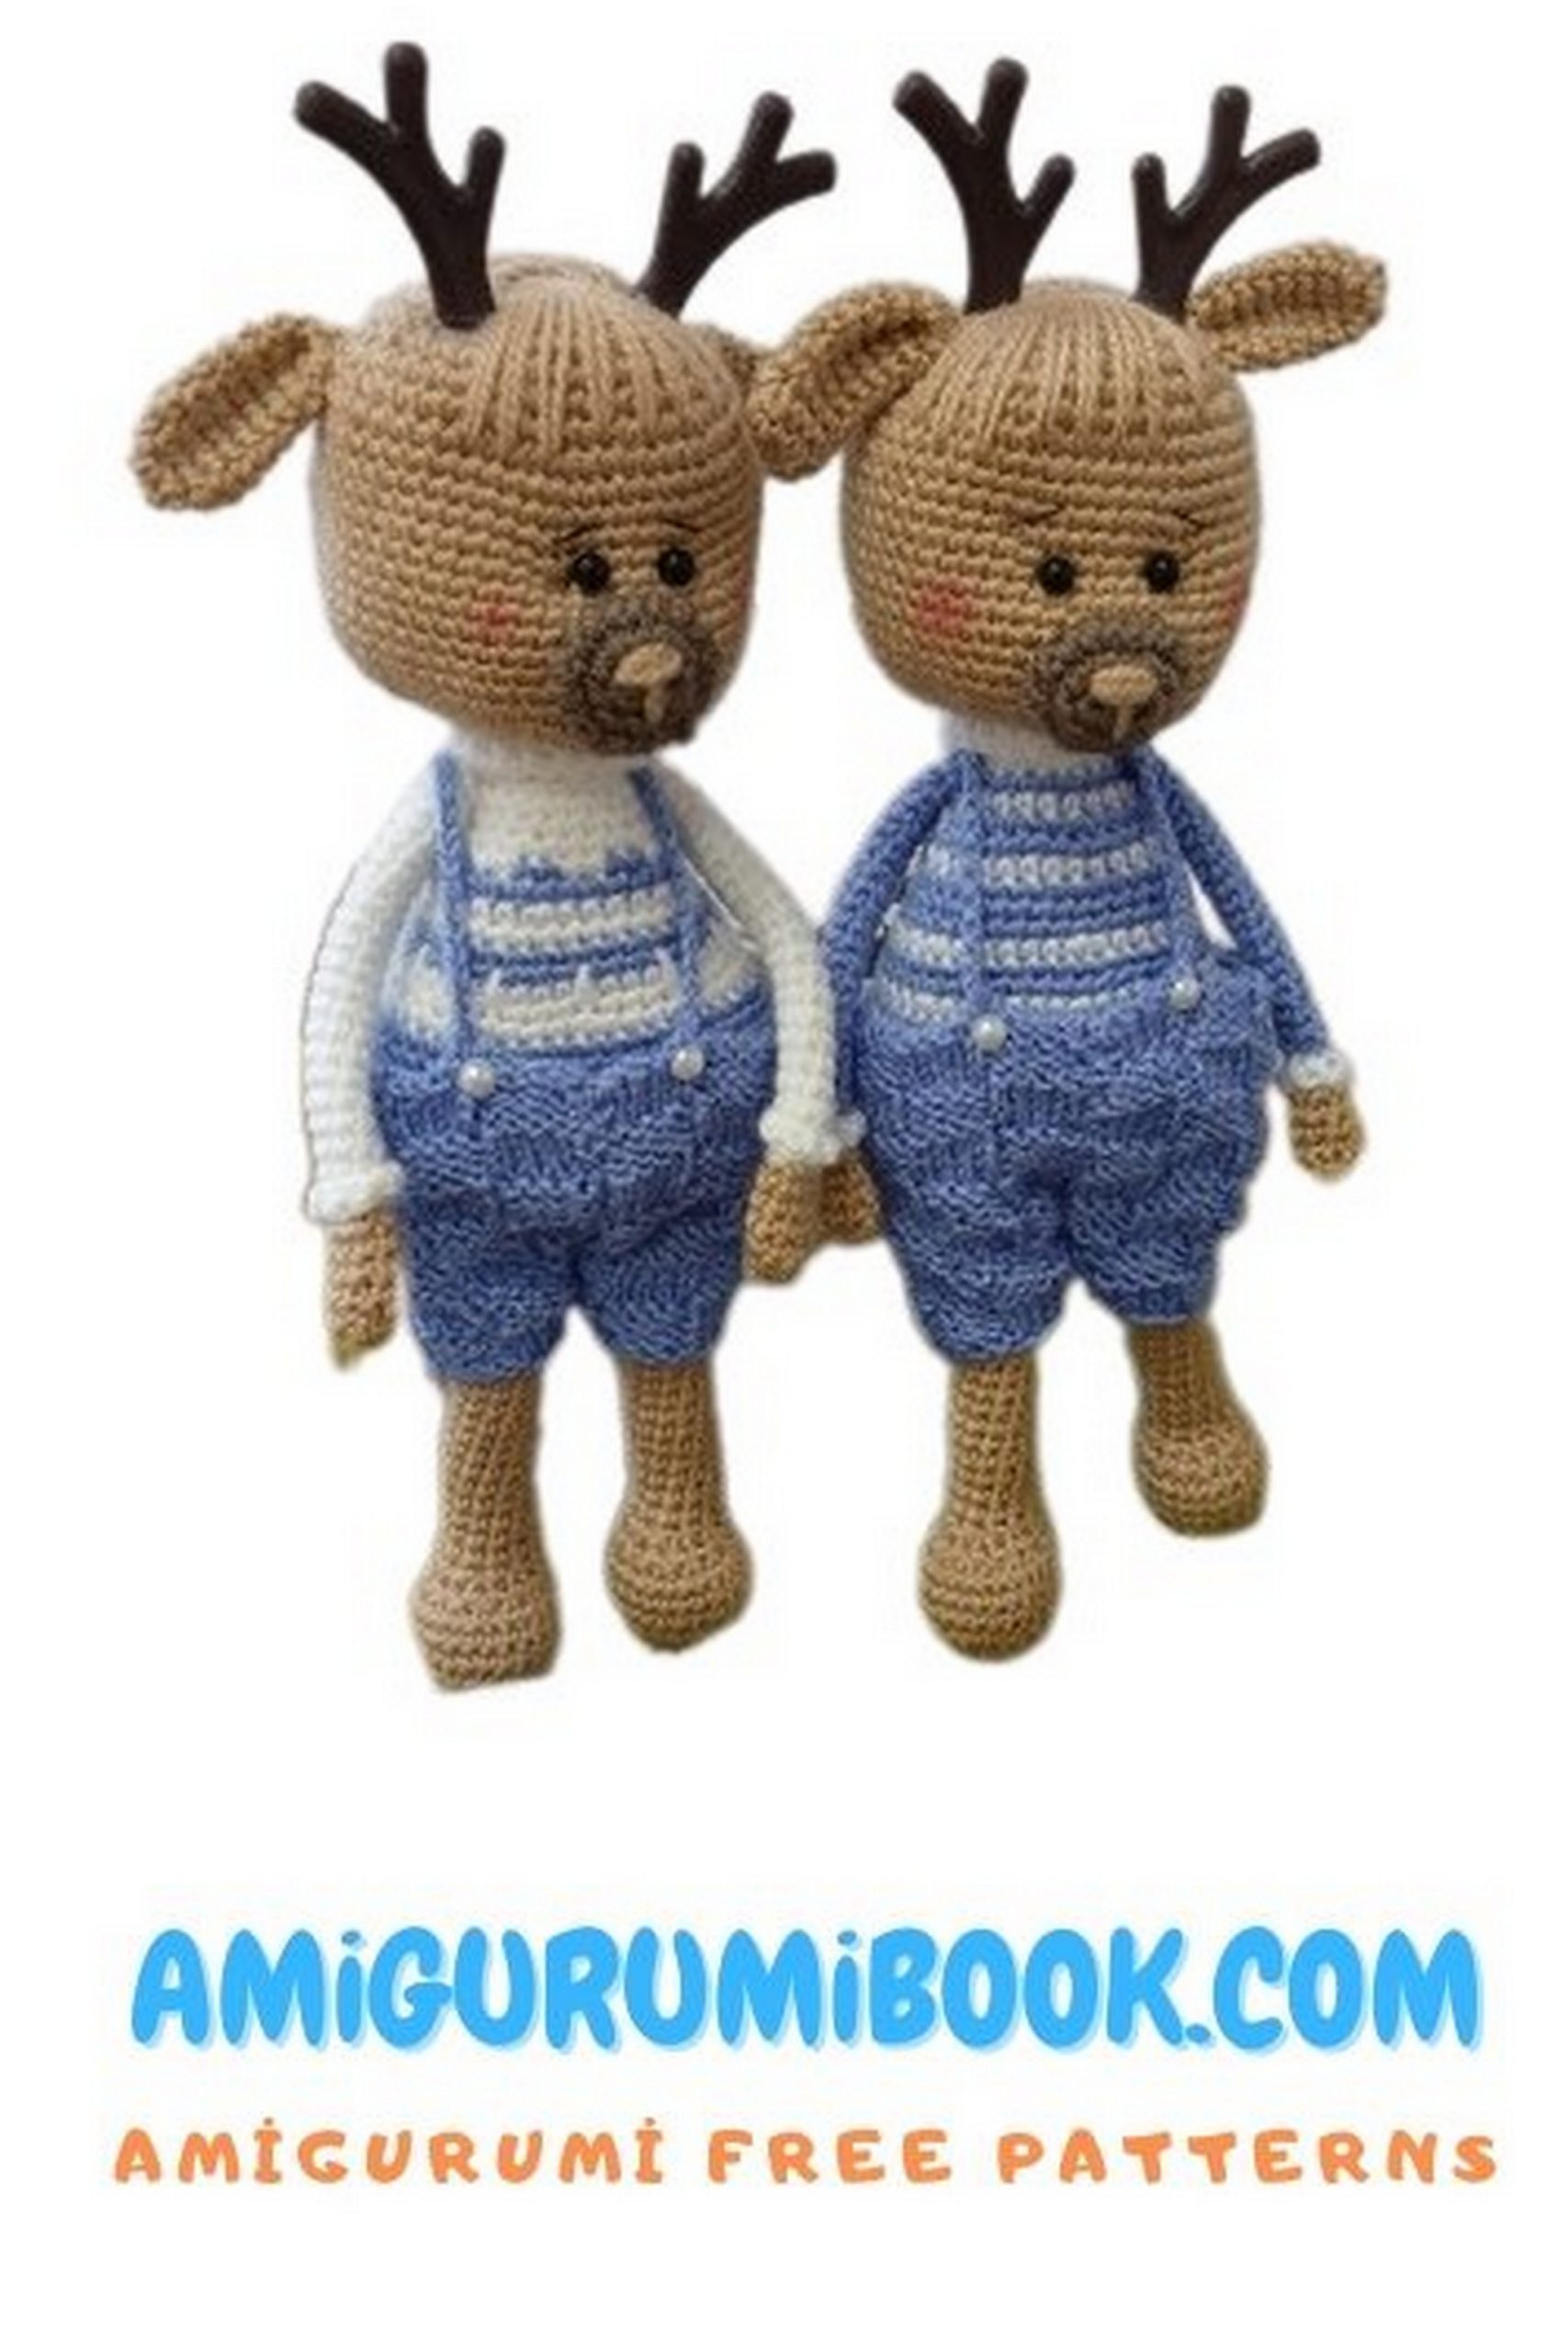
Body:
Row 30 – 18 sc
Row 31 – in the back loops only, 18 sc
Row 32 – (2 sc, increase) x 6 times (24)
Rows 33-34 – 24 sc
Row 35 – (3 sc, increase) x 6 times (30), switch to blue color and crochet stripes in any combination
Rows 36-37 – 30 sc
Row 38 – (4 sc, increase) x 6 times (36)
Rows 39-40 – 36 sc
Row 41 – (5 sc, increase) x 6 times (42)
Rows 42-43 – 42 sc, stuff
Row 44 – (6 sc, increase) x 6 times (48)
Rows 45-46 – 48 sc
Row 47 – (7 sc, increase) x 6 times (54)
Rows 48-53 – 54 sc (6 rows)
Row 54 – (7 sc, decrease) x 6 times (48)
Row 55 – (6 sc, decrease) x 6 times (42)
Row 56 – (5 sc, decrease) x 6 times (36)
Continue crocheting forward with sc, leaving the yarn on the side of the body. Cut the yarn, leaving a long tail, stuff the body. Return to Row 31 and crochet the collar in the front loops:
Row 1 – (5 sc, increase) x 3 times (21)
Rows 2-3 – 21 sc.
Muzzle (brown color):
Ch 4.
Row 1 – in the 2nd ch from the hook – 4 sc in one stitch, sc, 4 sc in one stitch, on the opposite side of the chain – sc (10)
Row 2 – 4 increases, sc, 4 increases, sc (18)
Row 3 – “crab stitch”.
Ears (beige color):
Row 1 – 6 sc in MR
Row 2 – 6 increases (12)
Rows 3-8 – 12 sc (6 rows)
Row 9 – (2 sc, decrease) x 3 times (9)
Row 10 – connect the edges and crochet 4 sc.
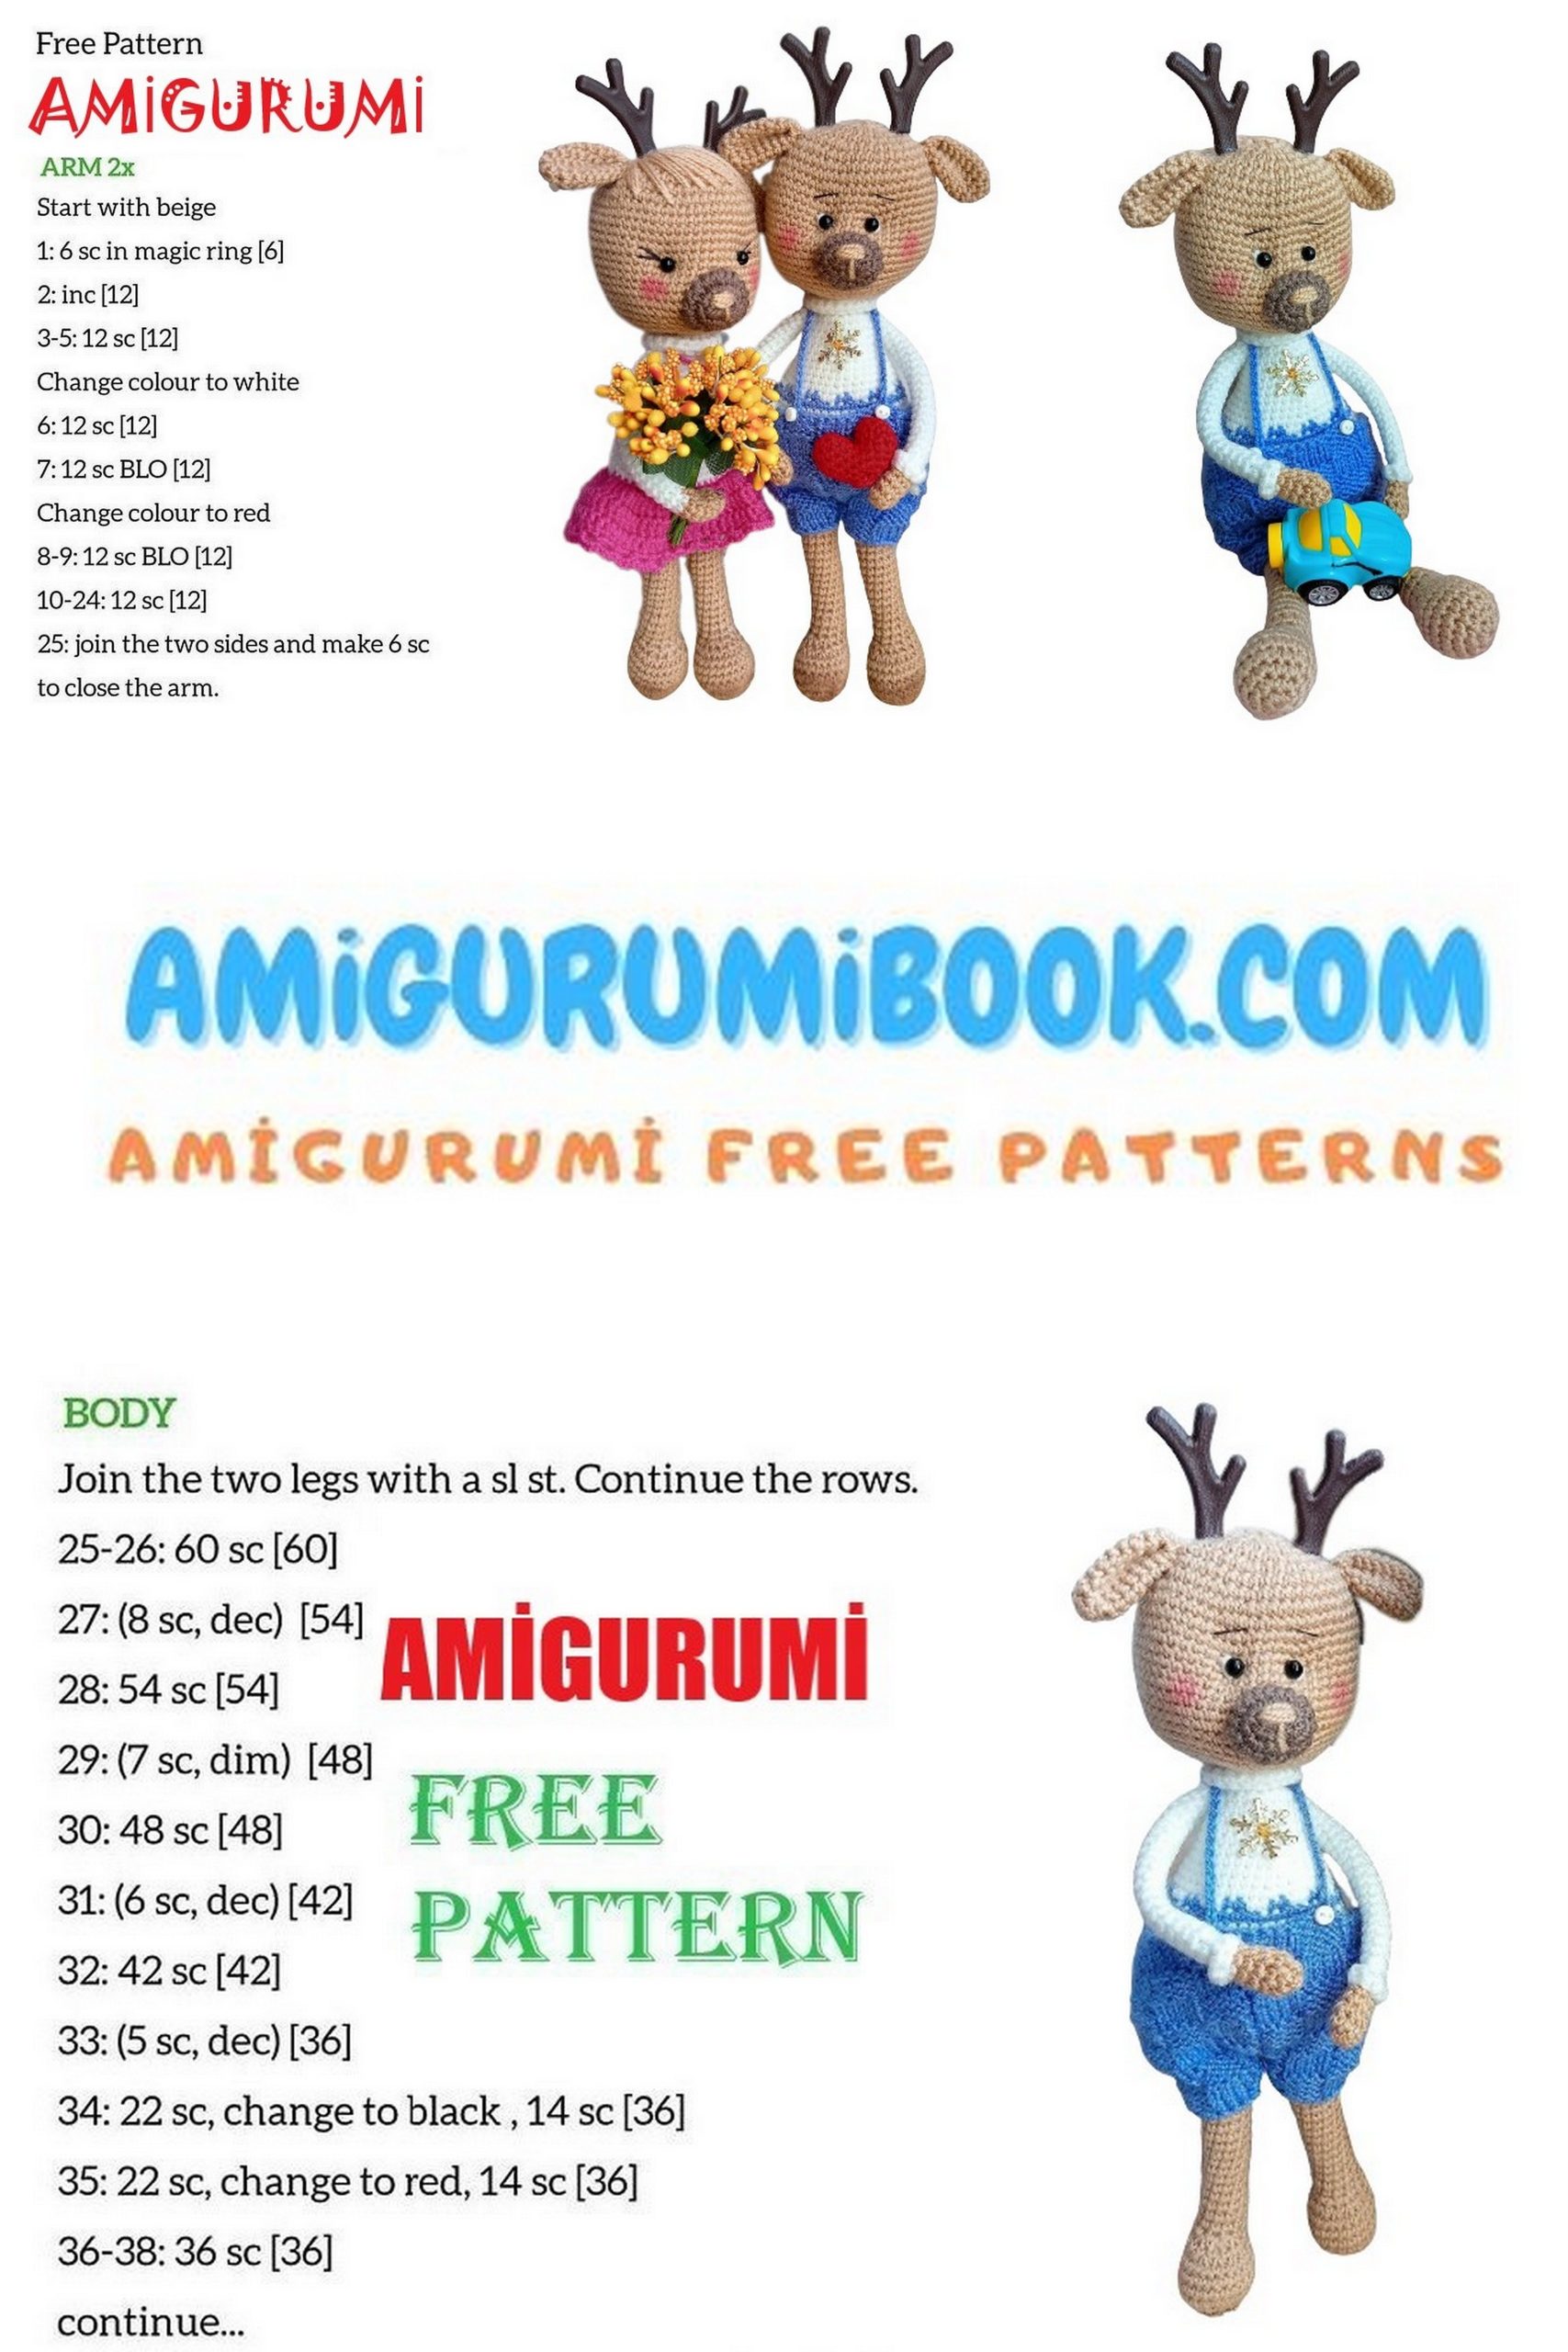
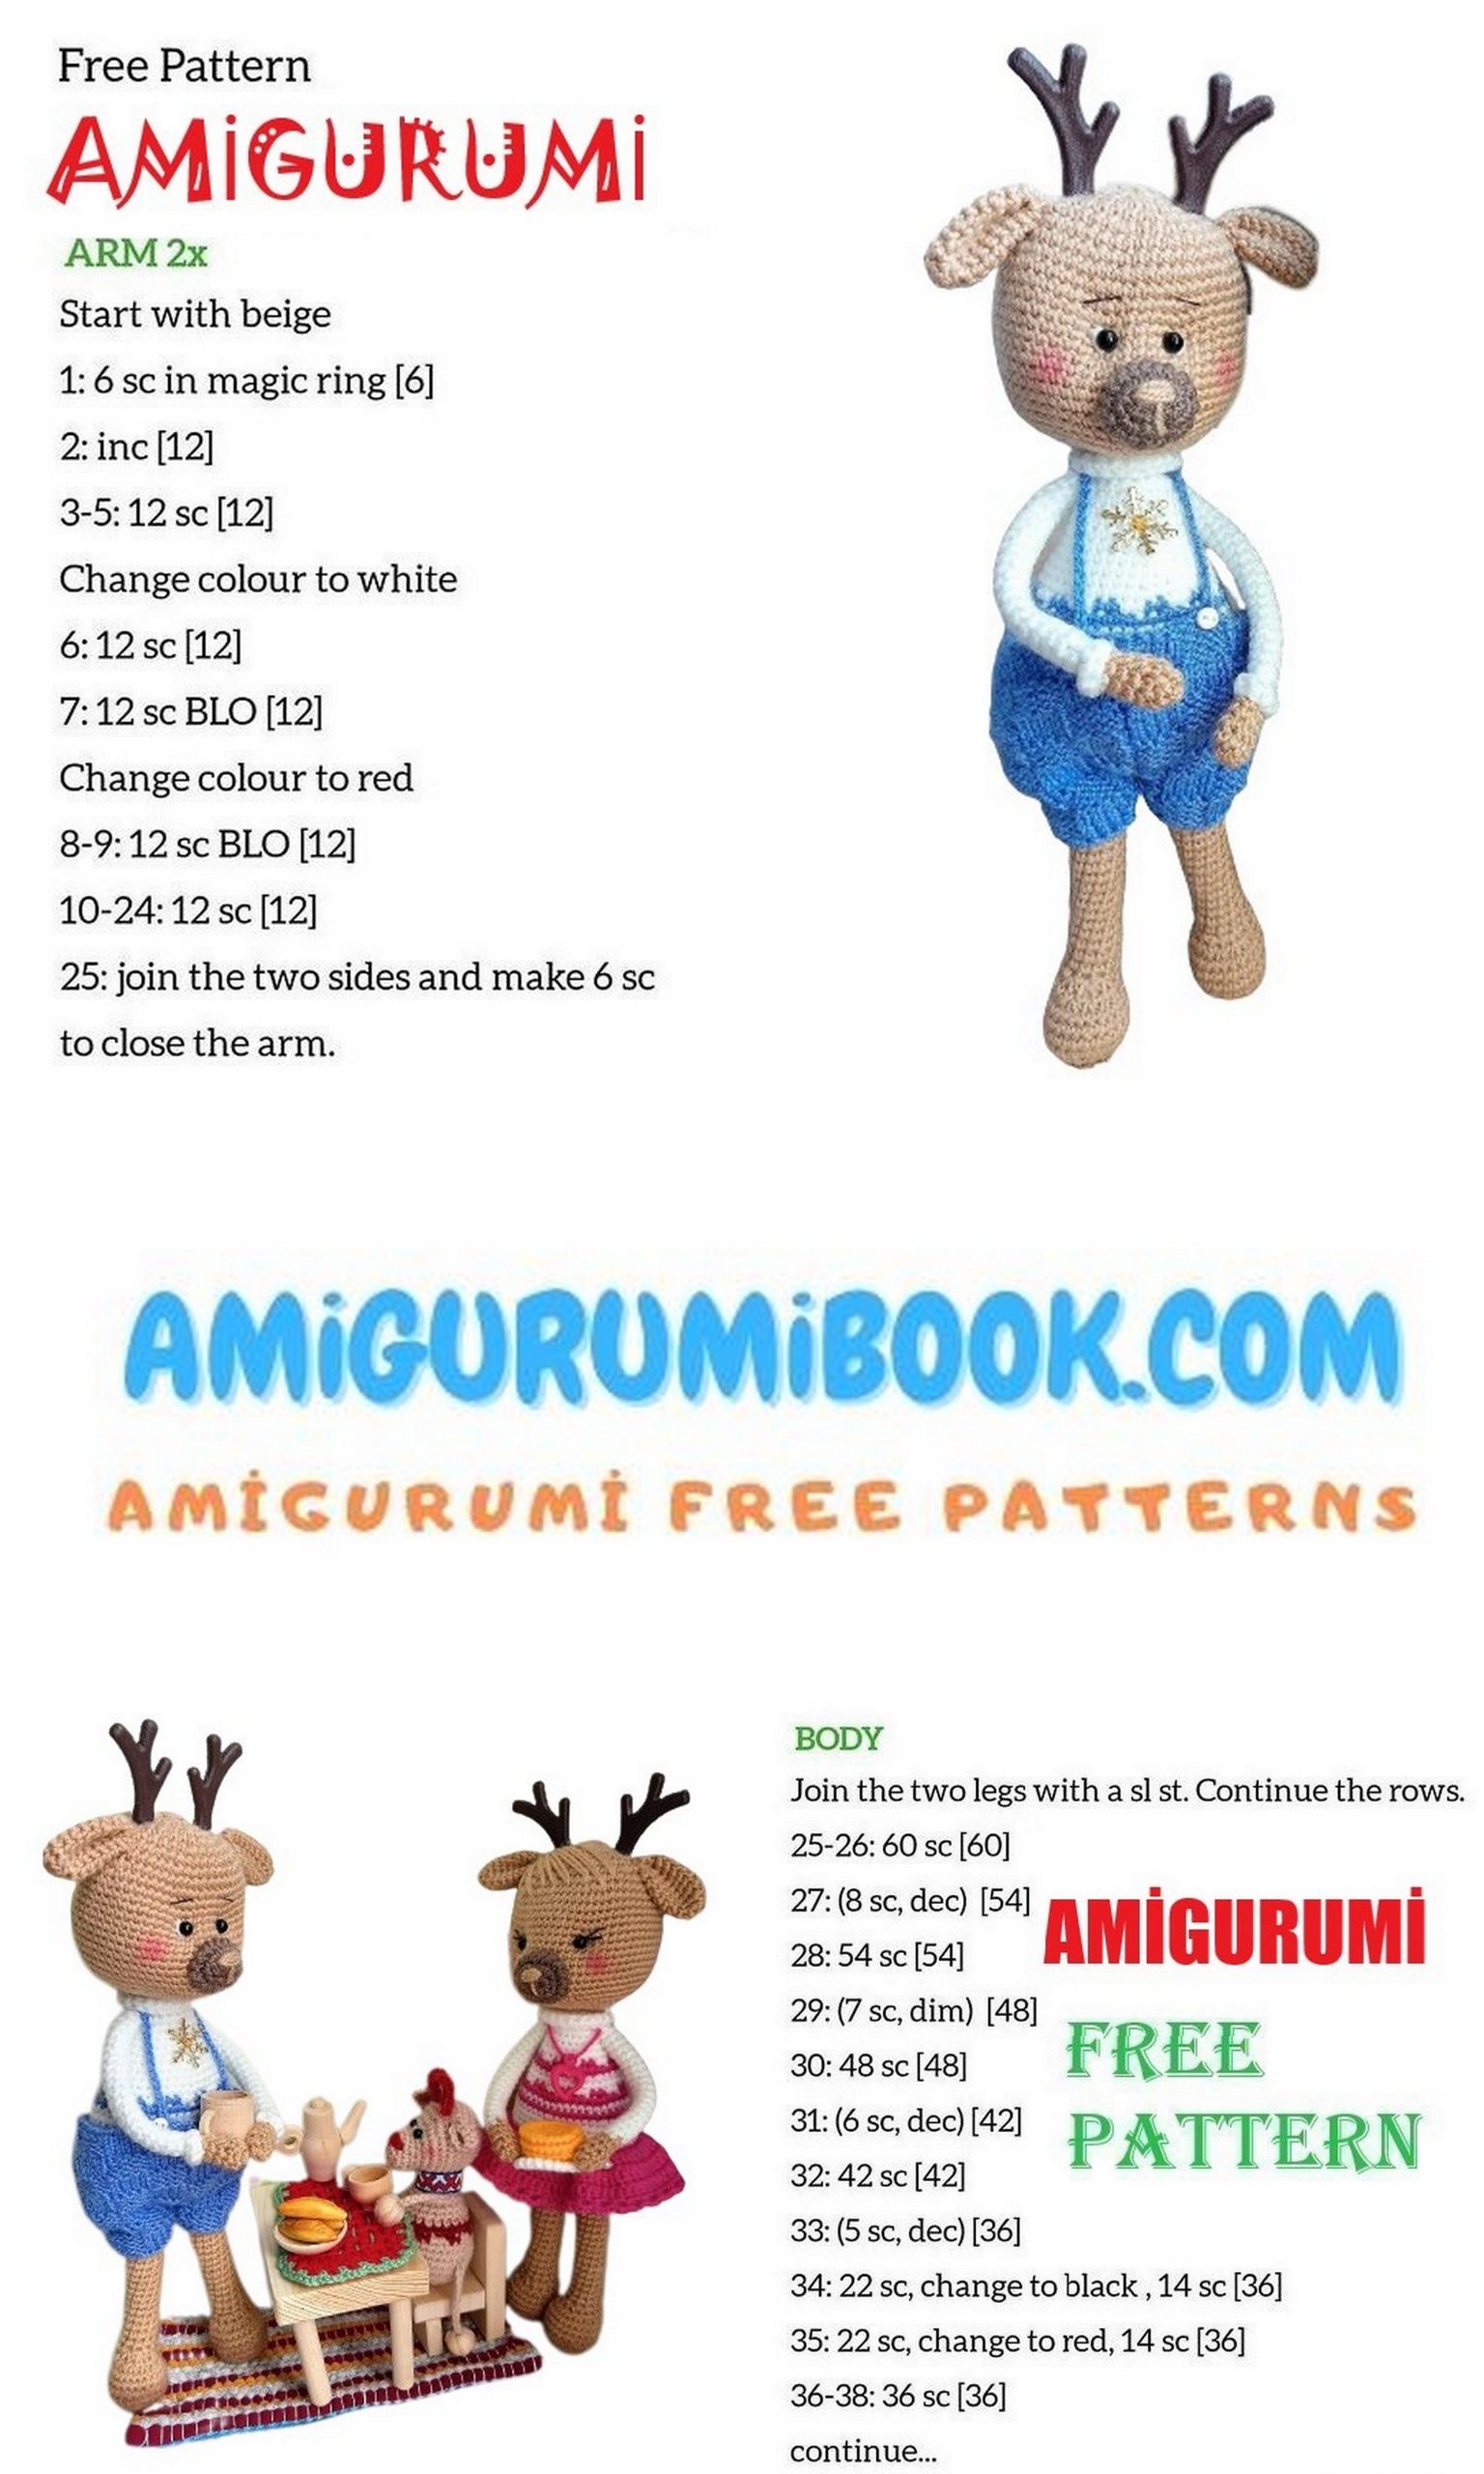
Arms (beige color):
Row 1 – 8 sc in MR
Rows 2-5 – 8 sc (4 rows), switch to white color
Row 6 – 8 sc
Row 7 – in the back loops only, 8 sc
Rows 8-26 – 8 sc (19 rows). Return to Row 7 and crochet 2 rows of 8 sc in the front loops with white color.
Legs (beige color):
Row 1 – 6 sc in MR
Row 2 – 6 increases (12)
Row 3 – (sc, increase) x 6 times (18)
Row 4 – (2 sc, increase) x 6 times (24)
Rows 5-7 – 24 sc, stuff
Row 8 – 7 decreases, 10 sc (17)
Row 9 – sc, 5 decreases, 6 sc (12)
Rows 10-29 – 12 sc (20 rows), stuff
Row 30 – connect the edges and crochet 5 sc.
Shorts (blue color):
Cast on 26 stitches on knitting needles and knit in a “Checkerboard” pattern for 20 rows. Then decrease 1 stitch on each side in every right side row. Repeat this 4 times. You’ll have 18 stitches on the needles. Bind off the stitches. Knit the second part and sew the shorts together. Make straps (when the shorts are already on the toy) – ch 25, sc in the middle of the back of the shorts, ch 25.
Assembly:
Finish the head – sew on the muzzle, embroider the nose and eyebrows, attach the eyelids, glue on the eyes and horns, sew on the ears. Thread Chenille wire through the body, put on the arms and sew them to the body. Insert the legs into the body and sew the opening closed, put on the shorts, decorate with buttons.