
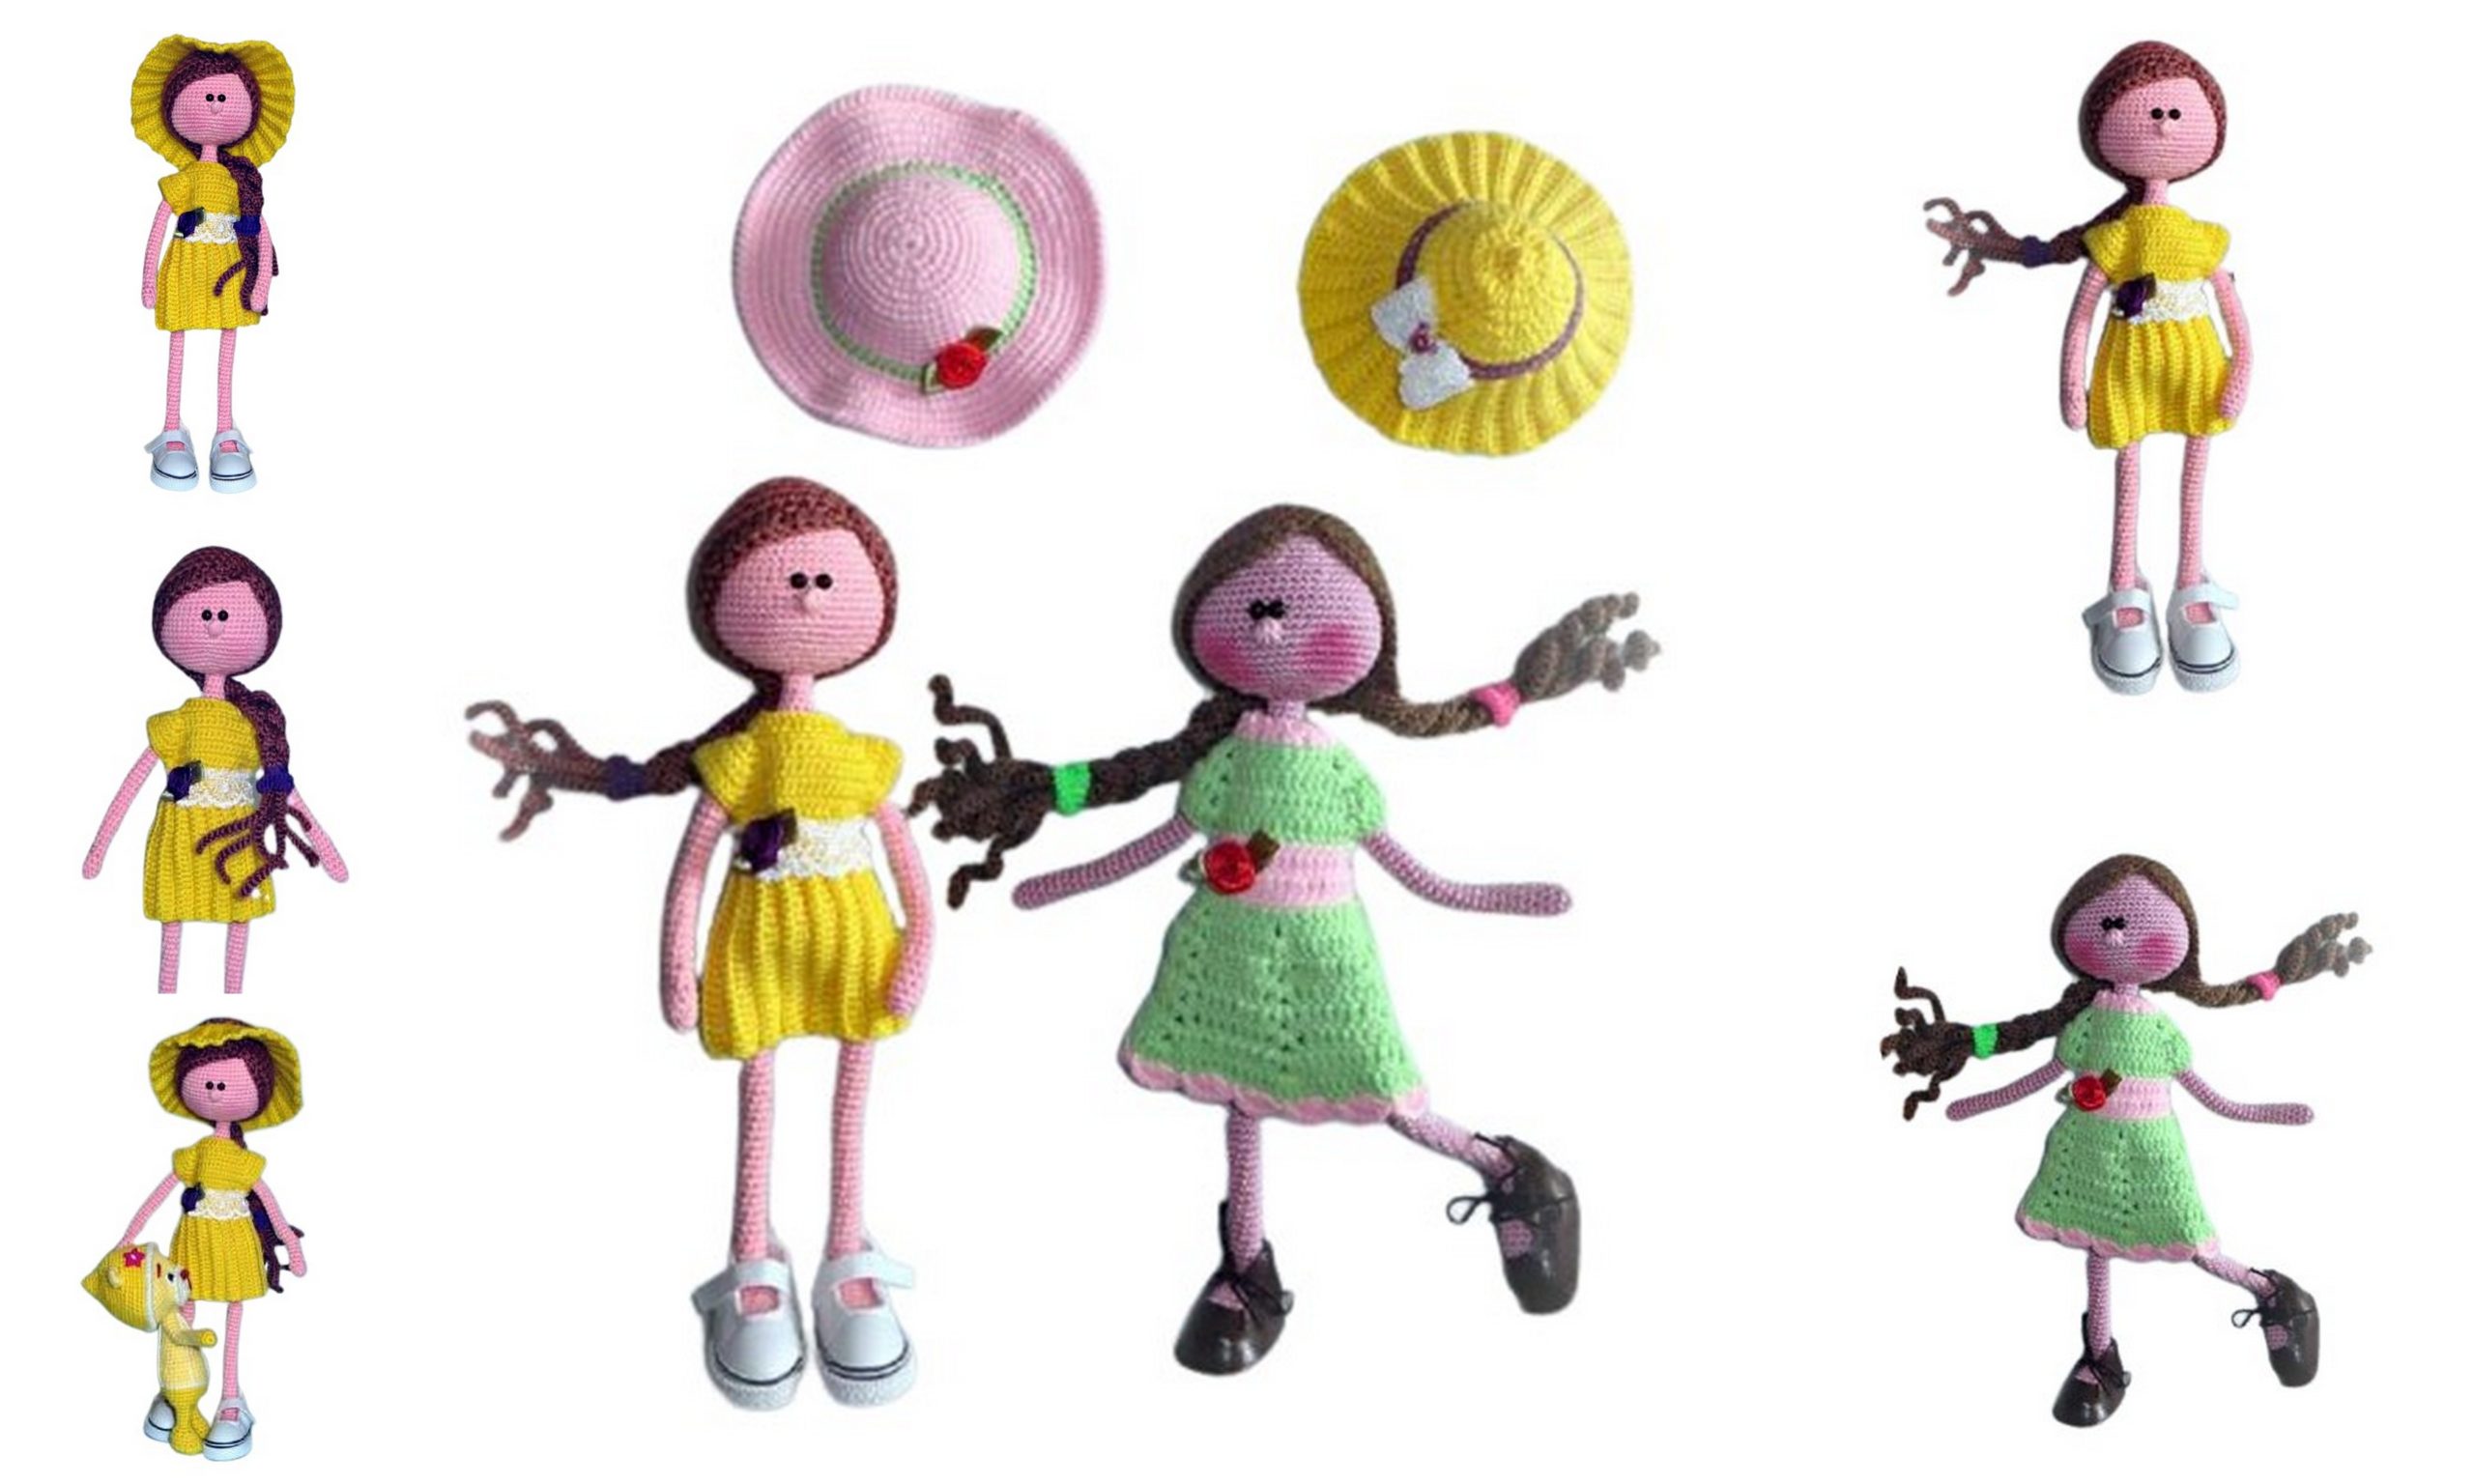
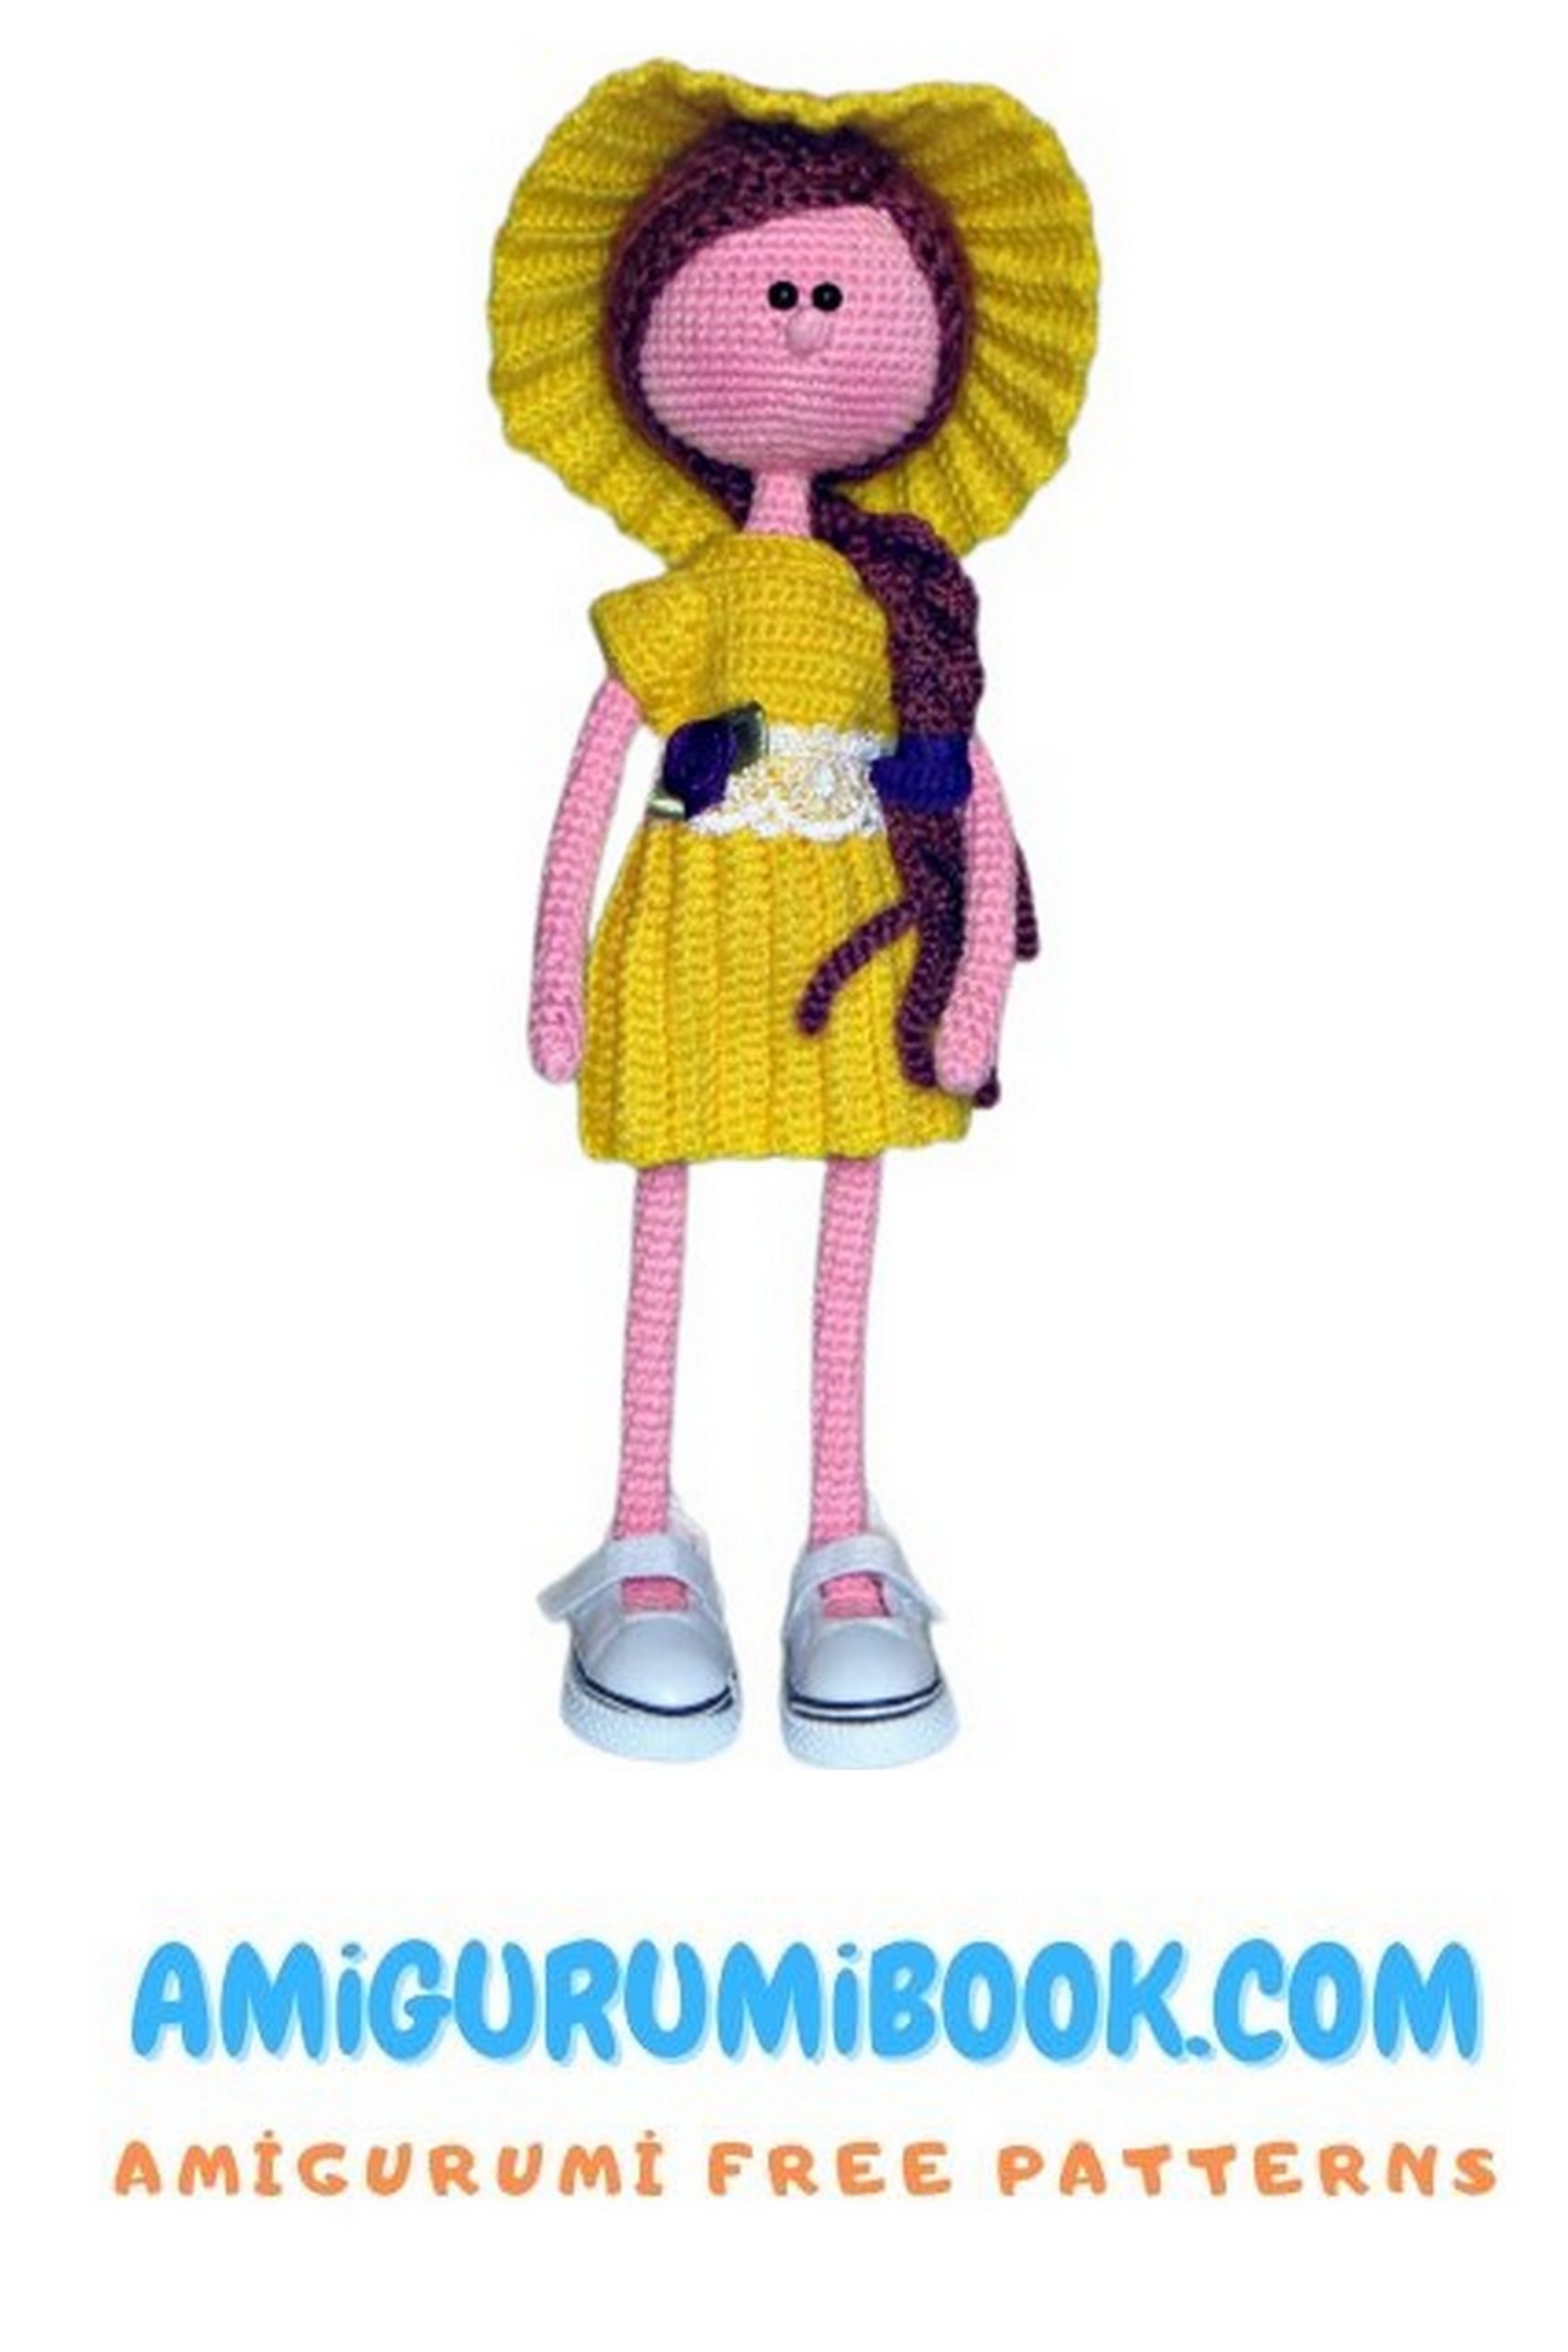
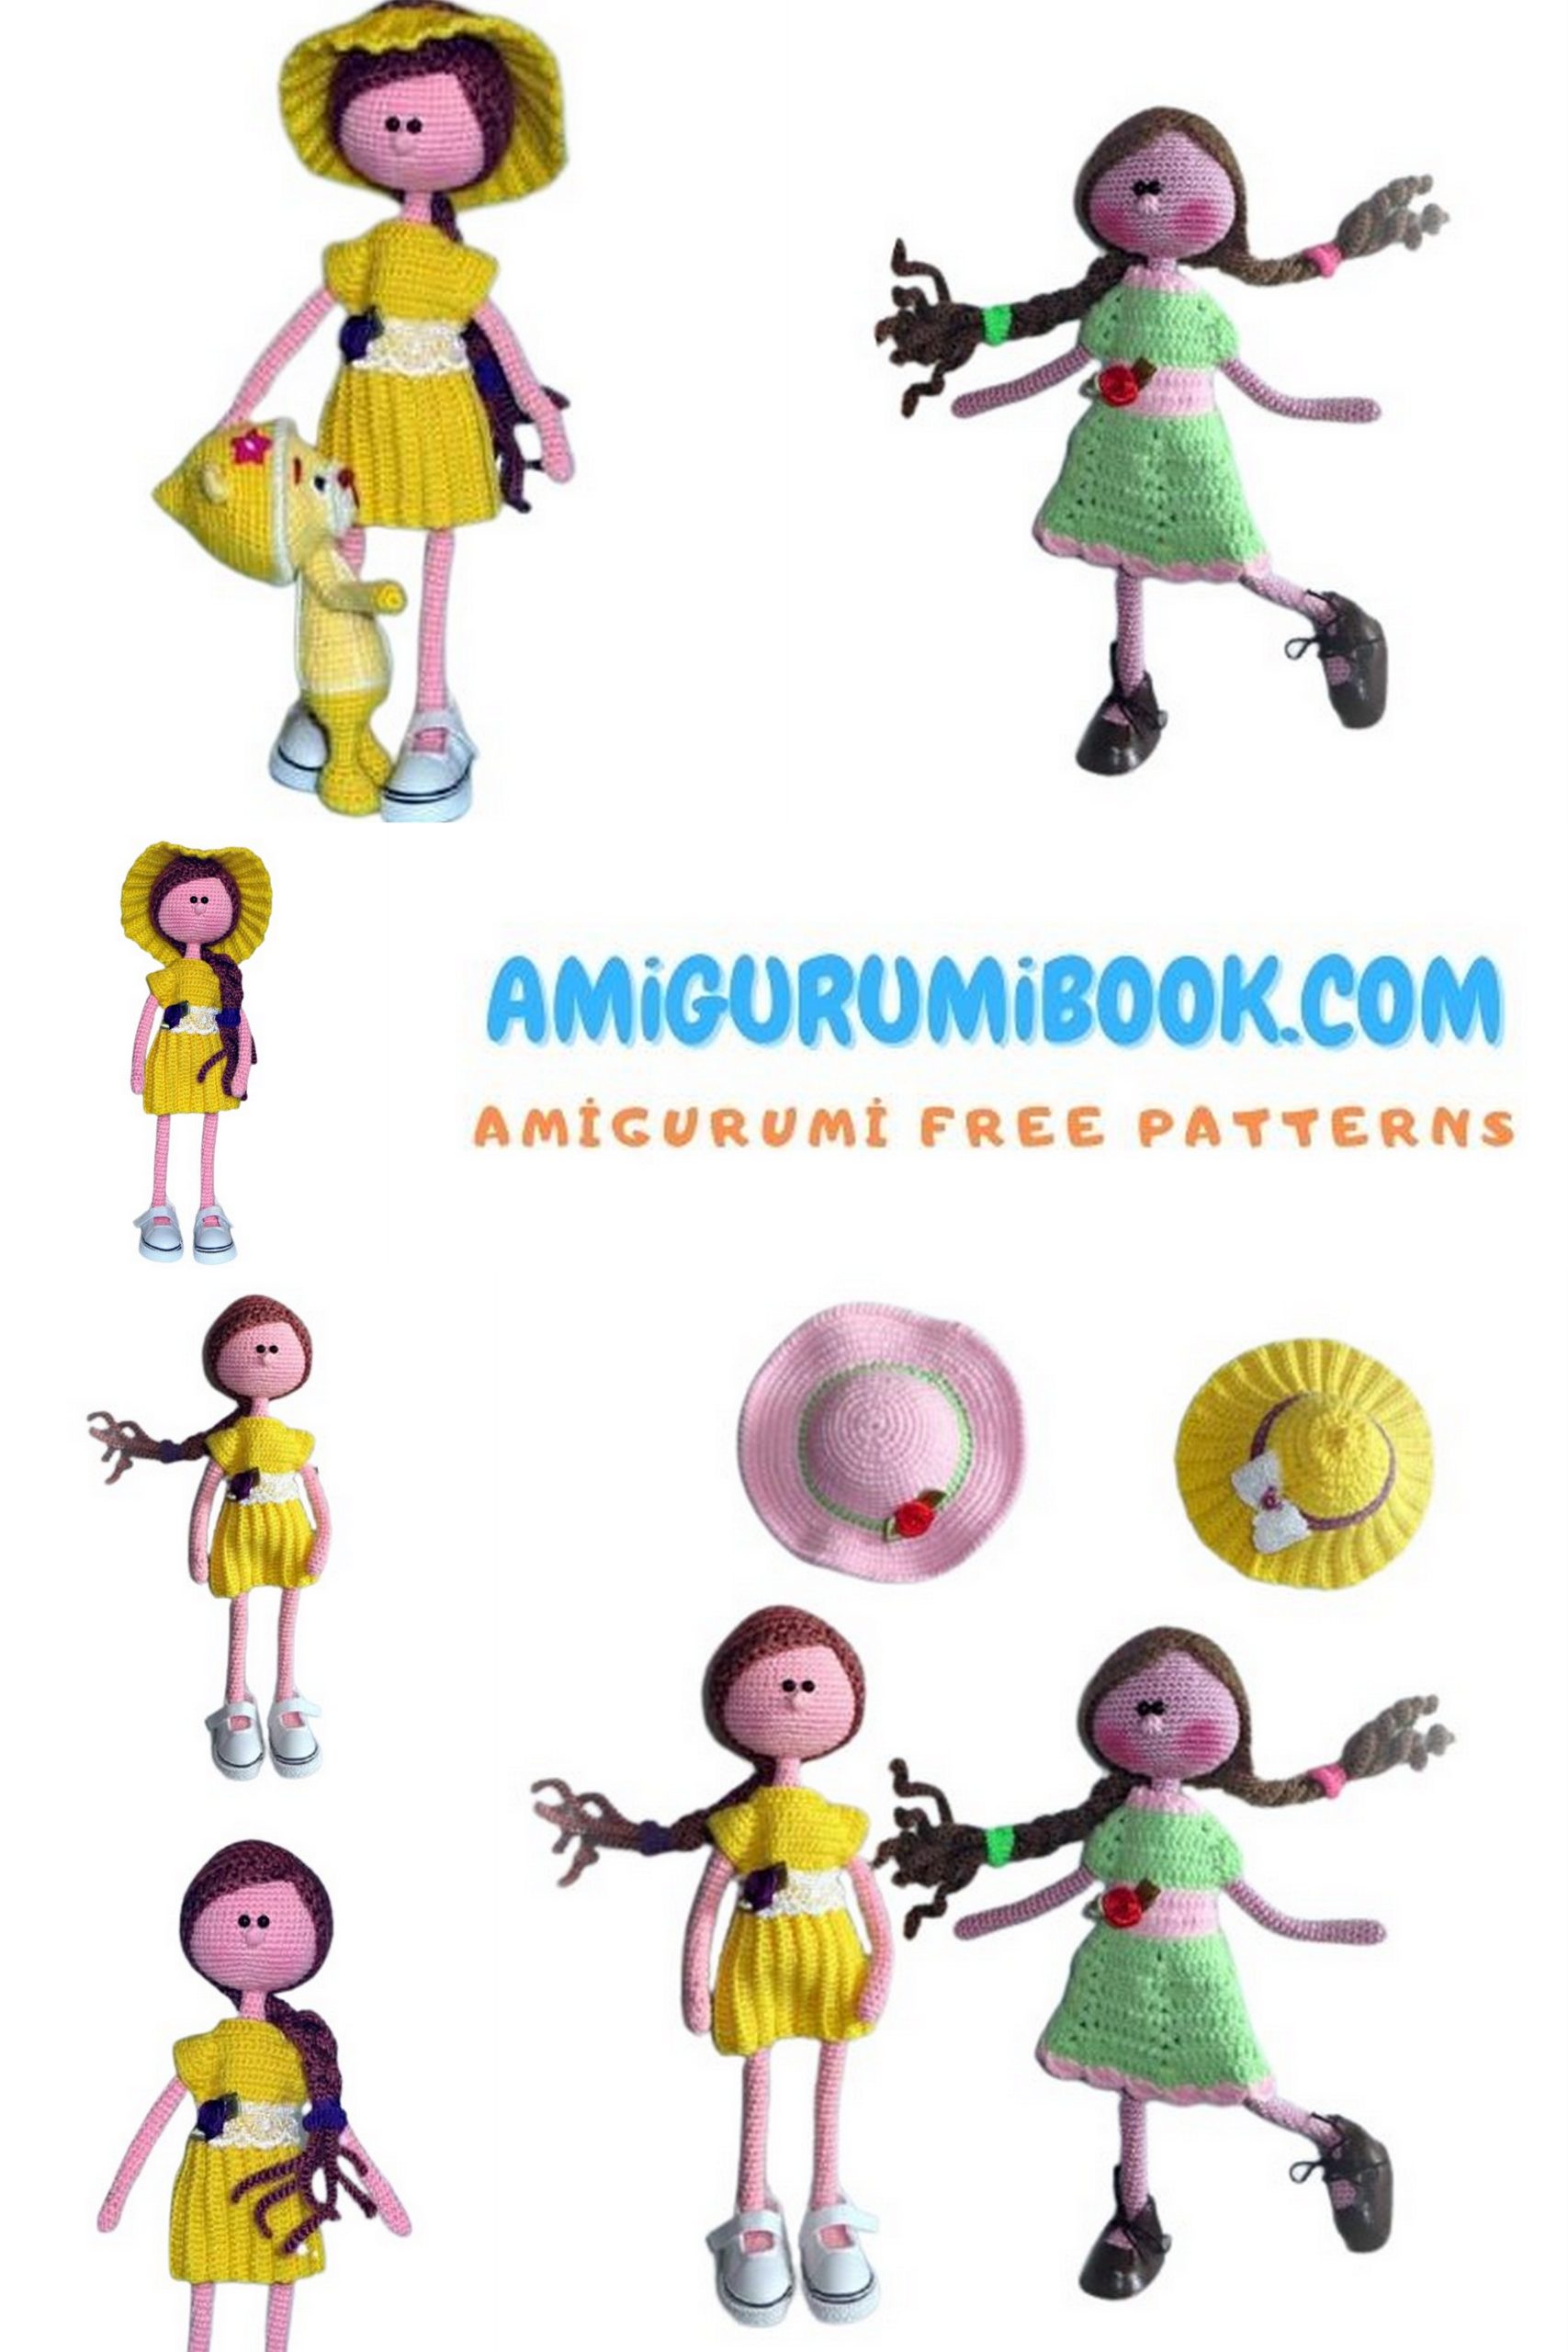
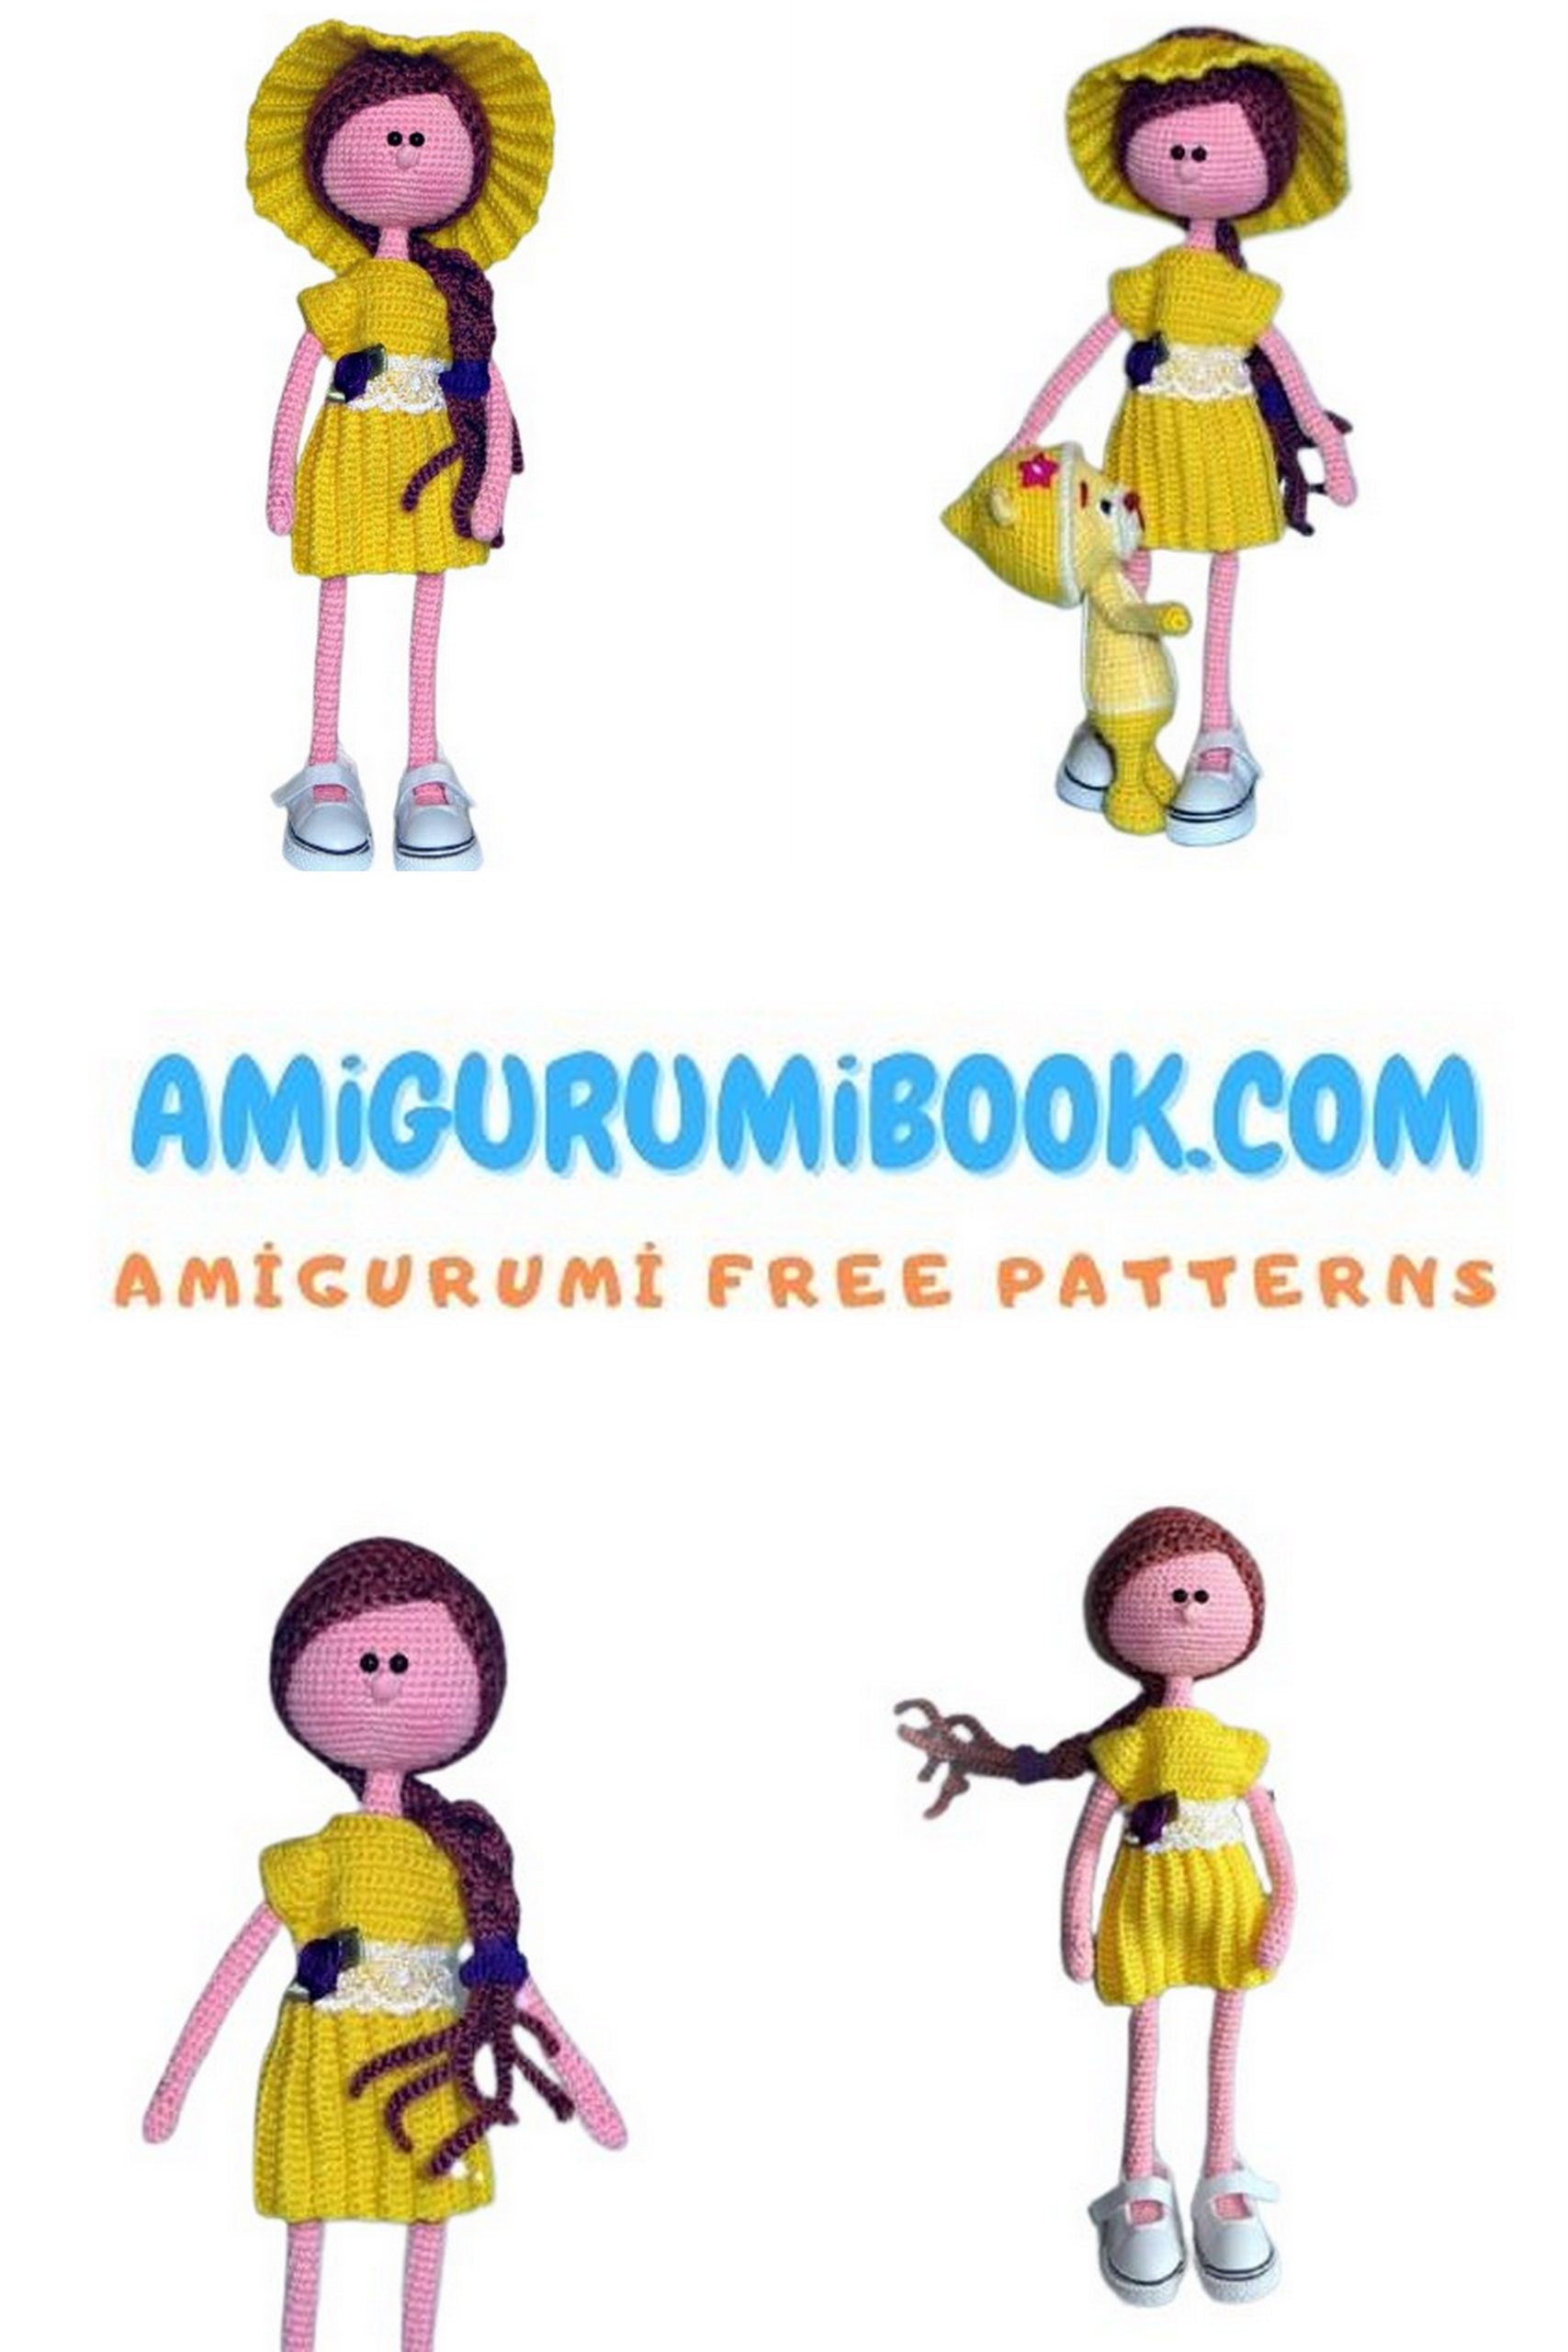
If you enjoy making cute handmade dolls, this Amigurumi Doll Christina Free Pattern is a wonderful crochet project to try. This adorable crochet doll features a stylish dress, hat, boots, and beautiful hair, making it a charming addition to any amigurumi collection.
The step-by-step crochet tutorial will guide you through creating the legs, body, head, hair, and accessories of this lovely doll. Whether you are an experienced crocheter or an advanced beginner, you can easily follow this free amigurumi pattern to create your own Christina doll for gifts, decorations, or a handmade toy collection.
If you want to access 1000+ free amigurumi patterns, you can download our application from this link!
Materials
- Main yarn: Bella by Alize (Color #32)
- Hair yarn: Ogonok yarn by Troitskaya Factory
- Dress and hat yarn: Beaded Perkhorka
- Crochet hooks:
- 1.25 mm hook (for the body and dress)
- 1.75 mm hook (for the hair)
- Wire frame:
- 2–2.5 mm diameter wire for the body
- 1.5 mm diameter wire for the arms
- 2 half beads for the eyes
- Elastic band
- Lace and rhinestones for decorating the doll
- 5 cm doll boots
- Sewing needle and scissors
- Toy stuffing (polyester fiberfill)
You can also use any other yarn for the doll’s hair and clothing.
Abbreviations
dec – decrease
MR – Magic Ring (adjustable ring)
ch – chain
sc – single crochet
dc – double crochet
sl st – slip stitch
inc – increase
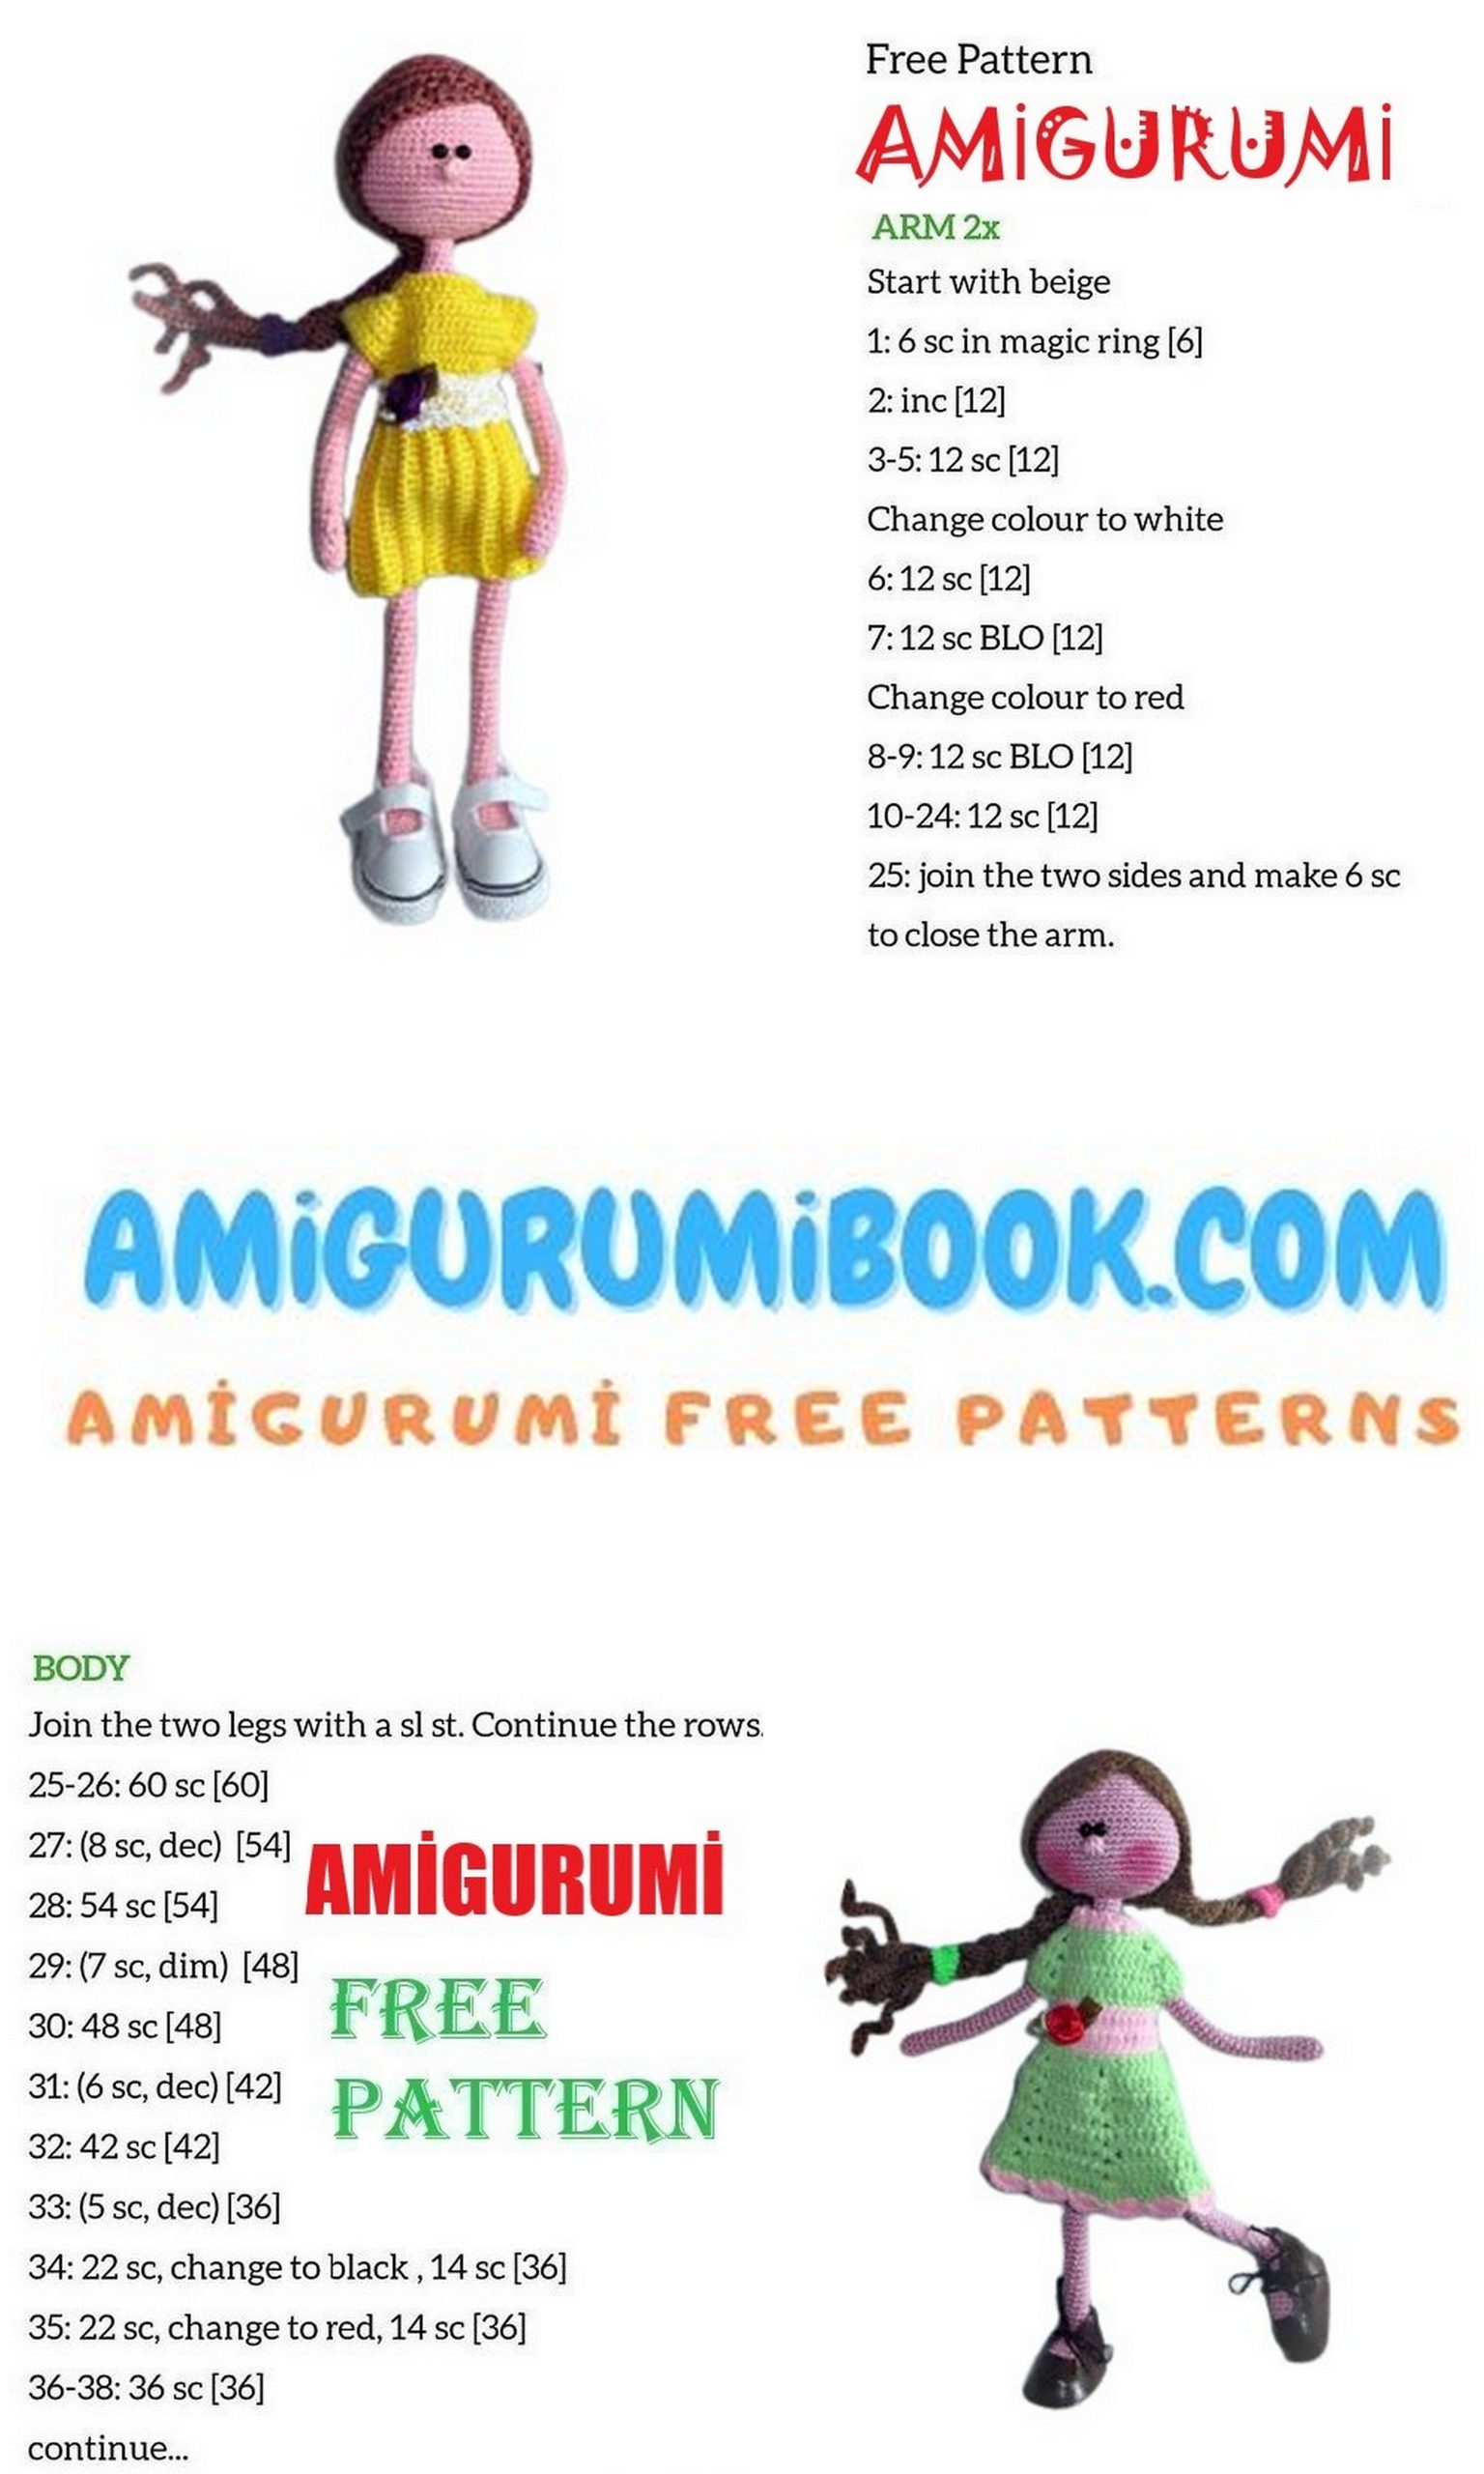
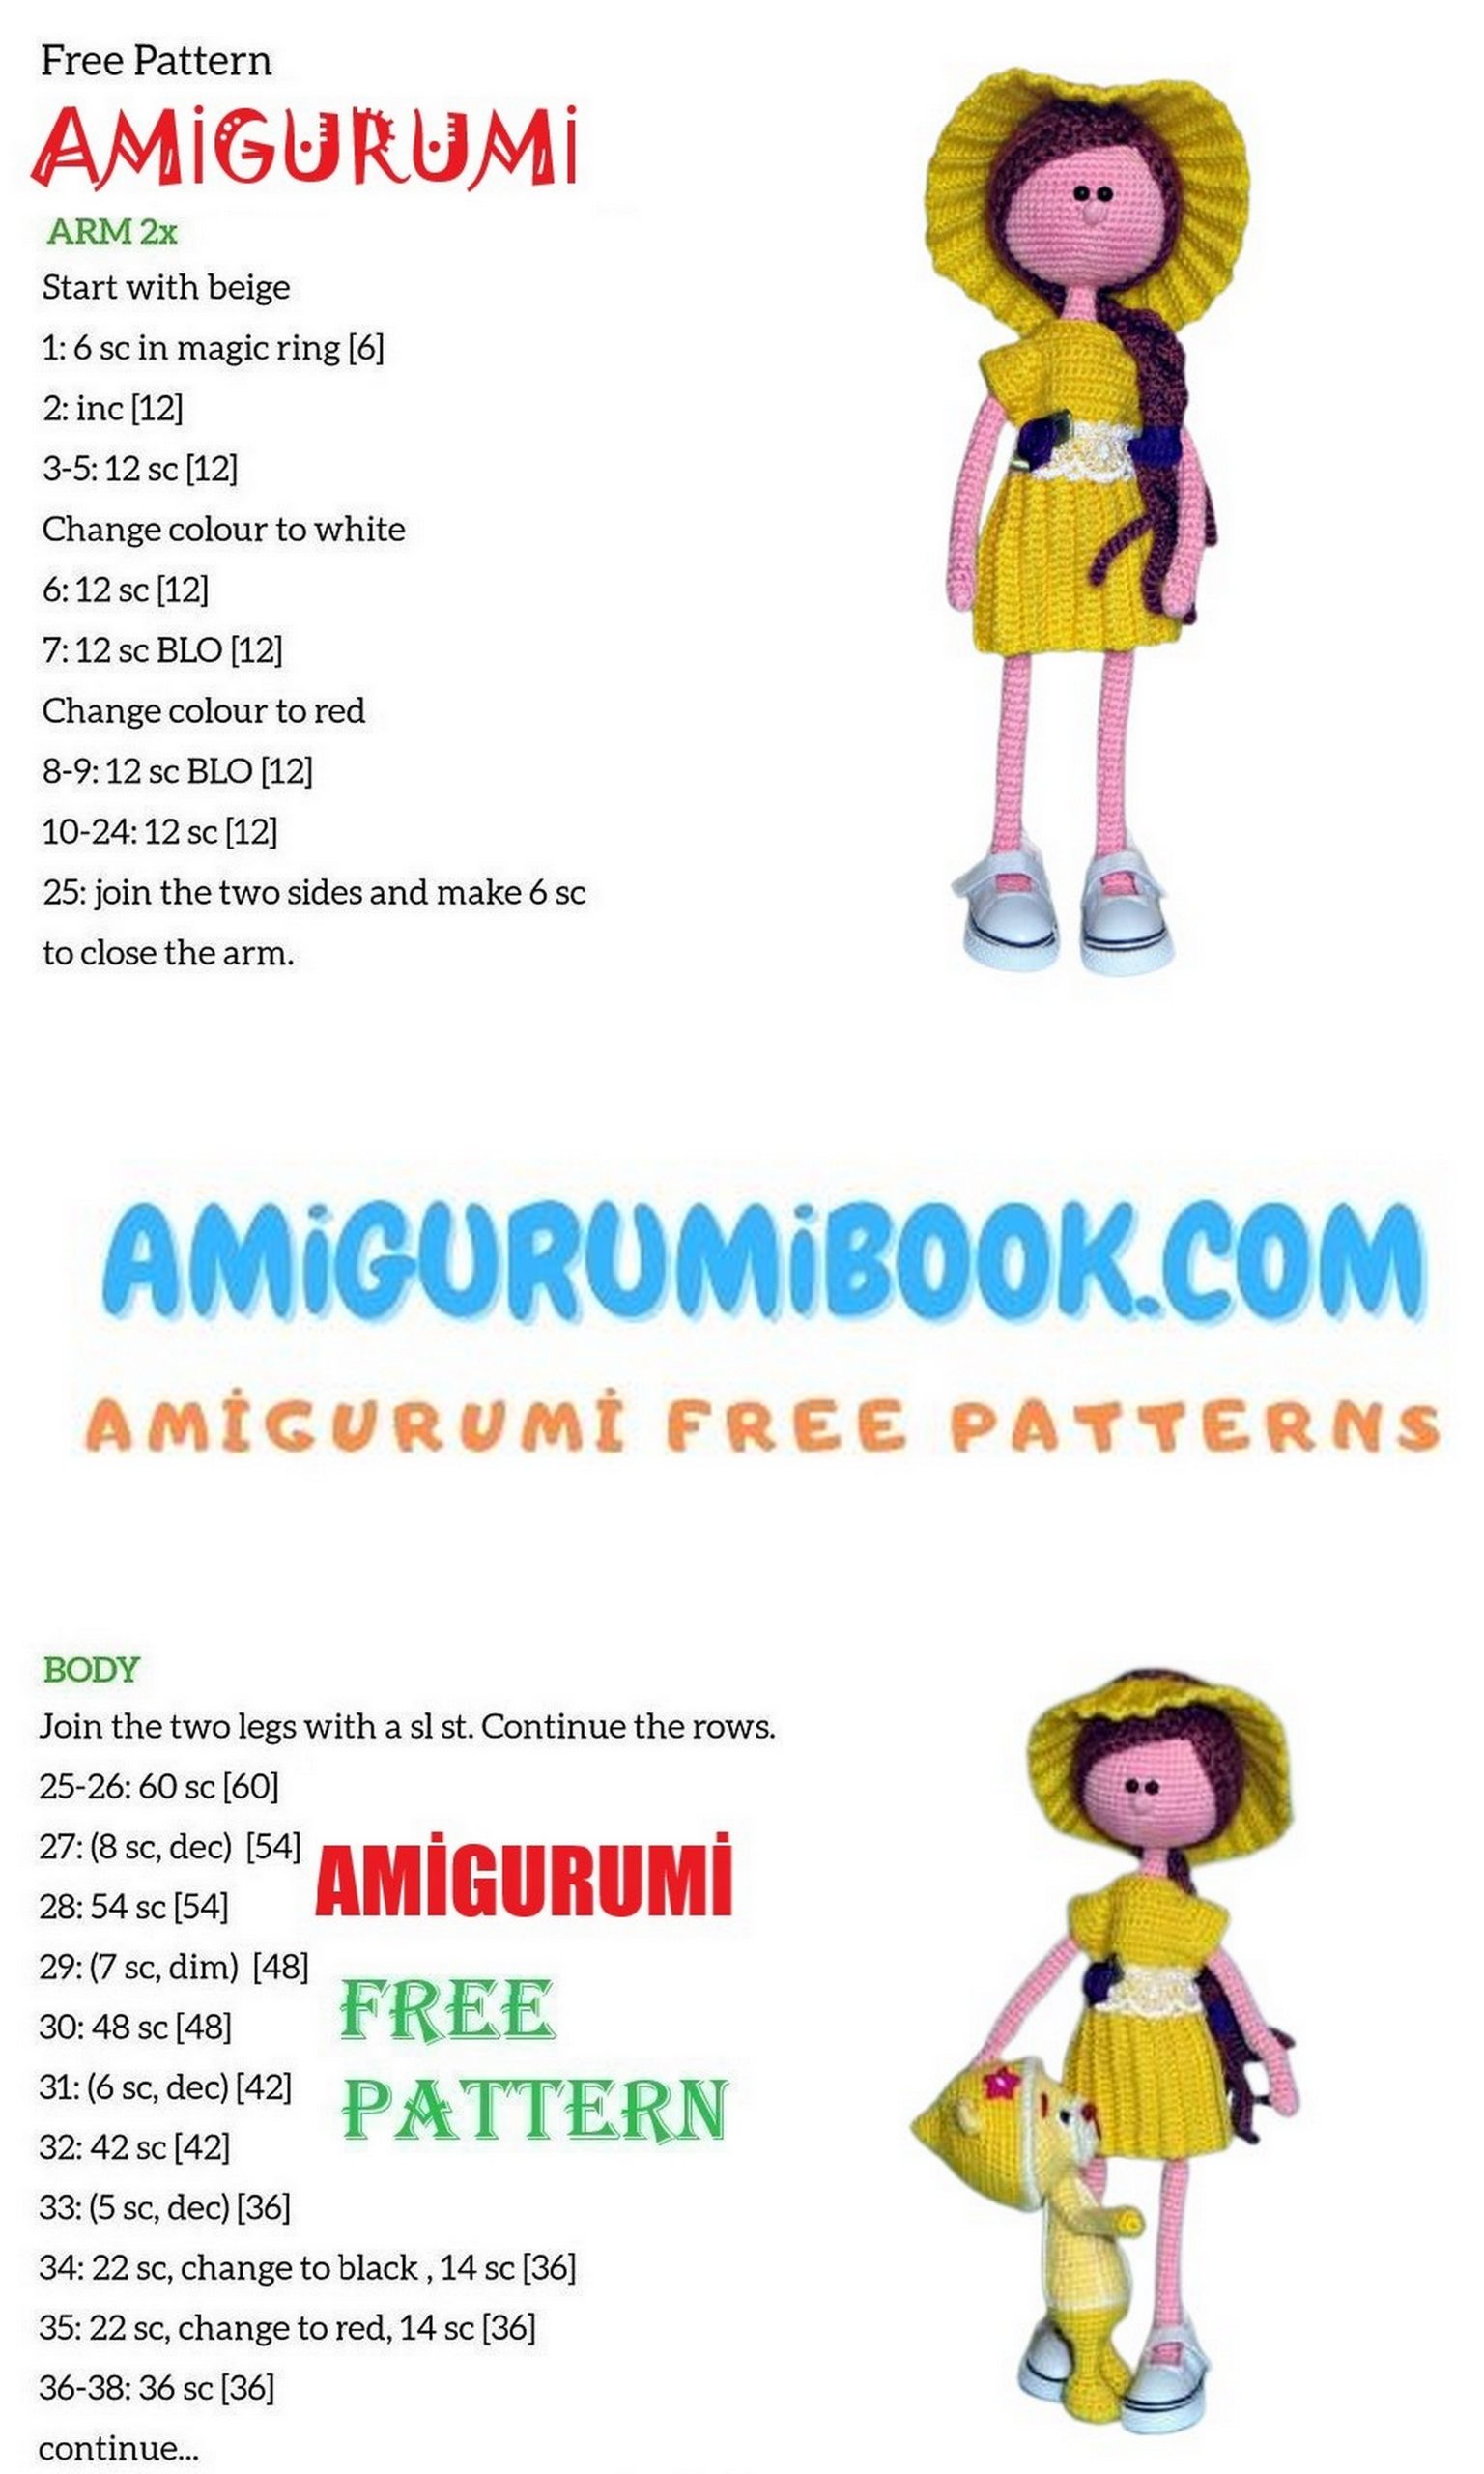
Arms (Make 2)
1: 6 sc in MR (6)
2: (inc, 2 sc) ×2 (8)
3–32: sc in each st around (8) — 30 rows
Fasten off and leave a tail for sewing.
Legs (Make 2)
Begin each new row with a turning chain.
After the double decrease in Row 19, also make a turning chain to prevent the decrease from spreading.
Do not count this chain in the stitch count.
Start with ch 6.
1: In the 2nd ch from hook:
4 sc, 3 sc in one stitch,
continue on the other side of the chain:
3 sc, inc
(12)
2: inc, 3 sc, inc, 1 sc, inc, 3 sc, inc, 1 sc
(16)
3–12: sc in each st around (16) — 10 rows
13: 5 sc, turn, 11 sc, turn
14: 11 sc, turn
15: 11 sc, turn
Insert the cardboard insole and wire frame.
16: dec, 7 sc, dec, turn
17: dec, 1 sc, double dec, 1 sc, dec, turn
18: 1 sc, double dec, 1 sc, turn
Stuff the sole only. Do not stuff the entire leg.
Continue the Leg
19:
1 sc, double dec, 1 sc (side),
dec, 3 sc, dec (front),
1 sc, double dec, 1 sc (side),
double dec (heel)
(12)
20: (1 sc, dec, 1 sc) ×3
(9)
21–57: sc in each st around (9) — 35 rows
Do not cut the yarn on the second leg, as you will continue crocheting the body from it.

Body
Continue crocheting from the second leg without cutting the yarn.
Chain 6 stitches between the legs and join the second leg.
Place the marker at the back.
Stuff the body gradually as you crochet.
Note: In the second round, crochet sc into the chain stitches between the legs.
1:
9 sc on first leg
7 sc in chain (last sc in same stitch as leg to avoid gap)
9 sc on second leg
7 sc in chain
(32)
2–6: sc in each st around (32)
7: Make 4 decreases:
- 2 on the sides (slightly towards the back)
- 2 at the back with 5 stitches between them
(28)
8: Make 3 decreases:
- 2 on the sides
- 1 in the center back
(24)
Twist the wire frame.
9–13: sc in each st around (24)
14: Make 4 decreases:
- 2 on the sides
- 2 at the back with 1 stitch between them
(20)
15: Attach the arms.
Move the marker to the center of the back.
16:
2 sc
4 sc together with 4 stitches of the arm
8 sc
4 sc together with 4 stitches of the arm
2 sc
(20)
17:
2 sc, inc, 4 sc, inc,
8 sc, inc, 4 sc, inc, 2 sc
(28)
18:
2 sc, dec, 4 sc, dec,
8 sc, dec, 4 sc, dec, 2 sc
(24)
19:
2 sc, dec, 3 sc, dec,
6 sc, dec, 3 sc, dec, 2 sc
(20)
20:
2 sc, dec, 2 sc, dec,
4 sc, dec, 2 sc, dec, 2 sc
(16)
21:
2 sc, dec, dec,
4 sc, dec, dec, 2 sc
(12)
22: Make 2 decreases on the sides
(10)
23–26: sc in each st around (10)
(Neck)
Do not cut the yarn.
Head
1: inc ×10 (20)
2: (inc, 1 sc) ×10 (30)
3: (1 sc, inc, 1 sc) ×10 (40)
4: (inc, 6 sc) ×6 (48)
5: (7 sc, inc) ×6 (54)
6: (8 sc, inc) ×6 (60)
7–10: sc in each st around (60)
11: In the center of the face, crochet 5 sc to form the nose.
12–15: sc in each st around (60)
16: (4 sc, dec, 4 sc) ×6 (54)
17: sc in each st around (54)
18: (7 sc, dec) ×6 (48)
19: sc in each st around (48)
20: (3 sc, dec, 3 sc) ×6 (42)
21: (5 sc, dec) ×6 (36)
22: (2 sc, dec, 2 sc) ×6 (30)
23: (3 sc, dec) ×6 (24)
24: (1 sc, dec, 1 sc) ×6 (18)
25: (1 sc, dec) ×6 (12)
26: dec ×6 (6)
Fasten off and hide the yarn.
Hair (Wig)
Start with MR.
1: 8 sc in MR (8)
The wig is crocheted using half double crochet (hdc).
Always try the wig on the doll’s head while crocheting to ensure the correct size.
2: inc ×8 (16)
3: (1 sc, inc) ×8 (24)
4: (2 sc, inc) ×8 (32)
5: (3 sc, inc) ×8 (40)
6: (19 sc, inc) ×2 (42)
7: (6 sc, inc) ×6 (48)
Try the wig on the head.
If needed, add a few more increases.
Crochet several more rows without increases, trying it on the head until the wig fits properly.
Do not cut the yarn. Continue crocheting the brim.
Hair Brim
ch 11
Work in back loops only:
9 sc, inc, ch 2, turn
sc, 9 sc, sl st to attach to the hat.
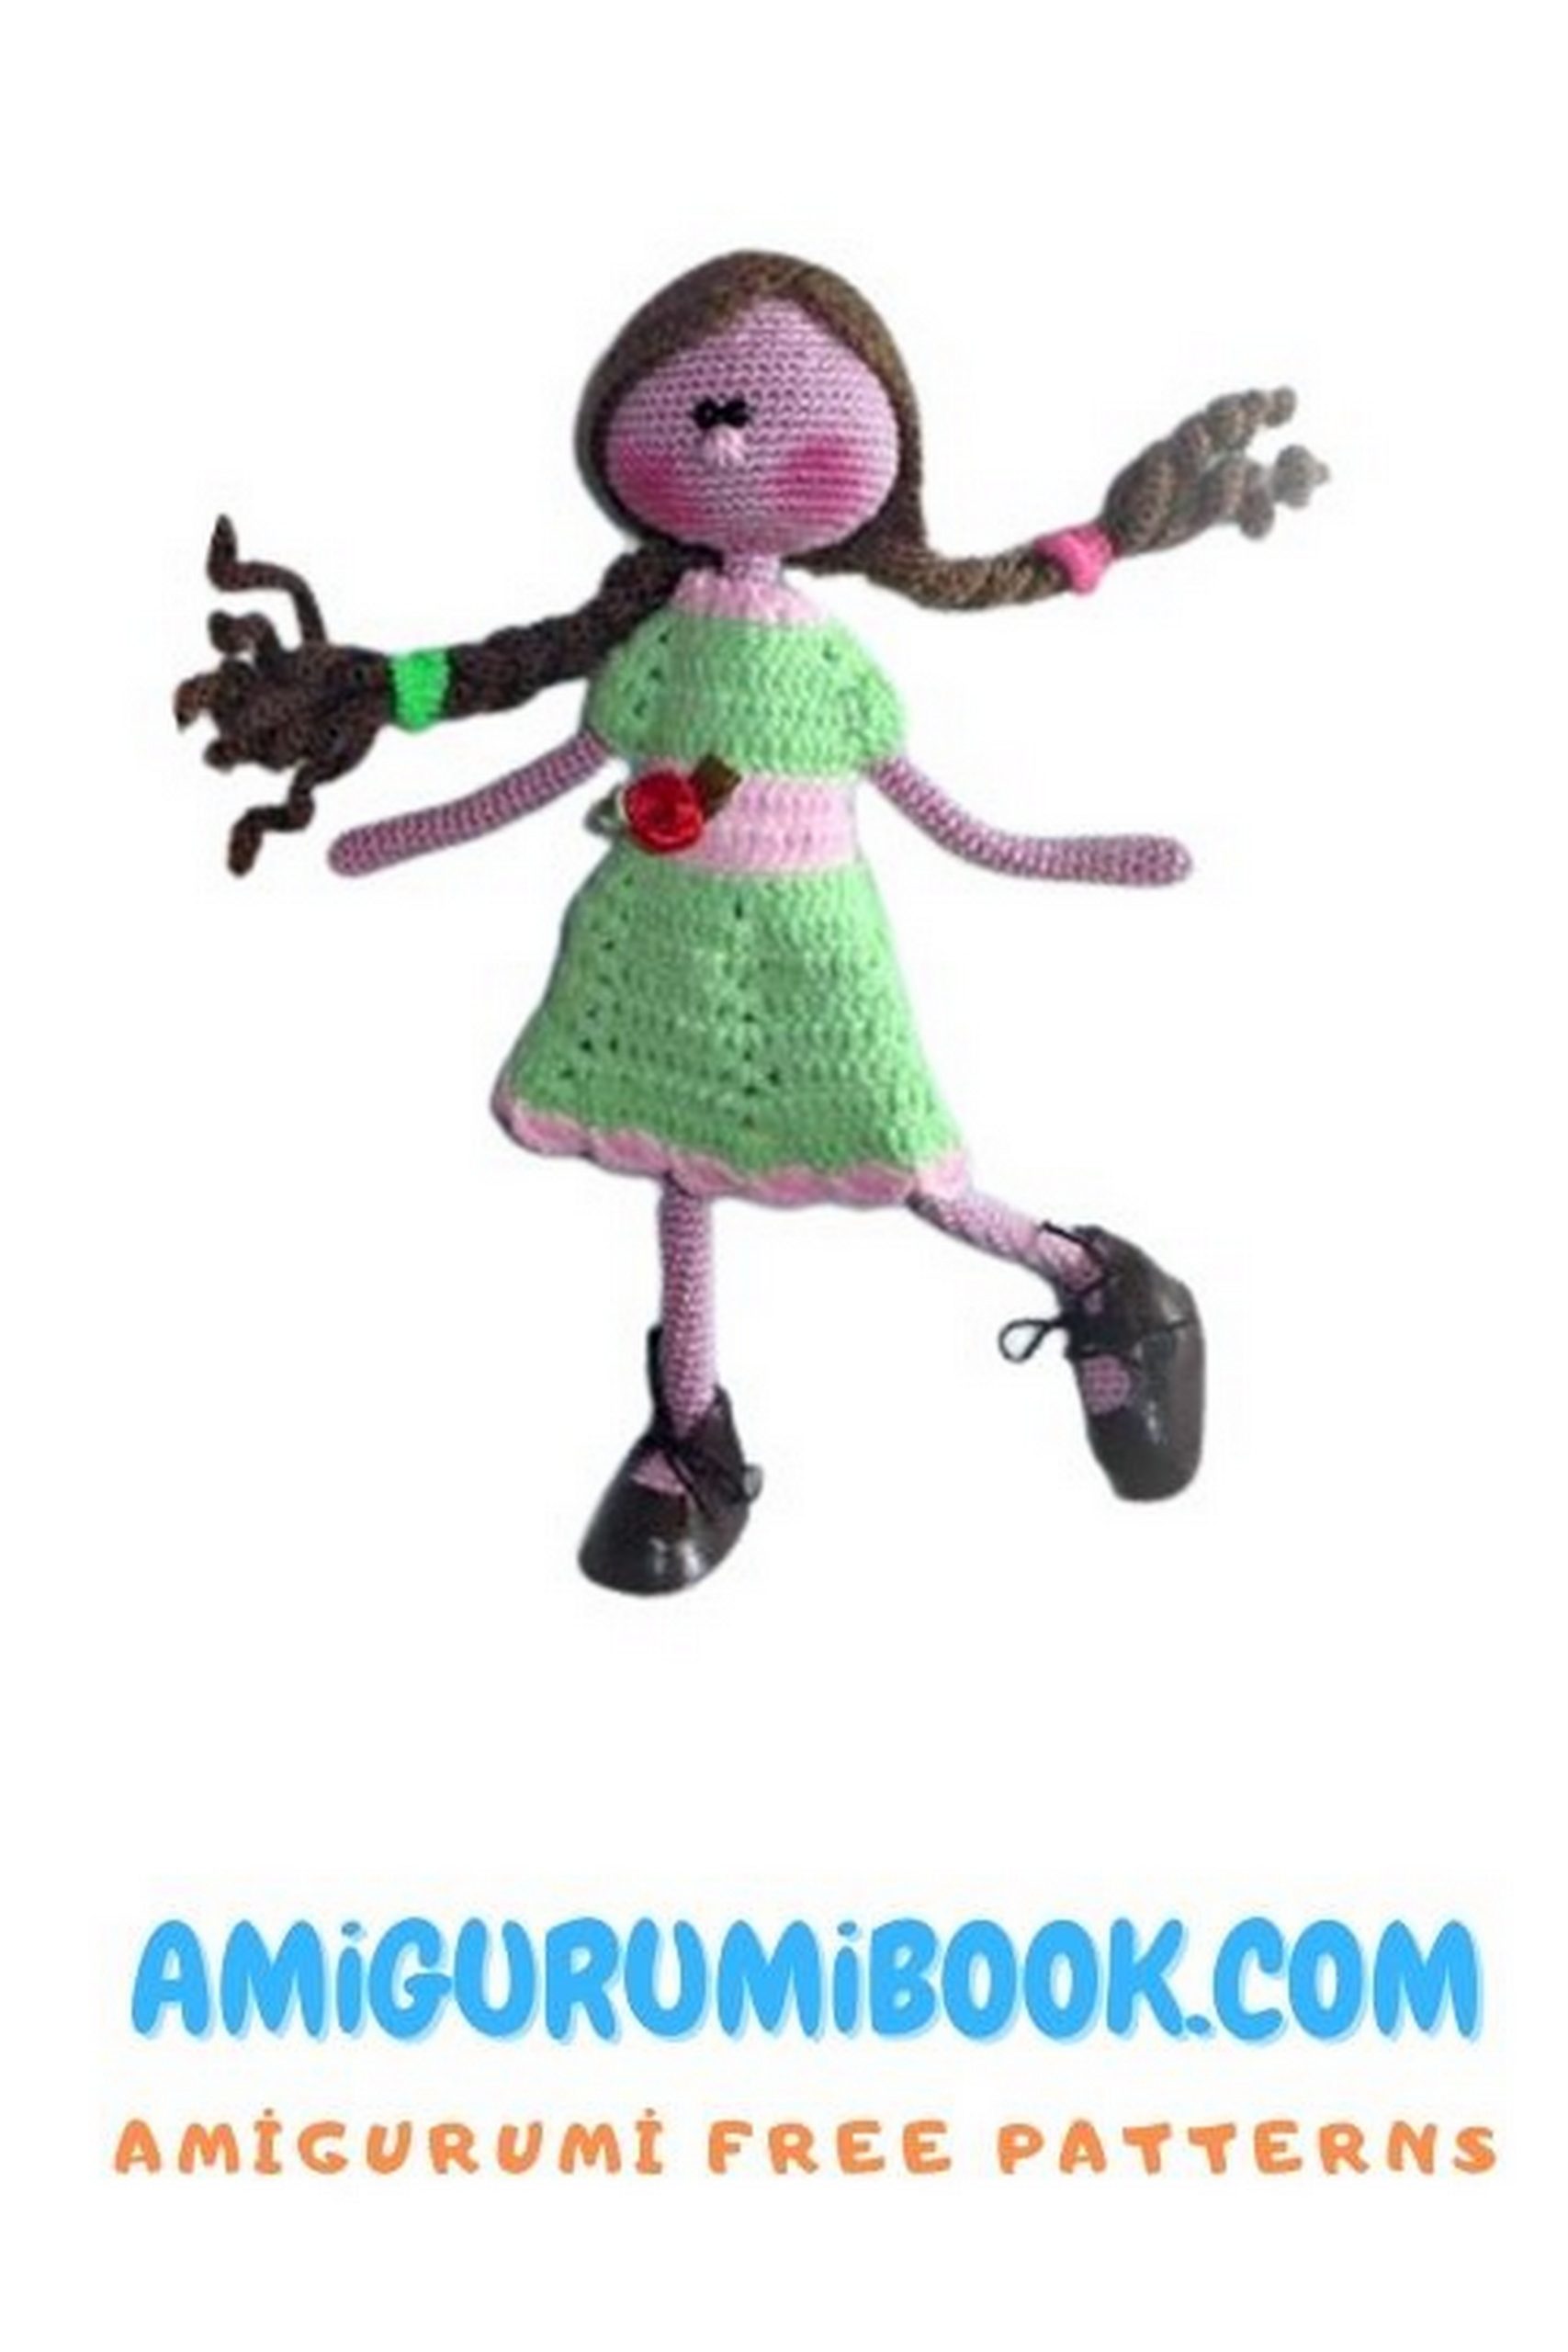
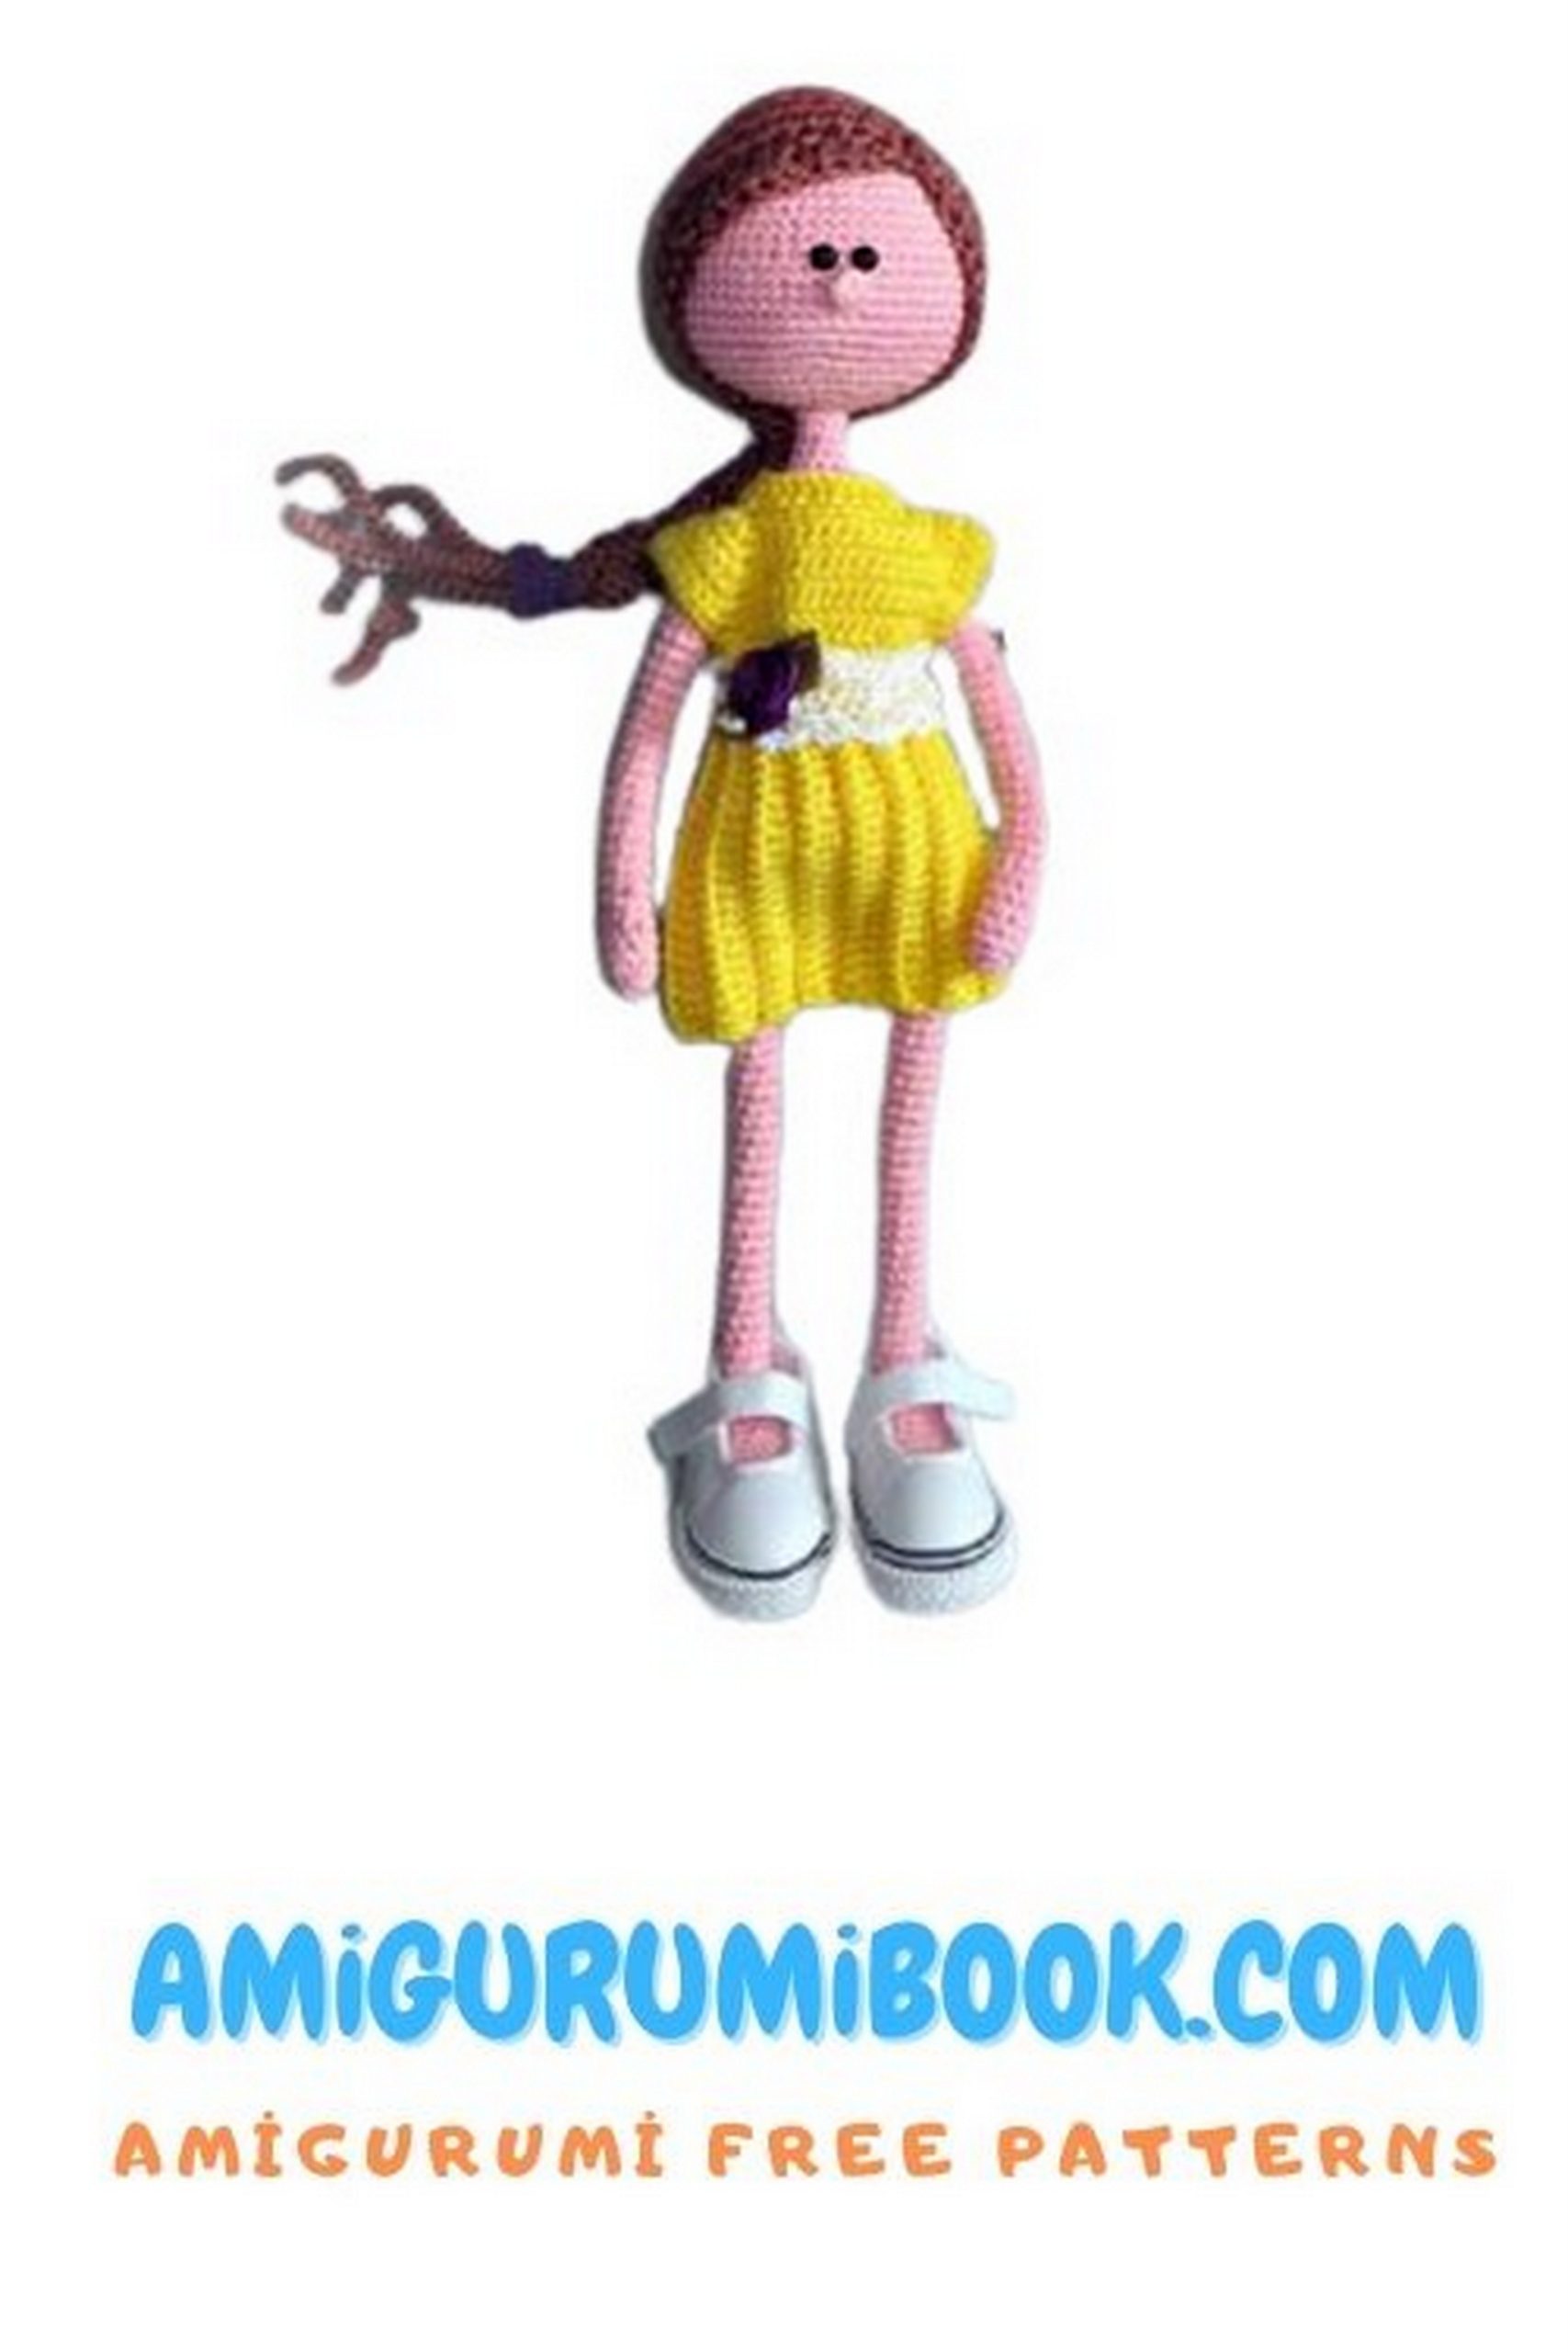
Dress
Below is a basic dress yoke structure.
You can design the skirt part however you like.
Start with ch 26.
Stitch distribution:
4 back
1 raglan
3 sleeve
1 raglan
8 front
1 raglan
3 sleeve
1 raglan
4 back
1:
4 sc
(1 sc, ch 2, 1 sc) in raglan
3 sc
(1 sc, ch 2, 1 sc) in raglan
8 sc
(1 sc, ch 2, 1 sc) in raglan
3 sc
(1 sc, ch 2, 1 sc) in raglan
4 sc
ch 2, turn
2:
5 sc
(1 sc, ch 2, 1 sc) in raglan
5 sc
(1 sc, ch 2, 1 sc) in raglan
10 sc
(1 sc, ch 2, 1 sc) in raglan
5 sc
(1 sc, ch 2, 1 sc) in raglan
5 sc
ch 2, turn
3:
6 sc
(1 sc, ch 2, 1 sc) in raglan
7 sc
(1 sc, ch 2, 1 sc) in raglan
12 sc
(1 sc, ch 2, 1 sc) in raglan
7 sc
(1 sc, ch 2, 1 sc) in raglan
6 sc
ch 2, turn
4:
7 sc
(1 sc, ch 2, 1 sc) in raglan
9 sc
(1 sc, ch 2, 1 sc) in raglan
14 sc
(1 sc, ch 2, 1 sc) in raglan
9 sc
(1 sc, ch 2, 1 sc) in raglan
7 sc
ch 2, turn
Try the dress on the doll.
If the sleeves fit the arms, continue with:
5:
8 sc
skip 9 sleeve stitches
16 sc
skip 9 sleeve stitches
8 sc
(32)
Continue crocheting straight rows of dc and chain stitches to create the skirt to your desired length.
Hat
Start with MR.
1: 8 sc in MR (8)
2: inc ×8 (16)
3: (1 sc, inc) ×8 (24)
4: (2 sc, inc) ×8 (32)
5: (3 sc, inc) ×8 (40)
6: (19 sc, inc) ×2 (42)
7: (6 sc, inc) ×6 (48)
Try the hat on the doll’s head.
If necessary, add a few more increases.
Crochet several more rounds without increases until the hat fits properly.
Do not cut the yarn.
Hat Brim
ch 11
Work in front loops only:
9 sc, inc, ch 2, turn
sc, 9 sc, sl st to attach to the hat.
Continue repeating this pattern around the hat to form the brim.
Assembly
- Glue the eyes onto the doll’s face.
- Attach and sew the wig onto the head.
- Dress the doll in the dress, boots, and hat.
- Decorate with lace, rhinestones, or other accessories if desired.
Your amigurumi doll is now complete.
Happy crocheting! 🧶