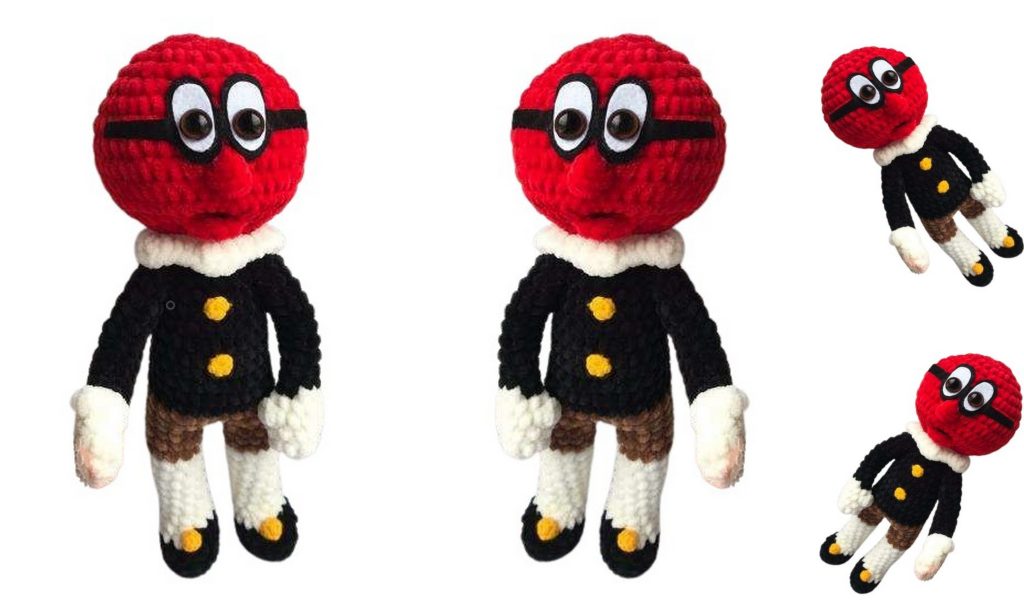
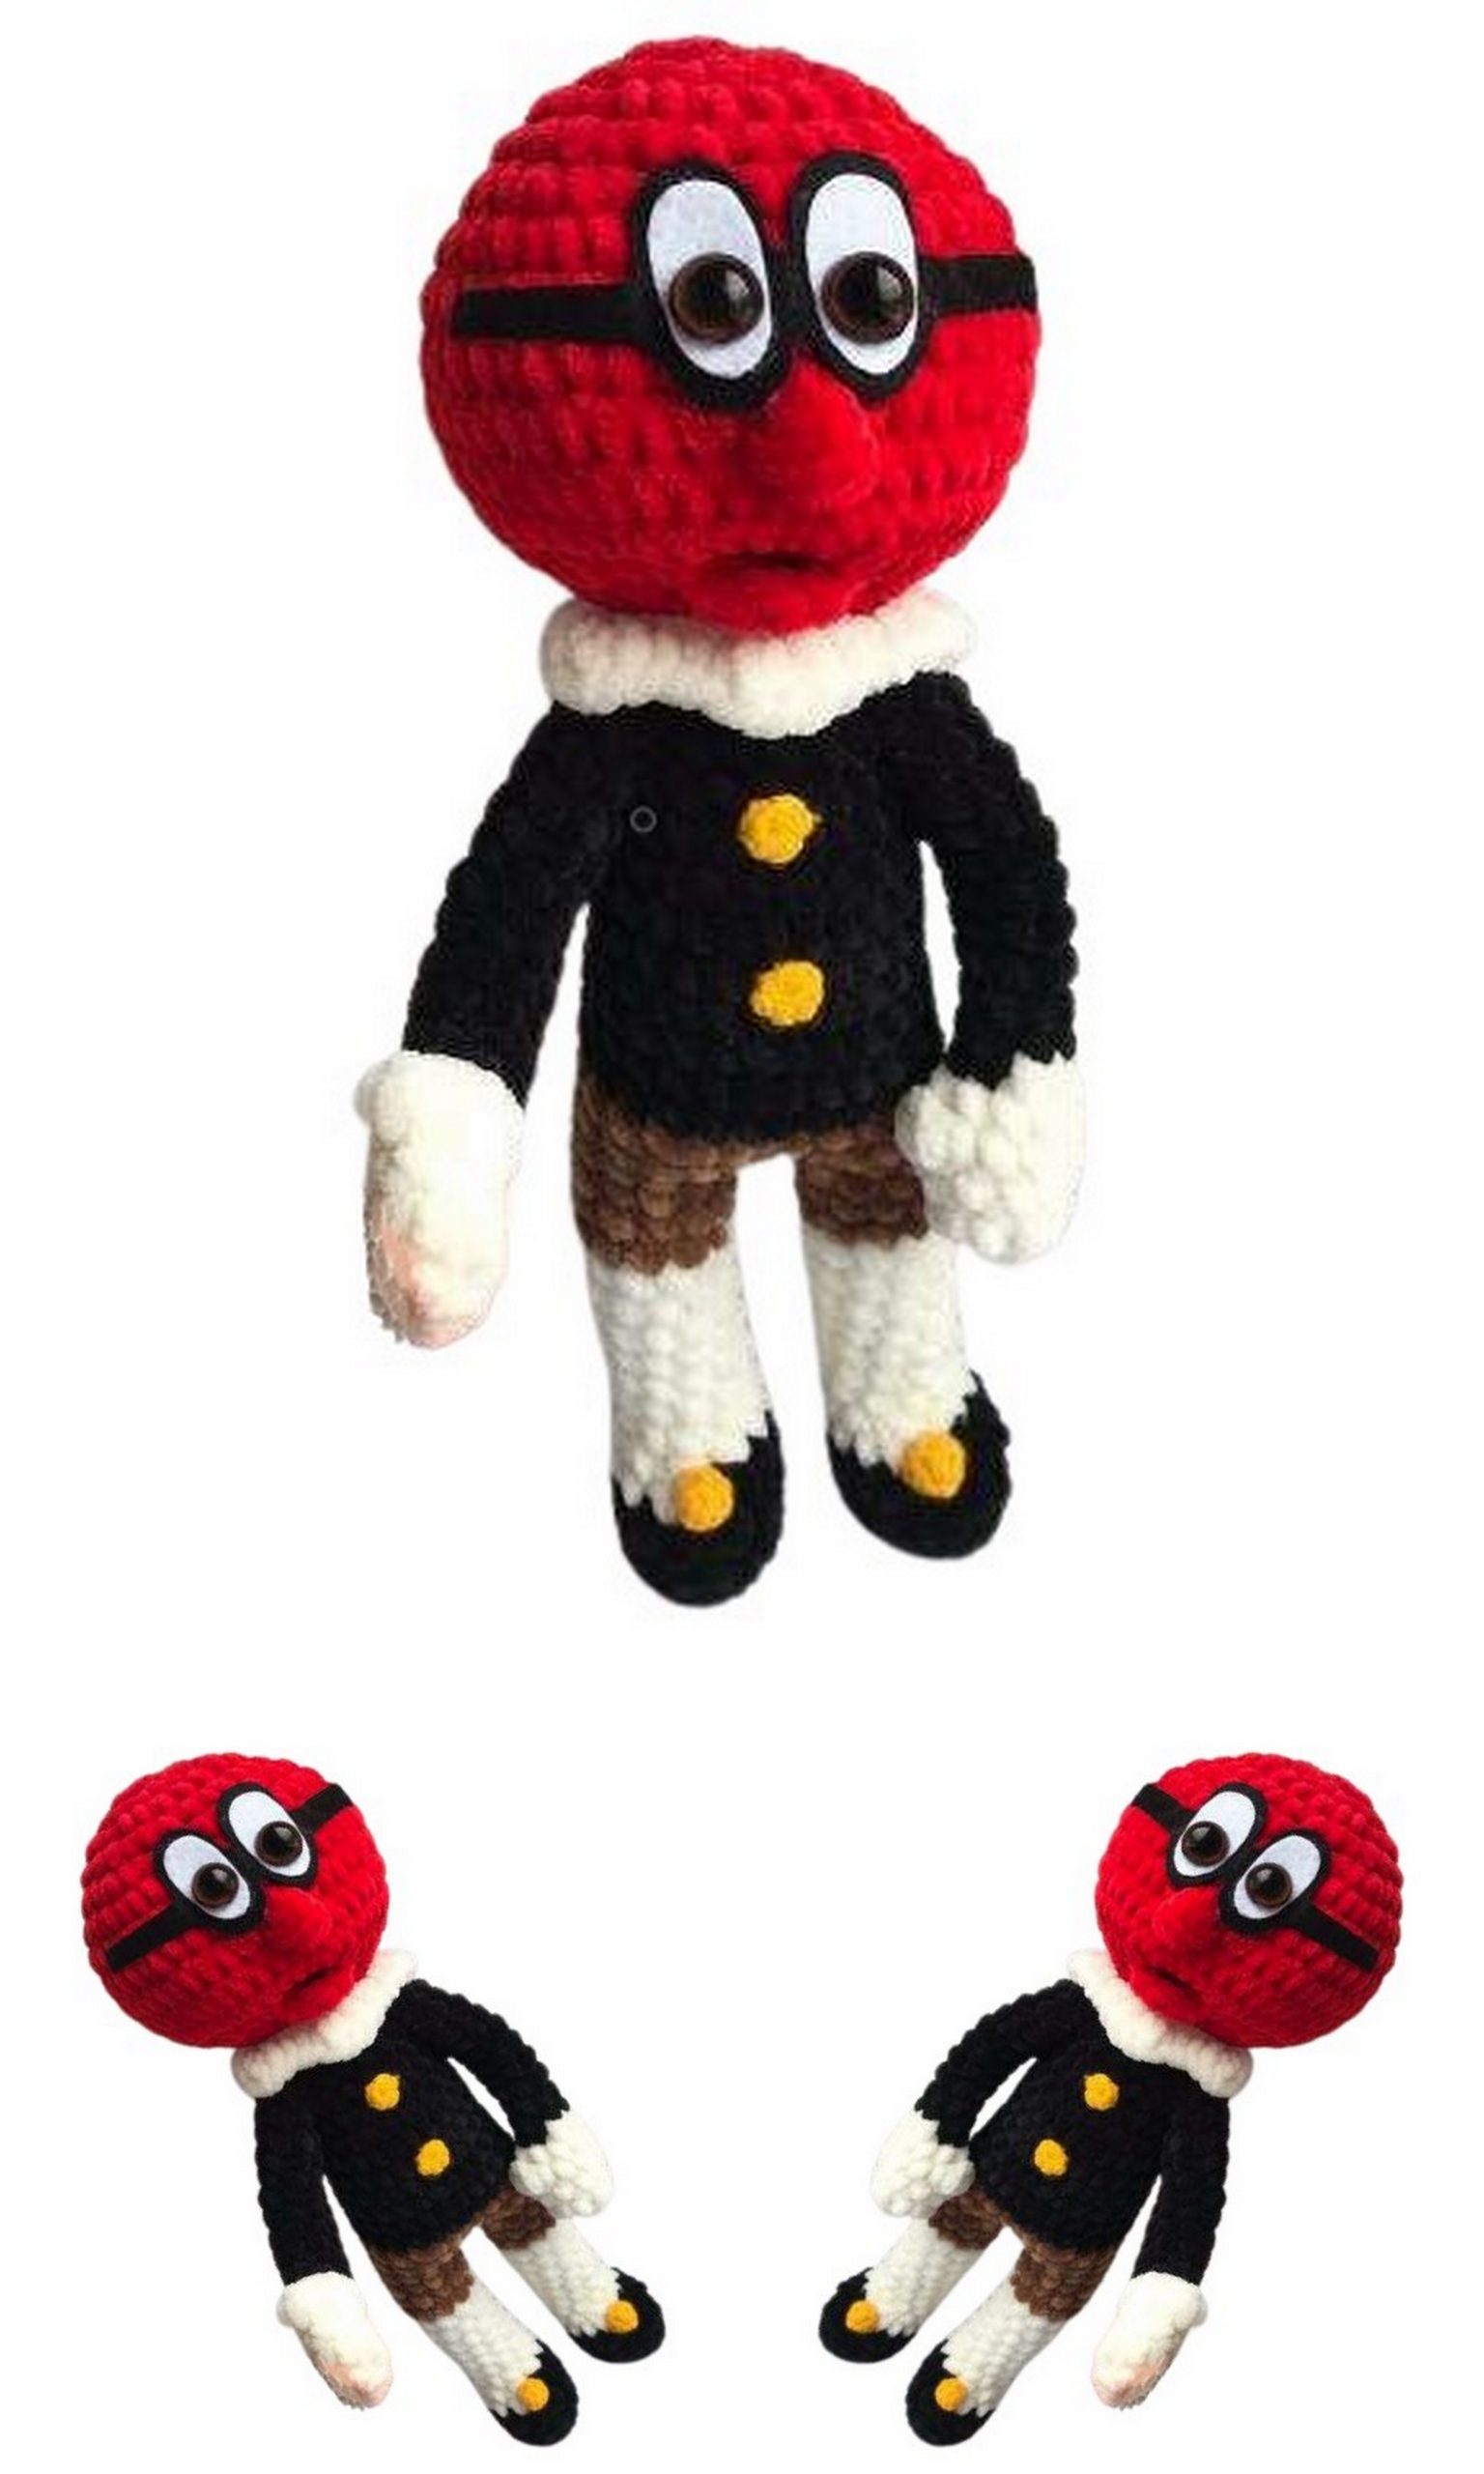
Are you ready for a charming and regal crochet project? Our Crochet Prince Cherry amigurumi free pattern and instructions are just what you need! Perfect for crochet enthusiasts of all levels, this detailed guide will help you create your very own Prince Cherry. Whether you’re crafting a unique gift or adding to your amigurumi collection, this delightful Prince Cherry pattern will bring a touch of royalty to your creations. Follow our step-by-step instructions and start your Prince Cherry amigurumi today! Enjoy the joy of crocheting a majestic and lovable character.
If you love the amigurumi cartoon character like me, you should also see the super sonic amigurumi pattern.
If you want to access 1000+ free amigurumi patterns, you can download our application from this link!
Materials:
Yarn – DOLCE plush in white, black, brown, and red colors.
Denim yarn or novelty yarn for buttons and pompoms in yellow color.
Crochet hook No. 3 for plush yarn, and No. 1.5 for denim.
Felt in white, black, and pink for eyes and tongue.
Stuffing.
Needle and thread for weighting and sewing parts.
Eyes 1.2 cm.
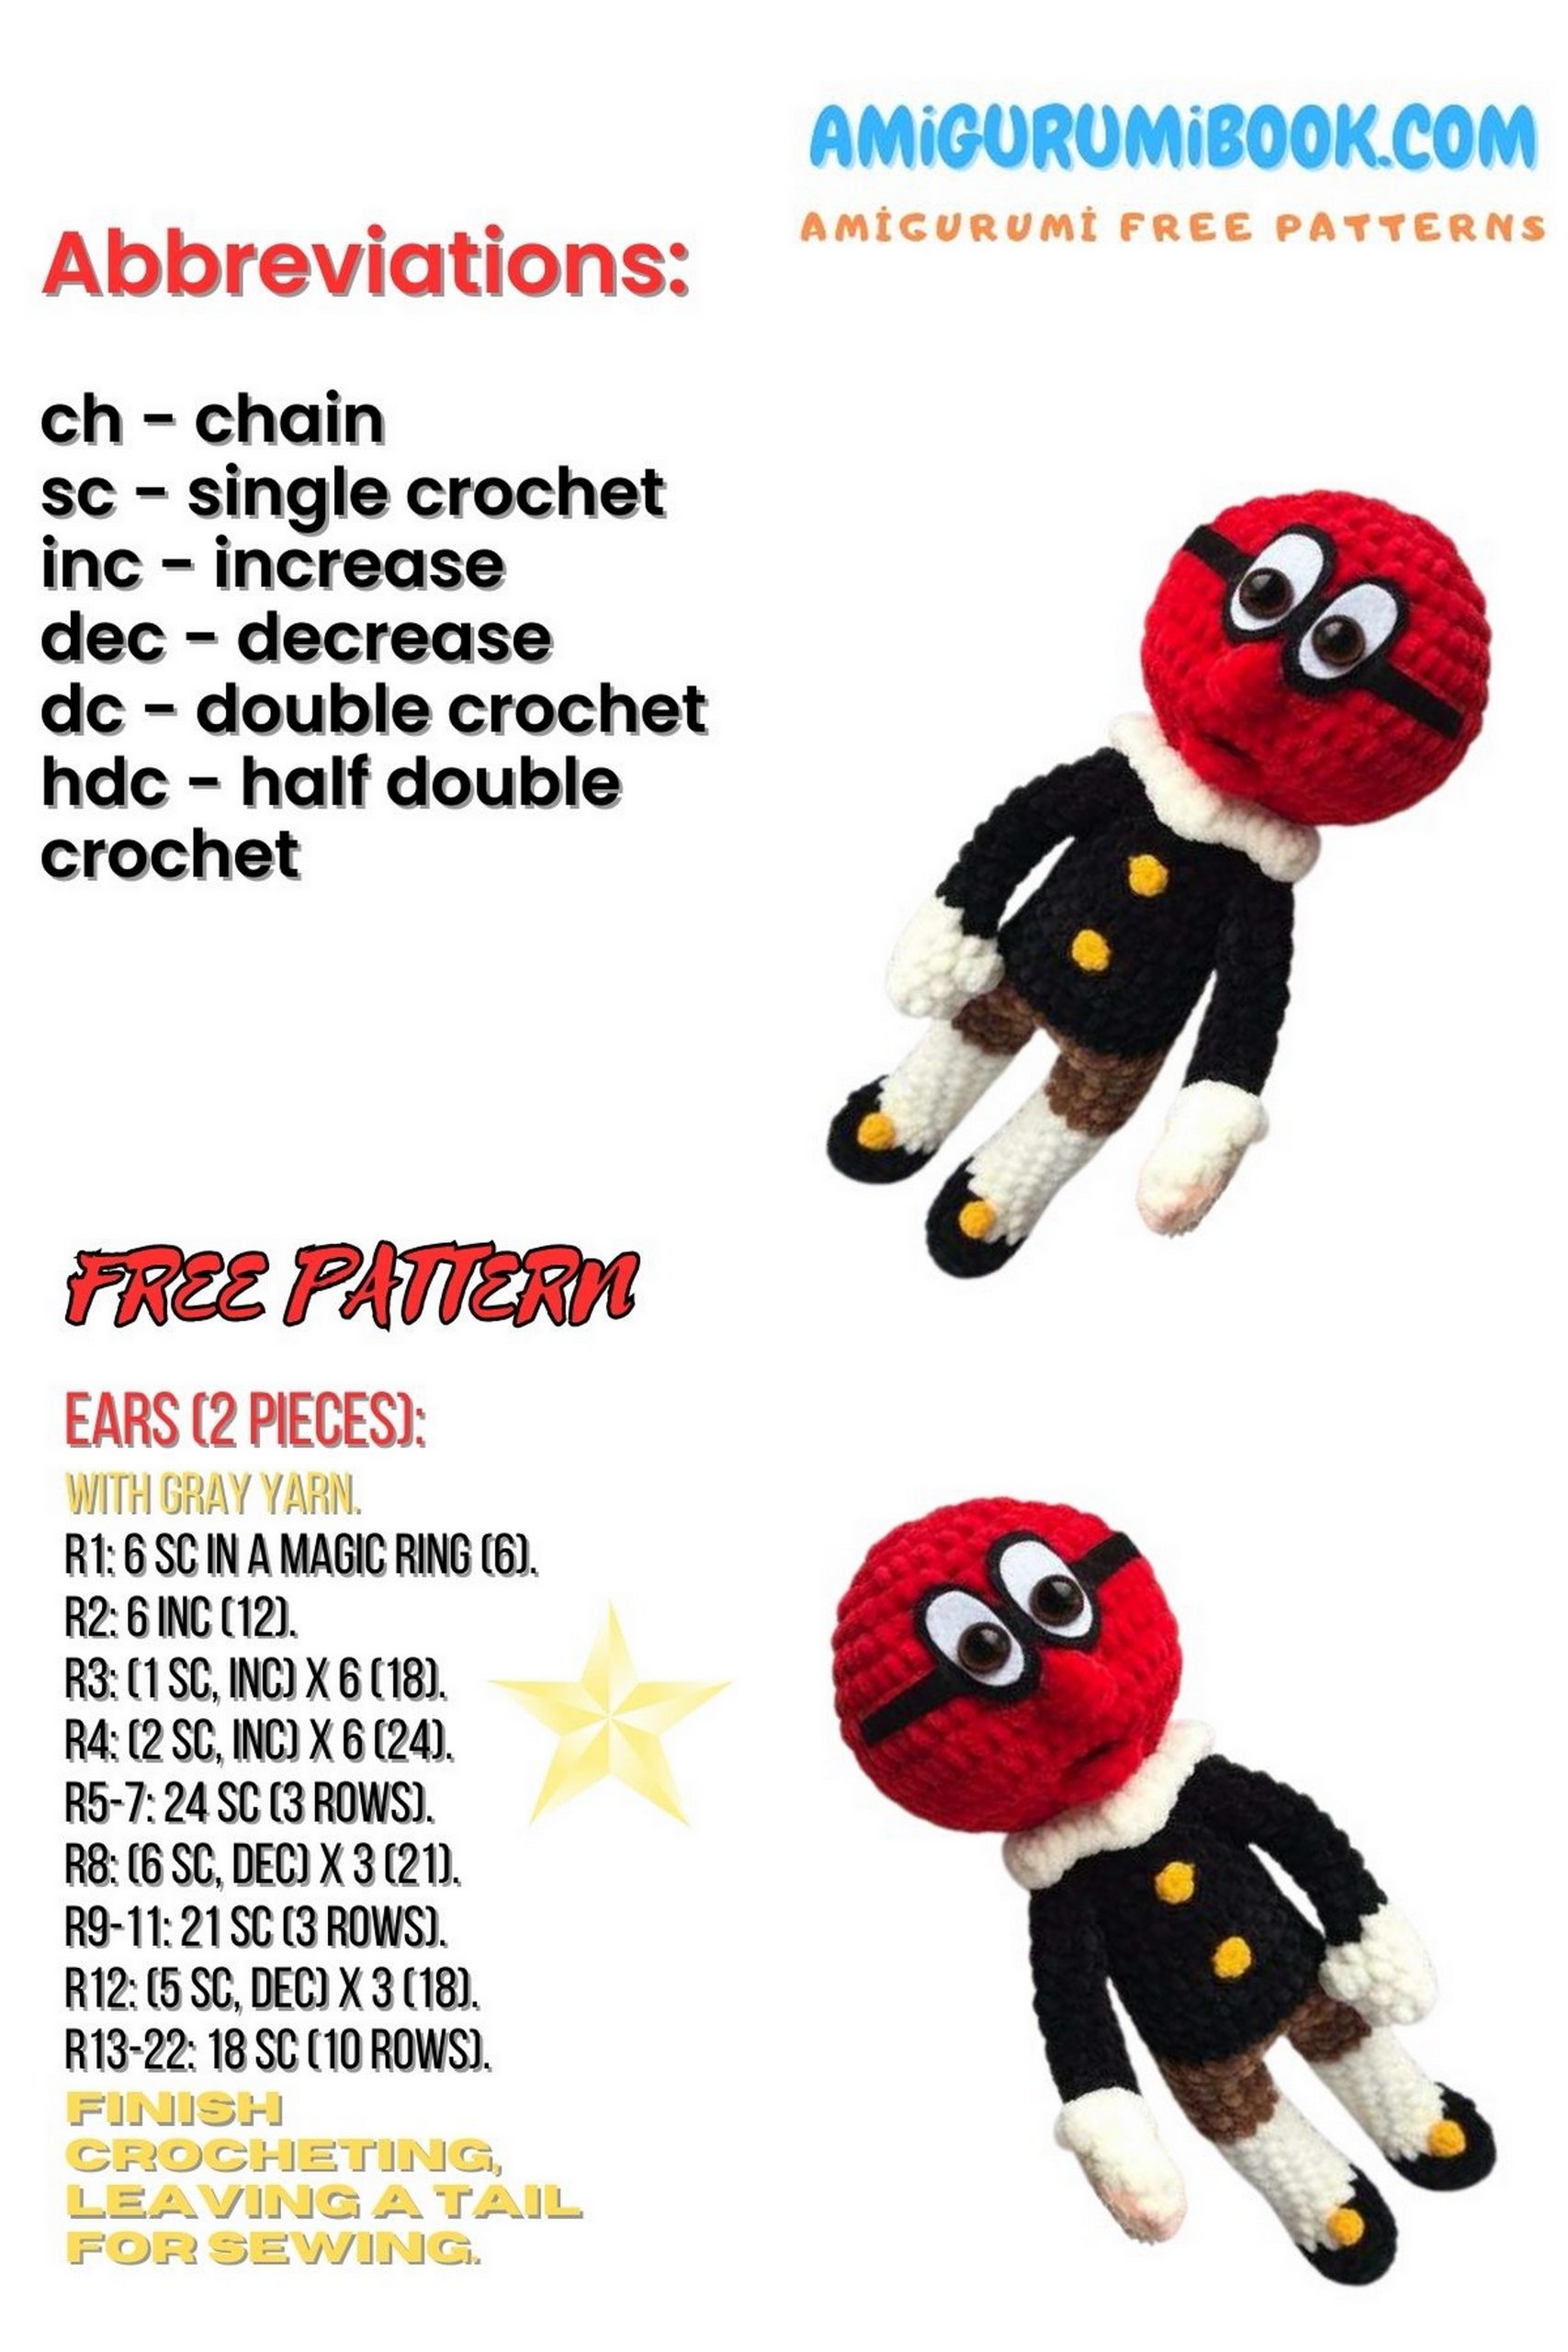
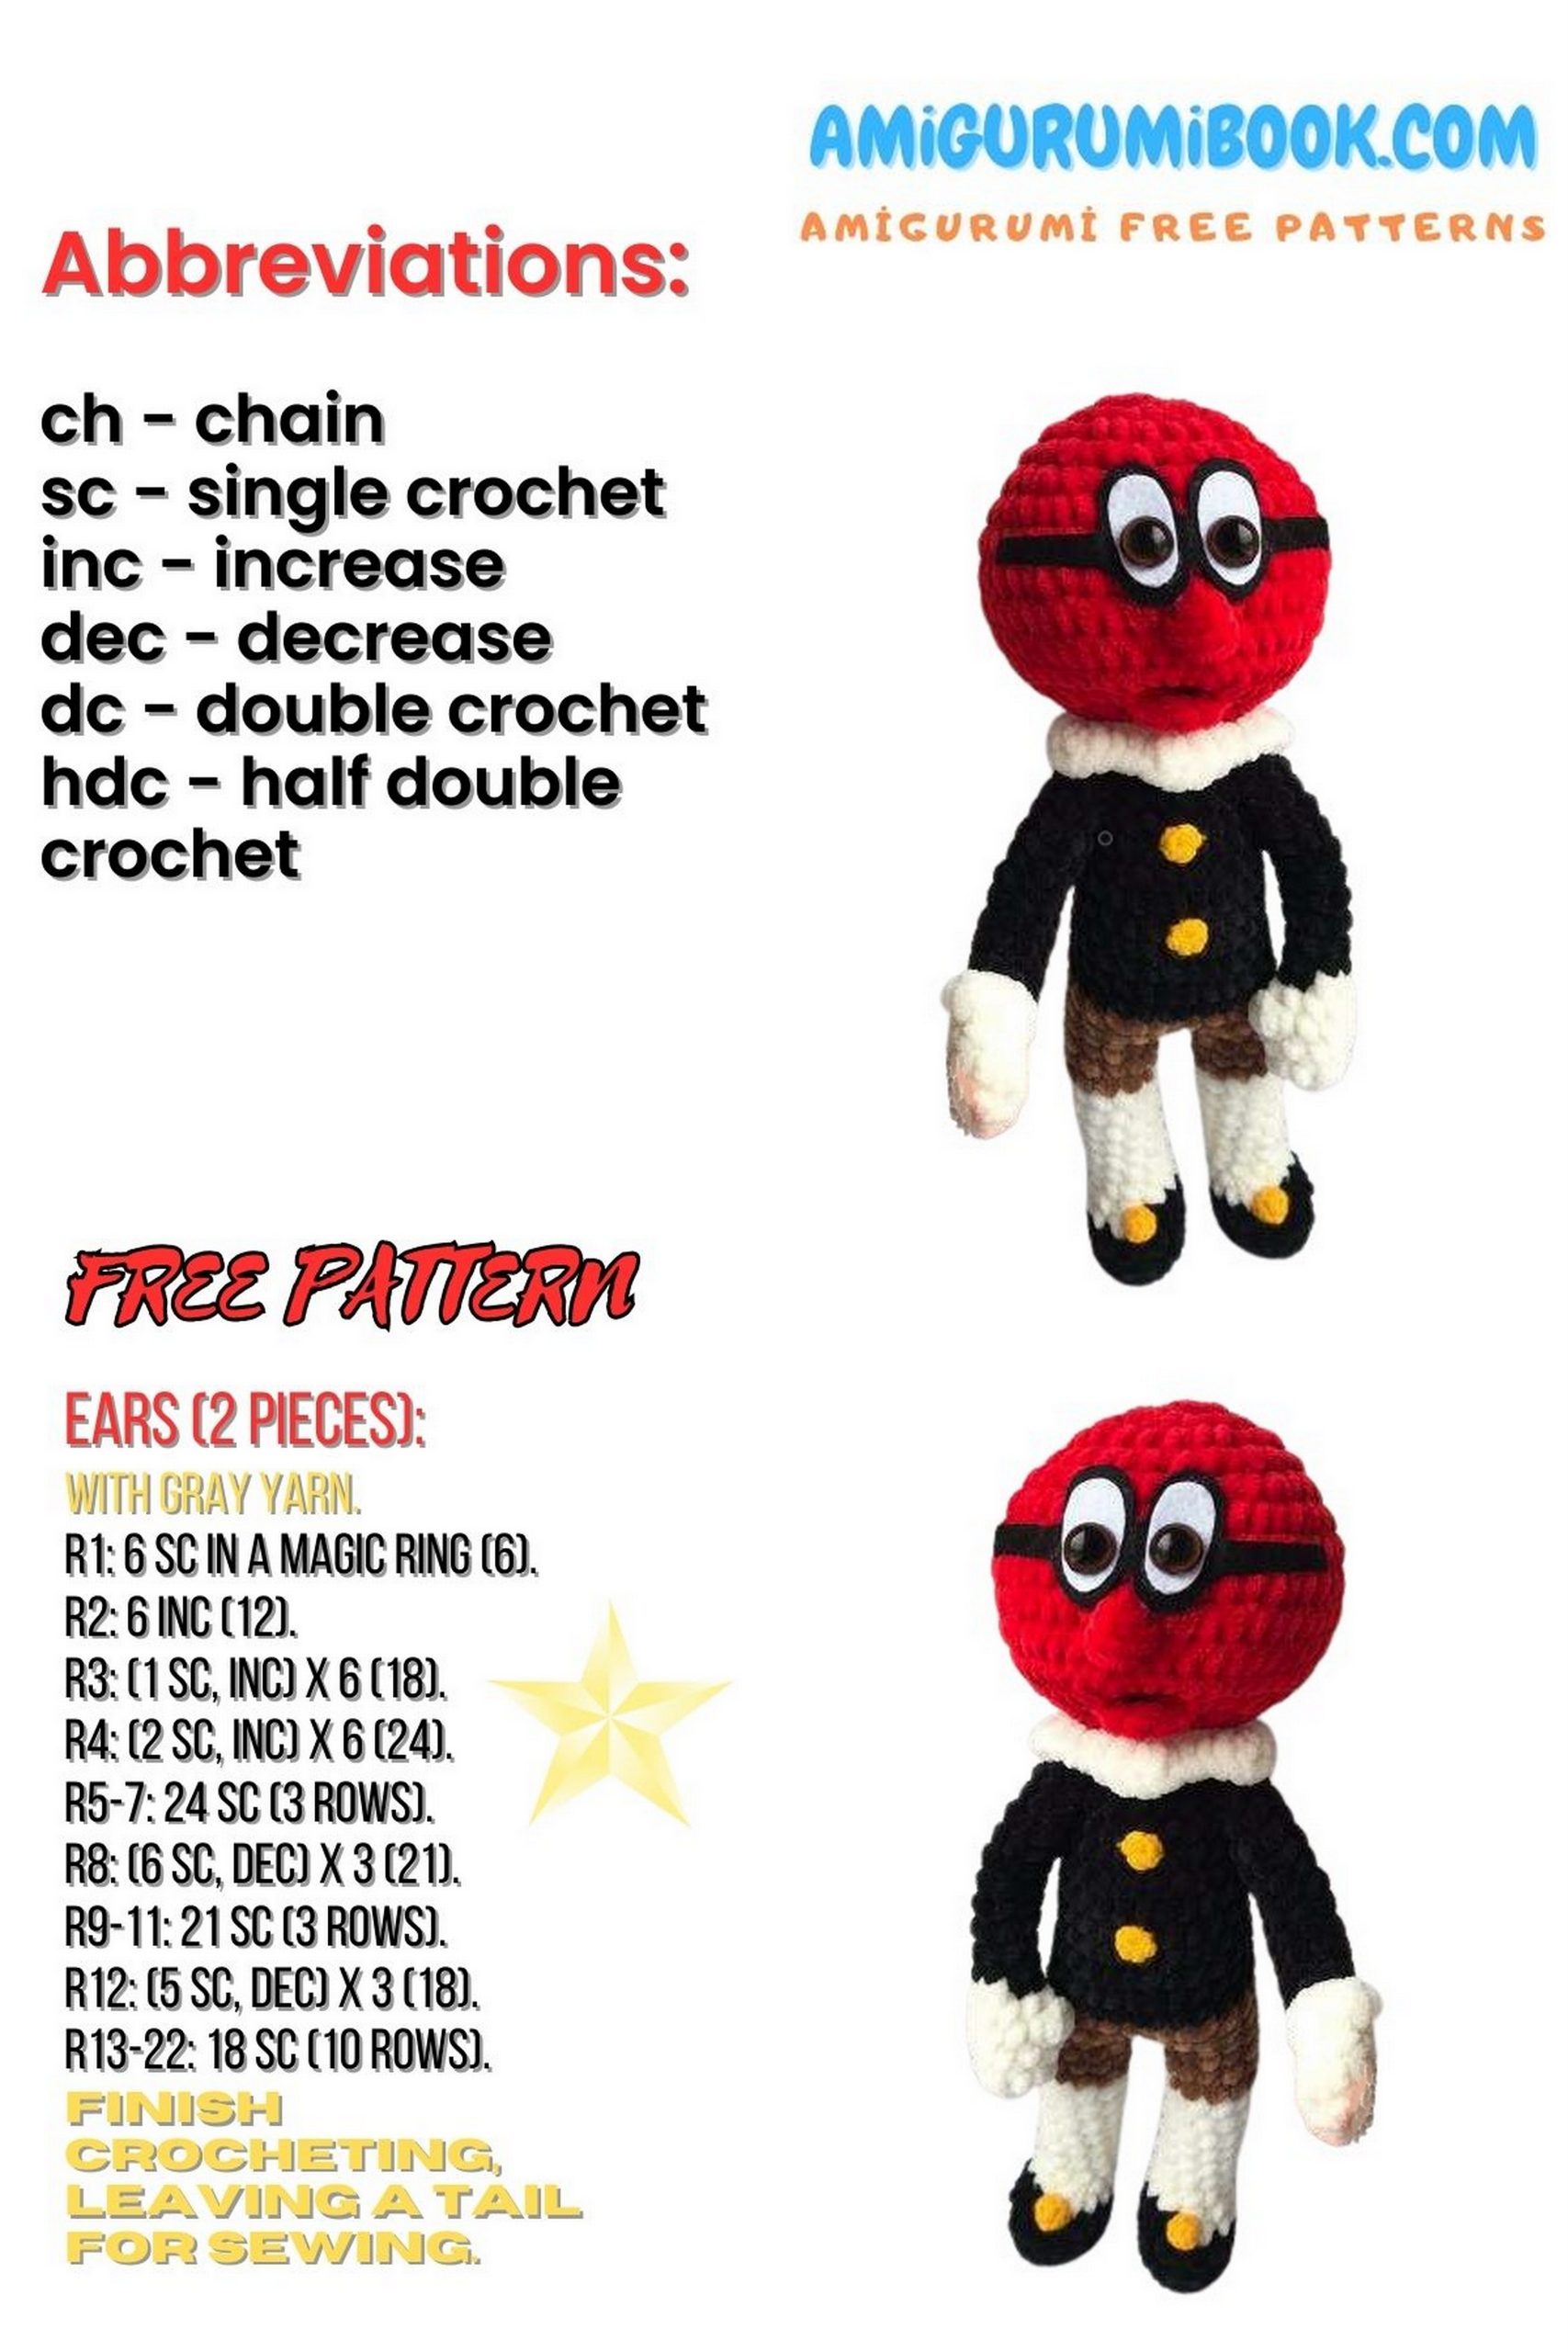
Abbreviations:
MR – magic ring
Inc – increase
Dec – decrease
Ch – chain stitch
Sc – single crochet
Hdc – half double crochet
FPsc – front post single crochet
BLO – back loop only
If a row indicates 1 sc, inc (18), then 1 sc, inc – repeat until the end of the row, the number of stitches in brackets is the total for the row.
PATTERN

Legs (start with black color): Prince Cherry
1: 5 in MR, inc from the second loop, 2 sc, 3 sc in the last, 2 sc, inc (11), place marker.
2: 2 inc, 2 sc, 3 inc, 4 sc (16).
3: 16 sc in the back loops.
4: 2 dec, 10 sc, dec (13).
5: Change to white color, 13 sc.
6: 2 dec, 9 sc (11).
7-15: 11 sc.
16: Change to brown color, 11 sc.
17-18: 11 sc.
Crochet the second leg and join.
Watch the marker – the leg connection should be in the middle of the inner side. If your hook is not in this place, crochet the necessary number of stitches to the connection point.
19: Chain 3, join with the first leg, crochet 11 sc along the first leg, 3 sc in chains, 11 sc along the second leg, 3 sc in chains (28).
20-21: 28 sc.
22: Change to black, 28 sc.
23-24: 28 sc.
25: 12 sc, dec, 12 sc, dec (26).
26-27: 26 sc.
28: 11 sc, dec, 11 sc, dec (24).
29: 24 sc.
30: (4 sc, dec)*4 (20).
31-33: 20 sc.
Arm (make 2): Prince Cherry
Start with white color.
1: 6 sc in MR.
2: 1 sc, inc (9).
3: 9 sc.
4: 1 FPsc (4 Hdc in one stitch), 8 sc.
5: Dec, 3 sc, dec, 2 sc (7).
6-16: 7 sc.
Do not stuff.
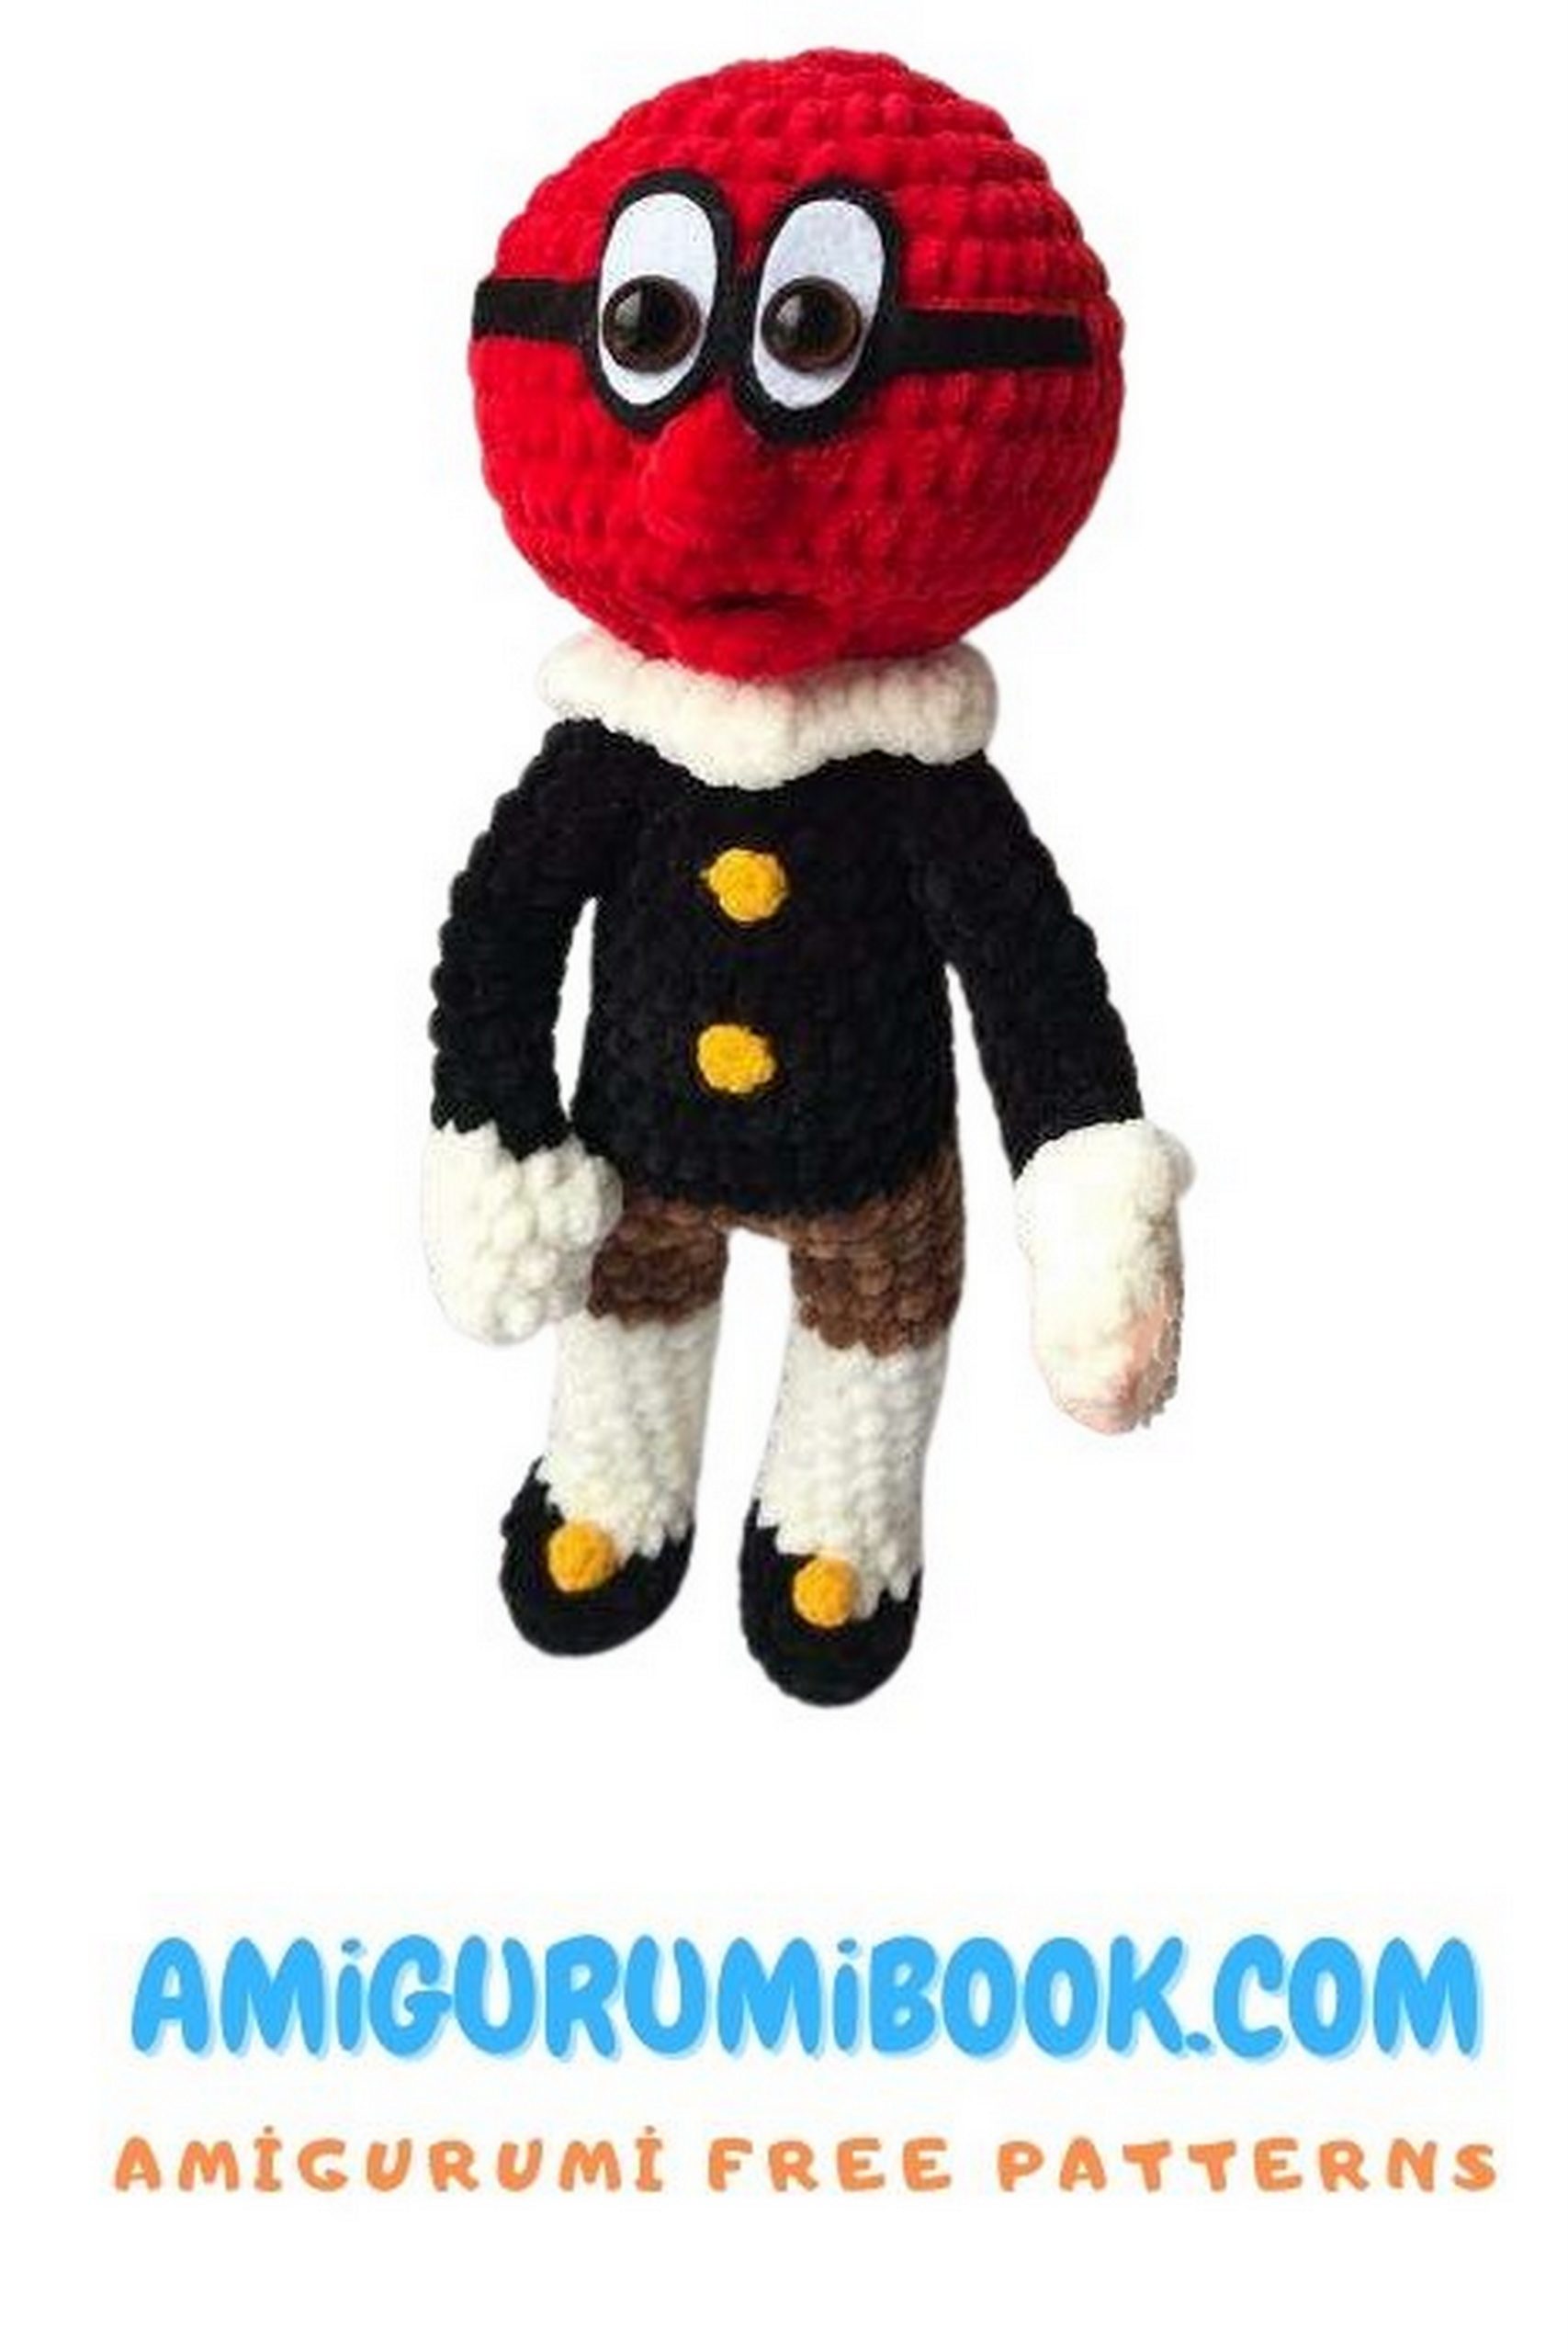
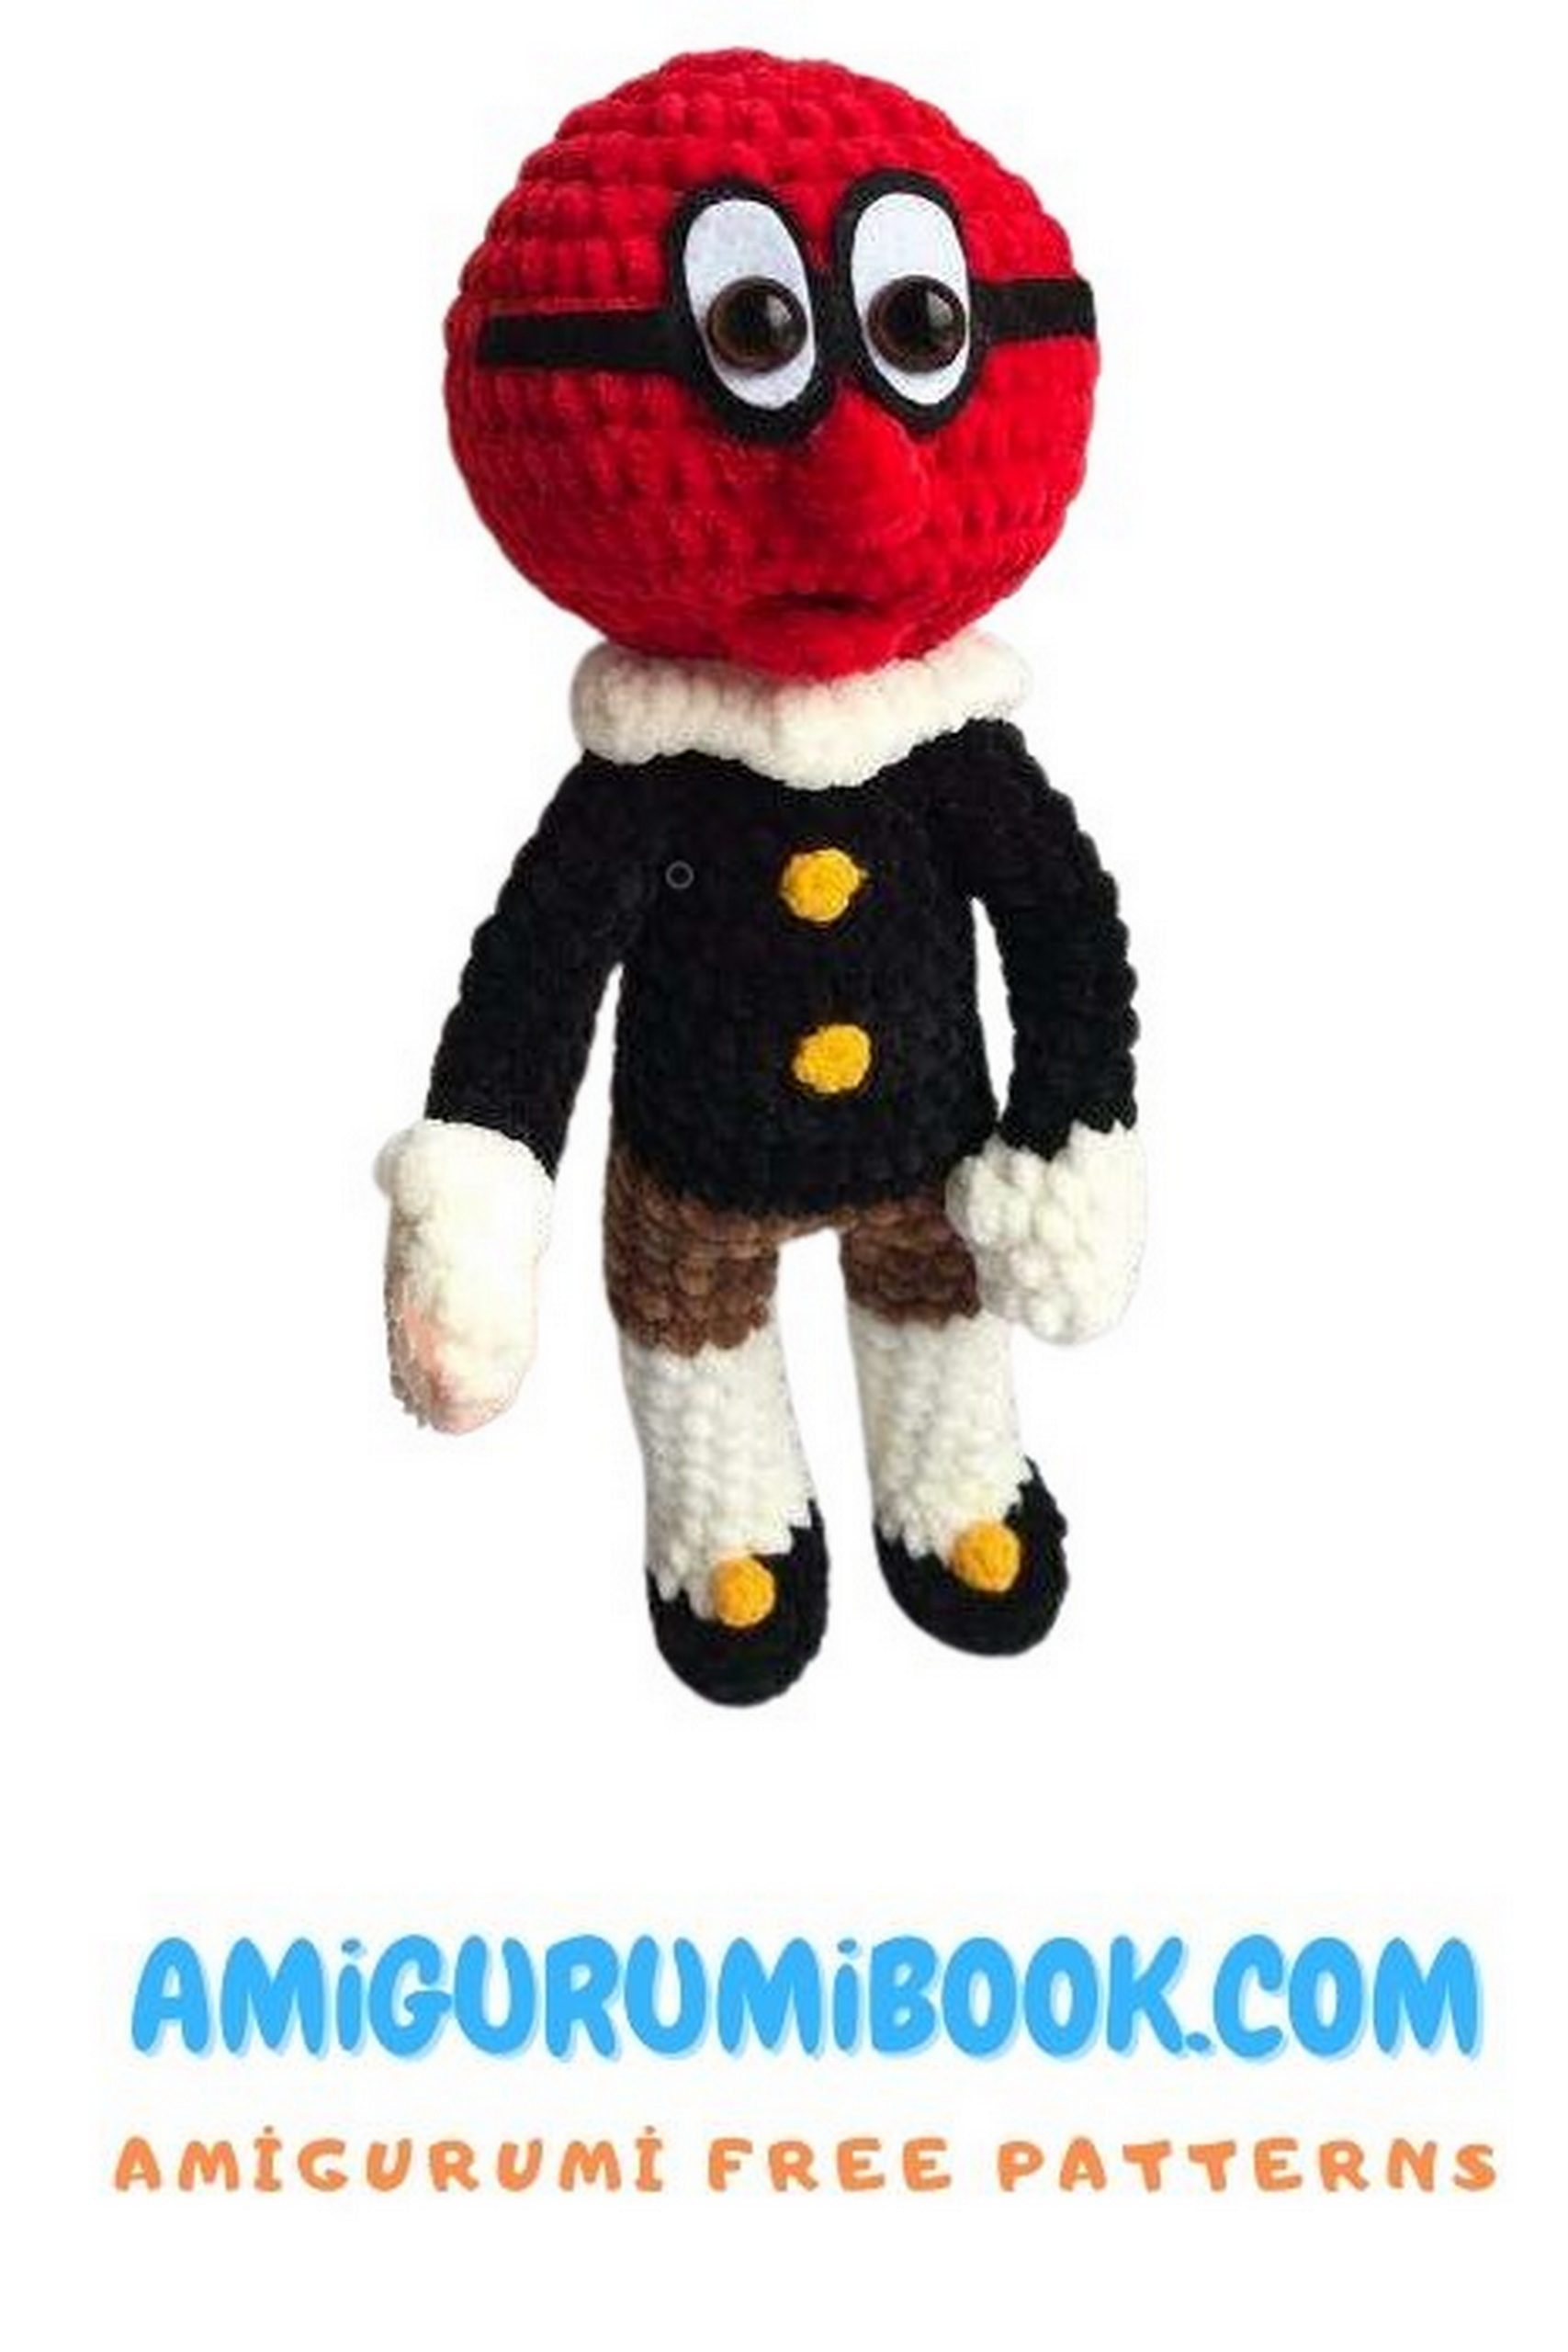
Head – Prince Cherry
(make with red color):
Upper part of the head:
1: 6 sc in MR.
2: 6 inc (12).
3: 12 inc (24).
4: 24 sc.
5: 3 sc, inc (30).
6: 1 sc, inc (45).
7: (4 sc, inc)*9 (54).
8-11: 54 sc.
12: (4 sc, dec)*9 (45).
13: (1 sc, dec)*15 (30).
14: (3 sc, dec)*6 (24).
15: 24 sc.
16: 12 dec (12).
17: 6 dec.
This part will be sewn to the body.
Pompoms for slippers (make 2):
Yellow color.
1: 6 sc in MR.
2: 1 sc, inc (9).
3: 6 sc, dec (6).
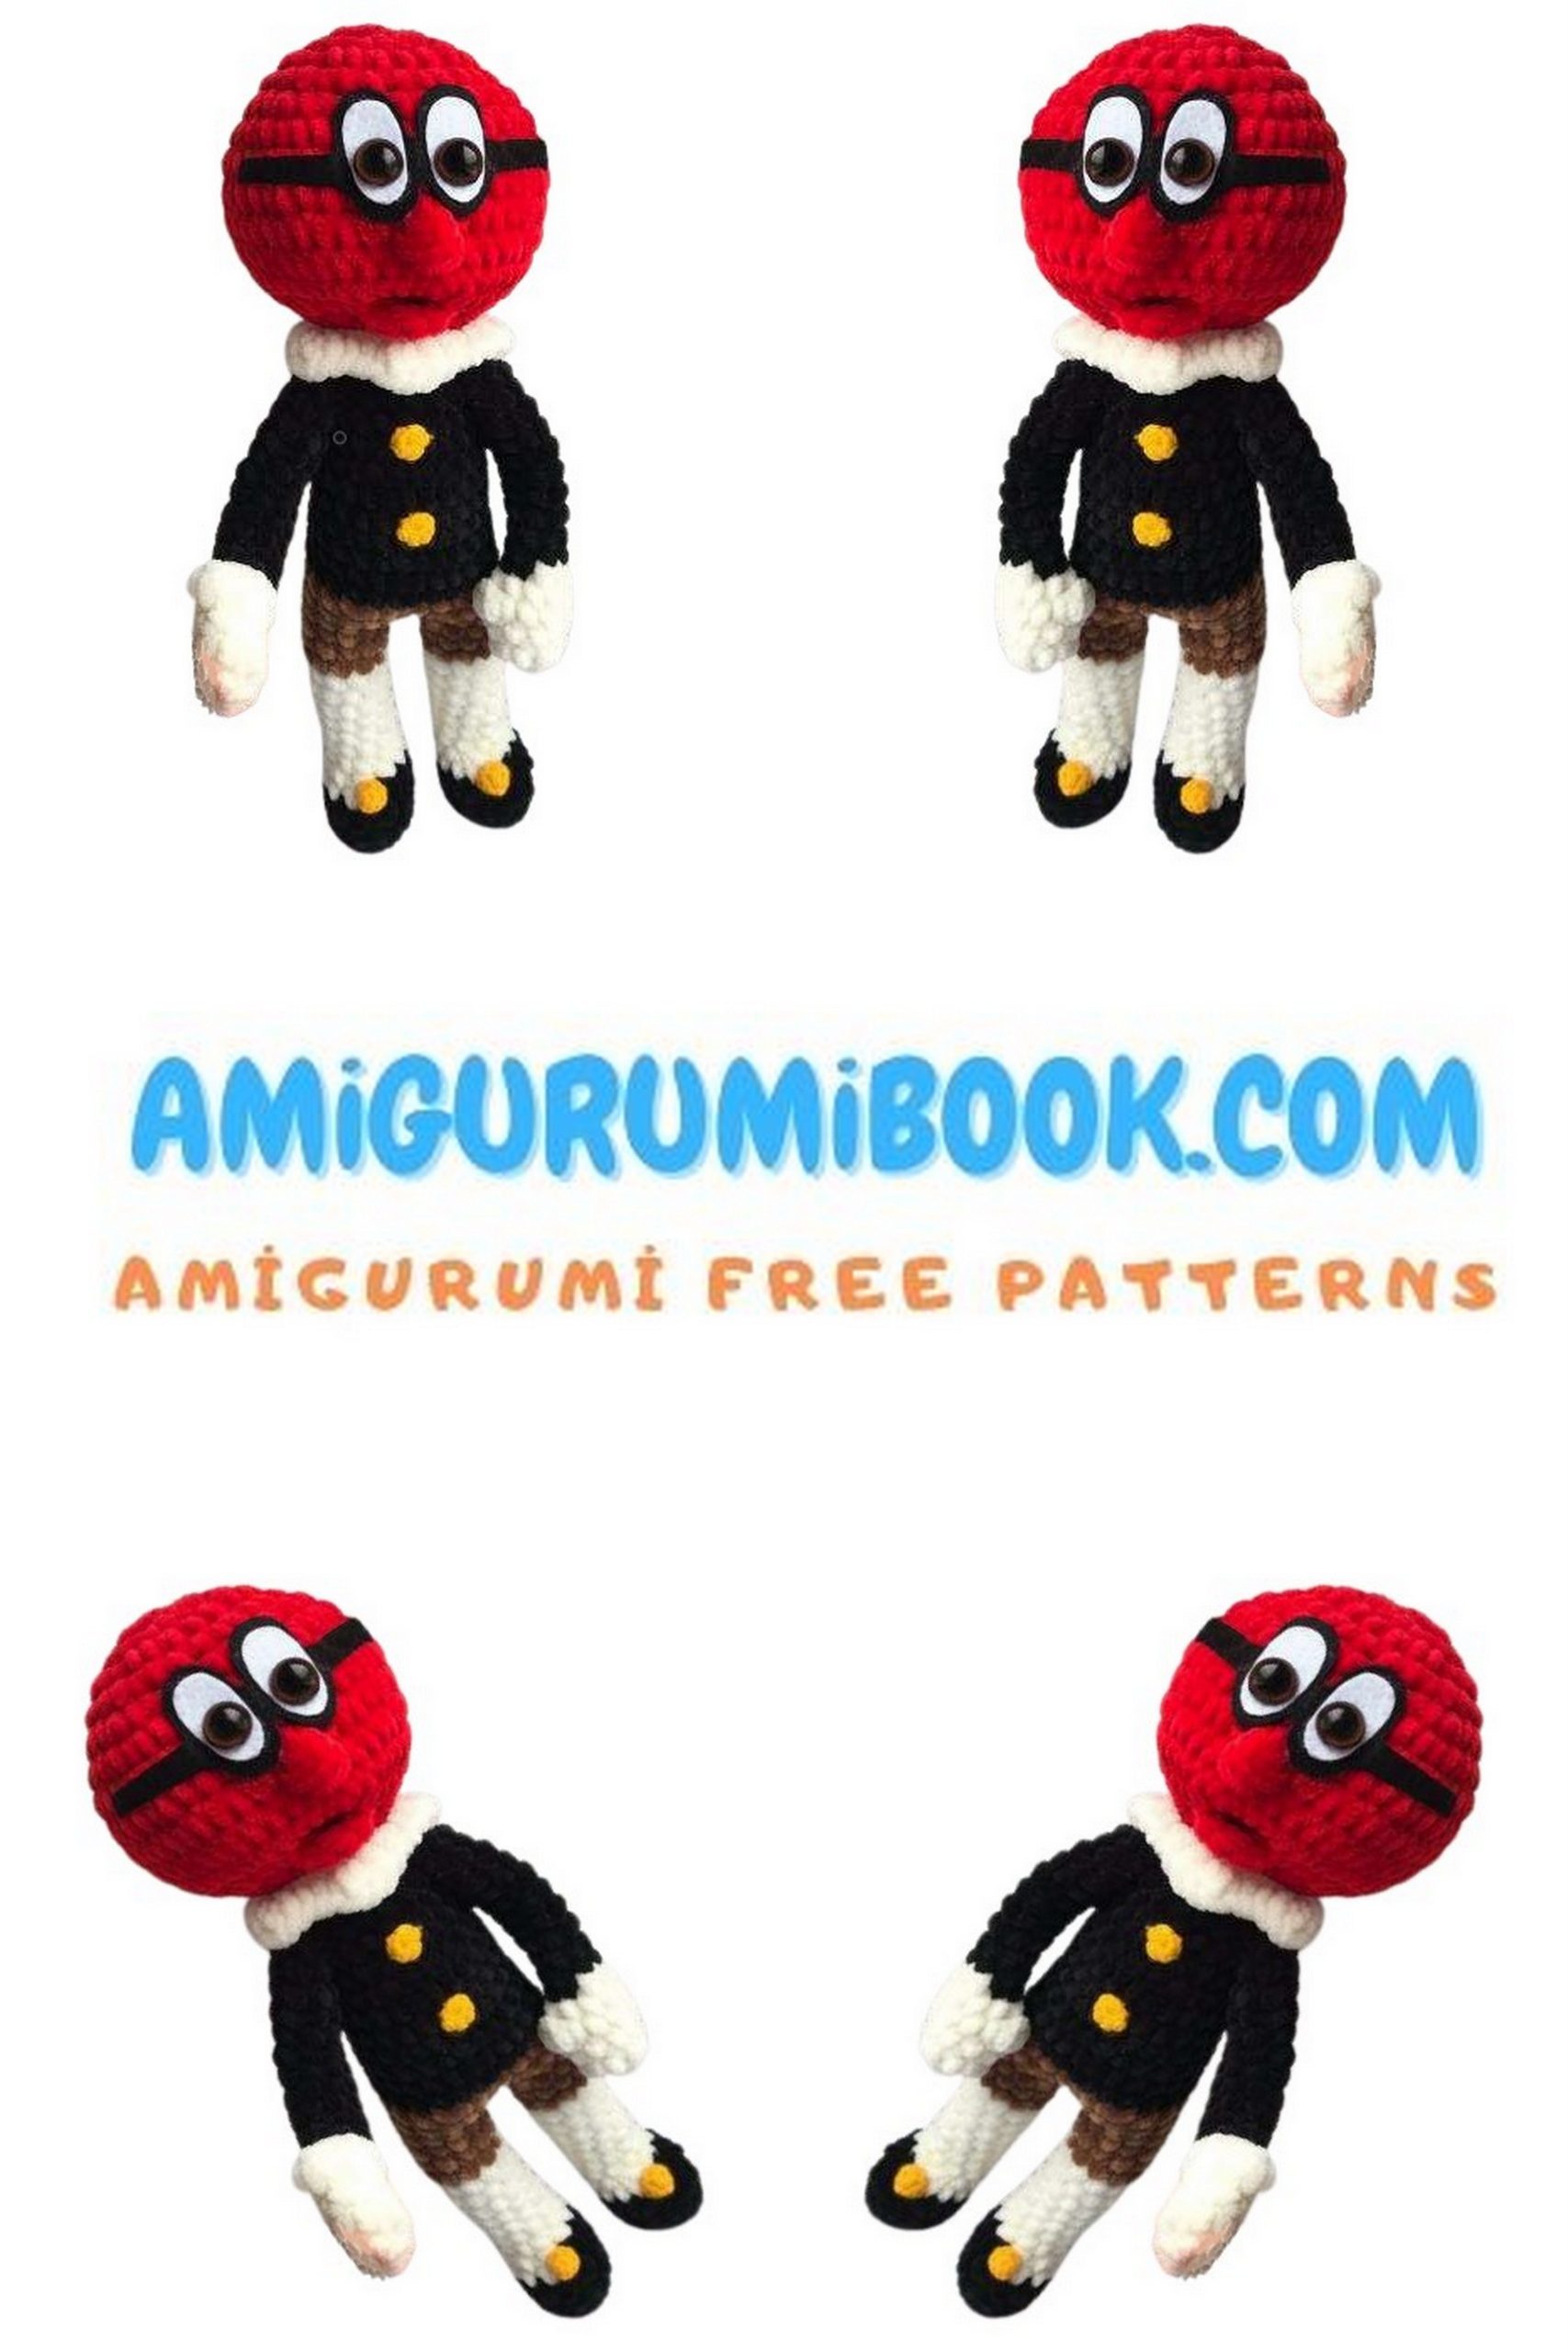
Buttons (make 2):
8 sc in MR.
Collar – Prince Cherry
(white color):
Chain 23, starting from the second, 3 sc, (sc, Hdc, sc) in one stitch, repeat until the end of the row.
Assembly and decoration:
Sew arms to rows 30-31.
Cut glasses from black felt, eyes from white felt, make holes for eye fasteners.
Glue everything together.
Do weighting.
Insert the needle in row 13 and lead it diagonally to the 9-10th row, deviating 3 sc to the right.
Lead it down again, then lead the needle from the bottom to the 9-10th row diagonally to the left.
Pull tight, if necessary, repeat.
Glue the eyes in the recesses.
Mouth – 5 sc in MR, glue the tongue – a piece of felt.
Sew the mouth into the recess in row 13.
Embroider the nose in the center under the eyes, I pull the thread with a hook.
Make several stitches until a bump is formed.
Sew the head to the body.
Sew on the pompoms, buttons, and collar.