
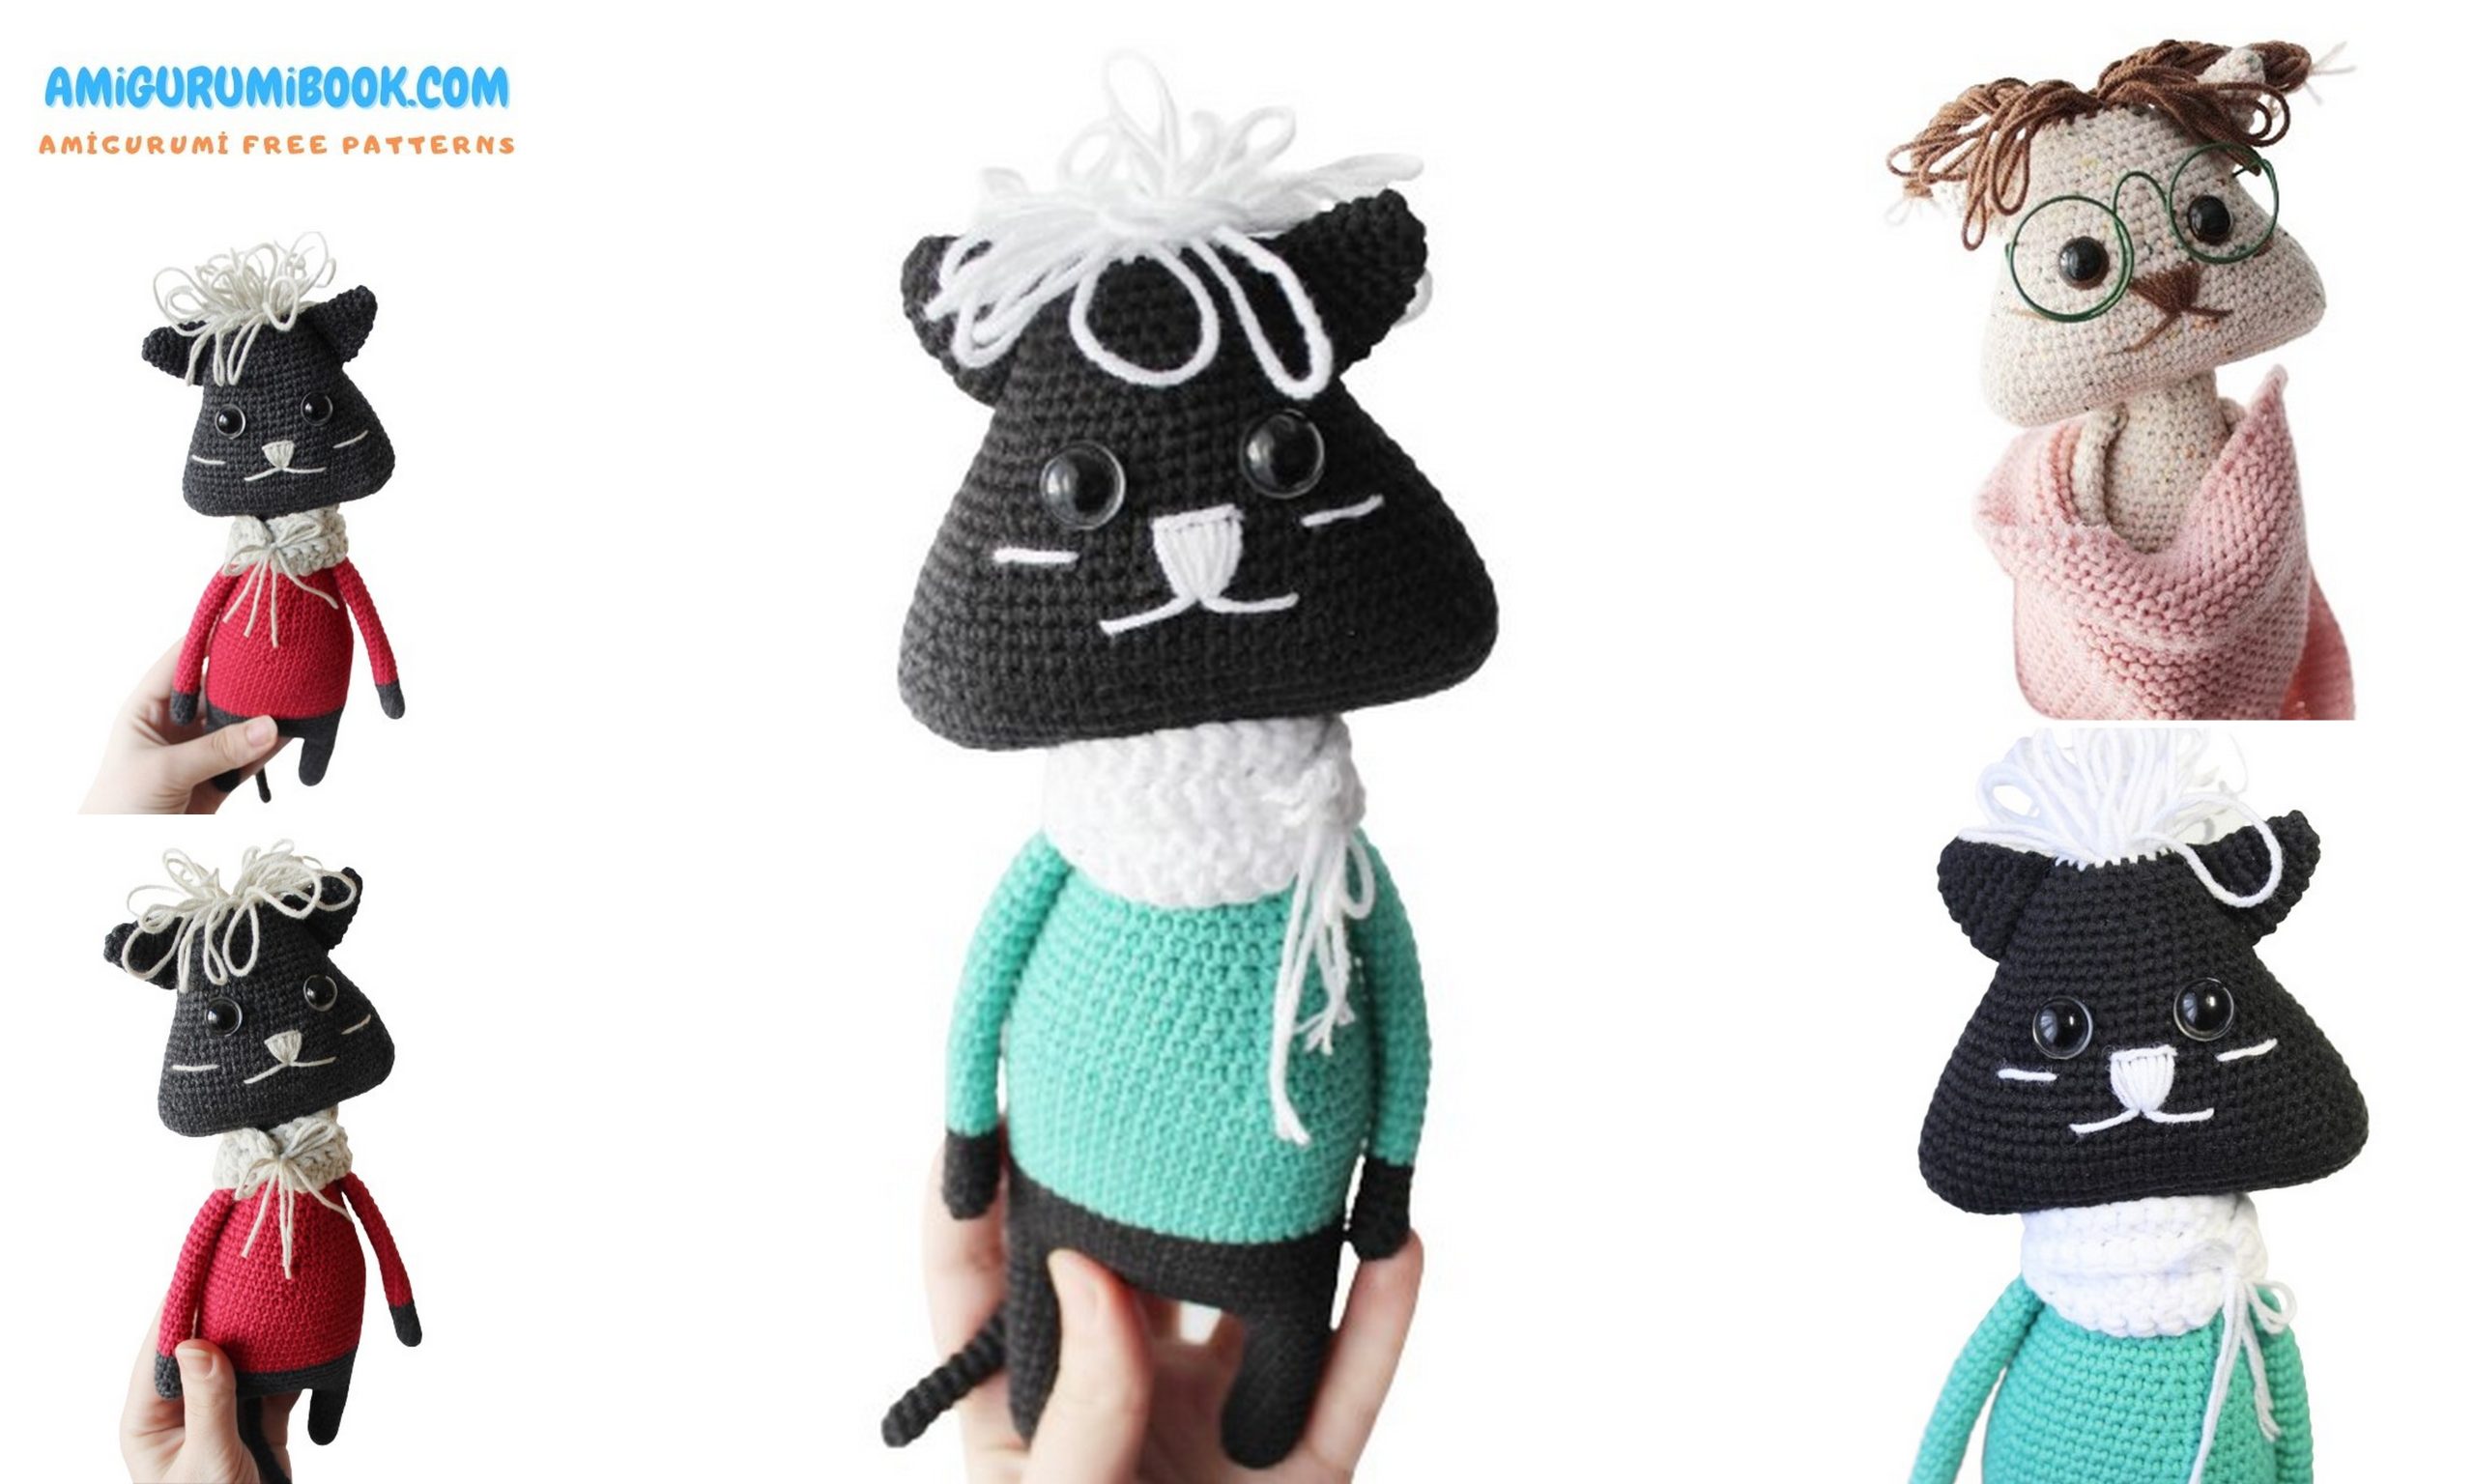
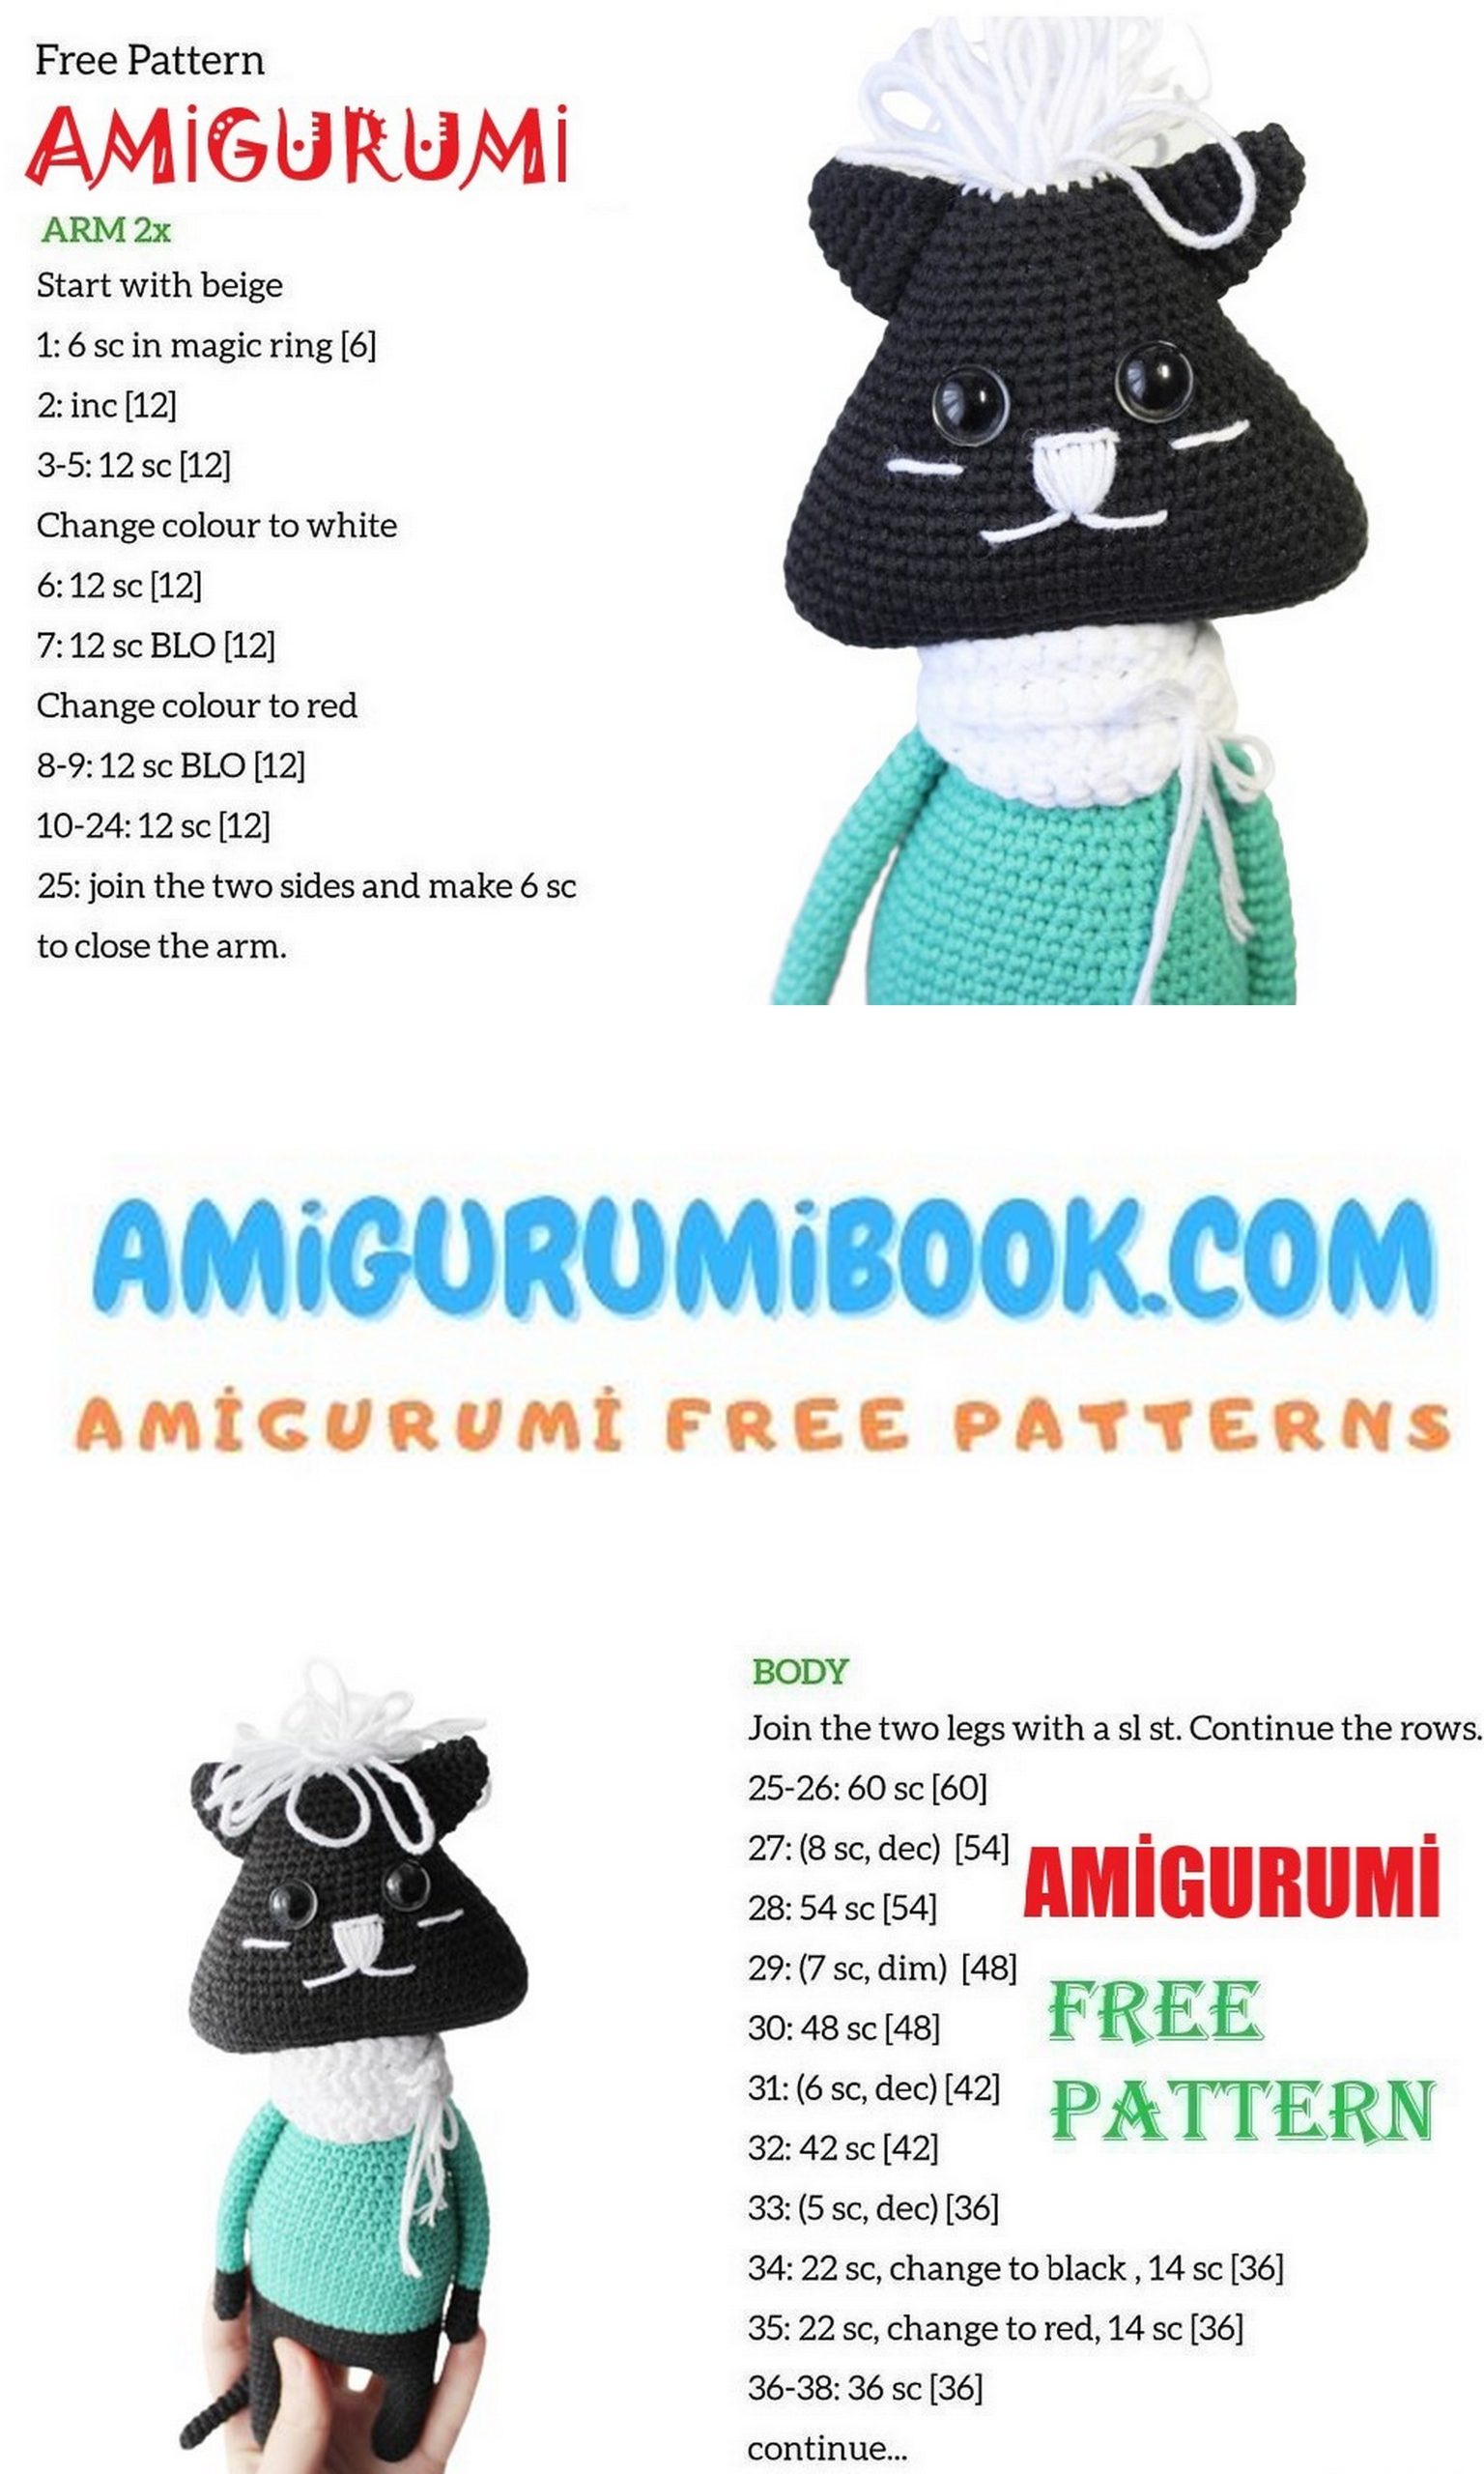
Looking for a cute and beginner-friendly crochet project? This crochet tabby cat amigurumi free pattern is perfect for creating a soft, stylish, and totally adorable handmade toy. With its cozy sweater, fluffy tuft, and charming face details, this cat design is a must-try for amigurumi lovers. Whether you’re making a gift or adding a new piece to your collection, this pattern will guide you step by step to create a beautiful result.
The design is carefully structured to be both enjoyable and easy to follow, even if you’re not an expert yet. Clear rounds, simple shaping, and detailed assembly steps make this pattern ideal for anyone who wants a smooth crochet experience without confusion.
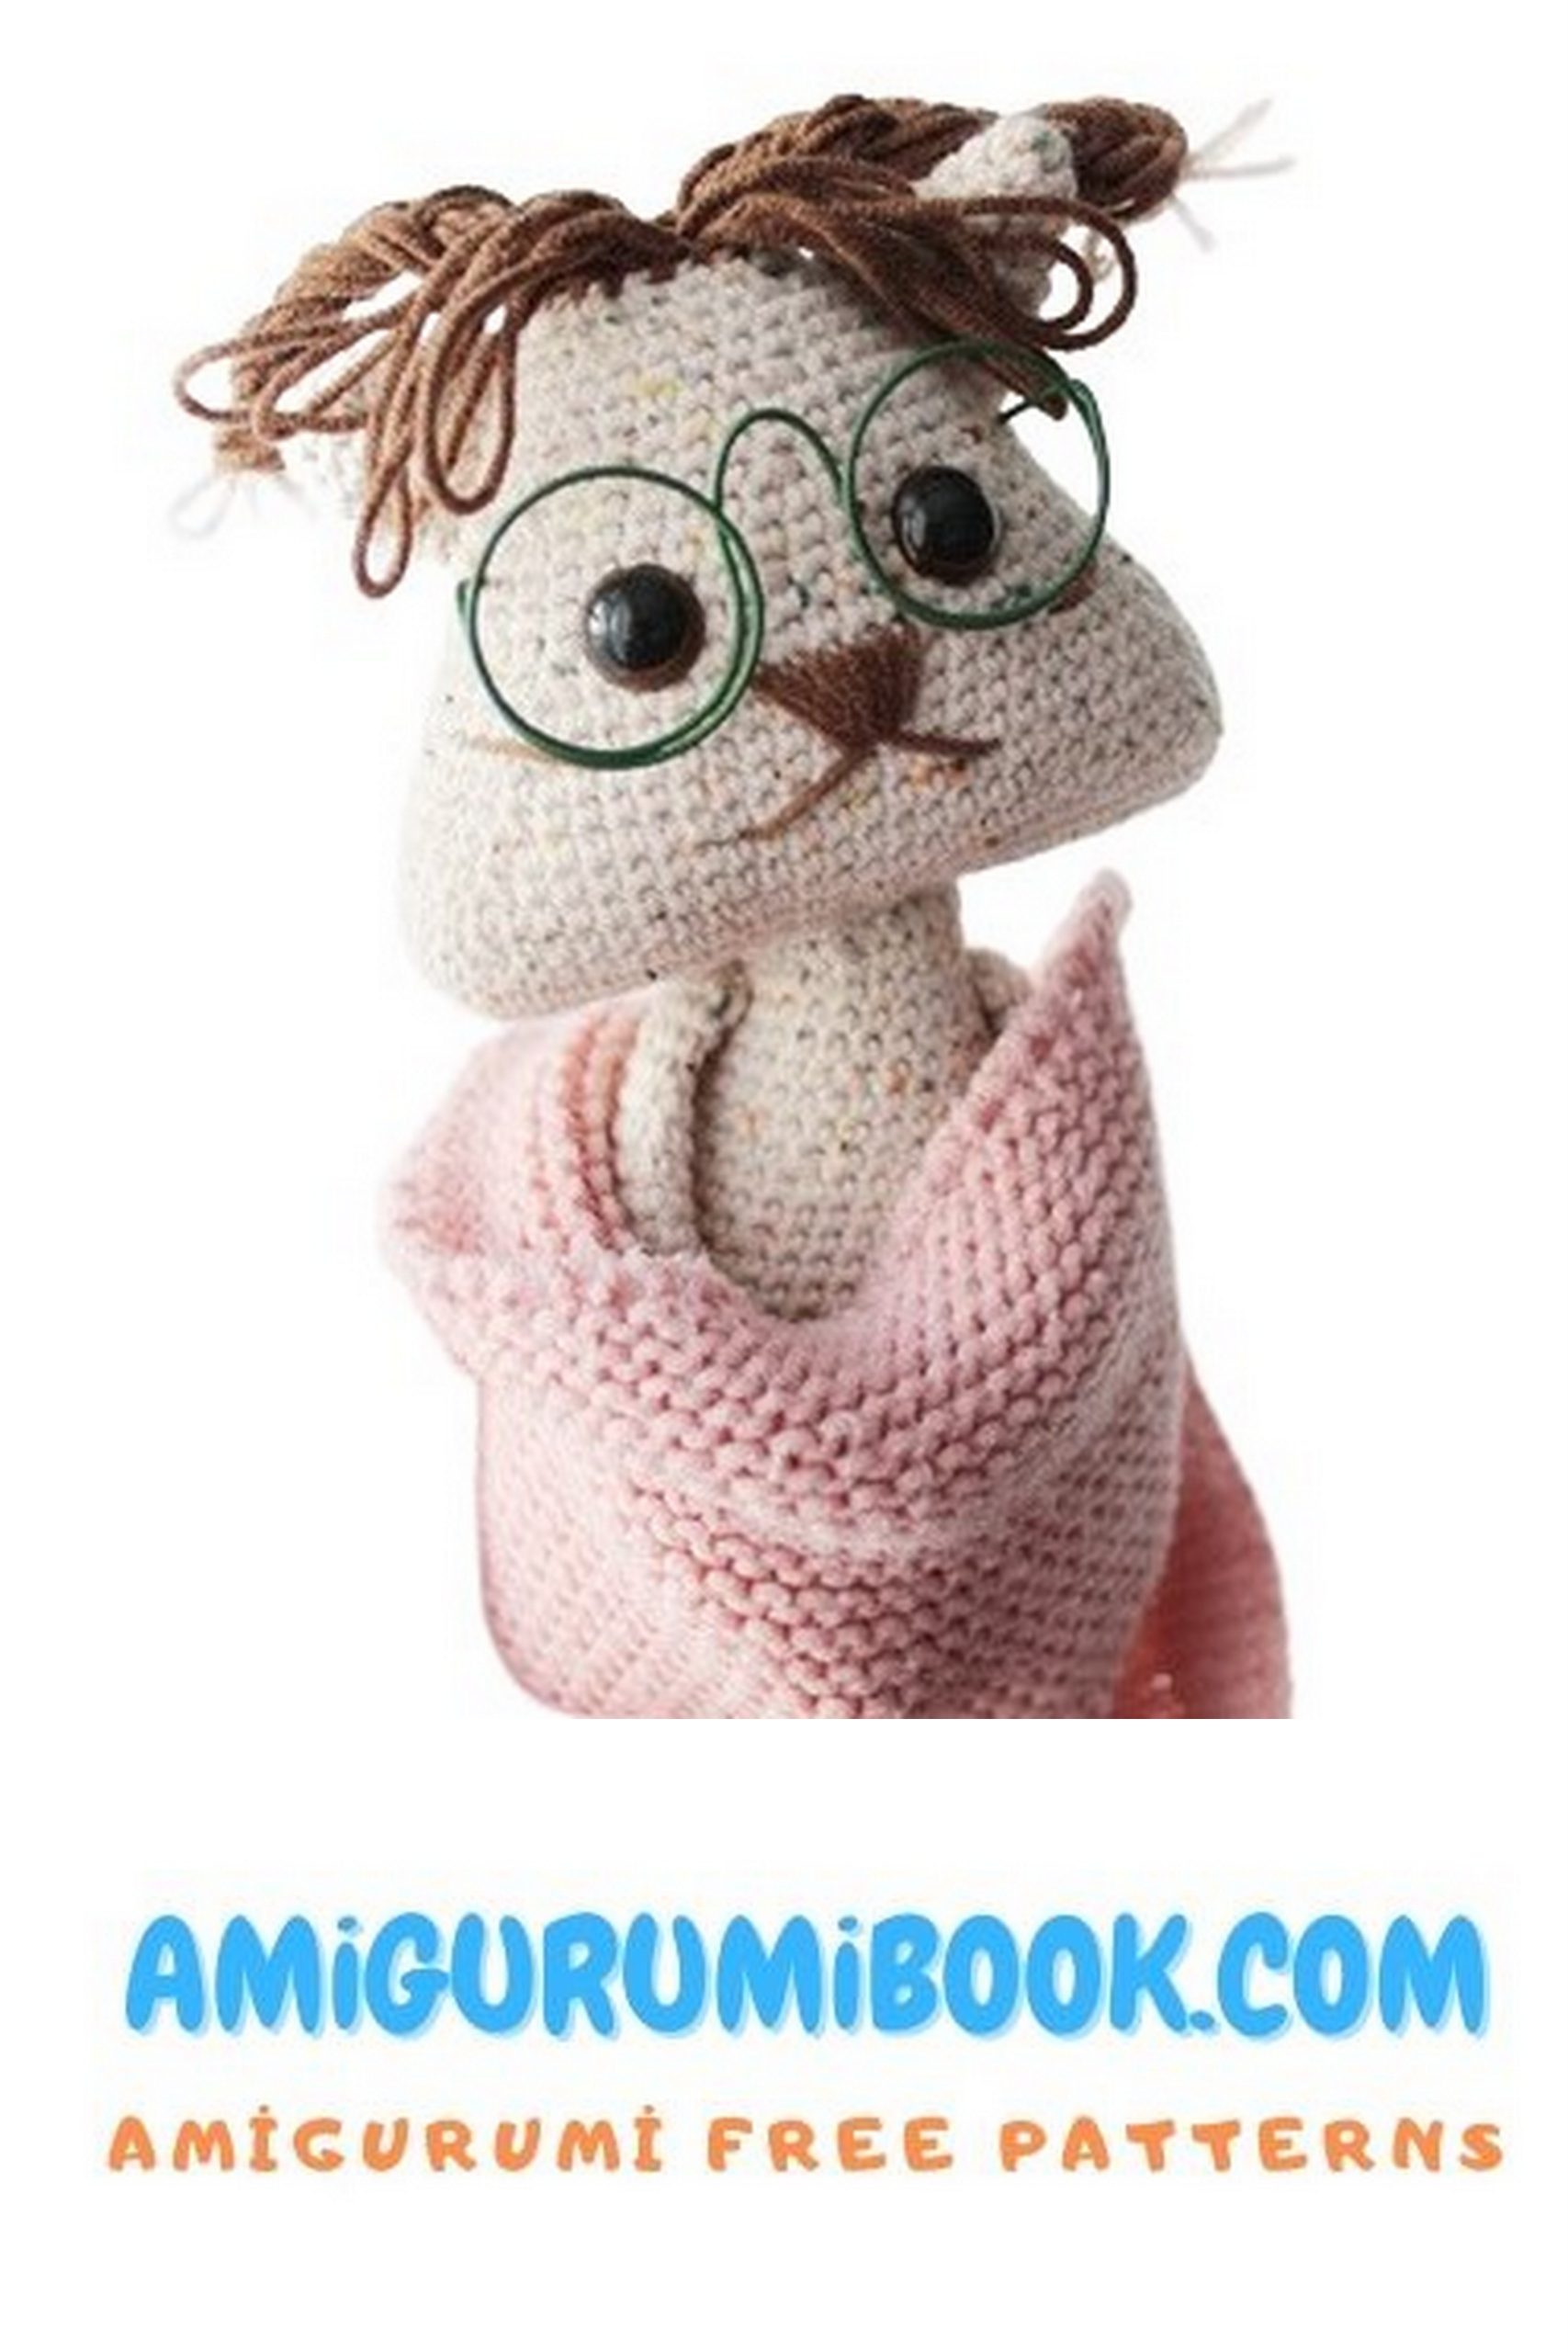
You can also customize your tabby cat with different yarn colors, eye placements, or scarf styles to give it a unique personality. It’s a great project for relaxing crochet sessions and a perfect handmade gift idea for cat lovers.
If you want to access 1000+ free amigurumi patterns, you can download our application from this link!
🧶 Materials & Tools
- Medium-weight yarn (3 colors):
• Main color (body)
• Sweater color
• Details (tuft, scarf, facial features) - Recommended yarns:
• YarnArt Jeans (160m/50g, 55% cotton / 45% acrylic)
• Alize Cotton Gold (330m/100g, 55% cotton / 45% acrylic)
• Alize Cotton Gold Tweed (330m/100g) - Suggested colors: Graphite, Light Gray, Red, Black, White, Turquoise, Milky Beige, Brown
- Crochet hooks:
• 2.0 mm (main work)
• 4.0 mm (scarf/cowl) - 10 mm safety eyes
- Toy stuffing (polyester fiberfill)
- Sewing needle
- Pins
- Scissors
- Florist wire (for glasses)
✂️ Abbreviations
(36): Total stitches in the round
MR: Magic Ring
ch: Chain
sc: Single Crochet
sl st: Slip Stitch
inc: Increase (2 sc in the same stitch)
dec: Decrease (sc 2 stitches together)
(2 sc, dec) * n: Repeat the sequence n times
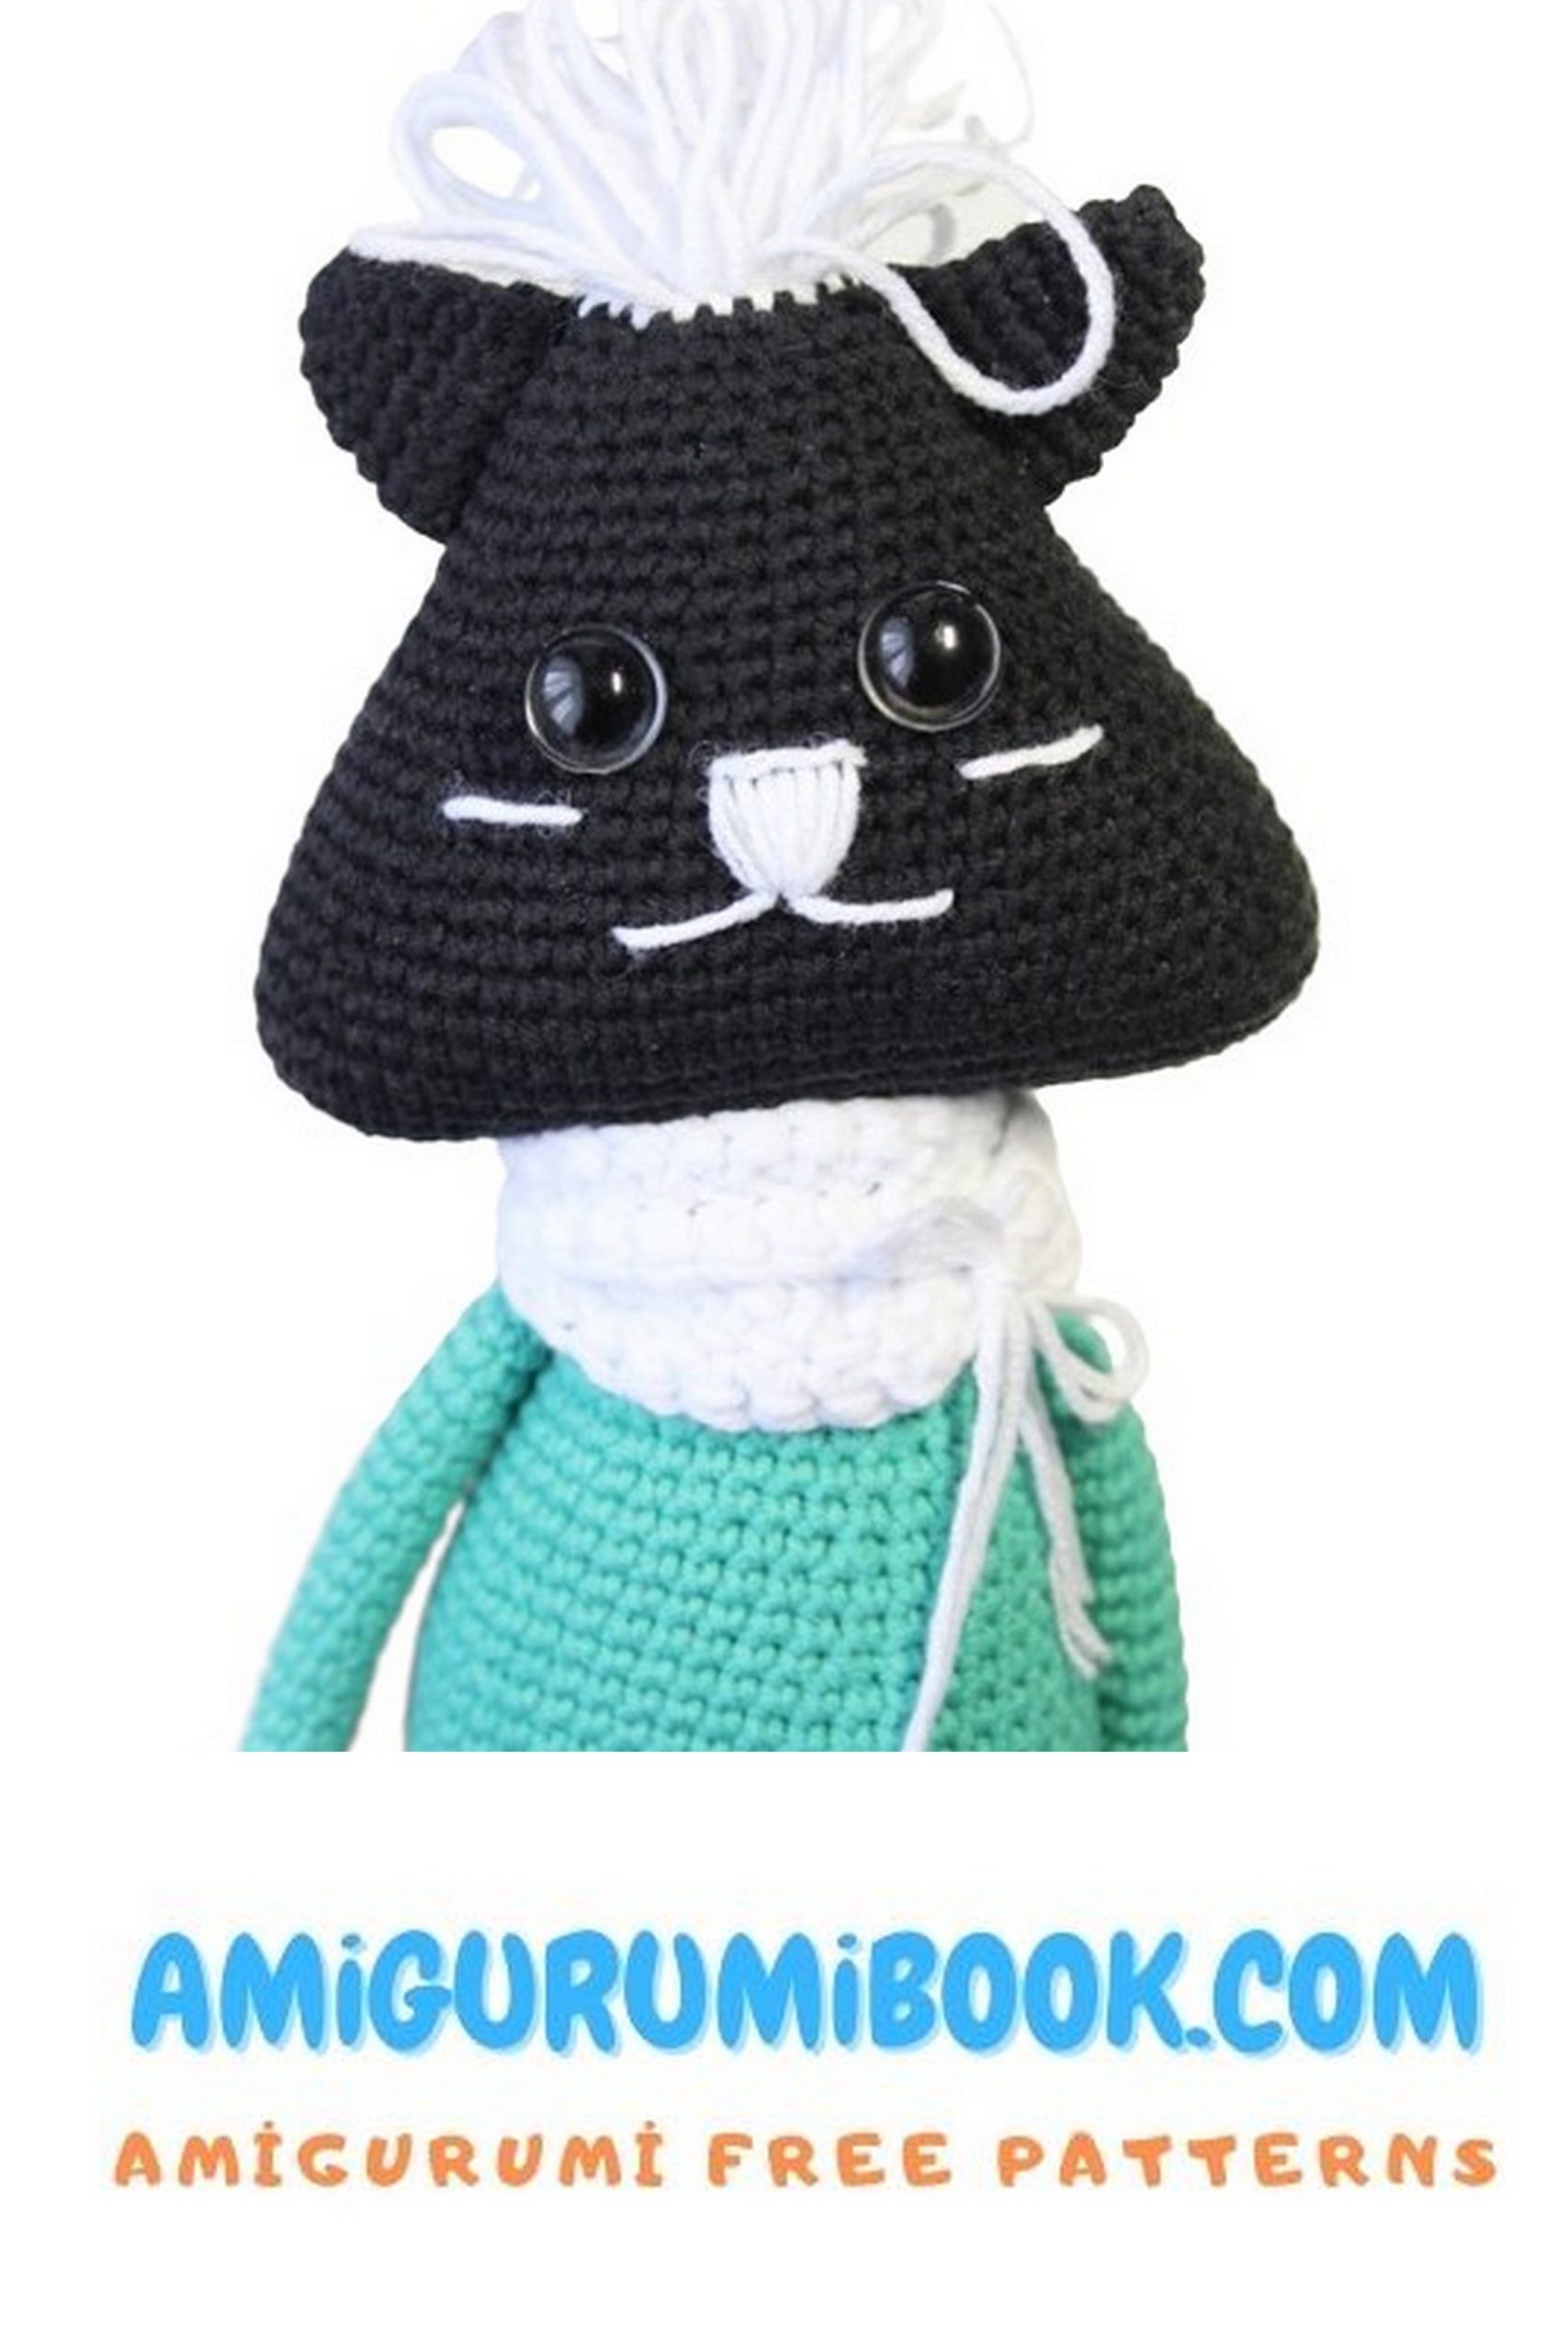
🧶 Head
Start with the main color (black).
Ch 25 and work in a spiral around the chain.
1: Starting from 2nd ch from hook:
23 sc, 3 sc in last ch, 22 sc, 2 sc in last st (52)
2: 2 inc, 22 sc, 4 inc, 22 sc, 2 inc (60)
3: 3 inc, 25 sc, 5 inc, 25 sc, 2 inc (70)
4–6: 70 sc
7: 4 sc, dec, 24 sc, dec, 7 sc, dec, 24 sc, dec, 3 sc (66)
8: 66 sc
9: 4 sc, dec, 22 sc, dec, 7 sc, dec, 22 sc, dec, 3 sc (62)
10: 62 sc
11: 4 sc, dec, 20 sc, dec, 7 sc, dec, 20 sc, dec, 3 sc (58)
12: 58 sc
13: 4 sc, dec, 18 sc, dec, 7 sc, dec, 18 sc, dec, 3 sc (54)
14: 54 sc
15: 4 sc, dec, 16 sc, dec, 7 sc, dec, 16 sc, dec, 3 sc (50)
16: dec, 23 sc, dec, 23 sc (48)
17: (6 sc, dec) * 6 (42)
18–19: 42 sc
20: (5 sc, dec) * 6 (36)
21–22: 36 sc
23: (4 sc, dec) * 6 (30)
24–25: 30 sc
26: (3 sc, dec) * 6 (24)
👉 Insert 10 mm safety eyes between Rows 16–17 (8 stitches apart)
👉 Stuff firmly and shape slightly triangular
27: (2 sc, dec) * 6 (18)
✨ Hair (Tuft)
Change yarn color.
Tip: Extended loop = pull up a longer loop before finishing the stitch.
28: 18 sc (extended loops)
29: (1 sc, dec) * 6 (12)
30: 12 sc (extended loops)
Add stuffing
31: 6 dec (6)
Finish, close the hole through front loops only, tighten and shape the head.
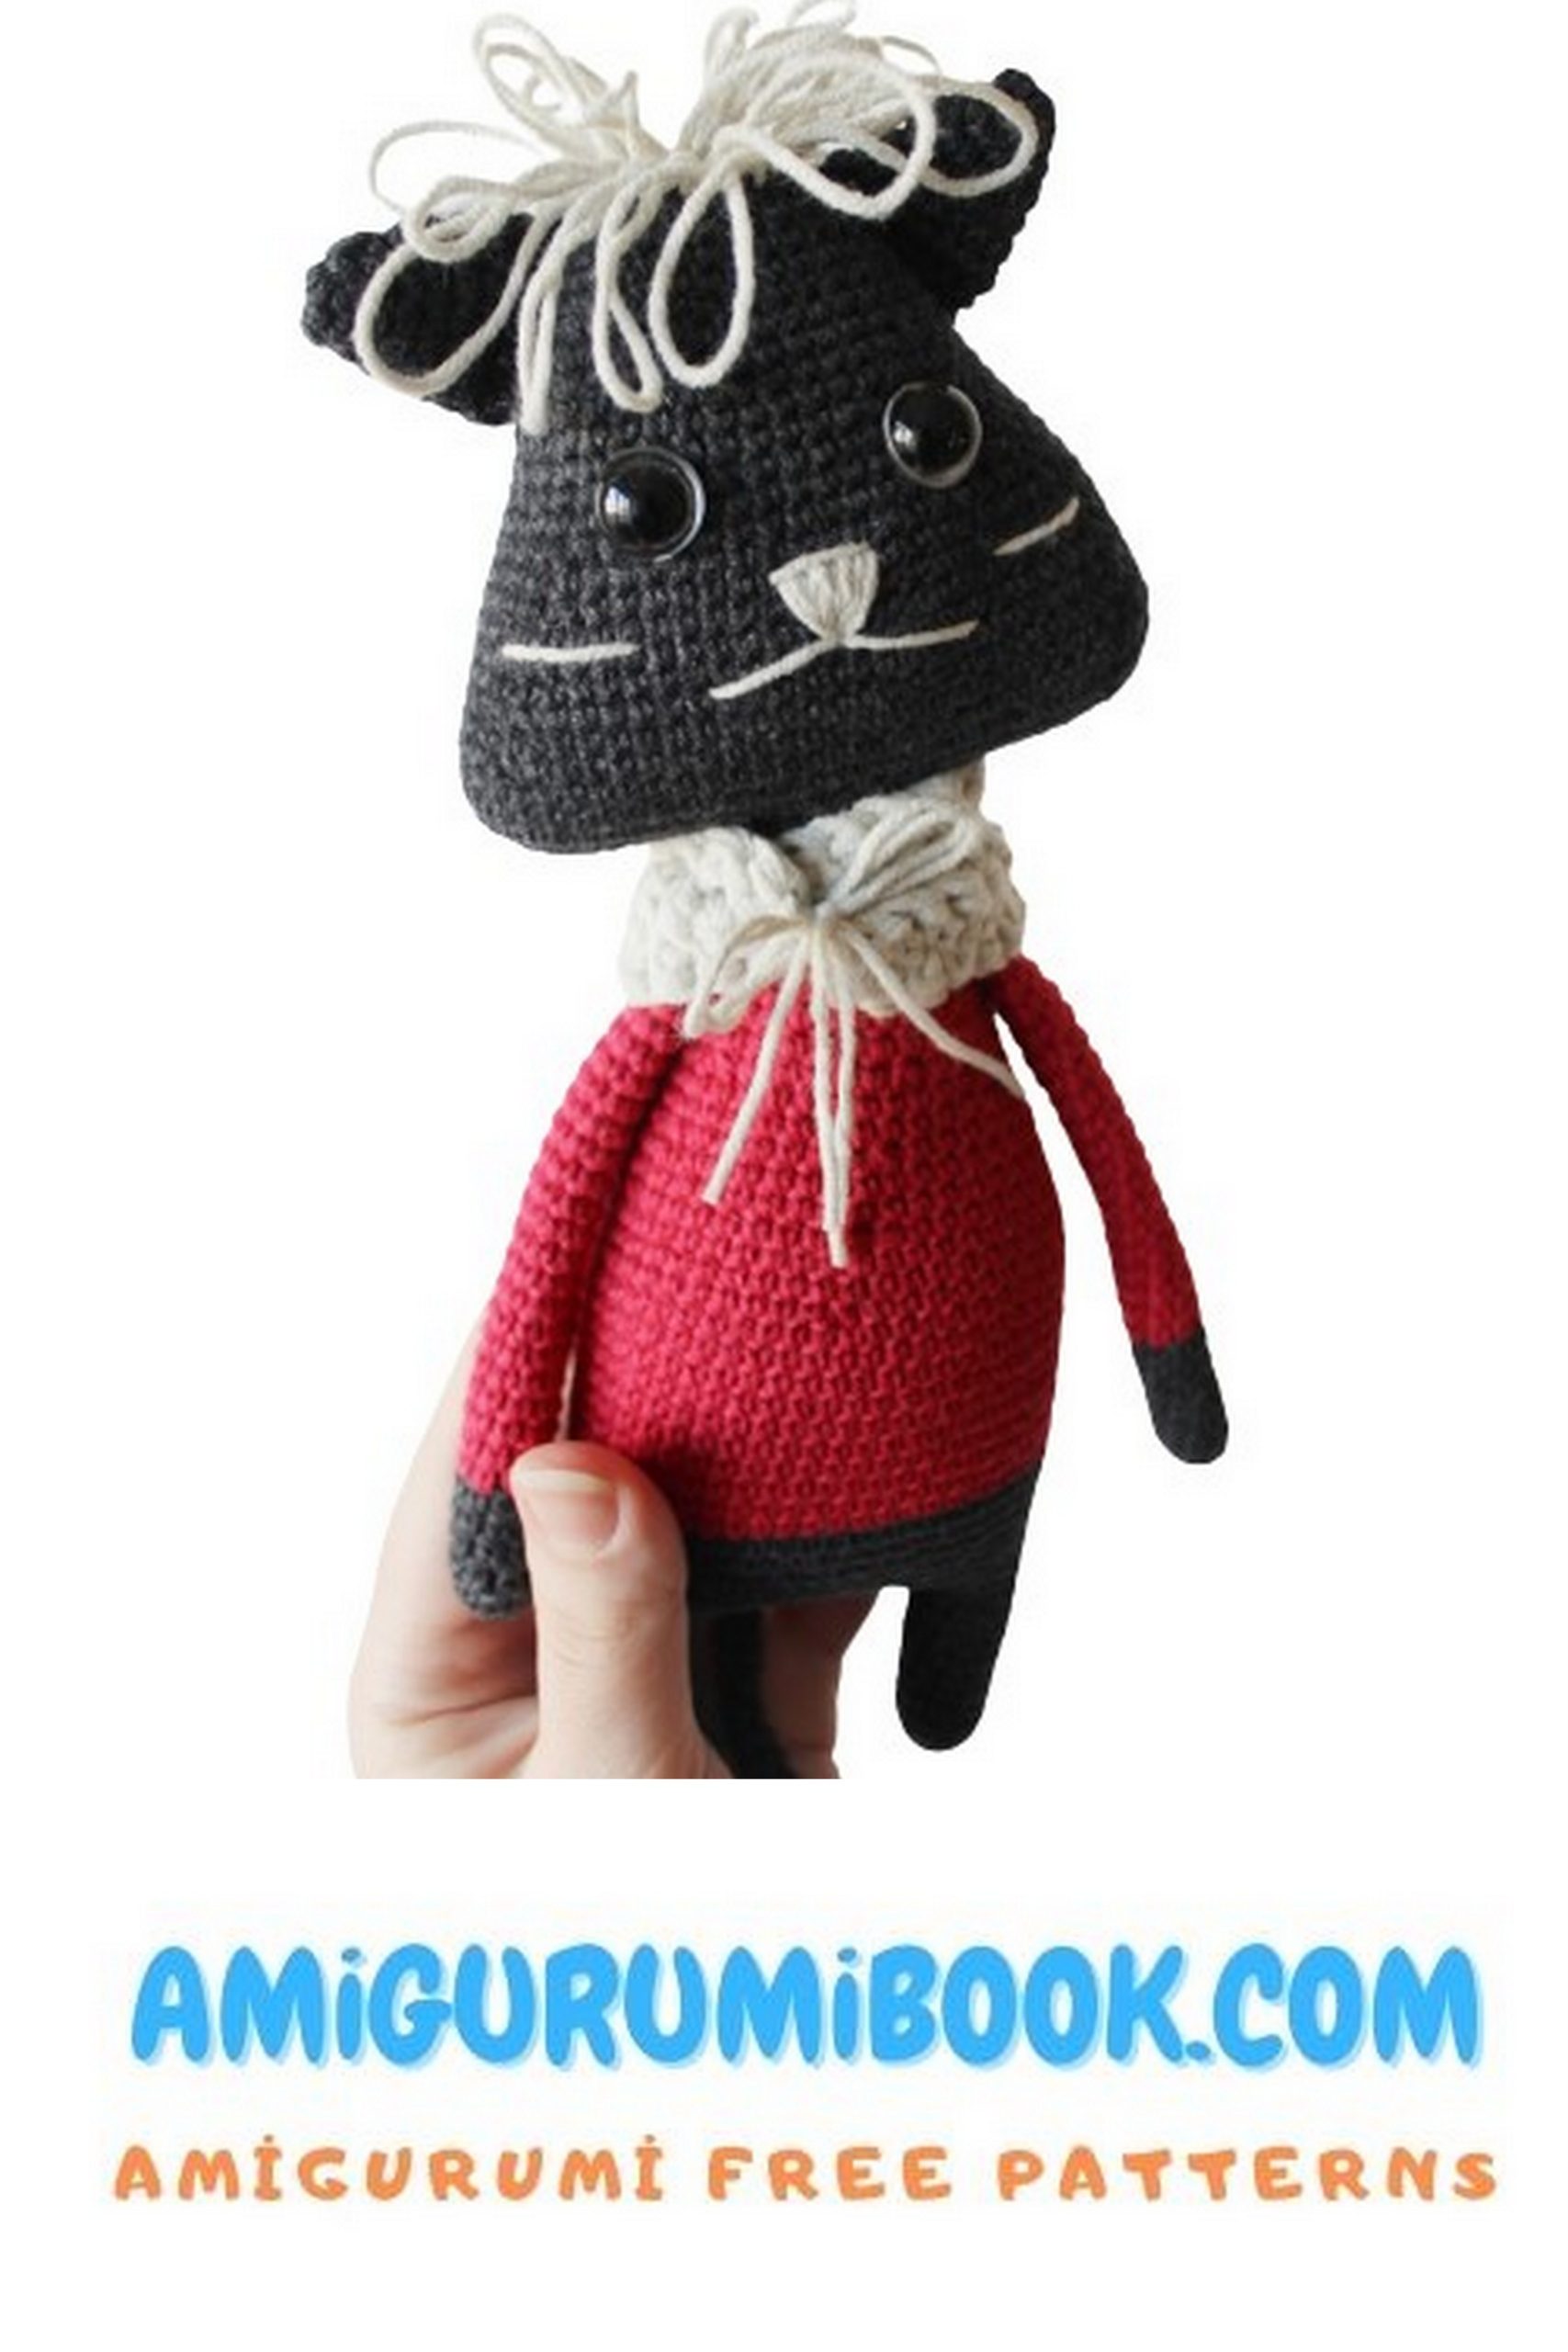
🐽 Muzzle
1: 6 sc in MR
2: (1 sc, inc) * 3 (9)
3: 9 sc
4: (2 sc, inc) * 3 (12)
5: 12 sc
6: (3 sc, inc) * 3 (15)
7: 15 sc
Do not stuff. Fold and crochet 7 sc to close.
👂 Ears (2 Pieces)
1: 6 sc in MR
2–7: 6 sc
8: inc, 5 sc (7)
9–19: 7 sc
20: inc, 6 sc (8)
21–25: 8 sc
Do not stuff.
🐾 Legs (2 Pieces)
1: 6 sc in MR
2: 6 inc (12)
3–12: 12 sc
👉 First leg: fasten off
👉 Second leg: do not cut yarn
Ch 12 (distance between legs)
Join legs and continue:
1: 48 sc
2: 6 sc, inc, 23 sc, inc, 17 sc (50)
3–8: 50 sc
9: 50 sc (attach tail here)
10: 50 sc
Stuff firmly
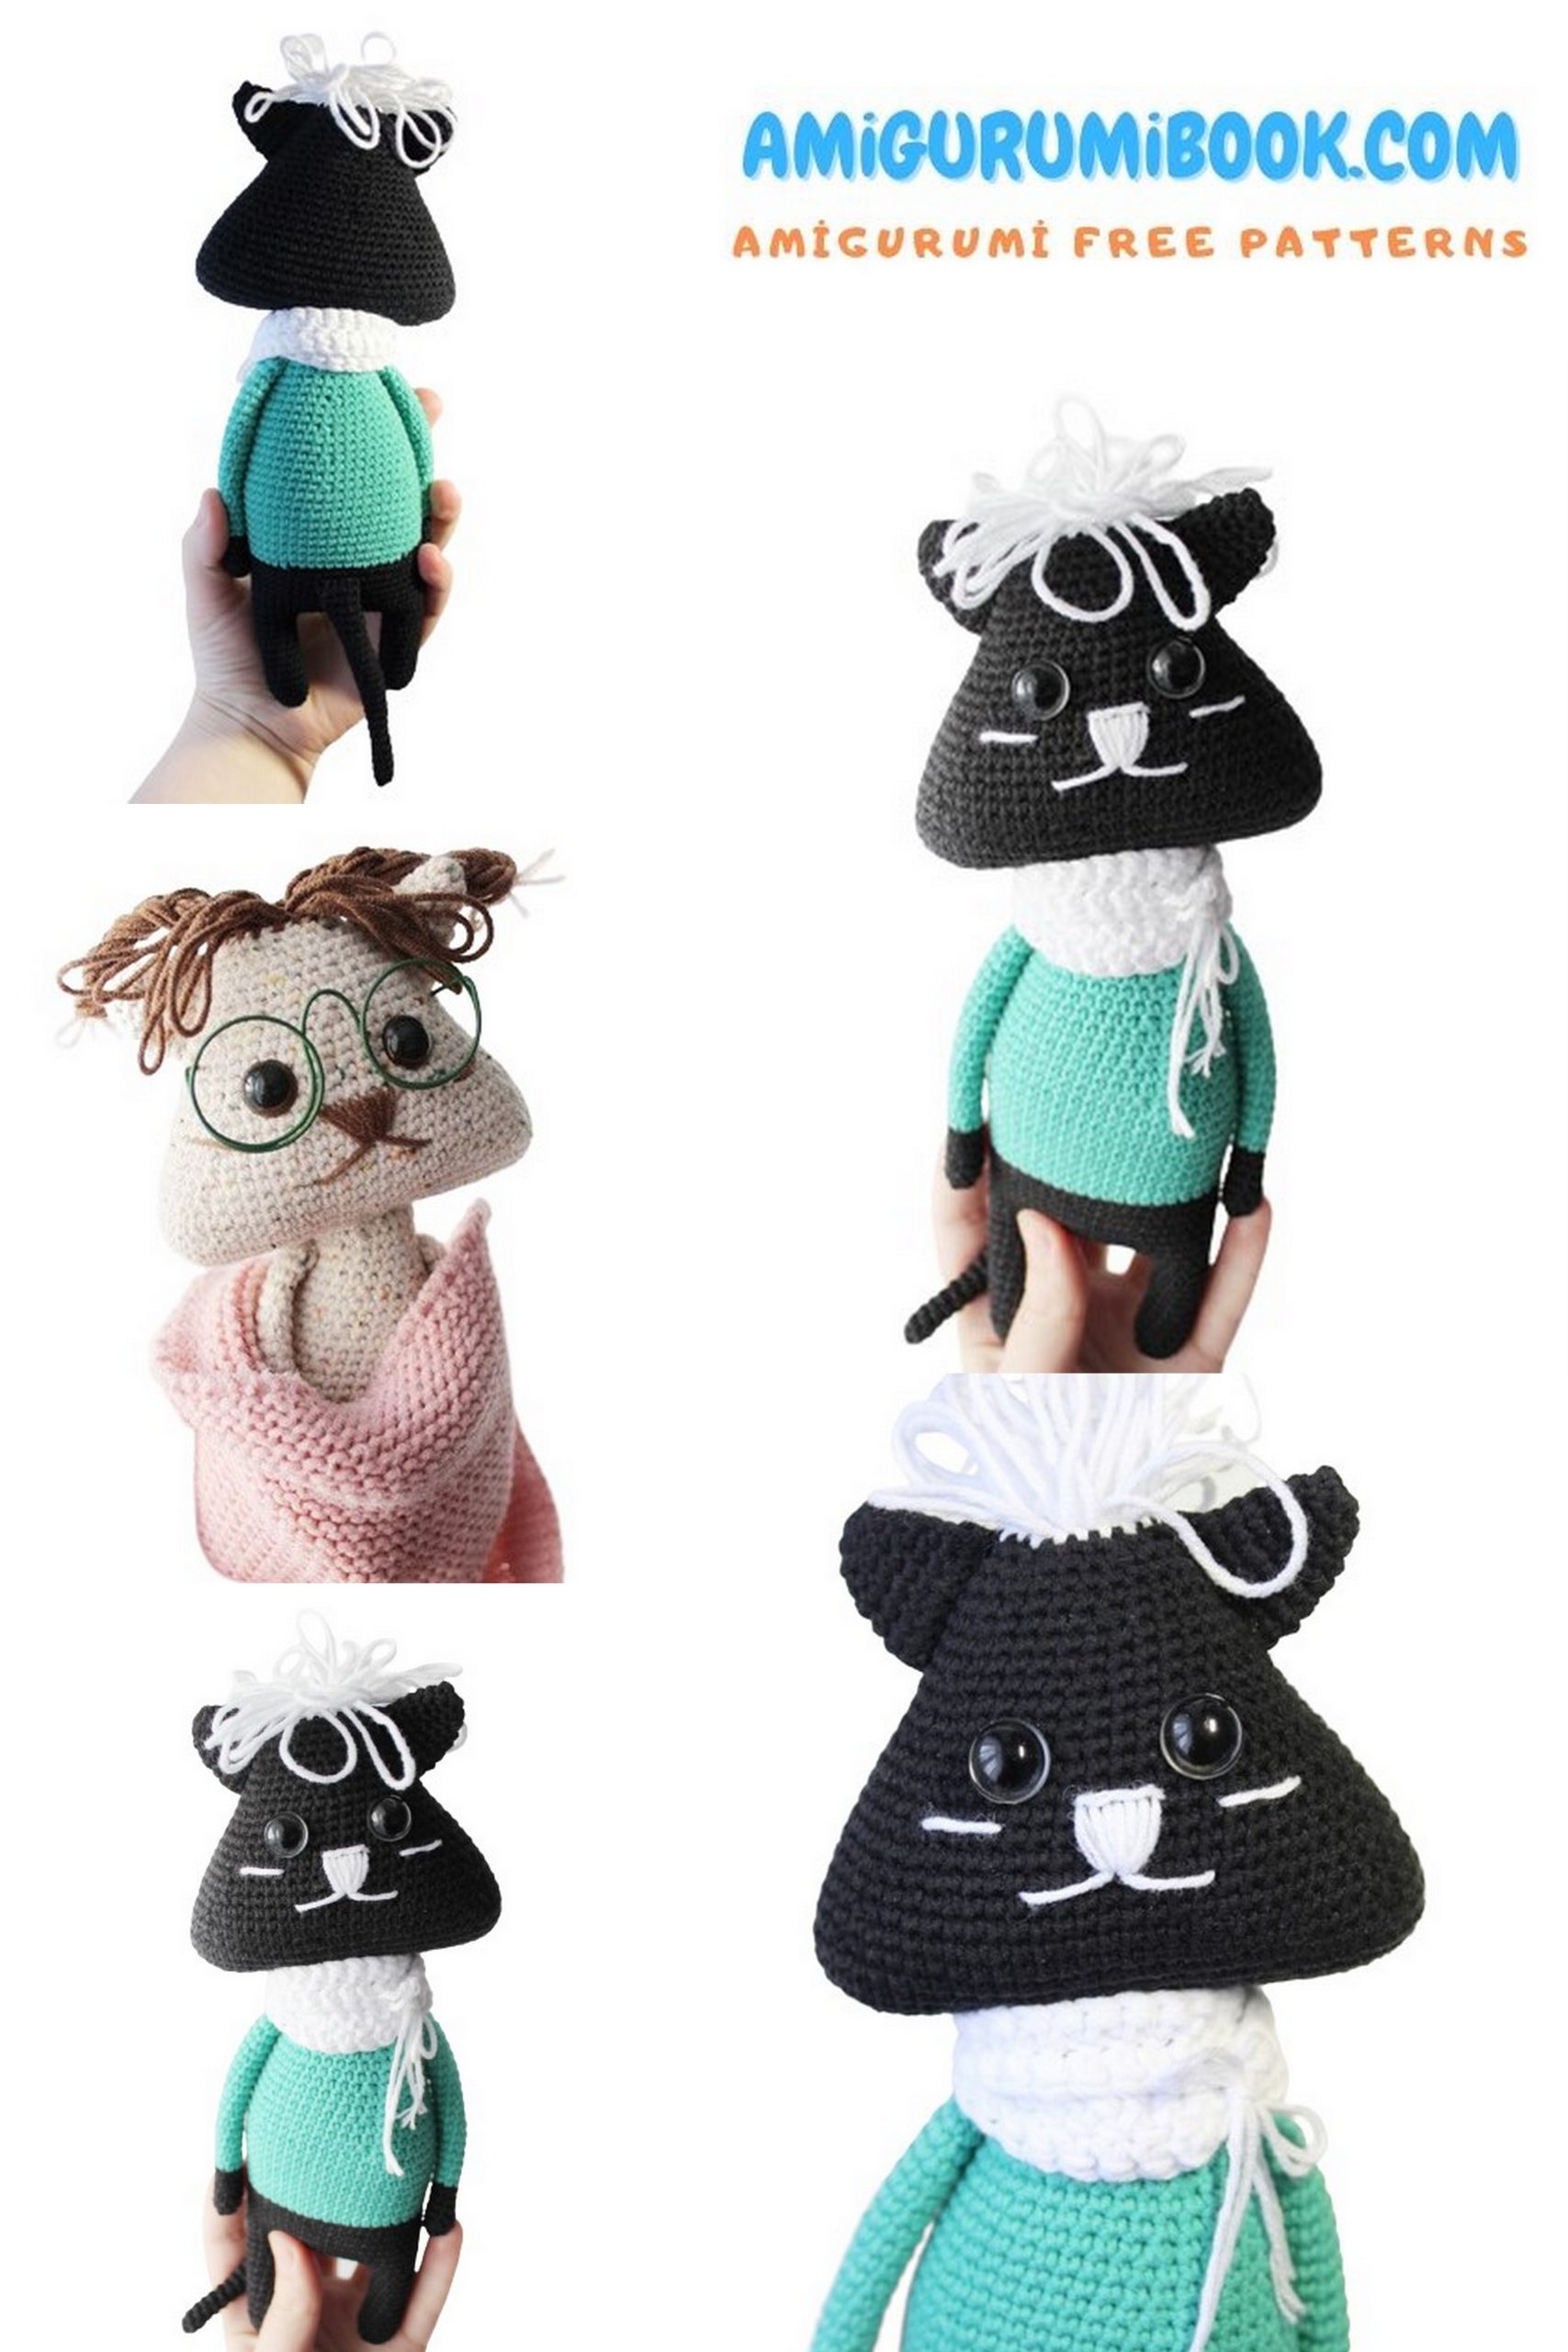
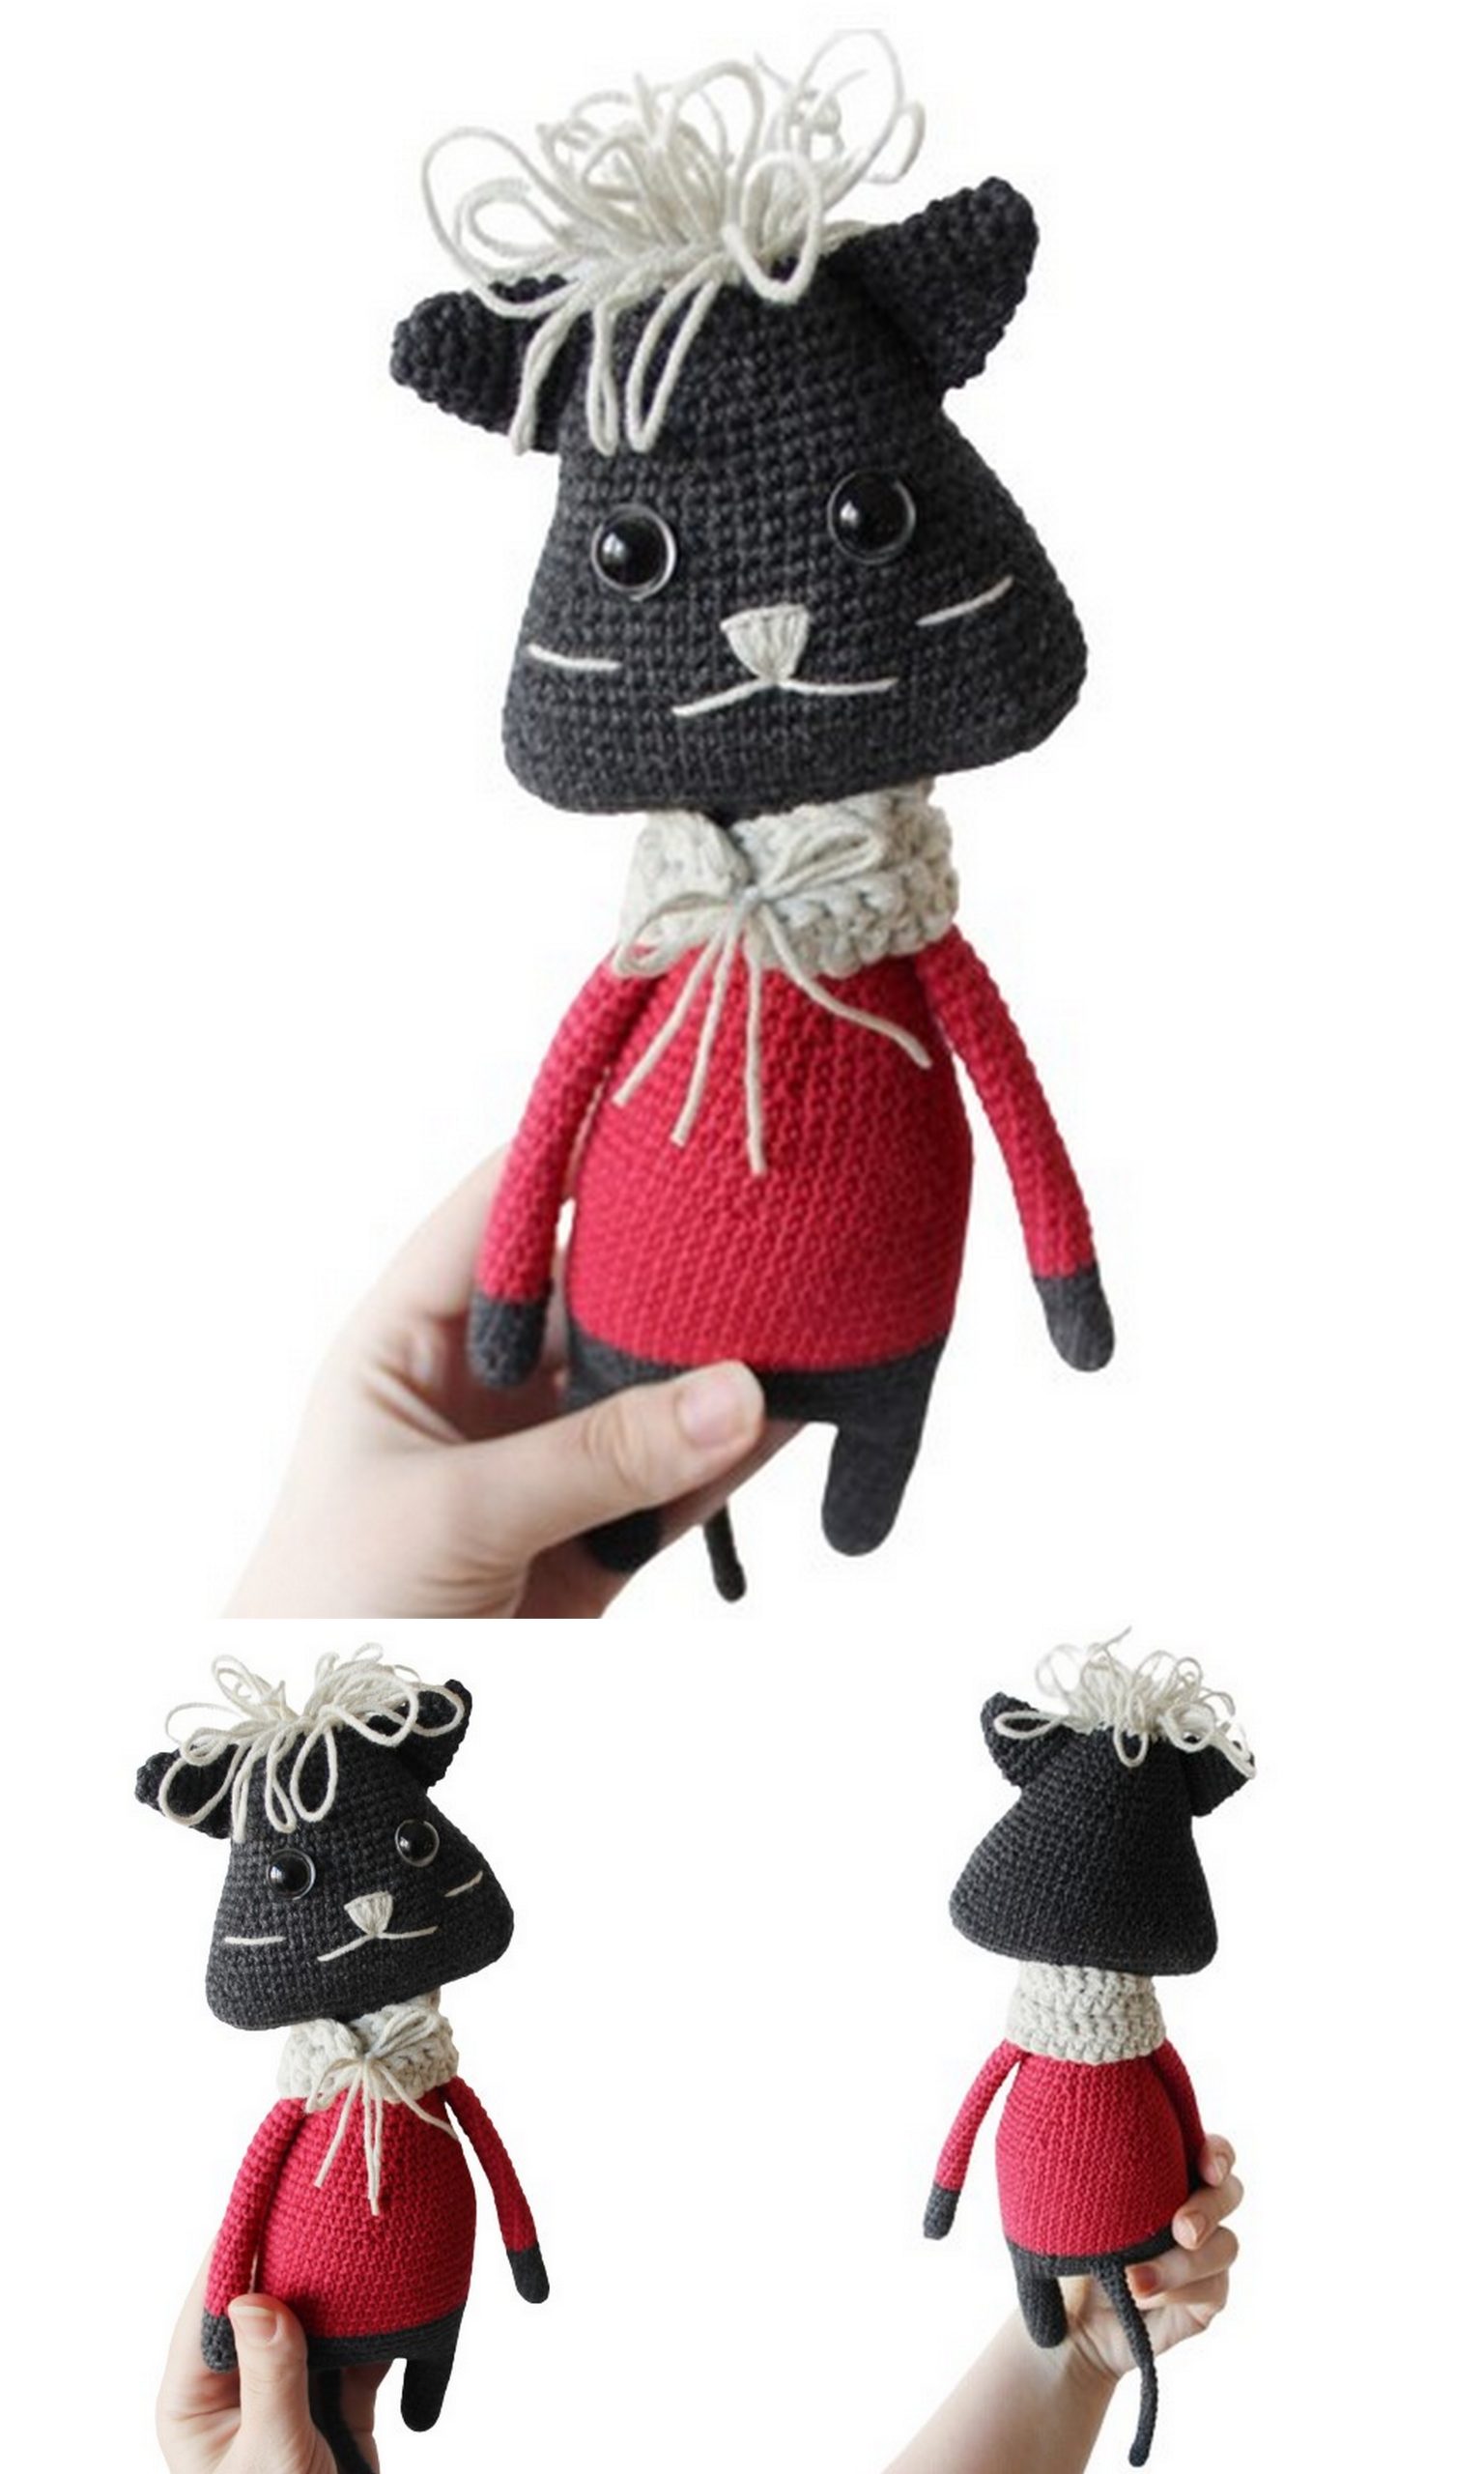
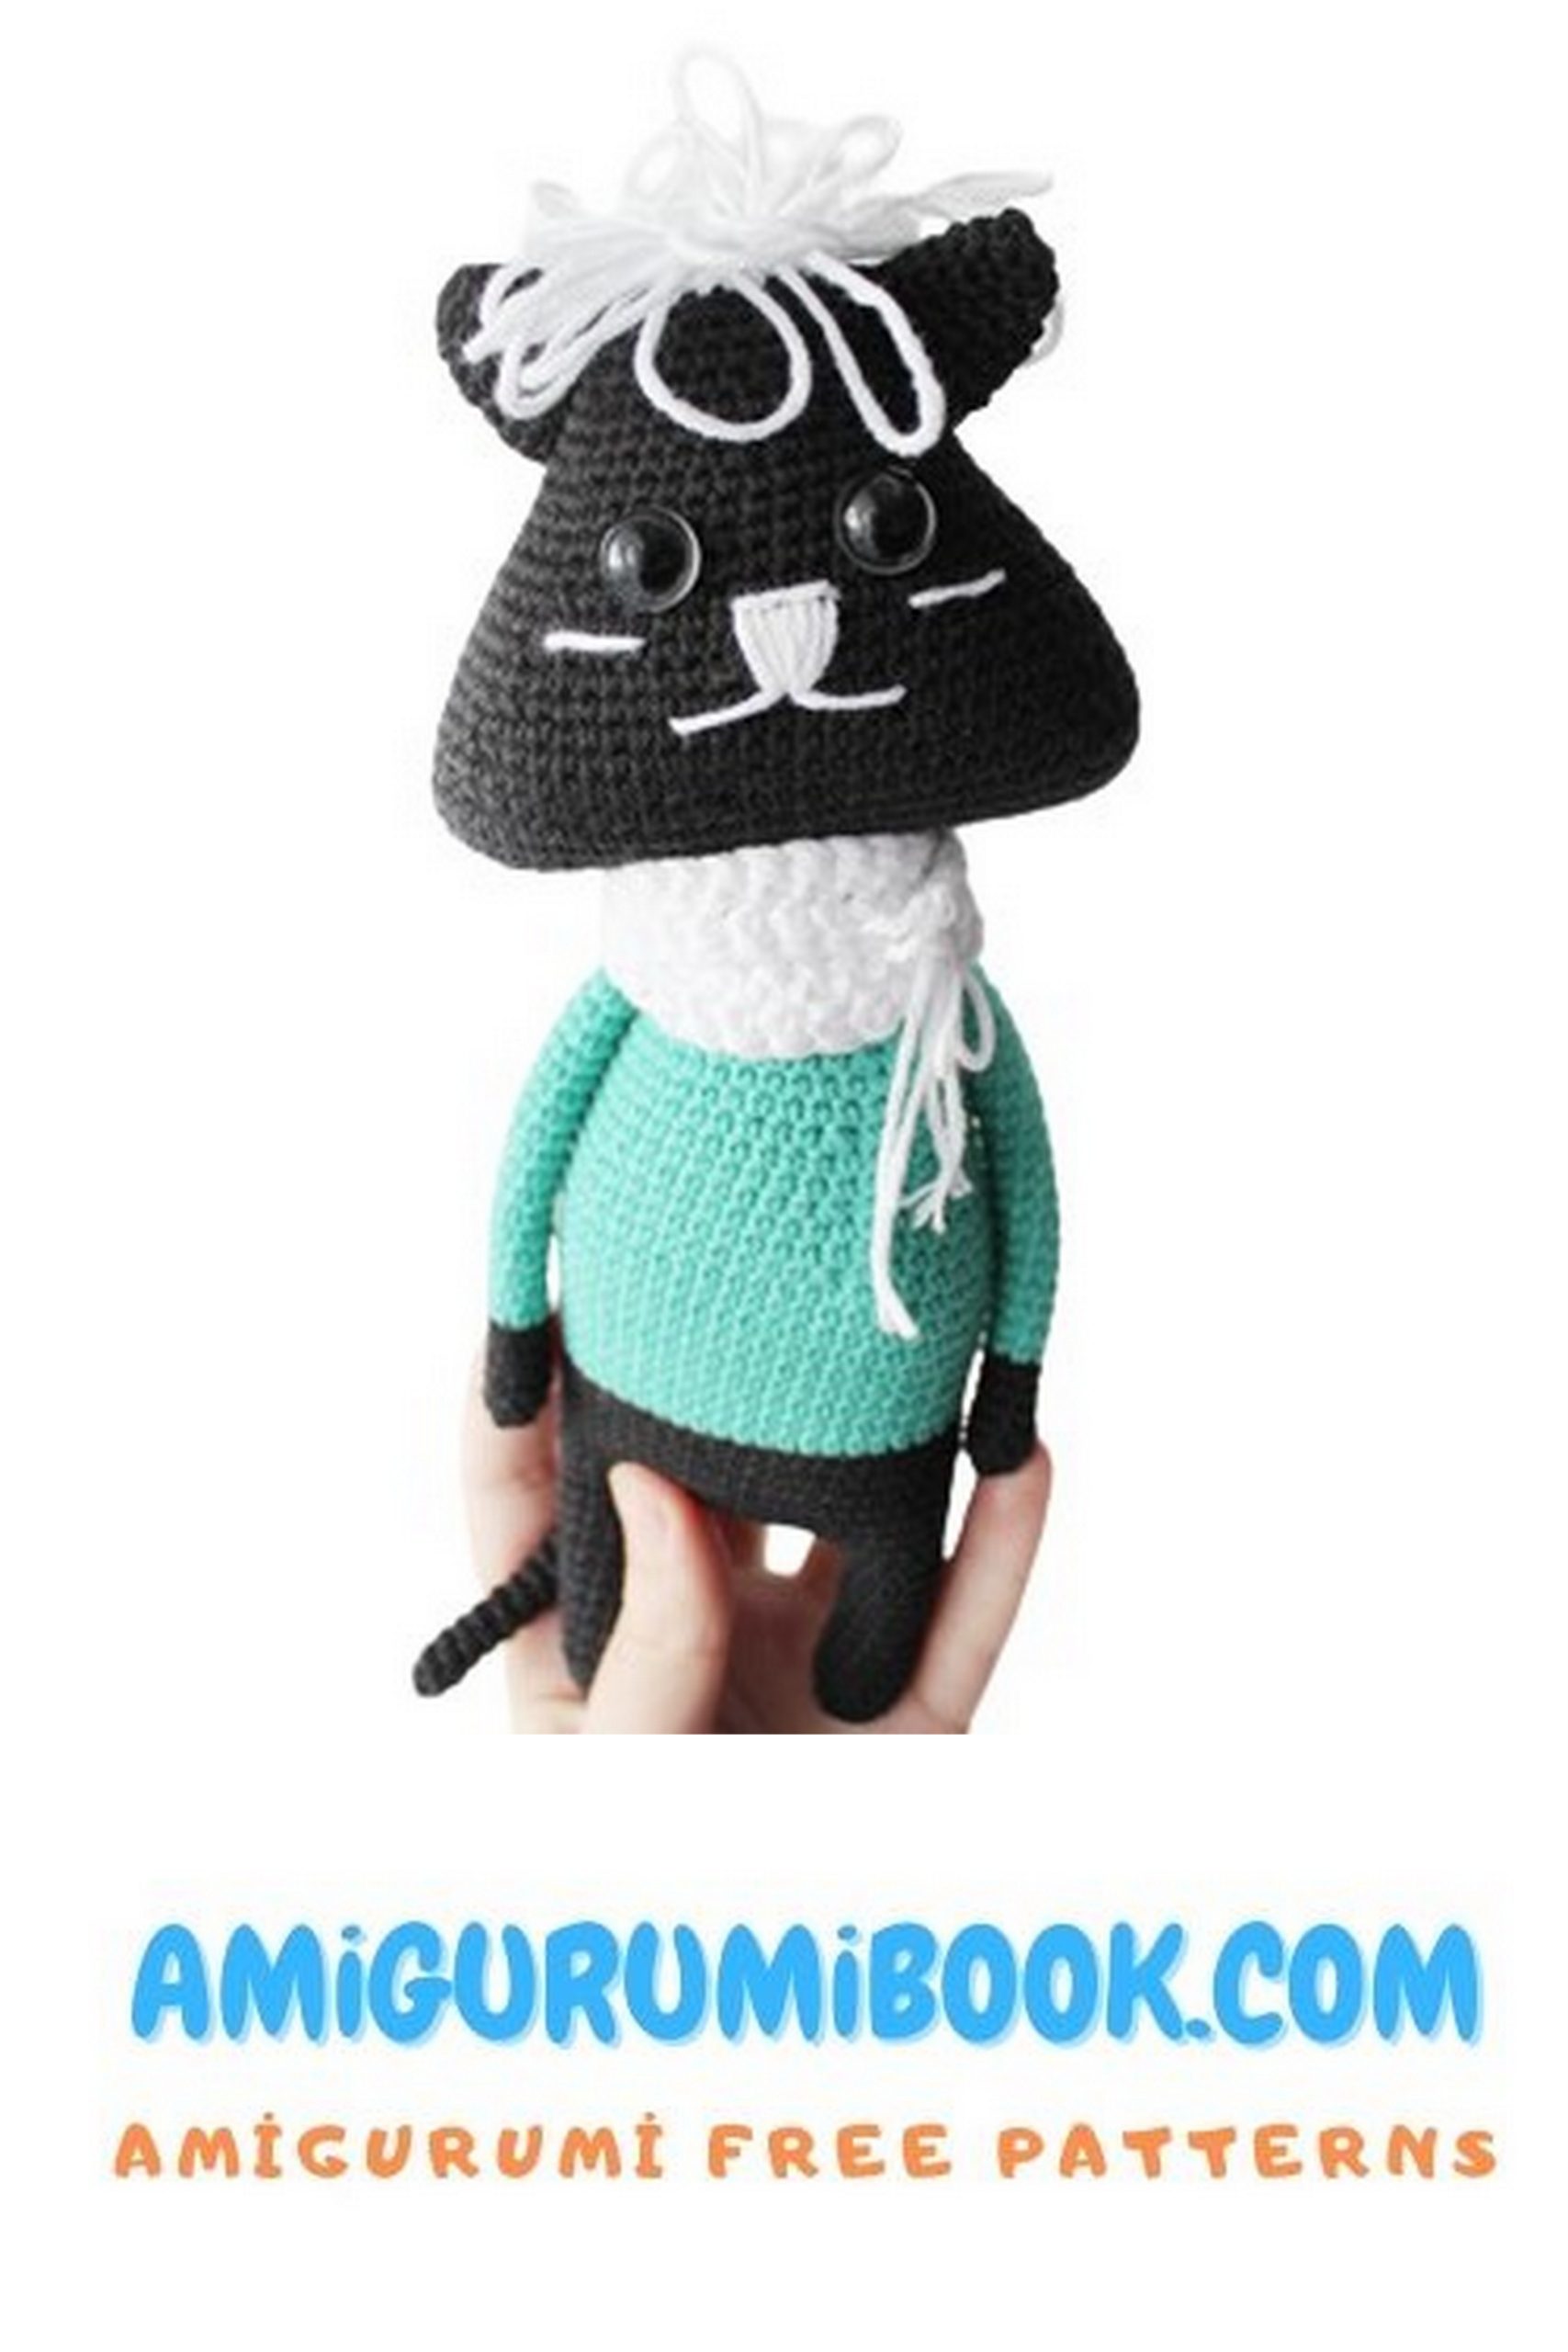
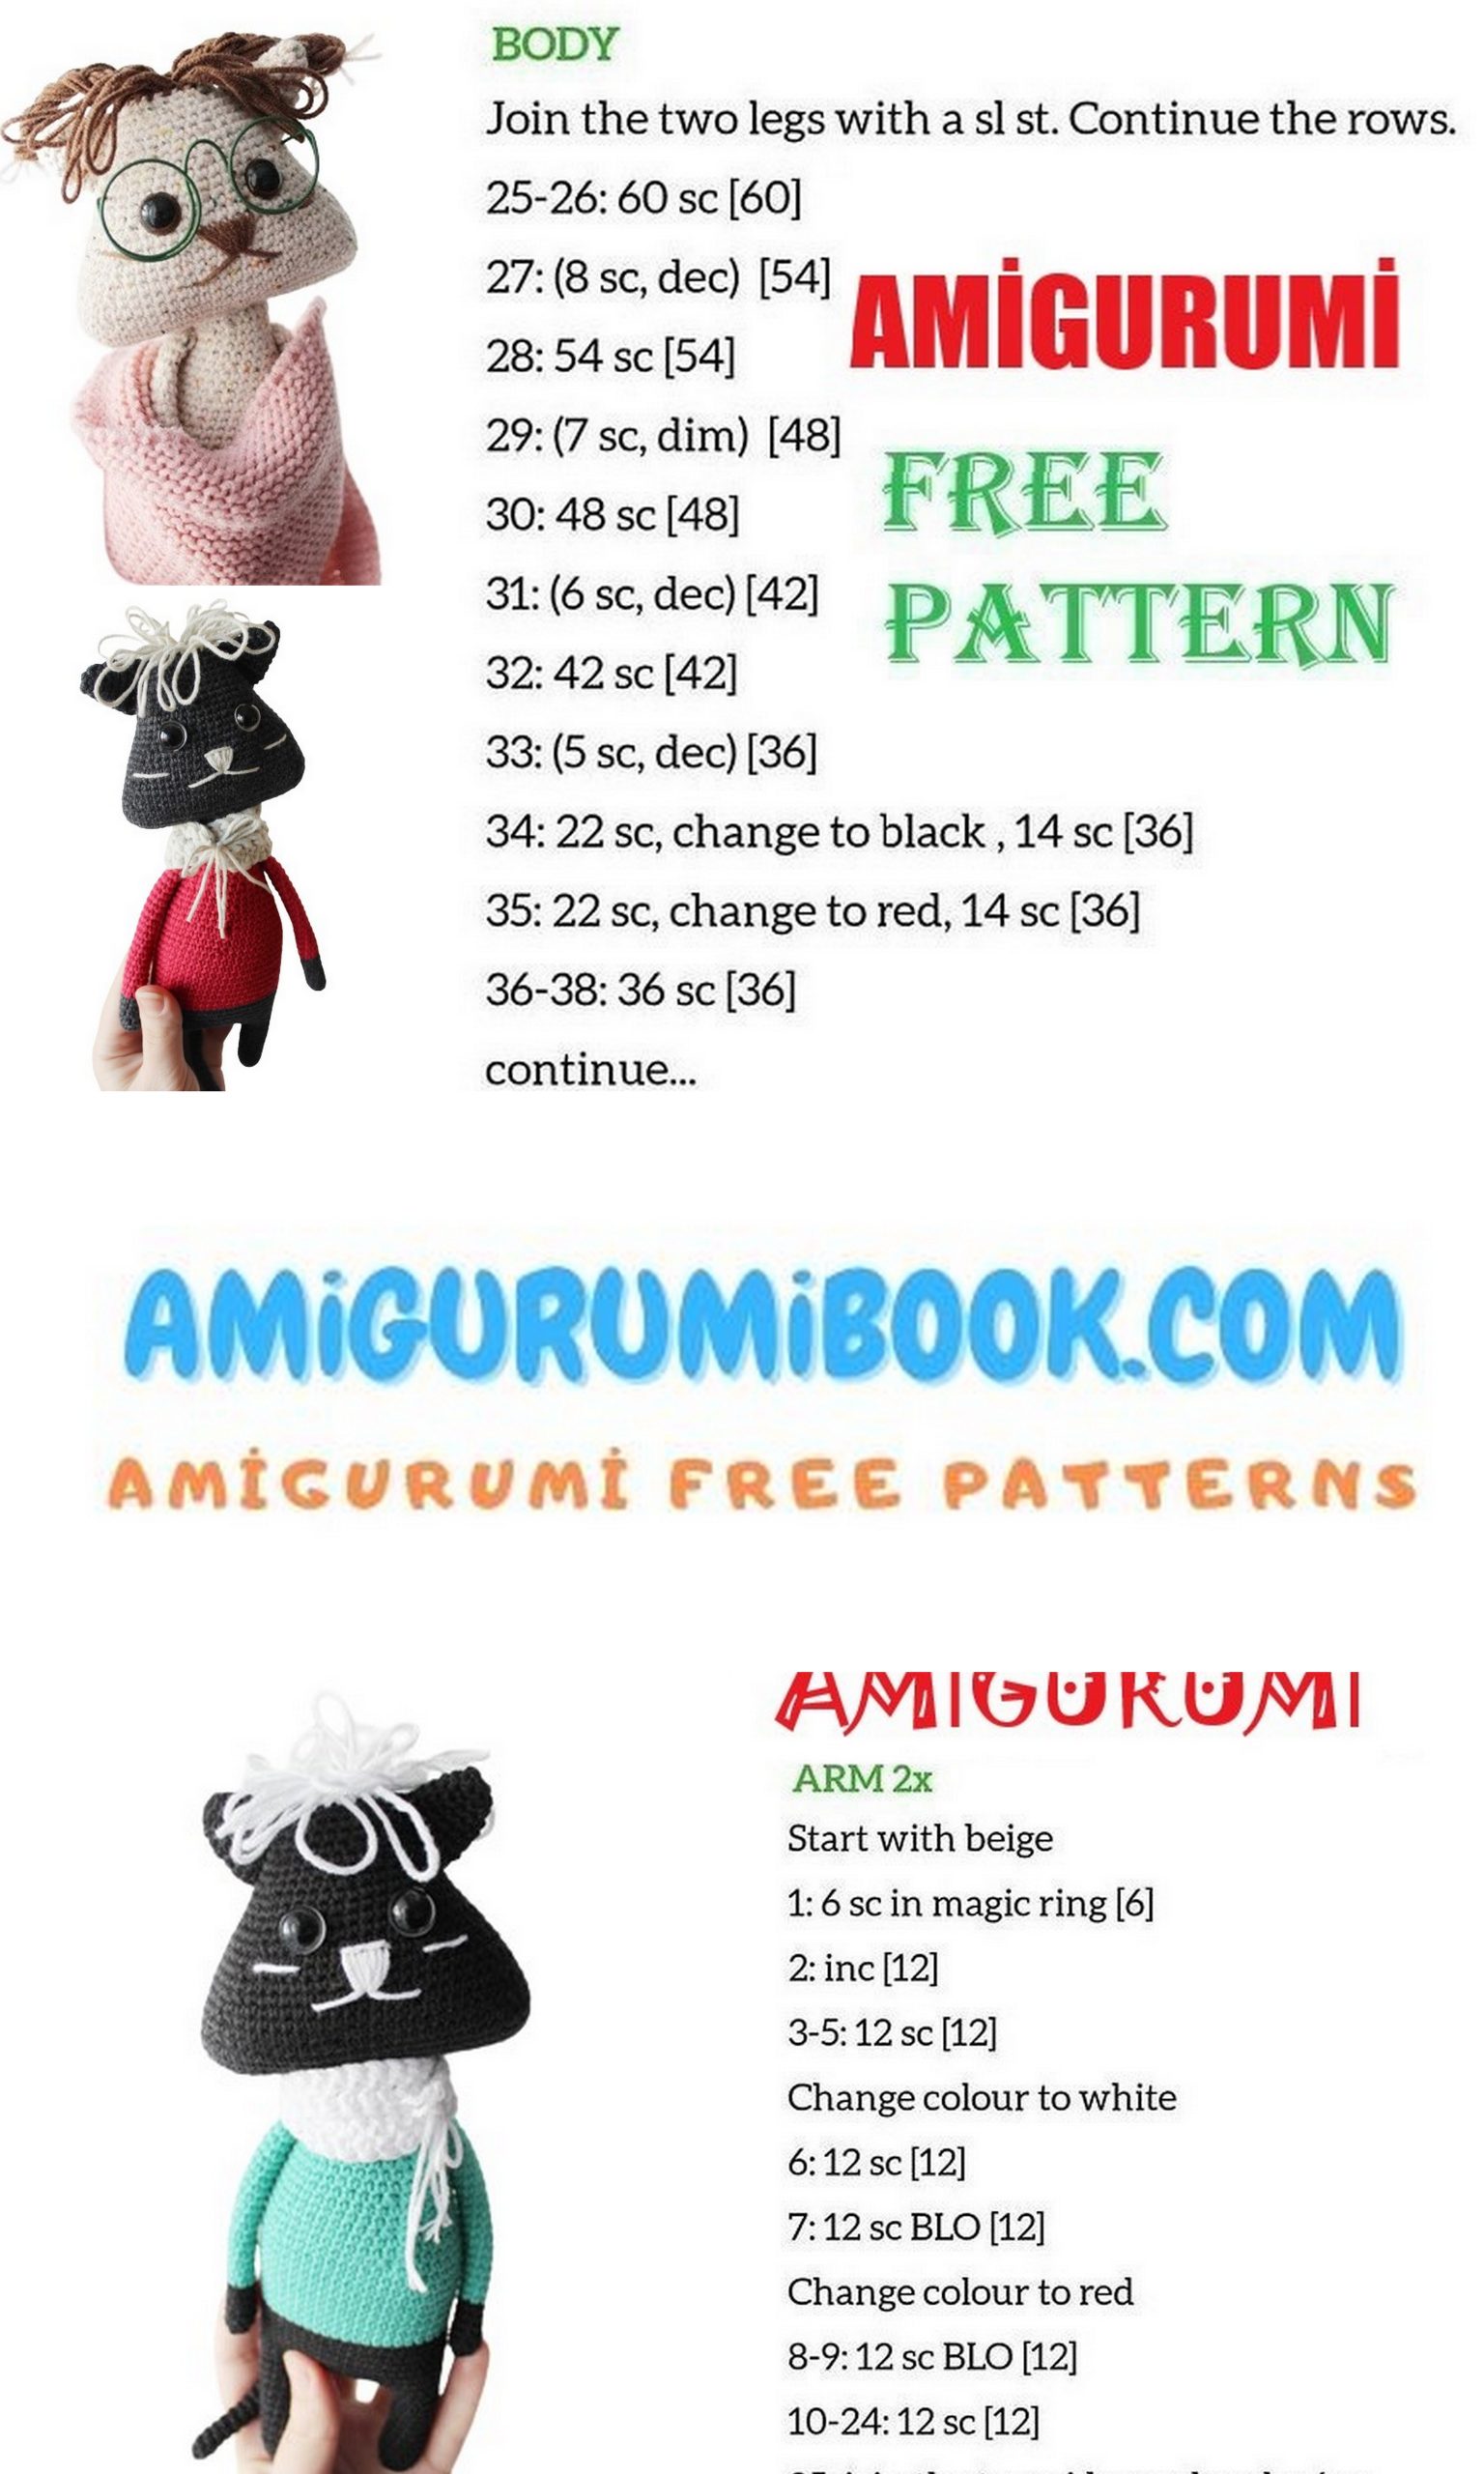
🐈 Body + Sweater
Change color (sweater)
11–19: 50 sc
20: (8 sc, dec) * 5 (45)
21–22: 45 sc
23: (7 sc, dec) * 5 (40)
24–25: 40 sc
26: (6 sc, dec) * 5 (35)
27–28: 35 sc
29: (5 sc, dec) * 5 (30)
30–31: 30 sc
32: (4 sc, dec) * 5 (25)
33–34: 25 sc
🧵 Neck
Change back to black.
35: 25 sc (back loop only)
🐱 Upper Body / Shoulder Shape
Work from the middle back.
36: 12 sc, sl st, turn
37: 11 sc, sl st, turn
38: 25 sc in round
Stuff and fasten off (leave long tail for sewing head)
🐕 Tail
1: 6 sc in MR
2: 6 inc (12)
3–12: 12 sc
Attach to body during Row 9.
🐾 Arms (2 Pieces)
1: 9 sc in MR
2–6: 9 sc
Change to sweater color
7–26: 9 sc
Do not stuff. Fold and sew closed.
🧵 Assembly
- Sew head to body firmly (add stuffing to neck area)
- Attach arms between Rows 34–35
- Sew ears symmetrically near hair
Face Embroidery
- Embroider a small triangular nose
- Place it centered below the eyes
- Create mouth + mini whiskers using two threads
🧣 Scarf
Use 2 strands together + 4.0 mm hook.
Ch ~46
Work around chain:
- Start in 2nd ch
- At end: 2 sc in last stitch to turn
- Continue on other side
Fasten off leaving ends for tying.