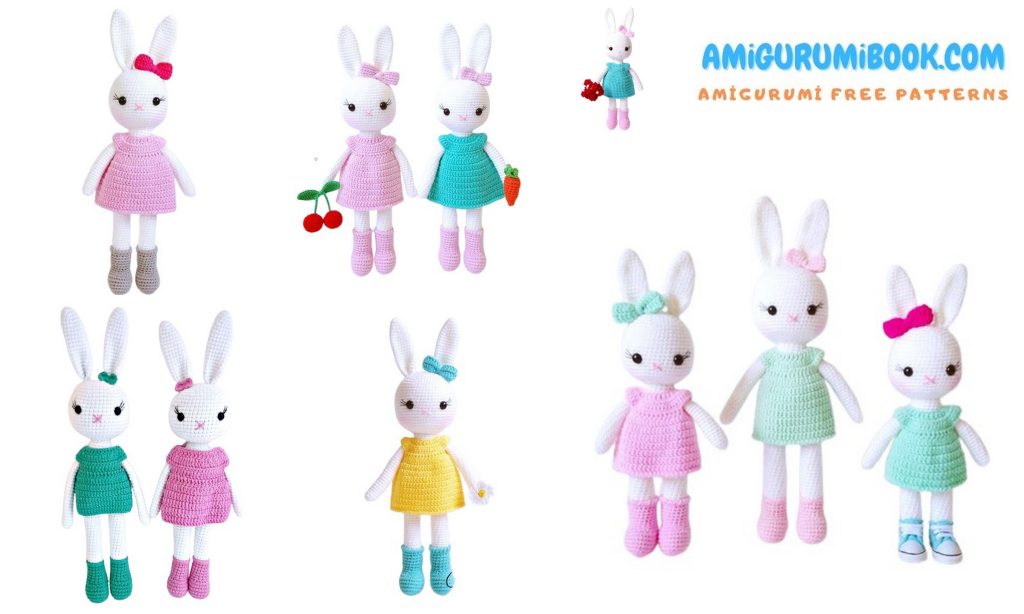
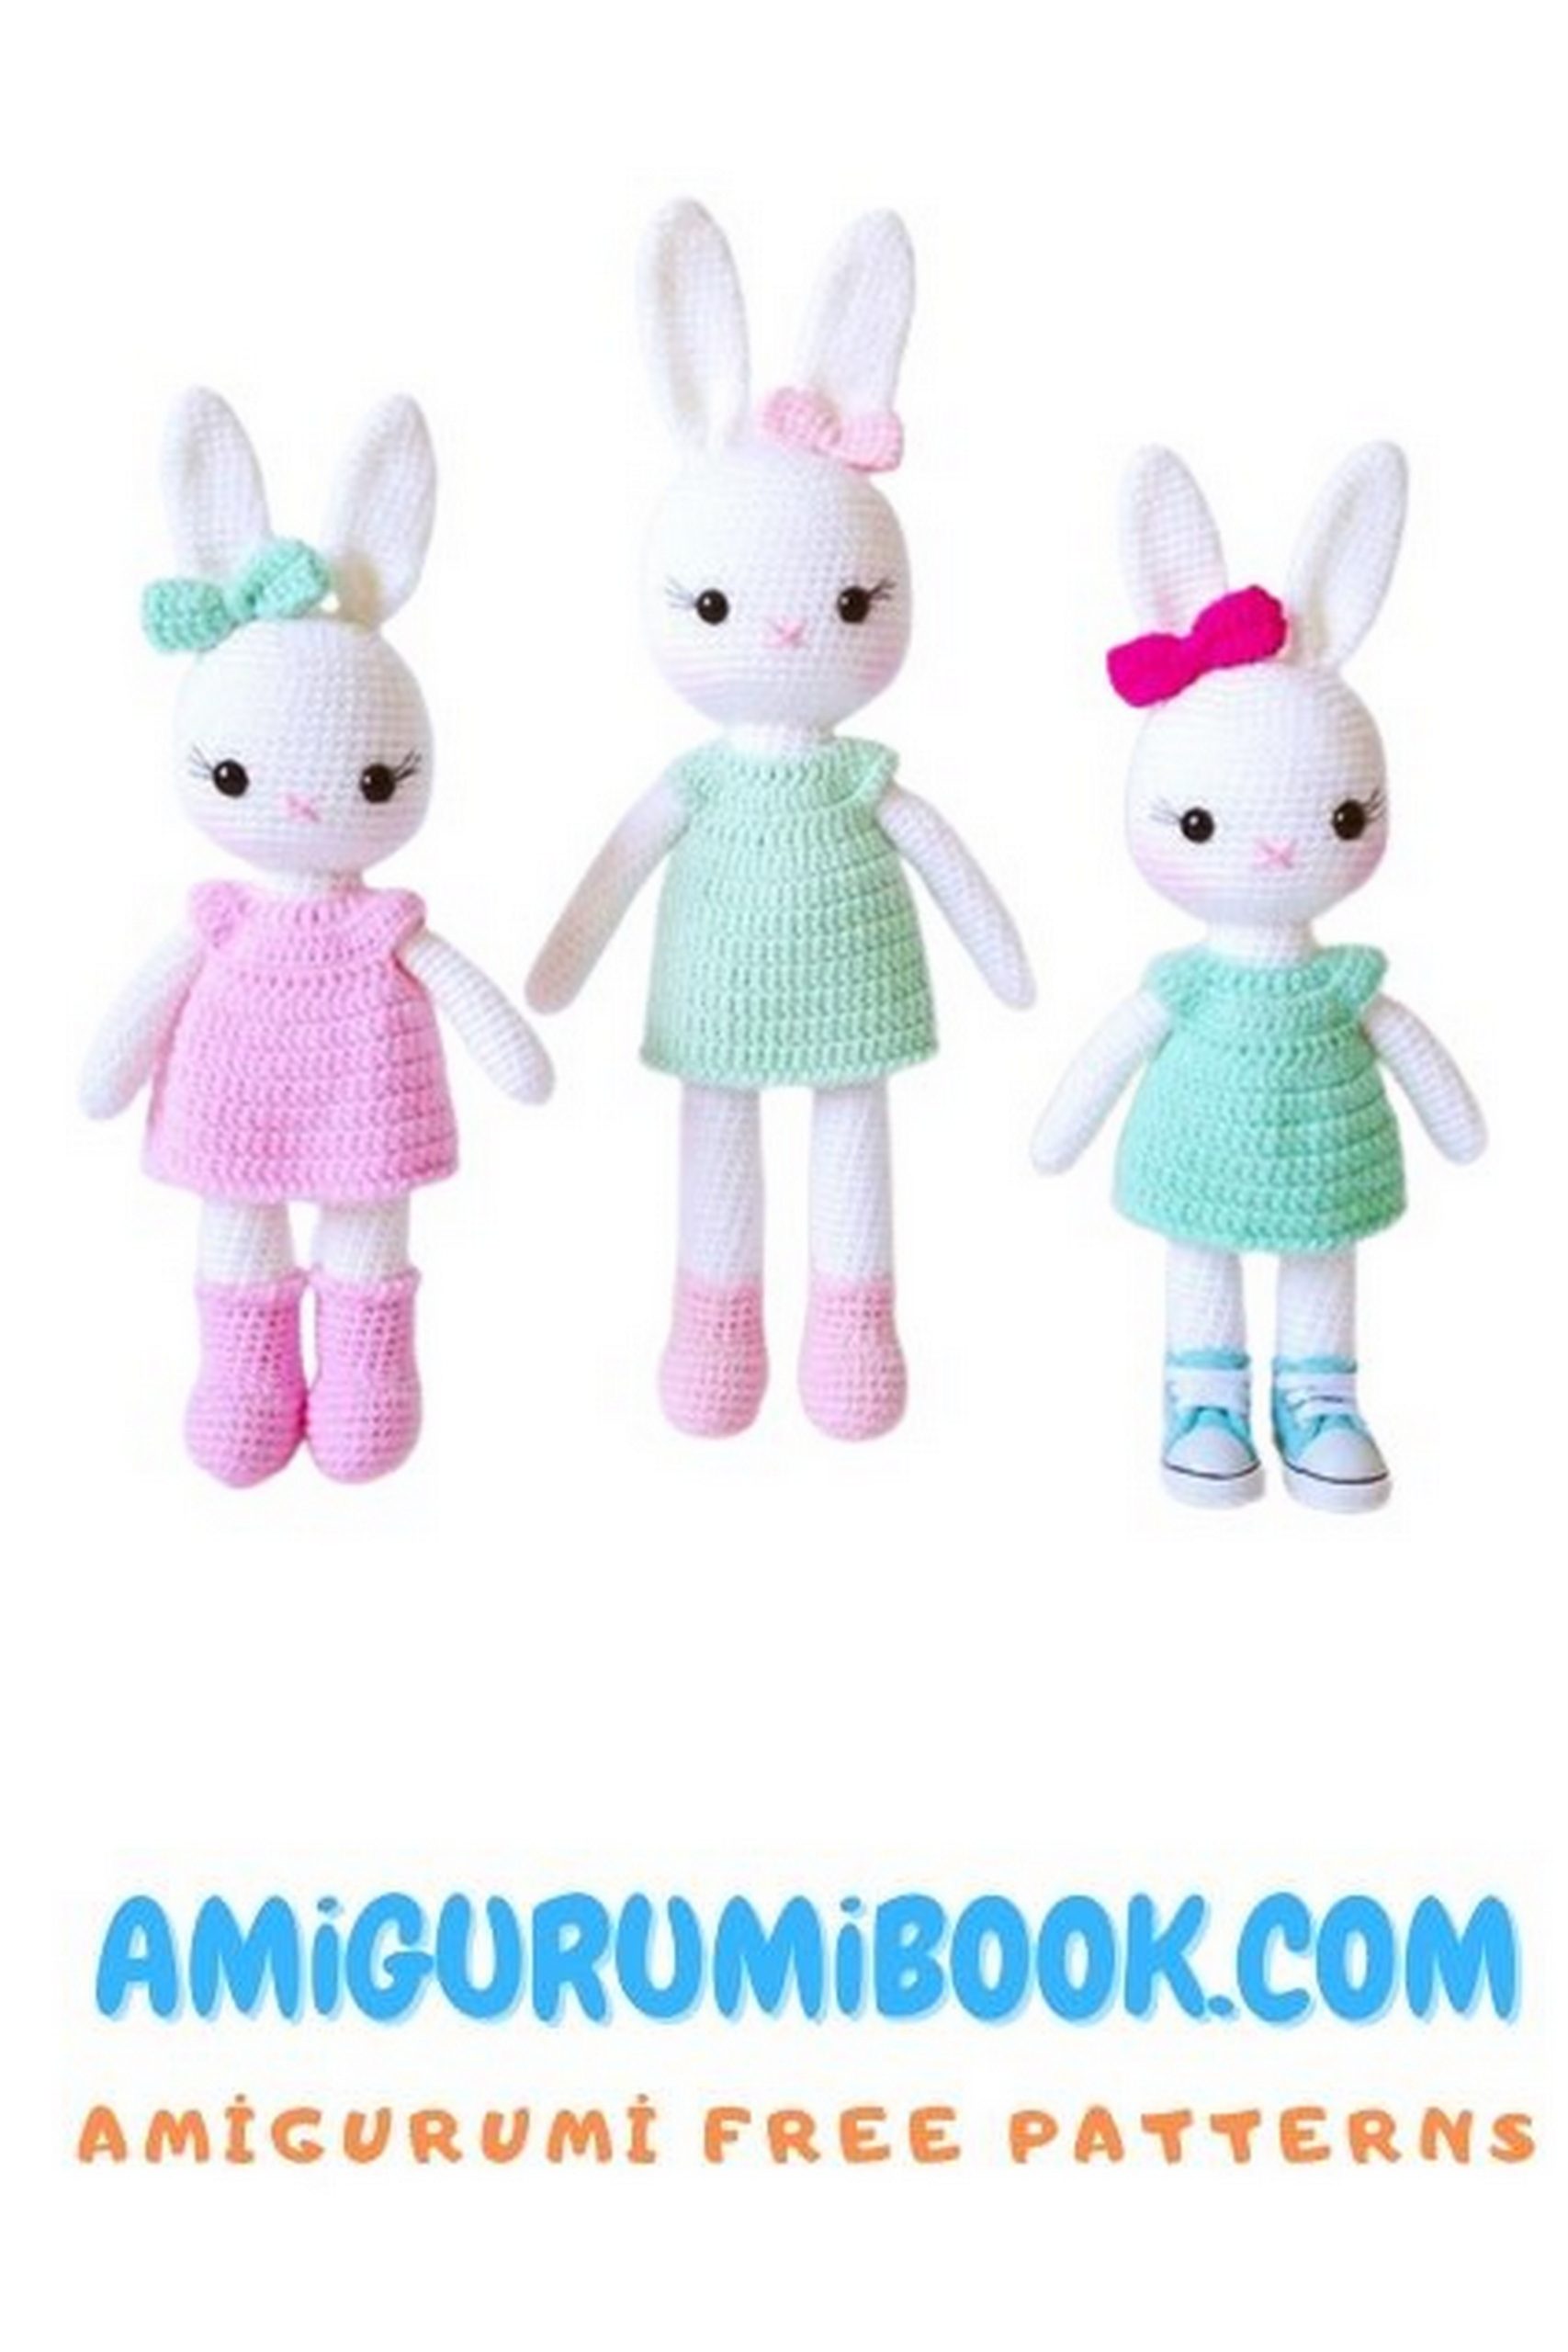
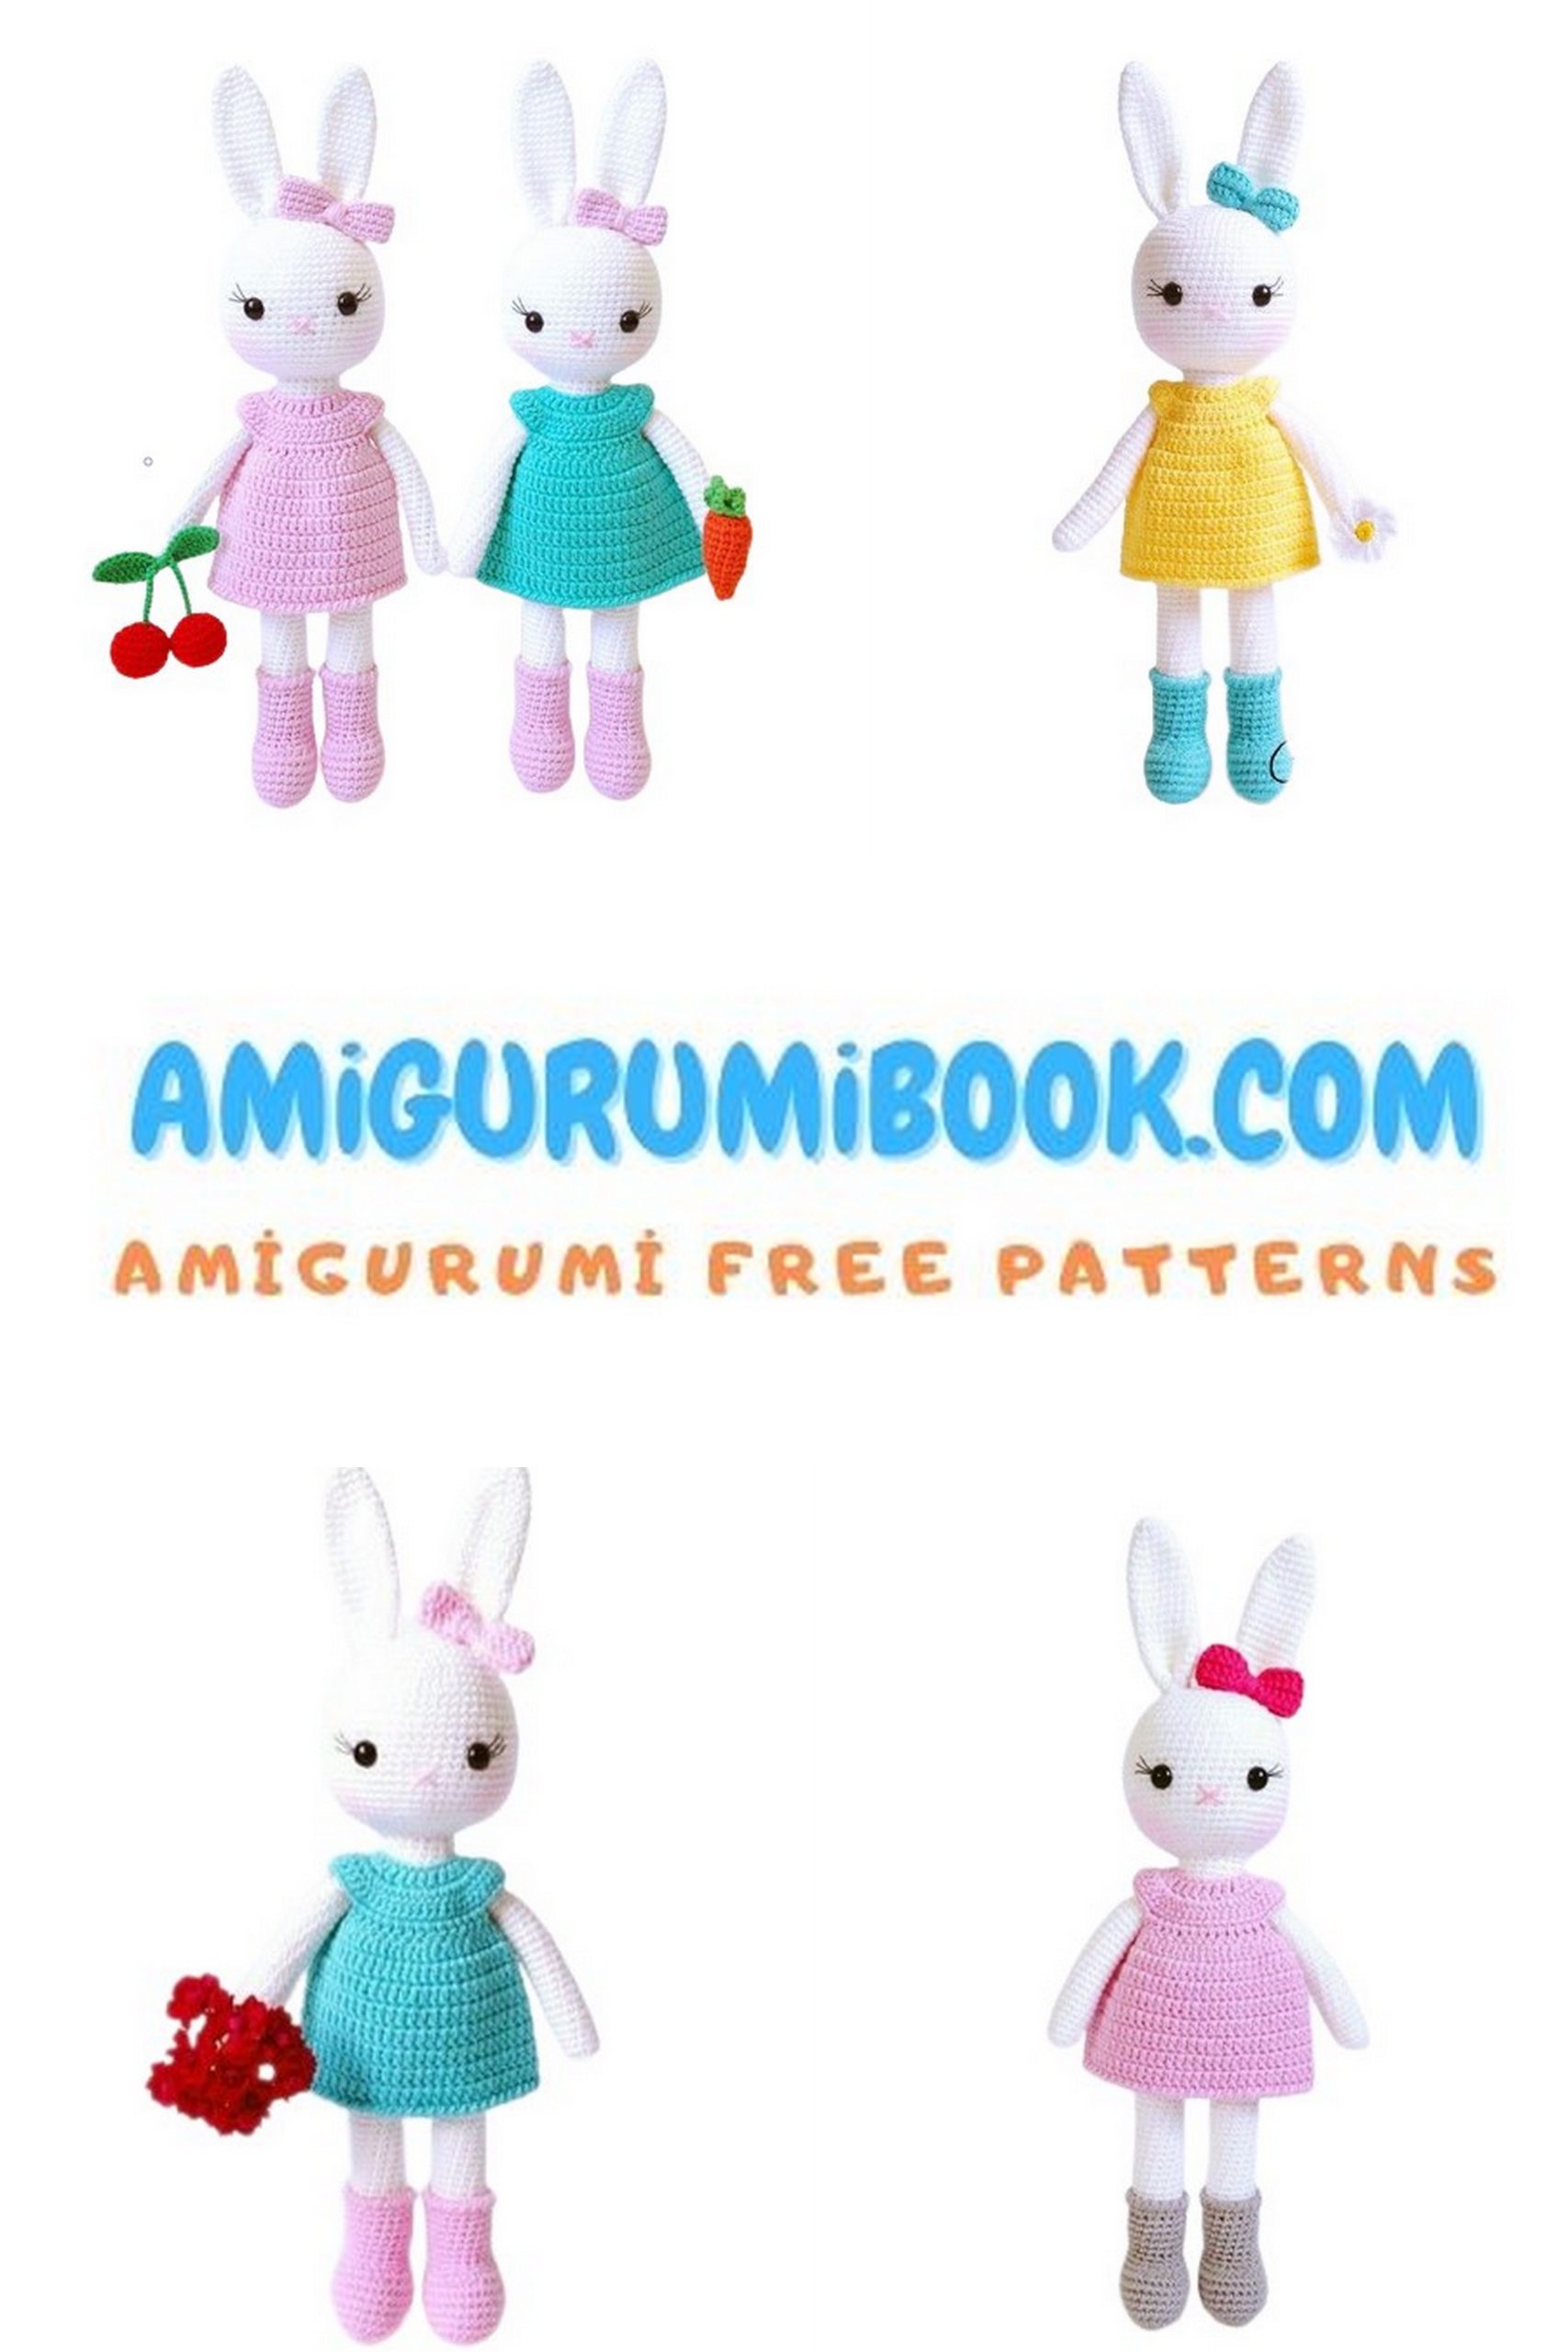
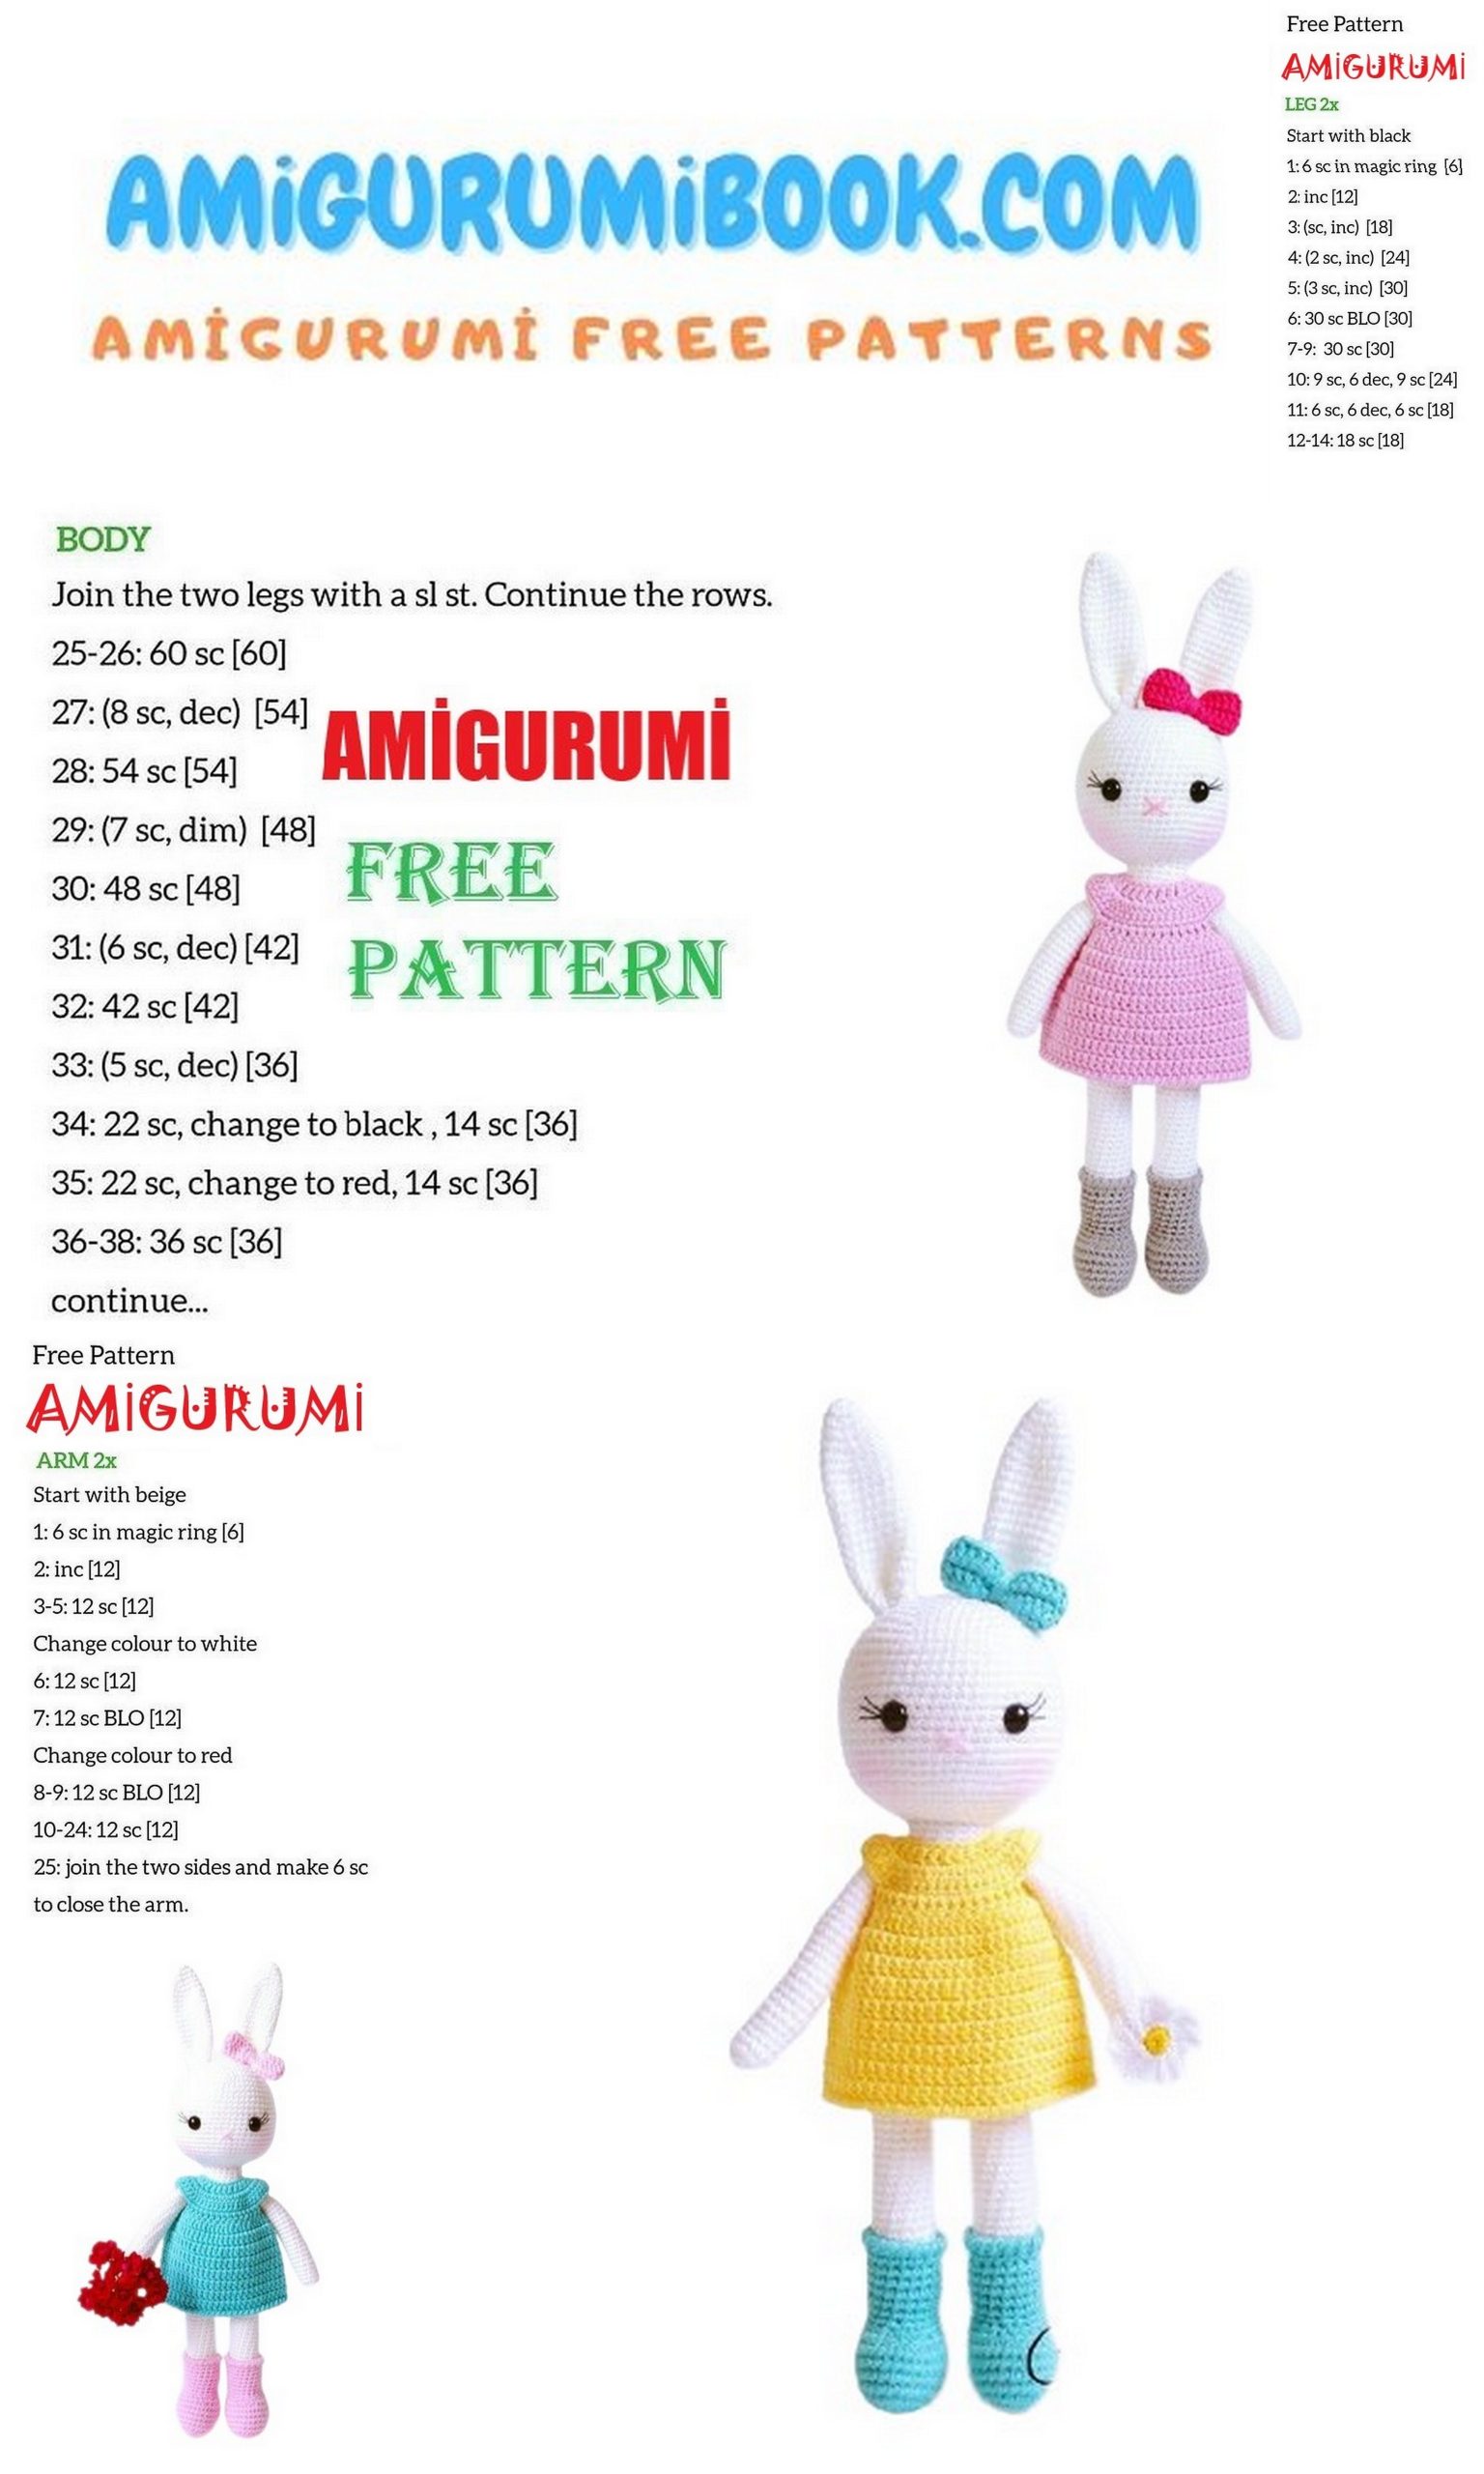
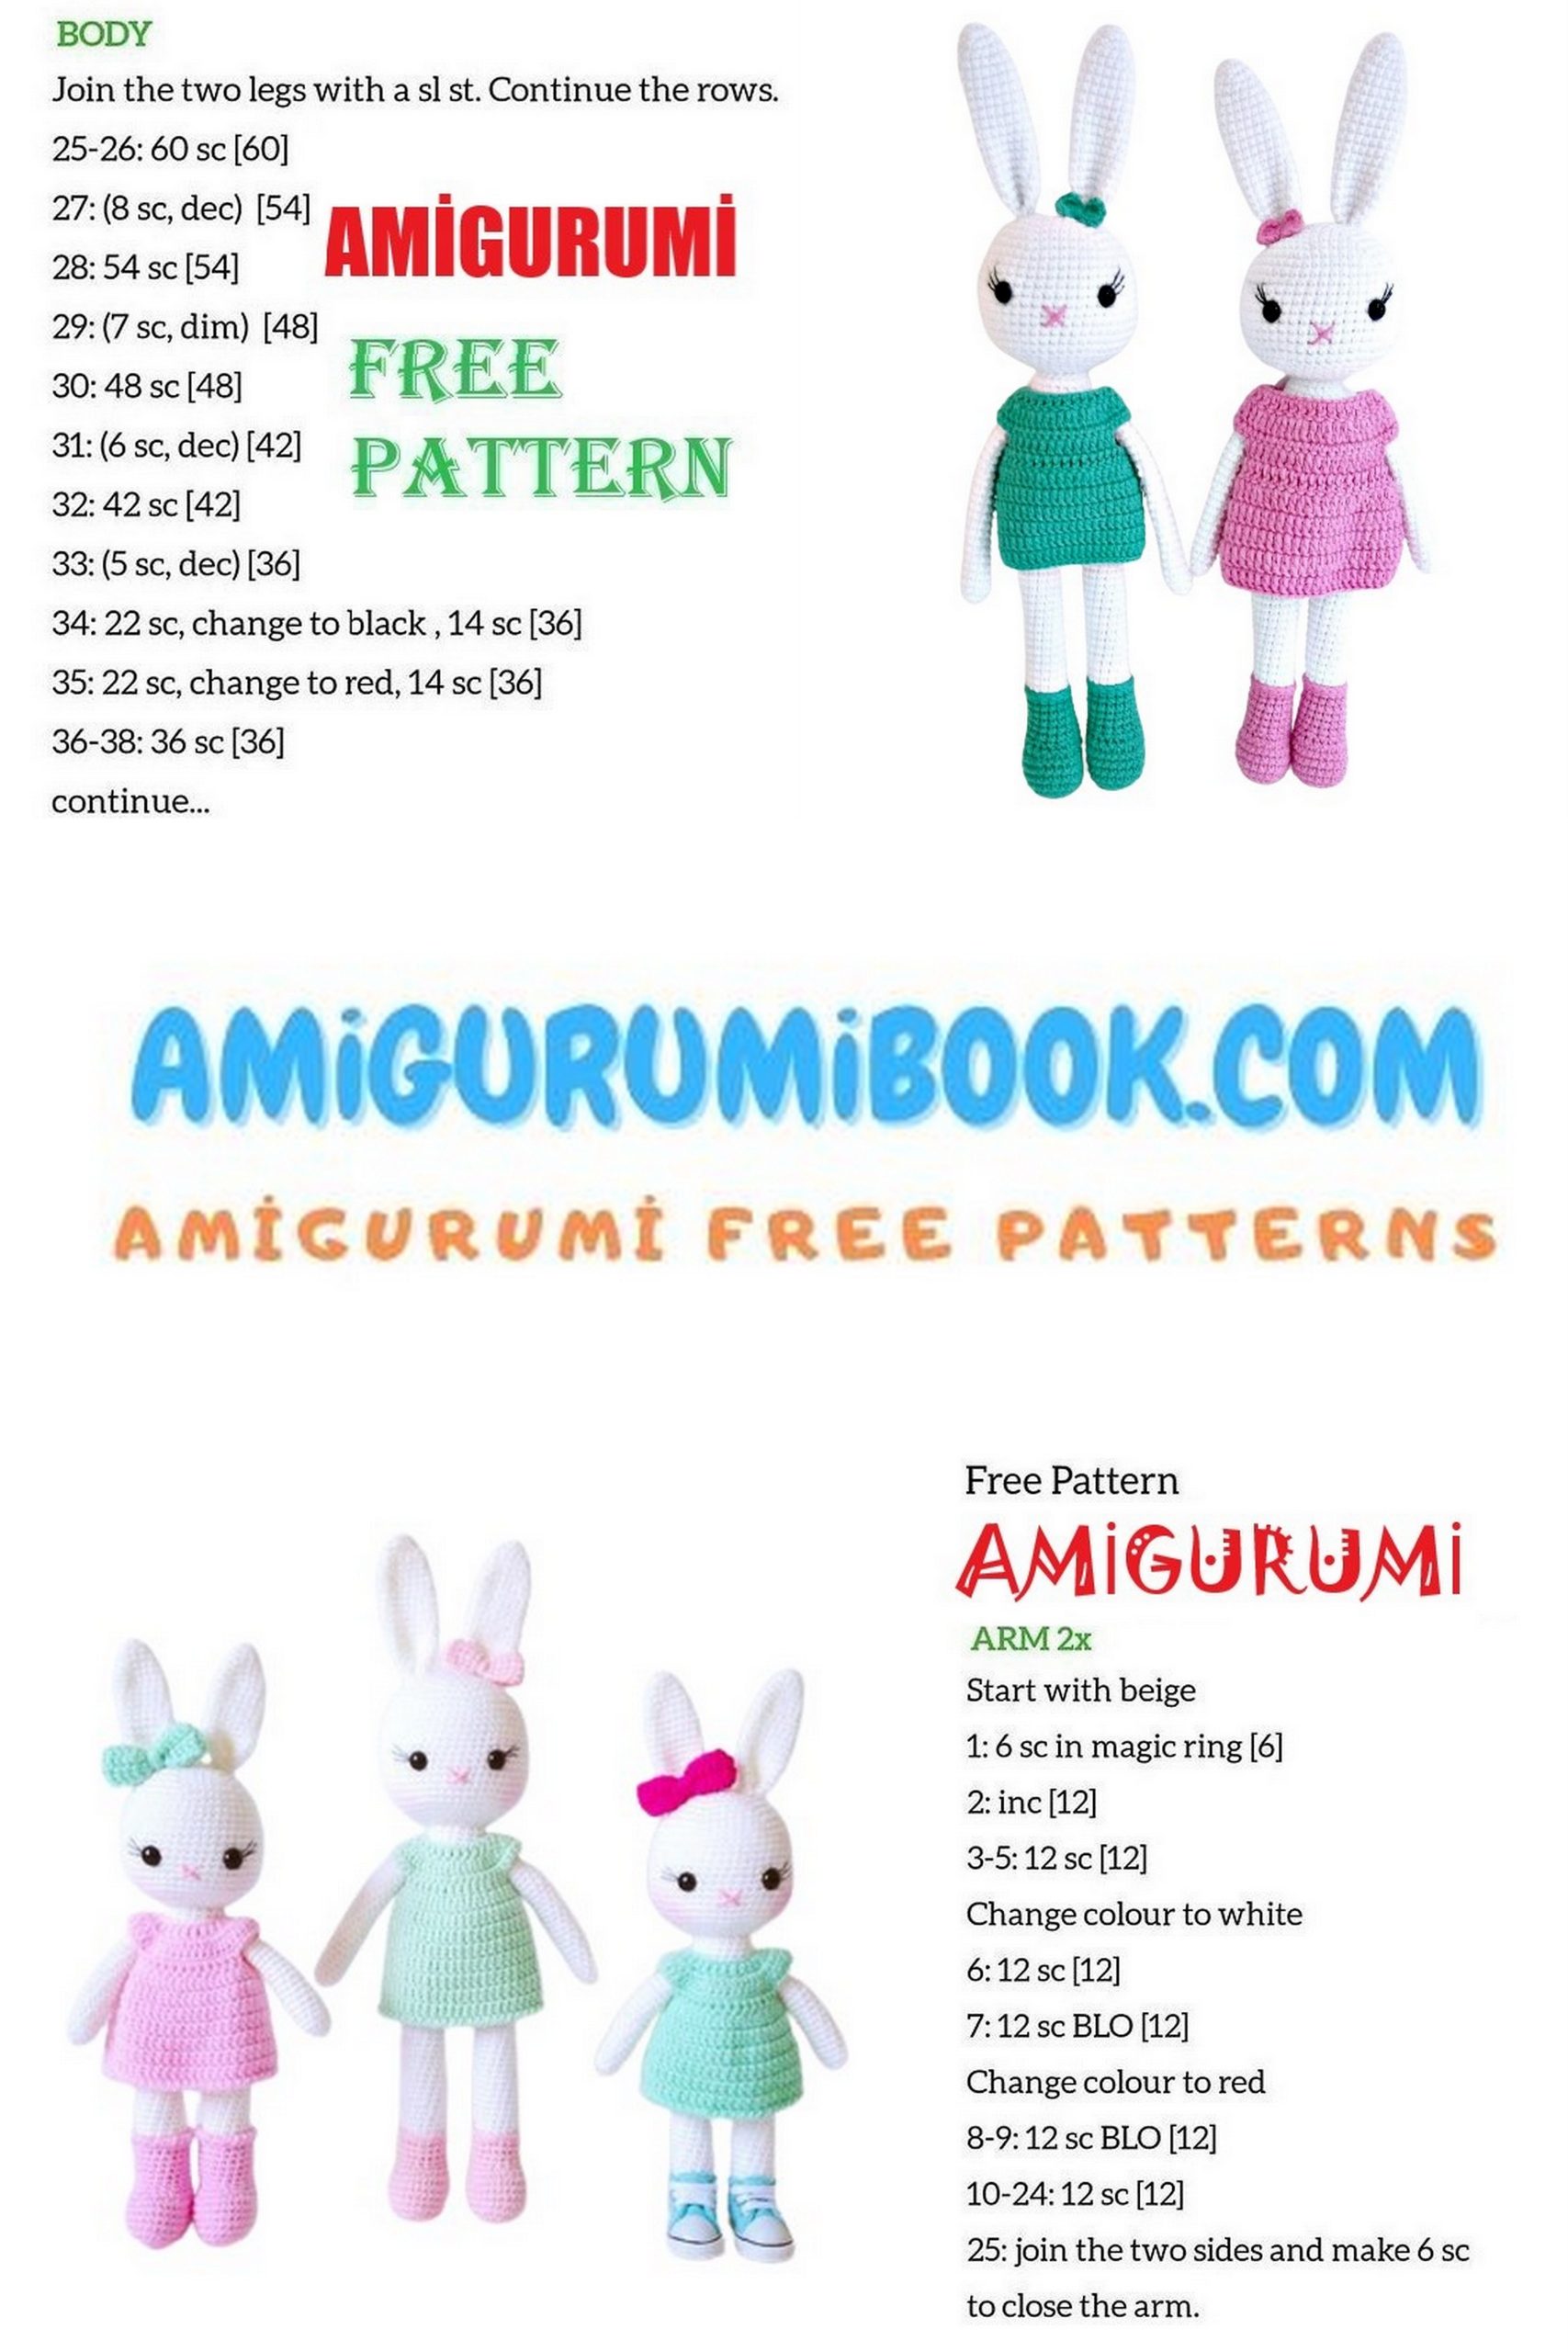
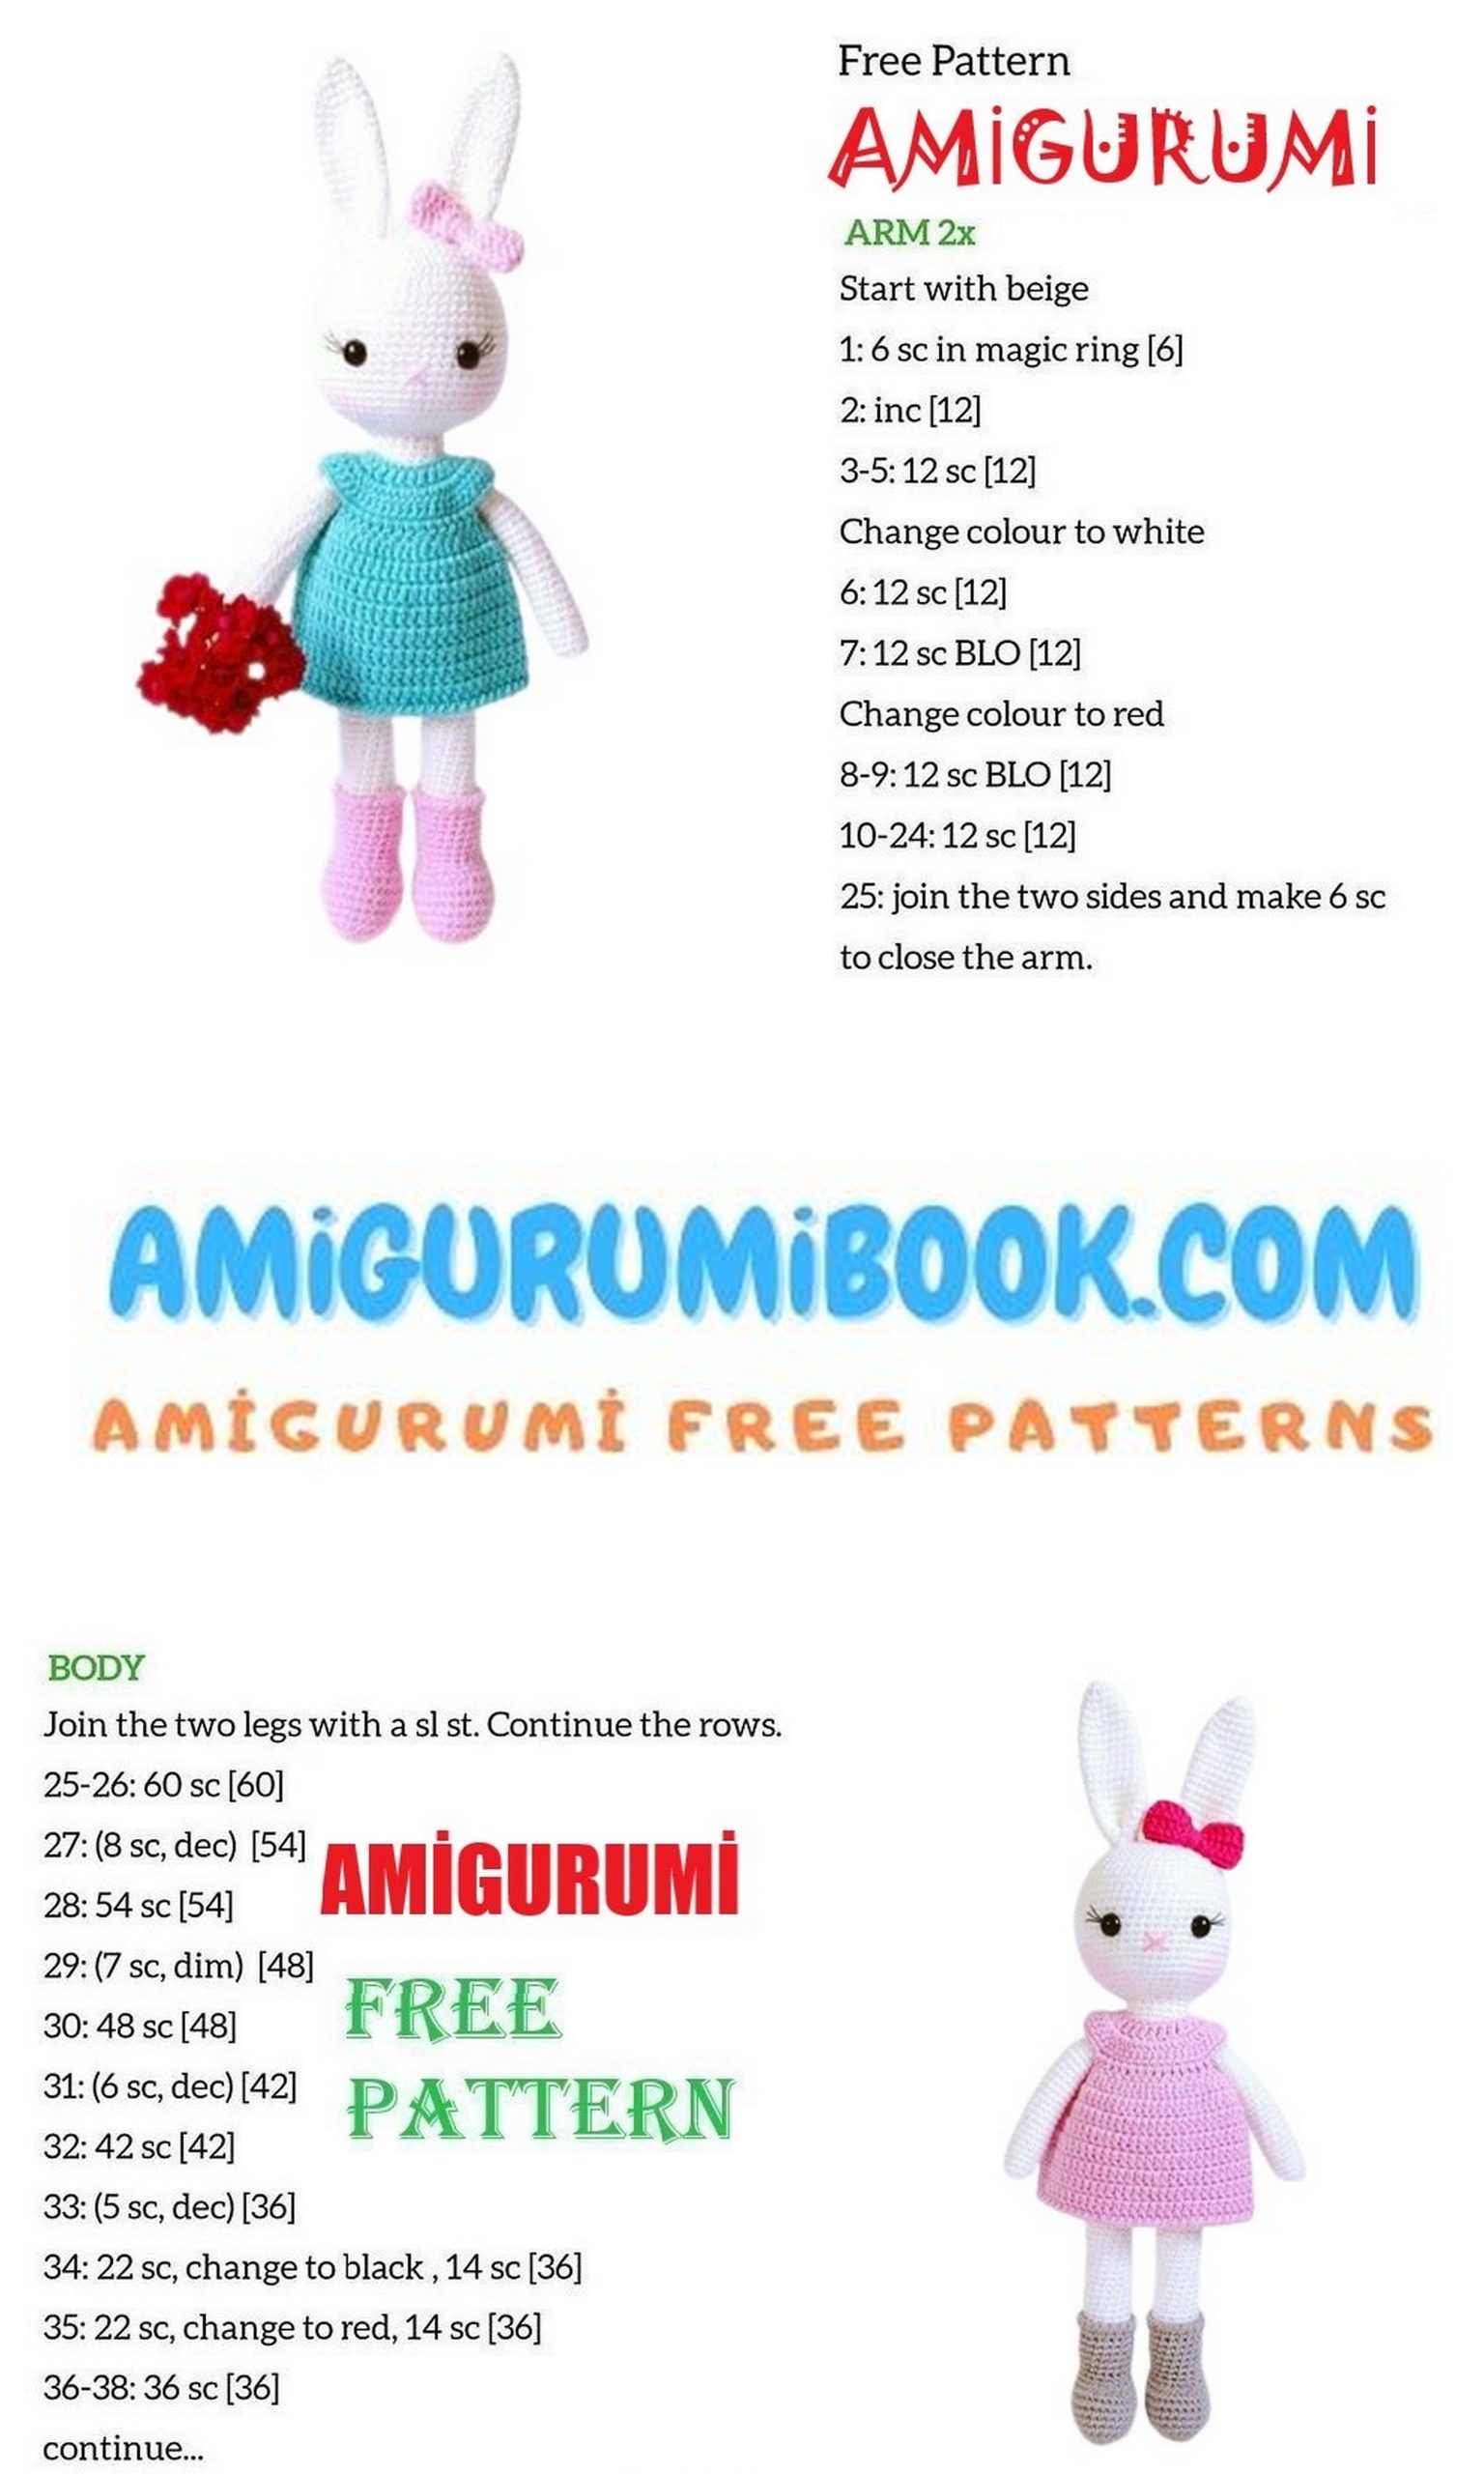
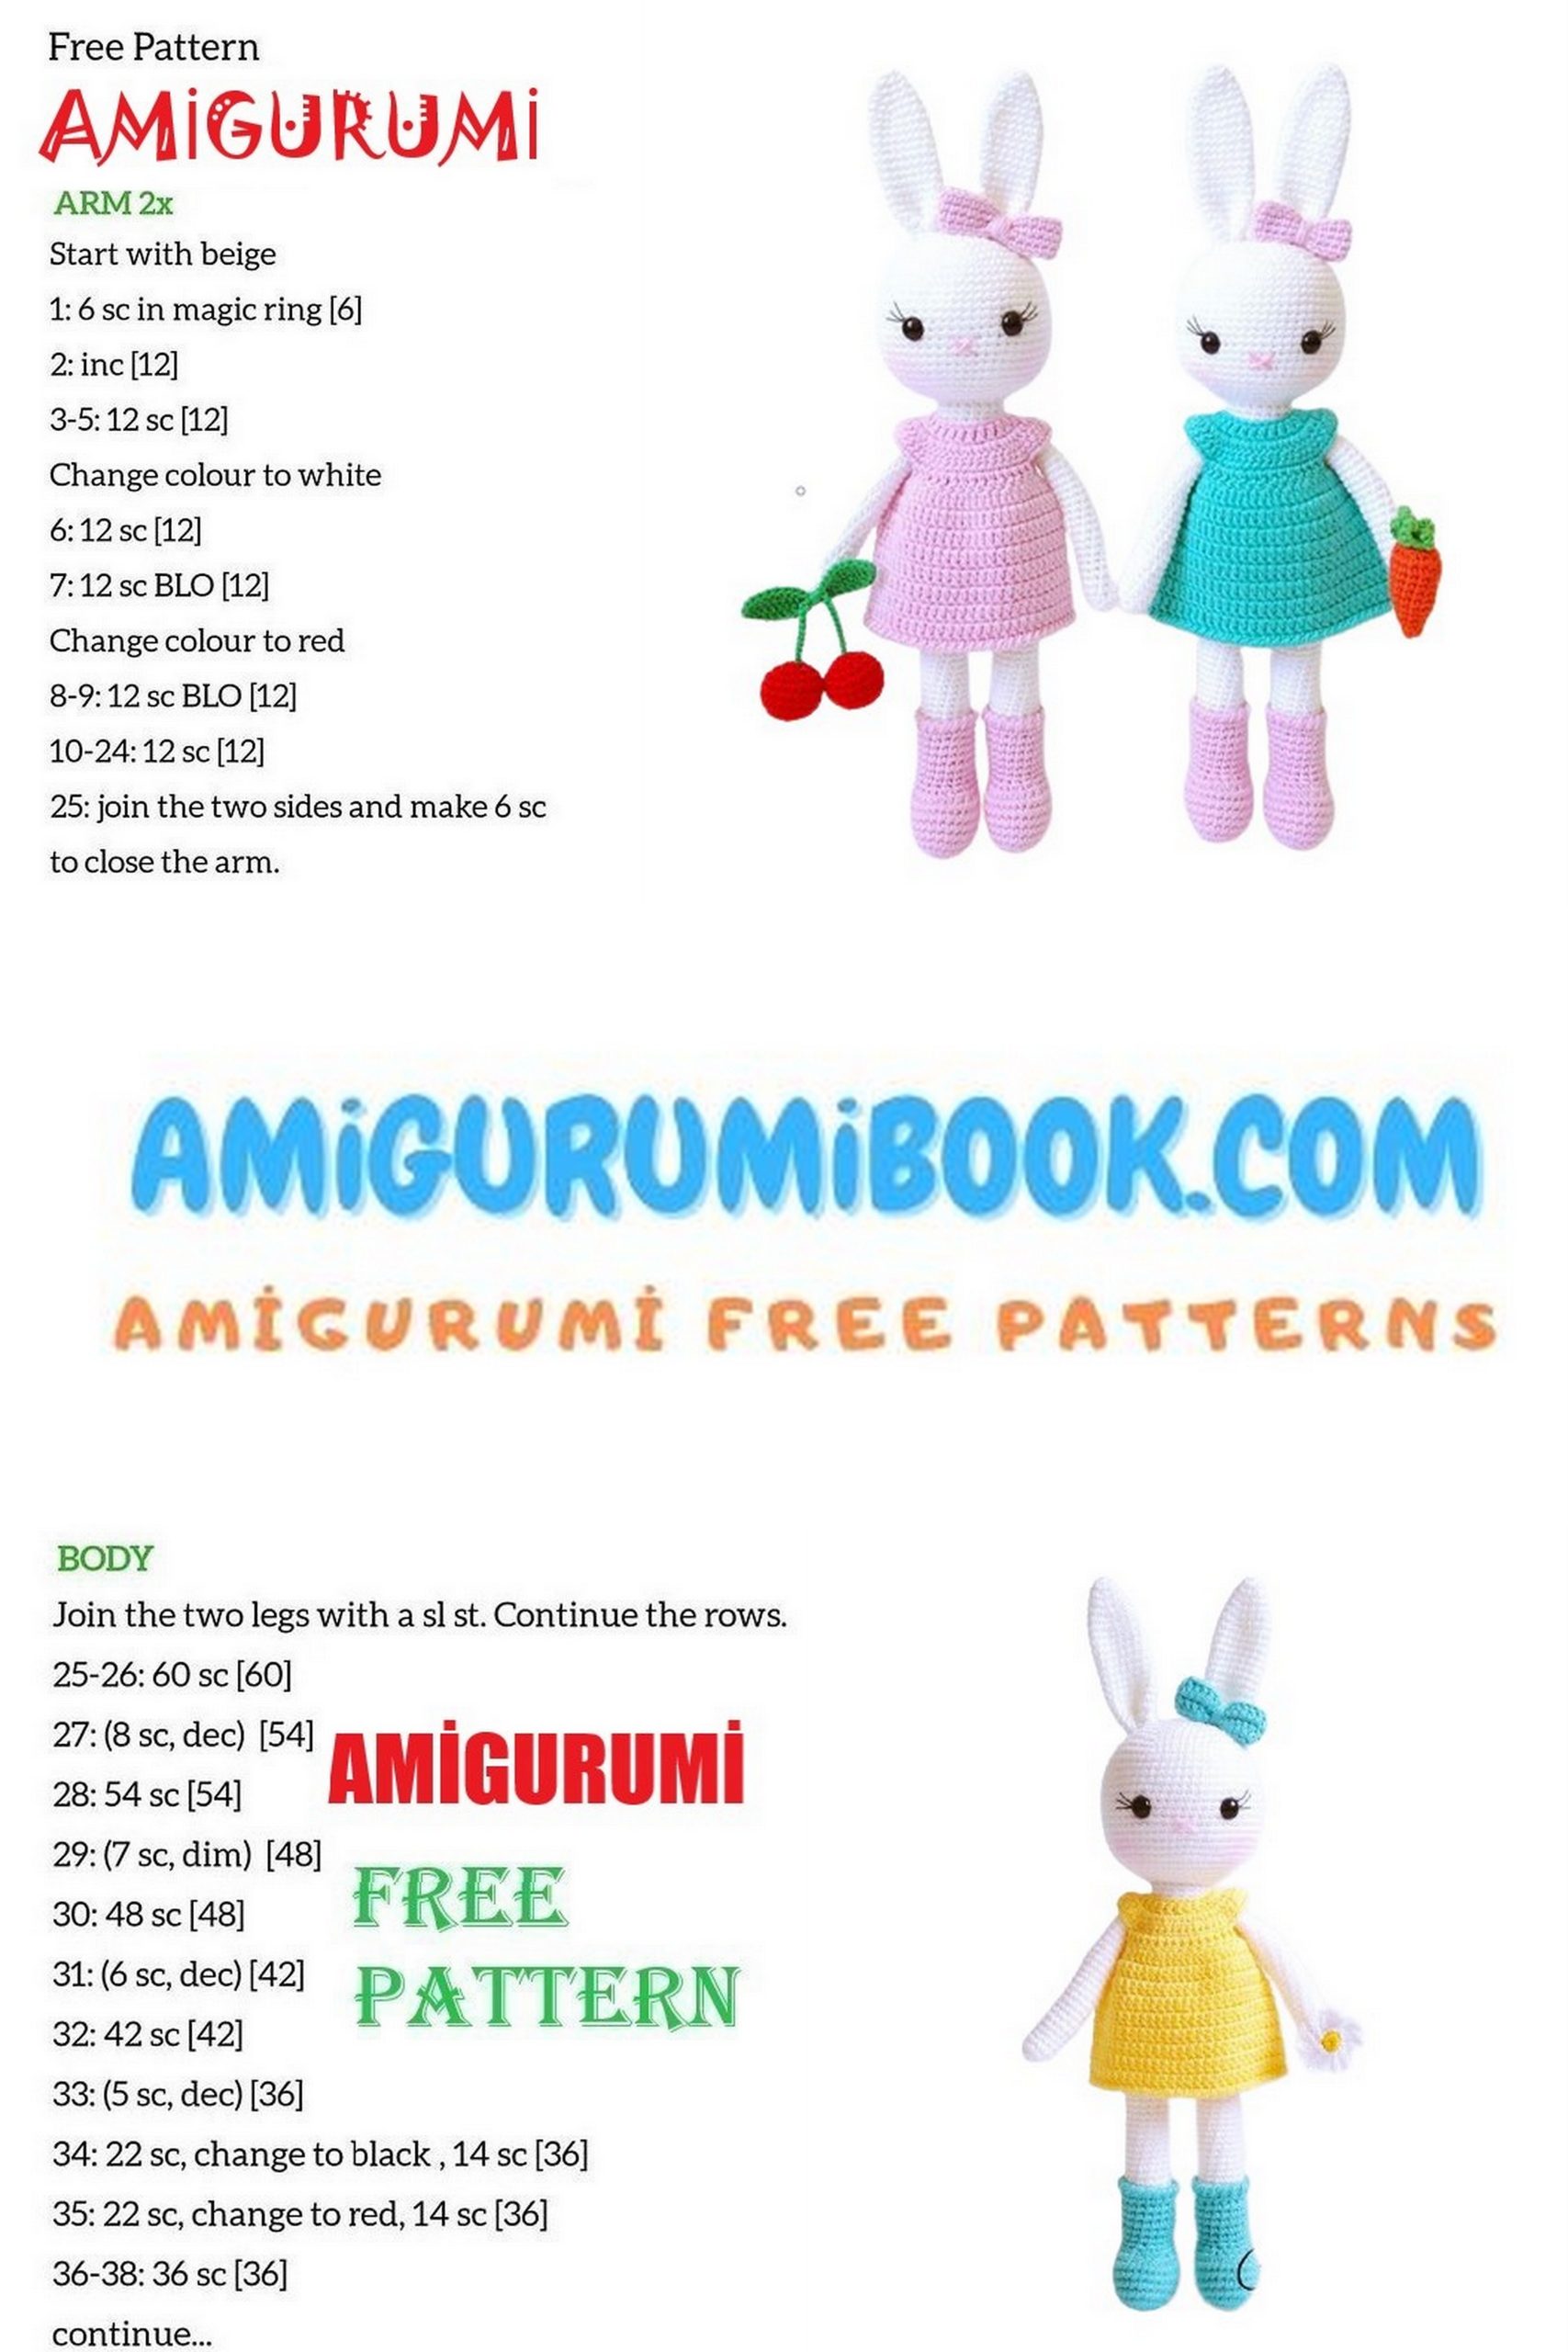
Crocheted Bunny Friends are charming and delightful amigurumi creations that bring warmth and joy to any space. This adorable free pattern offers an easy and fun way to craft your own cuddly bunny companions, perfect for gifts or decorating your home. free crochet patterns
You may also like more amigurumi patterns.
These amigurumi bunny friends are not just adorable; they’re also a wonderful project for crochet enthusiasts of all levels.
Whether you’re a seasoned crocheter or just beginning your journey into the world of amigurumi, you’ll find these patterns both fun and rewarding. From crafting the bunny’s fluffy head to fashioning its tiny outfits and accessories, we’ll guide you through each step, ensuring your crocheted creations turn out as charming as can be.
So, grab your crochet hook, choose your favorite yarn, and let’s embark on a creative journey to bring these lovable free amigurumi bunny pattern to life. Whether you’re making them as gifts or simply as companions for your own cozy corner, these crocheted bunnies are sure to steal your heart and spark your creativity. Let’s get started!
For the bunny, you will need:
White yarn (preferably YarnArt Jeans or Alize Cotton Gold)
Polyester stuffing
8 mm safety eyes
Yarn for the dress and boots (use acrylic for the dress and something sturdier for the boots to maintain their shape)
Cotton thread for embroidering delicate eyelashes
2.5 mm crochet hook
Yarn needle
Scissors
Stitch marker (optional)
The bunny stands approximately 30-32 cm tall when using the specified yarn.
Abbreviations:
Magic Ring — Amigurumi Magic Ring
SC — Single Crochet
INC — Increase
DEC — Decrease
CH — Chain
HDC — Half Double Crochet
DC — Double Crochet
SL ST — Slip Stitch
PATTERN:
Head
Row 1: 6 SC in the magic ring.
Row 2: INC in each stitch around. (12)
Row 3: (1 SC, INC) repeat around. (18)
Row 4: 1 SC, INC, (2 SC, INC) repeat 5 times, 1 SC. (24)
Row 5: (3 SC, INC) repeat around. (30)
Row 6: 2 SC, INC, (4 SC, INC) repeat 5 times, 2 SC. (36)
Row 7: (5 SC, INC) repeat around. (42)
Row 8: 3 SC, INC, (6 SC, INC) repeat 5 times, 3 SC. (48)
Rows 9 to 21: 48 SC
Row 22: (6 SC, DEC) repeat 6 times. (42)
Row 23: (5 SC, DEC) repeat 6 times. (36)
Row 24: (4 SC, DEC) repeat 6 times. (30)
Row 25: (3 SC, DEC) repeat 6 times. (24)
Row 26: (4 SC, DEC) repeat 4 times. (20)
Leave a tail of 35-40 cm for sewing the head closed.
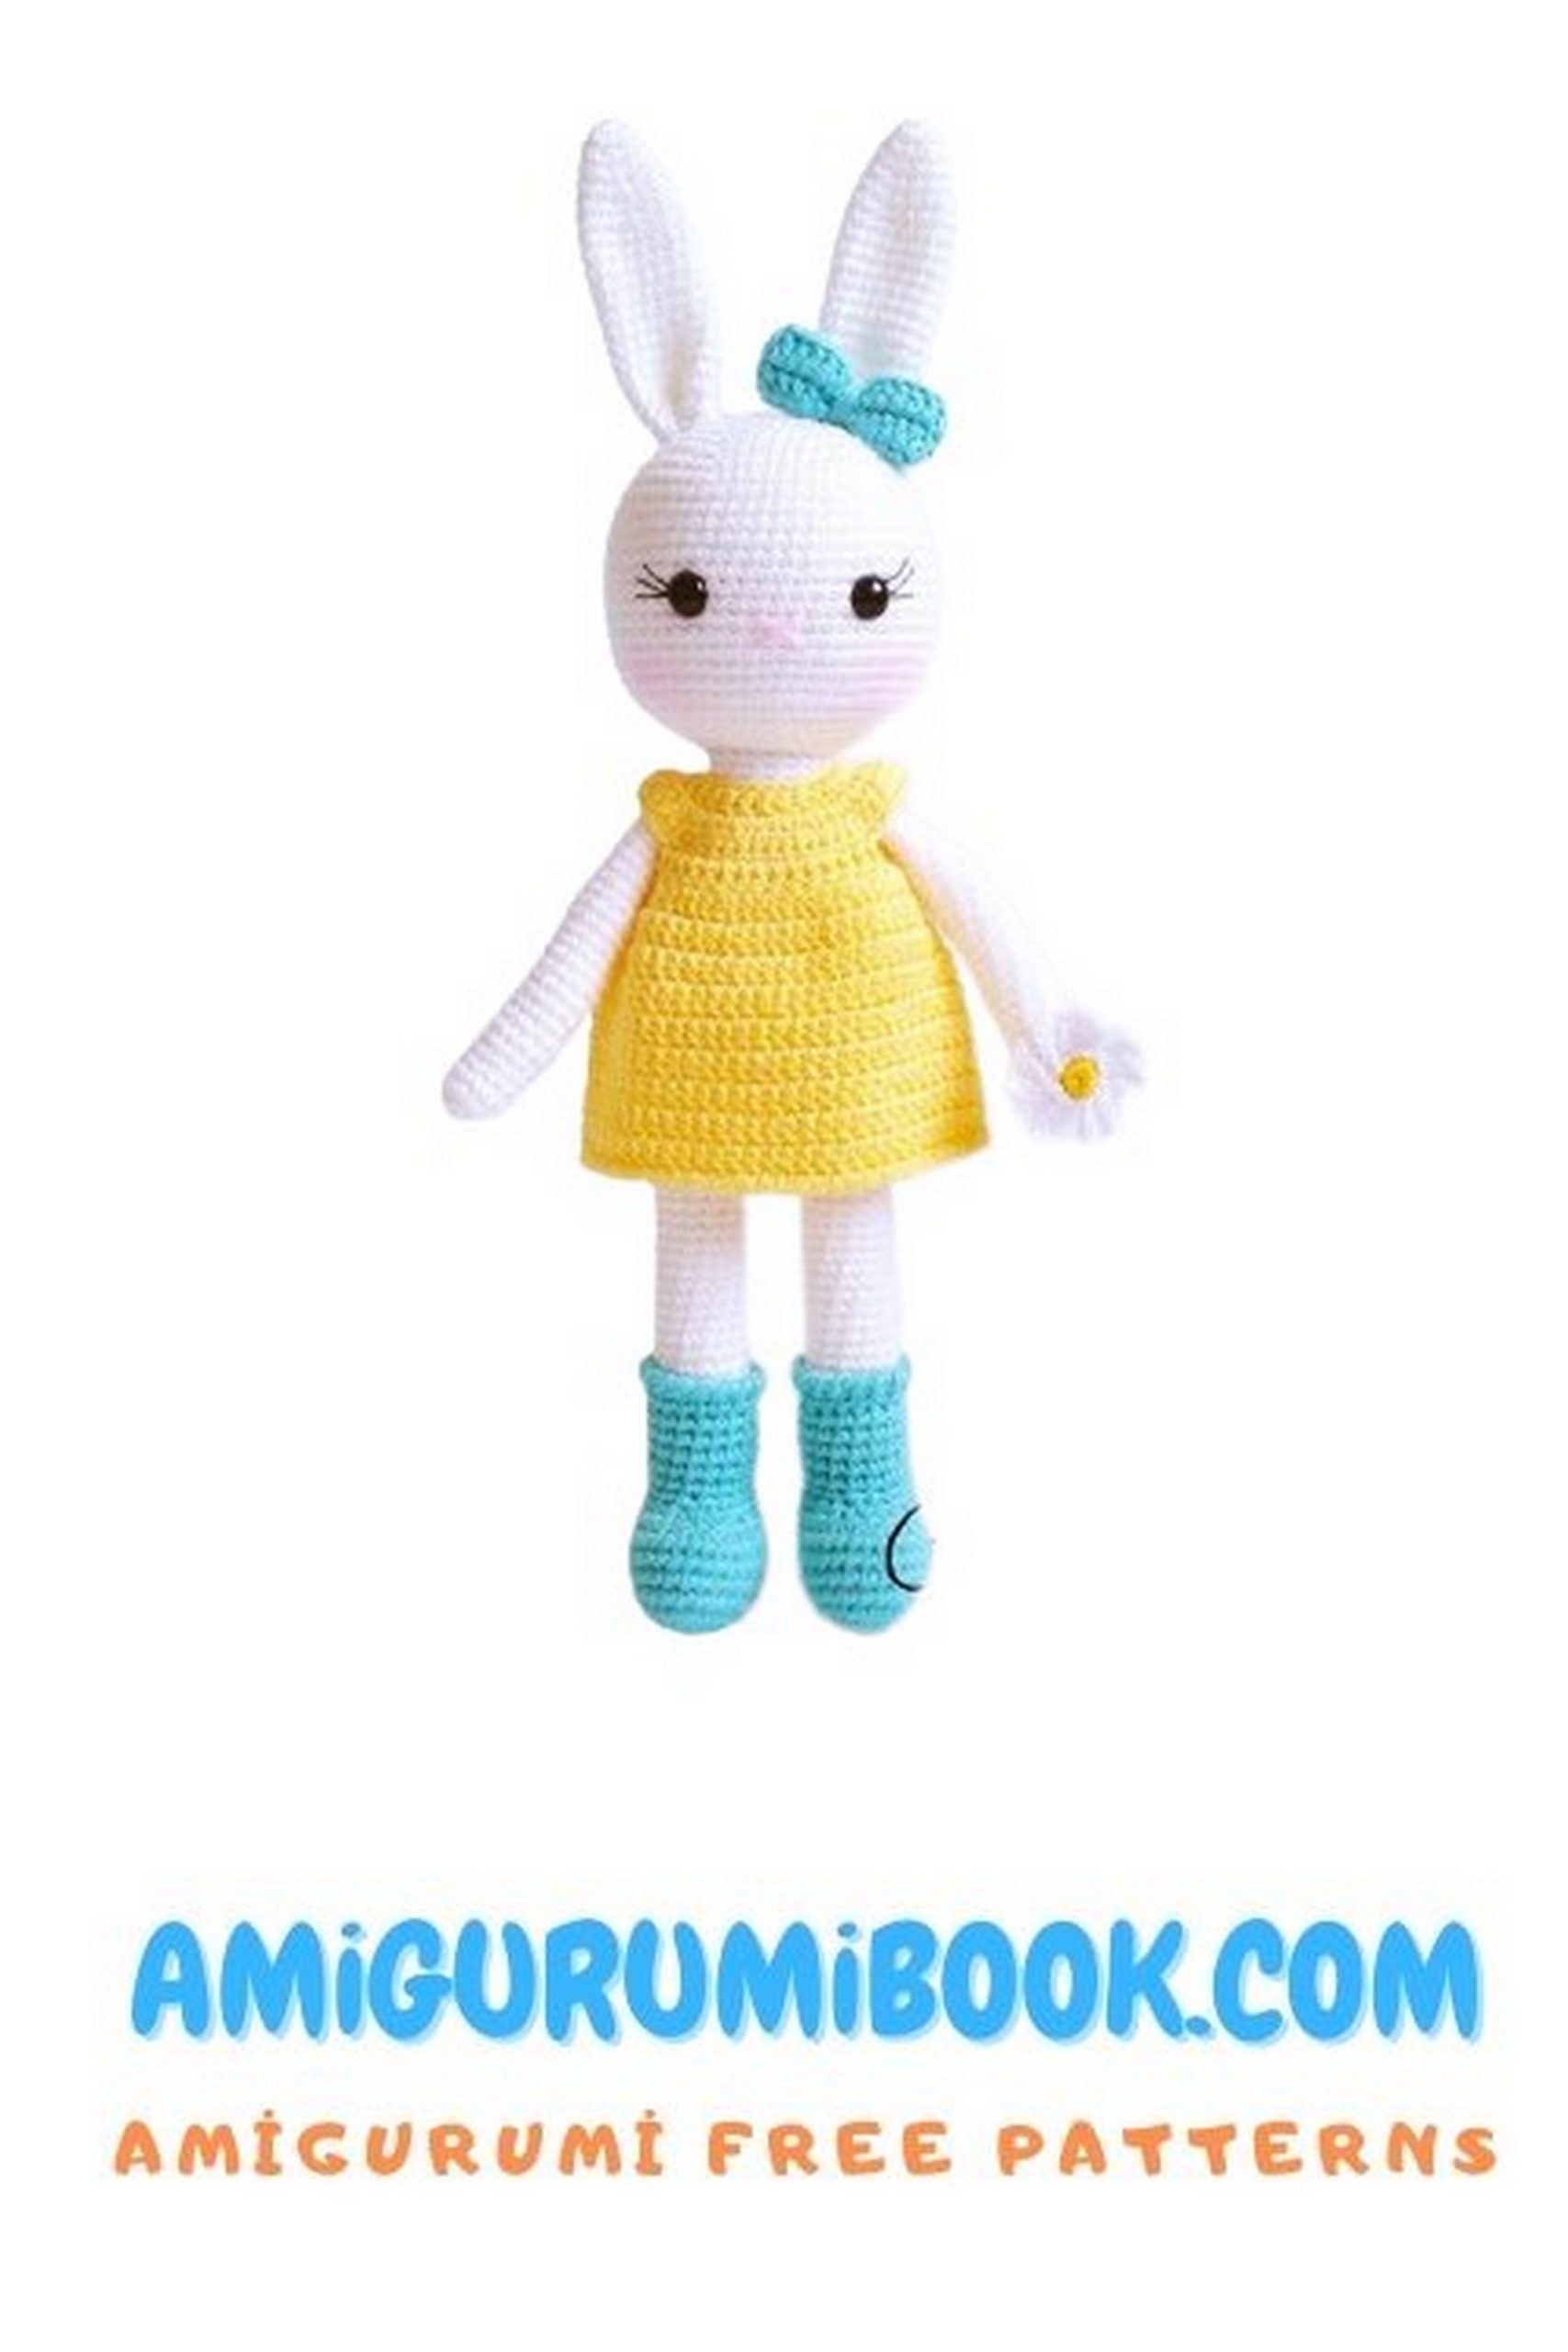
Note: If you plan to glue the eyes (rather than inserting them), it’s advisable to do so at the very end to avoid damaging them. The distance between the eyes is 7 SC. It’s recommended to first insert safety pins and then embroider 3 eyelashes for each eye. Afterward, lightly glue the eyes. I will use half-beads and Moment Gel glue.
Gently embroider a pink nose on the next row below the eyes.
Through trial and error, we’ve found that if you’re using YarnArt Jeans or Alize Cotton Gold yarn, you can crochet up to row 18-19 directly. The main thing is to form a round ball, as shown in the photo. This also depends on the tightness of your crochet work.


Ears (2 pieces)
Row 1: 6 SC in the magic ring.
Row 2: (1 SC, INC) repeat 3 times. (9)
Row 3: (2 SC, INC) repeat 3 times. (12)
Row 4: 12 SC
Row 5: (2 SC, INC) repeat 4 times. (16)
Rows 6 to 18: 16 SC
Row 19: (2 SC, DEC) repeat 4 times. (12)
Row 20: 12 SC
Leave a long tail for sewing the ears together and attaching them to the head. I usually sew them on around rows 3-4.
Bow for the Ear
Bow: Chain 18 + 1 chain for turning.
Row 1: SC in each chain. (18)
Row 2: SC in each stitch. (18)
Fasten off, wrap yarn around the center, and sew it onto the ear.
Arms (2 pieces)
Row 1: 5 SC in the magic ring.
Row 2: INC in each stitch around. (10)
Rows 3 to 25: 10 SC
Lightly stuff the arms to help them maintain their shape.
Boots + Legs (2 pieces)
Start by crocheting the boots.
Row 1: Chain 6. Starting from the second chain from the hook: 4 SC, 3 SC in the last chain. On the other side of the chain: 3 SC, 3 SC in the last chain. (13)
Row 2: 4 SC, INC in the next 3 stitches, 3 SC, INC in the next 3 stitches. (19)
Row 3: 6 SC, INC, 3 SC, INC, 7 SC, INC. (25)
Rows 4 to 7: 25 SC
Row 8: 4 SC, DEC 6 times, 9 SC. (19)
Row 9: 4 SC, DEC 3 times, 9 SC. (16)
Rows 10 to 15: 16 SC
Continue crocheting 3 SC to ensure the end of the row is at the back of the leg, in the center.
Row 16: Crochet in the FRONT LOOP ONLY of each SC. (16)
Row 17: Work BACK POST STITCHES as follows: Chain 2, start making the back post stitch from the next stitch, at the end pull the hook through the chain 2 we started with, then insert it into the last stitch of the previous round, pull the yarn through, pull it through the 2 loops on the hook, cut the thread, hide it inside the boot using a needle. (16)
Stuff the boot and leg part.

Body
Chain 3 between the legs, join, and continue crocheting in the round:
Row 1: 34 SC
Row 2: 6 SC, INC, 8 SC, INC, 8 SC, INC, 9 SC. (37)
Rows 3 to 8: 37 SC
Row 9: 4 SC, DEC, 5 SC, DEC, 4 SC, DEC, 5 SC, DEC, 4 SC, DEC, 5 SC. (32)
Rows 10 to 13: 32 SC
Row 14: (4 SC, DEC) repeat 5 times, 2 SC. (27)
Row 15: 27 SC
Row 16: DEC, (3 SC, DEC) repeat 5 times. (21)
Row 17: DEC, 19 SC. (20)
Rows 18 to 21: 20 SC
Stuff the body. Sew the head to the body.
Sew the arms approximately at row 18 of the body.
Dress
Row 1: Chain 39, make a slip stitch (SL ST) in the 10th chain from the hook, chain 3, and crochet 29 DC.
Row 2: Chain 3, (1 DC, INC) repeat 15 times. (45)
Row 3: Chain 1, SC in each stitch. (45)
Row 4: Chain 3, change color, 6 SC, chain 10, skip 8 SC and crochet 1 SC in the 9th, 17 SC, chain 10, skip 8 SC, 6 SC.
Row 5: Chain 3, 6 SC, 13 SC in the chain space from the previous row, 17 SC, 13 SC in the chain space, 6 SC.
Row 6: Chain 3, increase every 5 SC. (64) Join in a circle with a slip stitch (SL ST).
Rows 7 to 13: 64 SC
Row 14: Work a back post stitch border.
Since everyone uses different yarn and has different crochet tension, try the dress on your bunny. You may need to chain more or fewer stitches in row 4. Also, in row 5, I crocheted 13 SC into the chain space, but you can do fewer if the dress fits well. Adjust the length according to your bunny. I made the dress using thinner cotton yarn compared to YarnArt Jeans.