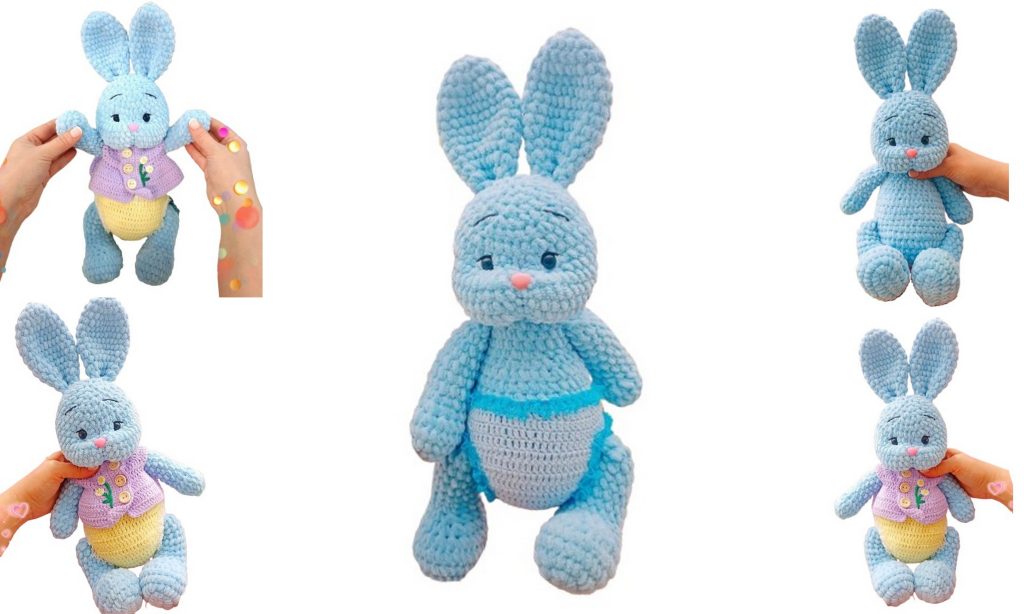
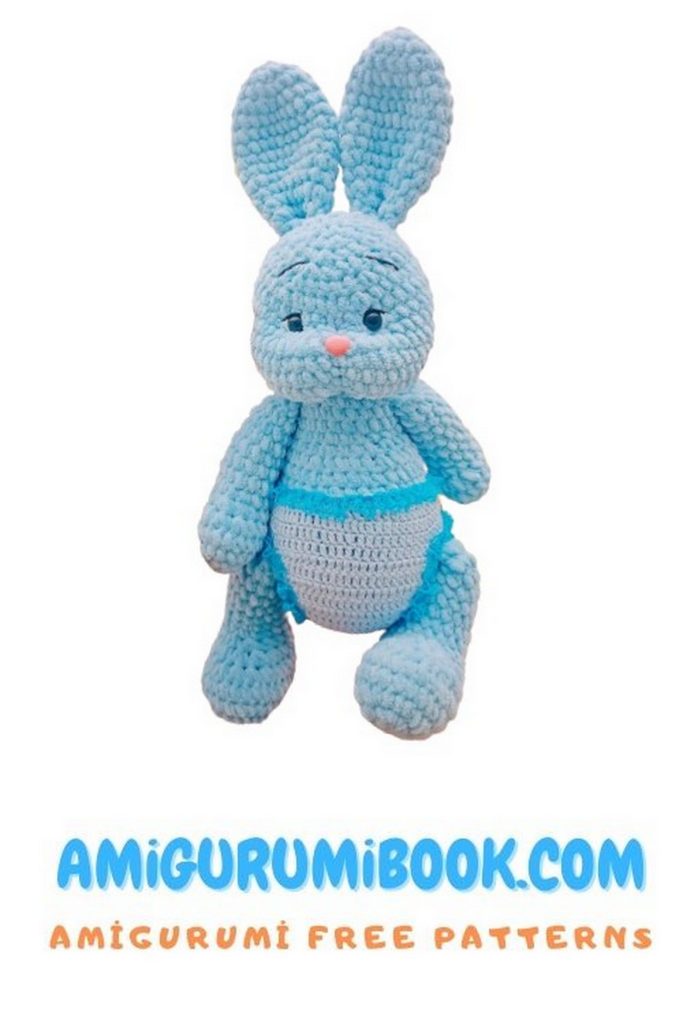
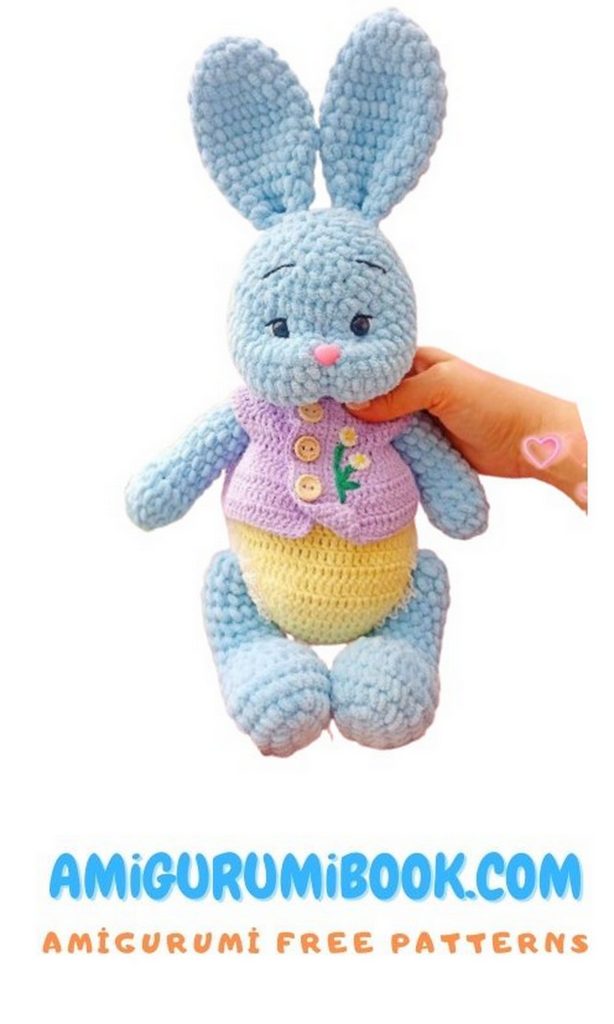
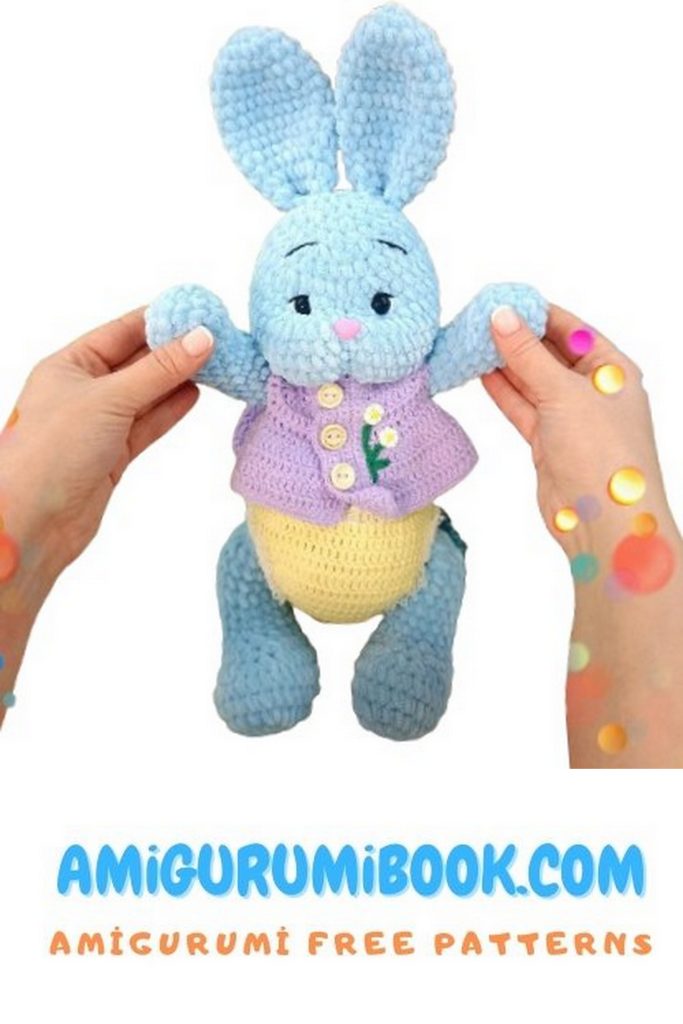
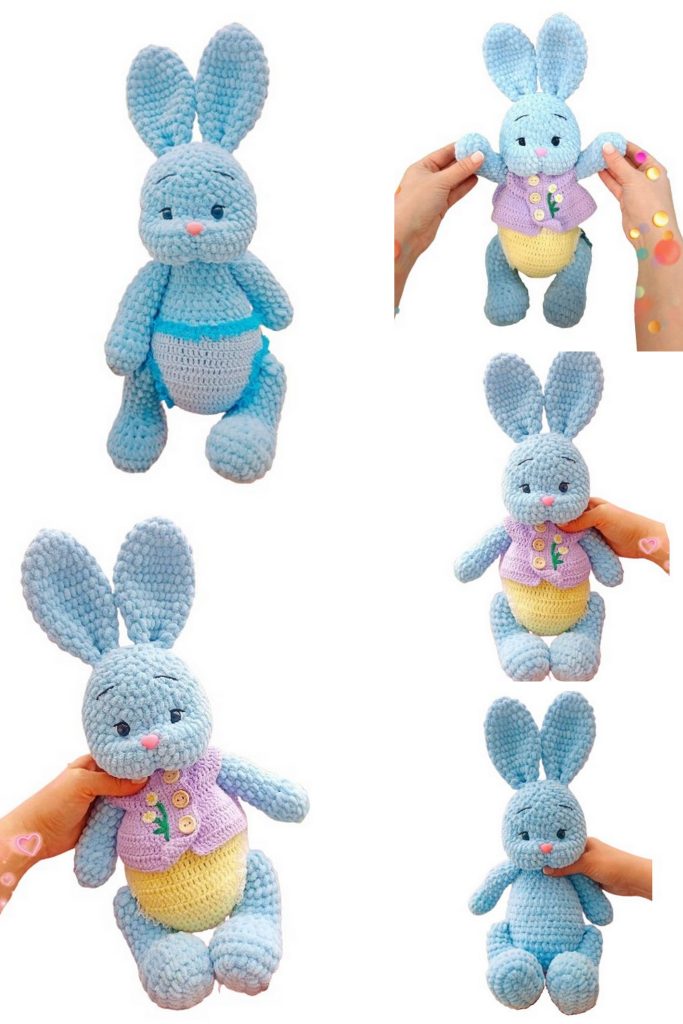
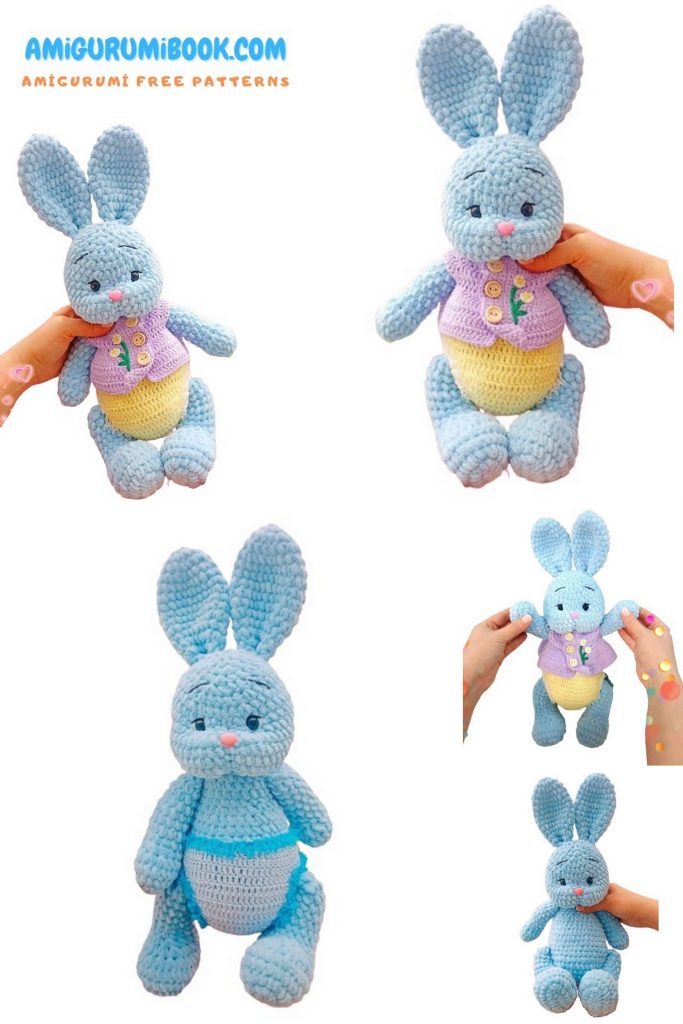
If you’re searching for the perfect amigurumi bunny project, look no further! This Cute Blue Bunny Amigurumi Free Pattern is a charming and beginner-friendly crochet pattern that will steal your heart. With its soft blue color and adorable floppy ears, this bunny is ideal for Easter gifts, baby showers, or simply as a sweet handmade toy. Follow the detailed step-by-step instructions to create your very own blue amigurumi bunny — a must-have addition to any amigurumi lover’s collection!
If you want to access 1000+ free amigurumi patterns, you can download our application from this link!
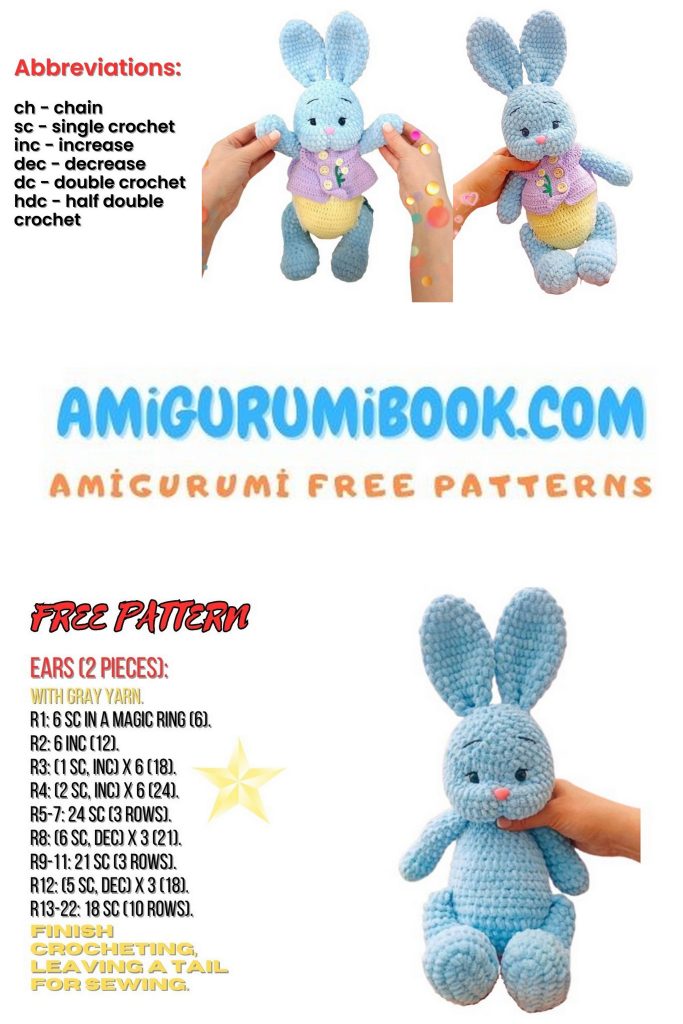
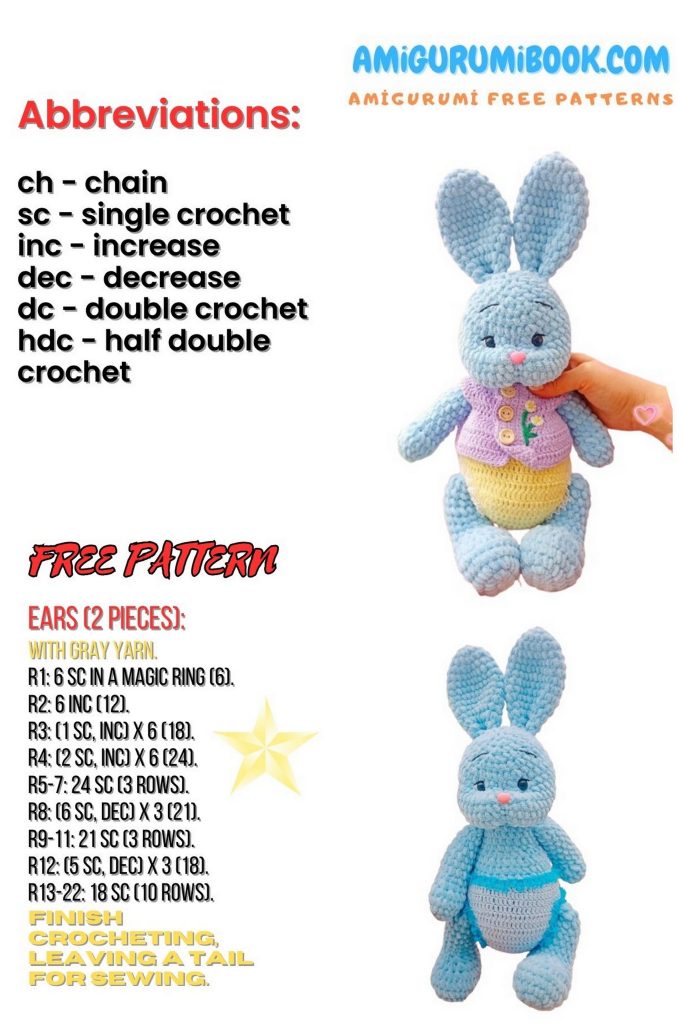
Abbrevations:
ch – chain stitch
sc – single crochet
dec – decrease
inc – increase
sl-st – slip stitch
*п – repeat required number of times
NECESSARY MATERIALS
YarnArt dolce №749 – 2 skeins;
Semi-cotton thread for tightening and shaping eyes, eyebrows
Sewing thread
Black screw eyes 12 mm
Pink nose 17 mm by 12 mm
Hook 3.5 mm
Needle for plush yarn and regular for sewing
Marker
Scissors
Filler
Glue Moment Crystal (optional)
Amigurumi Bunny – LEGS (2 pcs)
1: 8 ch, in the second loop from the hook knit one inc, then 5 sc, in the last loop 3 sc, on the back side knit 4 sc, put a marker (16)
2: (1 inc, 1 sc) * 3, 1 sc, (1 inc, 1 sc) * 3, 3 sc (22)
3: (1 sc, 1 inc)*4, 3 sc, (1 sc, 1 inc)*4, 3 sc (30)
4-5: 30 sc – 2 rows (30)
6: 1 sc, 5 dec, 3 sc, 1 dec, 10 sc, 1 dec, 2 sc (23)
7: 1 sc, 3 dec, 16 sc (20)
8: 1 sc, 2 dec, 15 sc (18) Stuff the legs gradually
9-15: 18 sc – 7 rows (18) Knit 4sc, fold the piece in half and knit 1 dec, 5 sc, 1 dec (7) (decreases on the sides). Fix the thread, cut it off, hide it in the leg. Knit the second leg in the same way.
Amigurumi Bunny – HANDLES (2 pcs)
1: 6 sc into magic ring (6)
2: 6 inc (12)
3: (1 sc 1 inc)*6 (18)
4: 18 sc (18)
5: 2 sc, 3 dec, 10 sc (15)
6: 3 sc, 1 dec, 10 sc (14)
7-12: 14 sc – 6 rows (14)
Stuff the handles gradually
Knit 5 sc, fold the piece in half and knit 1 dec, 3 sc, 1 dec (5) (decreases on the sides). Fix the thread, cut it off, hide it in the handle.
Knit the second handle in the same way.

Amigurumi Bunny – TAIL
1: 6 sc into magic ring (6)
2: 6 inc (12)
3: 6 dec (6)
Sl-st, cut thread, no need to stuff
Amigurumi Bunny – BODY
1: 6 sc into magic ring (6)
2: 6 inc (12)
3: (1 sc, 1 inc)*6 (18)
4: (2 sc, 1 inc)*6 (24)
5: (3 sc, 1 inc)*6 (30)
6: (4 sc, 1 inc)*6 (36)
7: (5 sc, 1 inc)*6 (42)
8: 42 sc (42)
Marker goes along the back, attach legs.
I don’t like when the legs are knitted with only one row from the body (they look untidy and dangle a lot (hang), I knit two rows of the tummy together with the legs. With the first row I knit the last row of the leg on the inside, and with the second row I knit the row where the legs are joined in half.
9: 3 sc, 7 sc with the leg (last row of the leg on the inside), 14 sc, 7 sc with the leg (last row of the leg on the inside), 11 sc (42)
10: 3 sc, 7 sc with the leg (row joined in half), 14 sc, 7 sc with the leg (row joined in half), 11 sc (42)
11-13: 42 sc – 3 rows (42)
Knit 1 sc, move the marker. Stuff the body gradually.
14: 3 sc, 7 sc (over leg), 1 sc, (1 dec, 1 sc)*4 (decreases form tummy), 1 sc, 7 sc (over leg), 11 sc (38)
15: 6 sc, 1 dec, 14 sc, 1 dec, 14 sc (36)
16: (4 sc, 1 dec)*6 (30)
17: (3 sc, 1 dec)*6 (24)
18-20: 24 sc – 3 rows (24)
21: 3 sc, 5 sc with arm, 7 sc, 5 sc with arm, 4 sc (24)
Stuff the body.
Knit sl-st, cut the thread, fix.
EARS (2 pcs)
Knit with the main color.
1: 6 sc into magic ring (6)
2: 6 inc (12)
3: (1 sc, 1 inc)*6 (18)
4: 18 sc – 1 row (18)
5: (2 sc, 1 inc)*6 (24)
6-10: 24 sc – 5 rows (24)
11: (2 sc, 1 dec)*6 (18)
12-14: 18 sc – 3 rows (18)
Fold the piece in half, knit through 2 loops 9 sc, then fold again, knit through 2 loops 4 sc, and the ninth loop goes to the fold. Cut the thread, fix, hide inside the product.
Amigurumi Bunny – HEAD
1: 6 sc into magic ring (6)
2:6 inc (12)
3: (1 sc, 1 inc)*6 (18)
4: (2 sc, 1 inc)*6 (24)
5: (3 sc, 1 inc)*6 (30)
6: (4 sc, 1 inc)*6 (36)
7: (5 sc, 1 inc)*6 (42)
8: (6 sc, 1 inc)*6 (48)
9-11: 48 sc – 3 rows (48)
12: 13 sc, 1 dec, 2 sc, 1 dec, 2 sc, 1 dec, 25 sc (45)
13: 12 sc, 1 dec, 2 sc, 1 dec, 2 sc, 1 dec, 23 sc (42)
2 sc (underlined) should be above 2 sc.
14: 42 sc – 1 row (42)
15: (5 sc, 1 dec)*6 (36)
16: (4 sc, 1 dec)*6 (30)
Insert the eyes between the 14th and 13th rows above the first and last decrease of the 12th and 13th rows, between them there are about 6 sc. Stuff the head.
17: (3 sc, 1 dec)*6 (24)
18: (2 sc, 1 dec)*6 (18)
19: (1 sc, 1 dec)*6 (12)
20: 6 dec (6)
Stuff the head, make decreases to the end, cut the thread, fix, hide in the head.
WE STYLE THE HEAD
a)We tighten the eyes with a semi-cotton thread approximately in the color of the yarn (yarnart jeans).
b)We take the head and insert the needle with the thread into the place of the first row of the head, bring it out to “2”, throw the thread to “3” and bring it out to “1”. Tighten. Tie a knot.
Next, we make a combination of “1” – “4” – “5” – “1”.
Tighten. Tie a knot. Next, a combination of “1” – “6” – “7” – “1”. Tighten. Tie a knot.
And the fourth combination of “1” – “8” – “9” – “1”.
Tighten. Tie a knot. We make the whites of the eyes with the same thread, eyelashes with a black thread (a regular strip, you can add one eyelash on the side) and eyebrows. I tighten slightly. Sometimes I fix the thread with Crystal glue so that the white and eyelashes do not slide onto the eye.
I break off the screw at the nose, if there is one, and glue it.
WE DESIGN THE BODY
We sew the head to the body with sewing thread (in the color of the yarn) in three rows so that the head does not dangle. It is better to sew several times so that the head does not tilt. We sew the tail so that it is at the level of the sewn-on legs (not higher than the 9th row). We sew the ears above the eyebrows. The distance between the eyebrows and the ears is about 6-7 sc. We sew the ears with sewing thread in the color of the yarn.