
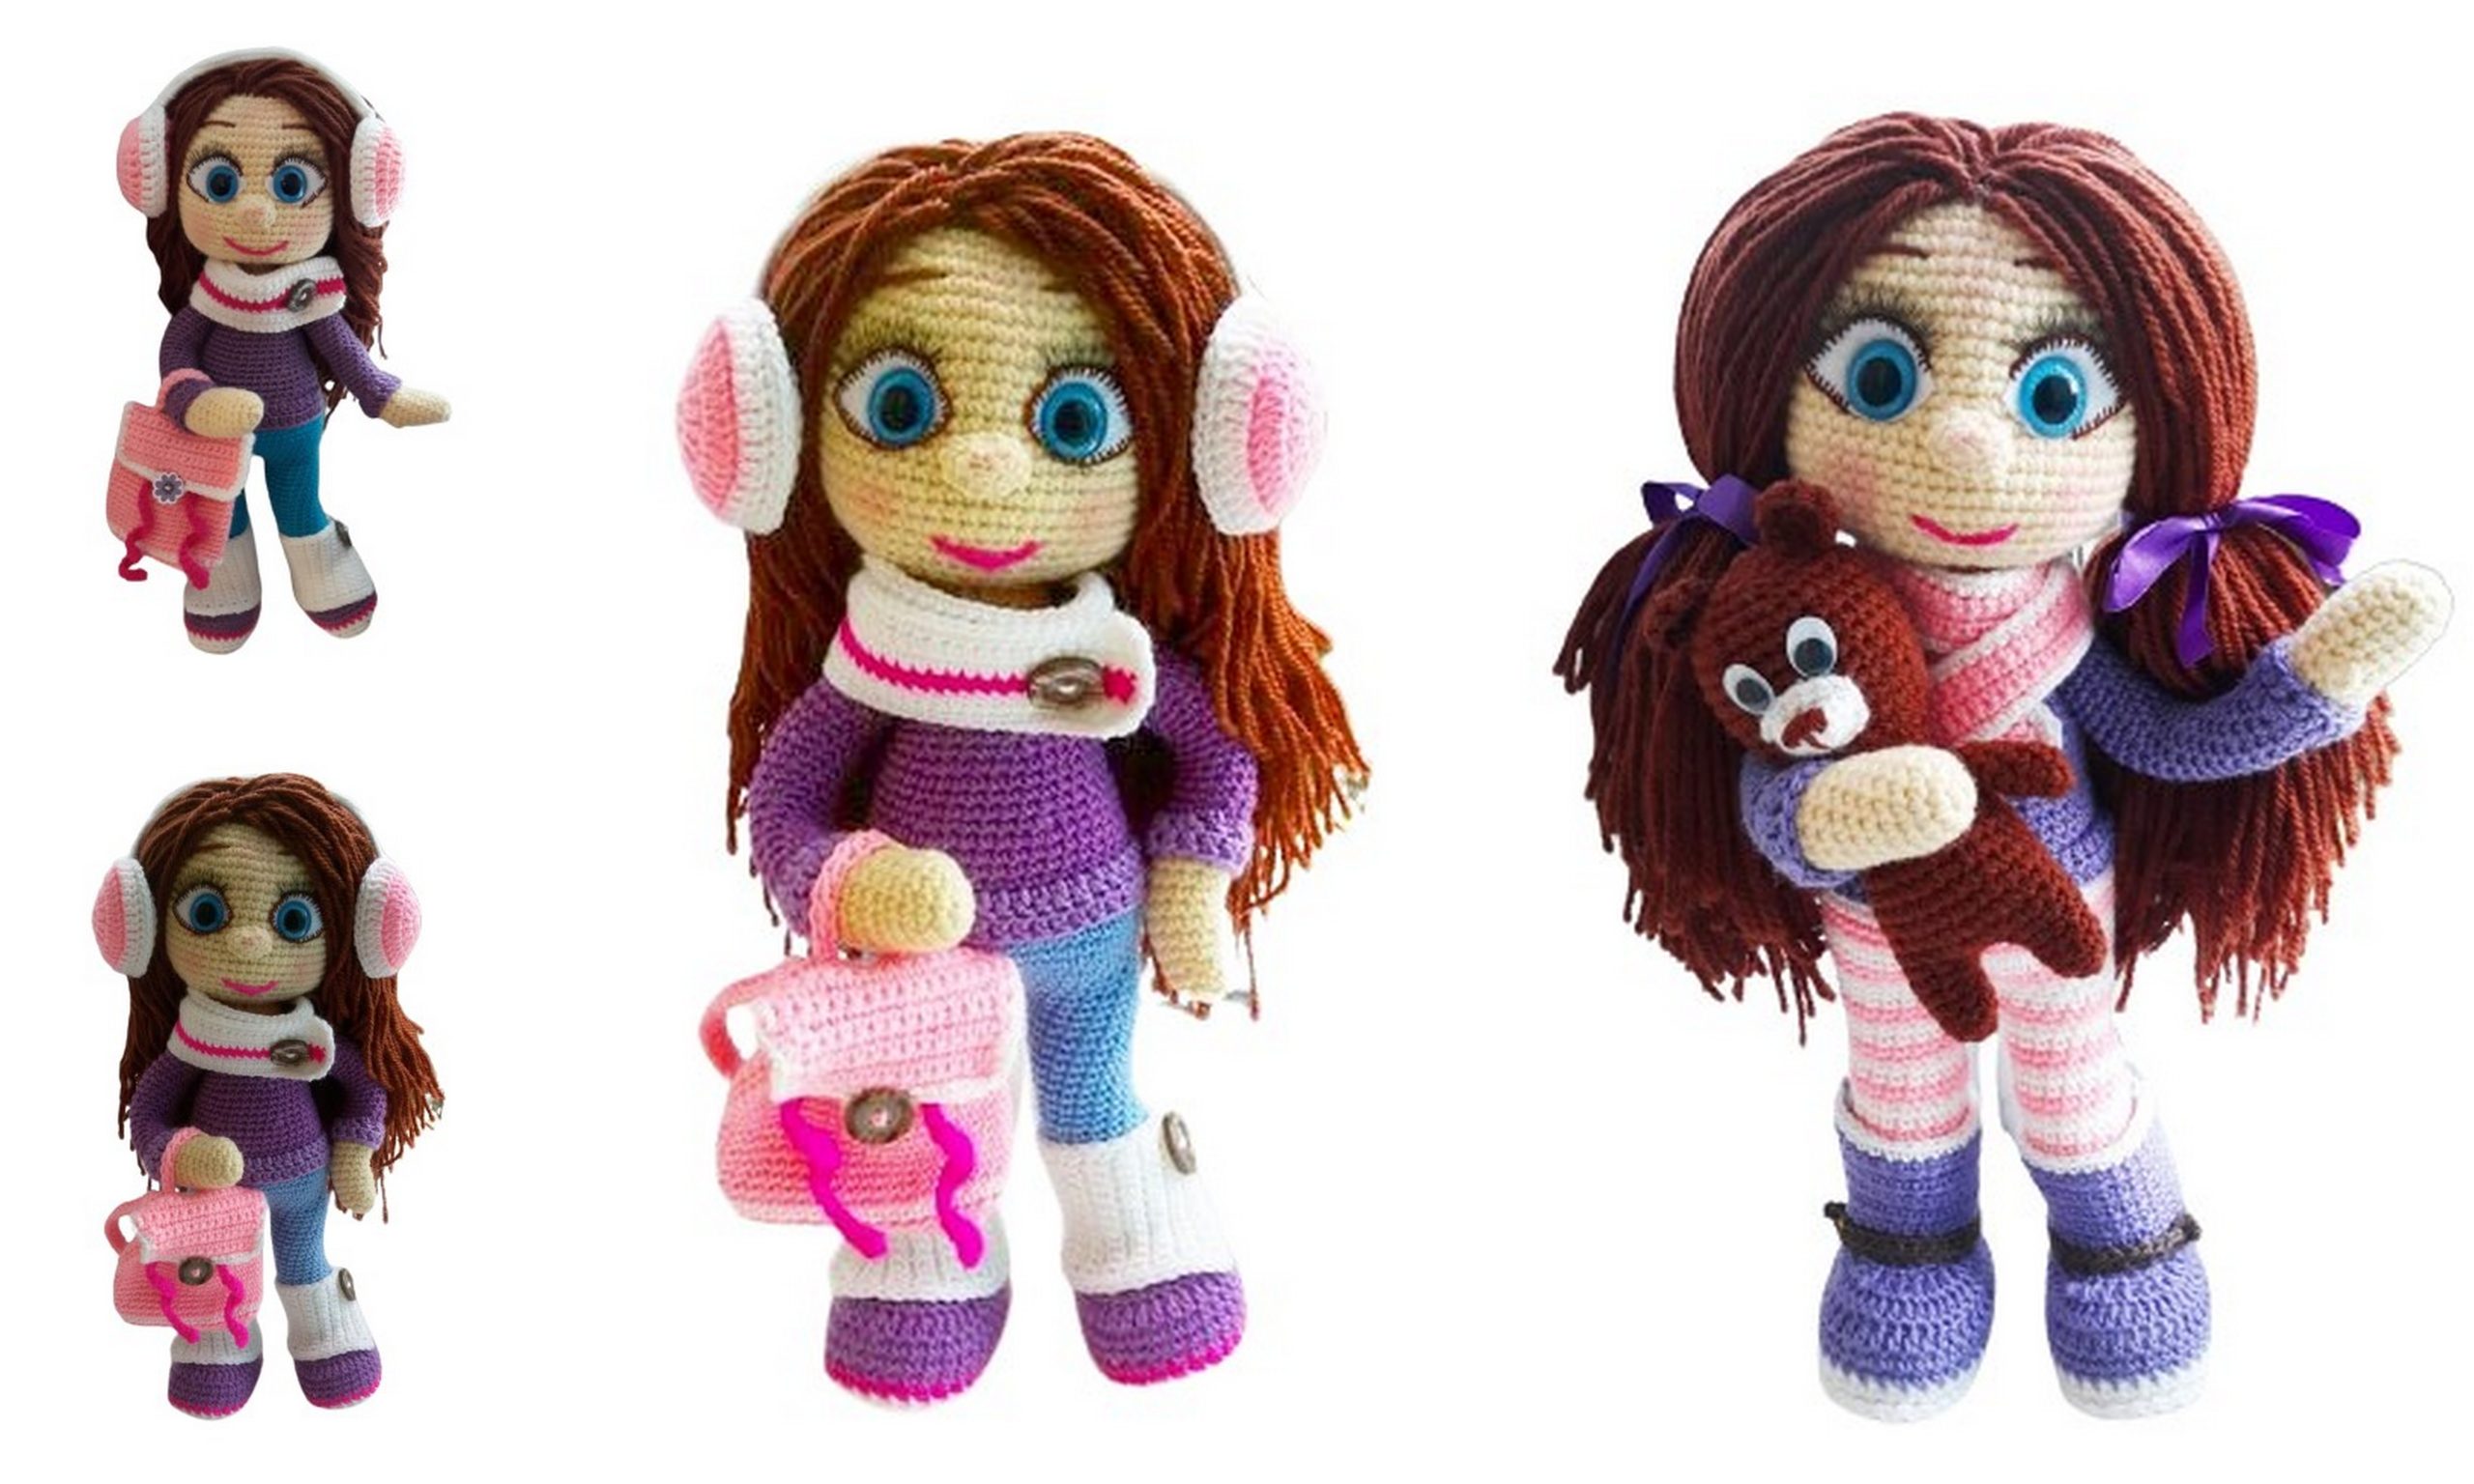
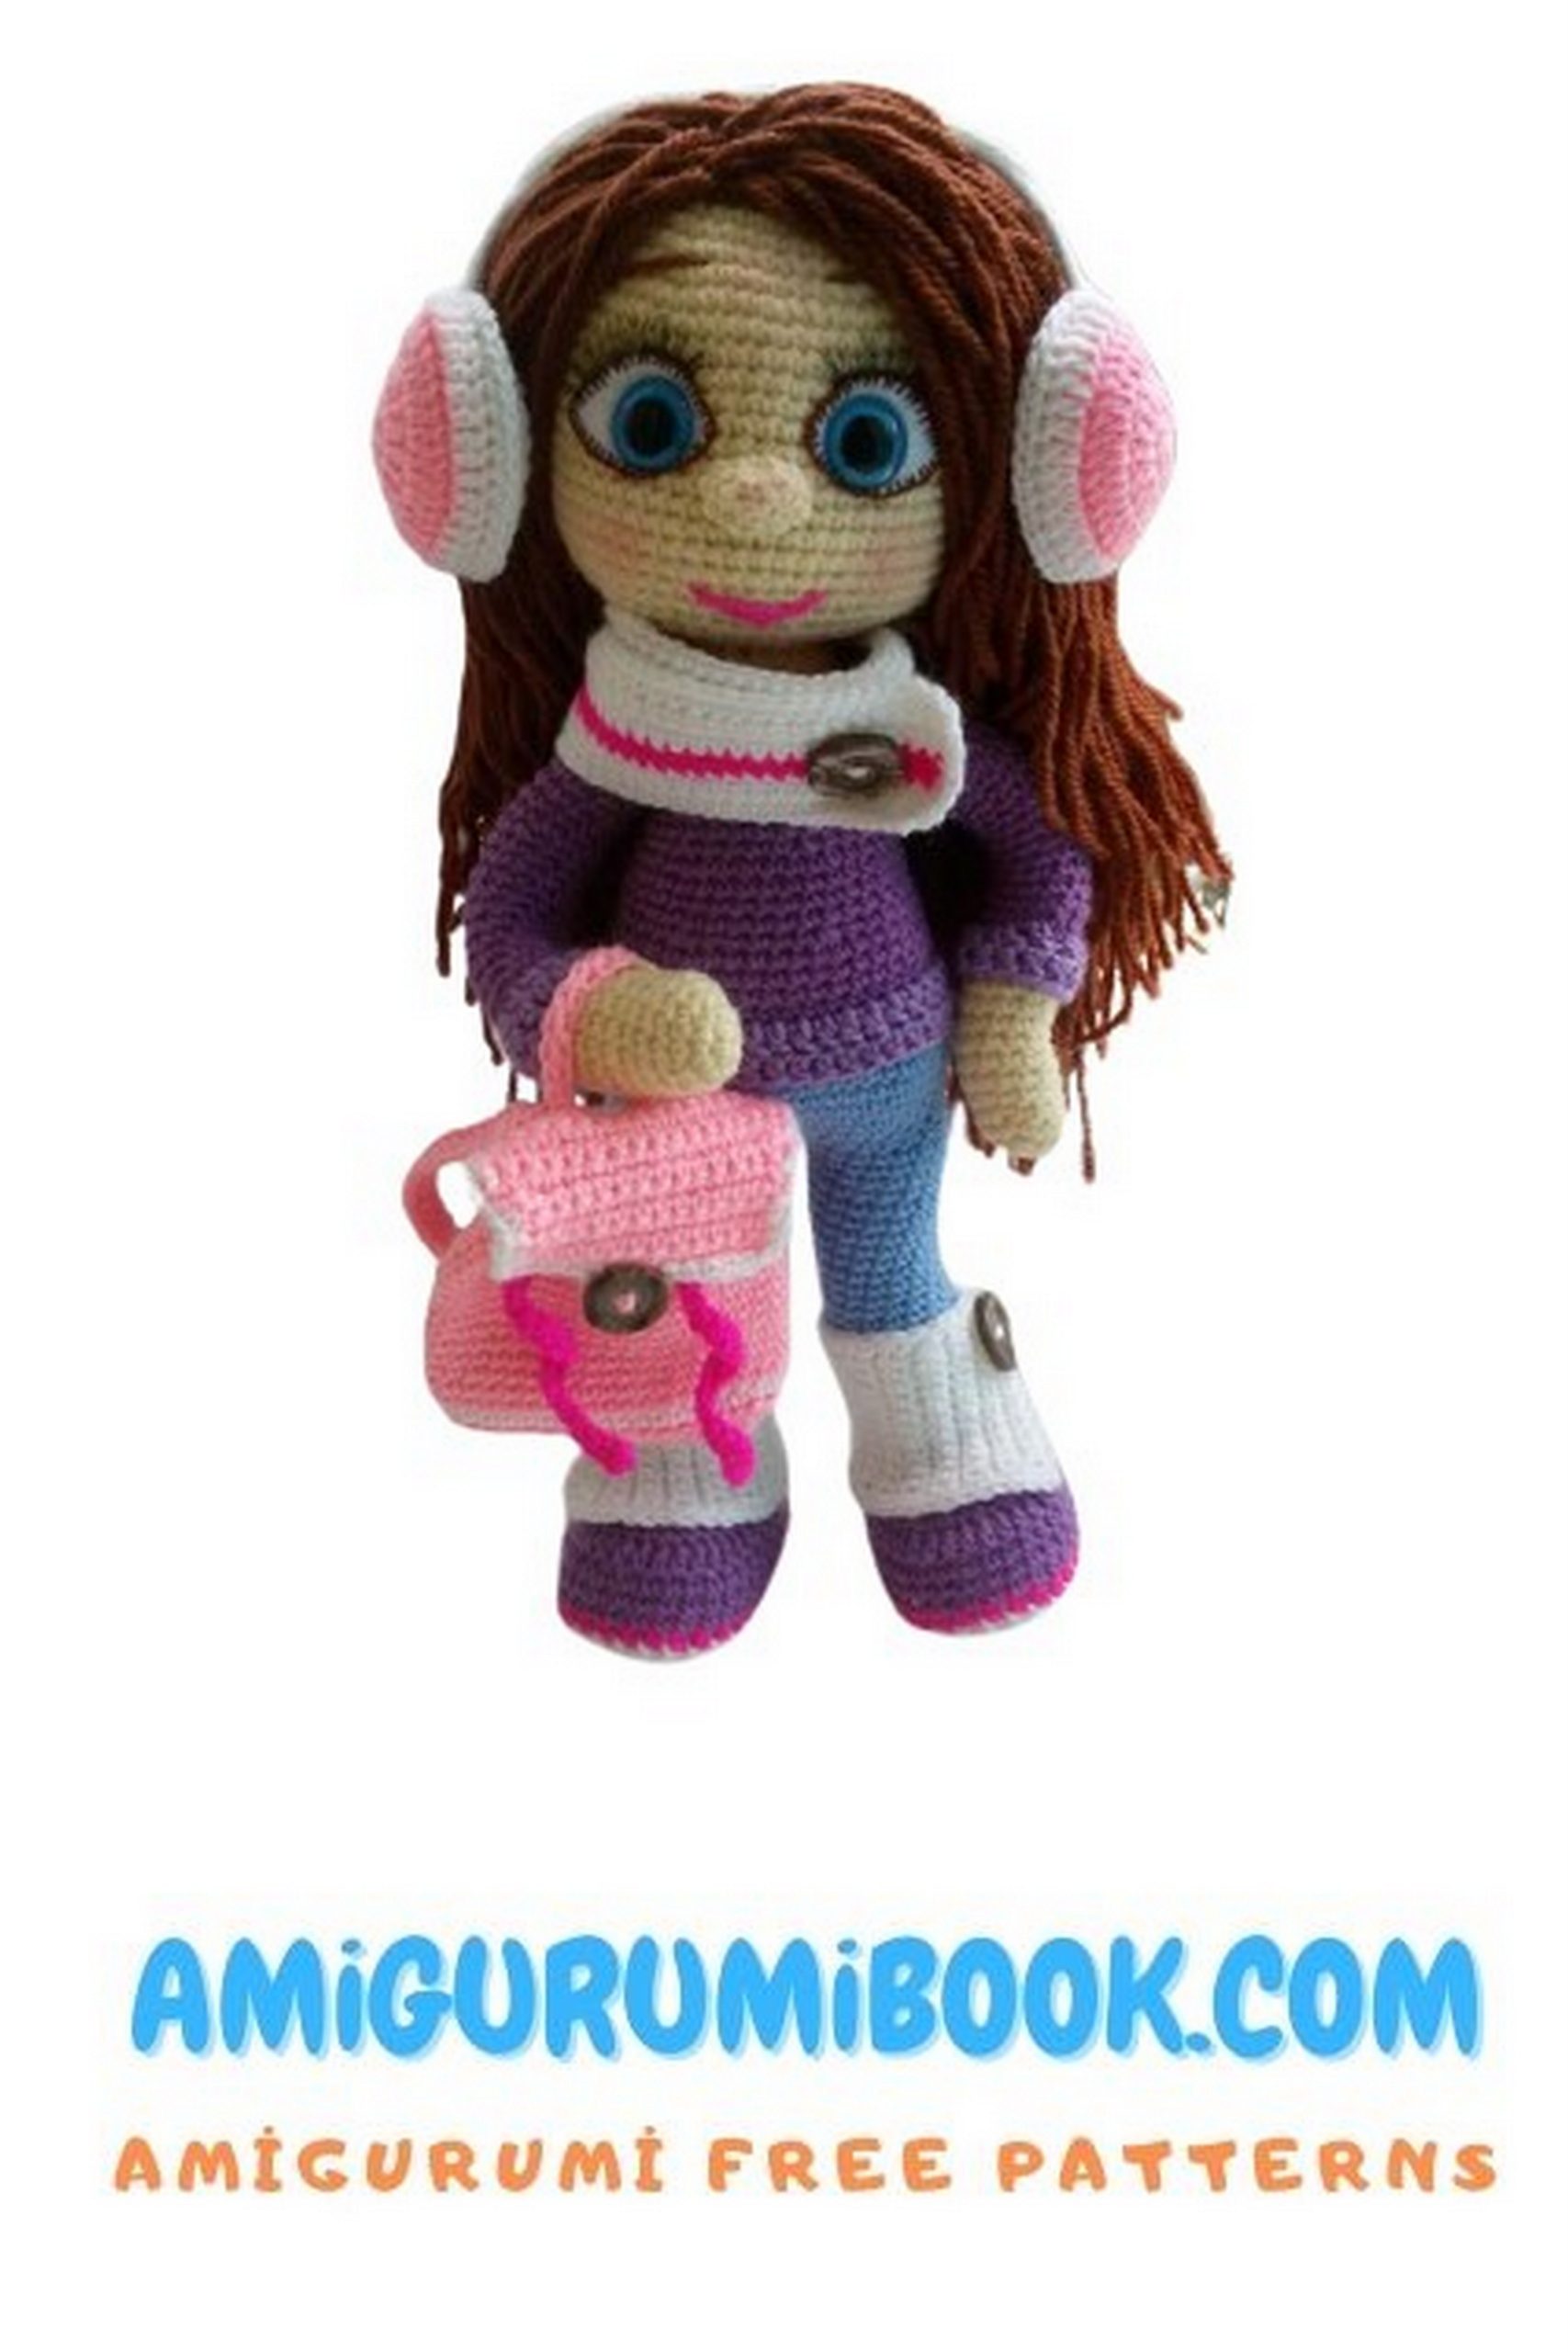
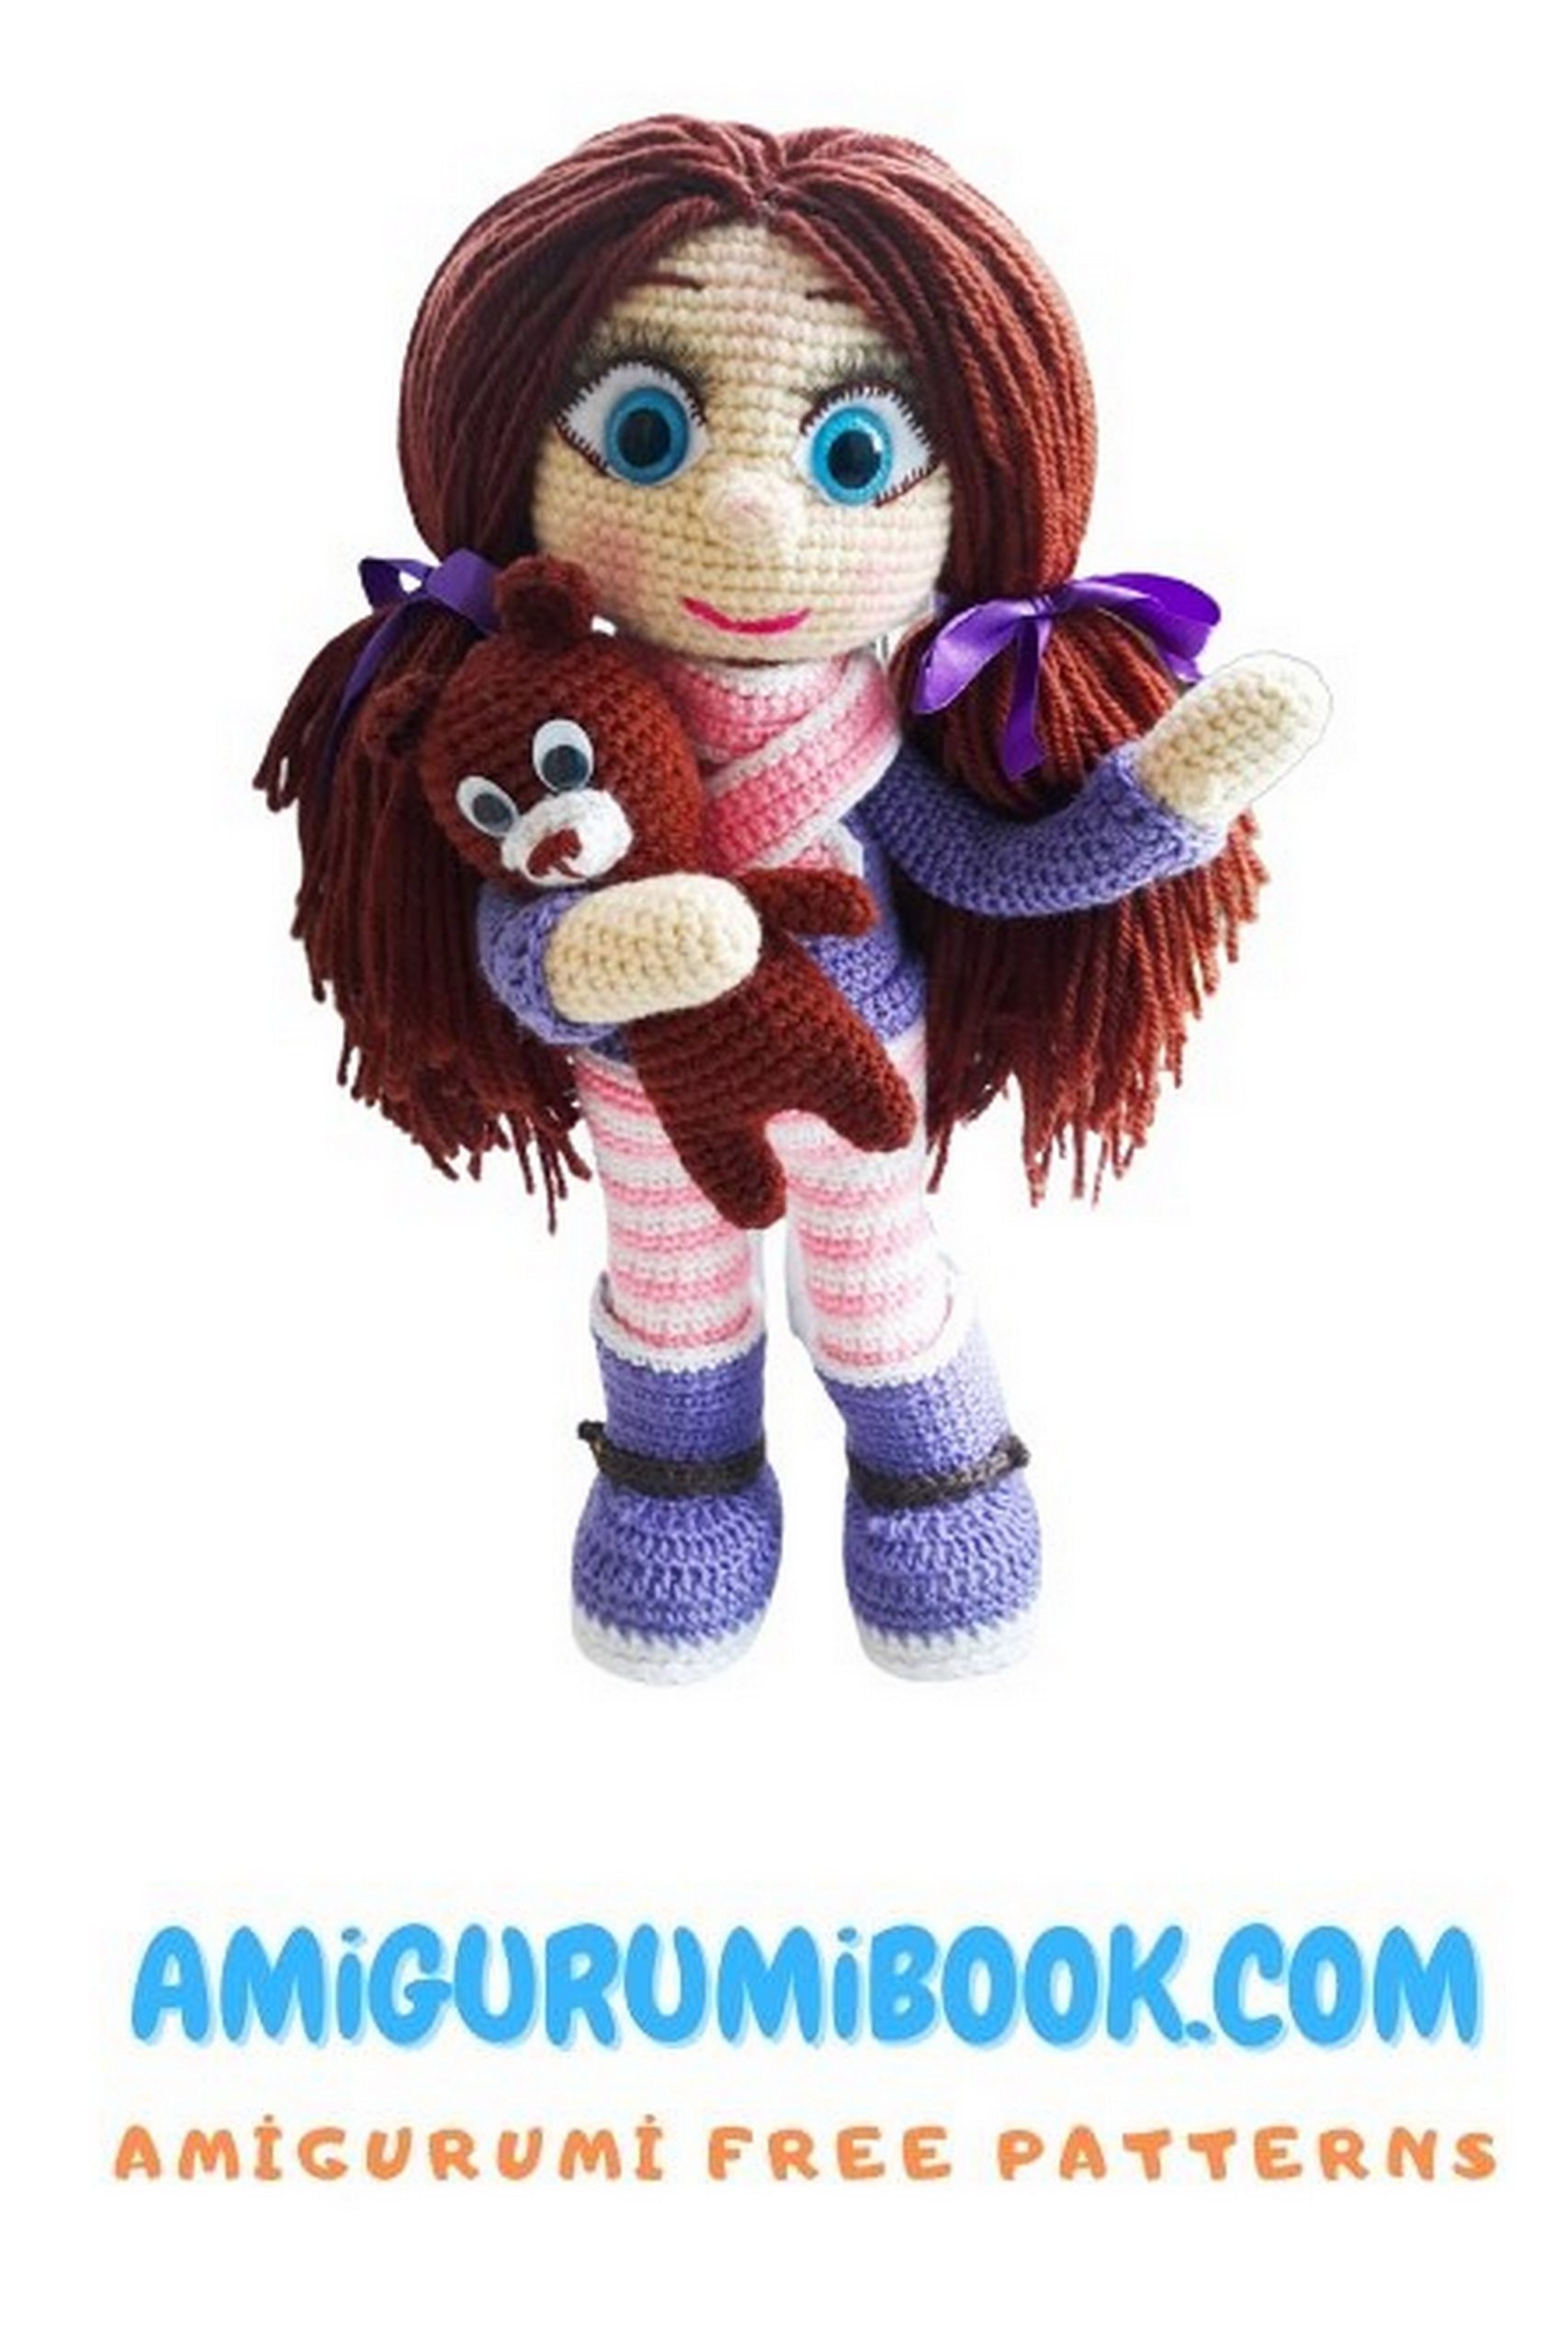
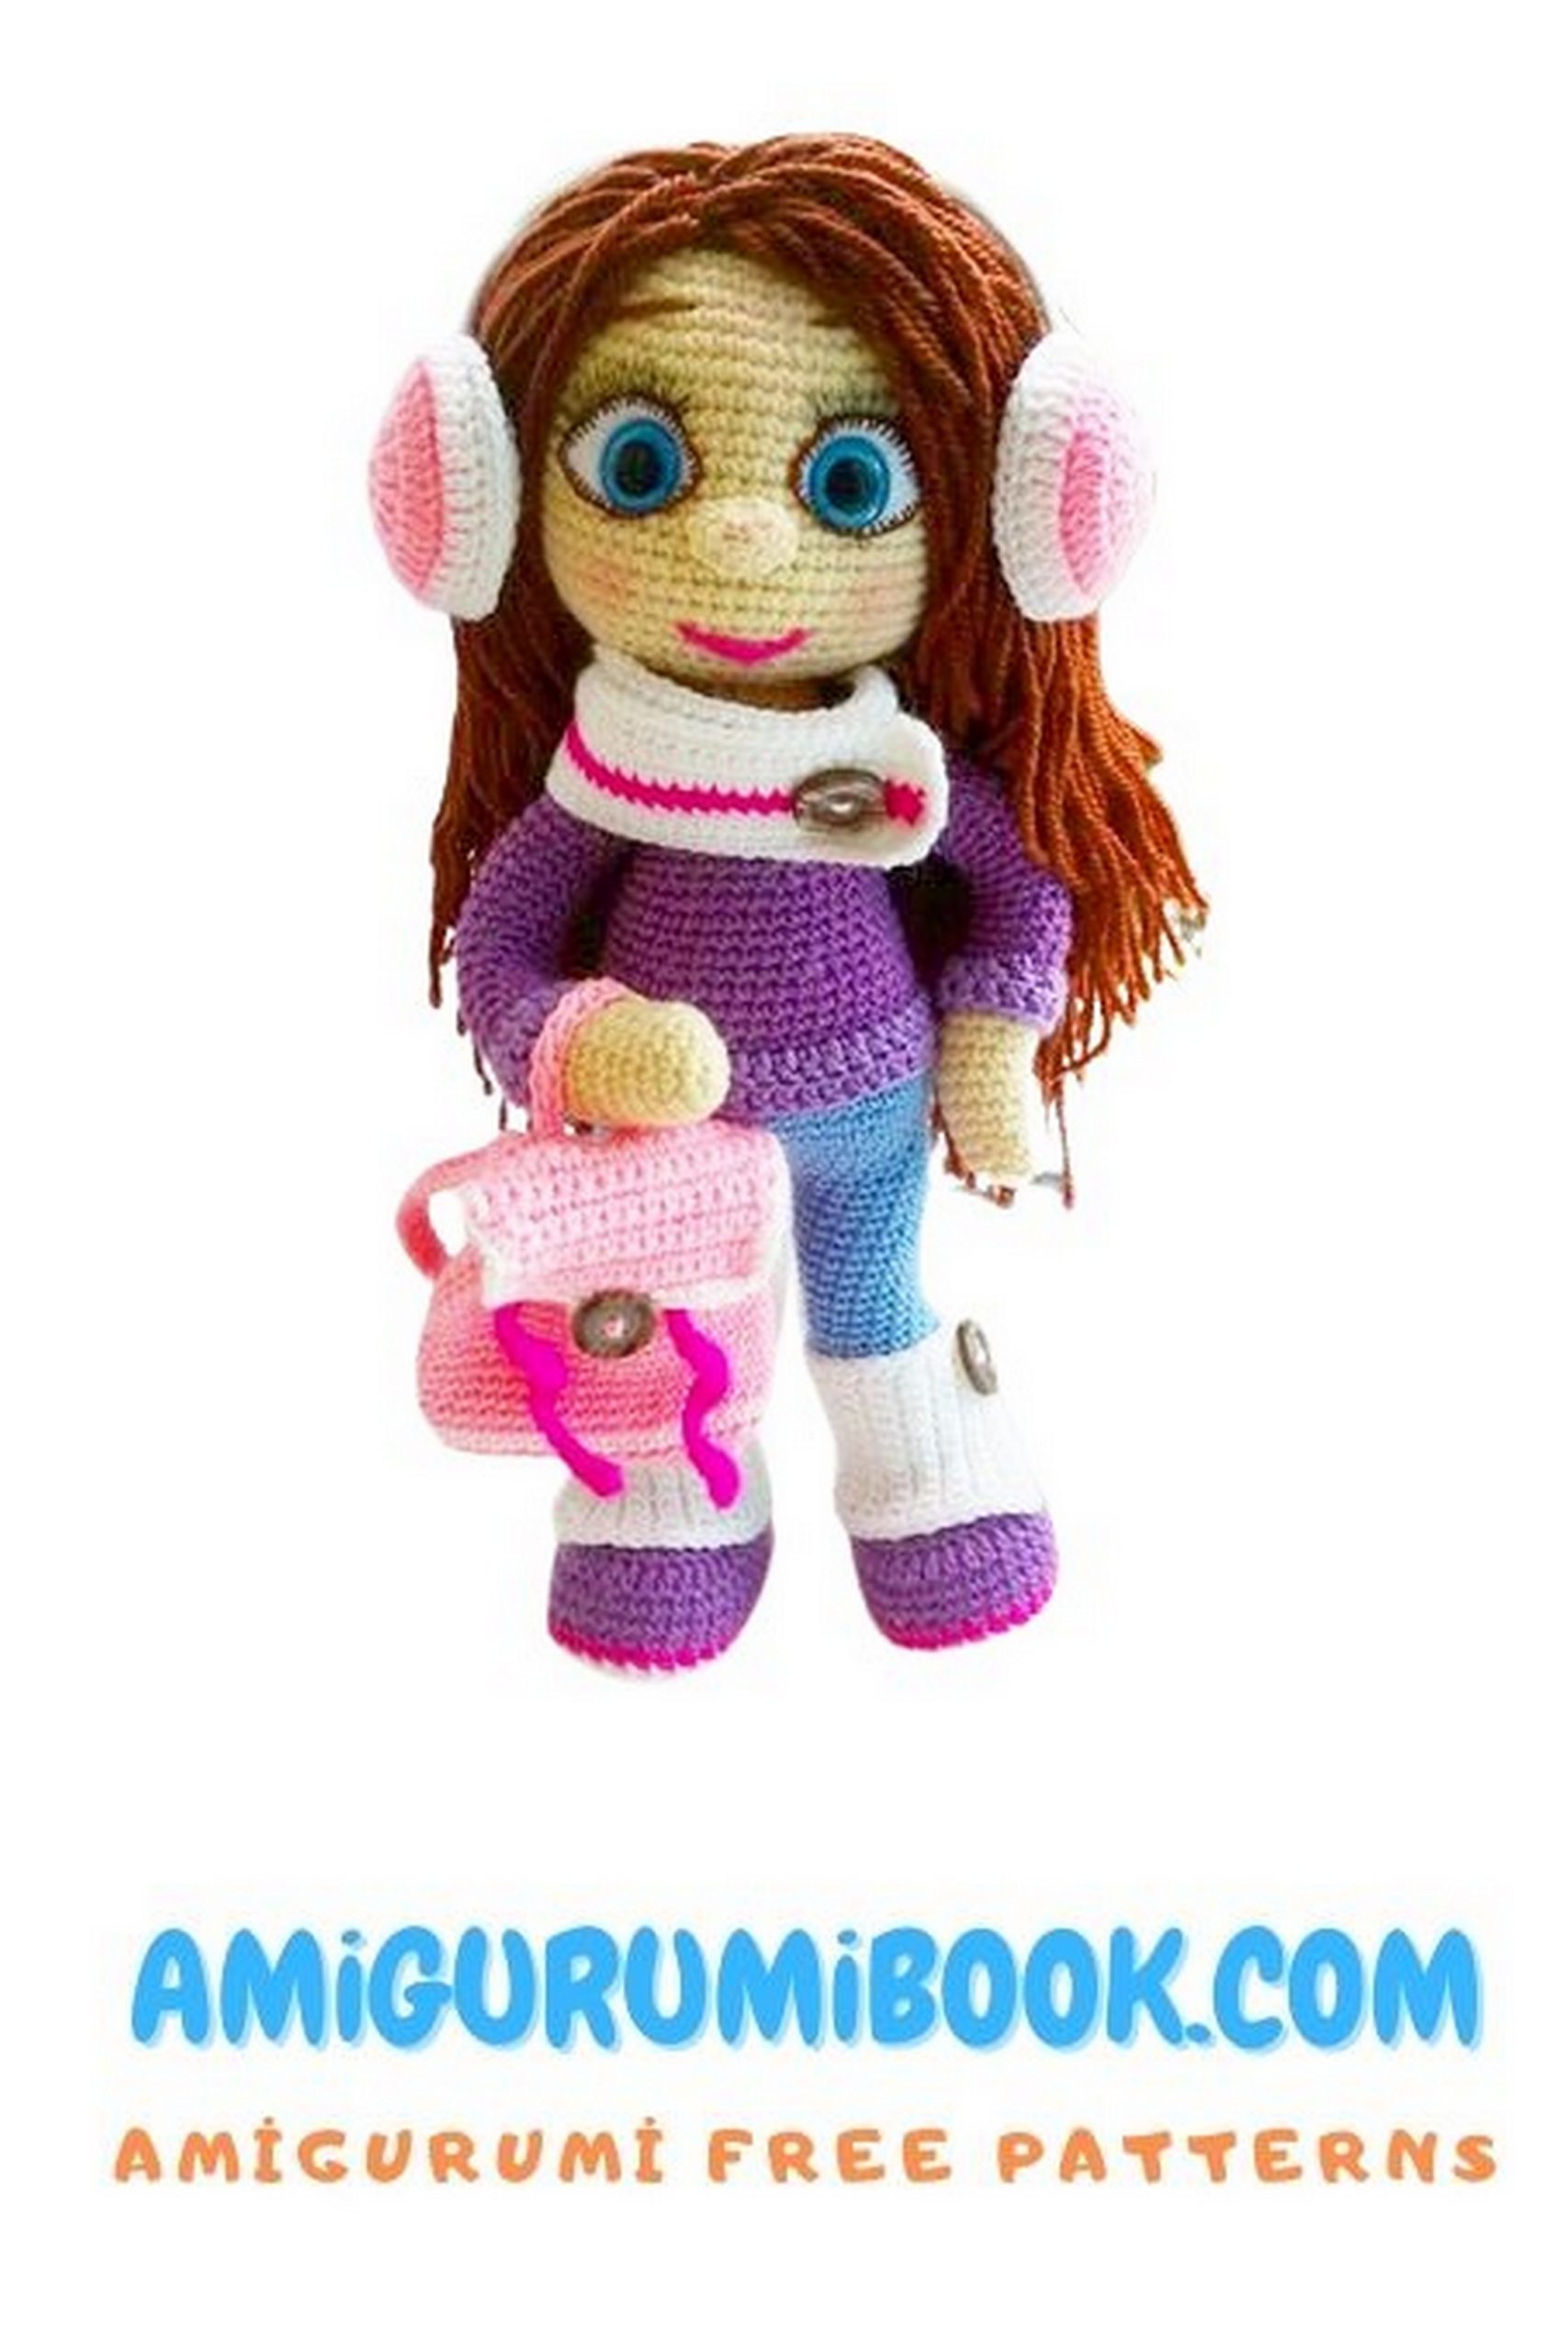
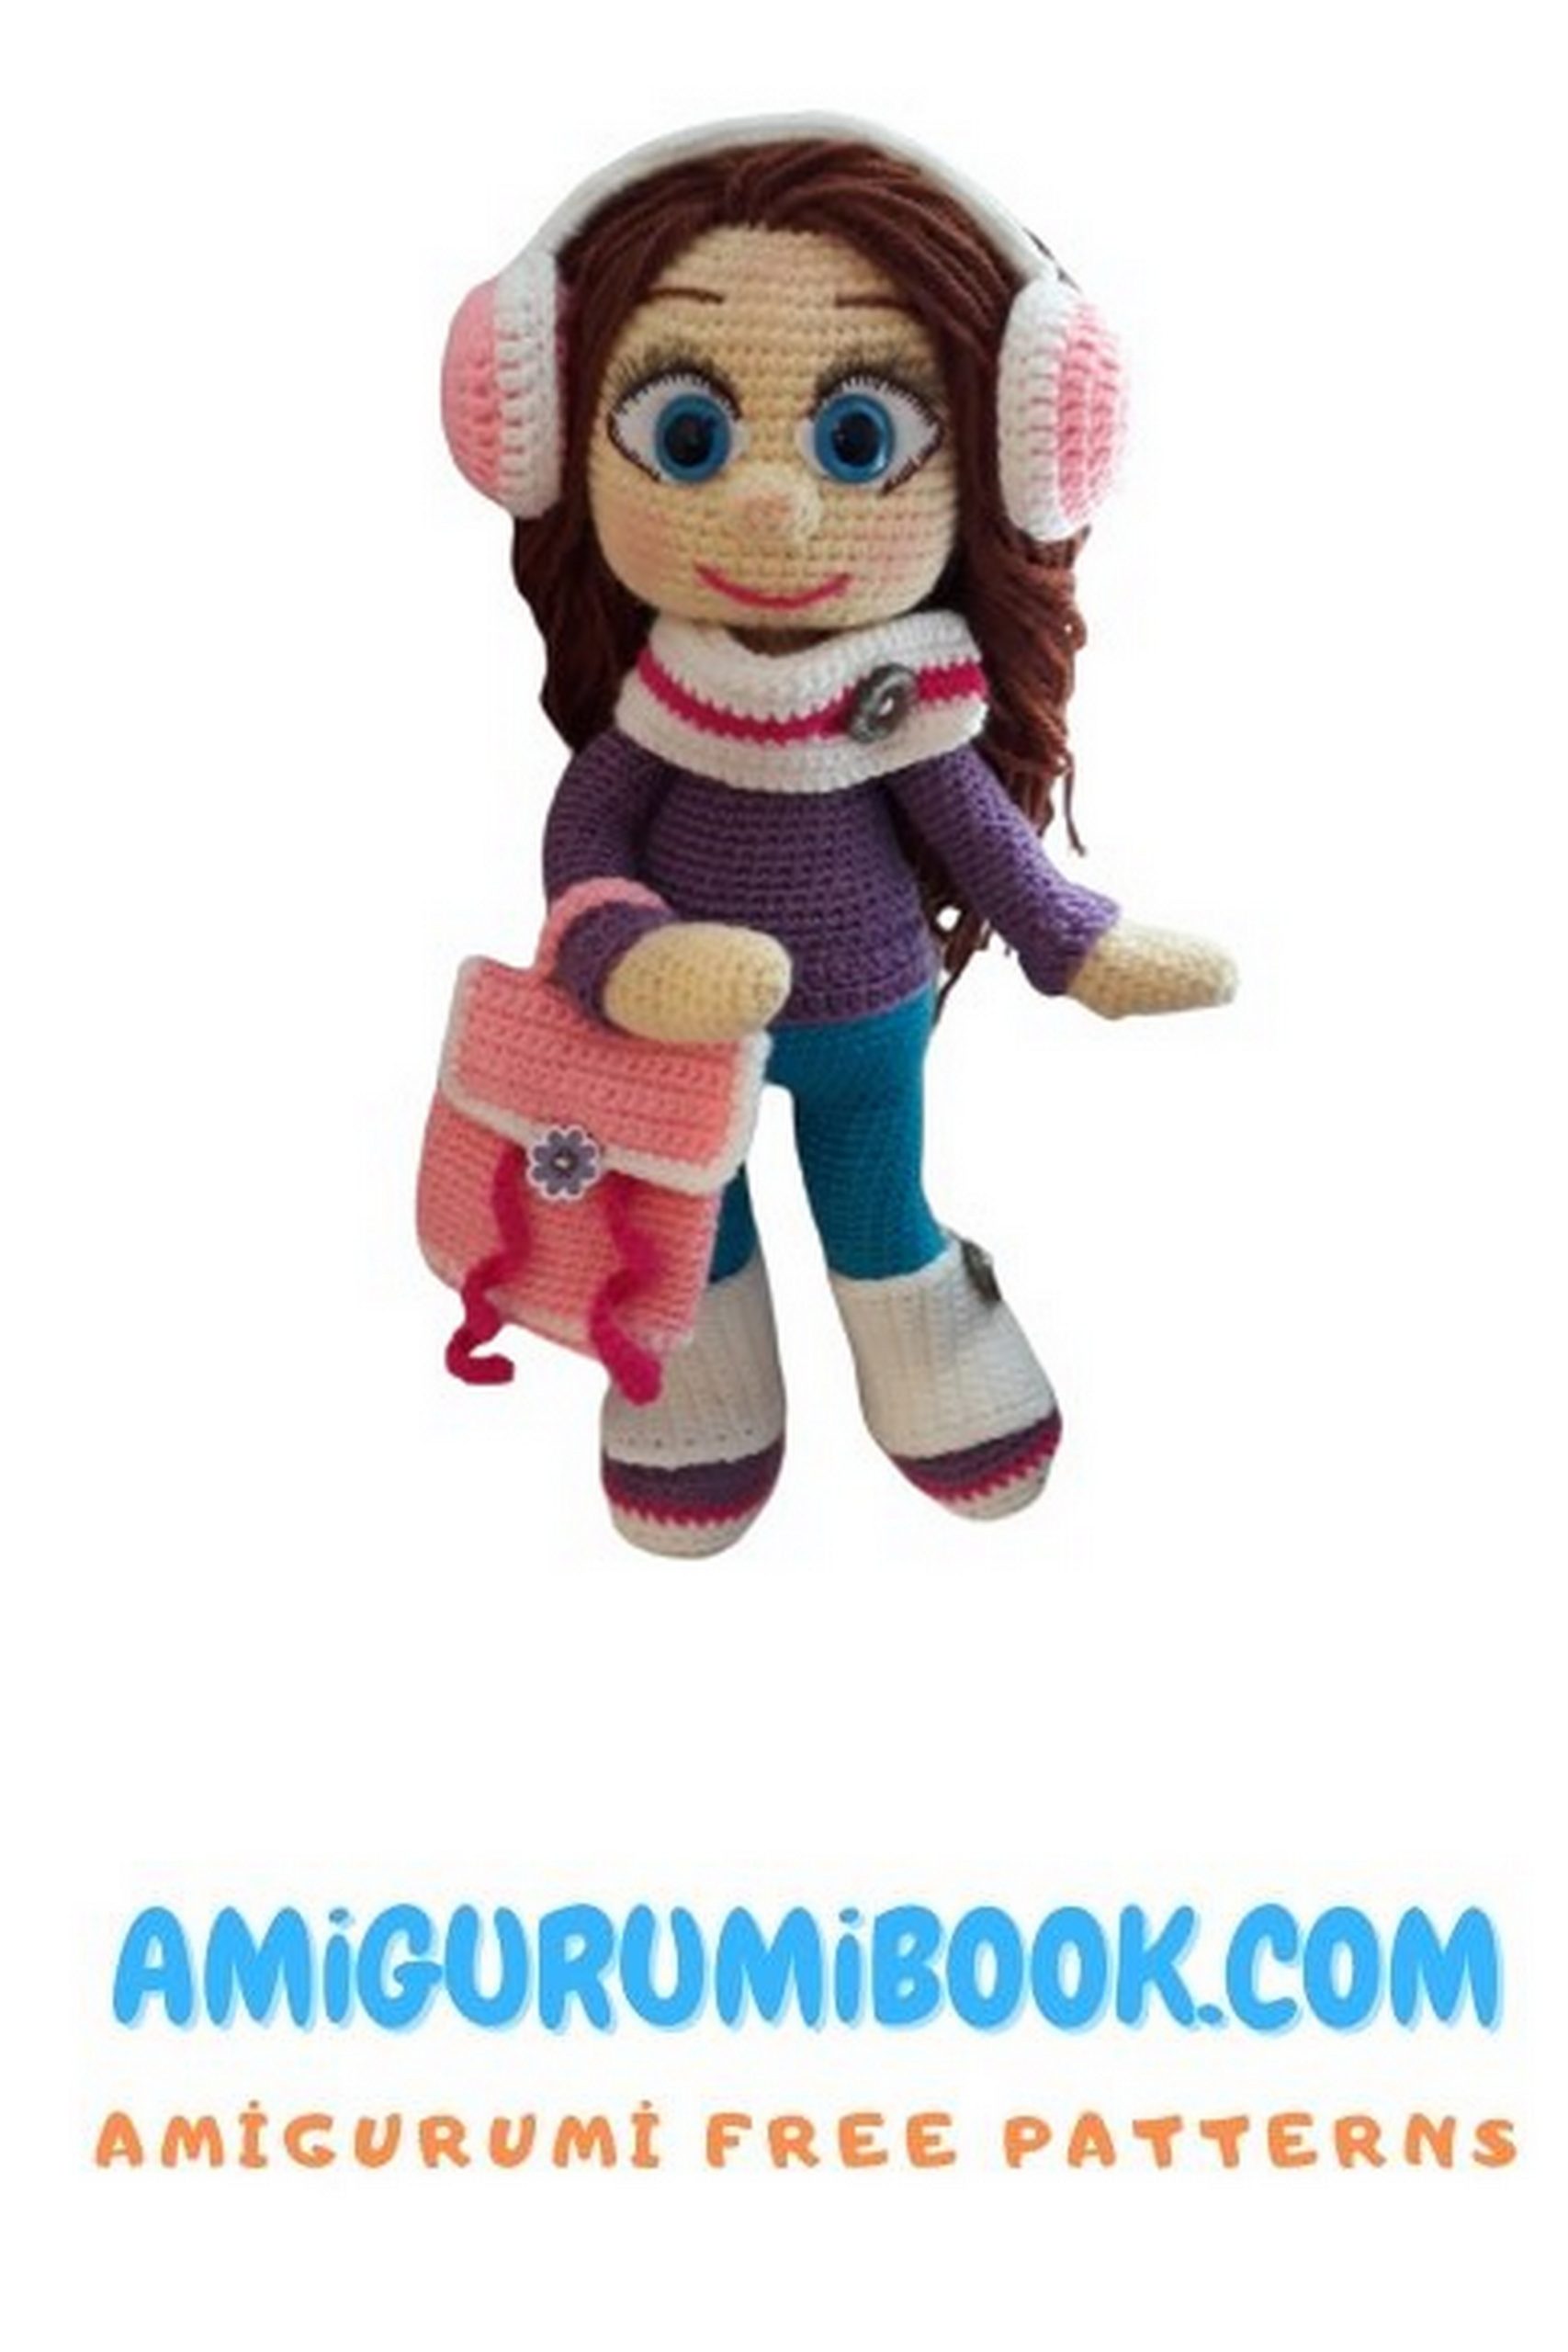
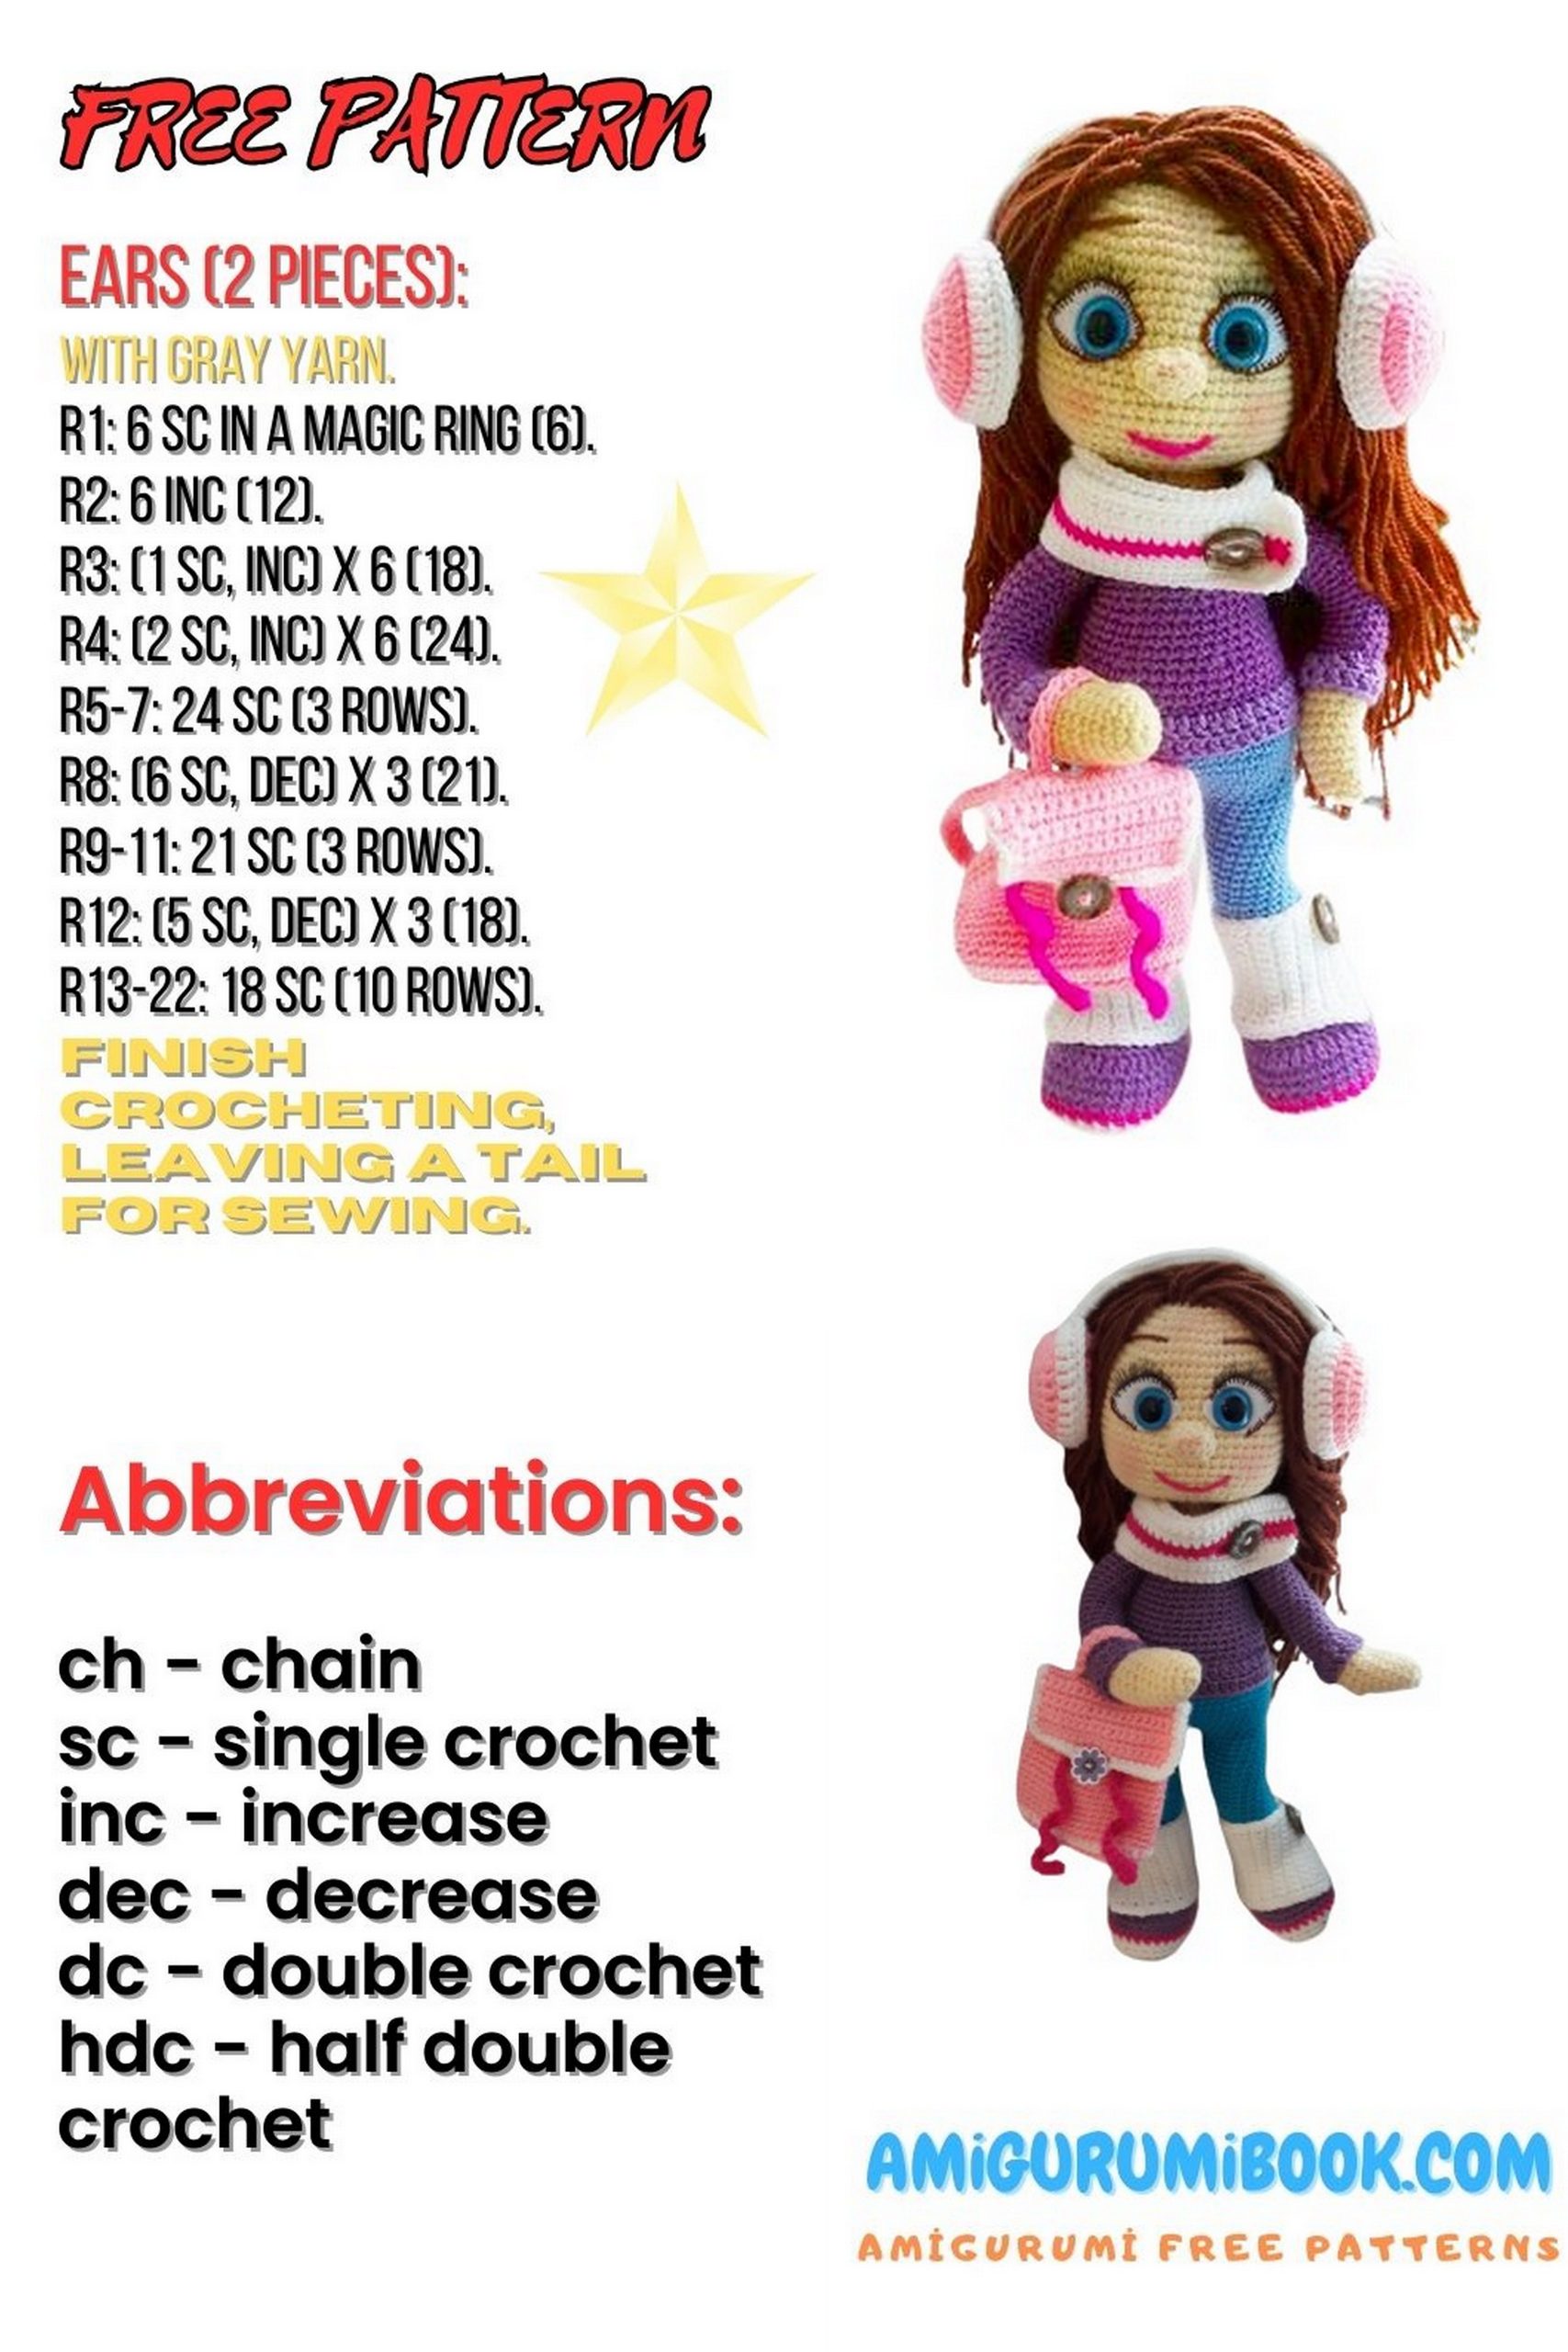
If you’re looking for a stylish and detailed doll project, this Fashionable Girl Amigurumi Doll Free Pattern is a perfect choice. With her cozy sweater, cute boots, scarf, backpack, and trendy headphones, she’s more than just a doll — she’s full of personality and charm.
This free amigurumi doll pattern includes step-by-step instructions for the head, body, legs, arms, hair, and all accessories. The wire frame structure allows gentle posing, making her both decorative and interactive. At approximately 43–45 cm tall, she’s a wonderful handmade gift idea or a standout addition to your amigurumi collection.
Whether you’re an intermediate crocheter or ready to challenge yourself with a detailed project, this fashionable doll will be a fun and rewarding make. Grab your yarn and let’s bring this adorable girl to life! 🧶
If you want to access 1000+ free amigurumi patterns, you can download our application from this link!
MATERIALS & TOOLS
Yarns
Body (skin tone):
• Podmoskovnaya iz Troitska (50% wool / 50% acrylic, 250 m / 100 g)
– Color: Champagne – 1 skein
Hair:
• Podmoskovnaya iz Troitska
– Color: Cognac – 1 skein
Sweater & Boots:
• Bambino (35% merino wool / 65% acrylic, 150 m / 50 g)
– Lilac (or color of your choice) – 1 skein
Pants:
• Bambino – Blue – 1 skein
Socks, Soles, Scarf, Headphones & Trim:
• Bambino – White – 1 skein
Additional Body Detail (pink areas):
• Bambino – Pink – 1 skein
Accent Details:
• Small amount of Bambino – Raspberry (for scarf decoration, boots, mouth embroidery)
Notions & Accessories
• 4 decorative buttons
• Aluminum wire (1.5–2 mm diameter) – 2.5–3 meters (for doll frame & headphones)
• White adhesive tape or electrical tape (to wrap wire ends)
• Safety eyes – 16 mm or 20 mm (blue or preferred color)
• Doll eyelashes – 8 mm
• Thick cardboard or white plastic (for soles)
• Brown Mouline or Iris thread (small amount)
• Small piece of white felt (for eyes)
• Super glue (for eyes & eyelashes)
• Polyester stuffing / holofiber – approx. 150 g
• White nylon thread or fishing line (for face tightening)
• Crochet hook – 3 mm
• Scissors
• Dry pastels or blush (optional, for shading)
Finished Size
Using the listed materials, the doll will measure approximately 43–45 cm tall.
Knitting Tips
✓ Always place a marker at the beginning of each round.
✓ Crochet tightly to avoid holes when stuffing.
✓ Stuff firmly, but do not overstretch the fabric.
Abbreviations
MC – Magic Circle
CH – Chain
SC – Single Crochet
INC – Increase
DEC – Decrease
SS – Slip Stitch
BLO – Back Loop Only
FLO – Front Loop Only
ST – Stitch
STAGE 1: HEAD + NOSE
HEAD
Work in continuous rounds.
1: 6 SC in MC (6)
2: INC x6 (12)
3: (1 SC, INC) x6 (18)
4: (1 SC, INC, 2 SC) x6 (24)
5: (3 SC, INC) x6 (30)
6: (2 SC, INC, 4 SC) x6 (36)
7: (5 SC, INC) x6 (42)
8: (3 SC, INC, 6 SC) x6 (48)
9: (7 SC, INC) x6 (54)
10: (4 SC, INC, 8 SC) x6 (60)
11–23: 60 SC (60) – 13 rounds
24: (4 SC, DEC, 8 SC) x6 (54)
25: (7 SC, DEC) x6 (48)
26: (3 SC, DEC, 6 SC) x6 (42)
27: (5 SC, DEC) x6 (36)
28: (2 SC, DEC, 4 SC) x6 (30)
29: (3 SC, DEC) x6 (24)
30: (1 SC, DEC, 2 SC) x6 (18), SS
Fasten off, leaving a long tail for sewing.
Stuff the head firmly before closing completely.
✔ Increase/decrease symmetry doğru
✔ Stitch counts tam tutuyor
✔ Spiral mantıkta problem yok
NOSE
Work in joined rounds (oval base).
1: CH 4, starting from 2nd CH from hook:
1 SC, 4 SC in last CH,
continue on opposite side: 1 SC, 3 SC in first CH, SS (10)
2: 10 SC (10)
Fasten off, leaving a long tail for sewing.
STAGE 2: LEGS (Make 2)
Sole – White Yarn
1: CH 10, CH 2 (turning chains)
2: 4 SC in 3rd CH from hook, 8 SC, 5 SC in last CH, 8 SC on the other side of the chain, SS (25)
3: CH 2, 1 SC in same stitch as SS, BLO 4 SC, 4 INC, 8 SC, 5 INC, 8 SC, SS (35)
Cut insoles from cardboard or plastic according to the sole shape.
Boot
4: Switch to raspberry yarn. 35 SC in BLO (35)
5: Switch to lilac yarn. 35 SC (35)
6: 35 SC (35)
7: 35 SC (35)
8: 35 SC (35)
Crochet 3 additional SC to move the marker to the middle of the heel.
9: 10 SC, 7 DEC, 11 SC (28)
Insert the insole.
10: 9 SC, 5 DEC, 9 SC (23)
11: 23 SC (23)
Cut approximately 80 cm of wire.
Fold in half, form a loop at the end, twist the ends together, and insert the wire into the boot.
12: 9 SC, 3 DEC, 8 SC (20)
13: (DEC, 8 SC) x2 (18)
Stuff the boot firmly.
Leg (Pant Section – Blue Yarn)
14: Switch to blue yarn. 18 SC in BLO (18)
15- 38: 18 SC (18)
Stuff the leg as you go.
Crochet 4 additional SC to reach the middle of the inner side of the leg.
Fasten off the first leg.
For the second leg, repeat the same pattern but do not fasten off — the yarn will be used to join the legs to the body later.
Stage 3: Arms (Make 2)
Start with skin-colored yarn.
1: 6 SC in MC (6)
2: INC in each stitch (12)
3: (5 SC, INC) x2 (14)
4–8: 14 SC (14)
9: 1 SC, SH (4 FLO SC in one stitch), 12 SC (14)
10: 14 SC (14)
11: (DEC, 5 SC) x2 (12)
12: 12 SC (12)
Switch to lilac yarn.
13: 12 SC (12)
14: 12 SC in BLO (12)
Insert a 25–30 cm wire piece into the arm.
Bend one end into a small loop, twist the ends together and insulate with tape.
Stuff the palm firmly.
15–33: 12 SC (12)
Stuff lightly as you go, leaving the top slightly unstuffed.
Fasten off, leave a long tail for sewing.
Make the second arm the same way.
Sleeve Cuff
Turn the arm so it faces away from you.
Join yarn to the first unworked FLO stitch of Round 14 (where BLO was worked).
1: 2 CH (does not count as a stitch), 1 FLO SC in the same stitch, (2 FLO SC, INC in FLO) x3, 2 FLO SC, SS (16)
2: 2 CH, 15 FLO SC, SS (16)
Fasten off and hide the yarn tail neatly.
Stage 4: Body
Join the Legs
On the leg where the yarn was not cut:
- CH 3
- Join with 1 SC to the second leg
- Place marker (beginning of round)
Body
1: 42 SC
(18 SC on first leg, 3 SC in CH, 18 SC on second leg, 3 SC on opposite side of CH) (42)
2: 42 SC (42)
Twist together the wires from both legs and insulate securely.
3: (6 SC, INC) x6 (48)
4–6: 48 SC (48)
7: (7 SC, INC) x6 (54)
8–10: 54 SC (54)
11: (DEC, 7 SC) x6 (48)
12: (DEC, 6 SC) x6 (42)
Move the stitch marker so it aligns with the center of the side.
Switch to lilac yarn.
13: 42 SC (42)
14: 42 SC in BLO (42)
Insert a 25–30 cm wire piece into the body.
Bend one end into a loop, twist, and insulate with tape.
Stuff the body firmly.
15–33: 42 SC (42)
Stuff evenly as you go.
Fasten off, leaving a long tail for attaching the head.
Stage 5: Face Decoration
Eye Sculpting (Eye Sockets)
- Count 16 rows down from the first round of the head.
Place a blue marker between Rounds 16–17. - From the blue marker, count 2 SC upward.
Place a yellow marker. - From the yellow marker, count 8 SC to the right.
Place a lilac marker. - From the lilac marker, count 2 SC downward.
Place a green marker. - On the bottom row of the head, exactly between the blue and green markers, place a red marker.
Tightening the Right Eye
- Insert a long needle with nylon thread (or fishing line) into the open hole at the base of the head.
- Bring the needle out at the blue marker.
- Insert the needle at the yellow marker.
- Bring it out at the red marker.
- Pull tightly to create the eye socket.
- Repeat once more for firmness.
- Tie secure knots and hide the thread ends inside the head.
Tightening the Left Eye
- Insert the needle again through the bottom opening.
- Bring it out at the green marker.
- Insert at the lilac marker.
- Bring it out at the red marker.
- Pull tightly.
- Repeat tightening once.
- Tie knots and hide thread ends.
⚠ Make sure both eyes are tightened evenly.
Eyes
- Cut two identical eye bases from white felt.
- Make a small slit in the center of each.
- Insert the blue pupils through the slits.
- Position the eyes symmetrically on the head.
- Sew the felt pieces in place using brown “Iris” thread.
- Apply a small amount of super glue to the back of the pupils and secure them.
Eyelashes
- Cut doll eyelashes to the desired length.
- Glue them along the upper edge of each eye using super glue.
Facial Embroidery
Sew the previously crocheted nose in place between the cheeks.
Use hair-colored yarn to embroider the eyebrows.
Embroider the mouth using raspberry yarn.
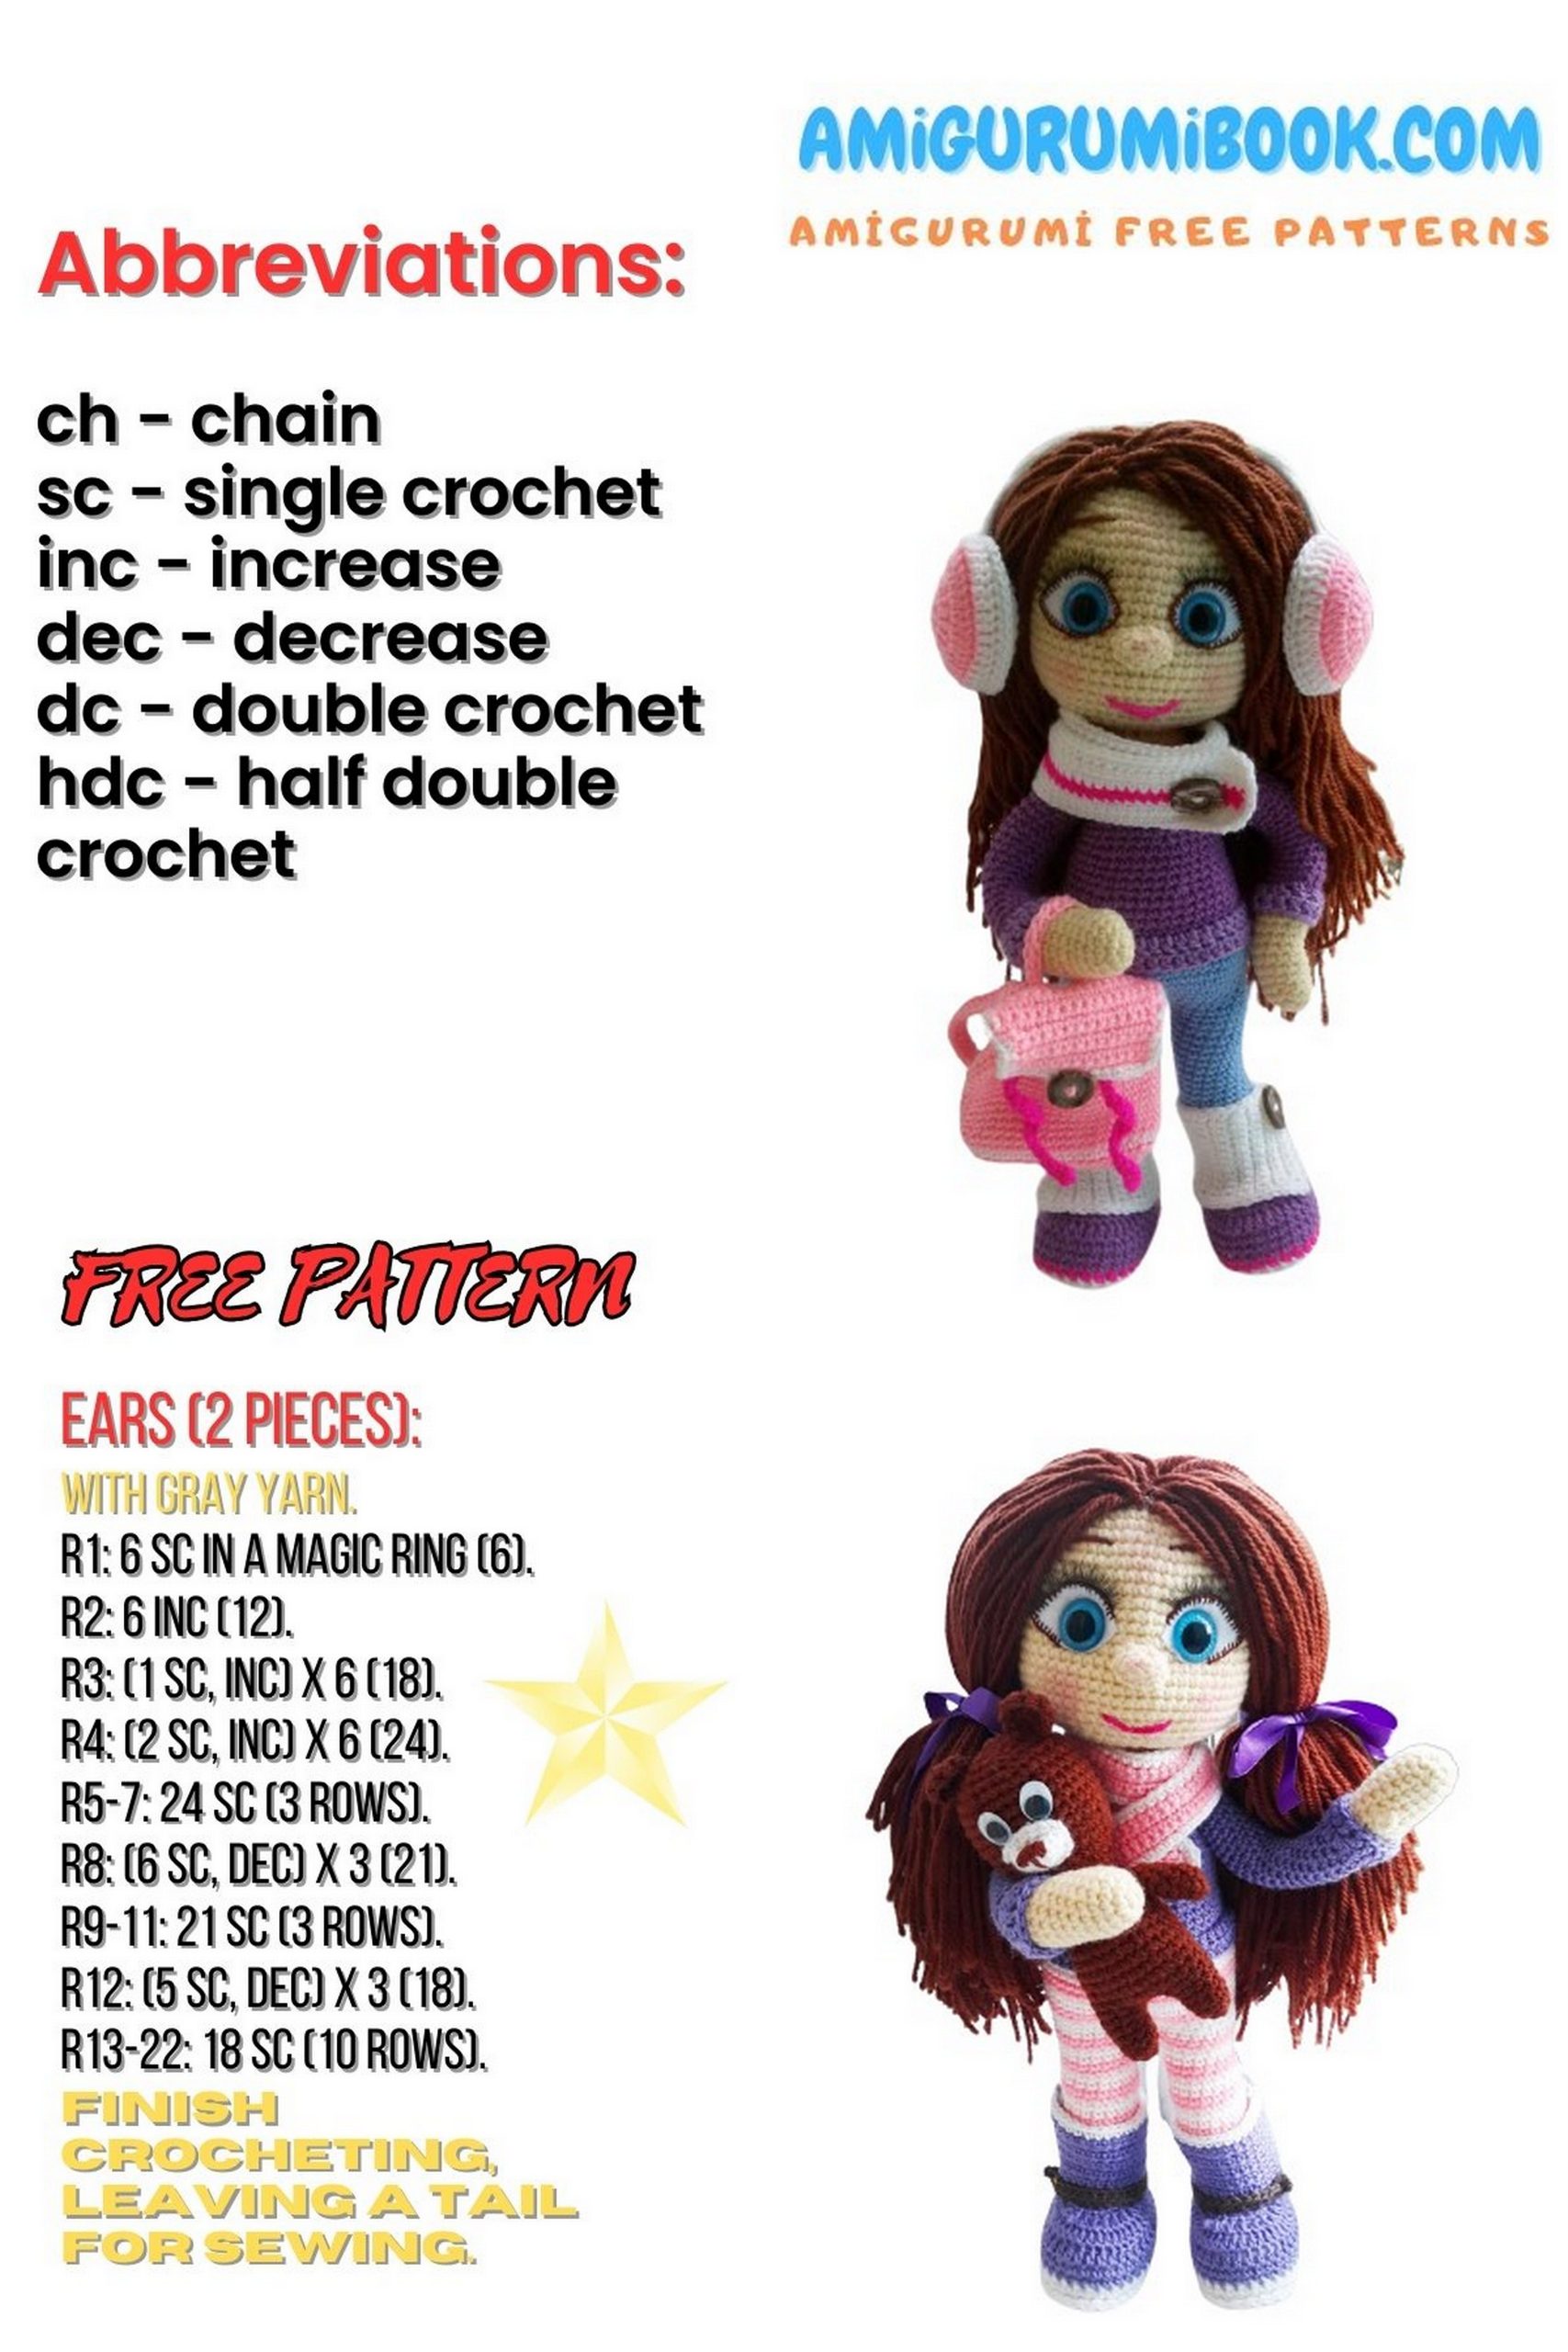
EARS (Embroidered + Crocheted Edge)
- Using skin-colored yarn, embroider the ear outline on the head with chain stitch.
- Do NOT cut the yarn.
- Crochet SC around the embroidered loops to form the ear shape.
- Repeat for the second ear.
Stage 6: Hair (25 cm Length)
- Wrap yarn around a 25 cm tall book.
- Cut along one side to create 50 cm strands.
- Fold each strand in half.
- Attach using the fringe method:
- Insert hook under SC.
- Pull folded strand through.
- Pull ends through loop and tighten.
Attach hair along the hairline first, then fill the inside area.
Attach strands to every second SC.
Stage 7: Scarf
Using white yarn:
1: CH 90 + 1 turning CH
2–4: 90 SC, CH, turn (3 rows)
Switch to raspberry:
5: 90 SC, CH, turn
6: 6 SC, CH 5, skip 5 SC, 79 SC, CH, turn (buttonhole)
Switch to white:
7–8: 90 SC, CH, turn
9: SC evenly around entire scarf edge
FO. Sew button in place.
Backpack
Base
1: CH 15 + 1 CH
2: 14 SC, 3 SC in last CH, 14 SC opposite side, SL ST (33)
3: SL ST, 13 SC, 3 SL ST, 14 SC, 2 SL ST (39)
Switch to white:
4: 39 SC BLO
Switch to pink:
5–17: 39 SC (13 rows)
18: 20 SC, 19 SC BLO, SL ST
19: CH, 39 SC, SL ST
FO.
Backpack Lid
Attach pink yarn to Round 17.
1–15: 17 SC, CH, turn (15 rows)
Edge with white yarn:
• 14 SC along side
• 2 SC in corner
• 6 SC across front
• CH 5 (button loop), skip 4 SC
• 6 SC
• 2 SC in corner
• 14 SC along side
FO.
Straps (Make 2)
Attach to Round 3 BLO.
CH 25
SL ST to Round 17
25 SC back along chain
SL ST to starting point
FO.
Handle
1: CH 16
2: 15 SC
FO.
Drawstring
1: CH 81
2: 80 SC
Insert through backpack openings and tie knot.
Headphones
Wire Frame
Cut approx. 45 cm wire.
Bend ends into loops and tape them.
Inner Cup (Make 2)
1: 6 SC in MR (6)
2: 6 INC (12)
3: (1 SC, INC) x6 (18)
4: (2 SC, INC) x6 (24)
5: (3 SC, INC) x6 (30)
FO.
Outer Cup (Make 2)
1: 6 SC in MR (6)
2: 6 INC (12)
3: (1 SC, INC) x6 (18)
4: (2 SC, INC) x6 (24)
5: (3 SC, INC) x6 (30)
Switch to white:
6: 30 SC
Join inner + outer with SC, slightly stuff.
Insert wire frame.
For second cup, continue crocheting approx. 50 SC around the wire to cover it completely.
FO.
Final Assembly
• Insert body wire securely
• Attach scarf
• Attach backpack
• Position headphones
• Add blush or pastel shading if desired