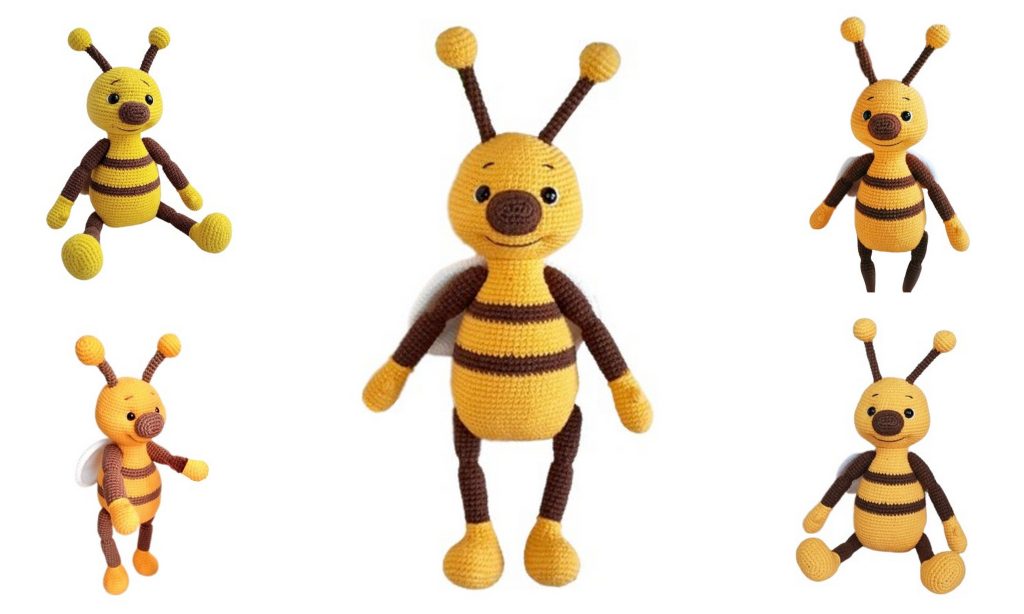
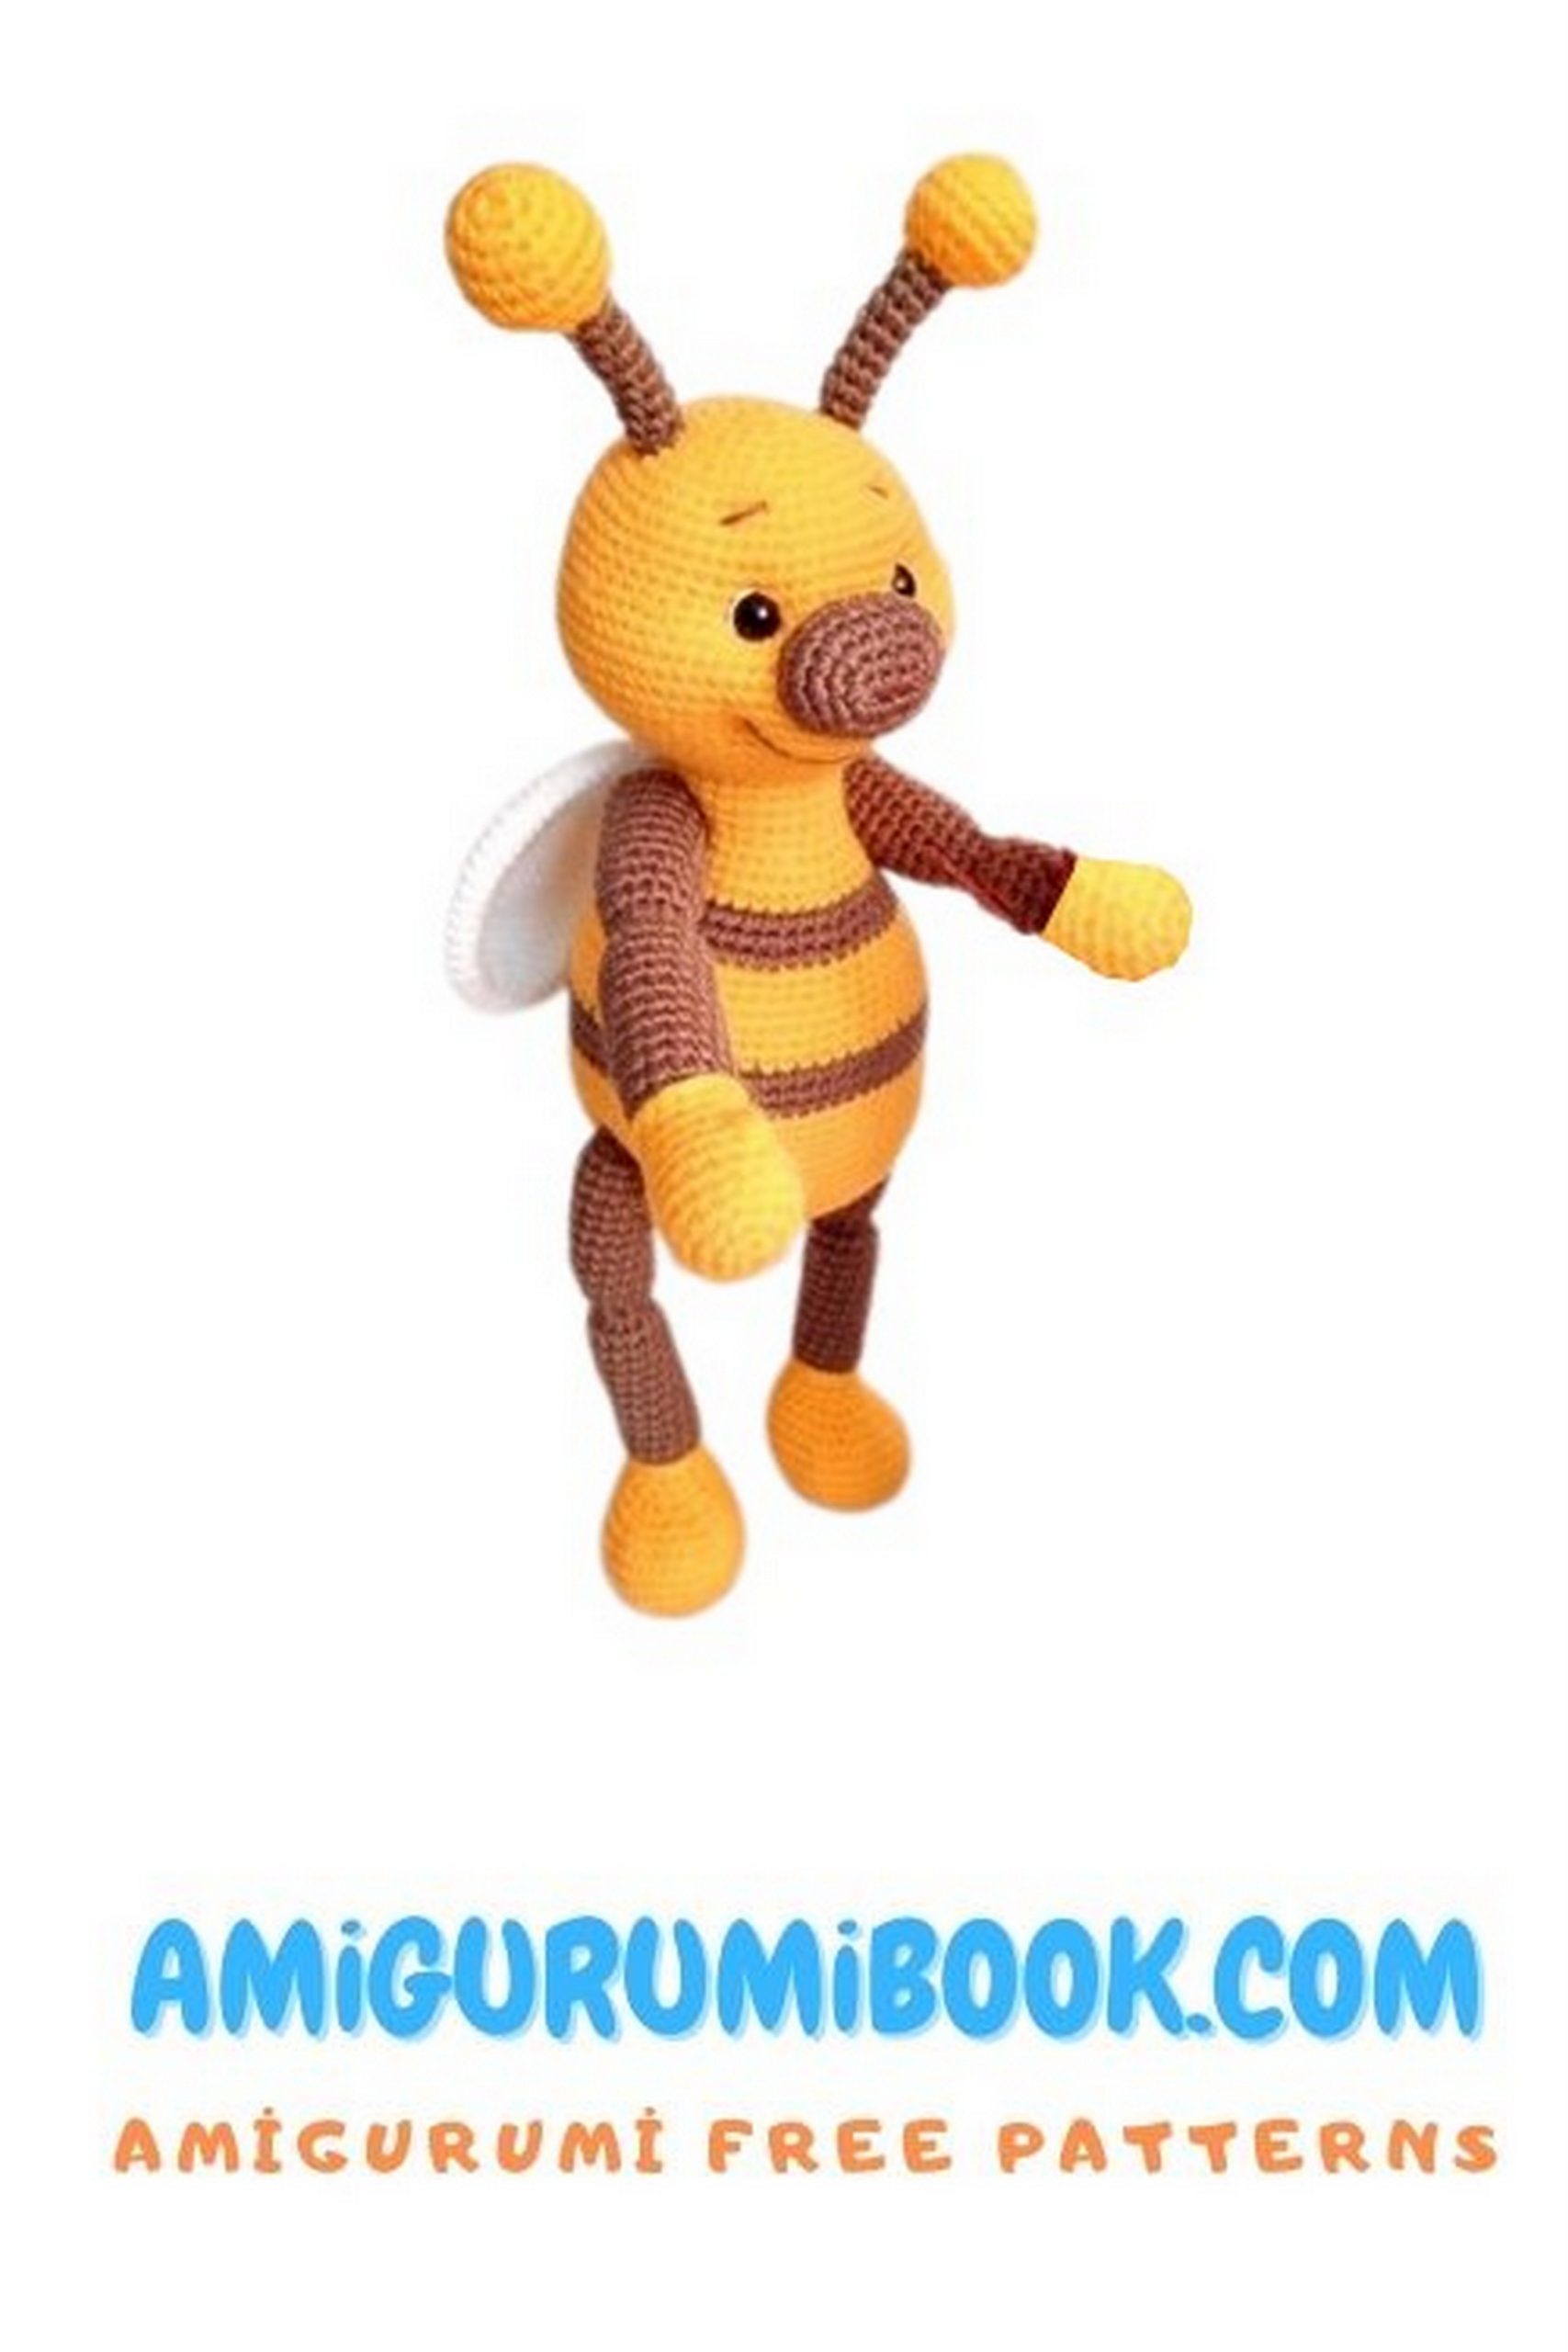
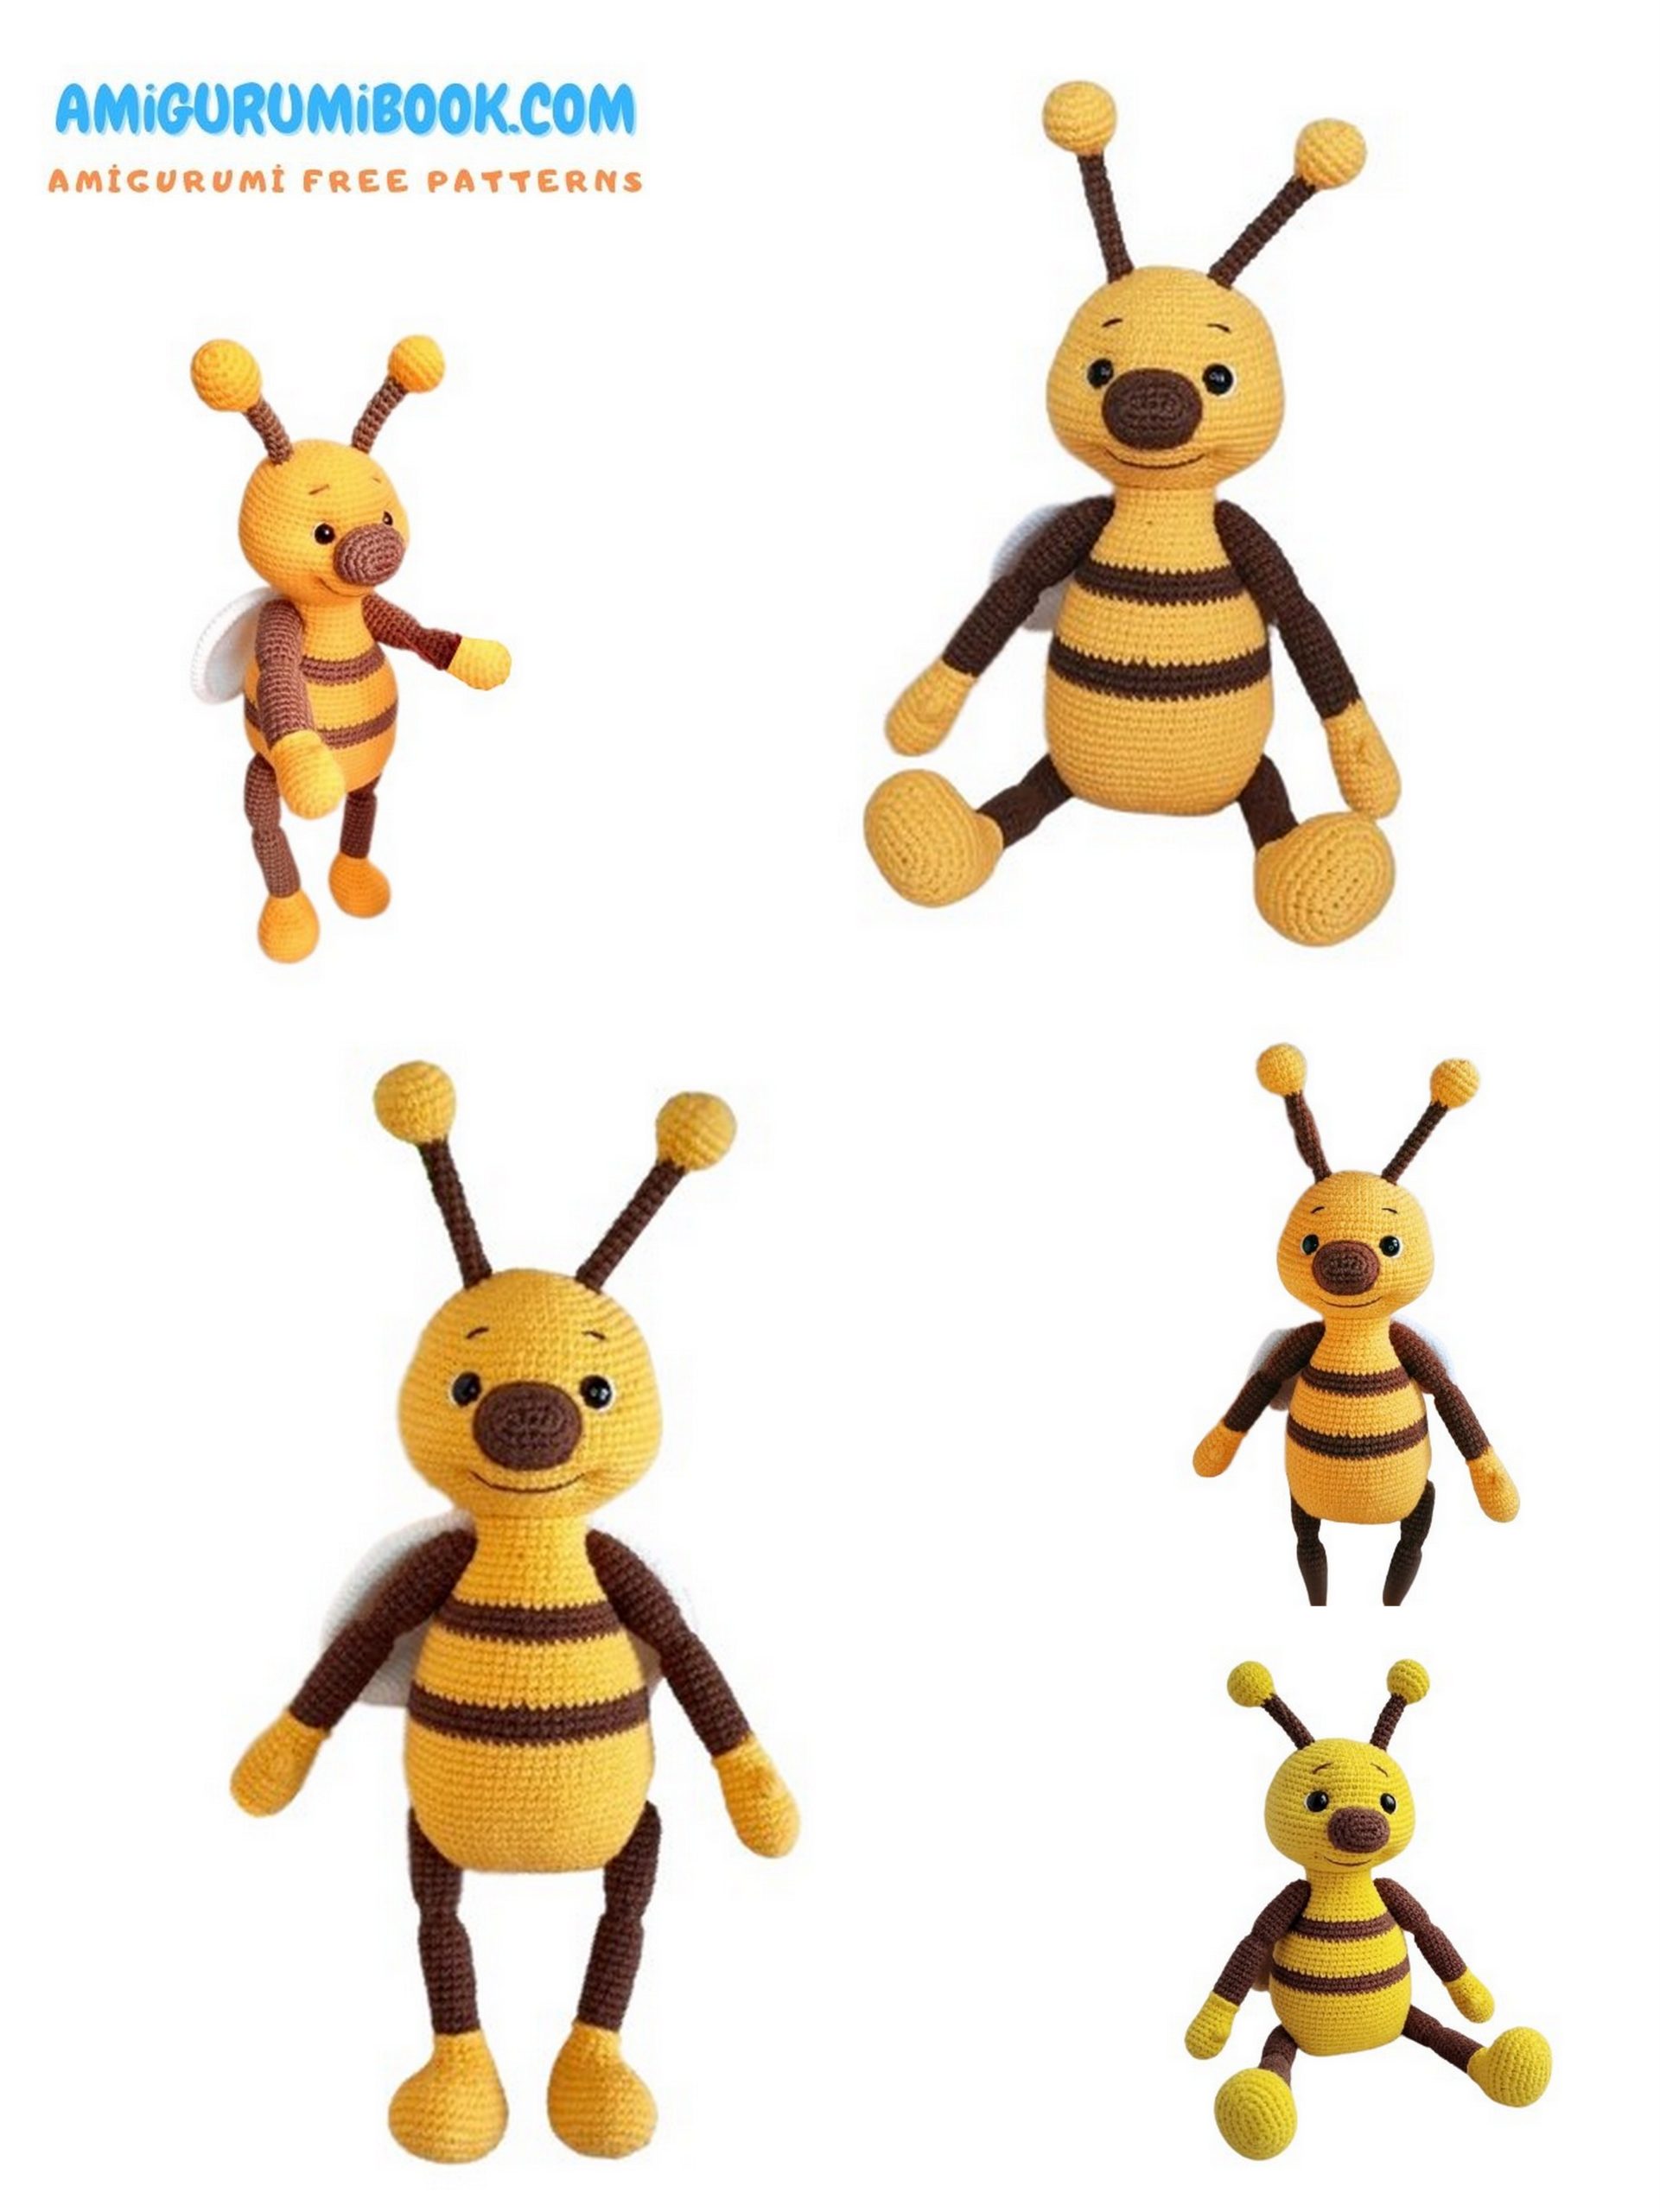
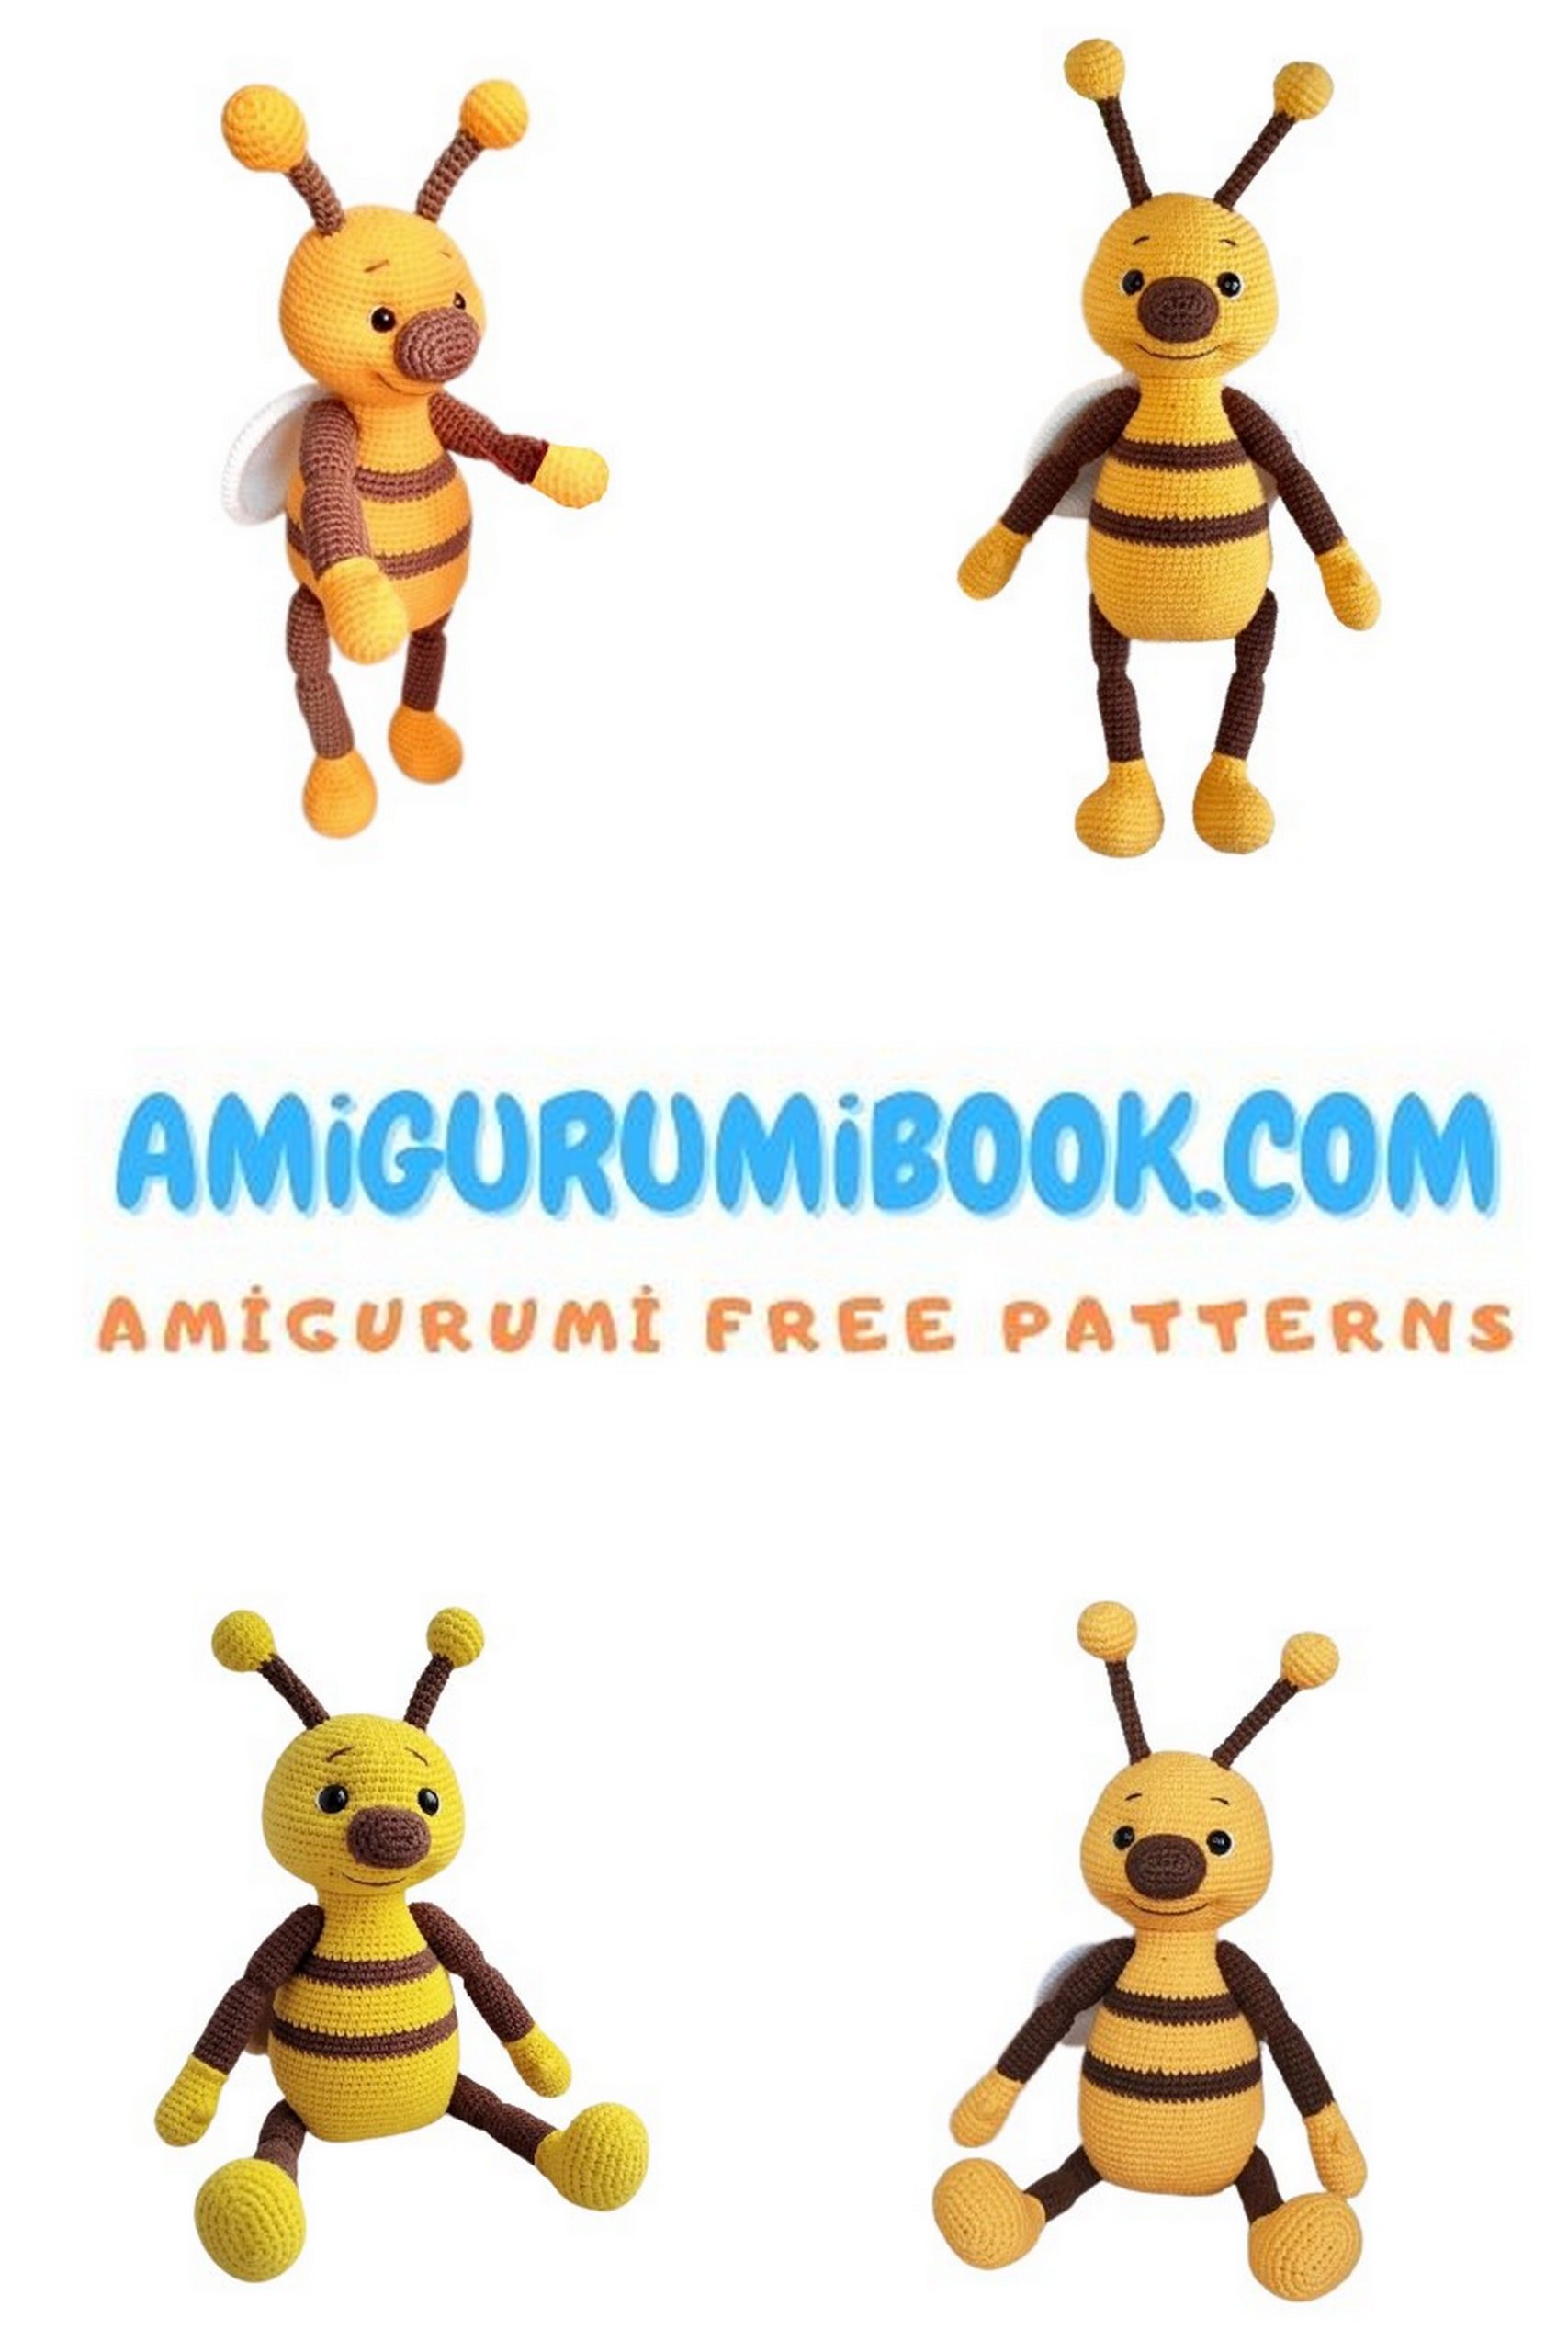
Discover the joy of crafting with this free adorable bee amigurumi pattern, perfect for both beginners and experienced crocheters. Create a charming little bee that adds a touch of sweetness to your handmade collection or makes a delightful gift. free crochet patterns
You may also like more amigurumi patterns.
Welcome to the world of amigurumi, where cuteness knows no bounds! Are you ready to create your very own adorable bee amigurumi with our free pattern? In this guide, we’ll walk you through the steps to craft your buzzing companion using crochet techniques. Whether you’re a beginner or an experienced crafter, this pattern is suitable for all skill levels.
Prepare your materials and dive into the enchanting realm of amigurumi as you embark on the journey to create a charming crochet bee!
If you want to access 1000+ free amigurumi patterns, you can download our application from this link!
MATERIALS AND TOOLS
Yarn
- YarnArt Jeans (50 g / 160 m)
- 35 Yellow – 1 skein
- 70 Brown – 1 skein
- 01 White – 1 skein
- Iris (25 g / 150 m) or similar strong thread
- 7214 Black (eyebrows) – small amount
- 6512 Brown (for sewing limbs) – small amount
- Alize Diva (100 g / 350 m) – small amount (for tightening)
Other Materials
- Safety eyes: 8–9 mm (1 pair)
- Crochet hook: 2.0 mm
- Wide-eye needle (for limbs)
- Blunt tapestry needle (details)
- Polyester fiberfill
- Scissors
- Tweezers
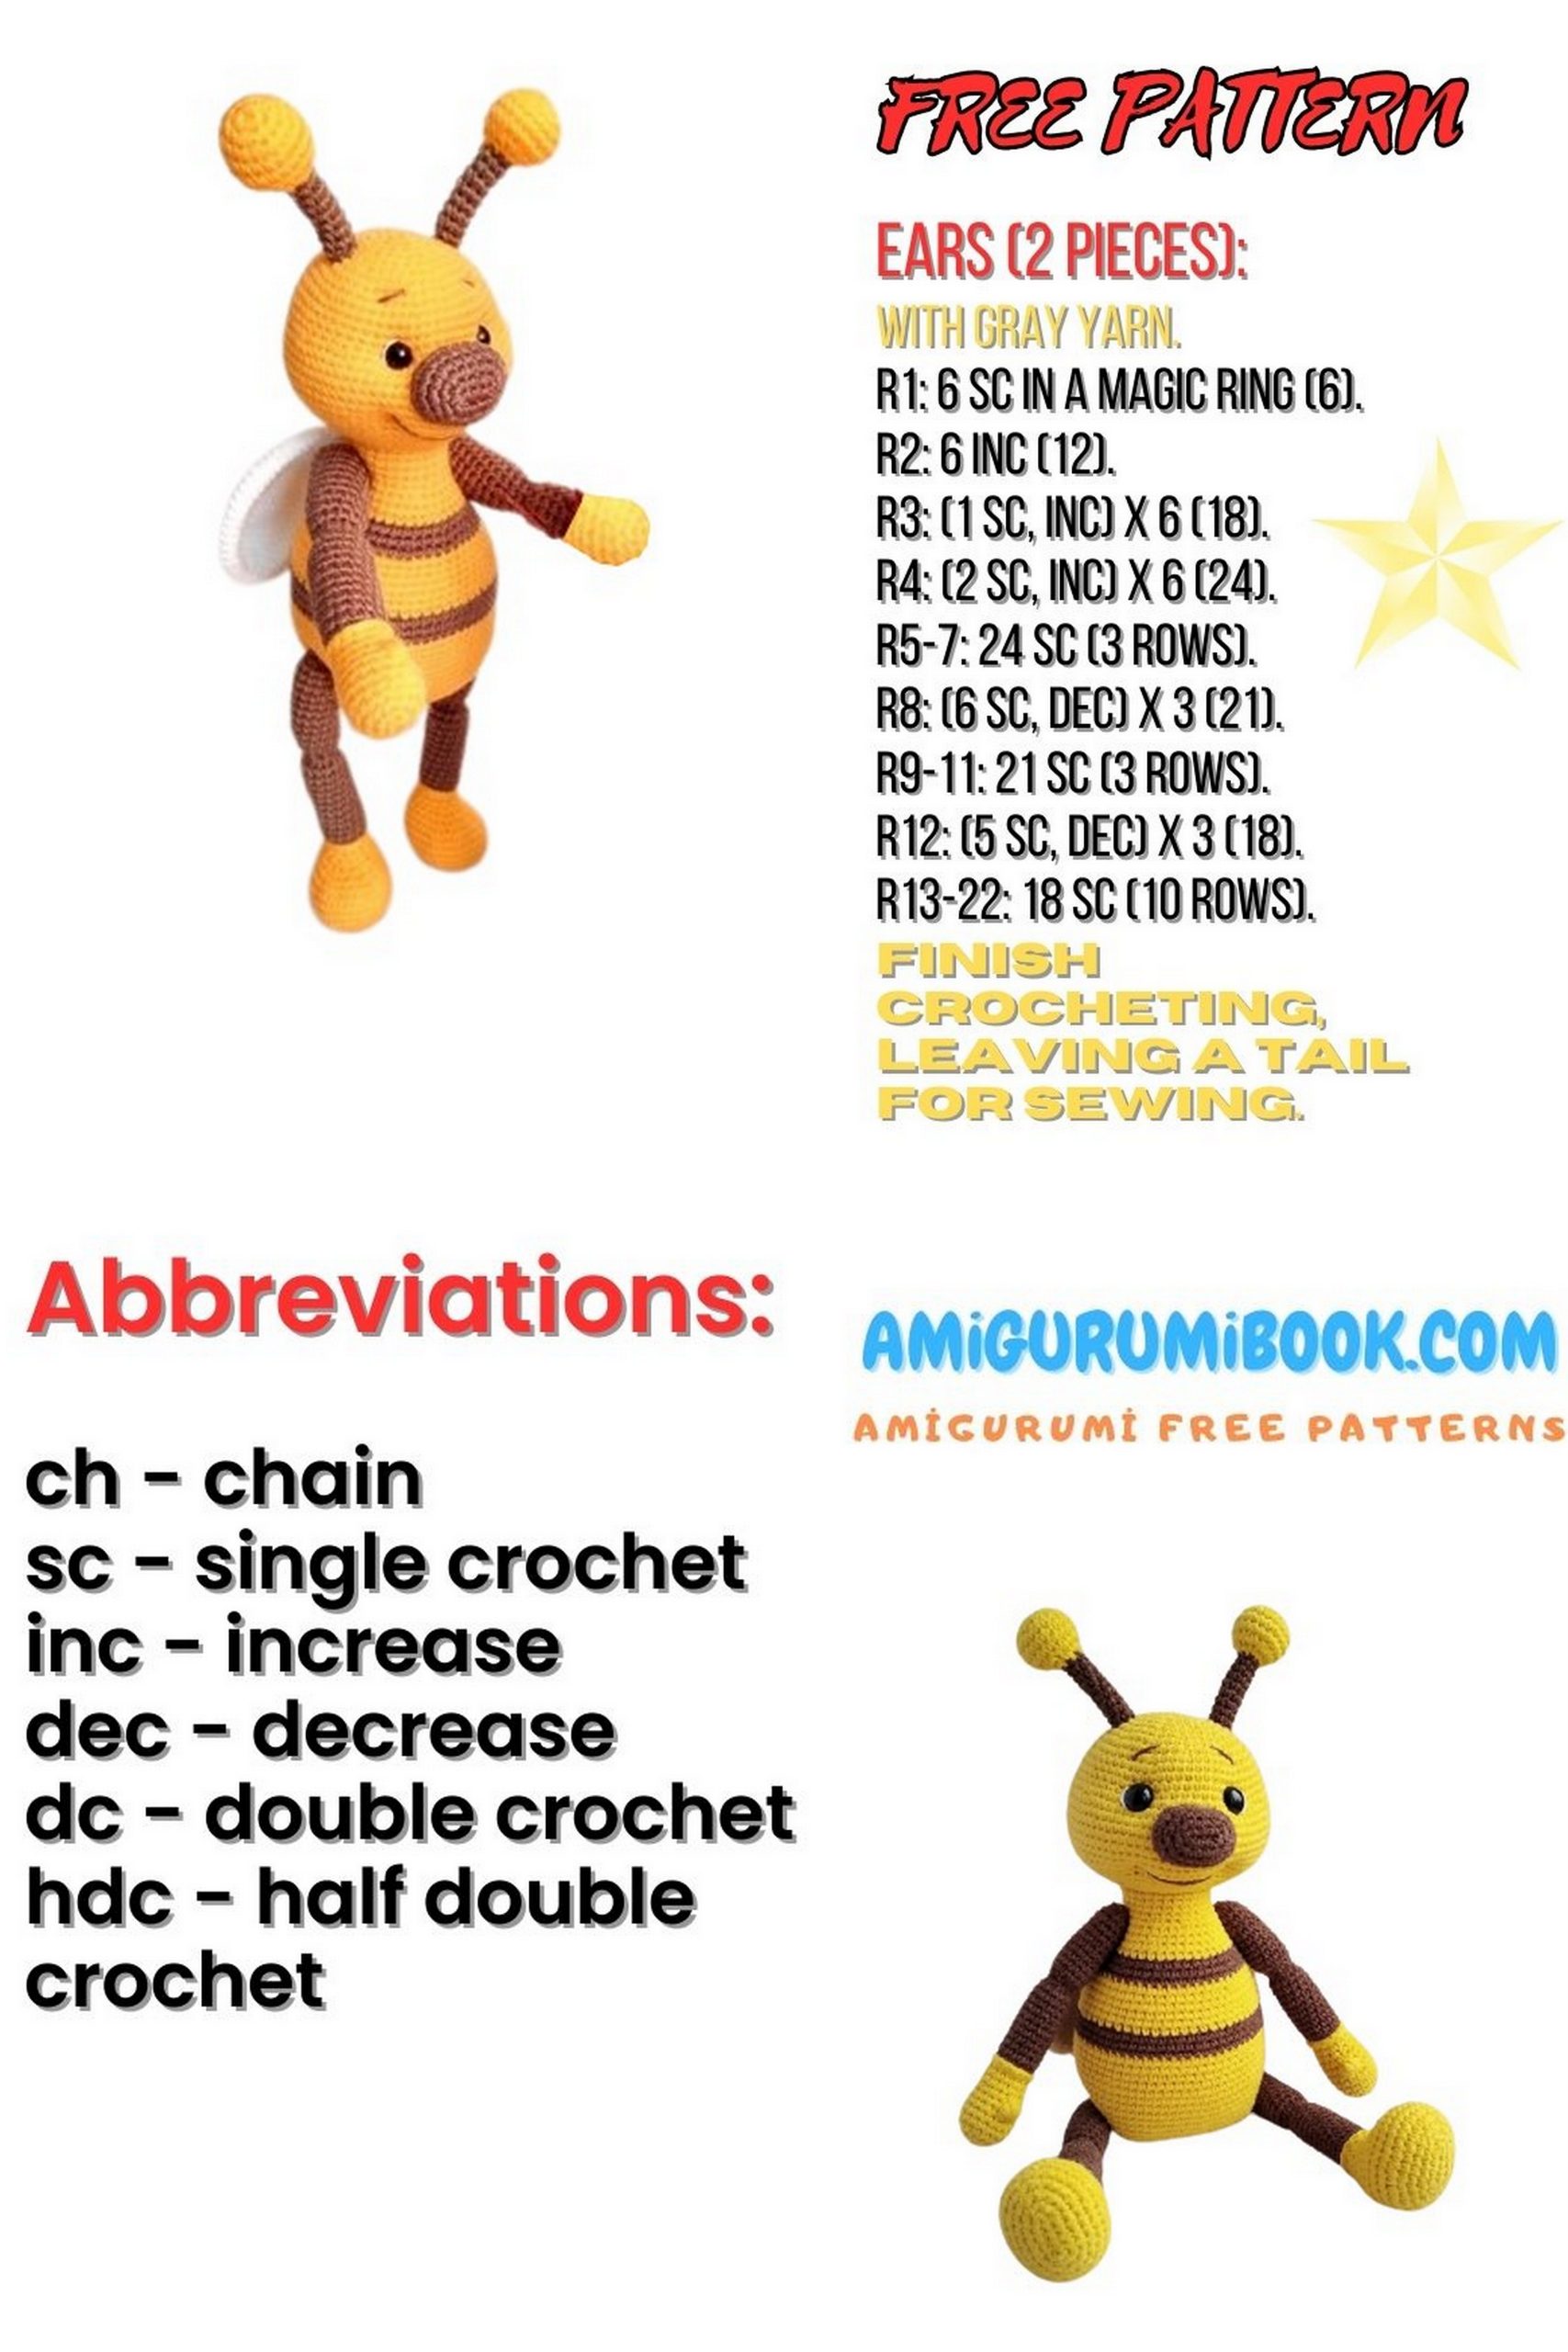
ABBREVIATIONS
( ) – Stitch count at end of row
MR – Magic Ring
CH – Chain
SC – Single Crochet
INC – Increase (2 SC in same stitch)
DEC – Decrease (SC2tog)
BLO – Back Loop Only
FLO – Front Loop Only
SL ST – Slip Stitch
( ) × n – Repeat instructions n times

HEAD
1: 6 SC in MR (6)
2: INC ×6 (12)
3: (1 SC, INC) ×6 (18)
4: 1 SC, INC, (2 SC, INC) ×5, 1 SC (24)
5: (3 SC, INC) ×6 (30)
6: 2 SC, INC, (4 SC, INC) ×5, 2 SC (36)
7: (5 SC, INC) ×6 (42)
8: 3 SC, INC, (6 SC, INC) ×5, 3 SC (48)
9: (7 SC, INC) ×6 (54)
10: 4 SC, INC, (8 SC, INC) ×5, 4 SC (60)
11–14: 60 SC
15: 12 SC, marker, (INC, 2 SC) ×12, marker, 12 SC (72)
(cheeks shaping)
16–23: 72 SC
Insert eyes between rows 14–15 (24 SC, eye, 11 SC, eye, 25 SC)
24: 12 SC, (DEC, 2 SC) ×12, 12 SC (60)
25: 4 SC, DEC, (8 SC, DEC) ×5, 4 SC (54)
26: (7 SC, DEC) ×6 (48)
27: 3 SC, DEC, (6 SC, DEC) ×5, 3 SC (42)
28: (5 SC, DEC) ×6 (36)
29: 2 SC, DEC, (4 SC, DEC) ×5, 2 SC (30)
Fasten off and hide yarn.
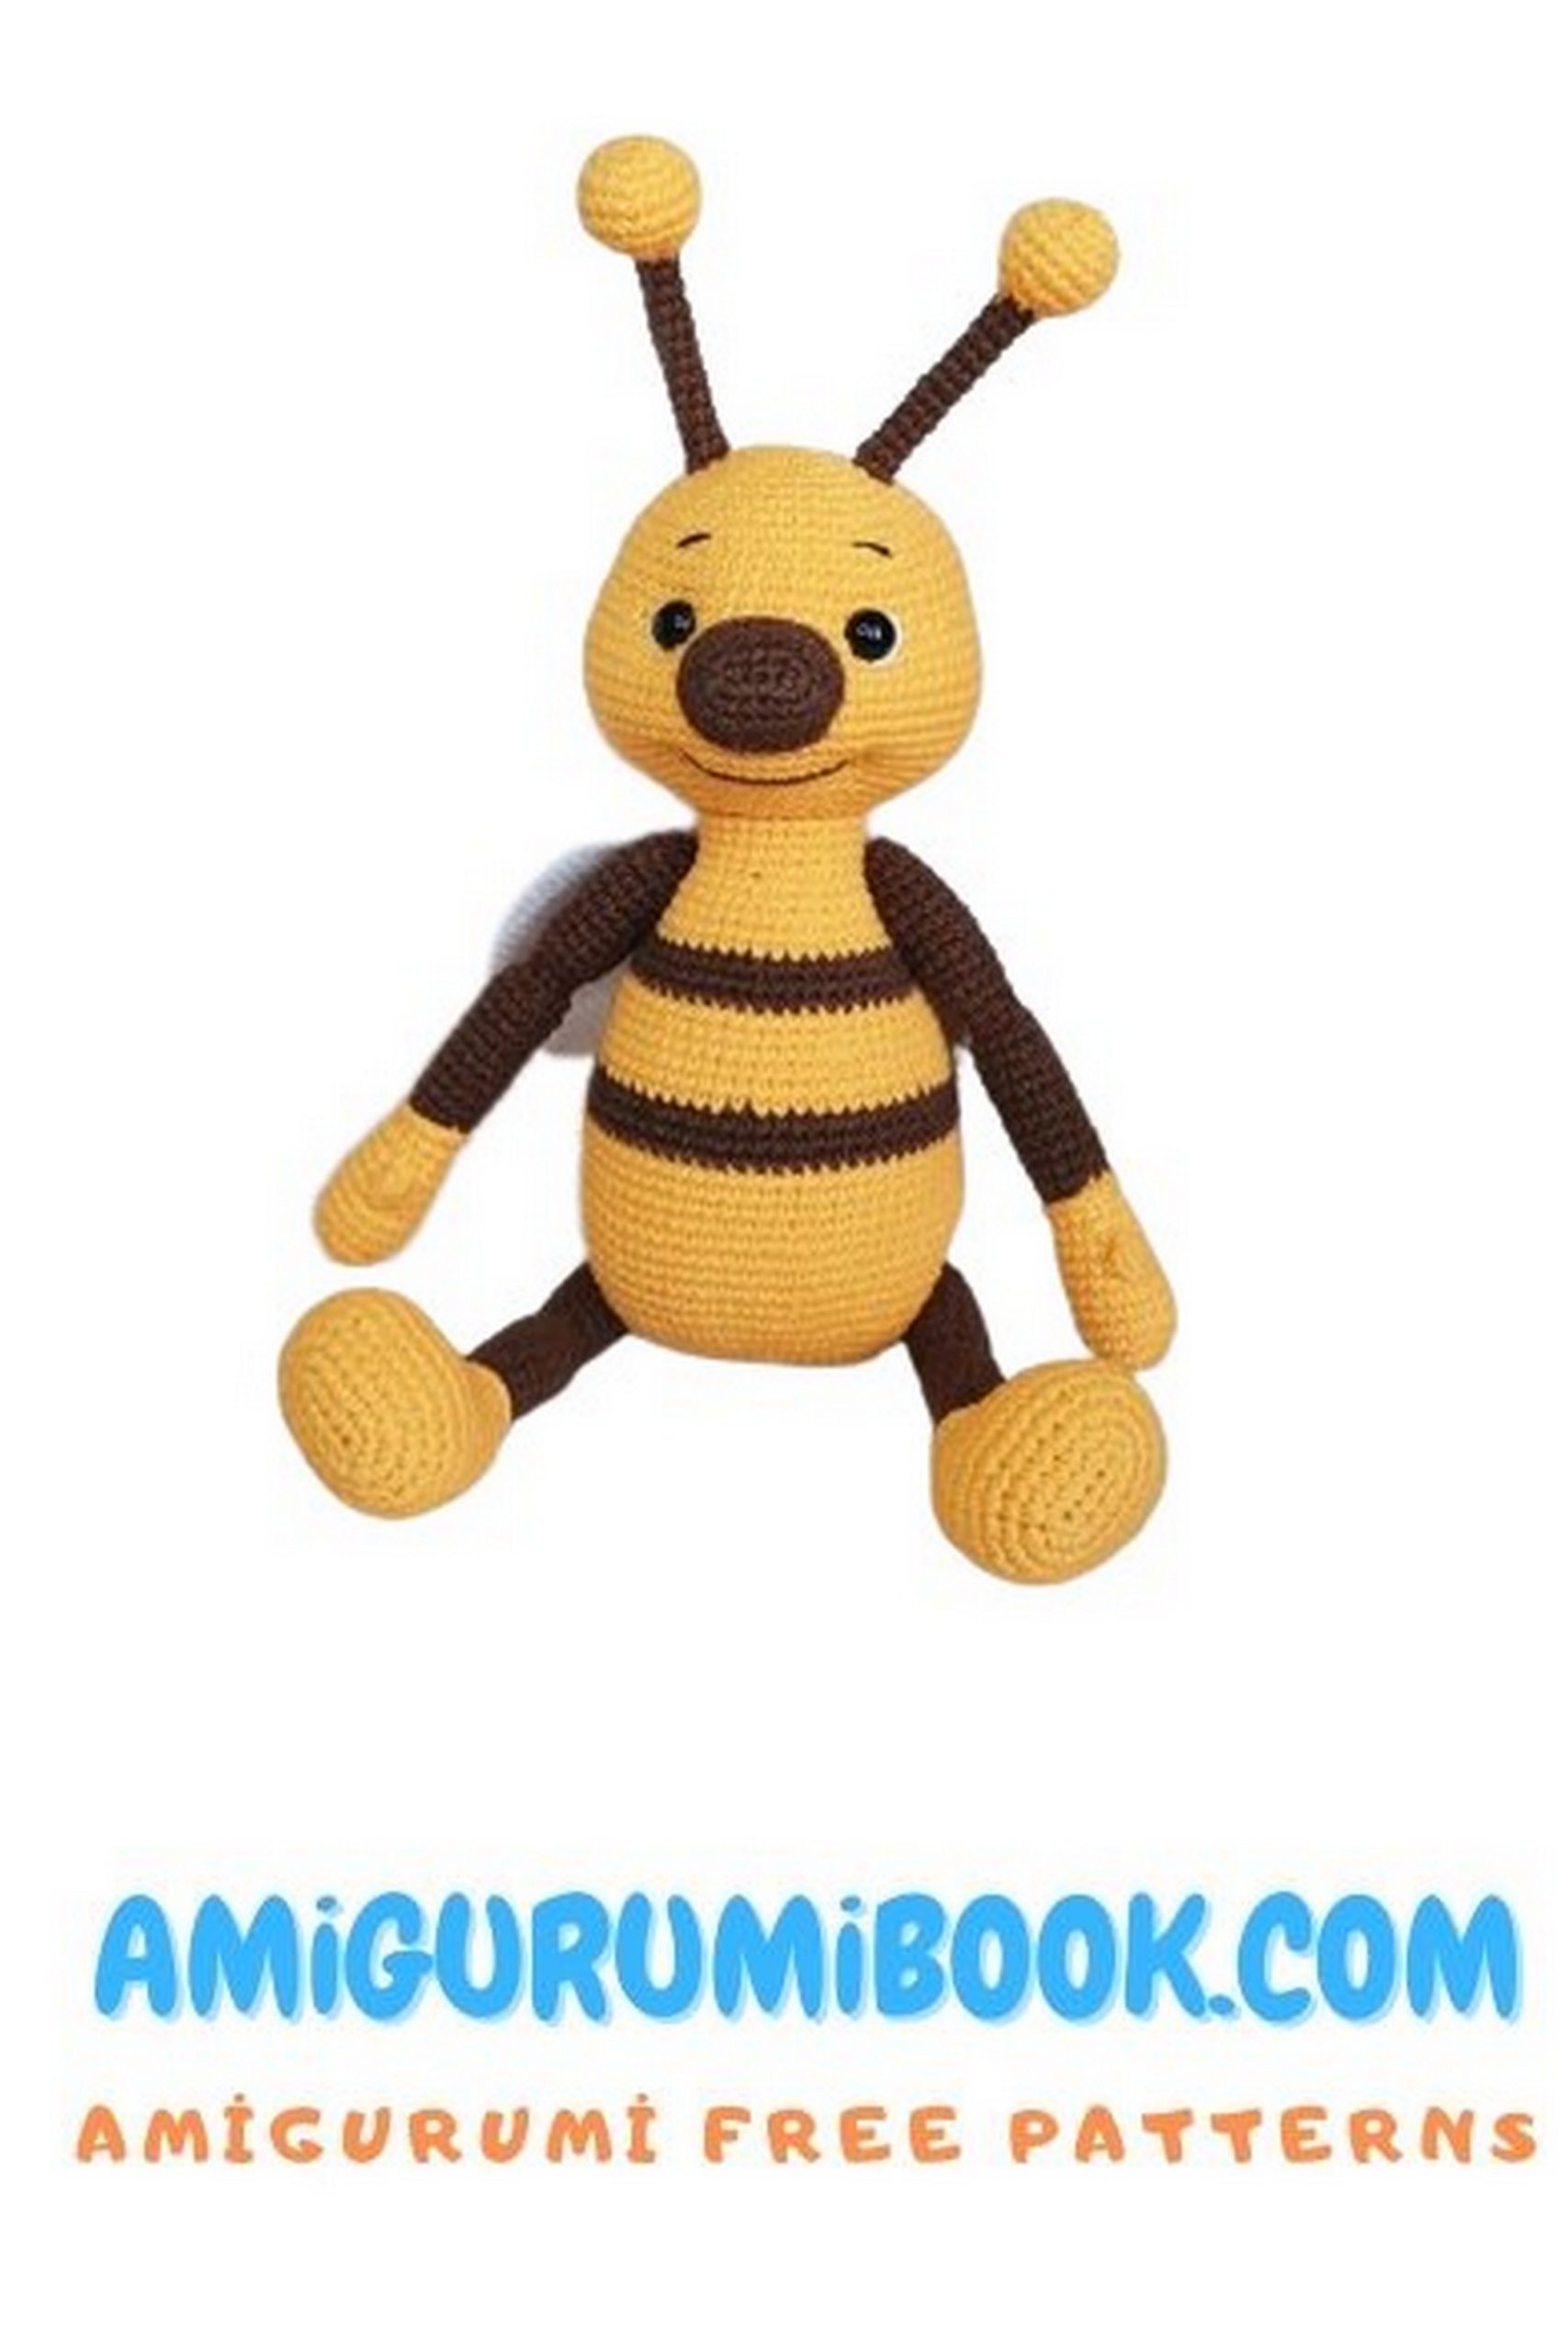
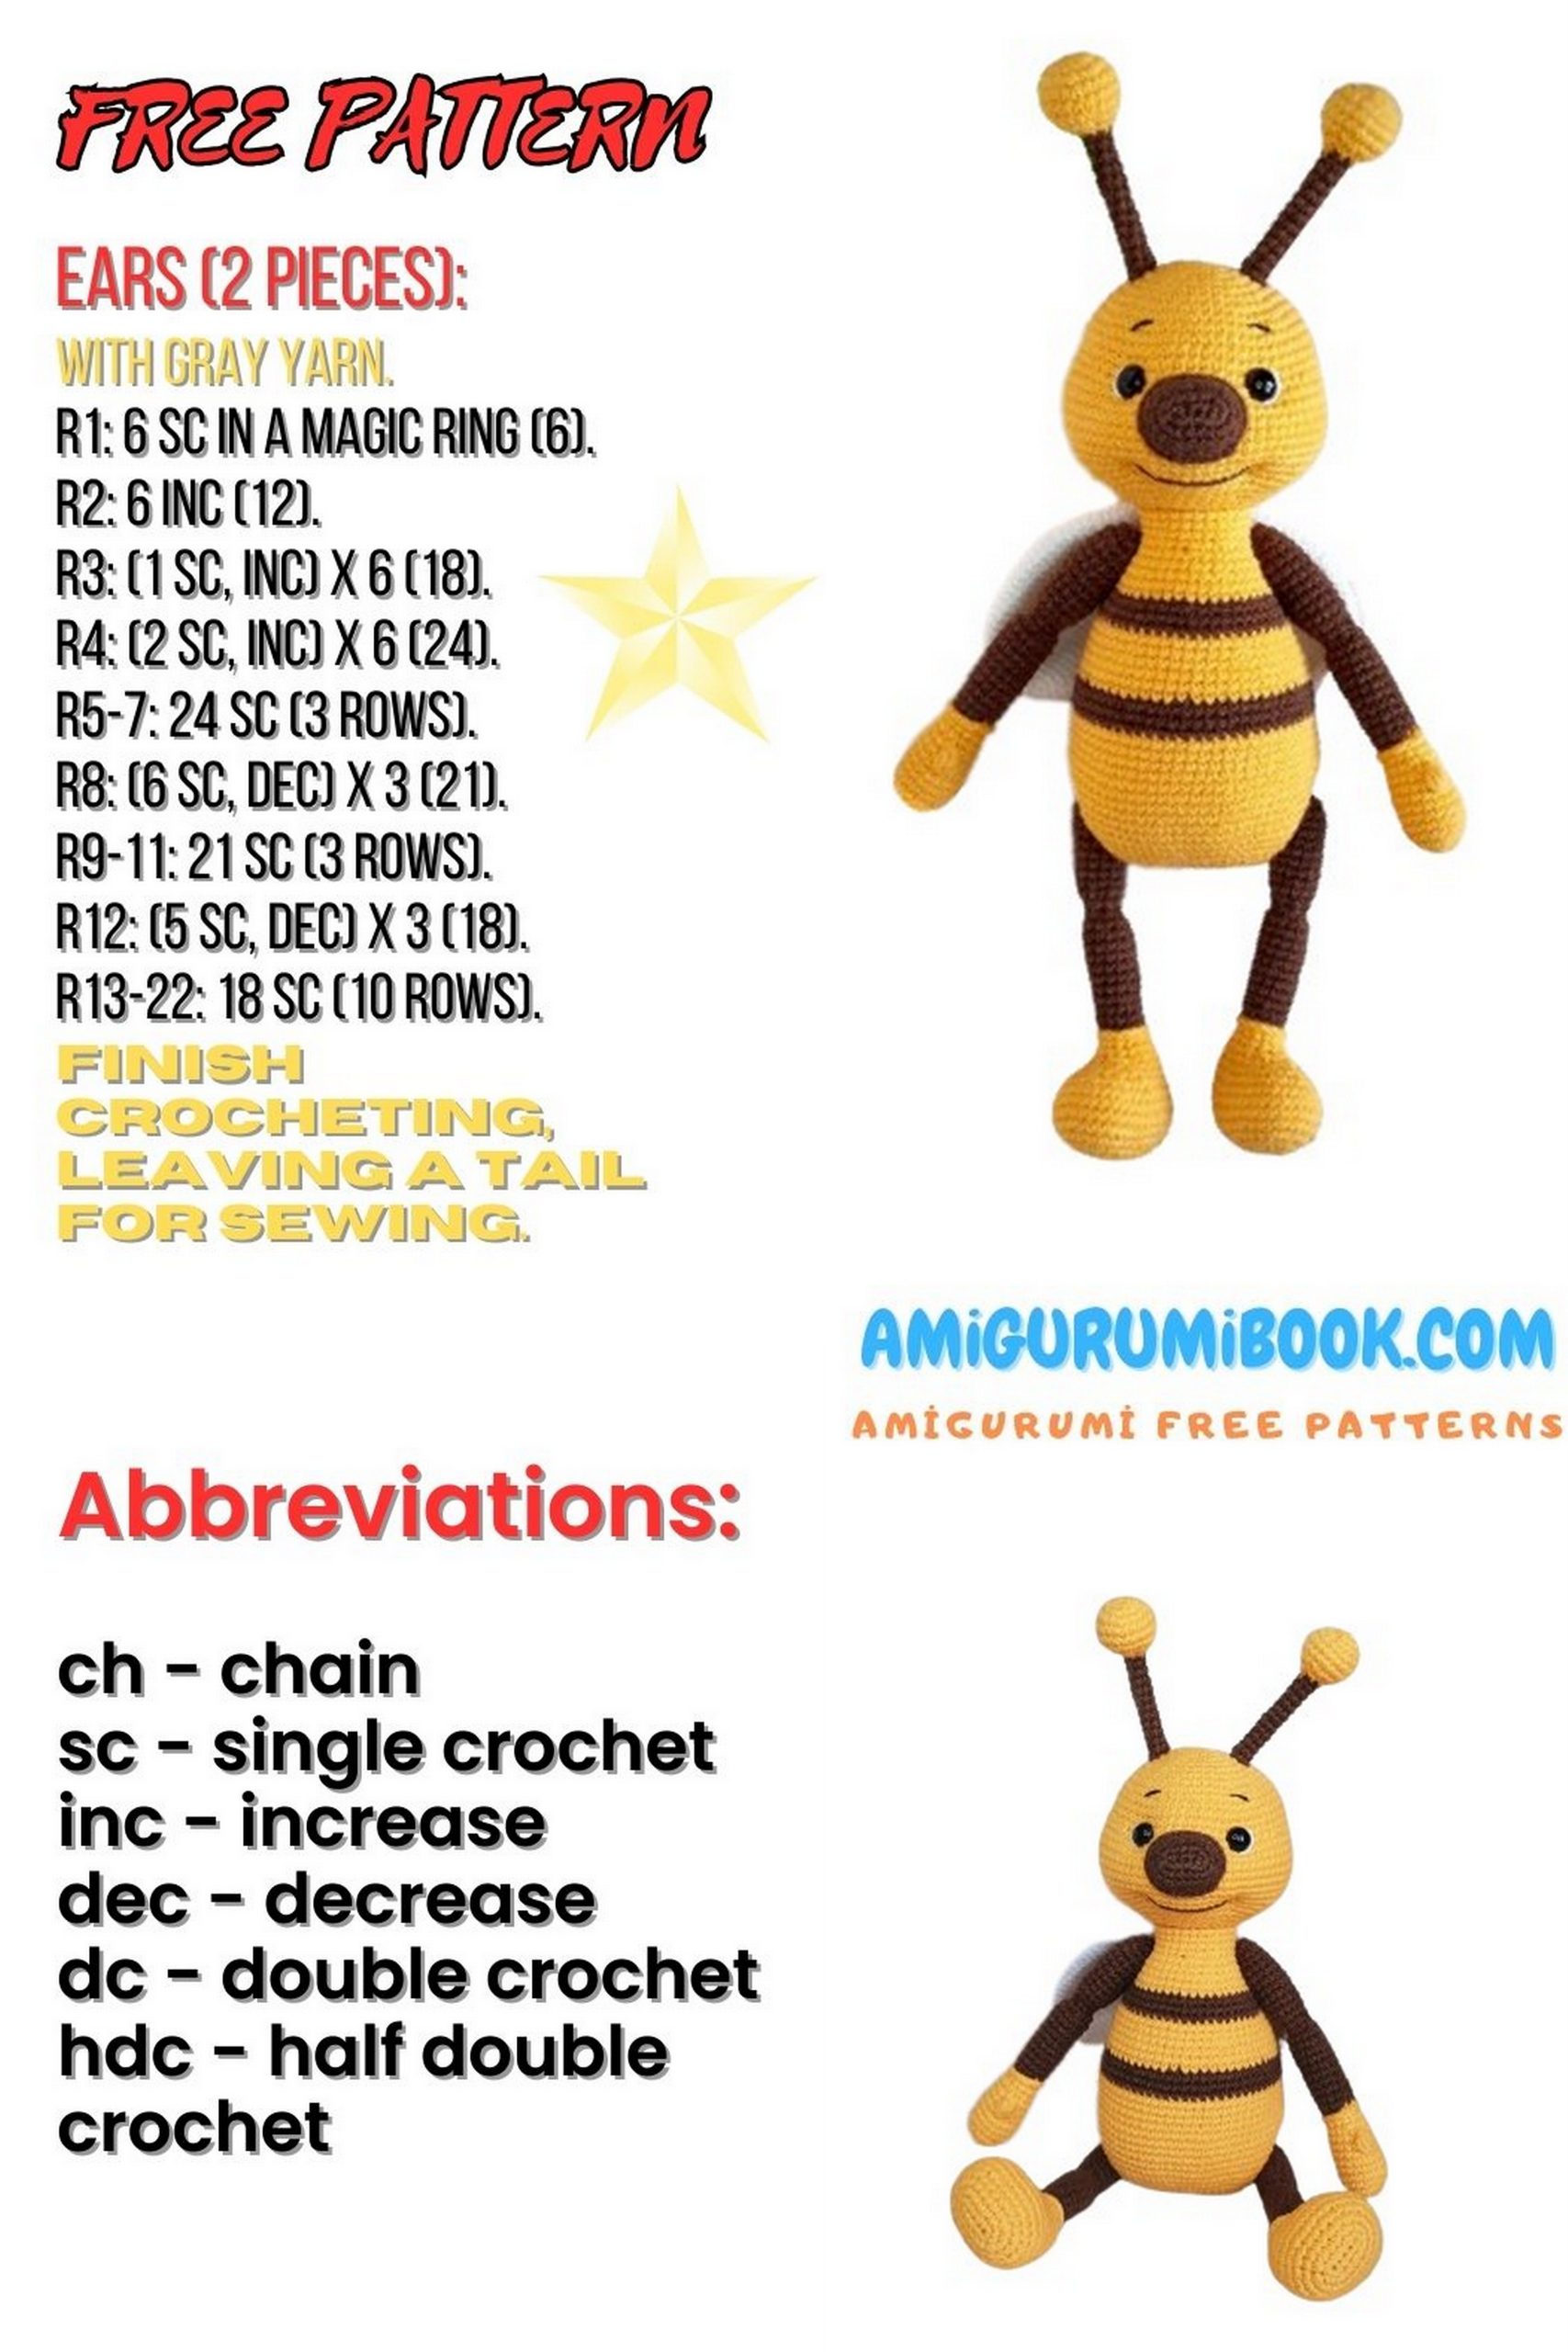
ANTENNAE (make 2)
1: 7 SC in MR (7)
2: INC ×7 (14)
3: (1 SC, INC) ×7 (21)
4–6: 21 SC
7: (1 SC, DEC) ×7 (14)
8: DEC ×7 (7)
Change to brown yarn
9–17: 7 SC
Leave long tail for sewing.
NOSE
CH 5
1: INC, 2 SC, 3 SC in one stitch, other side 3 SC (10)
2: 2 INC, 2 SC, INC ×3, 2 SC, INC (16)
3: (1 SC, INC) ×2, 2 SC, (1 SC, INC) ×3, 2 SC, (1 SC, INC) (22)
4–5: 22 SC
Leave yarn for sewing.
ARMS (make 2)
1: 6 SC in MR (6)
2: INC ×6 (12)
3: (1 SC, INC) ×6 (18)
4–6: 18 SC
7: DEC, 16 SC (17)
8: Make bump, 16 SC (17)
9: DEC, 15 SC (16)
10: DEC, 6 SC, DEC, 6 SC (14)
11: 14 SC
Switch to brown yarn, BLO
12: 14 SC
13–22: 14 SC
23: DEC ×7 (7)
24: INC ×7 (14)
25–34: 14 SC
35: DEC ×7 (7)
Close hole from FLO, hide yarn.
Return to Row 12 BLO and SL ST around.
LEGS (make 2)
CH 6, start in 2nd CH from hook
1: SC, 3 SC BLO, 3 SC BLO other side, 4 SC (12)
2: INC ×2, 3 SC, INC ×3, 3 SC, INC (18)
3: INC ×3, 6 SC, INC ×3, 6 SC (24)
4: (3 SC, INC) ×6 (30)
5: (2 SC, INC, 2 SC) ×6 (36)
6–8: 36 SC
9: 7 SC, (DEC, 2 SC) ×5, DEC, 7 SC (30)
10: 7 SC, (DEC, SC) ×5, 8 SC (25)
11: 7 SC, DEC ×5, 8 SC (20)
12: 7 SC, DEC ×3, 7 SC (17)
13: DEC, 5 SC, DEC, 6 SC, DEC (14)
14: 14 SC
Change yarn BLO
15–26: 14 SC
27: DEC ×7 (7)
28: INC ×7 (14)
29–39: 14 SC
40: DEC ×7 (7)
Close hole, hide yarn.
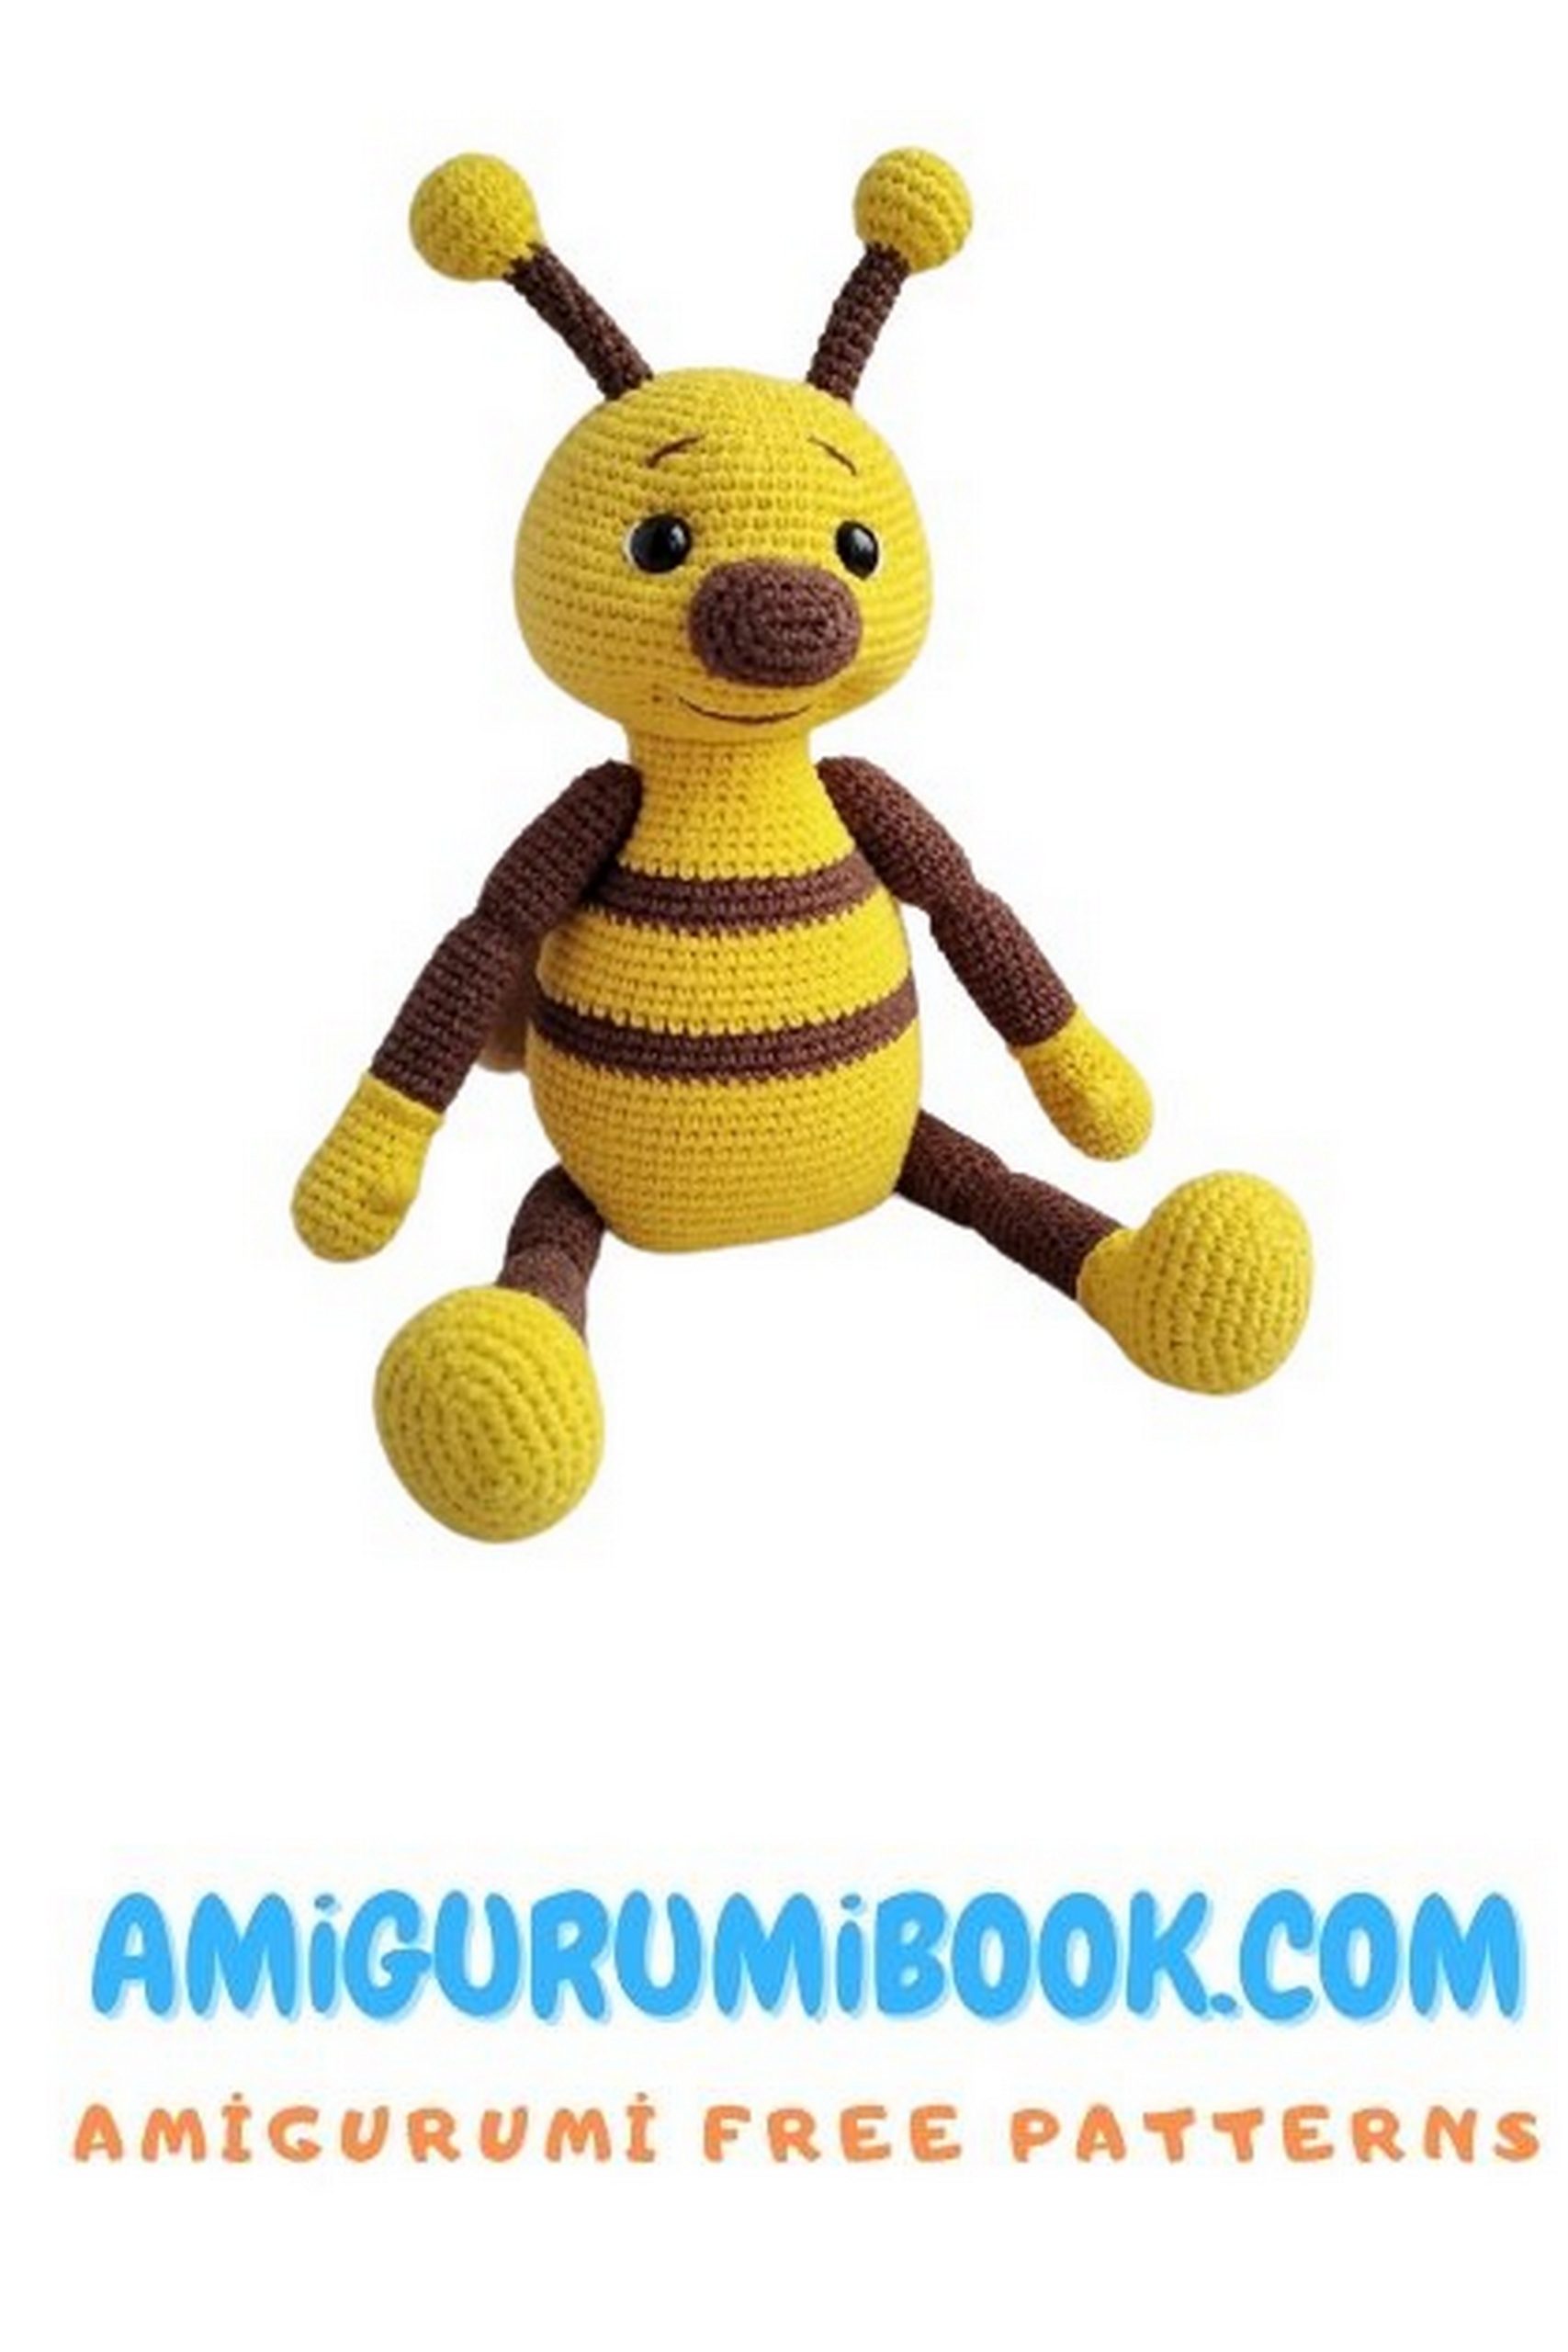
BODY
CH 13, start in 2nd CH
1: INC, 10 SC, 3 SC BLO, other side 11 SC (26)
2: INC ×2, 10 SC, INC ×3, 10 SC, INC (32)
3: (SC, INC) ×2, 10 SC, (SC, INC) ×3, 10 SC, (SC, INC) (38)
4: (2 SC, INC) ×2, 10 SC, (2 SC, INC) ×3, 10 SC, (2 SC, INC) (44)
5: (3 SC, INC) ×2, 10 SC, (3 SC, INC) ×3, 10 SC, (3 SC, INC) (50)
6: (4 SC, INC) ×2, 10 SC, (4 SC, INC) ×3, 10 SC, (4 SC, INC) (56)
7: (3 SC, INC) ×14 (70)
8: 21 SC, INC, 34 SC, INC, 13 SC (72)
9–15: 72 SC
16: (10 SC, DEC) ×6 (66)
17–19: 66 SC
20–22: 66 SC (brown yarn)
23: (9 SC, DEC) ×6 (60)
24–26: 60 SC
27: 4 SC, DEC, (8 SC, DEC) ×5, 4 SC (54)
28–30: 54 SC
31: (7 SC, DEC) ×6 (48)
32–33: 48 SC
34: 3 SC, DEC, (6 SC, DEC) ×5, 3 SC (42)
35: 42 SC
36: (5 SC, DEC) ×6 (36)
37: 2 SC, DEC, (4 SC, DEC) ×5, 2 SC (30)
38–40: 30 SC
Leave long tail for sewing.
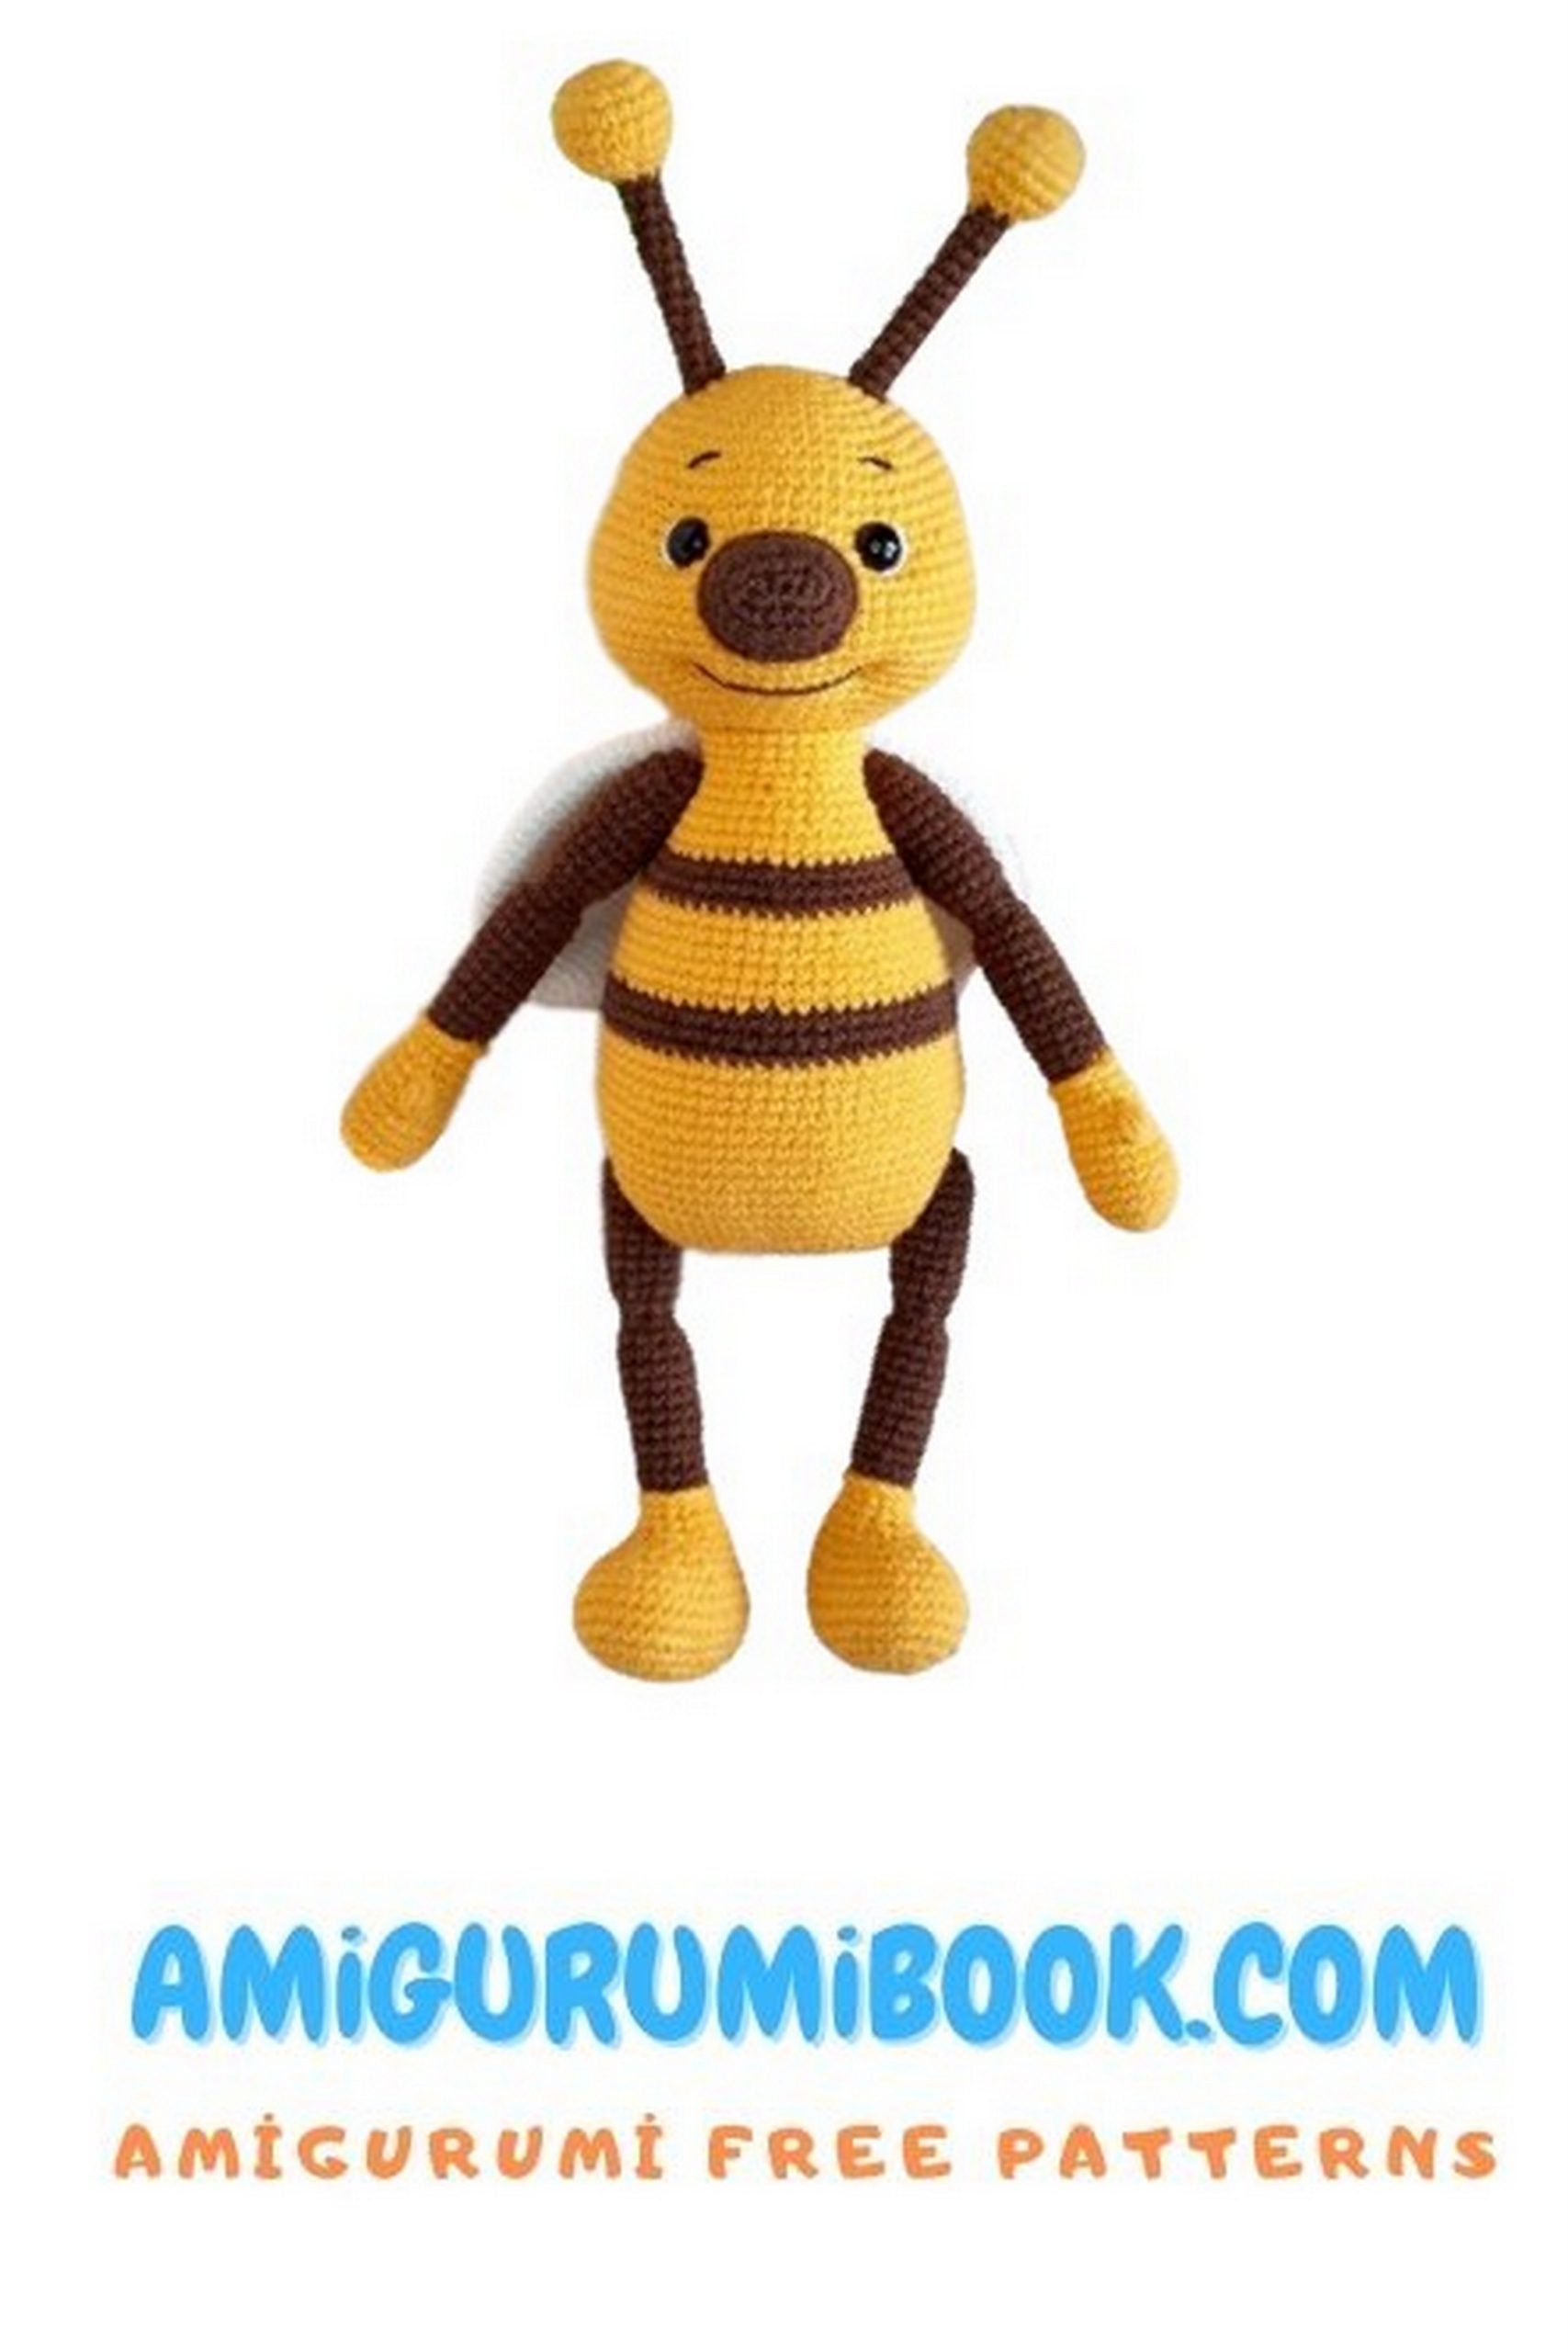
WINGS (make 2)
1: 6 SC in MR (6)
2: INC ×6 (12)
3: (SC, INC) ×6 (18)
4: 1 SC, INC, (2 SC, INC) ×5, 1 SC (24)
5: (3 SC, INC) ×6 (30)
6: 2 SC, INC, (4 SC, INC) ×5, 2 SC (36)
7: (5 SC, INC) ×6 (42)
8–19: 42 SC
20: (5 SC, DEC) ×6 (36)
21: 36 SC
22: 2 SC, DEC, (4 SC, DEC) ×5, 2 SC (30)
23: 30 SC
24: (3 SC, DEC) ×6 (24)
25: 24 SC
26: 1 SC, DEC, (2 SC, DEC) ×5, 1 SC (18)
27: 18 SC
28: (SC, DEC) ×6 (12)
29: 12 SC
Fold and SC 5 stitches together. Leave tail.
ASSEMBLY
- Shape face and embroider details
- Attach antennae (rows 5–7)
- Sew nose (rows 14–21)
- Sew head to body
- Attach arms and legs symmetrically
- Sew wings under the head
Your bee amigurumi is ready! 🐝