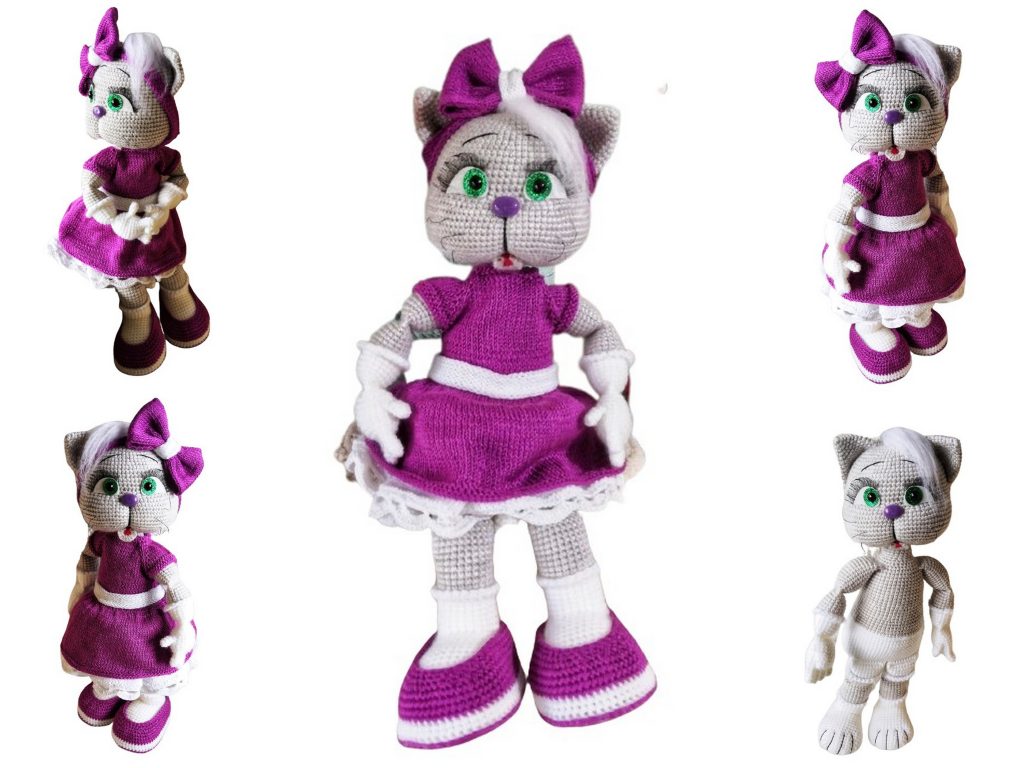
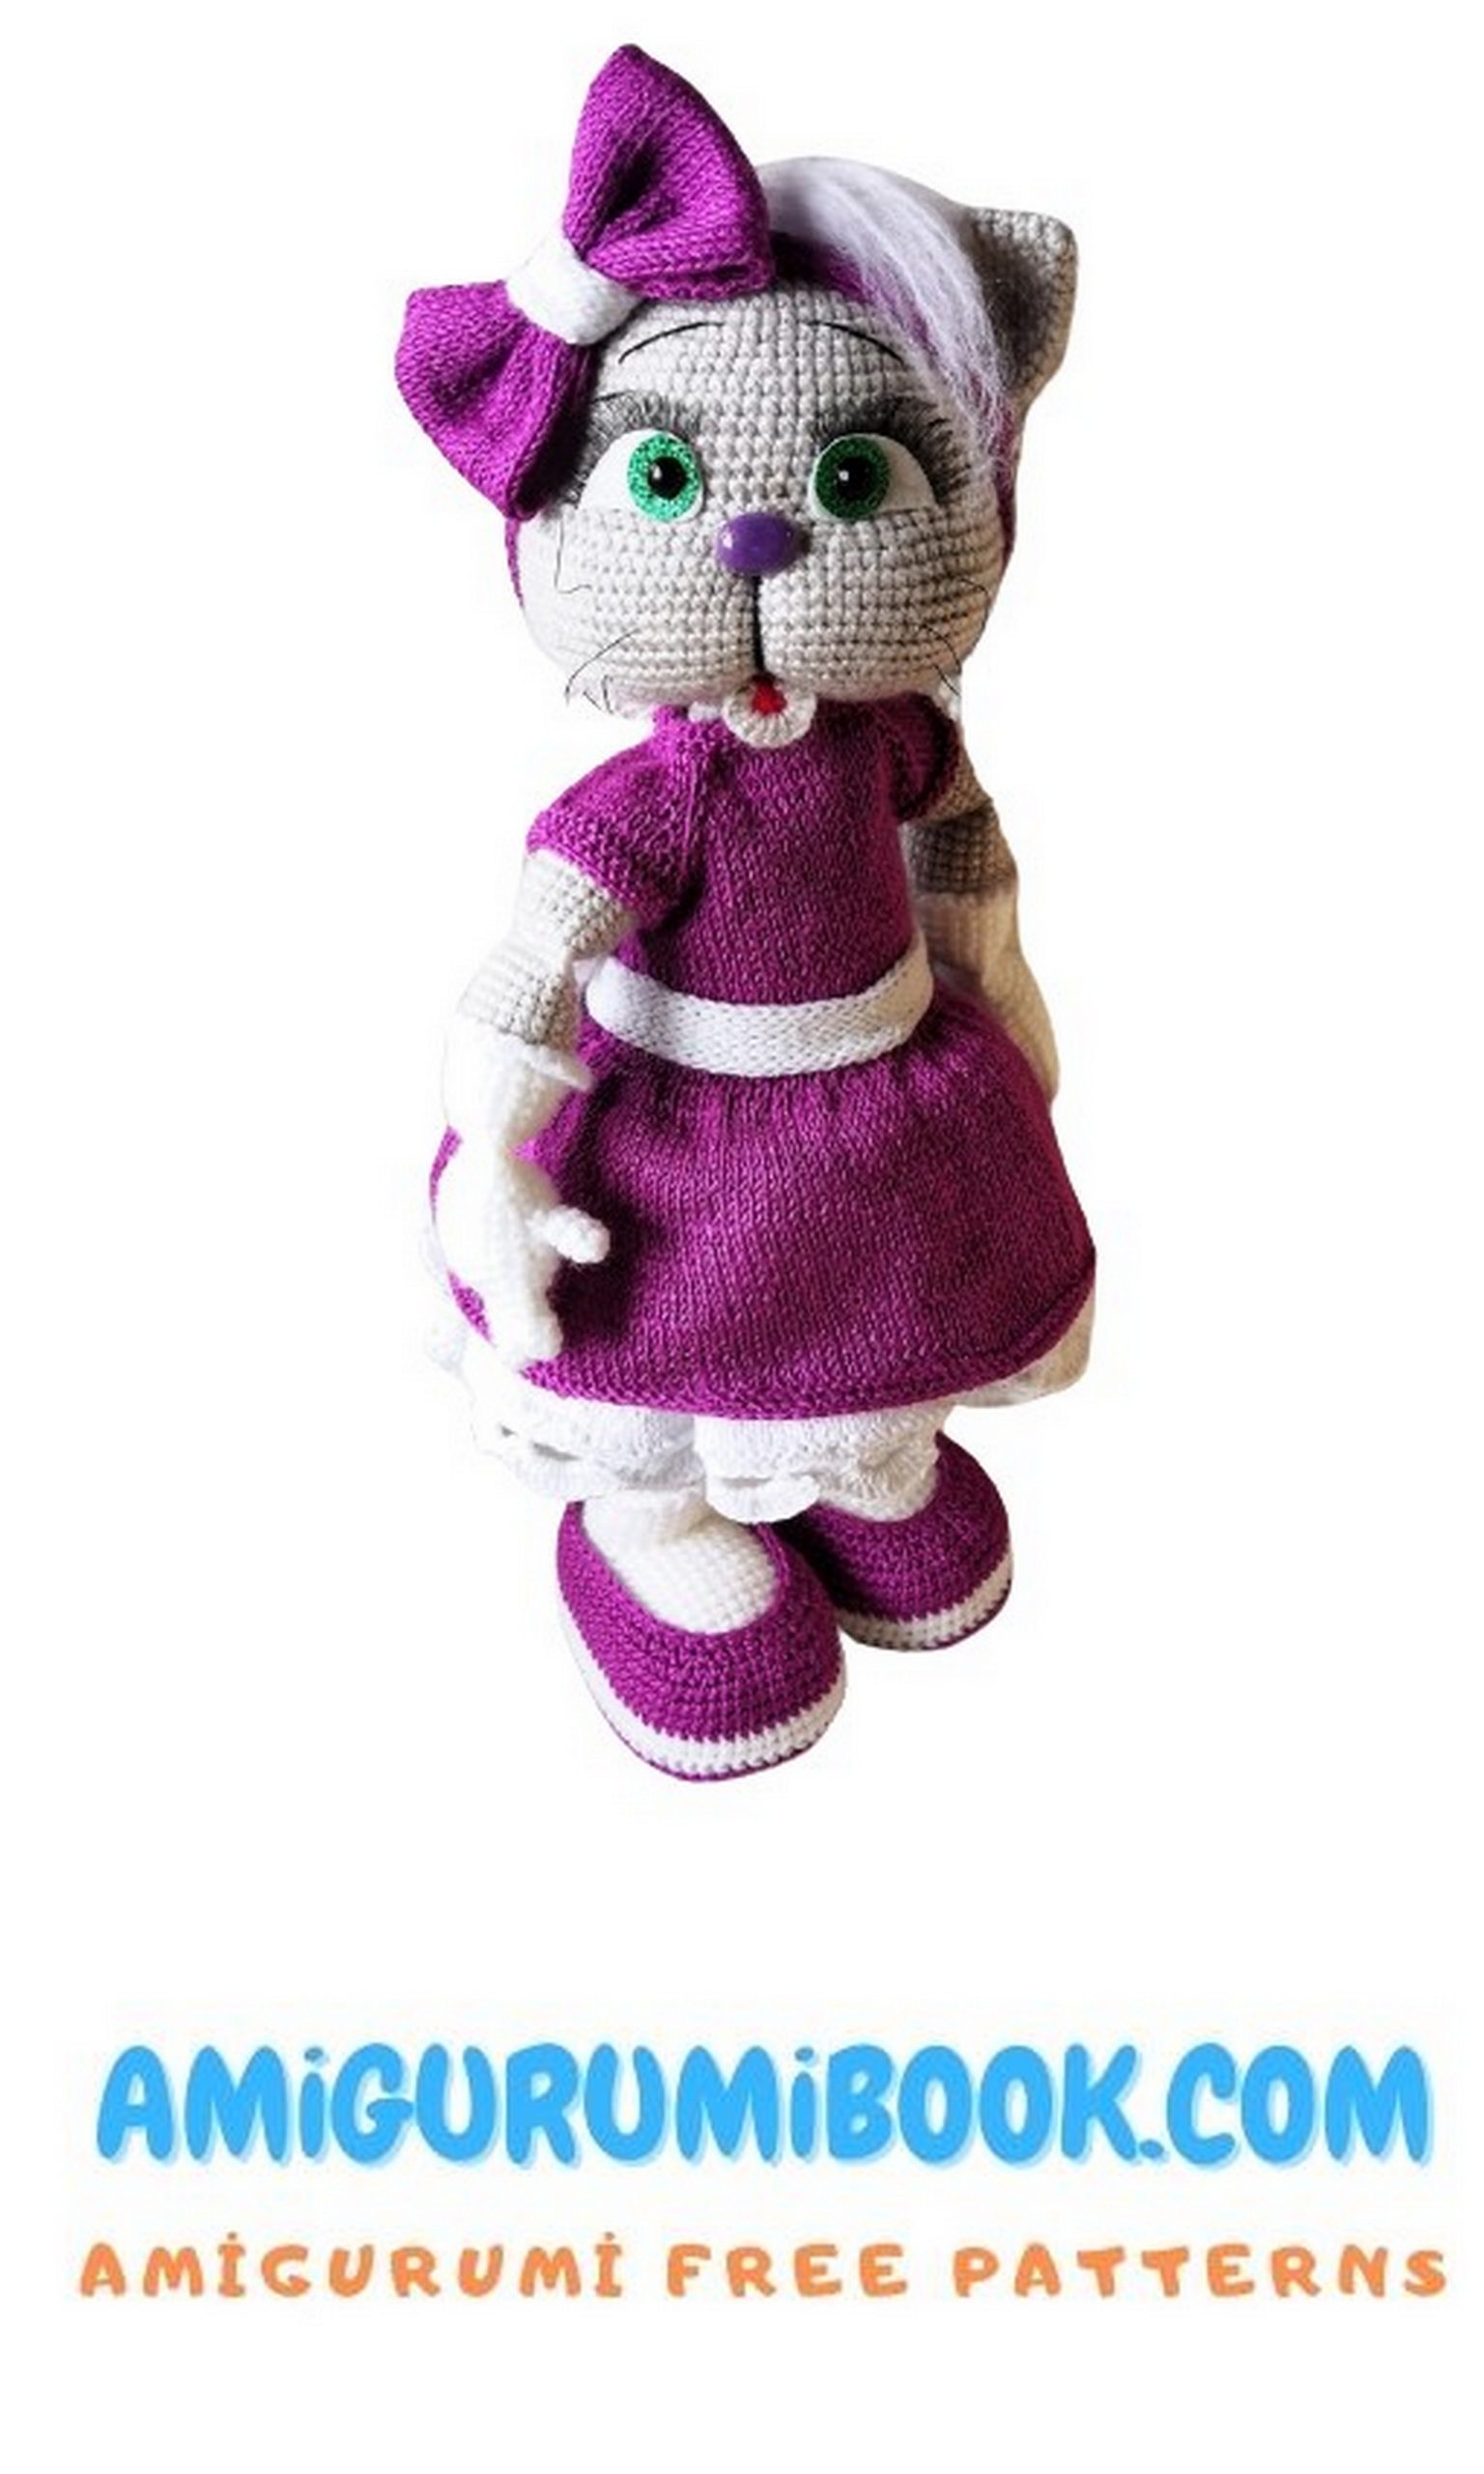
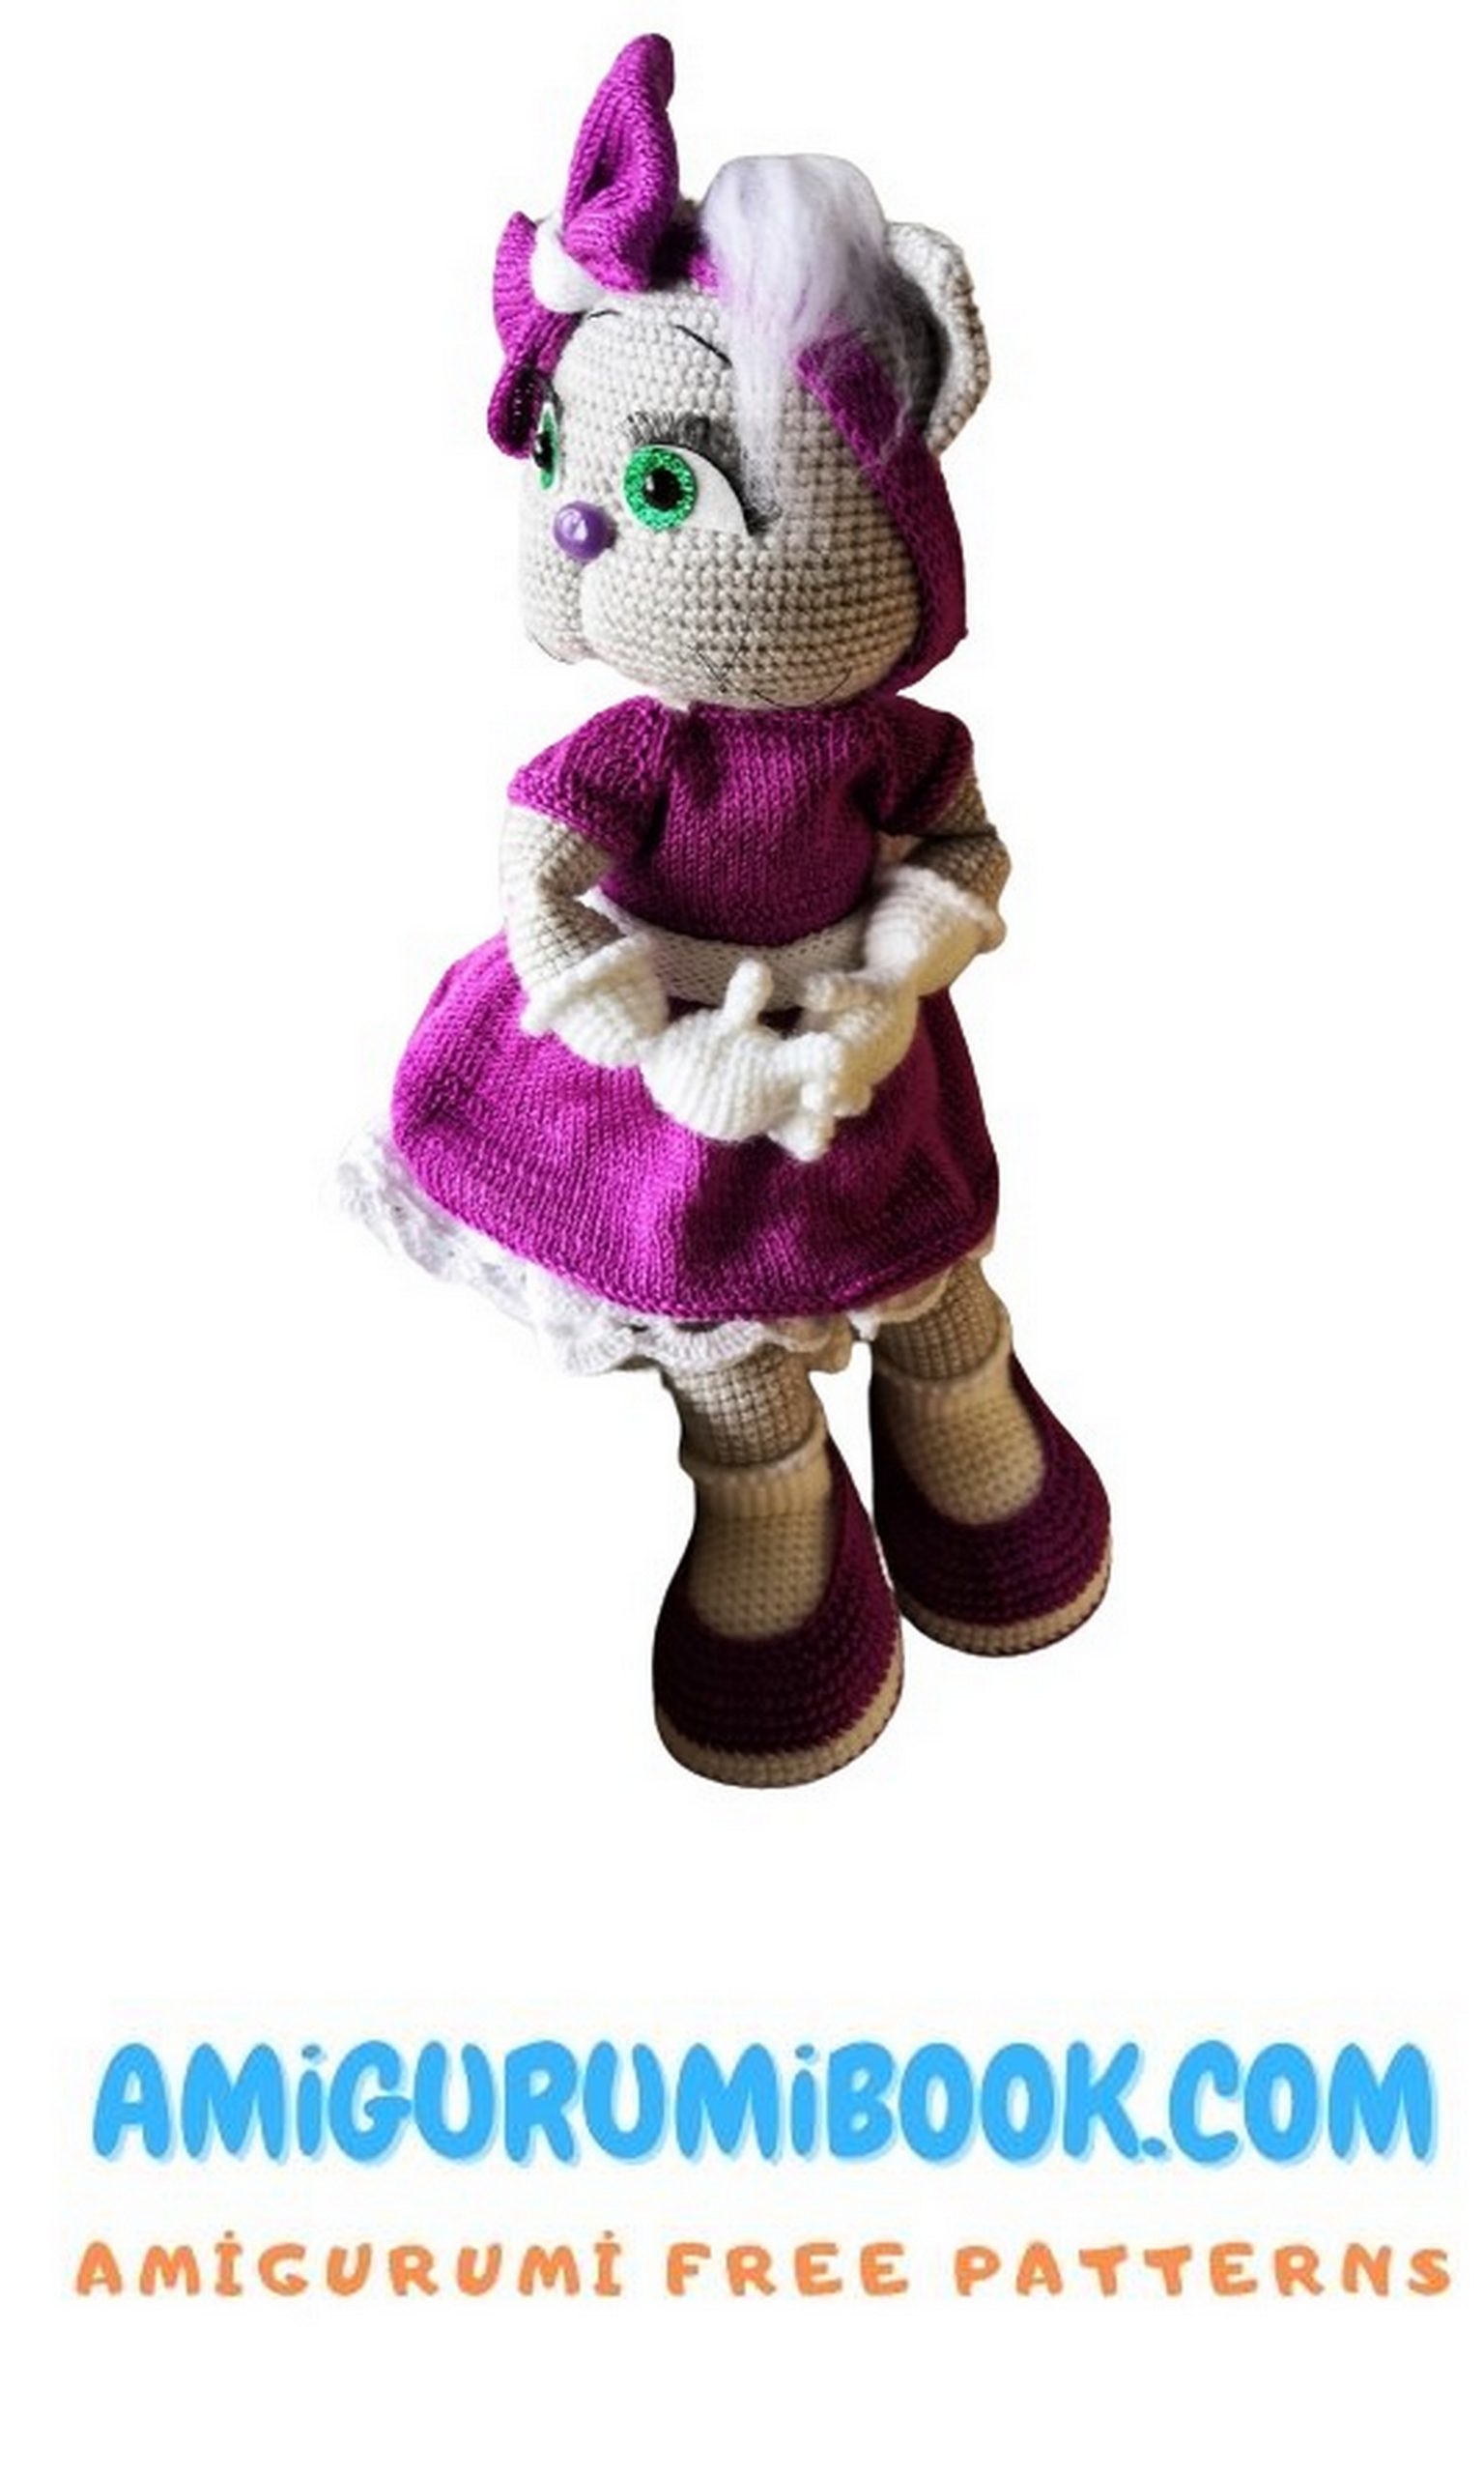
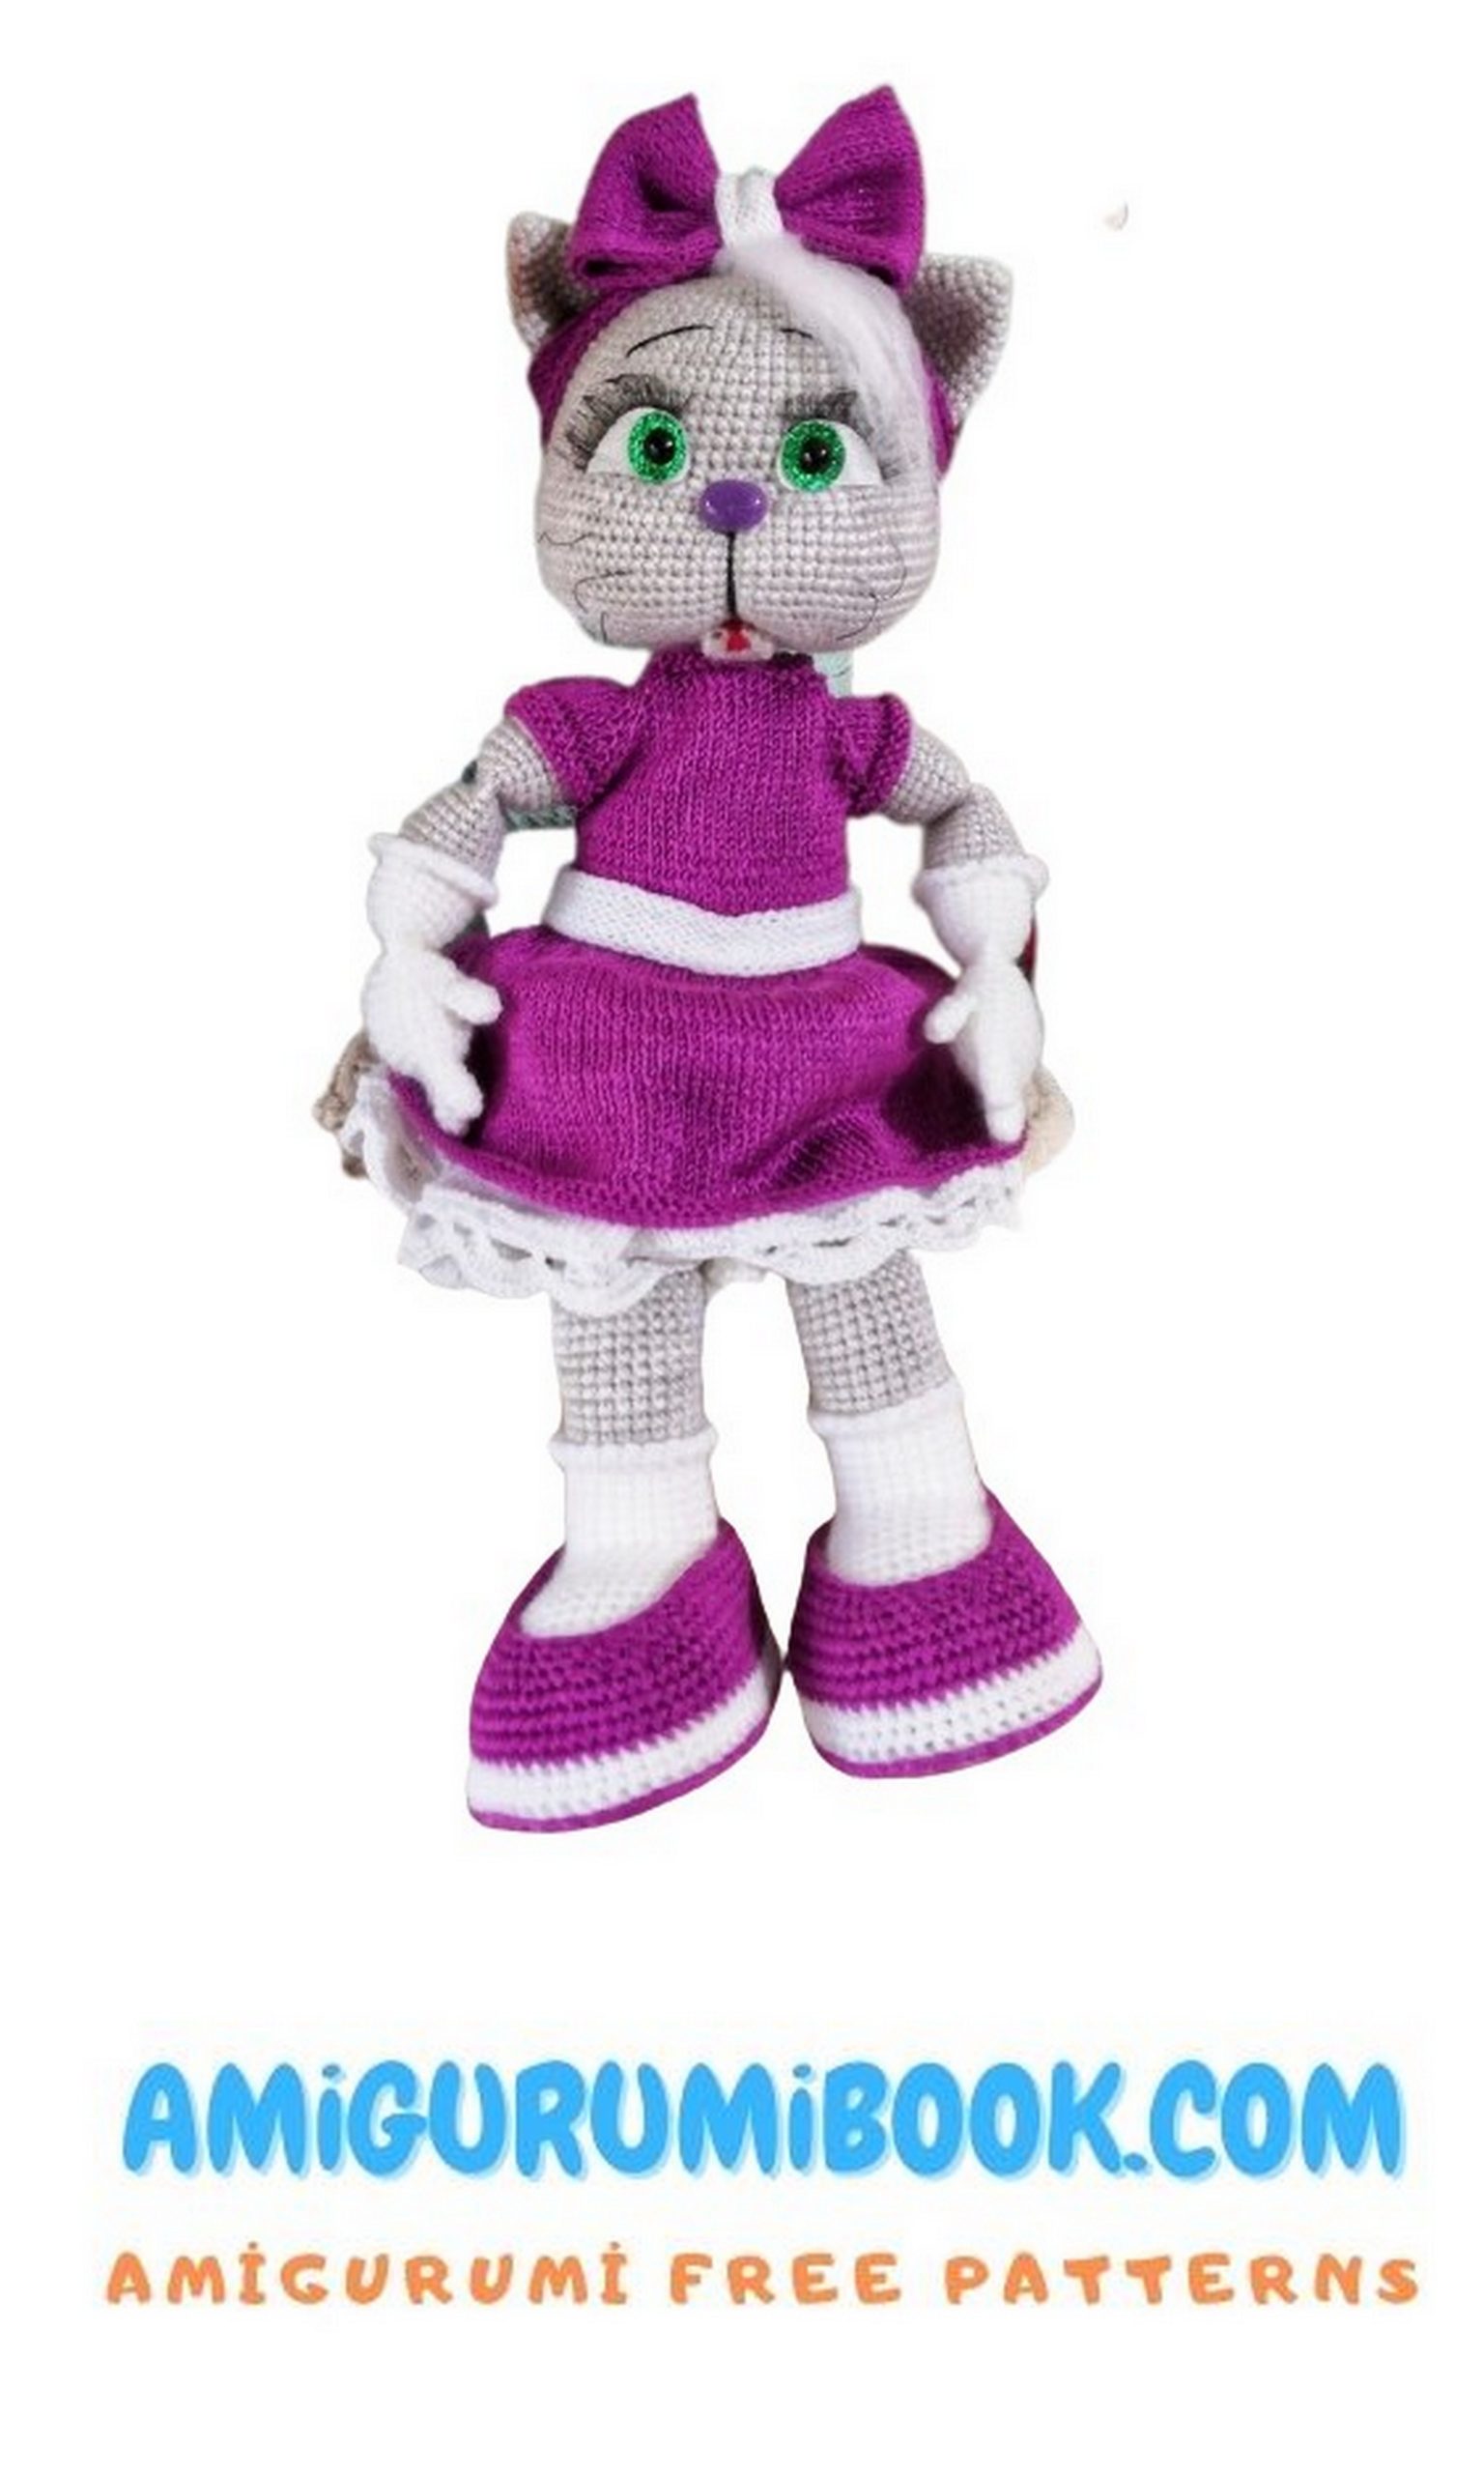
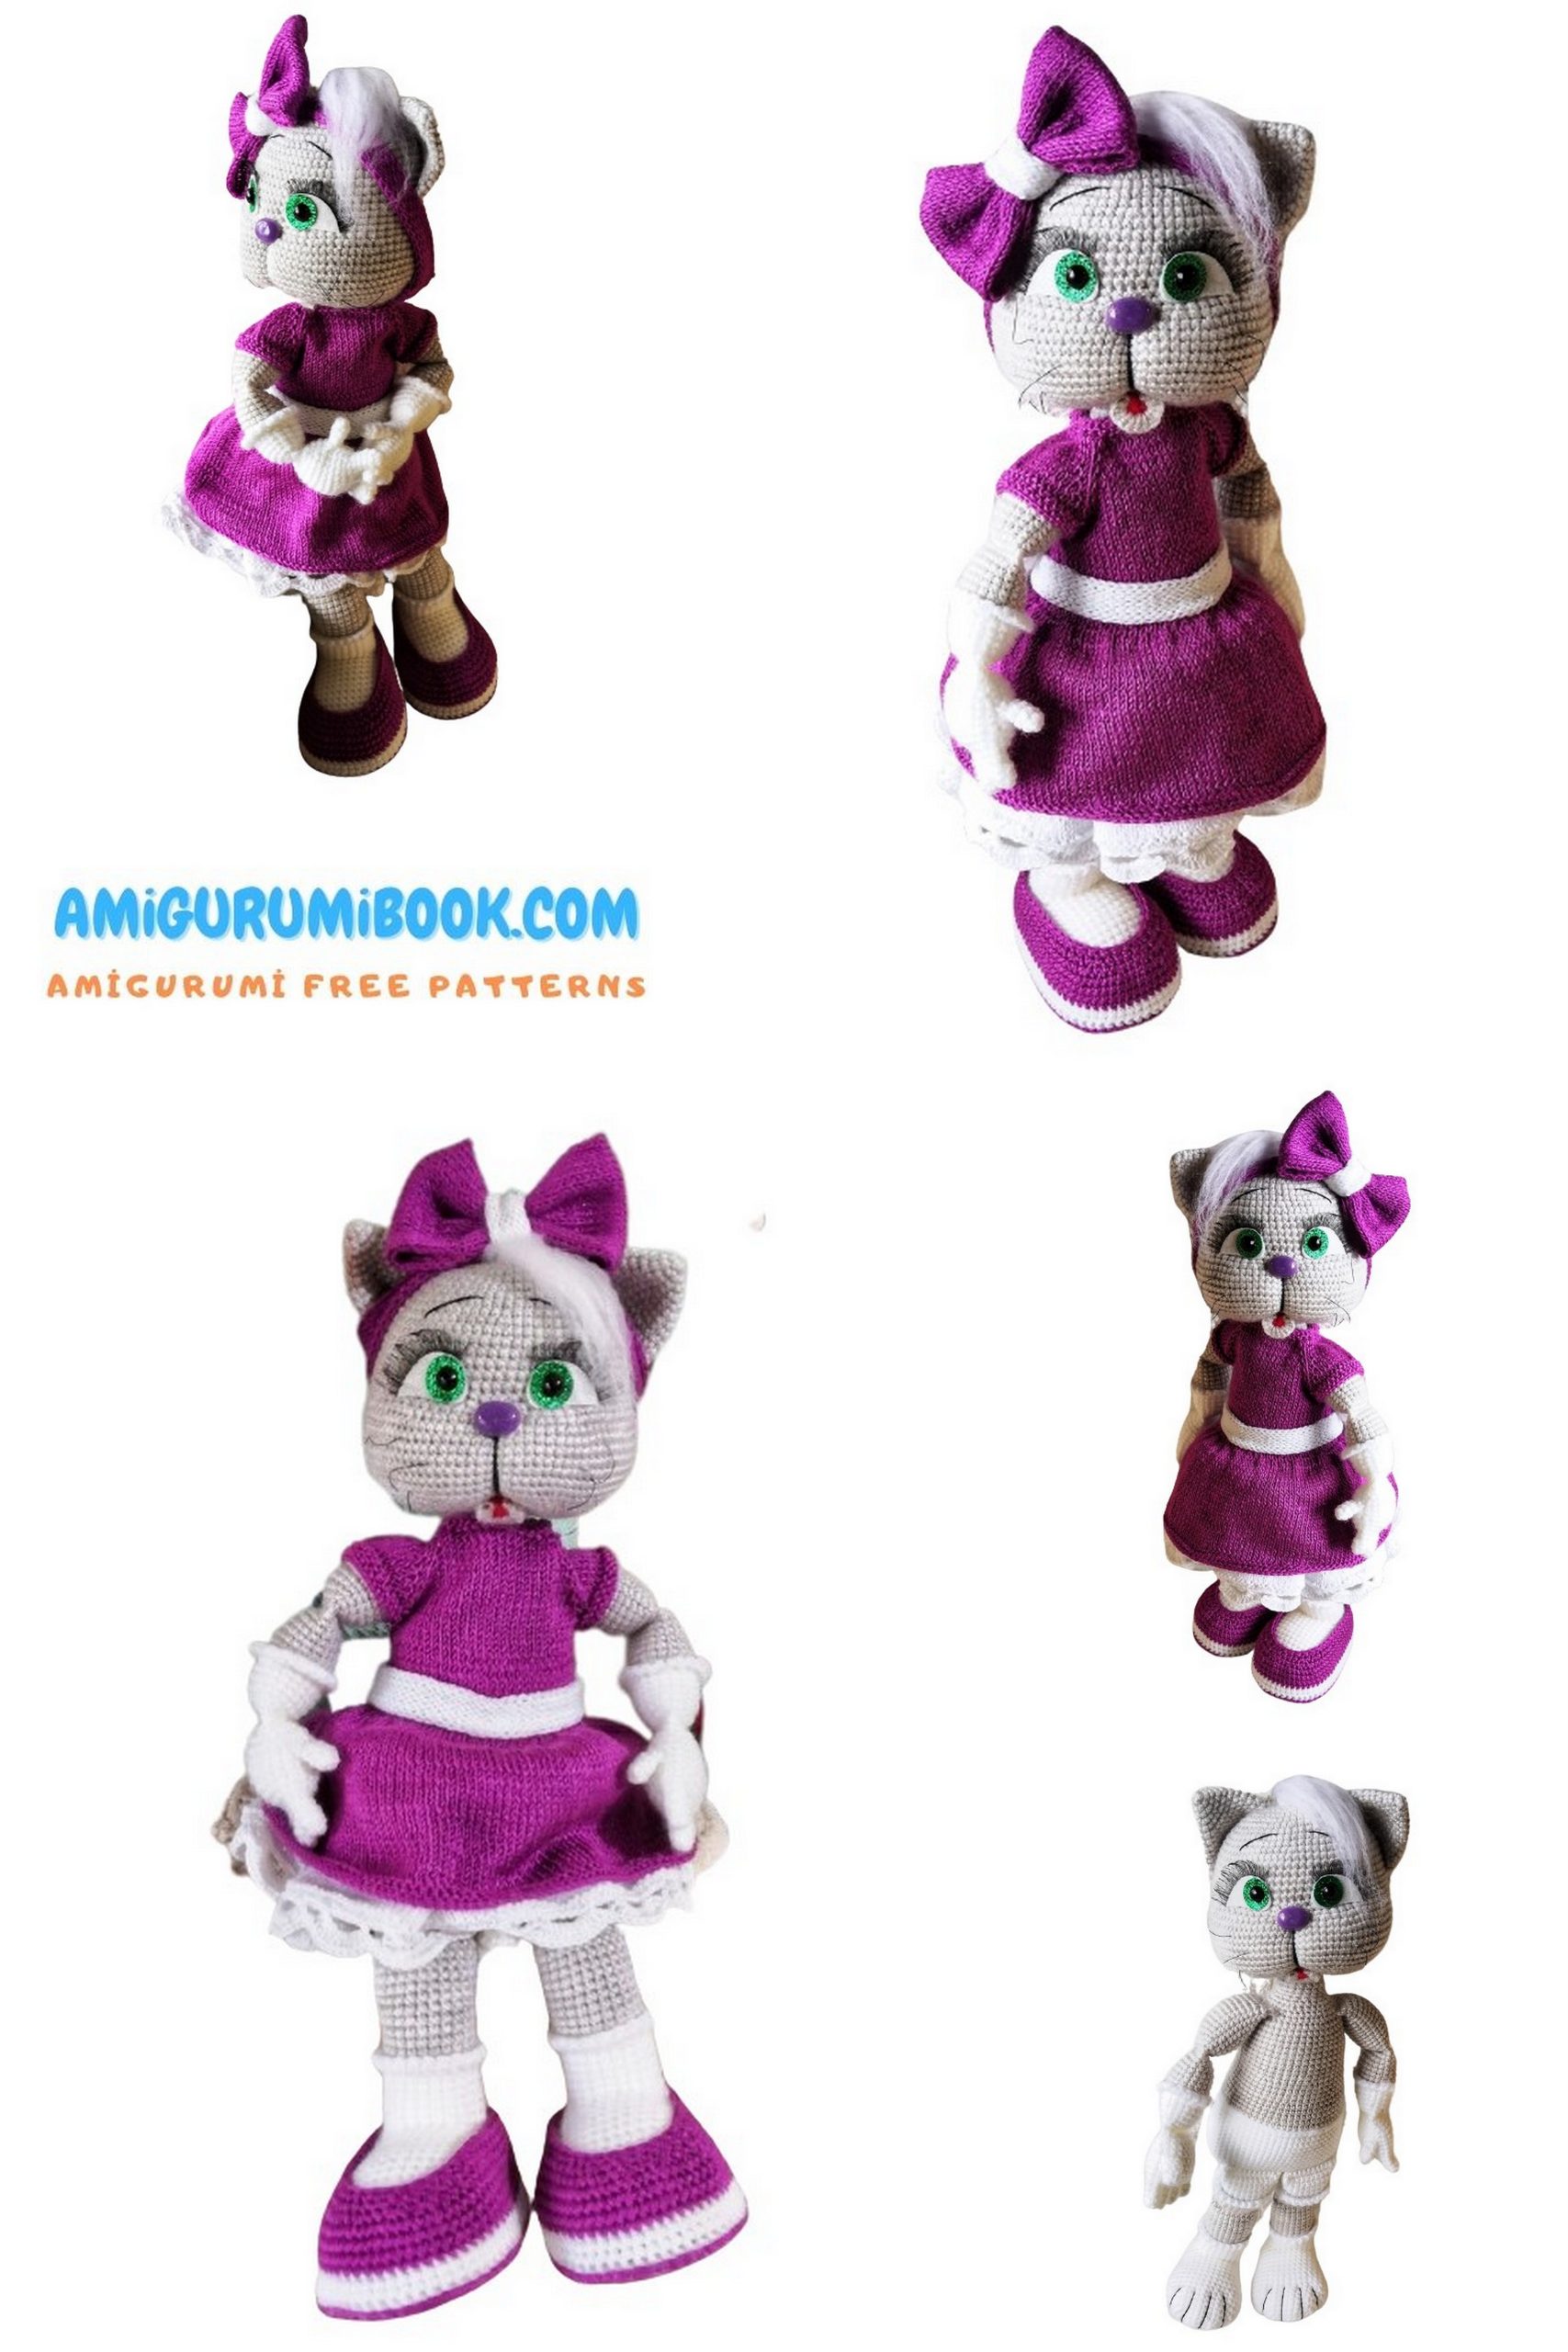
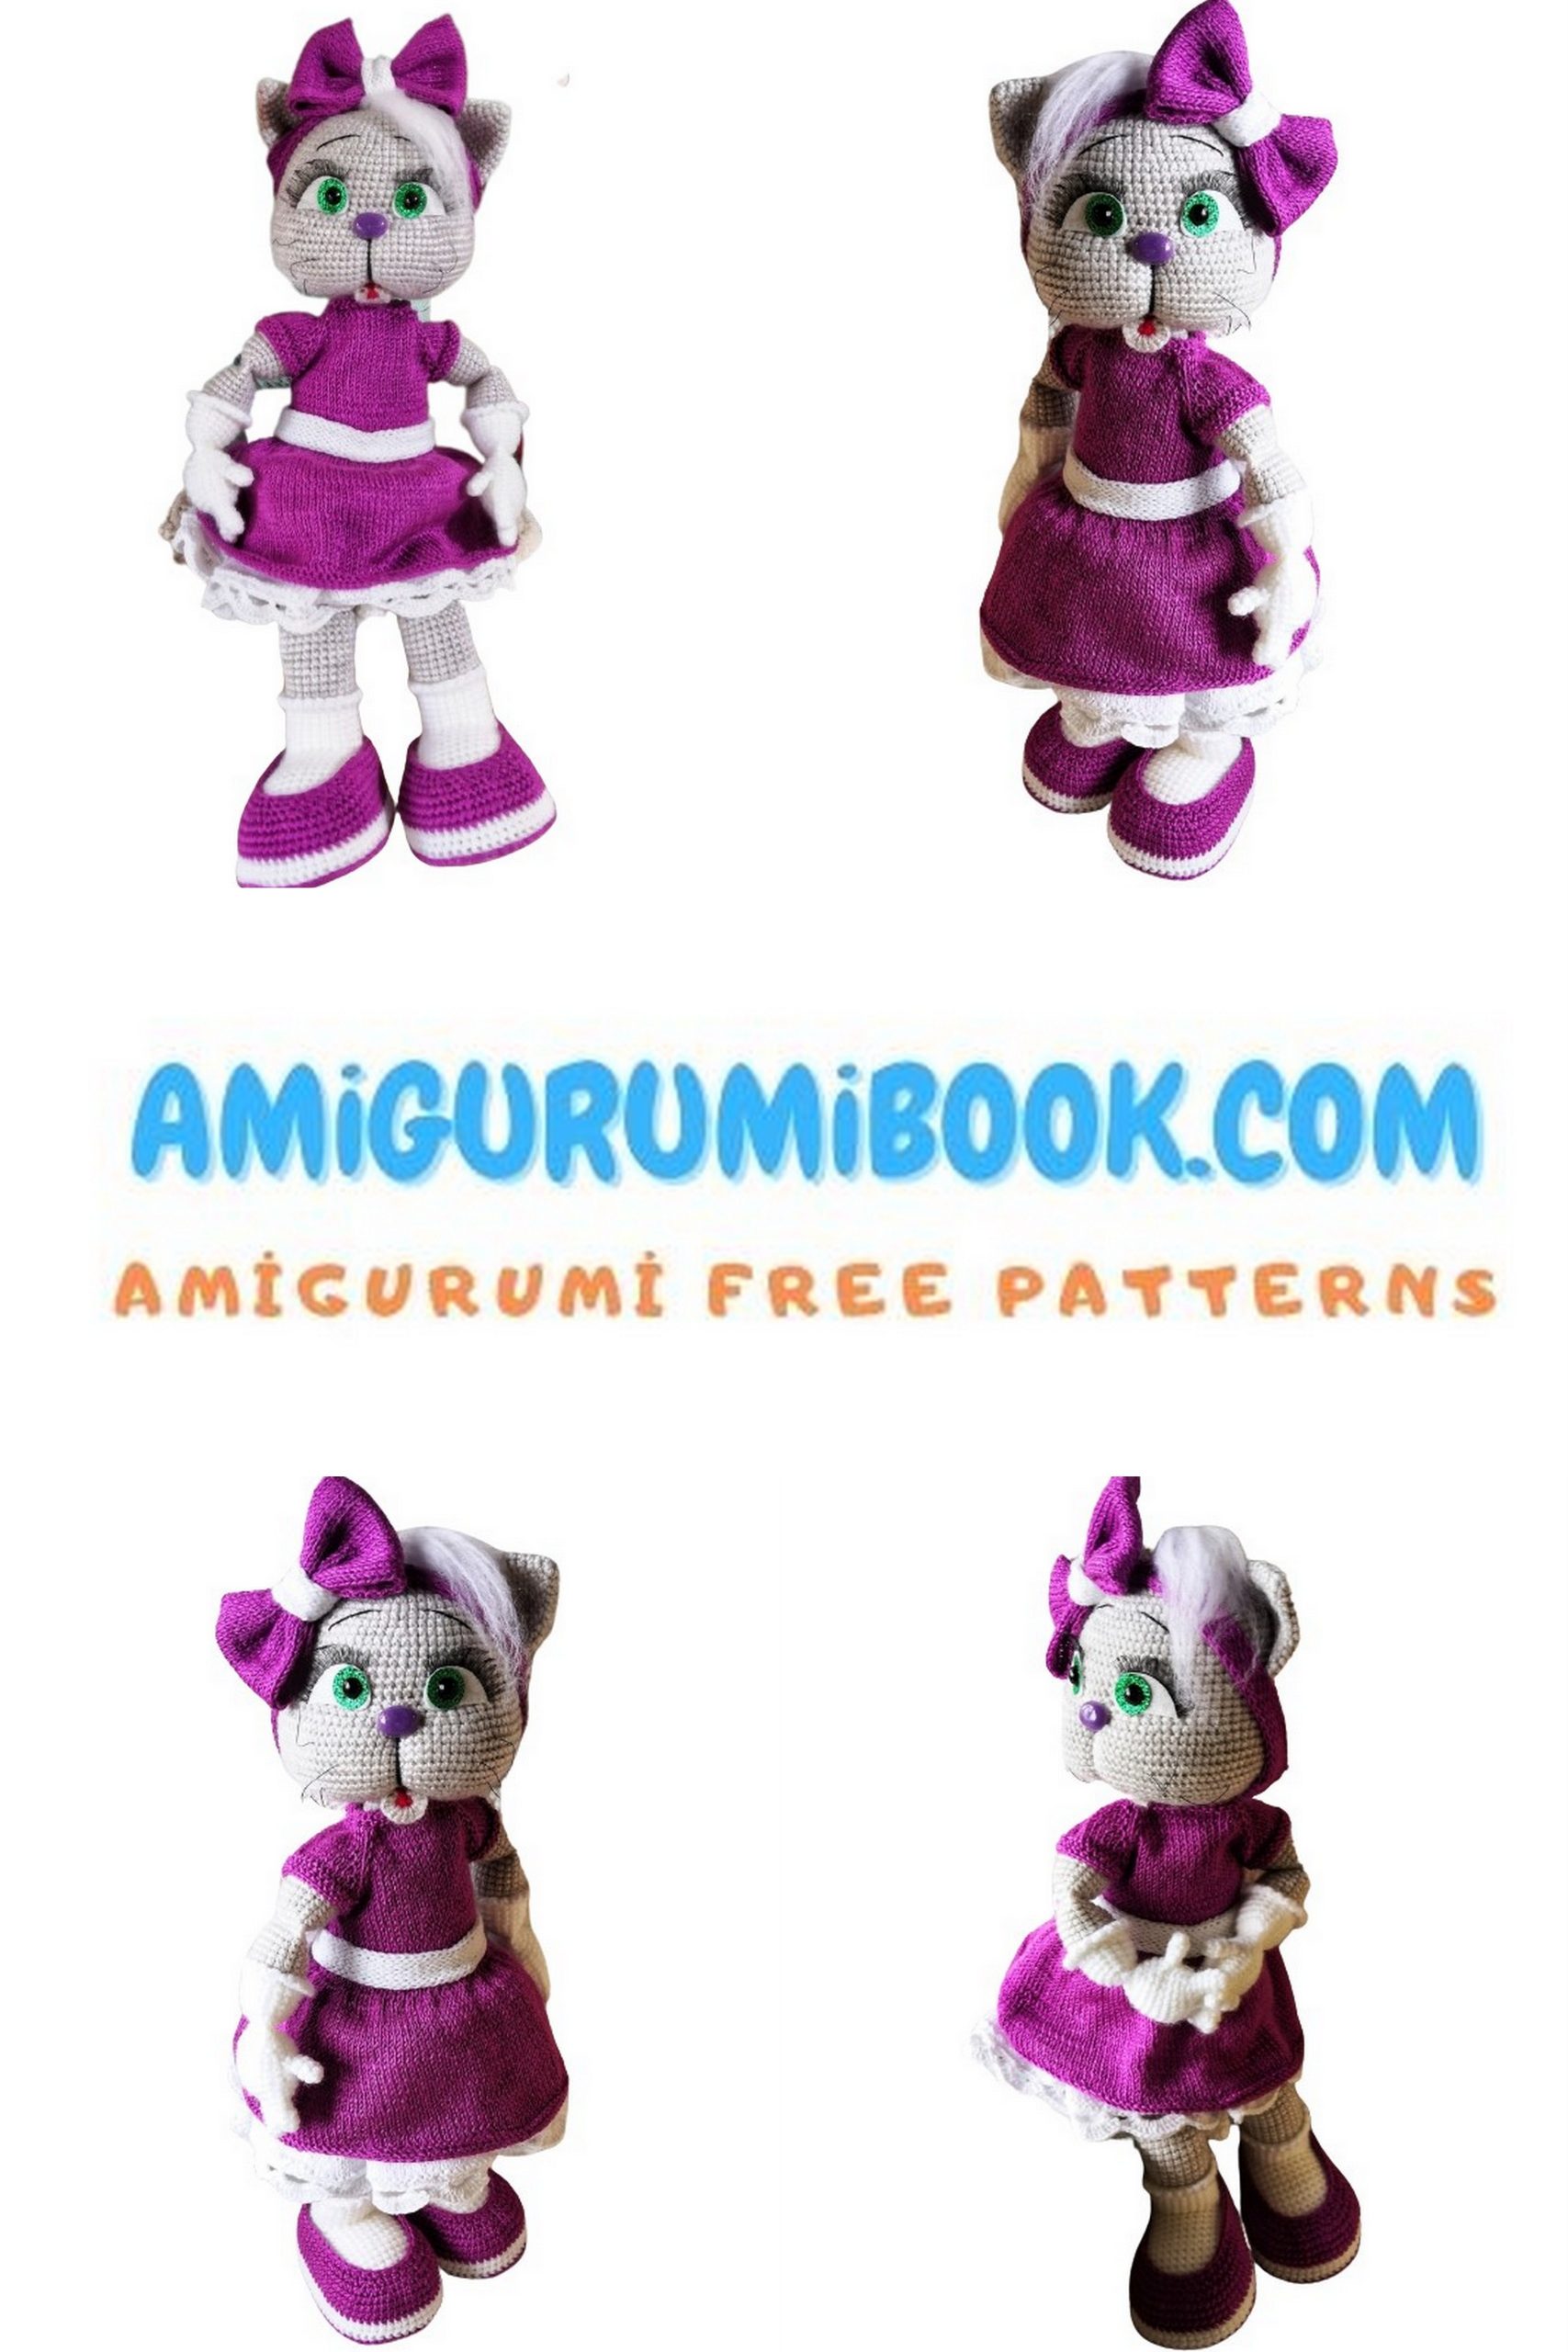
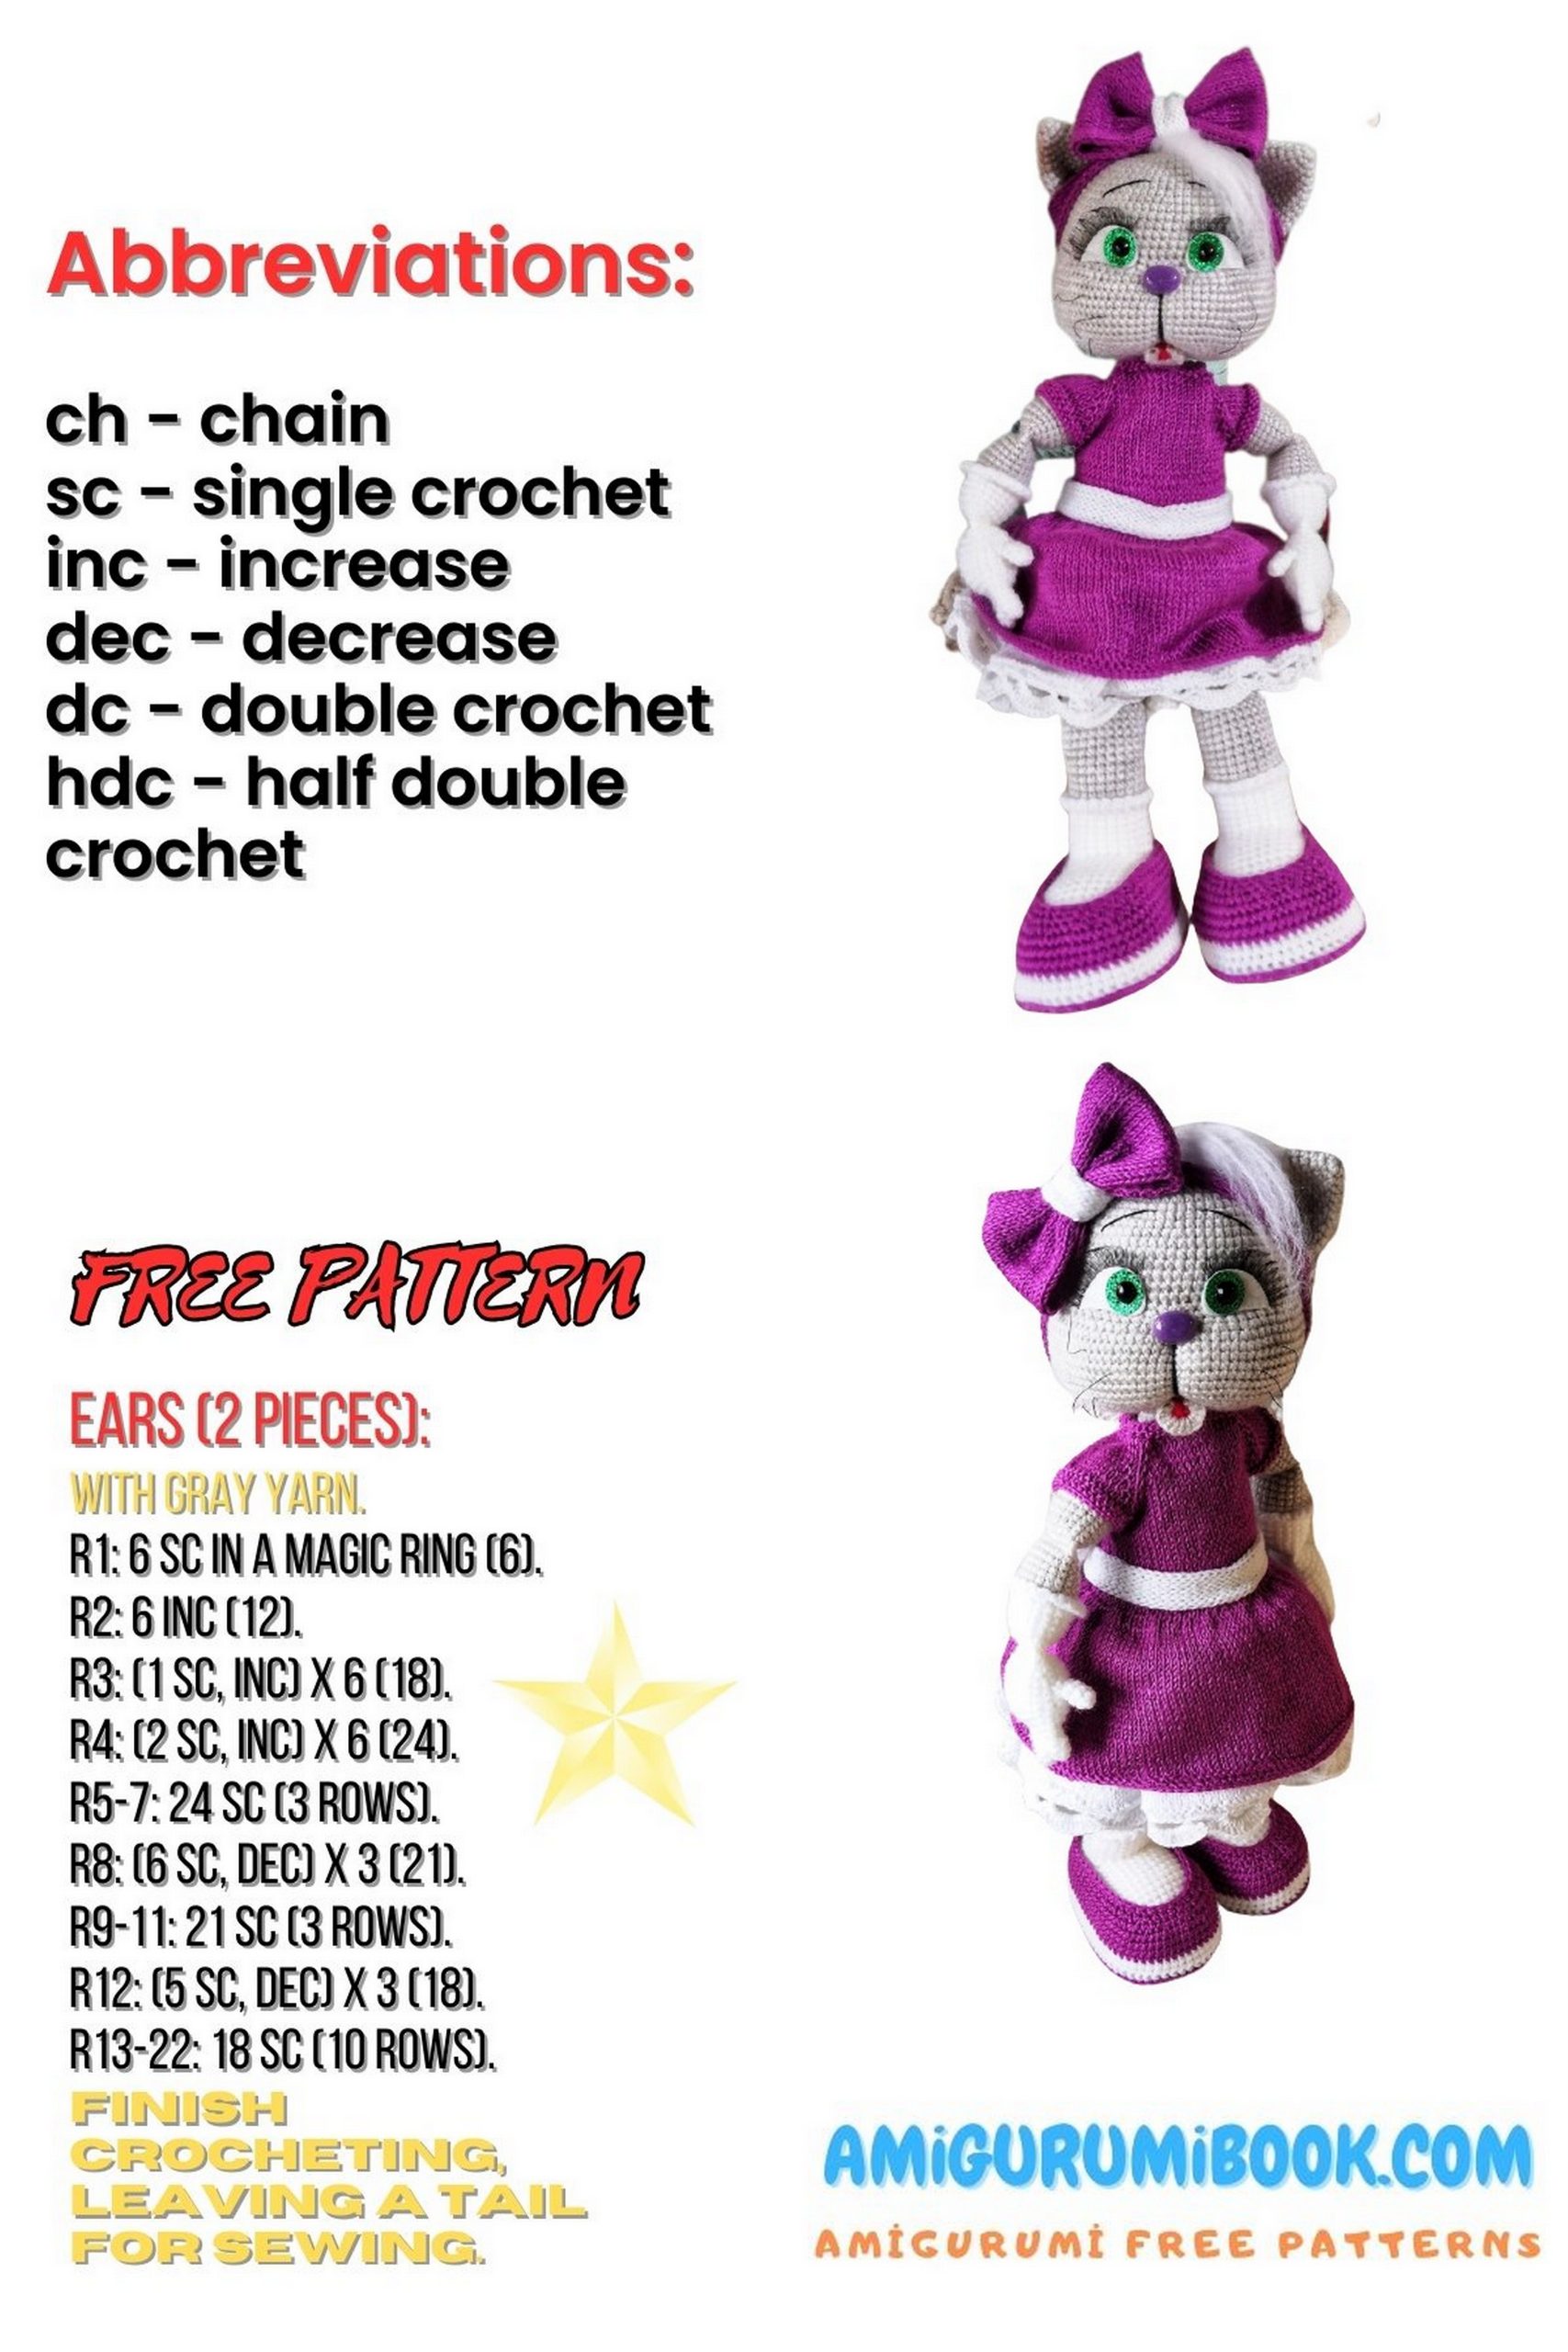
If you love cute handmade toys, you’re going to adore this Amigurumi Cat Larisa pattern. This charming crochet kitty features sweet cheeks, soft paws, and an adorable outfit that makes it perfect as a decorative doll or a thoughtful handmade gift.
In this free crochet tutorial, you’ll learn how to create the cat step by step, including the head, body, ears, tail, and even the tiny dress and slippers. The detailed instructions make it suitable for confident beginners and experienced crocheters who enjoy making character-style amigurumi toys.
Whether you’re crocheting for fun, creating a unique gift, or adding a new character to your amigurumi collection, this lovely cat will definitely become one of your favorite projects.
Grab your yarn and hook, and let’s start crocheting this cute Amigurumi Cat Larisa!
If you want to access 1000+ free amigurumi patterns, you can download our application from this link!
Materials
- Pekhorka Children’s Novelty yarn – color 181 Pearl (1 skein)
- Pekhorka Children’s Novelty yarn – color 01 White (1 skein)
- A small amount of red Pekhorka Children’s Novelty yarn
- White yarn matching the gauge of Pekhorka Lace
- 1.5 mm crochet hook (for the body)
- 1.25 mm crochet hook (for edging)
- Circular and double-pointed knitting needles 1.6 mm (for clothing)
- Safety nose for facial features
- White felt for the eyes
- A small piece of green foamiran
- Black eye bases – 8 mm
- Eyelashes for attachment
- Moment Crystal glue
- Black thread for facial features (Iris thread recommended)
- Long needle for attaching the head
- Wire (about 20 cm) for reinforcing the neck
- Adhesive plaster or tape
- Toy stuffing
- Felting needle
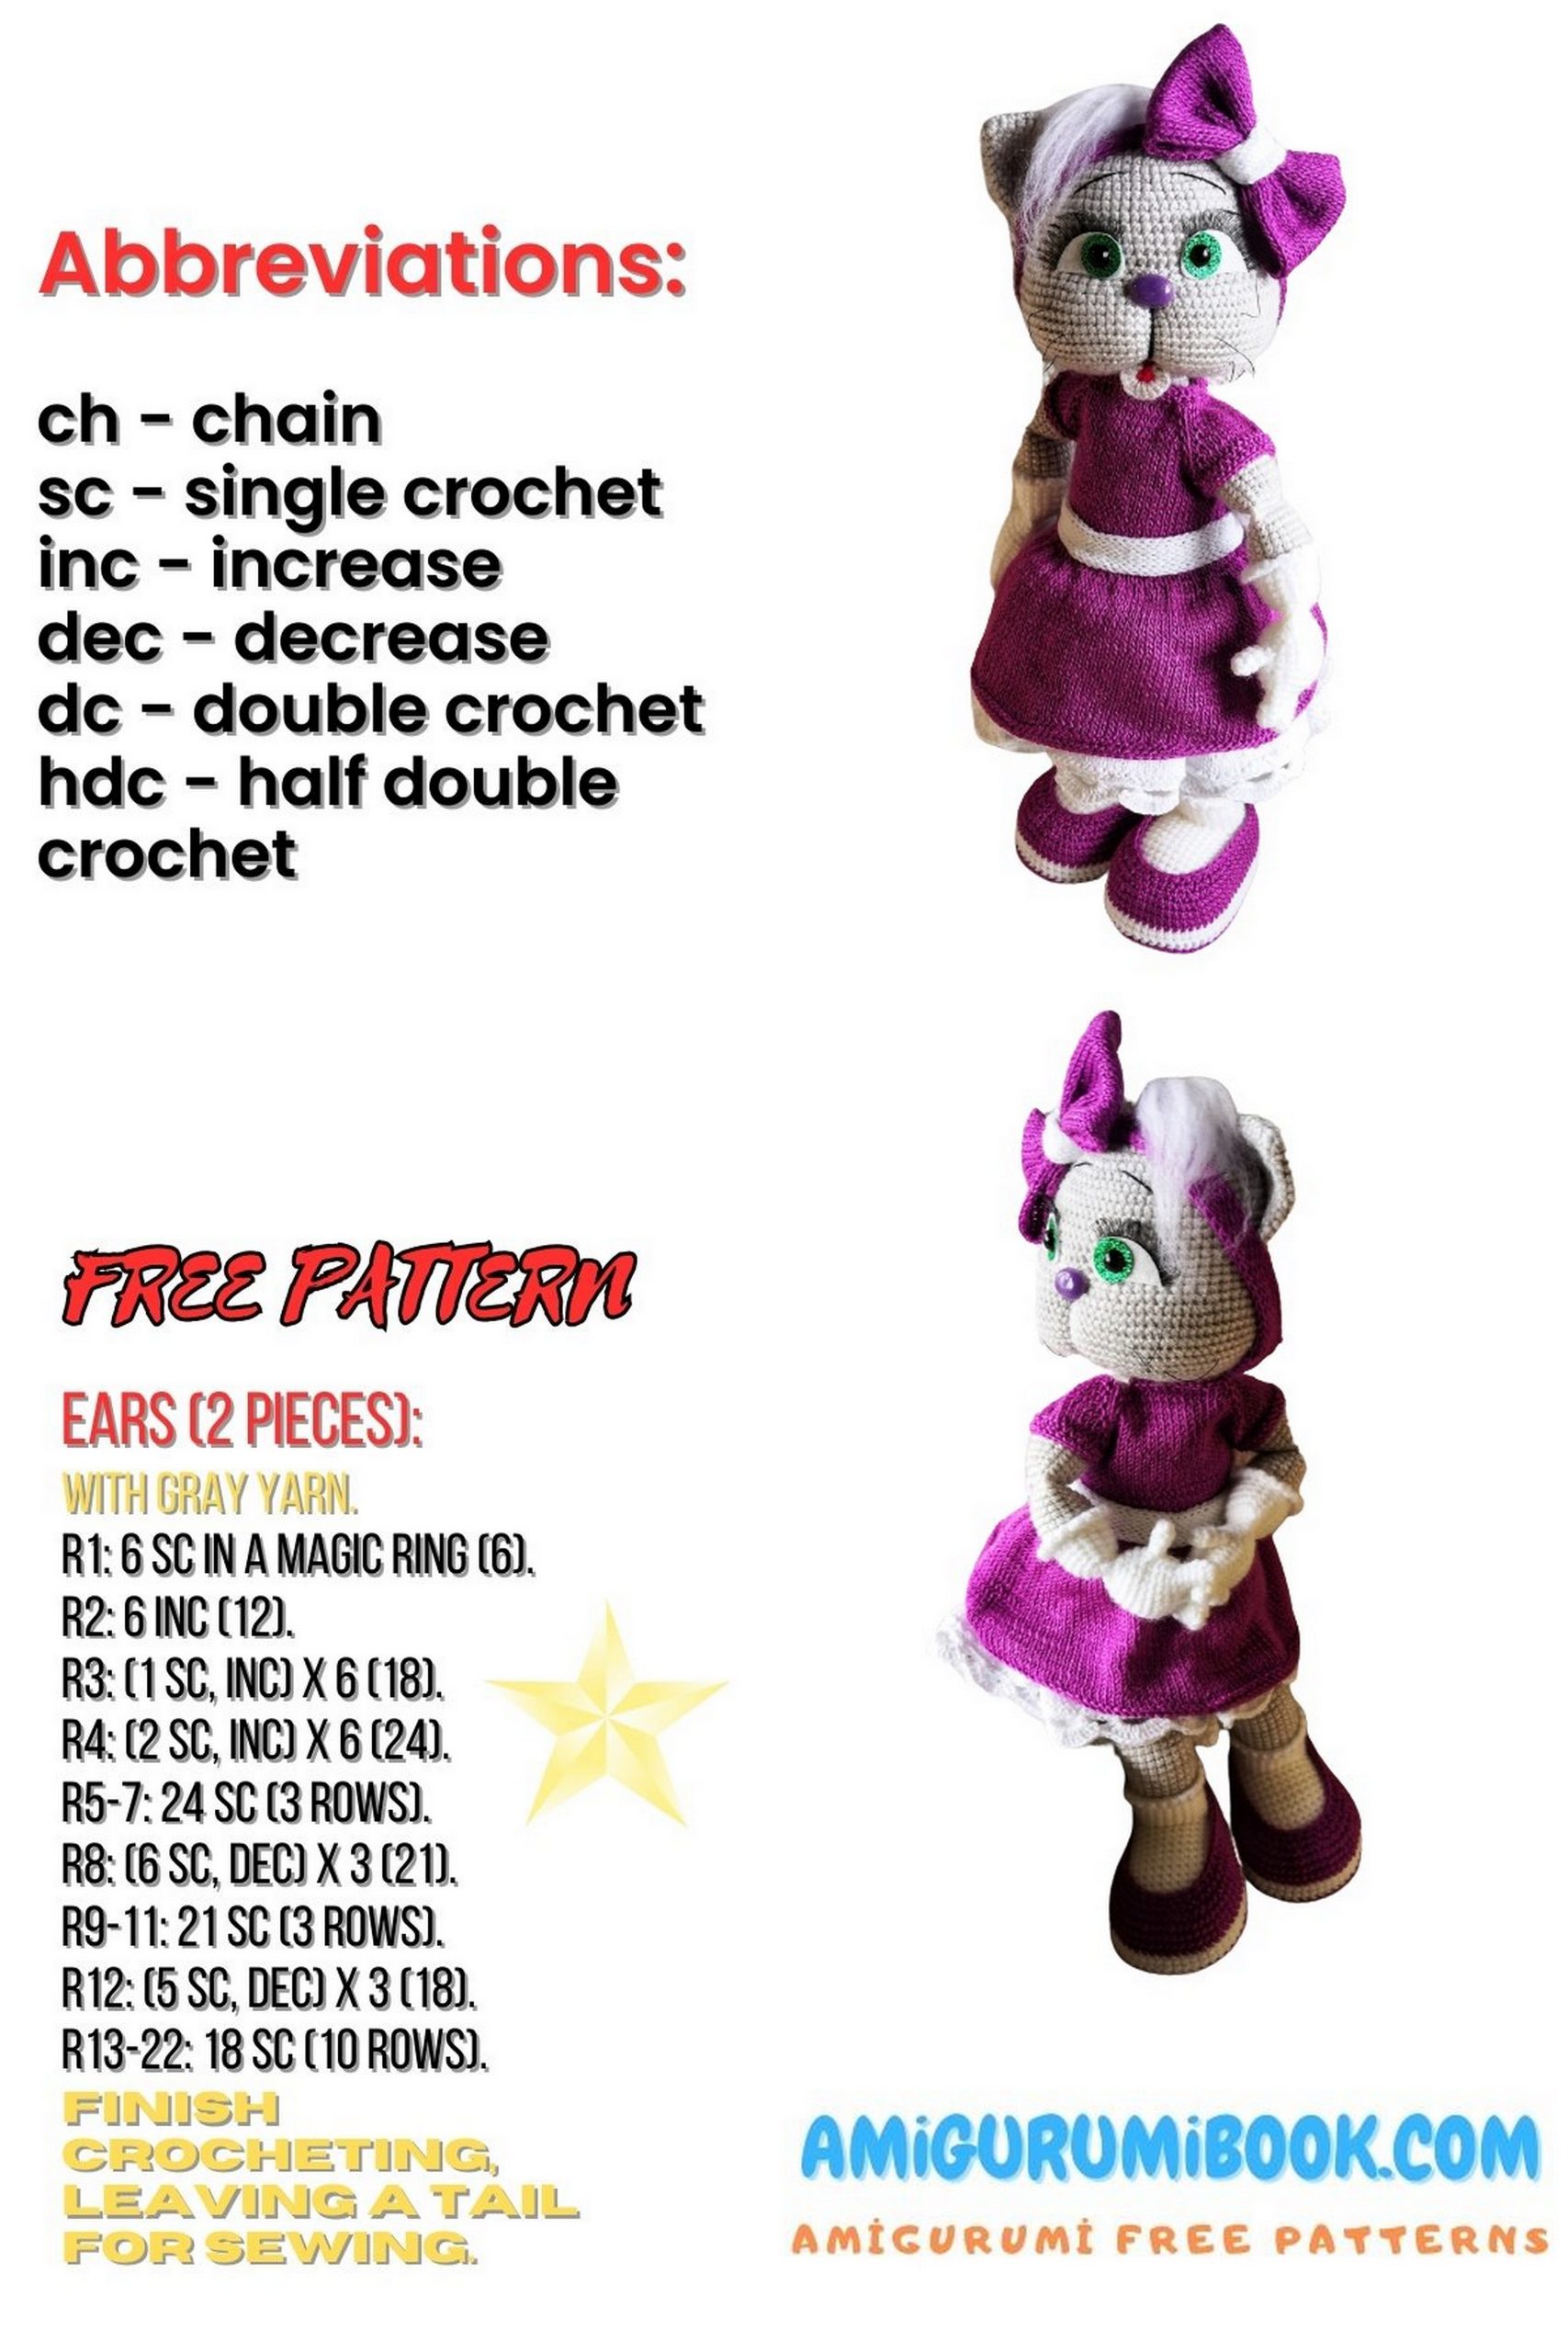
Abbreviations
tr inc – treble crochet increase
ka – amigurumi ring
sc – single crochet
dec – decrease
blo – back loop only
flo – front loop only
sl st – slip stitch
rev sc – reverse single crochet
hdc – half double crochet
ch – chain
hdc inc – half double crochet increase
tr – treble crochet

Legs (Make 2)
Start with white yarn and a 1.5 mm crochet hook.
1: ch 7, from 2nd ch from hook: 5 sc, 3 sc in last ch, on other side 4 sc, inc (14)
2: inc, 4 sc, 3 inc, 4 sc, 2 inc (20)
3: sc, inc, 4 sc, (sc, inc) ×3, 4 sc, (sc, inc) ×2 (26)
4: 2 sc, inc, 4 sc, (2 sc, inc) ×3, 4 sc, (2 sc, inc) ×2 (32)
5: 30 sc, move marker after 2 more sc (32)
6: inc, 14 sc, inc, 16 sc (34)
7: 34 sc
8: inc, 16 sc, inc, 16 sc (36)
9–11: 36 sc
12: dec, 16 sc, dec, 16 sc (34)
13: 34 sc
14: dec, 15 sc, dec, 15 sc (32)
15: 32 sc
16: dec, 13 sc, dec, 15 sc (30)
17: 4 sc, 7 sc flo, 19 sc (30)
18: 3 sc, 1 sc flo, 9 sc, 1 sc flo, 18 sc (30)
19–20: 2 sc, 1 sc flo, 9 sc, 1 sc flo, 17 sc (30)
21: 3 sc, 1 sc flo, 7 sc, 1 sc flo, 18 sc (30)
22: 4 sc, 7 sc flo, 19 sc (30)
23: (3 sc, dec) ×6 (24)
24: 24 sc
25: 18 sc, dec, (2 sc, dec) ×5, sc (18)
26: (sc, dec) ×6 (12)
27: dec ×6
Stuff the legs.
Boots
Attach yarn to the 7th flo of step 22.
1: 7 sc, 4 sc around flo from steps 21–20–19, 7 sc around flo step 18, 4 sc around flo steps 19–20–21 (22)
2–7: 22 sc
Attach gray yarn.
8: 22 sc blo
9–18: 22 sc
Stuff the foot.
19: 9 sc
20: fold piece and crochet 11 sc through both sides
Leg Edging
Return to white yarn.
1: 22 sc
2: (sl st, ch) ×22
Repeat for second leg.
Arms (Make 2)
Start with white yarn.
Fingers
Thumb / index / middle finger
1: 6 sc in ka
2–4: 6 sc
Middle finger
1: 6 sc in ka
2–5: 6 sc
Little finger
1: 6 sc in ka
2–3: 6 sc
Palm Assembly
1:
3 sc little finger
3 sc ring finger
3 sc middle finger
6 sc index finger
3 sc middle finger
3 sc ring finger
3 sc little finger (24)
2–4: 24 sc
5: 8 sc, sc3tog with index finger, 13 sc (24)
Second hand:
13 sc, sc3tog index finger, 8 sc
6: 8 sc, sc3tog with thumb, 13 sc
Second hand:
13 sc, sc3tog thumb, 8 sc
7: 24 sc
8: dec, 9 sc, dec, 11 sc (22)
9: dec, 8 sc, dec, 10 sc (20)
10: 20 sc
Stuff palm lightly.
11: fold piece and crochet 10 sc through both sides
12: 10 sc flo, 10 sc blo (20)
13–18: 20 sc
Attach gray yarn.
19: 20 sc blo
20–25: 20 sc
Stuff arm.
26: fold piece, crochet 10 sc through both sides
27: 10 sc flo, 10 sc blo
28–40: 20 sc
41: 10 sc through both sides
Body
Start with white yarn.
1: ch 21, from 2nd ch: 19 sc, 3 sc last ch, 18 sc, inc (42)
2: inc, 18 sc, 3 inc, 18 sc, 2 inc (48)
3: sc, inc, 18 sc, (sc, inc) ×3, 18 sc, (sc, inc) ×2 (54)
4: 2 sc, inc, 18 sc, (sc, inc) ×3, 18 sc, (sc, inc) ×2 (60)
Attach legs.
5: 2 sc, 11 sc with left leg, 1 sc, 11 sc with right leg, 6 sc, (inc, 3 sc) ×6, inc, 4 sc (67)
6–14: 67 sc
15: 31 sc, (dec, 3 sc) ×6, dec, 4 sc (60)
16: 60 sc
Switch to gray yarn.
17: 60 sc
Return to white yarn and crochet 60 slip stitches between steps 16–17.
18: (8 sc, dec) ×6 (54)
19–21: 54 sc
22: (7 sc, dec) ×6 (48)
23–25: 48 sc
26: 3 sc, dec, (6 sc, dec) ×5, 3 sc (42)
27–35: 42 sc
Attach arms.
37: 6 sc, 10 sc with left arm, 11 sc, 10 sc with right arm, 5 sc
38: (5 sc, dec) ×6 (36)
Stuff body.
39: 2 sc, dec, (4 sc, dec) ×5, 2 sc (30)
40: (3 sc, dec) ×6 (24)
41: sc, dec, (2 sc, dec), sc (18)
42–44: 18 sc
Insert wire neck support.
45: (7 sc, dec) ×2 (16)
46–53: 16 sc
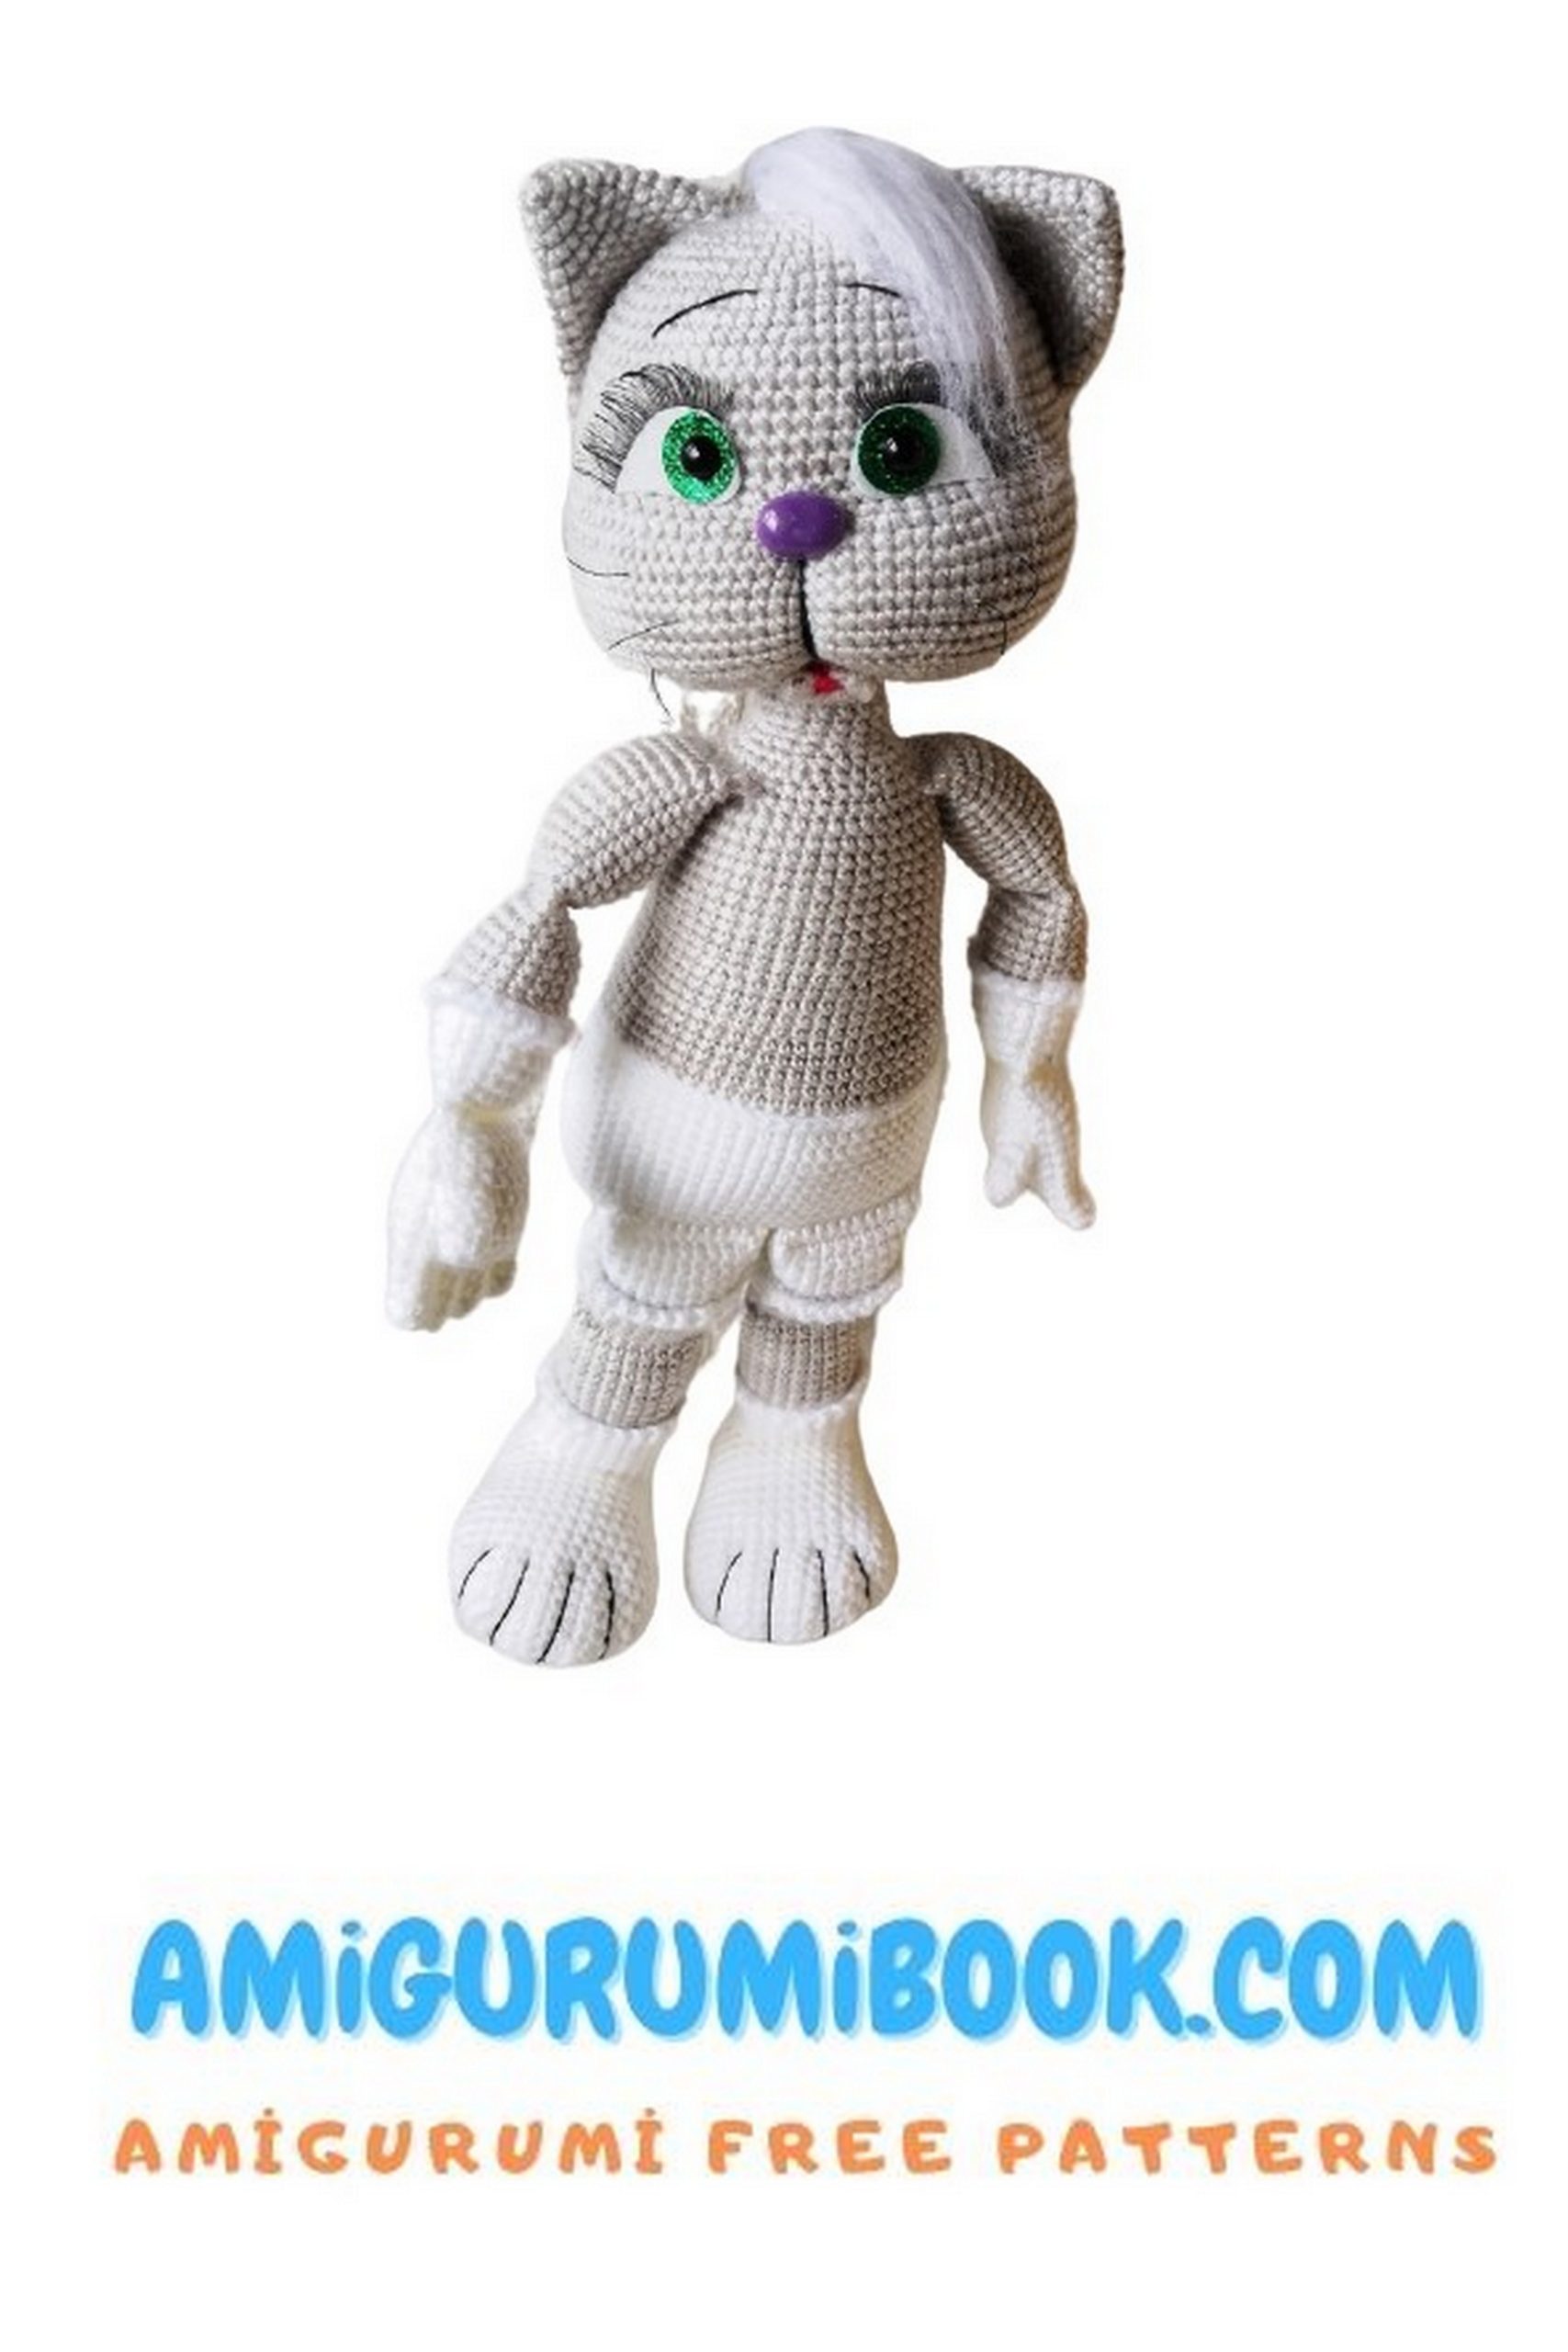
Head
Start with gray yarn.
1: 8 sc in MR
2: inc ×8 (16)
3: (sc, inc) ×8 (24)
4: sc, inc, (2 sc, inc) ×7, sc (32)
5: (3 sc, inc) ×8 (40)
6: 2 sc, inc, (4 sc, inc) ×7, 2 sc (48)
7: 48 sc
8: (5 sc, inc) ×8 (56)
9: 56 sc
10: 3 sc, inc, (6 sc, inc) ×7, 3 sc (64)
11: 64 sc
12: 4 sc, inc, (8 sc, inc) ×7, 4 sc (72)
13–20: 72 sc
21: 36 sc, marker, 36 sc
22: 17 sc, (2 sc, inc) ×6, 2 sc, (inc, 2 sc) ×6, 17 sc (84)
23: 17 sc, (inc, 7 sc) ×3, 2 sc, (7 sc, inc) ×3, 17 sc (90)
24–29: 90 sc
30: 17 sc, (dec, 7 sc) ×3, 2 sc, (7 sc, dec) ×3, 17 sc (84)
31: 17 sc, (2 sc, dec) ×6, 2 sc, (dec, 2 sc) ×6, 17 sc (72)
32: 5 sc, dec, (10 sc, dec) ×5, 5 sc (66)
33: (9 sc, dec) ×6 (60)
34: 4 sc, dec, (8 sc, dec) ×5, 4 sc (54)
35: (7 sc, dec) ×6 (48)
36: 3 sc, dec, (6 sc, dec) ×5, 3 sc (42)
Start stuffing head.
37: (5 sc, dec) ×6 (36)
38: 2 sc, dec, (4 sc, dec) ×5, 2 sc (30)
39: (3 sc, dec) ×6 (24)
40: sc, dec, (2 sc, dec) ×5, sc (18)
41–50: 18 sc
Fasten off.
Facial Features
Muzzle tightening:
Insert a needle with black yarn from point A to B, leaving a small yarn tail.
From B insert needle to C under the fabric.
Repeat tightening 2–3 times.
Tie the threads in a knot under the muzzle and hide the yarn inside the head.
Eye Tightening
Place pins as follows:
Point A — center of muzzle
Point B — 3 rows up and 4 stitches left
Point C — 3 stitches left from B
Repeat symmetrically for the other side.
Tightening path:
A → C → B → D → E → A
Pull yarn tightly and repeat 2–3 times.
Glue the nose between stitches 21–22.
Mouth
Start with red yarn.
1: 6 sc in MR
2: change to gray yarn, ch 1, turn, inc ×6 (12)
Fasten off leaving a long tail.
Sew the mouth below the muzzle shaping.
Embroider eyebrows with black thread.
Ears (Make 2)
1: 6 sc in MR
2: (sc, inc) ×3 (9)
3: (inc, 2 sc) ×3 (12)
4: (3 sc, inc) ×3 (15)
5: 2 sc, inc, (4 sc, inc) ×2, 2 sc (18)
6: (5 sc, inc) ×3 (21)
7: 3 sc, inc, (6 sc, inc) ×2, 3 sc (24)
8: (7 sc, inc) ×3 (27)
9: 4 sc, inc, (8 sc, inc) ×2, 4 sc (30)
10: (9 sc, inc) ×3 (33)
11: 5 sc, inc, (10 sc, inc) ×2, 5 sc (36)
12: fold piece in half and crochet 18 sc through both sides
Leave a long tail and sew ears between head rows 5–18.
Tail
Start with white yarn.
1: 6 sc in MR
2: (sc, inc) ×3 (9)
3: (inc, 2 sc) ×3 (12)
4–5: 12 sc
Switch to gray yarn.
6–35: 12 sc
36: fold piece and crochet 6 sc through both sides
Sew the tail in the center of the back.
Brush the yarn on the head to create a small tuft.
Underskirt (Knitted)
Using 1.6 mm needles.
Cast on 280 stitches and join in the round.
1: purl 280
2–5: knit 280
6: (k12, dec) ×20 → 260
7–9: knit 260
10: (k11, dec) ×20 → 240
11–13: knit 240
14: (k5, dec, k5) ×20 → 220
15–17: knit 220
18: (k9, dec) ×20 → 200
19–21: knit 200
22: (k4, dec, k4) ×20 → 180
23–25: knit 180
26: (k7, dec) ×20 → 160
27–29: knit 160
30: (k3, dec, k3) ×20 → 140
31–33: knit 140
34: knit 70 decreases → 70
35: knit 70
Bind off.
Skirt Edging (Crochet)
Using 1.25 mm hook.
1: 280 sc around edge
2: (ch 5, skip 4 sc, sc) repeat around → 56 loops
3: 10 hdc in each loop, sc in next loop
Dress
Using lilac yarn and 1.6 mm needles.
Cast on 46 stitches.
1: knit
2: purl
3: knit
4: raglan increase row
Continue knitting while increasing according to pattern.
When reaching armholes:
Slip 22 stitches for sleeves onto spare needles.
Cast on 7 stitches under each arm.
Continue knitting body in rows.
Dress Skirt
Join work in the round.
Increase to 140 stitches.
Knit straight 30 rows.
Finish with:
1: purl
2: knit
3: purl
Bind off.
Sleeves
Pick up 31 stitches.
Knit in round:
1: knit
2: purl
3: knit
4: purl
Bind off.
Belt
Cast on 12 stitches.
Knit rib stitch for about 55 cm.
Steam lightly and sew onto dress.
Attach decorative button.
Slippers
Using 1.5 mm hook.
Sole
1: ch 13, from 2nd ch: sc, inc, 10 sc, 4 sc last ch, 10 sc, inc (28)
2:
2 inc
3 sc
3 hdc
4 dc
4 dc inc
4 dc
3 hdc
3 sc
2 inc (36)
3: (sc, inc) ×2, 10 sc, (inc, sc) ×2, (sc, inc) ×2, 10 sc, (sc, inc) ×2 (44)
4: (2 sc, inc) ×2, 3 sc, 3 hdc, 4 dc, (inc dc, 2 dc) ×2, (2 dc, inc dc) ×2, 4 dc, 3 hdc, 3 sc, (2 sc, inc) ×2 (52)
5: (3 hdc, inc) ×2, 10 hdc, (inc, 3 hdc) ×2, (3 hdc, inc) ×2, 10 hdc, (3 hdc, inc) ×2 (60)
6: (9 sc, inc) ×6 (66)
Insert cardboard sole.
Slippers Upper
1: 66 sc
2–3: 66 sc
Switch to lilac yarn.
4–7: 66 sc
8: dec, 22 sc, (dec, sc) ×3, (sc, dec) ×3, 22 sc, dec (58)
9: 20 sc, (dec, sc) ×3, (sc, dec) ×3, 20 sc (52)
10: dec, 15 sc, (dec, sc) ×3, (sc, dec) ×3, 15 sc, dec (44)
Fasten off.
Headband
Cast on 12 stitches.
Knit rib stitch to head circumference (~23 cm).
Bow
Cast on 22 stitches.
Knit stockinette stitch for about 15 cm.
Steam lightly.
Fold ends to center and sew.
Wrap middle to create bow shape.
Attach to headband.
Assembly
- Attach head to body using long needle
- Sew ears to head
- Attach muzzle
- Glue nose and eyes
- Embroider eyebrows and whiskers
- Sew tail
- Dress the doll
- Put on slippers and accessories
Your Amigurumi Cat Larisa is ready!