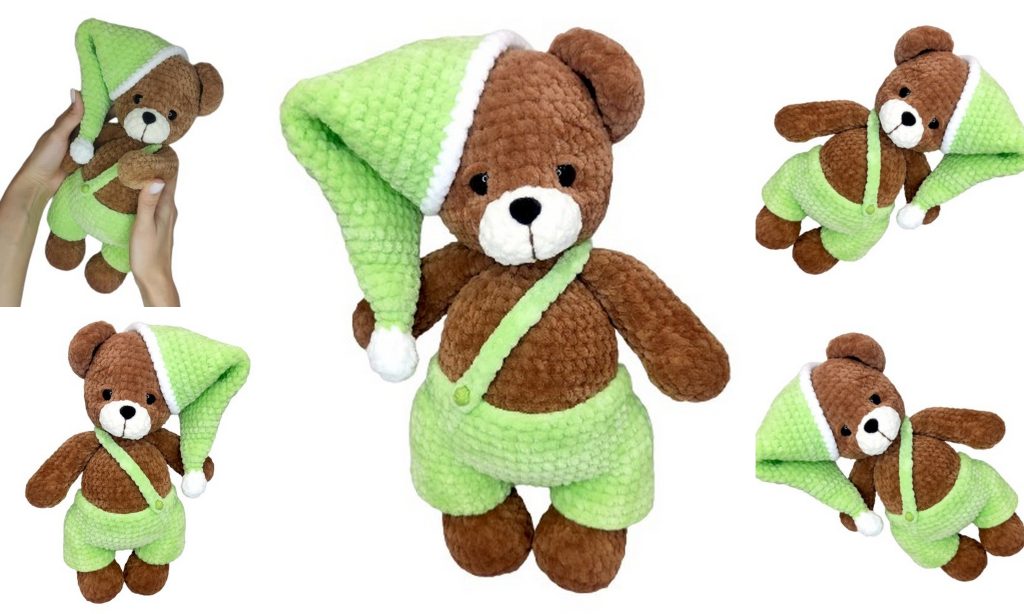
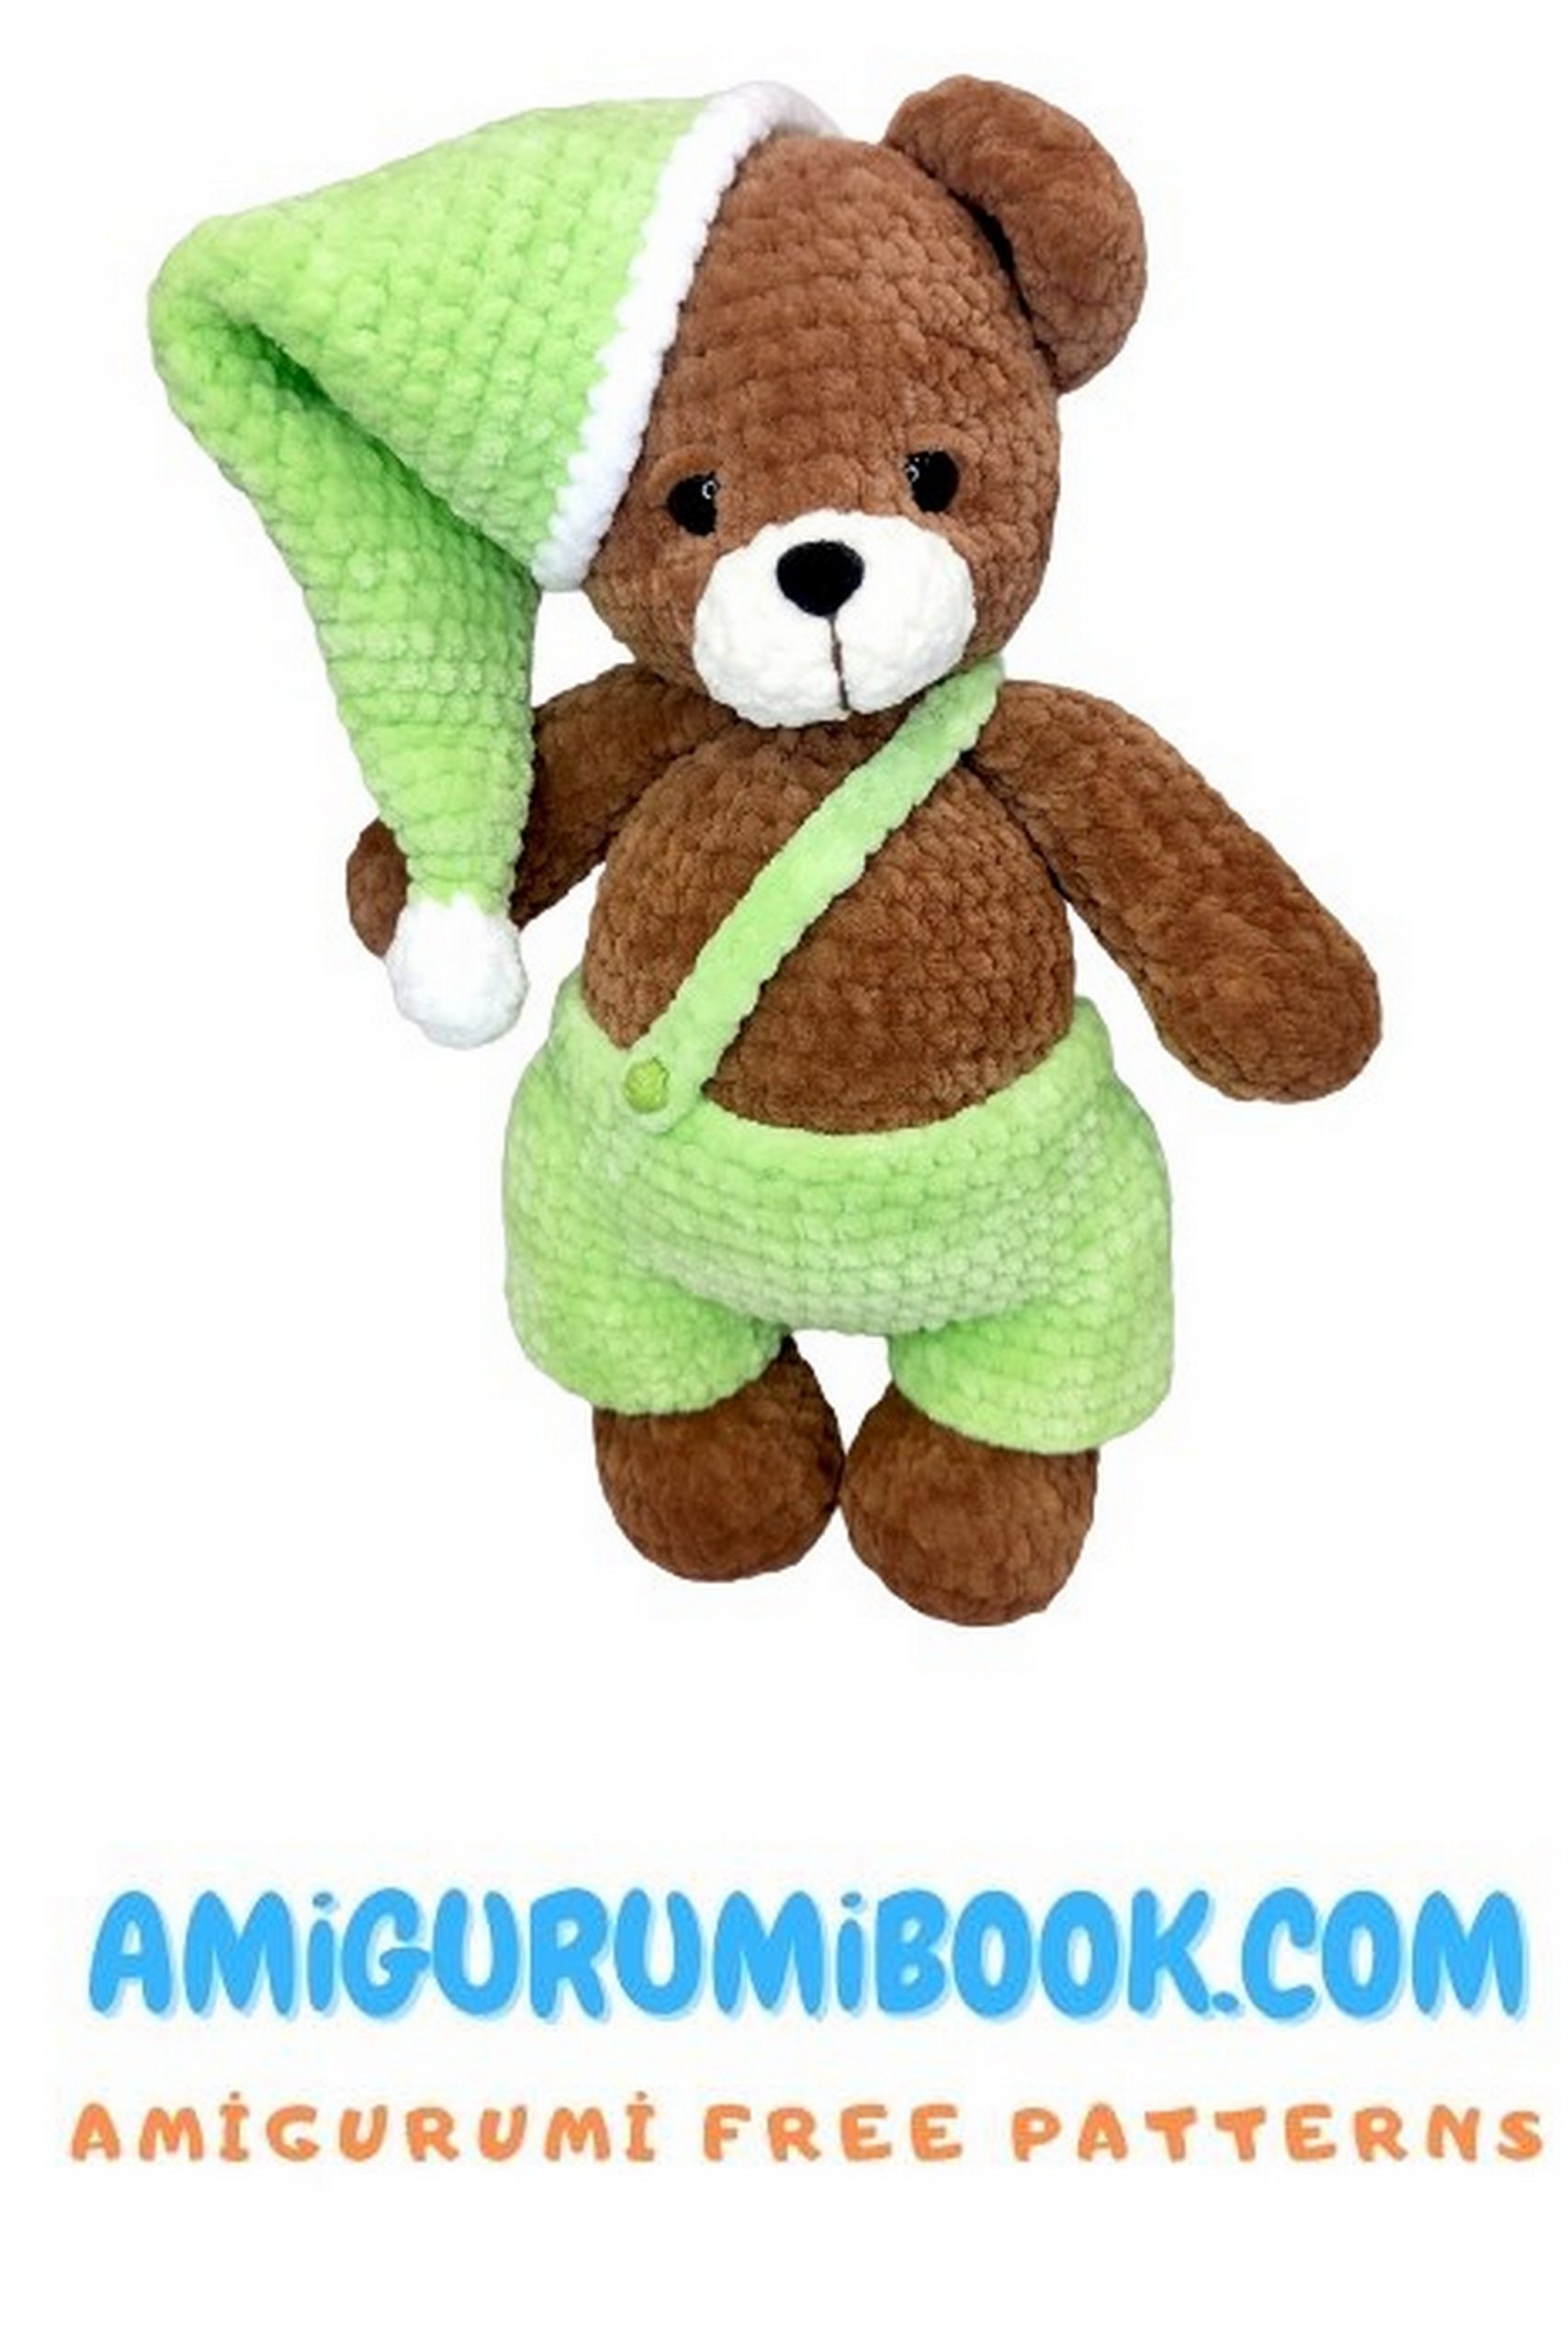
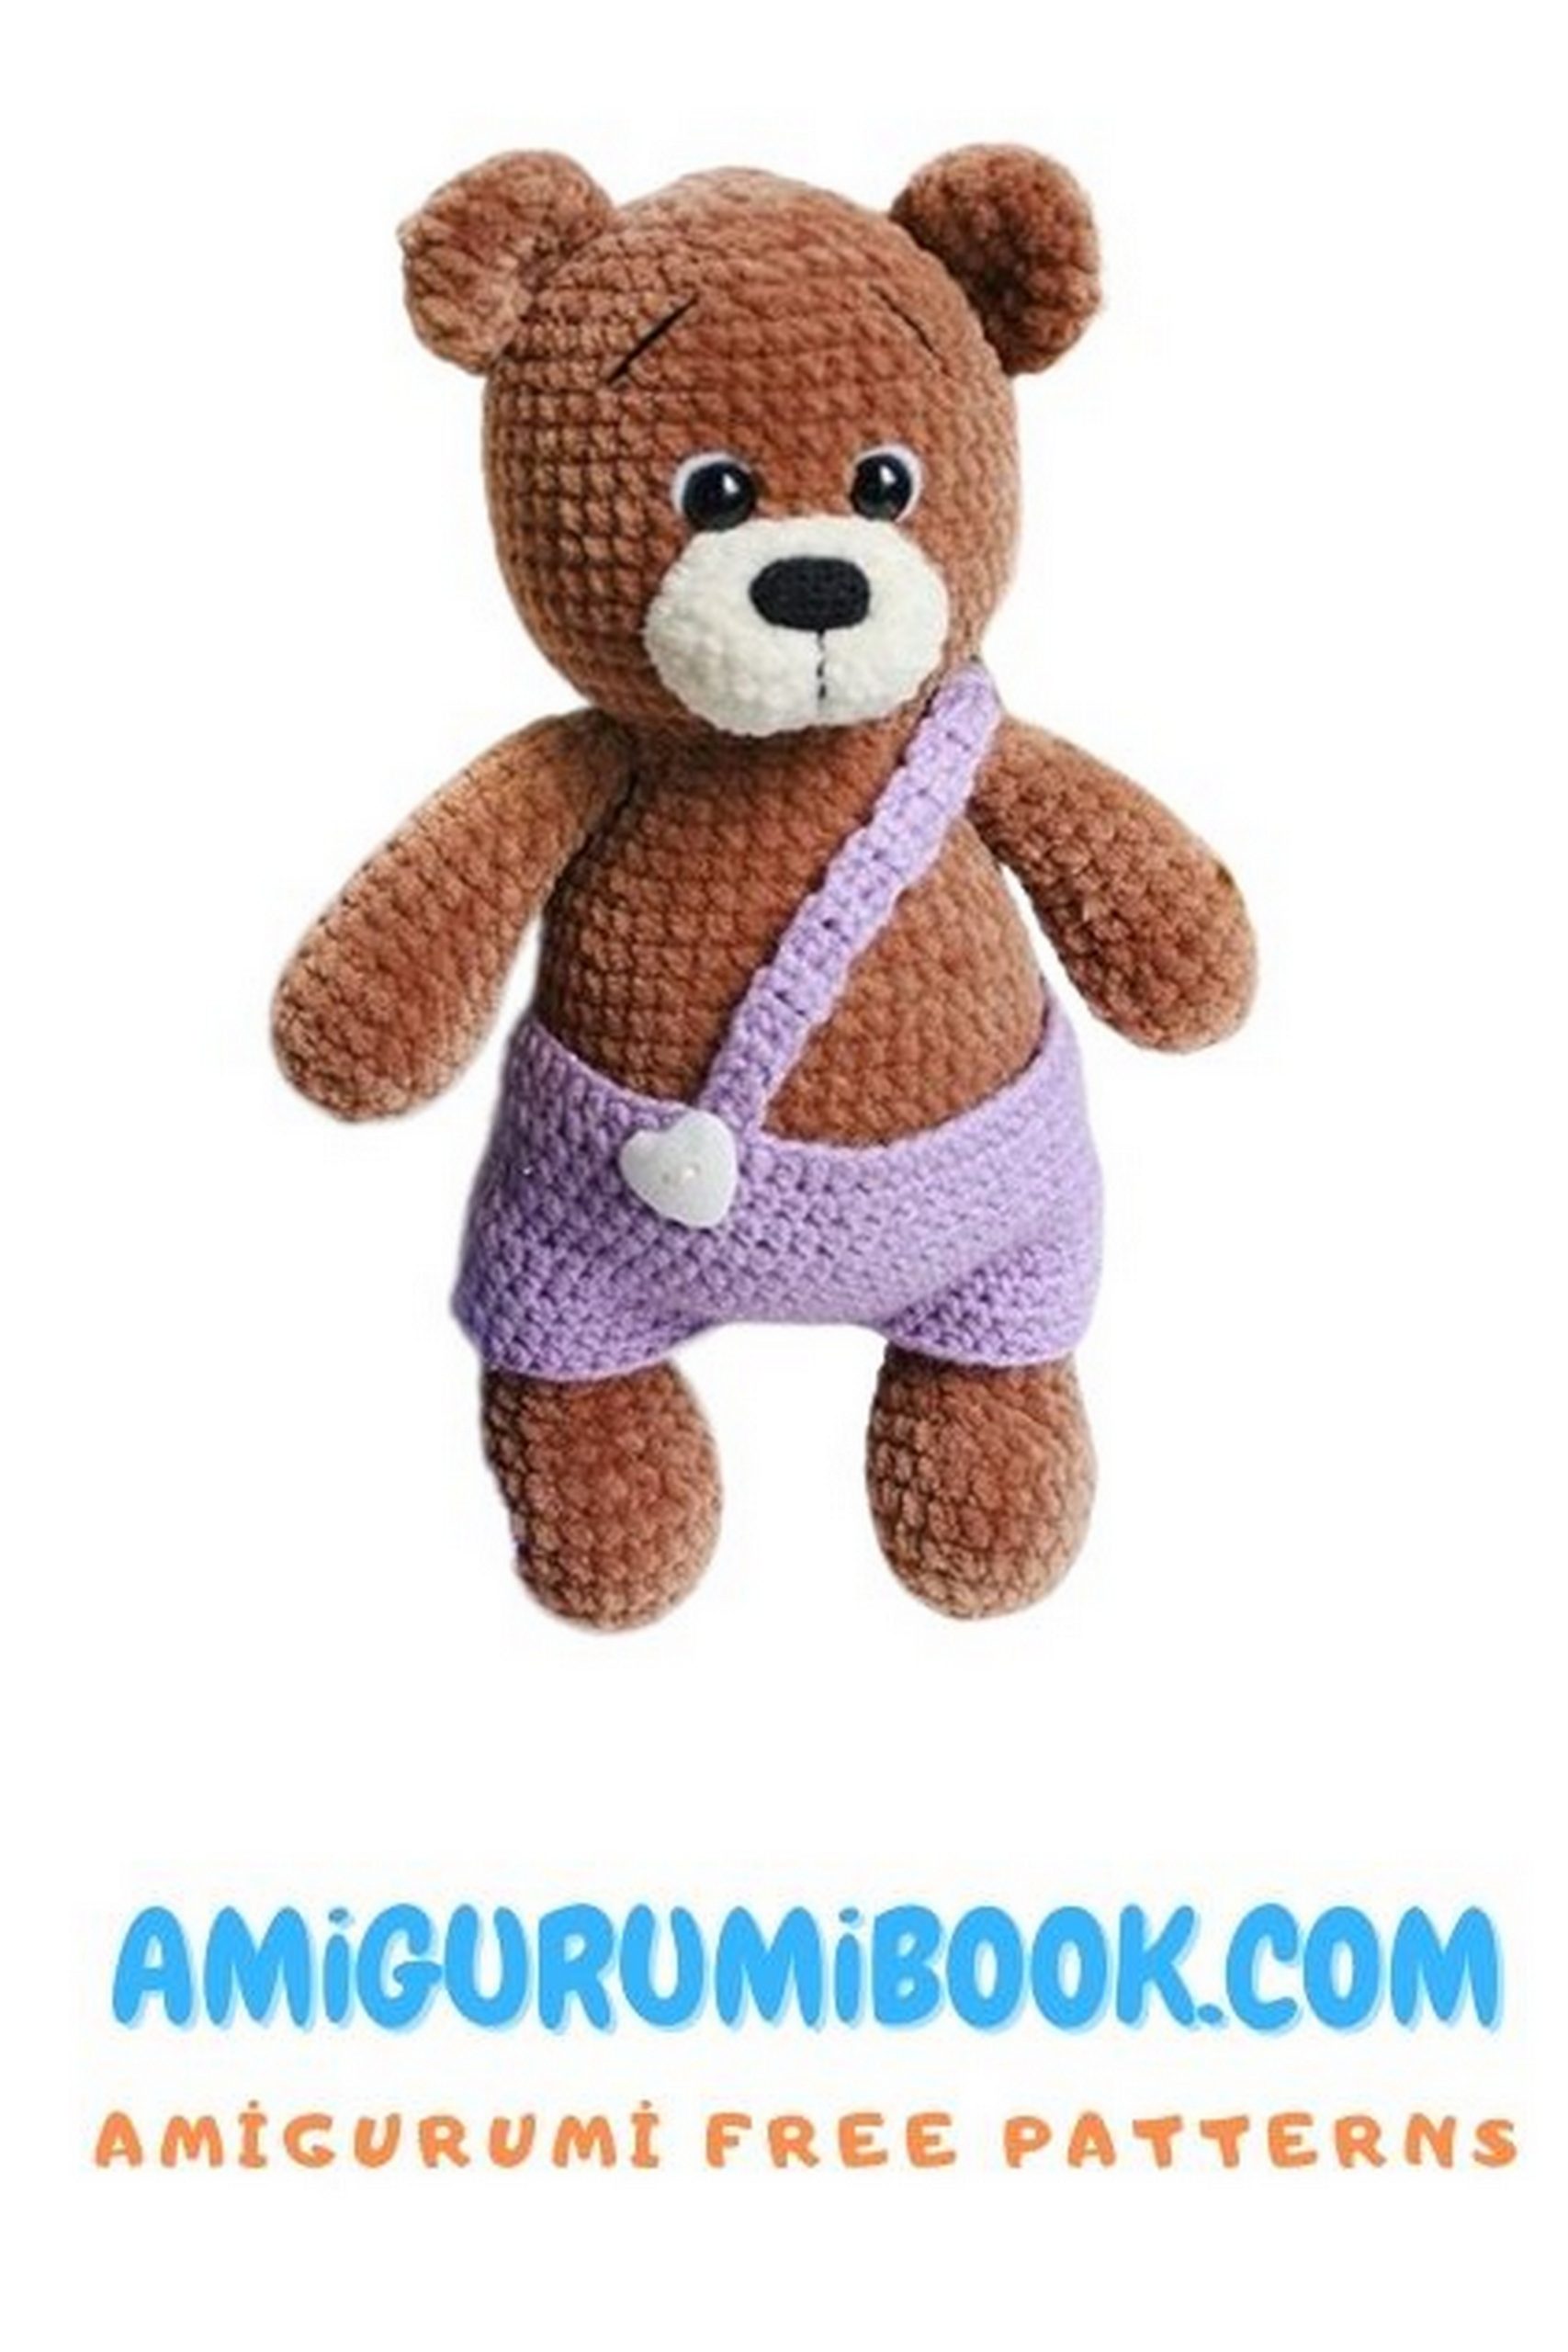
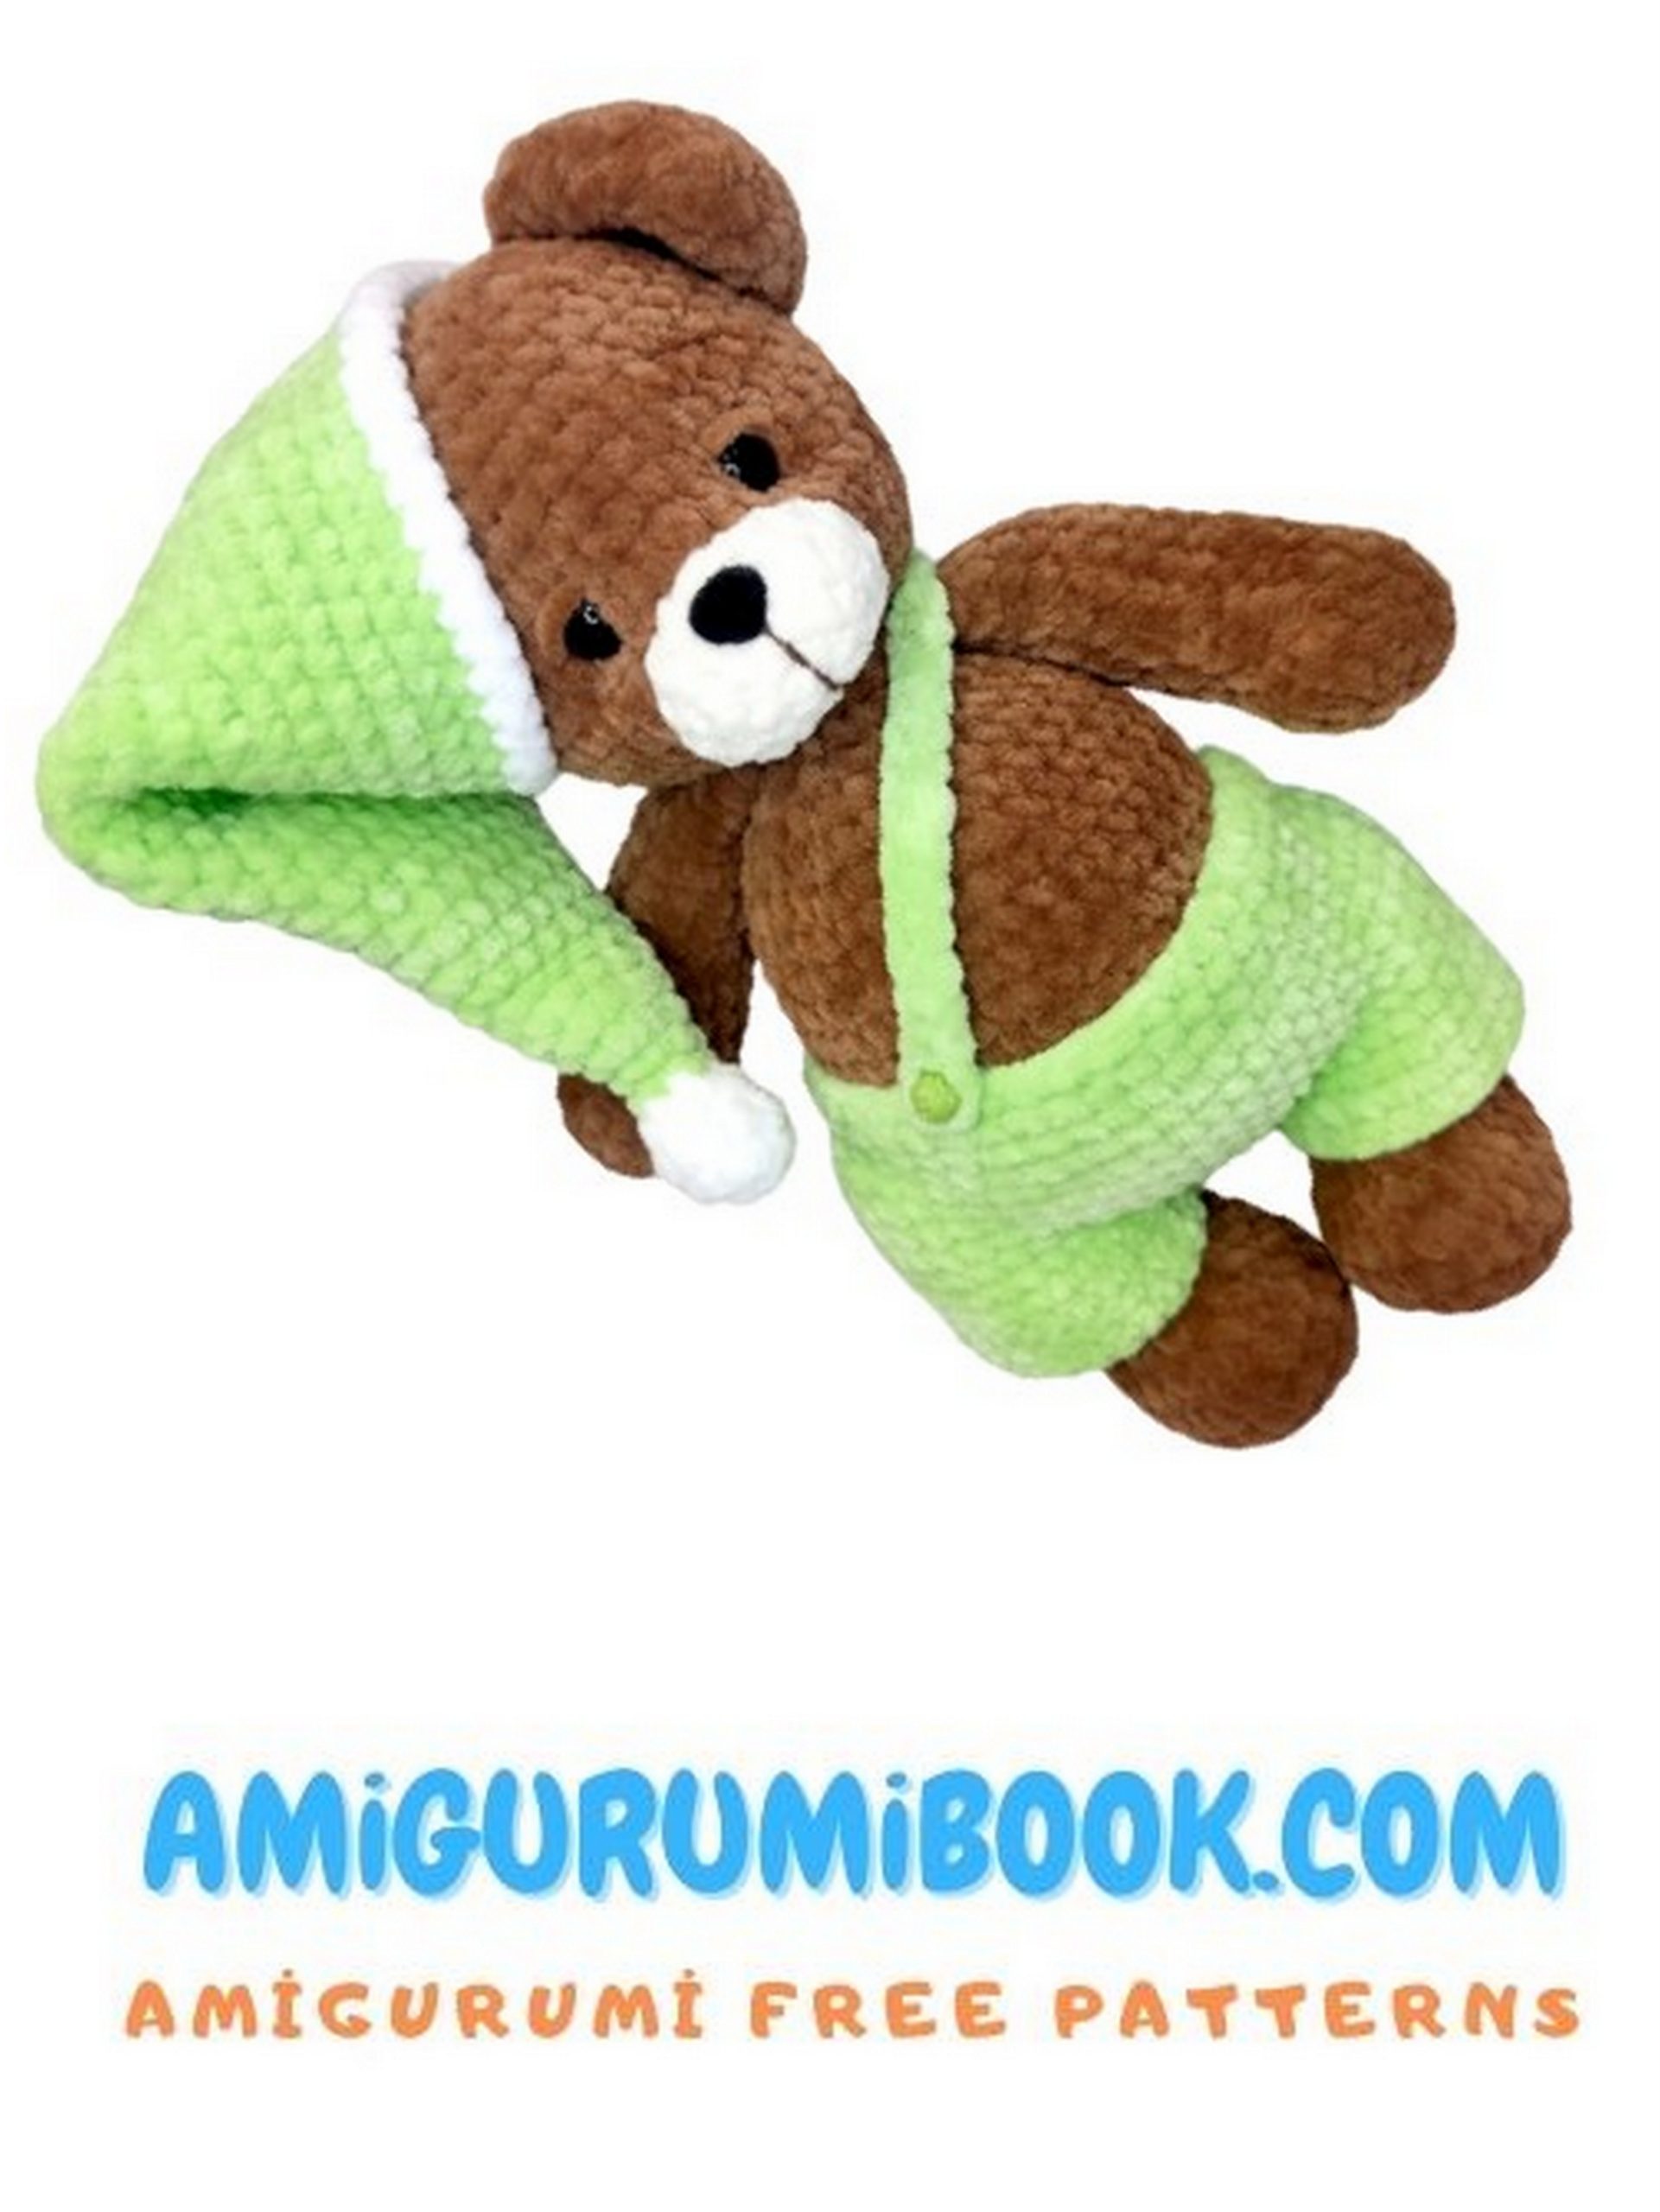
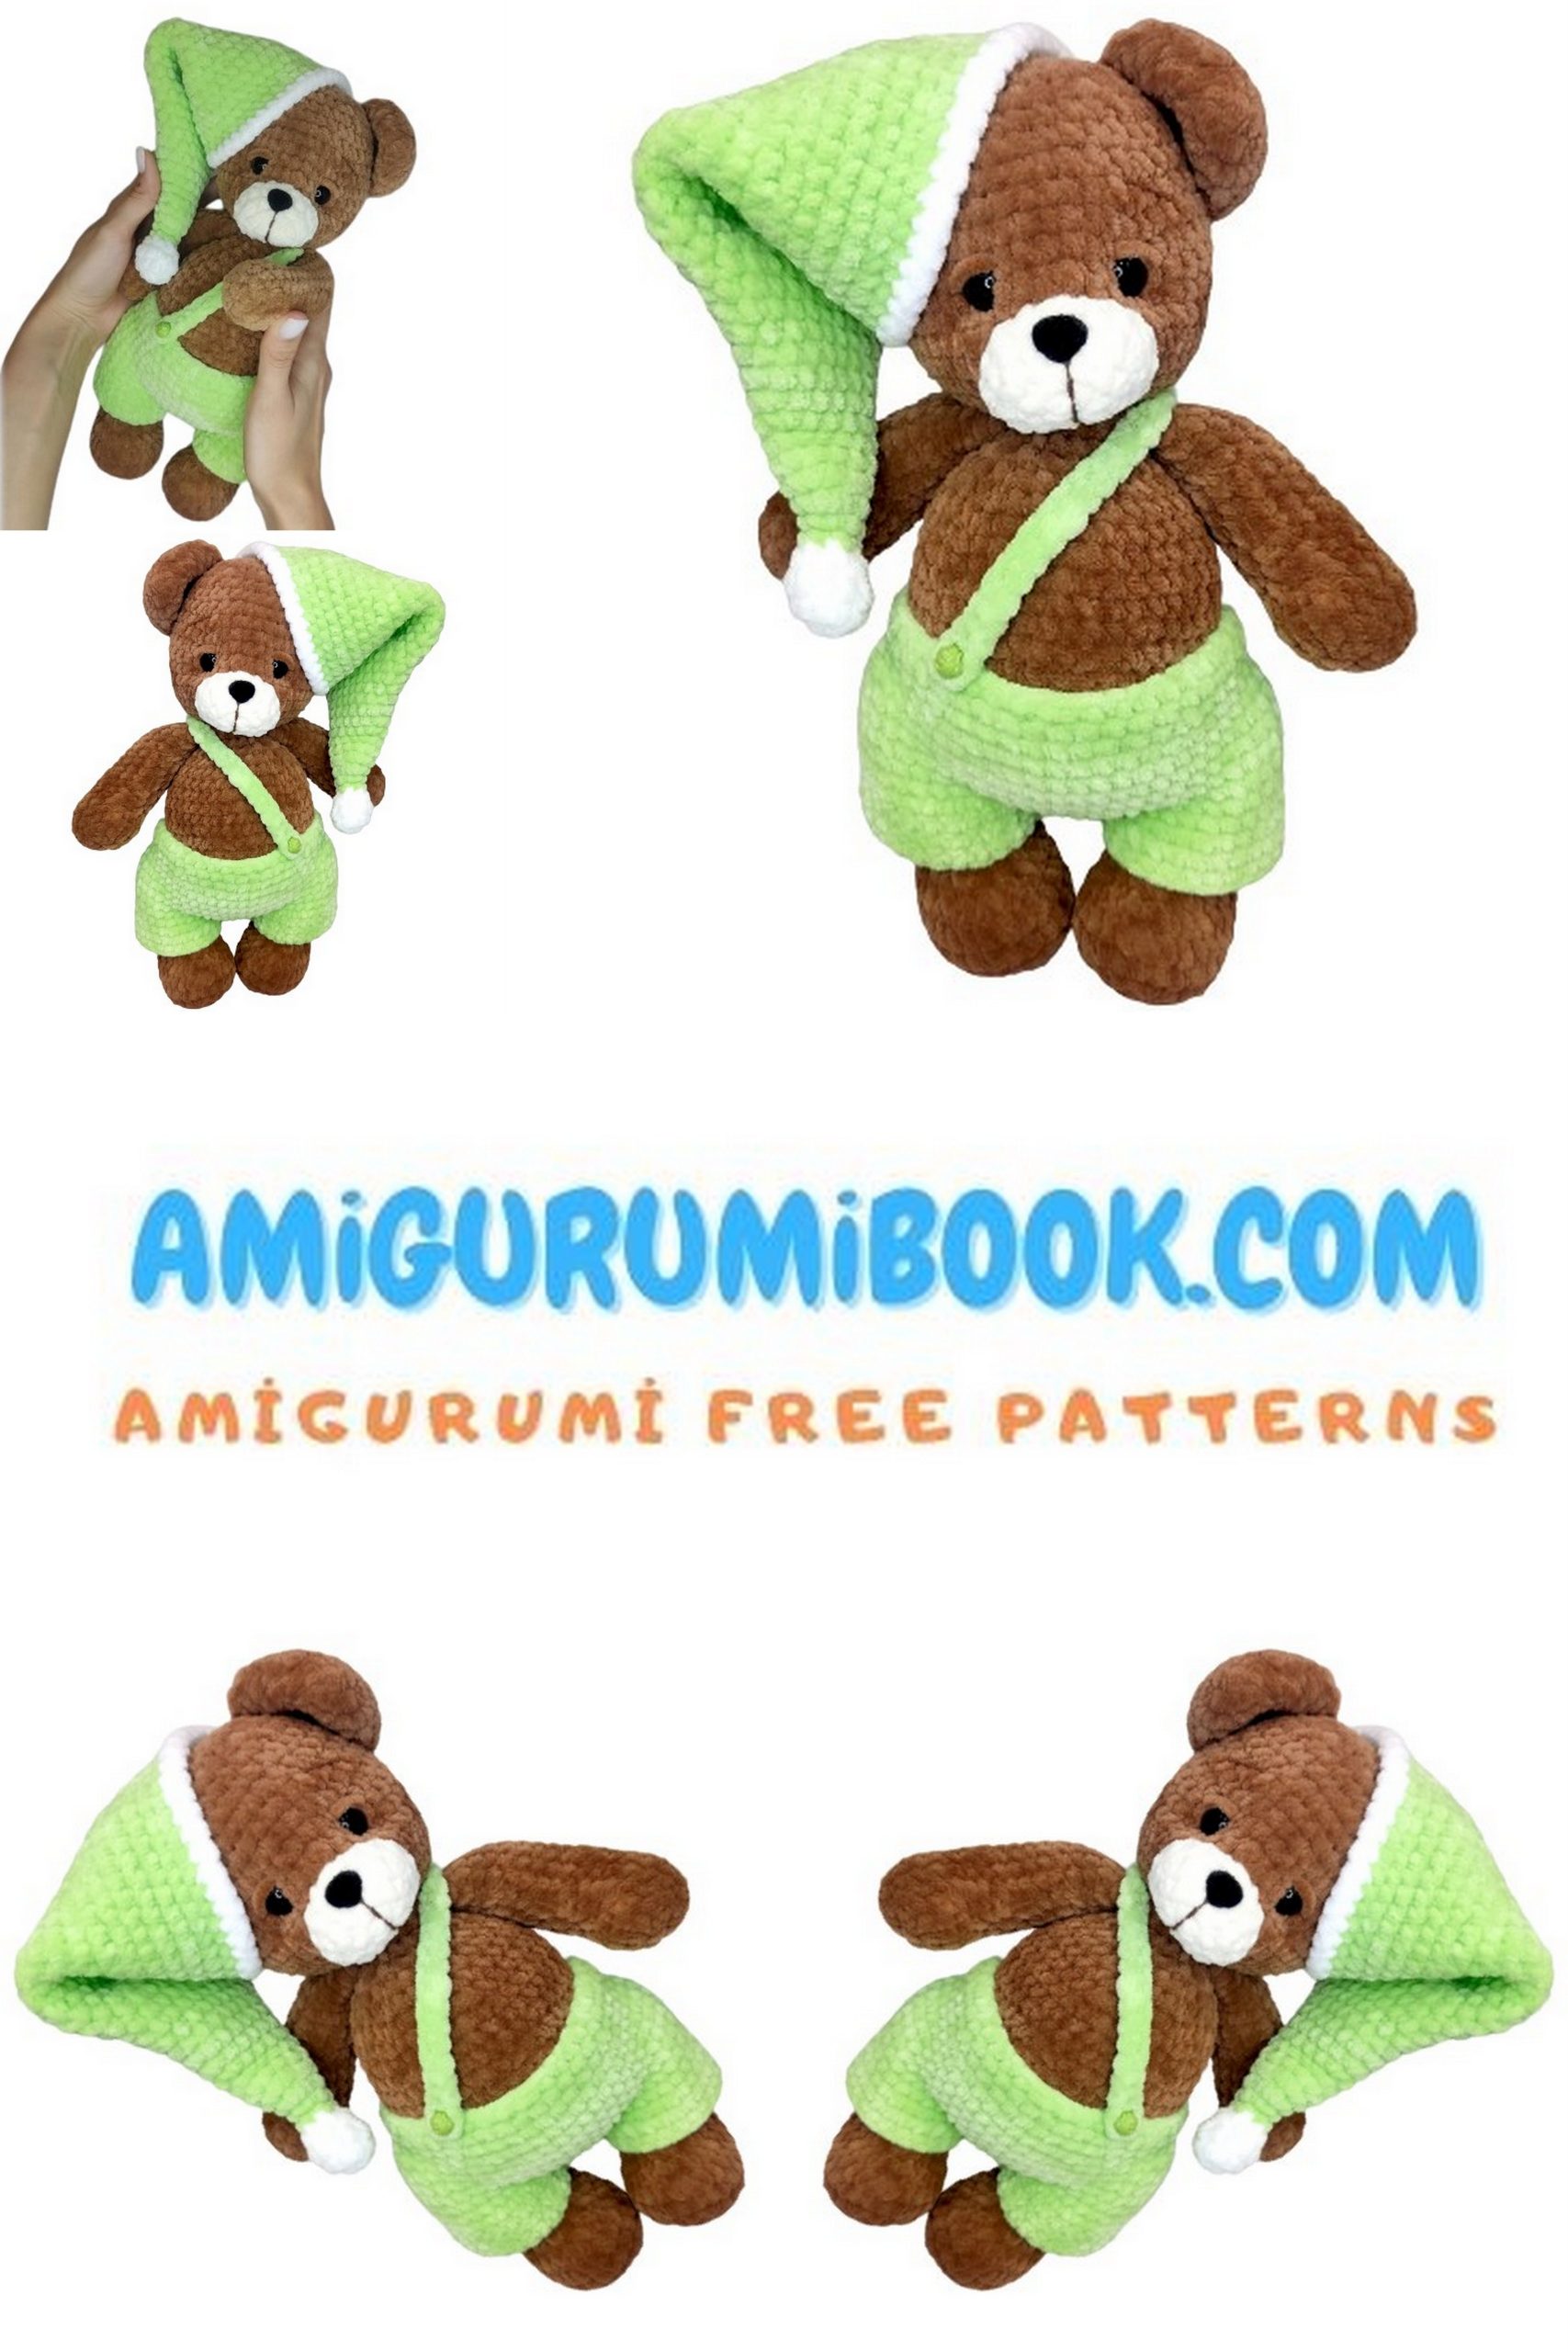
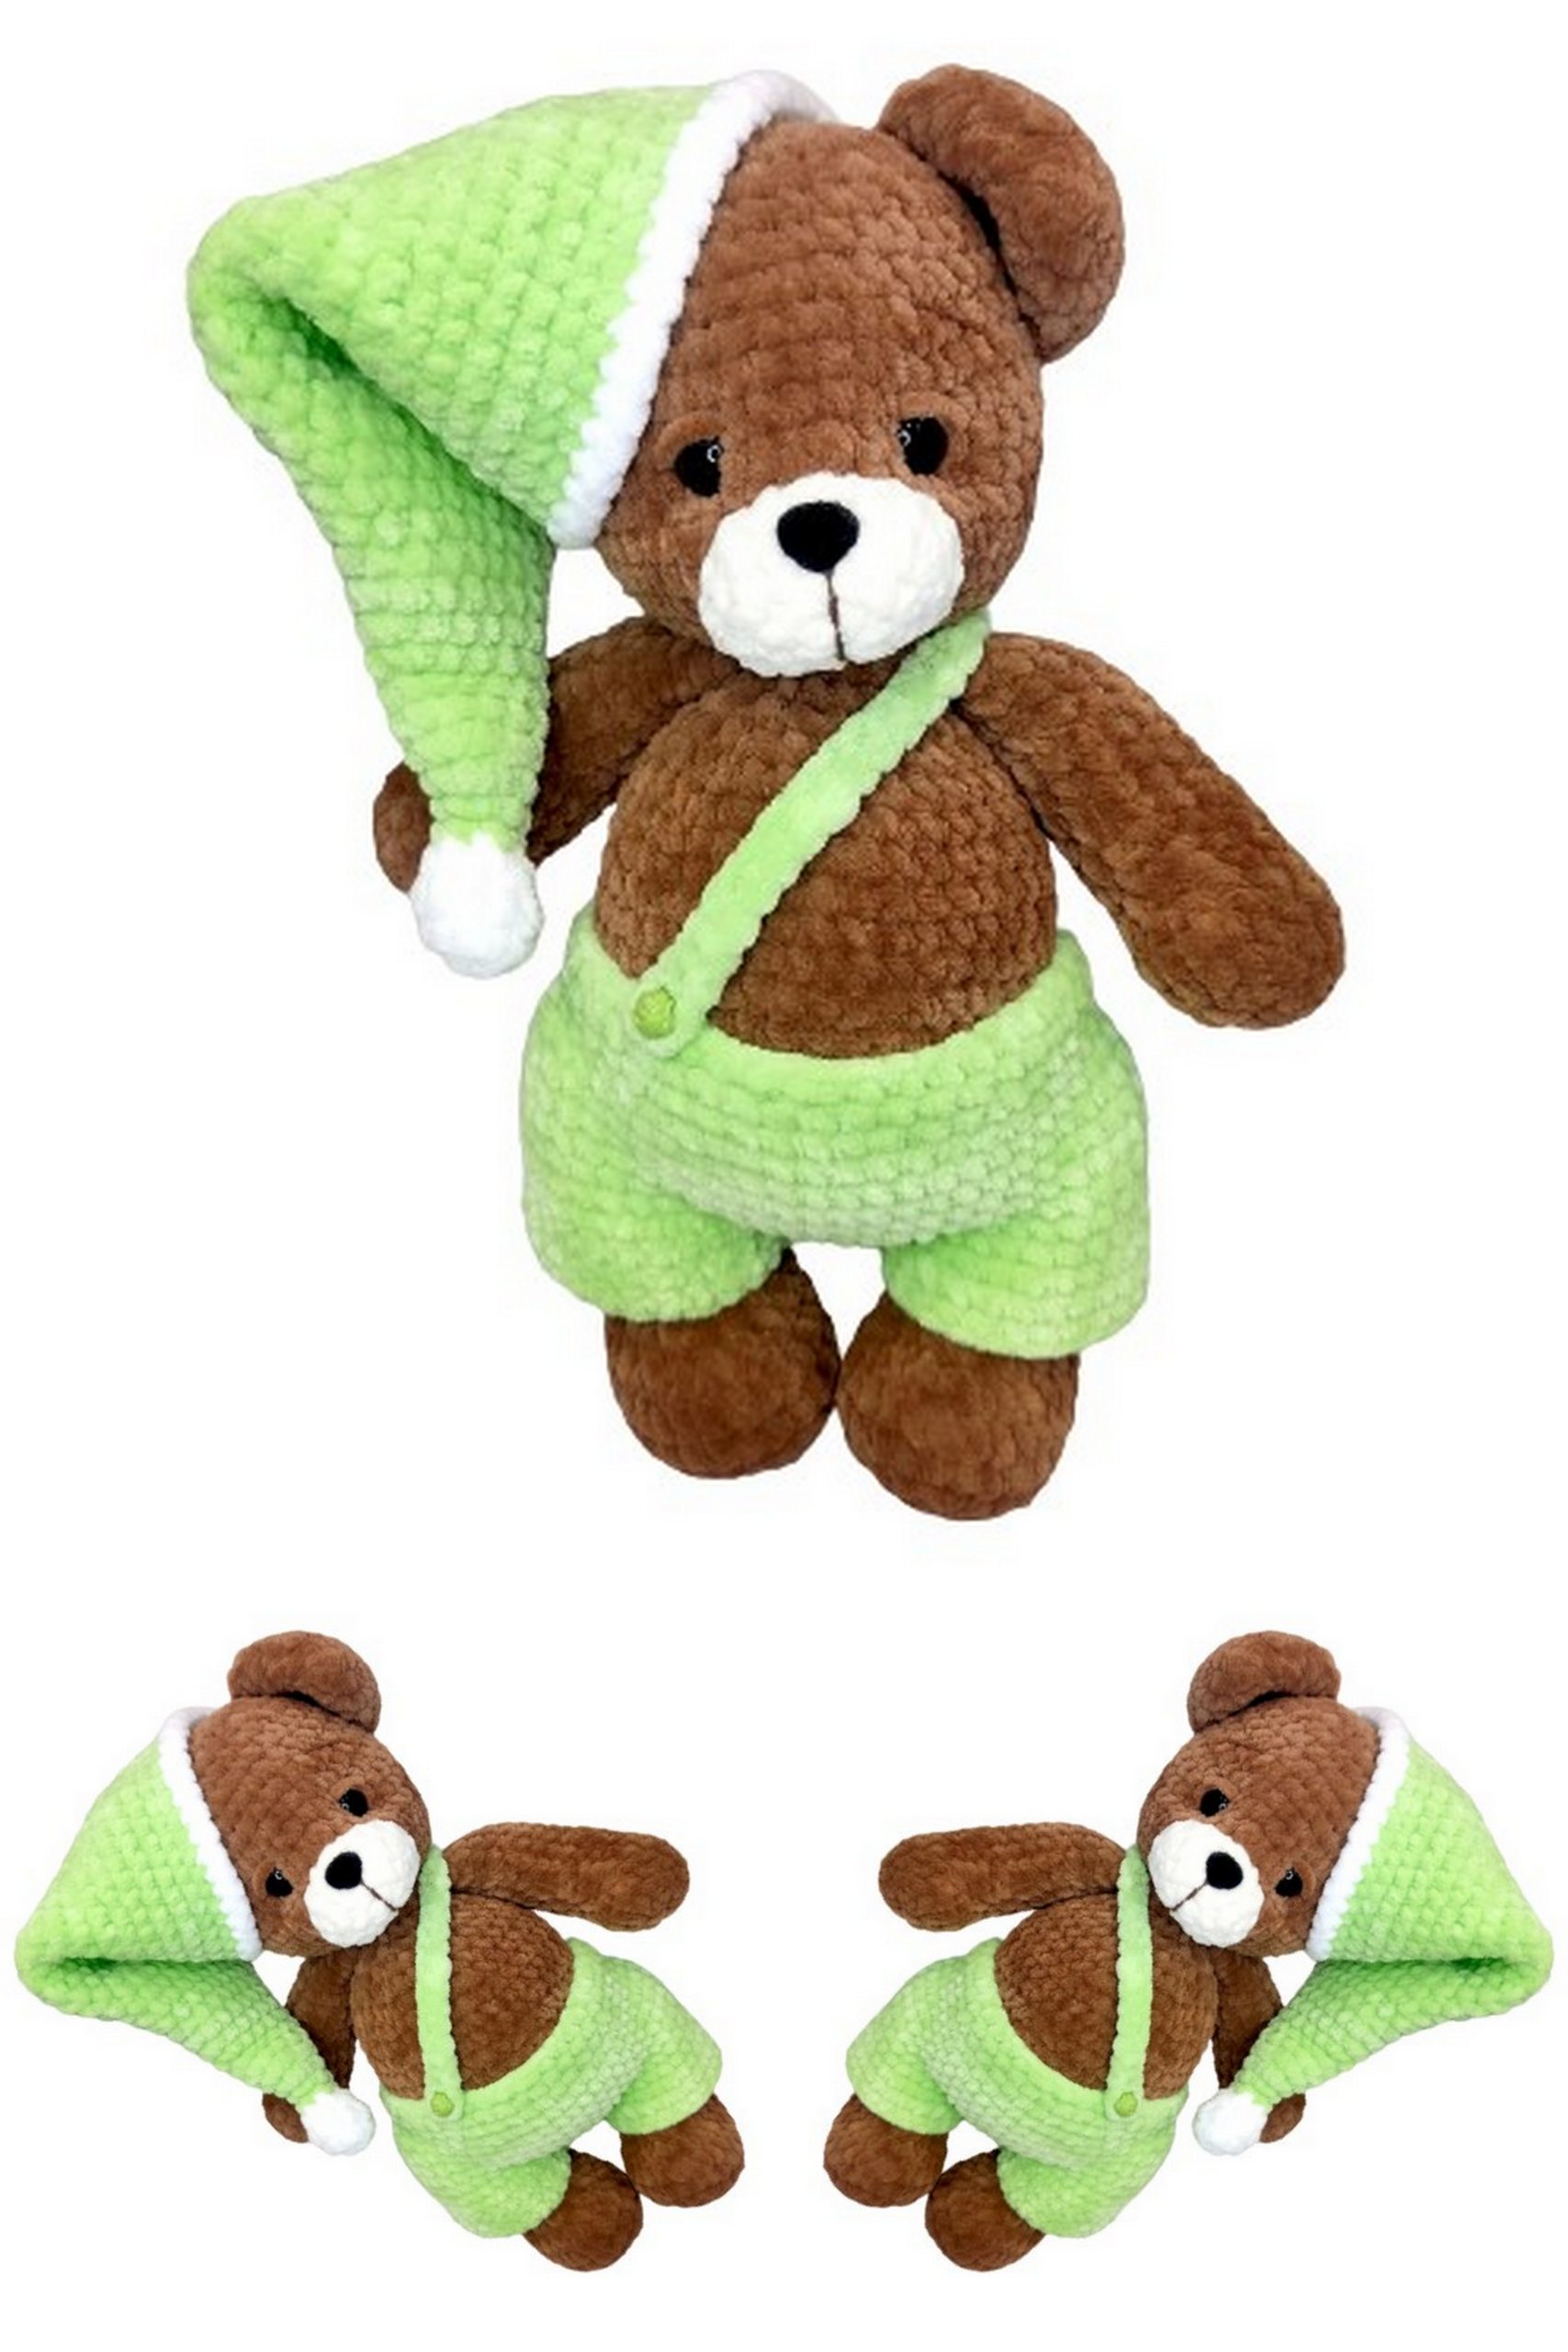
If you’re looking for a soft and adorable teddy project, this Barney Bear amigurumi pattern is perfect for you! In this free crochet tutorial, you’ll learn step by step how to create your own cuddly Barney Bear with detailed instructions and helpful guidance.
This Barney Bear crochet pattern is suitable for intermediate crocheters and includes clear rounds, shaping tips, and assembly instructions. Whether you’re making a handmade gift or adding a new design to your amigurumi collection, Barney Bear will quickly become one of your favorite creations.
If you want to access 1000+ free amigurumi patterns, you can download our application from this link!
🧵 Materials & Tools
To make this amigurumi toy, you will need:
🧶 Yarn
- Himalaya Dolphin Baby – Color 337 (1 skein)
- Himalaya Dolphin Baby – Color 350 (slightly more than ½ skein)
- Small amount of white yarn (for hat and face details)
- Matching thread for facial stitching (e.g., YarnArt Jeans in a similar shade)
👀 Notions
- 14 mm safety eyes
- 15 × 11 mm velvet nose
- 25 mm safety joints (for legs)
- 1 decorative button (for pants)
🧸 Other Supplies
- Polyester fiberfill (or preferred stuffing)
- 4 mm crochet hook
- Tapestry needle (large eye)
- Scissors
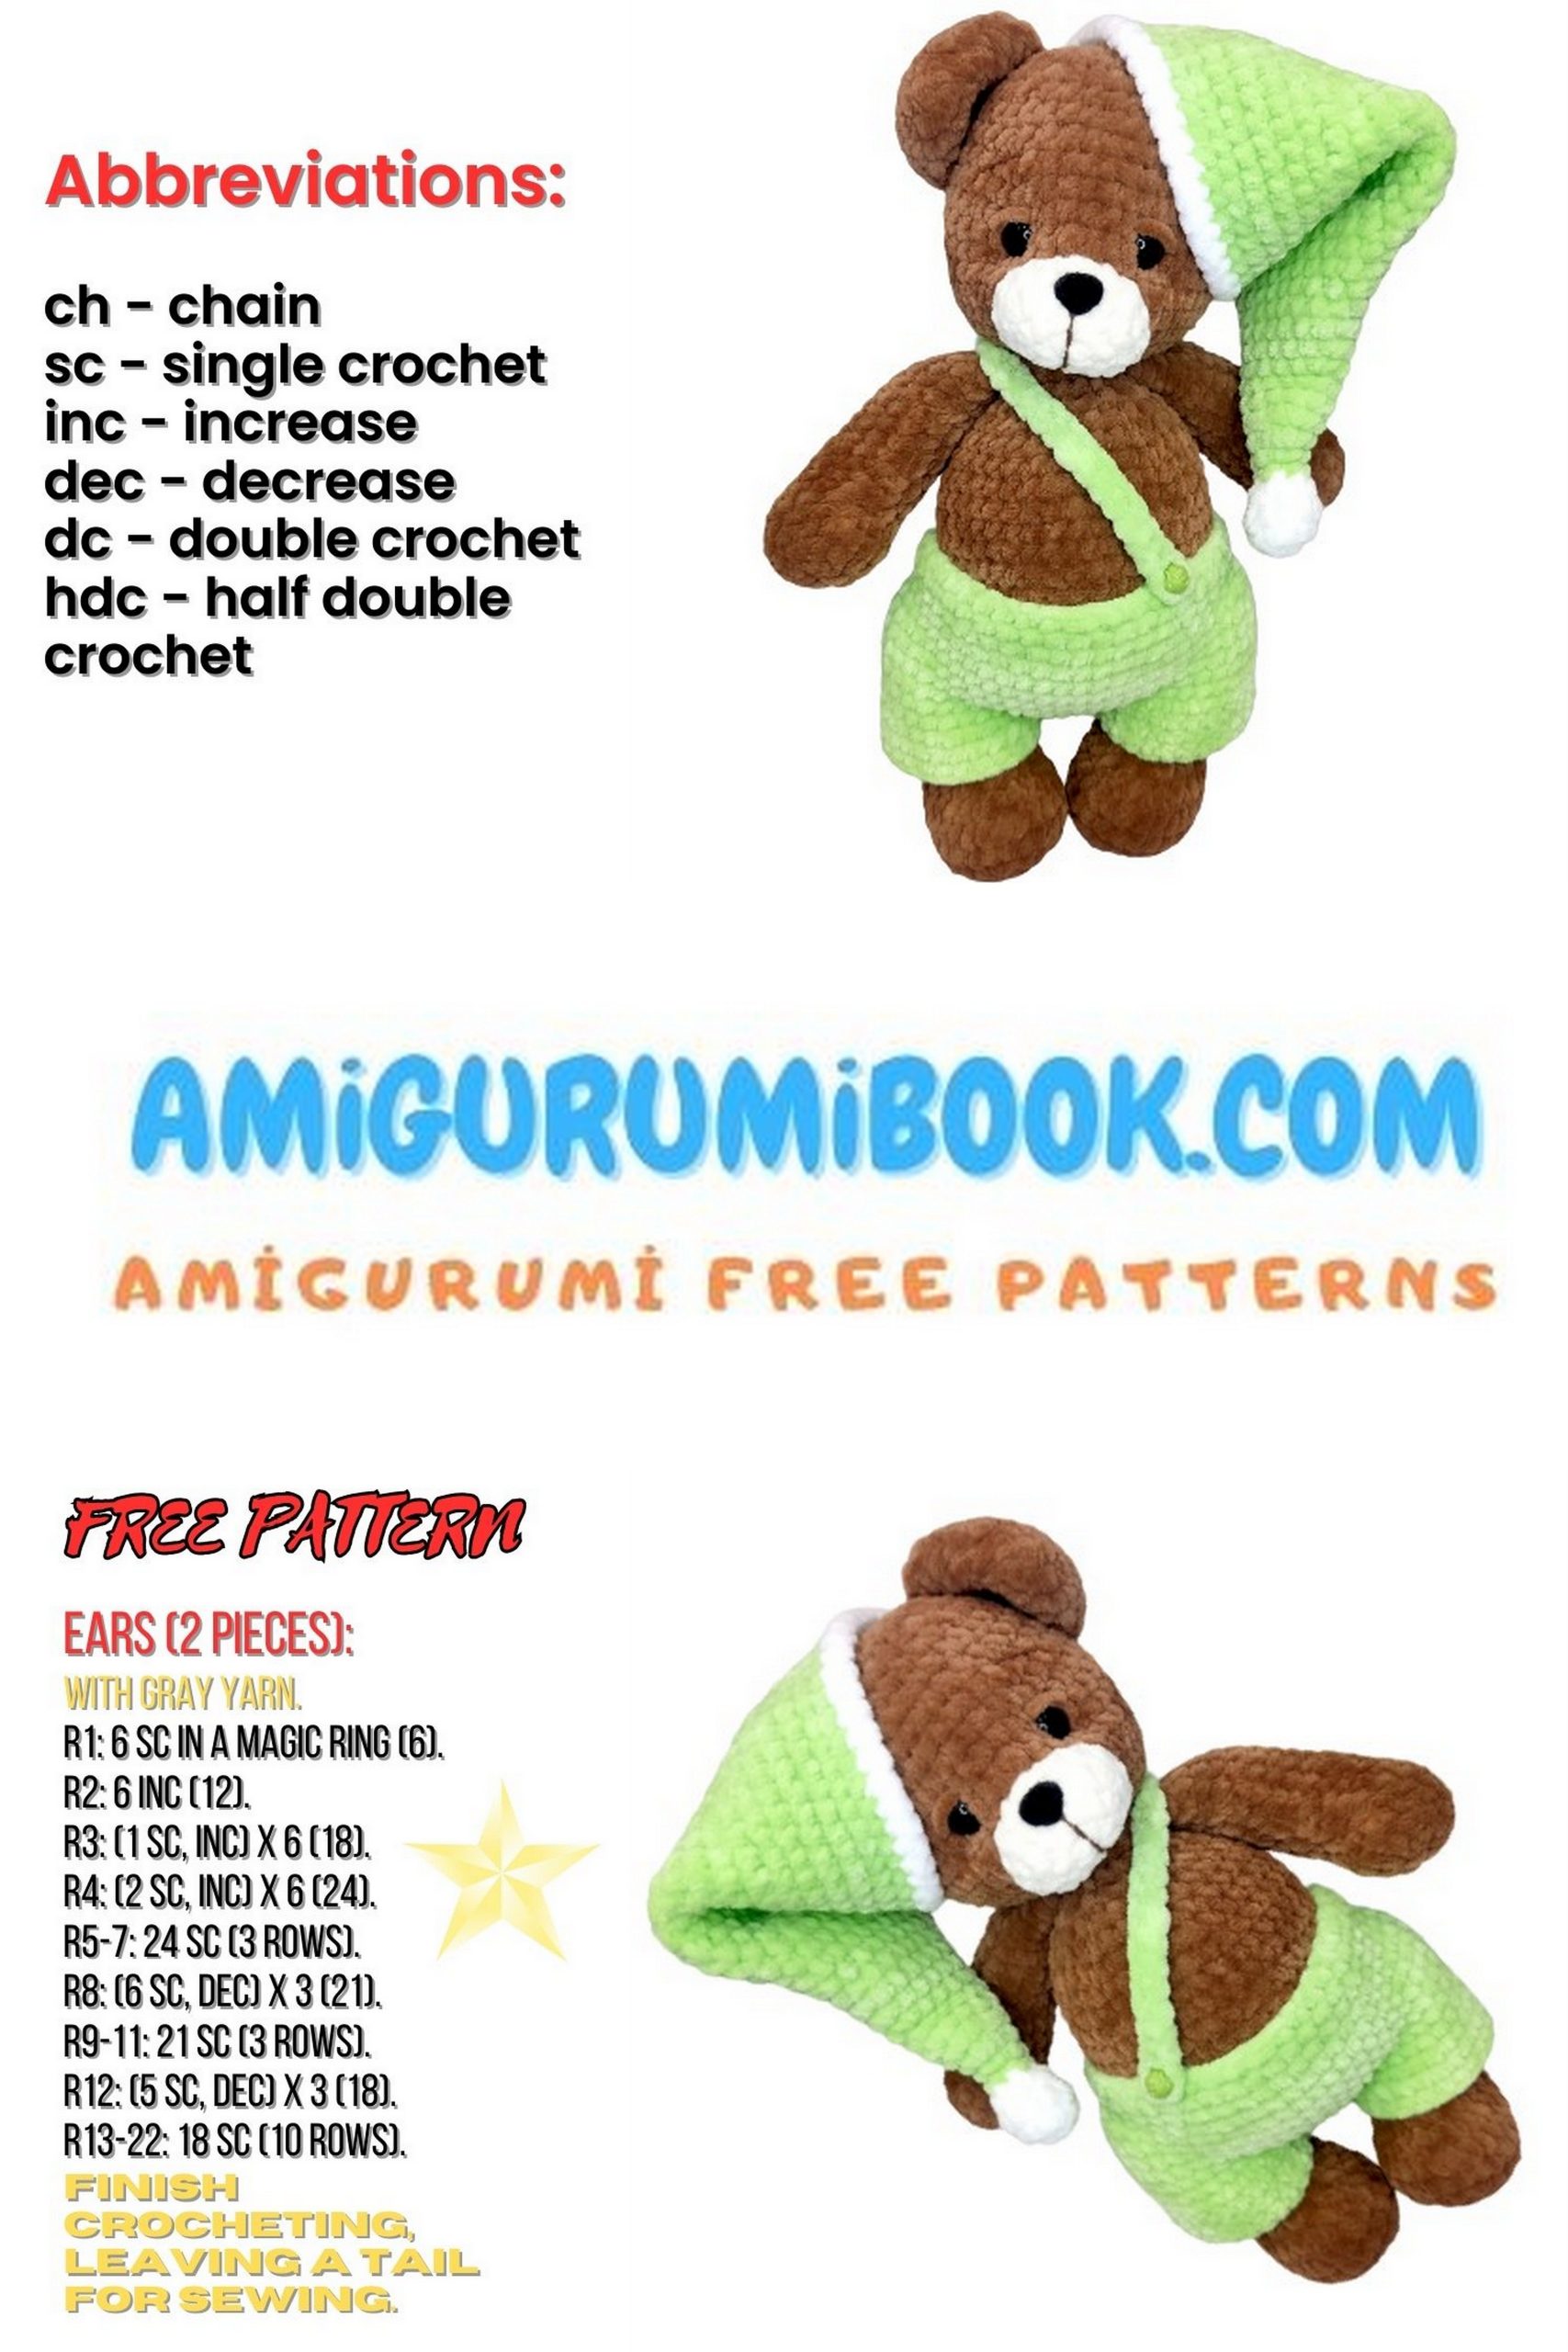
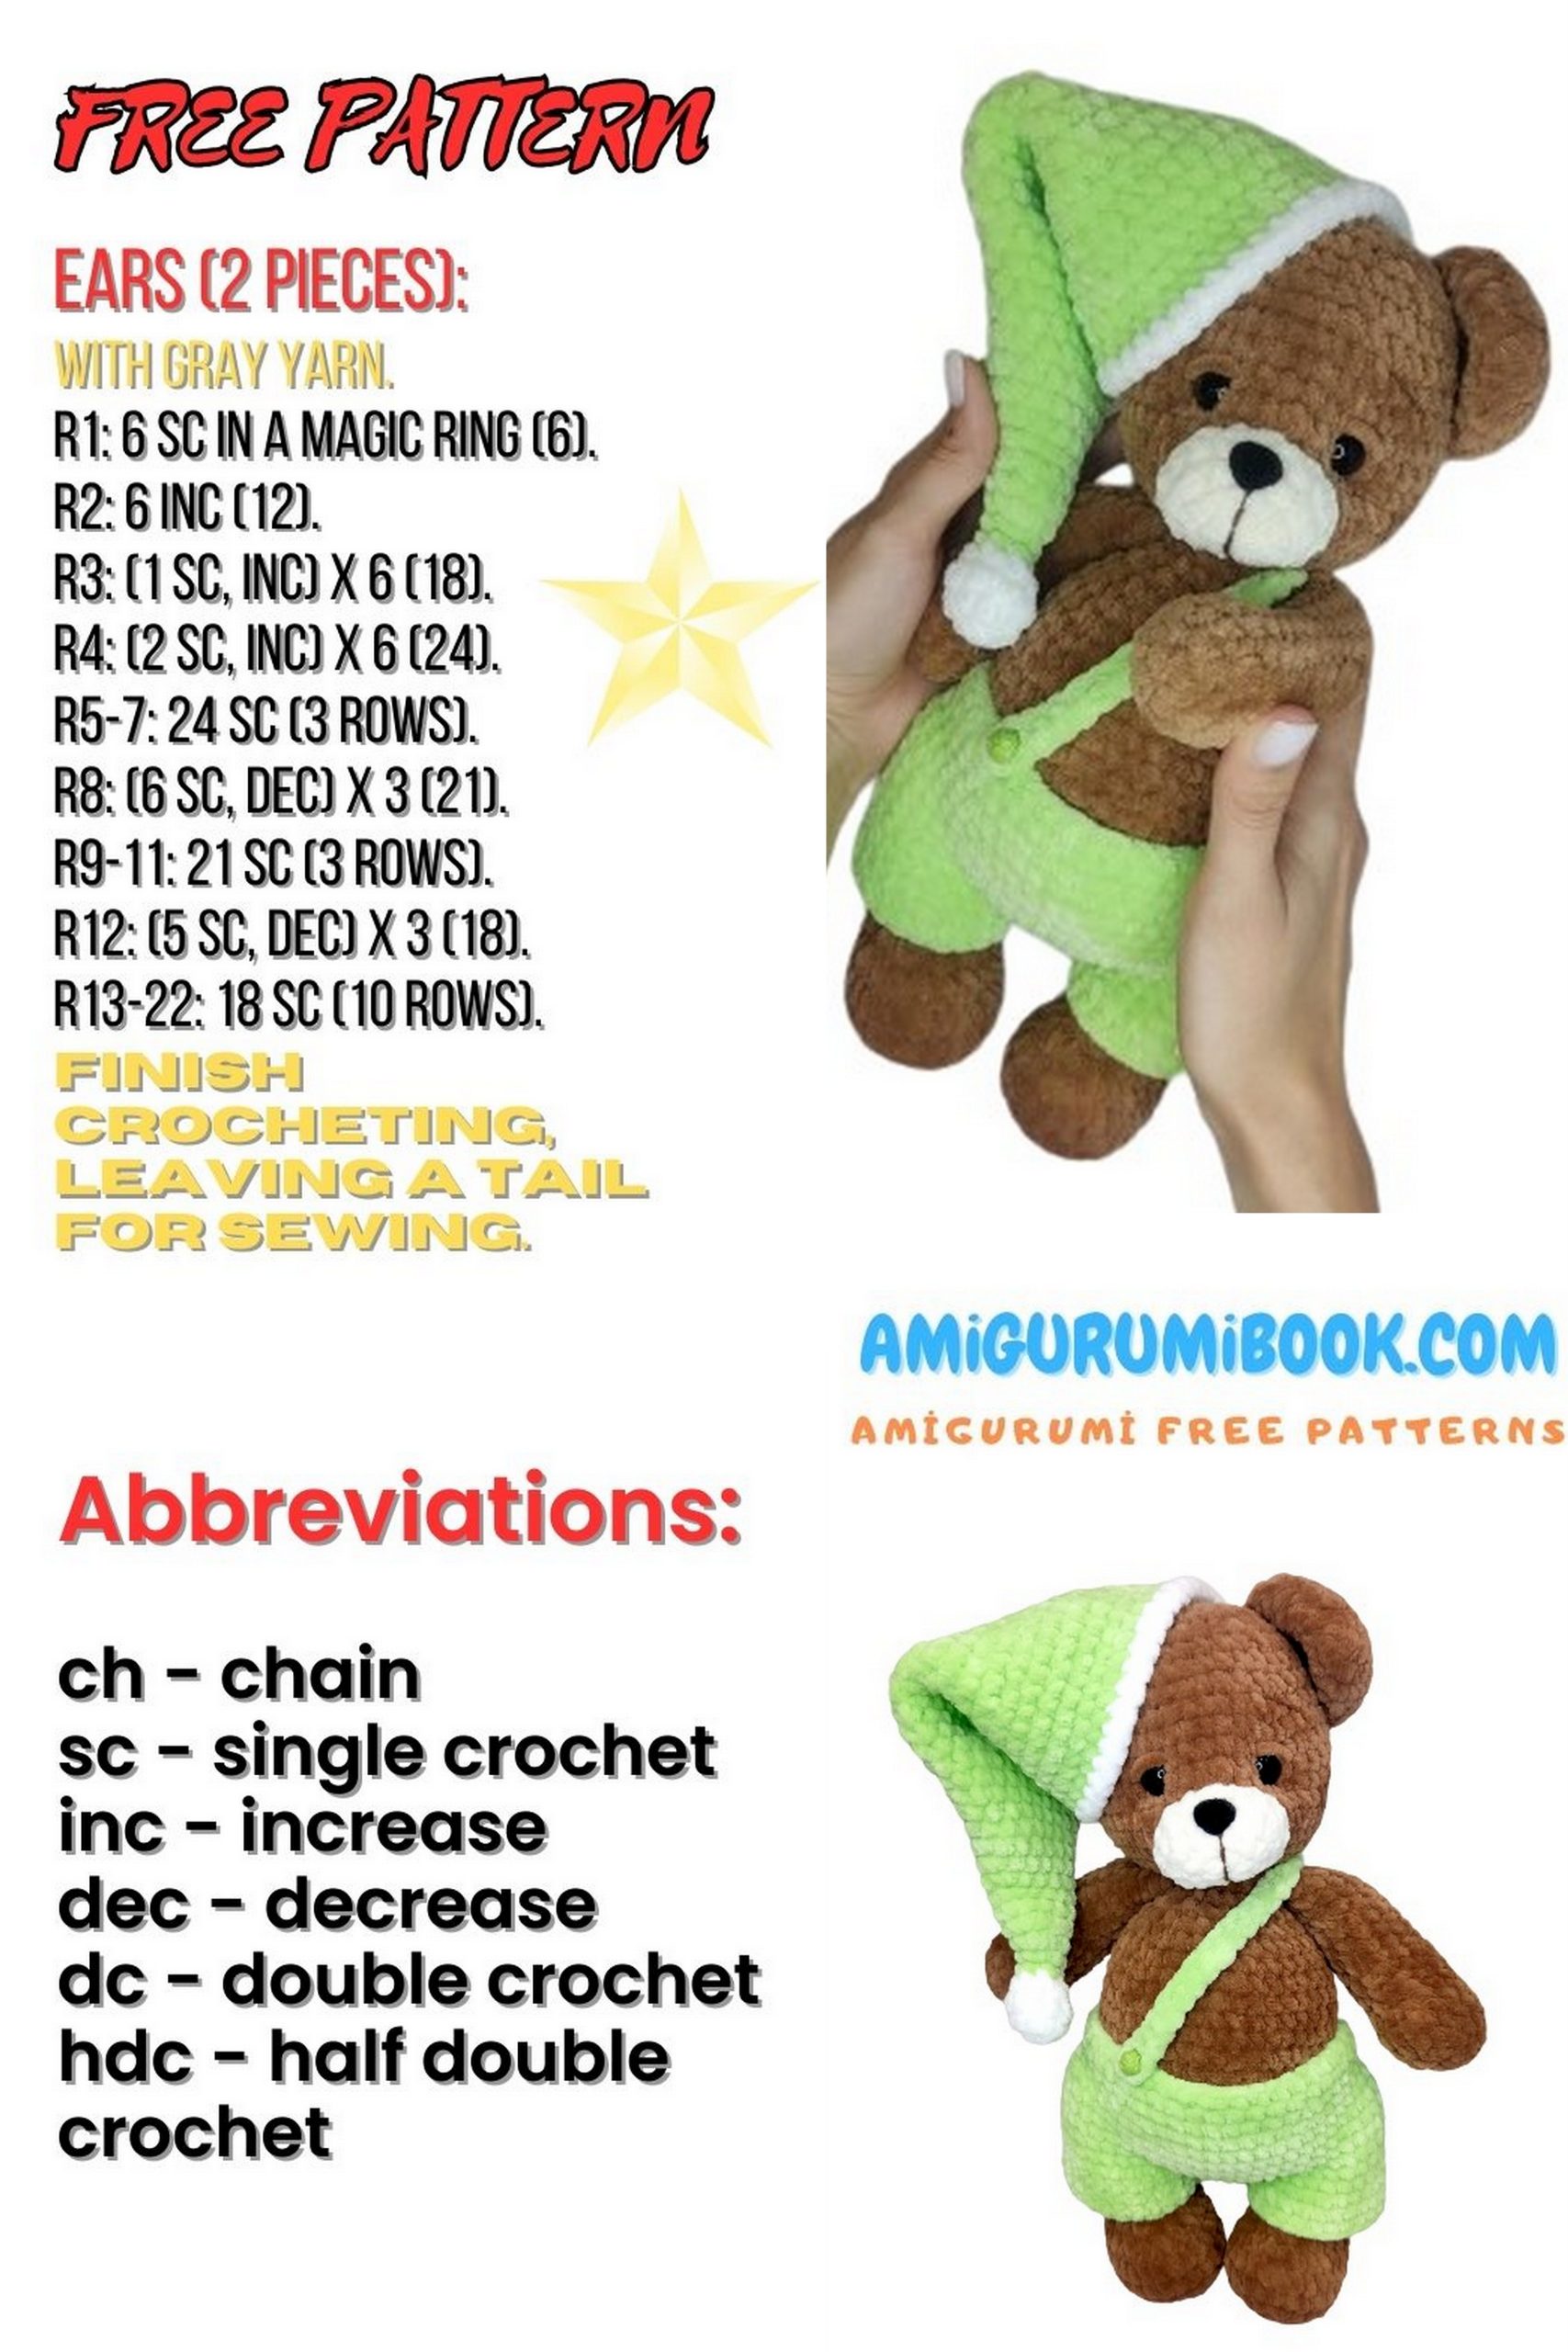
✂ Abbreviations
*(5) – Repeat the instruction 5 times
SC – Single Crochet
SS – Slip Stitch
INC – Increase (2 SC in the same stitch)
DEC – Decrease (single crochet 2 stitches together)

LOWER FEET (Make 2)
1: 6 SC in MR (6)
2: 6 INC (12)
3: (1 SC, INC) ×6 (18)
4: (1 SC, INC, 2 SC, INC) ×5, 1 SC (24)
5: 24 SC (24)
6: (5 SC, INC) ×4 (28)
7: 8 SC, (DEC ×6), 8 SC (22)
8: 7 SC, (DEC ×4), 7 SC (18)
9: 7 SC, (DEC ×2), 7 SC (16)
10–17: 16 SC (8 rounds)
👉 Insert leg joints.
Make sure the joints are positioned on opposite sides so the finished legs form left and right sides correctly.
18: 4 SC, DEC, 4 SC, DEC, DEC, DEC (12)
19: 6 DEC (6)
Stuff firmly. Close the opening around the joint and hide the yarn end securely.
EARS (Make 2)
1: 6 SC in MR (6)
2: 6 INC (12)
3: (1 SC, INC) ×6 (18)
4: (2 SC, INC) ×6 (24)
5–6: 24 SC (2 rounds)
7: (1 SC, DEC) ×8 (16)
Fold the ear in half and crochet 8 SC through both layers to close.
Fasten off, leaving a long tail for sewing to the head.

UPPER FEET (Make 2)
1: 6 SC in MR (6)
2: 3 SC in same st, 3 SC in same st, 1 SC, 3 SC in same st, 3 SC in same st, 1 SC (14)
3: 2 SC, INC, 6 SC, INC, 4 SC (16)
4–5: 16 SC (2 rounds)
6: 3 SC, INC, 6 SC, DEC ×2, 2 SC (15)
7: 4 SC, INC, 6 SC, DEC, 2 SC (15)
8: 11 SC, DEC, 2 SC (14)
9: 14 SC (14)
10: 11 SC, DEC, 1 SC (13)
11–13: 13 SC (3 rounds)
14: 11 SC, DEC (12)
15–17: 12 SC (3 rounds)
Stuff firmly but leave the top (around R14–15) lightly stuffed.
Fold flat and close with 6 SC through both layers.
Do NOT cut the yarn — these will be attached to the body.
BODY–HEAD (Continuous Piece)
1: 6 SC in MR (6)
2: 6 INC (12)
3: (1 SC, INC) ×6 (18)
4: (1 SC, INC, 2 SC, INC) ×5, 1 SC (24)
5: (2 SC, INC, 3 SC, INC) ×5, 1 SC (30)
6: (3 SC, INC, 4 SC, INC) ×5, 1 SC (36)
7: (4 SC, INC, 5 SC, INC) ×5, 1 SC (42)
8: (5 SC, INC, 6 SC, INC) ×5, 1 SC (48)
9–15: 48 SC (7 rounds)
16: (6 SC, DEC) ×6 (42)
17–18: 42 SC (2 rounds)
19: (5 SC, DEC) ×6 (36)
20: 36 SC (36)
👉 At this stage:
- Attach the lower legs.
- Position them between R10–11.
- Leave approx. 23 SC between joints.
- Make sure legs face forward.
- Temporarily remove stuffing if needed and secure joints.
21: (4 SC, DEC) ×6 (30)
22: (3 SC, DEC) ×6 (24)
23: 24 SC (24)
24: (2 SC, DEC) ×6 (18)
25: Attach upper legs as follows:
- 6 SC together with first leg
- 5 SC
- 6 SC together with second leg
- 1 SC (18)
⚠ Important:
- Convex side of upper legs must face forward.
- Legs should be parallel to lower legs.
- Adjust position slightly if stitch alignment shifts.
Stuff the body firmly.
Do NOT cut the yarn — continue directly with the head.
HEAD
(Continue from Body – do not cut yarn)
26: 18 INC (36)
27: (5 SC, INC) ×6 (42)
28: (6 SC, INC) ×6 (48)
29–35: 48 SC (7 rounds)
👉 Insert safety eyes between R33–34.
👉 Leave 5 SC between the eyes.
👉 Stuff the head firmly and check alignment before continuing.
36: (6 SC, DEC) ×6 (42)
37: (5 SC, DEC) ×6 (36)
38: 36 SC (36)
39: (4 SC, DEC) ×6 (30)
40: (3 SC, DEC) ×6 (24)
41: (2 SC, DEC) ×6 (18)
42: (1 SC, DEC) ×6 (12)
43: 6 DEC (6)
Fasten off, close the opening with a needle, and hide the yarn tail.
MUZZLE
1: 6 SC in MR (6)
2: 6 INC (12)
3: (1 SC, INC) ×6 (18)
4: 18 SC (18)
Sl st, fasten off, leave a tail for sewing.
Muzzle Placement & Nose
- Position the muzzle centered between the eyes.
- The nose should sit between the safety eyes, around R3–4 of the muzzle.
- Fold the muzzle slightly in half and sew it below the eyes.
- Align the lower edge with the natural curve of the face.
Attach the nose before fully sewing the muzzle if preferred.
Muzzle Indentation (Shaping)
- Mark shaping points with pins.
- Insert needle from bottom center of muzzle (Point A).
- Bring out at Point 1 → insert at Point 2 → return near Point A (Point B).
- Pull tight to create indentation.
- Repeat symmetrically for other side.
- Wrap thread around the base of the nose to define it.
- Secure and hide yarn ends inside the head.
Make sure both sides are tightened evenly.
Ears Placement
Attach ears between R3–11 (counting from top of head).
Align symmetrically and sew securely.
Eyelids
Create eyelids for safety eyes (optional shaping).
Attach carefully to give expression.
HAT
Start with white yarn.
1: 6 SC in MR (6)
2: 6 INC (12)
3: 12 SC (12)
4: 6 DEC (6)
Switch to main color.
5: 6 SC (6)
6: (2 SC, INC) ×2 (8)
7: (3 SC, INC) ×2 (10)
8: (4 SC, INC) ×2 (12)
9: 12 SC (12)
10: (5 SC, INC) ×2 (14)
11: (6 SC, INC) ×2 (16)
12: (7 SC, INC) ×2 (18)
13: (8 SC, INC) ×2 (20)
14: (9 SC, INC) ×2 (22)
15: (10 SC, INC) ×2 (24)
16: (11 SC, INC) ×2 (26)
17: (12 SC, INC) ×2 (28)
18: (13 SC, INC) ×2 (30)
19: (14 SC, INC) ×2 (32)
20: (15 SC, INC) ×2 (34)
21: (16 SC, INC) ×2 (36)
22: 36 SC (36)
23: (17 SC, INC) ×2 (38)
24: (18 SC, INC) ×2 (40)
25–28: 40 SC (4 rounds)
29: (19 SC, INC) ×2 (42)
30–34: 42 SC (5 rounds)
Switch to white yarn.
35: 42 SC (42)
Sl st, fasten off, and hide yarn tail.
PANTS
Start with main pants color.
1: Ch 45, join with sl st to form a ring.
Ch 1, 45 SC (45)
2: (8 SC, INC) ×5 (50)
3: (9 SC, INC) ×5 (55)
4–6: 55 SC (3 rounds)
7: (10 SC, INC) ×5 (60)
8–9: 60 SC (2 rounds)
Dividing for Legs
Turn the work inside out.
Count 26 SC and join both sides with 4 sl st through both layers.
This forms two leg openings (each section has 26 stitches).
Turn work right side out again. Do not cut yarn.
First Leg
10–13: 26 SC (4 rounds)
Fasten off and cut yarn.
Second Leg
Join yarn to remaining leg opening.
10–13: 26 SC (4 rounds)
Fasten off and cut yarn.
Suspender Strap
Attach yarn at the back of the pants.
Ch 32
Ch 3 more (buttonhole space)
Starting from 4th ch from hook:
32 SC
Fasten off and cut yarn.
Sew a button to the front of the pants to secure the strap.
Pants are complete ✨