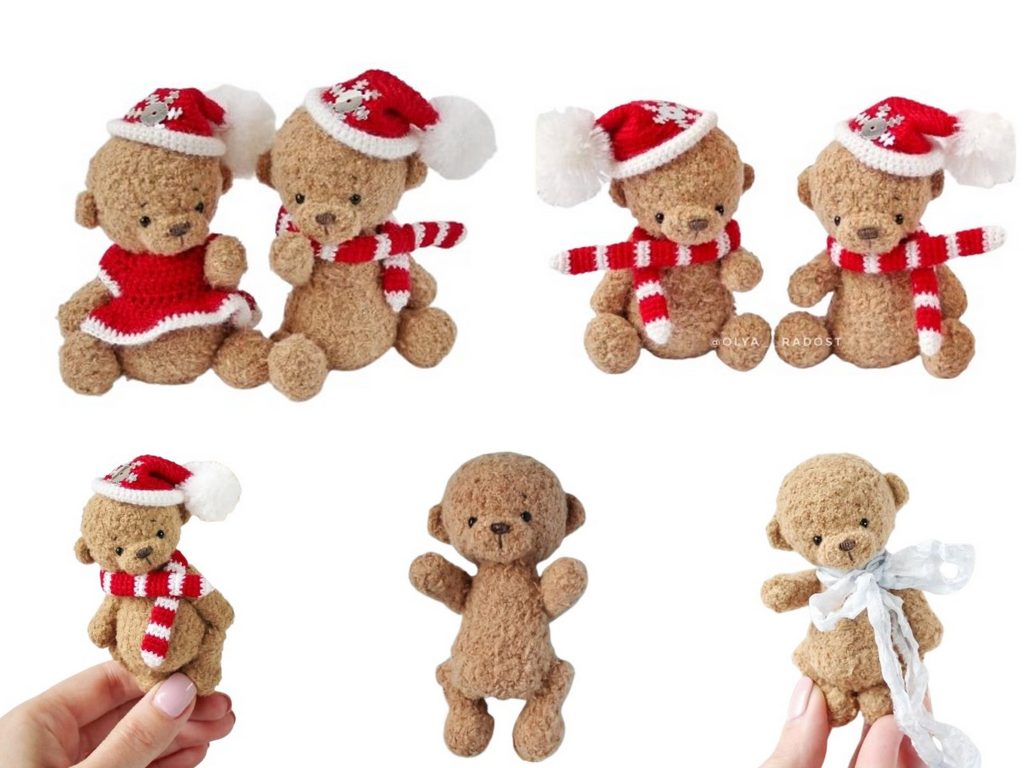
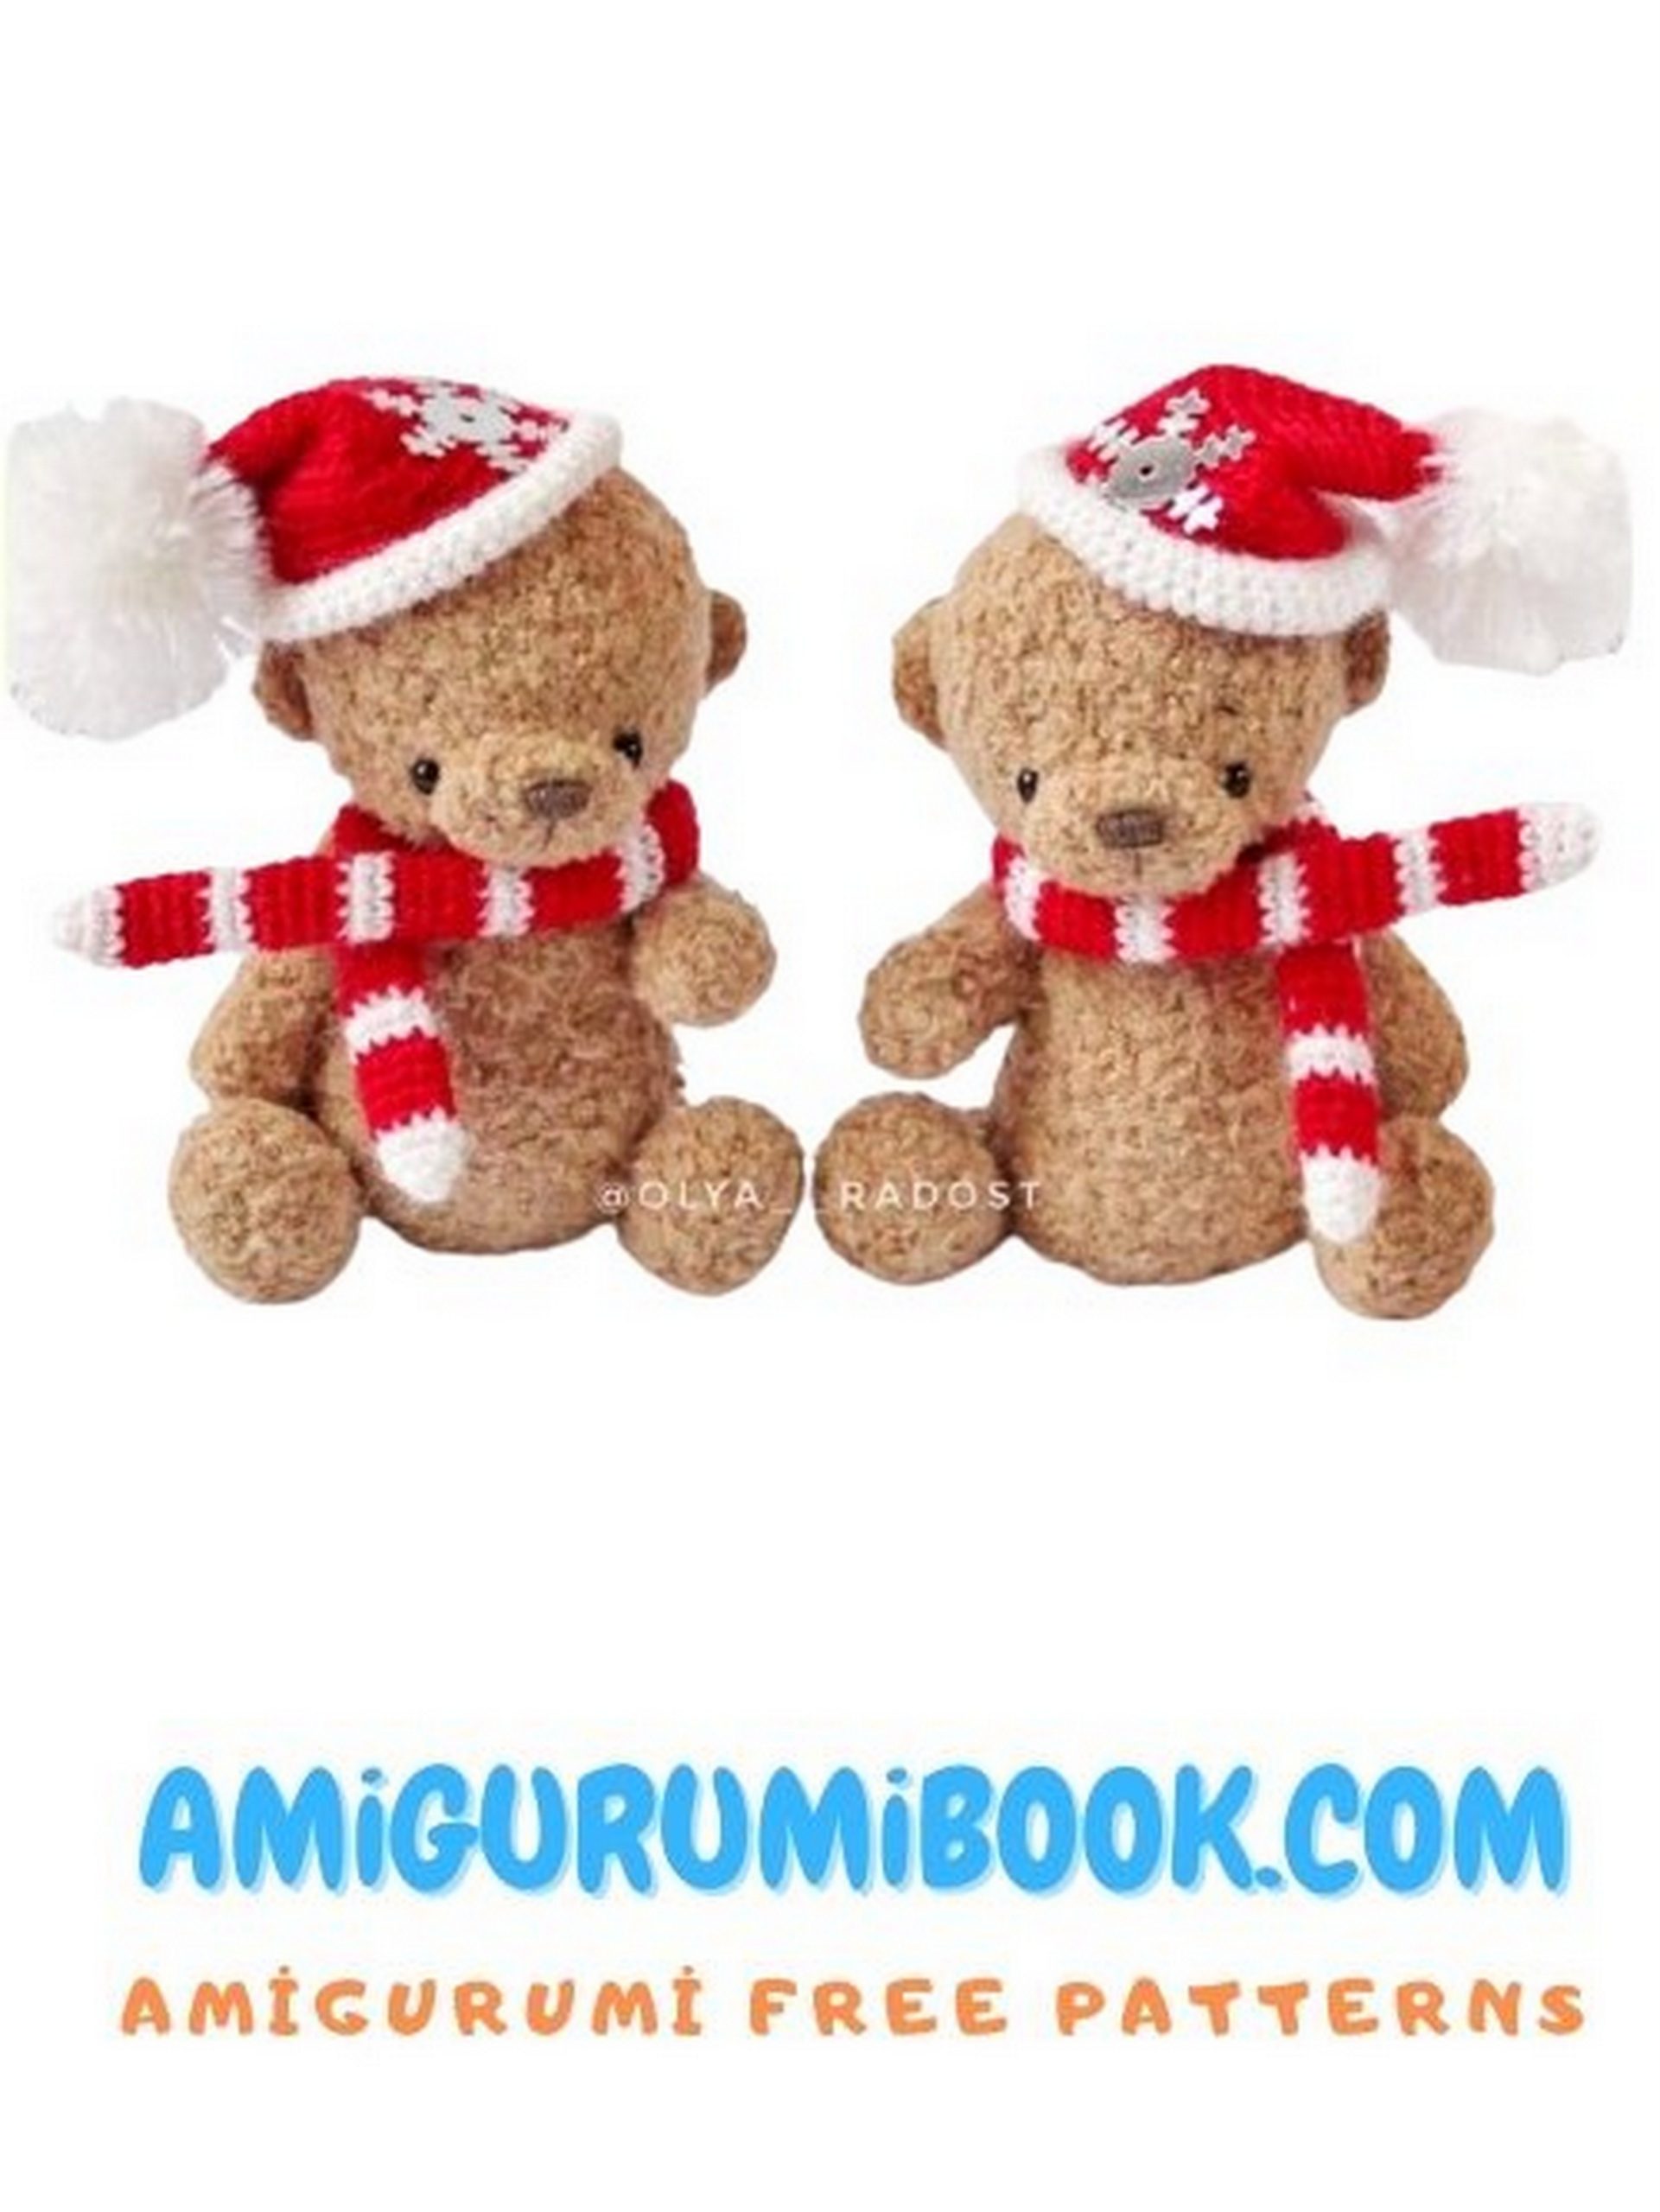
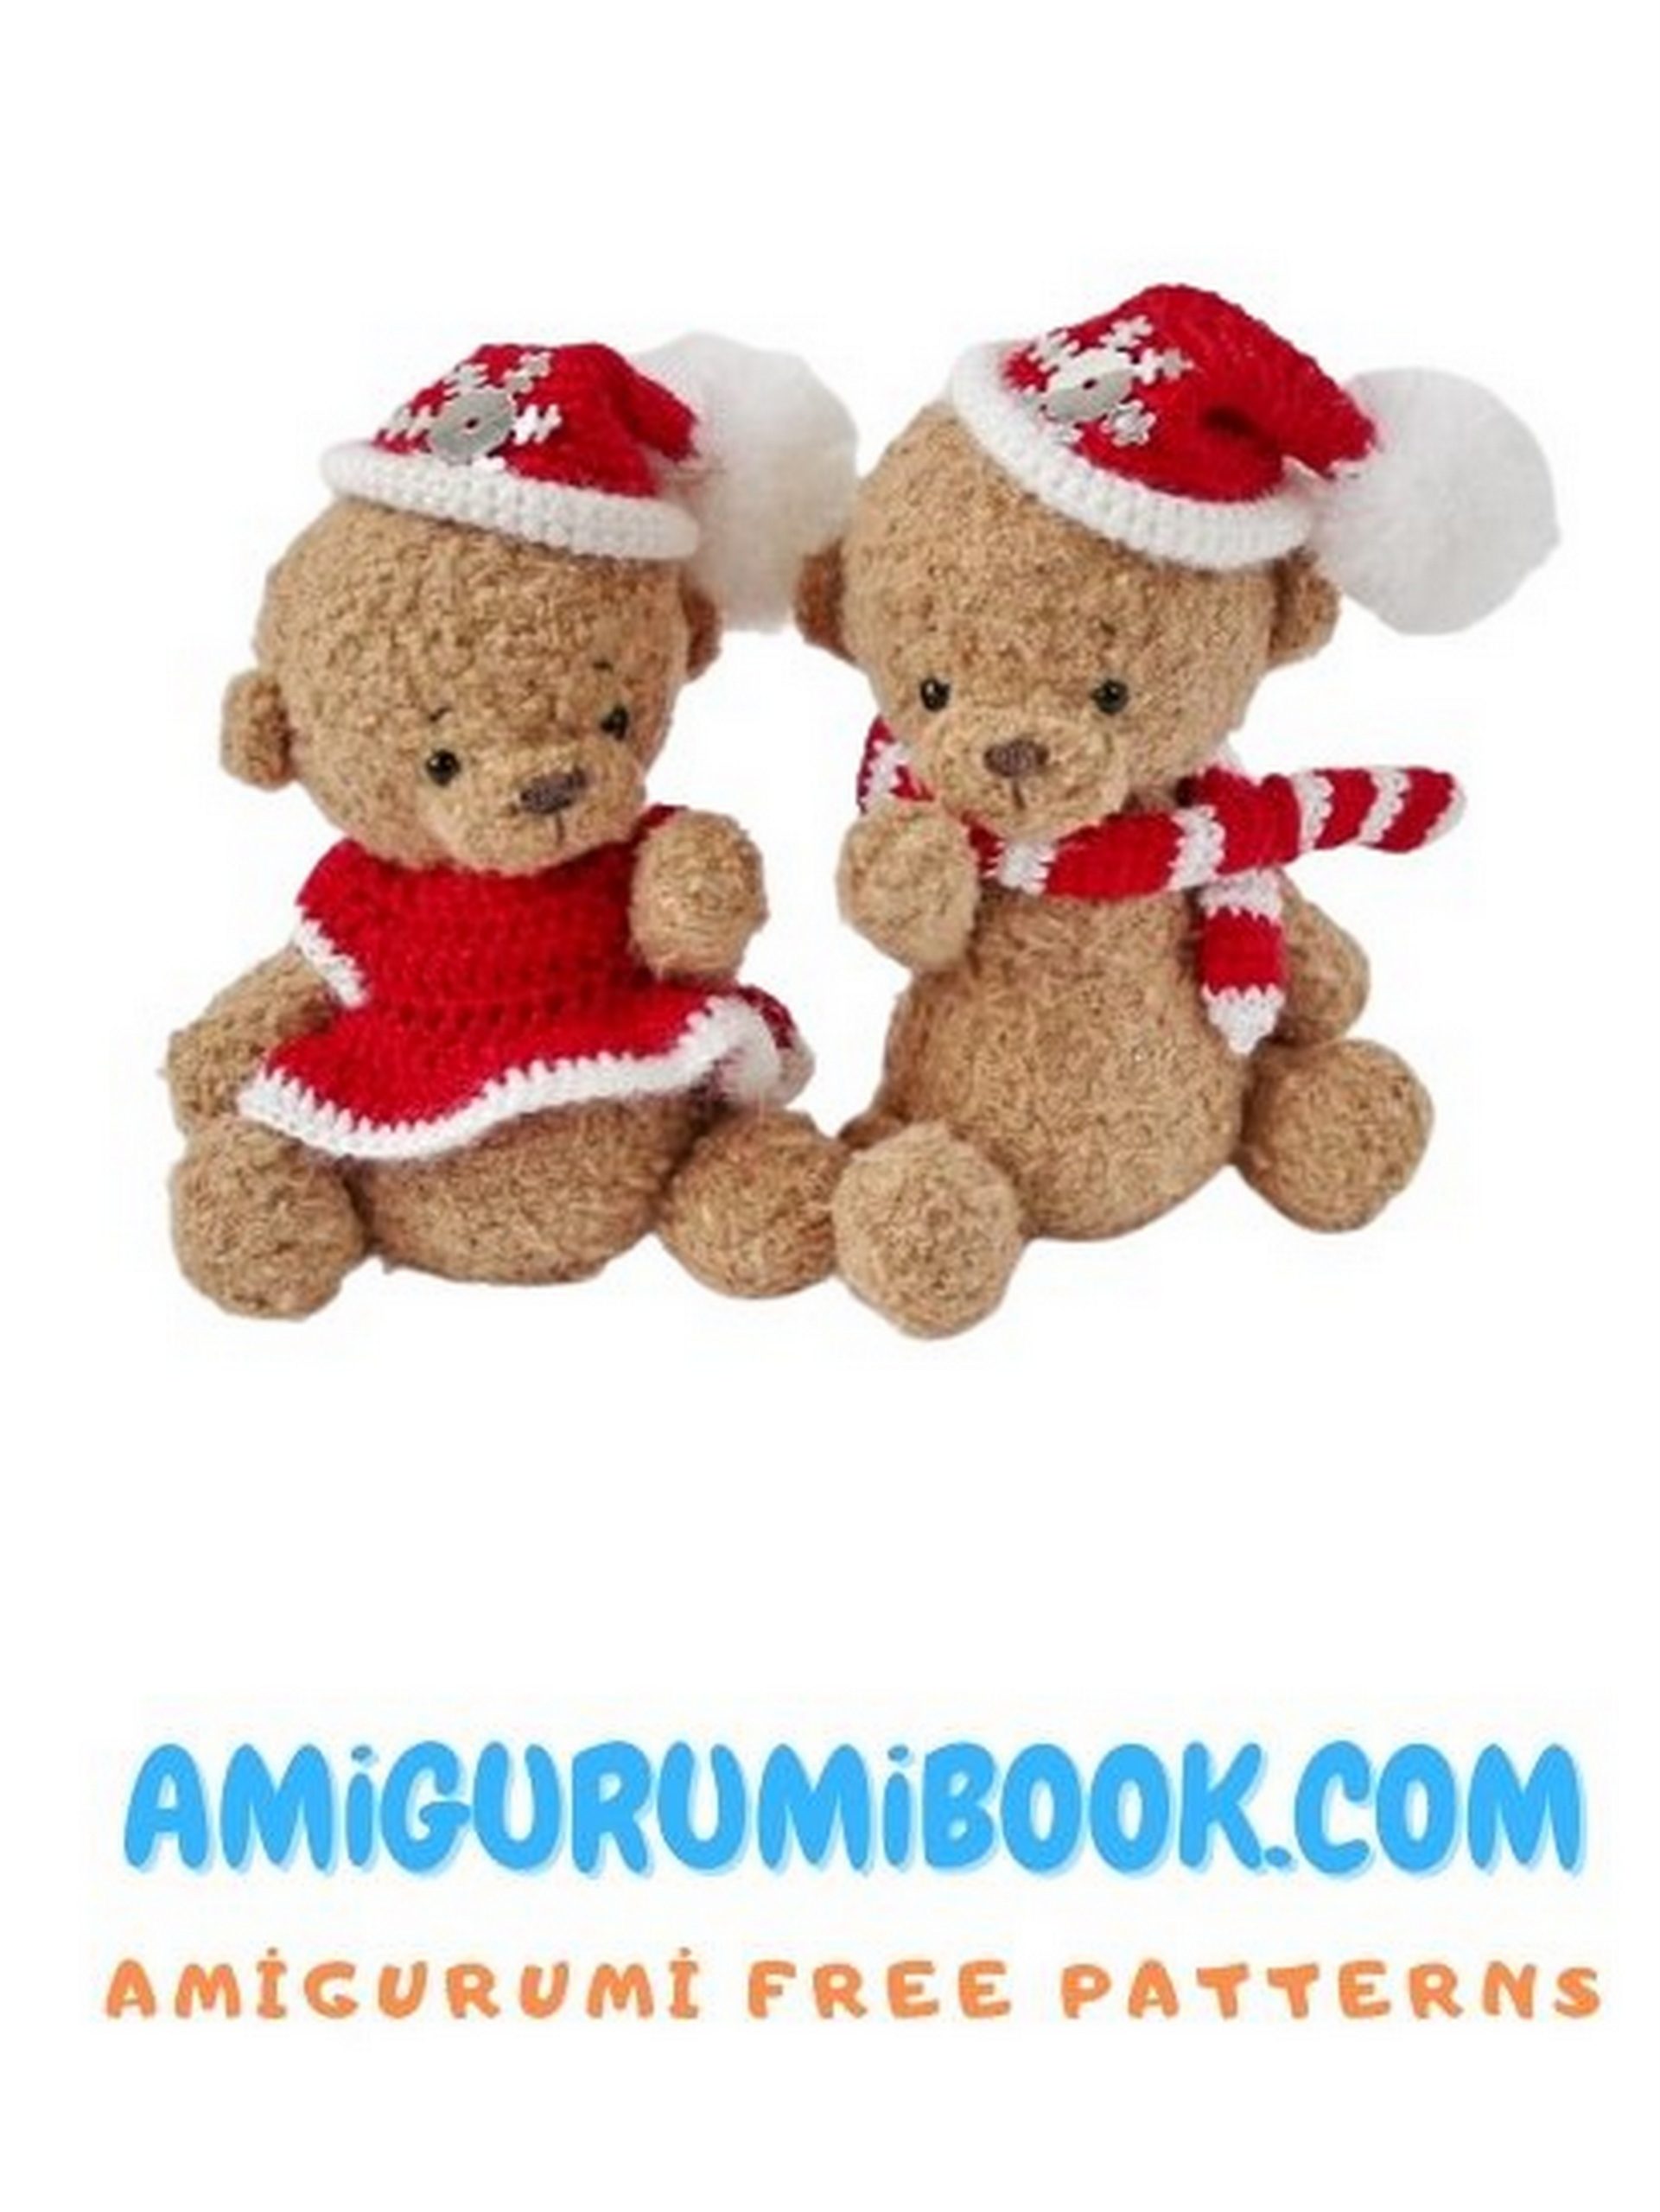
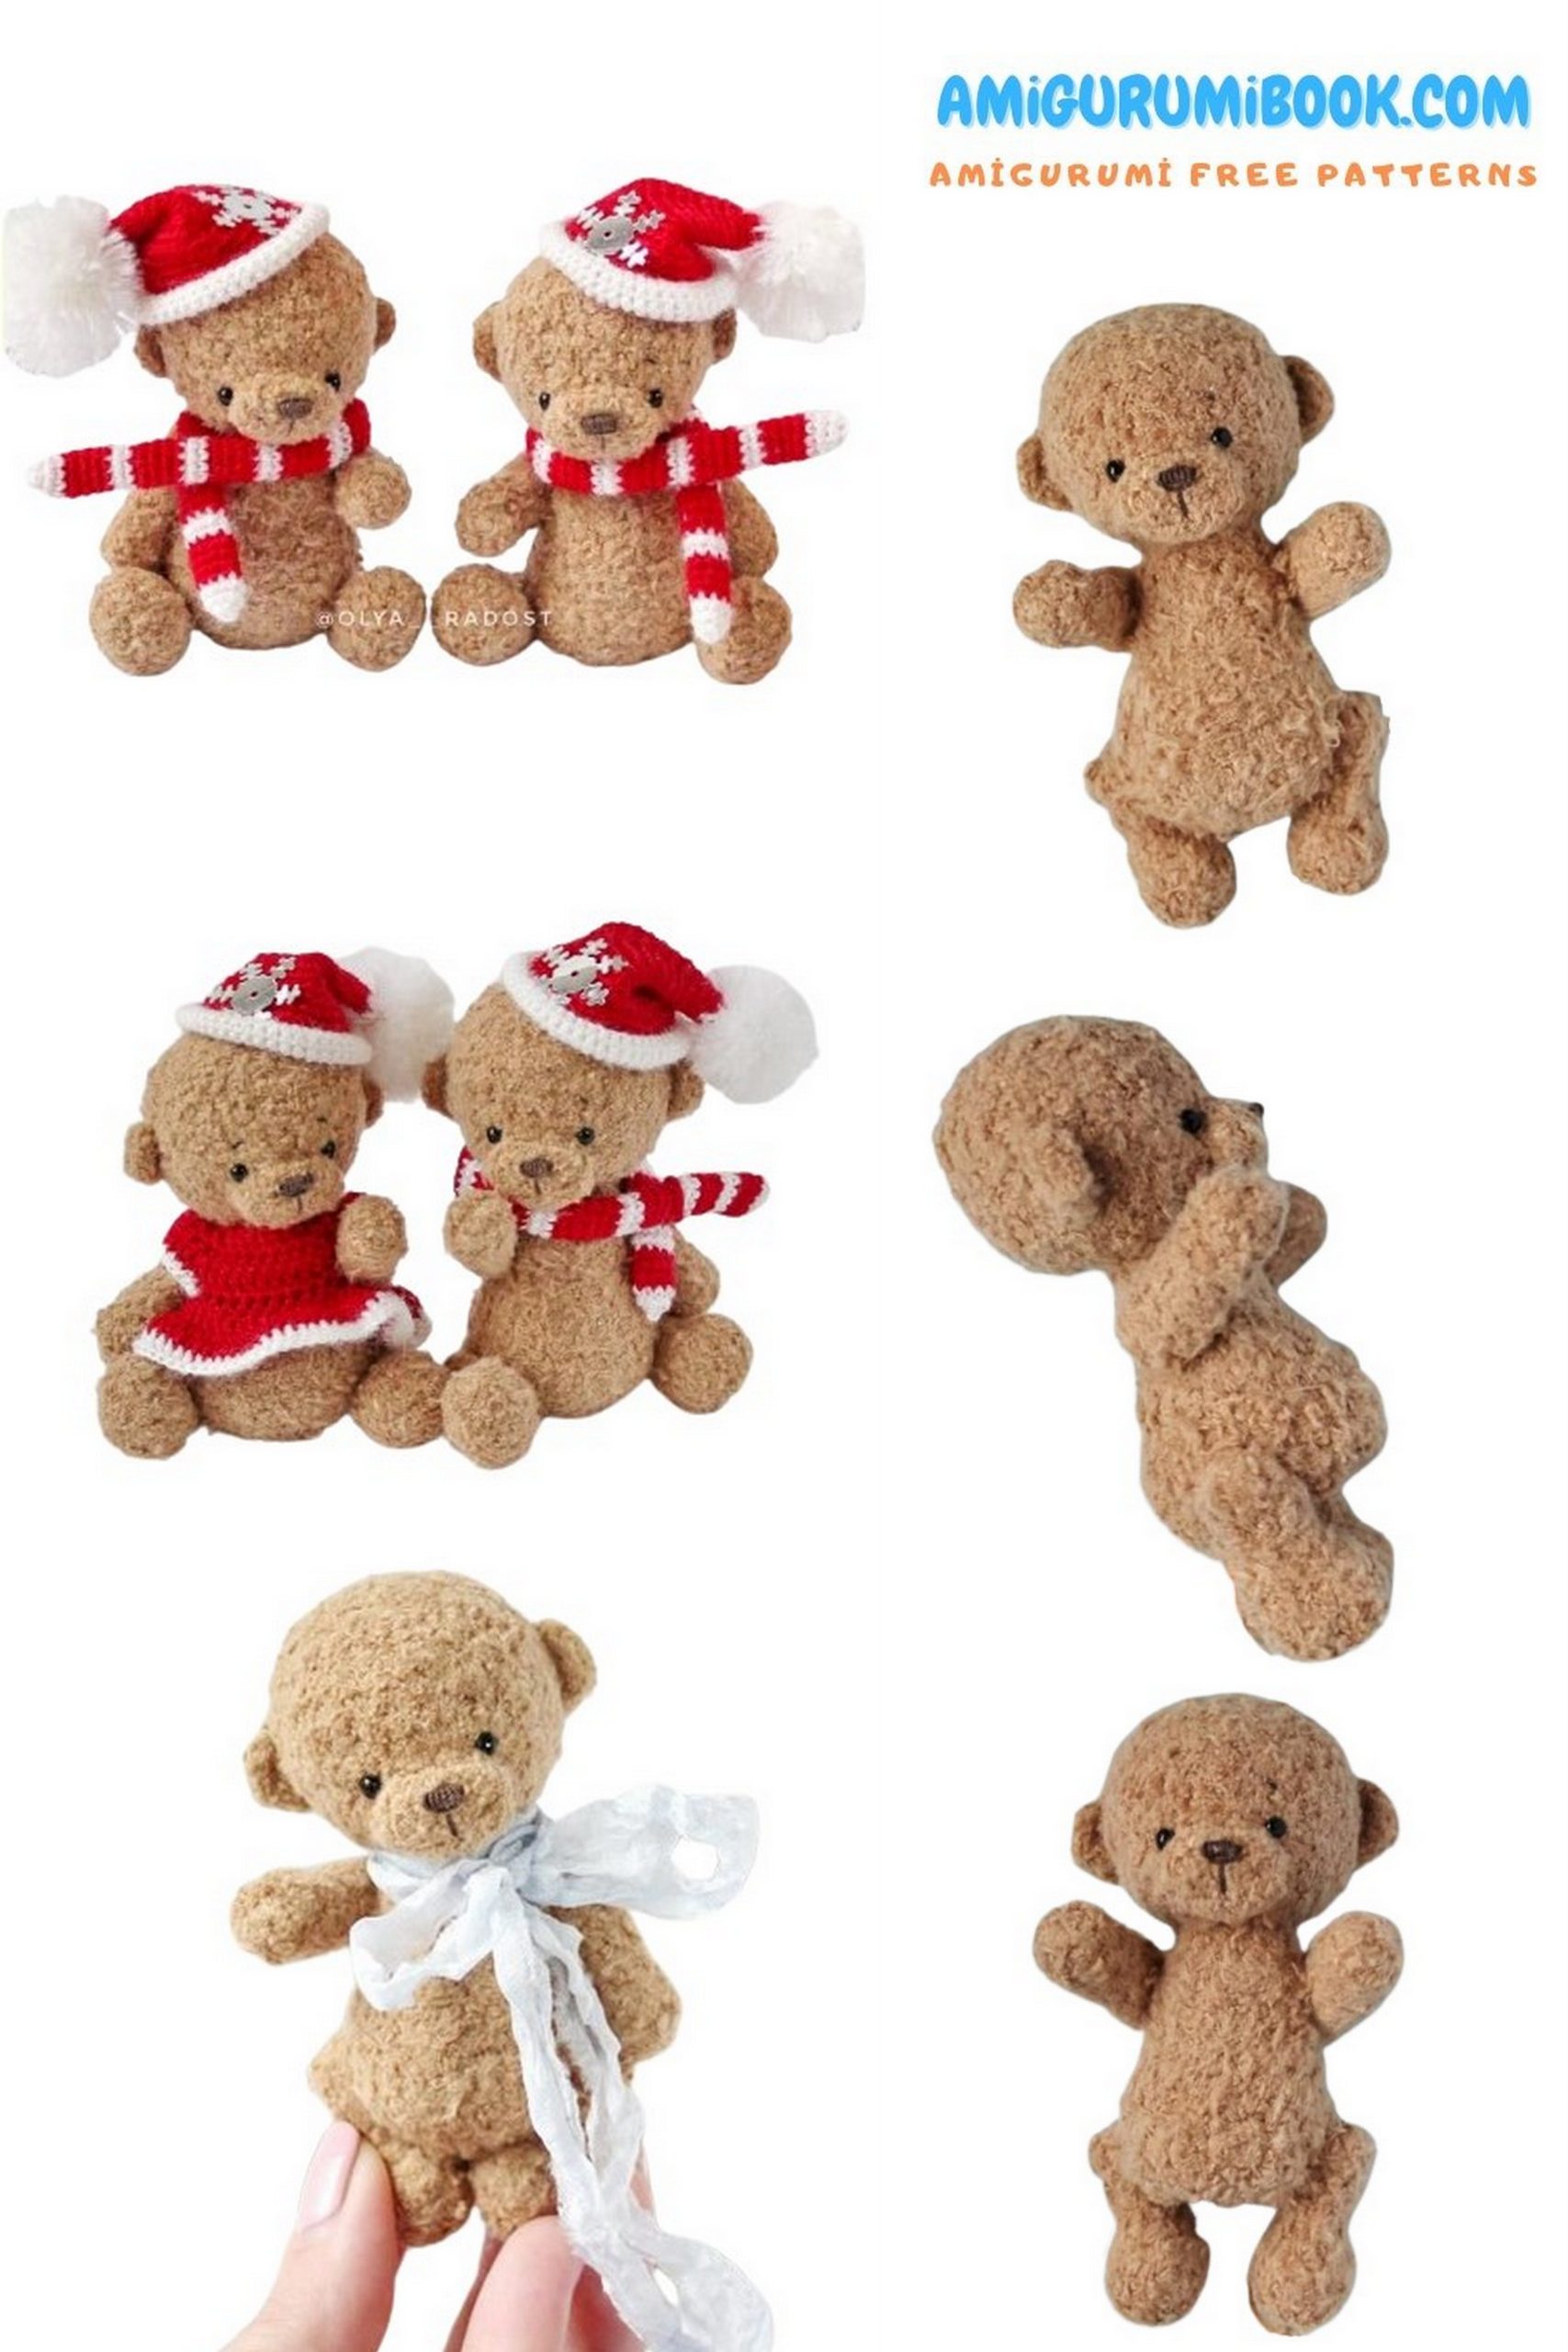
Welcome to our cozy corner of crochet magic! If you’re on the hunt for the perfect cuddly companion to accompany you through the holiday season, look no further. Our free Christmas Teddy Bear Amigurumi pattern is here to spread warmth and joy. Whether you’re an experienced crocheter or just starting out, this adorable bear is a delightful project to add to your festive crafting repertoire. With its festive attire and charming demeanor, this teddy bear is bound to become a treasured part of your holiday decor or a cherished gift for a loved one. So, grab your crochet hook, some yarn in your favorite holiday hues, and let’s embark on a crocheting adventure filled with love and holiday spirit!
You should definitely see the amigurumi big teddy bear for your amigurumi bear collection.
If you want to access 1000+ free amigurumi patterns, you can download our application from this link!
Materials Needed:
Yarn “Kuzia Clubochkin” (95 m/50 g) – 1 skein;
Yarn Iris Gamma (82 m/10 g) or another thin yarn matching the color of the “Kuzia Clubochkin” yarn – 1 skein;
Clover crochet hook No. 1.5 (adjust according to yarn thickness);
Stuffing (polyester fiberfill);
3mm looped glass eyes or beads – 2 pieces;
Black thread for the nose;
Thread matching the yarn color for sewing the muzzle and ears;
Brown thread for embroidering the nose;
For attaching the head: 2 disks 12 mm and 9 mm, 1 T-pin 18 mm; for attaching the upper paws: 4 disks 6 mm, 2 T-pins 18 mm; for attaching the lower paws: 4 disks 6 mm, 2 T-pins 18 mm.
Round-nose pliers;
Manicure scissors for trimming.
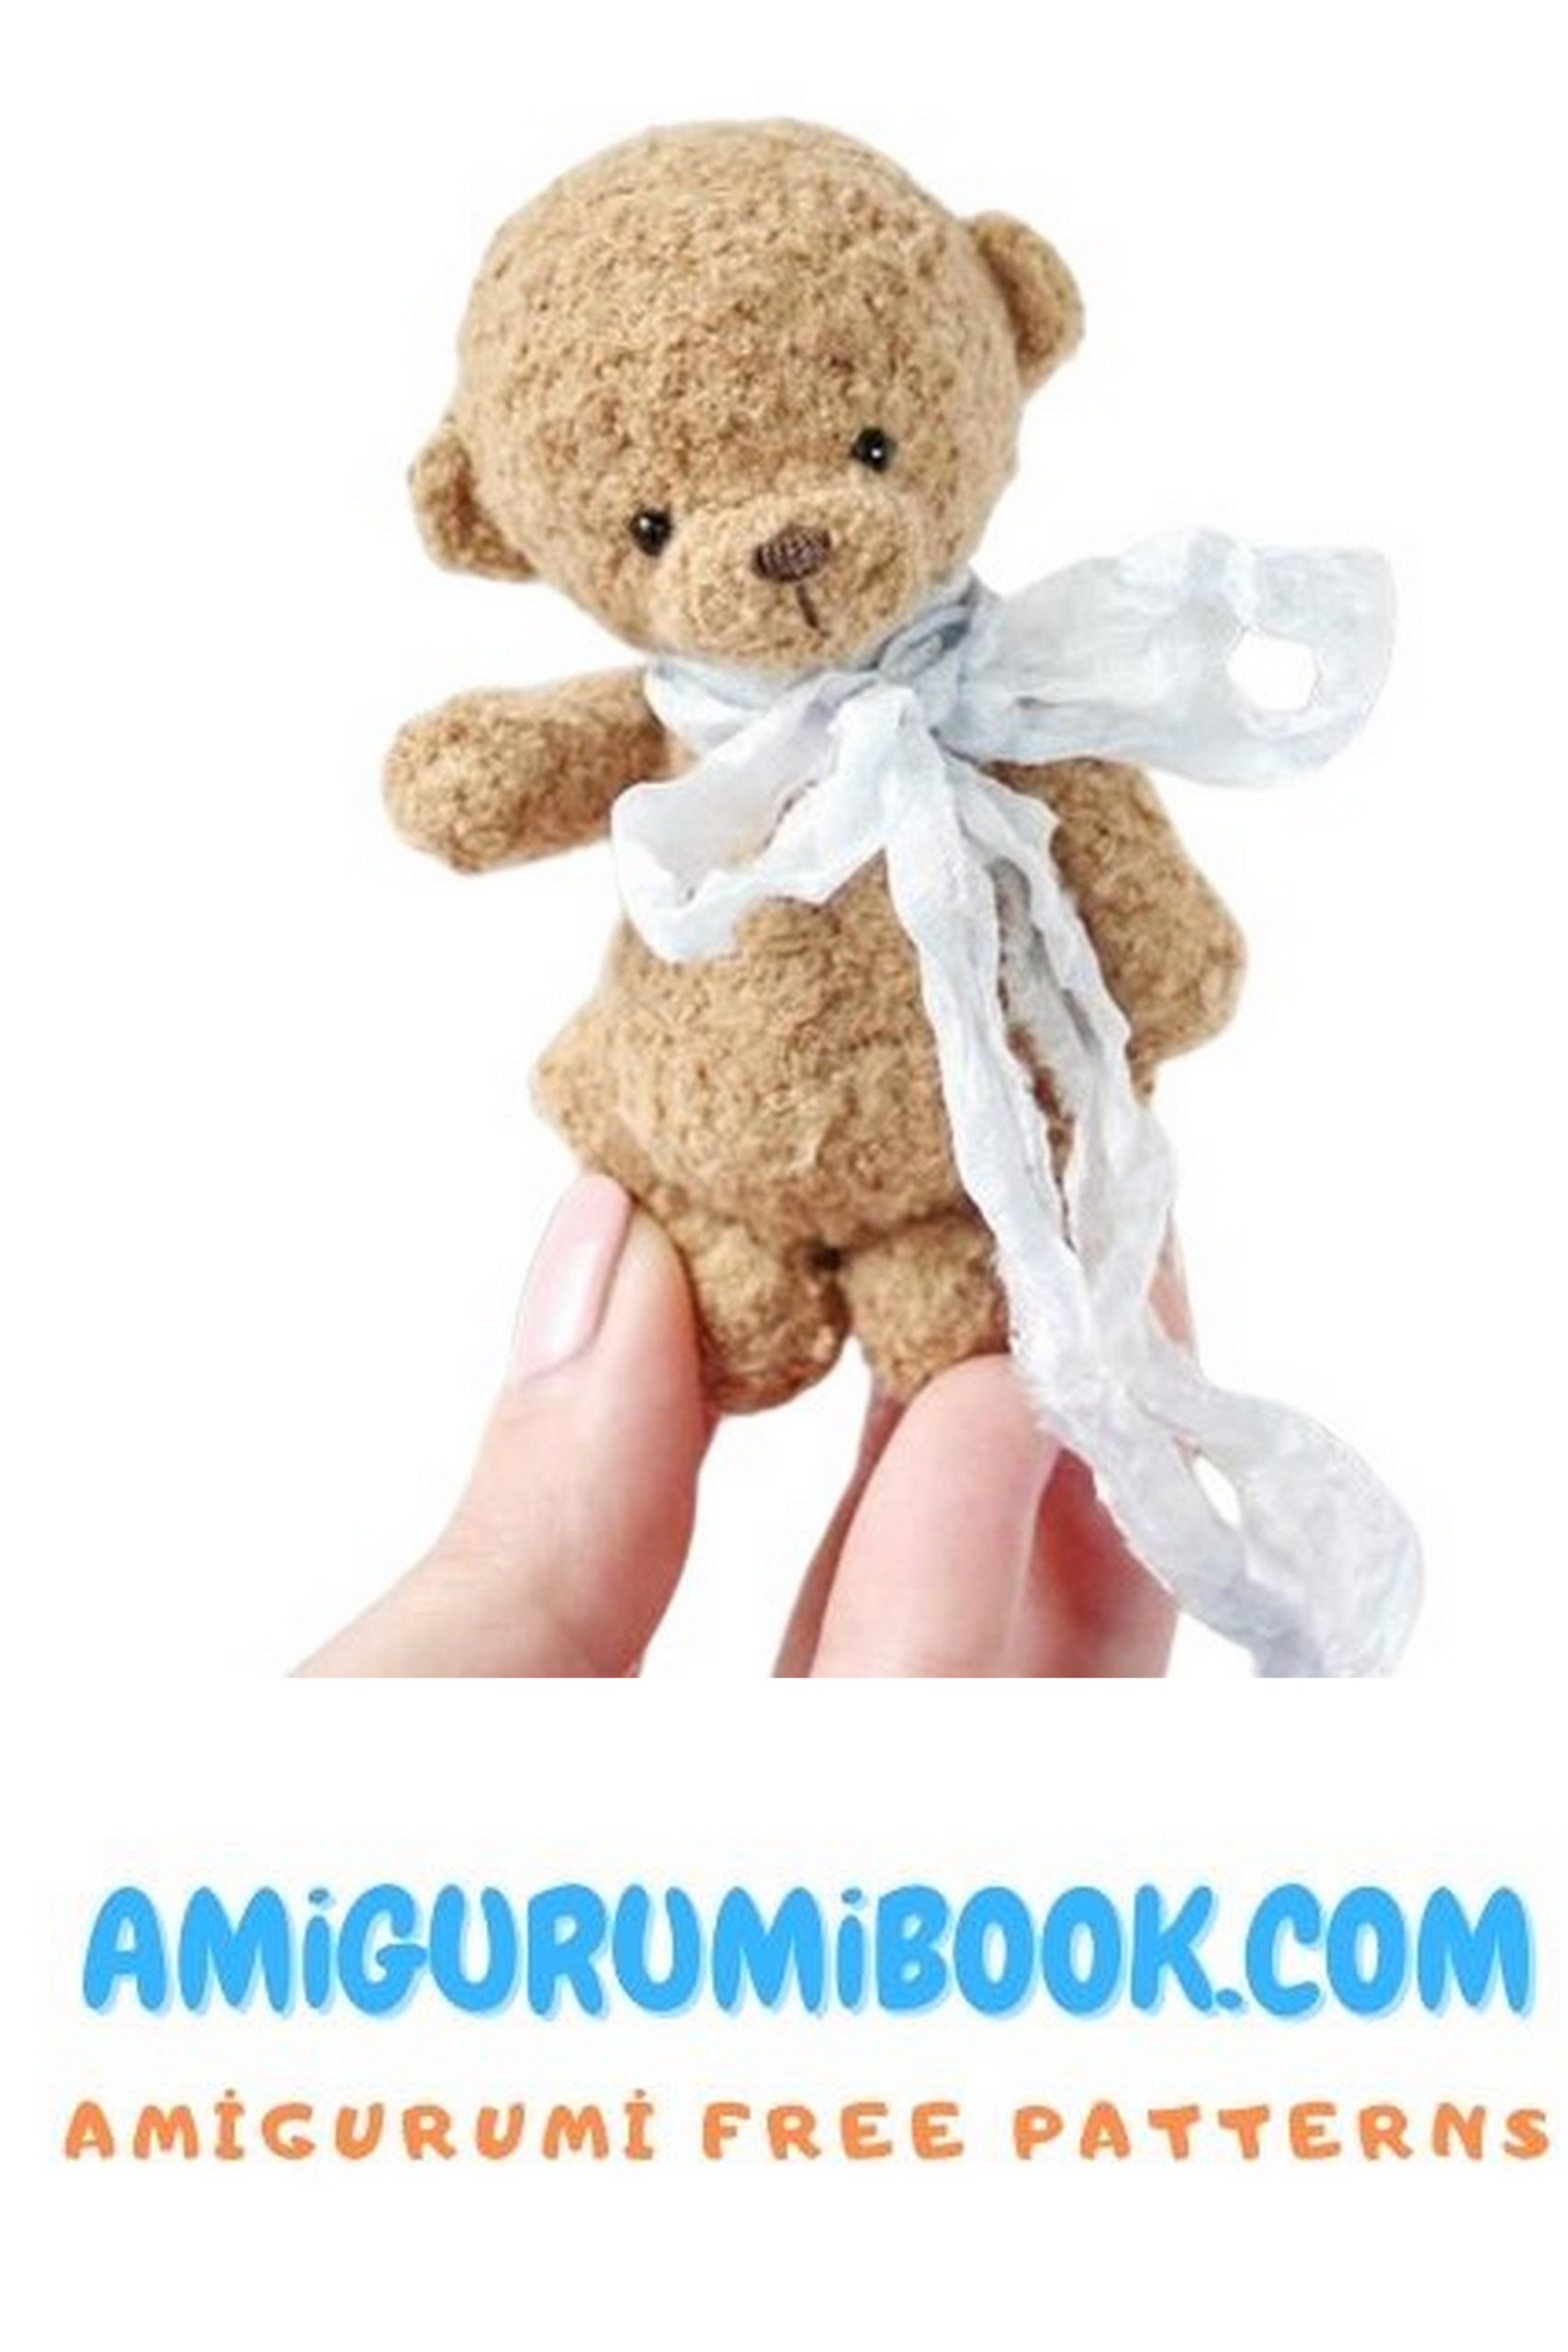
When using the specified materials, you’ll create a bear approximately 8-9 cm tall. Yarn consumption is minimal.
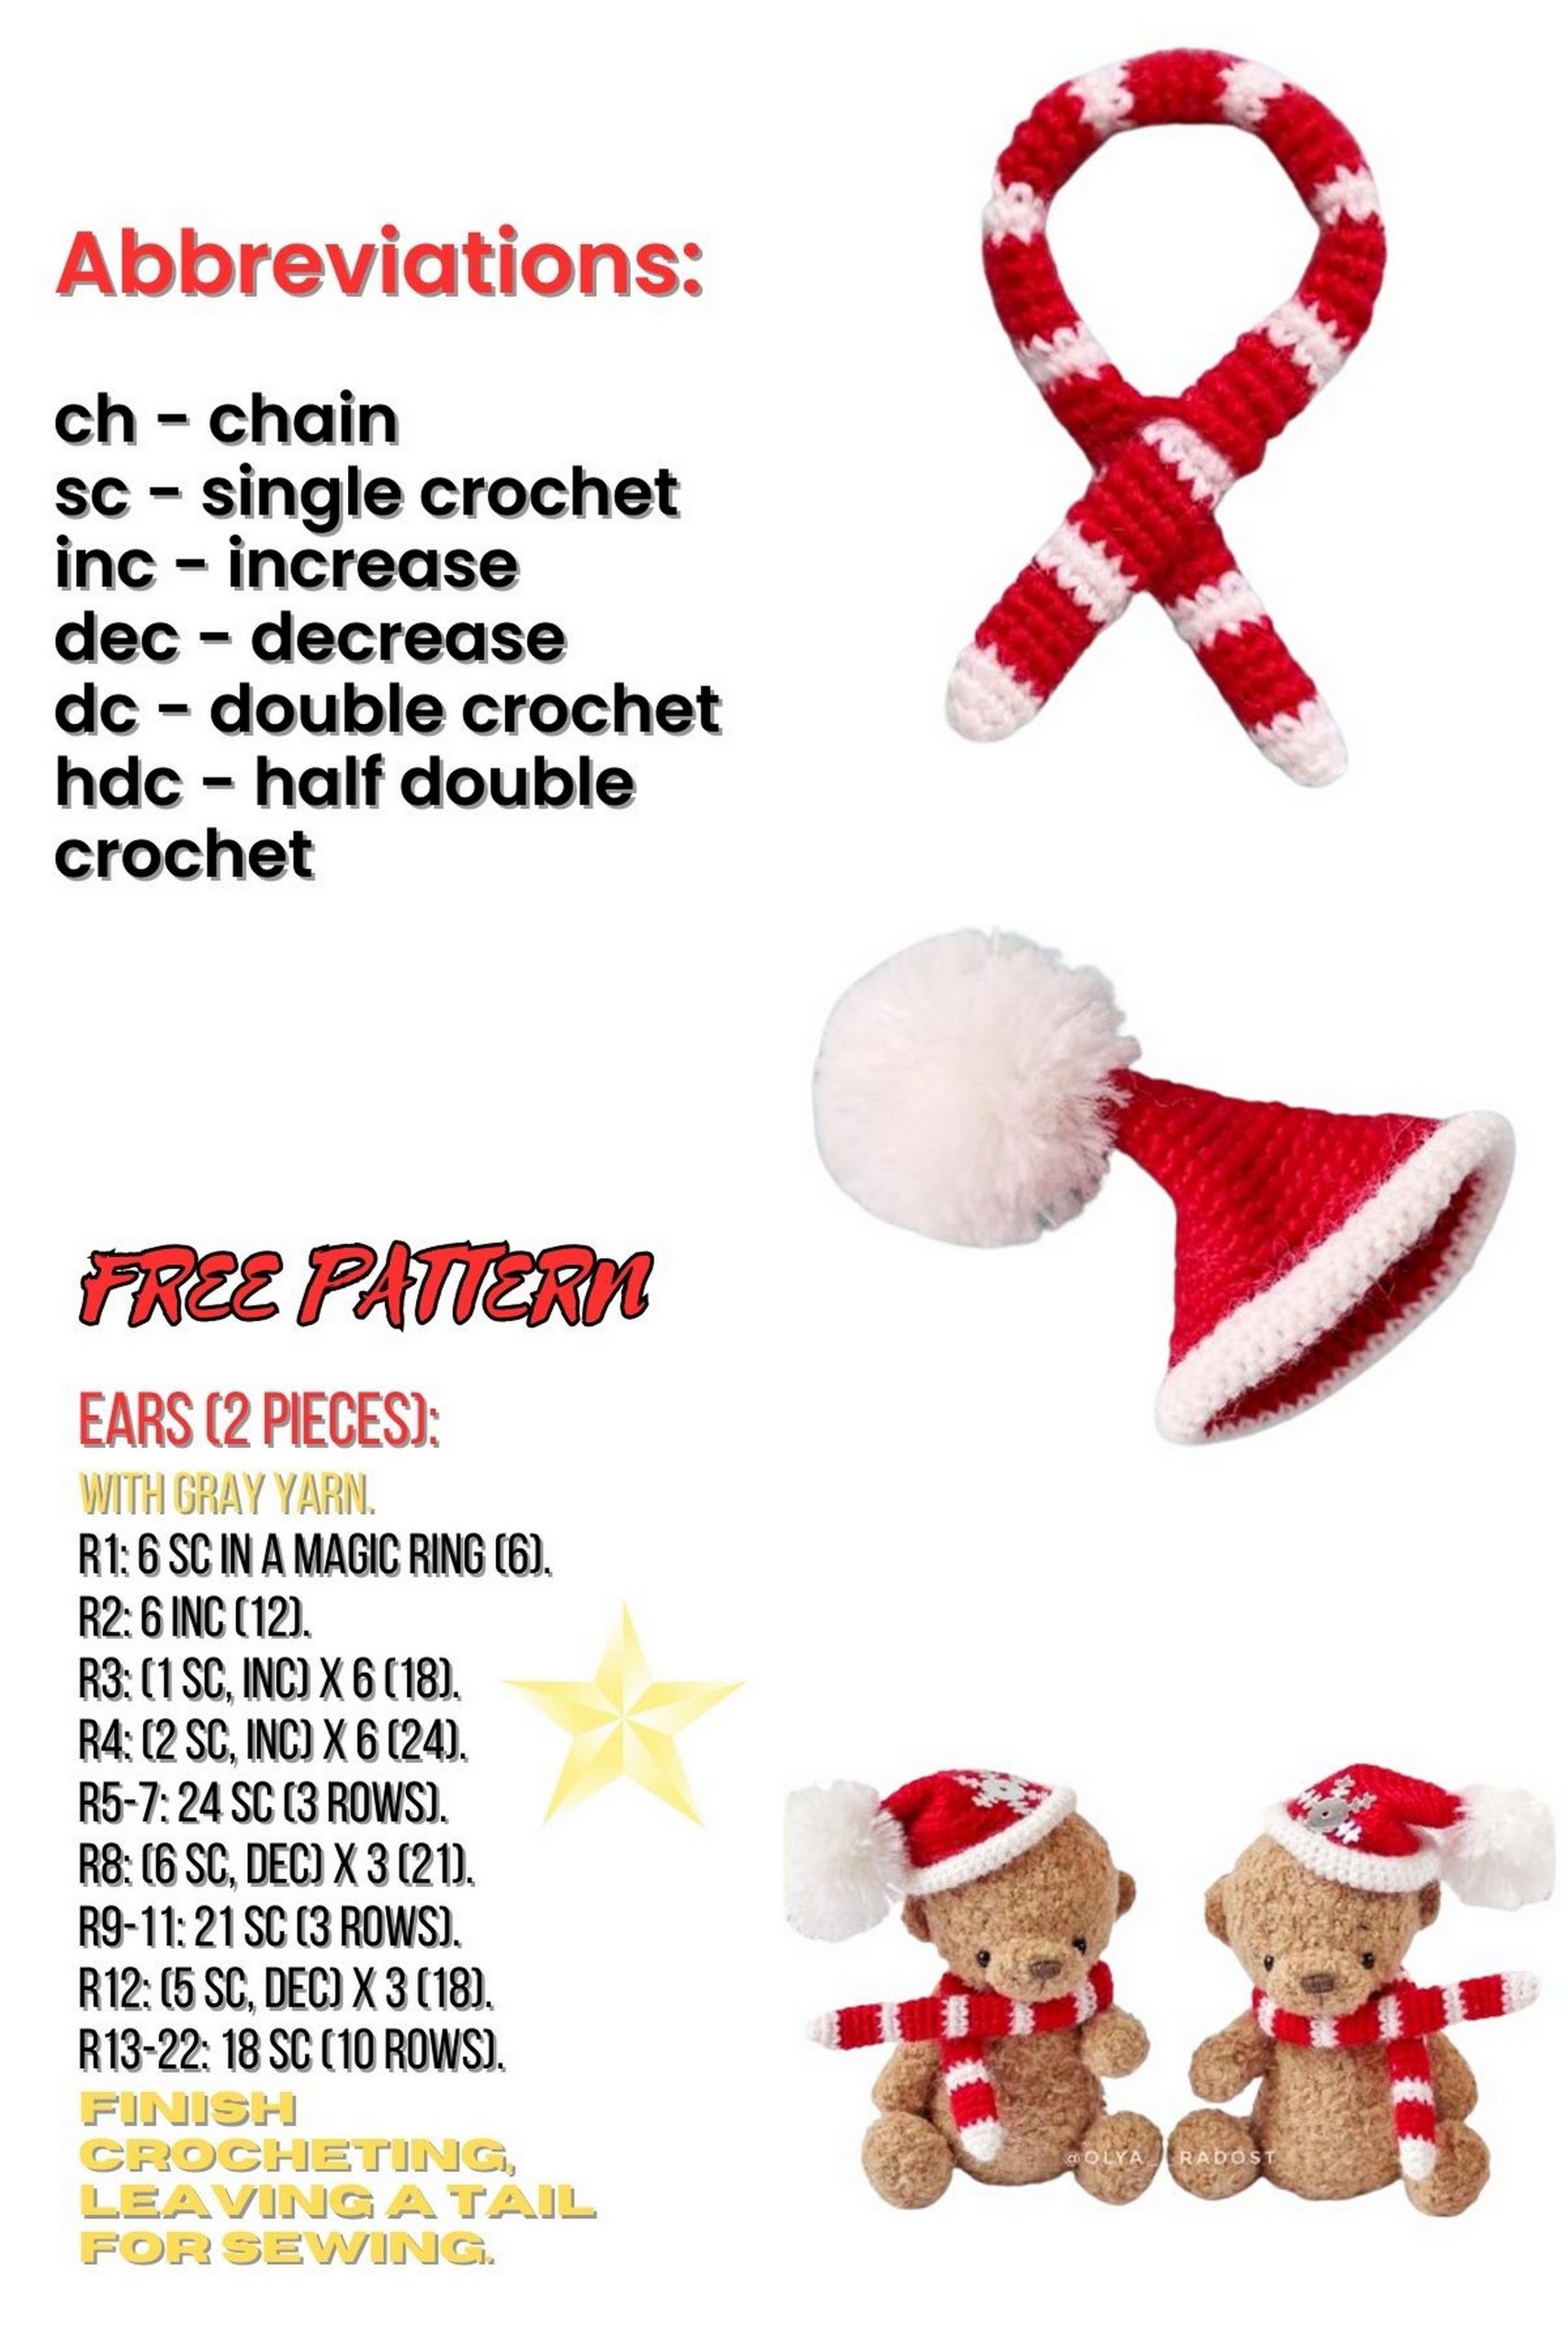
Abbreviations:
ch – chain stitch;
sc – single crochet;
inc – increase;
dec – decrease.

Preparation for Crocheting:
Yarn “Kuzia Clubochkin” consists of three twisted threads. We will crochet the bear using a single thread, so it is necessary to divide the skein into three strands.
Combine “Kuzia Clubochkin” yarn and Iris “Gamma” yarn and start crocheting.
In this tutorial, we use reverse crochet technique (working on the wrong side facing outwards).
Tips for crocheting with textured yarn:
Mark the beginning of each row with a marker.
Count stitches in each row.
If stitches aren’t visible, crochet by feel, i.e., insert the hook into the next available space.
If you’re a beginner, practice with less textured yarn before attempting with highly textured yarn, as it can be more challenging to work with.
PATTERN
Head: Christmas Teddy Bear
1: 6 sc in magic ring.
2: [inc] around (12).
3: [(1 sc, inc) repeat 6 times] (18).
4: [(2 sc, inc) repeat 6 times] (24).
5: [(3 sc, inc) repeat 6 times] (30).
6-11: 30 sc (6 rows).
12: [(3 sc, dec) repeat 6 times] (24).
13: [(2 sc, dec) repeat 6 times] (18).
14: [(1 sc, dec) repeat 6 times] (12).
Stuff the head.
Take a 12mm disk and a T-pin. Attach securely. Insert the T-pin into the hole. Row 15: 6 dec. Close the hole. Cut the thread, secure, and hide inside the piece. Use manicure scissors for a neat trim of the head.
Muzzle: Christmas Teddy Bear
Crochet a chain of 6.
1: From the second stitch, 4 sc, 3 sc in one stitch, continue on the other side with 3 sc, inc (12).
2: 12 sc. Fasten off and cut the yarn. Use manicure scissors for a neat trim of the muzzle.
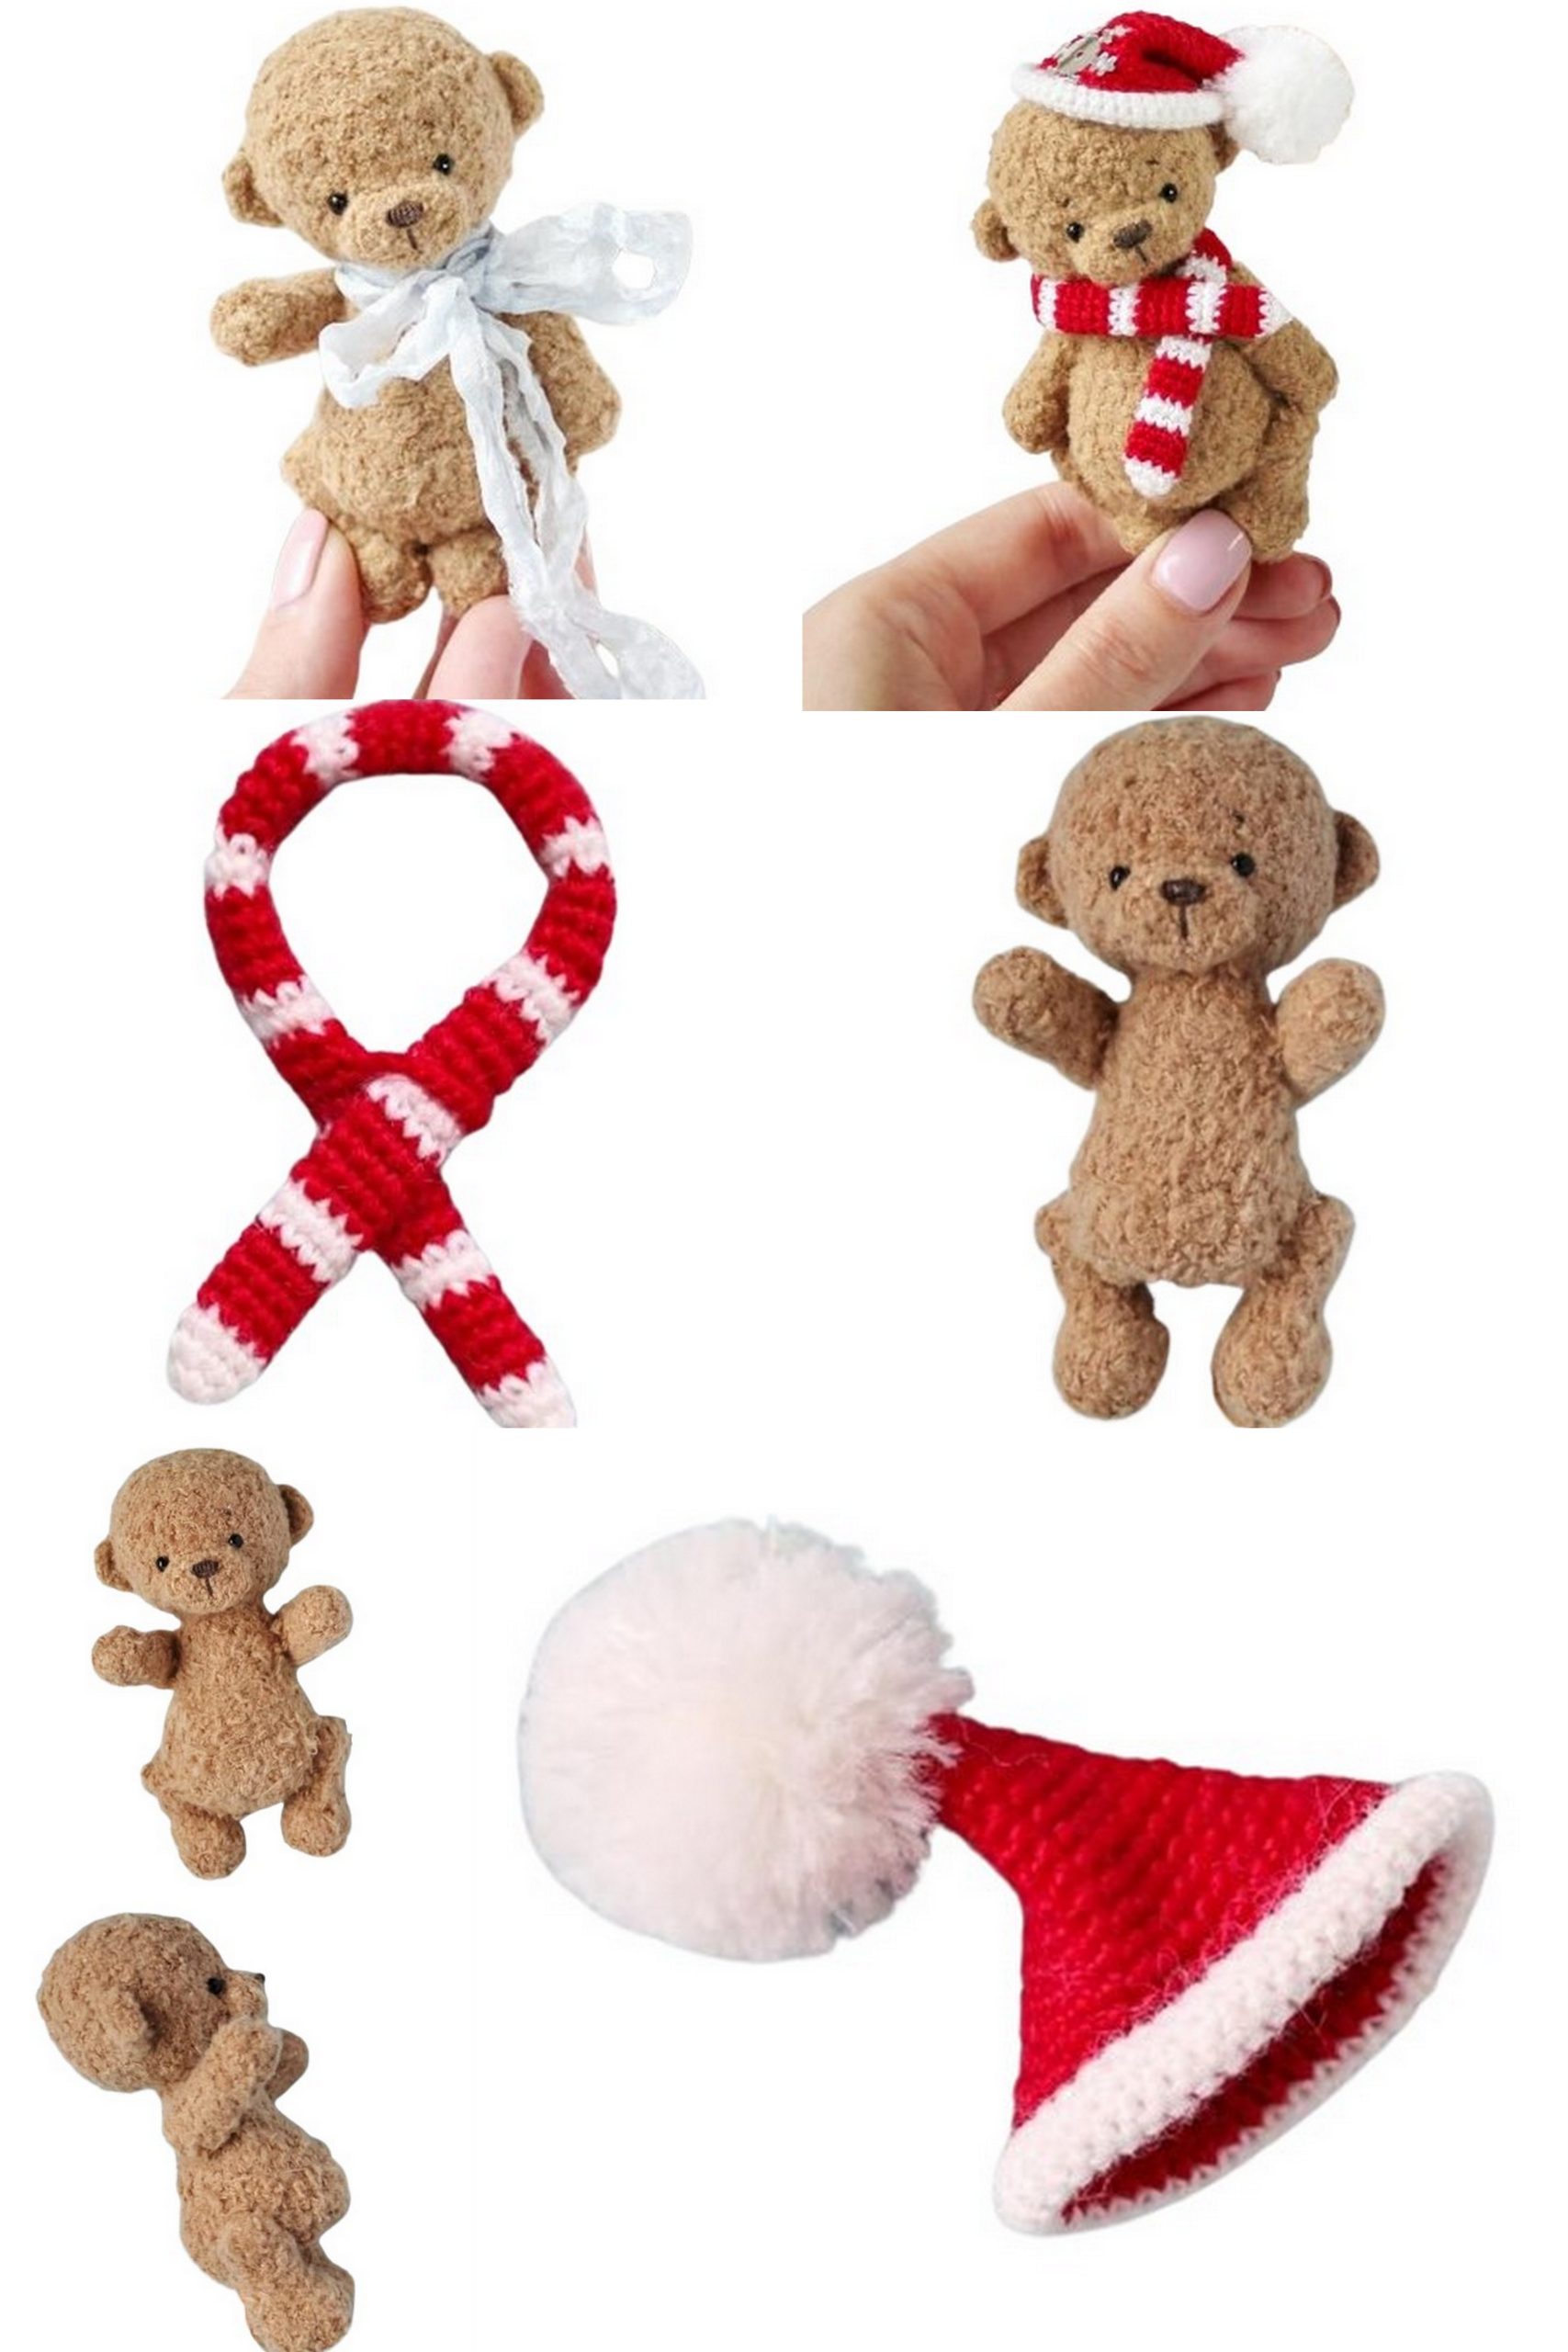
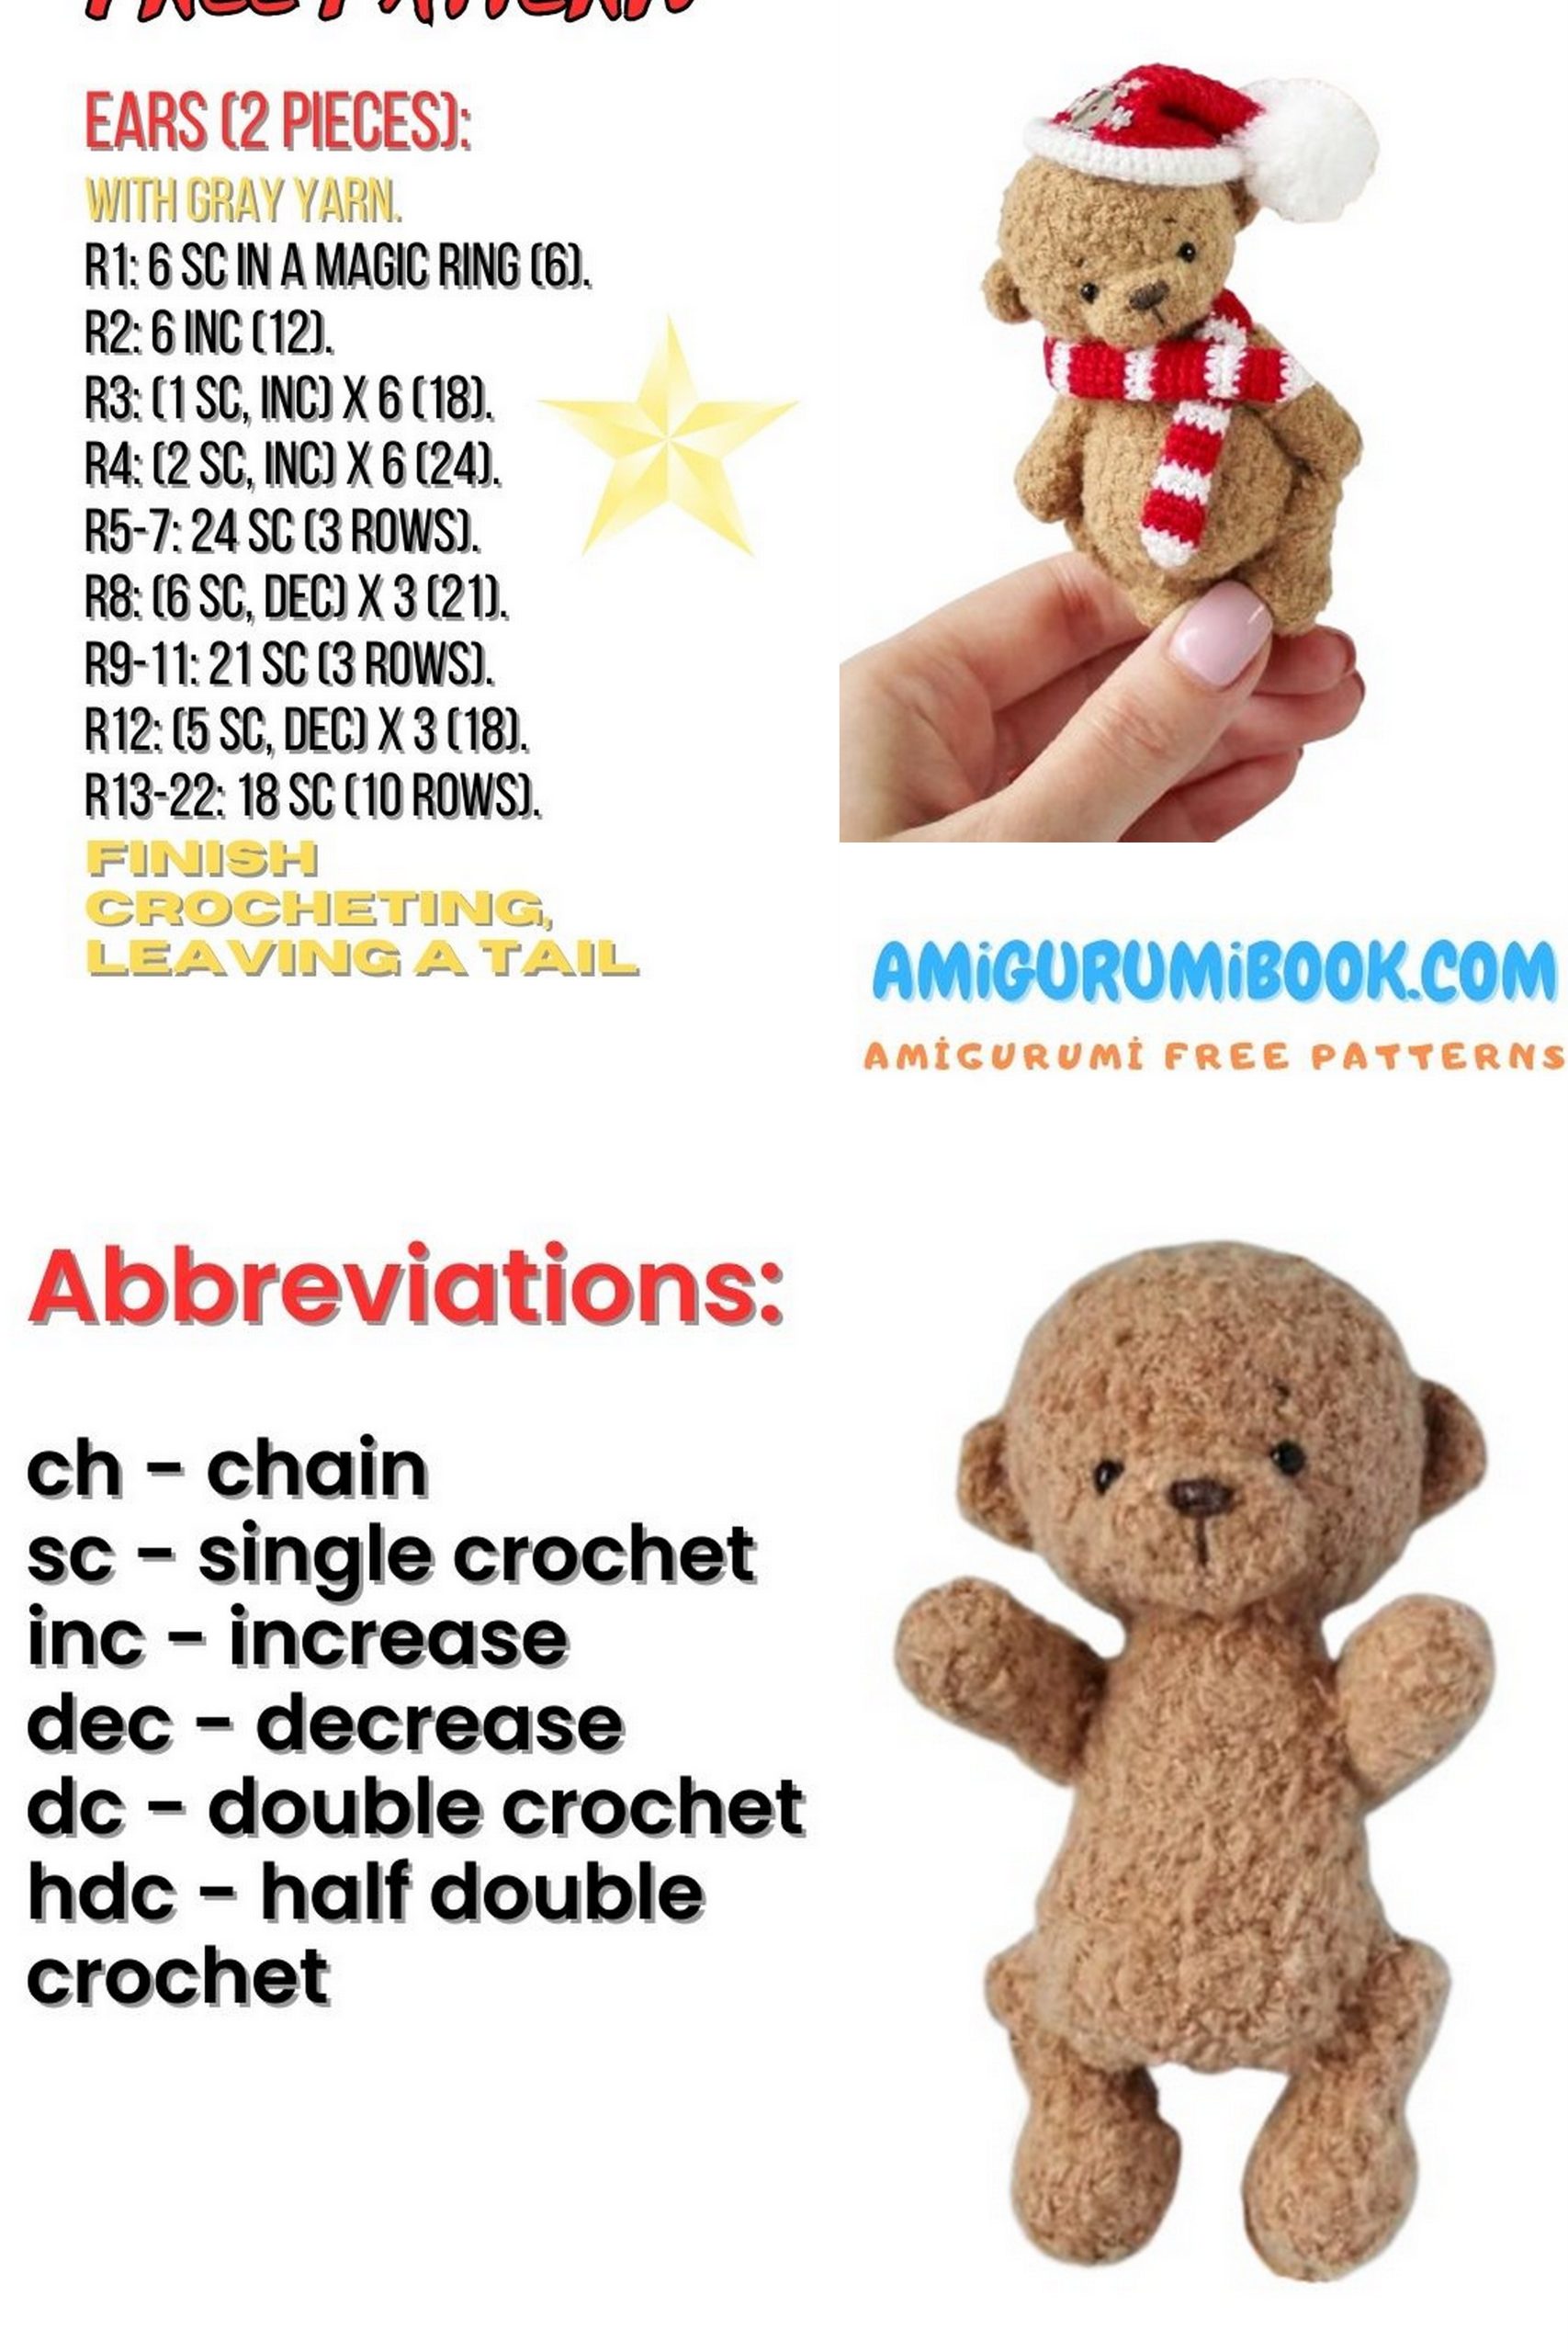
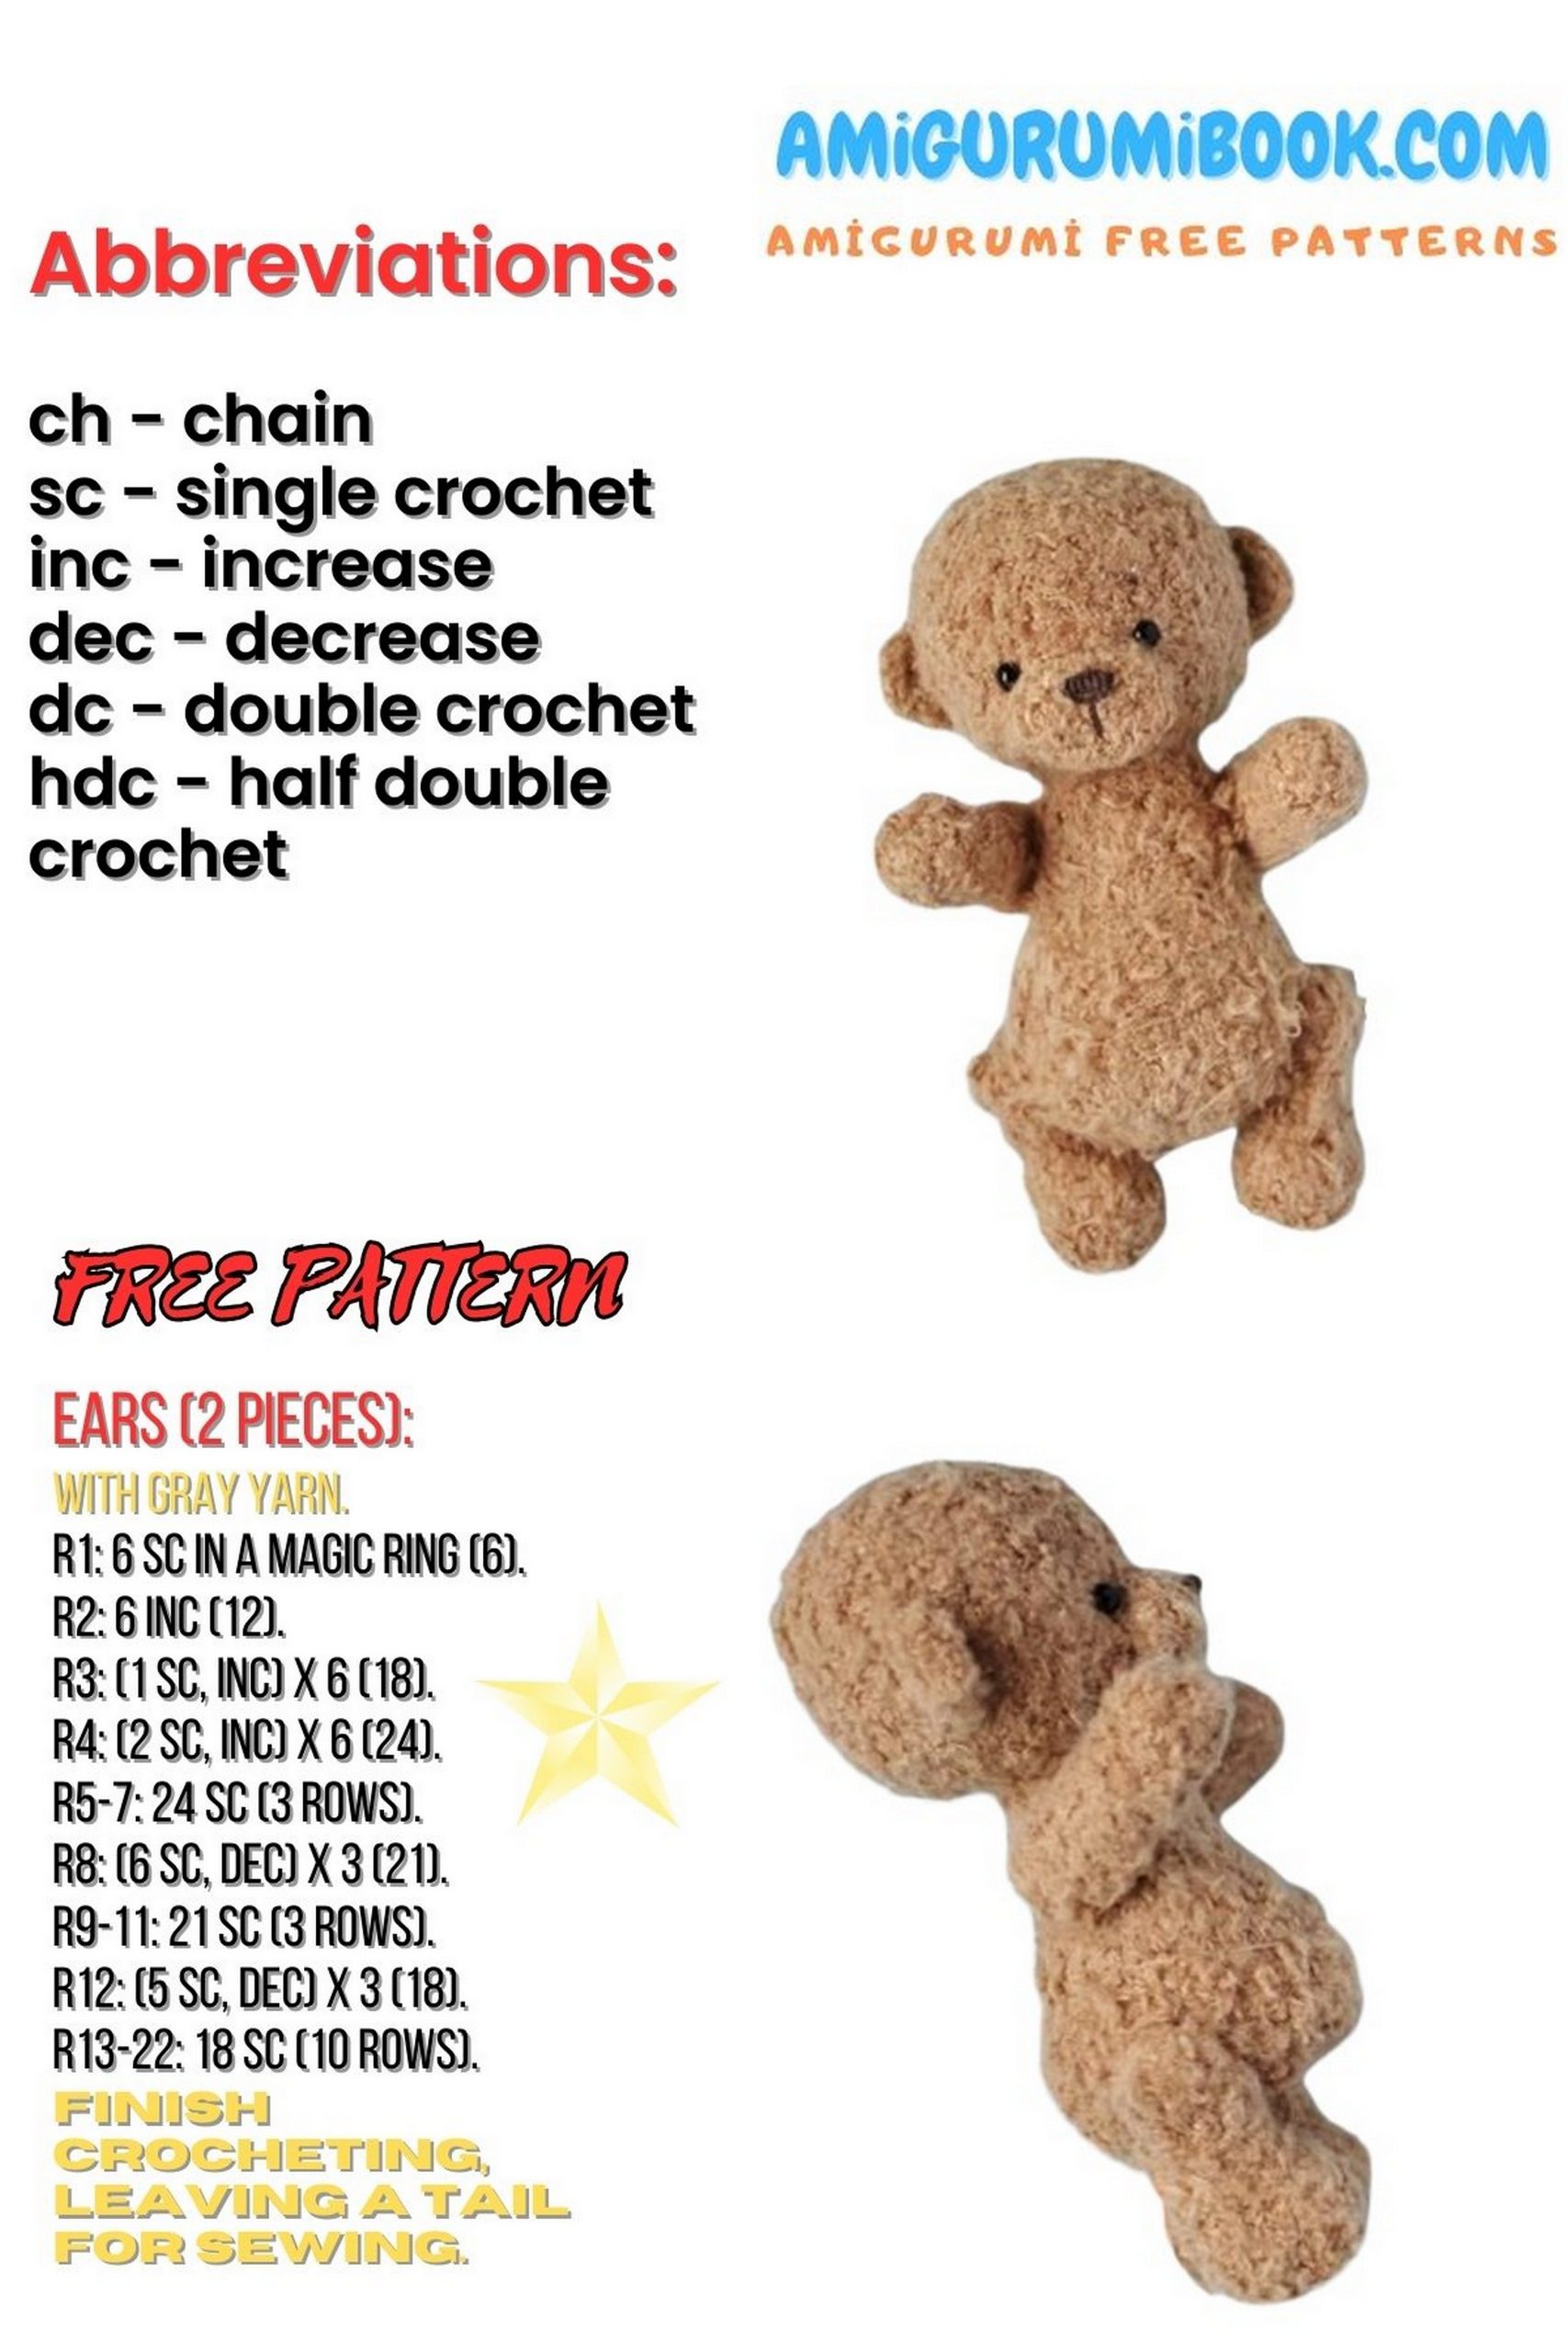
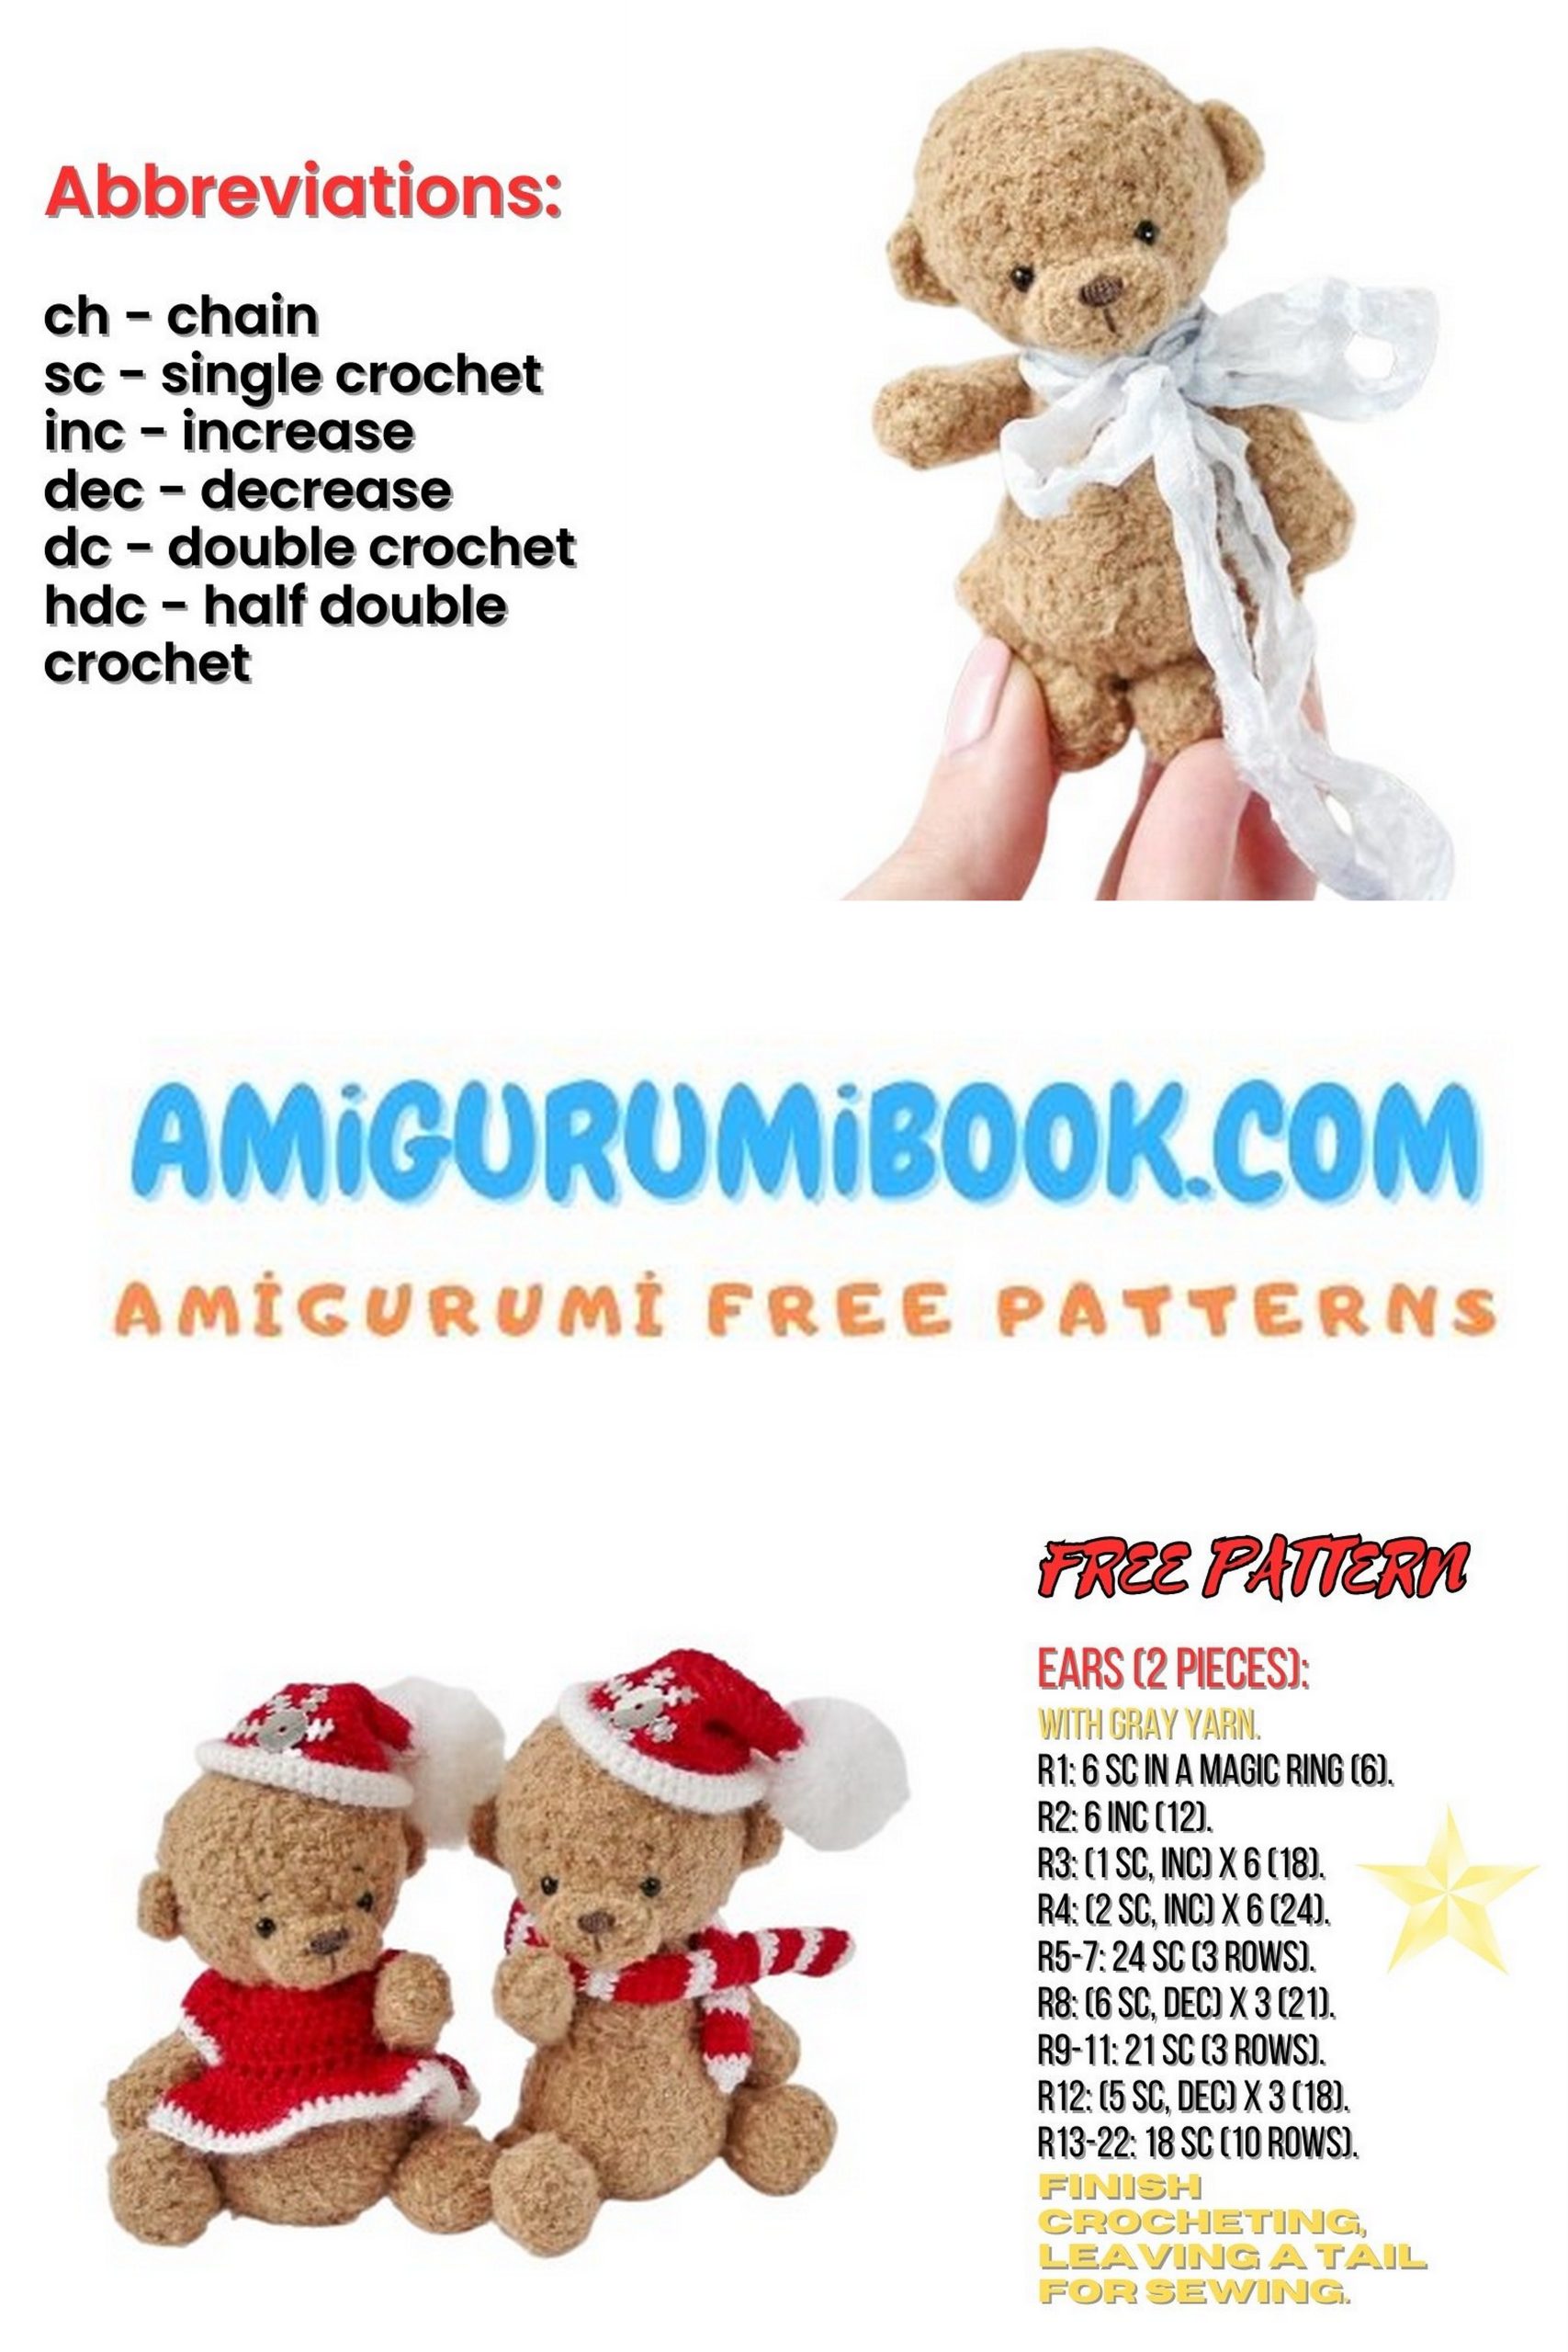
Ears (2 pieces): Christmas Teddy Bear
Crochet using a single strand of “Kuzia Clubochkin” yarn, no additional yarn!
1: 6 sc in magic ring. 1 ch, turn.
2: 6 sc. Fasten off, cut the yarn, secure, and leave tails for sewing. Trim the ears neatly.
Assembly and Decoration of the Head:
Attach the muzzle to the head using a sewing pin. You can position the muzzle as you prefer; I place it at the bottom of the head.
Sew the muzzle onto the head using a needle and matching thread, moving in a circular motion. Before finishing sewing, add a bit of stuffing to the muzzle.
Take brown thread and a needle. Embroider the nose.
Take the eyes (or beads), a needle, and strong thread. First, place the eyes and find the spots for attachment. Insert the needle from the bottom of the head, behind (point 1), and bring it out at point 1 of the first eye (point 2). Pass the needle through the loop (or bead). Insert the needle again at the same point 2 (if using beads for eyes, it’s better to leave a gap of 1 stitch from point 2) and bring it out at point 1. Move one stitch away from point 1, insert the needle at point 3, and bring it out near the second eye (point 4). Repeat the same procedure as with the first eye, bringing the needle out at the bottom of the head (point 3). Slightly tighten the threads, tie a knot, and hide them inside the head.
Attach the ears to the head. Thread the tails left during crocheting into the head using a hook. Bring them out from the back of the head. After sewing the ears, these threads need to be cut off.
Embroider eyebrows.
Upper Paws: Christmas Teddy Bear
1: 6 sc in magic ring.
2: [inc, 2 sc] repeat 2 times (8).
3-9: 8 sc (7 rows).
Stuff the paw slightly.
Take a 6mm disk and a T-pin. Attach securely. Insert the T-pin between rows 8 and 9.
10: 4 dec. Close the hole. Cut the thread, secure, and hide inside the piece.
Neatly trim the paw.
Crochet the second paw in the same way as the first one, inserting the T-pin from the opposite side.
Lower Paws: Christmas Teddy Bear
Crochet a chain of 4.
1: From the second stitch, 2 sc, 3 sc in one stitch, continue on the other side with 1 sc, inc (8).
2: inc, 1 sc, 3 inc, 1 sc, 2 inc (14).
3: 14 sc.
4: 3 sc, 4 dec, 3 sc (10).
5: 3 sc, 2 dec, 3 sc (8).
6-9: 8 sc (4 rows).
You can add 1-2 more rows if you find the paw too short.
Stuff the paw.
Take a 6mm disk and a T-pin. Attach securely. Insert the T-pin between rows 8 and 9.
10: 4 dec. Close the hole. Cut the thread, secure, and hide inside the piece.
Neatly trim the paw.
Crochet the second paw in the same way as the first one, inserting the T-pin from the opposite side.
Body and Assembly: Christmas Teddy Bear
1: 6 sc in magic ring.
2: [inc] around (12).
3: 12 sc.
4: [(1 sc, inc) repeat 6 times] (18).
5: 18 sc.
Take the head, a 9mm disk, and round-nose pliers. Attach the head to the crocheted piece. Insert the T-pin in the middle so that the marker is at the back. Put the disk on the T-pin. Using round-nose pliers, twist the ends of the T-pin tightly to secure the head and the crocheted piece together.
We will trim the body as we continue crocheting.
6: [(2 sc, inc) repeat 6 times] (24).
7: [(3 sc, inc) repeat 6 times] (30).
Take 2 disks of 9mm and round-nose pliers. Attach the upper paws on the sides of the body between rows 4 and 5.
8-12: 30 sc (5 rows).
13: [(3 sc, dec) repeat 6 times] (24).
Take 2 disks of 9mm and round-nose pliers. Attach the lower paws on the sides of the body between rows 11 and 12.
14: [(2 sc, dec) repeat 6 times] (18).
15: 18 sc.
Stuff the body.
16: [(1 sc, dec) repeat 6 times] (12).
17: 6 dec.
Close the hole. Cut the thread, secure, and hide inside the piece.
Tail: Christmas Teddy Bear
1: 6 sc in magic ring.
Tie the ends of the thread into a knot; we will later hide them inside the body when sewing the tail.
Sew the tail using matching thread to the yarn color.
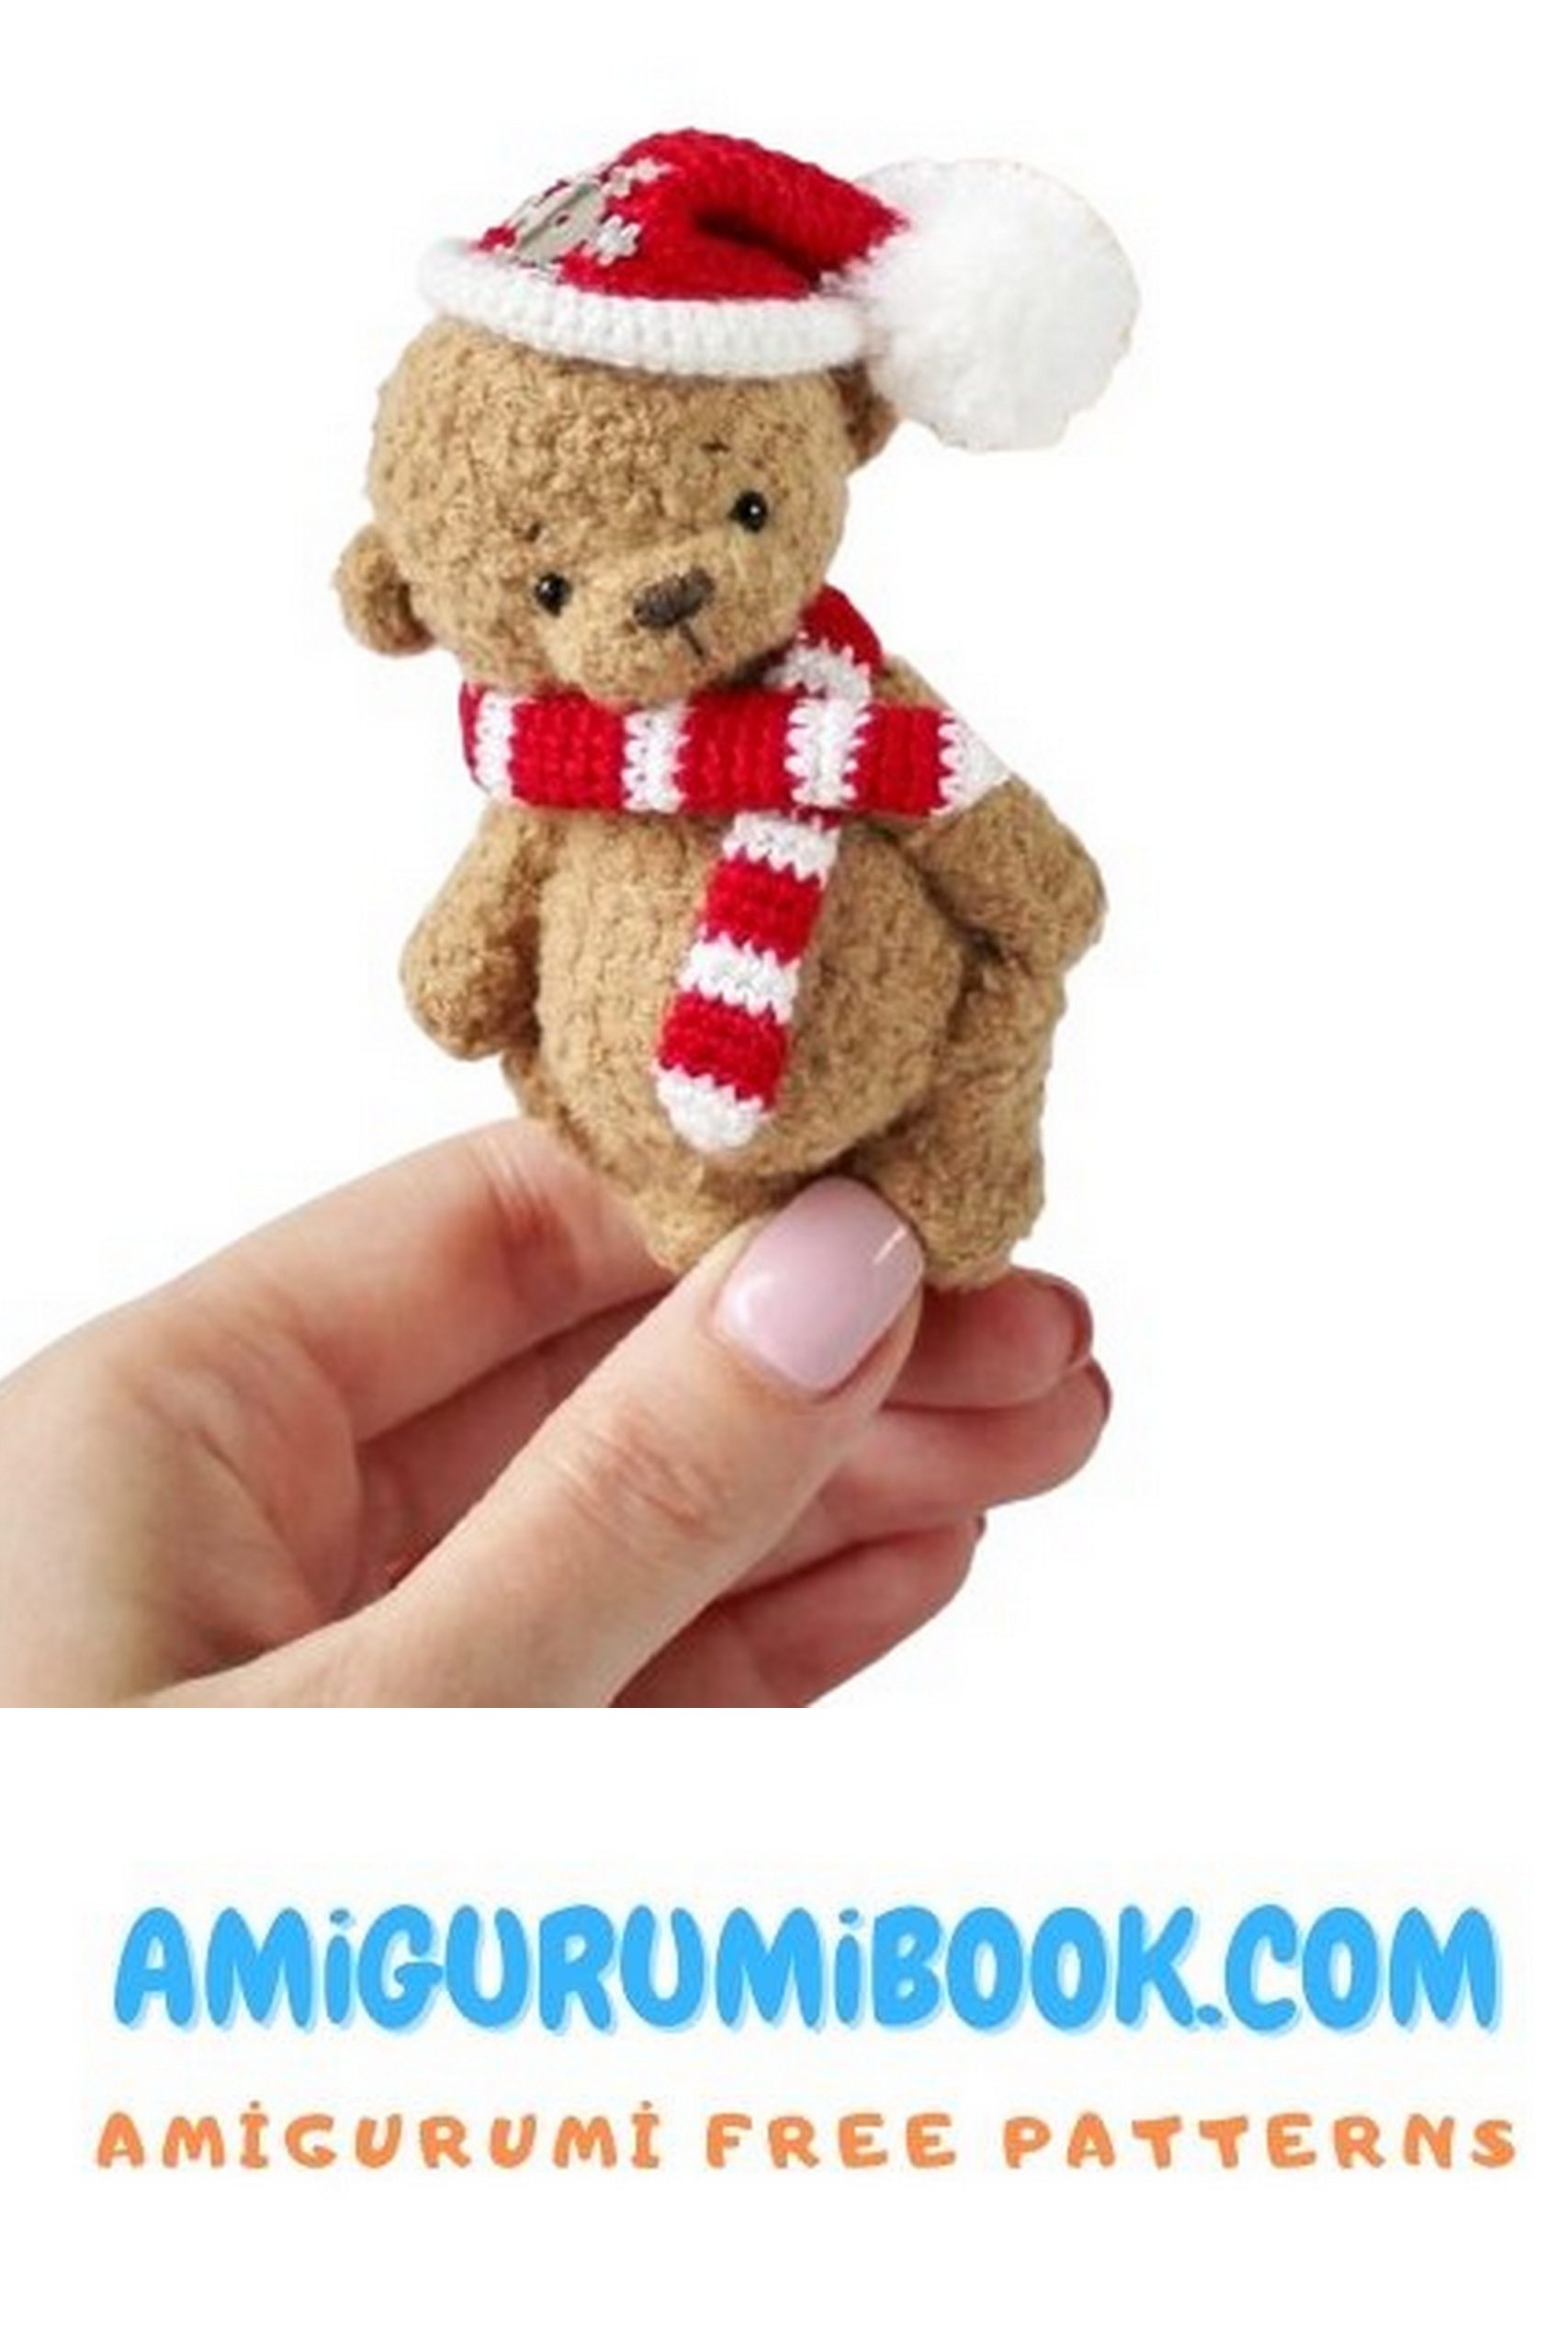
Hat + Scarf:
For knitting the hat and scarf, you can use Iris PMK named after Kirov, Rainbow woolen floss “Rainbow” in two strands, or any other thin yarn in red and white colors.
Hat: Christmas Teddy Bear
Crochet with red yarn.
1: 6 sc in magic ring.
You can crochet through the back loops of stitches; the hat will be slightly longer and have a pattern.
2: [(inc, 1 sc) repeat 3 times] (9).
3: 9 sc.
4: [(inc, 2 sc) repeat 3 times] (12).
5: 12 sc.
6: [(inc, 3 sc) repeat 3 times] (15).
7: 15 sc.
8: [(inc, 4 sc) repeat 3 times] (18).
9: 18 sc.
10: [(inc, 5 sc) repeat 3 times] (21).
11: 21 sc.
12: [(inc, 6 sc) repeat 3 times] (24).
13: 24 sc.
14: [(inc, 3 sc) repeat 6 times] (30).
15: 30 sc.
16: [(inc, 4 sc) repeat 6 times] (36).
17: 36 sc.
18: [(inc, 5 sc) repeat 6 times] (42).
19: 42 sc.
20: [(inc, 6 sc) repeat 6 times] (48).
21: 48 sc.
Change yarn to white.
22-26: 48 sc for 5 rows.
Fasten off and cut the yarn.
Pom-pom for the hat:
Wrap white yarn around two fingers (in my case, Rainbow woolen floss). Remove from fingers and tie tightly in the middle with a thread.
Then trim the pom-pom, plenty and neatly.
Thread the pom-pom threads (which we used to tie it) into the holes inside the hat’s crown. Tie a knot inside.
Scarf: Christmas Teddy Bear
Crochet with white yarn.
1: 6 sc in magic ring.
2: [(inc, 1 sc) repeat 3 times] (9).
3: 9 sc.
*Change yarn to red.
Knit 4 rows of 9 sc.
Then change yarn.
Knit 2 rows of 9 sc.*
Continue knitting from * to * to a scarf length of 11 cm.
Make a chain of 15 ch. Continue crocheting sc into the adjacent loop. We have formed a loop. Continue crocheting the scarf alternating the same pattern. Finish with white yarn.
By inserting the end of the scarf into the loop, you secure the scarf.
THAT’S ALL!
HAPPY KNITTING!