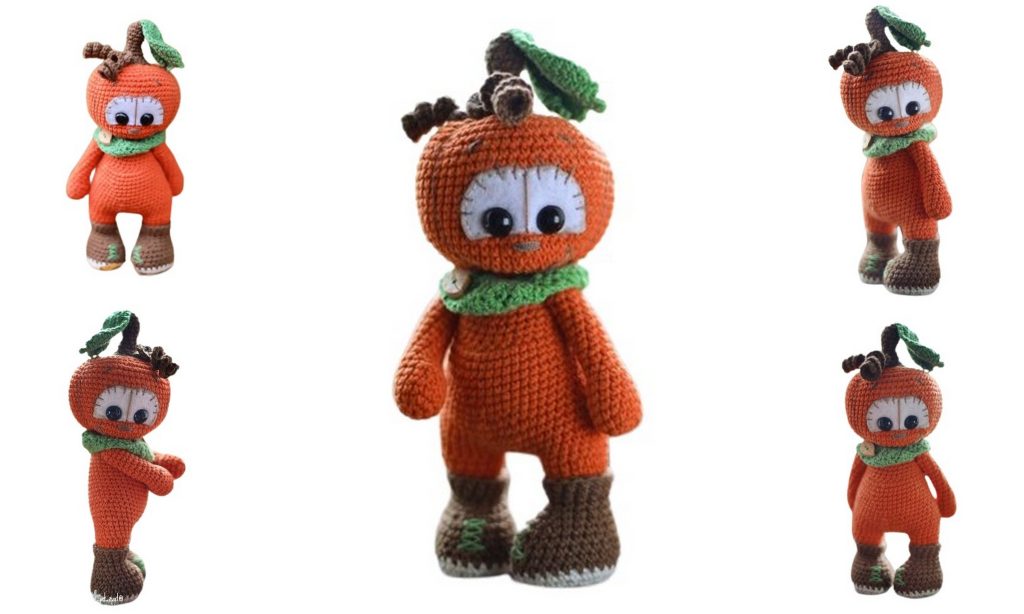
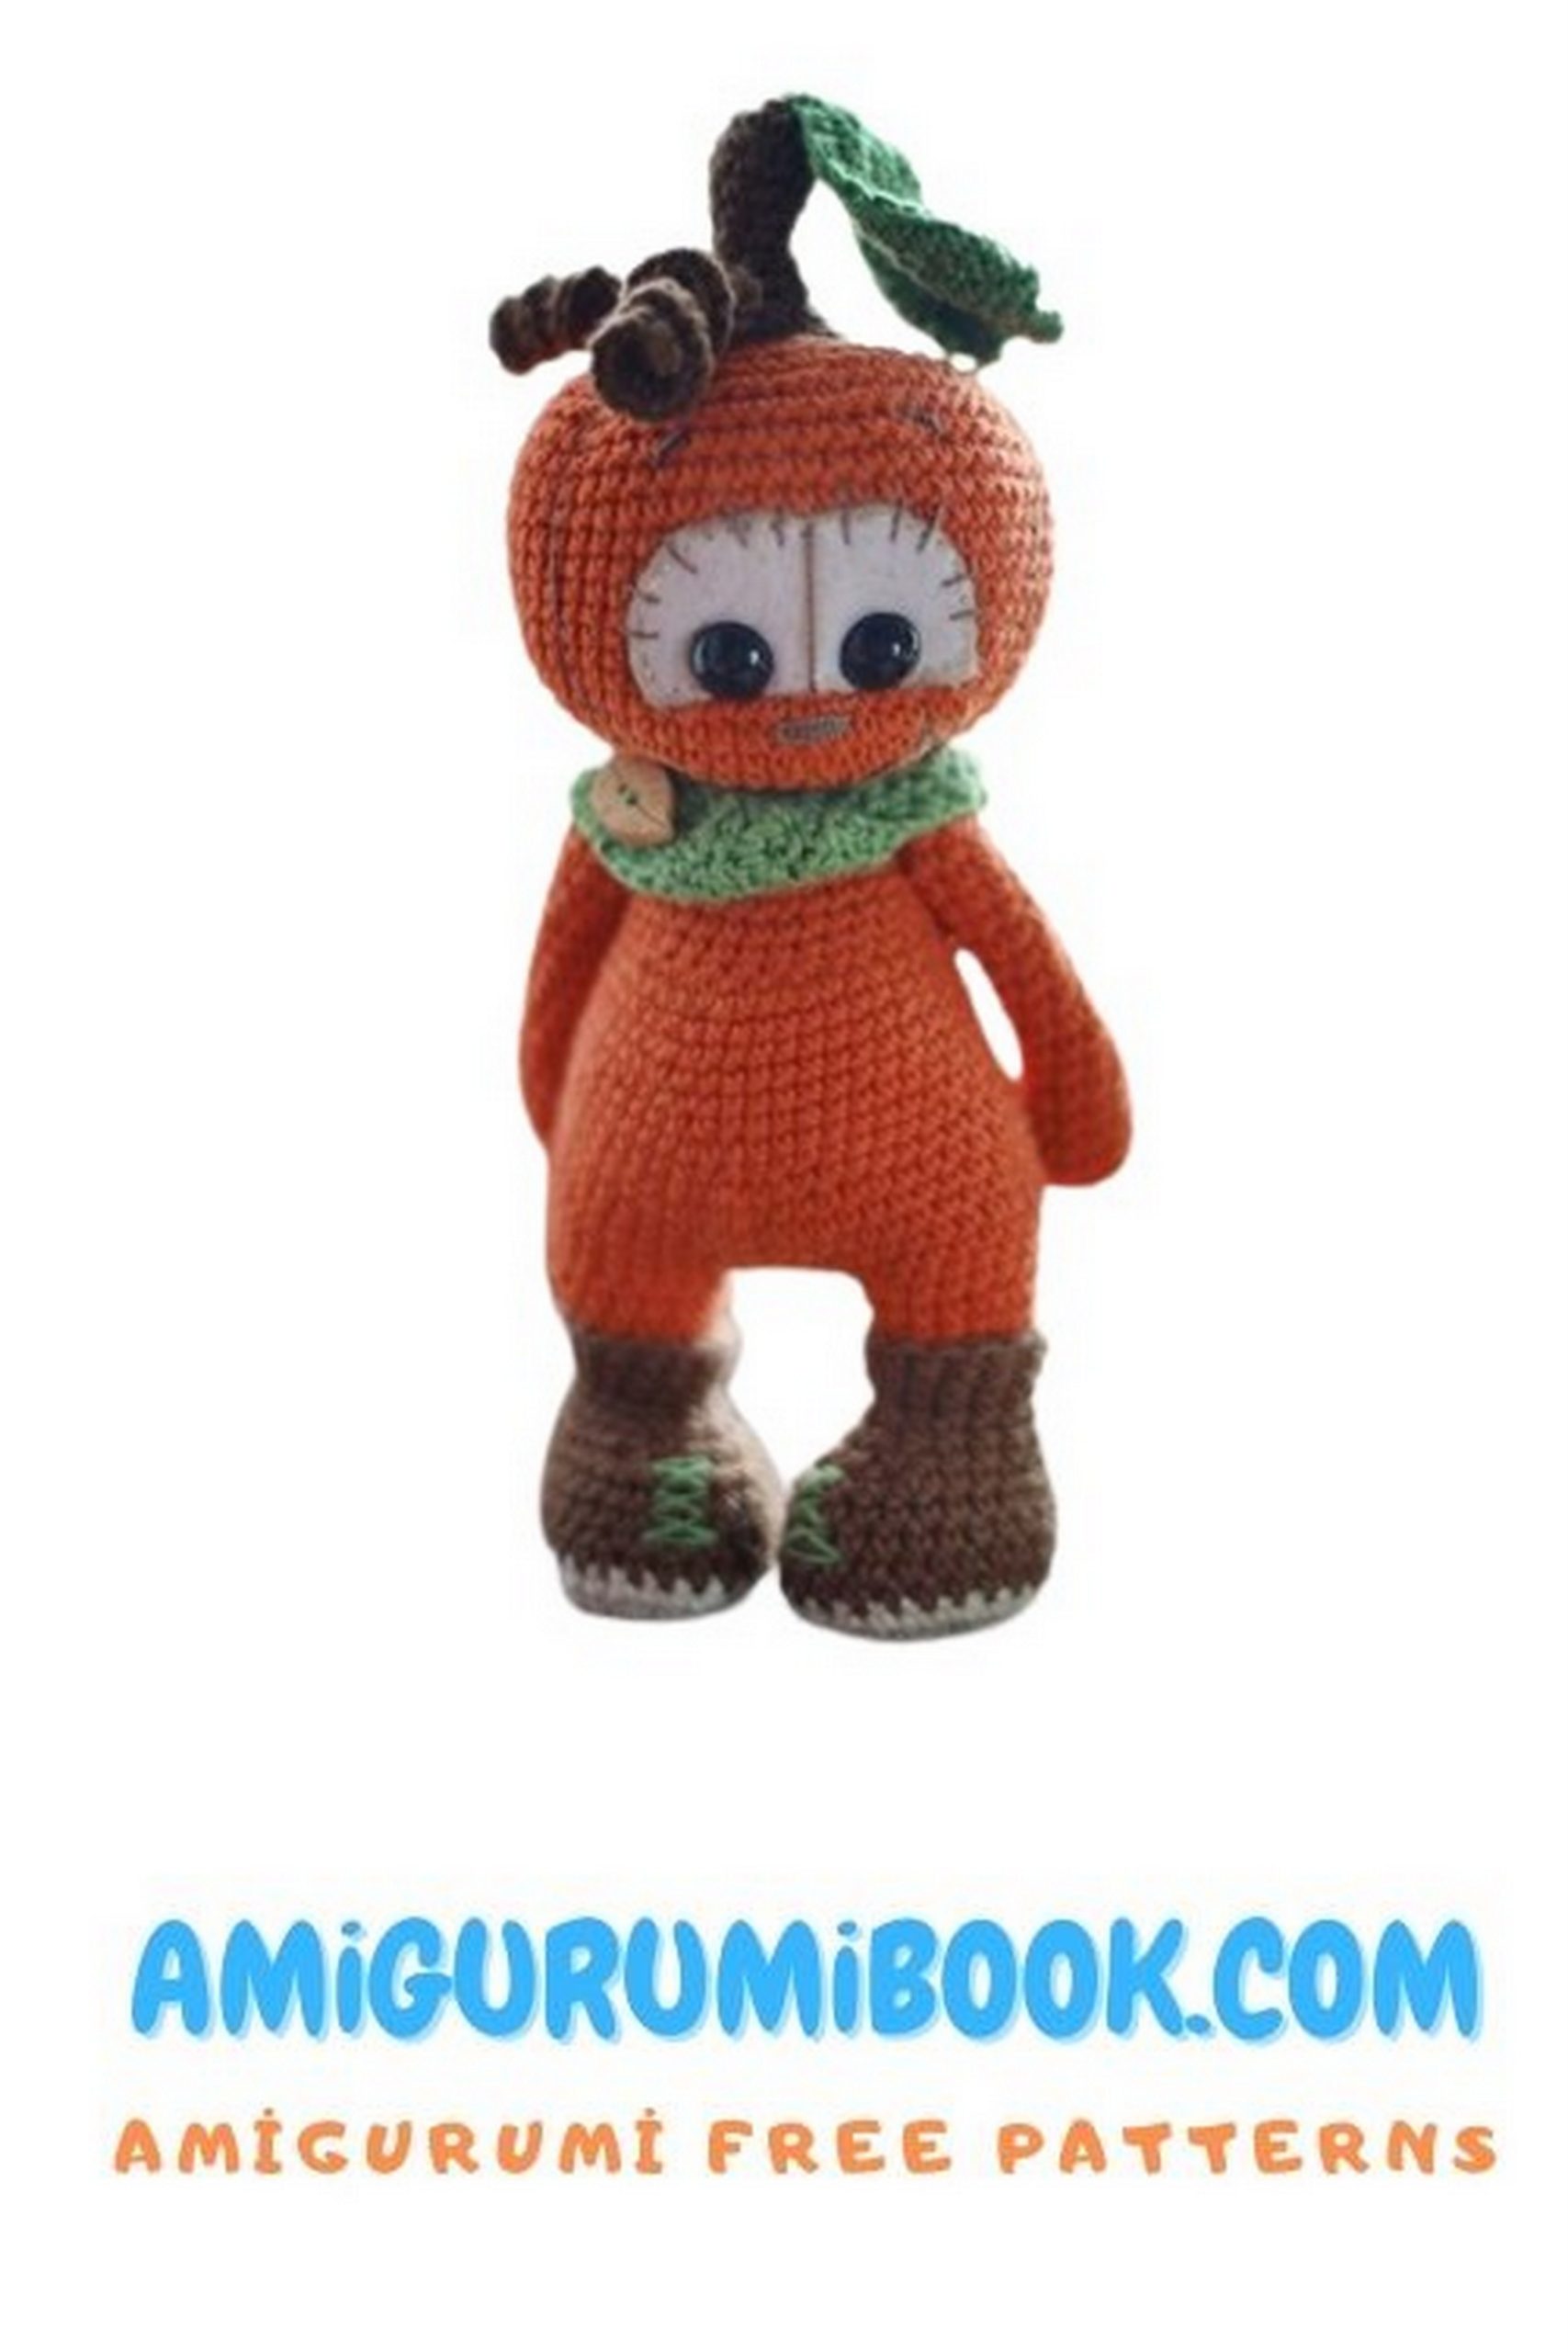
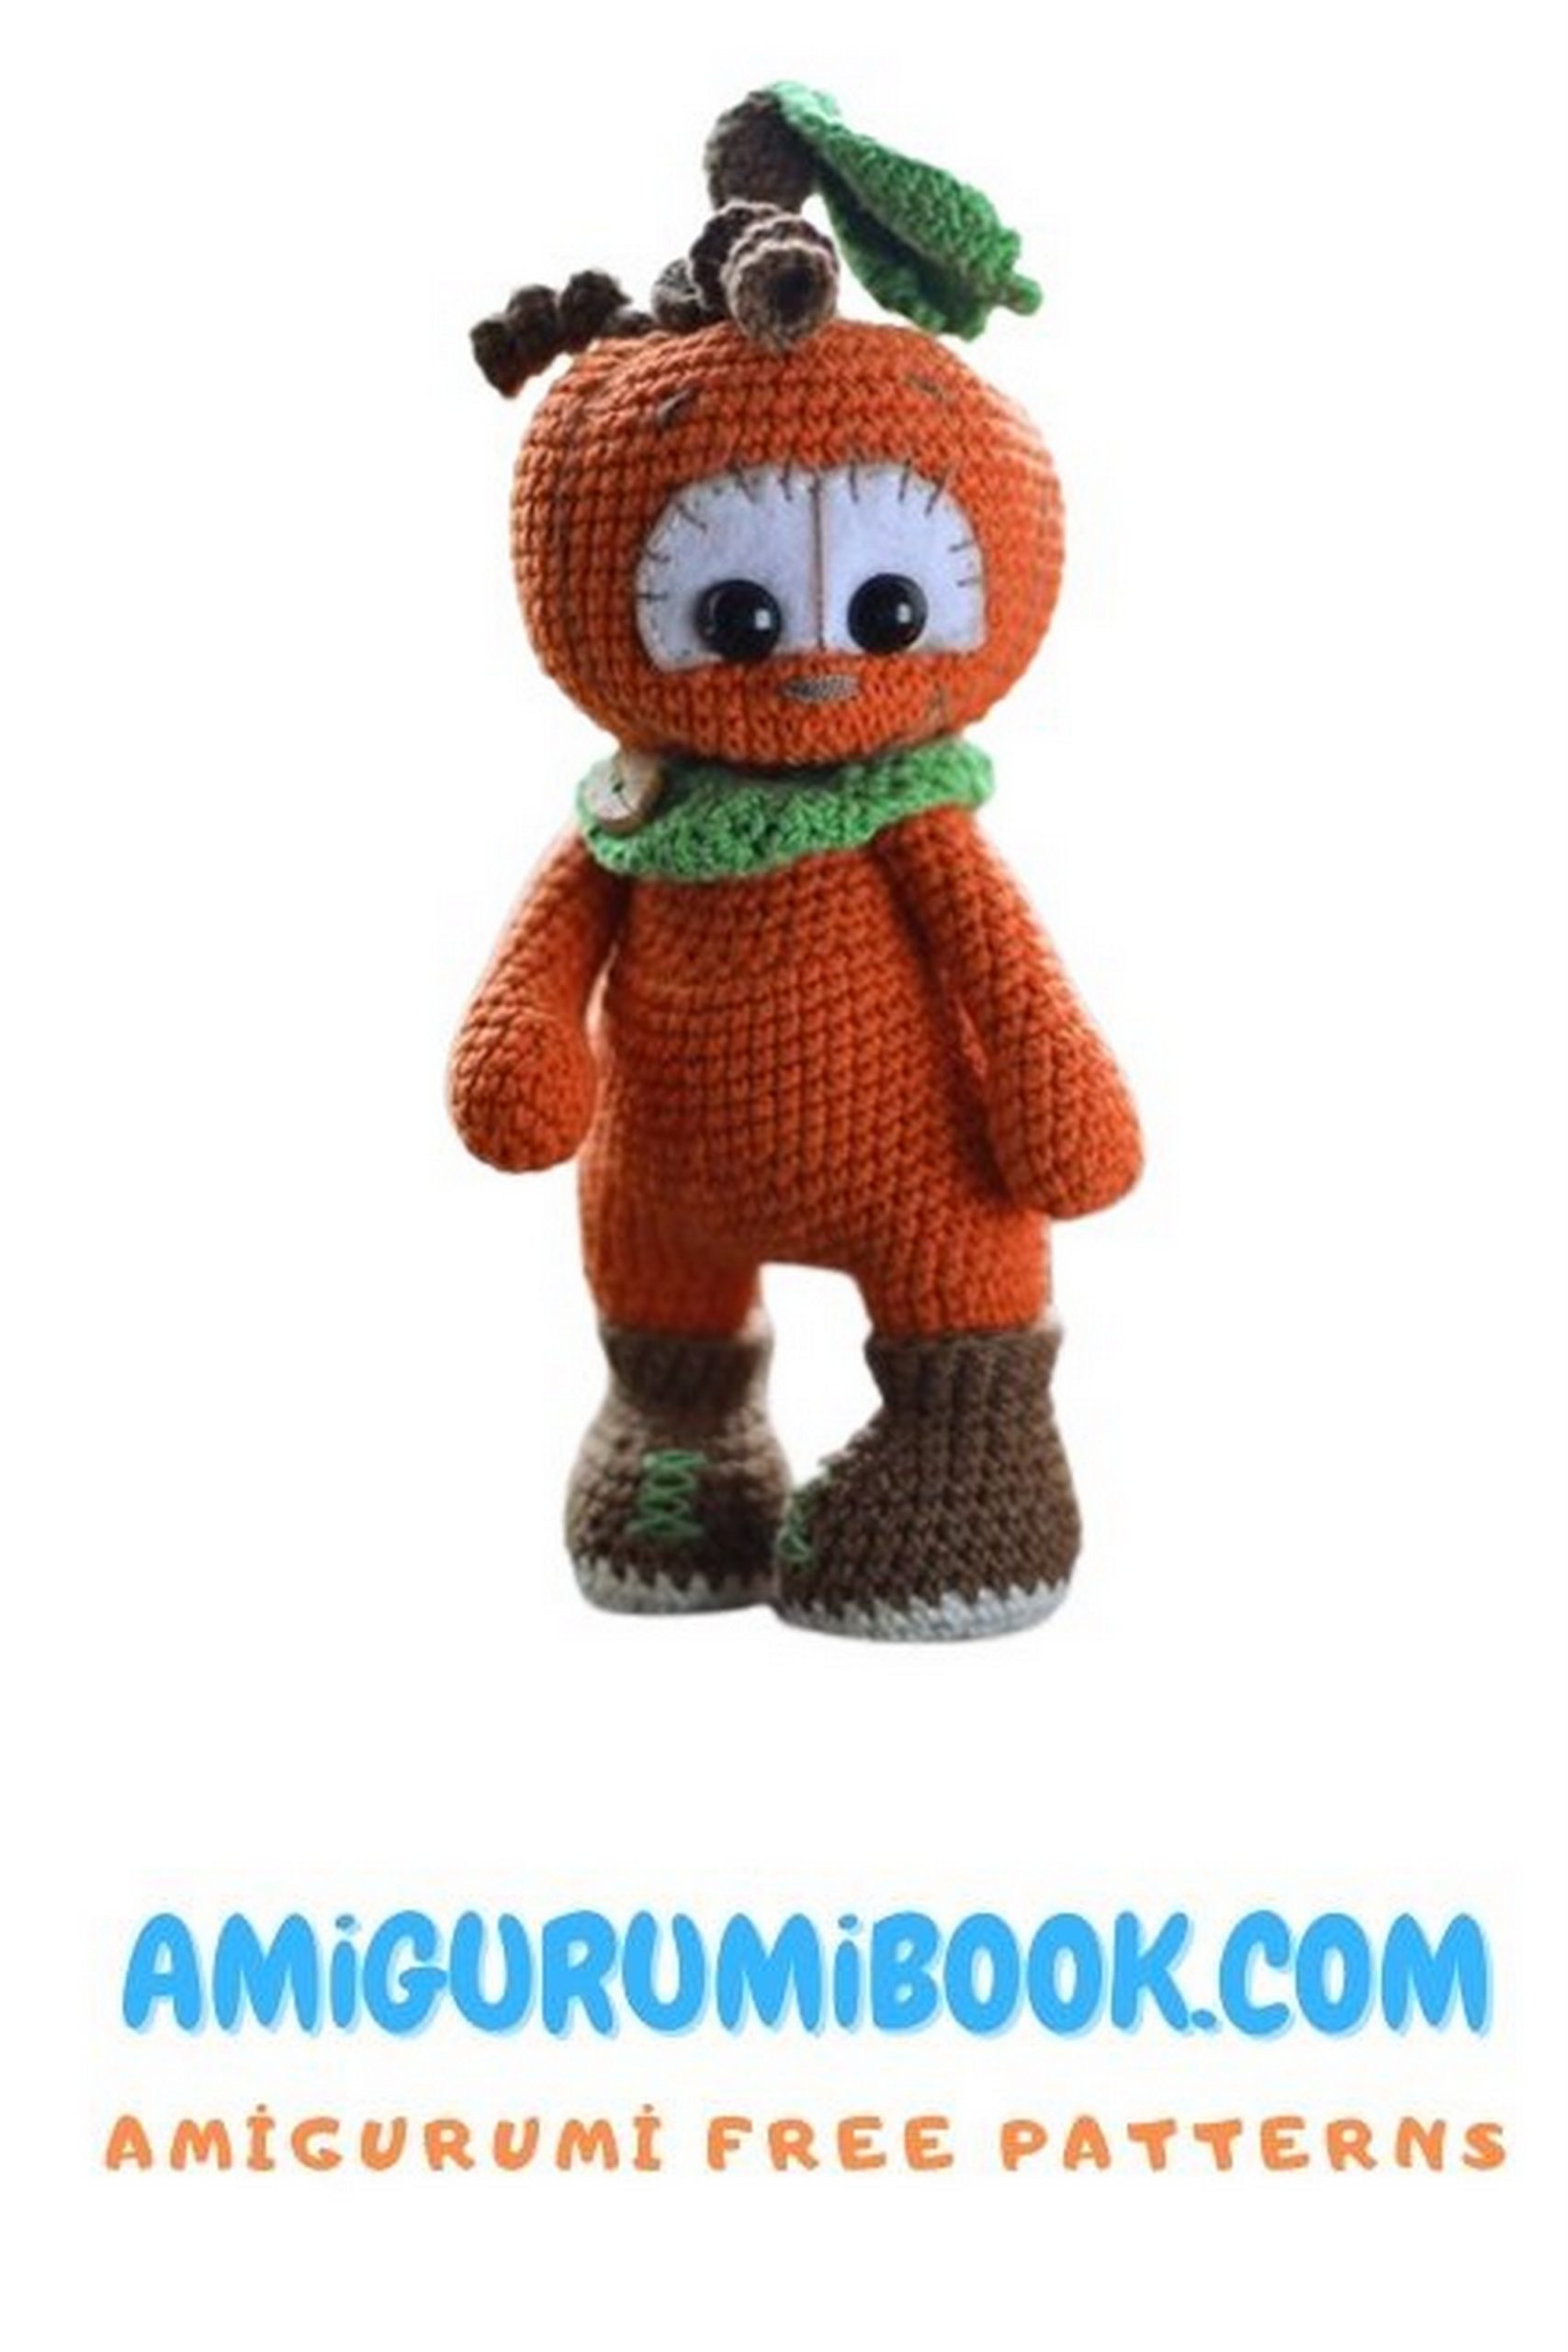
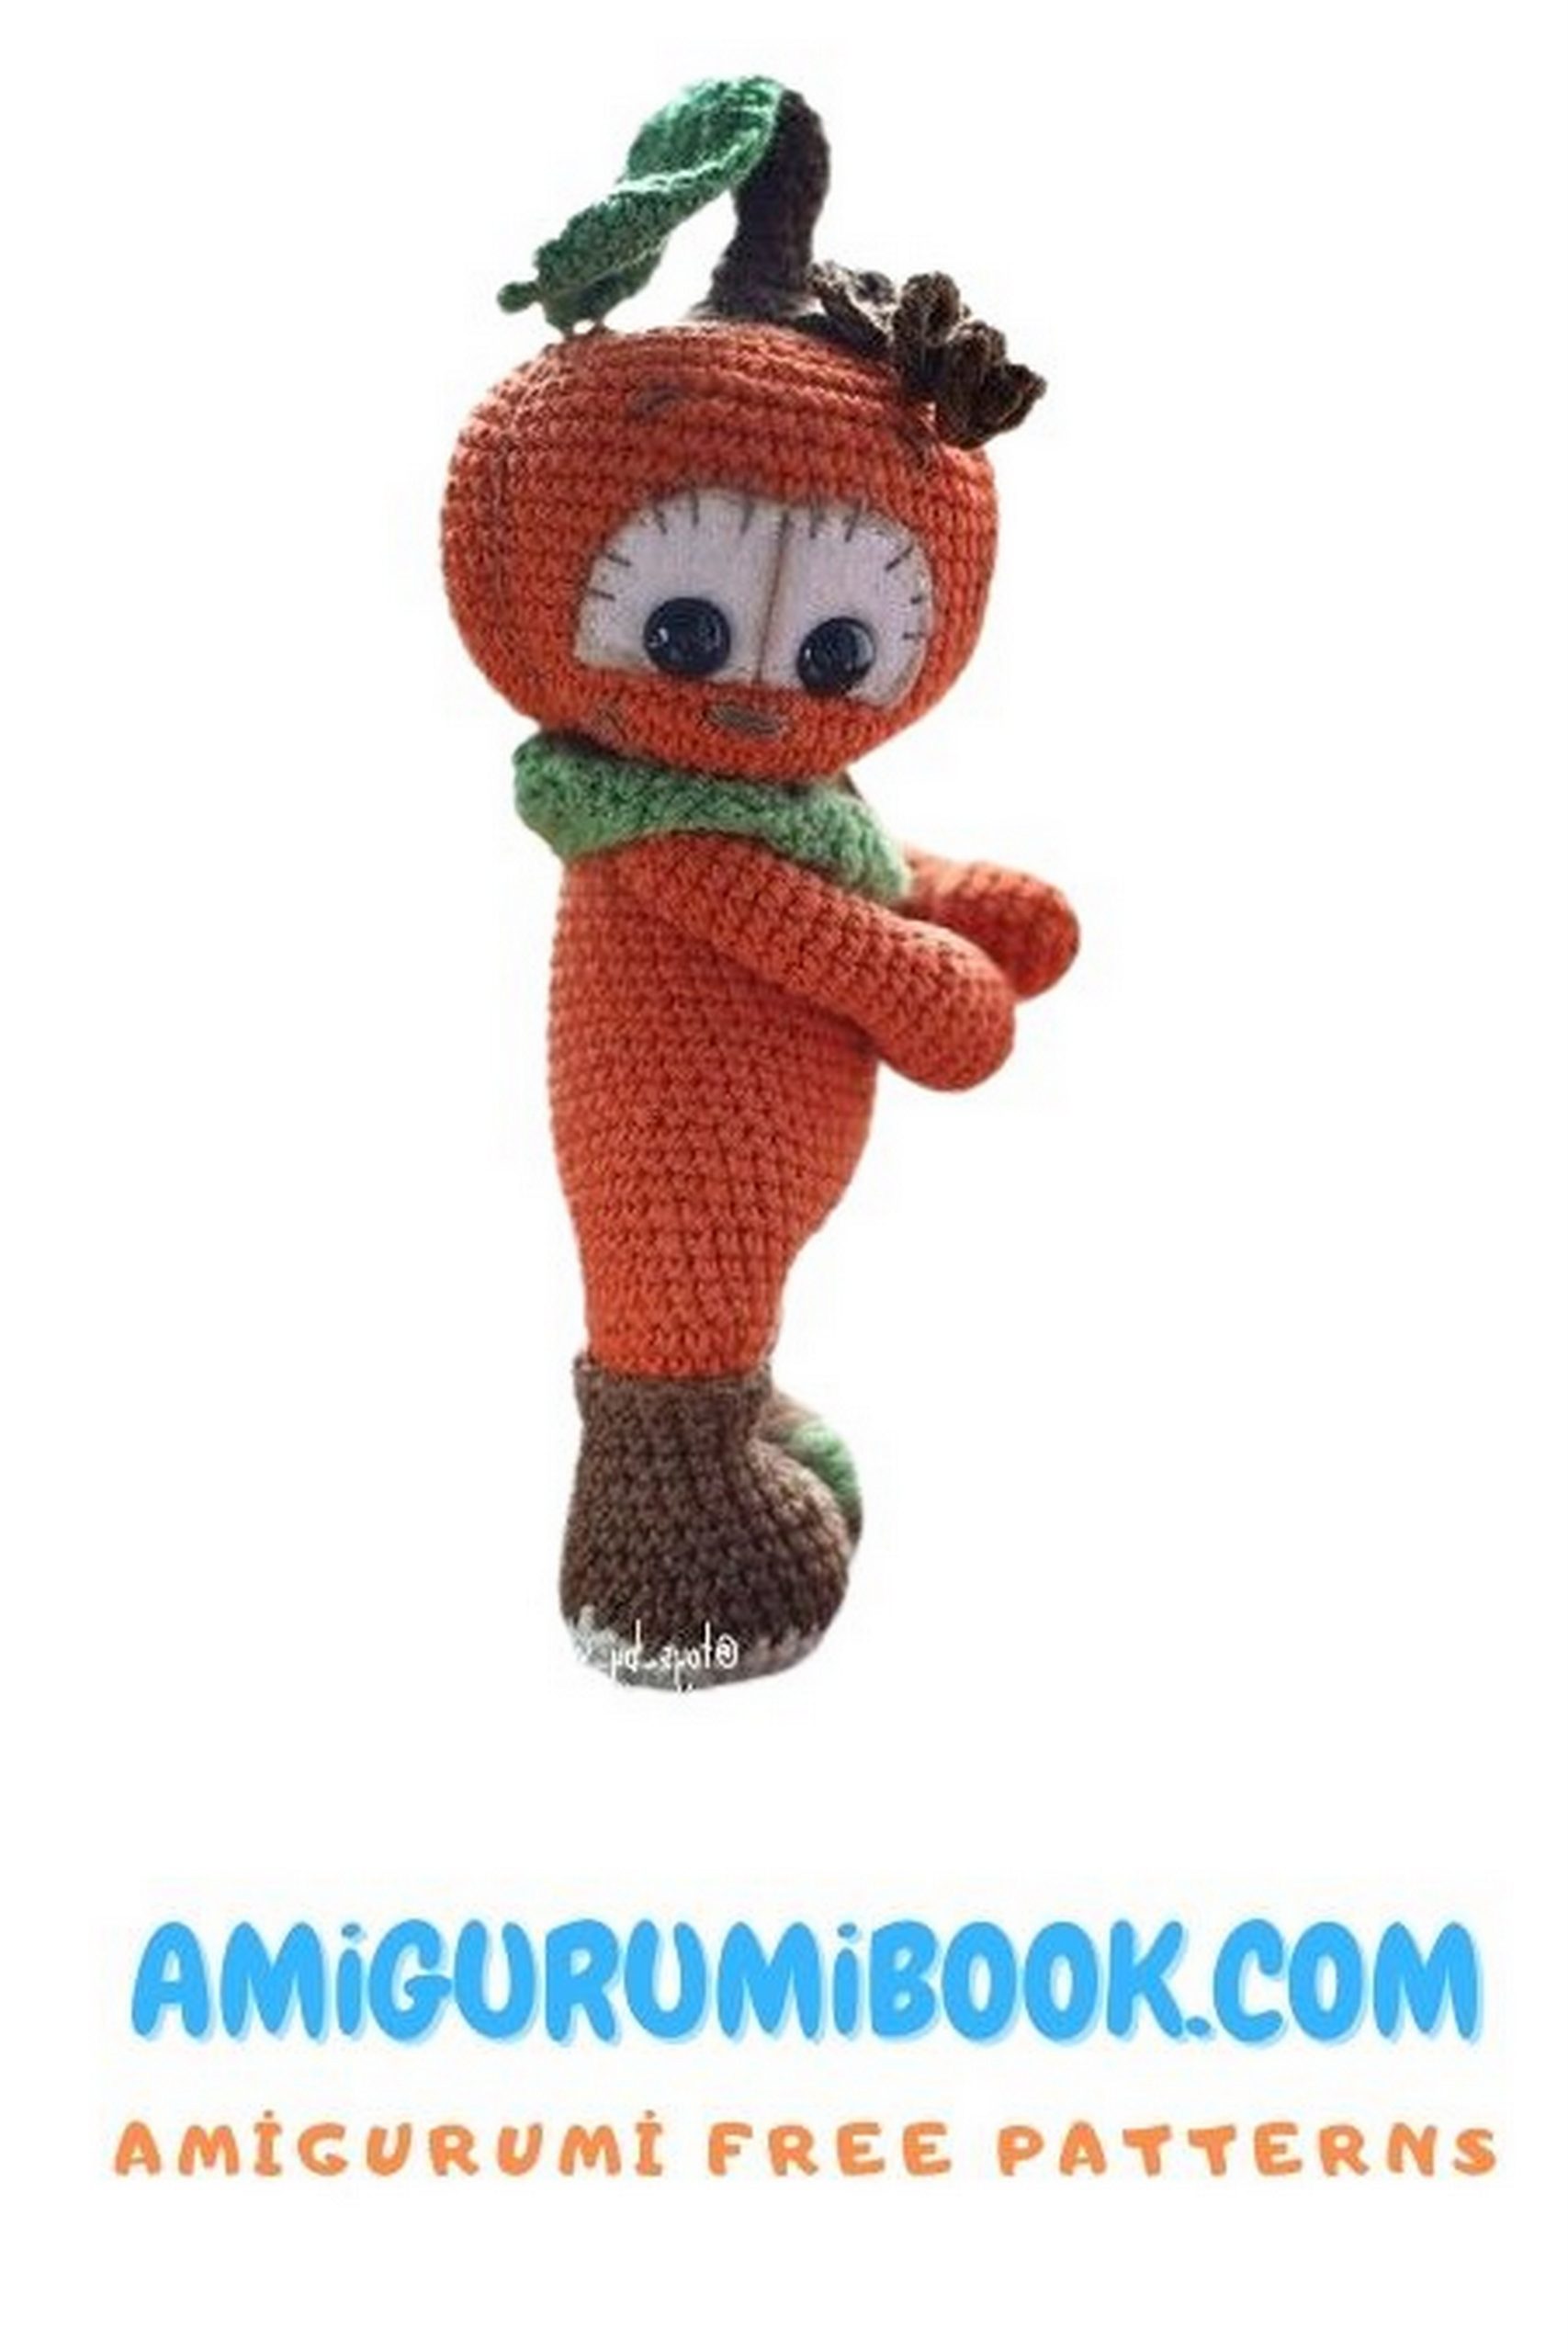
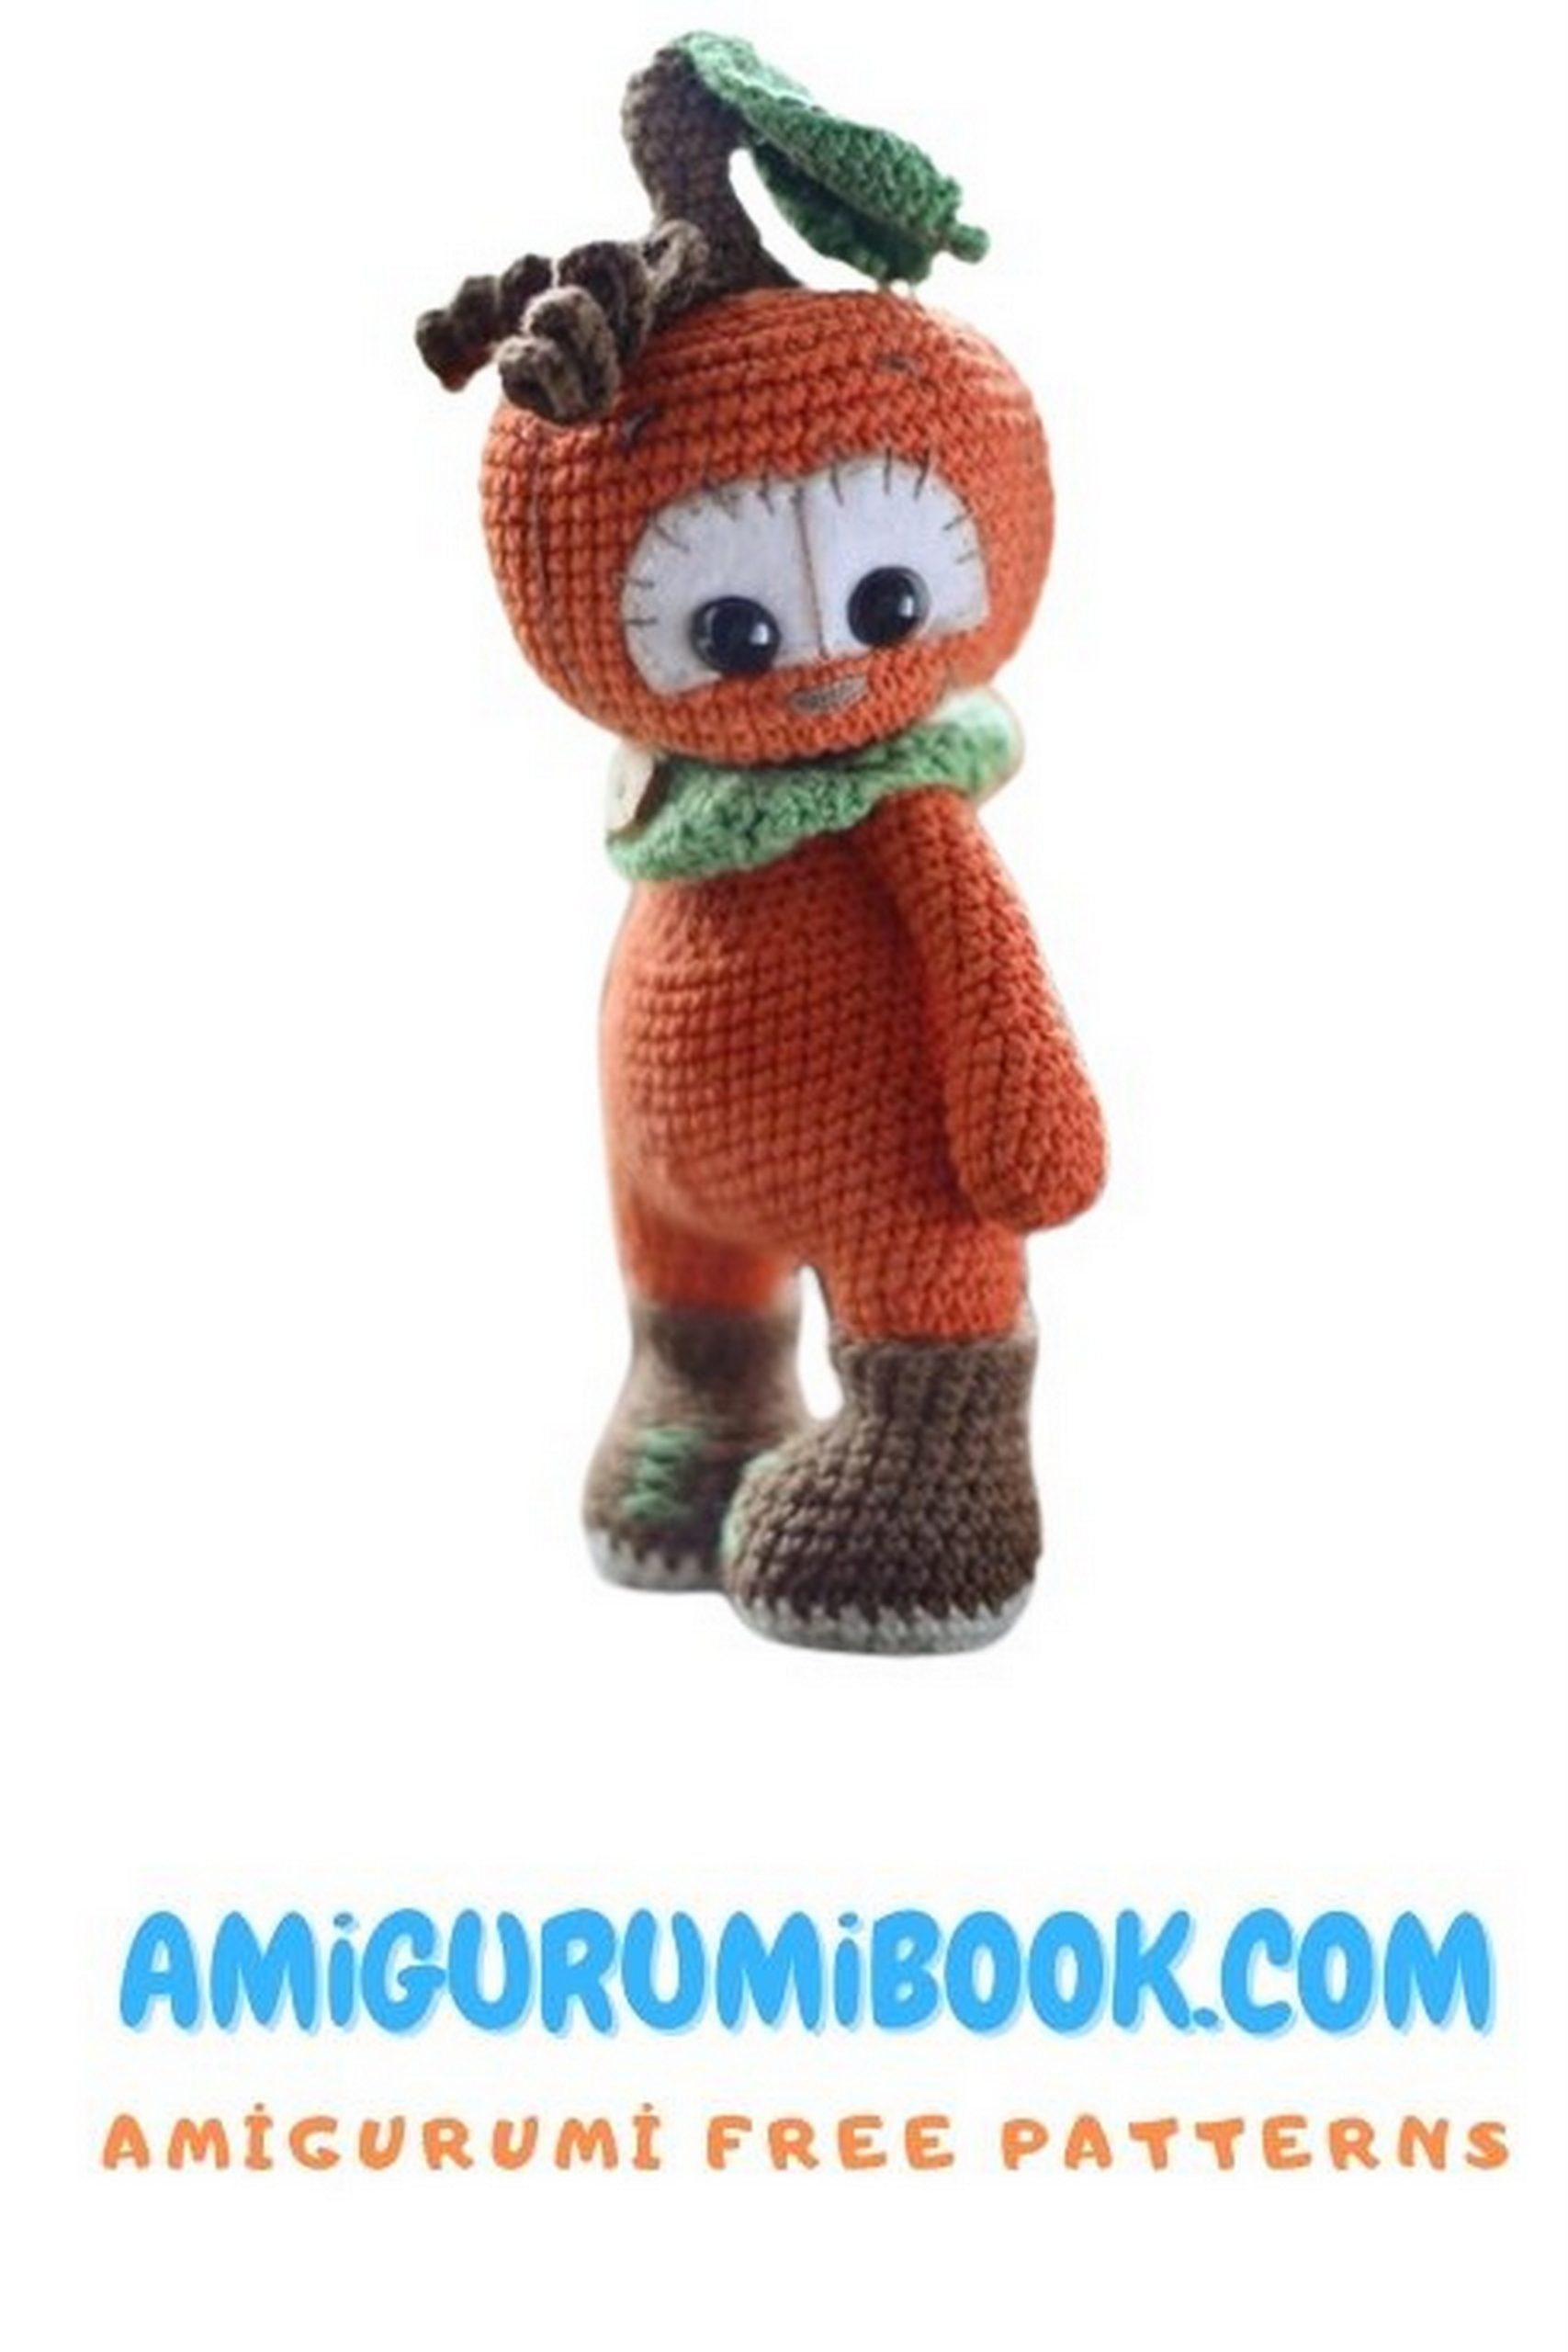
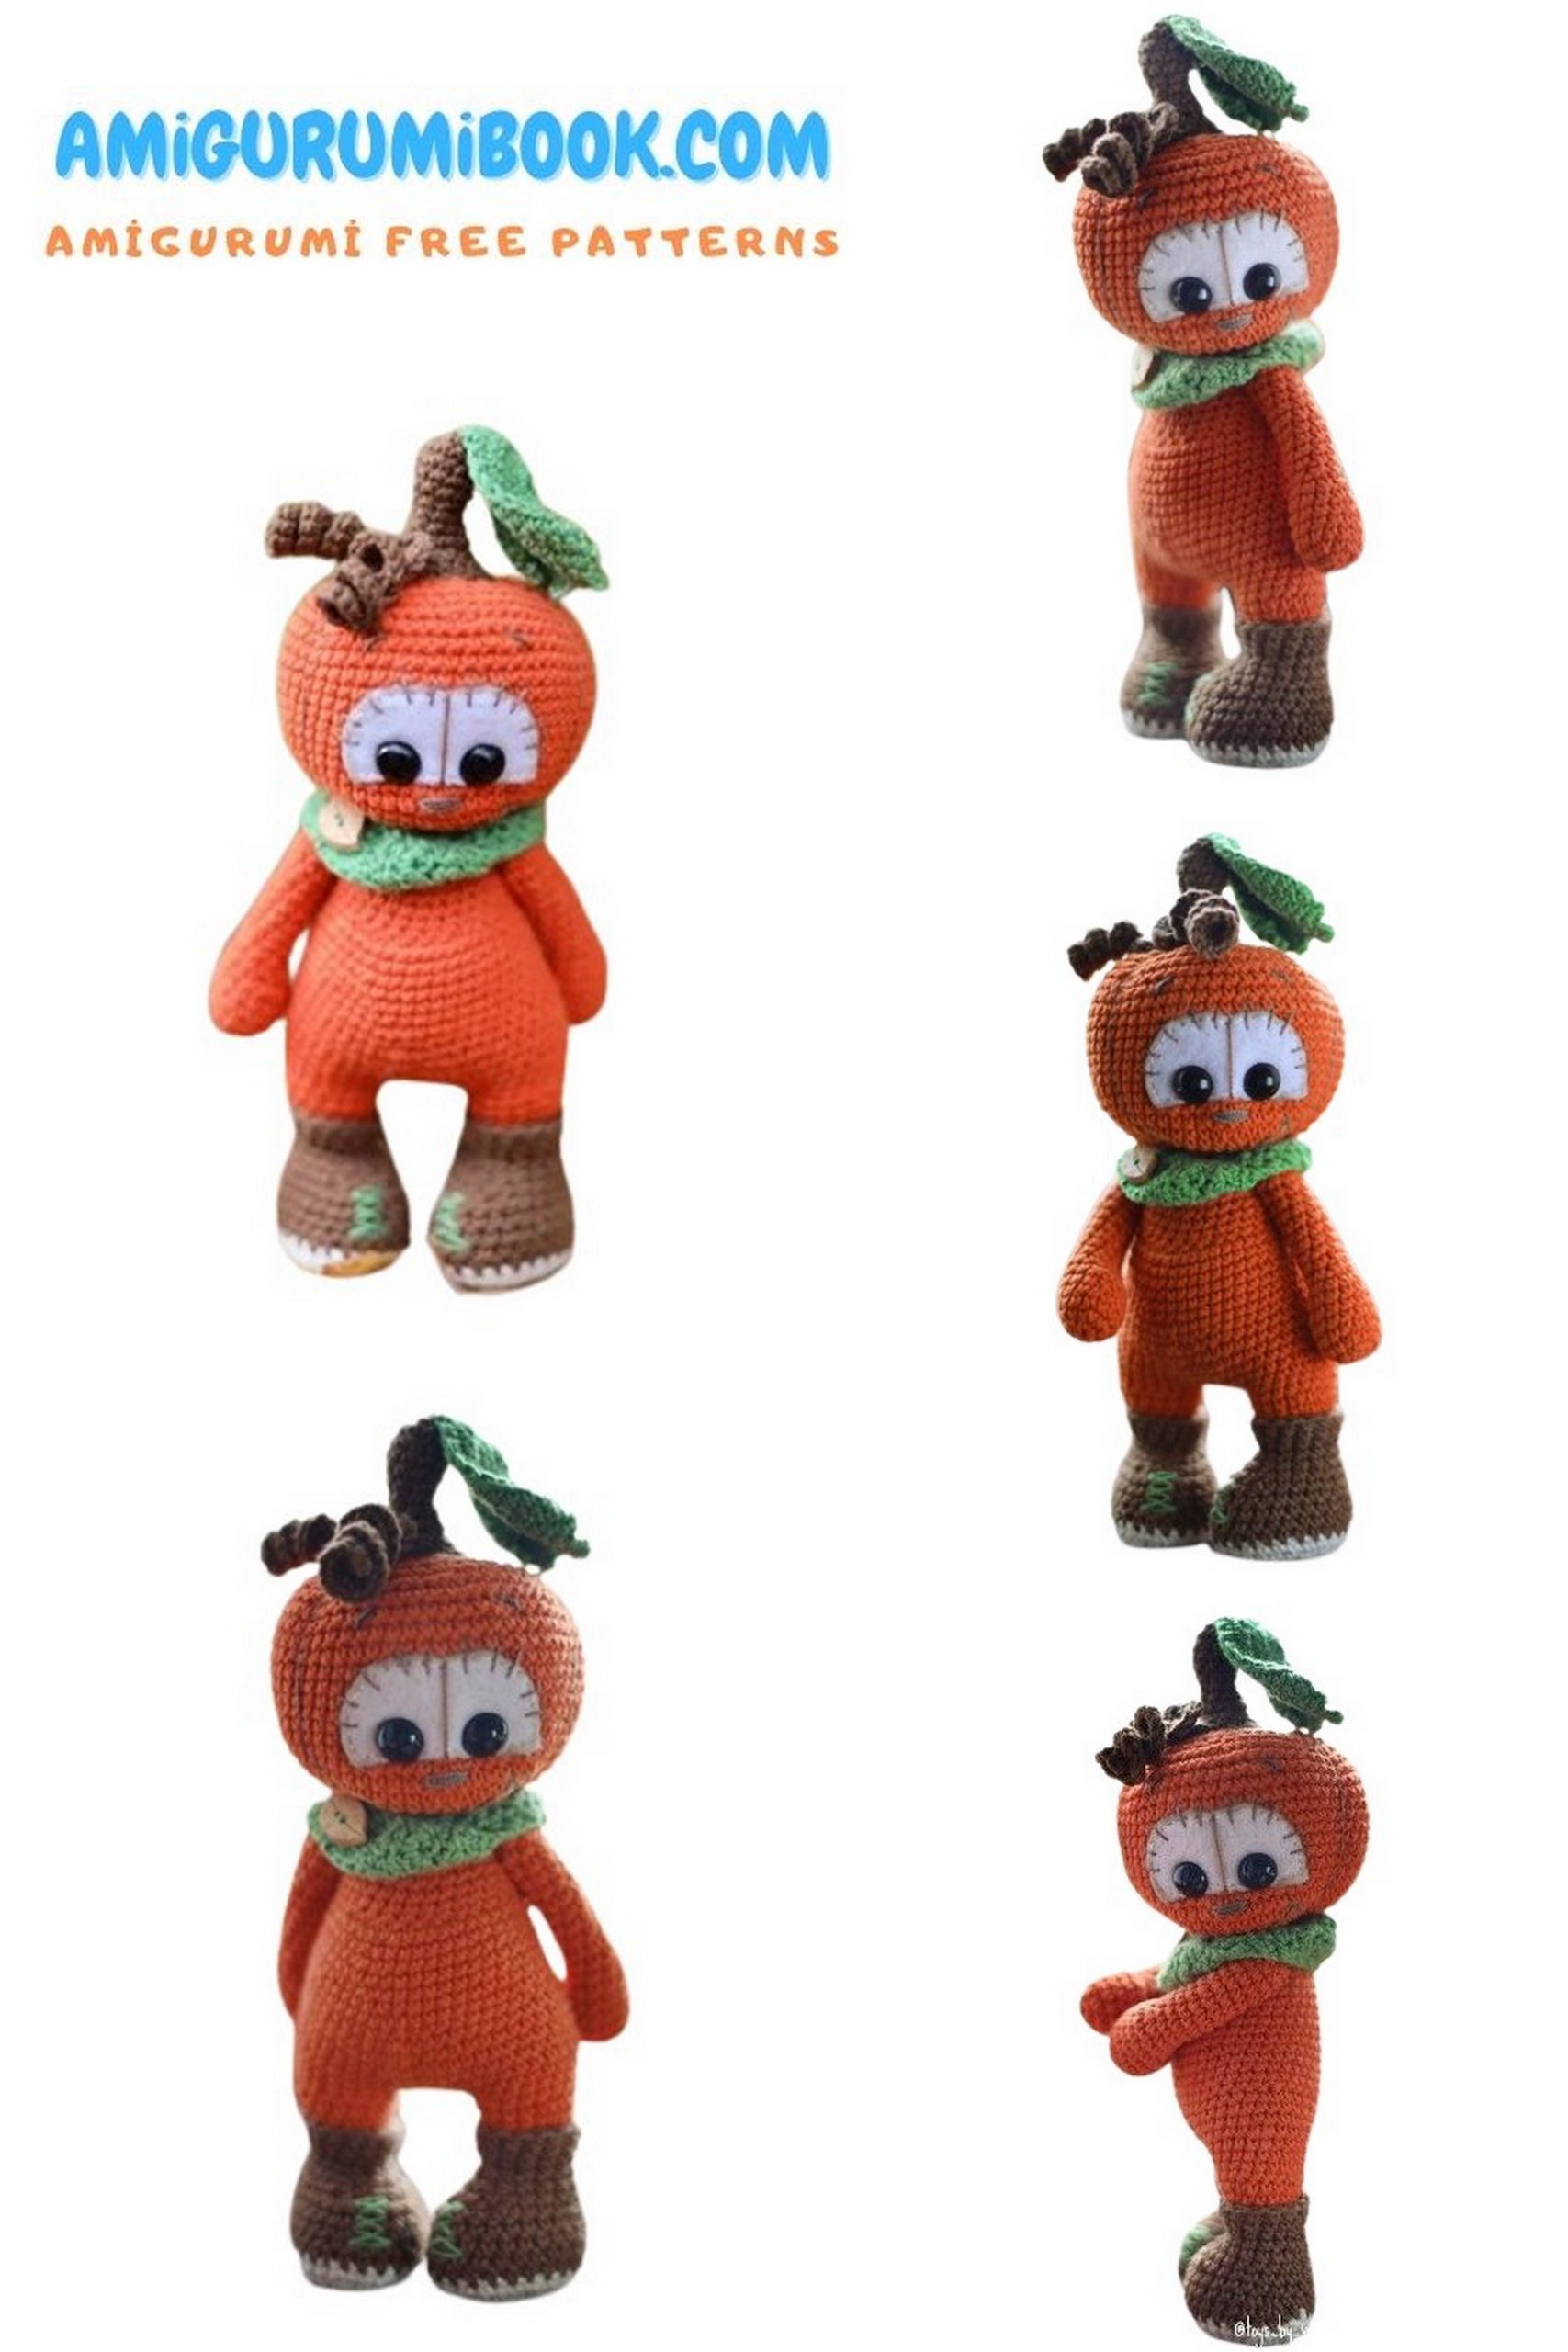
Get ready to add a touch of spooky charm to your Halloween decorations with this free pumpkin amigurumi pattern. Perfect for crochet enthusiasts of all levels, this fun and festive project brings a playful twist to traditional autumn crafts. free crochet patterns
You may also like more amigurumi patterns.
Are you ready to add a dose of handmade charm to your Halloween decorations this year? Look no further than our free Halloween Pumpkin Amigurumi pattern! Whether you’re an experienced crocheter or just starting out, this fun and festive project is perfect for getting into the Halloween spirit.
Creating Your Halloween Pumpkin Amigurumi
Our step-by-step crochet pattern will guide you through the process of making an adorable pumpkin amigurumi. These little crochet pumpkins make fantastic decorations for your home, office, or even as gifts for friends and family who love the spookiest holiday of the year.
List of Materials Used:
YARNART JEANS (55% Cotton 45% Acrylic, 50g, 160m)
Color Оз for the sole
Color 40 for the boots
Color 85 for the toy (half a skein)
GAZZAL BABY COTTON (60% Cotton, 40% Acrylic, 50g, 165m)
Color 3449 for the scarf and leaves
Crochet Hook 1.75 mm (I use Clover)
Cotter pins: T-pins (Size 2×20) – 3 pieces
Disks: 12mm, 4 pieces for the handles, 18mm – 1 piece for the body, 22mm – 1 piece for attaching the head
Round-nose pliers (flat-nose pliers)
Filling (Swan down, holofiber)
Toy eyes with a diameter of 10-12mm
Felt for the face
Thin plastic (for insoles)
Yarn similar to Iris or Mouline for decorating the face
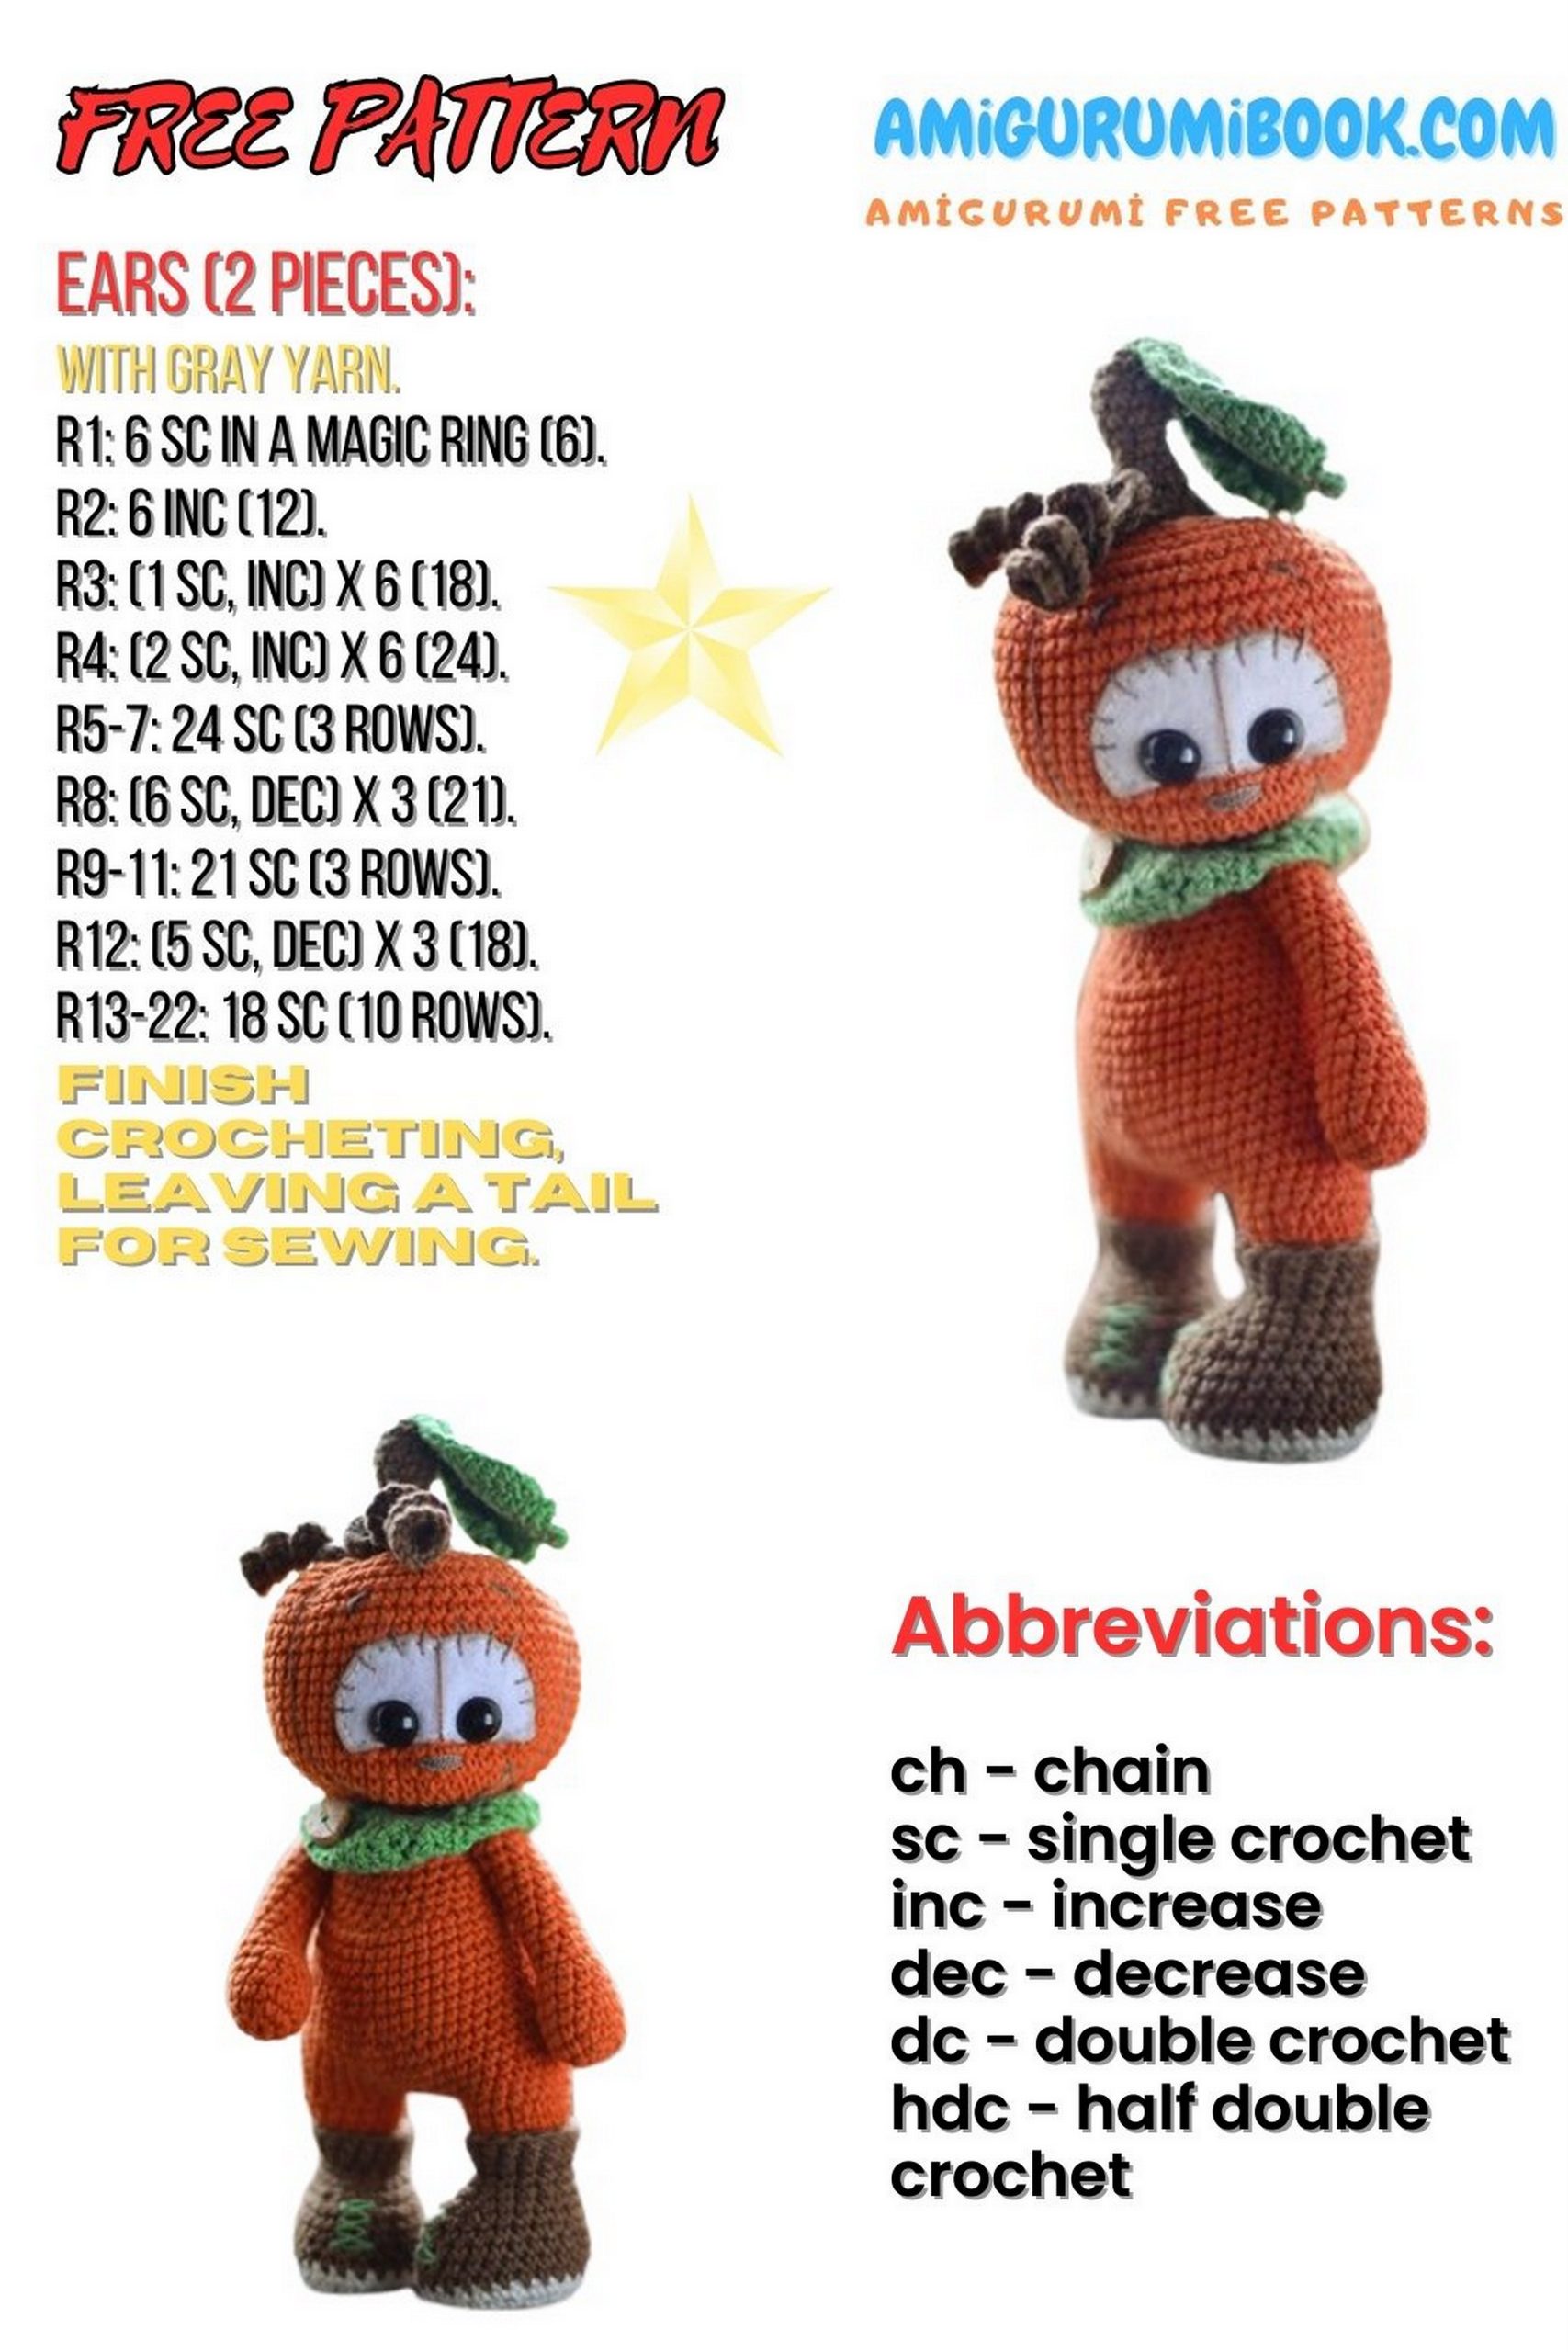
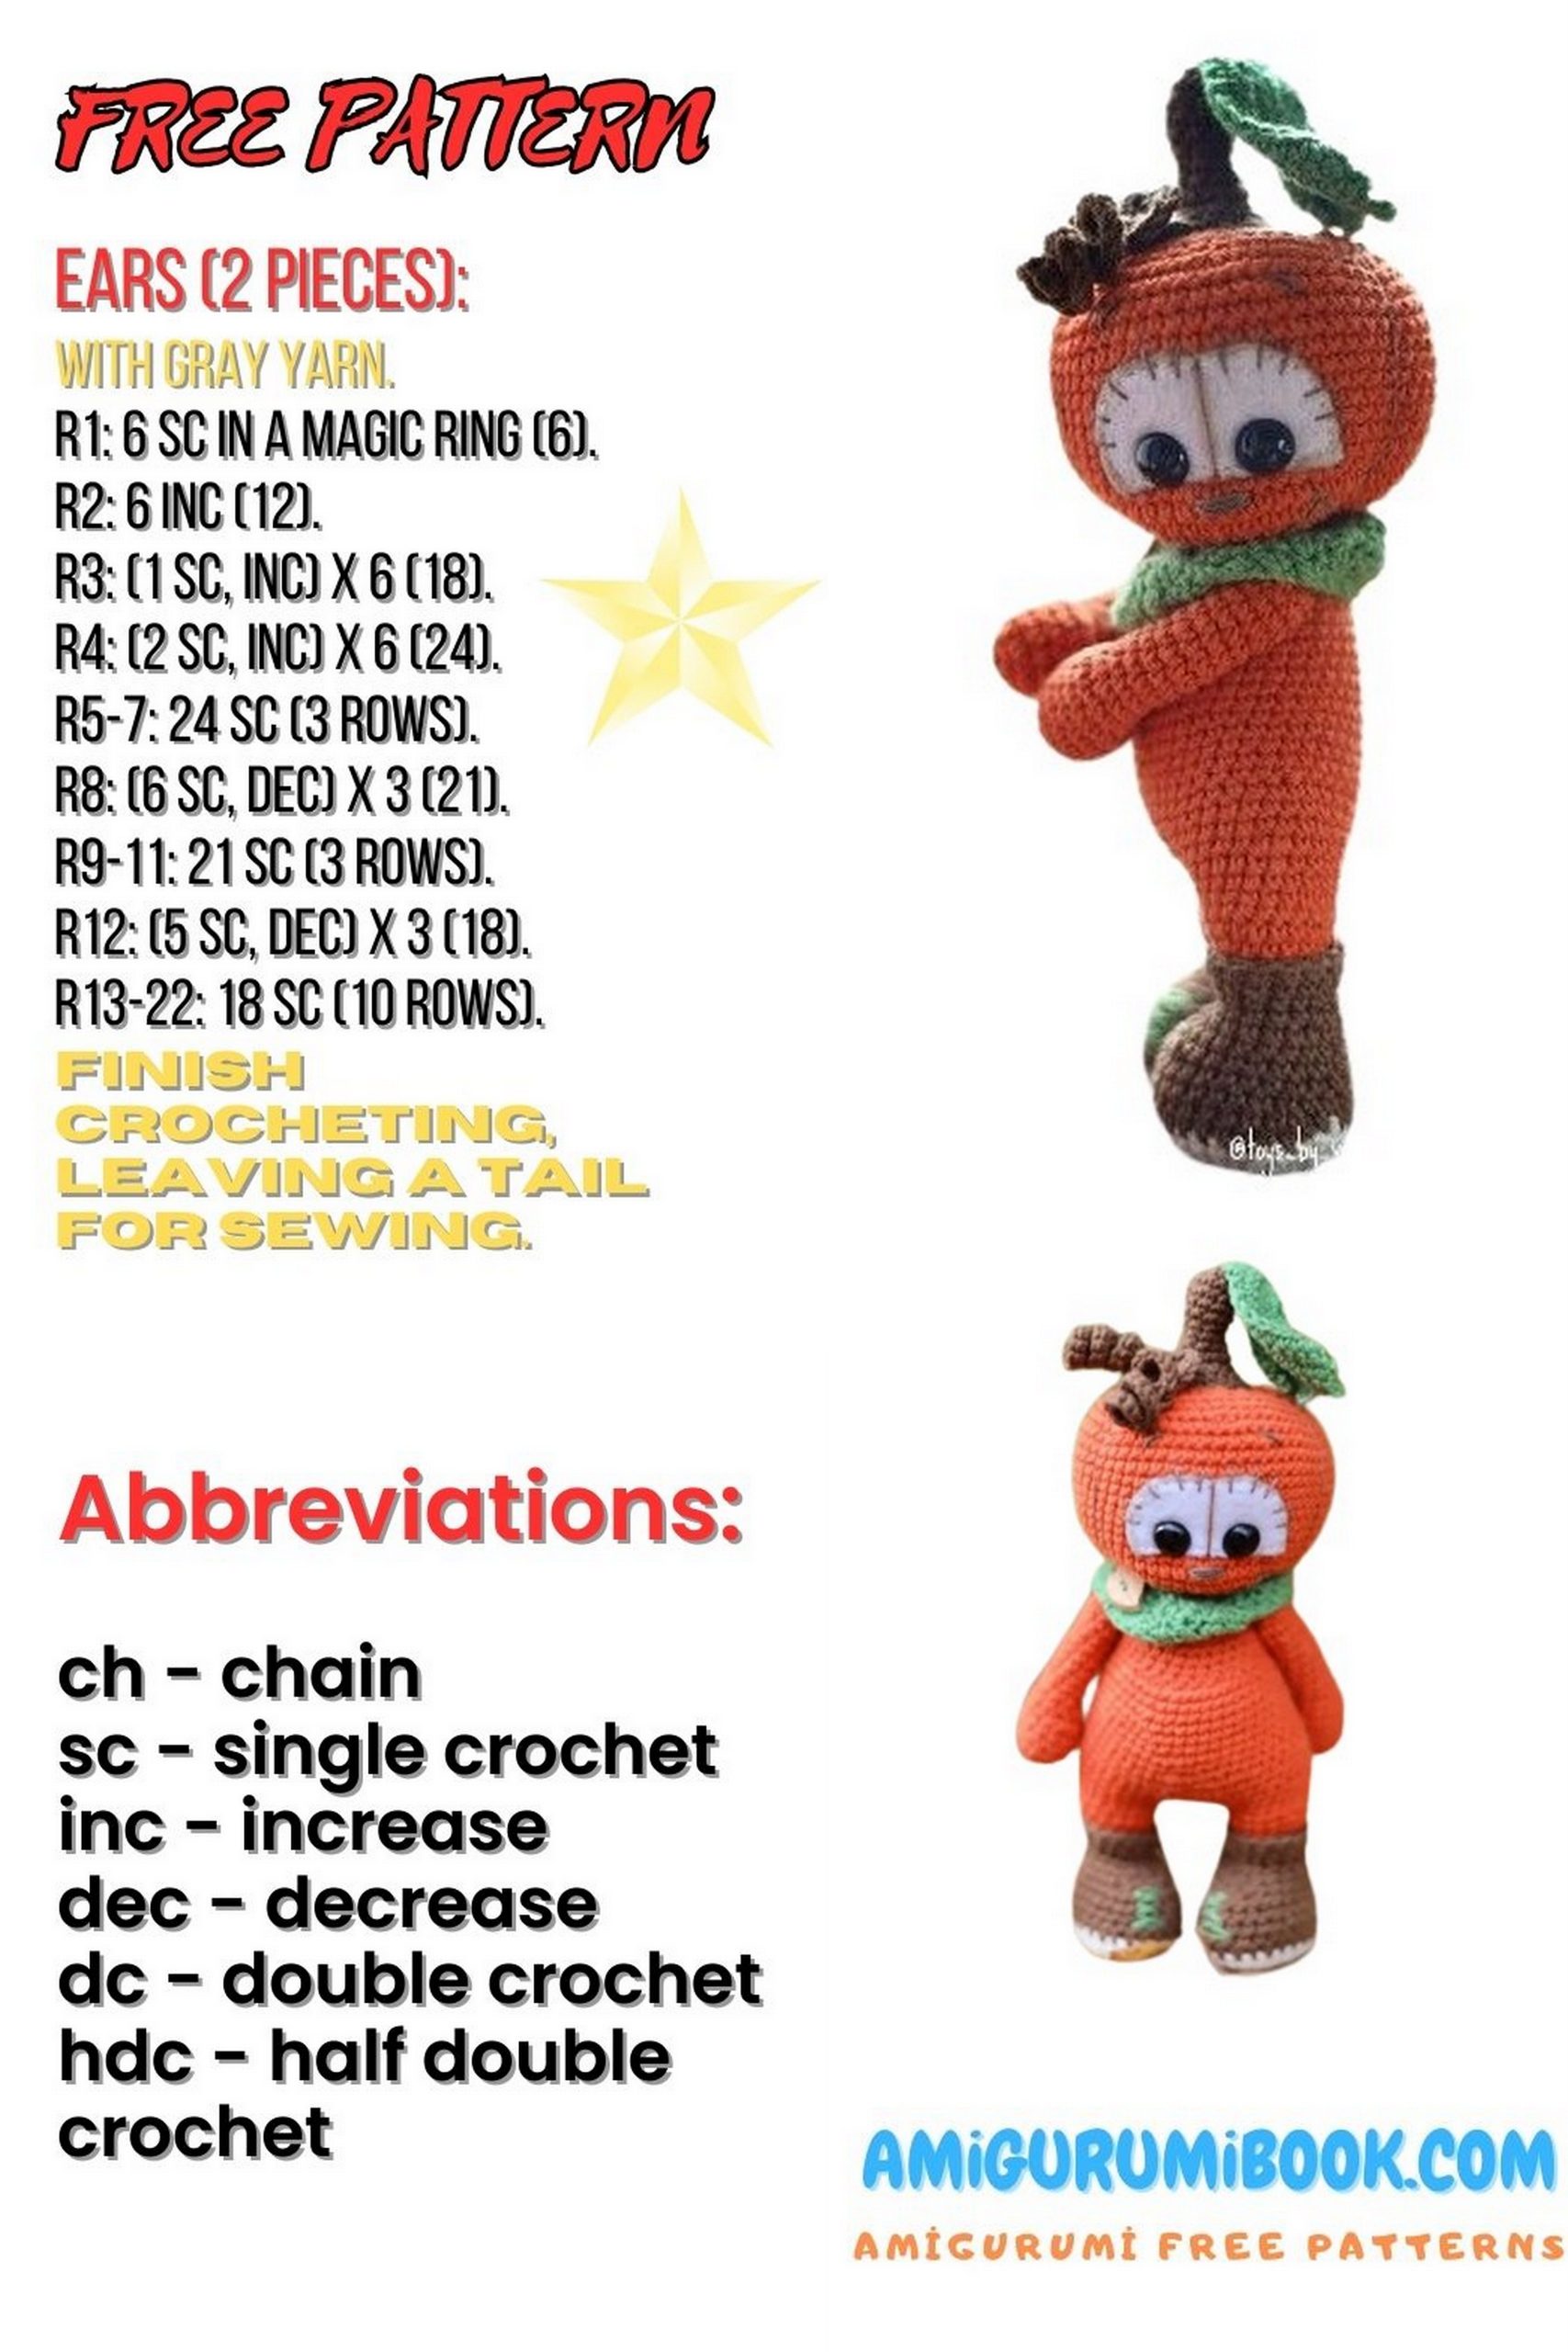
Abbreviations:
MR – Magic Ring (Amigurumi ring)
INC – Increase
DEC – Decrease
CH – Chain
SC – Single Crochet
SS – Slip Stitch
HDC – Half Double Crochet
DC – Double Crochet
TC – Triple Crochet
(SC, INC) * N – Repeat N times (Single Crochet, Increase)
FLO – Front Loops Only
BLO – Back Loops Only
FO – Finish Off
Notes:
All crochet stitches are in US terms.
Work in continuous rounds; do not join or turn unless stated otherwise.
Use a stitch marker (thread or a safety pin) to mark the last stitch of each round and the first stitch of the next round.
To move the marker where indicated in the pattern, align the round with a slip stitch.
Shifting stitches are not specified in the description and are not included in the total number of SC.
PATTERN

Handles:
Round 1: MR, 6 SC (6)
Round 2: INC in each stitch around (12)
Round 3: (SC, INC) * 3 (15)
Round 4-6: 15 SC (15)
Round 7: 5 SC, DEC, 4 SC (12)
Round 8: (4 SC, DEC) * 2 (10)
Round 9-18: 10 SC (10)
Stuff the handle lightly. Insert cotter pin attachment in Round 16.
Round 19: 5 DEC (5)
Legs (Starting with Boots):
Round 1: 5 CH, starting from the second stitch from the hook, 1 SC in the next CH, turn the work and continue on the other side of the chain, 2 SC, INC (10)
Round 2: INC, 2 SC, INC, 2 SC, INC, 2 SC, INC (16)
Round 3: SC, INC, SC, (INC, SC) * 3, SC, (INC, SC) * 2 (22)
Round 4: (10 SC, INC) * 2 (24)
Round 5: 24 SC (24)
Cut the yarn.
Cut insoles from plastic, approximately the size of the piece up to Row 3 or 4.
Boot (with a marker at the center of the heel):
Round 1: 5 CH, starting from the second stitch from the hook, 1 SC in the next CH, turn the work and continue on the other side of the chain, 2 SC, INC (10)
Round 2: INC, 2 SC, INC, 2 SC, INC, 2 SC, INC (16)
Round 3: SC, INC, SC, (INC, SC) * 3, SC, (INC, SC) * 2 (22)
Round 4: (10 SC, INC) * 2 (24)
Round 5: 24 SC (24)
Do not cut the yarn. Continue crocheting. Place the insole between the dark and light parts and continue crocheting through both parts simultaneously (in the dark part from the bottom, crocheting clockwise).
Round 6-10: 24 SC (24)
Round 11: 8 SC, 4 DEC, 8 SC (20)
Round 12: 8 SC, 2 DEC, 8 SC (18)
Round 13: 7 SC, 2 DEC, 7 SC (16)
Round 14: 16 SC (16)
Slip stitch in BLO.
Round 15-16: 16 SC (16)
Secure and cut the yarn. Stuff the boots.
Join to the back loops of the 14th round where indicated in the pattern. Use the main color yarn.
Round 17: 16 SC (16)
Then crochet in both loops as usual.
Round 18: 16 SC (16)
Round 19: 10 SC, INC, 5 SC (17)
Round 20: 11 SC, INC, 5 SC (18)
Round 21: 11 SC, INC, 6 SC (19)
Round 22: 5 SC, SS, Secure and cut the yarn.**
Crochet the second leg following the same instructions up to Round 19.
Round 19: 5 SC, INC, 10 SC (17)
Round 20: 5 SC, INC, 11 SC (18)
Round 21: 6 SC, INC, 11 SC (19)
Round 22: 12 SC, SS**
Do not cut the yarn. We will now join the legs and crochet the body, stuffing as we go.
Round 23: Chain 6, slip stitch into the corresponding stitch of the first leg to join them, 19 SC on the first leg, 6 SC (the chains), 19 SC on the second leg, 6 SC (50)
Move the marker to the end of the round and align the front to the center.
Body:
Round 24-29: 50 SC (50)
Round 30: (23 SC, INC) * 2 (48)
Round 31: 48 SC (48)
Round 32: (22 SC, INC) * 2 (46)
Round 33: 46 SC (46)
Round 34: (21 SC, INC) * 2 (44)
Round 35: (2 SC, INC) * 2 (42)
Round 36: 42 SC (42)
Round 37: 18 SC, move the marker (center of the back)
Round 38: 15 SC, 6 INC, 15 SC (36)
Round 39-41: 36 SC (36)
In Round 41, you can place an additional marker at the end of the round (in this round, attach the handles).
Round 42: (4 SC, INC) * 6 (30)
Round 43-44: 30 SC (30)
Round 45: (2 SC, INC) * 6 (24)
Install the handles.
Round 46: 24 SC (24)
Round 47: (2 SC, INC) * 6 (18)
Round 48: 18 SC, install cotter pin with a disk
Round 49: (SC, INC) * 6 (12)
Round 50: 6 INC (6)
Head:
1 Row: 6 SC in a magic ring (6)
2 Row: 6 INC (12 SC)
3 Row: (SC, INC) * 6 (18 SC)
4 Row: (2 SC, INC) * 6 (24 SC)
5 Row: (3 SC, INC) * 6 (30 SC)
6 Row: (4 SC, INC) * 6 (36 SC)
7 Row: (5 SC, INC) * 6 (42 SC)
8 Row: (6 SC, INC) * 6 (48 SC)
9 Row: (7 SC, INC) * 6 (54 SC)
10 Row: (8 SC, INC) * 6 (60 SC)
11 Row: 20 Row: 60 SC
Attach the head and stuff it as you crochet.
21 Row: (8 SC, DEC) * 6 (54 SC)
22 Row: (7 SC, DEC) * 6 (48 SC)
23 Row: (6 SC, DEC) * 6 (42 SC)
24 Row: (5 SC, DEC) * 6 (36 SC)
25 Row: (4 SC, DEC) * 6 (30 SC)
26 Row: (3 SC, DEC) * 6 (24 SC)
27 Row: (2 SC, DEC) * 6 (18 SC)
28 Row: (SC, DEC) * 6 (12 SC)
29 Row: 6 DEC (6)
Tail:
1 Row: 6 SC in a magic ring (6)
2 Row: 6 INC (12 SC)
3 Row: 12 SC
4 Row: 12 SC
5 Row: (4 SC, DEC) * 2 (10 SC)
6 Row: 7 Row: 10 SC
8 Row: (4 SC, INC) * 2 (12 SC)
9 Row: (3 SC, INC) * 3 (15 SC)
10 Row: 15 SC in the back loops only
11 Row: (4 SC, INC) * 3 (18 SC)
12 Row: 5 SC, make 21 CH, skip 2 CH, 2 HDC in the next CH, 1 SC, make 26 CH, skip 2 CH, 25 HDC in the next CH, 12 SC. Stuff lightly.
Muzzle:
Cut out of felt or crochet with a cream-colored yarn (in rows, making increases).
1 Row: 6 SC in a magic ring (6)
2 Row: 6 INC (12 SC)
3 Row: (SC, INC) * 6 (18 SC)
4 Row: 18 SC
5 Row: 1 SC, 2 HDC, 1 DC, 2 TR, 1 DC, 2 HDC, 1 SC, 2 HDC, 1 DC, 2 TR, 1 DC, 2 HDC, 1 SC. Fasten off with a SC around the bottom edge.
Leaf:
Crochet in rows, making increases.
1 Row: Chain 14, starting from the second chain from the hook, 12 SC, 6 SC in 1, continue on the other side of the chain, 9 SC, 1 Chain
2 Row: 11 SC, 2 SC in 1, 13 SC, 1 Chain
3 Row: 26 SC, 1 Chain
4 Row: 25 SC, 1 Chain
5 Row: 24 SC, 1 Chain
6 Row: 13 SC
Secure and cut the thread.
Assembly:
Divide the head into 4 equal parts by marking points on the head and close to the neck.
Thread a long needle with thread (dark brown Iris color) and insert it into the head, coming out as close to the neck as possible, leaving a long thread tail on the head. Insert the needle back into the head at the opposite point (exit at point 1, insert at point 2), and come out at the base of the neck. Do the same for the other two parts of the head. Do not pull the thread too tight, or the head will be too constricted.
After dividing the head, sew the tail to it, and attach the leaf to the tail.
Find a suitable position for the muzzle, mark the center and the lower part with pins. Tighten the eyes as follows:
Points 1 and 3 are located on the SC stitches to the left and right of the center of the future muzzle and 2 rows above its bottom.
Points 2 and 4 are 2 SC away from points 1 and 3.
Tighten diagonally by inserting the needle as close to the neck as possible and exiting at the base of the neck (exit at point 1, insert at point 2, and exit at the base of the neck).
Secure the muzzle with pins again, mark the tightening spots on it, and make holes for the eyes. You can glue or sew the muzzle in place. Glue the eyes. Embroider eyebrows, nose, smile, and stitches on the muzzle as desired to complete the face.
Scarf:
Make a chain of stitches that fits around the neck + 1-2 cm (e.g., 40 CH + 1 CH for turning).
1 Row: (SC, HDC) in the 1st CH, skip the next CH, repeat to the end of the row. Finish the row with HDC and 1 CH for turning.
2 Row: Skip SC, work (HDC, SC) in the HDC stitches, repeat to the end of the row. Finish the row with HDC and 1 CH for turning.
3 Row: (SC, HDC) in the HDC stitches, skip SC. Repeat to the end of the row. Finish the row with SC.
Repeat rows 2 and 3 until you reach the desired width of the scarf. Finish the last row with SC.
Once you’ve crocheted the scarf, sew it onto the toy. You can also embellish it with decorative buttons if desired.
I hope this helps you complete your amigurumi project! If you have any more questions or need further assistance, feel free to ask.