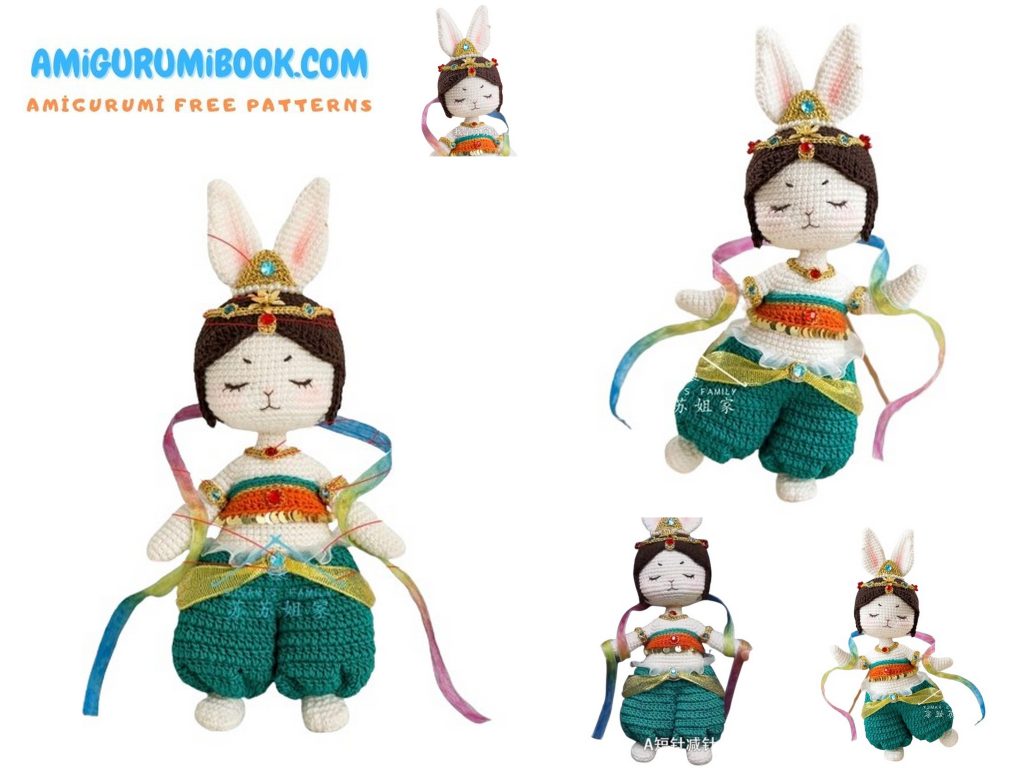
Discover the joy of creating your own adorable Jade Bunny with this free amigurumi crochet pattern. This easy-to-follow tutorial is perfect for beginners and crafters looking to add a charming handmade touch to their collection. free crochet patterns
You may also like more amigurumi patterns.
Welcome to our delightful world of crochet! If you’re on the hunt for a new project to spark your creativity, look no further than our free Jade Bunny Amigurumi pattern. Whether you’re an experienced crocheter or just starting out, this pattern is perfect for all skill levels.
Crafted with love and attention to detail, our Jade Bunny Amigurumi is a whimsical companion waiting to be brought to life by your hands. With our easy-to-follow instructions, you’ll embark on a crochet journey filled with joy and satisfaction as you watch your bunny take shape stitch by stitch.
Not only is this project a joy to make, but it also makes for a thoughtful and personalized gift for loved ones of all ages. So gather your crochet hooks and yarn, and let’s create something magical together. Get ready to crochet your way to happiness with our free Jade Bunny Amigurumi pattern!
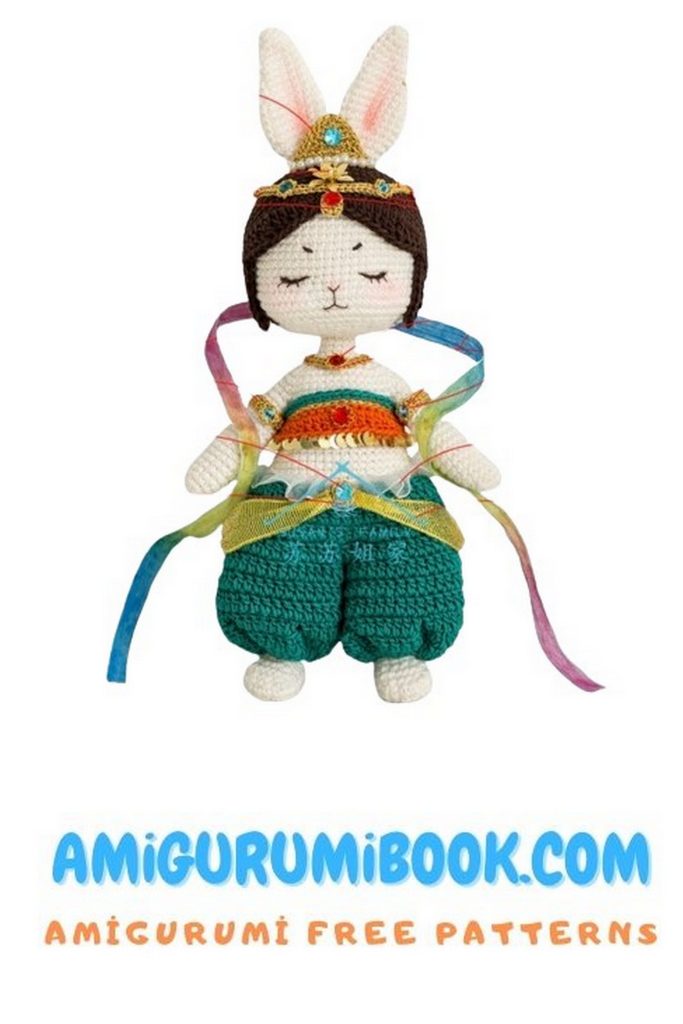
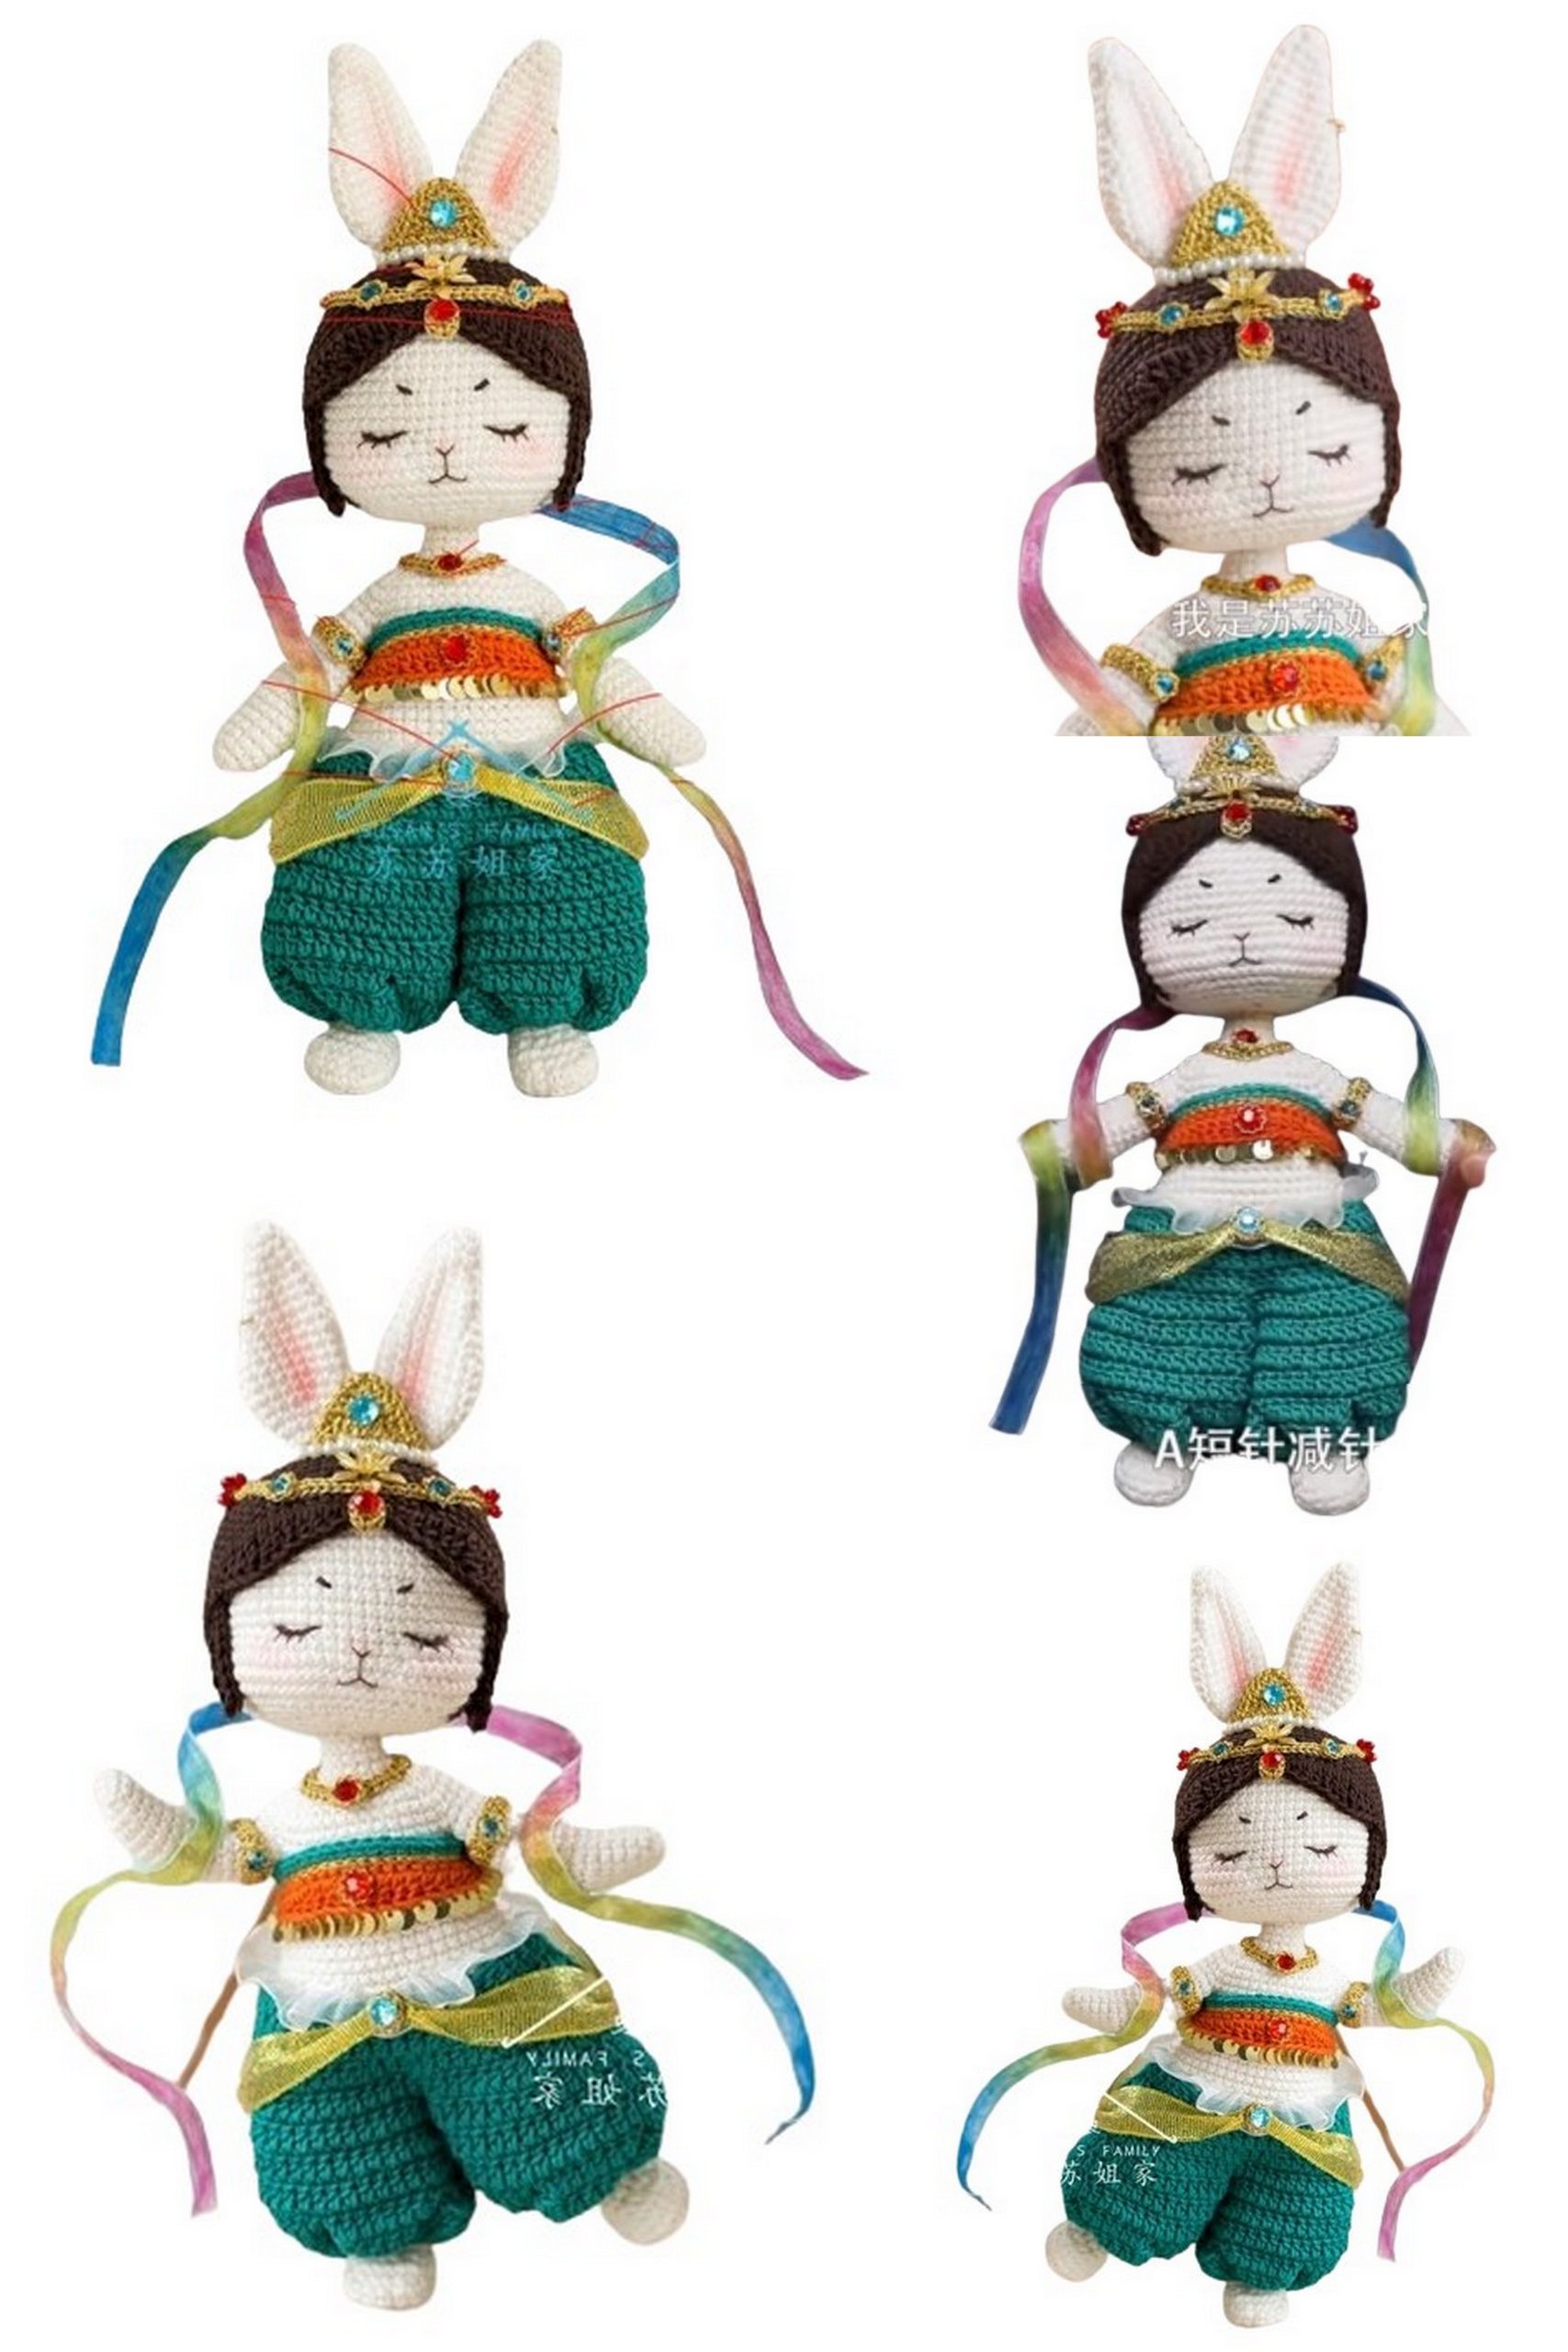
This doll consists of arms, body, head, facial features, clothing, tail, and accessories. Height is about 18 cm.
I have a suggestion for your amigurumi bunny collection. You may also like amigurumi overalls bunny.
If you want to access 1000+ free amigurumi patterns, you can download our application from this link!
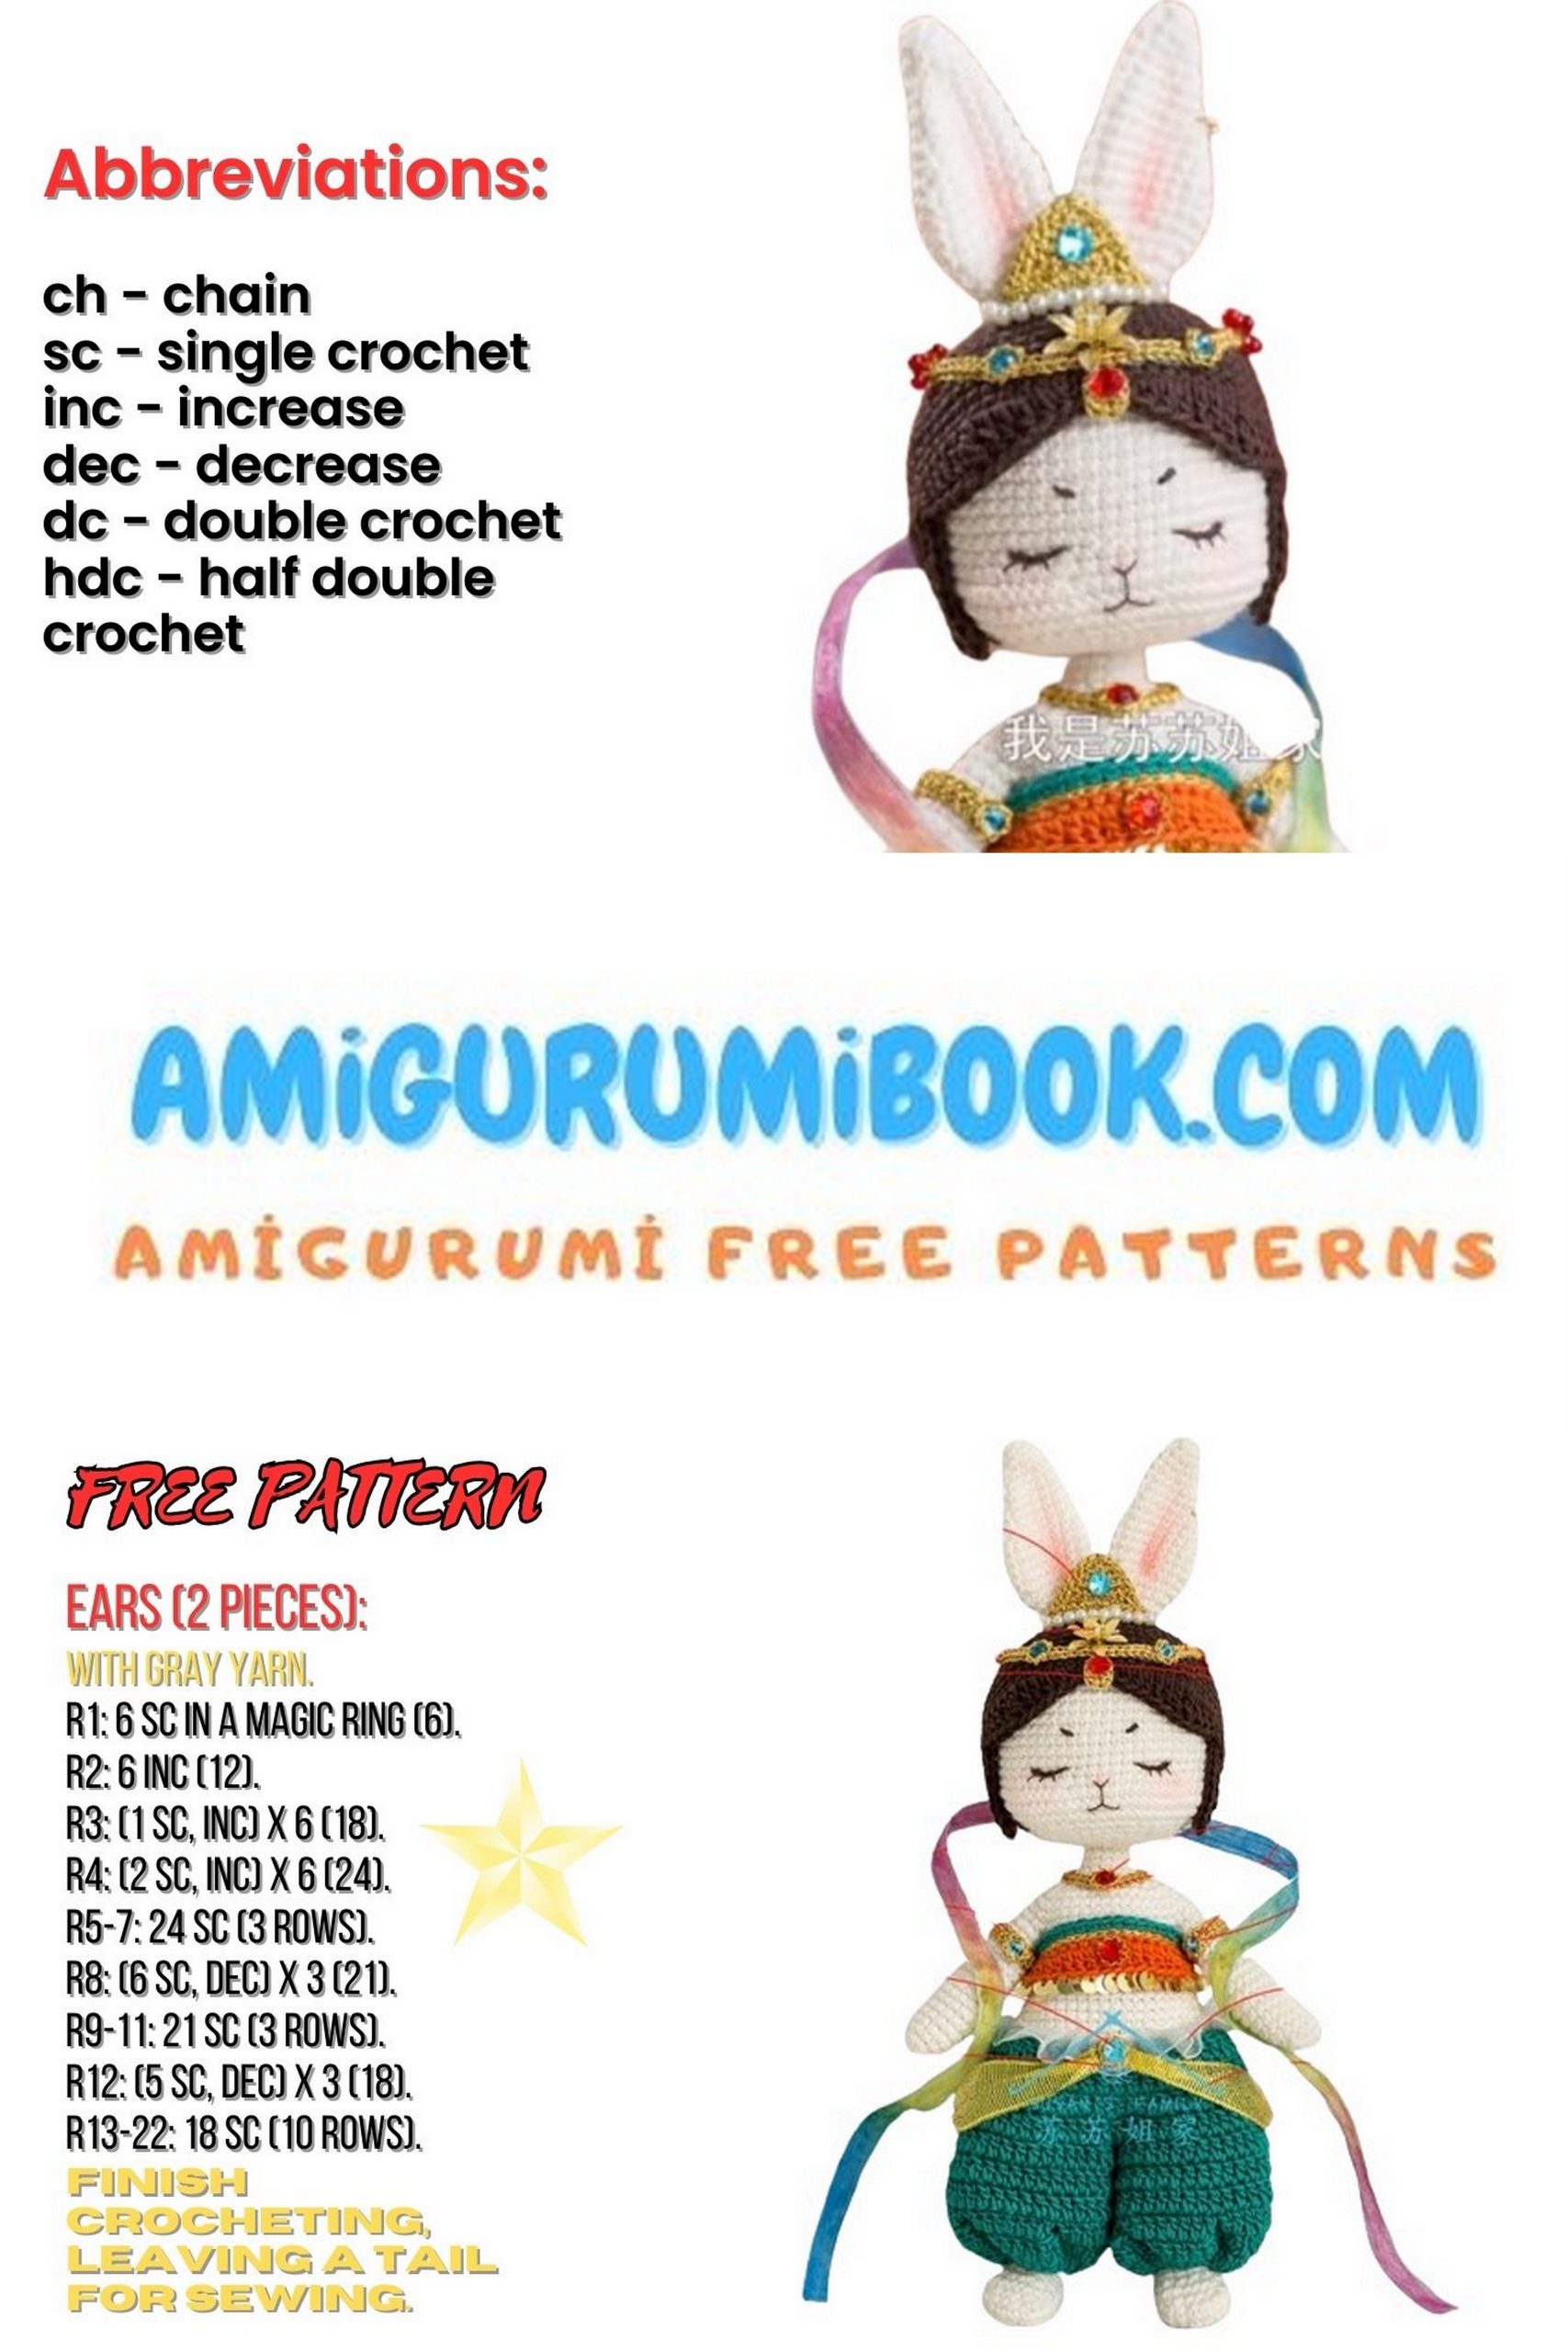
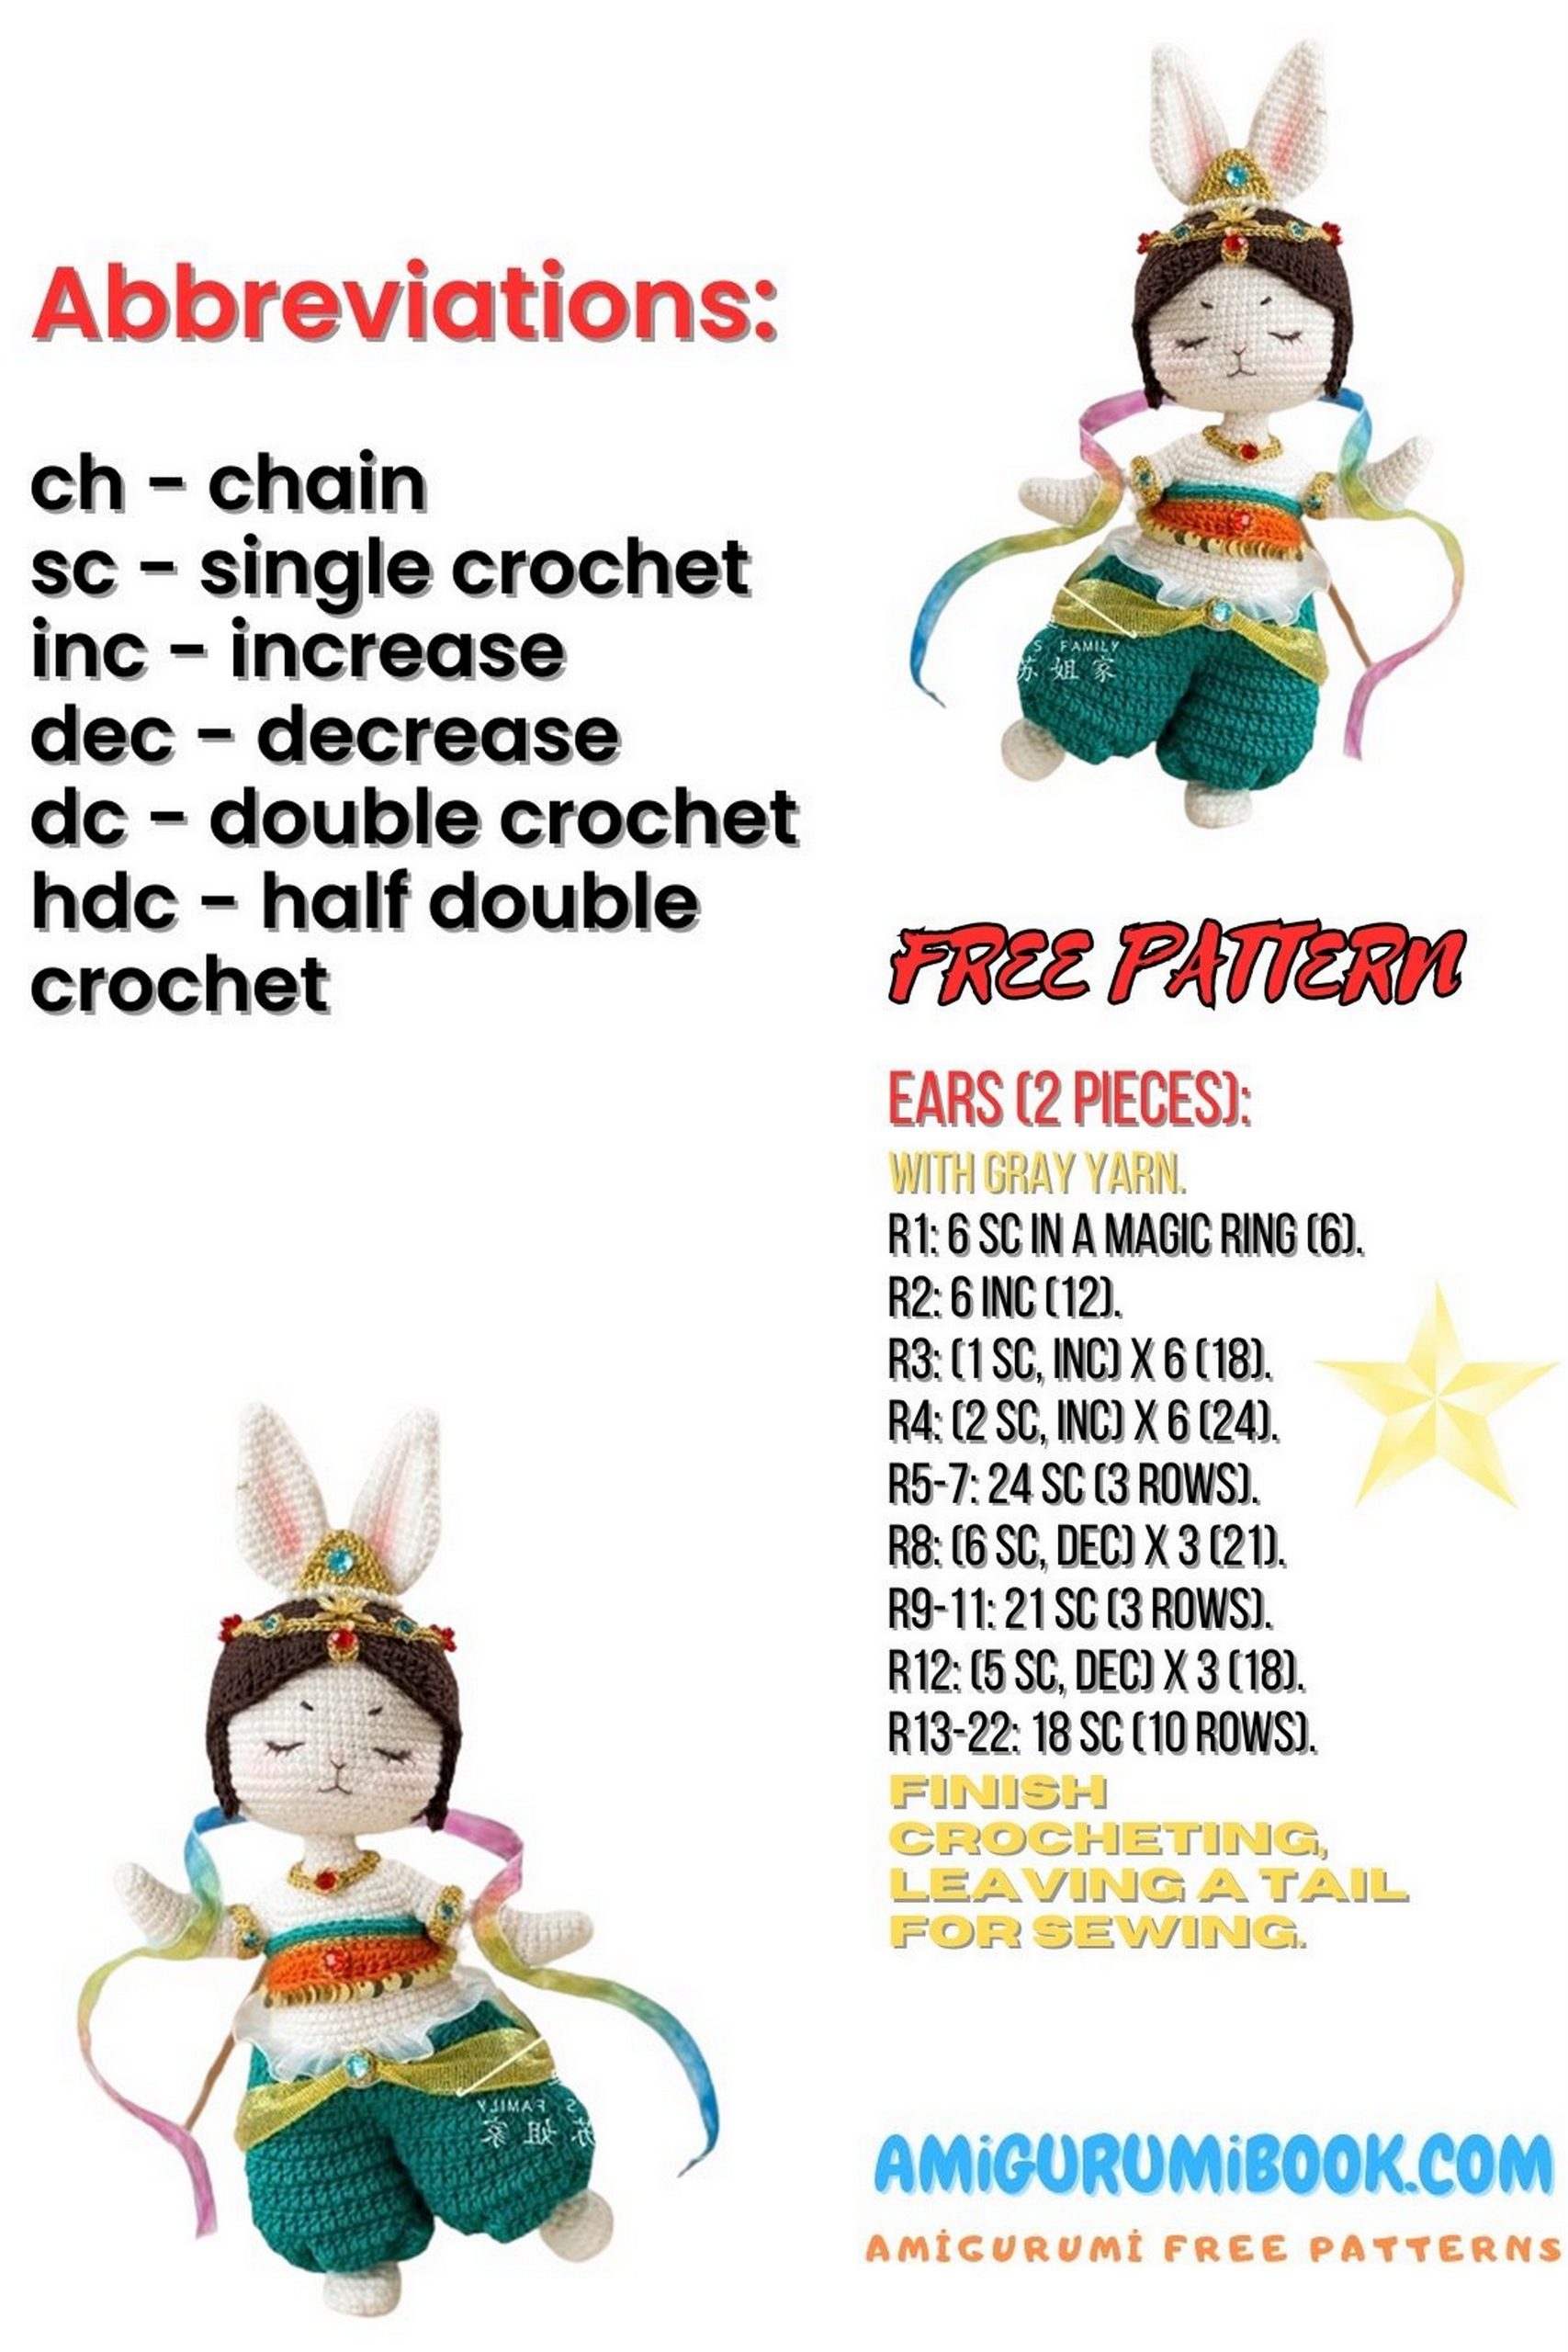
ABBREVIATIONS:
MR – magic ring
hdc – half double crochet
CH – chain
dc – double crochet
sl st – slip stitch
sc – single crochet
FLO – front loops only

PATTERN -Jade Bunny
PART 1, ARMS.
The arms are divided into left and right arms. Crochet in a spiral.
LEFT ARM.
1. 4 CH, from the 2nd loop from the hook: inc, sc, 3 sc in one loop, 2 sc (8)
2. (inc, 3 sc) ×2 (10)
3. 7 sc, inc, 3 sc (13)
4. 13 sc
5. 10 sc, inc, 2 sc (14)
6. 10 sc, inc, 3 sc (15)
7-9. 15 sc
10. 10 sc, dec, 3 sc (14)
11-15. 14 sc
16. sc, dec, 4 sc, dec, 5 sc (12)
17. 12 sc
Note: Leave about 10 cm of yarn and do not stuff the arms yet.
RIGHT ARM-Jade Bunny
1. 4 CH, from the 2nd loop from the hook: inc, sc, 3 sc in one loop, 2 sc (8)
2. 4 sc, inc, 2 sc, inc (10)
3. sc, 3 inc, 6 sc (13)
4. 13 sc
5. 3 sc, inc, 9 sc (14)
6. 4 sc, inc, 9 sc (15)
7-9. 15 sc
10. 4 sc, dec, 9 sc (14)
11-15. 14 sc
16. dec, 6 sc, dec, 4 sc (12)
17. 12 sc
Note: Leave about 10 cm of yarn and do not stuff the arms yet.

PART 2. LEGS.
First, you need to crochet the left and right legs, then join them to crochet the torso.
LEFT LEG.
1. 5 CH, from the 2nd loop from the hook: 3 sc, inc, 2 sc, inc (10)
2. inc, 2 sc, 3 inc, 2 sc, 2 inc (16)
3. sc, inc, 2 sc, (sc, inc) ×3, 2 sc, (sc, inc) ×2 (22)
4-5. 22 sc
6. skip 8 loops, 5 sc, 5 CH, return to the 7th loop, 7 sc, 7 CH, return to the 5th loop, dec, 7 sc, dec, 9 CH, return to the 7th loop, (sc, 2 dec) × 2, sc, 9 CH, return to the 2nd loop, (dec, sc) ×3, dec, 5 sc (watch this leg crochet part on the video)
7. 12 sc
8. (3 sc, inc) ×3 (15)
9. inc, 13 sc, inc (17)
10. inc, 15 sc, inc (19)
11. inc, 8 sc, inc, 8 sc, inc (22)
12. 9 sc, inc, 2 sc, inc, 9 sc (24)
13. 23 sc, inc (25)
14. 25 sc
15. 13 sc, inc, 10 sc, inc (27)
16. 26 sc
Note: Insert a 37 cm wire into the foot and add cotton fabric filler to the foot sole.
17. 27 sc, inc (29)
18-20. 29 sc
Add filler to the bent edge at the back, leaving about 10 cm of yarn.
RIGHT LEG- Jade Bunny
Rows 1 to 8 crochet the same as the left leg.
9. 7 sc, 2 inc, 6 sc (17)
10. 9 sc, 2 inc, 6 sc (19)
11. 9 sc, 2 inc, 7 sc, inc (22)
12. sc, inc, 19 sc, inc (24)
13. 12 sc, inc, 11 sc (25)
14. 25 sc
15. 13 sc, inc, 10 sc, sc (27)
16. 13 sc, inc, 13 sc (28)
Note: Insert a 37 cm wire into the foot and add cotton fabric filler to the foot sole.
BODY-Jade Bunny
17. 14 sc, inc, 13 sc (29)
18-20. 29 sc
1. 3 CH, and connect with the 16th loop of the left leg’s 20th row: 29 sc, 3 sc, 29 sc, 3 sc (64)
2. 64 sc
3. 13 sc, dec, 31 sc, dec, 16 sc (62)
4-5. 62 sc
6. 11 sc, 2 dec, 29 sc, 2 dec, 14 sc (58)
7. 58 sc
8. 11 sc, dec, 29 sc, dec, 14 sc (56)
9. 56 sc
10. 11 sc, dec, 27 sc, dec, 14 sc (54)
11. 6 sc, dec, 6 sc, dec, 19 sc, dec, 6 sc, dec, 9 sc (50)
12. 7 sc, dec, 2 sc, dec, 21 sc, dec, 2 sc, dec, 10 sc (46)
13. 46 sc
14. 6 sc, dec, 4 sc, dec, 16 sc, dec, 4 sc, dec, 8 sc (42)
15. 42 sc
16. 6 sc, dec, 2 sc, dec, 16 sc, dec, 2 sc, dec, 8 sc (38)
17-18. 38 sc
19. 7 sc, dec, 18 sc, dec, 9 sc (36)
20. 36 sc
21. 6 sc, 4 sc (join with the 12th to 9th loops of the 17th row of the left arm), 15 CH, 4 sc (join with the 6th to 3rd loops of the 17th row of the right arm), 7 sc (36)
22. 6 sc, 7 sc, dec, 13 sc, dec, 7 sc, 7 sc (42)
Note:
After completing the 22nd row, fold a 30 cm wire in half and insert it into the arms, and add the necessary amount of cotton filler.
23. 5 sc, dec, 5 sc, dec, 13 sc, dec, 5 sc, dec, 6 sc (38)
24. 38 sc
25. 4 sc, dec, 5 sc, dec, 11 sc, dec, 5 sc, dec, 5 sc (34)
26. sc, 3 dec, sc, 3 dec, 5 sc, 3 dec, sc, 3 dec, 2 sc (22)
27. 2 dec, sc, 2 dec, 3 sc, 2 dec, sc, 2 dec, sc (14)
28. 14 sc
29. (2 sc, dec, sc, dec) × 2 (10)
30-40. 10 sc
41. 5 dec (5)
Note: Sew up the hole.
Make toe draws on the feet. (see video)
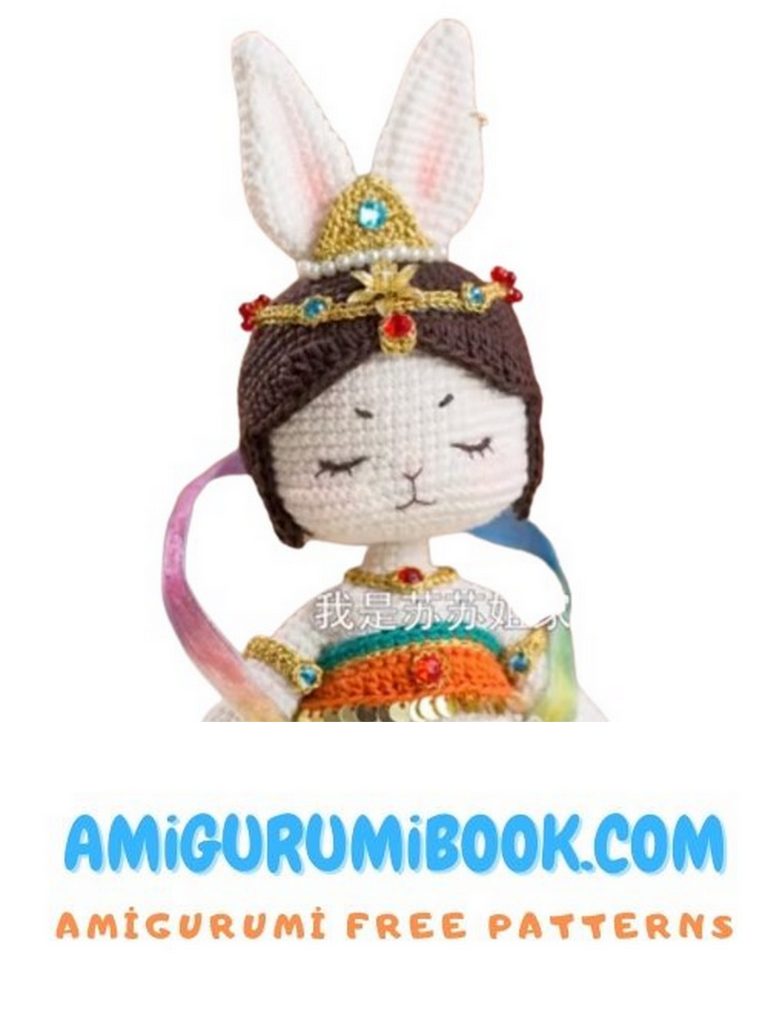
PART 3, HEAD- Jade Bunny
The head includes a headband and a wig, which are crocheted separately and then assembled.
1. 6 sc in MR (6)
2. 6 inc (12)
3. (sc, inc) ×6 (18)
4. (sc, inc, sc) ×6 (24)
5. (3 sc, inc) ×6 (30)
6. (2 sc, inc, 2 sc) ×6 (36)
7. (5 sc, inc) ×6 (42)
8. (3 sc, inc, 3 sc) ×6 (48)
9. (7 sc, inc) ×6 (54)
10. 54 sc
11. (4 sc, inc, 4 sc) ×6 (60)
12-18. 60 sc
19. 22 sc, dec, sc, dec, 6 sc, dec, sc, dec, 22 sc (56)
20. 20 sc, 5 inc, 6 sc, 5 inc, 20 sc (66)
21-23. 66 sc
24. 20 sc, 5 dec, 6 sc, 5 dec, 20 sc (56)
25. (3 sc, dec, 3 sc) ×7 (49)
26. (5 sc, dec) ×7 (42)
27. (2 sc, dec, 2 sc) ×7 (35)
28. (3 sc, dec) ×7 (28)
29. (sc, dec, sc) ×7 (21)
30. (sc, dec) ×7 (14)
31. inv sl st: 14 sc
32-36. 14 sc
Note: Add filler, starting from the 26th row, leave about 10 cm of yarn, and stuff well in rows 32-36.
WIG -Jade Bunny
1. 6 sc in MR (6)
2. 6 inc (12)
3. (sc, inc) ×6 (18)
4. (sc, inc, sc) ×6 (24)
5. (3 sc, inc) ×6 (30)
6. (2 sc, inc, 2 sc) ×6 (36)
7. (5 sc, inc) ×6 (42)
8. (3 sc, inc, 3 sc) ×6 (48)
9. (7 sc, inc) ×6 (54)
10. 54 sc
11. (4 sc, inc, 4 sc) ×6 (60)
12. 60 sc
13. (9 sc, inc) ×6 (66)
14-18. 66 sc
19. 19 sc, [sc, 10 ch, from the 3rd loop from the hook, 2 hdc, 3 dc, 2 sc, sl st], dc, 3 sl st, 2 sc2tog, 2 sl st, 3 dc, sc, 2 sl st, dc, 3 sl st, 2 sc2tog, 2 sl st, 3 dc, dc, [sl st, 10 ch, from the 3rd loop from the hook, 2 hdc, 3 dc, 2 sc, sl st, sc], 19 sc
PART 4, Facial Features -Jade Bunny
Facial features consist of eyes, eyelashes, nose, mouth, eyebrows, and ears.
Note:
Cut a thread about 40 cm long and embroider the eyes, eyelashes, nose, and mouth.
Cut a piece of thread about 15 cm long to embroider the eyebrows.
EARS ×2 – Jade Bunny
1. 6 sc in MR (6)
2. (sc, inc, sc) ×2 (8)
3. (3 sc, inc) ×2 (10)
4. 10 sc
5. 4 sc, 2 inc, 4 sc (12)
6. 12 sc
7. 5 sc, inc, 6 sc (13)
8. 6 sc, inc, 6 sc (14)
9. 7 sc, inc, 6 sc (15)
10. 7 sc, inc, 7 sc (16)
11. (7 sc, inc) ×2 (18)
12-13. 18 sc
14. dec, 16 sc (17)
15. 7 sc, dec, 6 sc, dec (15)
16. (3 sc, dec) ×3 (12)
17. (dec, 4 sc) ×2 (10)
18. (3 sc, dec) ×2 (8)
Note: Leave about 15 cm of thread for sewing.
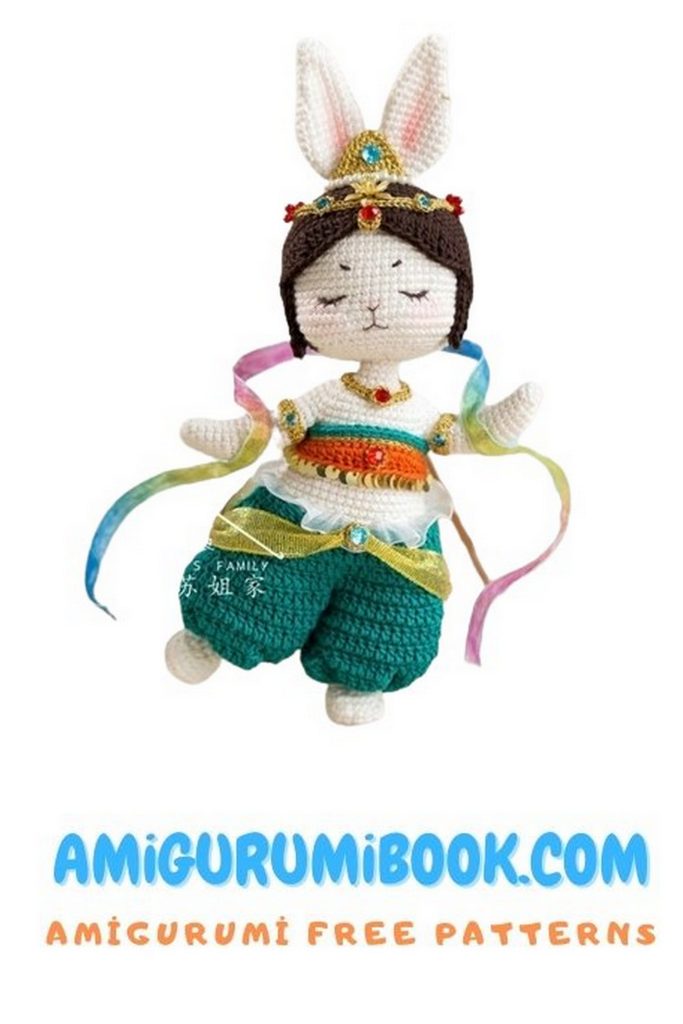
PART 5 Clothing. Supplementary video:
The outfit includes pants and a top.
PANTS ×2 -Jade Bunny
1). 20 ch, join into a ring, [3 ch, sc], 19 hdc from sc (40)
2.) 3 ch, 2 hdc, hdc from sc, (3 hdc, hdc from sc) ×9 (50)
3.) [3 ch, sc], (sc, hdc from sc) ×2, skip 5 loops, {hdc from sc, (sc, hdc from sc) ×2, skip 5 loops} ×4 (40)
4-6. 3 ch, 39 sc
TROUSERS- Jade Bunny
1. 3 ch, 5 sc, dec from sc, 7 sc, dec from sc, 6 sc, dec from sc, 7 sc, dec from sc, skip 6 loops, join with the 4th loop of the 6th row of the other leg, (6 sc, dec from sc, 7 sc, dec from sc) ×2, skip 6 loops (60)
2.) 3 ch, dec from sc, sc, (sc, dec from sc, sc) ×14 (45)
3). 3 ch, 44 sc
4. 3 ch, 2 sc, dec from sc, (3 sc, dec from sc) ×8 (36)
Note: 3 ch count as 1 loop. First, use the reserved thread on the pants to sew the crotch, then tighten the last loop carefully after putting them on.
JACKET – Jade Bunny
1. 40 ch, from the 2nd loop from the hook, 39 sc
2. ch, turn, 10 sc, 5 sl st, 9 hdc, 5 sl st, 10 sc (39)
3. For BLO: 39 sc
Note: After completing the second part, leave about 15 cm of thread for sewing. Use the front part of the area from the 2nd row as the front part of the top and run one row of gold thread between the first and second parts. Put the jacket on the bunny and sew it at the back. (See video)
PART 6. Tail -Jade Bunny
1. 6 sc in MR
2. 6 inc (12)
3.(sc, inc) ×6 (18)
4-5. 18 sc
6. (sc, dec)×6 (12)
7. 6 dec
Note: Add the required amount of cotton filling, leaving about 20 cm of thread for sewing.
Part 7 Accessories
Accessories include headwear, neck accessories, hand accessories, trouser accessories, and streamers.
Note: Cut 2 colored ribbons 46 cm long and 2 wires 46 cm long and assemble them into ribbons.
Gold thread decoration ×2
1. 20 ch, from the 2nd loop from the hook, 19 sc
2. ch, turn, 19 sc
Necklace (gold thread)
1. 25 ch, join into a ring, (2 sc, inc, 2 sc) ×5 (30)
Head decoration 1 (gold thread)
1. 70 ch, join into a ring, 70 sc
Head decoration ×2
1. 2 ch, from the 2nd loop from the hook, 3 sc in one loop (3)
2. ch, turn, inc, sc, inc (5)
3.ch, turn, 5 sc
4. ch, turn, inc, 3 sc, inc (7)
5-6. ch, turn, 7 sc
7. ch, turn, inc, 5 sc, inc (9)
8. ch, turn, 8 sc, 3 sc in one loop, 13 sc, inc (26)
9. BLO: (3 ch, sl st) ×9
Note: Leave about 20 cm for sewing.
Susu Decoration 3×3 (gold thread)
1. 4 ch, from the 2nd loop from the hook, sc, sl st, 3 sc in one loop, sl st, inc (8)
Hemming ×7 (gold thread)
1. 8 ch (8)