
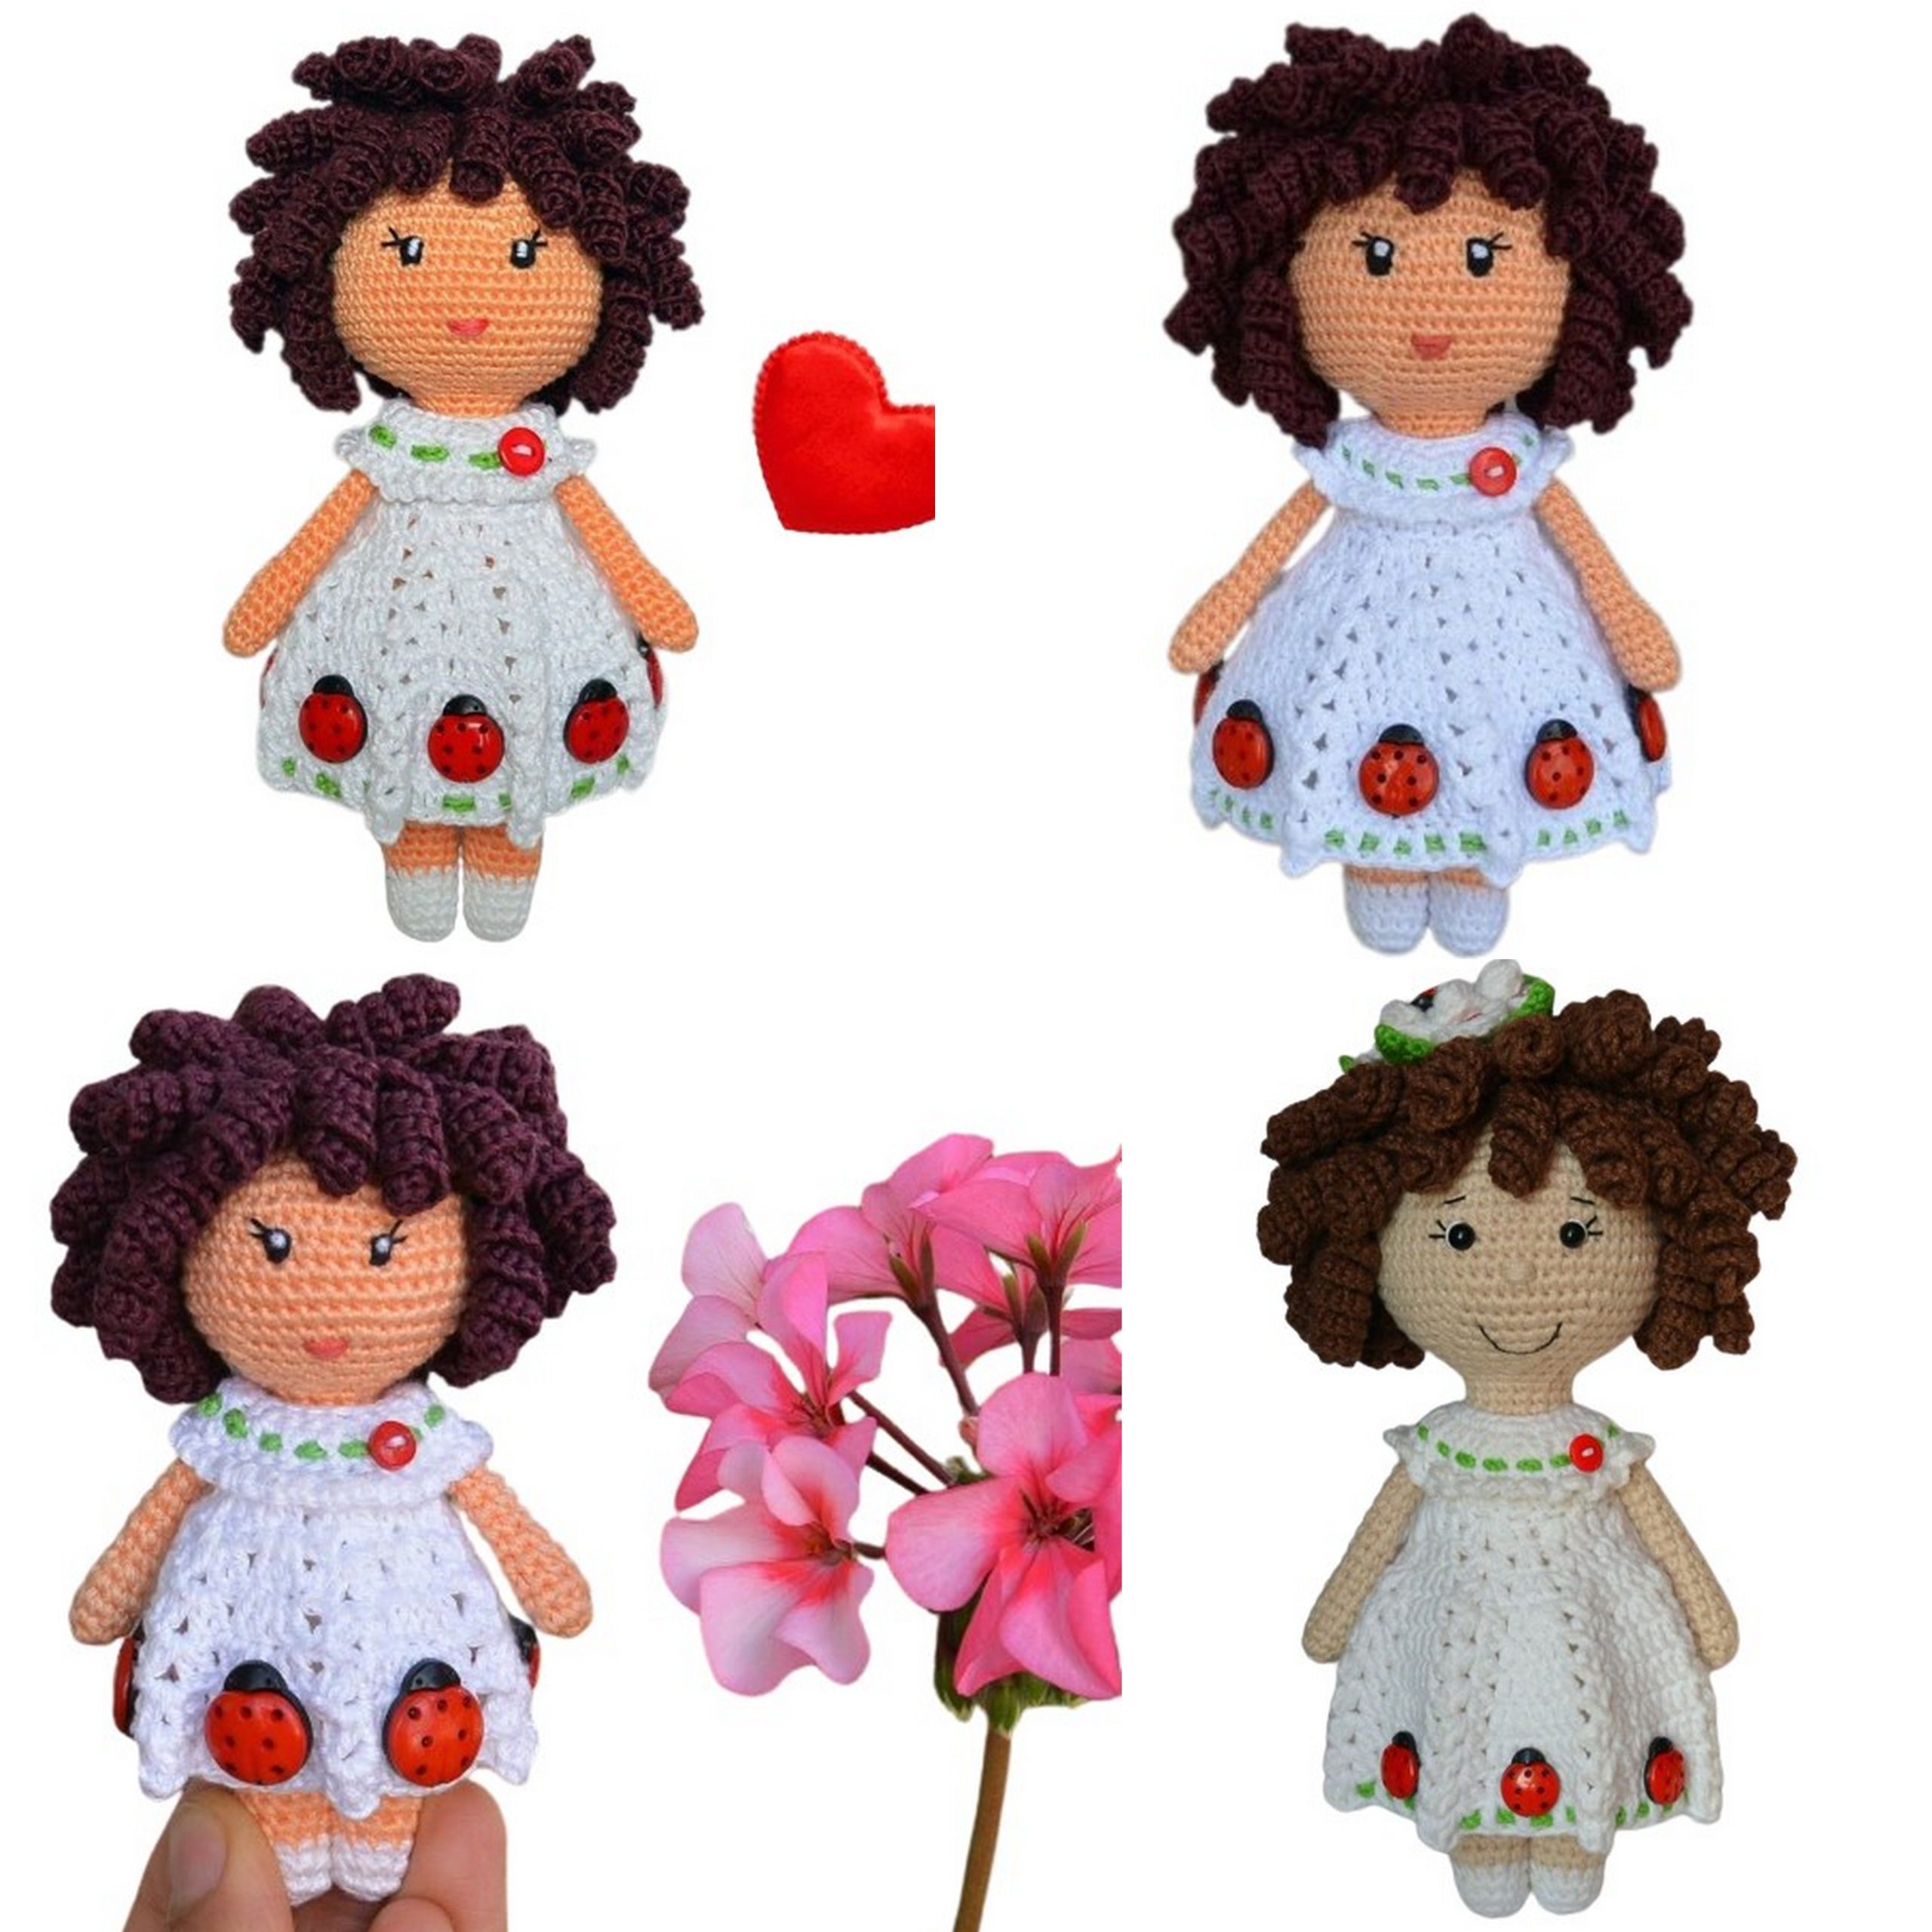
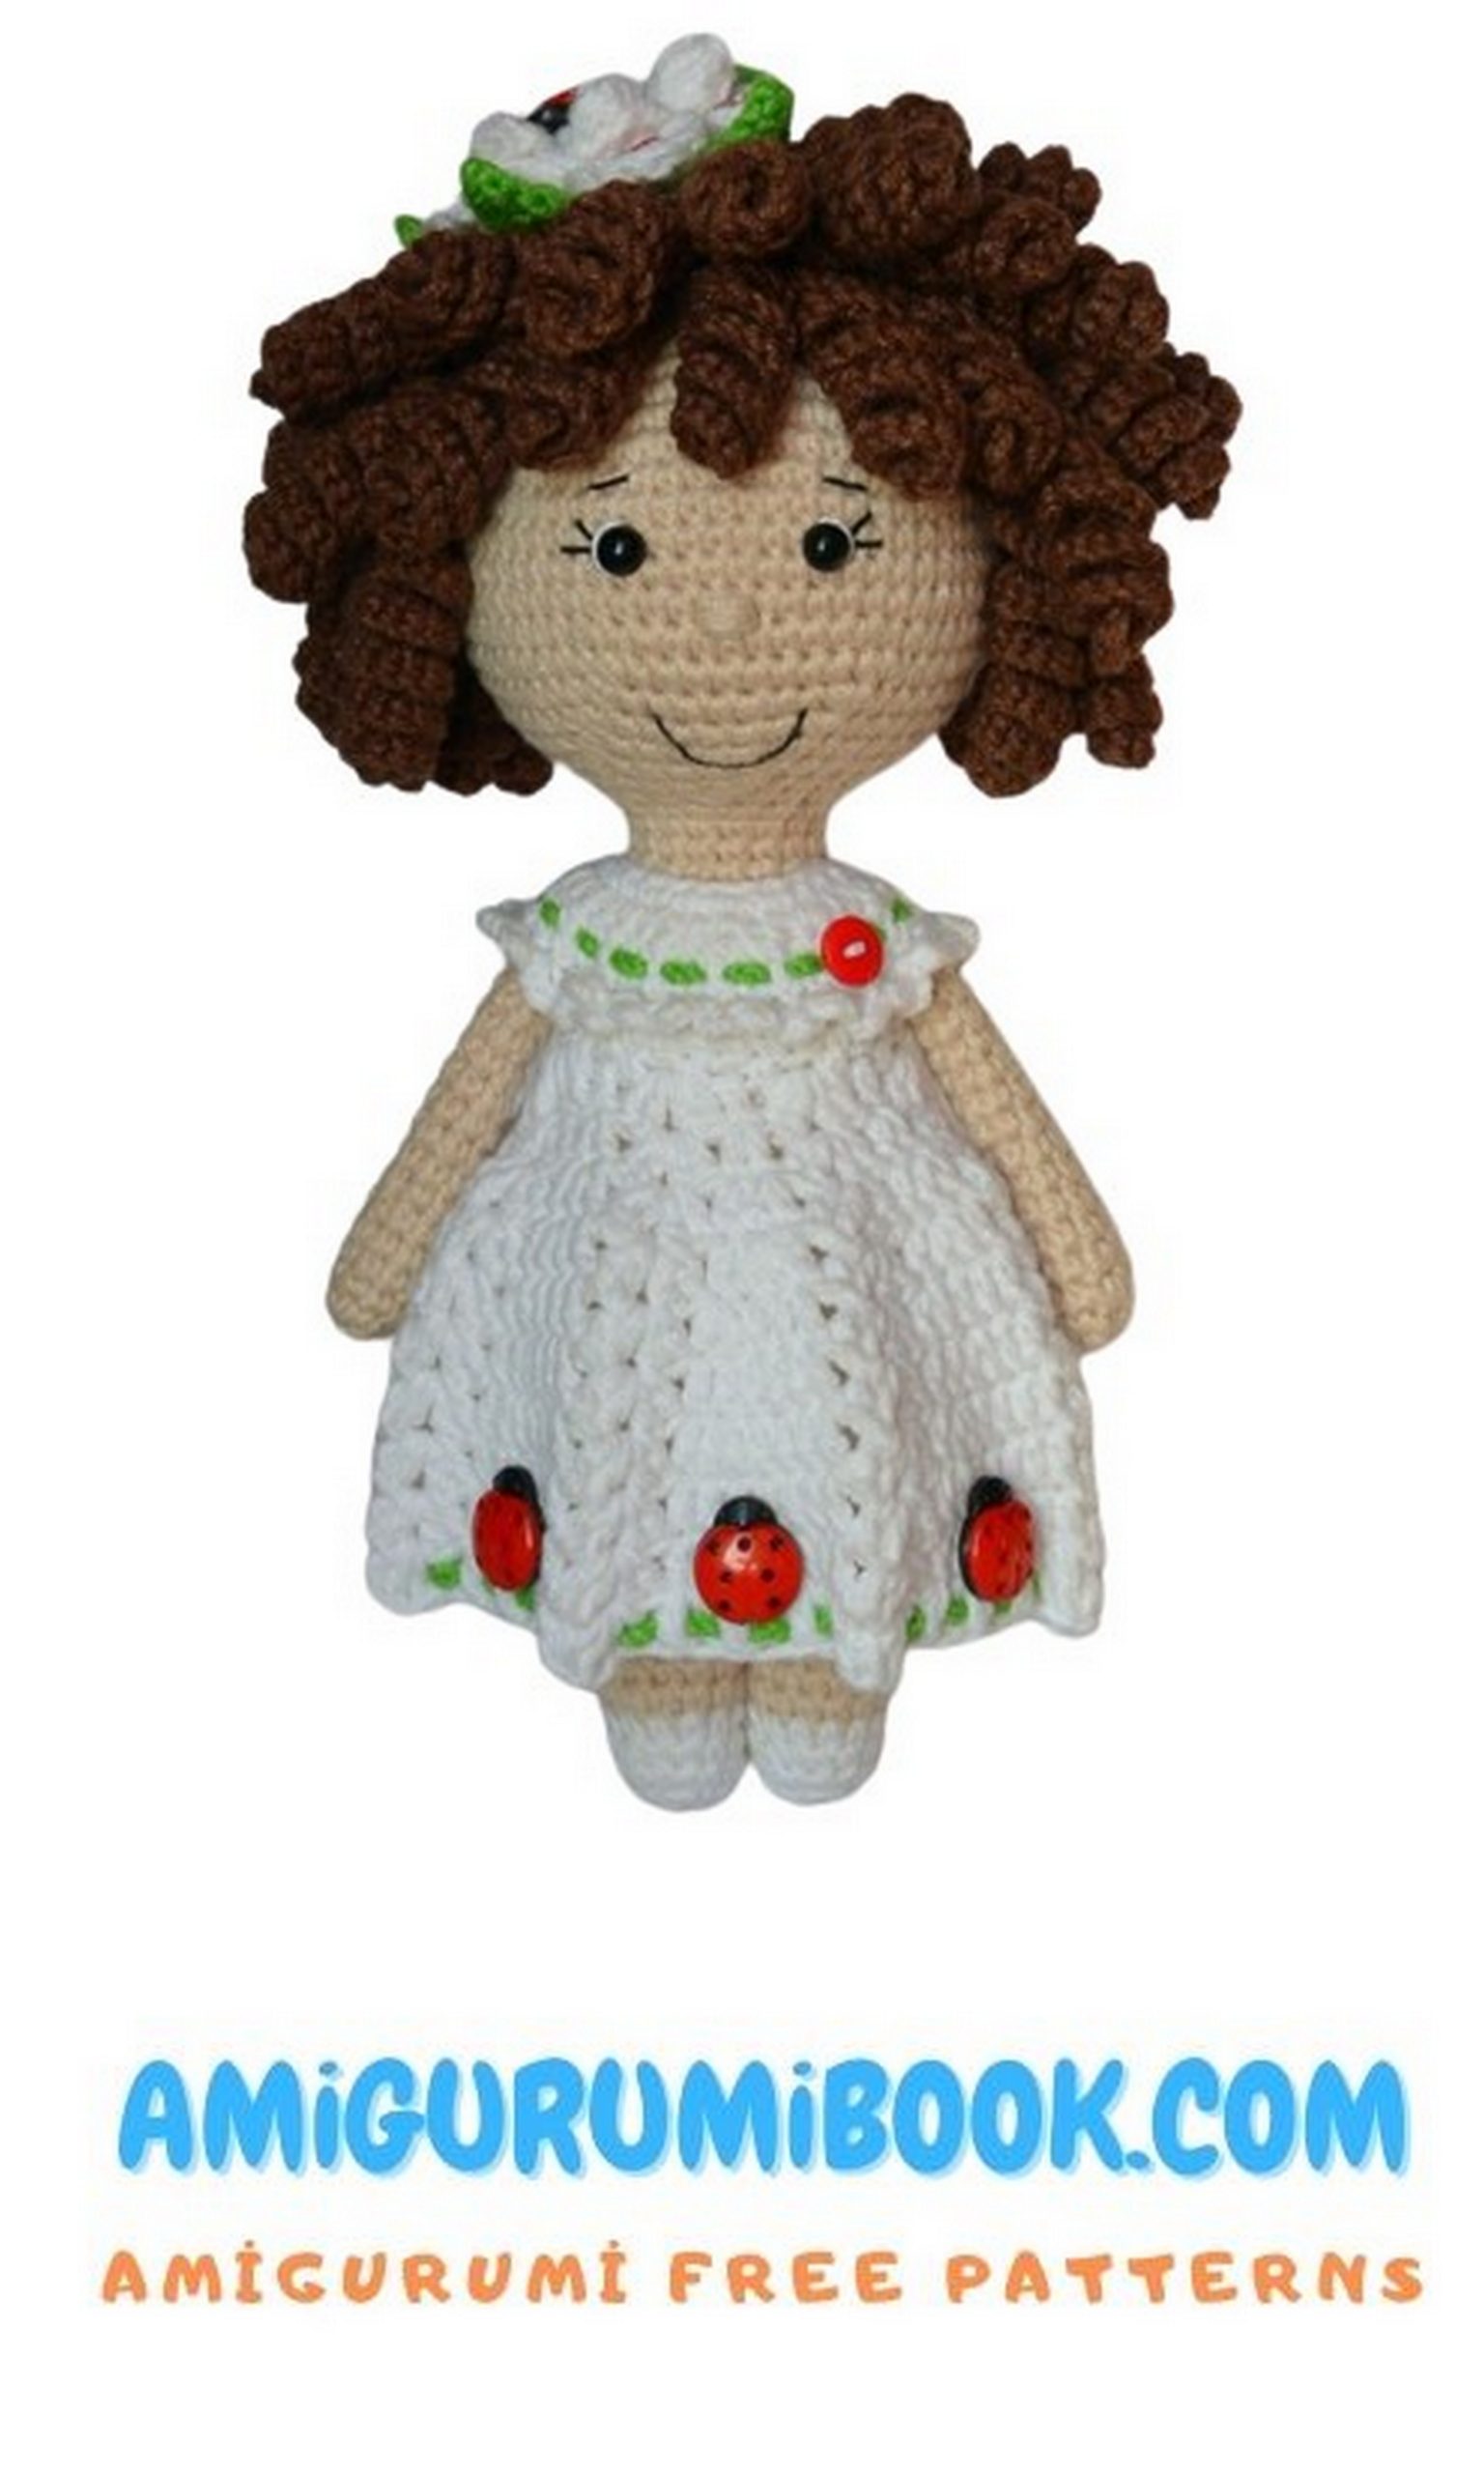
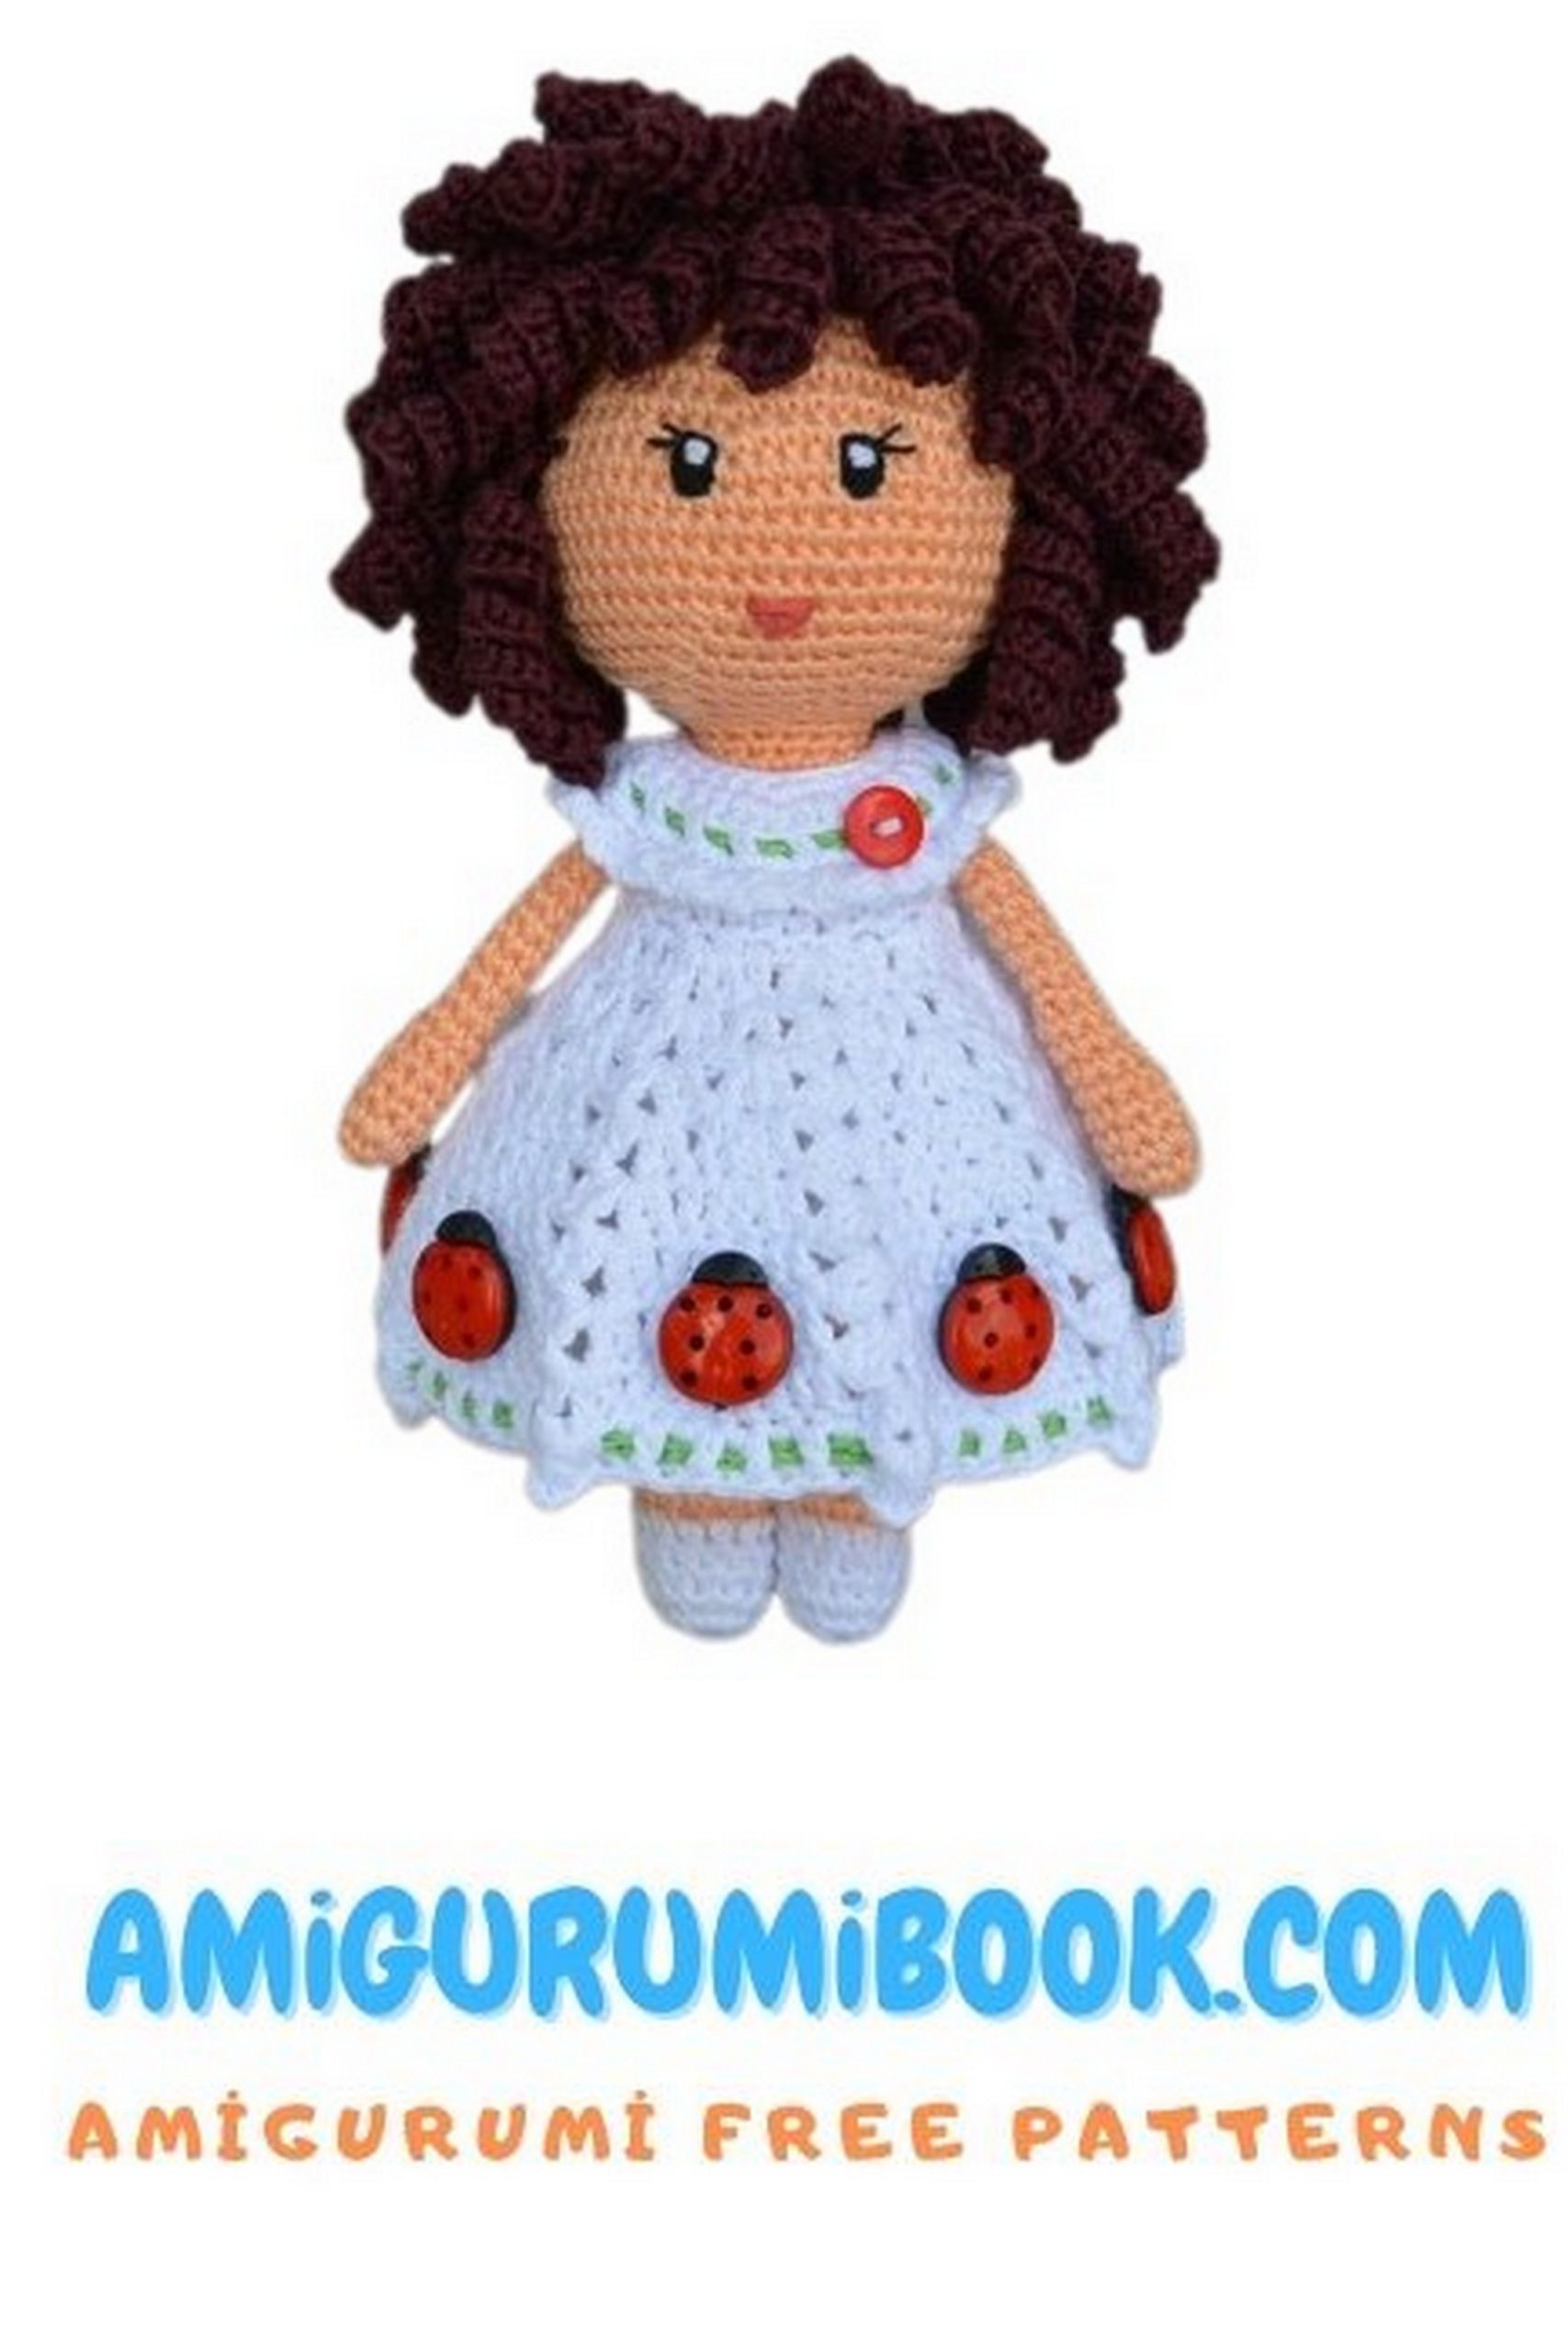
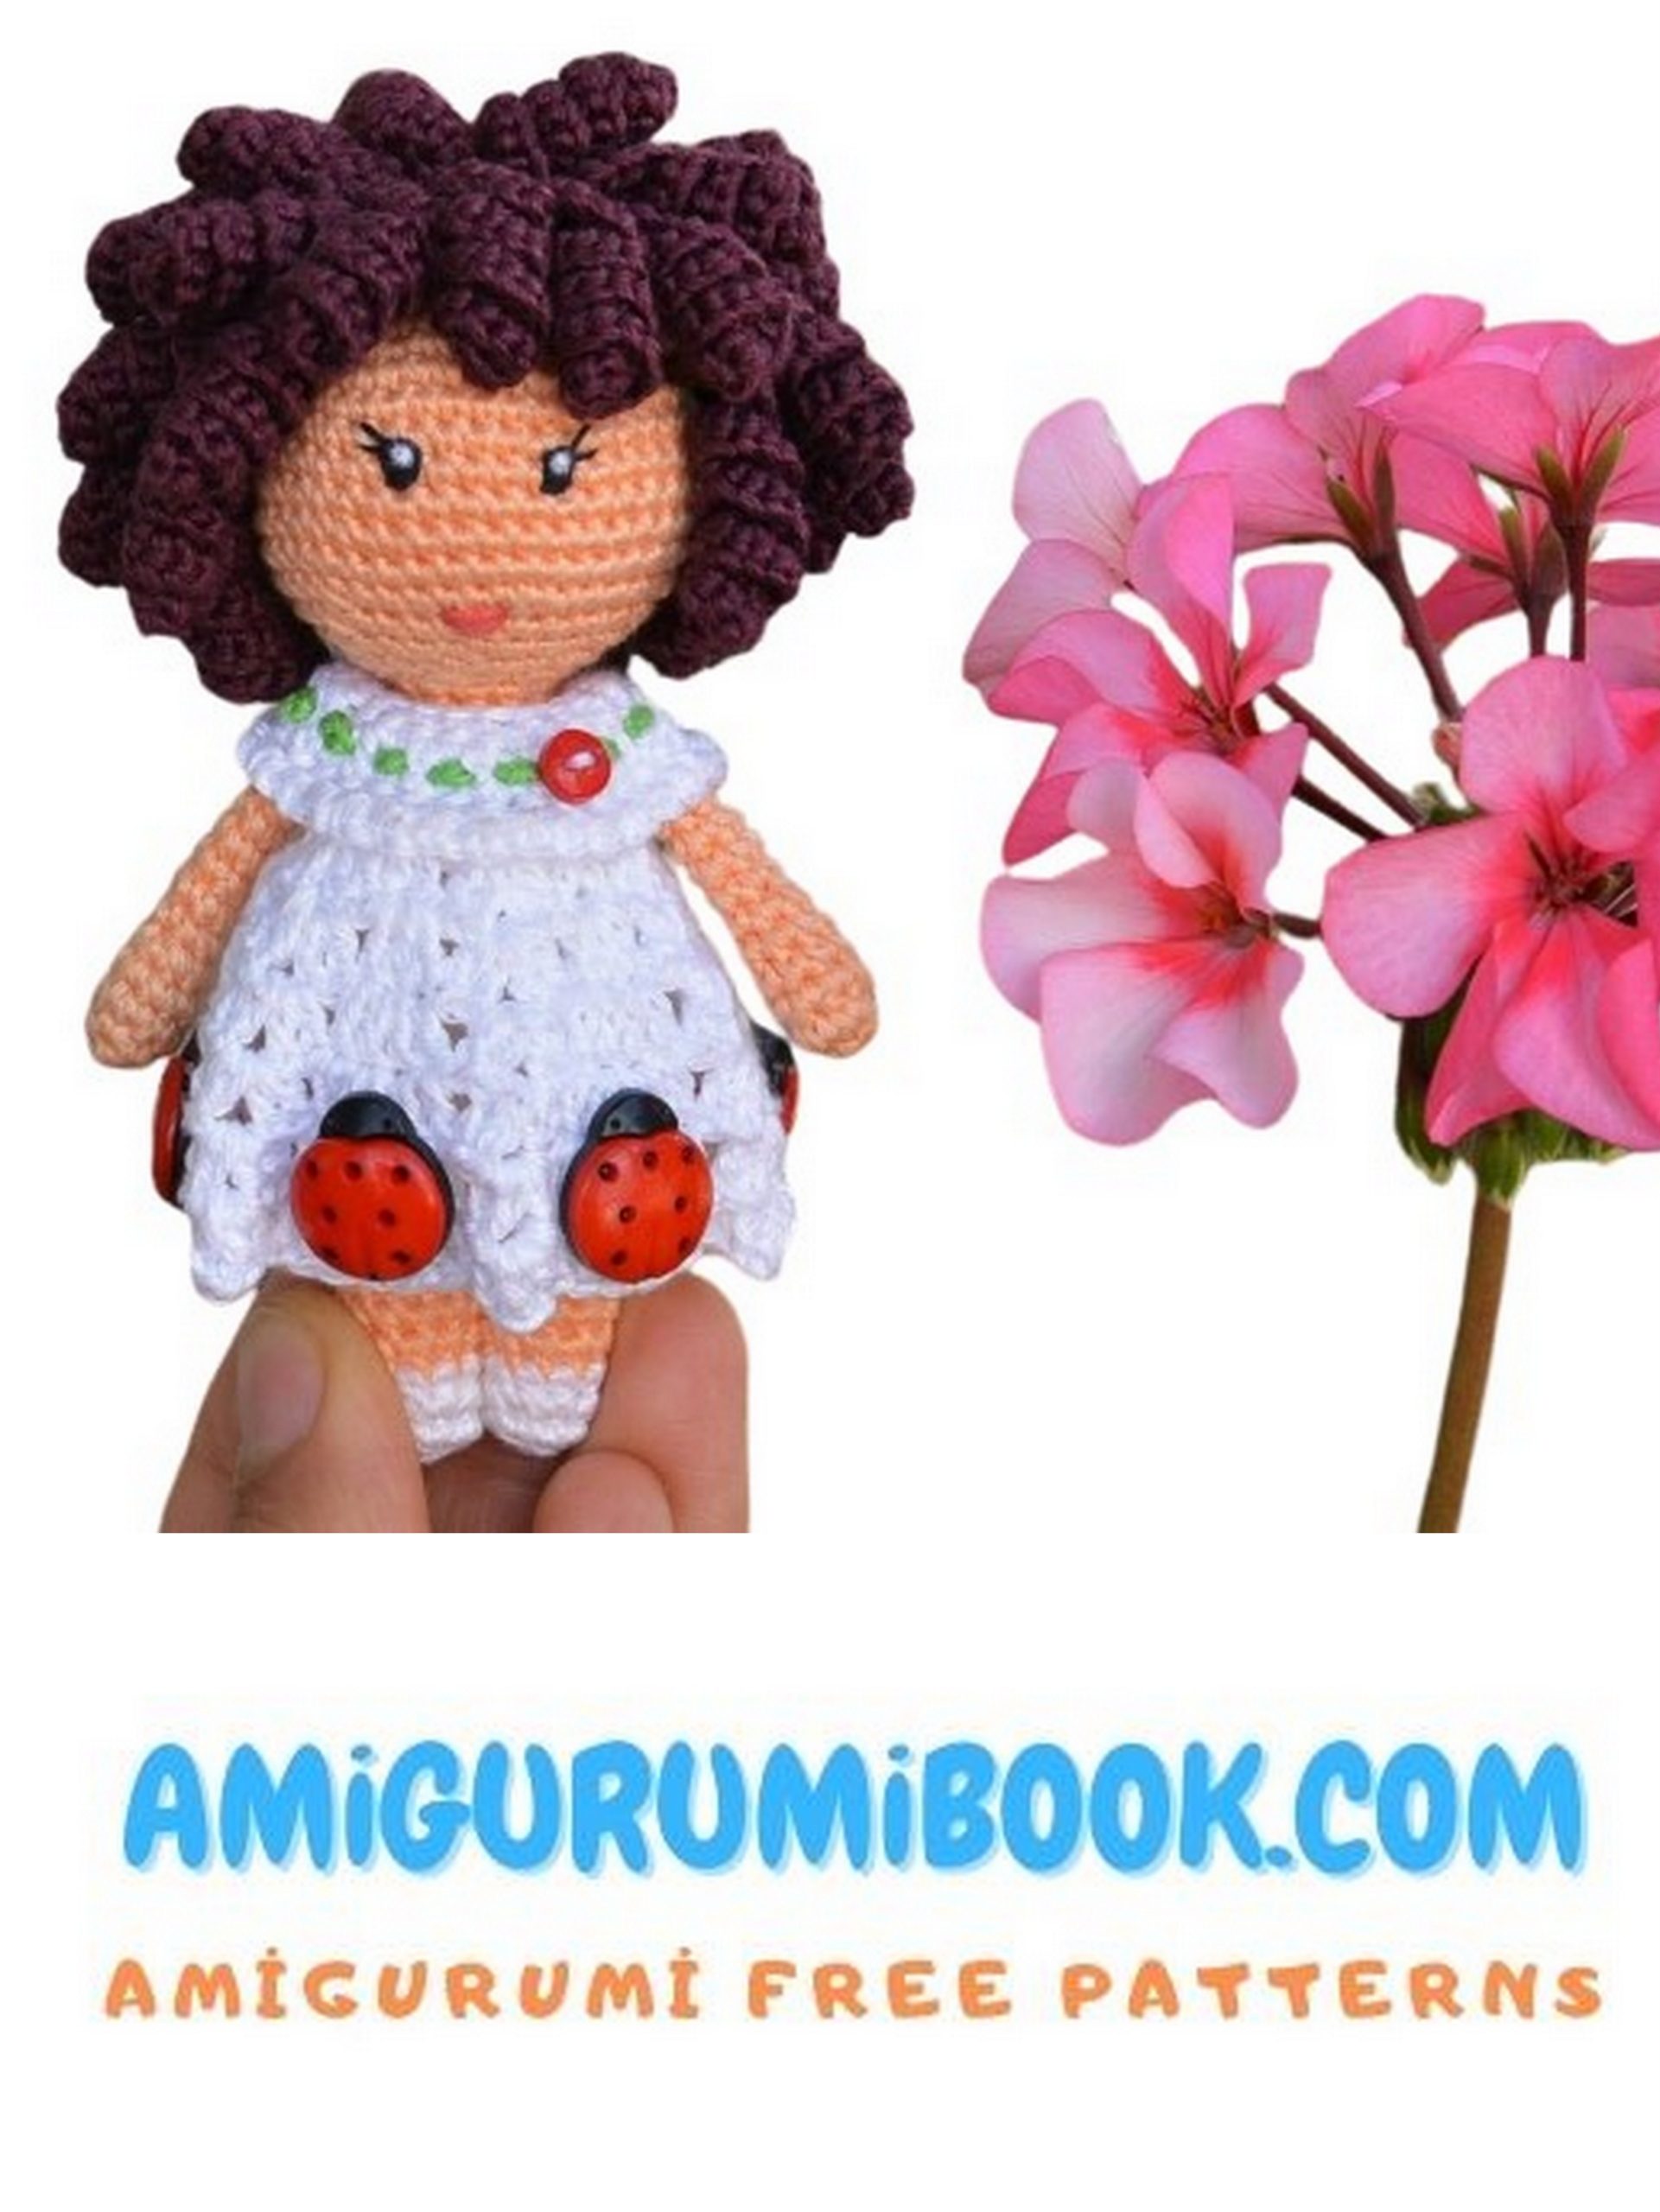
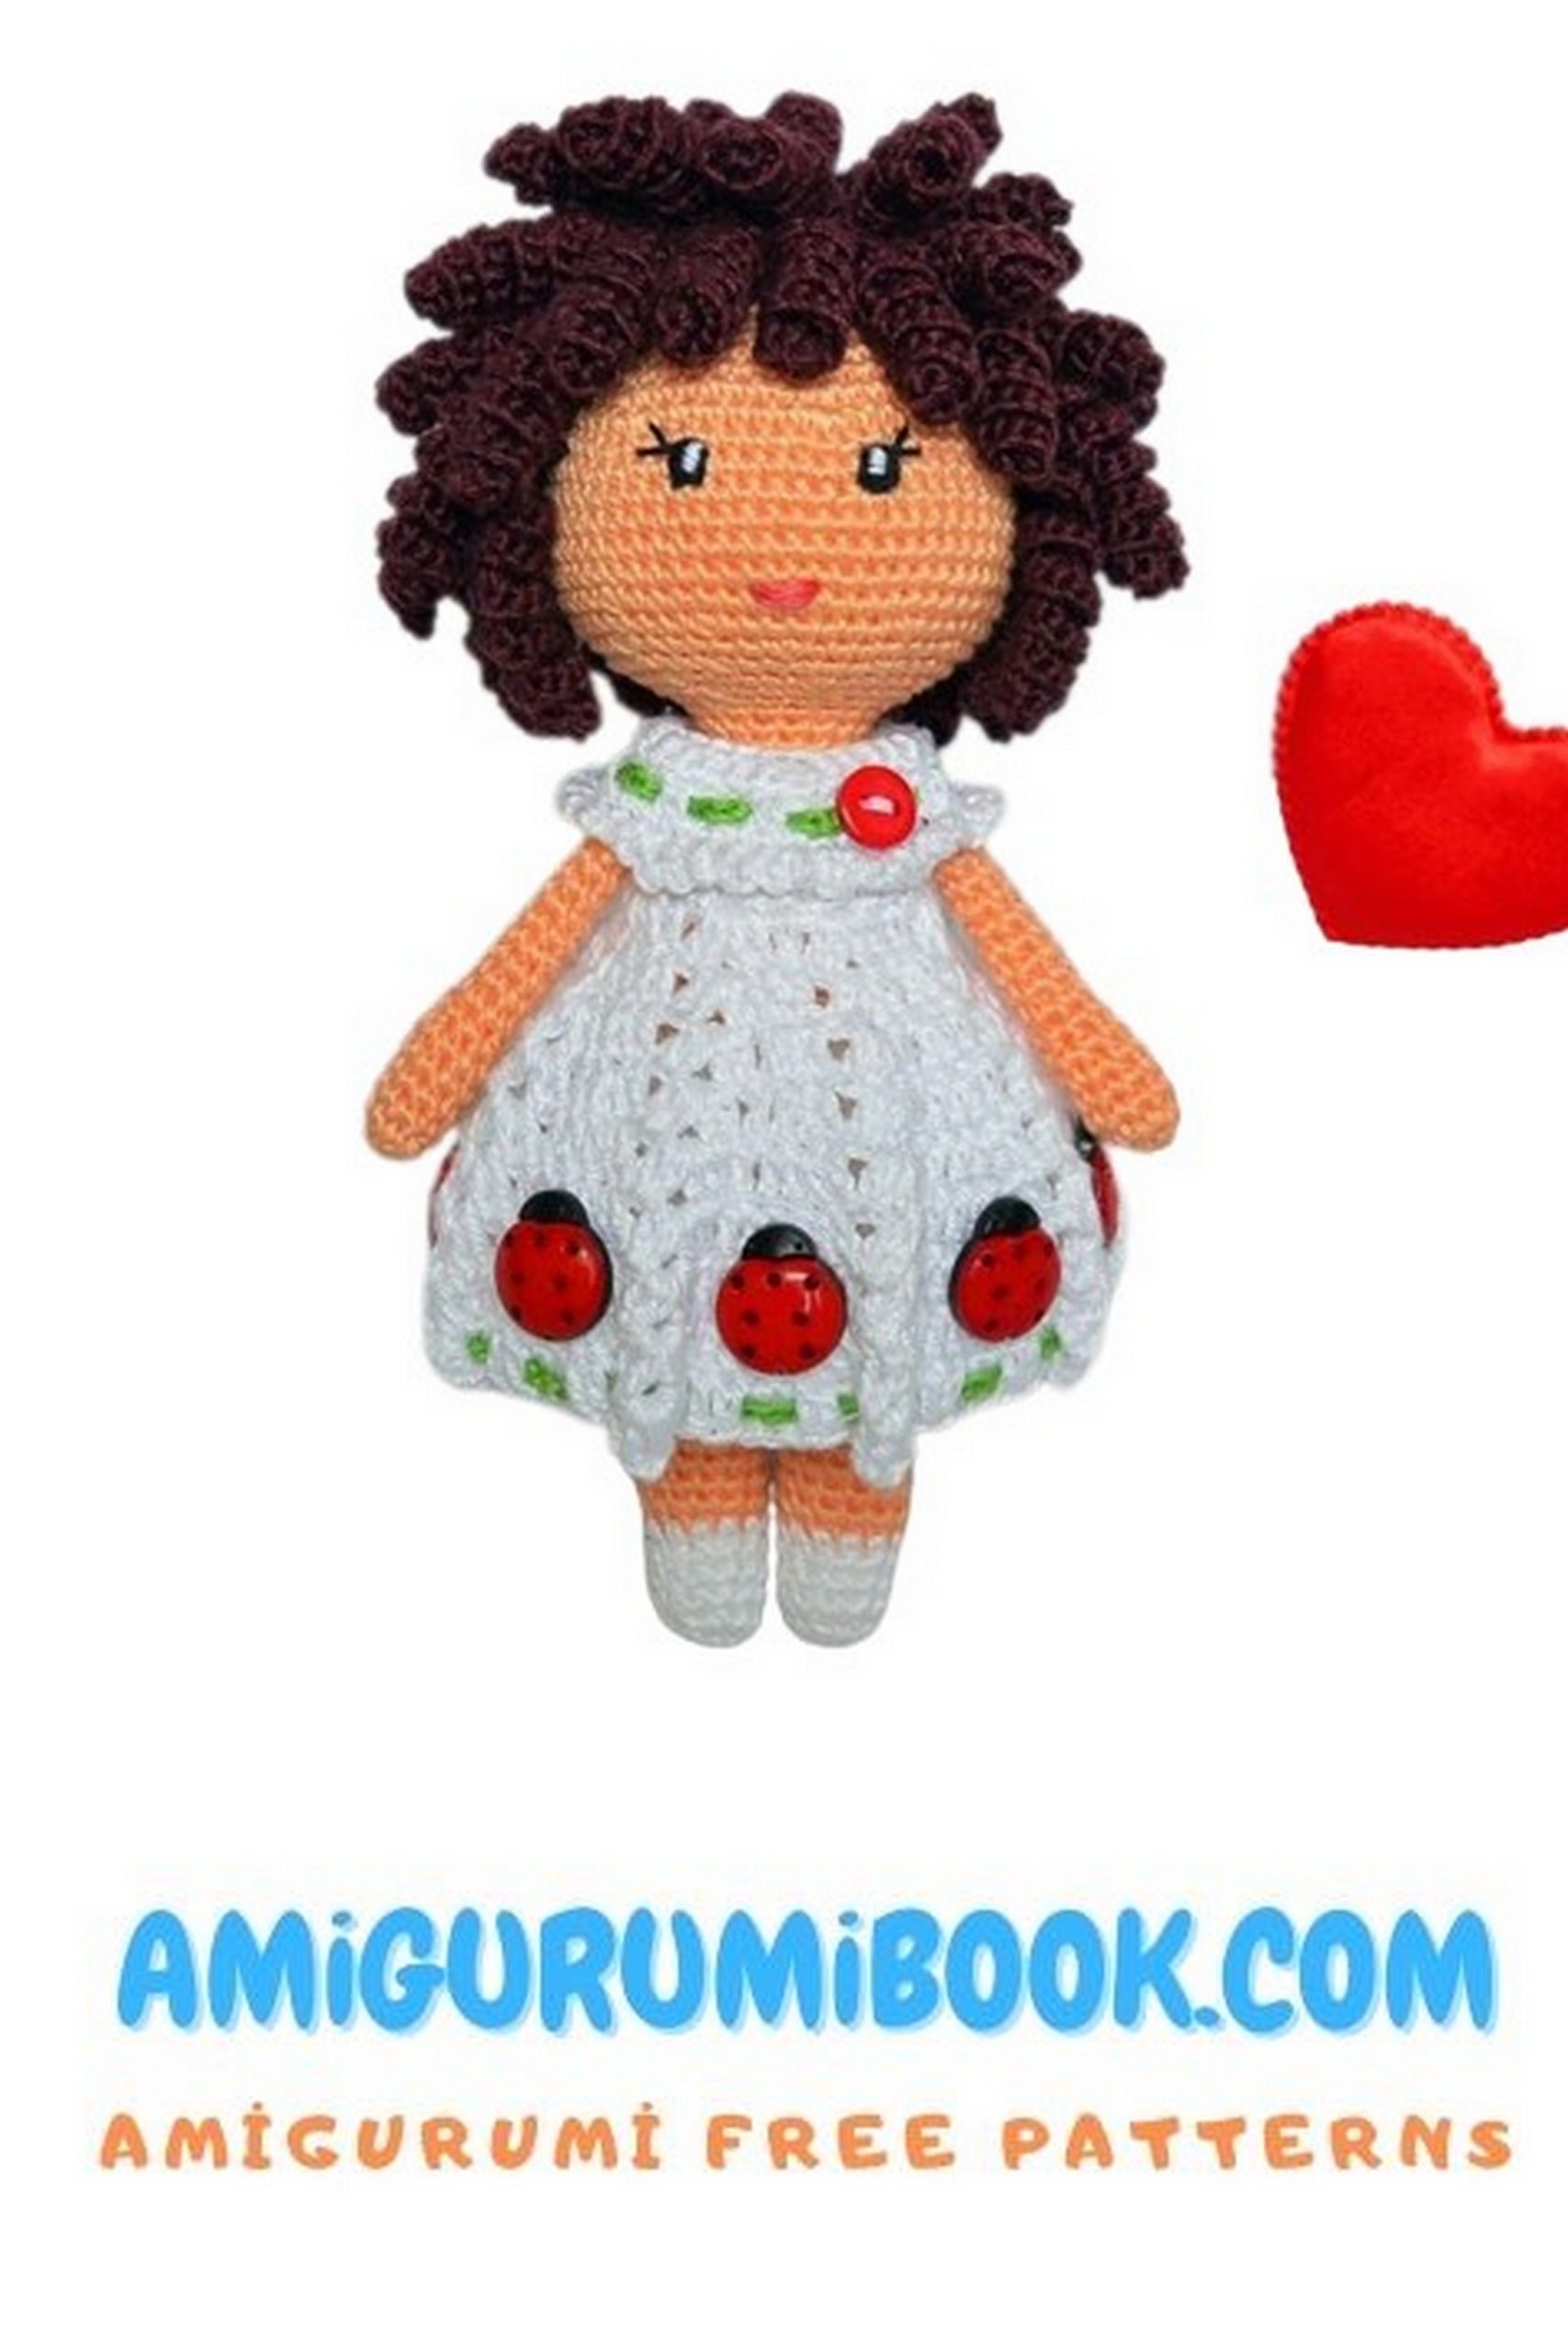
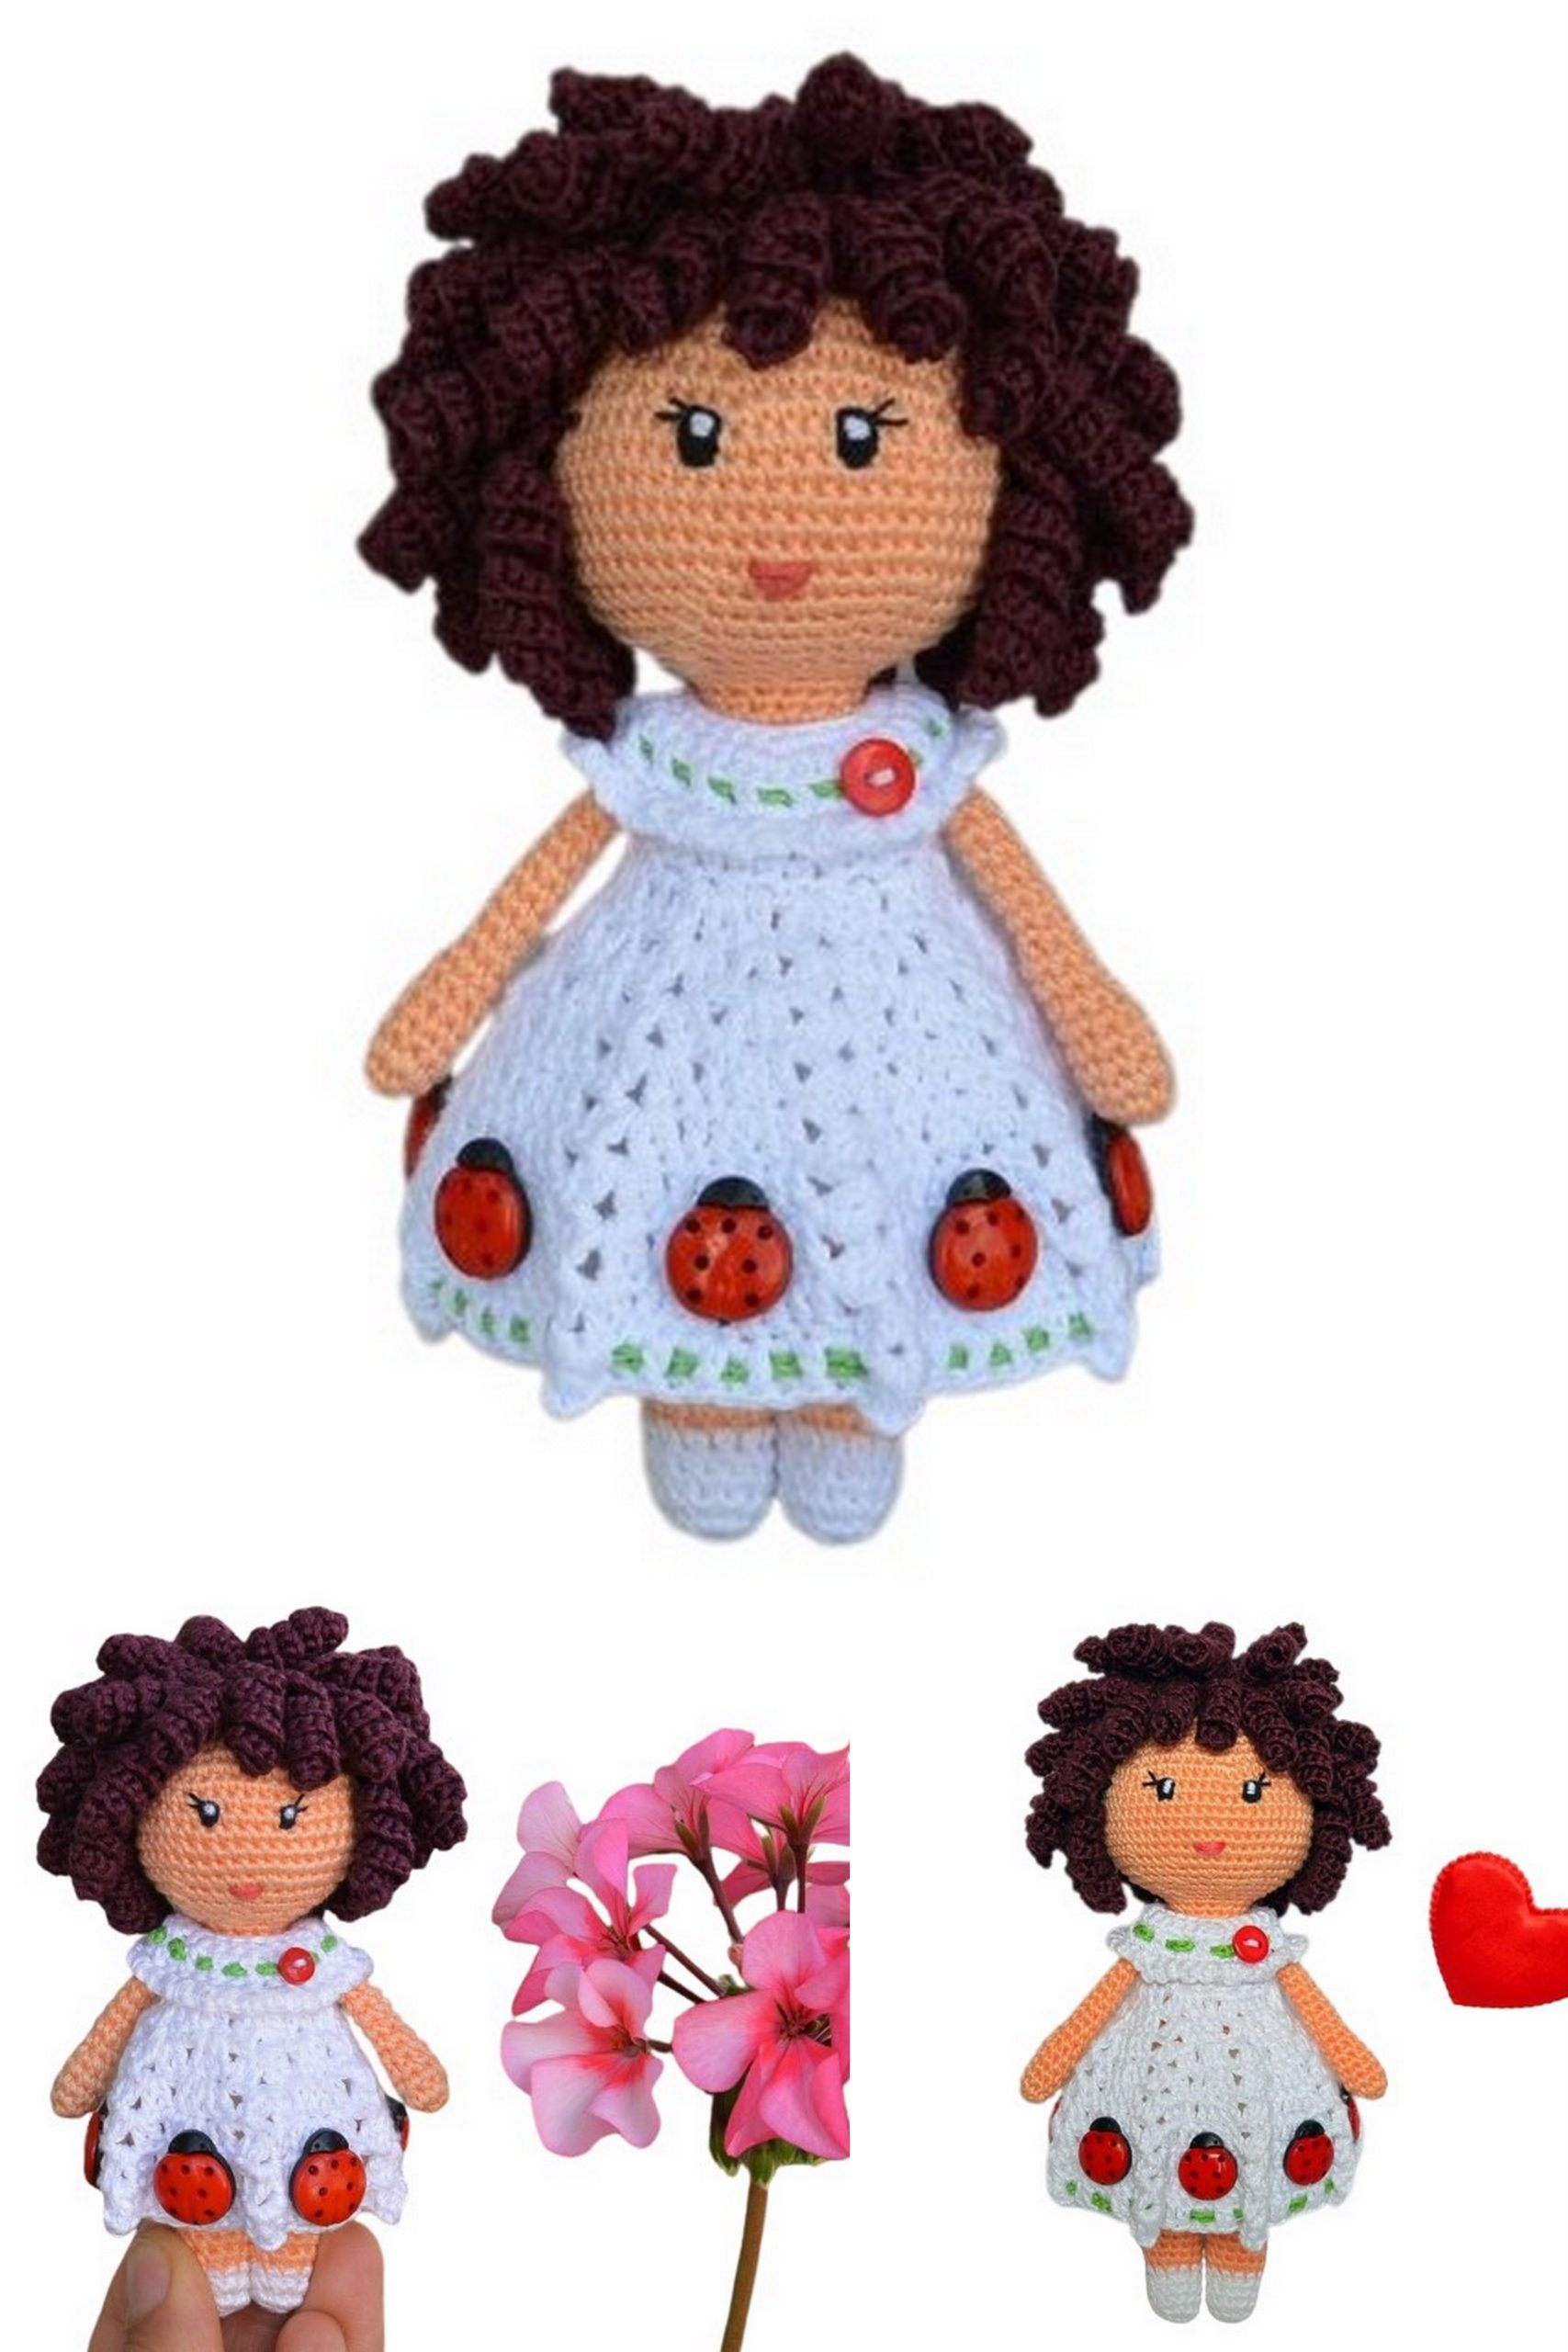
Bring a touch of charm and cuteness to your crochet collection 🐞 This ladybug doll amigurumi free pattern is perfect for creating an adorable handmade toy full of personality and color.
With its sweet design, tiny details, and playful look, this ladybug doll is a fun and rewarding project for both beginners and experienced crocheters. The step-by-step instructions make it easy to follow while helping you achieve a clean and professional finish.
Whether you’re making a unique gift or adding a cheerful piece to your amigurumi collection, this cute ladybug doll will definitely stand out. Grab your yarn and start crocheting your own little lucky bug today! 🧶✨
If you want to access 1000+ free amigurumi patterns, you can download our application from this link!
🧶 Materials & Tools
- Yarn (100% mercerized cotton, 200 m/50 g or similar)
✔ Colors: white, beige/apricot (body), brown, green (details) - Crochet hook: 1.3 mm
- Fiberfill stuffing
- Black & white sewing thread (for eyes)
- Buttons (8 decorative ladybug buttons + 1 plain button)
- Yarn needle
- Scissors
👉 Optional: granulate (for adding weight to legs)
✂️ Abbreviations
- MR: magic ring
- sc: single crochet
- hdc: half double crochet
- sl st: slip stitch
- ch: chain
- inc: increase (2 sc in same stitch)
- dec: decrease (sc 2 stitches together)
- ( ) * n: repeat instructions n times
🧵 Skills Required
- Basic stitches (sc, hdc, sl st)
- Working in the round (amigurumi technique)
- Magic ring
- Color changing
👉 A bit of patience 😉
🧸 Head
With beige yarn:
1: 6 sc in MR (6)
2: (inc) * 6 (12)
3: (1 sc, inc) * 6 (18)
4: (2 sc, inc) * 6 (24)
5: (3 sc, inc) * 6 (30)
6: (4 sc, inc) * 6 (36)
7: (5 sc, inc) * 6 (42)
8: (6 sc, inc) * 6 (48)
9: (7 sc, inc) * 6 (54)
10: (8 sc, inc) * 6 (60)
11–16: 60 sc
17: (8 sc, dec) * 6 (54)
18: (7 sc, dec) * 6 (48)
19: (6 sc, dec) * 6 (42)
20: (5 sc, dec) * 6 (36)
21: (4 sc, dec) * 6 (30)
22: (3 sc, dec) * 6 (24)
23: (2 sc, dec) * 6 (18)
🧵 Neck
24–27: 18 sc
👉 Stuff firmly
👉 Do not cut yarn — continue with the body
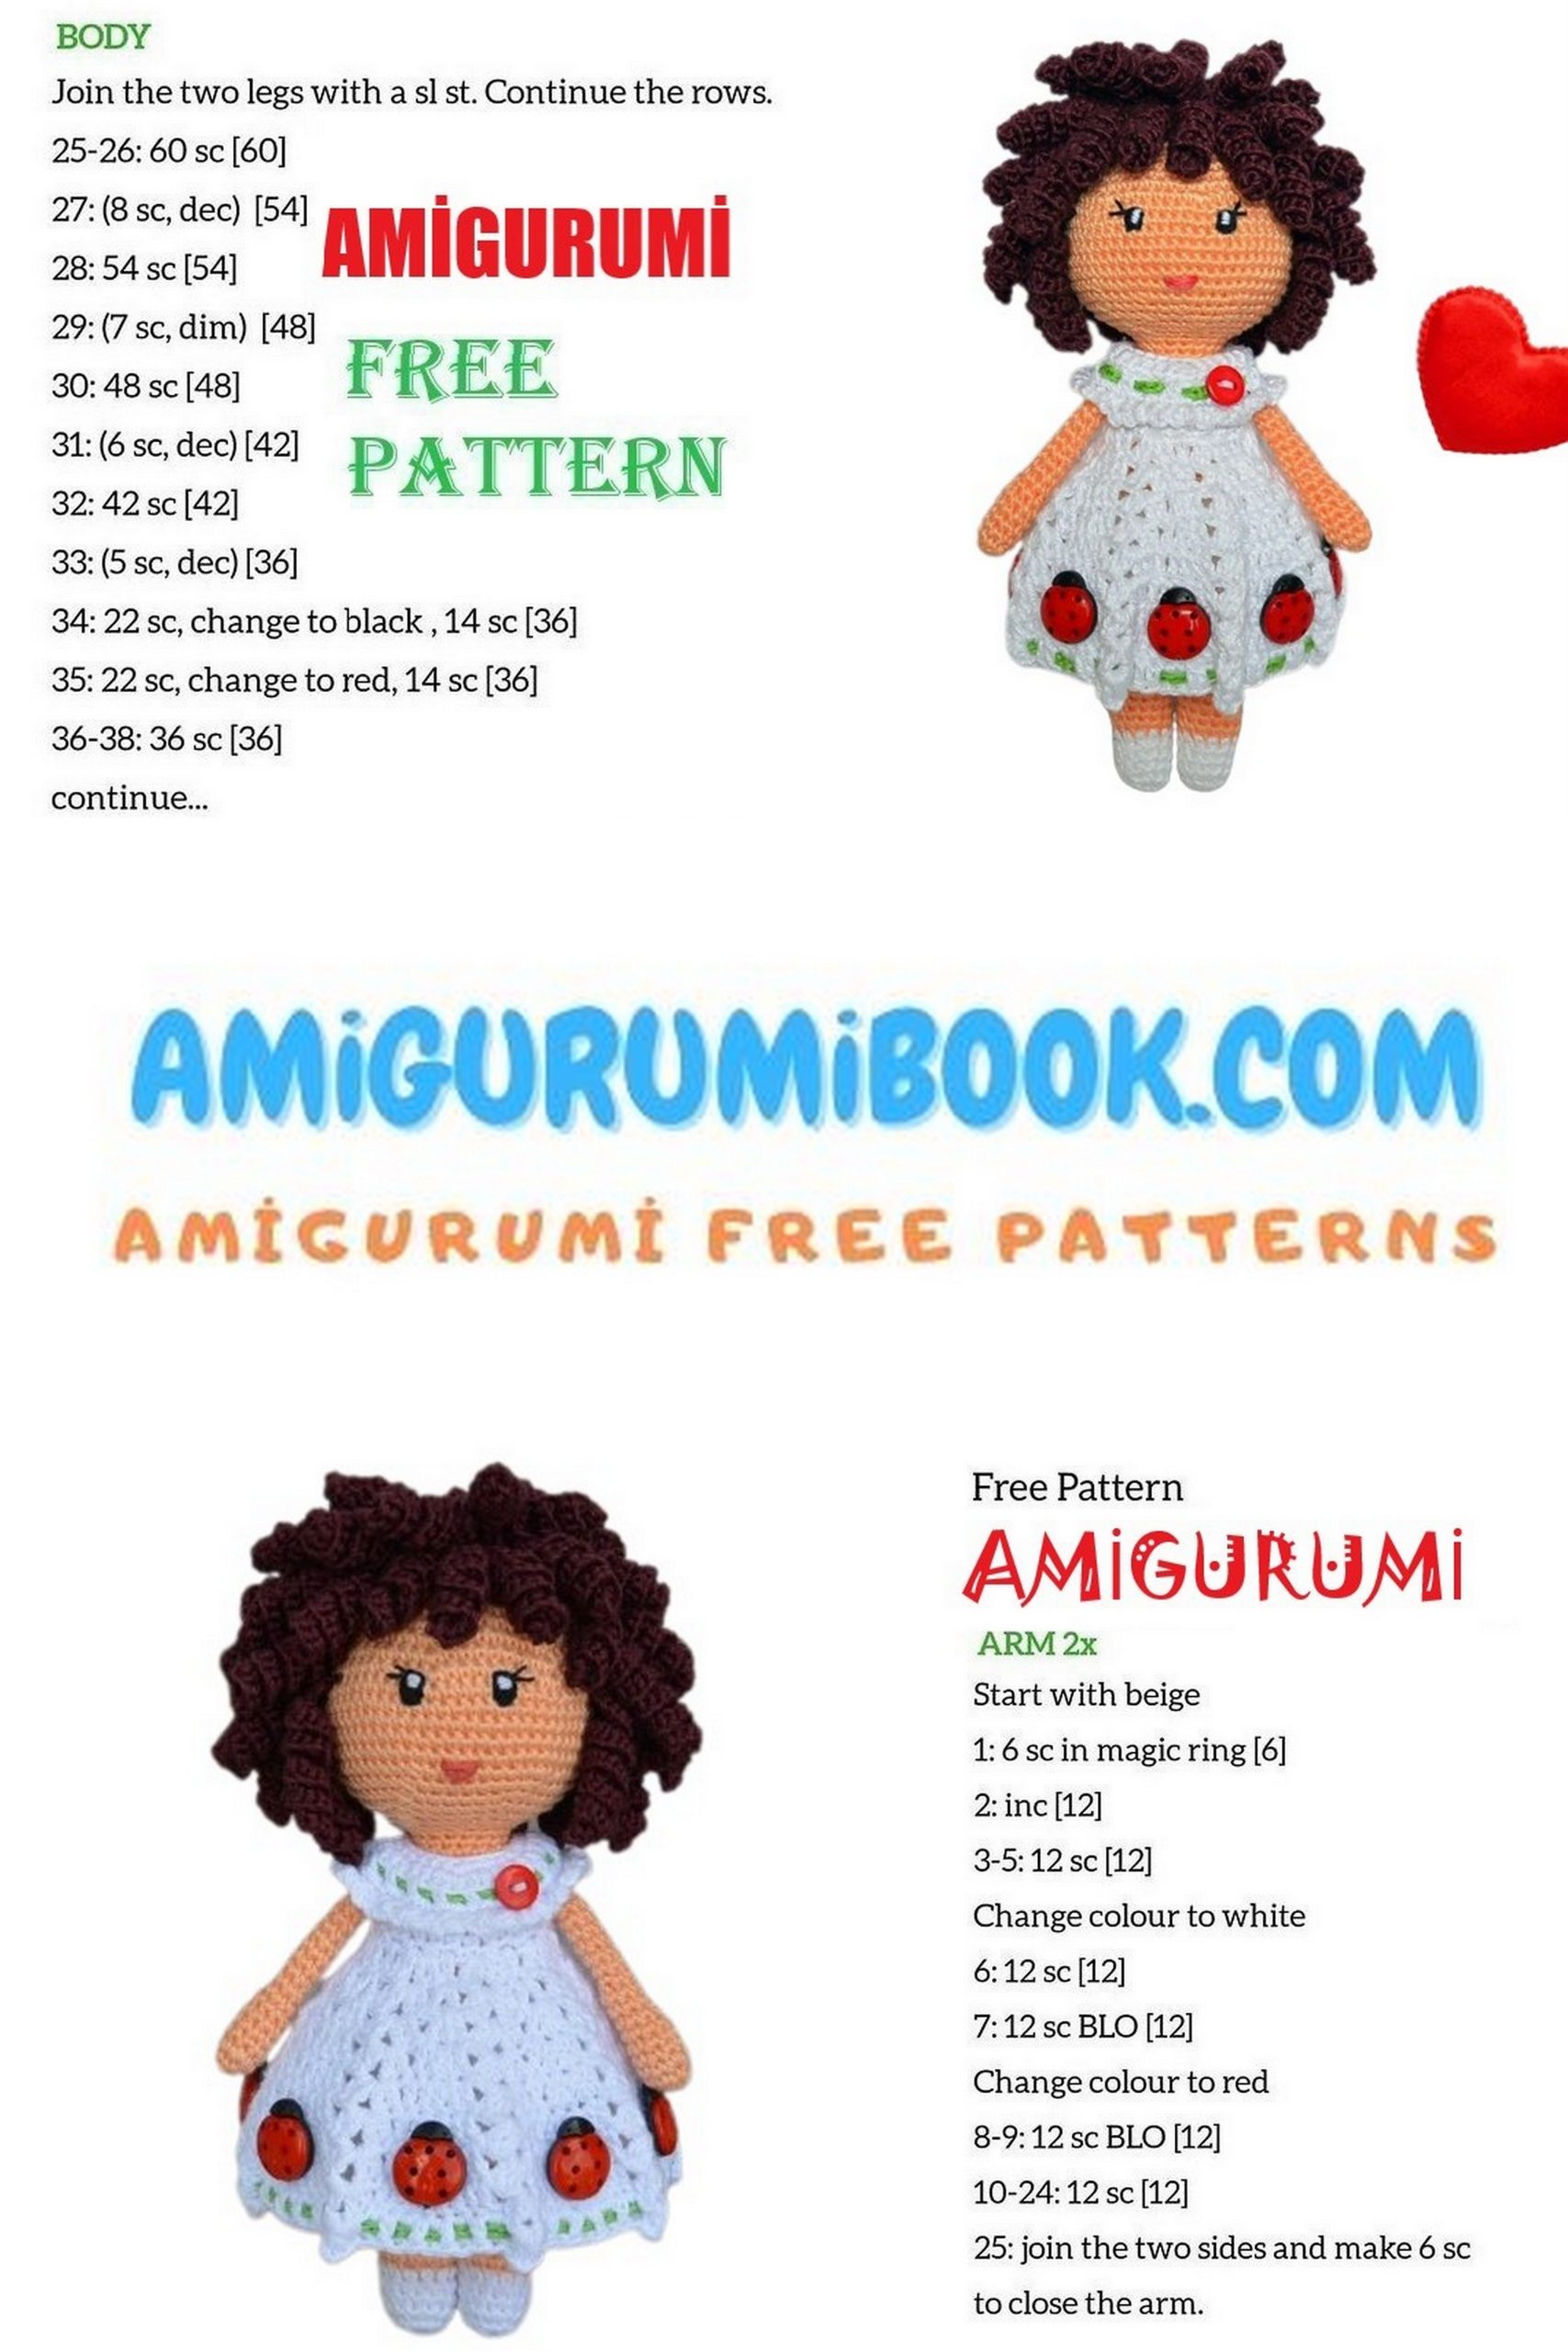
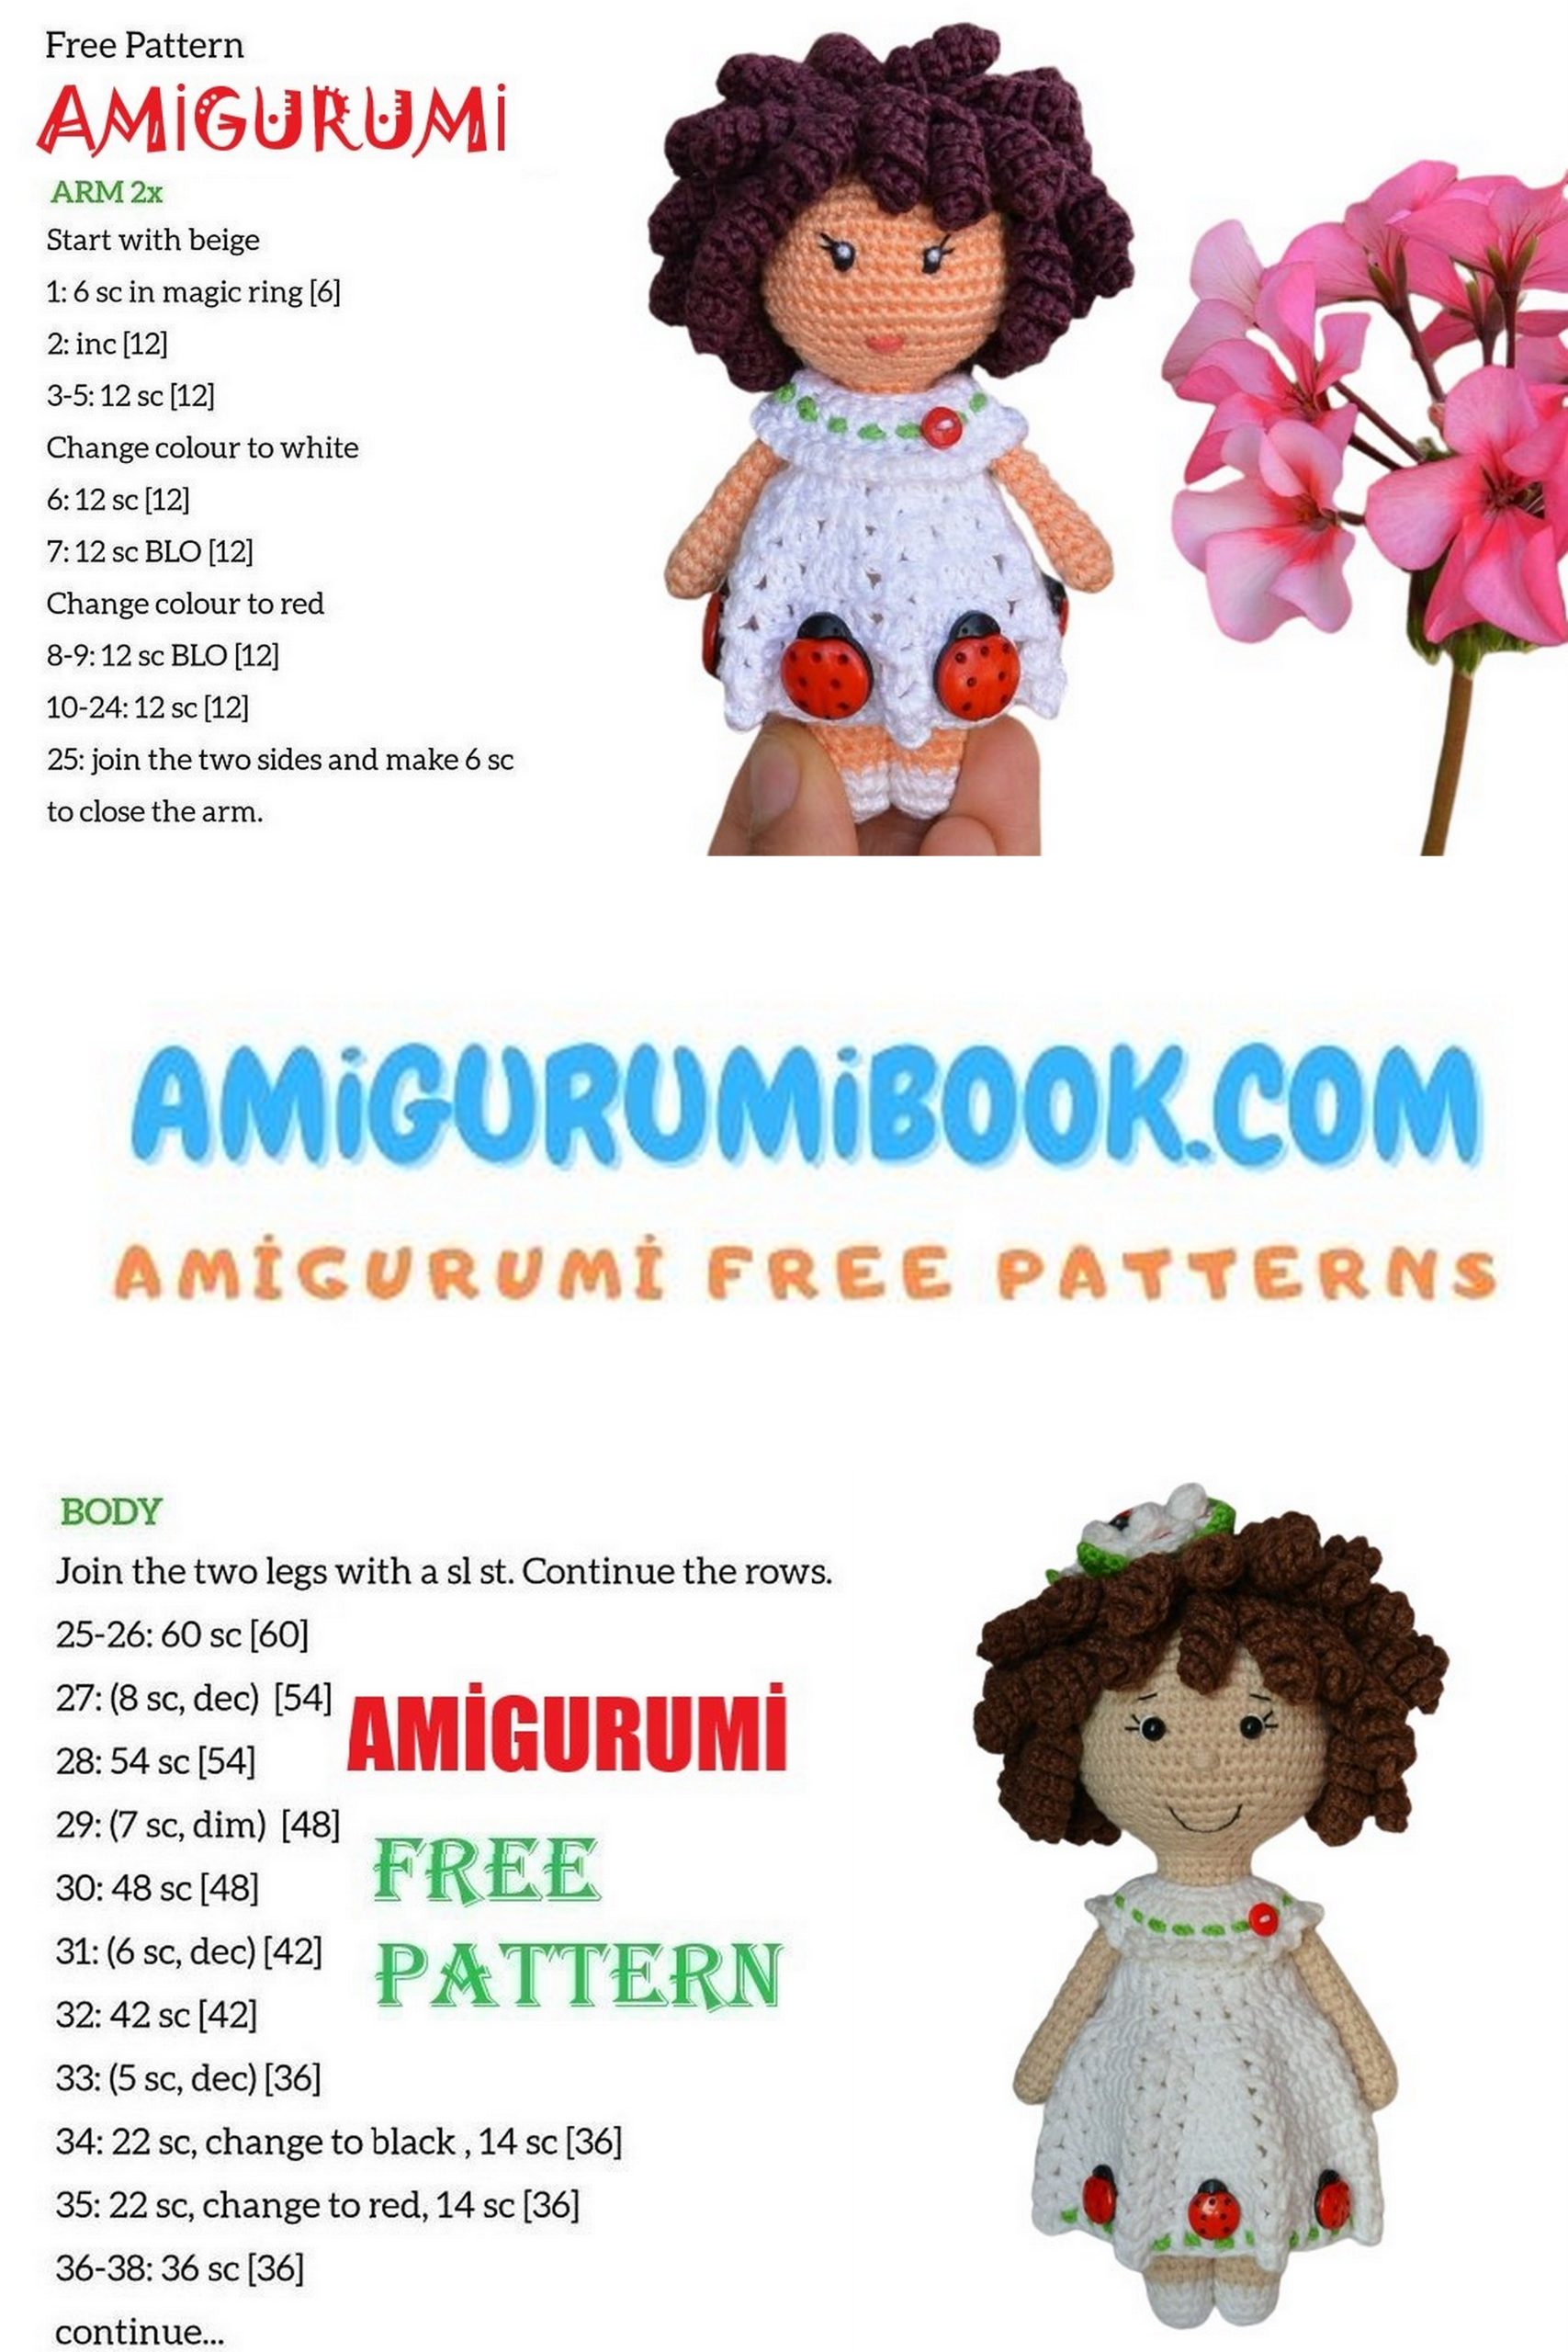
🧸 Body
28: (2 sc, inc) * 6 (24)
29: (3 sc, inc) * 6 (30)
30–31: 30 sc
👉 Change to white yarn (recommended for cleaner look under dress)
32–45: 30 sc
👉 Stuff firmly
👉 Do not cut yarn
🦵 Legs (Divide Work)
Work 15 sc, then join next stitch with the first using sc
👉 Each leg = 14 stitches
Continue with left leg first
🦵 Left Leg
With white yarn:
1–3: 14 sc
4: 14 sc
👉 Change to beige yarn
5–14: 14 sc
👉 Change to white yarn
15–18: 14 sc
👉 Stuff firmly
19: (dec) * 7 (7)
F.o., close and hide yarn
🦵 Right Leg
Attach white yarn at join point
Follow same pattern as left leg
👉 Difference:
Row 4: work 11 sc, then change to beige
Continue same as left leg
👉 Keep color changes at back side
Stuff, close and hide yarn

✋ Arms (Make 2)
With beige yarn:
1: 6 sc in MR (6)
2: (1 sc, inc) * 3 (9)
3–6: 9 sc
7: (2 sc, dec) * 2, 1 sc (7)
8–18: 7 sc
👉 Lightly stuff (about 1/3)
👉 Fold flat and crochet 3 sc through both sides
F.o.
👉 Leave a long tail on one arm for sewing
👗 Dress
With white yarn:
Foundation: ch 27
🔹 Upper Part
1: starting from 4th ch → 1 sc, (hdc, 4 sc) * 4, hdc, 2 sc (30)
2: ch 2, 1 sc, hdc, (4 sc, hdc) * 5, 2 sc (36)
3: ch 2, (1 sc, ch 1, skip 1 st) repeat across (36)
4: ch 2, 1 sc in each st and ch-space (36)
🔹 Waist
5: in FLO → (ch 3, sl st in next st) repeat
👉 Join into round with sl st
👉 Put dress onto doll
🔹 Sleeves Division
6: work in BLO:
ch 2, 5 sc, ch 4, skip 6 sts, 12 sc, ch 4, skip 6 sts, 6 sc, sl st
👉 Arms go into sleeve openings
🔹 Skirt
7: 32 sc
8: ch 3, skip 1 st, (1 sc, ch 1, skip 1 st) repeat
9: in each ch-space:
(2 hdc, ch 2, 2 hdc), then 1 hdc in next space
🔹 Length Adjustment
Continue increasing pattern:
- Next row: 3 hdc between shells
- Then: 4 hdc
- Then: 5 hdc
👉 Continue until:
- 9 hdc → normal length
- 10 hdc → longer dress
✨ Finishing
Adjust puffiness as desired
Fasten off
👗 Dress Decoration
With green yarn:
- Crochet ch 40
- Thread it through the holes of Row 3
- Secure and sew a button
👉 (small decorative button recommended)
✨ Lower Decoration
- Make a chain (~25 cm)
- Thread it through the lower part of the dress
- Secure and cut yarn
👉 Decorate with buttons (ladybug or any style)
🎀 Shaping
- Create soft folds in the dress
- Secure with a few stitches at the bottom
👩🦱 Hair (Curls)
With brown yarn:
🔹 Make Curls (x50)
Foundation: ch 22
Row:
- From 2nd ch: 3 sc in each stitch
- Last 2 stitches: 1 sc in each
F.o., leave small tail
👉 Make about 50 curls
👉 Add more if needed for full coverage
🧵 Attach Hair
- Start from Row 11 of the head
- Insert yarn tails through stitches
- Tie securely and hide ends inside
🔹 Placement
- First row of curls → evenly spaced
- Skip 3 rows
- Second row → attach again
👉 Continue same method
👉 Ensure head is fully covered
✨ Finishing
Embroider eyes and mouth
Adjust curls