
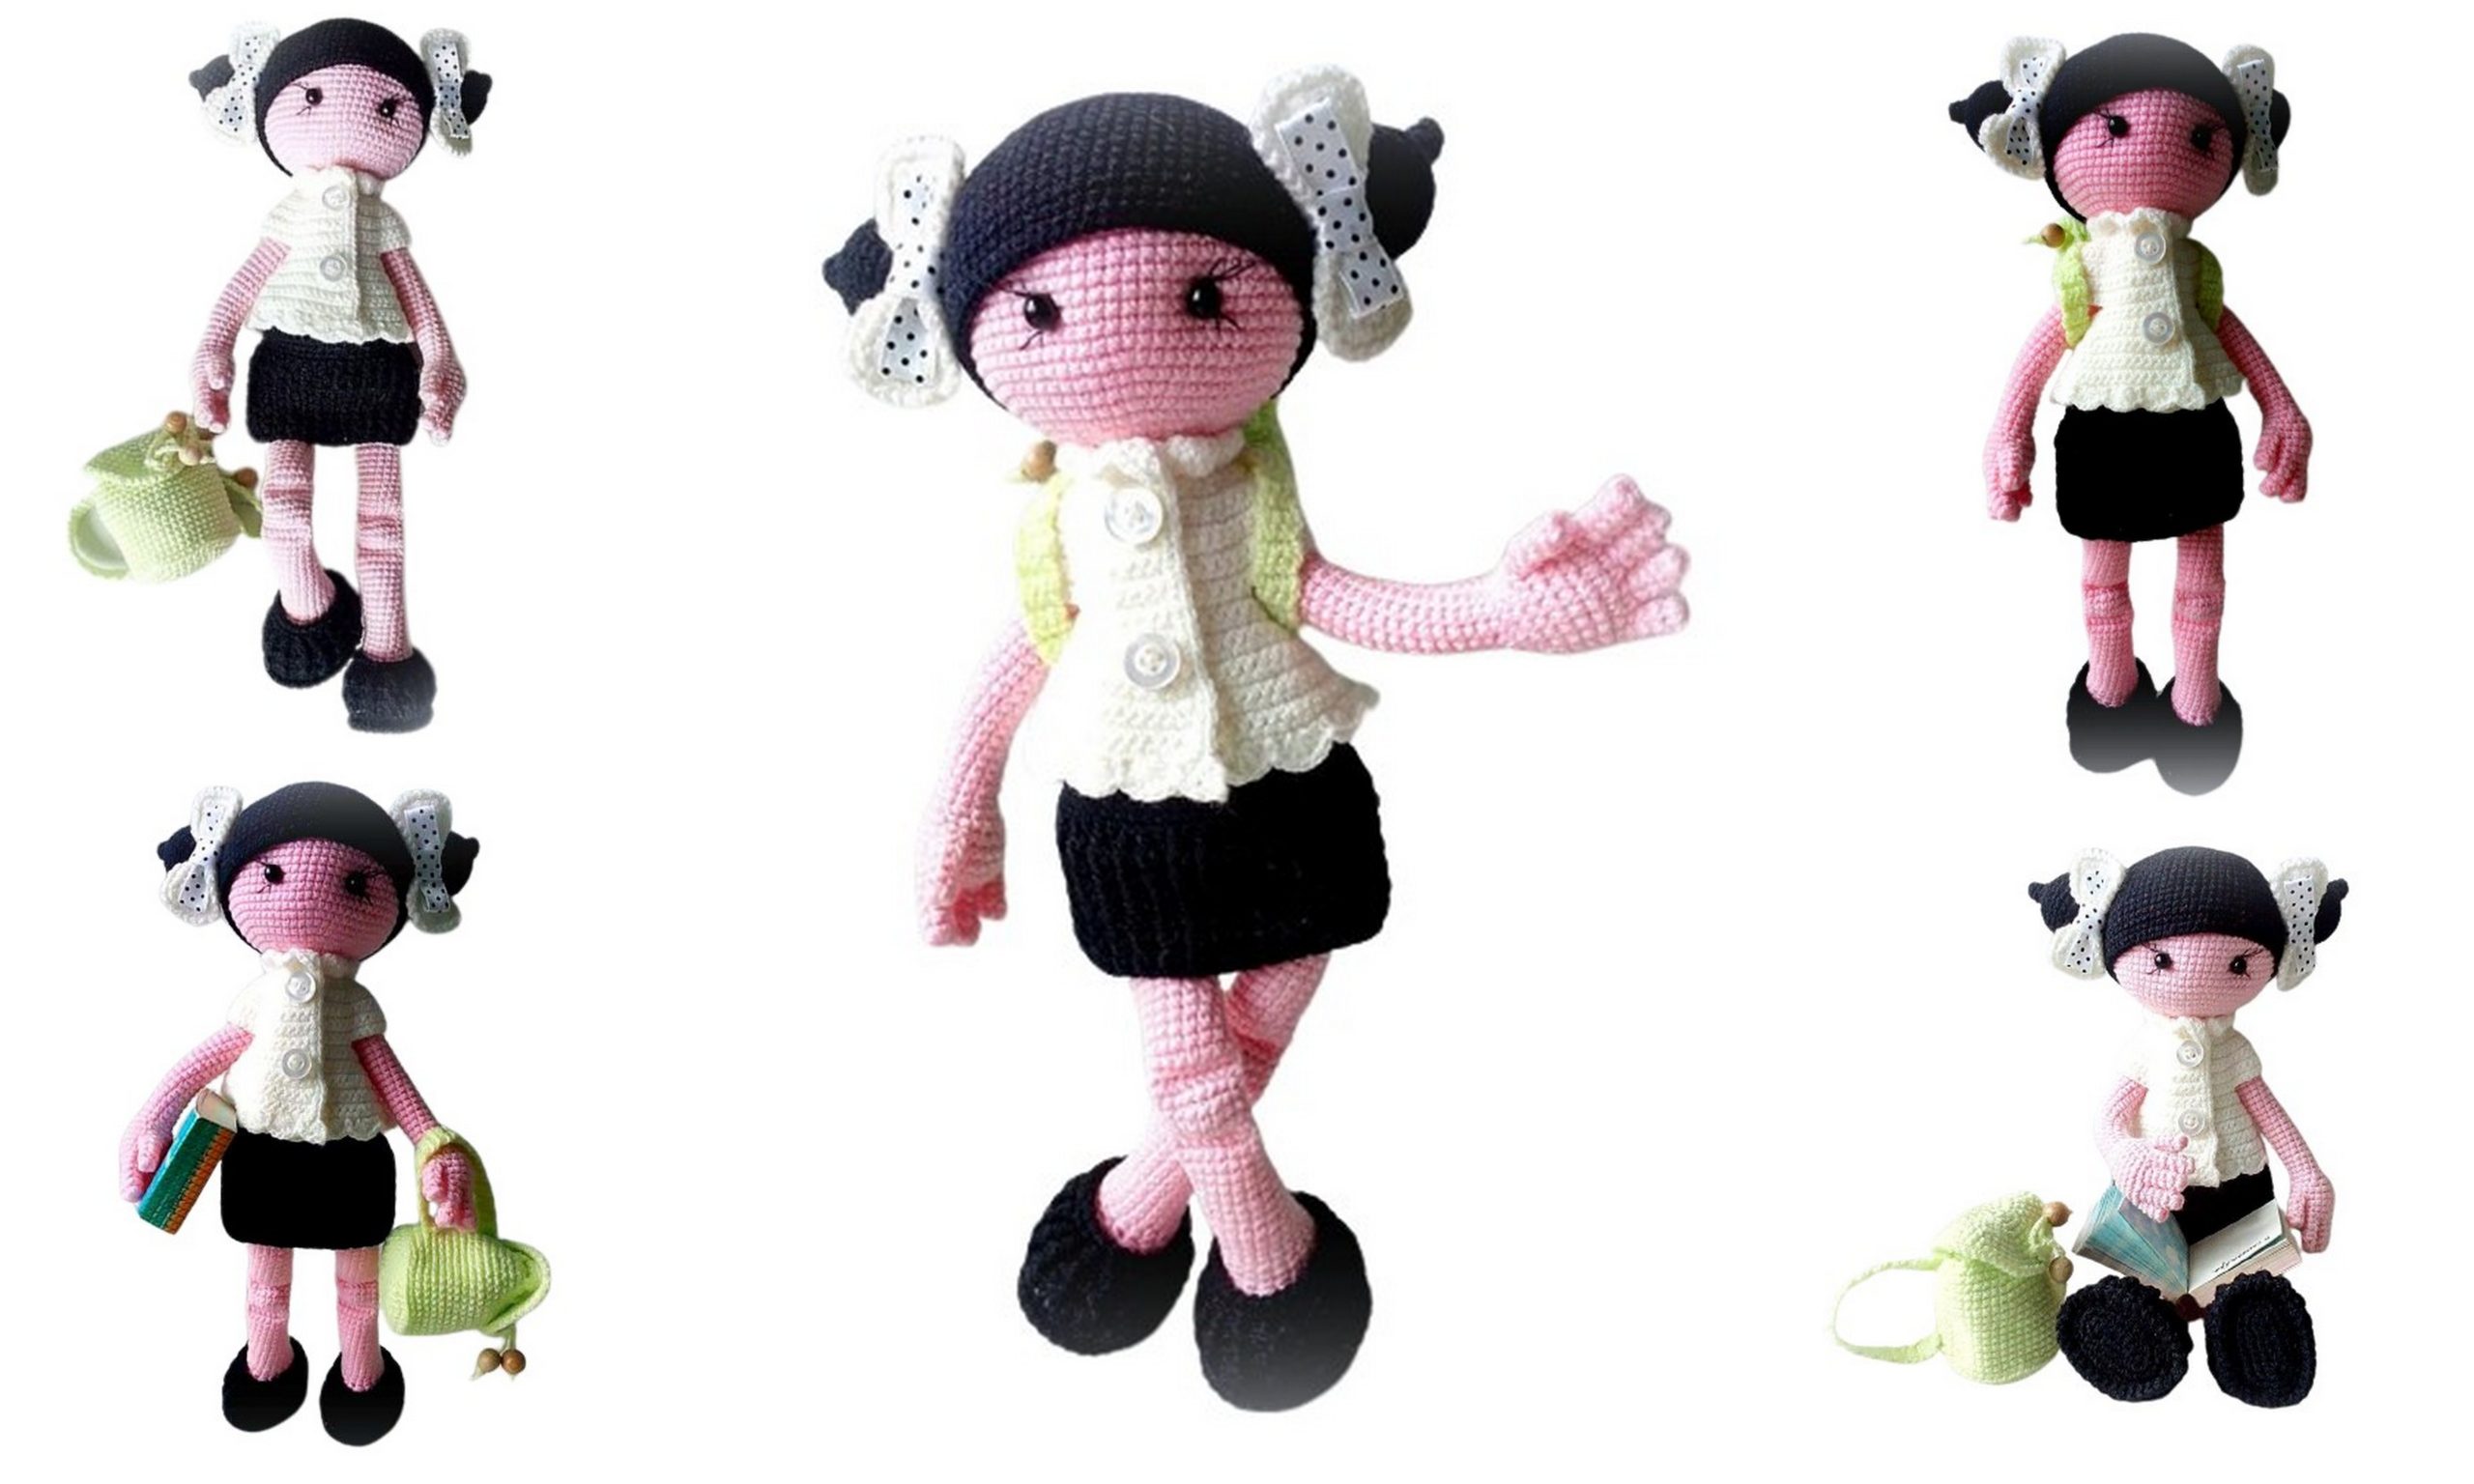
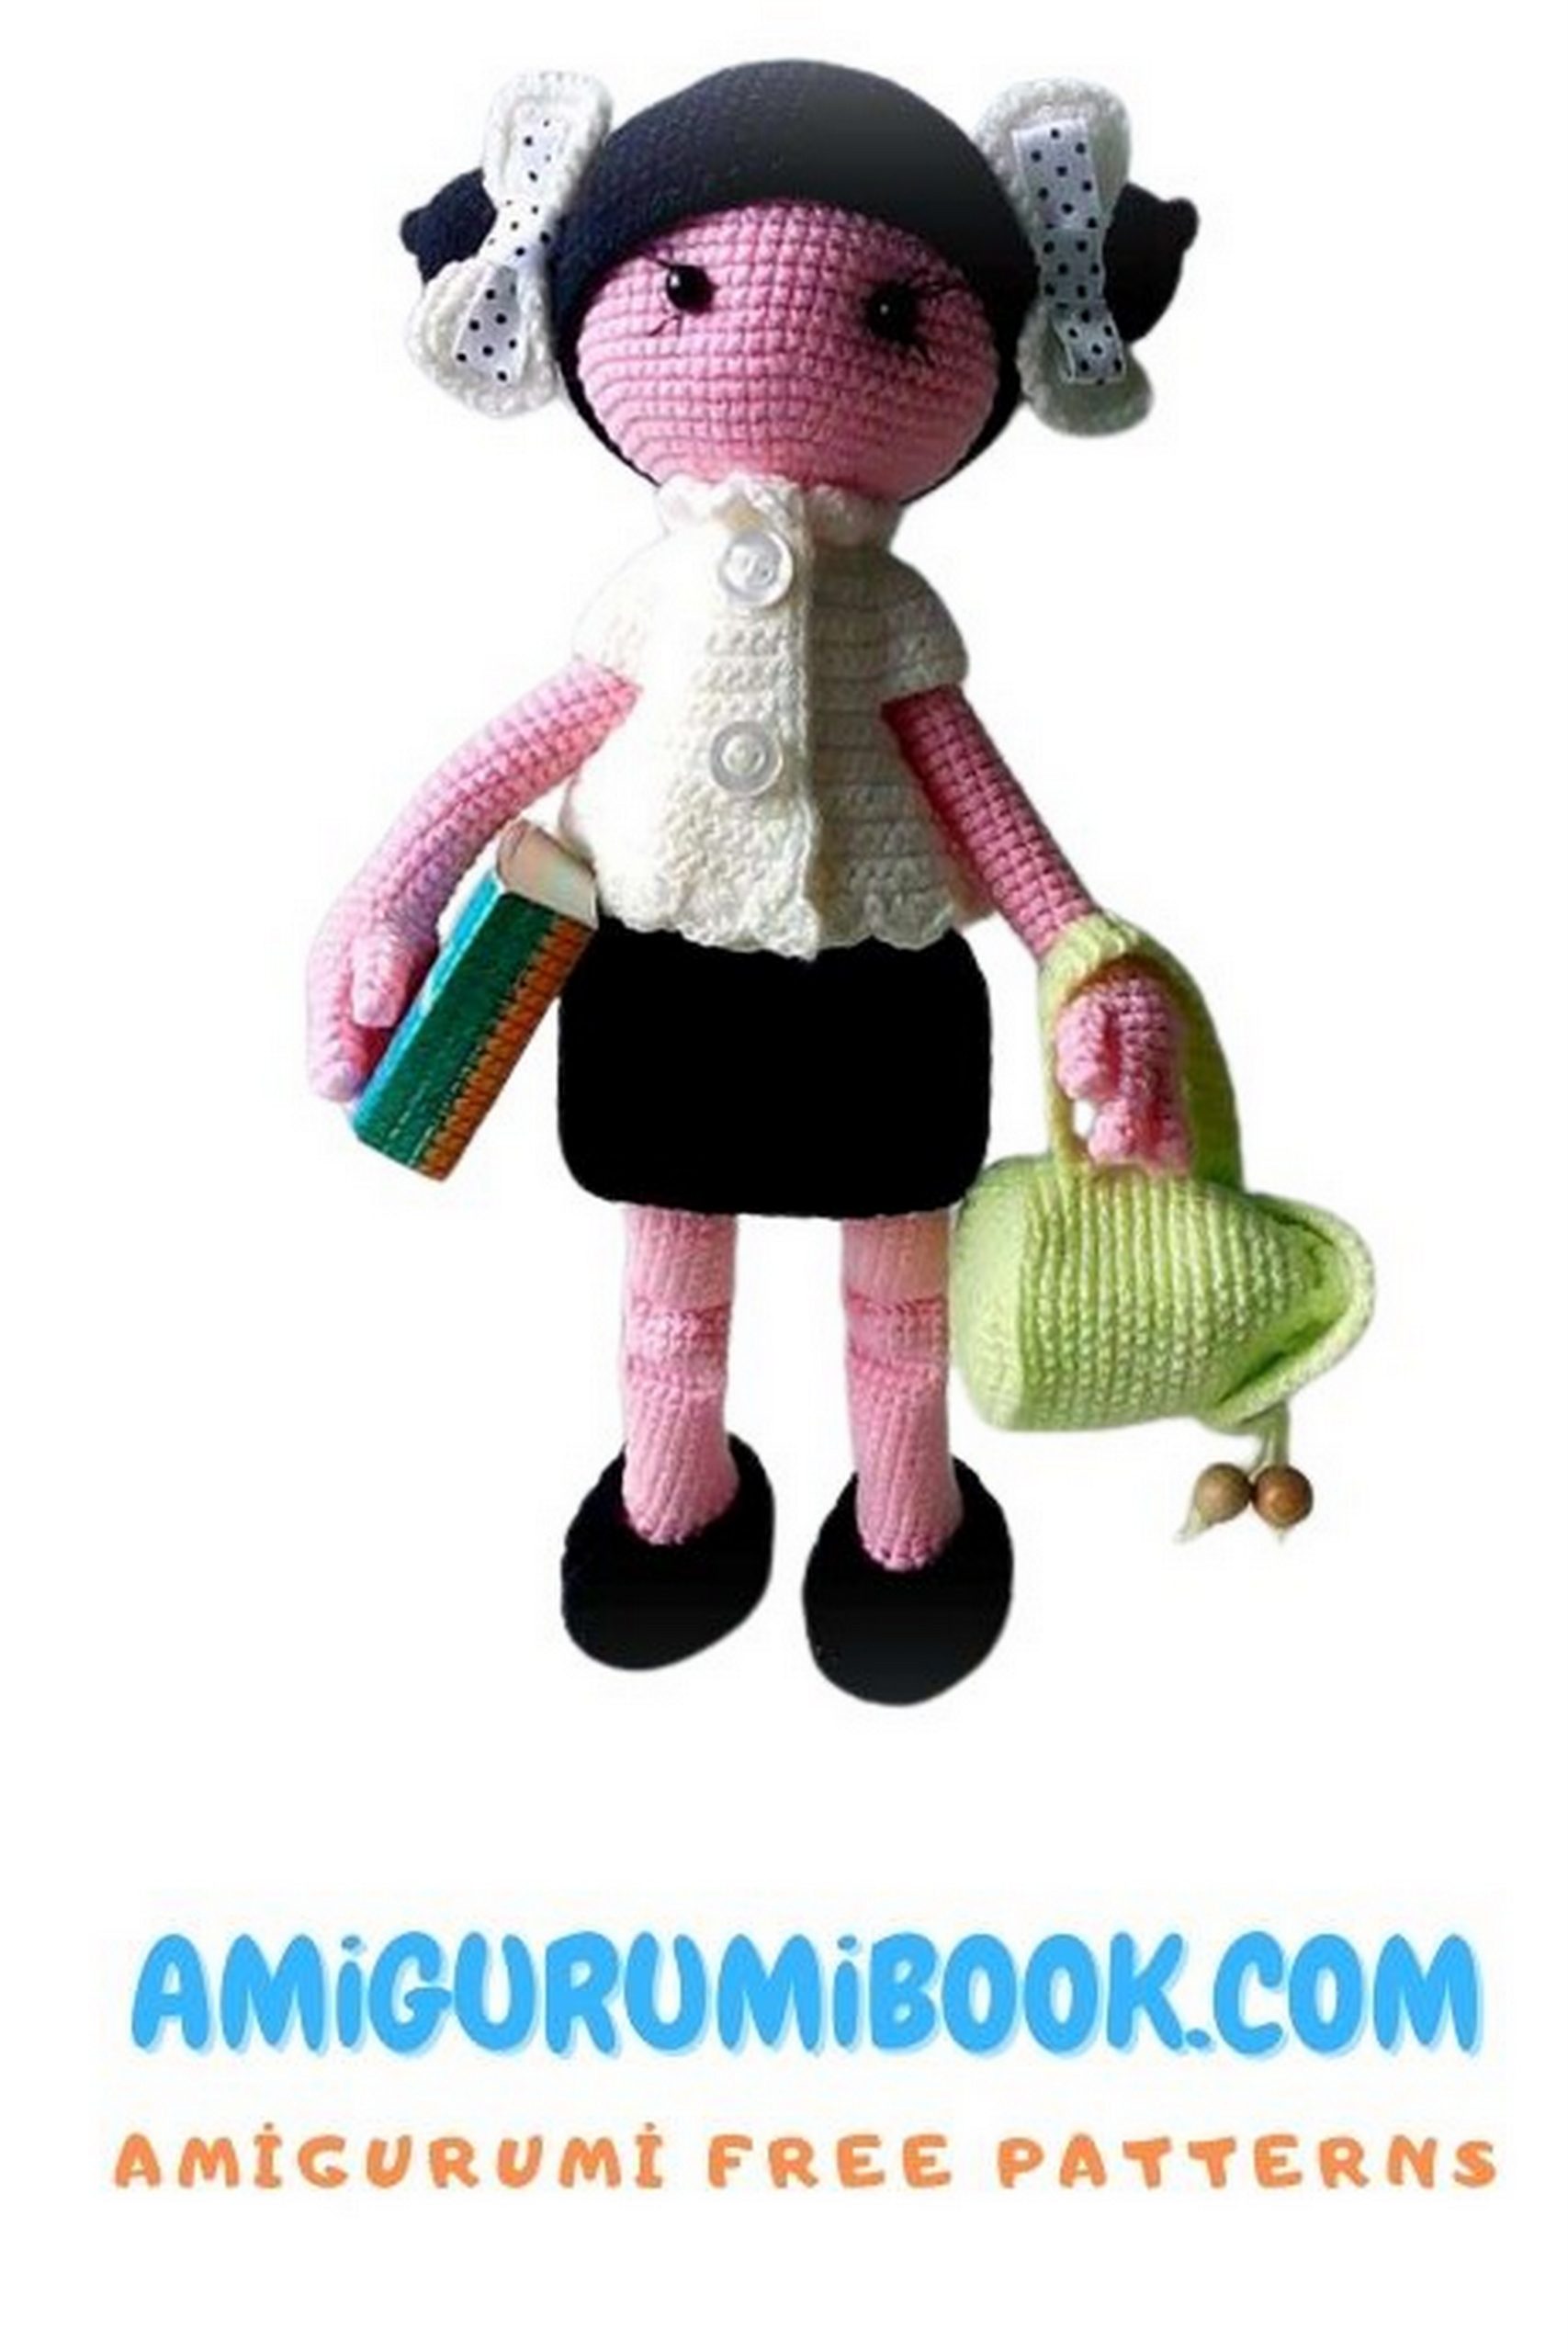
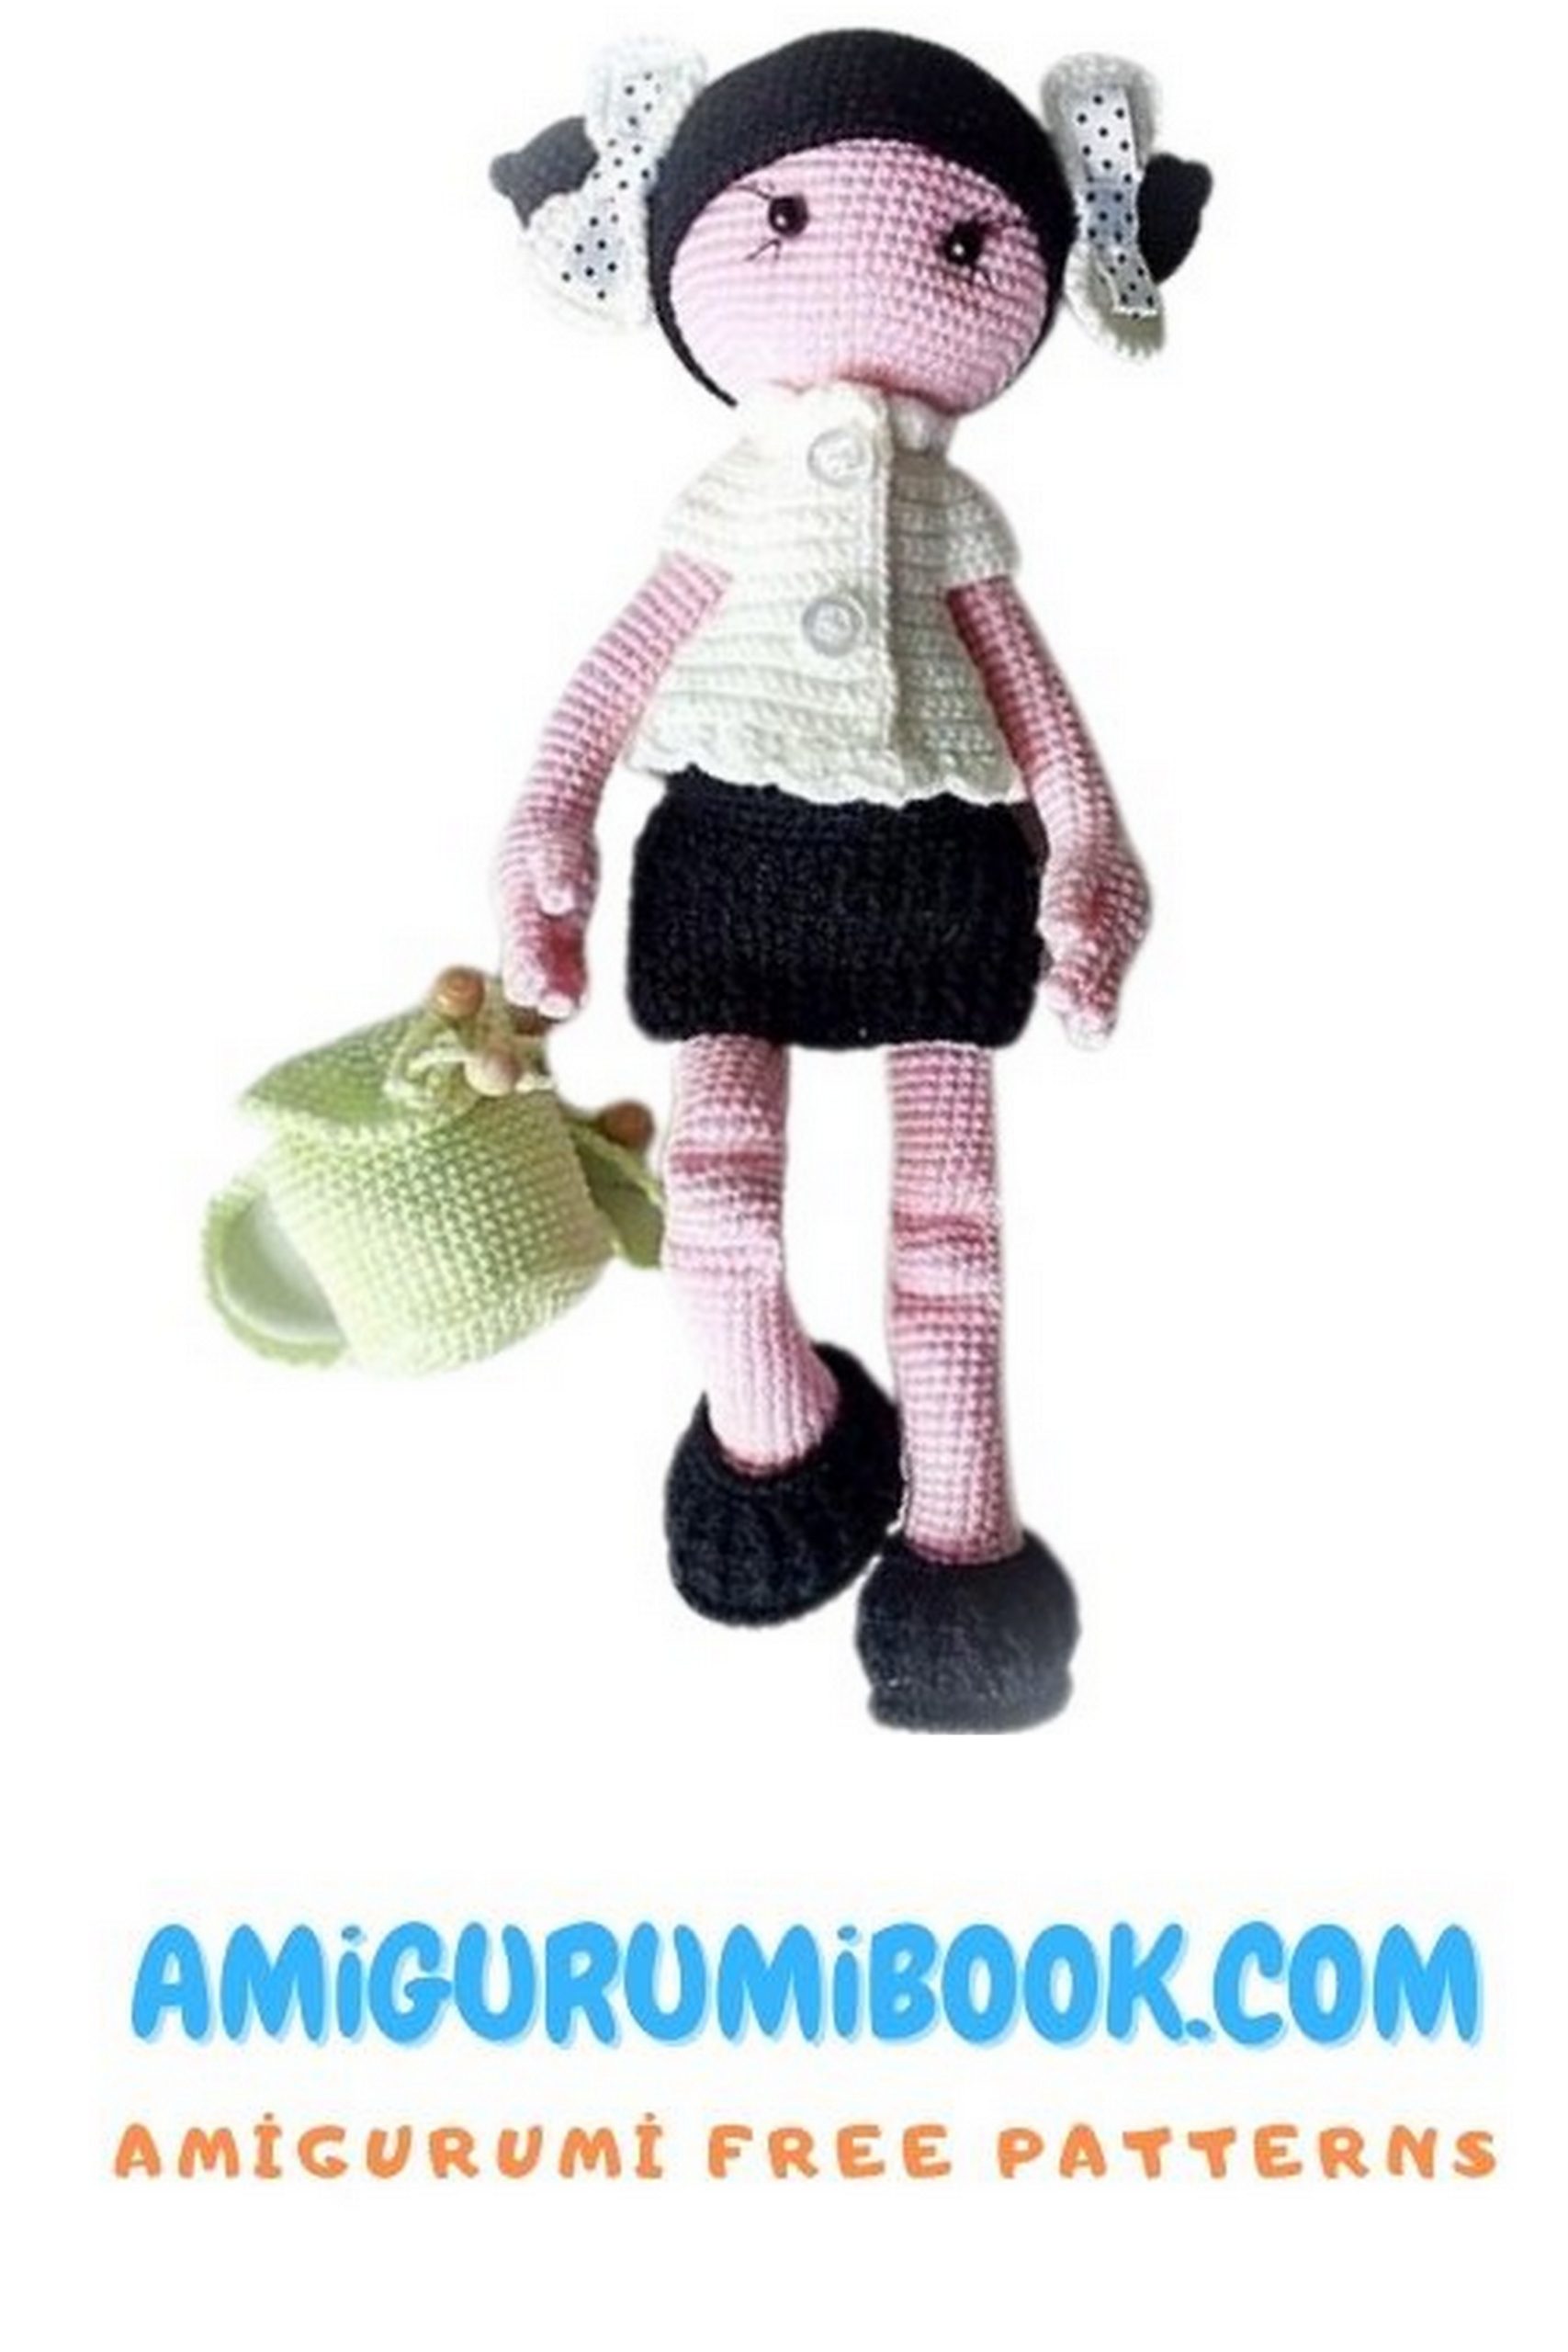
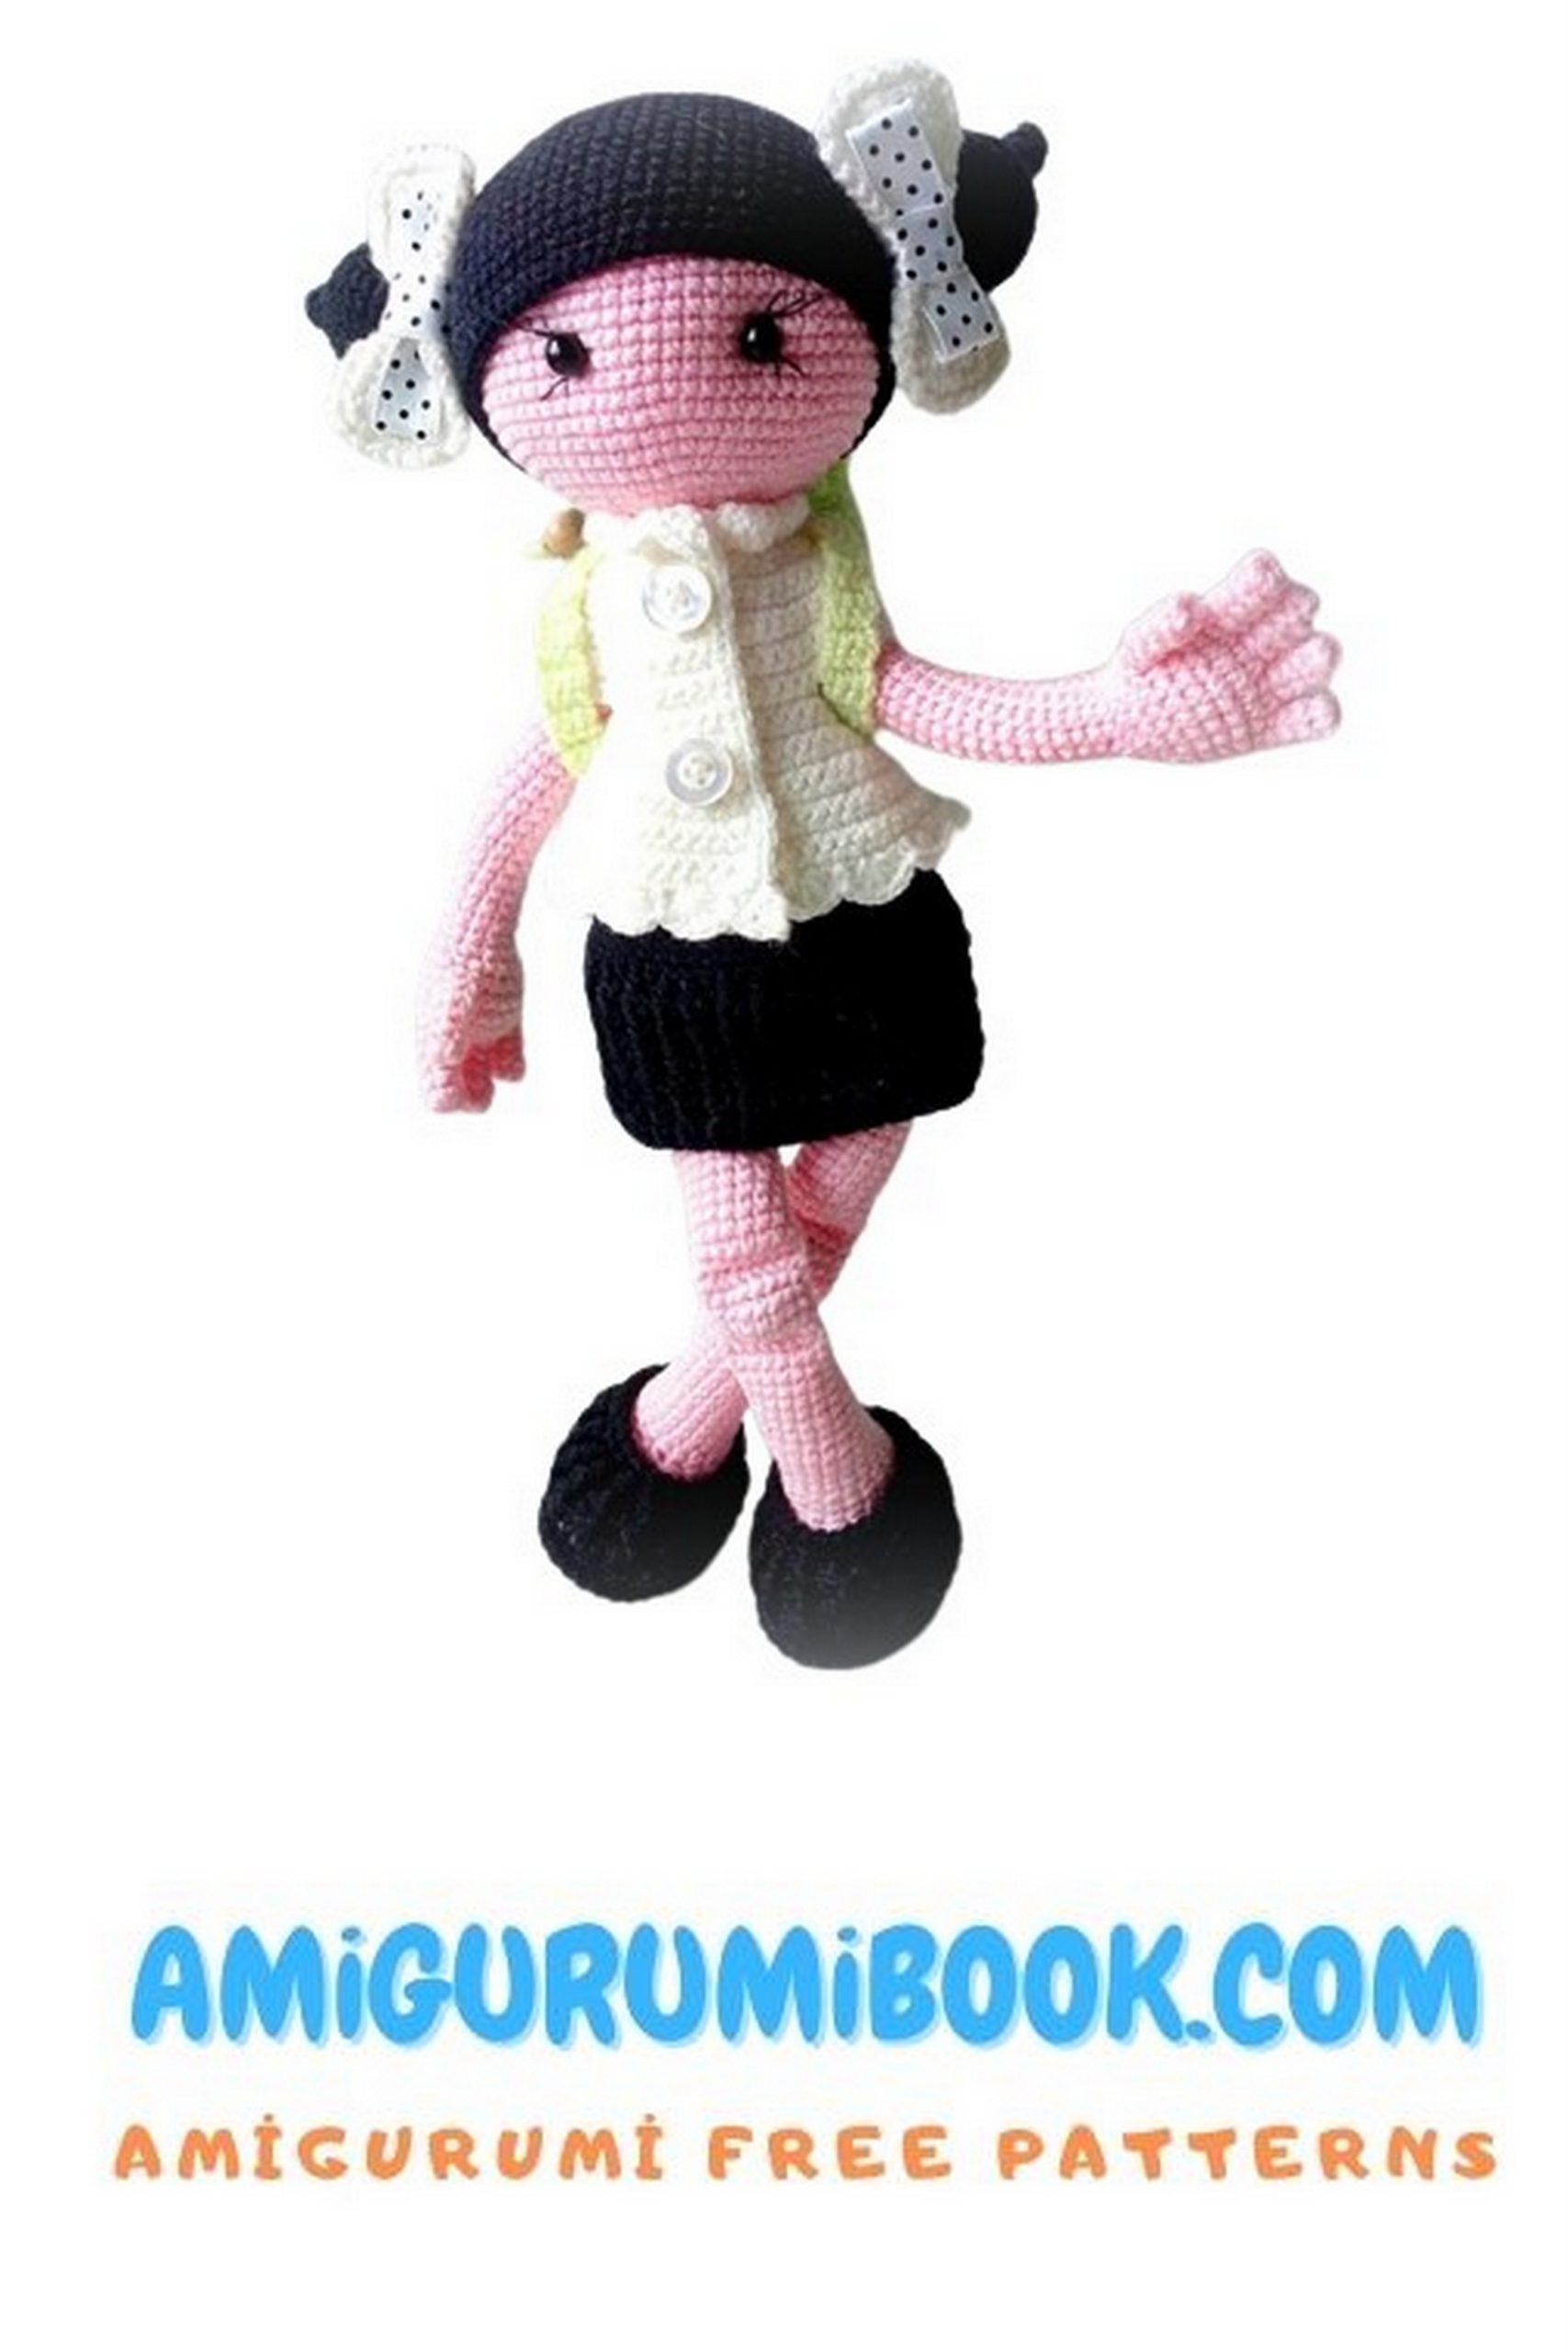
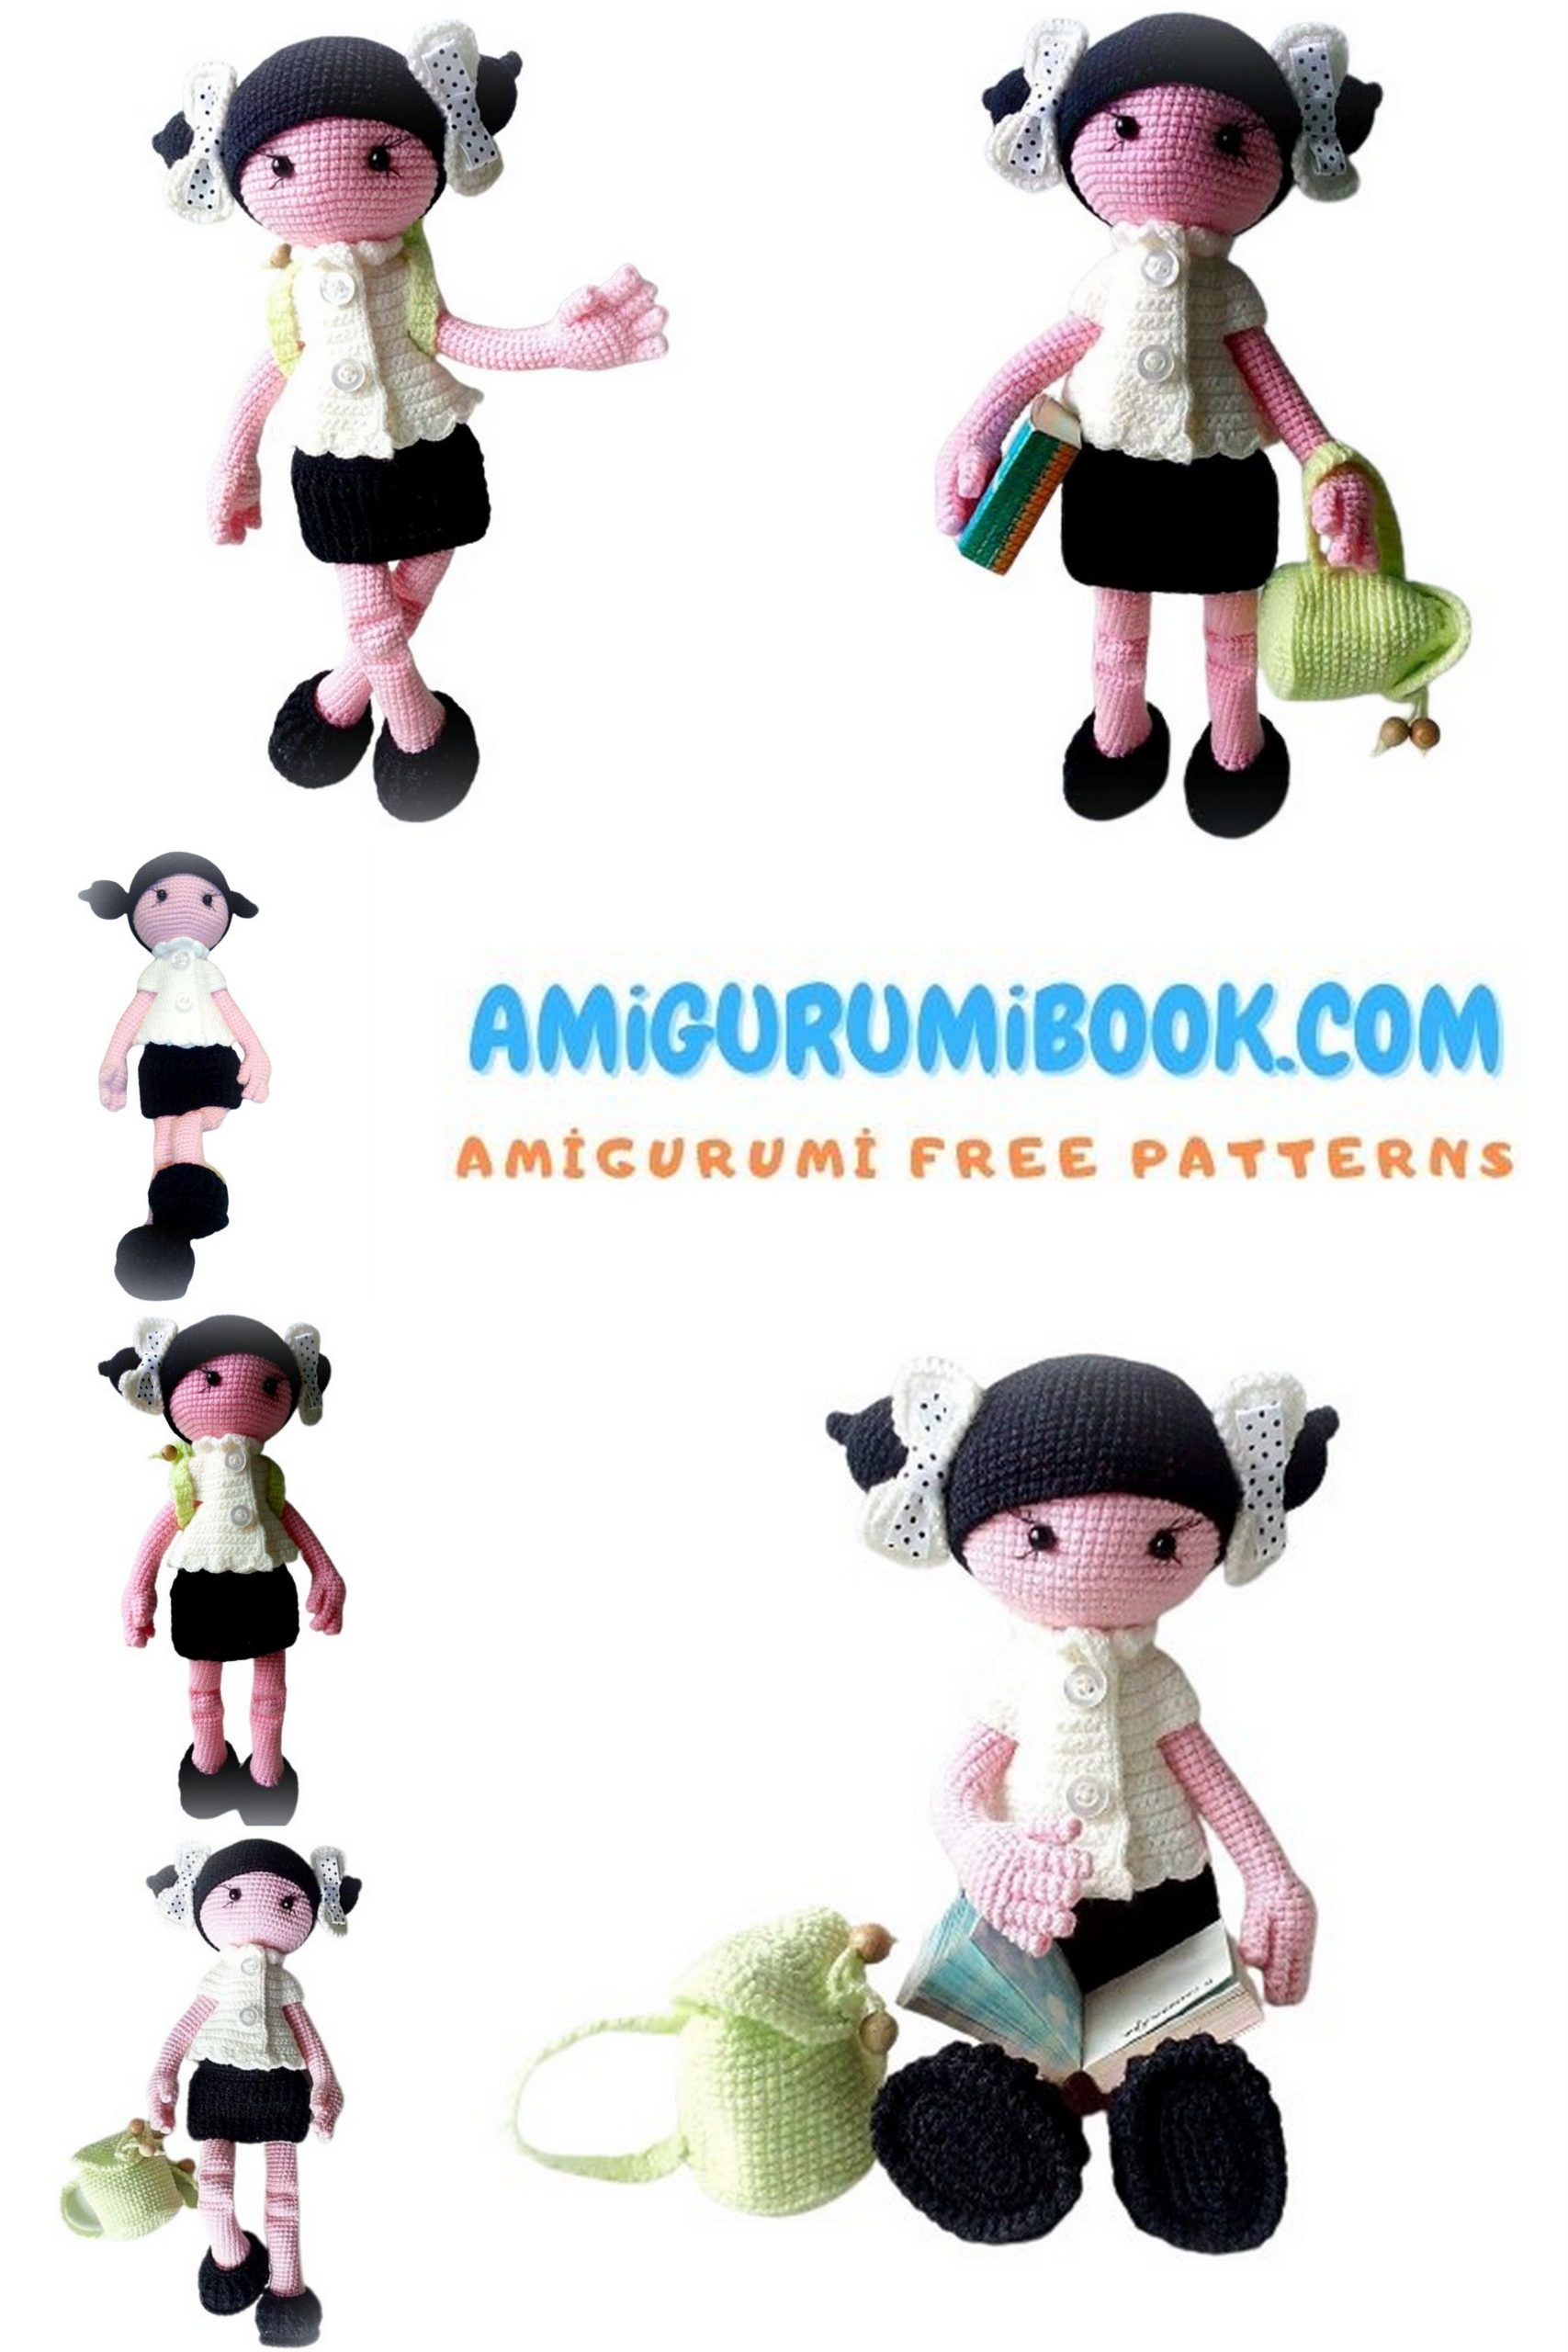
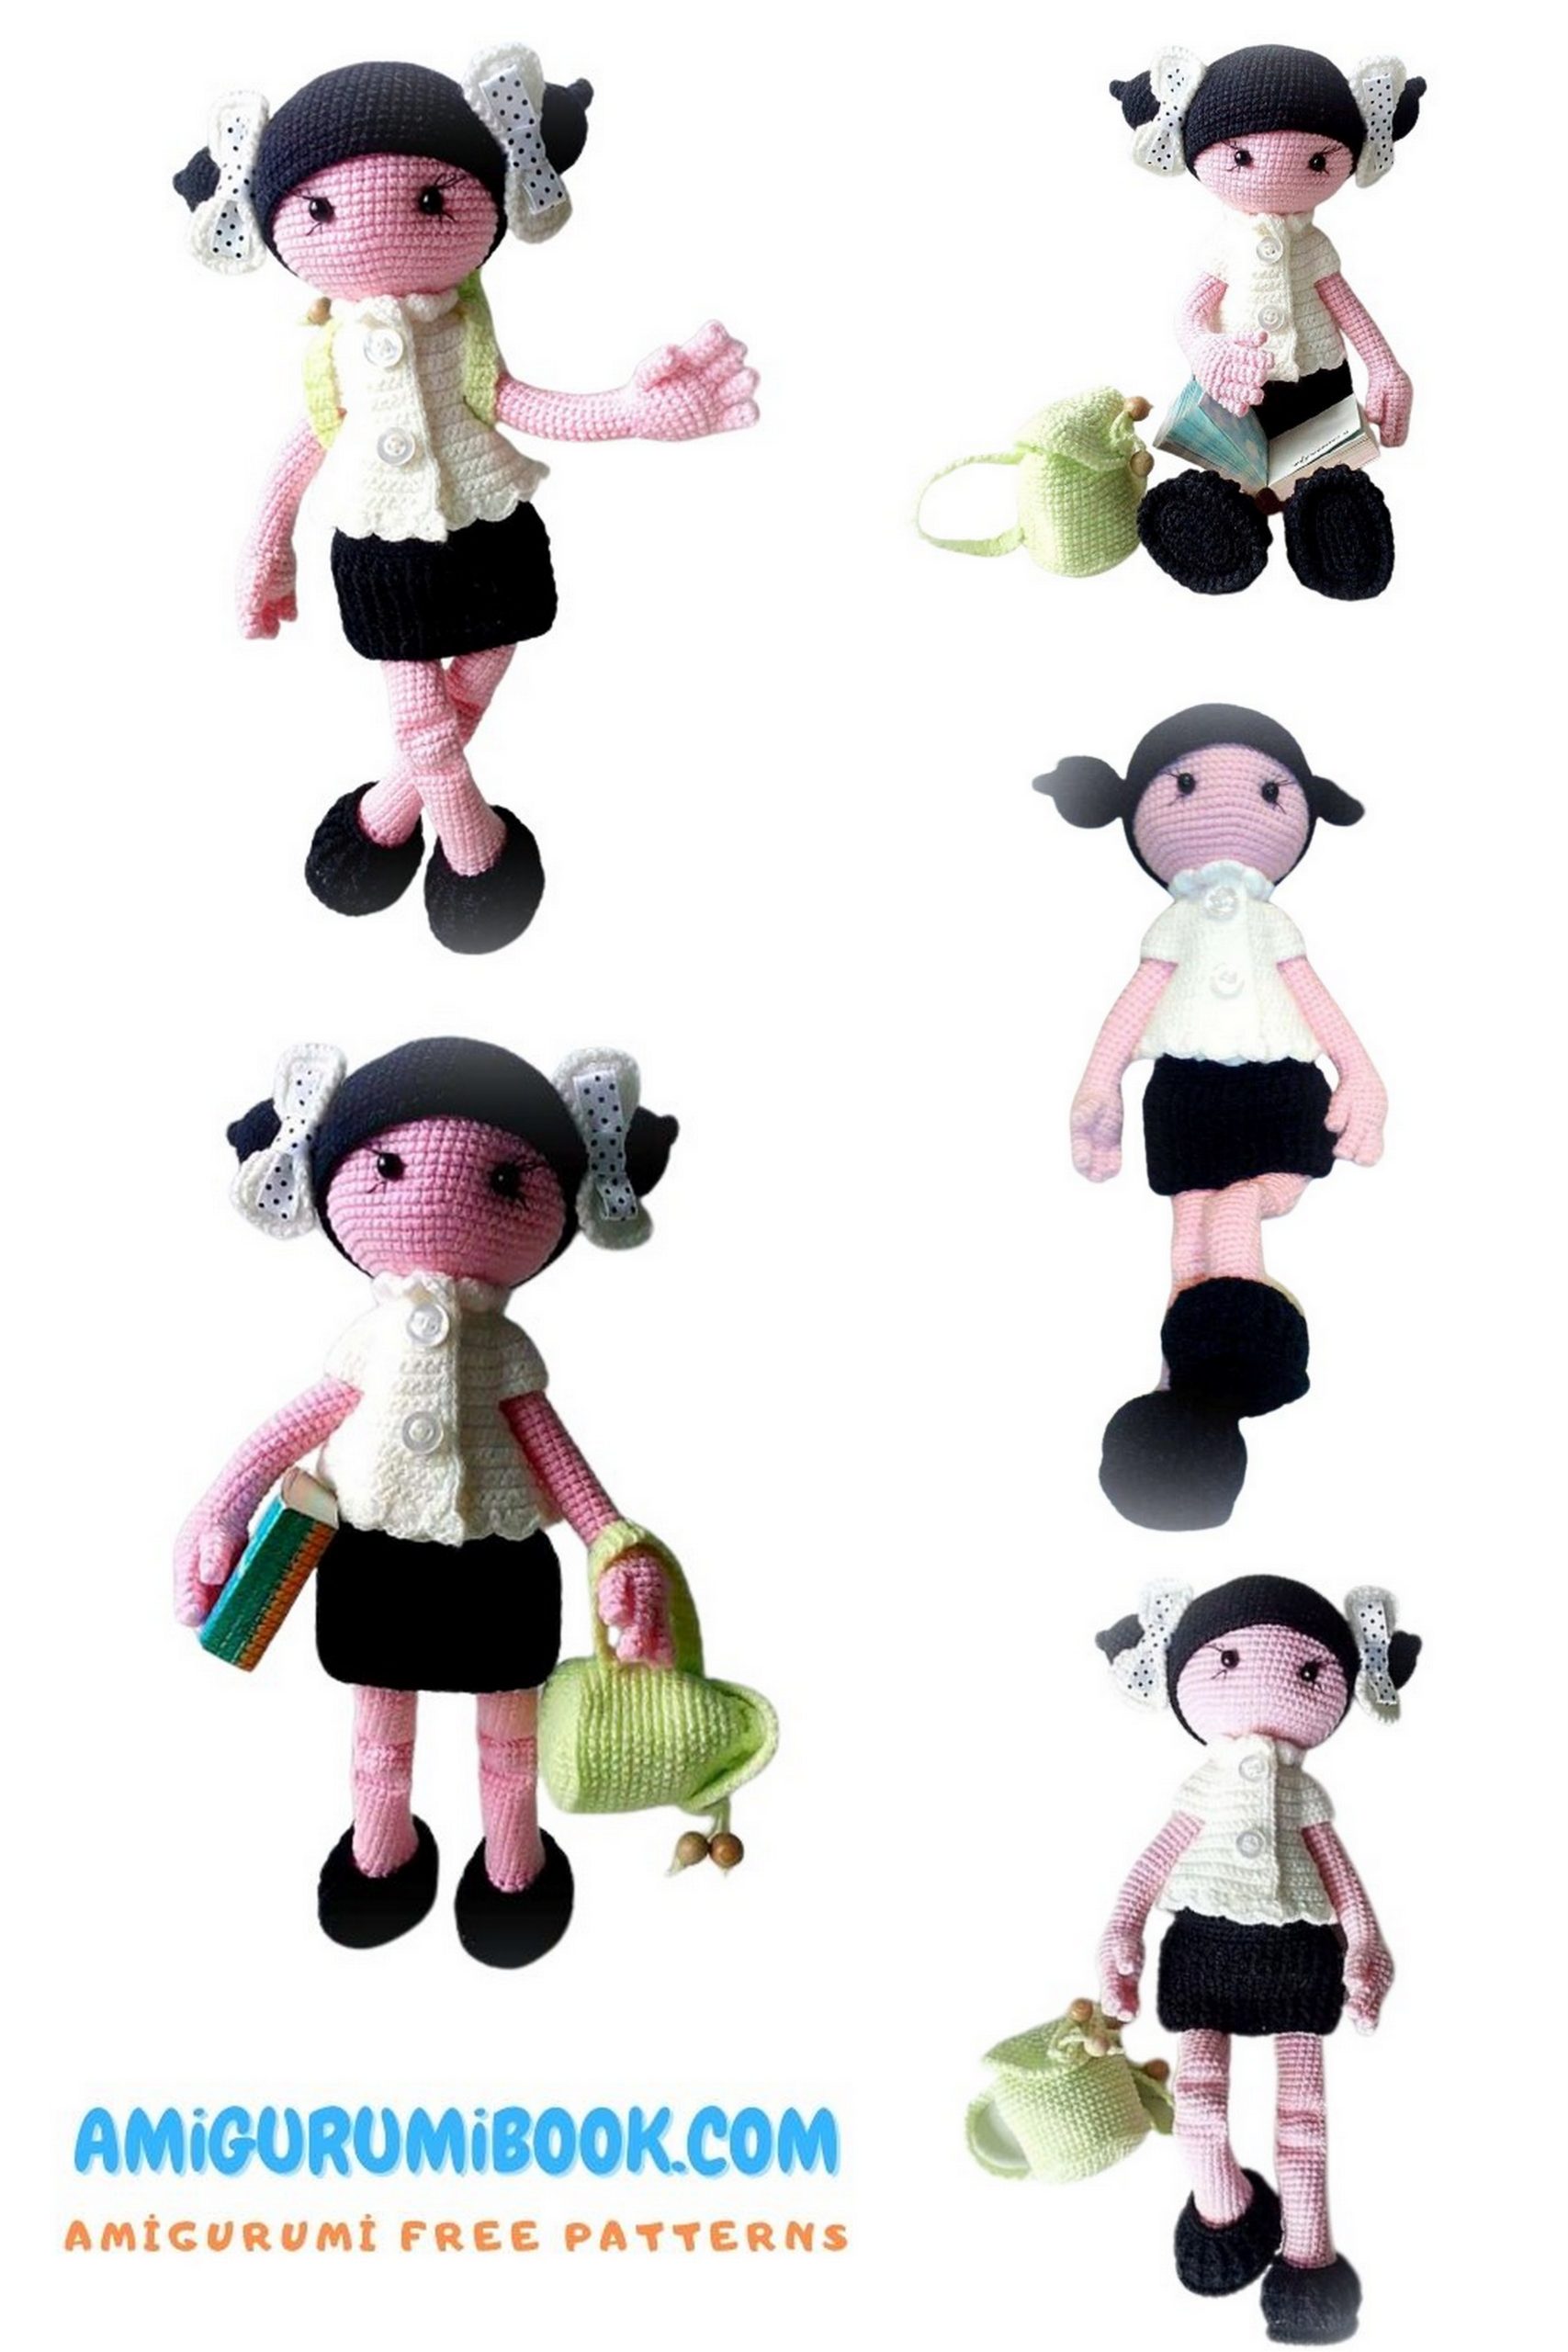
If you love making cute handmade dolls, this Free Schoolgirl Doll Amigurumi Pattern is a perfect crochet project to try. This adorable crochet doll features a charming school outfit, stylish pigtails, boots, and even a tiny backpack, making it a delightful addition to any amigurumi collection.
The step-by-step crochet tutorial will guide you through creating the doll’s legs, body, head, hairstyle, and accessories with clear instructions. Whether you’re an experienced crocheter or an advanced beginner, this pattern will help you create a beautiful handmade schoolgirl doll that’s perfect as a gift, decoration, or collectible amigurumi toy.
If you want to access 1000+ free amigurumi patterns, you can download our application from this link!
🧶 Materials
- Yarn of your choice (recommended yarn weight 220–250 m / 50 g)
- Crochet hooks 1 mm and 1.5 mm
- Beginners may use 1.5 mm and 2 mm hooks (do not use larger sizes)
- Toy stuffing (polyester fiberfill or similar)
- 6 wooden or acrylic beads
- 4 beads – 10 mm diameter
- 2 beads – 20 mm diameter
- Beads can also be replaced with stuffing
- Safety eyes or black beads (6–8 mm)
- Nylon thread for attaching the arms
- Thin black cotton thread for attaching eyes, hair, and embroidering eyelashes
- 2 small buttons for the doll’s sweater
- Decorative accessories (optional): beads, satin ribbon, small buttons
- Scissors
- Sewing needle
✂️ Abbreviations
dec – decrease
ch – chain
sc – single crochet
dc – double crochet
sl st – slip stitch
inc – increase
🦵 Legs (Make 2)
Crochet both legs simultaneously, starting from opposite ends of the yarn ball.
Use the main body color.
Start with ch 6.
1: In the 2nd ch from hook, make 2 sc, 3 sc, 4 sc in the last chain.
Continue on the other side of the chain:
3 sc, inc.
(12)
From this point, begin each round with ch 1 and finish with sl st.
2: inc, 5 sc, 2 inc, 5 sc, inc.
(18)
3: inc, 7 sc, 3 inc, 5 sc, 2 inc.
(24)
4: 2 inc, 8 sc, 4 inc, 8 sc, 2 inc.
(32)
5: sc in each st around in back loops only.
(32)
6–8: sc in each st around.
(32)
Cut the yarn and set aside.
If desired, prepare plastic insoles, but do not insert them yet.
Continue Crocheting the Legs
9: 11 sc, dec ×6, 9 sc.
(26)
10: 10 sc, dec ×4, 8 sc.
Insert the insole.
11: dec, 8 sc, dec ×2, 6 sc, dec.
(18)
12: sc in each st around.
(18)
Stuff the leg firmly with filling, paying special attention to the toe area.

🧵 Legs & Body (Continued)
Working in Spiral
13: dec, 14 sc, dec (16)
14–26: sc in each st around (16) — 13 rounds
Stuff the leg, leaving about 0.7–1 cm at the top unfilled.
Shaping the Leg
27: 5 sc, fold the leg flat and join both sides with 8 sc.
The beginning of the round is now where the 8th sc ends. Mark this point.
28: ch 1,
8 sc in back loops,
8 sc in front loops (creates an opening).
(16)
29: Skip the turning chain and crochet 16 sc. (16)
30–32: sc in each st around (16)
Insert a 10 mm bead or fill the opening with stuffing.
33: Fold the leg again and join both sides with 8 sc.
Move the marker to the new start of the round.
34: ch 1,
8 sc in back loops,
8 sc in front loops (second opening).
(16)
35: Skip the turning chain, 16 sc (16)
36–46: sc in each st around (16) — 11 rounds
Stuff the piece.
Change yarn color to the shorts/shirt color.
47–48: sc in each st around (16)
🧶 Joining the Legs & Starting the Body
49: Fold the leg flat and join both sides with 8 sc.
50: ch 1,
8 sc in back loops,
8 sc in front loops (creates opening).
(16)
51: Skip the turning chain, 16 sc (16)
52–53: sc in each st around (16)
Cut yarn on one leg only.
Leave yarn attached on the second leg.
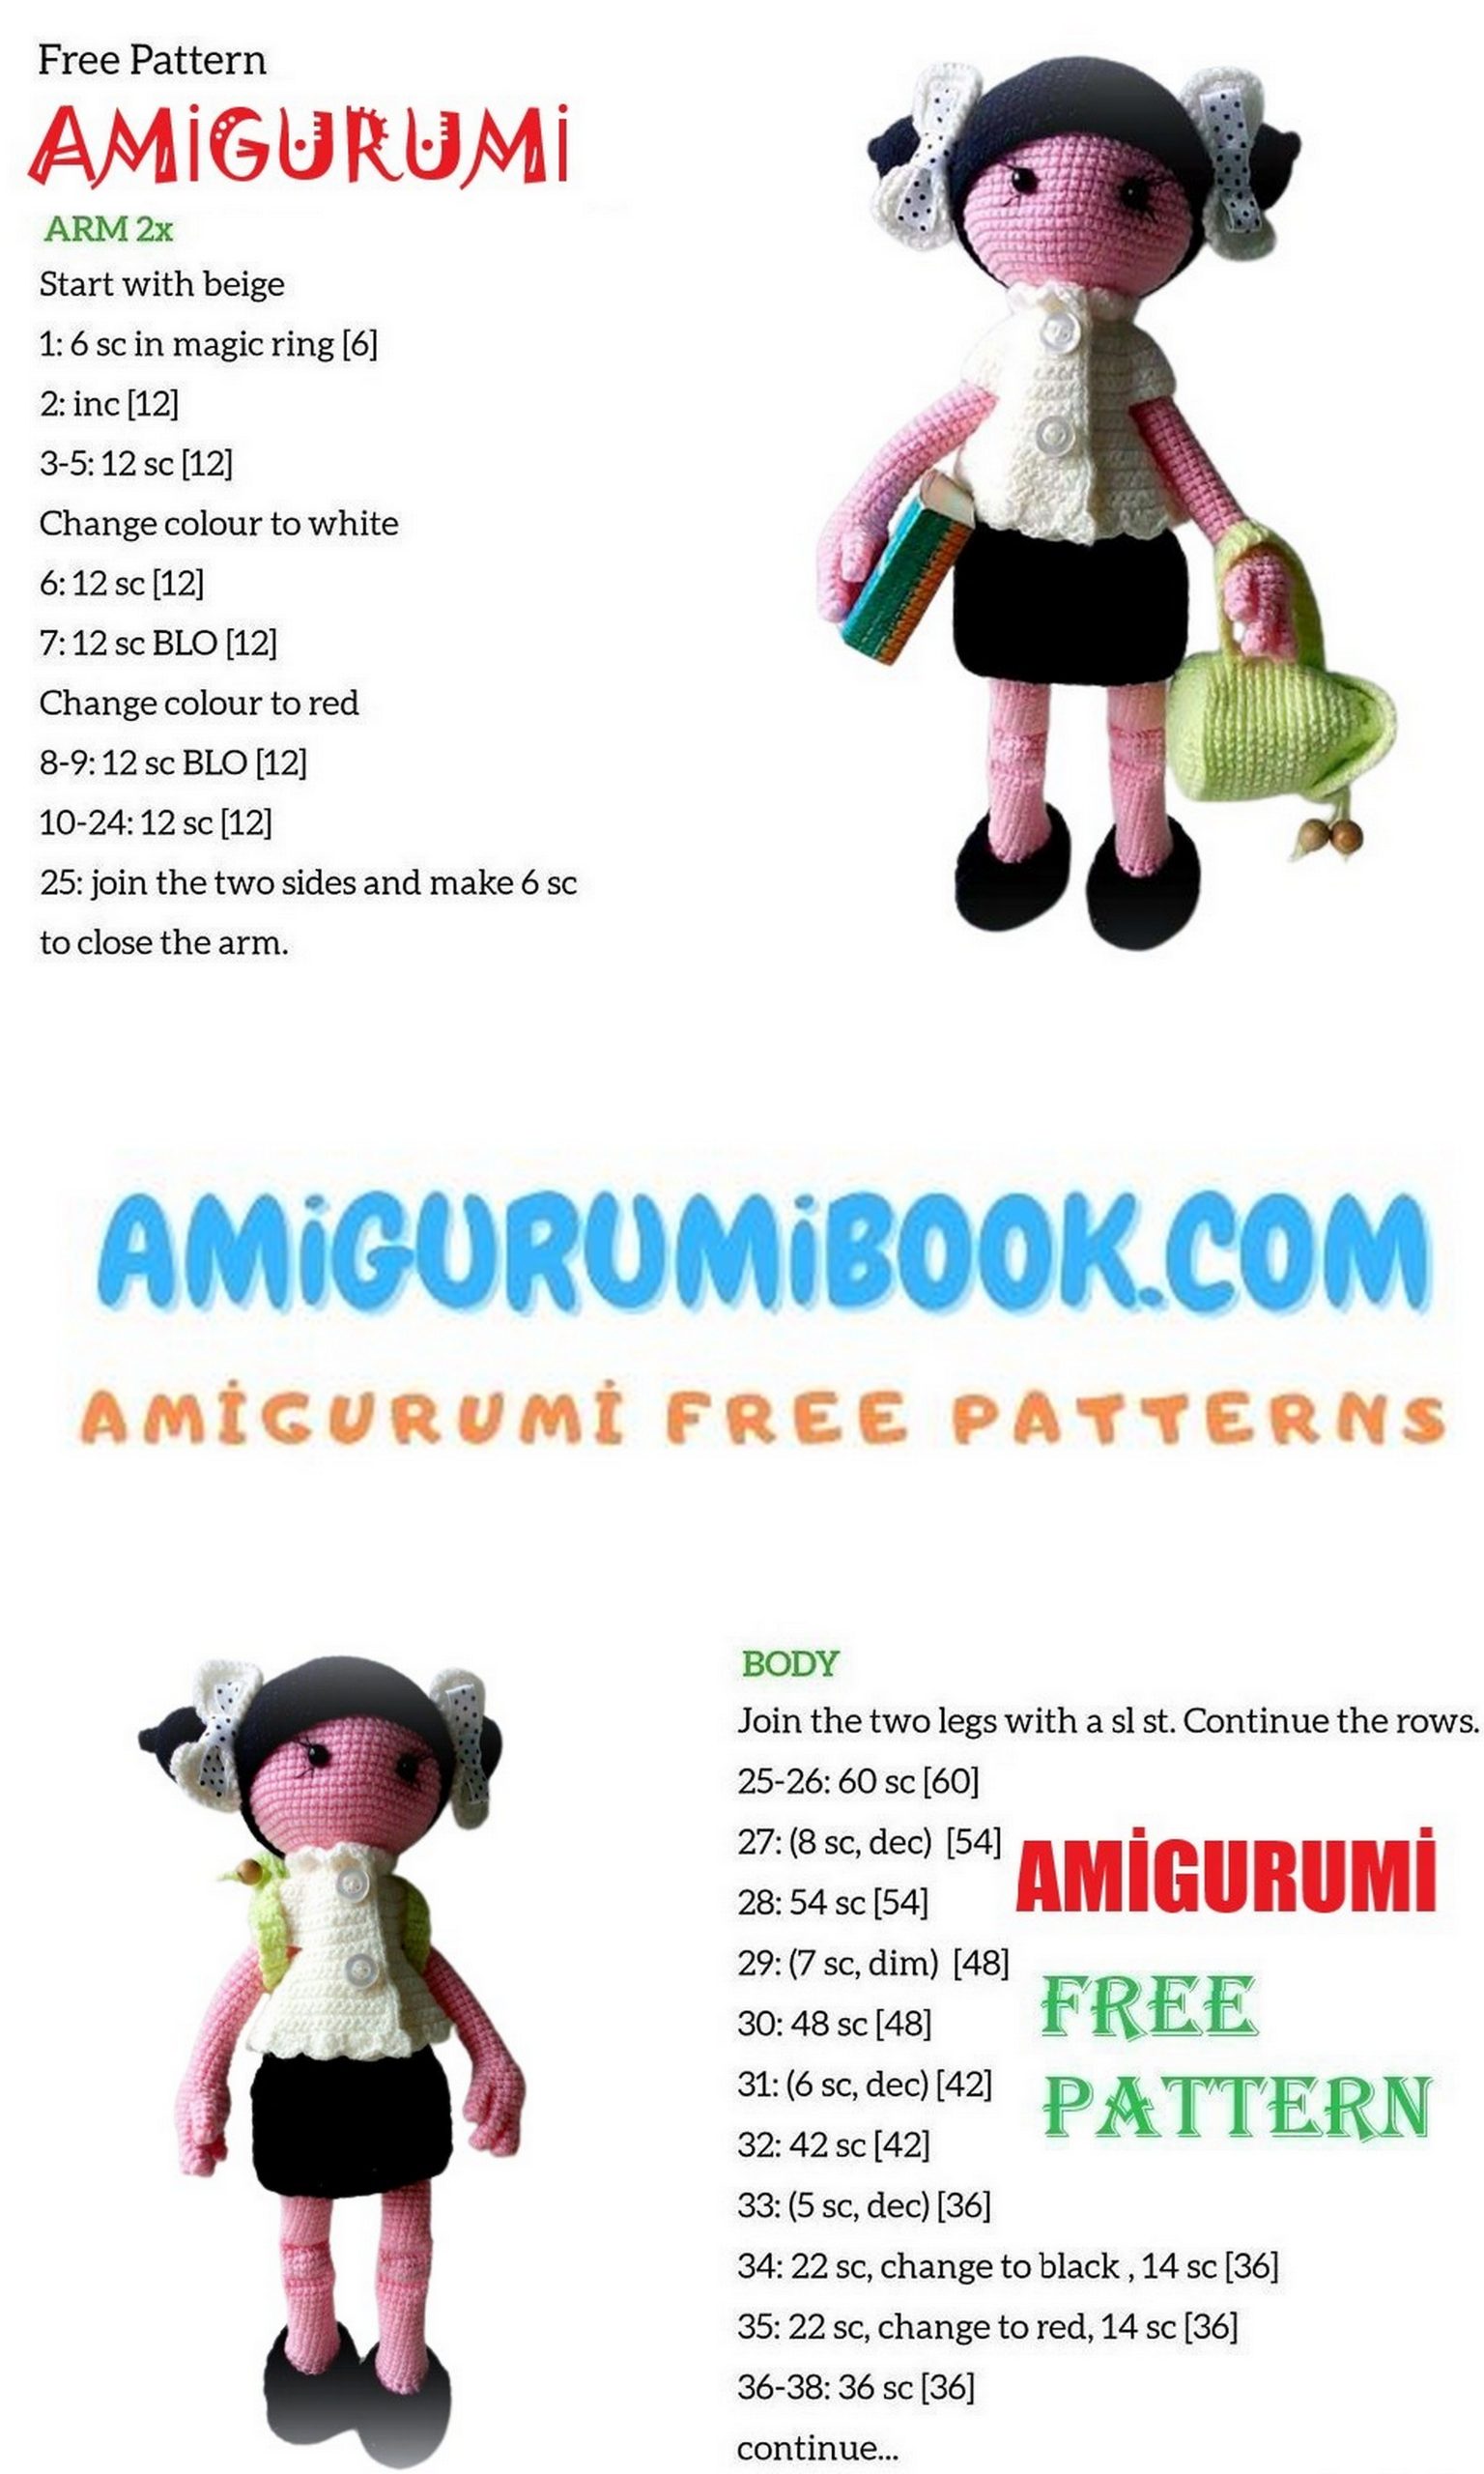
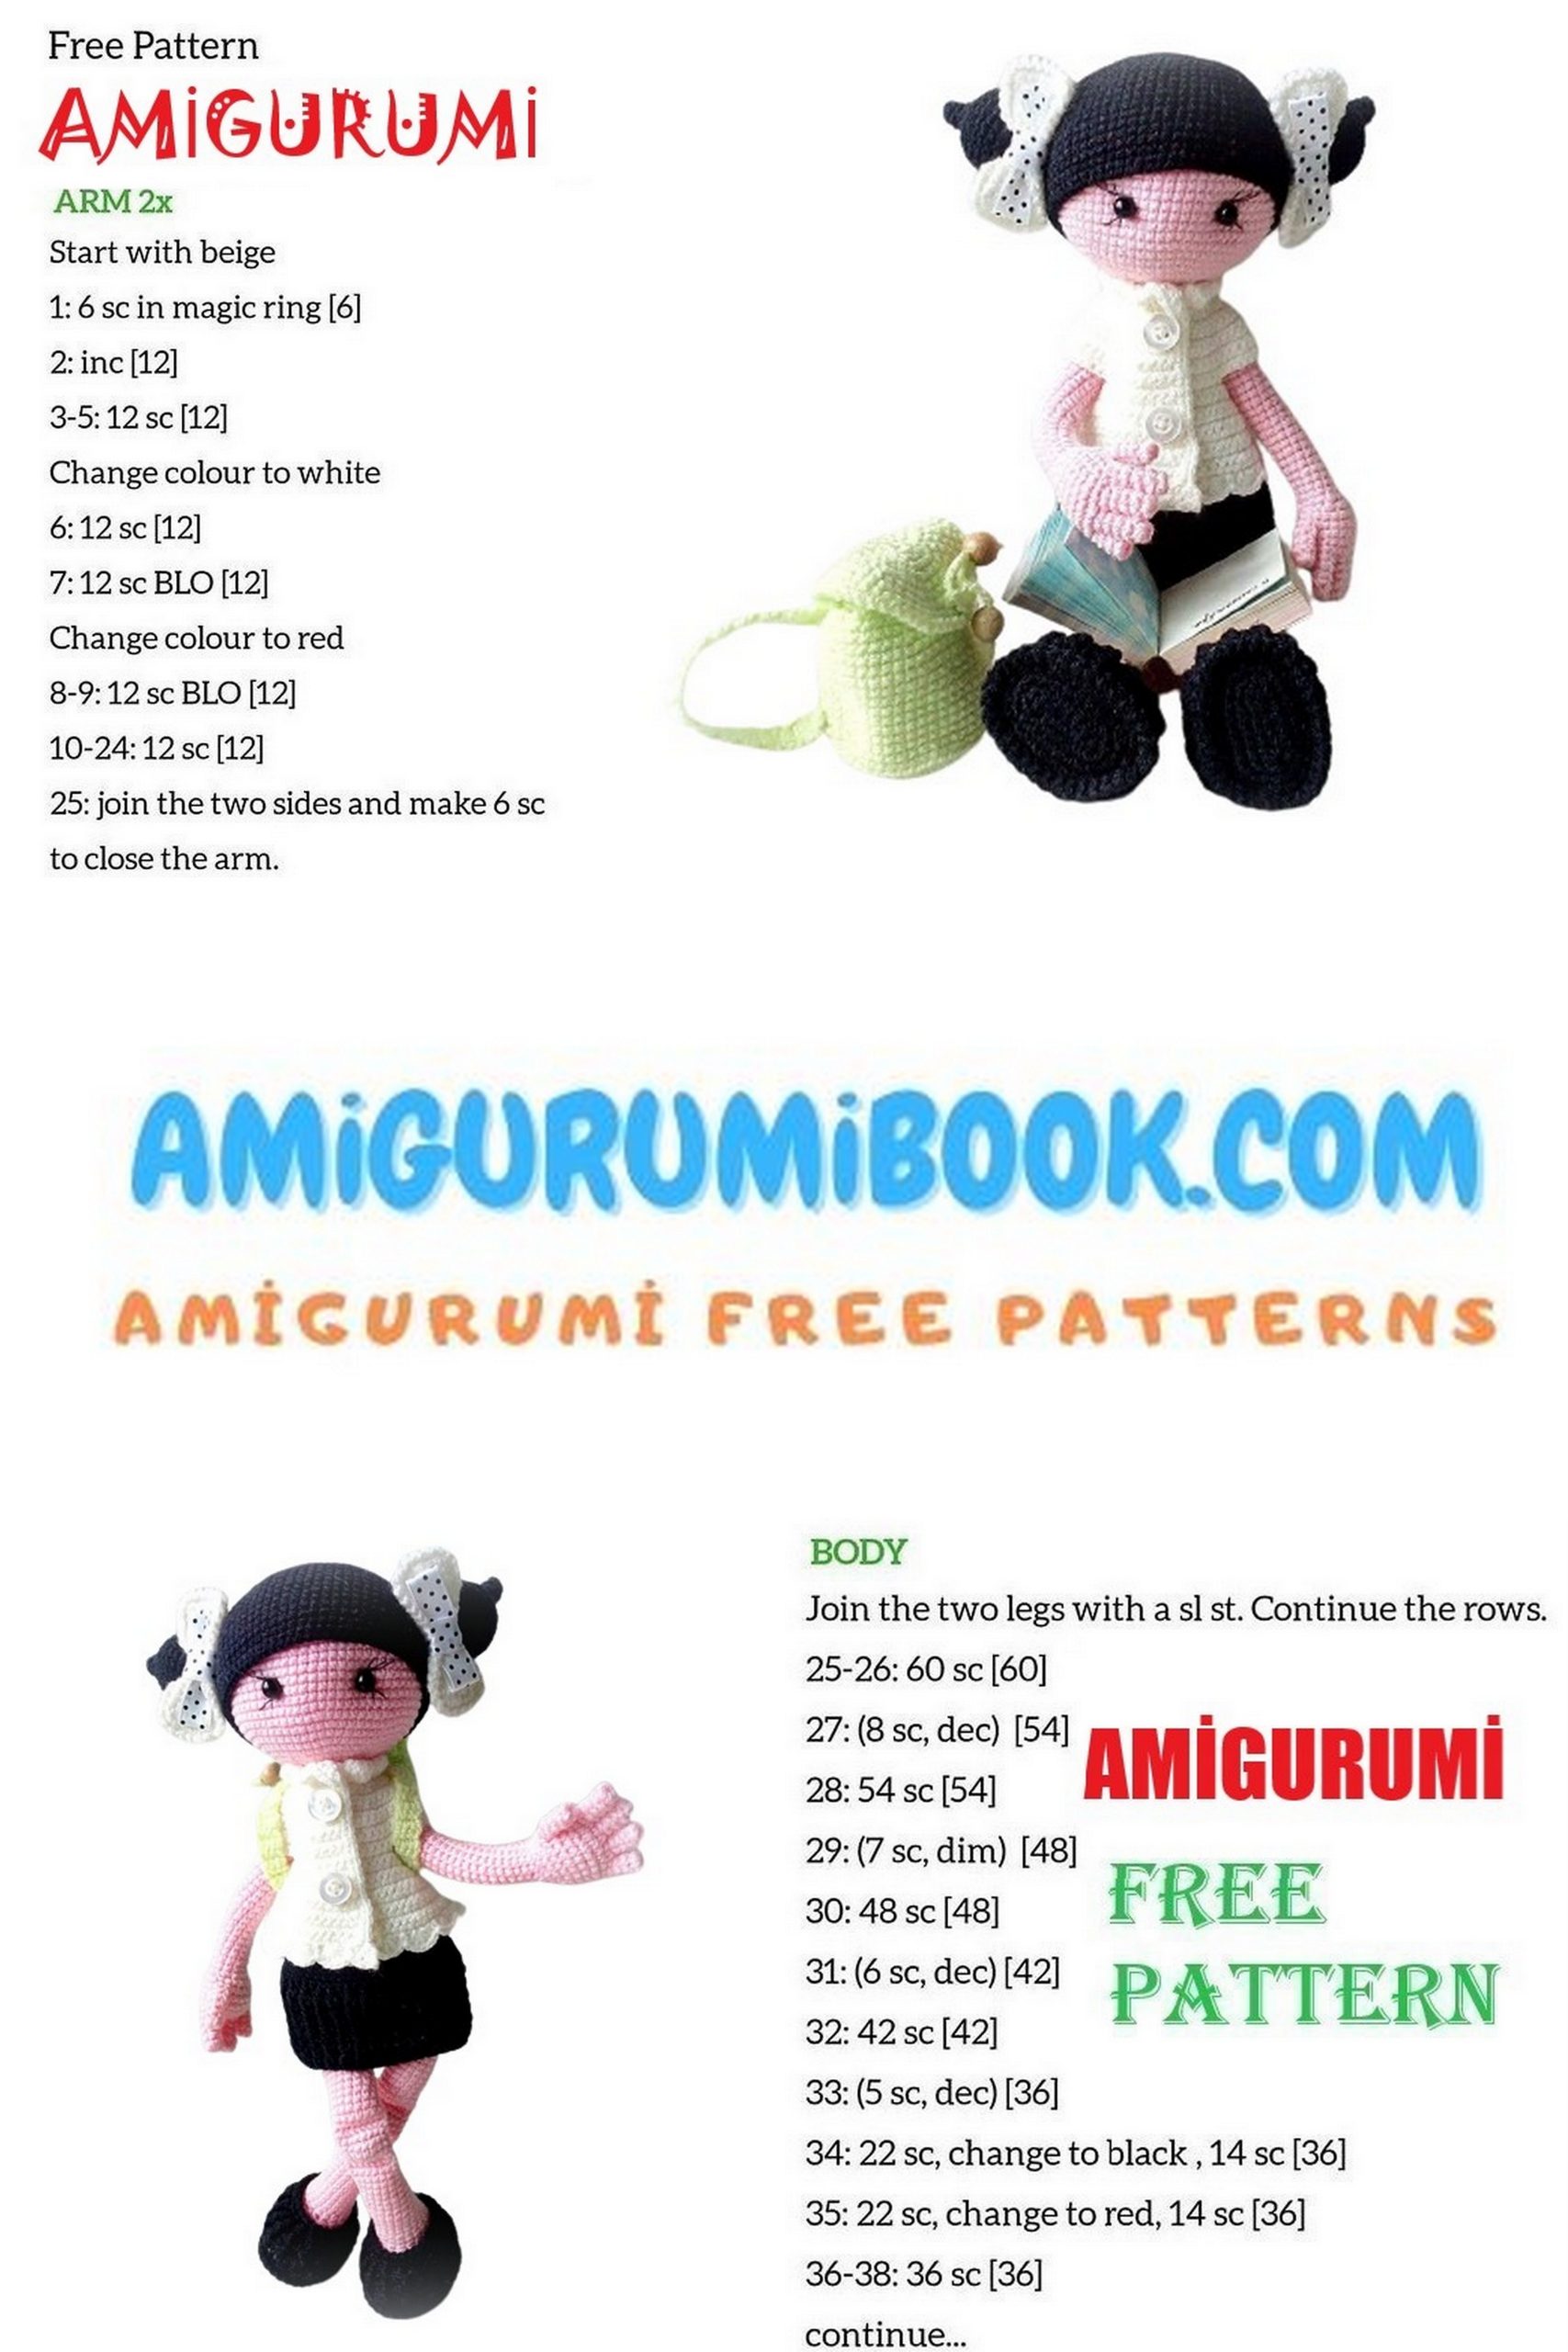
🧸 Body
54: From the leg with working yarn:
ch 5, join to the second leg.
16 sc (right leg)
5 sc in chain
16 sc (left leg)
5 sc in chain
(42)
Move the start of the round to the center of the back.
55: (6 sc, inc) repeat around (48)
56: (7 sc, inc) repeat around (54)
57: (8 sc, inc) repeat around (60)
58–61: sc in each st around (60)
Insert 10 mm beads into the upper legs if needed.
62: (8 sc, dec) repeat around (54)
63: (7 sc, dec) repeat around (48)
64: (6 sc, dec) repeat around (42)
Switch to body color yarn.
65–67: sc in each st around (42)
Switch to shorts color.
68–69: sc in each st around (42)
70: (5 sc, dec) repeat around (36)
71: sc in each st around (36)
Start stuffing the body.
72–78: sc in each st around (36)
Switch back to body color yarn.
79–81: sc in each st around (36)
82: (4 sc, dec) repeat around (30)
83–84: sc in each st around (30)
85: (3 sc, dec) repeat around (24)
86: (2 sc, dec) repeat around (18)
87: sc in each st around (18)
🧸 Head
Continue crocheting from the body.
88: (2 sc, inc) repeat around (24)
89: (3 sc, inc) repeat around (30)
90: (4 sc, inc) repeat around (36)
91: (5 sc, inc) repeat around (42)
92: (6 sc, inc) repeat around (48)
93: (7 sc, inc) repeat around (54)
94: (8 sc, inc) repeat around (60)
95: (9 sc, inc) repeat around (66)
96: (10 sc, inc) repeat around (72)
97–105: sc in each st around (72)
106: (10 sc, dec) repeat around (66)
107: (9 sc, dec) repeat around (60)
108: (8 sc, dec) repeat around (54)
109: (7 sc, dec) repeat around (48)
110: (6 sc, dec) repeat around (42)
111: (5 sc, dec) repeat around (36)
Begin stuffing the head evenly.
112: sc in each st around (36)
113: (4 sc, dec) repeat around (30)
114: (3 sc, dec) repeat around (24)
Stuff the head firmly so it keeps a round shape.
115: (2 sc, dec) repeat around (18)
116: (1 sc, dec) repeat around (12)
117: dec around (6)
Fasten off, cut the yarn, and hide the end.
✋ Hands
Start by crocheting 10 fingers.
Make ch 4 and join into a ring.
Index, Thumb, Middle and Ring Fingers (8 pieces)
1: 5 sc in ring (5)
2–4: sc in each st around (5)
Fasten off and cut the yarn.
Little Finger (2 pieces)
1: 5 sc in ring (5)
2–3: sc in each st around (5)
Do not cut the yarn on the little finger.
🖐 Right Hand (Palm)
1:
2 sc on thumb
2 sc on ring finger
2 sc on middle finger
5 sc on index finger
3 sc on middle finger
3 sc on ring finger
3 sc on thumb
(20)
2–3: sc in each st around (20)
4: 7 sc, sc together with thumb, 12 sc (20)
5: 7 sc, 3 sc on thumb,
dec (1 st from thumb + 1 st from palm),
11 sc (22)
6: 9 sc, dec, 9 sc, dec (20)
7: (3 sc, dec) ×4 (16)
8: (2 sc, dec) ×4 (12)
Stuff the palm lightly.
✋ Left Hand
1:
3 sc (little finger)
3 sc (ring finger)
3 sc (middle finger)
5 sc (index finger)
2 sc (middle finger)
2 sc (ring finger)
2 sc (little finger)
(20)
2–3: sc in each st around (20)
4: 12 sc, sc together with thumb, 7 sc (20)
5: 11 sc, dec (1 st from palm + 1 st from thumb), 3 sc on thumb, 7 sc (22)
6: dec, 9 sc, dec, 9 sc (20)
7: (3 sc, dec) ×4 (16)
8: (2 sc, dec) ×4 (12)
Stuff the palm lightly.
9–32: sc in each st around (12)
33: dec around (6)
Fasten off and hide yarn.
Position the hands 1–2 rows above the shirt and attach.
💇 Hair
Start with ch 5, join into a ring.
1: 6 sc in ring (6)
2: inc in each st (12)
3: (1 sc, inc) ×6 (18)
4: (2 sc, inc) ×6 (24)
5: (3 sc, inc) ×6 (30)
6: (4 sc, inc) ×6 (36)
7: (5 sc, inc) ×6 (42)
8: (6 sc, inc) ×6 (48)
9: (7 sc, inc) ×6 (54)
10: (8 sc, inc) ×6 (60)
11: (9 sc, inc) ×6 (66)
12: (10 sc, inc) ×6 (72)
13–25: sc in each st around (72)
Fasten off.
The piece should fit snugly on the head.
🎀 Pigtails (Make 2)
Start with ch 5, join into ring.
1: 6 sc (6)
2: sc around (6)
3: (1 sc, inc) repeat (9)
4: (2 sc, inc) repeat (12)
5: 12 sc
6: inc in each st (24)
7–12: 24 sc
Insert 20 mm bead.
13: (2 sc, dec) repeat (18)
14: (1 sc, dec) repeat (12)
15: 12 sc
Leave long tail for sewing.
👗 Skirt
ch 50 and join to form ring.
1–4: 50 sc
5: ch 2, (4 dc, inc) ×10 (60)
6: FPdc / BPdc alternately (60)
7–15:
Work FPdc over FPdc
Work BPdc over BPdc
(creates pleated effect)
Fasten off.
🥾 Boots
Use slightly larger hook.
ch 6
1: 2 sc, 3 sc, 4 sc in last st, 3 sc, inc (12)
2: inc, 5 sc, 2 inc, 5 sc, inc (18)
3: inc, 7 sc, 3 inc, 5 sc, 2 inc (24)
4: 2 inc, 8 sc, 4 inc, 8 sc, 2 inc (32)
5: BLO sc around (32)
6–7: FPdc / BPdc pattern (32)
8: 11 BPdc, dec (6 sts together), 9 BPdc
9: 26 sc
10: ch, sl st around
Finish sole with sc edging.
Make 2 boots.
🙂 Face Assembly
- Position the hair cap on the head
- Pin the pigtails in place
- Mark eye placement (10 stitches apart)
- Sew or glue the eyes
- Embroider eyelashes with thin cotton thread
- Sew hair around the head
- Attach the pigtails
🧥 Sweater
ch 39
1: 38 sc
2: 4 sc, (4 sc, inc) ×6, 4 sc
3: 4 sc, (5 sc, inc) ×6, 4 sc
4: 50 sc
5: buttonhole row with ch 3 spaces
6–9: 56–62 sc shaping rows
10: sleeve openings with ch 7
11–12: 50 sc
13–20: increase shaping to 72 sc
Work sc edging around sweater.
Sew 2 buttons.
🎒 Backpack
Start with MR
1: 6 sc
2: inc around (12)
3: (1 sc, inc) (18)
4: (2 sc, inc) (24)
5: (3 sc, inc) (30)
6: (4 sc, inc) (36)
7: (5 sc, inc) (42)
8: (6 sc, inc) (48)
9: BLO sc (48)
10–20: 48 sc
21: (6 sc, dec) (42)
22: 42 sc
23: (5 sc, dec) (36)
24–25: create buttonholes
Make ch 110 drawstring and decorate with beads.
🎒 Backpack Flap
MR
1: 6 sc
2: inc (12)
3: (1 sc, inc) (18)
4: (2 sc, inc) (24)
5: (3 sc, inc) (30)
6: (4 sc, inc) (36)
7: (5 sc, inc) (42)
8: (6 sc, inc) (48)
Edge with ch + sl st pattern.
🎒 Straps
ch 4
1: 3 sc
2–65: 3 sc
Fold and sew to backpack.