
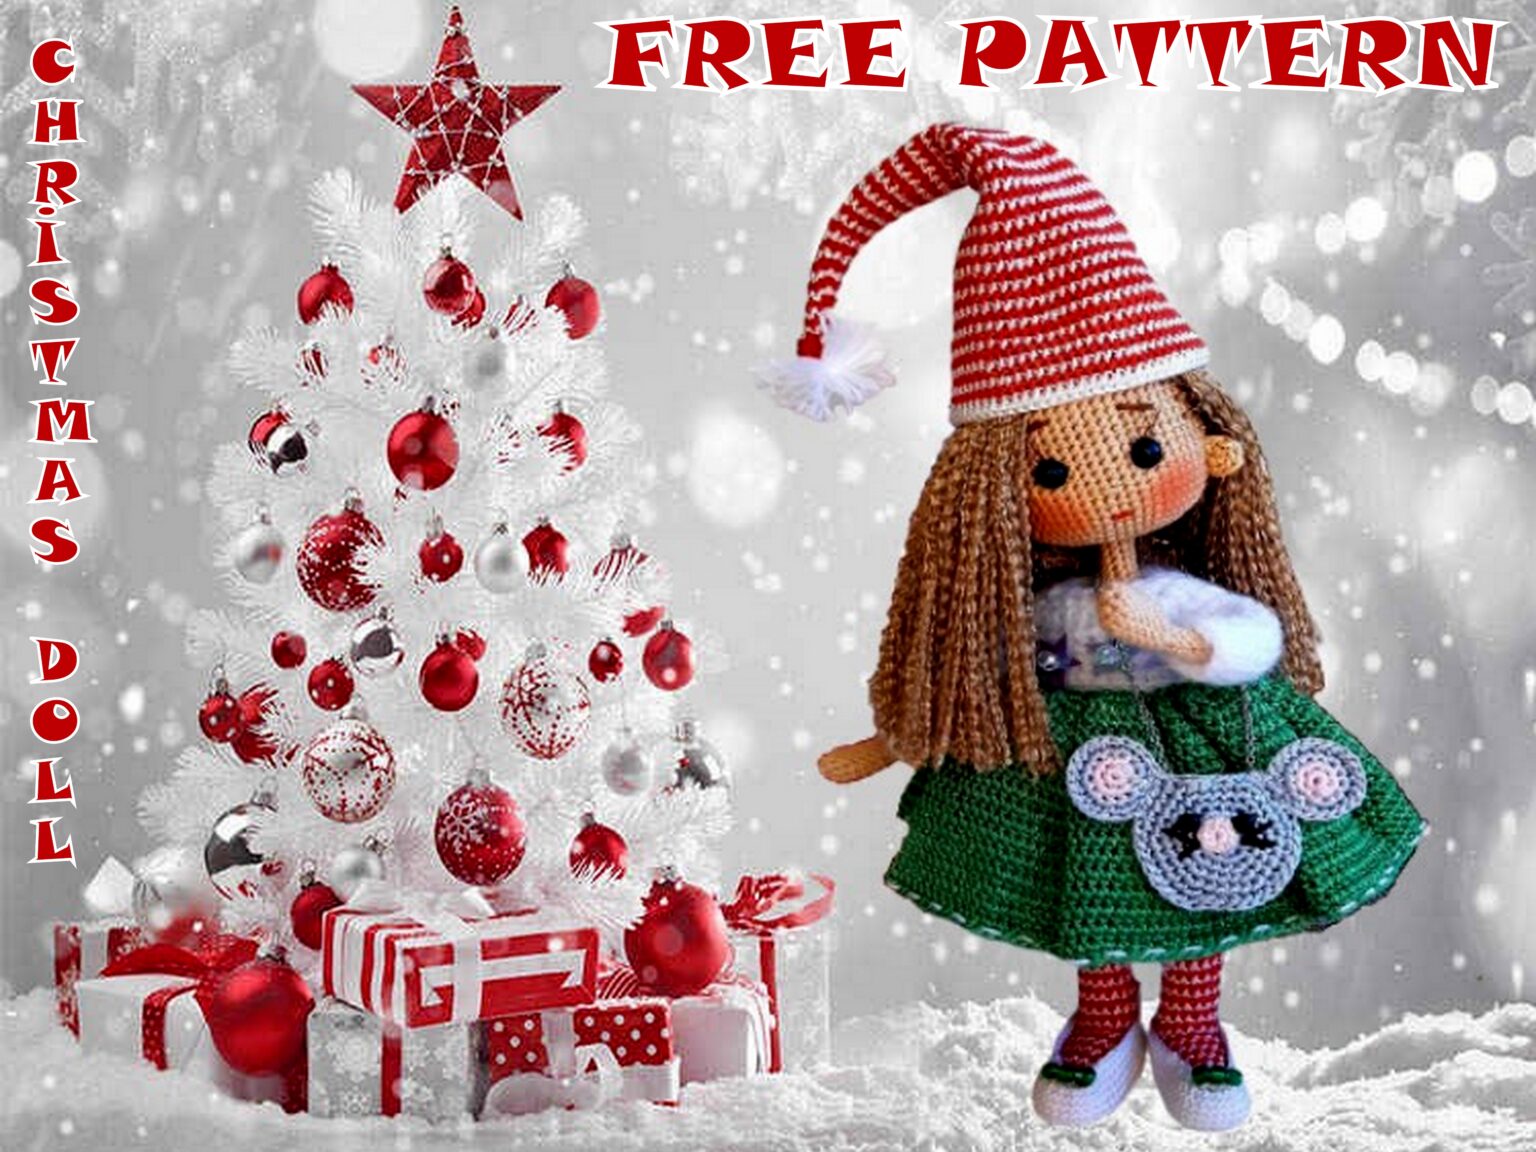
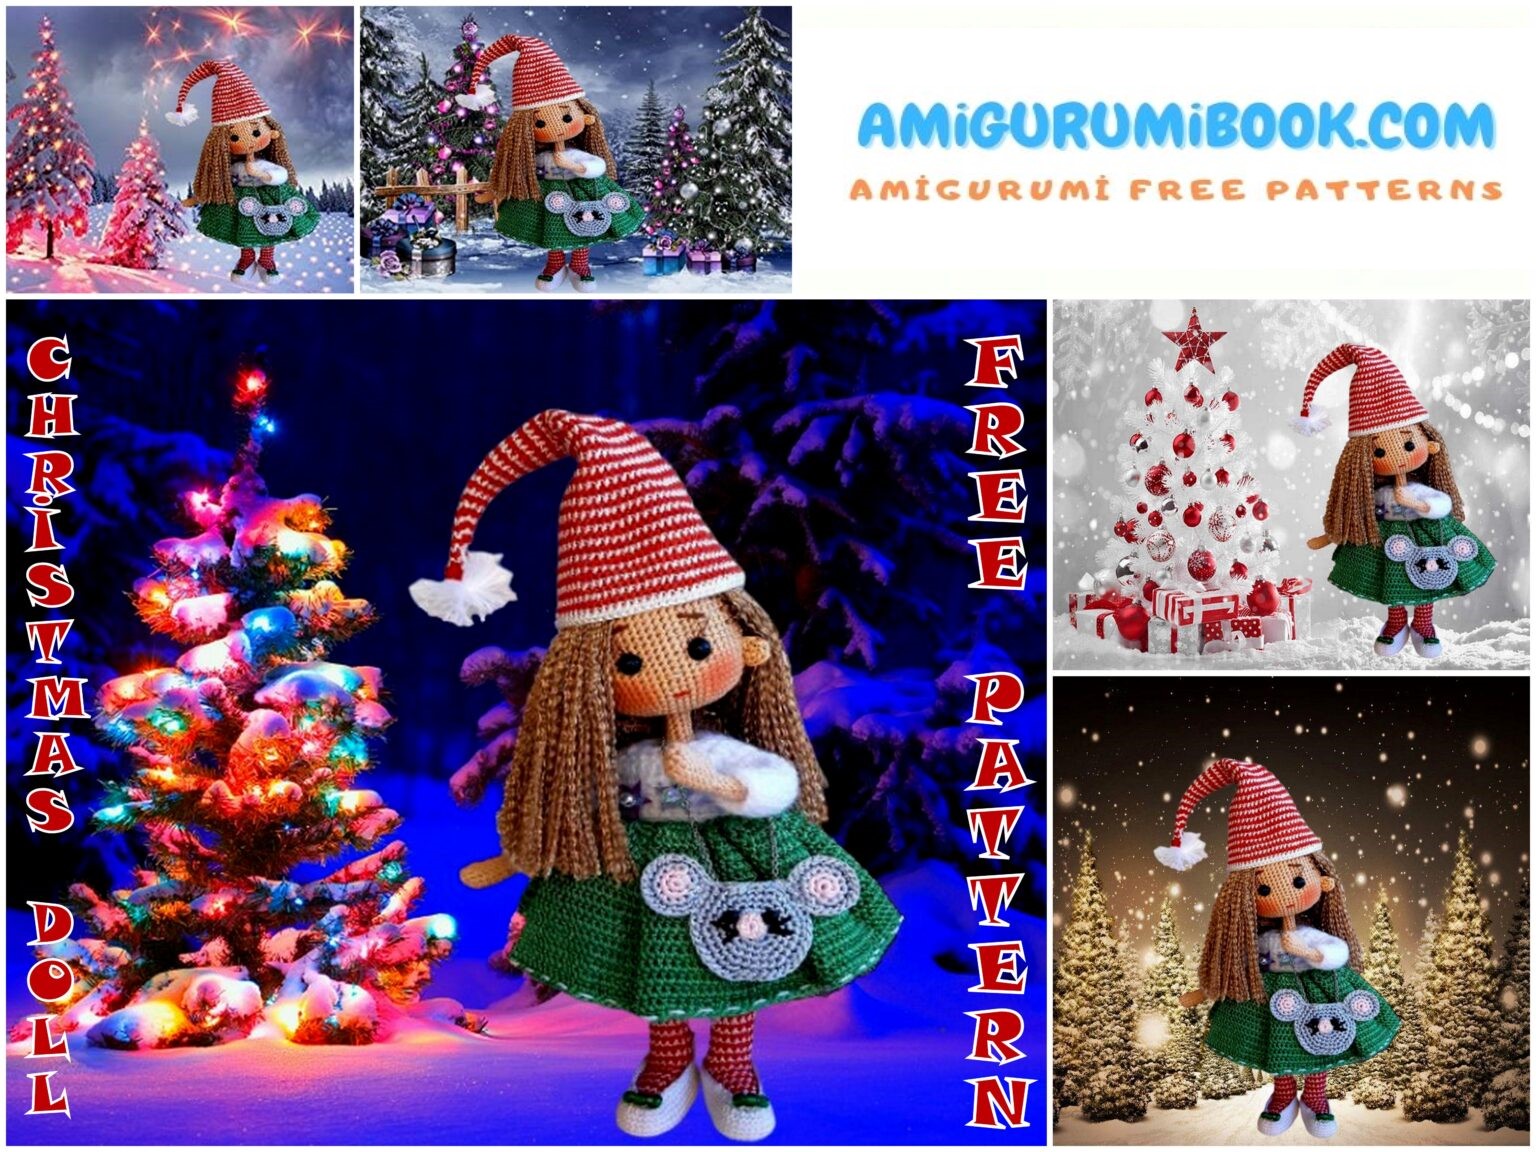
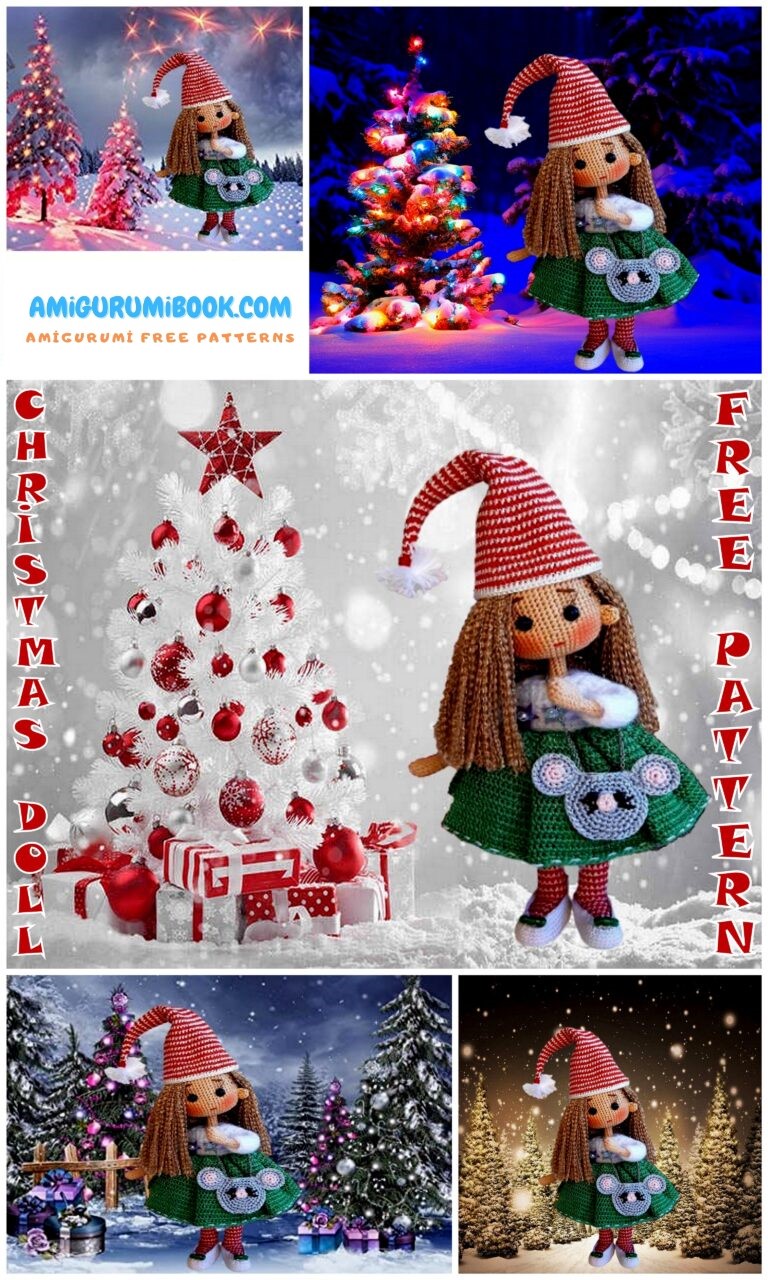
I share the most beautiful amigurumi christmas patterns for free. I shared with you the amigurumi christmas doll pattern in this article.
Necessary materials.
1. Yarn Art Tulip yarn (white, red, brown, green, gray, pink);
2. Yarn Chamomile (beige);
3. Yarn Alize Angora Gold (white);
4. Yarn Art Camellia yarn (gold);
5. Cardboard;
6. Glue Moment Crystal;
7. Filler (holofiber or synthetic winterizer);
8. Safety eyes with plugs 3 mm;
9. Cilia;
10. Star sequins – 3 pcs .;
11. White or transparent beads – 3 pcs .;
12. Green beads – 6 pcs .;
13. Copper wire is thin and thick;
14. Black beads – 2 pcs .;
15. Thin chain – 10 cm;
16. Fatin;
17. Small buttons for doll clothes 3mm – 3 pcs .;
18. Sewing threads, needle, scissors;
19. Hook 1 mm. , 1.6 mm;
20. A lot of patience and great mood!
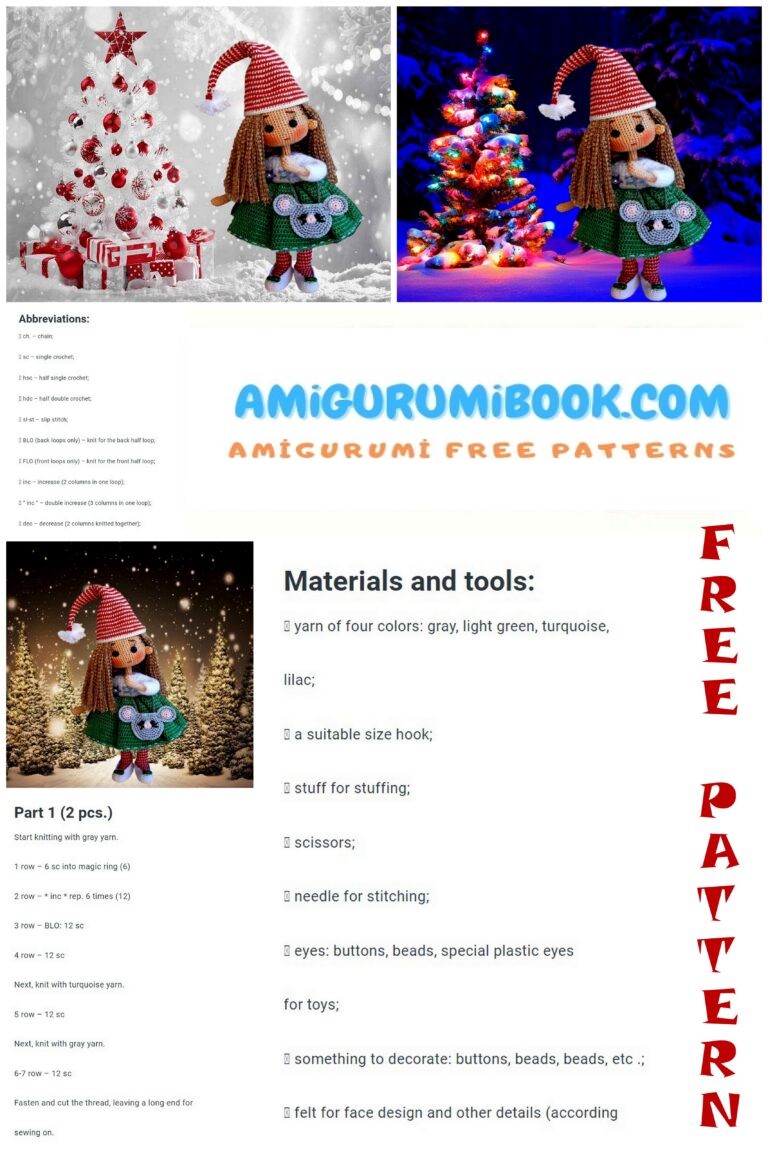
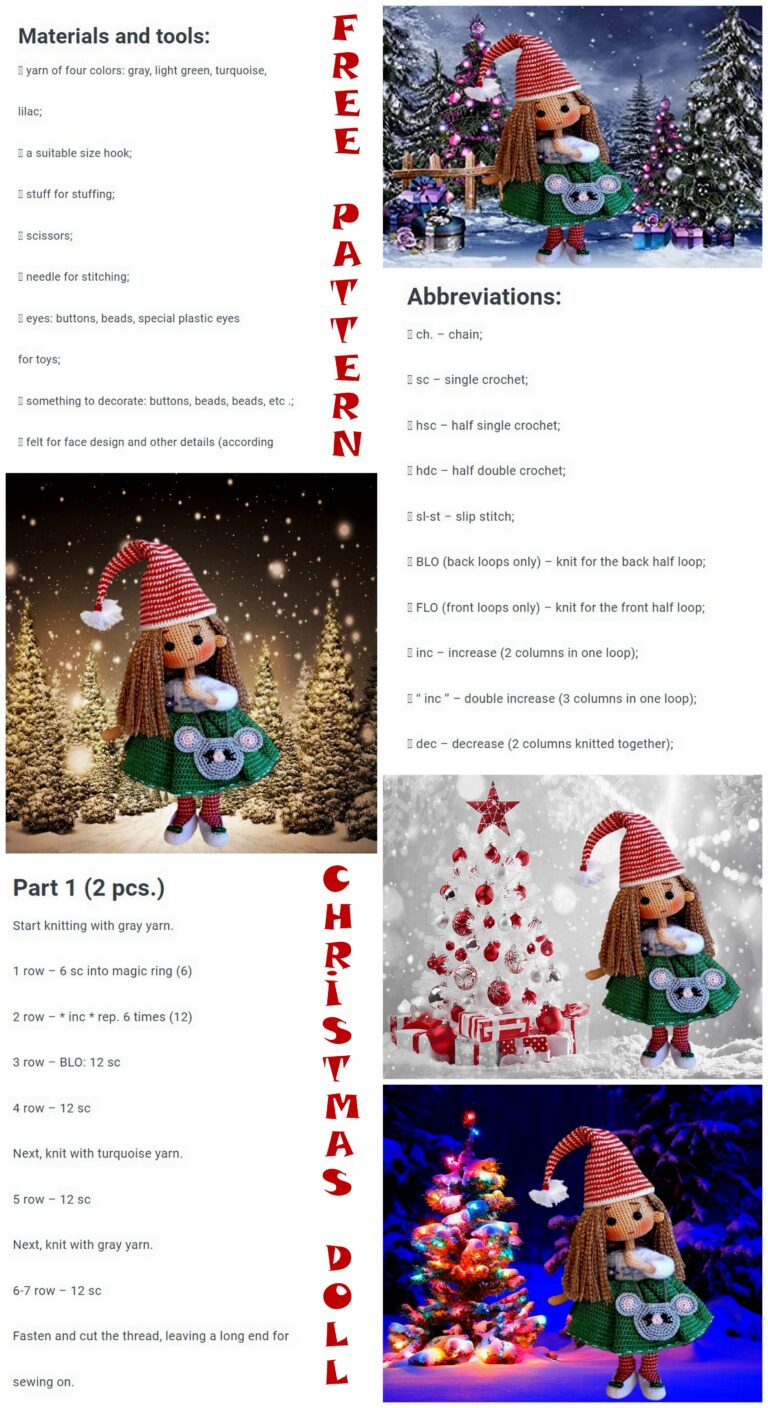
Abbrevations:
SC – single crochet;
HDC – half double crochet;
CH – chain;
SL-ST – slip stitch;
Dec – decrease;
Inc – increase.
The doll is fully knitted with purl rows.
Arms.
INTO MAGIC RING 6 SC
6 inc (12)
12 SC × 5 rows
4 dec, 4 SC (8)
8 SC × 23 rows.
We knit the second hand in the same way.
Ears.
We dial in the spacecraft: 1 CH, 2 SC, 3 HDC, 1 SC, 1 SL-ST.
We tighten the ring.
Cut the thread, leaving a long end for sewing.
We knit the second ear in the same way.
Now we start knitting the body.
We start knitting from the feet.
We will knit by alternating 2 colors – white and red.
I would also like to note that I do not insert the frame into the legs.
Thanks to tight knitting and stuffing, the legs are always strong, and the doll stands perfectly on its own, without any support or other things.
But, if you want to make a wireframe, for more confidence, then please do it!
First we knit the left leg.
(B) INTO MAGIC RING 8 SC (8)
(B) 8 Ave (16)
(C, B … C) 16 SC × 7 rows
(B) Skip 1 st, knit 7 SC, unfold the work, skip 1 st, knit 6 SC
(K) 6 SC, expand, 6 SC
(B) Skip 1 st, 5 SC, unfold, skip 1 st, 4 SC
(K) Skip 1 p, SC 3, unfold, skip 1 p, SC 2
(B) unfold, skip 1 st, 1 SC and knit in a circle:
5 SC (side), skip 1 st, 6 SC (before), skip 1 st, go to the second side 5 SC (17)
(K) 5 SC, 1 p skip, 5 SC, 1 p skip, 5 SC (15)
We fill the foot.
Then we knit in a circle.
(B) 15 SC
(C) 15 SC
(B) 15 SC
(C) 15 SC
(B) 15 SC
(C) 15 SC
We fill the foot and heel tightly.
We distribute everything well.
(B) 15 SC
(C) 15 SC
(B) 15 SC
(C) 15 SC
Add a synthetic winterizer.
(B) 15 SC
(C) 15 SC
(B) 15 SC
(C) 15 SC
Add a synthetic winterizer.
(B) 15 SC
(C) 15 SC
(B) 15 SC
(C) 15 SC
Add a synthetic winterizer if necessary.
(B) 15 SC
(C) 15 SC
(B) 15 SC
(C) 15 SC
(B) 15 SC
(C) 15 SC
Cut the red thread and hide it. Add a synthetic winterizer.
Next, we continue to knit with white thread.
15 SC × 4 rows.
Next, before cutting the thread, we knit a few more SCs to the middle of the inner side of the leg (here the connection of the legs will pass). I am tying 6 SC.
So, we have our left leg ready.
We knit the right one in the same way, but at the end we do not cut the thread.
We will make the connection of the legs as follows:
From the right leg, knit a chain of 6 stitches (CH) and connect this chain to the left leg SC.
Then we knit another 14 SC, in total, together with the connecting SC, we got 15 SC on the left leg.
Next, we knit along one side of the chain:
Inc, 1 SC, inc, 1 SC, inc, 1 SC
Move to the right leg
15 SC (right leg)
We knit along the second side of the chain
Inc, 1 SC, inc, 1 SC, inc, 1 SC.
In total, we got a circle of 48 SC.
Next we knit
48 SC × 10 rows.
(4 SC, dec) × 8 times (40)
40 SC × 3 rows.
We tie it with a white thread to the middle of the back and cut the thread.
Next, we will continue to knit with beige thread.
(6 SC, dec) × 5 times (35)
35 SC × 10 rows.
We begin to knit our hands.
9 SC, 3 SC simultaneously on the body and arm, 13 SC, 3 SC simultaneously on the body and arm, 7 SC (35)
9 SC, 5 SC (1st hand), 13 SC, 5 SC (2nd hand), 7 SC (39)
We stuff the body.
2 SC, dec, 4 SC, 4 dec, 10 SC, 4 dec, 2 SC, dec, 1 SC (29)
5 SC, 4 dec, 6 SC, 4 dec, 2 SC (21)
Add filler and insert the wire frame into your hands.
3 SC, 3 dec, 4 SC, 3 dec, 2 SC (15)
Dec, 1 SC, 2 dec, 3 SC, 2 dec, 1 SC (10)
2 SC, dec, 3 SC, dec, 1 SC (8)
Add filler as needed.
8 SC × 5 rows (neck).
At this stage, we cut the thread, leaving a small section.
First, we will knit the clothes and put on the doll, and then continue knitting the head.
Trousers.
The pantaloons will be knitted BACK-TURNING ROW.
We collect a chain of 40 CH + 1 PP
Knit from the 2nd loop from the hook
HDC, 1 CH HDC, 1 CH and so on until the end of the row. Finishing row 1 HDC.
1 CH 40 SC
1 CH (3 SC inc) × 10 times (50)
Do not forget to do 1 CH in each row.
50 SC × 2 rows
(4 SC, inc) × 10 times (60)
29 SC, inc, 30 SC (61)
61 SC × 5 rows.
Next, we knit the first leg.
Also BACK-TURNING ROW.
1 ch, 30 SC × 5 rows.
Cut the thread.
Step 1 SC from the first leg and knit in the same way for 30 sc × 5 rows.
The result is a blank.
Sew together the sides of the pantaloons.
Trying on.
Next, we make the harness on the doll.
We tie the belt.
20 HDC (knit only in the arch from 1 CH)
20 SC.
The belt is ready. Cut and fasten the thread.
We also tie the legs with HDC through 1 loop. The total is 13 HDC. Next, we knit 3 HDC in each of the 13 loops.
It turned out to be a small shuttlecock.
Cut and fasten the thread.
We make laces between the loops (ribbon, thread, braid).
We tie a bow.
We cut off the excess.
Our pantaloons are ready!
Shoes.
11 CH, from the 2nd from the loop hook
Inc, 8 SC, 4 SC in 1, 8 SC, inc (24)
2 inc, 8 SC, 4 inc, 8 SC, 2 inc (32)
(1 SC, inc) × 2 p, 8 SC, (1 SC, inc) × 4 p, 8 SC, (1 SC, inc) × 2 p (40)
(2 SC, inc) × 2 p, 8 SC, (2 SC, inc) × 4 p, 8 SC, (2 SC, inc) × 2 p (48)
Cut out the insole of the required size from cardboard.
We glue.
Let it dry.
We continue to knit.
48 SC × 4 rows
19 SC, 5 dec, 19 SC (43)
16 SC, 6 dec, 15 SC (37)
Cut the thread, fix it and hide it.
Next, we cut off two small pieces of leather, or just knit small pieces, or use fabric and sew them on the back in the form of loops.
You can pass a ribbon, lace, strings through these loops, and tie a bow.
I leave these loops as a decorative element.
Sew green beads on the toe of our shoes.
Our shoes are ready!
Dress.
We collect a chain of 22 CH + 2 PP
We turn the work.
In the third from the hook we knit a loop
3 HDC, 3 HDC in 1 loop, 3 HDC, 3 HDC in 1p, 6 HDC, 3 HDC in 1p, 3 HDC, 3 HDC in 1p, 3 HDC (30)
1 PP
5 SC, 5 CH, 5 SC skip, 10 SC, 5 CH, 5 SC skip, 5 SC (30)
1 PP
2 SC, inc, 8 SC, inc, 6 SC, inc, 8 SC, inc, 2 SC (34)
Remember to do 1 PP at the end of each row while knitting the BACK-TURNING ROW.
34 SC × 6 p.
Then we knit in a circle
In each of 34 loops we knit 3 SC (102)
We make an increase in each loop (204)
Next we knit HDC.
204 HDC × 15 rows.
Our dress is ready.
We sew the back.
Tulle skirt.
I use in my work a regular white tulle of medium hardness.
Cut strips about 2, 1.5 cm wide, about 10 cm long.
Cut off a white thread about 20 cm long.
We bend each strip of tulle in half and string it on a thread.
The more tulle you attach, the fuller your skirt will be.
When the skirt is ready, tie it at the waist of the doll, cut off the excess threads.
Then, put on a dress over this skirt.
Straighten everything well, and the dress in length and tulle.
Carefully cut off the excess tulle length.
Sweater.
We use Alize Angora Gold yarn, and hook number 1.6
We dial 22 CH + 2 PP
We turn the work.
3 HDC, 3 HDC in 1p, 3 HDC, 3 HDC in 1p, 6 HDC, 3 HDC in 1p, 3 HDC, 3 HDC in 1p, 3 HDC (30)
1 PP
5 SC, 4 CH, 5 p skip, 10 SC, 4 CH, 5 p skip, 5 SC (28)
28 SC × 3 p.
We knit the sleeves.
We type 12 sc in a circle.
12 SC × 10 p.
Next, carefully sew the back and tie the SC neckline through 1 loop.
We sew three buttons on the back.
Decorate the front of the sweater with sequins with beads.
The sweater is ready.
We try it on a doll.
Head.
When all things are connected and our doll is dressed, we continue to knit the head.
8 inc (16)
(1 SC, inc) × 8 p (24)
(2 SC, inc) × 8 p. (32)
(3 SC, inc) × 8 p. (40)
(4 SC, inc) × 8 p. (48)
(5 SC, inc) × 8 p. (56)
56 SC × 7 rows
32 SC, 2 CH, 2 p skip, 6 SC, 2 CH, 2 p skip, 12 SC (56)
They made holes for the eyes.
56 SC × 10 rows
We sew on the ears, insert the eyes, to which we have previously glued the cilia, embroider the eyebrows, nose and mouth.
We insert a wire frame into the neck.
(5 SC, dec) × 8p. (48)
(4 SC, dec) × 8 p. (40)
We stuff the head, carefully distributing the filler.
Do not stuff very tightly yet.
(3 SC, dec) × 8 p. (32)
(2 SC, dec) × 8 p. (24)
We stuff our heads well.
(1 SC, dec) × 8 p. (16)
8 dec.
We tighten the thread, fix it and hide it.
Hair.
I made Gnomushka’s hair out of brown Tulip.
Anyone who is familiar with this thread understands that it is very capricious in work, puffs are easily made on it.
But I really like the way it looks like hair.
It is shiny and very soft to the touch.
You can use any other yarn that is convenient for you, or even sew on tres.
So, cutting off one thread at a time is very long and not convenient, so I picked up one of my son’s plastic rectangles and will use it for work.
You can also take a book or notebook that suits you in size.
If you want longer hair, we take a bigger book, if you make a square, then the object, respectively, is not needed large.
We wind a sufficiently voluminous amount of thread on a rectangle (book, notebook).
We cut the entire winding from one side, and we get many threads of the same length.
We bend each in half and begin to attach it to the head with a hook.
We fasten it through the post.
When you finish a row, start doing the next one through the row.
The hair will turn out to be quite thick and obedient.
After I fix one thread, I stratify each of its sides, that is, I dissolve. Then the hairstyle will turn out with the effect of a light wave.
Closer to the crown, we begin to fasten the threads denser, not skipping loops and rows. At the top of the head, everything should be “clogged” with a thread and there should be absolutely no gaps.
Hair attachment may take more than 1 hour.
Please be patient).
When you’re done securing the threads, gently shape the parting line and trim your Gnomer’s hair evenly.
I made an elongated square.
Cap.
We will knit the cap, like the legs, in two colors, white and red, alternating threads.
We knit the cap inside out.
(K) INTO MAGIC RING: 6 SC
6 SC × 6 rows (K, B … B)
(K) (inc, 2 sc) × 2 p (8)
(B, K, B) 8 SC × rows (8)
(K) (inc, 3 sc) × 2 p (10)
(B, K) 10 SC × 2p (10)
(B) (inc, 4 sc) × 2 p (12)
(K, B, K) 12 sc × 3 p (12)
(B) (inc, 3 SC) × 3 p. (15)
(K, B, K) 15 SC × 3 p (15)
(B) (inc, 4 sc) × 3 p (18)
(K, B..B) 18 SC × 6 R (18)
(K) (inc, 5 SC) × 3 p (21)
(B) 21 SC (21)
(K) (inc 6 SC) × 3 p (24)
(B, K) 24 sc × 2 p (24)
(B) (inc, 5 sc) × 4 p (28)
(C) 28 SC (28)
(B) (inc, 6 sc) × 4 p (32)
(K, B) 32 sc × 2 p (32)
(K) (inc, 7 sc) × 4 p (36)
(B, K) 36 sc × 2 p (36)
(B) (inc, 8 sc) × 4 p (40)
(K, B) 40 SC × 2 p (40)
(K) (inc, 7 sc) × 5 p (45)
(B, K) 45 SC × 2p (45)
(B) (inc, 8 sc) × 5 p (50)
(K, B) 50 SC × 2 p (50)
(K) (inc, 9 sc) × 5 p (55)
(B, K) 55 SC × 2 R (55)
(B) (inc, 10 sc) × 5 p (60)
(K, B) 60 SC × 2 p (60)
(K) (inc, 9 sc) × 6 p (66)
(B, K) 66 sc × 2 p (66)
(B) (inc, 10 sc) × 6 p (72)
(K, B, B) 72 SC × 3 p
The cap is ready!
Mouse handbag.
The bag will consist of several separately linked parts.
We will knit in two colors: gray and pink.
The front side of the bag will be gray, the back will be pink.
They fit in the same way.
INTO MAGIC RING: 6 SC
6 inc (12)
(1 SC, inc) × 6 p (18)
(2 SC, inc) × 6 p (24)
(3 SC, inc) × 6 p (30)
(4 SC, inc) × 6 p (36)
Ears.
Two gray details.
INTO MAGIC RING 6 SC
6 inc (12)
(1 SC, inc) × 6 p (18)
We knit two more details of the ears as follows:
We start with a pink thread
INTO MAGIC RING 6 SC
6 inc (12)
We knit the next row with a gray thread
(1 SC, inc) × 6 p (18)
Apply the gray piece to the pink-gray seamy side inward, and tie them with SC gray thread.
Thus, we have connected two parts, making one eyelet.
The front side will be with pink.
We do the second the same way.
Our ears are ready.
We knit the nose of the mouse with a pink thread.
INTO MAGIC RING 6 SC
6 inc (12)
We take the gray part of the bag and sew the nose to the center, just above the eyes and, if desired, embroider the antennae.
Then we apply the second side of our handbag (pink detail) and begin to tie them with SC with gray thread. First on the side, then below and on the second side. Do not touch the top of the bag, respectively.
Next, carefully sew the ears to the purse with a gray thread.
We measure the chain of the length you need and also sew it to the purse.
If there is no chain, tie a regular CH cord, or use a ribbon.
Our purse is ready!
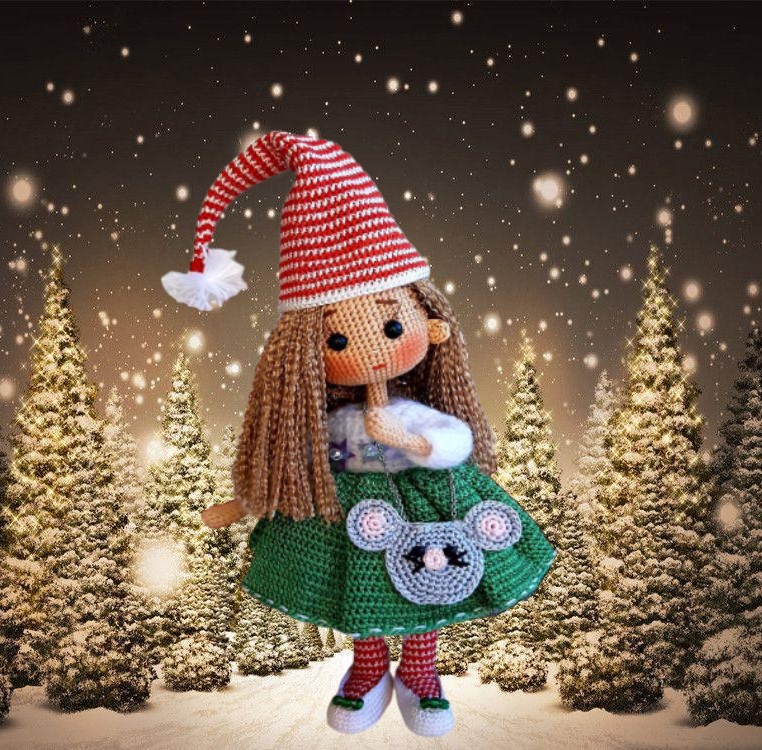
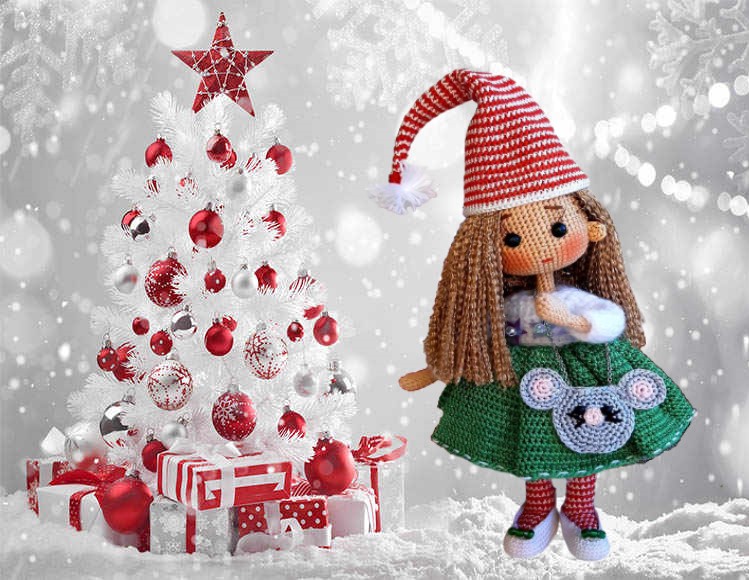
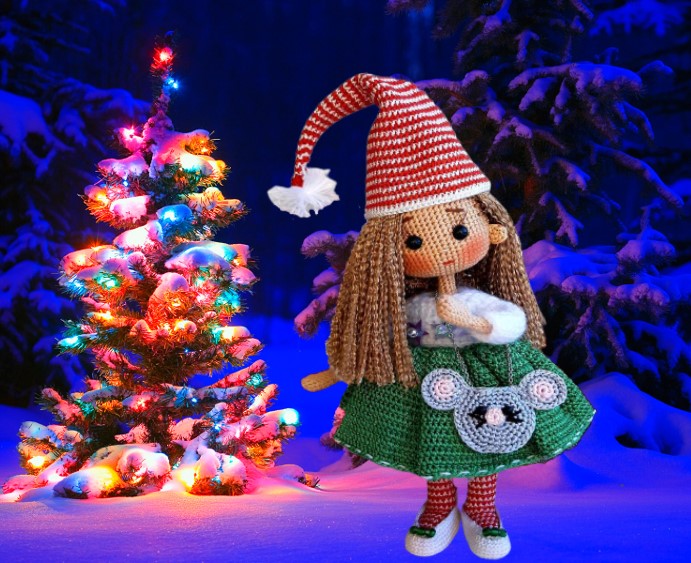
So we knitted and dressed our beautiful Christmas Gnome!
She will undoubtedly bring you a lot of joyful emotions, kindness, and a piece of New Year’s magic!