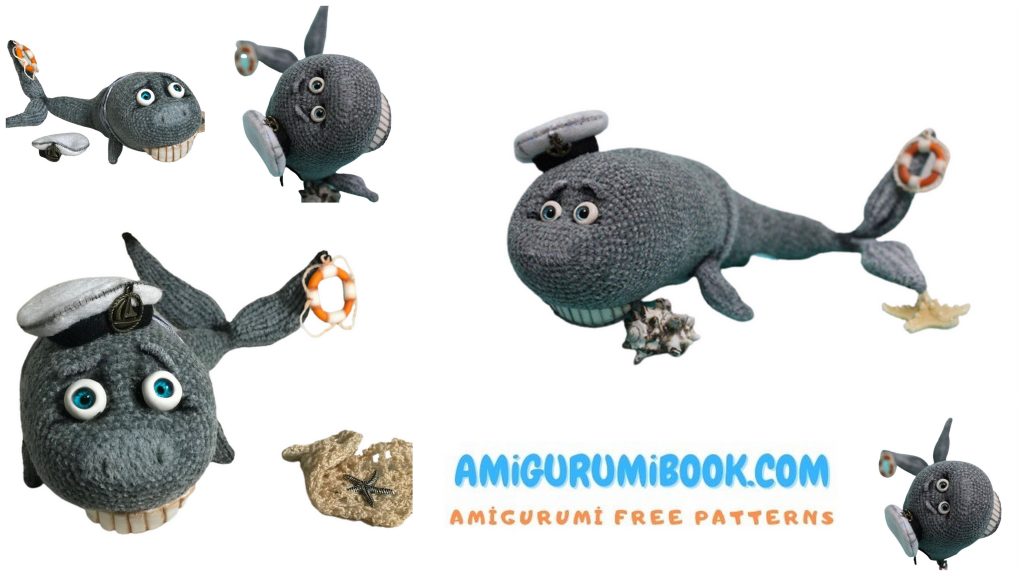
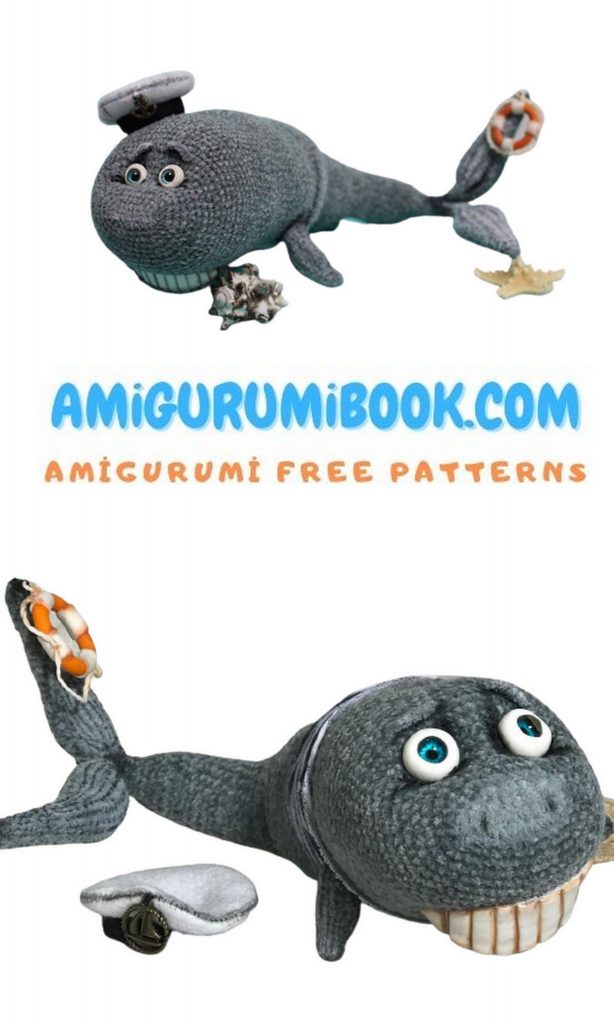
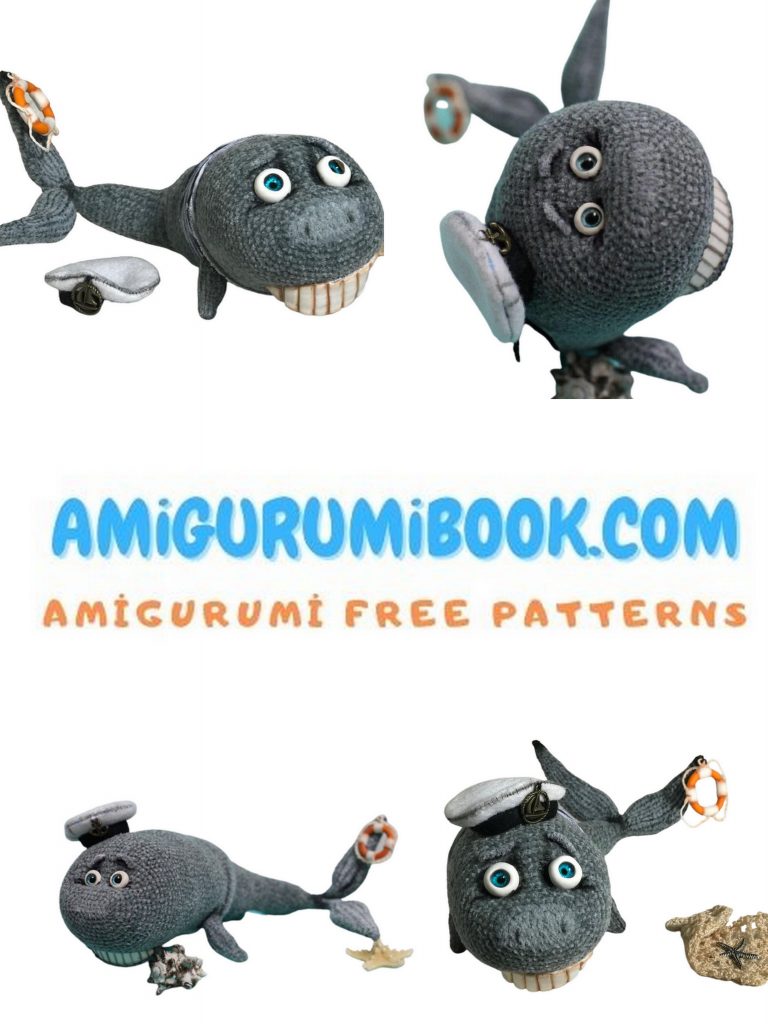
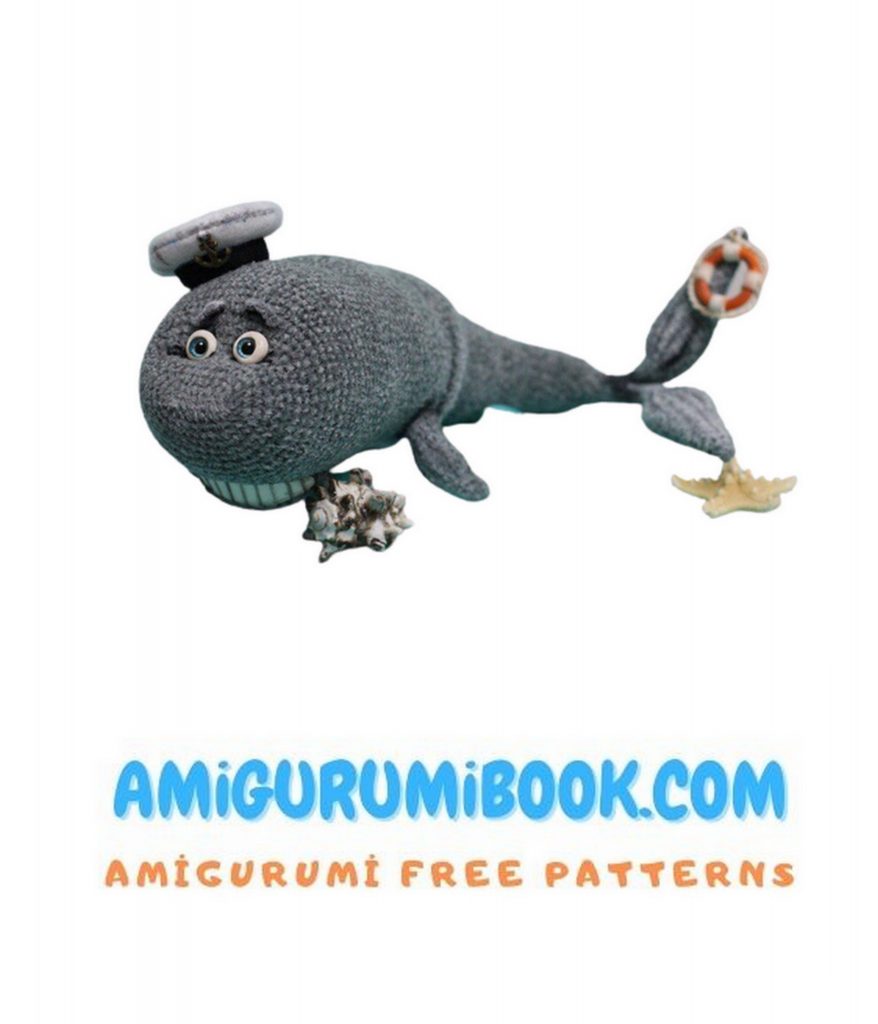
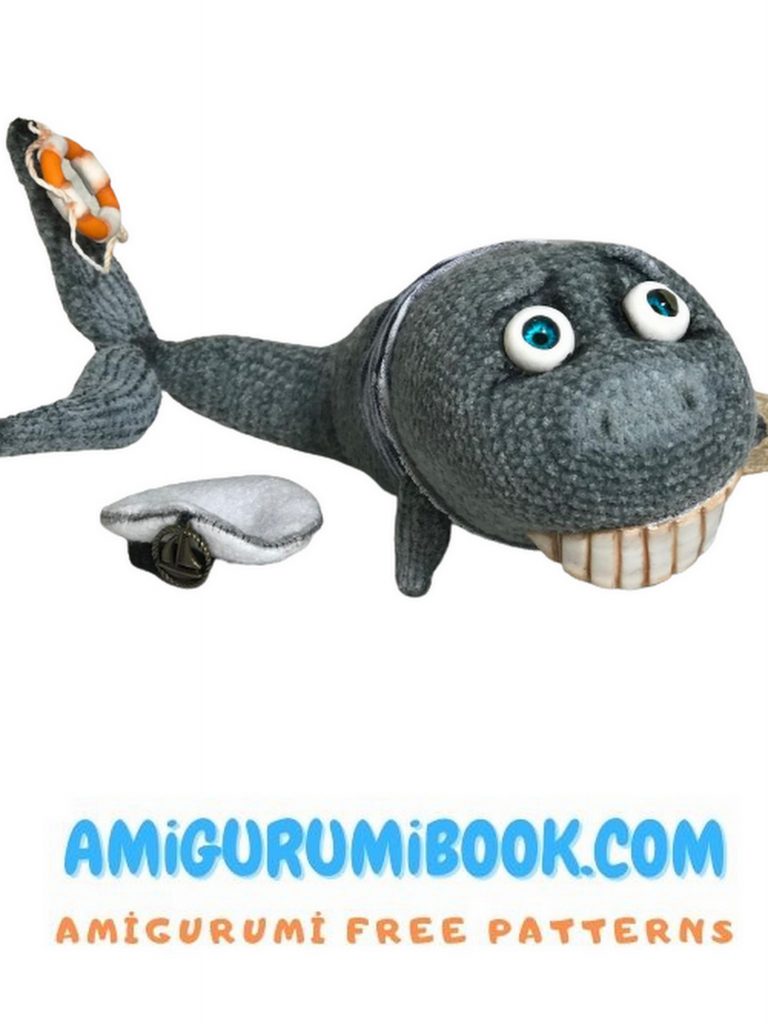
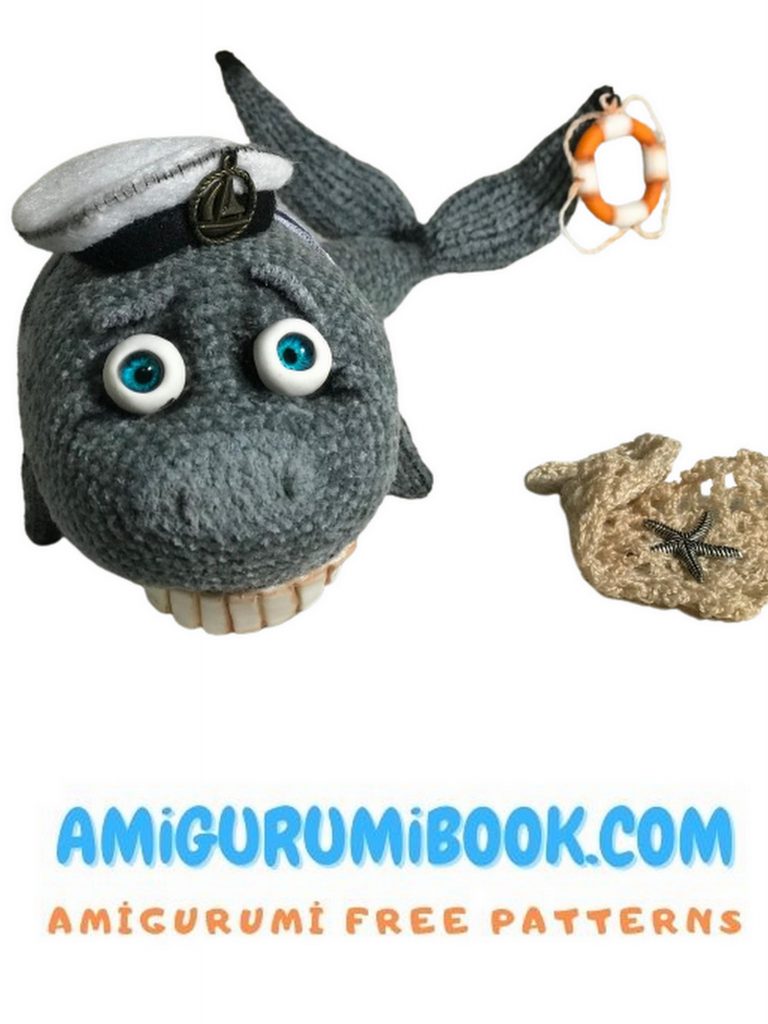
Creating a happy whale amigurumi is a delightful project for both beginners and experienced crocheters. This free pattern provides simple instructions to craft an adorable, smiling whale that makes a perfect gift or charming decoration. free crochet patterns – Chucky Amigurumi Free Pattern
You may also like more amigurumi patterns.
Happy whale amigurumi free pattern is waiting for you in this article. You can find Amigurumi free patterns on our website.
Materials and Tools:
* Hook No. 1.5
* 30-40 grams of gray velor yarn (100gr/600m). Can
use any other yarn, such as YarnArt Jeans, etc.
* Glass eyes of a suitable color, d = 0.6-0.8 cm or beads.
* For sculpting the whites of the eyes, teeth and lifebuoy: baked plastic
white and some red or orange, stacks or miscellaneous
tools, wet wipes.
*Pastel colors of beige shades, for toning teeth.
* Glossy acrylic lacquer for plastics, brush
* Any synthetic filler.
* Glue super-moment. I use Moment Crystal.
* Long needle for tightening.
* Strong thread for tightening.
* To tint toys: white and black oil paints, oil thinner (I have a weak smelling Sonnet), brushes and toothbrushes.
Abbreviations:
* sc – single crochet
* inc – increase, knit 2sc in one loop
* dec – decrease, knit 2sc together
* sl-st – slip stitch
*ch-chain
A little important about the master class:
The complexity of knitting toys for this master class is easy.
This master class is not a crochet tutorial and requires knowledge and skills in crochet.
We will knit the toy in a spiral, so the rows do not connect with each other. I always use a marker, in the form of a contrasting thread, in order to follow the beginning of a new row. If the marker shifts during knitting, I knit an offset loop at the end of the row. The marker must be in a straight line.
I advise you to choose a hook depending on the density of your knitting, the fabric should be dense, without holes, so that the filler does not shine through.
The size of my toy with the indicated materials is about 20 cm.
Well, well, I advise you to charge yourself with a good mood, arm yourself with a sharpened hook and good luck !!!
PATTERN
Mouth.
Cast on 7 ch Turn the knitting and knit from the 2nd loop from the hook.
You don’t have to follow the marker.
1 row: 5sc, 3sc in 1 loop, 5sc, 3sc in 1 loop = 16sc
2nd row: 5sc, 3inc, 5sc, 3inc = 22sc
3 row: 6sc, (1inc, 1sc) * 2 times, 1inc, 6sc, (1inc, 1sc) * 2 times, 1inc = 28 stitches
4-9 row: 28sc = 28sc
Fasten and cut the thread, hide. The mouth will be tied into the head folded.

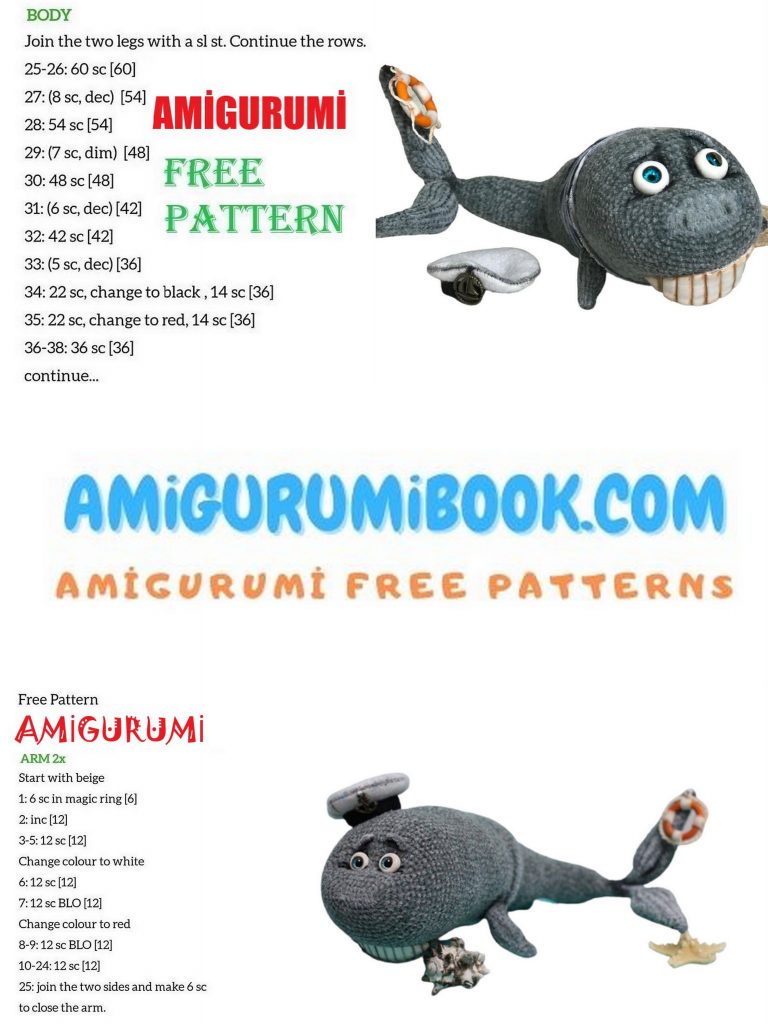
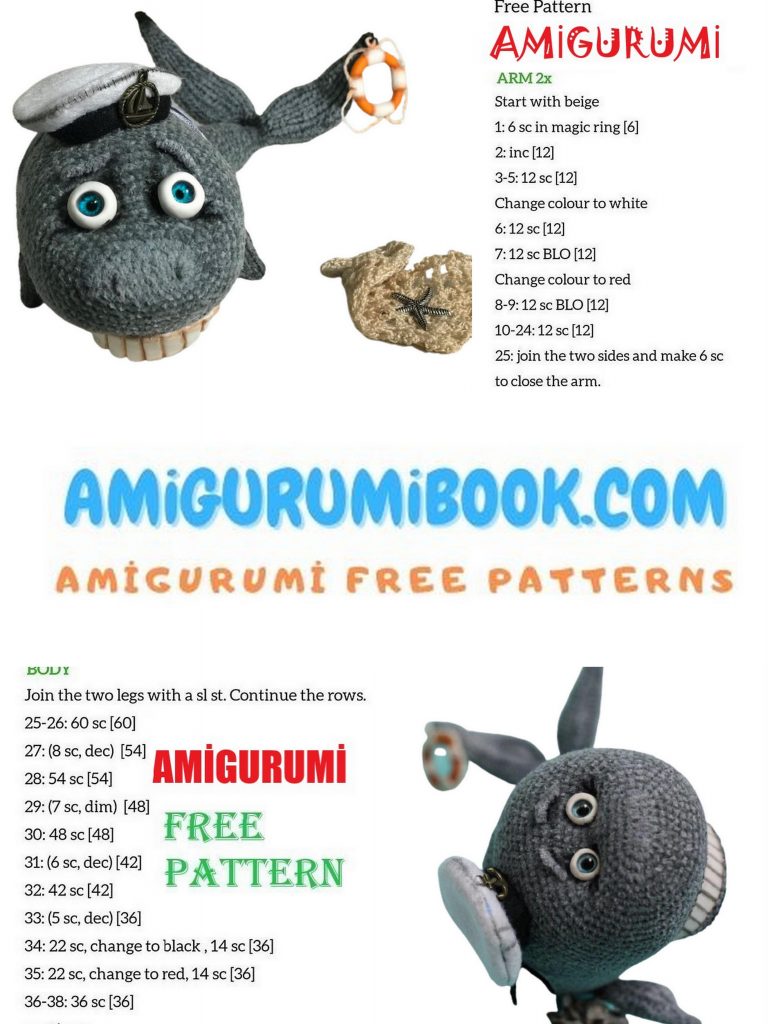
Fins: (2 parts)
You can’t follow the marker.
1st row: 6sc into magic ring
2-3 row: 6sc = 6sc
4 row: (2sc, inc) * 2 times = 8sc
5 row: (3sc, inc) * 2 times = 10sc
Row 6: (4sc, inc) * 2 times = 12 stitches
7-8 row: 12sc = 12sc
9th row: 1dec, 10sc = 11sc
10th row: 1dec, 9sc = 10sc
11 row: 1dec, 8sc = 9sc
12 row: 9sc = 9sc
13 row: 1dec, 7sc = 8sc
14 row: 8sc = 8sc
Fasten the thread and cut. We will tie the fins into the body.
Head – Torso.
We knit the head and body of the whale in one single piece, knitting the mouth and fins.
If desired, you can use wire to create a frame, or you can make a toy without it.
Cast on 8 ch on the hook, turn the knitting and continue with 2 loops from the hook.
1 row: 6sc, 3sc from 1 stitch (from the outermost, left loop in the chain), then knit on the reverse side of the chain, 6sc, 3sc from 1 stitch (far right loop) = 18sc
2nd row: 6sc, 3inc, 6sc, 3inc = 24sc
3rd row: Not a full row. Knit 3 sc and place a marker.
4 row: 4sc, (1inc, 1sc) * 2 times, 1inc, 7sc, (1inc, 1sc) * 2 times, 1inc, 3sc = 30sc
5 row: 4sc, (1inc, 2sc) * 2 times, 1inc, 8sc, (1inc, 2sc) * 2 times, 1inc, 4sc = 36sc
6 row: 4sc, (1inc, 3sc) * 2 times, 1inc, 9sc, (1inc, 3sc) * 2 times, 1inc, 5sc = 42sc
7 row: (6sc, 1inc) * 6 times = 48sc
8 row: (7sc, 1inc) * 6 times = 54sc
9 row: (8sc, 1inc) * 6 times = 60sc
10 row: (19sc, 1inc) * 3 times = 63sc
11 row: 10sc, (1inc, 20sc) * 2 times, 1inc, 10sc = 66sc
12-18 row: 66sc = 66sc (7 rows)
19 row: 26sc knit across the body, fold the piece of the mouth in half, attach the piece with the right side to the front side of the head and knit 14 loops of the head and 14 loops of the mouth at the same time, 26sc = 66sc
20 row: 26sc on the body, 14sc on the remaining loops of the mouth, 26sc = 66sc
21-22 row: 66sc = 66sc
23 row: 3sc, 1dec, 56sc, 1dec, 3sc = 64sc
24-26 row: 64 sc = 64 sc
27 row: 3sc, 1dec, 54sc, 1dec, 3sc = 62sc
28-31 row: 62sc = 62sc
32 row: 3sc, 1dec, 52sc, 1dec, 3sc = 60sc
33-34 row: 60sc = 60sc
35 row: 17sc on the body, attach the fin with the right side to the front side of the body and knit simultaneously 4 loops of the torso and 4 loops of the fin, 18 sc on the torso, attach the second fin with the right side to the front side of the body and knit 4 loops of the fin and 4 loops of the torso at the same time, 17sc on the torso = 60 sc
36 row: 17 sc, 4sc in loose sts of the fin, 18sc, 4sc, in loose sts of the fin, 17sc = 60 sc
37 – 40 row: 60 sc = 60 sc
Rnd 41: 38sc, 12sc in front half st (forming a crease on the side of the whale), 10sc in both half sts = 60sc
42 row: 60sc = 60sc
43 row: 2sc, 1dec, 1sc, 1dec, 46sc, 1dec, 1sc, 1dec, 2sc = 56sc
44 row: 56sc = 56sc
45 row: 36sc, knit 12sc, grabbing the back half loops left in the 41st row, 9sc = 56sc
46 row: 3sc, 1dec, 46sc, 1dec, 3sc = 54sc
47 row: 34sc, 8sc over the front half loop (forming the 2nd crease on the side of the whale), 12sc over both half loops = 54sc
48-49 row: 54sc = 54sc
50 row: 34sc, knit 8sc, grabbing the back half loops left in the 47th row, 12sc = 54sc
51 row: 4sc, 1dec, 42sc, 1dec, 4sc = 52sc
52-53 row: 52sc = 52sc
54 row: 32sc, 6sc over the front half loop (forming the 3rd crease on the side of the whale), 14sc over both half loops = 52sc
55 row: 52sc = 52sc
At this stage, you can prepare and insert the frame. Take a piece of wire 45-50 cm long. Bend the frame in half and insert it with the bent part into the part of the mouth, distributing the frame along the perimeter of the part. To make the frame motionless, flash the part of the mouth through and through. The remaining length of wire will be the carcass of the whale.
Take 2 pieces of thinner wire, about 0.7-0.8 mm, 15-20 cm each, bend them and stick them into the details of the fins. Twist the frames of the fins and the main frame, wrap with adhesive tape. Then continue knitting around the frame, tightly stuffing the carcass.
56 row: (11sc, 1dec) * 4 times = 48sc
57 row: 30sc, knit 6sc, grabbing the back half loops left in the 54th row, 12sc = 48sc
58 row: (14sc, 1dec) * 3 times = 45sc
59 row: 45sc = 45sc
60 row: (13sc, 1dec) * 3 times = 42sc
61 row: 42sc = 42sc
62 row: (12sc, 1dec) * 3 times = 39sc
63 row: 39sc = 39sc
64 row: (11sc, 1dec) * 3 times = 36sc
65 row: 36sc = 36sc
66 row: (10sc, 1dec) * 3 times = 33sc
67 row: 33sc = 33sc
68 row: (9sc, 1dec) * 3 times = 30sc
69 row: 30sc = 30sc
70 row: (8sc, 1dec) * 3 times = 27sc
71 row: 27sc = 27sc
72 row: (7sc, 1dec) * 3 times = 24sc
73-74 row: 24sc = 24sc
75 row: (6sc, 1dec) * 3 times = 21sc
76 row: 21sc = 21sc
77 row: (5sc, 1dec) * 3 times = 18sc
Check carcass stuffing.
78-79 row: 18sc = 18sc
80 row: 1dec, 16sc = 17sc
81 row: 1dec, 15sc = 16sc
82 row: 1dec, 14sc = 15sc
83 row: 1dec, 13sc = 14sc
84 row: (5sc, 1dec) * 2 times = 12sc
85 row: 12sc = 12sc
The carcass was tied up and now, without interrupting knitting, we knit the whale’s tail. We should have a small piece of wire left. We divide it into two parts, wrap each part of the wire with adhesive tape, each will be tied with a tail detail. If the wire segments are longer than the tail parts, cut off the excess.
86 row: knit 6sc, 4ch lay them between pieces of wire, returning to the beginning of the row = 10sc
Tail (2 pcs).
1 row: (1sc,1inc)*5 times = 15sc
2 row: (4sc, 1inc) * 3 times = 18sc
3 row: 18sc = 18sc
4 row: (5sc, 1inc) * 3 times = 21sc
5-8 row: 21sc = 21sc (4 rows)
9 row: 1dec, 19sc = 20sc
10 row: 1dec, 18sc = 19sc
11 row: 1dec, 17sc = 18sc
12 row: (7sc, 1dec) * 2 times = 16sc
13 row: (6sc, 1dec) * 2 times = 14sc
14 row: (5sc, 1dec) * 2 times = 12sc
15 row: (4sc, 1dec) * 2 times = 10sc
16 row: (3sc, 1dec) * 2 times = 8sc
17 row: (2sc, 1dec) * 2 times = 6sc
Fasten the thread and cut. Hide the end of the thread. We knit the second part of the tail in the same way. Only on 4ch we knit 4sc.
Muzzle shaping:
We have a whale connected, now you can arrange it. First, we do the muzzle tightening. We mark 3 points on the muzzle.
1 t point – 7 row 3 loops to the left of the marker;
2 t points – 7 row 3 loops to the right of the marker;
(the third pin marks the first row)
3 points – inside the mouth.
We fix a double strong thread at the left point, bring the needle inside the head in the mouth, approximately under the needle insertion point, pull the thread well with our fingers and fasten it with a few stitches. We repeat the tightening several times.
Similarly, we perform the tightening on the right.
Jaw sculpting and:
Before you start sculpting, you need to wash and dry your hands thoroughly. Not suitable if dust and fluff get on the part. Roll an unnecessary piece of plastic in your hands so that they are clean.
To sculpt a whale jaw, we take a small piece of white plastic, roll it well in our hands and roll the sausage, then using a rolling pin or other improvised tools we roll this sausage into a long plate, as in my photo. Its length should match the size of the whale’s jaw, the height is approximately 1-1.5 cm, it all depends on the mood of the mammal, and the thickness is about 1 mm. With the help of a knife, we cut off the excess plastic along the edges of the smile and make visible indentations, as if outlining the teeth. The size of the teeth is approximately 5-6 mm.
Do not forget to try on the whale’s jaw, applying it to the toy.
Jaw toning and:
On sandpaper we rub a little pastel of light brown tones. With a dry, flat synthetic brush, we collect a little paint and apply it very carefully, with light sliding movements, into the interdental slits. It is unnecessary to apply a lot of pastels, only a light shade of brown.
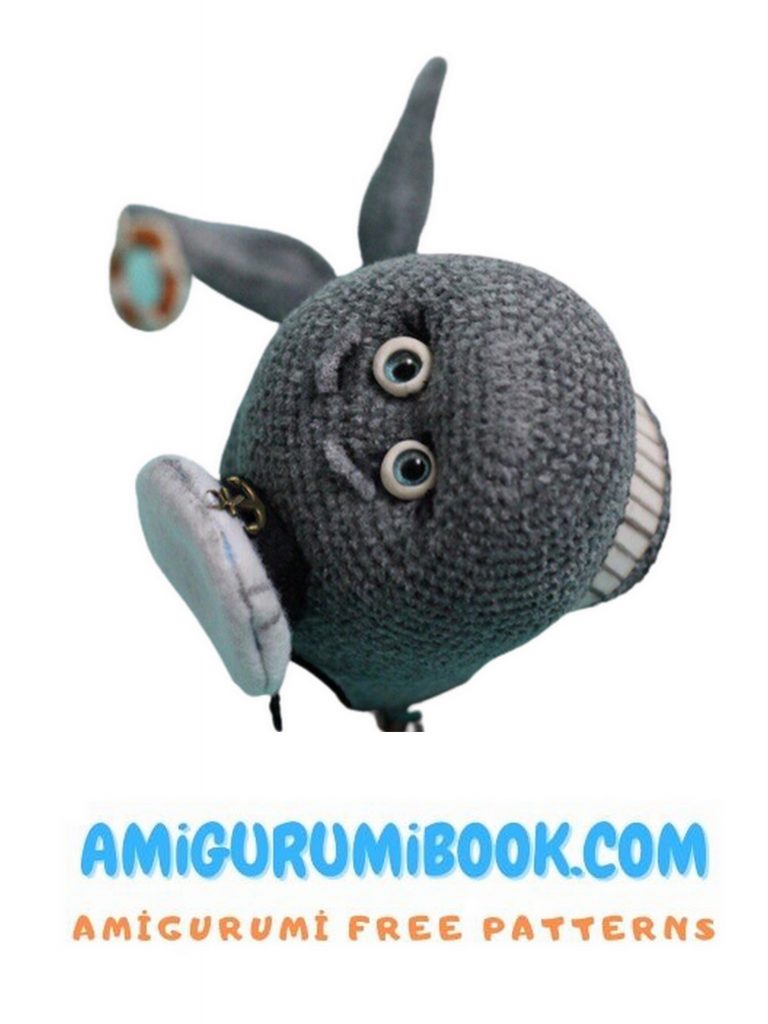
Sculpting squirrels peephole:
To sculpt proteins, we need to take two small pieces of white plastic and roll two balls out of them, which can be the same or different in size. It depends on your imagination. Then we press the pupils into the whites (I have glass eyes and I bake with them !!!) We send the eyes and jaw to bake according to the instructions on polymer clay. It usually takes me 15-20 minutes.
at a temperature of 120C, depending on the size of the part. Follow the directions on the package.
After the parts have completely cooled, apply a glossy acrylic varnish on them.
Try on the jaw and eyes on the muzzle and, if you like everything, glue it. I use Moment Crystal glue for work.
Toning:
Make toning. I use oil paints: white and black, thinner for oil paints “Sonnet” with a low odor, synthetic flat brushes of different numbers, a clean toothbrush.
Put a little white paint on the palette, dilute with thinner to the state of liquid sour cream and apply a small amount with a brush on the tummy, fins, tail, convex parts of the folds and nose. Blend well with a toothbrush.
Add black paint to the palette, mix a little black and white paint, with the resulting gray color we tint the places between the folds, on the tummy and fins you can draw thin longitudinal stripes, the places where the eyes will be located.
Brows:
Embroider an eyebrow above each eye. To do this, step back from the eye up 2-3 rows, make a stitch about 2-3 columns long. Wrap the thread around the stitch.
Lifebuoy:
To sculpt a lifebuoy, you will need orange (red) and white plastic.
From orange plastic, roll up a sausage 10 cm long and 0.5 cm thick, roll it into a ring and smooth the junction well.
Make 4 squares from white plastic and wrap them around a circle, smoothing well inside the junction.
Roll up two thin sausages from white plastic, less than 1 mm thick. Twist them together and attach in four places to the lifebuoy without pulling. Make a ring to attach to a toy. Bake according to instructions on polymer clay.
The lifeline is ready!
Well, what kind of captain without a headdress !!!
Cap
To sew a cap, you will need a small piece of white and a little black felt.
We cut out three parts according to the pattern. The field and the crown are white (1 piece each), the band is 1 black piece. The edges of the felt do not crumble, so it is very convenient to work with it. We fold the field of the cap and the tulle with the front sides and sew with a thread to match.
We fold the band (black) with short sides and sew, then bend it in half lengthwise, put it inside the cap and sew it to the crown.
We turn the headpiece on the front side, iron the seams well with our fingers.
If desired, the cap can be slightly toned and decorated with a pendant.