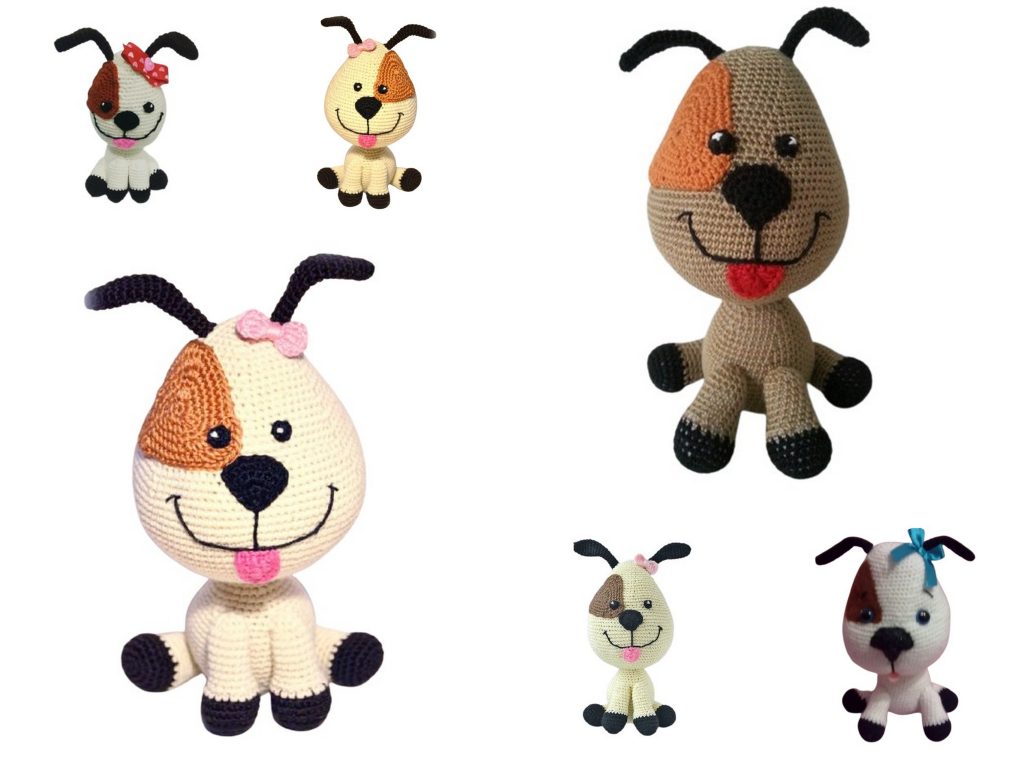
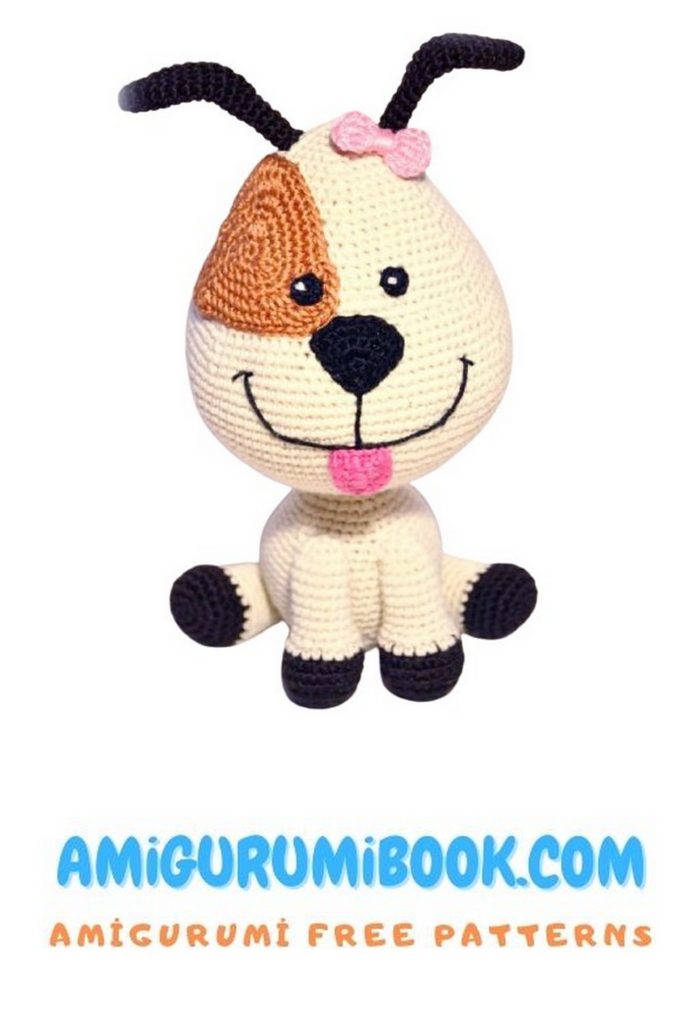
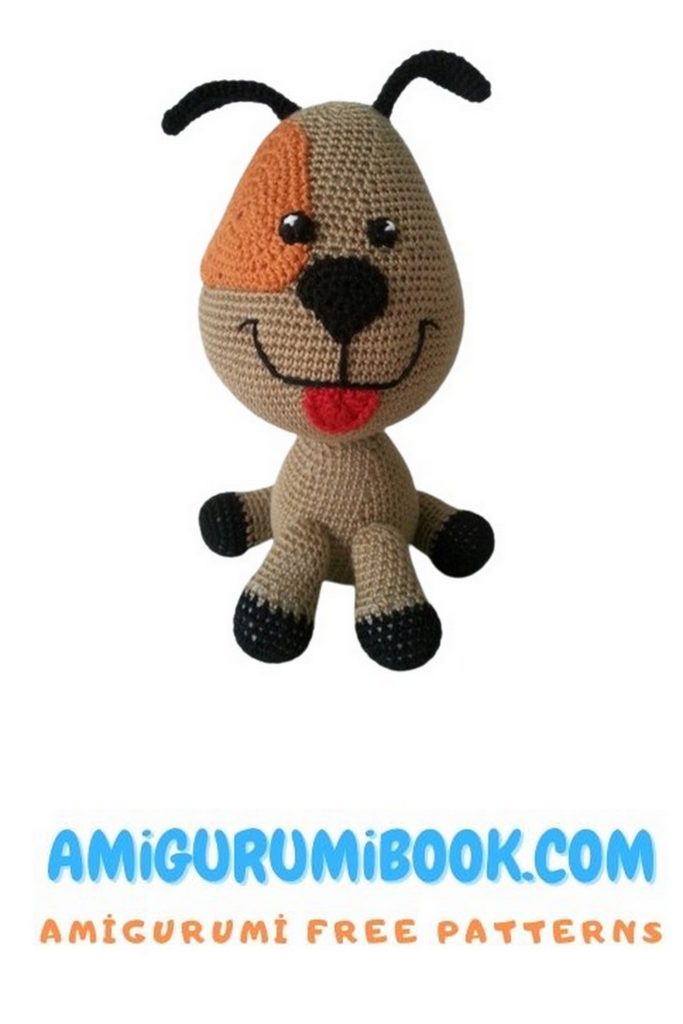
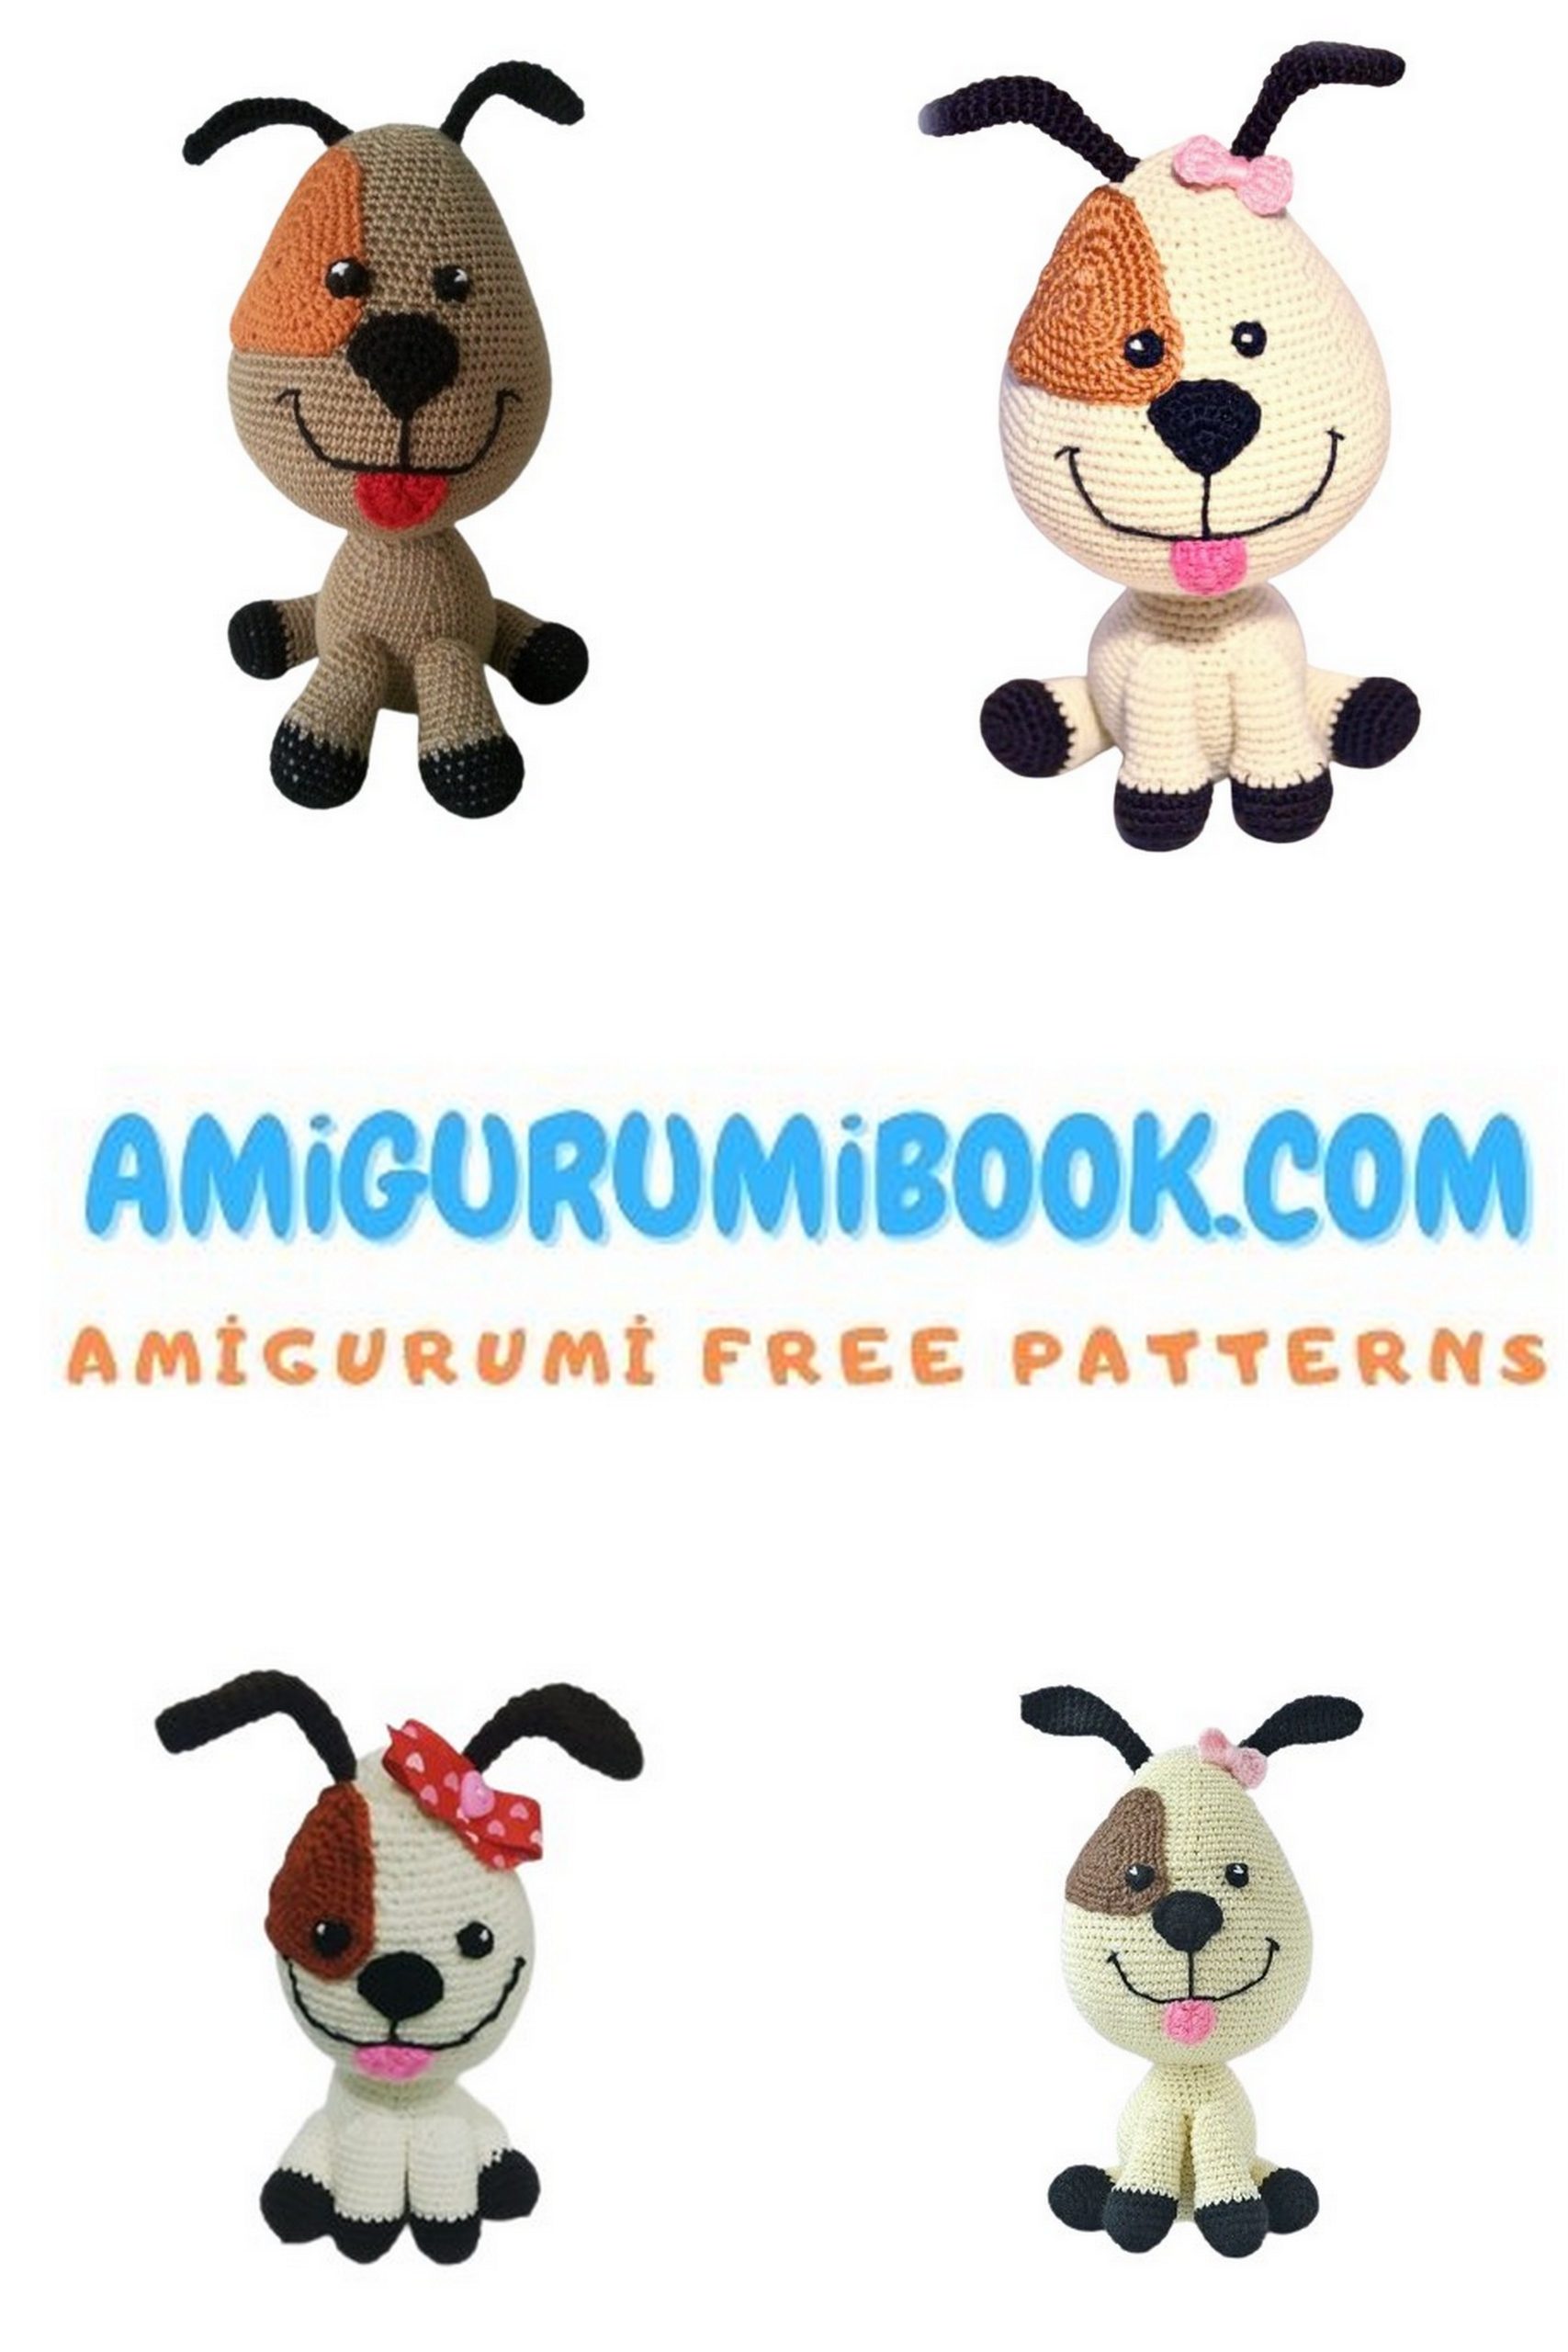
Welcome to our cozy corner of crochet wonders! If you’re a dog lover and enjoy crafting adorable amigurumi, you’re in for a treat. Today, we’re excited to share a special free pattern for crafting your very own Jack Russell Terrier amigurumi dog. With its characteristic features and playful personality, this project is perfect for capturing the spirit of this beloved breed. Whether you’re an experienced crocheter or just starting out, this pattern is suitable for all skill levels. So, grab your crochet hook and let’s embark on a journey to create a charming canine companion that will bring joy to your heart!
Would you like a great suggestion for your amigurumi dog collection? I think amigurumi tiny dog will suit your collection very well.
If you want to access 1000+ free amigurumi patterns, you can download our application from this link!
Materials and Tools:
Yarn:
1: Kable Linen (30674) – for the body, Lily Brown (88) – for ears, paws, and tail, Lily Gold (219) – for spot, Lily Fuchsia (30158) – for tongue, crocheting hook No1.3.
2: Iris (7214) for eyes and nose, smile embroidery, crocheting hook No1.25.
3: Snowflake 0101 (for sparkles) crocheting hook No0.9.
Tools:
Scissors, needle, stick for stuffing convenience, English pins.
Stuffing:
Synthetic balls, polyester fiberfill.
Important: You can use any yarn you like, but the result may vary. Adjustment may be necessary.
Crocheting Parts:
1: Head
2: Body
3: Lower Legs
4: Upper Legs
5: Ears
6: Eyes
7: HOC (could not translate)
8: Tongue
9: Tail
10: Spot
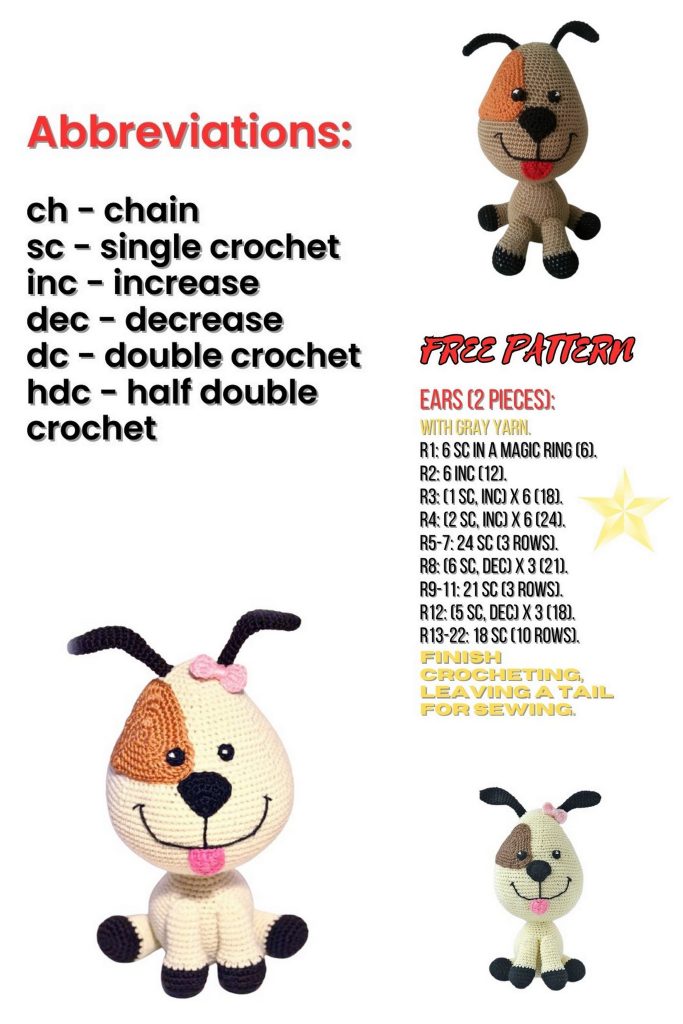
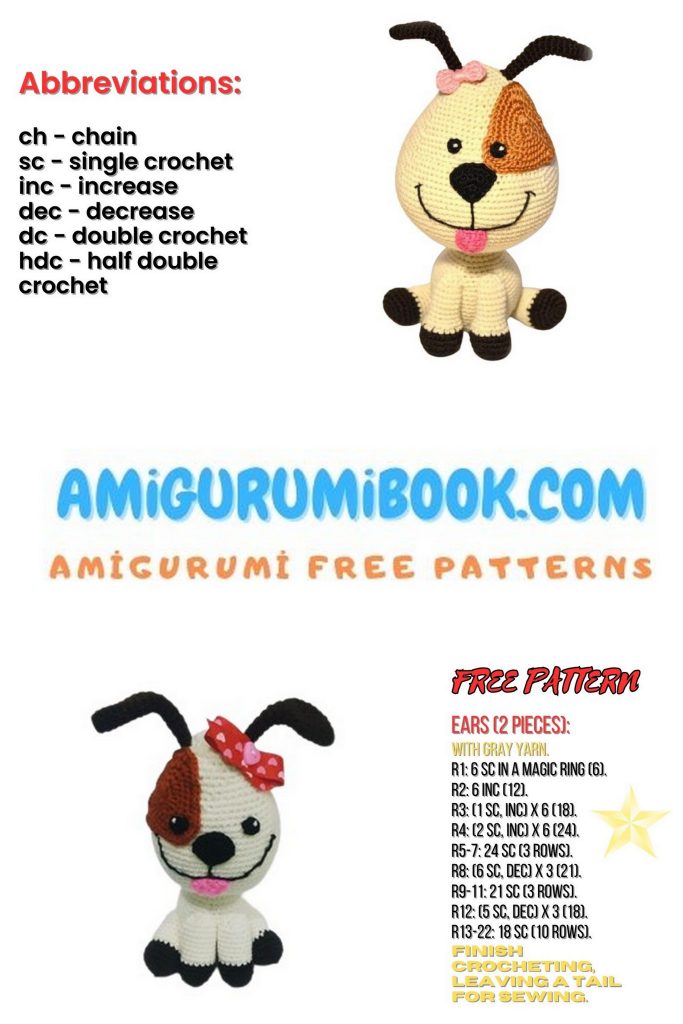
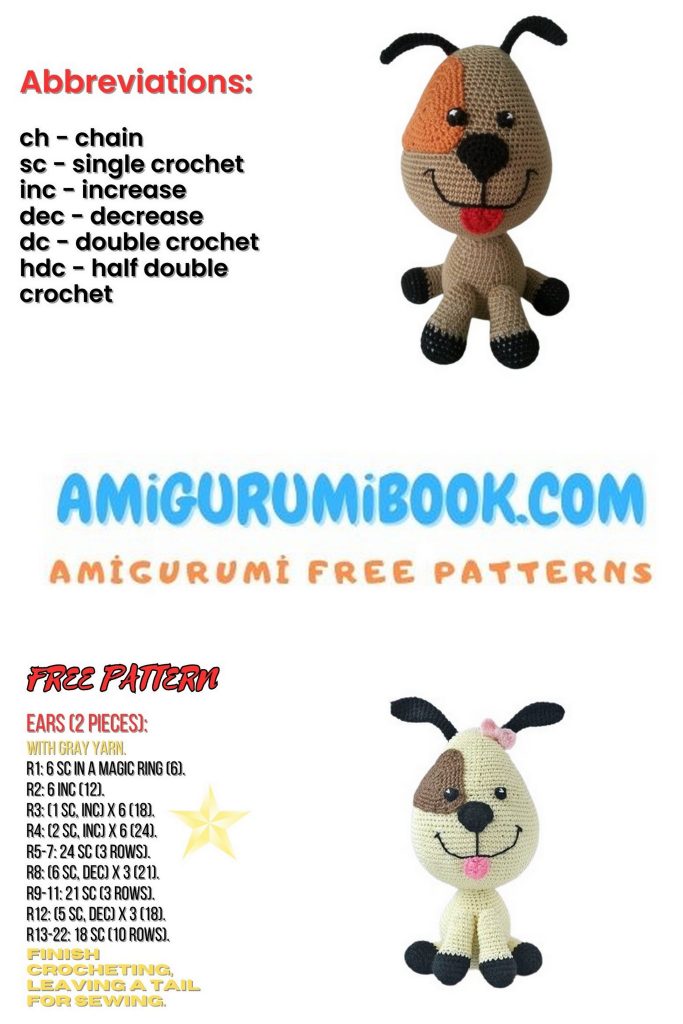
Abbreviations:
ch – chain stitch
sc – single crochet
hdc – half double crochet
dc – double crochet
sl st – slip stitch
inc – increase: 2 sc in one stitch of the previous row (round)
dec – decrease: sc two stitches together

PATTERN
Jack Russell Head:
Crochet with Kable Linen (30674) color, using hook No1.3.
(1) 6 sc in Magic Ring
Increases
(2) inc * 6 times (12)
(3-16) 1(2, 3, 4, 5, 6, 7, 8, 9, 10, 11, 12, 13, 14) sc, inc – for 6 rows, end with 18 (24, 30, 36, 42, 48, 54, 60, 66, 72, 78, 84, 90, 96) sts
(17-22) 96 sc
Decreases
(23) (14 sc; dec)*6 (90)
(24) 90 sc
(25) sc in next, (13 sc; dec)*6 (84)
(26) 84 sc
(27) sc in next; (12 sc; dec)*6 (78)
Forming the Muzzle
(28) 13 sc; (sc; dec) *4; 2 sc; (dec; sc) *4; 39 sc (70)
(29) sc in next; 11 sc; dec; (sc; inc) *4; (inc; sc) *4; dec; (11 sc; dec) *3 (73)
(30) 73 sc
(31) sc in next; 10 sc; dec; 9 sc; dec*2; (10 sc; dec) *4 (66)
(32) 66 sc
(33) sc in next; (9 sc; dec) *6 (60)
(34) 60 sc
(35) sc in next; (8 sc; dec) *6 (54)
(36) 54 sc
(37) sc in next; (7 sc; dec) *6 (48)
(38) 48 sc
(39) sc in next; (6 sc; dec) *6 (42)
(40) 42 sc
(41) sc in next; (5 sc; dec) *6 (36)
(42) 36 sc
(43) sc in next; (4 sc; dec) *6 (30)
(44) 30 sc
(45) sc in next; (3 sc; dec) *6 (24)
(46) sc in next; (2 sc; dec) *6 (18)
Stuff the piece with stuffing
(47) sc in next; (sc; dec) *6 (12)
(48) sc in next; dec *6
Finish crocheting, fasten off, hide yarn tail. Accept the end of crocheting as the top.


Jack Russell Body:
Crochet with Kable Linen (30674) color, using hook No1.3.
(1) 6 sc in Magic Ring
Increases
(2) inc* 6 (12)
(3) (sc; inc) * 6 (18)
(4) (2 sc; inc) * 6 (24)
(5) (3 sc; inc) * 6 (30)
(6) (4 sc; inc) * 6 (36)
(7) (5 sc; inc) * 6 (42)
(8) (6 sc; inc) * 6 (48)
(9) (7 sc; inc) * 6 (54)
(10) (8 sc; inc) * 6 (60)
Decreases
(11) (8 sc; dec) *6 (54)
(12-17) 54 sc
Forming the Rear Part of the Body
(18) 8 sc; (dec; sc) *6; dec; 26 sc (47)
(19) 47 sc
(20) sc in next; 7 sc; dec; (4 sc; dec) *2; 6 sc; dec; (7 sc; dec)*2 (41)
(21) 41 sc
(22) sc in next; 6 sc; dec; (3 sc; dec) *2; 5 sc; dec; (6 sc; dec)*2 (35)
(23) 35 sc
(24) sc in next; 5 sc; dec; 6 sc; dec; 4 sc; dec; 5 sc; dec; 5 sc; dec (30)
(25) 30 sc
(26) sc in next; 4 sc; dec; 5 sc; dec; 3 sc; dec; 4 sc; dec; 4 sc; dec (25)
(27) sc in next; 3 sc; dec; 4 sc; dec; 2 sc; dec; 3 sc; dec; 3 sc; dec (20)
(28) 20 sc
Finish crocheting, fasten off, leaving a tail for sewing. Stuff the piece with stuffing. Attach the head to the body, aligning with the muzzle and rear part of the body.
Jack Russell Lower Legs:
Start crocheting with Lily Brown (88) color, using hook No1.3.
(1) 6 sc in Magic Ring
Increases
(2) inc* 6 (12)
(3) (sc; inc) * 6 (18)
(4) (2 sc; inc) * 6 (24)
(5-6) 24 sc
(7) (dec; sc) * 4; 6 sc (20)
Change to Kable Linen (30674) color
(8) 20 sc
(9) 6 sc; dec; 4 sc; dec; 6 sc (18)
(10-12) 18 sc
(13) 6 sc; dec; 3 sc; dec; 5 sc (16)
(14-16) 16 sc
(17) (sc; dec) * 4 (12)
Stuff the piece with stuffing
(18) dec * 6
Finish crocheting, fasten off, hide tail.

Jack Russell Upper Legs:
Start crocheting with Lily Brown (88) color, using hook No1.3.
(1) 6 sc in Magic Ring
Increases
(2) inc * 6 (12)
(3) (sc; inc) * 6 (18)
(4) (2 sc; inc) * 6 (24)
(5-6) 24 sc
(7) (dec; sc) * 4; 6 sc (20)
Change to Kable Linen (30674) color
(8) 20 sc
(9) (2 sc; dec) * 5 (15)
(10-16) 15 sc
Stuff the piece with stuffing
(17) (sc; dec) * 5 (10)
(18) dec * 5 (5)
Finish crocheting, fasten off, leaving a tail for sewing.
Jack Russell Ears:
Start crocheting with Lily Brown (88) color, using hook No1.3.
(1) 6 sc in Magic Ring
Increases
(2) (sc; inc) *3 (9)
(3) 9 sc
(4) (2 sc; inc) *3 (12)
(5-8) 12 sc
Decreases
(9) dec; 10 sc (11)
(10) dec; 9 sc (10)
(11) dec; 8 sc (9)
(12) dec; 7 sc (8)
(13) dec; 6 sc (7)
(14-17) 7 sc
Finish crocheting, fasten off, leaving a tail for sewing.
Jack Russell Tongue:
Start crocheting with Lily Fuchsia (30158) color, using hook No1.3.
(1) Chain 4
(2) 3 chains as a turning chain; 2 hdc, 6 hdc in next stitch; 3 hdc
(3) Turn the work, crochet around in a crab stitch.
Finish crocheting, fasten off, leaving a tail for sewing.

Jack Russell Tail:
Start crocheting with Lily Brown (88) color, using hook No1.3.
(1) 4 sc in Magic Ring
Increases
(2) inc; 3 sc (5)
(3) sc; inc; 3 sc (6)
(4) 2 sc; inc; 3 sc (7)
(5) 3 sc; inc; 3 sc (8)
(6) 4 sc; inc; 3 sc (9)
(7-9) 9 sc
Finish crocheting, fasten off, leaving a tail for sewing.
Crocheting Eyes:
Start crocheting with Iris (7214) color, using hook No1.25
(1) 6 sc in Magic Ring
Finish crocheting, fasten off, leaving a tail for sewing.
Crocheting Nose:
Start crocheting with Iris (7214) color, using hook No1.25
(1) 3 sc in Magic Ring, distribute on one side (3)
Turn work with each subsequent row.
(2) Chain 1; sc; inc; sc (4)
(3) Chain 1; sc; 2 inc; sc (6)
(4) Chain 1; sc; inc; 2 sc; inc; sc (8)
(5) Crochet around the piece with sc, on the sides add 3 sc; at the bottom – inc; on the other side – 3 sc; at the top – inc; sc; inc; 2 sc; inc; sc; inc.
Finish crocheting, fasten off, leaving a tail for sewing.
Crocheting Spot:
Start crocheting with Lily Gold (219) color, using hook No1.3.
(1) 6 sc in Magic Ring
Increases
(2) ((sc, hdc, dc – in sc); (dc; hdc; sc in sc))*3 (18)
(3) 2 sc; (2 hdc – in sc)*2; 4 sc; (2 hdc – in sc)2; 4 sc; inc2; 2 sc (24)
(4) 3 sc; (2 hdc in sc)3; 5 sc; 2 hdc in sc; inc2; 7 sc; 2 hdc in sc; 2 sc (31)
(5) 4 sc; (2 hdc in sc)*4; 6 sc; (2 hdc in sc)*4; 8 sc; (2 hdc – in sc)*4; 1 sc (44)
(6) 6 sc; (2 hdc in sc)*4; 10 sc; (2 hdc in sc)*4; 12 sc; (2 hdc – in sc)*4; 2 sc; sl st (56)
Finish crocheting, fasten off, leaving a tail for sewing.
Assembling the Toy and Decorating the Muzzle:
1: Attach the head to the body, aligning with the muzzle and rear part of the body.
2: Sew on the upper legs, leaving 6 rounds down from the junction of the body with the head, keep a distance of 3 sc between the legs. Secure the legs firmly.
3: Attach the lower legs to the thread fastening between the 8th and 10th rounds of the body. There should be 21 sc between the legs, looking from the back.
4: Sew the tail between the 13th and 16th rounds of the body. It can be sewn higher.
5: Sew the ears on the crown between the 4th and 6th rounds, counting from the crown.
6: Attach the nose to the muzzle, aligning its upper part with the muzzle formation point. This is where the decreases are well visible.
7: Sew on the spot freely.
8: Sew on the eyes, leaving 1-2 rounds away from the nose, maintaining a distance of 4-5 sc between the eyes.
9: Attach the tongue, leaving 5 rounds down from the nose.
10: Embroider the smile. Start 11 sc to the right from the nose tip and 1 sc up; insert the needle and bring it out symmetrically from the left; insert the needle into the first point and form the smile, securing the thread in 3 points. Finish decorating the smile.