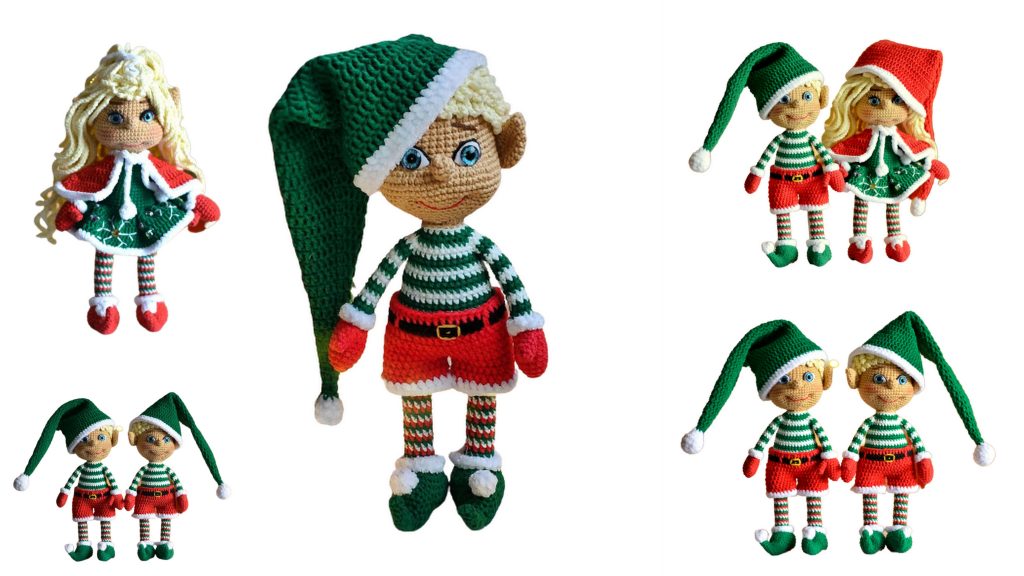
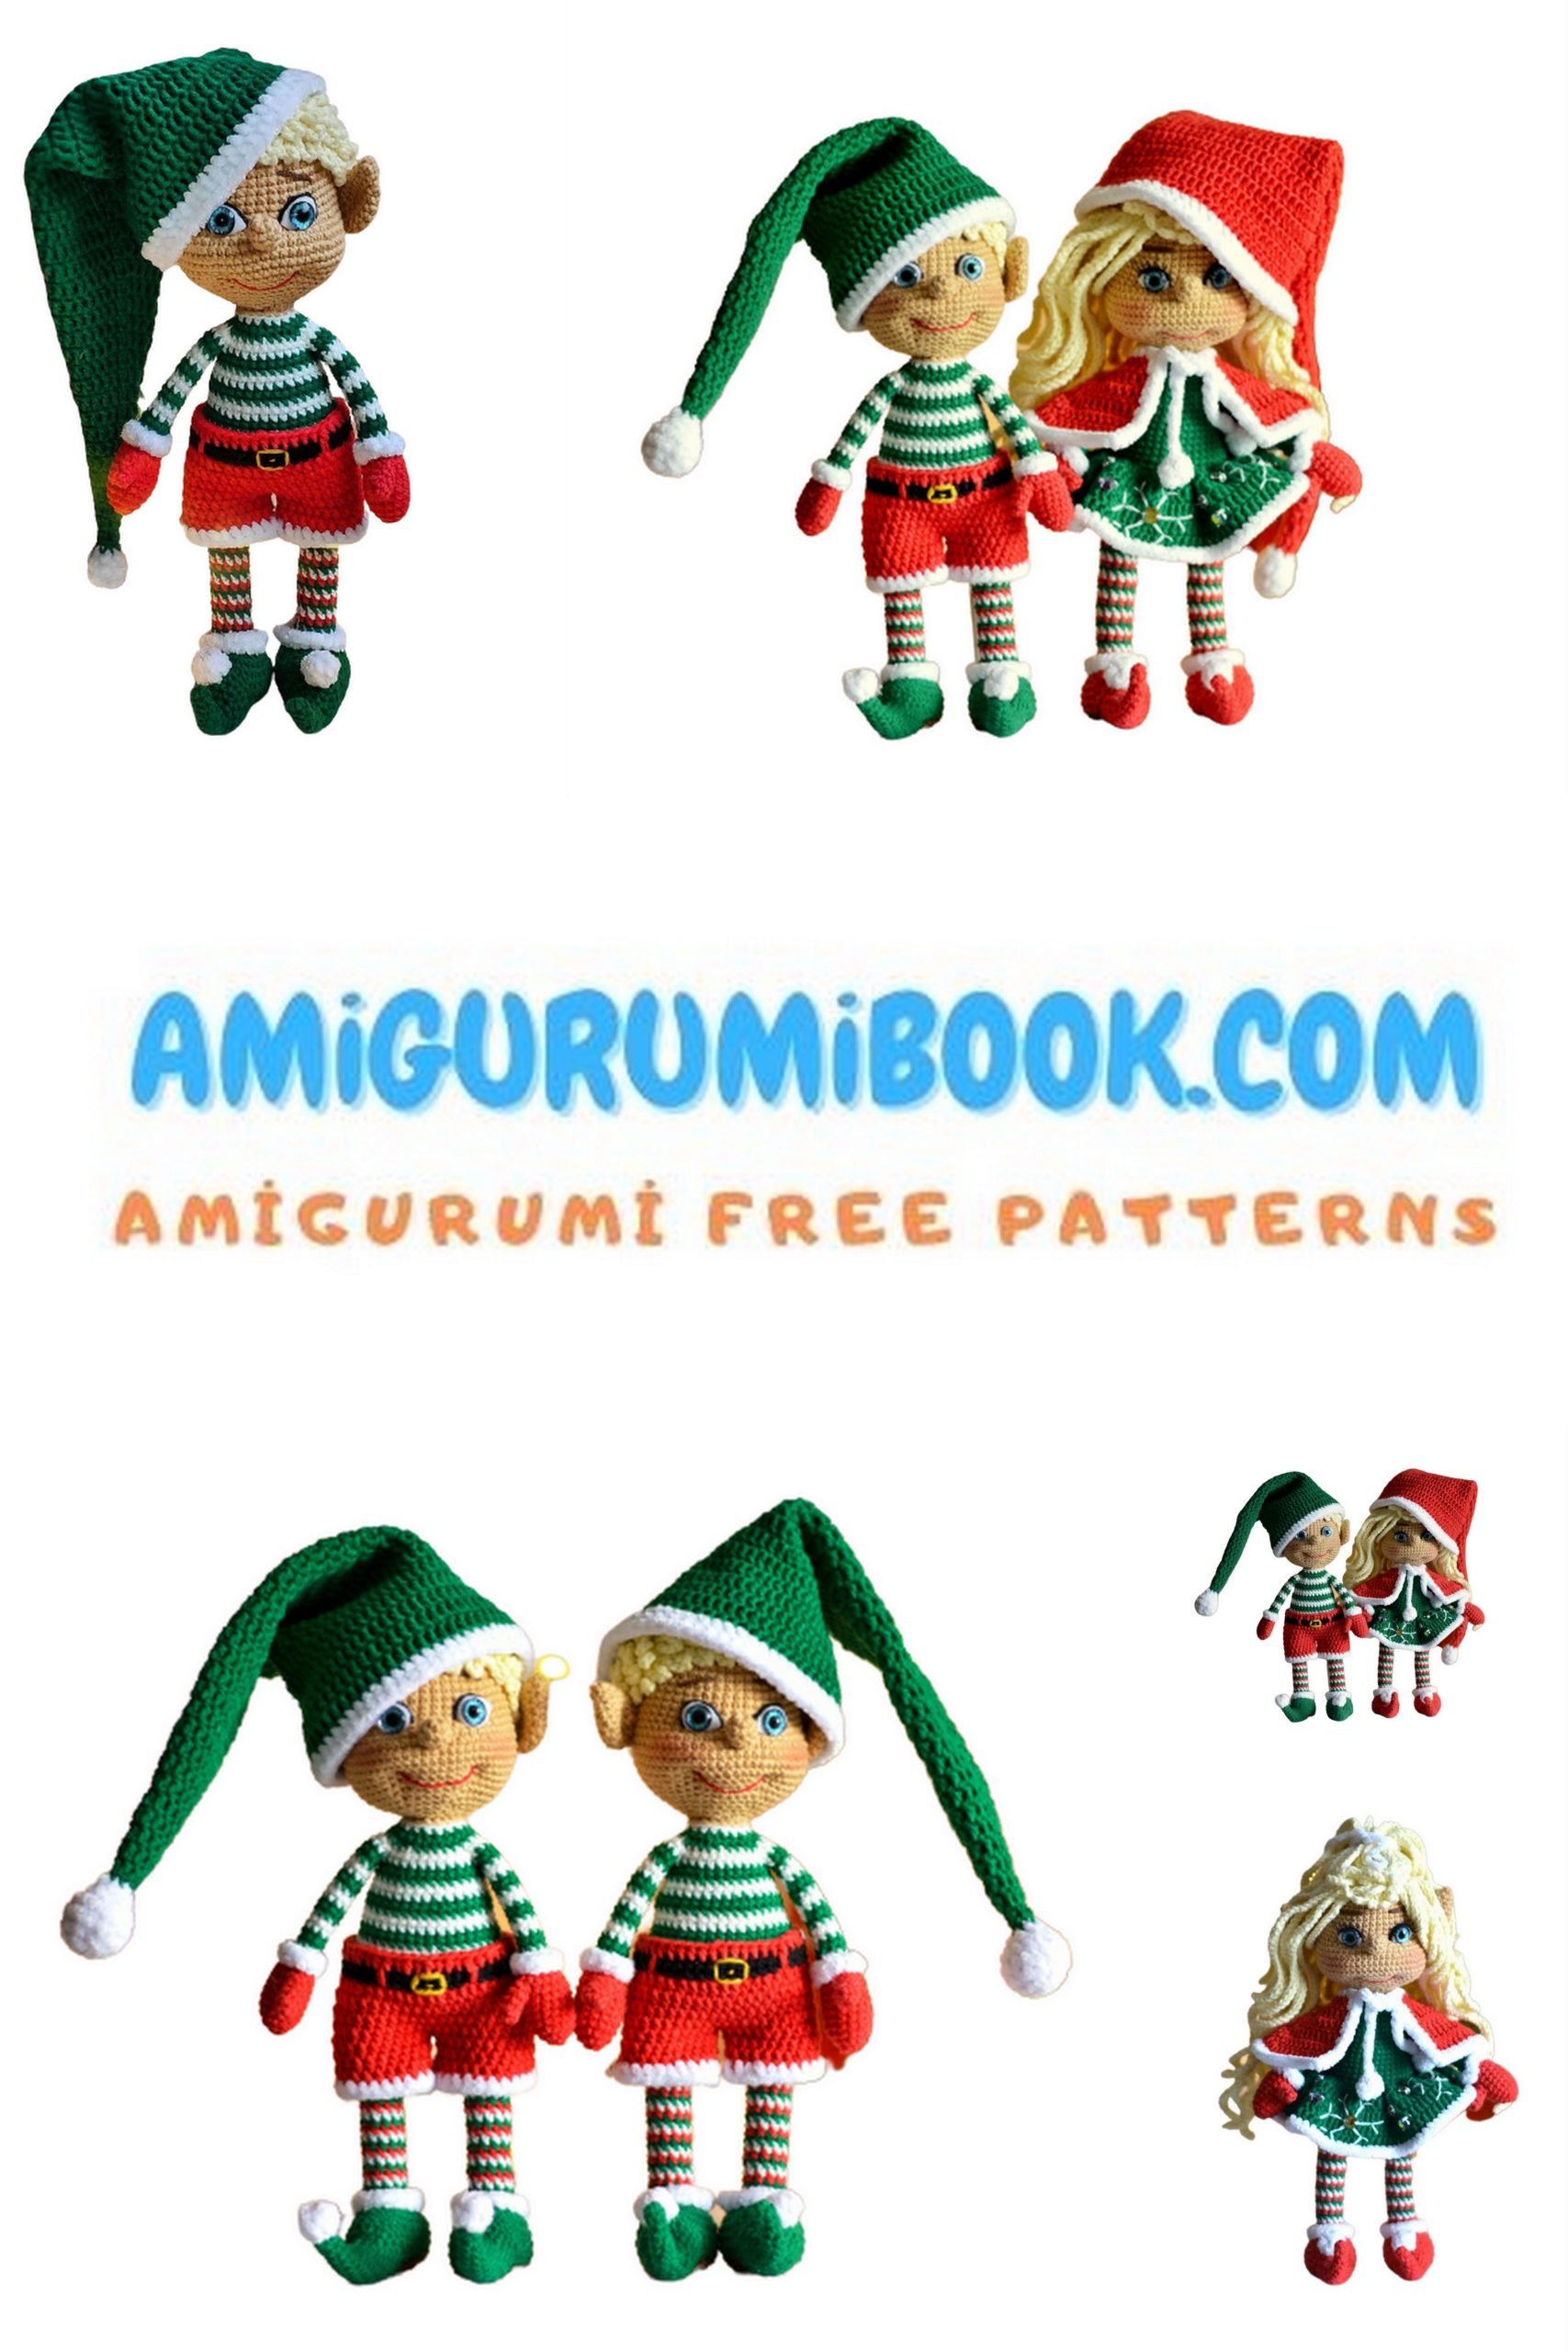
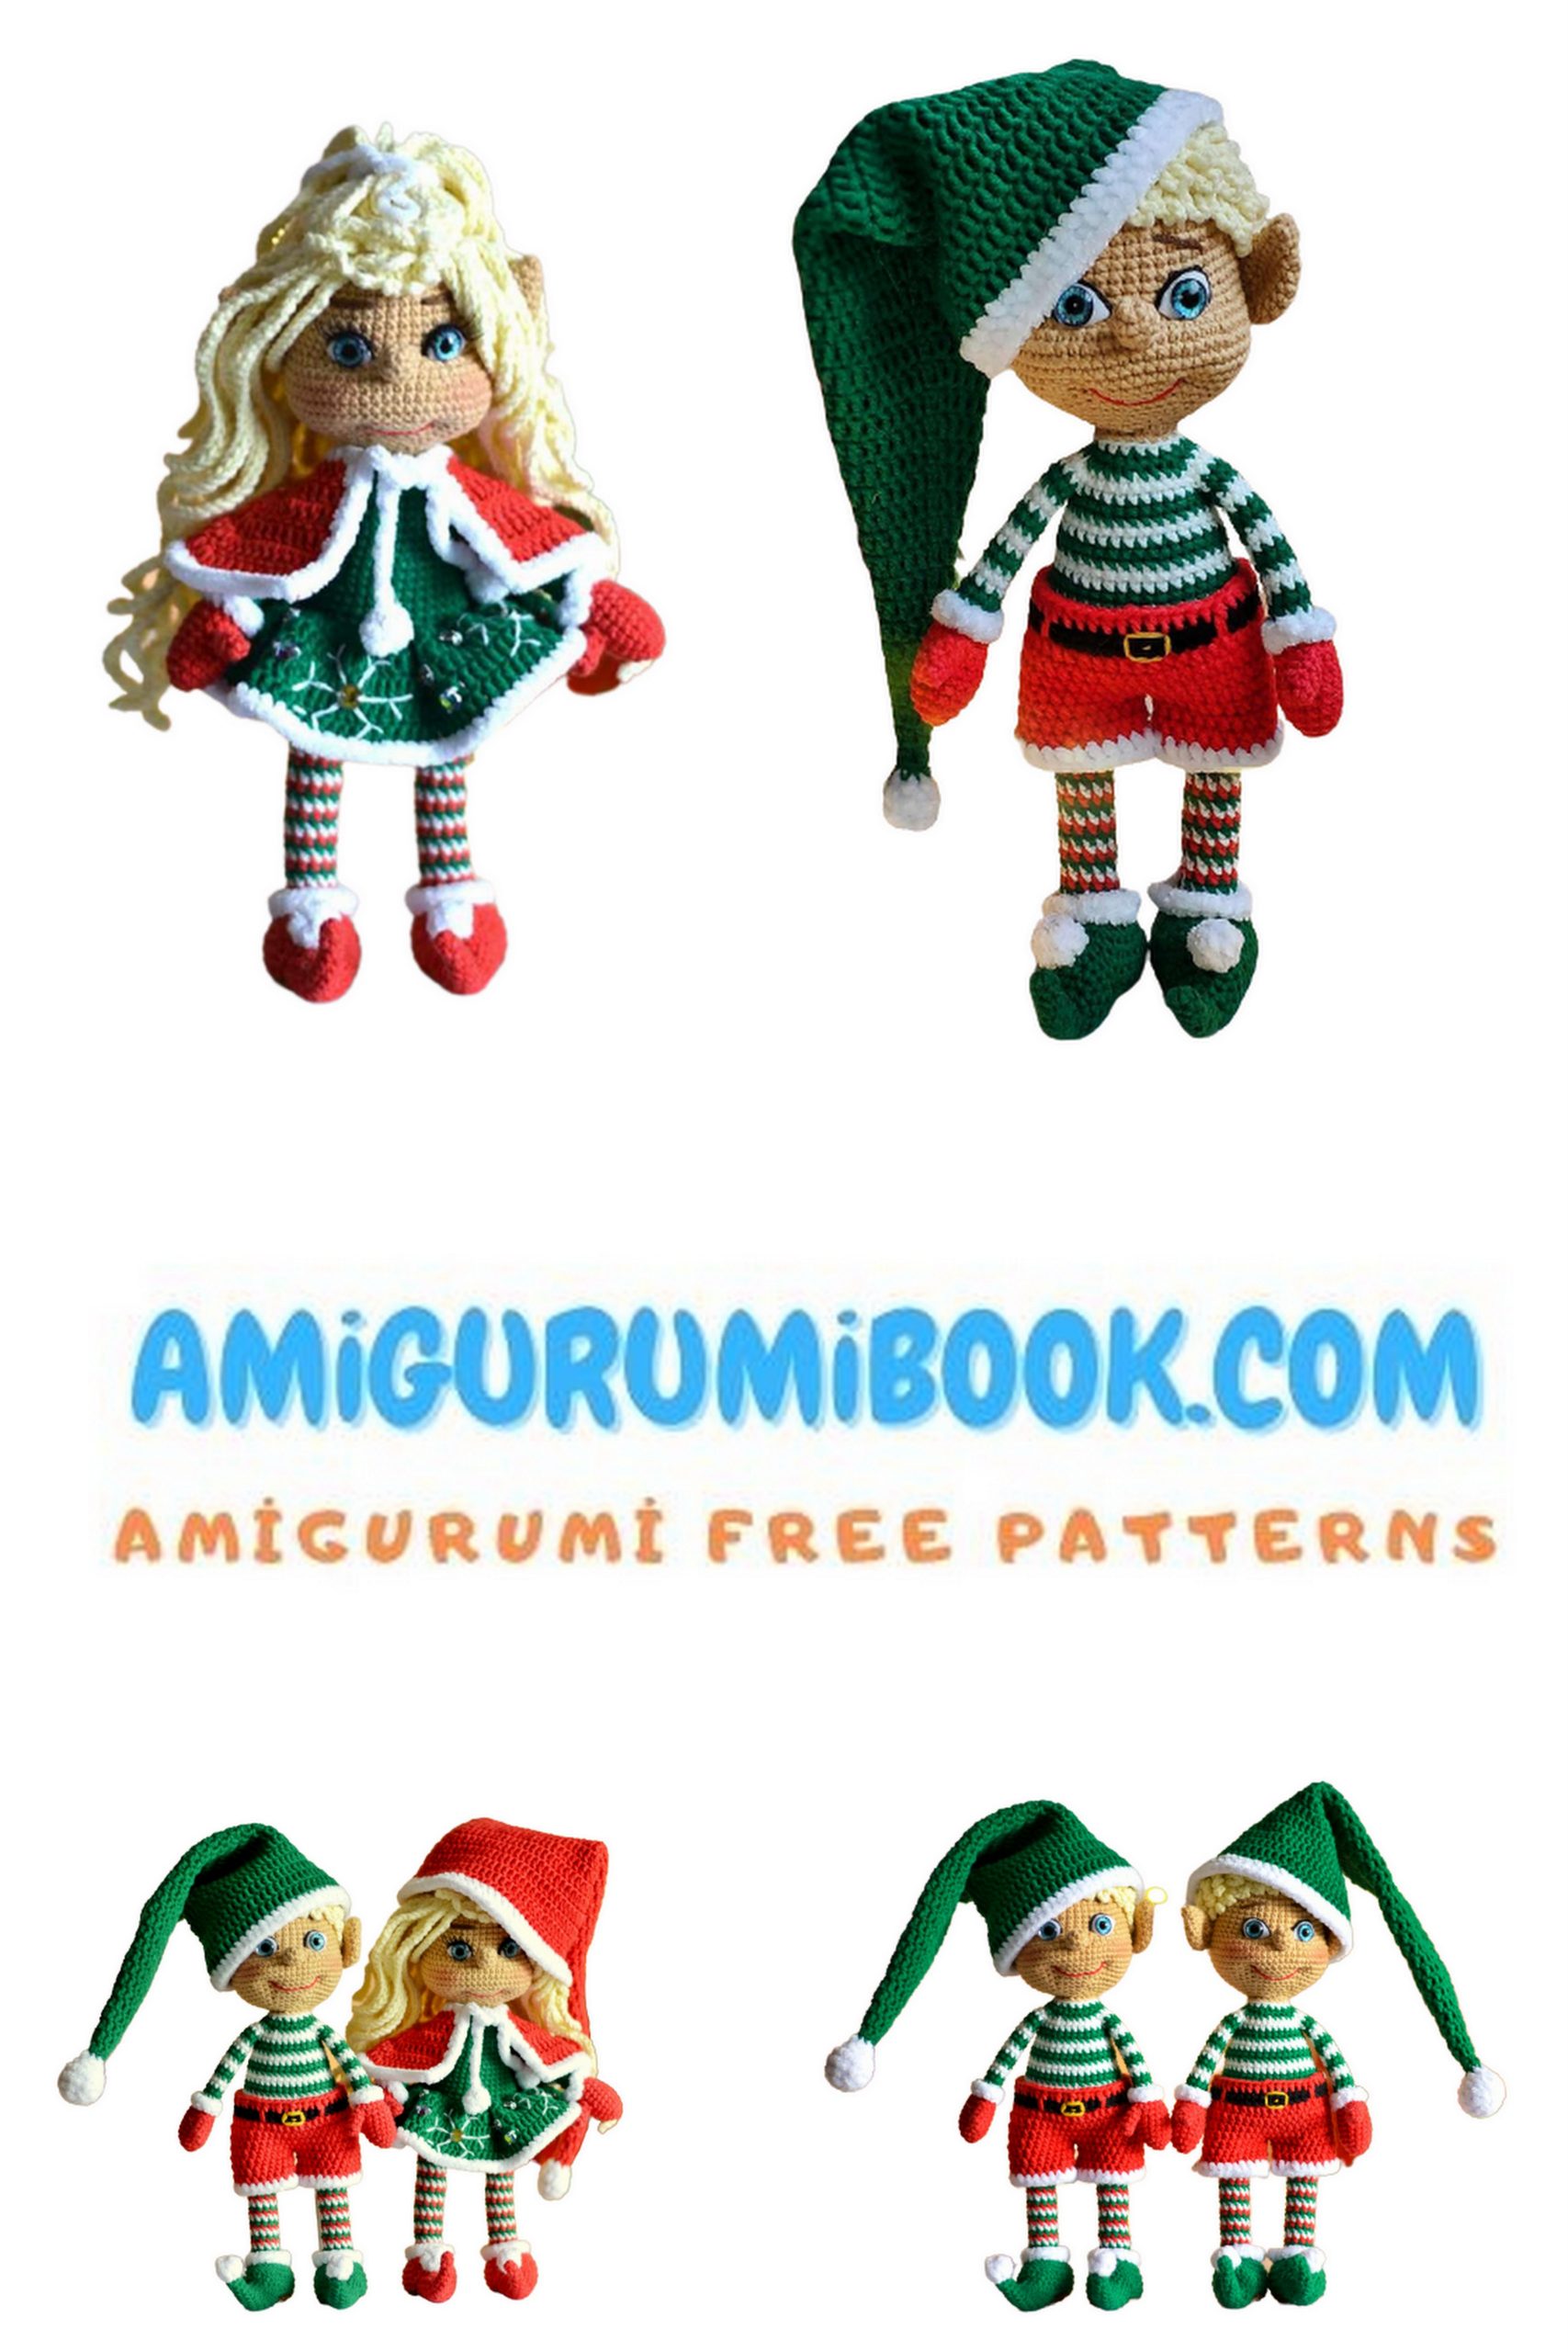
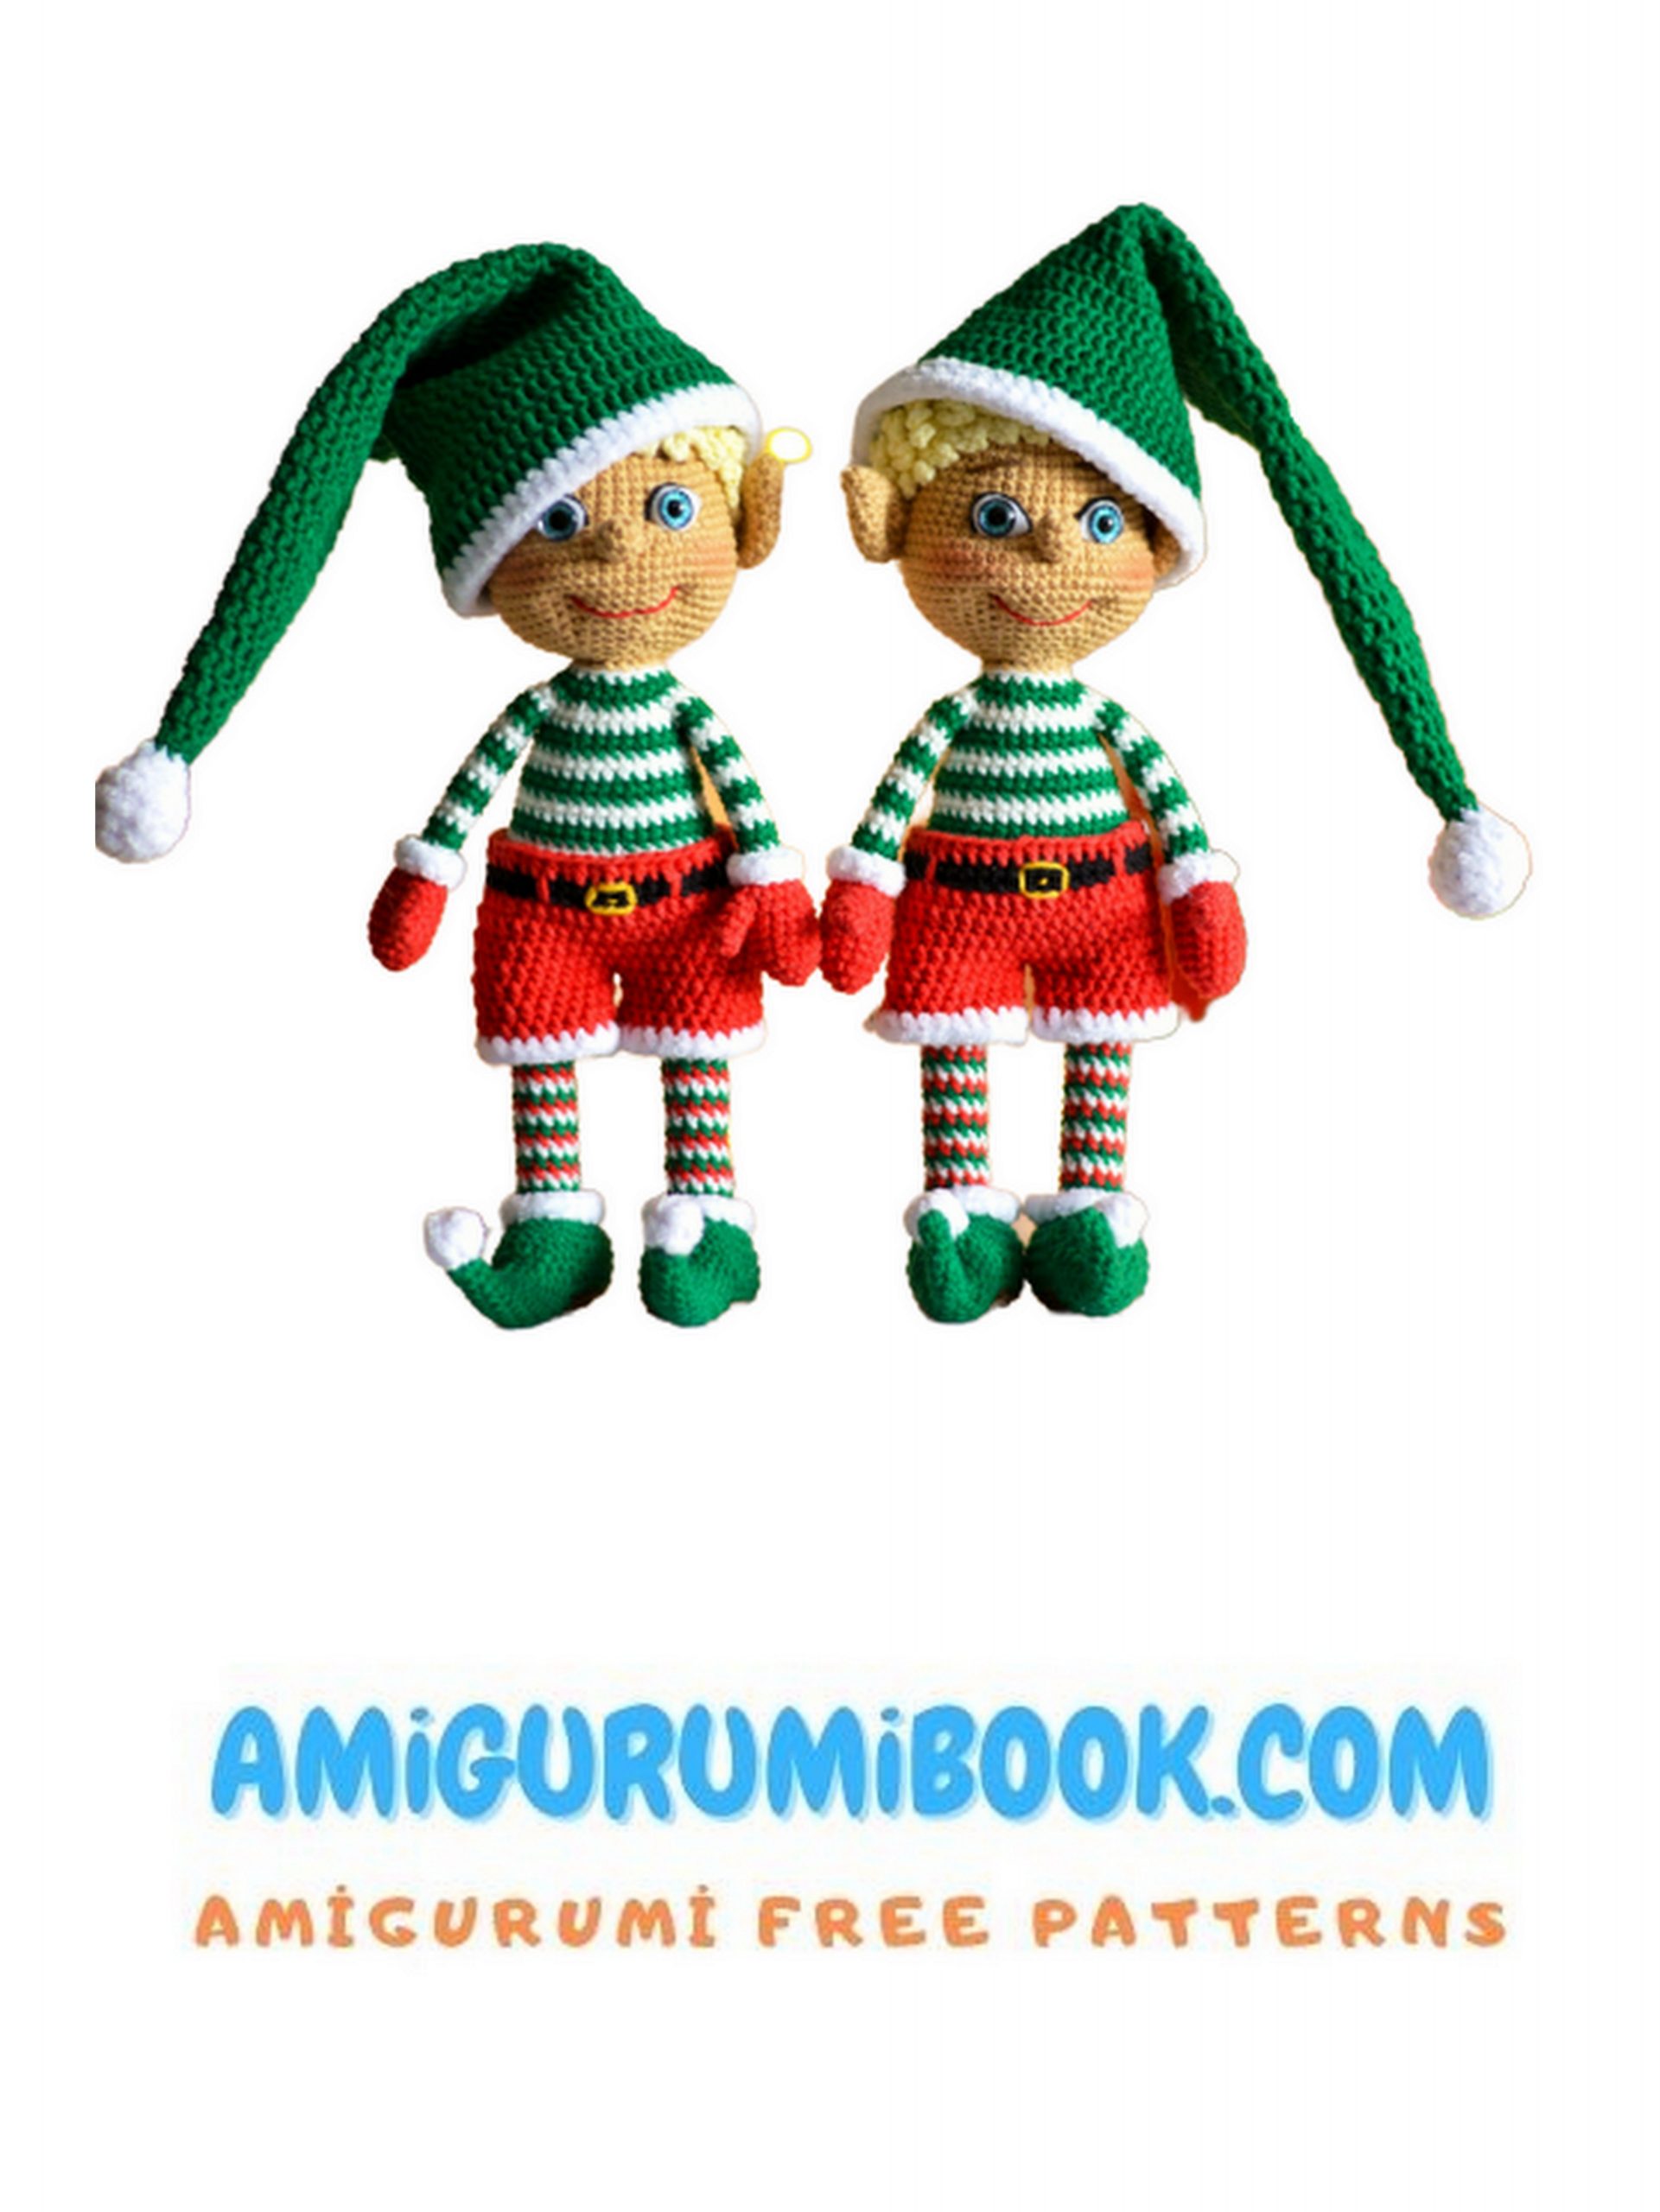
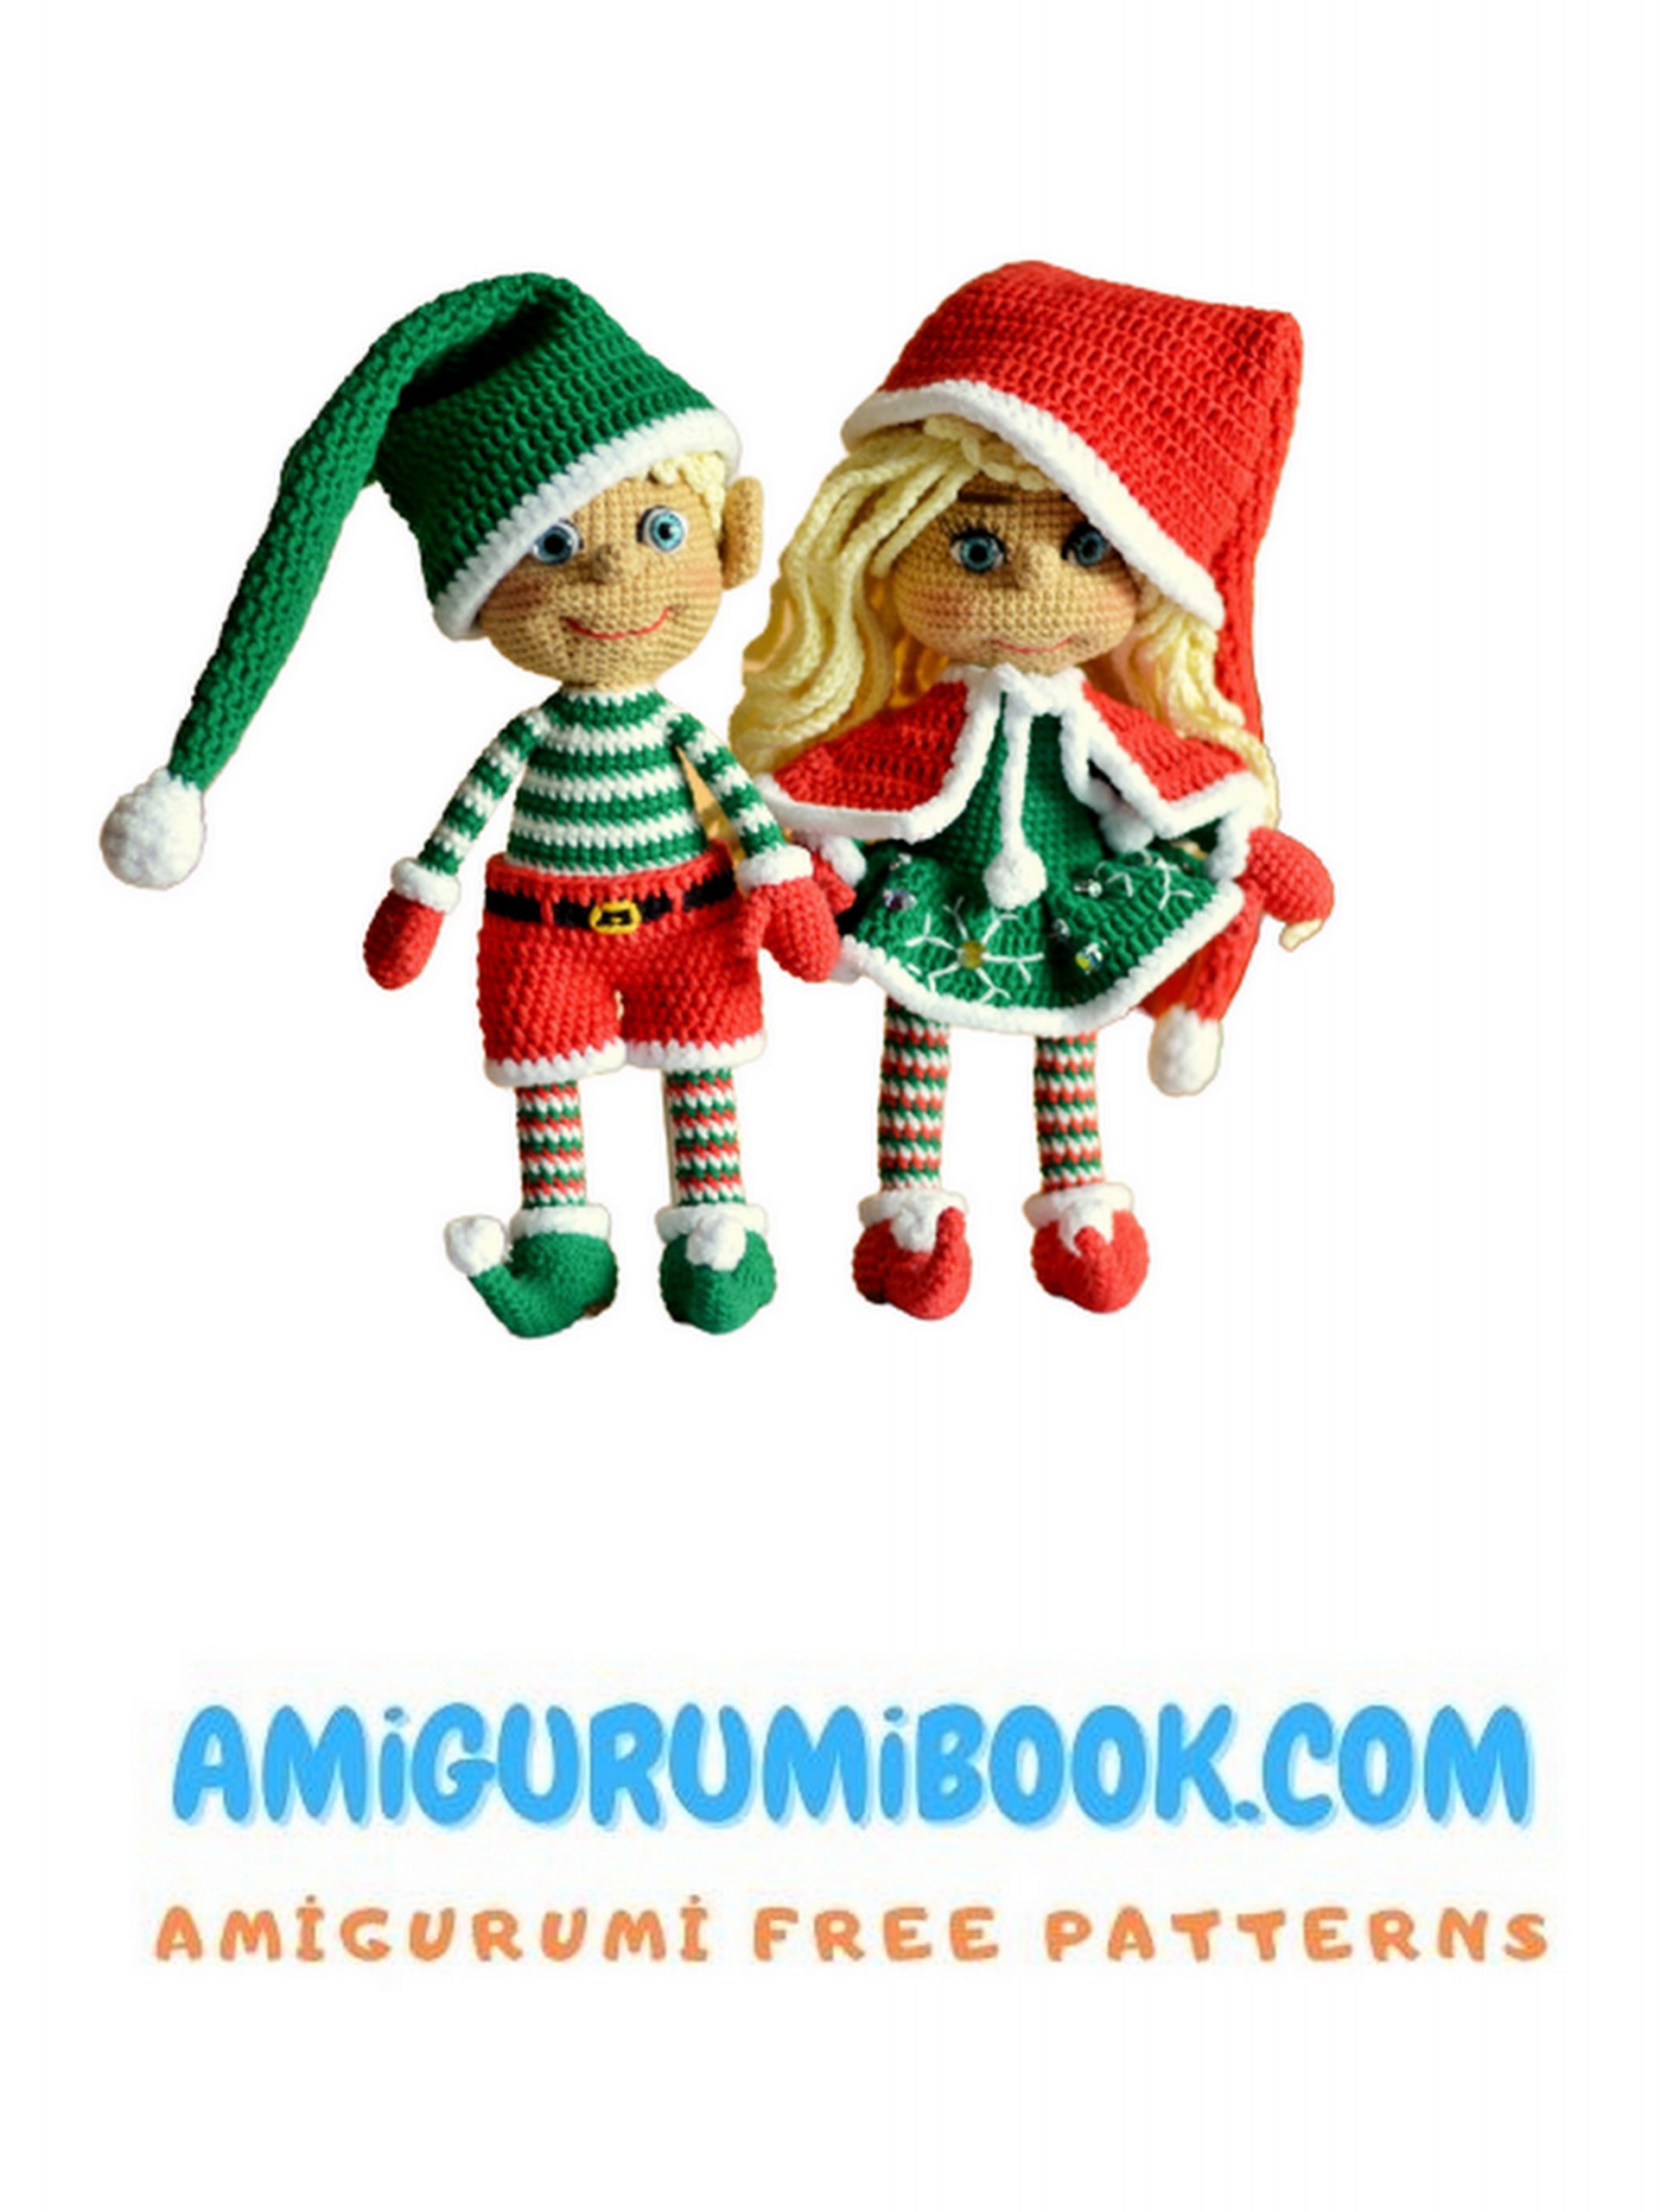
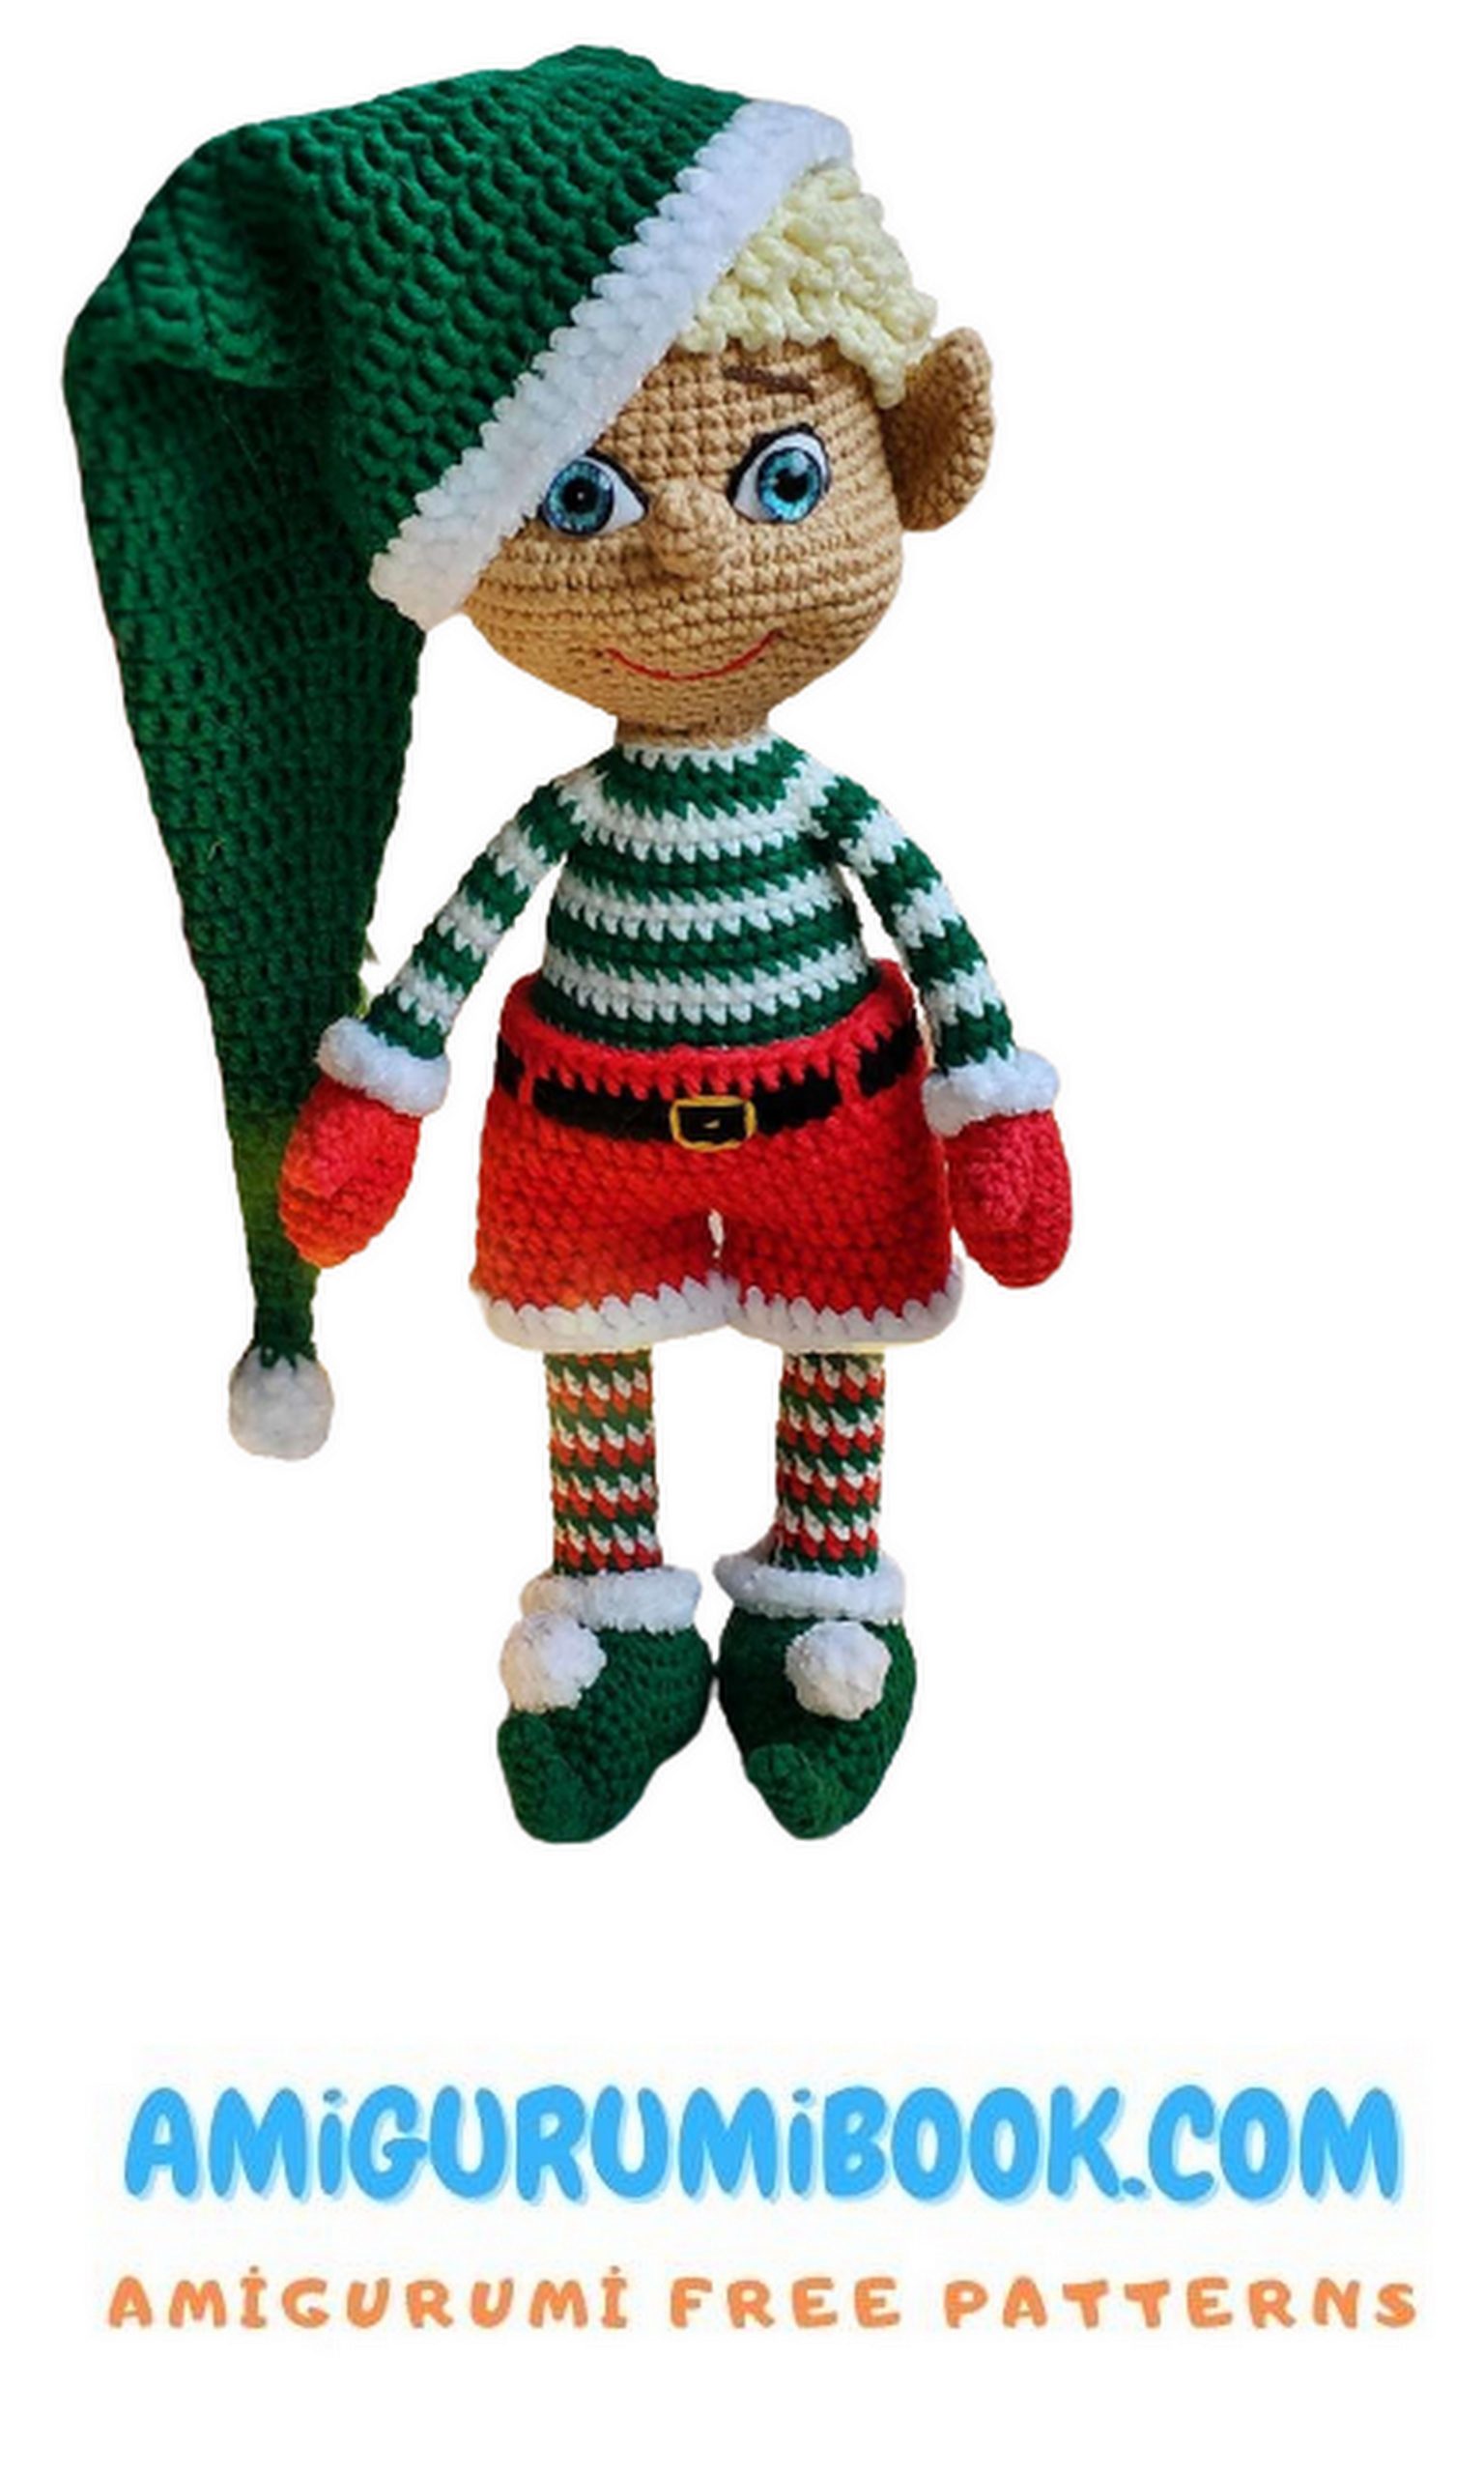
The Mr. and Mrs. Christmas Elf Amigurumi Free Pattern is a delightful crochet project perfect for holiday enthusiasts. These charming elf dolls bring festive cheer and make wonderful handmade gifts or decorations for the season. free crochet patterns – Free Amigurumi Rocket Pattern: Space Adventure!
You may also like more amigurumi patterns.
I continue to share amigurumi free patterns. In this article, Mr. and mrs. christmas elf amigurumi free pattern is waiting for you.
Materials:
Yarn:
– Yarn Art Jeans: 01(white), 07(beige), 26(red), 52(green),
40(brown) for insole, 53(black), 86(milky) for hair.
– Yarn Art Velor white.
– a little yellow or gold yarn for embroidering the buckle.
– a thin contrast thread – a marker. Be sure to use marker!
– a hook of the right size for your yarn, I have it No. 2;
– filler (holofiber, sintepukh);
– glass eyes 10mm;
– Glue Moment Crystal;
– white felt for the white of the eyes;
– a piece of plastic for insoles, I use old discount ones cards;
– a needle for stitching parts;
– scissors;
– pastels for toning cheeks.
If desired, you can use a weighting agent, I use aquarium soil.
The growth of the finished toy, with the specified materials 25cm.

Abbreviations:
sc – single crochet, knitted for both walls of the loop,
unless otherwise stated in the description;
ch – chain;
sl-st – slip stitch, do not knit it too tight;
Dec – decrease (2sc together for the front walls)
Inc – increase (2sc from one loop)
HDC – half double crochet
DC – double crochet
* – after this asterisk the number of repetitions knitted is indicated loops
General recommendations for knitting toys:
– Please read the description carefully first.
toys, then start knitting.
– Choose a hook according to your density! between the columns
there should be a distance, the filler should not shine through,
but you don’t need to knit too tightly, the canvas should
turn out plastic, and not be wooden.
– Use a good filler to prevent
the appearance of bumps and bumps when filling the toy.
– All parts are knitted in a spiral, a lifting loop at the beginning of the row and
the connecting loop at the end of the row is not used.
– All loops, except for the decrease loop, are knitted for both walls
loops. Knitting loops for the front or back wall
indicated in the row description.
– Please note that the connecting post is not
tied tight.
– Use a thin, contrasting marker thread to mark
the beginning of the row. Before knitting the first loop of the row
throw it alternately: before knitting and after knitting.
– The toy is knitted face out, fig.1.
– The thread is changed as follows:
You knit the last sc not to the end, i.e. insert hook for
both walls of the loop (when knitting a decrease, we insert the hook behind
two front walls), bring the thread out – there are two
loops, then take a thread of a different color and knit these loops
with a new color.
– When making the head, enter and exit all the threads at the bottom
head, in the place where the head will be sewn to the body, so that they
It was convenient to fasten and hide.
PATTERN
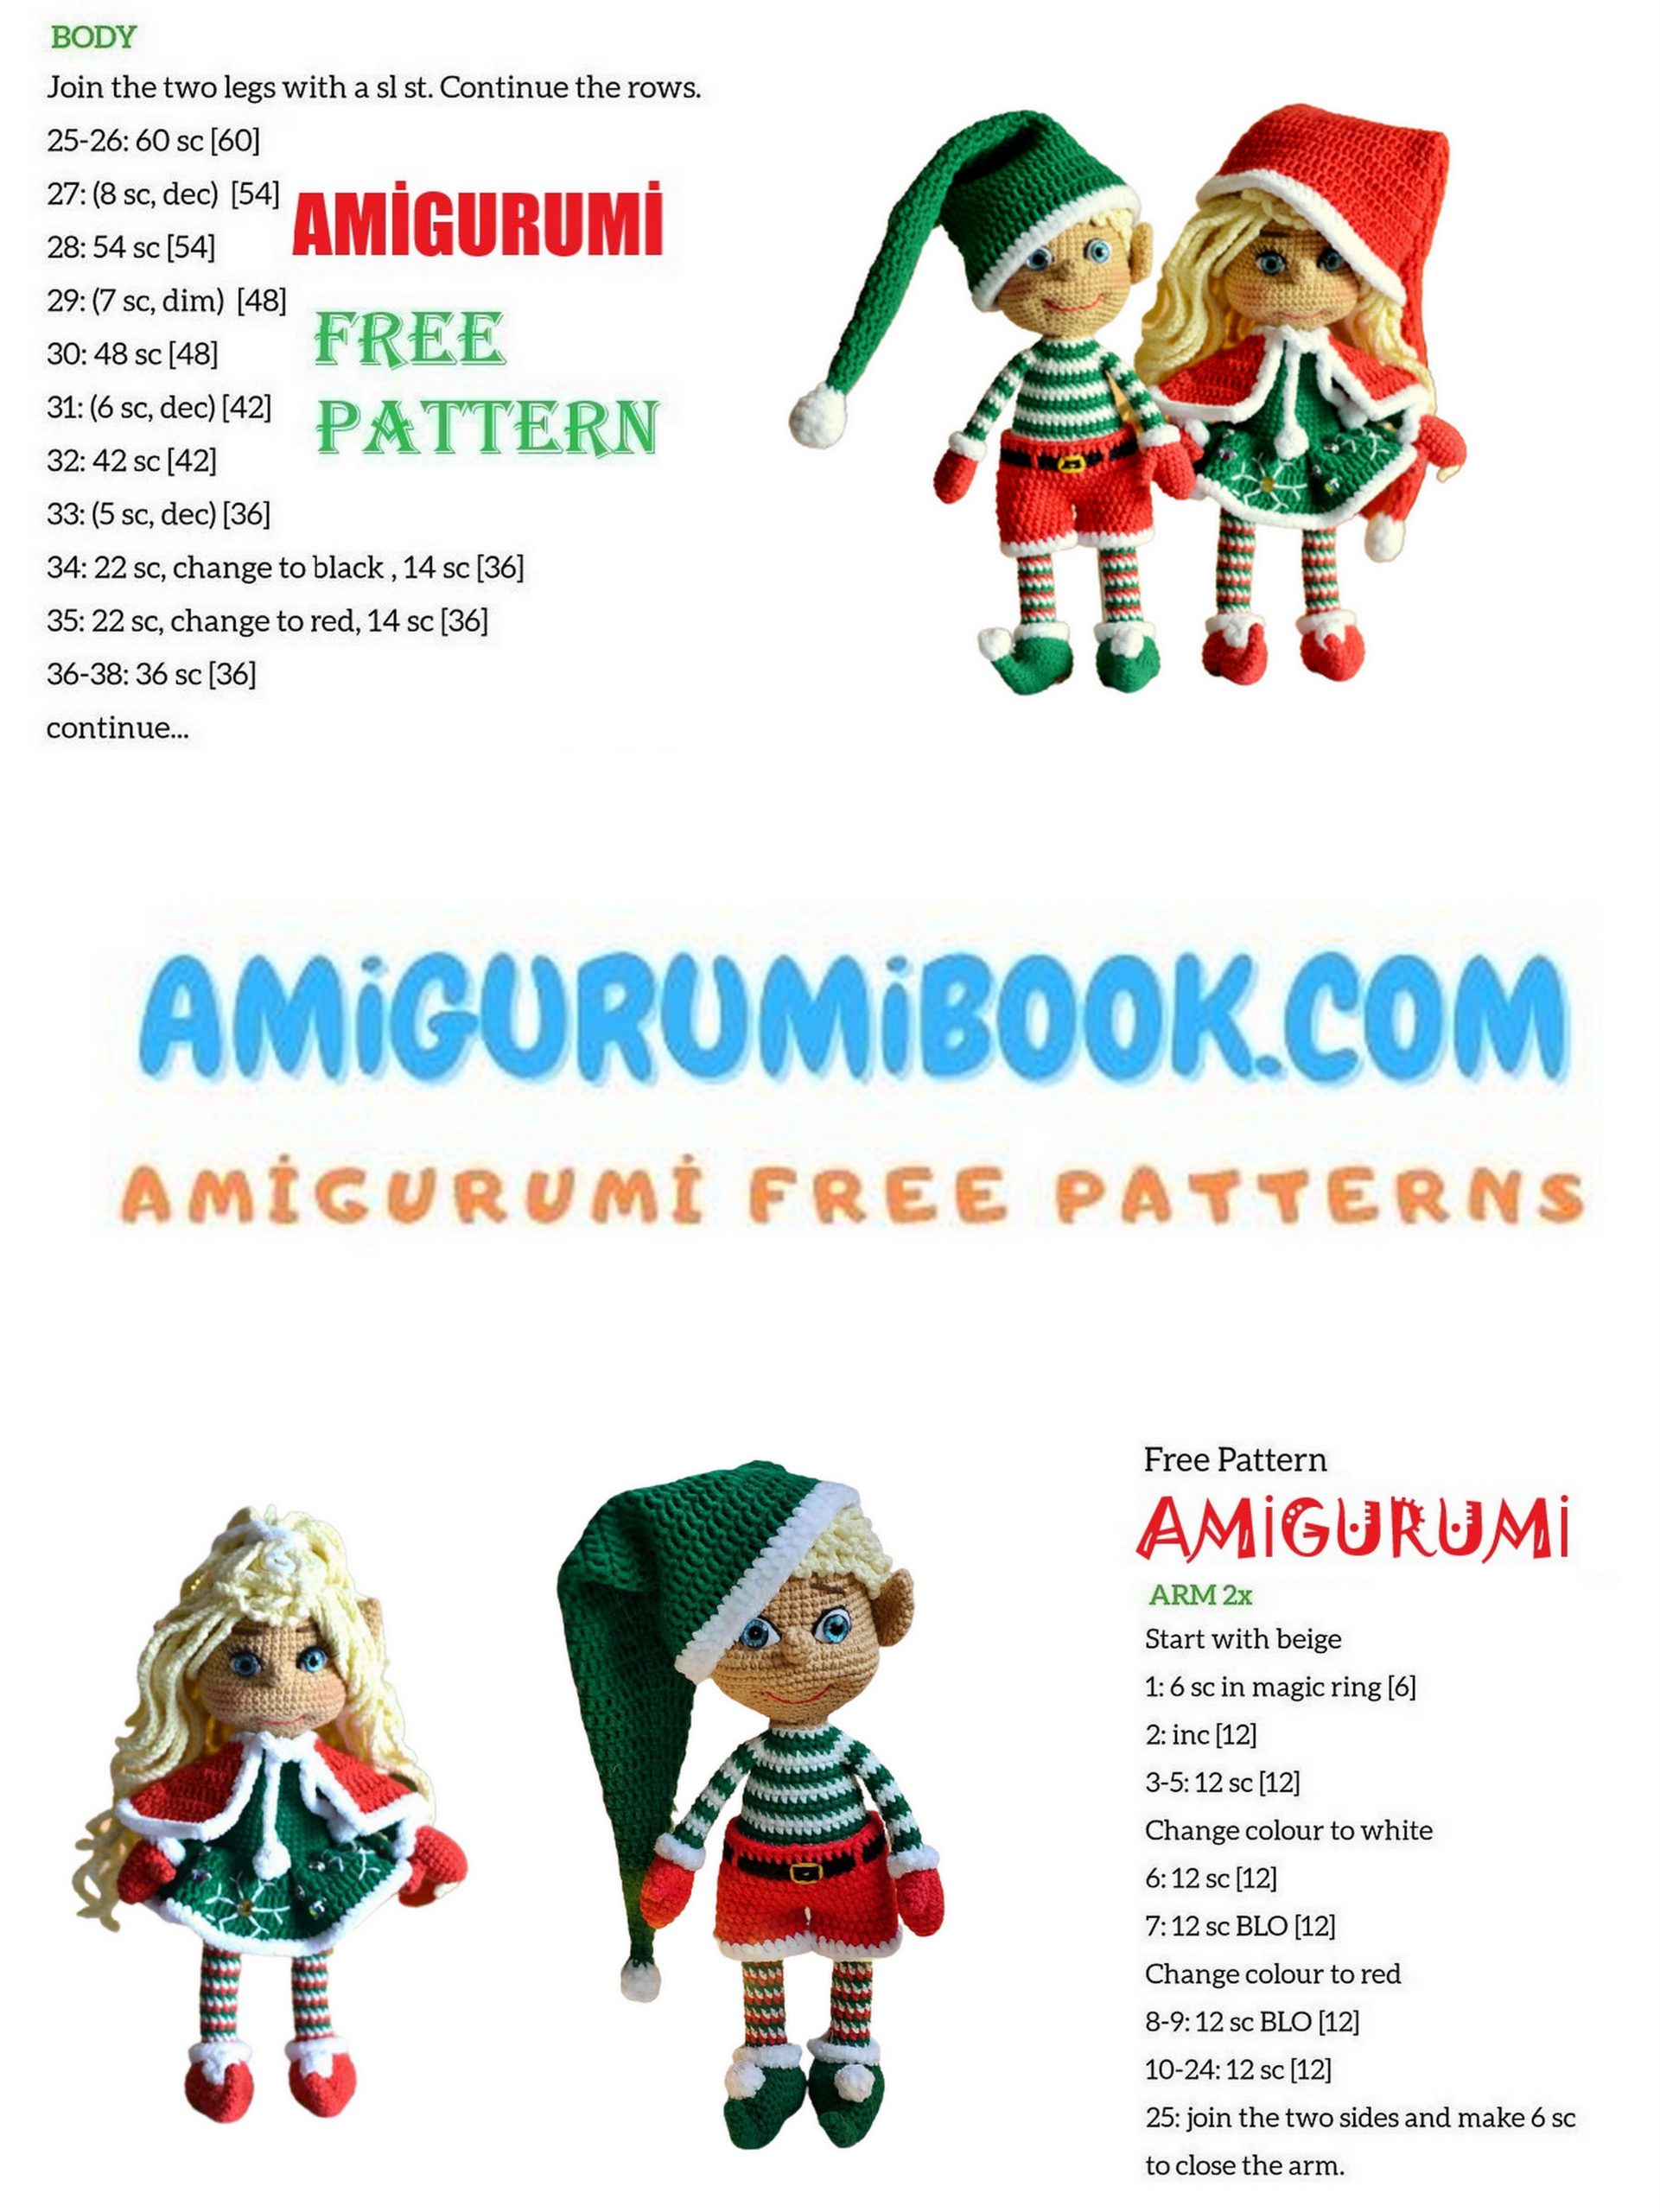
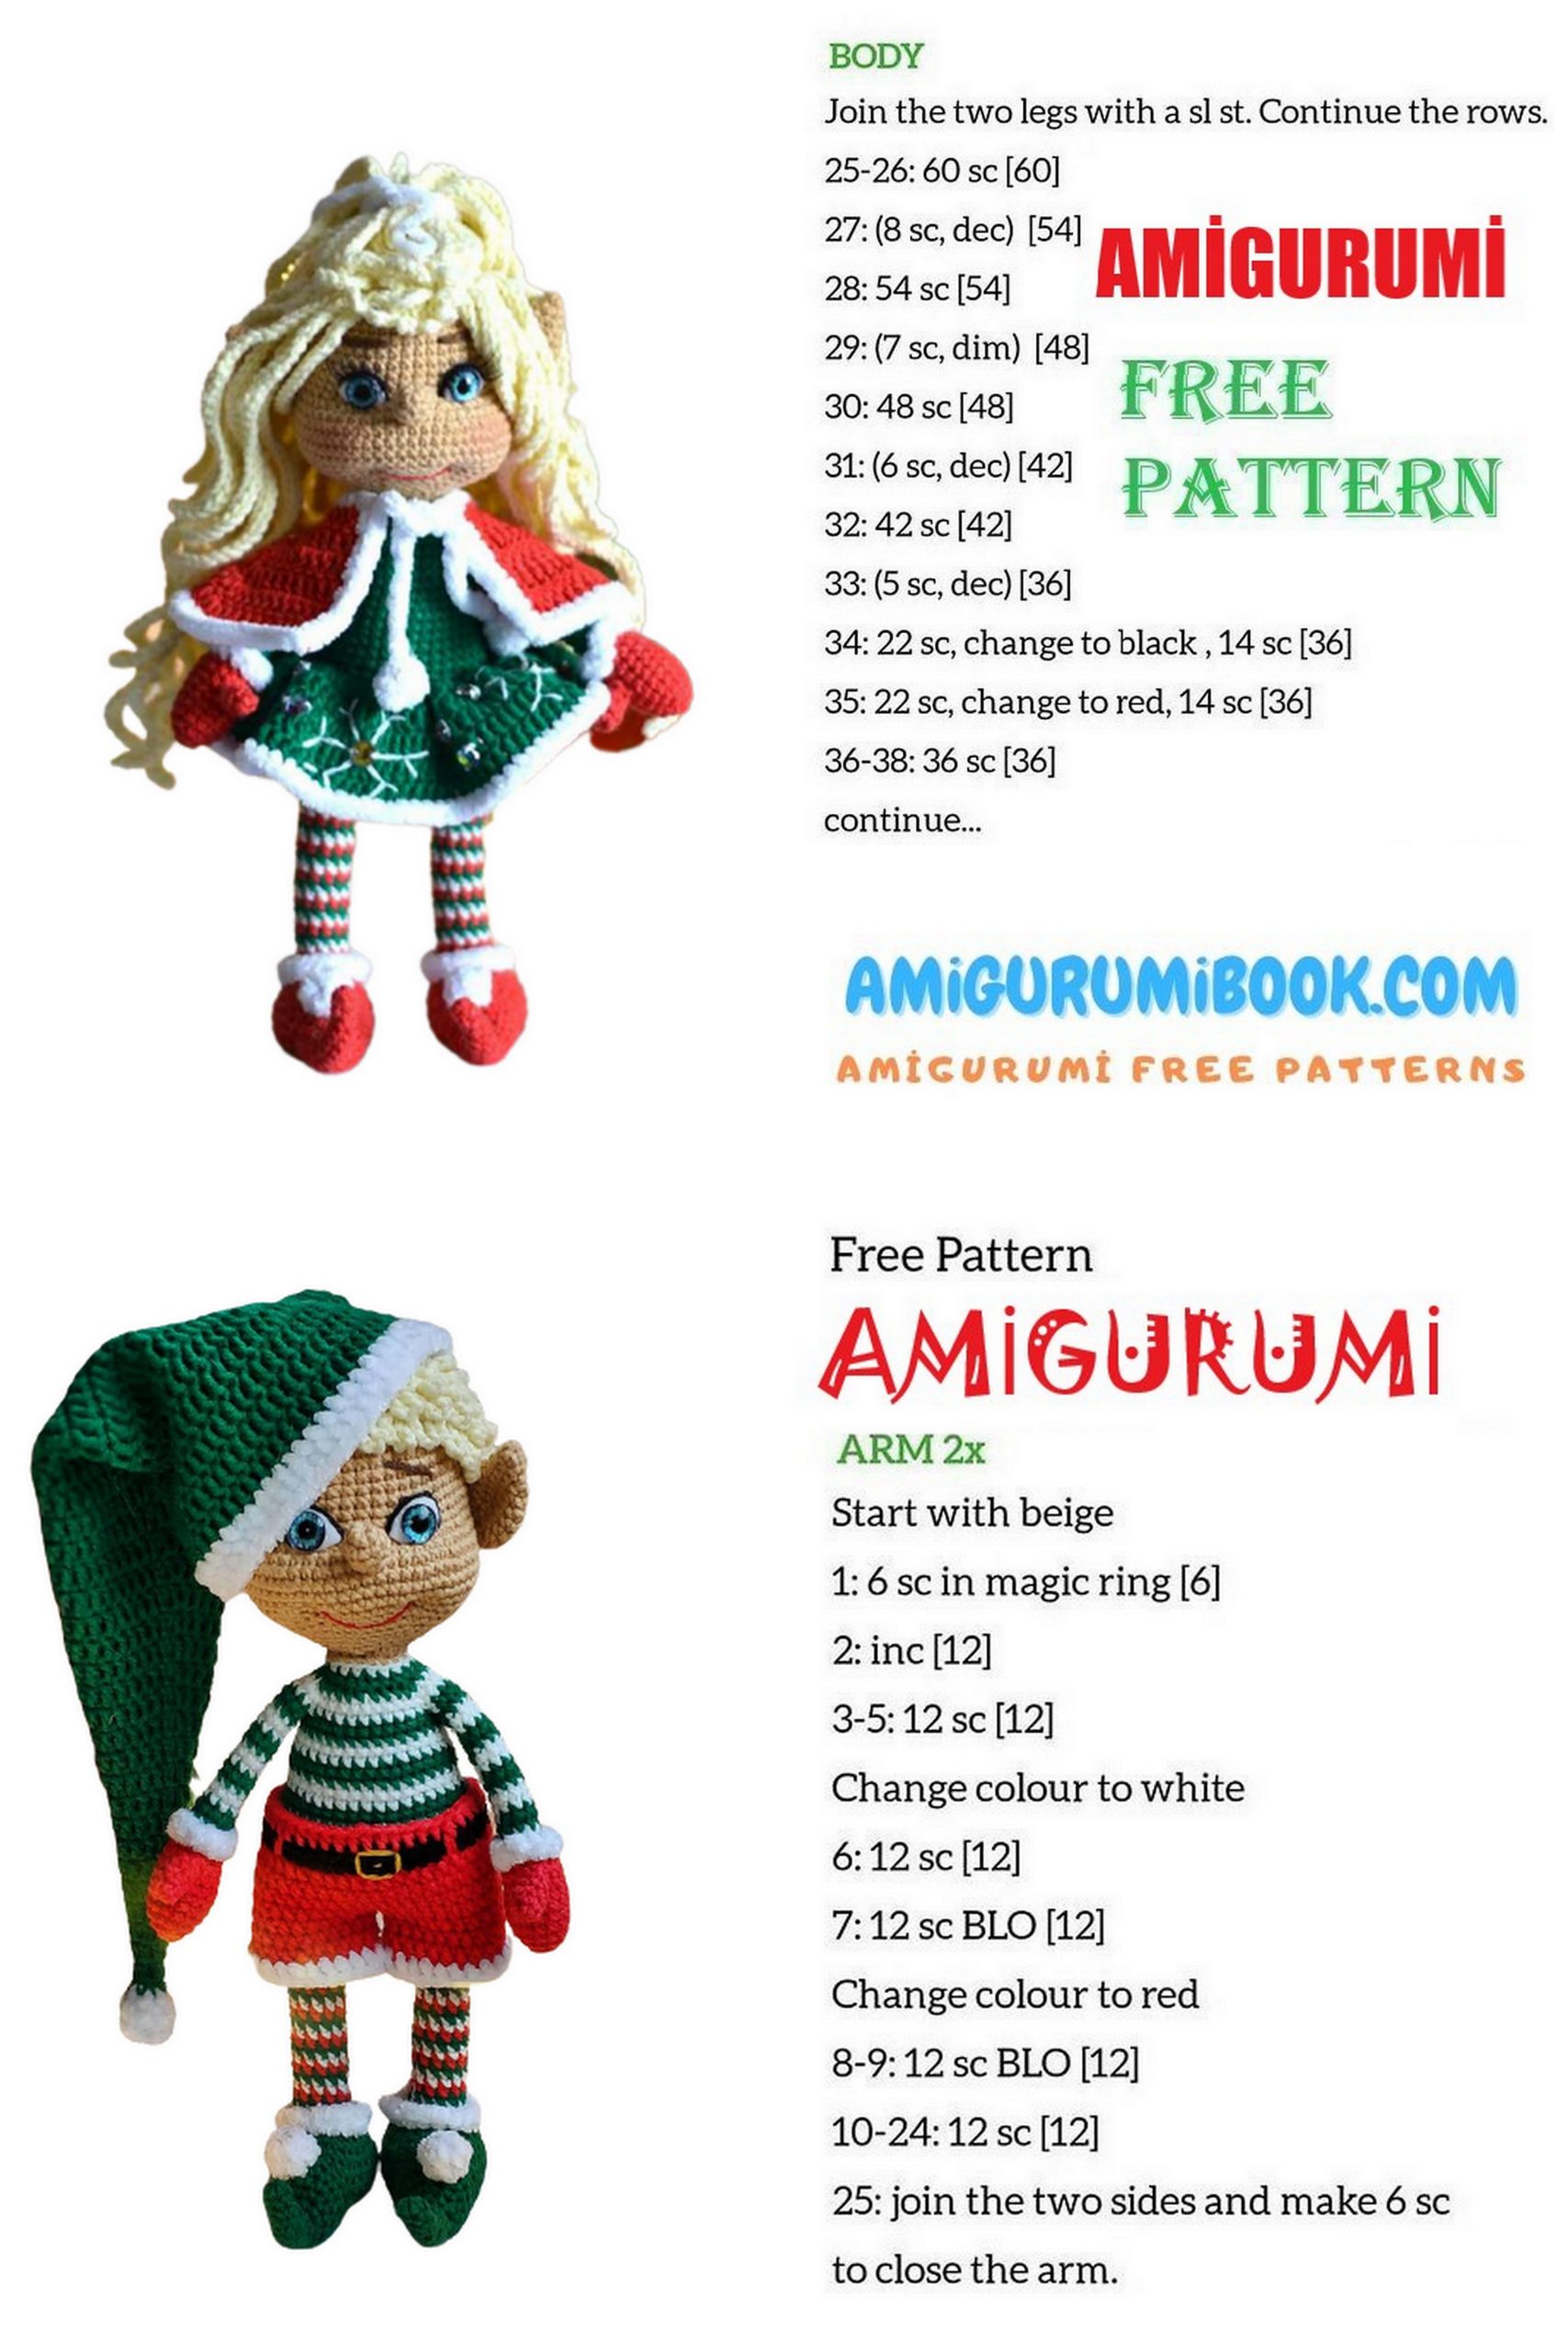
Arms:
The right and left hand are knitted differently to hide the transition.
colors. First we knit mittens. We start knitting in red color. We fill only the palm.
Finger:
1. 6sc into magic ring – 6sc
2-4. 6sc
Fasten the thread, cut. Tie two fingers, for the right and left hand. We do not stuff our fingers.
Palm:
1.6sc
2.6inc – 12sc
3. (3sc, inc) *3 – 15sc
4-6. (3 rows) 15sc
Next, we attach a finger, the place of attachment is at the right and left hand are different. When attaching the part, put facing each other, we pick up the loops of the finger from the inside.
Right hand:
7. 3sc, 2sc with finger, 10sc – 15sc
8. 3sc, 4sc on the finger, 10sc – 17sc
9. 4sc, dec, 6sc, dec, 3sc – 15sc
Left hand:
7. 10sc, 2sc with finger, 3sc – 15sc
8. 10sc, 4sc on the finger, 3sc – 17sc
9. 3sc, dec, 6sc, dec, 4sc – 15sc
Further, the hands are knitted in the same way.
10. (3sc, dec) *3 – 12sc, change the thread to a white, red thread fasten and cut.
Fill your palm well. Knit the next row in the back wall.
11. (2sc, dec)*3 – 9sc
12. 9sc in white.
Next, alternate white and green colors in 2 rows.
Knit an offset loop as needed so that the color transition does not shift or go to the side.
13-27. (15 rows) 9sc
Finish the hand with one row of white. Fasten the thread, cut.
Join the plush thread to the 11th row and knit 12sc for
front walls of the 11th row, holding the hand with the mitten down.
Legs:
We knit two identical legs.
We start by knitting the nose of the shoe in green:
1. 6sc into magic ring – 6sc
2.6sc
3. 5sc, inc – 7sc
4. 6sc, sc behind the back wall – 7sc
5. 6sc, inc behind the front wall of the previous (3rd) row – 8sc
6. 7sc, sc behind the back wall – 8sc
7. 7sc, inc in the front wall of the previous (5th) row – 9sc
8. 8sc, sc behind the back wall – 9sc
9. 8sc, inc to the front wall of the previous row – 10sc
10. 9sc, sc behind the back wall – 10sc
11. 9sc, inc to the front wall of the previous row – 11sc
12. 10sc, sc behind the back wall – 11sc
13. 10sc, inc to the front wall of the previous row – 12sc
14. 9sc, inc, sc, inc – 14sc
15. 10sc, inc*4 – 18sc
16.18sc
Fasten the thread, cut.
From the marker clockwise retreat 1sc, put
marker, for the next 8sc the nose will join
insole, mark the 8th loop with a marker for convenience.
Insole, brown:
We dial 6ch, we start knitting from the second loop from the hook.
1. inc, 3sc, 4sc in last st, turn chain, 3sc,
inc-14sc.
We put a marker.
2. inc*2, 3sc, inc*4, 3sc, inc*2 – 22sc
3. (sc, inc)*2, 3sc, inc*8, 3sc, (sc, inc)*2 – 34sc,
change the thread to green.
We circle the insole on the plastic, cut out two parts.
We knit the next row behind the back wall, attach the nose
shoes, please note that we knit the insole for
the back wall, and the nose behind both walls of the loop.
Put your nose on the insole as shown in the photo, facial
sides to each other.
4. 13sc, 8sc with shoe toe, 13sc – 34sc
In the next row, when knitting a decrease, you need to pick up
on the hook the front wall of the loop knitted together with the nose,
to avoid holes.
5. 12sc, dec, 8sc, dec, 12sc – 34sc
We knit the following decreases in the usual way.
6. 11sc, dec, 8sc, dec, 11sc – 32sc
7. 11sc, dec, 6sc, dec, 11sc – 30sc
We insert the insole, stuff the nose well, then tightly
we stuff the leg as we knit.
8. (3sc, dec) * 6 – 24sc
9. (2sc, dec) *6 – 18sc
We fix and cut the thread. Marker goes straight
in the middle of the back leg. If desired, you can add to the legs
weighting agent. I am using aquarium soil.
For the right leg, retreat 4sc clockwise from the marker
arrow, attach a white thread.
For the left leg, retreat from the marker 4 sc counterclockwise
arrows, attach a white thread.
We align the marker as we knit, knitting a loop
offsets so that the color transition stays inside the leg and doesn’t
shifted.
Knit the next row behind the back wall
10. (sc, dec) * 6 – 12sc
In the next row we attach a red thread, in the 12th row we attach a green thread, then we change the color of the thread each row.
11-34. (24rows) 12sc
We finish knitting the legs in white so that the last
the loop was exactly on the side of the leg. We fix the threads, cut off.
We attach a plush thread to the 9th row and knit 18sc for
front walls of the 9th row, holding the leg of the feet down.
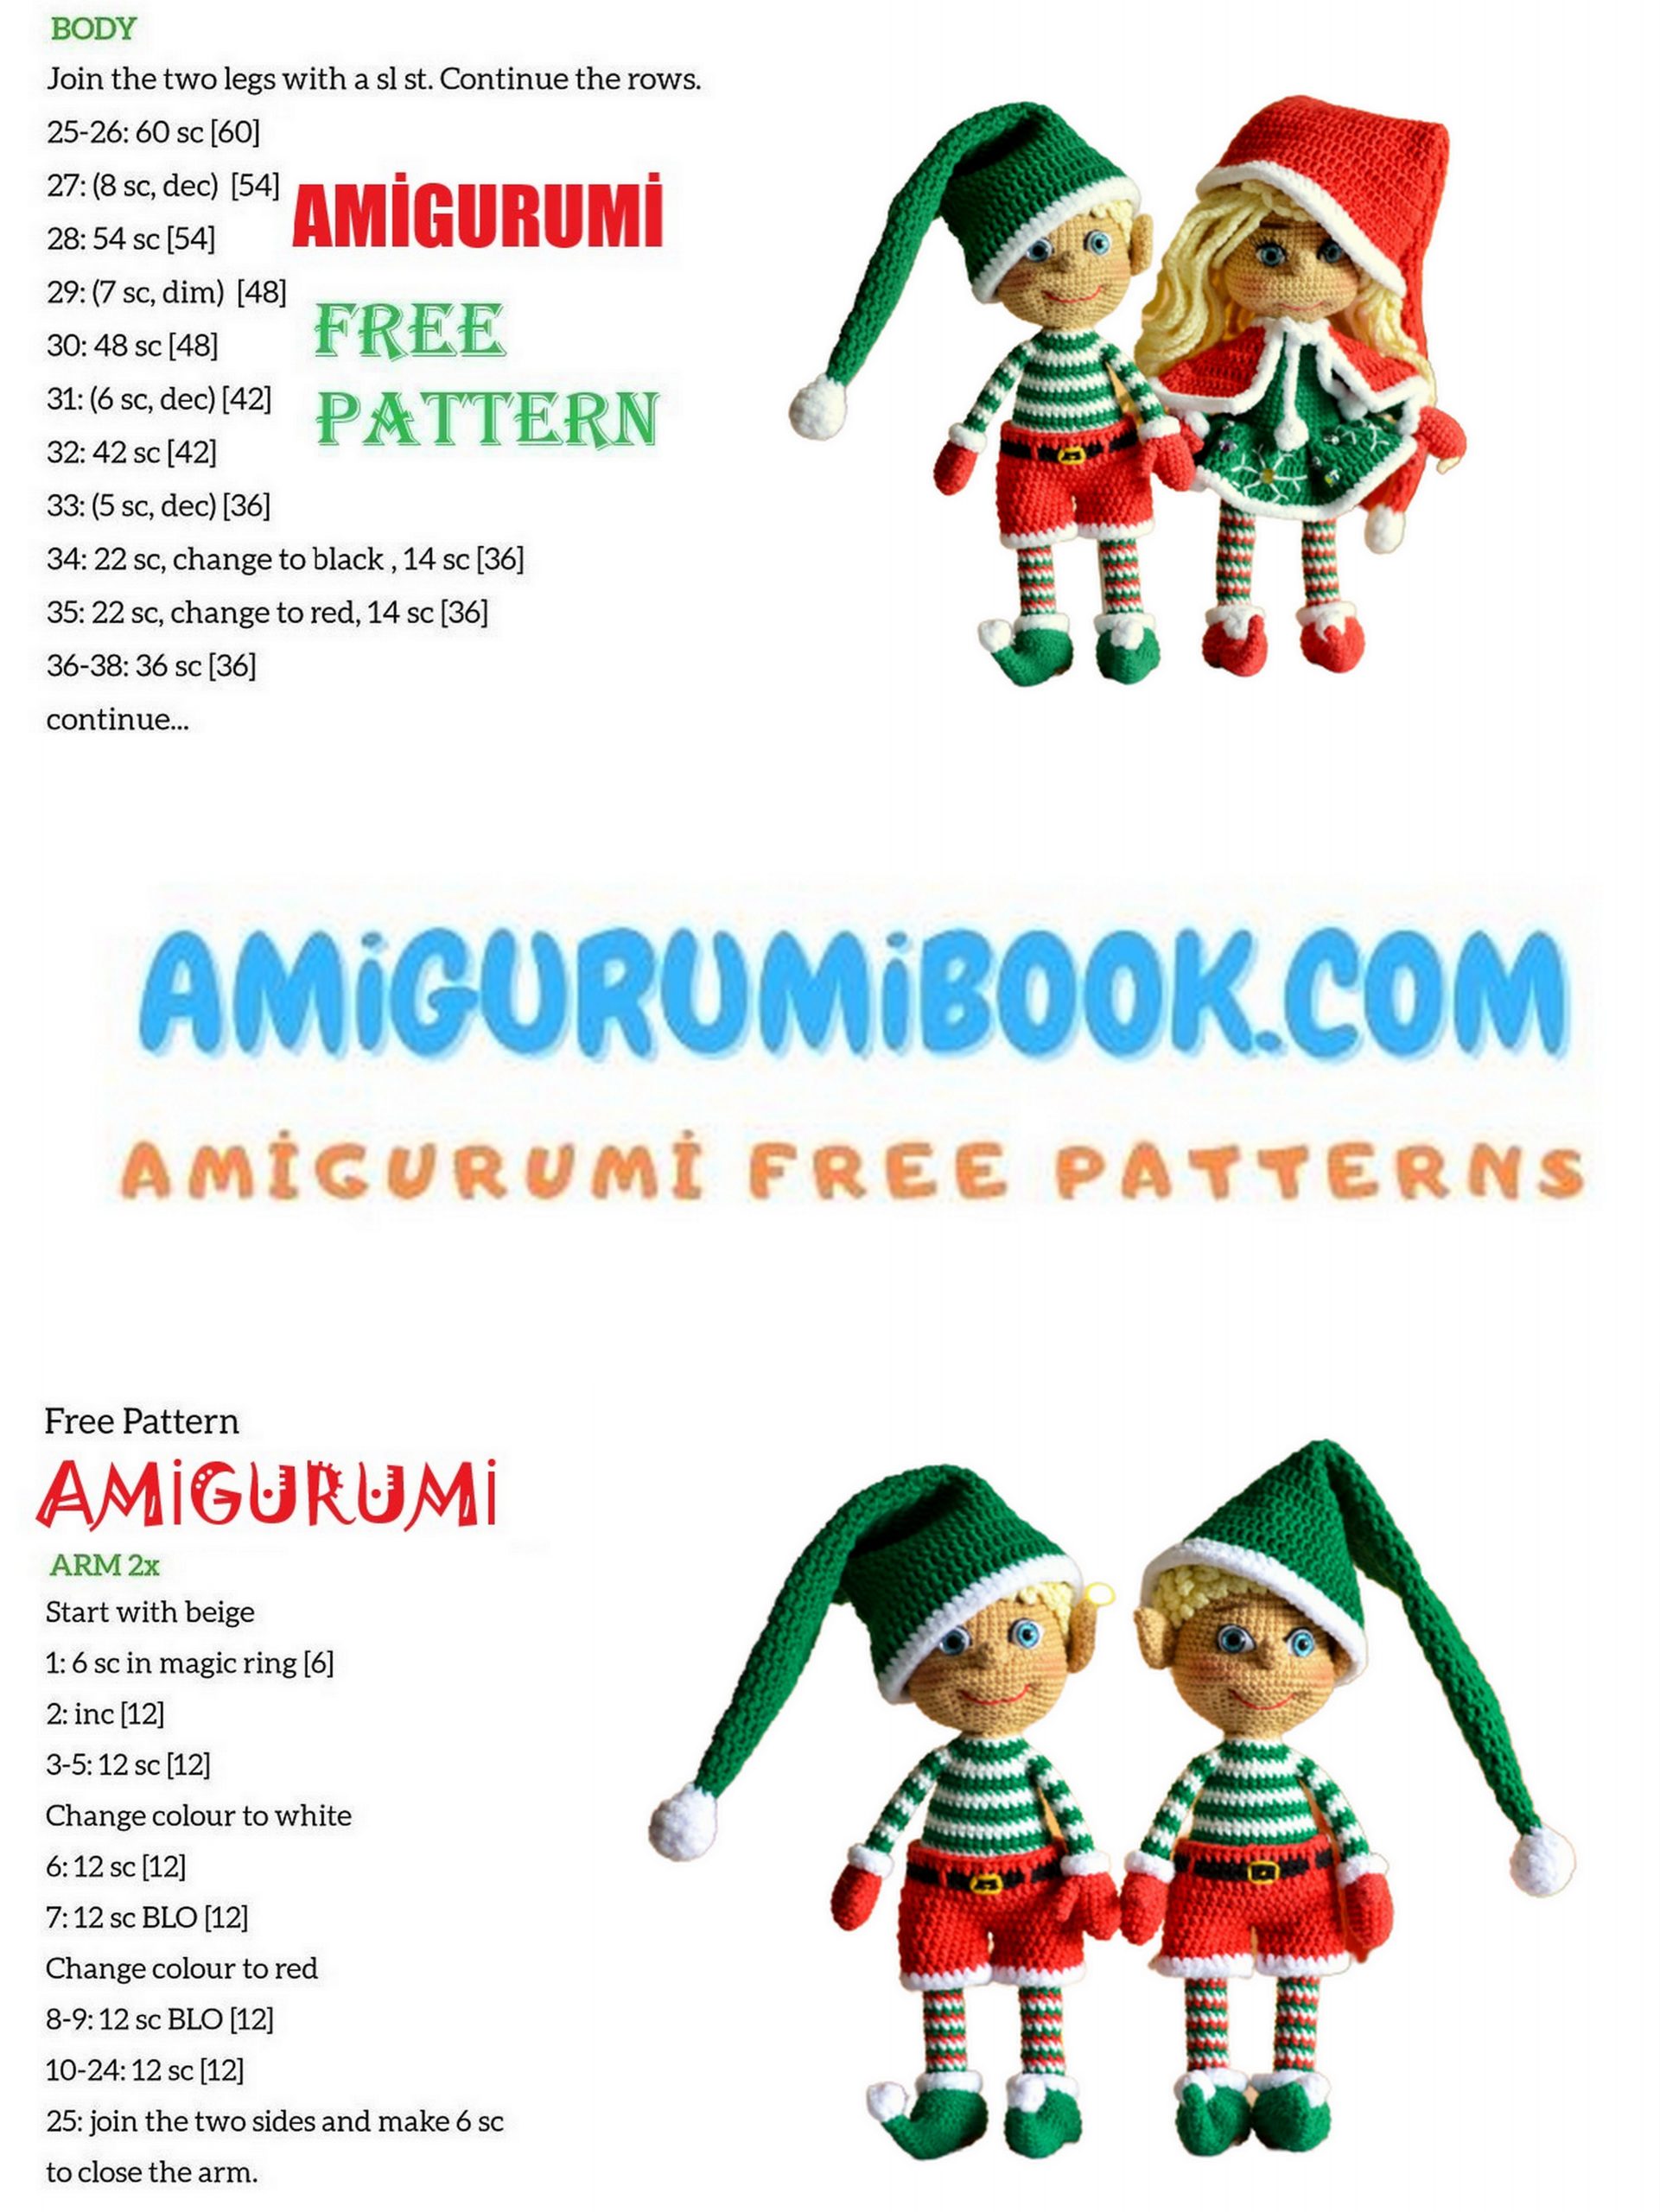
Body:
We stuff the body tightly as we knit.
From the right leg to the left, knit in red 6 ch
1. 12sc on the left leg, 6sc on the chain ch, 12sc on the right
leg, 3sc along the chain, – 33sc, change the thread to green, put
marker. We did not work 3sc in the chain to the end of the row in order to
put a marker in the middle of the back.
Knitting the second row starting with 3sc
along the chain.
2. (5sc, inc) * 6 – 42sc
Knit the next row in white
alternate colors each row until the 9th
row inclusive.
3. 3sc, inc, (6sc, inc) * 5, 3sc -48sc
4-8. (5 rows) 48sc
9. 7sc, dec, (14sc, dec) *2, 7sc – 45sc
We knit the next two rows in white, then change the thread
to green. Fasten the red thread and cut off. Next, alternate
colors in two rows. Stuff tightly
the junction of the legs and body, in this
the place should not be empty.
10. (13sc, dec) *3 – 42sc
11.42sc
12. 6sc, dec, (12sc, dec) * 2, 6sc –39sc
13-14. 39sc
15. (11sc, dec) * 3 – 36sc
16-17. 36sc
18. 5sc, dec, (10sc, dec) * 2, 5sc –33sc
19-20. 33sc
21. (9sc, dec) * 3 – 30sc
Pay attention, in the next row we join hands,
the marker should be exactly in the middle of the back. At
Knit alignment loops if necessary. Try on your hands
so that the color transition remains on the inside and
fingers looked slightly inward. We pick up the loops of the hand
from the inside, applying the parts face to face.
22. 7sc, 3sc with hand, 10sc, 3sc with hand, 7sc – 30sc
In the next row, at the places where the hands are attached,
holes will form, so we will knit the junction
hands and body with an invisible decrease. To do this, the first loop of the hand
we will knit together with the front wall of the body loop,
knitted together with the hand in the previous row. See
a photo. In the same way, knit on the other side of the hand,
picking up the loop of the previous row by the front wall.
23. 7sc, 6sc on the hand, 10sc, 6sc on the hand, 7sc – 36sc
24. 2sc, dec, (4sc, dec) *5, 2sc – 30sc
25. (3sc, dec) *6 – 24sc
26. sc, dec, (2sc, dec) * 5, sc – 18sc, change thread to body color
27. 18sc behind the back wall.
Fasten the thread, leave a long end for sewing,
cut off. Stuff the body and neck very tightly, so that when
sewing on, the head did not collapse.
Shorts:
Shorts need to be knitted a little looser than usual, for this you can
take a hook more than half a size or just knit not
tight.
With a red thread, dial 45ch, close around. Shorts
knit with half-columns with a crochet. We start the row at 2 ch, counting
them for the first loop.
1-4. 45hdc
Next, separate the pants.
1. 22 hdc, 23hdc knit by connecting 23 and the first loop together,
closing around.
2-3. 23hdc
The next row is knitted with plush thread.
4.23sc
Fasten the threads, cut off, hide the ends.
The second leg is knitted in the same way, but we knit the first loop from
connection points 23 and 1 loops of the first leg.
Next, attach a black thread to the top and knit two
a row of 45sc, change the thread to red, knit 45hdc,
we fix the threads, hide. We embroider loops with red thread,
yellow thread buckle. We put shorts on the elf.
Pompoms for shoes:
From plush yarn, knit pompoms for shoes:
1. 6sc into magic ring
2.6sc
Fasten the thread, cut. Choose a place for the pom-pom: tip
toe shoes or up shoes. Sew pom-poms to white shoes
thread Yarn Art Jeans, dividing it in two.
Head:
We knit in flesh color.
If you use eyes on a secure mount, then
insert them in the 16th row, stepping back from the marker about 21-22sc,
distance between eyes 6-8sc.
1. 6sc into magic ring – 6sc
2.6inc – 12sc
3. (sc, inc)*6 – 18sc
4. sc, inc, (2sc, inc) * 5, sc – 24sc
5. (3sc, inc)*6 – 30sc
6. 2sc, inc, (4sc, inc)*5, 2sc – 36sc
7. (5sc, inc)*6 – 42sc
8. 3sc, inc, (6sc, inc)*5, 3sc – 48sc
9-16. (8 rows) 48sc
17. 17sc, (inc, sc) *2, inc, 4sc, (inc, sc) *2, inc, 17sc–54sc
18.54sc
19. 17sc, (inc, 2sc) *2, inc, 6sc, (inc, 2sc) *2, inc,
17sc – 60sc
20-22. (3 rows) 60sc
23. 18sc, (dec, 2sc)* 2, dec, 6sc, (dec, 2sc), dec, 16sc
24.54sc
25. (7sc, dec)*6 – 48sc
26. 3sc, dec, (6sc, dec)*5, 3sc – 42sc
27. (5sc, dec)*6 – 36sc
28. 2sc, dec, (4sc, dec)*5, 2sc –30sc
29. (3sc, dec)*6 – 24sc
30. sc, dec, (2sc, dec) * 5, sc – 18sc
Fasten the thread, cut. tight stuff your head.
Nose:
We knit in flesh color.
1. 6sc into magic ring – 6sc
2. (inc, sc) * 3 – 9sc
3.9sc
4. (sc, dec) * 3 – 6sc
Fasten the thread, leave a long end for sewing,
cut off. Put some filler in the nose.
Between the increments of 17 and 19 rows, the middle of the face, along it we
we will be guided by the further design of the head.
To make it easier to find the place for sewing on the nose
turn your head over, mark two loops with pins, between 18 and
20 rows of the head – in the 19th row with increments, in the middle,
stepping back 2 loops to the center from the increase. Dots on
the photos are highlighted by the increments of the row. Sew on the nose. A thread
bring out the bottom of the head.
Next, we will make eye tightening and smiles.
First, let’s put labels for the eyes. For convenience again
turn the head, with pins we select the loop between the first
from the middle of the face with increases of the 17th row. between pins
distance of 6 loops.
Now let’s make marks for a smile, for this turn your head
to the normal position, retreat 7 rows from the eye mark down,
focusing on the sewn nose, step back from the middle of the face to
sides of 4 loops and the next, 5th loop, select pins.
Thread the needle with flesh-colored thread or dental floss. Enter the needle
from the bottom of the head, into the hole, bring out at point 1, enter at point 2,
bring out at point 3, tighten the thread, insert the needle at point 4, after
pull the thread again, a cheek should form.
Repeat tightening two times. Repeat the tightening with the second eye.
Next, embroider a smile. To do this, insert a red thread
needle colors. Insert the needle into the hole from the bottom of the head, withdraw
needle in the bottom drawstring on the left, thread the thread in the drawstring on the right,
slightly tighten the thread, bring the needle out approximately in the middle
smiles two or three rows below the tightening, clasp the thread and start
needle into the same hole, tighten the thread and form a smile.
Glue on the eyes. We take a glass eye, on a piece of paper
draw the white of the eye, the way we like, you can do
round highlight or more anatomical, choose to your taste.
I draw a slightly elongated shape. We cut out our paper
blank and on it we cut out two highlights from felt. On glue
Moment Crystal glue glare in the place of the eyes, wait
drying, glue the eye itself, now we are waiting for the full
drying of the eye.
After the eyes are completely dry, we embroider with a black thread
upper eye contour. Insert the needle from the bottom of the head, withdraw at point 1
and enter at point 2, while slightly pulling the thread, if the thread is not
lies it can be slightly glued using a toothpick and very
a small amount of glue Moment Crystal.
Ears:
We knit two identical parts in flesh color.
1. 4sc into magic ring
2. (sc, inc) * 2 – 6sc
3. (2sc, inc)*2 – 8sc
4. (3sc, inc)*2 – 10sc
5. (4sc, inc)*2 – 12sc
6. (5sc, inc)*2 – 14sc
7-8. 14sc
9. (5sc, dec)*2 – 12sc
10.6dec
Leave a long end for sewing, secure the thread,
cut off. Pull off the hole from the remaining 6sc, sew behind
sidewall of the ear to the head, departing from the eyes approximately 7-8sc, between
15 and 20 rows.
Hair:
With the color of the hair we knit the part behind the back wall.
1. 6sc into magic ring – 6sc
2.6inc – 12sc
3. (sc, inc)*6 – 18sc
4. sc, inc, (2sc, inc) * 5, sc – 24sc
5. (3sc, inc)*6 – 30sc
6. 2sc, inc, (4sc, inc)*5, 2sc – 36sc
7. (5sc, inc)*6 – 42sc
8. 3sc, inc, (6sc, inc)*5, 3sc – 48sc
9-11. (3 rows) 48sc
We knit one sl-st, then turn the part over and knit along
the resulting spiral of the front loops:
7ch, 2sl-st * repeat until the end of the spiral.
Got short curls. Try on a wig
fasten with pins and sew to the head.
Cap:
We start knitting with plush yarn:
1. 6sc into magic ring
2.6inc 12sc
3. (sc, inc) * 6 – 18sc
4.18sc
5. (sc, dec) – 12sc
Put filler.
6.6dec-6sc
Attach a green thread, knit 6sc, then
we knit with double crochets, we also knit increments from
double crochets. We start the row with 2 or 3ch, counting ch as first loop.
1. (2dc inc)*2 – 8dc
2.8dc
3. (3dc, inc)*2 – 10dc
4.10dc
5. (4dc, inc)*2 – 12dc
6.12dc
7. (5dc, inc)*2 – 14dc
8. (6dc, inc)*2 – 16dc
9. (7dc, inc)*2 – 18dc
10. (8dc, inc)*2 – 20dc
11. (9dc, inc)*2 – 22dc
12. (10dc, inc)*2 – 24dc
13. (11dc, inc)*2 – 26dc
14. (12dc, inc)*2 – 28dc
15. (13dc, inc)*2 – 30dc
16. (14dc, inc)*2 – 32dc
17. (15dc, inc)*2 – 34dc
18. (16dc, inc)*2 – 36dc
19. (17dc, inc)*2 – 38dc
20. (18dc, inc)*2 – 40dc
21. (19dc, inc)*2 – 42dc
22. (20dc, inc)*2 – 44dc
23. (21dc, inc)*2 – 46dc
24. (22dc, inc)*2 – 48dc
25. (23dc, inc)*2 – 50dc
26. (24dc, inc)*2 – 52dc
27. (25dc, inc)*2 – 54dc
28. (26dc, inc)*2 – 56dc
29. (27dc, inc)*2 – 58dc
30-32. (3 rows) 58dc
Fasten the thread, cut. Next, knit with plush thread.
33-34. 58sc
Fasten the thread, cut. Hide the ends.
Sew the head to the body. Dry or oil pastels
using a hard brush to make a light blush on the elf.
In the absence of pastels, you can use regular blush.
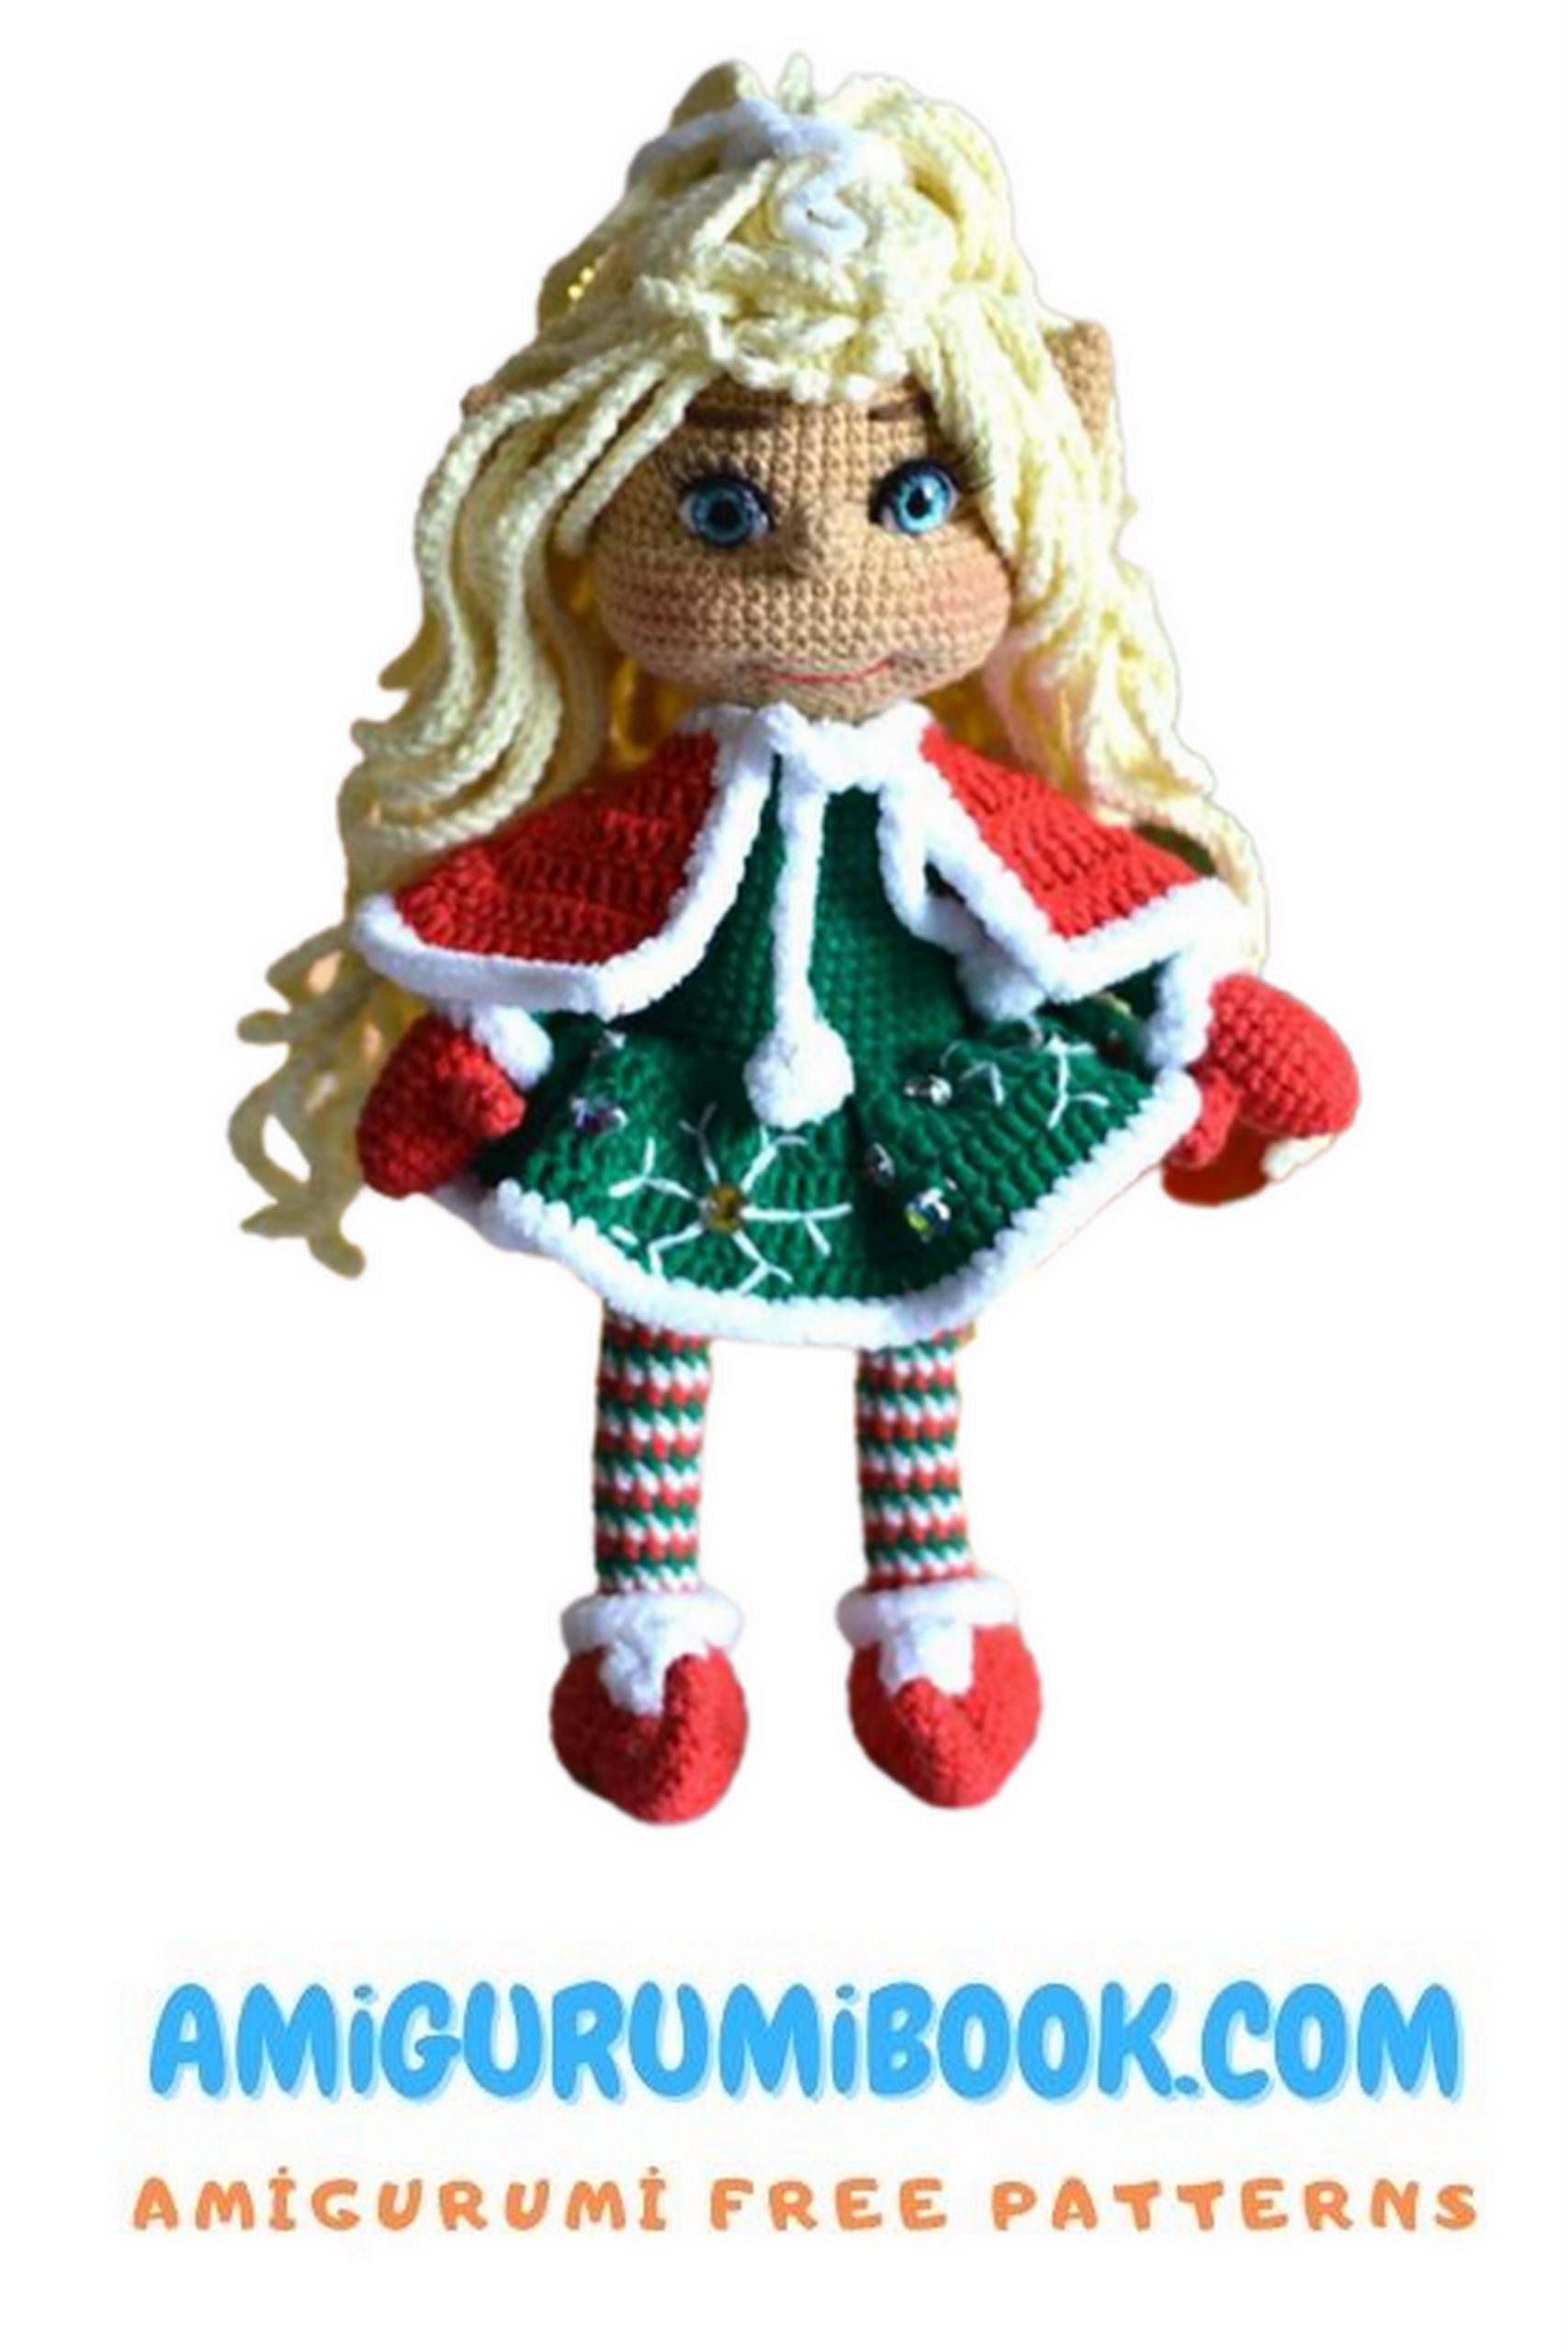
Addition to the description of the elf Noel.
Elf Noemi knits according to the description of Elf Noel, differences minimal.
Wig:
The wig is heavy, so the head will collapse,
I recommend making an elf using a frame or
just insert the reinforcer into the body-head when sewing.
Can use pen body without stem, thick
wire, sushi sticks, etc. I recommend a strengthener
wrap with a woven patch so that it does not come out of the doll.
We knit every second row of the wig behind the back wall.
1. 6sc into magic ring
2. 6 inc behind the back wall – 12sc
3. (sc, inc)*6 – 18sc
4. behind the back wall sc, inc, (2sc, inc) * 5, sc – 24sc
5. (3sc, inc) *6 – 30sc
6. behind the back wall 2sc, inc, (4sc, inc)*6, 2sc – 36sc
7. (5sc, inc)*6 – 42sc
8. behind the back wall 4sc, inc, (6sc, inc) * 5, 4sc – 48sc
9.48sc.
Next, we knit in each loop of the 9th row a chain of 50ch, along it
we knit connecting posts, it turns out a light curl, 8
we make curls short: 6-8 hours each, this will be a bang. Total
48 curls.
Next, we knit curls only in the 6th row, in each loop
we knit 52 ch, we knit in the ch chain
connecting posts, while knitting a connecting
column in the second loop of the chain, counting from the base of the wig,
grab the front wall of the 8th row. In this way
curls will lie on the head. There are 36 curls in total.
Next, we knit curls of the 2nd row from 54ch, capturing at
knitting the second ch the front walls of the 4th row. Total 6 curls.
Dress.
We knit the handles in plain colors after the mittens (green). Basic
the color of the dress (green) is entered in the 10th row of the body, the 11th row of the body
we knit behind the back wall, then we knit the body along
description, but in one color.
For the 11th row of the body, attach the thread and tie the dc skirt with loops
lifting at the beginning of the row, consider the lifting loop as the first loop row:
1. 2dc in one loop, 3dc in one loop, alternate to the end row – 105dc
2-5 (4 rows) 105 dc, change to plush.
6.105 sc
If desired, embroider snowflakes on the skirt, decorate with beads.
Cape:
Cast on 22 stitches in red.
1. 5dc, (3dc in one loop)*2.8dc, (3dc in one loop)*2.5dc
2. 6dc, (3dc in one loop)*2, 2dc, (3dc in one loop)*2, 10dc,
(3dc in one loop)*2, 2dc, (3dc in one loop)*2, 6dc
3. 7dc, (3dc in one loop)*2, 4dc, (3dc in one loop)*2, 12dc,
(3dc in one loop)*2, 4dc, (3dc in one loop)*2, 7dc
4. 8dc, (3dc in one loop)*2, 6dc, (3dc in one loop)*2, 14dc,
(3dc in one loop)*2, 6dc, (3dc in one loop)*2, 8dc
5. 9dc, (3dc in one loop)*2, 8dc, (3dc in one loop)*2, 16dc,
(3dc in one loop)*2, 8dc, (3dc in one loop)*2, 9dc
6. 10dc, (3dc in one loop)*2, 10dc, (3dc in one loop)*2,
18dc, (3dc single loop)*2, 10dc, (3dc single loop)*2, 10dc
Tie a cape in a circle with plush yarn, make two
pom-pom from the ball to 6sc into magic ring, pull off the ball and tie the strings.
Cap:
The width of the cap will have to be increased due to the hairstyle, so
knit increases in the cap and further, according to the same principle, with
while trying on a cap on his head. Approximately 3-4 more rows
increments, and then according to the description of the cap.