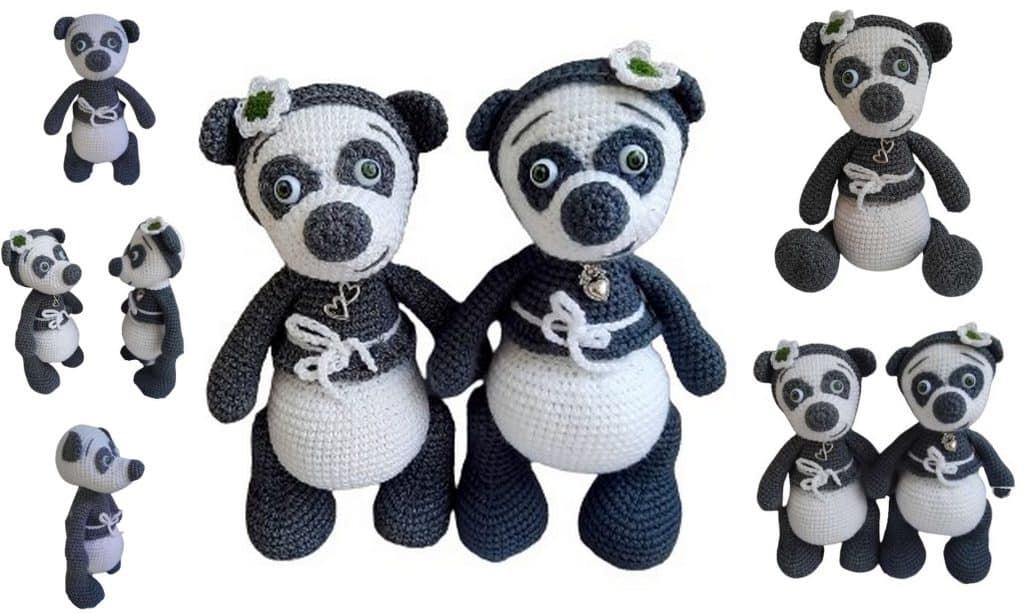
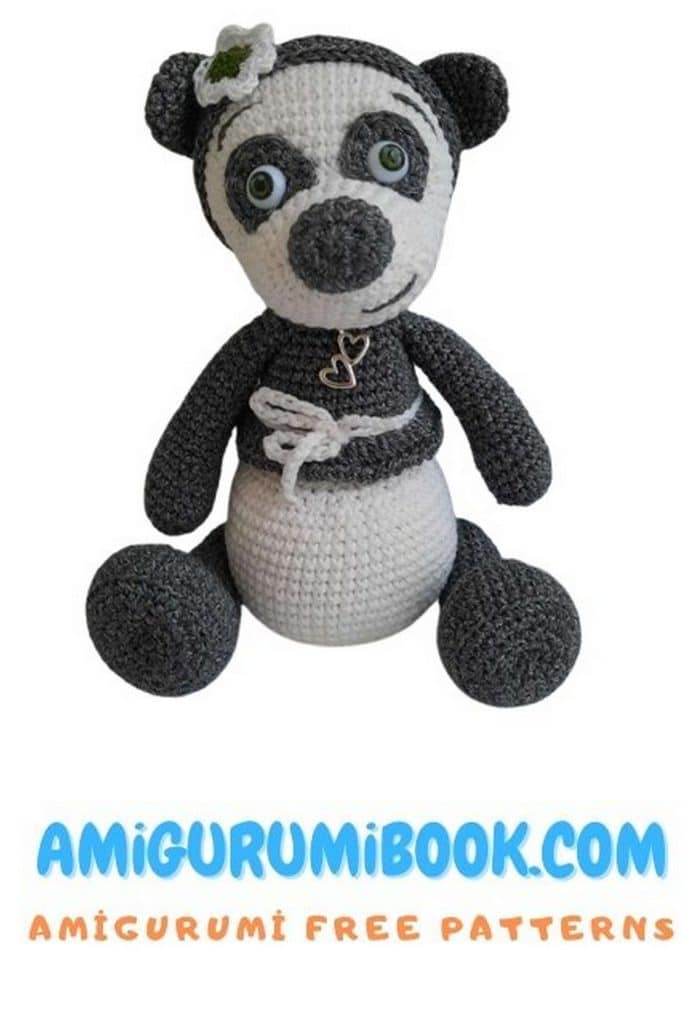
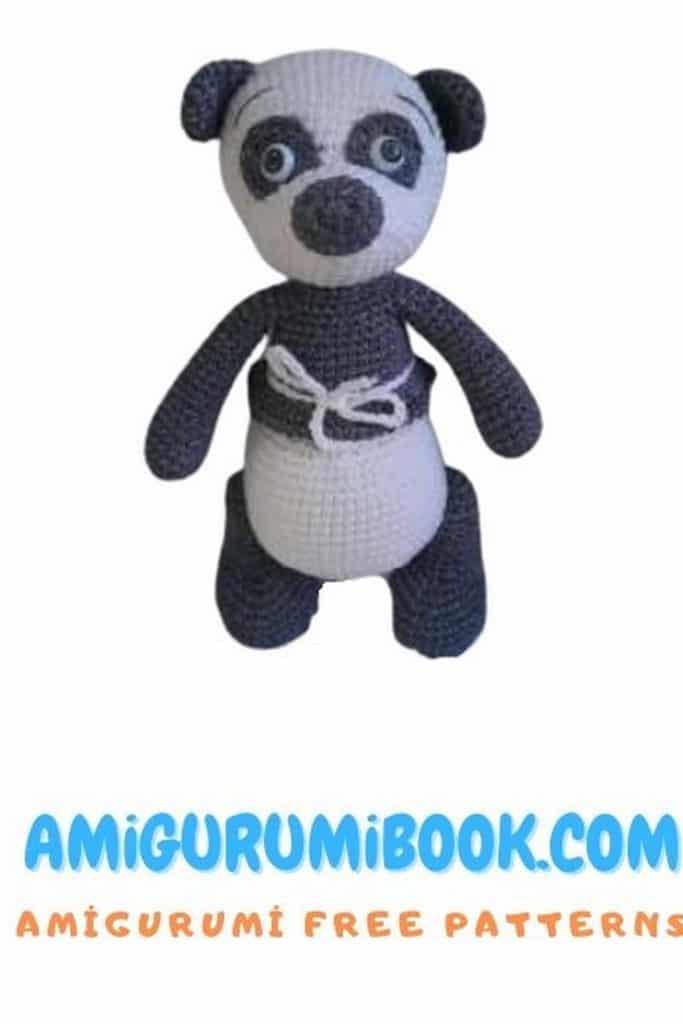
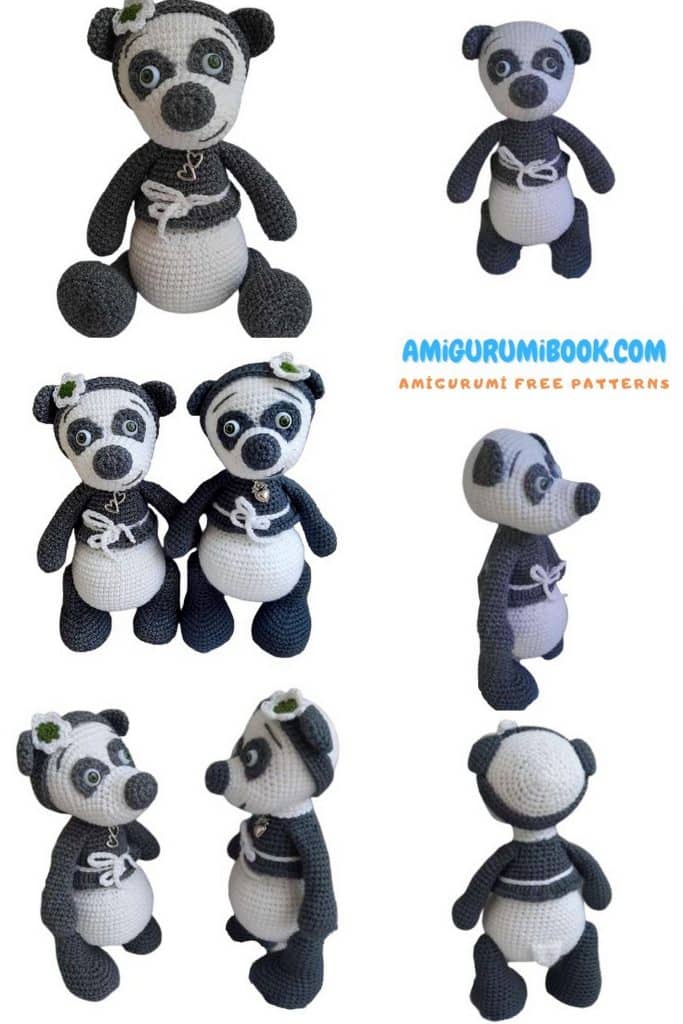
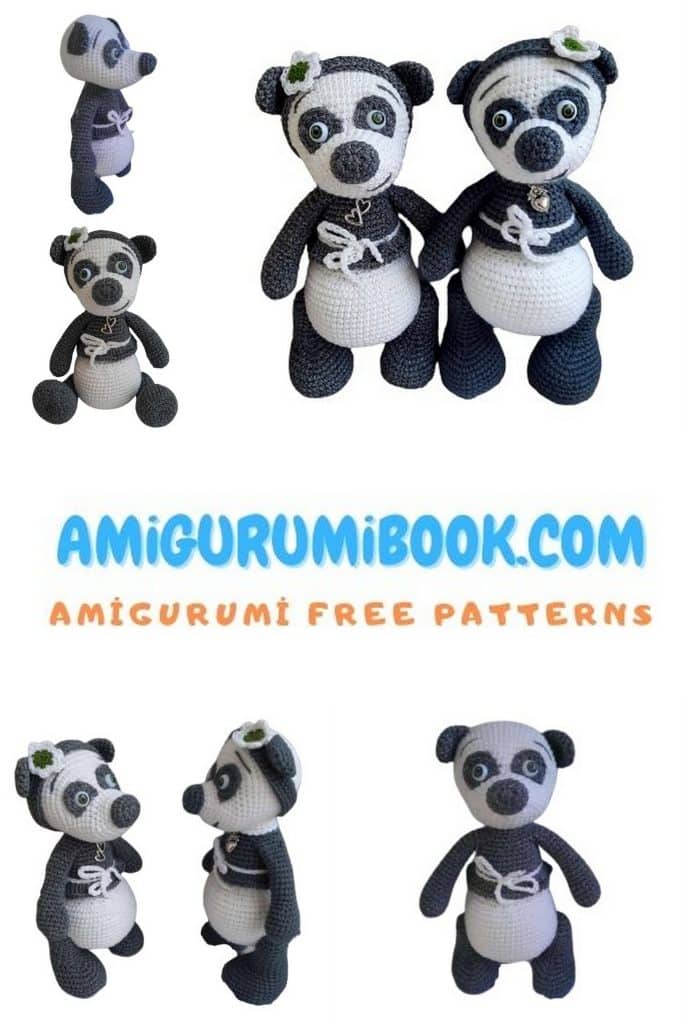
Looking for an irresistibly cute and beginner-friendly amigurumi project? Meet Free Amigurumi Panda Tanshi, the sweetest little panda you’ll ever crochet! This free amigurumi pattern comes with a detailed step-by-step tutorial that makes it easy for crafters of all levels to follow. With its charming face, chubby cheeks, and tiny limbs, Panda Tanshi is the perfect handmade gift for kids, panda lovers, or anyone who appreciates adorable creations. Whether you’re making it for your collection or as a special keepsake, this crochet panda tutorial will bring a smile to anyone’s face!
If you want to access 1000+ free amigurumi patterns, you can download our application from this link!
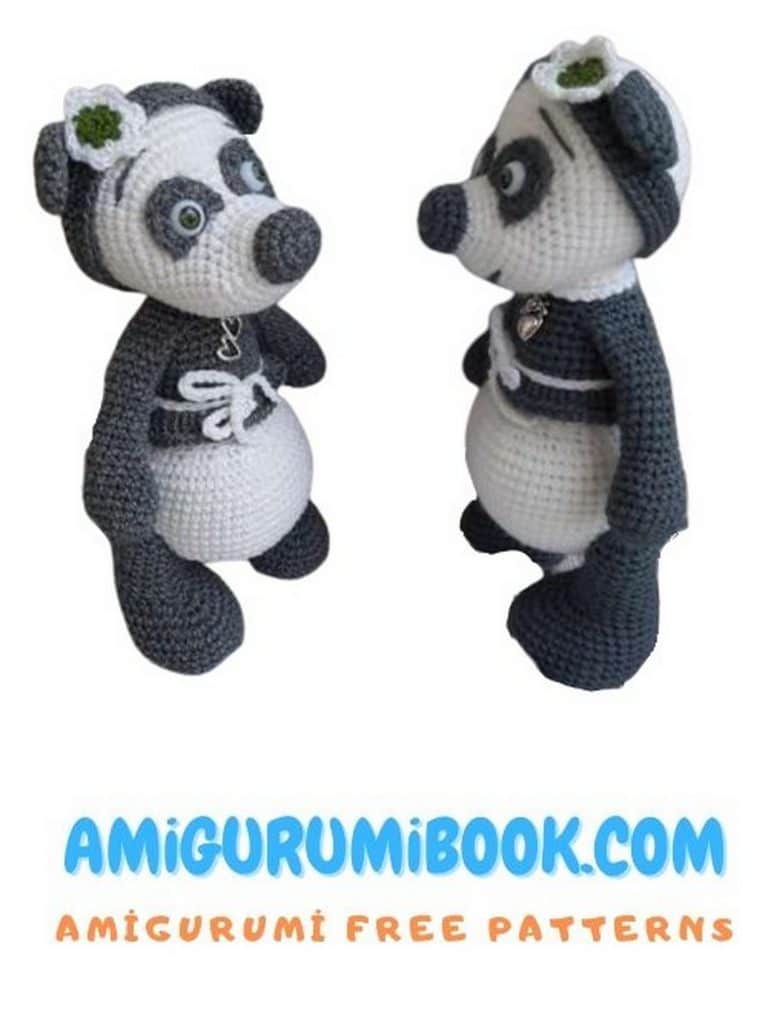
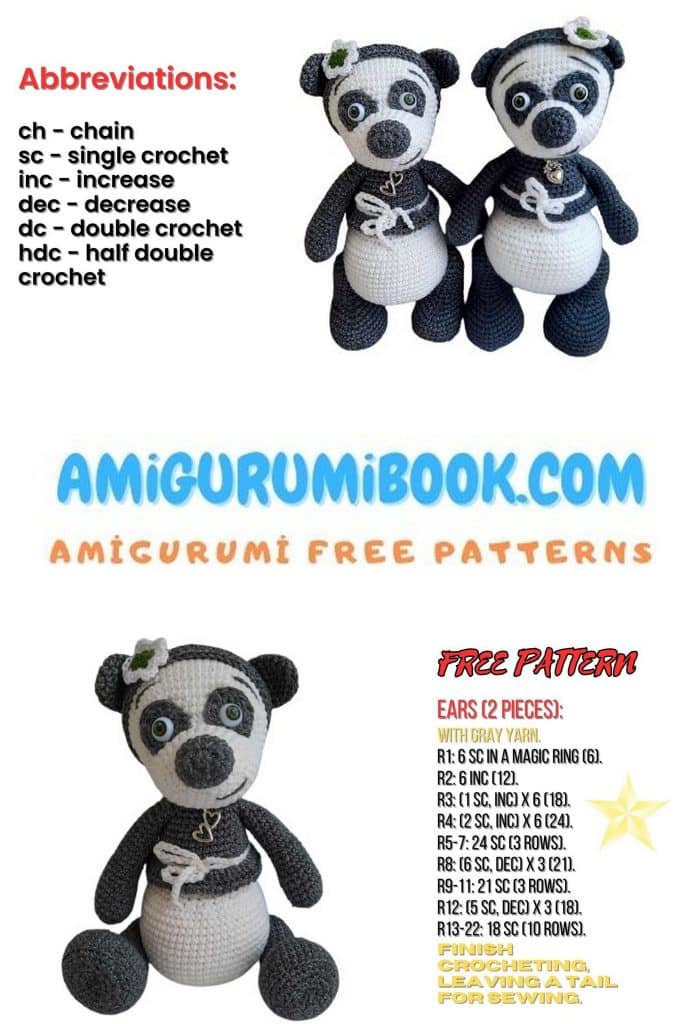
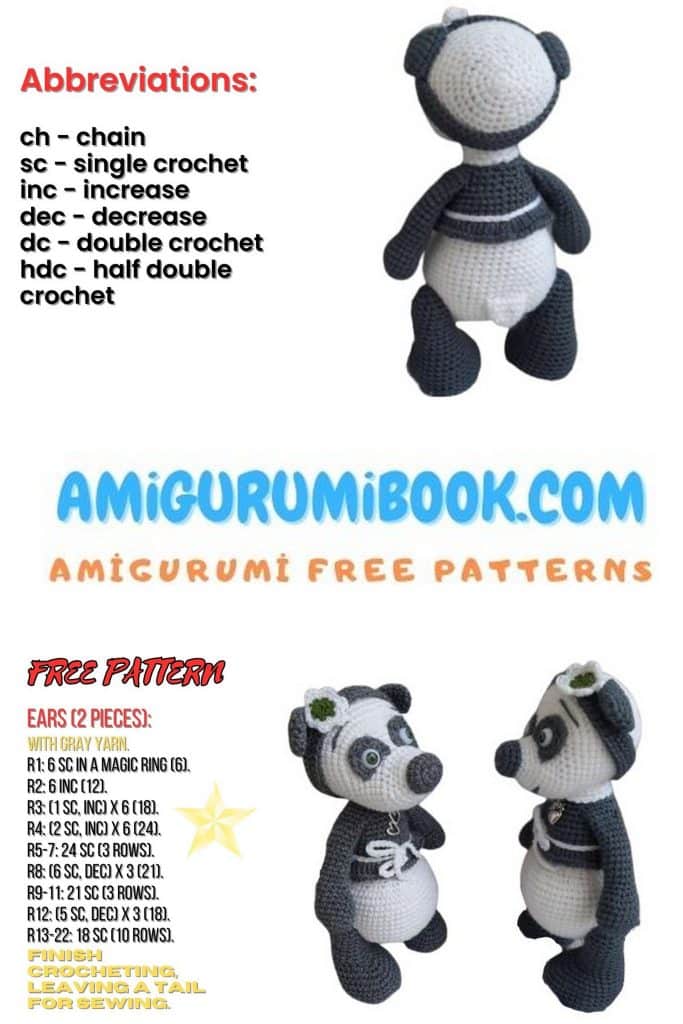
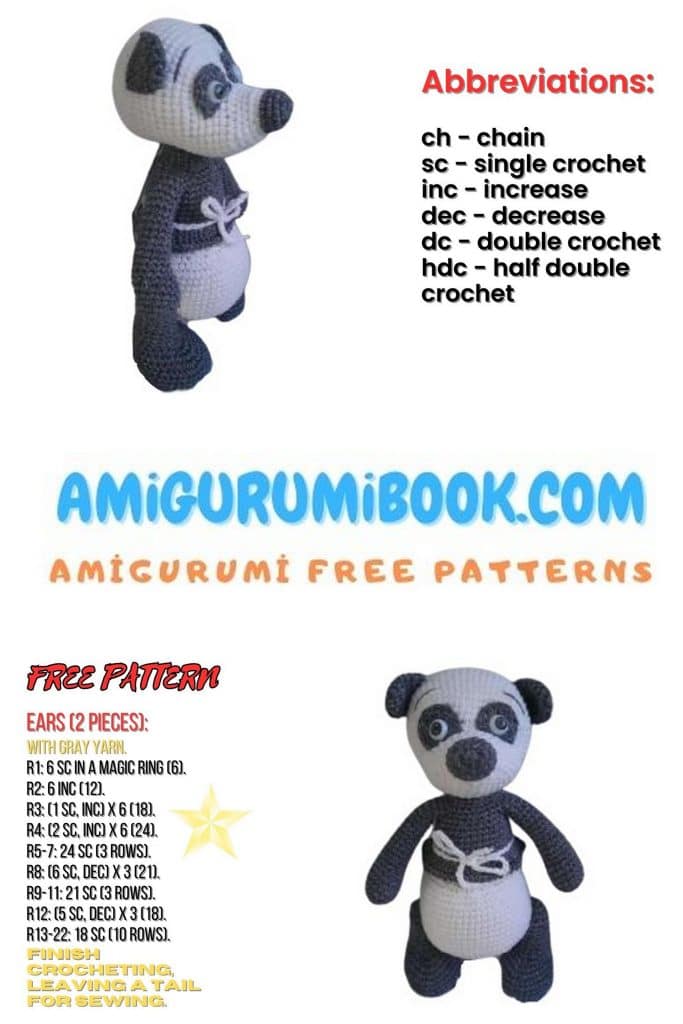
The panda is 17–18 cm tall. It can stand and sit on its own. The head rotates. The lower legs are attached using plastic joints. The arms are crocheted in. There is no wire frame or hard materials used inside. The neck is reinforced with cotton swabs. The eyes are securely attached (safety eyes).
Materials and Tools
Used Here is the yarn I personally used.
Feel free to choose any yarn you like:
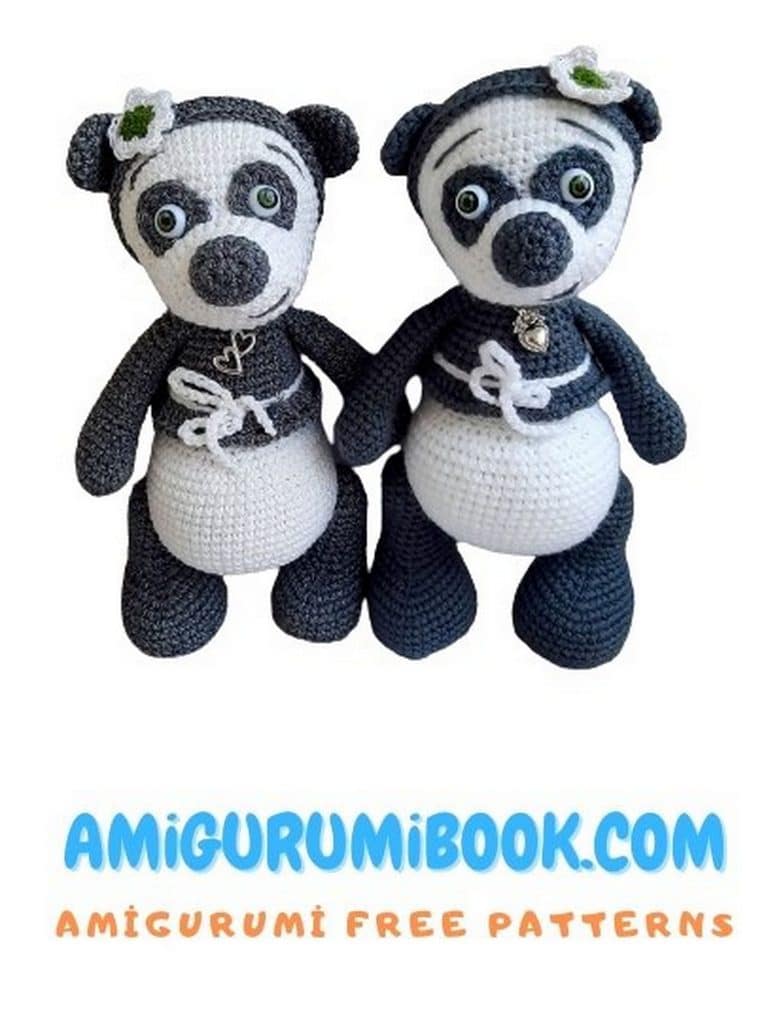
Yarn for the first panda:
Kamtex “Motylek” No. 137 (dark gray/marengo)
YarnArt Jeans No. 01 (white)
Yarn for the second panda:
Pekhorka “Children’s New” No. 490 (boxwood green)
Pekhorka “Children’s New” No. 01 (white)
Yarn for the flower:
Alize Forever No. 35 (green)
Alize Forever No. 55 (white)
Stuffing – holofiber
Plastic joints – 18–20 mm (for attaching the legs)
Safety eyes – 8–10 mm diameter (2 pcs)
Accessories – I used hearts and a small bag
Cotton swabs (5 pcs) – for neck reinforcement
Crochet hook – size 1.7 mm (match to your yarn)
Scissors
Long needle with a large eye
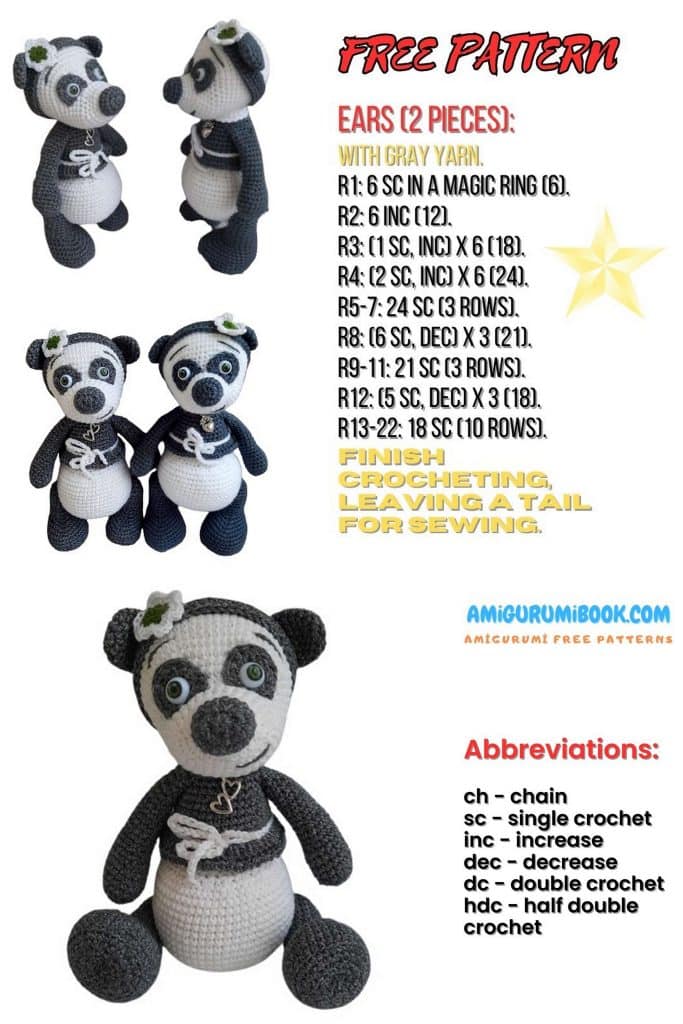
Abbreviations (US crochet terms)
MR – magic ring
ch – chain
sl st – slip stitch
sc – single crochet
hdc – half double crochet
dc – double crochet
tr – treble crochet (double treble)
BLO – back loops only
FLO – front loops only
inc – increase (2 sc in one stitch)
inc2 – double increase (3 sc in one stitch)
dec – decrease (sc 2 together through front loops)
dec2 – double decrease (sc 3 together through front loops)
sh – shift stitch
tch – turning chain
*6 – repeat the instructions in brackets 6 times
(30) – total number of stitches at the end of the round
Invisible Decrease 😊 (Tip: Use front loops for cleaner look)
Shift Stitch When crocheting in a spiral, your stitch marker often drifts to the right. Our goal is to bring it back to the correct position so the part stays symmetrical. This is why we use the shift stitch.
In the pattern you’ll see a phrase like:
“Check the start of the round, if needed, make a shift stitch.”
Let’s use the arm as an example. Fold the piece in half so that the thumb faces straight forward. If the marker has shifted, make a shift stitch (sh).
Visual reference: Blue marker = first stitch of round 12, green marker = last stitch of round 20. You’ll notice the round start has shifted right by 1 stitch. This can be 1 or 2 stitches depending on your tension.
Return the start of the round to its original position by crocheting the necessary number of sc and moving the marker. The shift stitch is not counted in the total stitch count – it’s just to fix the alignment.
I add stuffing before checking the round start.
Ready to begin? 😊
PATTERN – Amigurumi Panda
Arms (Make 2) – Amigurumi Panda
Use gray yarn. Begin from the bottom.
The marker runs along the outside of the arm.
Stuff as you go.
Stuff the lower part firmly.
Do not stuff the upper part, so the arm stays flexible and doesn’t stick out.
R1: 6 sc in MR (6)
R2: 6 inc (12)
R3: (sc, inc)*6 (18)
R4–7: 18 sc (4 rounds)
R8: 7 sc, dec x2, 7 sc (16)
R9: 6 sc, dec x2, 6 sc (14)
R10–12: 14 sc (3 rounds)
R13: dec, 12 sc (13)
R14–16: 13 sc (3 rounds)
R17: dec, 11 sc (12)
R18–22: 12 sc (5 rounds)
Fasten off, secure, and weave in the yarn end.
Lower Legs (Make 2) – Amigurumi Panda
Using grey yarn. Start crocheting from the top!
The stitch marker should run down the center of the back of the leg; adjust it as needed by making shift stitches.
Stuff firmly as you go so the little panda can stand on its own.
1: 6 sc in MR (6)
2: 6 inc (12)
3: (3 sc, inc) x3 (15)
From Round 4, the left and right legs are worked differently!
In Rounds 4 and 5, create holes for the joints.
Left Leg:
4: 3 sc, ch 2, skip 2 sts of previous round, 10 sc (15)
5: 3 sc, 2 sc in chs from previous round, 10 sc (15)
6–8: (3 rounds) 15 sc
Insert joints into the holes after Round 7.
Add stuffing.
9: (4 sc, inc) x3 (18)
10–12: (3 rounds) 18 sc
Check the start of the round, make a shift stitch if needed.
13: 7 sc, 2 inc-inc, 9 sc (22)
14: 9 sc, 2 inc-inc, 11 sc (26)
15: 11 sc, 2 inc-inc, 13 sc (30)
16: 13 sc, 2 inc-inc, 15 sc (34)
17: 15 sc, 2 inc, 17 sc (36)
18–22: (5 rounds) 36 sc
Now we crochet the sole:
23: In BLO, 36 sc
24: (sc, dec) x12 (24)
Add more stuffing.
25: (dec, sc) x8 (16)
26: (2 sc, dec) x4 (12)
Add more stuffing.
27: 6 dec (6)
Fasten off, leaving a tail for tightening.
Pull the opening closed with a needle.
Now make 2–3 stitches through the center of Round 13 (where increases started) to fix the sole in place. This will help it stay flat.
Secure the yarn end and weave it in.
Right Leg:
4: 10 sc, ch 2, skip 2 sts of previous round, 3 sc (15)
5: 10 sc, 2 sc in chs from previous round, 3 sc (15)
6–8: (3 rounds) 15 sc
Insert joints after Round 7.
Add stuffing.
9: (4 sc, inc) x3 (18)
10–12: (3 rounds) 18 sc
Check the center of the leg; if needed, make a shift stitch.
13: 9 sc, 2 inc-inc, 7 sc (22)
14: 11 sc, 2 inc-inc, 9 sc (26)
15: 13 sc, 2 inc-inc, 11 sc (30)
16: 15 sc, 2 inc-inc, 13 sc (34)
17: 17 sc, 2 inc, 15 sc (36)
18–22: (5 rounds) 36 sc
Now we crochet the sole:
23: In BLO, 36 sc
24: (sc, dec) x12 (24)
Add stuffing.
25: (dec, sc) x8 (16)
26: (2 sc, dec) x4 (12)
Add stuffing.
27: 6 dec (6)
Fasten off, leaving a tail for tightening.
Pull the opening closed with a needle.
Make 2–3 stitches through the center of Round 13 (where increases started) to fix the sole flat.
Secure the yarn end and weave it in.
Tail – Amigurumi Panda
In nature, pandas have a WHITE tail! 😊
At first I didn’t know this and made a dark tail. Later I made white ones 😊. I left the photos with the dark tail because it shows the placement of the tail on the body better 😊.
So, using white yarn.
Start from the bottom.
1: 6 sc in MR (6)
2: 6 inc (12)
3–5: (3 rounds) 12 sc
6: Fold the piece in half and crochet 6 sc through both layers.
Fasten off and weave in the tail.
Body – Amigurumi Panda
Use white yarn.
Start from the bottom.
The stitch marker runs down the center of the back.
Make shift stitches if needed.
Stuff the body as you go.
1: 6 sc in MR (6)
2: 6 inc (12)
3: (sc, inc) x6 (18)
4: sc, inc, (2 sc, inc) x5, sc (24)
5: (3 sc, inc) x6 (30)
6: sc, inc, (4 sc, inc) x5, 3 sc (36)
7: (5 sc, inc) x6 (42)
8: 2 sc, inc, (6 sc, inc) x5, 4 sc (48)
9: (7 sc, inc) x6 (54)
In Rounds 10–11 we create holes for the joints:
10: 10 sc, ch 2, skip 2 sts of previous round, 30 sc, ch 2, skip 2 sts of previous round, 10 sc (54)
11: 10 sc, 2 sc in chs from previous round, 30 sc, 2 sc in chs from previous round, 10 sc (54)
The leg holes are shifted toward the back — this is intentional so the tummy doesn’t tip the panda forward.
12: 54 sc
In Round 13 we attach the tail:
Align the tail with the body, matching their centers. Now, the 4th st of the tail becomes the new starting point of the body round.
13: 3 sc together with tail stitches from the center, 48 sc around the body, 3 sc (catching the first st of the tail at the side) together with the beginning sts of the tail (54)
14–19: (6 rounds) 54 sc
At the end of Round 19, adjust the marker with a shift stitch.
Insert the leg joints into the body holes and snap on the washers.
If the washers won’t click into place, dip them in boiling water or warm with a lighter. The plastic will soften and snap on easily, and once cooled, will firm up again while remaining secure on the joint 😊.
In Rounds 20–22 we shape the tummy:
20: 12 sc, dec, (2 sc, dec) x3, 2 sc, (dec, 2 sc) x3, dec, 12 sc (46)
21: 12 sc, dec, (sc, dec) x3, (dec, sc) x3, dec, 12 sc (38)
22: 17 sc, 2 dec, 17 sc (36)
23–25: (3 rounds) 36 sc
At the end of Round 25, adjust the marker with a shift stitch.
Stuff the body firmly.
Change to grey yarn. Here’s how to make the color change neatly 😊:
Work with both white and grey yarns:
– Bring in grey yarn,
– Insert hook into the next sc of the previous round, yarn over with white,
– Pull up a loop, yarn over with grey and finish the stitch.
Tighten both yarns to adjust tension. Continue the round this way: first half of the stitch in white, second half in grey.
26: 36 sc
Cut and secure the white yarn, weave in the end.
27: In BLO, 36 sc
28–30: (3 rounds) 36 sc
31: 2 sc, dec, (4 sc, dec) x5, 2 sc (30)
At the end of Round 31, adjust the marker with a shift stitch.
Ruffle along the chest line:
Go back to Round 26. If you do this later, the upper arms will get in the way.
We’ll crochet in the front loops of the stitches from the previous round. Insert the hook from above.
Join grey yarn at the center back, ch 2.
1: (dc, inc from dc) x24 (54), sl st
2: (sl st, ch 1) x54
Cut the yarn, leaving a tail for sewing. Sew the frill on the back with 2-3 stitches so it doesn’t stick out. Secure and weave in the yarn end.
In rounds 32 and 33, crochet in the upper arms.
I will show photos of this process using another toy because it’s hard to see with dark yarn.
Place the arm against the body so that the fist is facing forward.
32: 4 sc, 6 sc together with the bottom stitches of the arm, 10 sc, 6 sc together with the bottom stitches of the arm, 4 sc (30)
33: 4 sc, 6 sc through the top stitches of the arm, 10 sc, 6 sc through the top stitches of the arm, 4 sc (30)
34: (3 sc, dec) * 6 (24)
The placement of the decreases is marked with pins in the photo.
Stuff the body firmly.
Neck – Amigurumi Panda
In nature, a panda’s neck transitions smoothly into the head. And both are white 😊
That’s why I change the gray yarn to white. You can skip this and continue crocheting with gray if you prefer.
35: sc, dec, (dec, 2 sc) * 5, sc (18)
Cut the gray yarn, secure and weave in the end.
36: in back loops only – 18 sc
37-40: (4 rounds) 18 sc
Cut the yarn, leaving a tail for sewing the head.
Now go back to round 36 and crochet the collar.
We will crochet in the front loops of the previous round. Insert the hook from the top.
Insert the white yarn into the middle of the back and crochet: (sl st, ch 1) * 18
Cut the yarn, secure and weave in the end.
Stuff the neck and insert 4 cotton swabs (wrapped together with thread) to make the head sit firmly 😊
Ears (make 2) – Amigurumi Panda
Using gray yarn:
1: 6 sc in MR (6)
2: 6 inc (12)
3: (3 sc, inc) * 3 (15)
4-5: (2 rounds) 15 sc
6: Fold the piece in half and crochet 7 sc through both layers.
Cut the yarn, secure it, and weave in the tail when attaching the ears.
Eye patches (make 2)
Using gray yarn:
1: In MR, crochet: sc, hdc, 2 dc, tr, 2 dc, hdc, sc — do not tighten the magic ring too much, so the safety eye post fits in. Ch 1, turn. (9 stitches total)
2: 8 sc, inc + 4 sc along the lower edge, sl st.
Cut the yarn, leaving a tail for sewing.
Insert the safety eyes into the patches but do not attach the washers yet.
Head – Amigurumi Panda
Using white yarn. Begin at the back of the head.
The marker runs along the underside of the head.
1: 6 sc in MR (6)
2: 6 inc (12)
3: (sc, inc) * 6 (18)
4: sc, inc, (2 sc, inc) * 5, sc (24)
5: (3 sc, inc) * 6 (30)
6: sc, inc, (4 sc, inc) * 5, 3 sc (36)
7: (5 sc, inc) * 6 (42)
8: 2 sc, inc, (6 sc, inc) * 5, 4 sc (48)
9: (7 sc, inc) * 6 (54)
10: 54 sc
In round 11, crochet in the ears.
Place the ear on the head with the front side facing up.
11: 14 sc, 7 sc together with ear stitches, 12 sc, 7 sc together with ear stitches, 14 sc (54)
12: 54 sc
13 and 14: Neck opening
The beginning of the round shifts here. We’ll center it again later.
13: 50 sc, ch 8, skip 8 sc from the previous round, 2 sc (from round 14) (56)
14: 44 sc, 8 sc along the ch-8, 2 sc (54)
15: Re-center the round marker
15: 48 sc, move the marker (48)
In the photo, the round marker shift is shown using different colored markers:
Orange = start of round 13
Pink = start of round 15
Blue = start of round 16
16–18: (3 rounds) 54 sc
From round 18 we begin forming the face.
19: 13 sc, (dec, 2 sc) * 3, 4 sc, (2 sc, dec) * 3, 13 sc (48)
20: 13 sc, (dec, sc) * 3, 4 sc, (sc, dec) * 3, 13 sc (42)
21: 13 sc, 3 dec, 4 sc, 3 dec, 13 sc (36)
Eye holes (rounds 22–23)
22: 12 sc, ch 2, skip 2 stitches from previous round, 8 sc, ch 2, skip 2 stitches from previous round, 12 sc (36)
23: 12 sc, sc into eye arch, 4 dec, sc into eye arch, 12 sc (30)
24: 30 sc, 1 shift sc
Eye installation
Insert the safety eyes with the patches, align the patches, and attach the eye washers. Do not sew the patches yet — that will be done after the head is stuffed.
Stuff the back of the head.
Shaping the cheeks
25: 5 sc, inc2 (2 inc in a row), 14 sc, inc2, 5 sc (26)
26: 4 sc, inc2, 12 sc, inc2, 4 sc (22)
27: 3 sc, inc2, 10 sc, inc2, 3 sc (18)
Add stuffing, paying special attention to the cheeks.
Crochet the nose
Switch yarn to gray. (For a neat color change, see tips above.)
28: 18 sc
Cut the white yarn, secure and weave in.
29–30: (2 rounds) 18 sc
Add stuffing to the nose.
31: 9 dec (9)
Cut the yarn, leaving a tail.
Using a needle, thread the remaining tail through the front loops of the previous round and pull tight to close the hole. Hide the yarn tail inside the piece.
Through the neck opening, add stuffing to the nose.
Distribute the stuffing evenly.
Embroidering the Eyes and Eyebrows
Pin the patches in place. Start from the bottom edge, aligning it along the 25th round of the muzzle.
Use pins to mark the placement of the eyebrows and mouth.
Sew on the eye patches. Embroider the eyebrows and mouth.
The head is done!
Headband – Amigurumi Panda
With gray yarn:
1: Chain 51 and work from the second chain from the hook: inc, 48 sc, 4 sc in the last chain, continue on the opposite side of the chain: 48 sc, inc.
2: 50 sc.
Cut the yarn, leaving a tail for sewing.
Sew the headband into a ring. Weave in the yarn end.
Flower for the Headband
With green yarn:
1: 6 sc in MR (6)
2: 6 inc (12)
Switch to white yarn:
3 (arches for petals): (ch 2, skip 1 st, sc) repeat 6 times
4 (petals): (sc, 3 dc, sc) in each arch (6 times), sl st.
Cut the yarn, leaving a tail for sewing.
Sew the flower to the headband at the seam to hide the join.
Belt – Amigurumi Panda
With white yarn, chain 80.
Tie it in a bow above the ruffle on the body.
Secure in a few places with yarn.
Assembly and Finishing Touches
1. Insert 4–5 cotton swabs wrapped together with yarn into the neck.
2. The sticks help reinforce the neck so the head stays firmly in place and doesn’t wobble. 🙂
3. To insert them more easily, use tweezers or scissors to make a hole in the stuffing.
4. Add more stuffing around the sticks.
5. Insert the neck into the opening in the head and adjust to your desired position.
6. Sew the head in place.
7. Put the headband on.
8. Sew on the pendant.
Amigurumi Panda is completely ready!