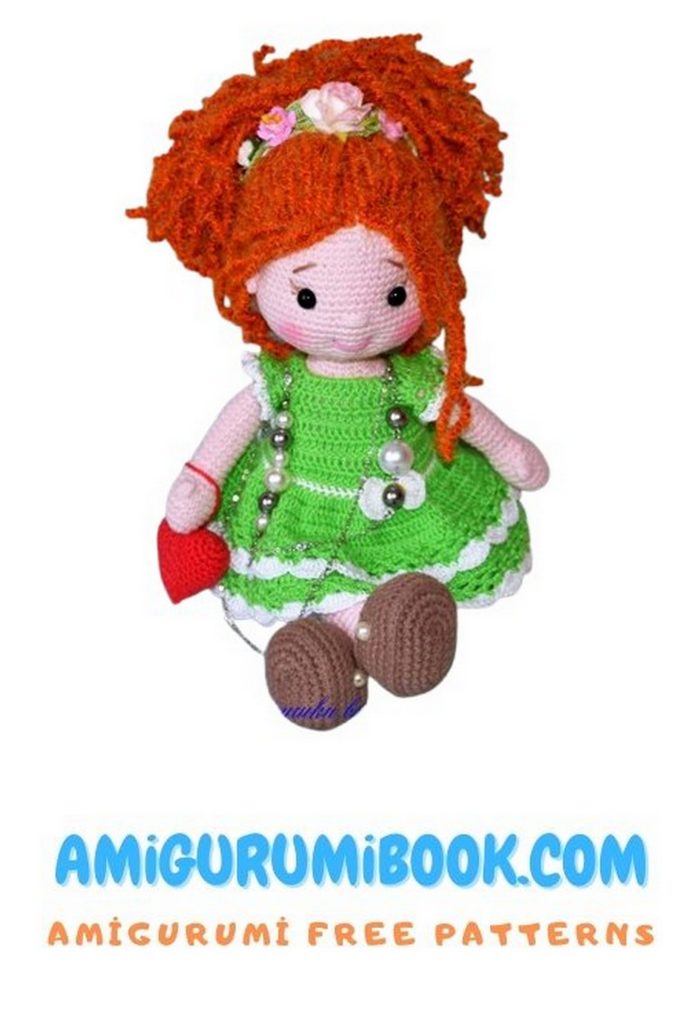
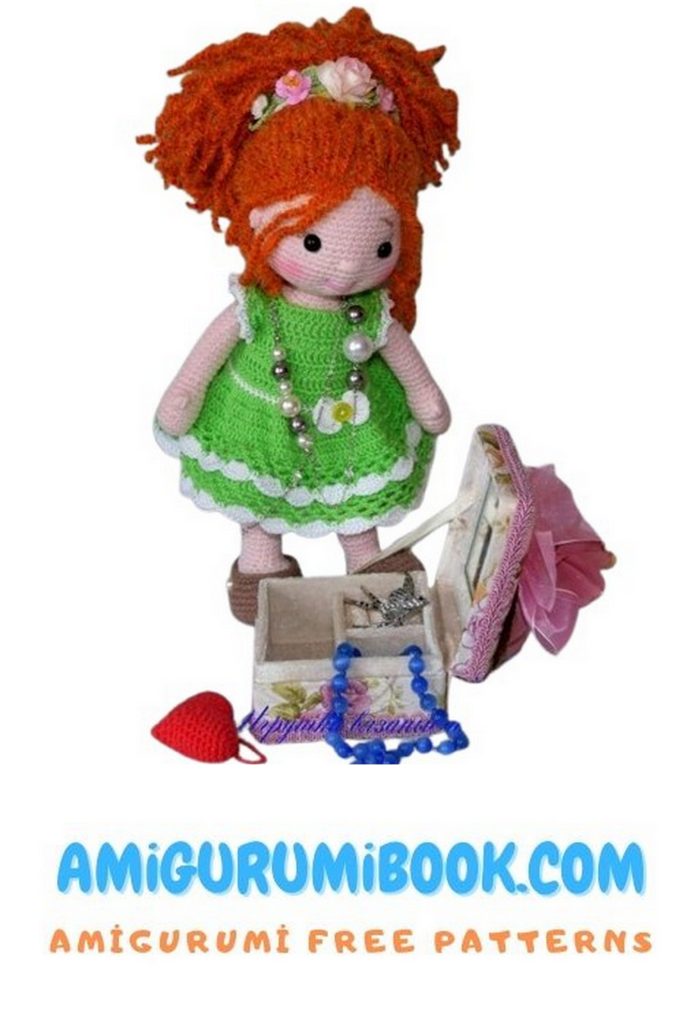
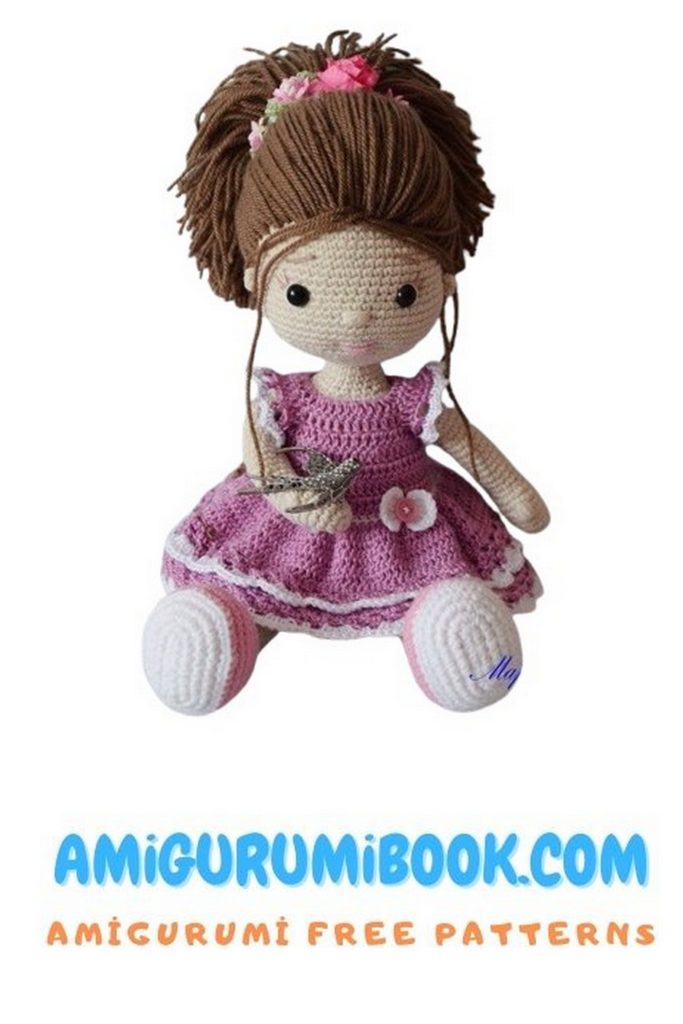
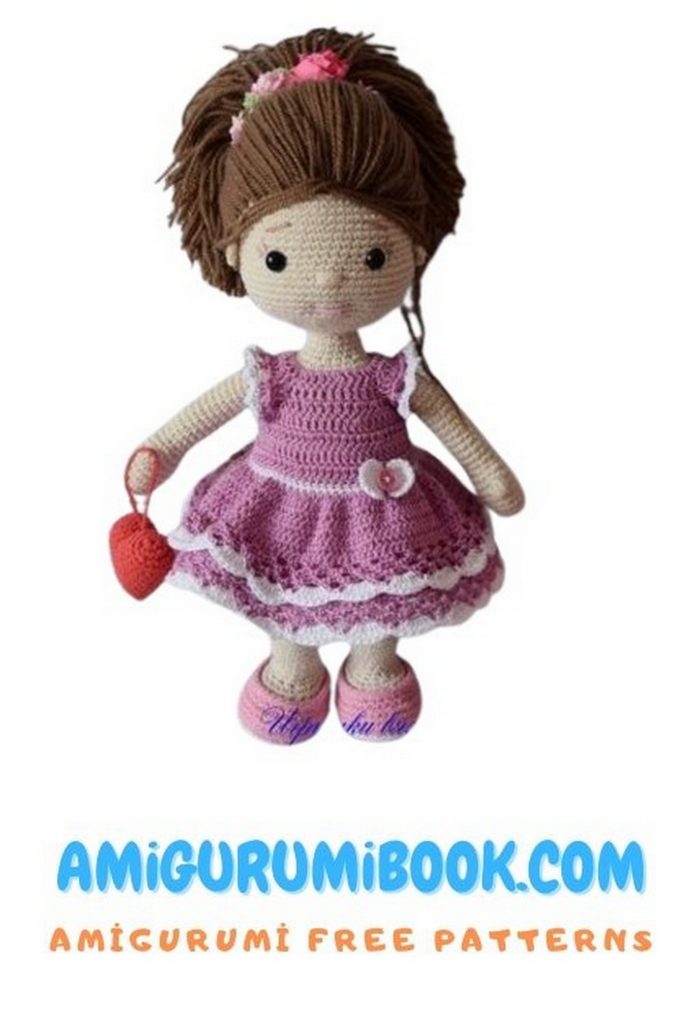
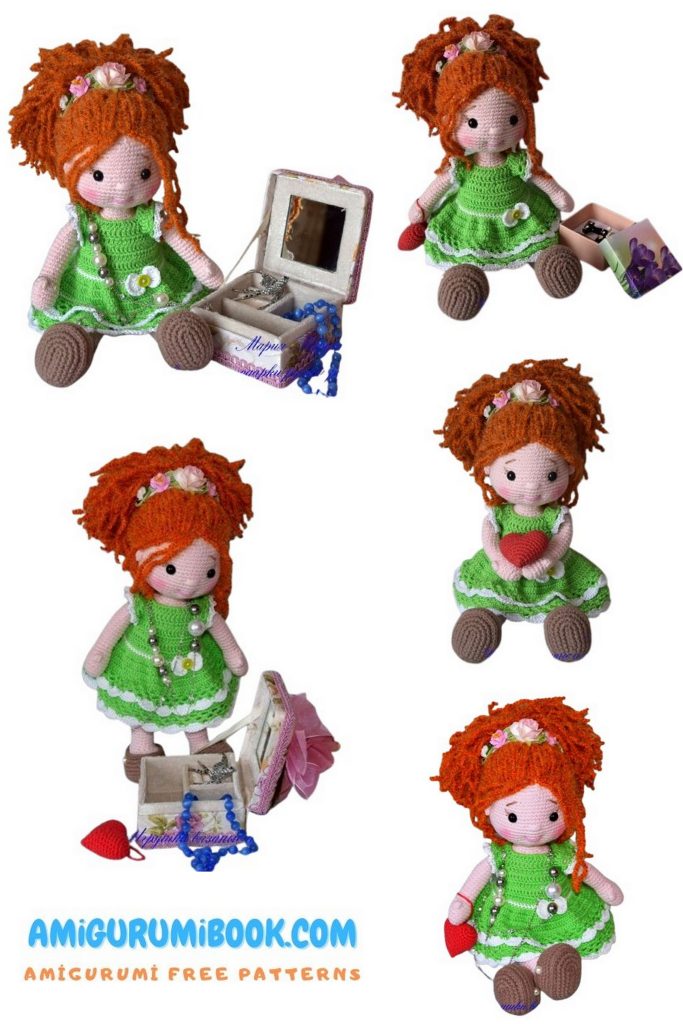
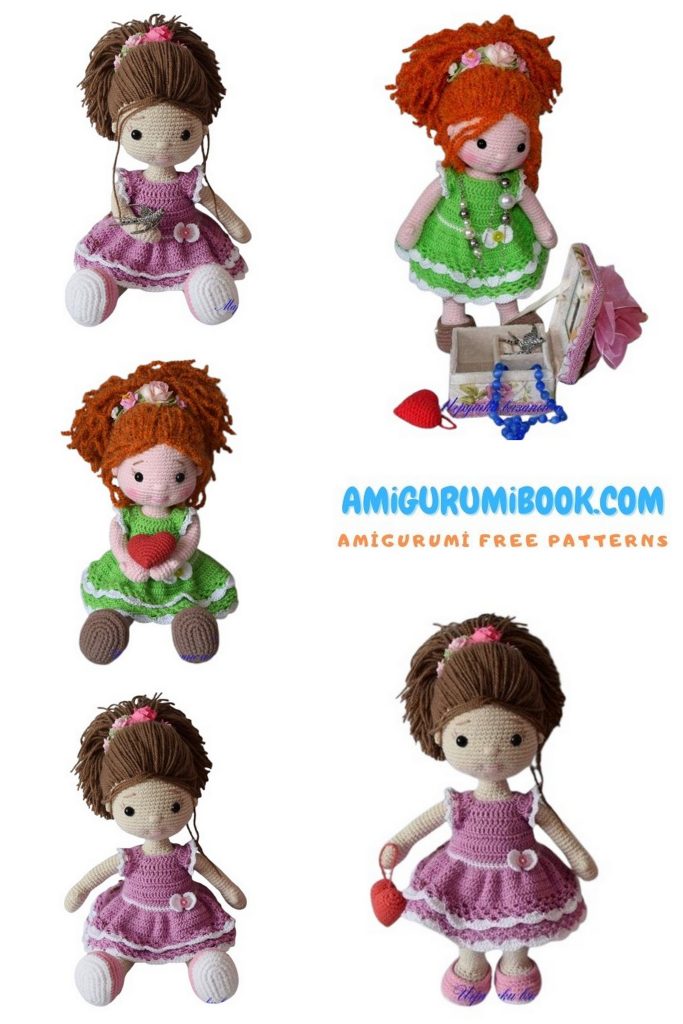
Discover the charm of handmade dolls with the Rostik Girl Amigurumi Doll Free Pattern! This step-by-step crochet tutorial will guide you in creating an adorable, detailed doll perfect for gifting or adding to your amigurumi collection.
If you want to access 1000+ free amigurumi patterns, you can download our application from this link!
Materials and Tools:
Yarnart Jeans color No. 18 (for body) 45% acrylic, 55% cotton. In 50g. 160m 1 skein
Kamteks Lotus Grass Streych color No. 051 (for hair) 70% acrylic, 28% polyamide, 2% lycra In 50g. 80m 1 skein
Yarnart Jeans color No. 71 (for shoes) 45% acrylic, 55% cotton. In 50g. 160m Less motor
Yarnart Jeans color No. 62 (for panties) 45% acrylic, 55% cotton. In 50g. 160m Less motor
Pekhorka Lace color No. 65 (for dress) 100% acrylic. In 50g. 280m
Skein
Vita Cotton Coco color No. 3851 (dress finish, headband) 100% mercerized cotton. In 50g. 240m Less skein
Sewing knives small 2 pcs 8mm
Eyes on a secure mount plastic 9mm
Thread for embroidering eyebrows and eyelashes Vita Cotton Coco color No. 3889
Thread for embroidering a mouth Yarnart Jeans color No. 20
Dry pastel for tinting
Half beads 2 pcs, button for decoration
Pechorka Successful color No. 09 for leaflets on a bandage
Paper flowers (for scrapbooking) 5 pcs.
Yarnart Jeans color No. 26 (for heart) 45% acrylic, 55% cotton. In 50g. 160m Less motor
Hollofiber or other filler
A piece of wire 3-4mm long 12-15 cm, adhesive tape or white electrical tape (to strengthen the neck)
Using these materials, the toy size is 27 cm.
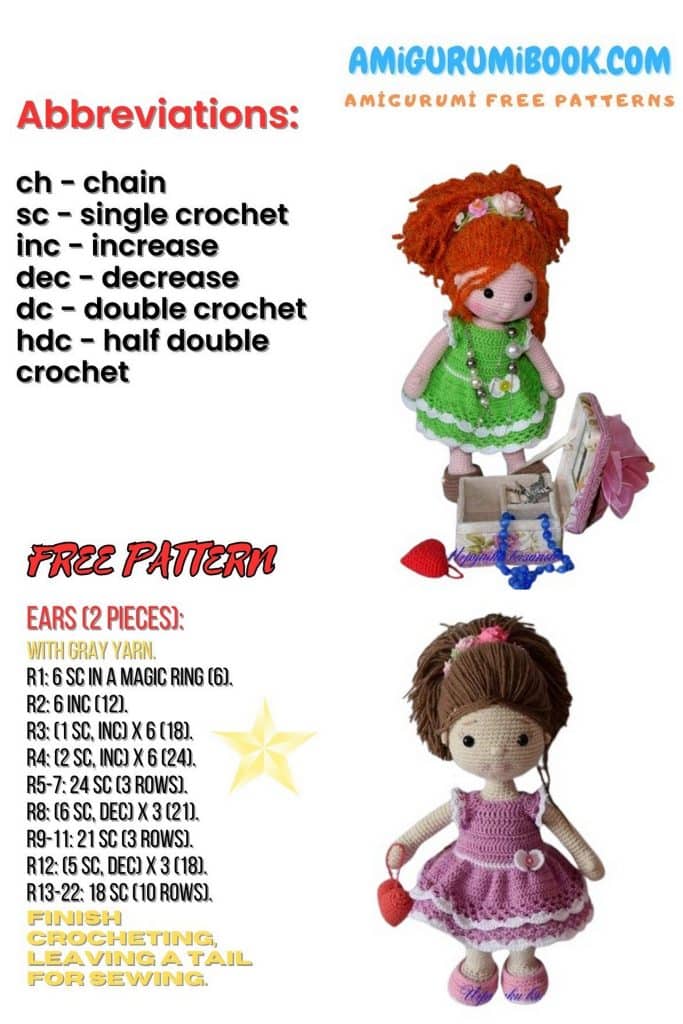
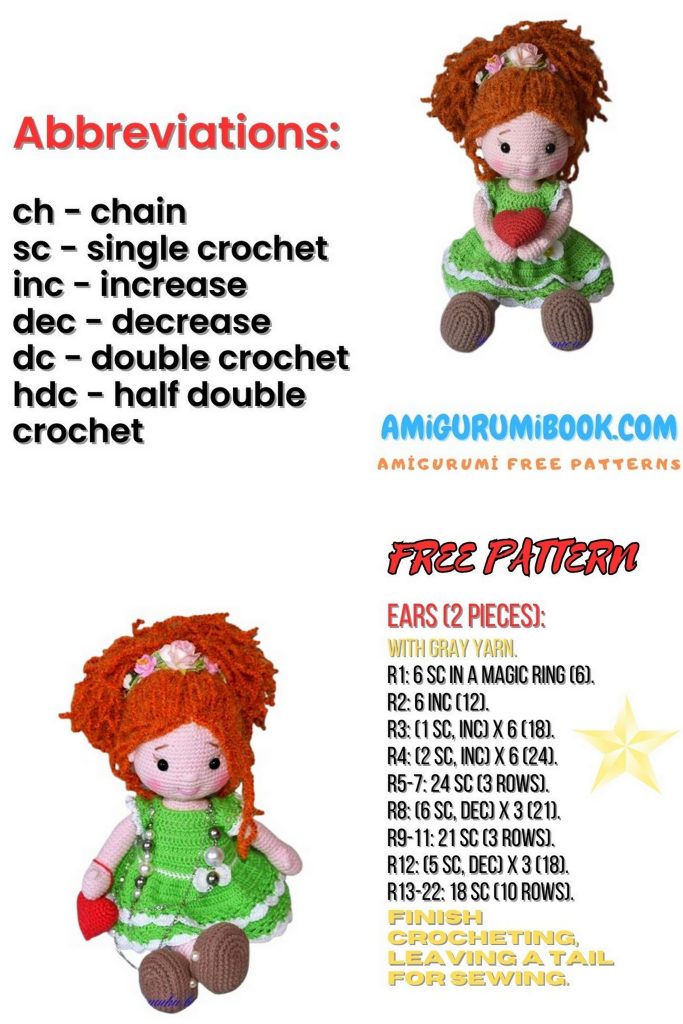
Abbreviations
Magic ring – amigurumi ring
Ch – chain
Sc – single crochet
Dc – Double crochet
İnc – increase (2 Sc in one loop)
Dec – decrease (2 Sc knit together)
Sl-st – connecting column
PATTERN – Amigurumi Doll

Knitting will be divided into stages: 1st stage legs and arms
2nd stage body
3rd stage dress
4th stage head and clearance
5th stage hair and heart dressing
How will the joint knitting go:
You can report on the steps in the comments under each step (this is optional).
Ask questions also in the comments. If possible, I will certainly answer, but with such a huge number of comers, I’m afraid I won’t manage. For this, please help each other !!!
We knit arms and legs.
In this doll I changed the color scheme.
Body Color 05 (Yarnart Jeans)
Shoes 36 (Yarnart Jeans)
In this option, I knit with a sole, i.e. with the separation of color into white and pink. You can knit in one color.
Necessary materials for the 1st stage: – body strings
– strings for shoes
– white threads
– filler
– a hook to the size of your yarn
– contrasting thread for marking rows
Arms – Amigurumi Doll
1: 6 Sc in Magic ring
2: 6 İnc = 12
3: (3 Sc, İnc) * 3 = 15
4: 15 Sc
5: 2 Sc, İnc, (4 Sc, İnc) * 2, 2 Sc = 18
6: 18 Sc
7: 9 Sc, 4 Dc into one, 8 Sc = 18
8: 18 Sc
9: 2 Sc, Ch, (4 Sc, Ch) * 2, 2 Sc = 15
10: (Ch, 3 Sc) * 3 = 12
11: (5 Sc, İnc) * 2 = 14
We fill in the course of knitting, but not until the end.
12-27 14 Sc
Cut the thread, fasten.
Similarly, we knit the second hand.
Legs – Amigurumi Doll
Start knitting in white
We collect a chain of 6Ch + 1p
1: İnc, 4 Sc, 4 Sc to zero loop, 4 Sc, İnc = 16
2: 1 Sc, İnc, 4 Sc, 4 İnc, 4 Sc, İnc, 1 Sc = 22
3: 1 Sc, İnc, 5 Sc, (İnc, 1 Sc) * 4, 6 Sc, İnc = 28
4: 2 Sc, İnc, 5 Sc, (İnc, 2 Sc) * 4, 7 Sc, İnc = 34
5: 3 Sc, İnc, 5 Sc, (İnc, 3 Sc) * 4, 5 Sc, İnc, 3 Sc = 40
Change the thread color to pink
6: Blo 40 Sc
Row 7-9 40 Sc, 1 ps
10: 8 Sc, (1 Sc, Ch) * 8, 8 Sc = 32
11: 32 Sc Flo
Cut the pink thread, fix and hide
To the left back semi-loops we attach a thread of body color
11: 32 Sc Blo Body Color
12: 8 Sc, 8 Ch, 8 Sc = 24
13: 4 Sc, 8 Ch, 4 Sc = 16 Sc
We fill in the course of knitting
14-30: 16 Sc
Attach the white thread. Cut the thread of body color, fasten and hide
31: 16 Sc
32: 16 Sc Blo
33-34: 16 Sc. Cut the thread, fasten.
We return to 32 to the left front p / p. We attach the thread
(the direction of knitting from top to bottom. As can be seen in photo No. 9).
32 (1 Sc, 2Ch) * 16 Flo. End of row connecting loop
Cut the thread, fasten and hide.
We’re not stuffing our feet to the end.
Similarly, we knit the second leg
The second stage of knitting Maroussi dolls Knit body
Necessary materials for the 2nd stage:
– body strings
– white threads
– filler
– a hook to the size of your yarn
– contrasting thread for marking rows
Body – Amigurumi Doll
Start knitting in white
1: 6 Sc in Magic ring
2: 6 İnc = 12
3: (1 Sc, İnc) * 6 = 18
4: 1 Sc, İnc, (2 Sc, İnc) * 5, 1 Sc = 24
5: (3 Sc, İnc) * 6 = 30
6: 2 Sc, İnc, (4 Sc, İnc) * 5, 2 Sc = 36
7: (5 Sc, İnc) * 6 = 42
8: 3 Sc, İnc, (6 Sc, İnc) * 5, 3 Sc = 4
9: (7 Sc, İnc) * 6 = 54
10: (8 Sc, İnc) * 6 = 60
Fold the leg in half and knit in three layers at once (2 sides of the leg and body)
11: 21 Sc, 8 Sc with foot, 2 Sc, 8 Sc with foot, 21 Sc = 60
12-18 (7 rows) 60 Sc
19 Flo 60 Sc in white. Cut the thread fasten and hide. Next, we will knit with the color of the body.
Attach the body color thread to the left rear p / p
19 Blo 60 Sc body color
20 9 Sc, (Ch, 2 Sc) * 3, 18 Sc, (2 Sc, Ch) * 3, 9 Sc = 54
21-22 54 Sc
23 8 Sc, (Ch, 2 Sc) * 3, 15 Sc, (2 Sc, Ch) * 3, 7 Sc = 48
24-25 48 Sc
We fill in the course of knitting
26 (6 Sc, Ch) * 6 = 42
27-30 42 Sc
31 (5 Sc, Ch) * 6 = 36
32-33 36 Sc. The marker should be centered on the back. If necessary, make offset loops.
We fold our hands in half and knit immediately in three layers (2 sides of the arm and body)
34 knit hands 6 Sc, 7 Sc with hand, 11 Sc, 7 Sc with hand, 5 Sc = 36
35 2 Sc, Ch, (4 Sc, Ch) * 5, 2 Sc = 30
36 (3 Sc, Ch) * 6 = 24
37 24 Sc
38 1 Sc, Ch, (2 Sc, Ch) * 5, 1 Sc = 18
39-41 18 Sc.
Cut the thread, fasten.
The dress Necessary materials for the 3rd stage:
– strings for a dress in two colors
– 2 small buttons or buttons
– button for decor
– a hook to the size of your yarn
– needle
The dress – Amigurumi Doll
We gain 38 vp +2 lifting loops
At the beginning of each row we do 2 lifting loops
1: 4Dc, (İnc, 3Dc) * 8, 2Dc = 46
2: 9Dc, 8 vp (skip 8Dc), 12Dc, 8 vp (skip 8Dc), 9Dc
3: 4Dc, (İnc, 6Dc) * 6 = 52
4: 4Dc, (İnc, 7Dc) * 6 = 58
5: 4Dc, (İnc, 8Dc) * 6 = 64
6: 64Dc
7: 6Dc, (İnc, 9Dc) 5, İnc, 7Dc = 70
Change to a white thread
Row 8-9 70Sc
Change the thread color of the dress
We join a dress in an overlap on 1Dc
10: 69İnc = 138Dc further at the end of each row is a connecting column
Series 11-13 138Dc
14: (Sc, 4c.p (skip 2 loops)) * 46 and knit for the front half loops
15-16: 46 arches
Change to a white thread
17: (In the first arch Sc, in the next 6Dc) * 23 Cut, fasten and hide the thread
We return to the 14th row and knit for the left back half loops
14a-16a 138Dc and then similarly knit the second tier

Mittens – Amigurumi Doll
1: in a circle armhole knit 27Dc
2: (Sc, 4c.p (skip 2 loops)) * 9
Change to a white thread
3: in each arch knit (2Sc, 2inc.p, 2Sc) * 9
We fix the thread, cut it and hide it.
Also tie a second sleeve
The bow knitted according to this pattern. Only double crochet posts. Along the edge of the bow tied around Sc.
Sew in the center of the bow a button for decoration and sew the bow to the dress
The fifth stage of knitting Maroussi dolls Face design
Necessary materials:
– body color yarn
– white yarn
– stitches for embroidering eyelashes and eyebrows
– pink thread for mouth
– hook
– big needle
– pins
Advice:
- Proceed to the design with a good mood, take your time, and so that no one bothers. Then you will succeed !!!
- For embroidery of eyebrows and eyelashes it is better to use thin strings like Iris or Vita cotton Coco and it is better to use brown colors rather than black. Then you will have a cute doll !!!
- For embroidery of proteins, the thickness of the thread is how the body was knitted, because thinner threads drop under the eye.
- Do not be afraid and do not be lazy to remake !!! Strive for the best !!!
Knit head Necessary materials:
– body color strings
– eyes on a secure mount 9mm
– filler
– contrasting thread for marking rows
– hook under your yarn
I will post all the remaining information on February 08 and 09
Head – Amigurumi Doll
1: 6 Sc in Magic ring
2: 6 İnc = 12
3: (1 Sc, İnc) * 6 = 18
4: 1 Sc, İnc, (2 Sc, İnc) * 5, 1 Sc = 24
5: (3 Sc, İnc) * 6 = 30
6: 2 Sc, İnc, (4 Sc, İnc) * 5, 2 Sc = 36
7: (5 Sc, İnc) * 6 = 42
8: 3 Sc, İnc, (6 Sc, İnc) * 5, 3 Sc = 48
9: (7 Sc, İnc) * 6 = 54
10: (8 Sc, İnc) * 6 = 60
11-16: Row 60 Sc
17: 24 Sc, 1inc.p (skip 1 Sc), 10 Sc, 1v.p (skip 1 Sc), 24 Sc
18: 18 Sc, İnc, 3 Sc, İnc, 3 Sc, İnc, 6 Sc, İnc, 3 Sc, İnc, 3 Sc, İnc, 18 Sc = 66
In the resulting holes in the 17th row, insert the eyes on the secure mount.
19-23: 66 Sc + 1p.s
24: 18 Sc, (Ch, 3 Sc) * 2, Ch, 6 Sc, (Ch, 3 Sc) * 2, Ch, 18 Sc = 60
25: 60 Sc
26: 4 Sc, Ch (8 Sc, Ch) * 5, 4 Sc = 54
27: (7 Sc, Ch) * 6 = 48
28: 3 Sc, Ch, (6 Sc, Ch) * 5, 3 Sc = 42
We fill in the course of knitting
29: (5 Sc, Ch) * 6 = 36
30: 2 Sc, Ch, (4 Sc, Ch) * 5, 2 Sc = 30
31: (3 Sc, Ch) * 6 = 24 Sc
32: 1 Sc, Ch (2 Sc, Ch) * 5, 1 Sc = 18 Cut the thread leaving a long end for sewing
The head is not yet sewn. We will make hair extensions, styling and hair fixing.
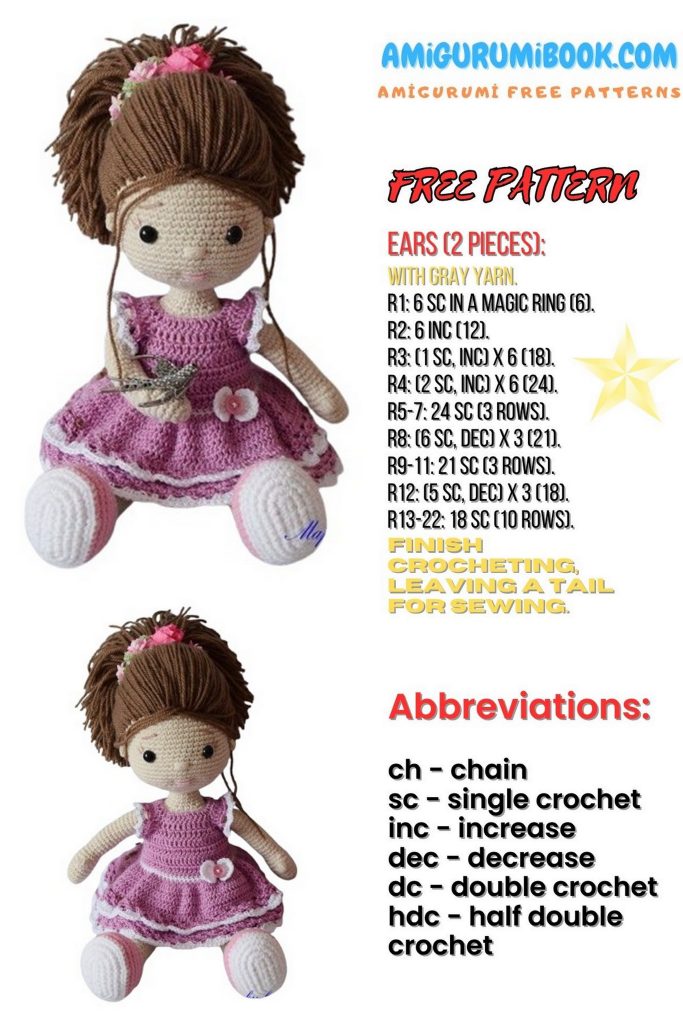
The ears We mark with pins the location of the ears from the 17th to 19th row, from the eye about 7 Sc.
Start knitting as shown in photo No. 3
Knit 3 Sc
Turn knitting (without lifting loop), пSc, İnc (2 Sc in an ode loop), пSc.
We fix the threads and hide in the bow.
Similarly, we knit the second eye.
Eye tightening Take a large needle and a thread of body color.
1:We start the needle under the eye and put it into the hole in the neck. We stretch the thread, remove the needle and put it on the other end of the thread.
2:We start the needle on the other side of the eye (photo No. 2) and put it into the hole in the neck.
The resulting stitch should be under the eye.
Turn the needle into the hole in neck and put it out from under the eye (photo No. 3), put the needle under the eye on the other side and put it into the hole in the neck (the resulting stitch should be under the eye). We tighten the ends of the threads and tie. We hide the ends in the head
Spout embroidery
Spout between 19 and 20 rows. Width in 3Sc. We make five stitches. We put the strings in the hole in the neck and knit
Mouth design We mark with pins the location of the mouth between the 23rd and 24th rows. Between the pins is approximately 4 Sc.
Take a large needle and a thread of body color.
We put the needle into the hole in the neck and put it out in the corner of the mouth, step back a little and then we start the needle and put it into the hole in the neck.
Do the same with the second side of the mouth.
We tighten the threads, tie and hide in the head.
Embroider a mouth with a pink thread with one stitch. We tie the threads and hide in the head
Eyelashes and eyebrows
Pins mark the location of the cilia and embroider. We start the needle under the eye. You can also embroider squirrels with white thread.
We outline the location of the eyebrows the upper part between the 12th and 13th rows, the lower part one row lower. We embroider in two stitches
Heart – Amigurumi Doll
1: 6 Sc in Magic ring
2: 6 İnc = 12
3: (1 Sc, İnc) * 6 = 18
4: 18 Sc
Cut the thread, fasten. Tie the second half of the heart only do not cut the thread
Connect the two halves of 3 Sc
5: 30 Sc
6: 4 Sc, Ch (8 Sc, Ch) * 2, 4 Sc = 27
7: 27 Sc
8: (7 Sc, Ch) * 3 = 24
9: 3 Sc, Ch (6 Sc, Ch) * 2, 3 Sc = 21
We fill in the course of knitting
10: (5 Sc, Ch) * 3 = 18
11: (1 Sc, Ch) * 6 = 12
12: 6 Ch
13: 3 Ch
Pull the hole, bring the thread to the middle of the heart (photo No. 4), make the loop the length you want, fasten the thread and hide it in the heart.