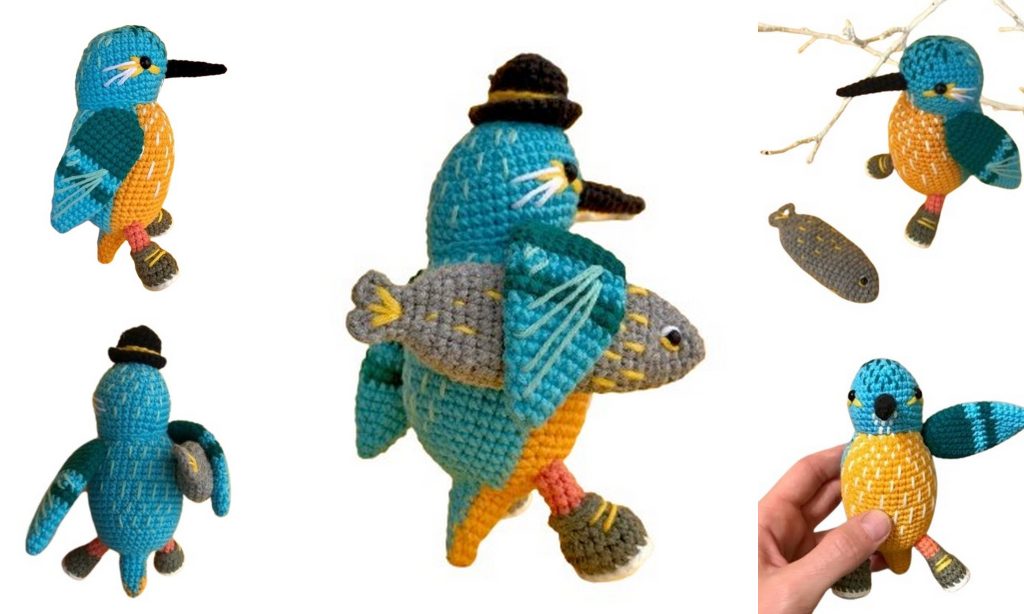
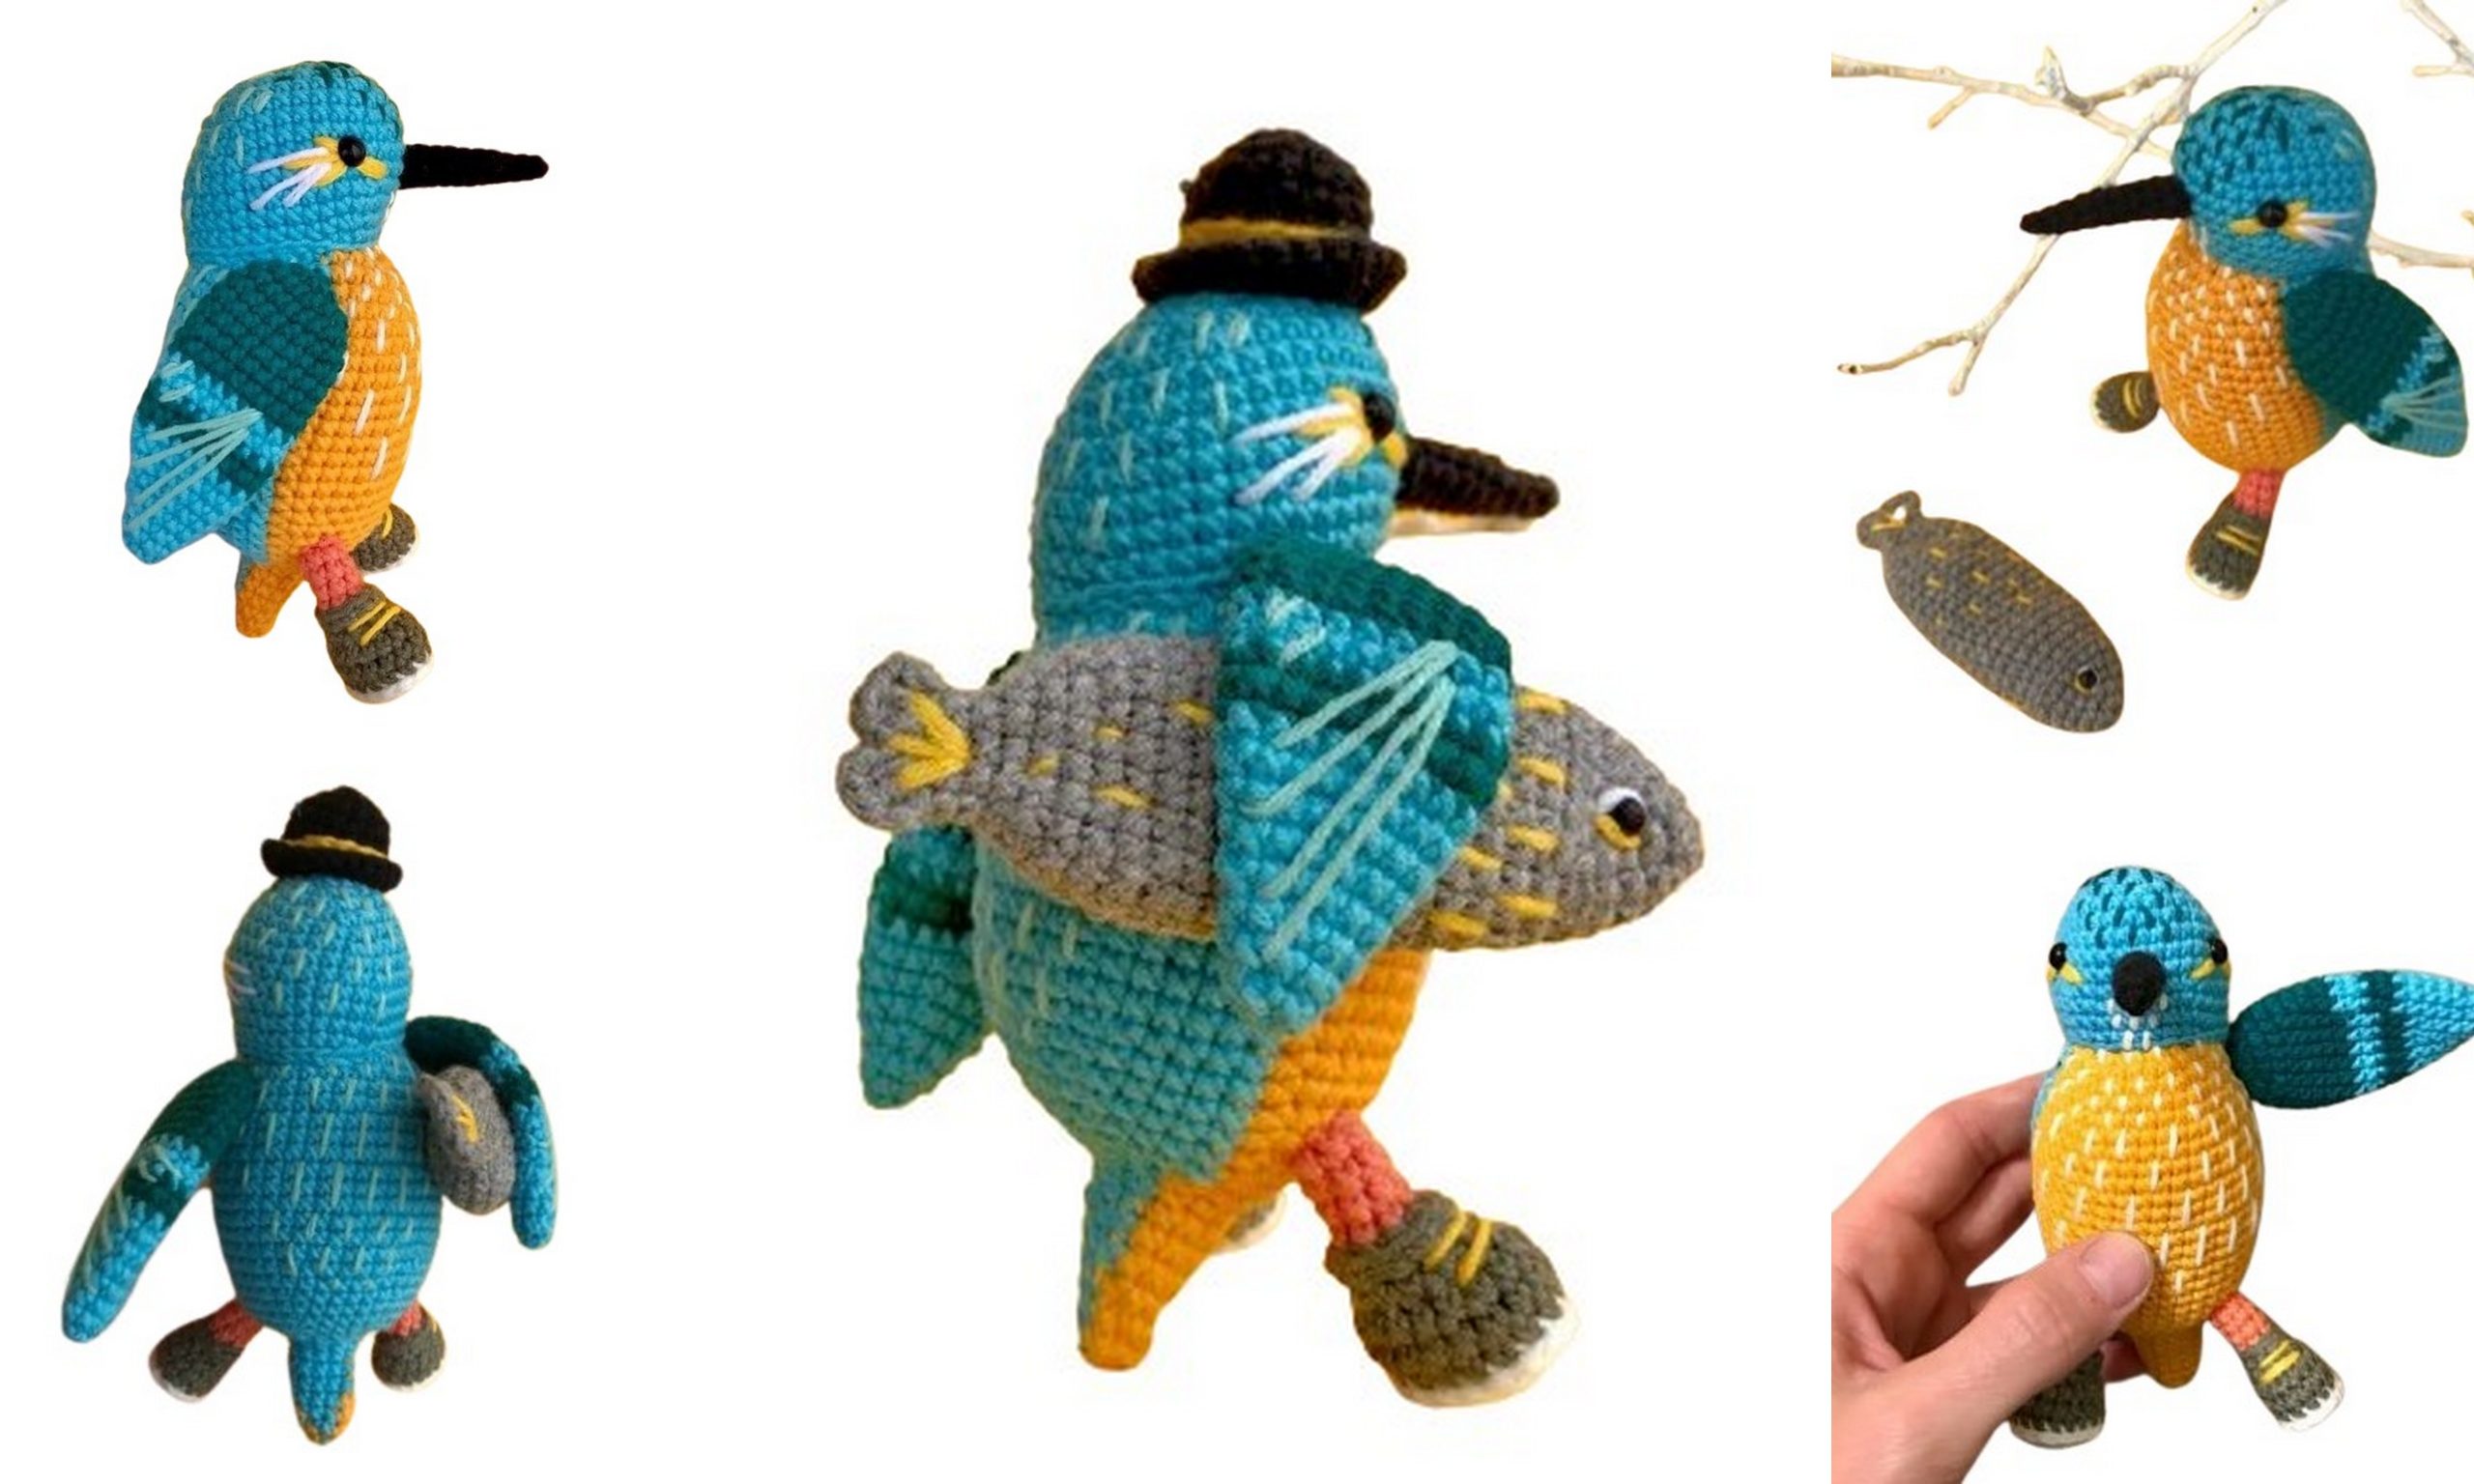
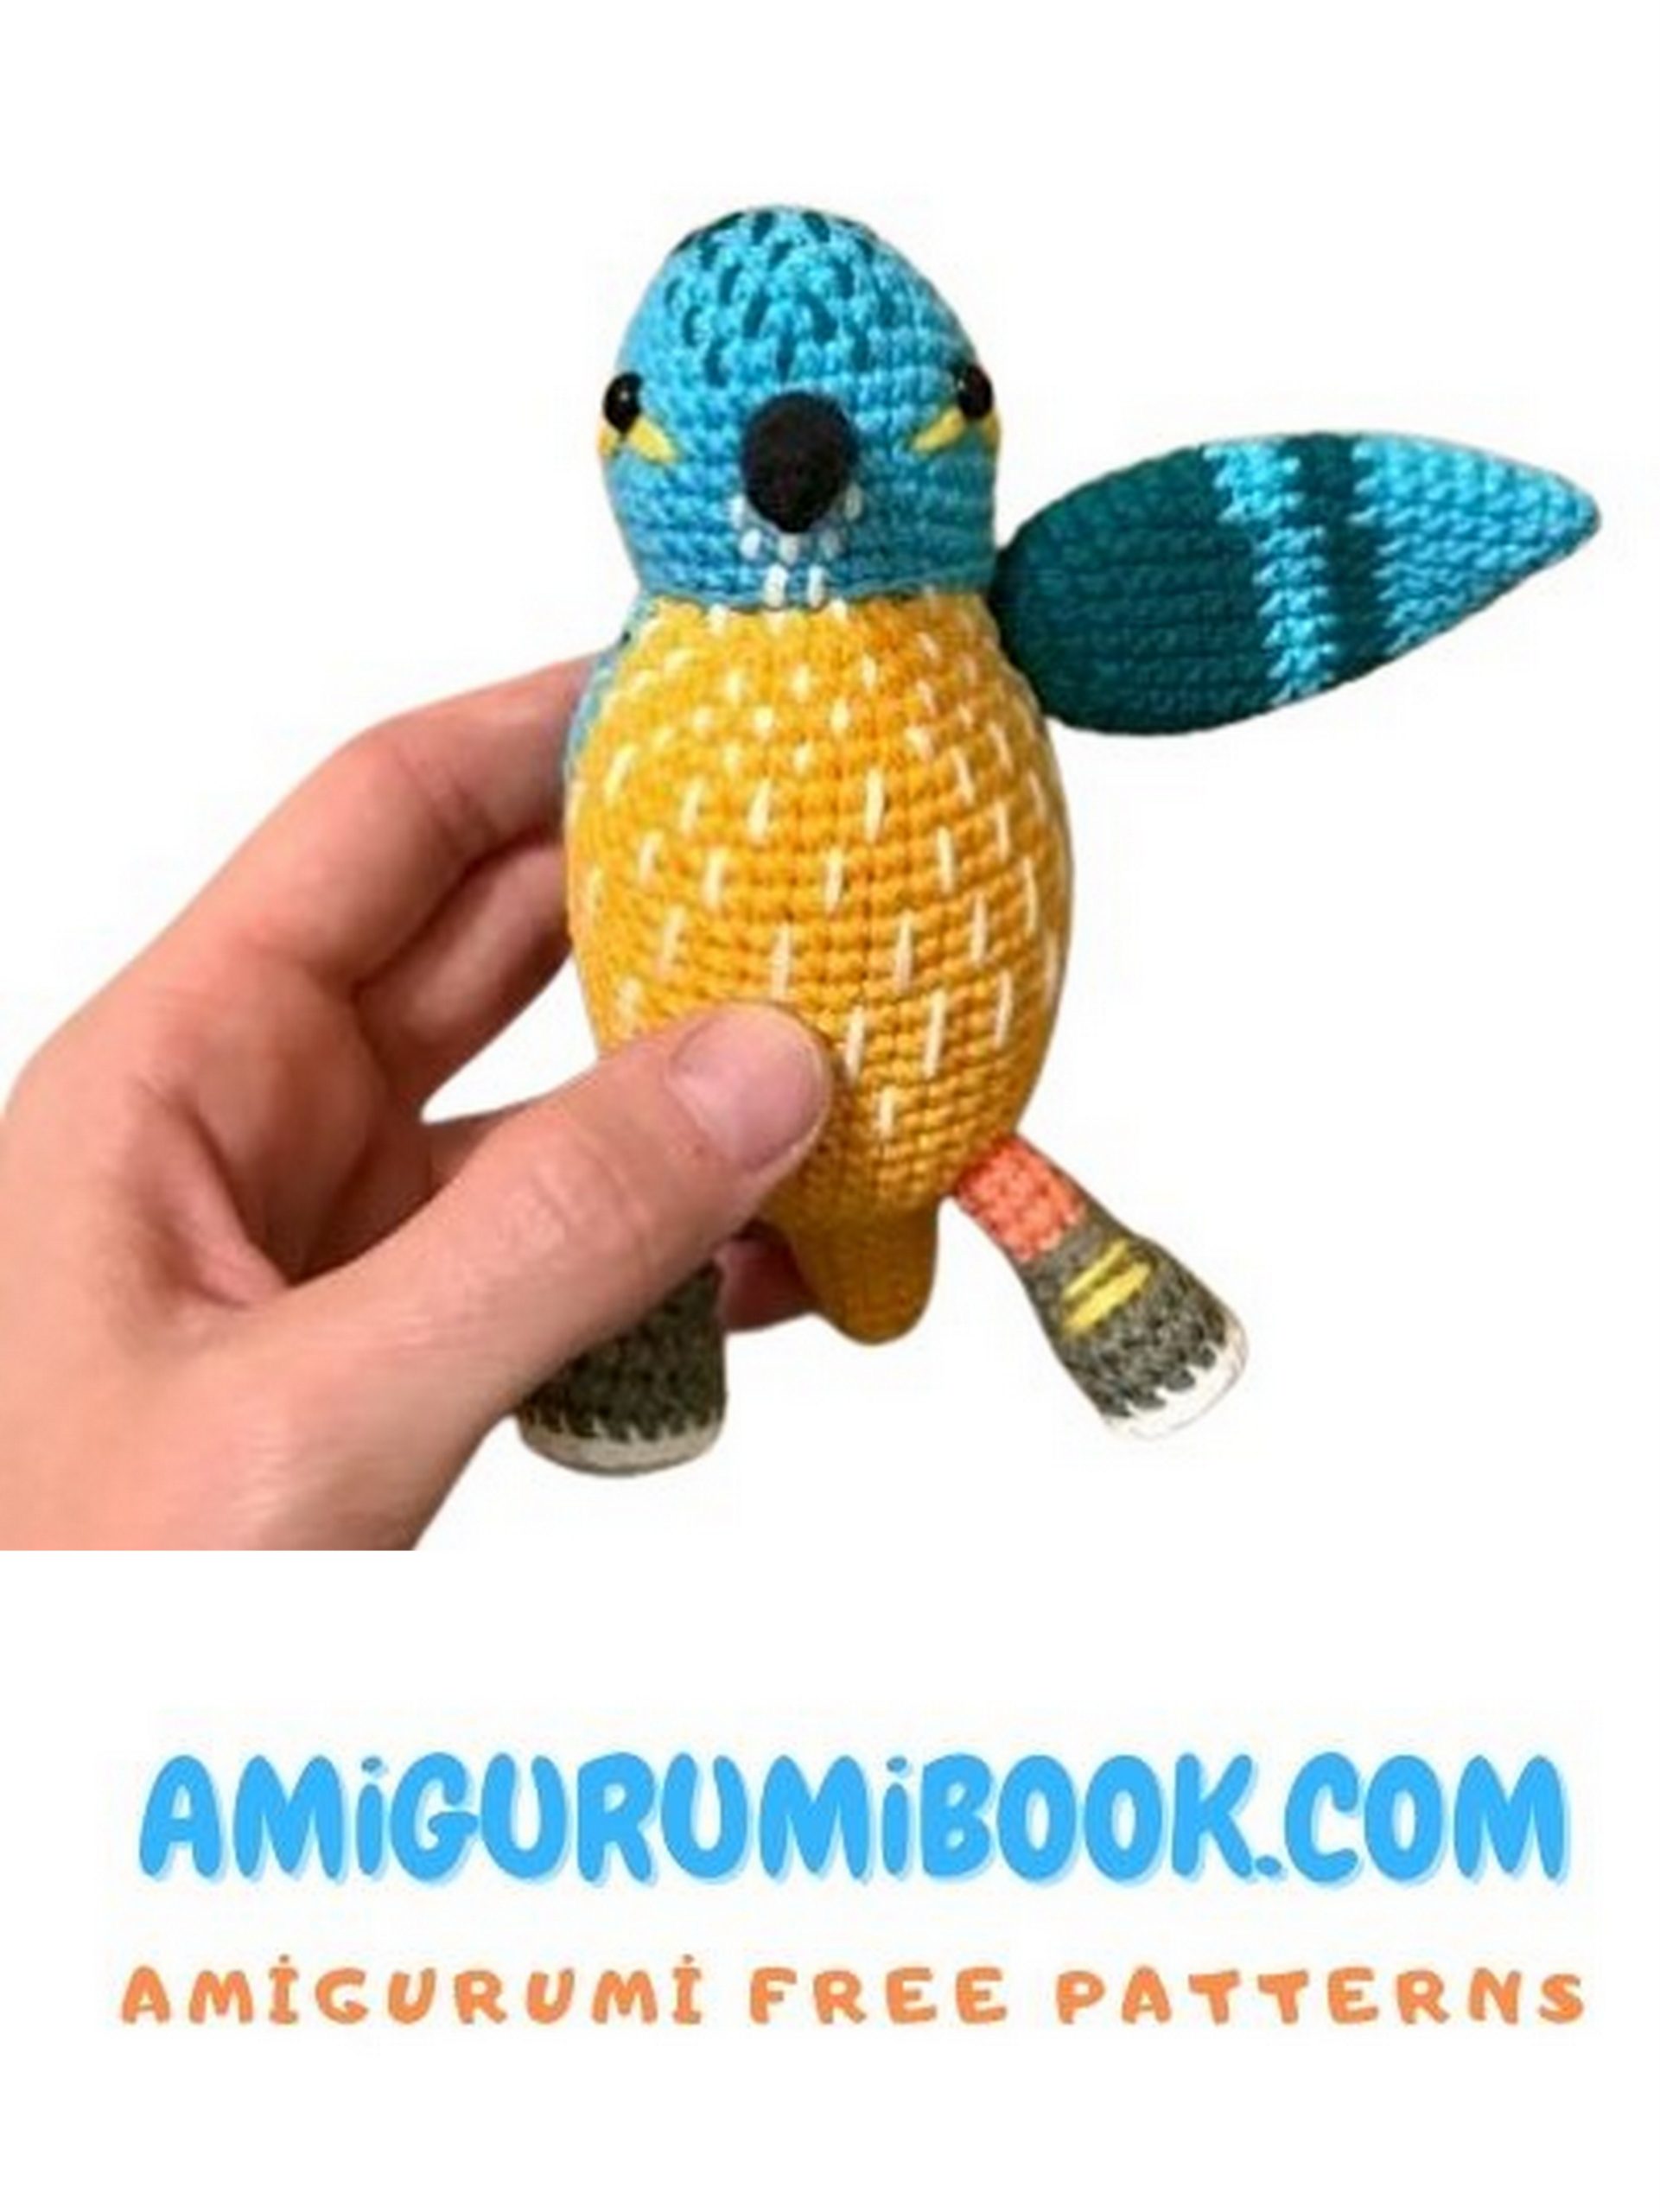
Embark on a colorful crochet adventure with our free amigurumi pattern for a stunning kingfisher bird amigurumi! This vibrant and eye-catching project captures the beauty of the kingfisher, making it a delightful addition to any crochet collection. Perfect for both experienced crocheters and enthusiastic beginners, our pattern provides detailed instructions and helpful photos to guide you through the creation process. Crochet your own kingfisher bird amigurumi to brighten your home decor or to gift to a bird-loving friend. Let your creativity take flight with this beautiful and unique crochet project!
KINGFISHER MATERIALS:
Yarn: Yarn Art Jeans or Alize Cotton Gold in turquoise and yellow colors
Eyes: 2 pcs
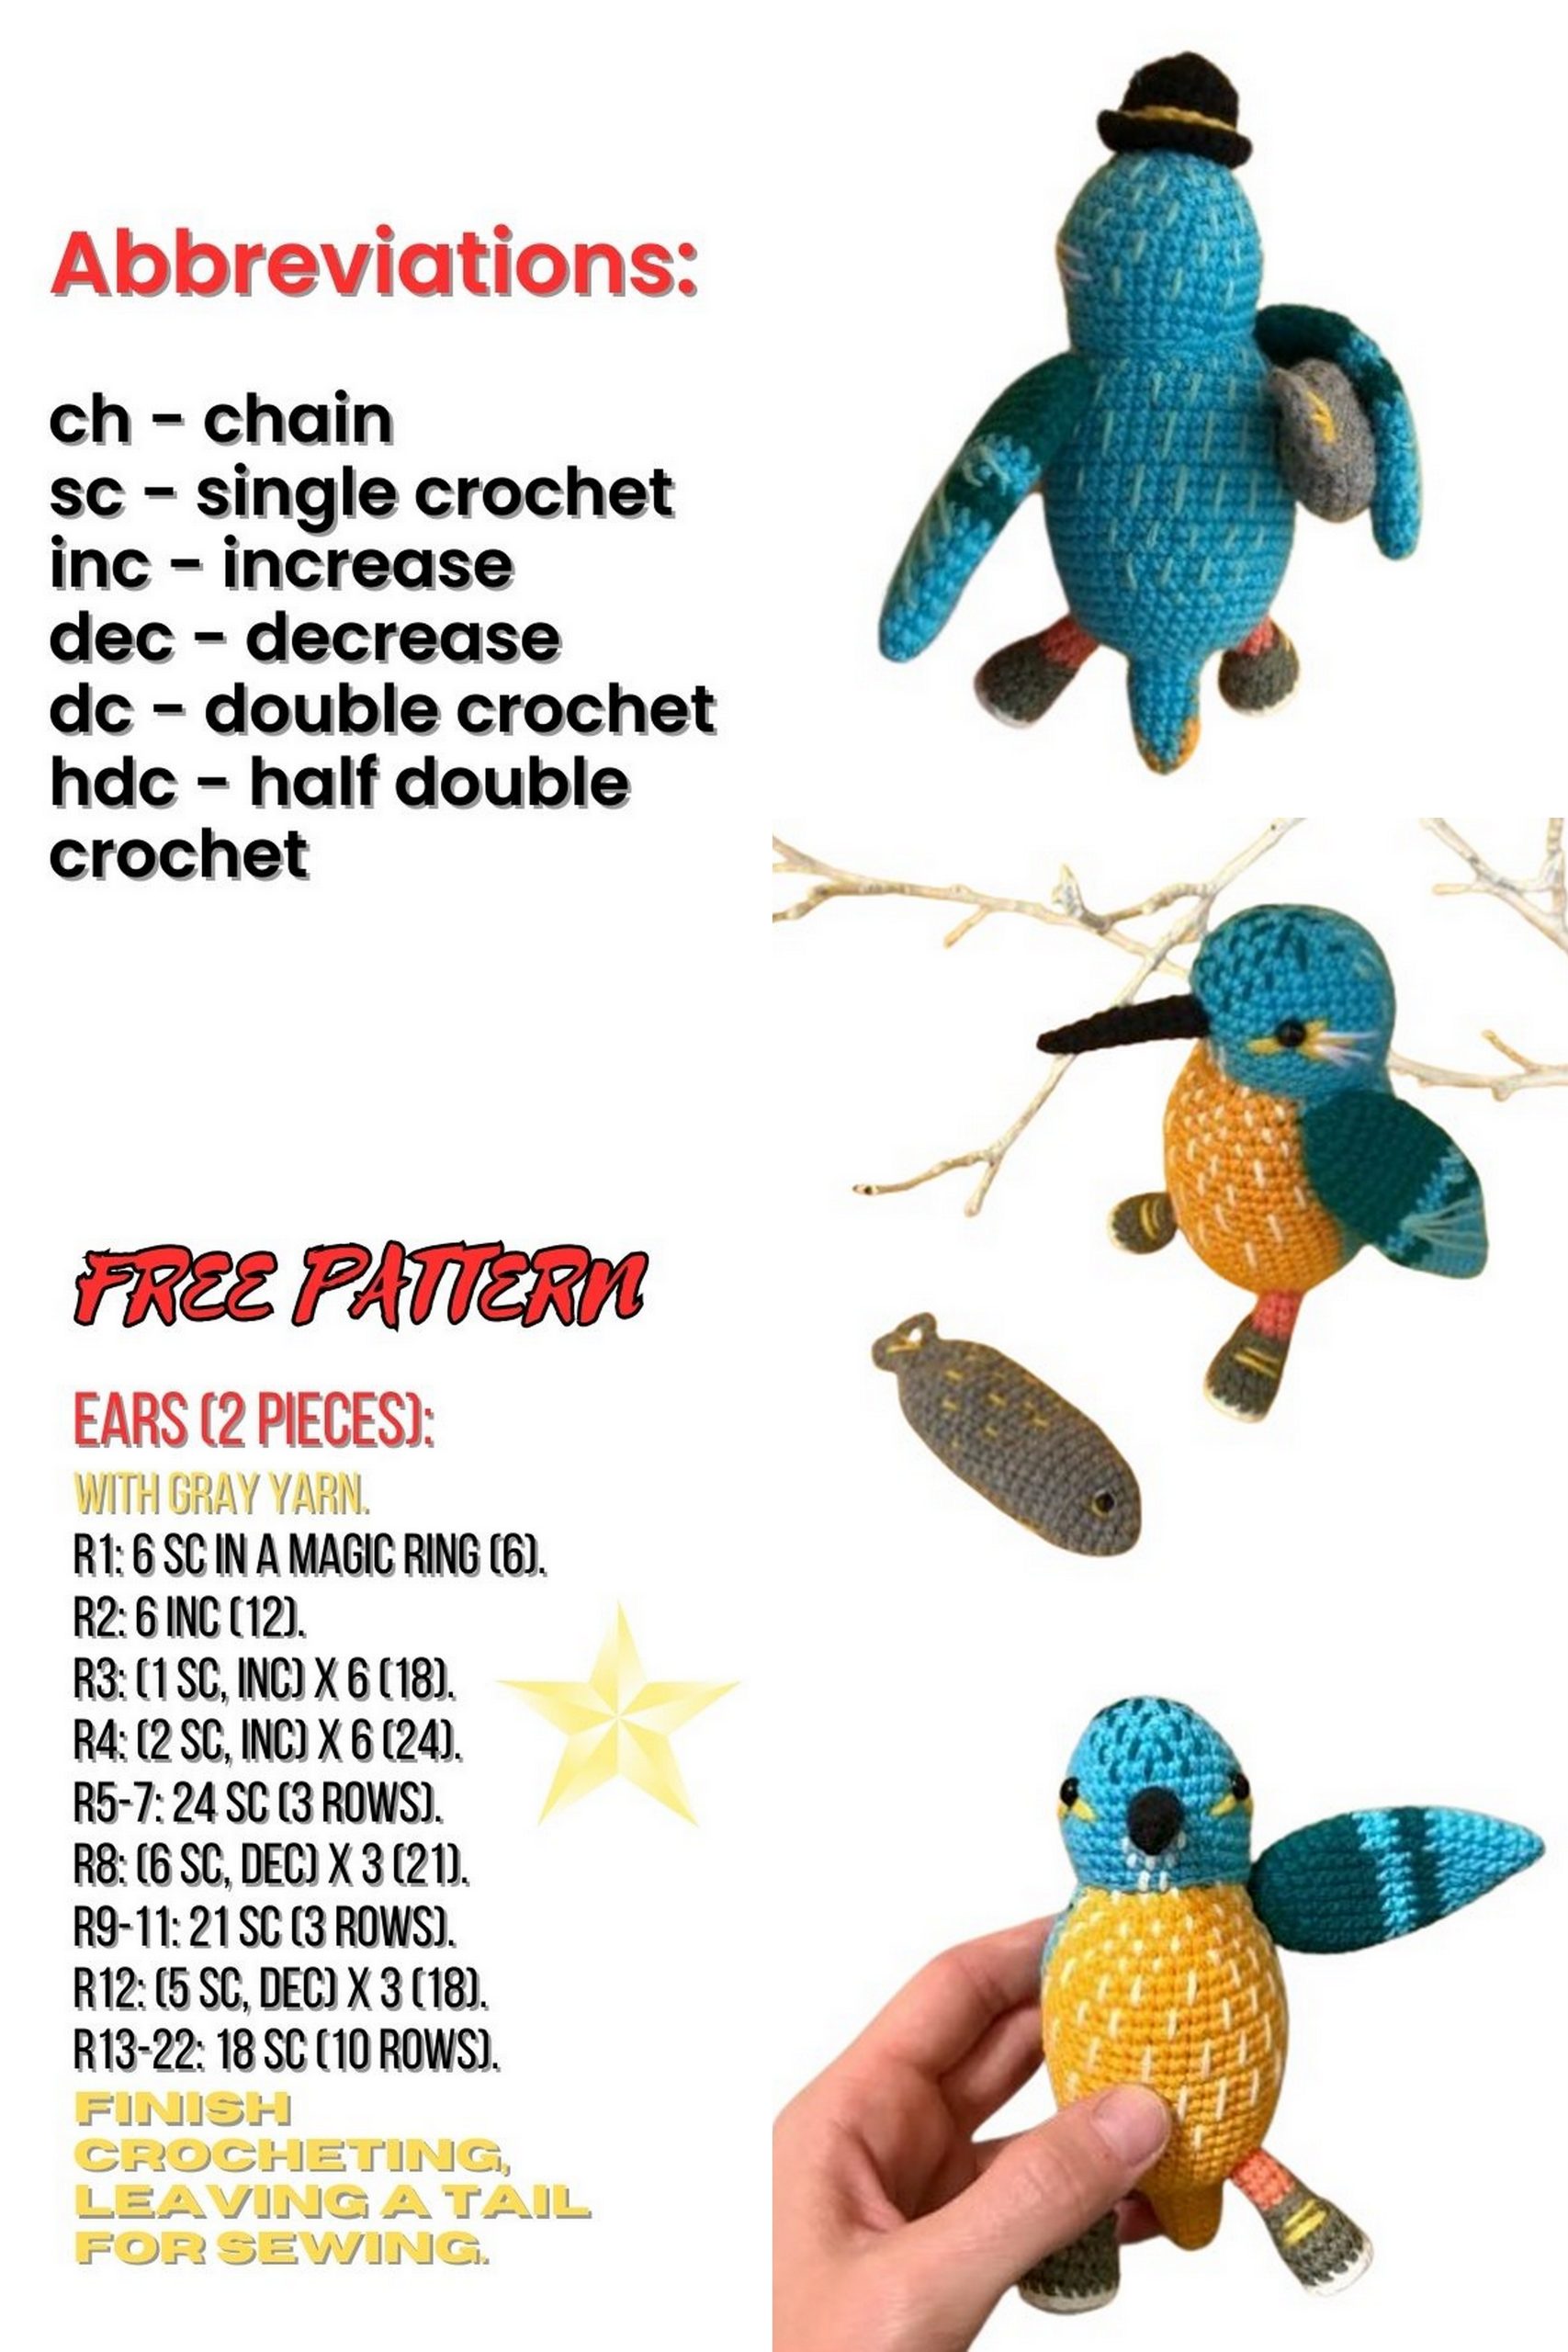
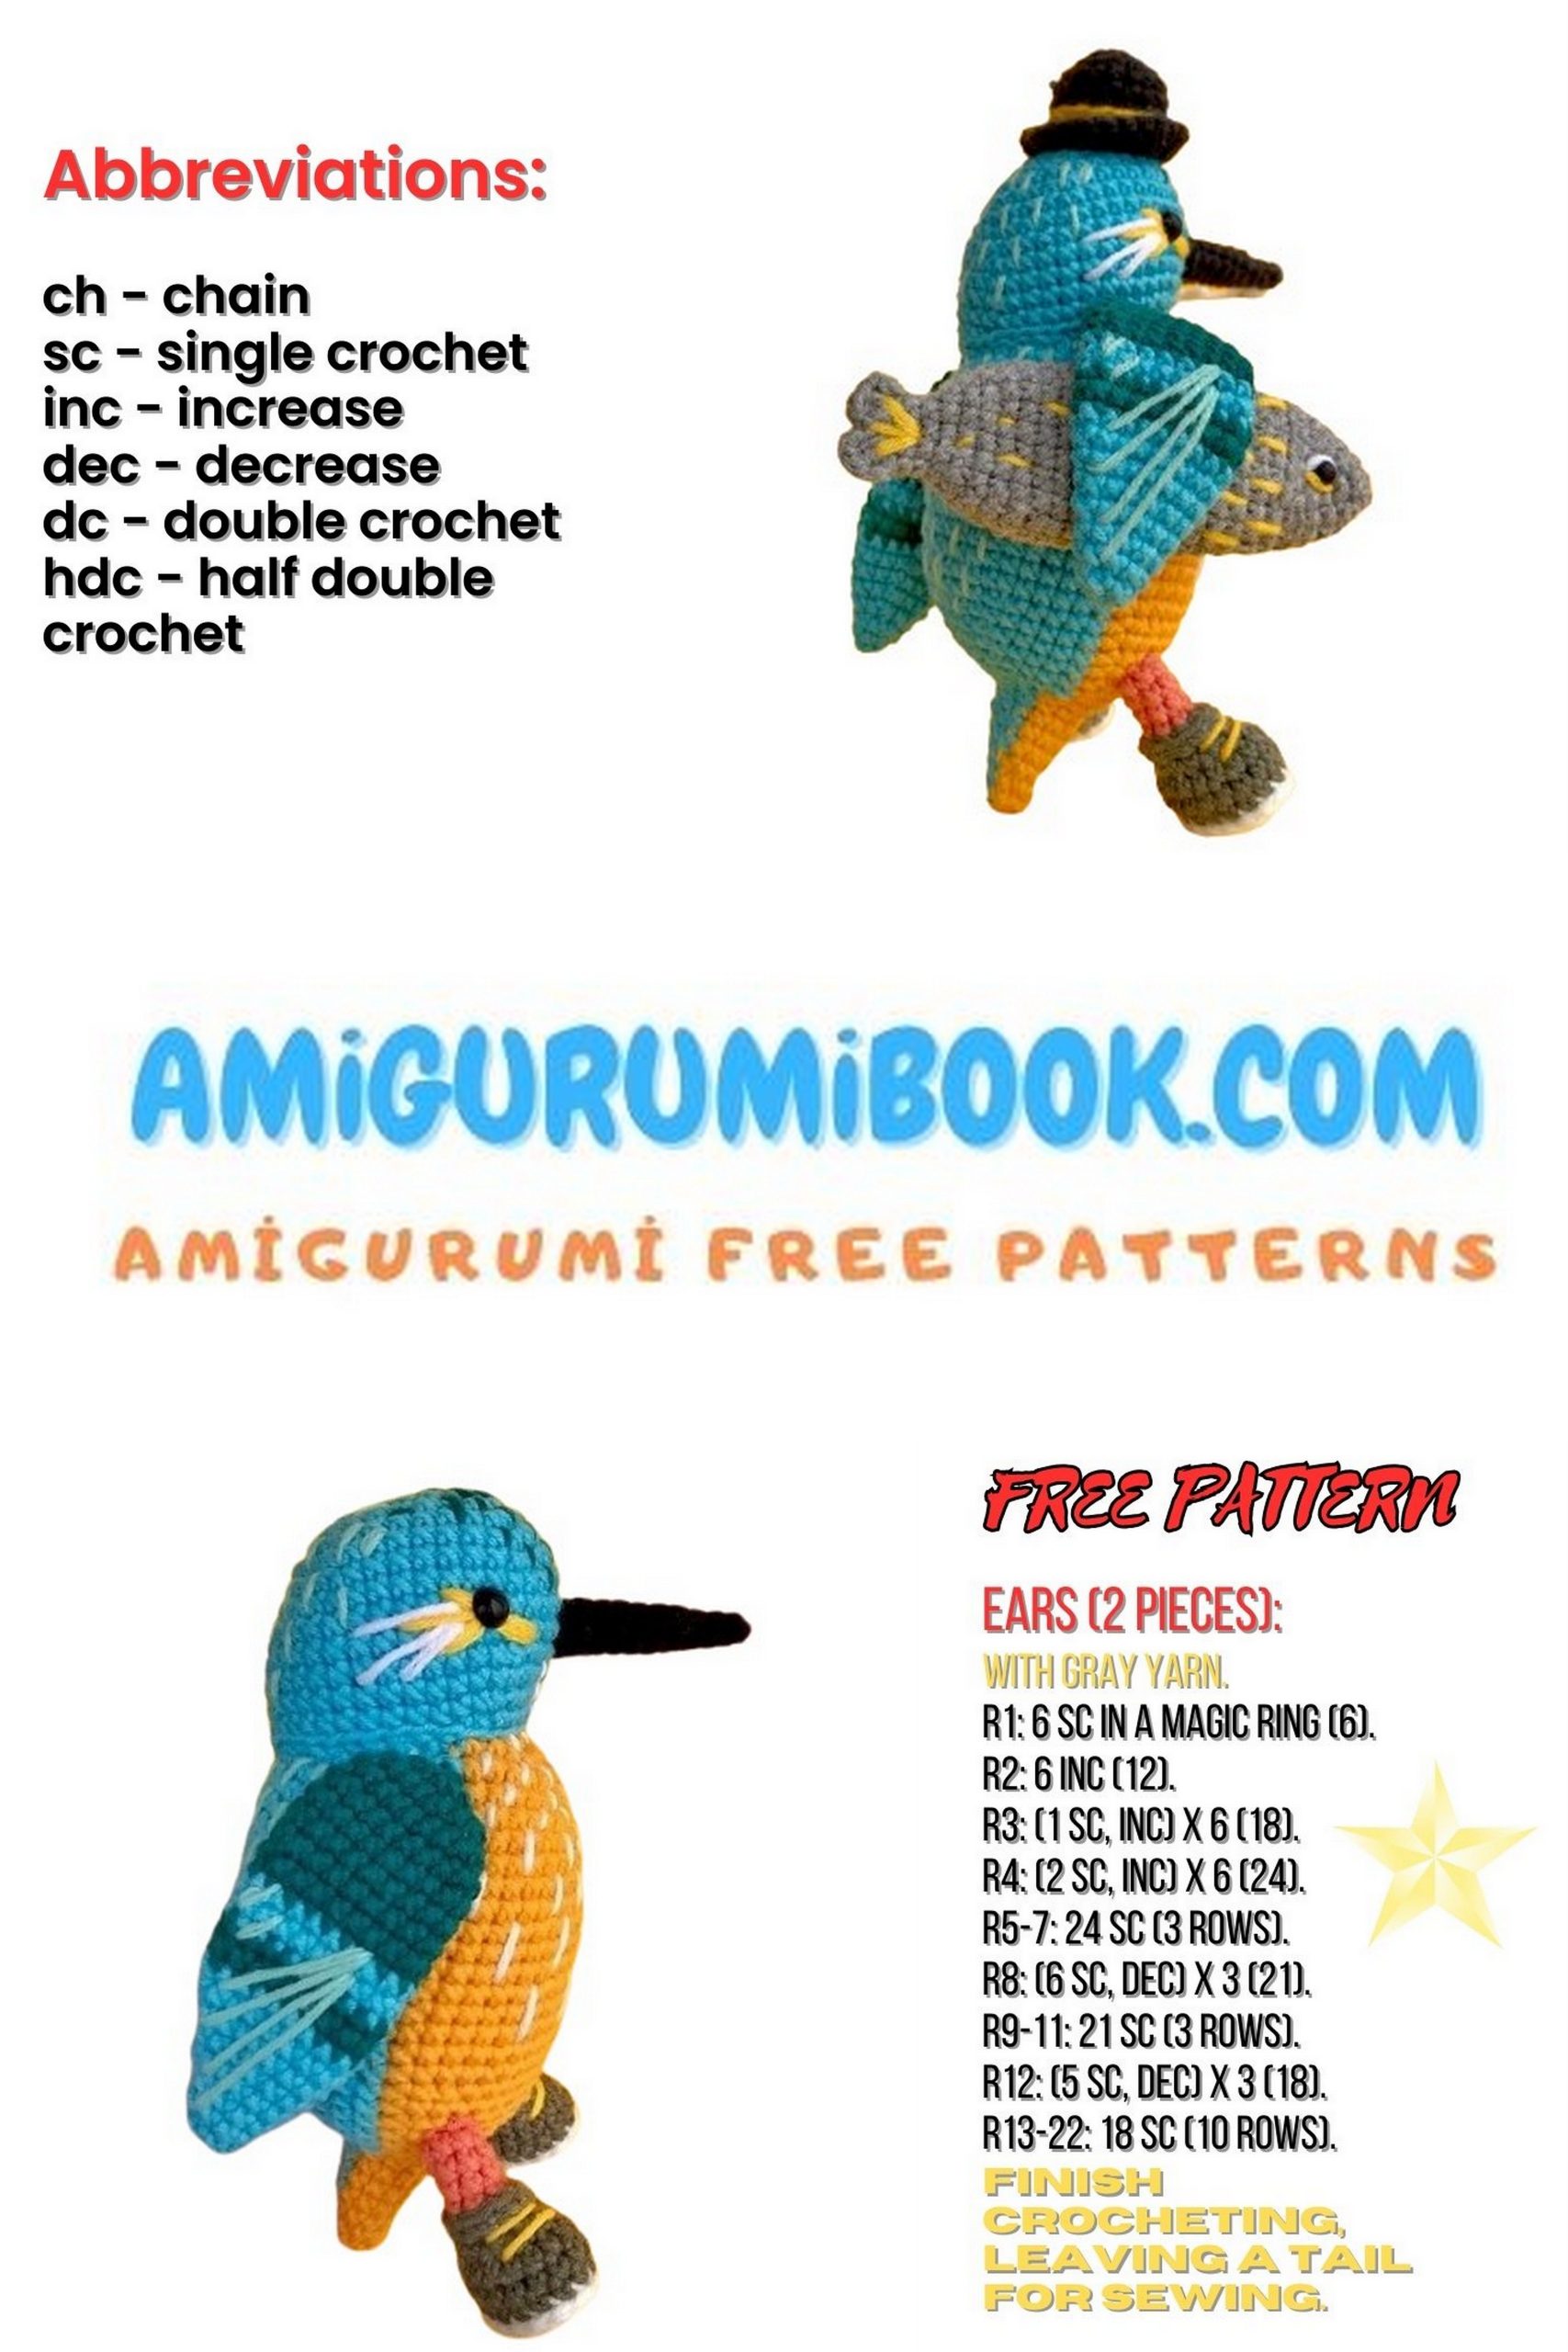
ABBREVIATIONS:
ch (chain stitch)
sc (single crochet)
hdc (half double crochet)
inc (increase)
dec (decrease)
sl st (slip stitch)
PATTERN
Amigurumi Bird Body
The body will be crocheted with two colors of yarn. In the amigurumi bird pattern, the part of the row that is crocheted with turquoise/yellow yarn is highlighted in the corresponding color.
1st row: 6 sc in a magic ring
2nd row: 6 inc (12)
3rd row: 1 sc, inc, (1 sc, inc) * 3, (1 sc, inc) * 2
4th row: 2 sc, inc, (2 sc, inc) * 3, (2 sc, inc) * 2
5th row: 3 sc, inc, (3 sc, inc) * 3, (3 sc, inc) * 2
6th row: 4 sc, inc, (4 sc, inc) * 3, (4 sc, inc) * 2
7th row: 6 sc, 18 sc, 12 sc
8th row: 5 sc, inc, (5 sc, inc) * 3, (5 sc, inc) * 2
9th-20th rows: 7 sc, 21 sc, 14 sc
21st row: 6 sc, dec, (6 sc, dec) * 2, 4 sc, 2 sc, dec, 10 sc
22nd row: 7 sc, 18 sc, 13 sc
23rd row: 5 sc, dec, (5 sc, dec) * 2, 4 sc, 10 sc
24th row: 6 sc, 16 sc, 12 sc
25th row: 1 sc, 4 sc, dec, (4 sc, dec) * 2, 3 sc, 1 sc, dec, 4 sc, dec, 3 sc
26th row: 1 sc, 3 sc, dec, (3 sc, dec) * 2, 3 sc, dec, 3 sc, dec, 3 sc
27th row: 1 sc, 2 sc, dec, (2 sc, dec) * 2, 2 sc, dec, 2 sc, dec, 3 sc
28th row: 1 sc, 1 sc, dec, (1 sc, dec) * 2, 1 sc, dec, 1 sc, dec, 3 sc
29th-33rd rows: 3 sc, 5 sc, 6 sc
34th row: 2 sc, dec, 3 sc, dec, 5 sc
35th row: 2 sc, dec, 2 sc, dec, 4 sc
36th row: 2 sc, dec, 1 sc, dec, 3 sc
Lightly stuff the base of the tail. Do not stuff the entire tail! Cut the yarn and close the hole.

TIP
Make sure your floats are not too tight. It’s better to make them looser, otherwise the body will cinch when stuffed. The photo shows an unsuccessful example where the floats were not loose enough.
Amigurumi Bird Head
Chain 6, then crochet back:
1st row: 4 sc, 3 sc in one stitch, 3 sc, inc
2nd row: inc, 3 sc, 3 inc, 3 sc, 2 inc
3rd row: 1 sc, inc, 3 sc, (1 sc, inc) * 3, 3 sc, (1 sc, inc) * 2 (24)
4th row: 2 sc, inc, 3 sc, (2 sc, inc) * 3, 3 sc, (2 sc, inc) * 2 (30)
5th row: 30 sc (30)
6th row: 3 sc, inc, 3 sc, (3 sc, inc) * 3, 3 sc, (3 sc, inc) * 2 (36)
7th-8th rows: 36 sc (36)
9th row: inc, 30 sc, inc, 4 sc (38)
10th row: 12 sc, dec, 6 sc, dec, 16 sc (36)
11th row: 1 sc, inc, 28 sc, inc, 5 sc (38)
12th row: 12 sc, dec, 6 sc, dec, 16 sc (36)
13th row: 11 sc, dec, 6 sc, dec, 15 sc (34)
Amigurumi Bird Legs
Chain 5 with white yarn.
1st row (white): Starting from the second chain from the hook: 3 sc, 3 sc in one stitch, 2 sc, inc
2nd row (white): inc, 2 sc, 3 inc in hdc, 2 sc, 2 inc
Attach gray yarn. Do not cut the white yarn, bring it to the front of the work.
3rd row: 16 sc in the back loop
4th-5th rows: 16 sc
6th row: dec, 1 sc, 4 dec, 1 sc, 2 dec (9)
7th row: in the back loop: 2 sc, 2 dec, 3 sc (7)
Stuff the boot.
8th-11th rows (coral): 7 sc
With the milk-colored yarn left at the beginning, crochet around the sole 1 row of sl st in the front loop of the 2nd row; close the circle, cut the yarn. Attach the gray yarn to the front loop of the 6th row, make a chain, crochet 10 sc; close the circle, cut the yarn.
Sew the legs at the level of the 23rd-25th rows, with a distance of 10 stitches between the legs.
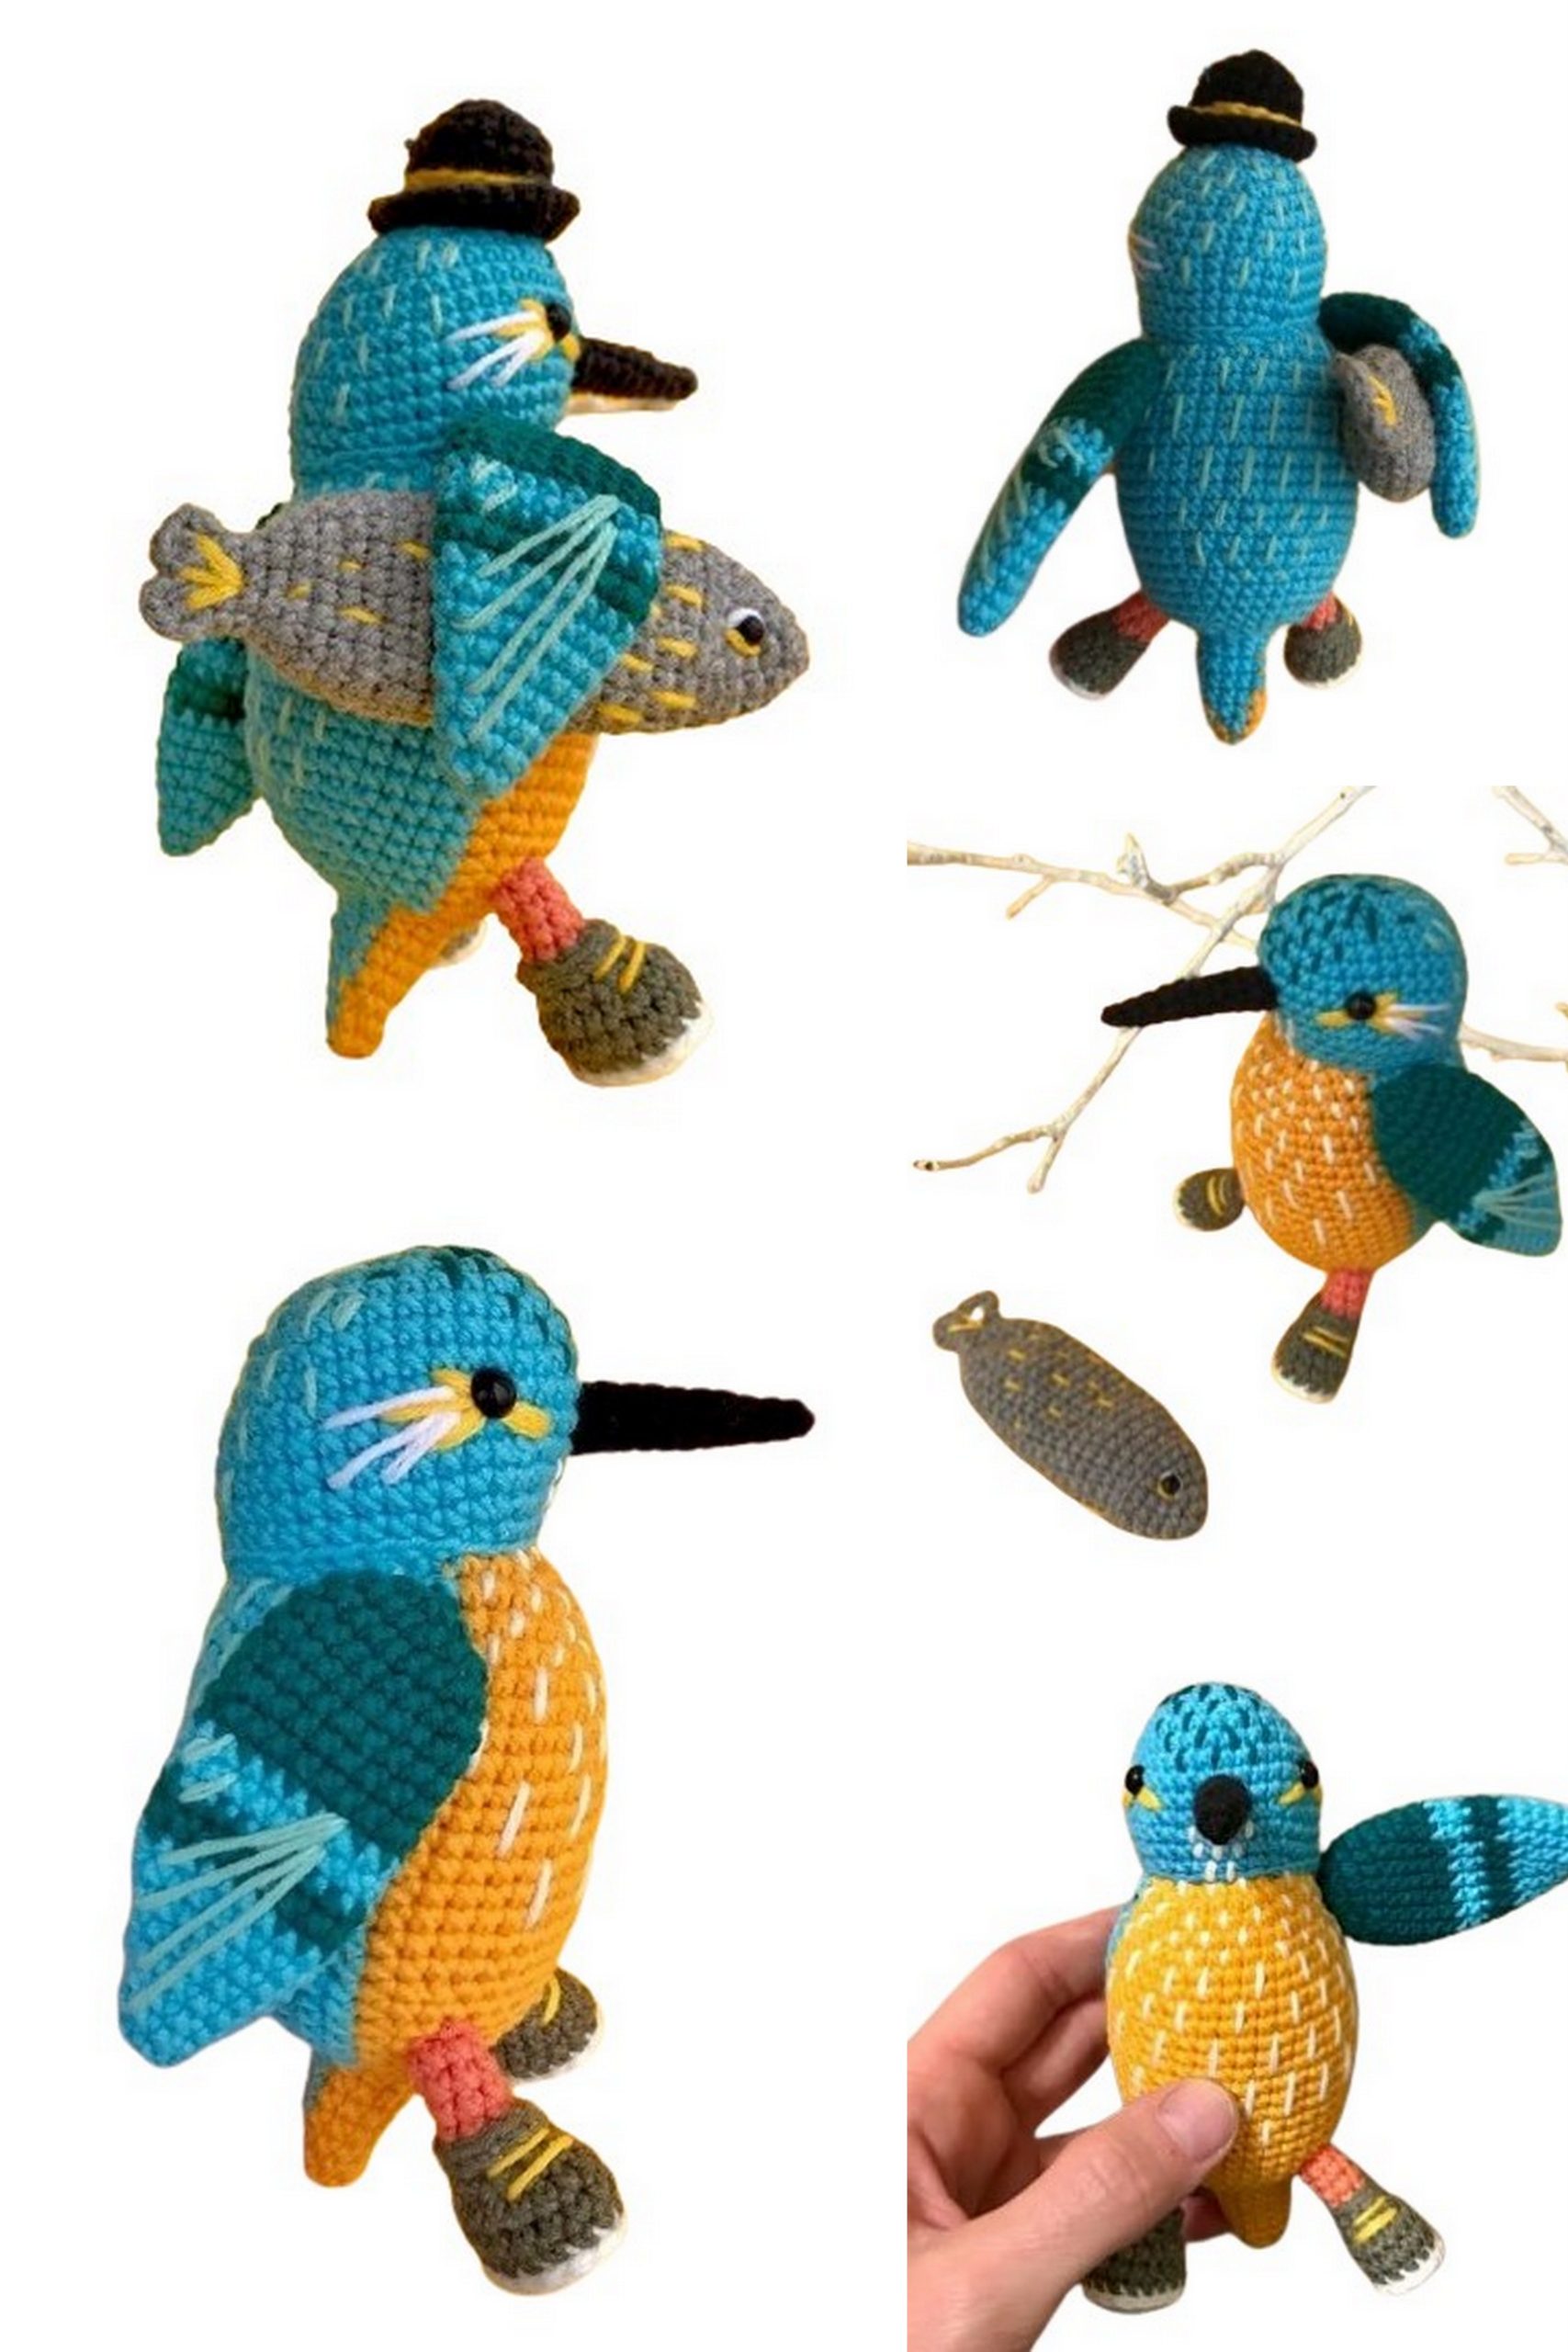
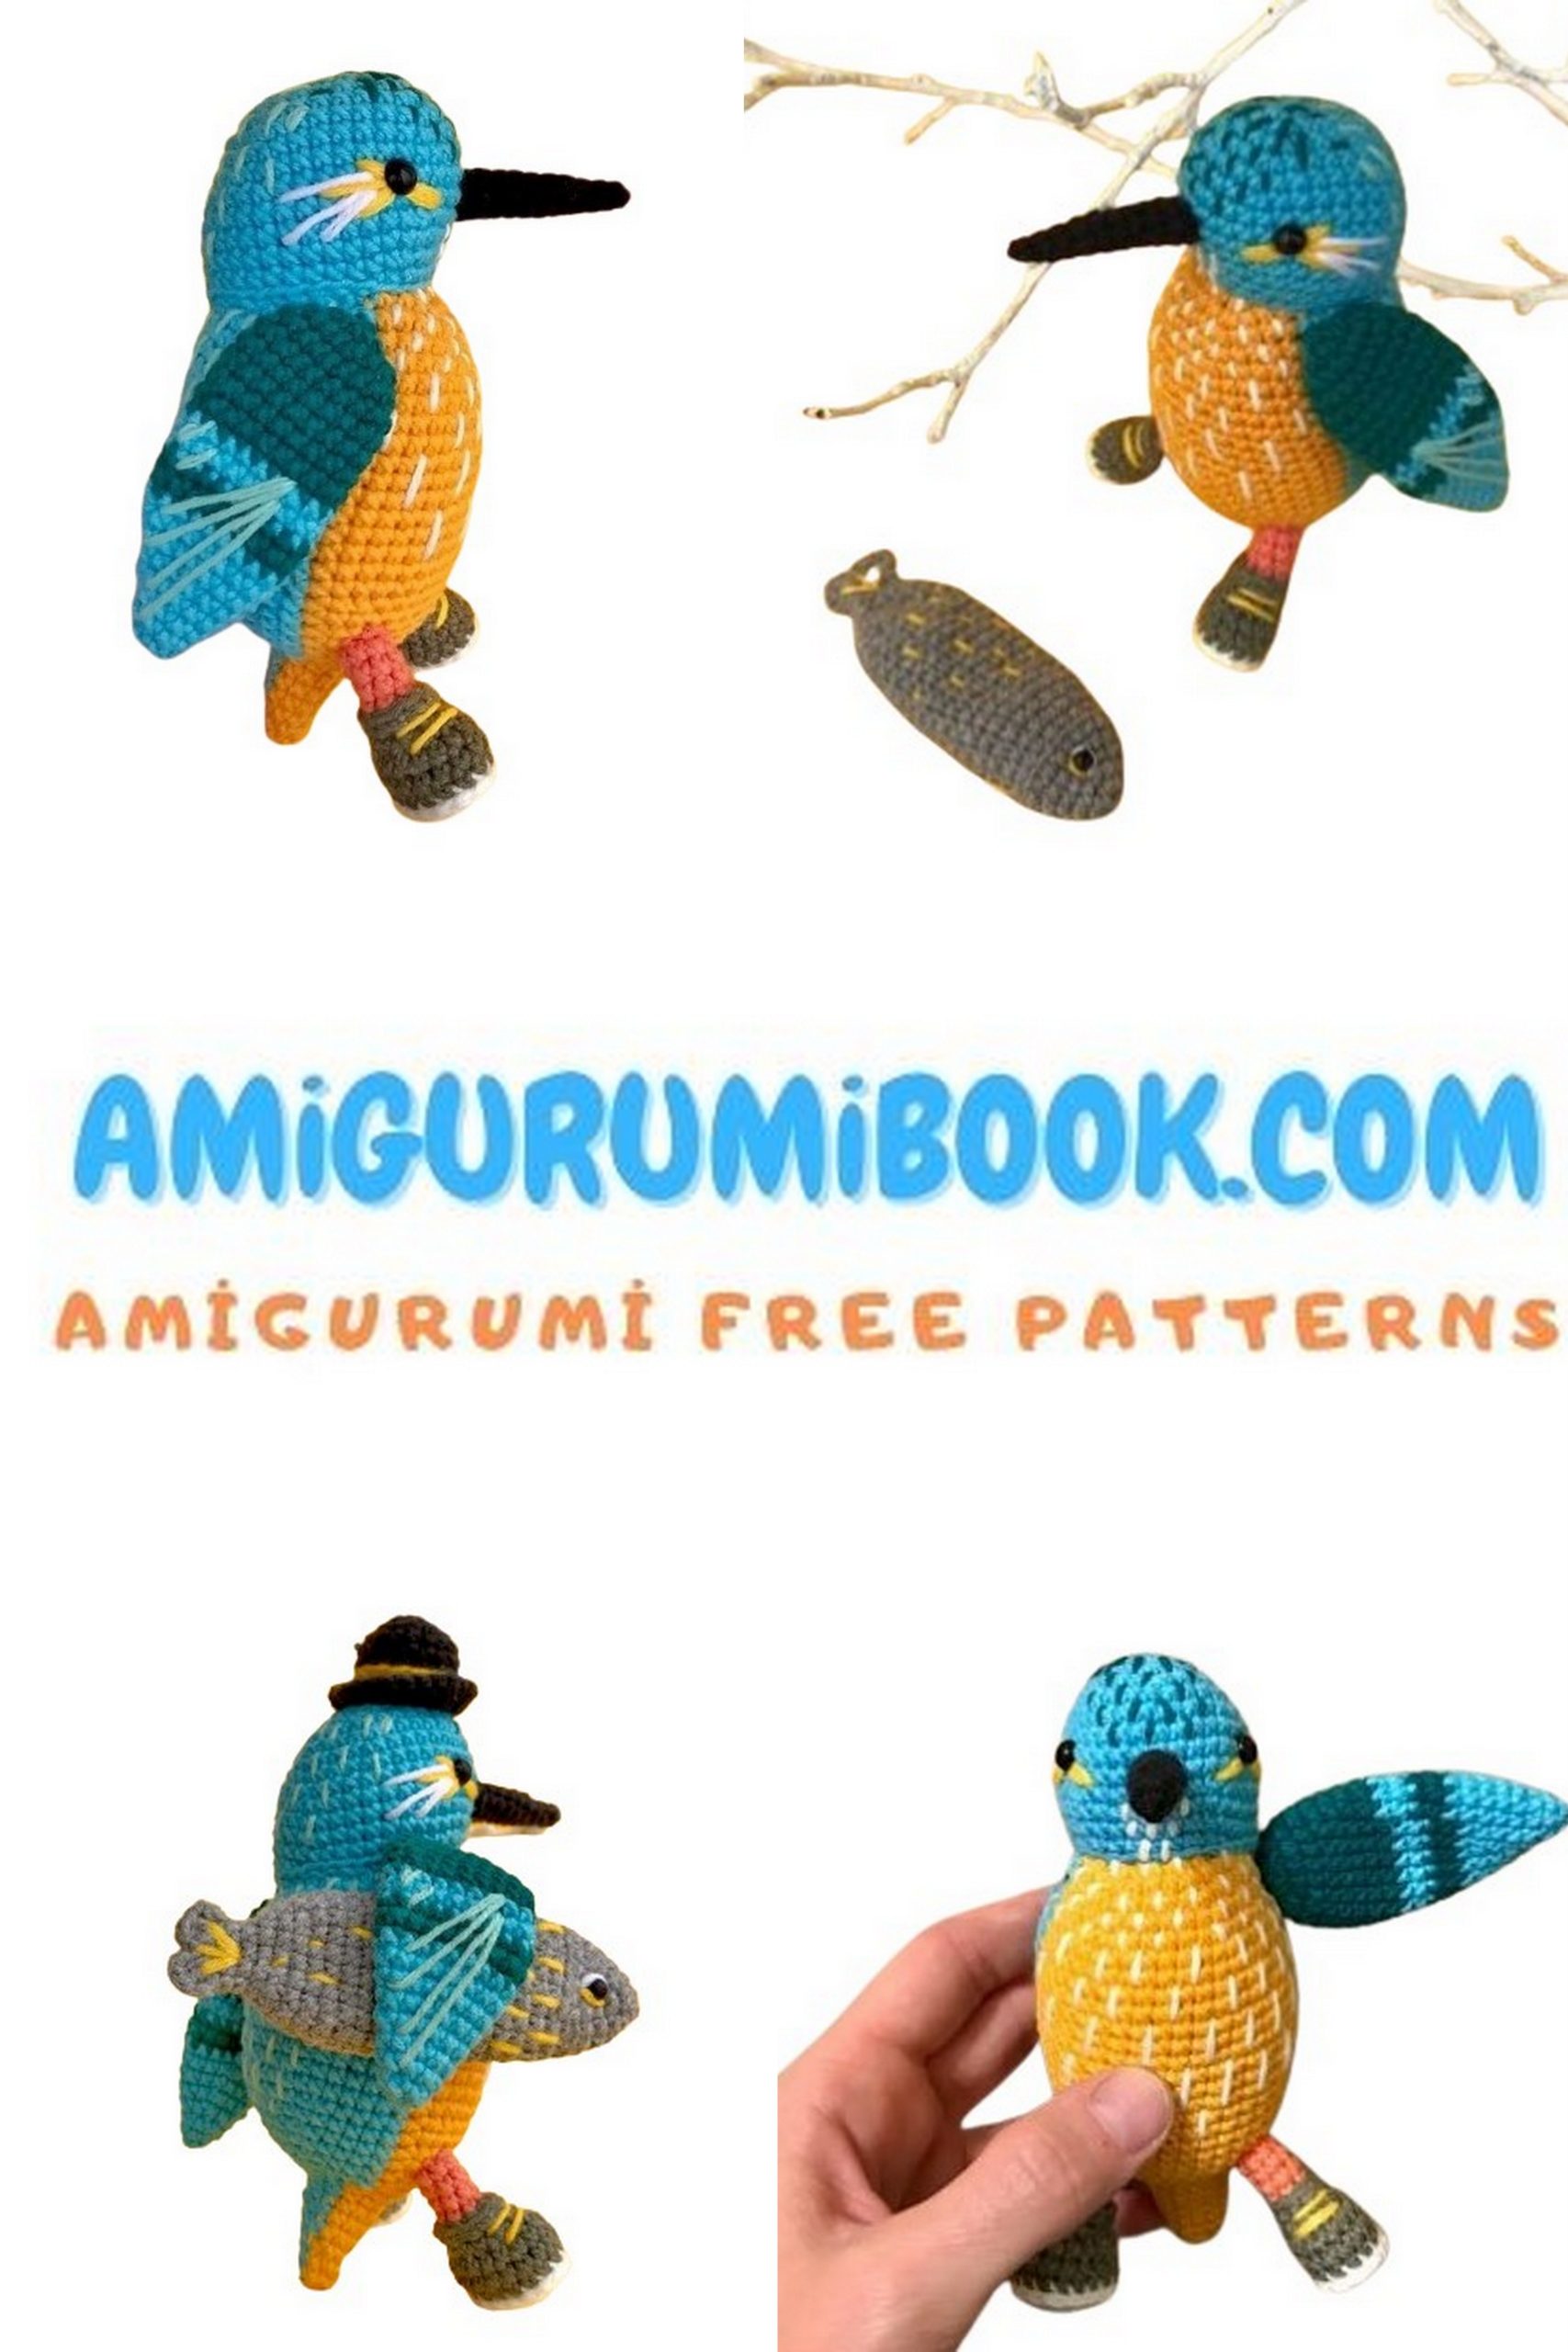
BEAK (black)
Chain 5, close into a ring. Crochet in a spiral:
1st-7th rows: 5 sc
8th row: dec, 3 sc
9th row: 4 sc
10th row: dec, 2 sc
Close the hole. Lightly stuff using a toothpick. Sew between the 8th and 10th rows of the head.
Amigurumi Bird Wing
1st row (emerald): 6 sc in a magic ring
2nd row (emerald): 6 inc (12)
3rd row (emerald): (1 sc, inc) * 6 (18)
4th-9th rows (emerald): 18 sc (18)
10th-11th rows (turquoise): 18 sc (18)
12th-13th rows (emerald): 18 sc (18)
14th row (turquoise): 18 sc (18)
15th row (turquoise): (4 sc, dec) * 3 (15)
16th row (turquoise): 15 sc (15)
17th row (turquoise): (3 sc, dec) * 3 (12)
18th row (turquoise): 12 sc (12)
19th row (turquoise): (1 sc, dec) * 3 (9)
20th row (turquoise): 9 sc (9)
TIP
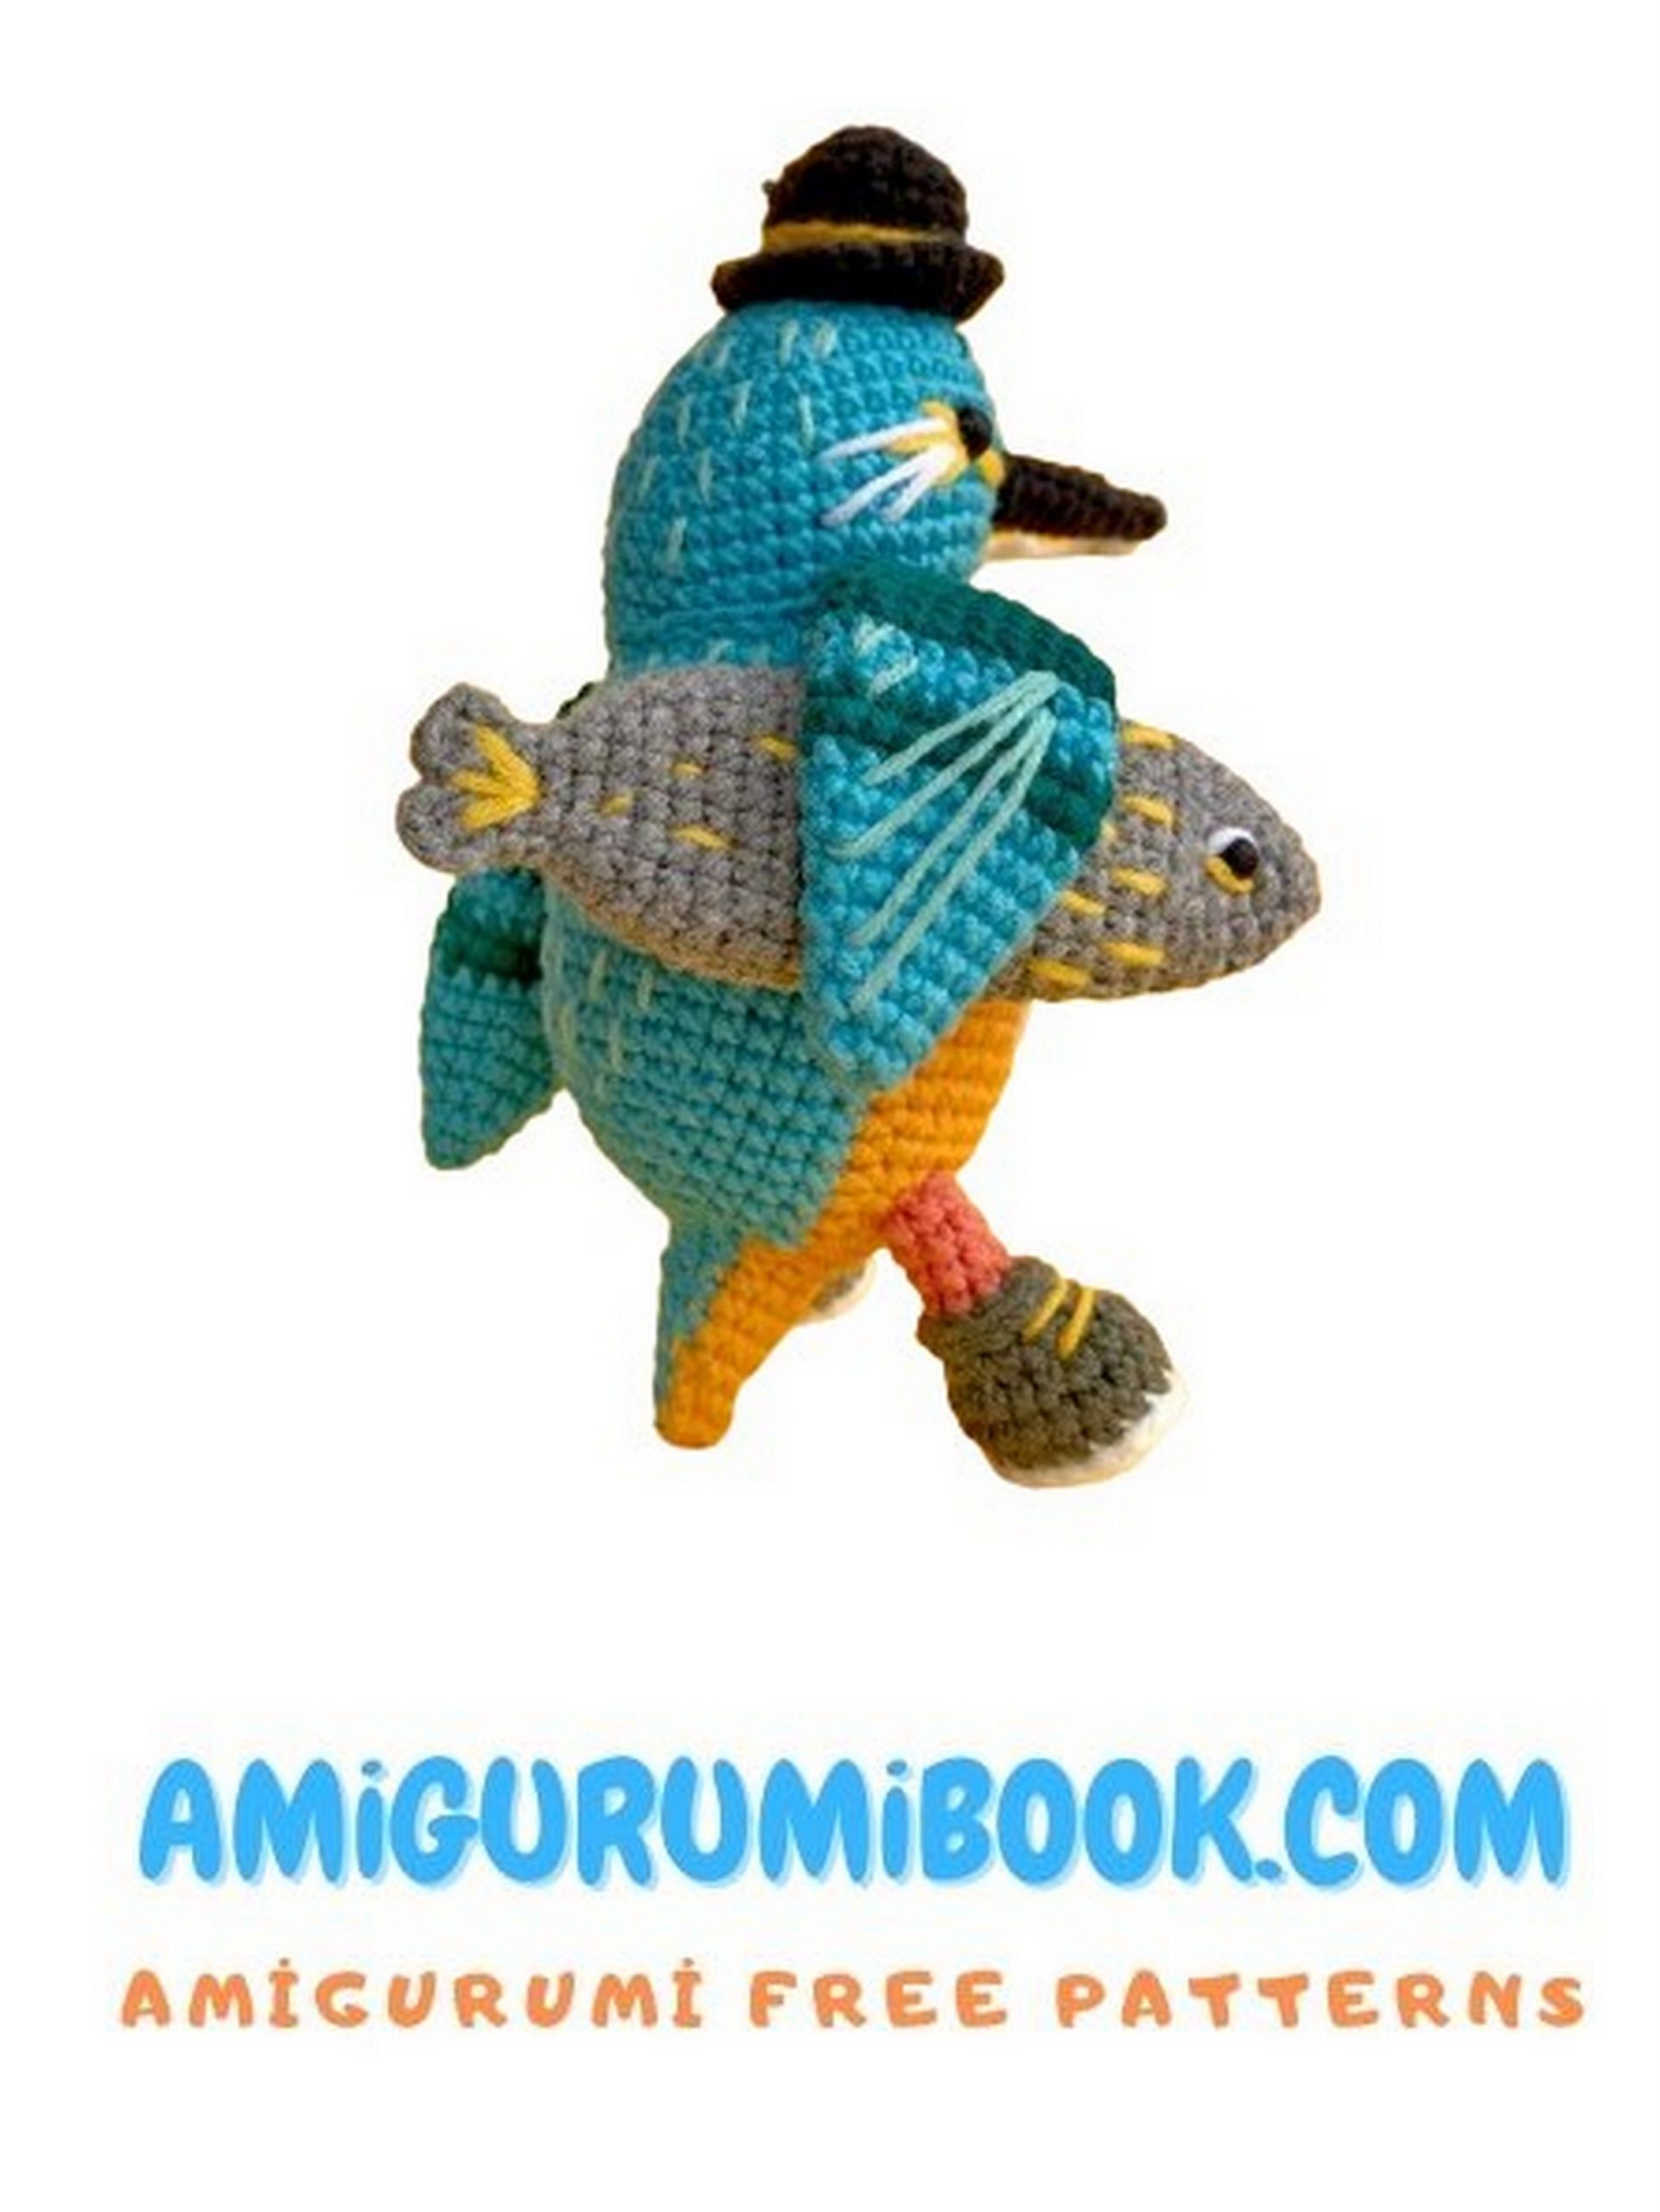
For my kingfisher, I made movable wings using a piece of wire approximately 16.5 cm long. After all, it has to hold onto fish somehow!
FISH
1st row: 4 sc in a magic ring
2nd row: 4 inc (8)
3rd row: (1 sc, inc) * 4 (12)
4th row: (2 sc, inc) * 4 (16)
5th row: (3 sc, inc) * 4 (20)
6th row: 20 sc (20)
7th row: in the back loop: 20 sc (20)
8th-21st rows: 20 sc (20)
22nd row: (3 sc, dec) * 4 (16)
23rd row: 16 sc (16)
24th row: (2 sc, dec) * 4 (12)
25th row: (1 sc, dec) * 4 (8)
26th-27th rows: 8 sc (8)
28th row: fold the piece in half, then 2 ch, 2 dc in one stitch, crocheting both sides together; 2 ch, sl st.
Amigurumi Bird Tail
1st row: 6 sc in a magic ring
2nd row: 6 inc (12)
3rd row: (1 sc, inc) * 6 (18)
4th-5th rows: 18 sc (18)
6th row: (2 sc, inc) * 6 (24)
7th row: (3 sc, inc) * 6 (30)
8th-9th rows: 30 sc (30)
10th row: (4 sc, inc) * 6 (36)
11th row: (5 sc, inc) * 6 (42)
12th-13th rows: 42 sc (42)
14th row: (6 sc, inc) * 6 (48)
15th row: (7 sc, inc) * 6 (54)
16th row: 54 sc (54)
17th row: (8 sc, inc) * 6 (60)
18th row: 60 sc (60)
19th row: (9 sc, inc) * 6 (66)
20th row: 66 sc (66)
FINAL ASSEMBLY
Head and Body Attachment: Sew the head to the body, making sure the seams are neat and secure.
Fitting the Beak: Sew the beak between the 8th and 10th rows of the head.
Attaching the Eyes: Secure the eyes on the head, placing them symmetrically on either side.
Replacing the Wings: Sew the wings onto the body at the desired position, making sure they are symmetrical.
Attaching the Legs: Sew the legs onto the body at the 23rd-25th row, ensuring they are evenly spaced.
Attaching the Tail: Sew the tail to the back of the body.
DETAILS
Wing Mobility: To make the wings movable, insert a piece of wire approximately 16.5 cm long into the wings. This will allow the wings to be posed as if the kingfisher is holding onto a fish.
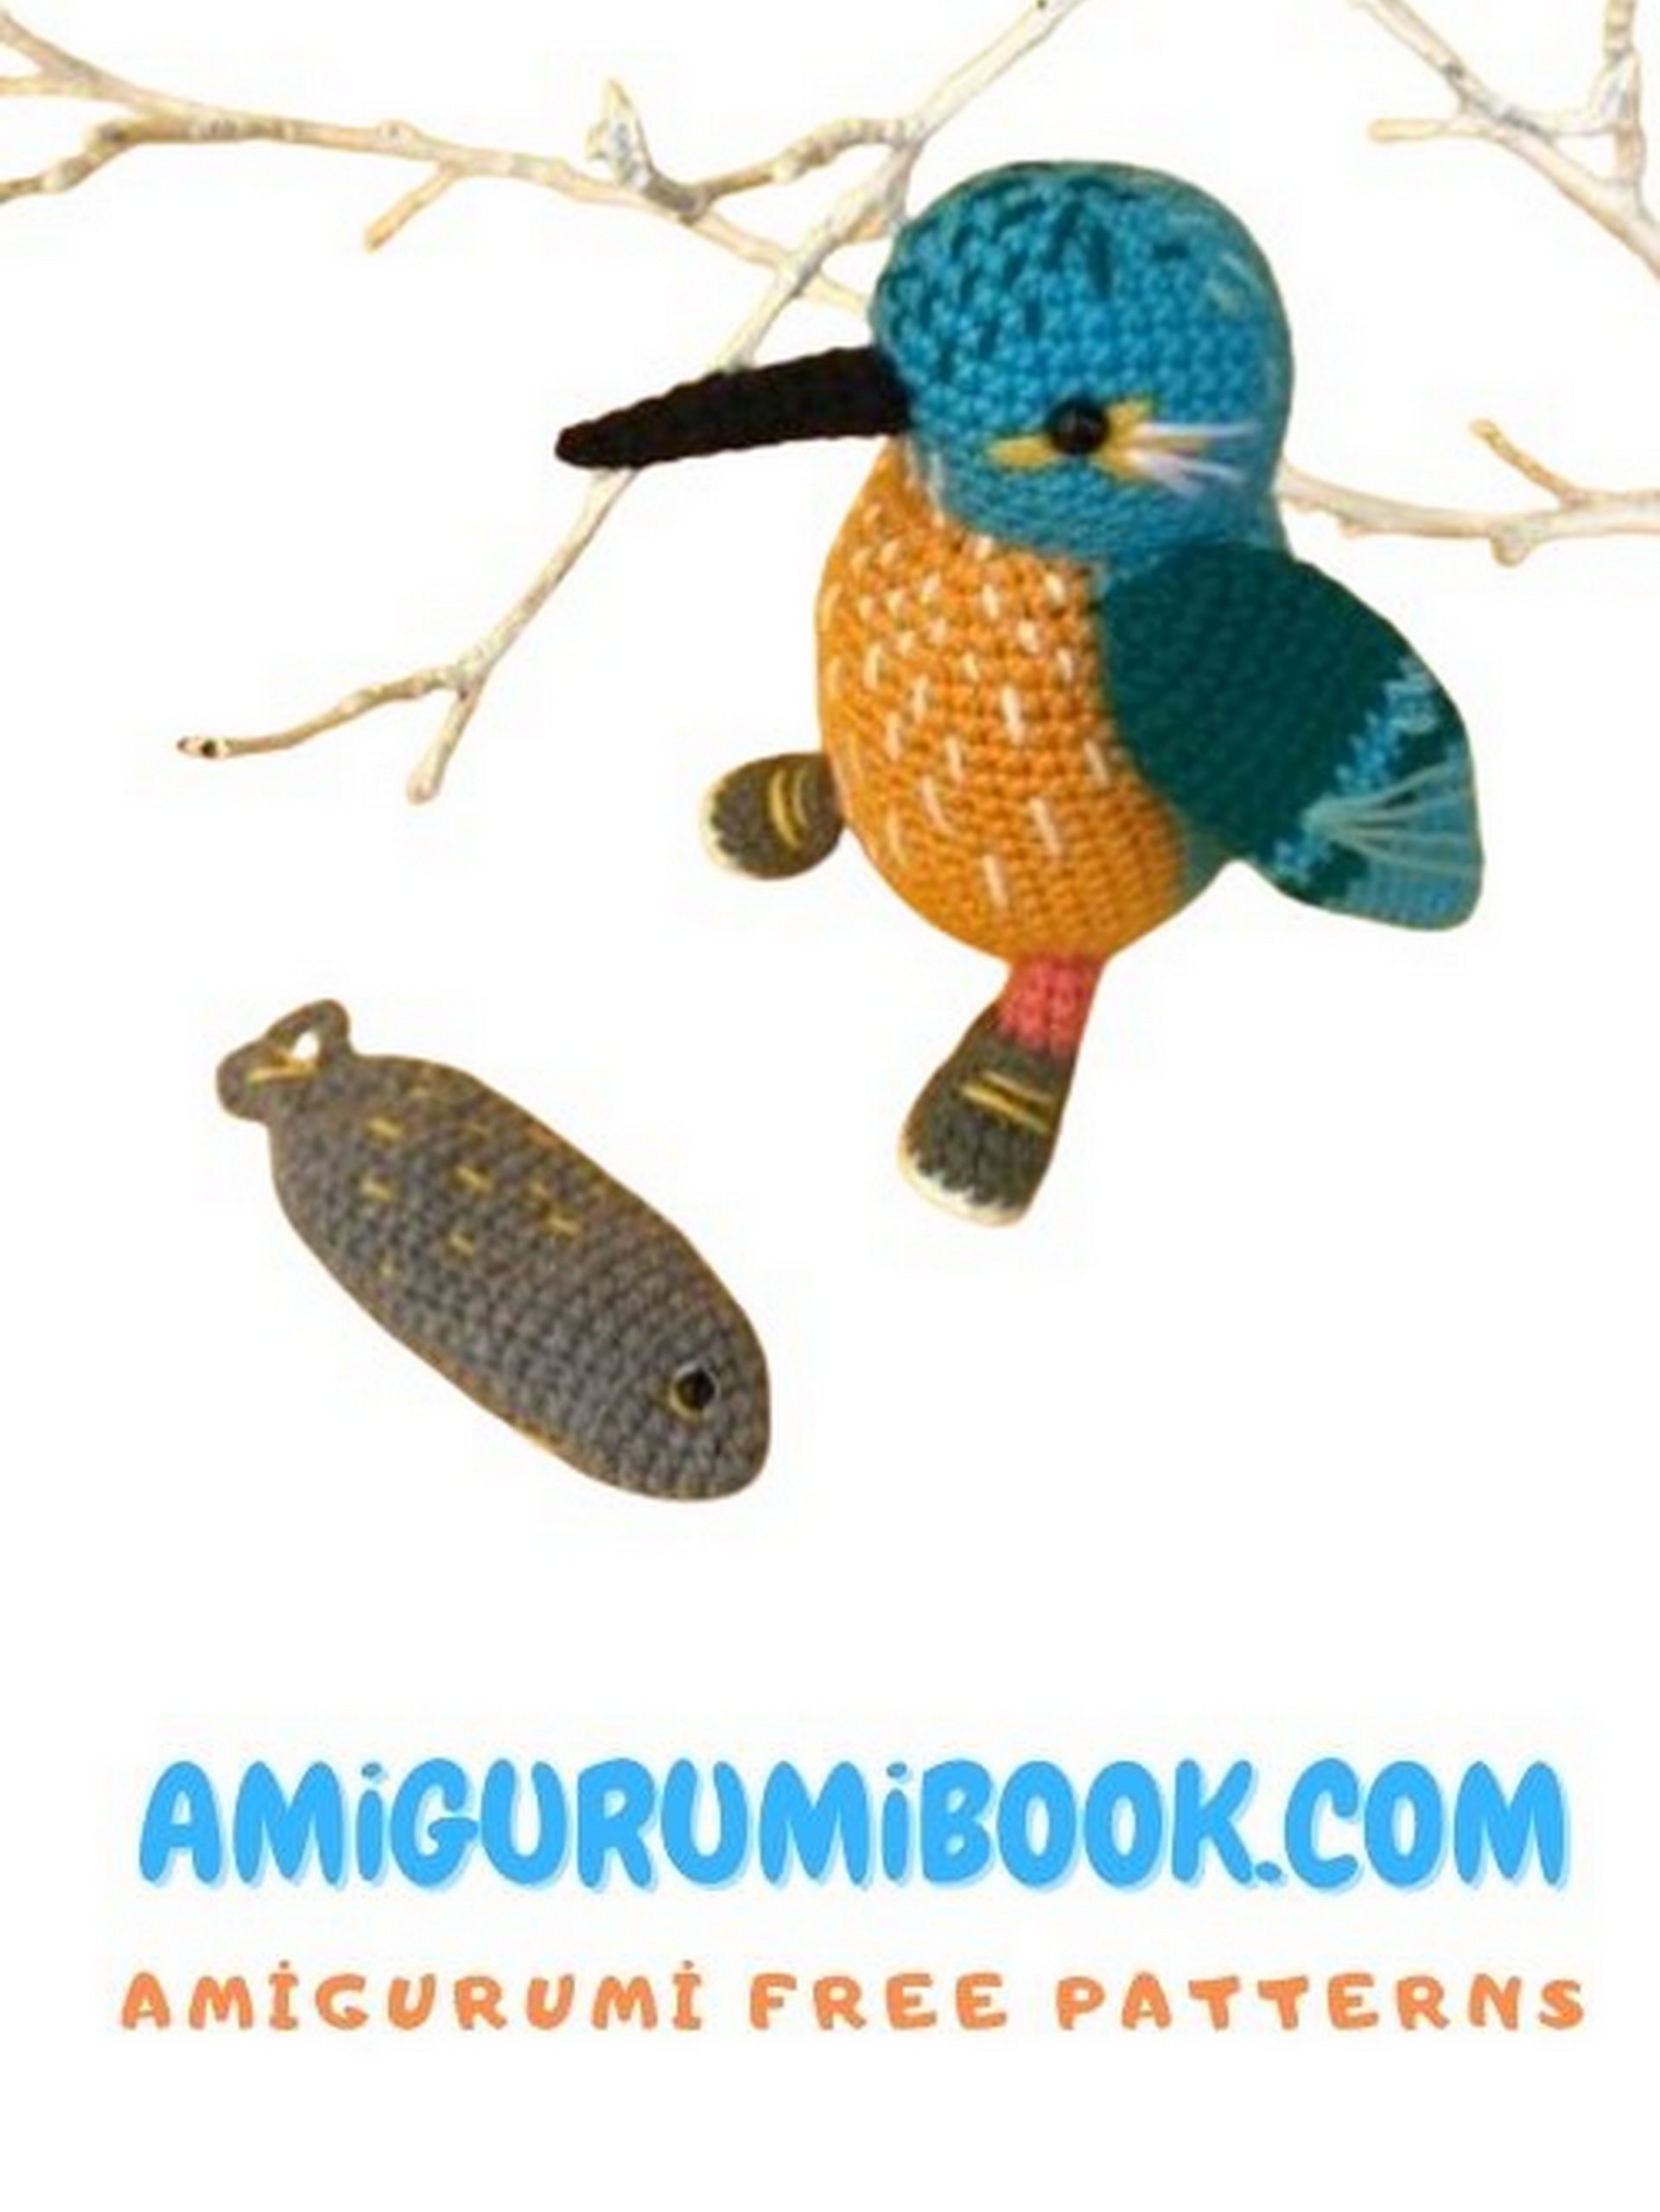
Fish: Crochet a small fish following the provided pattern and attach it to the kingfisher’s beak or legs for a realistic touch.
TIPS FOR CROCHETING
Floats: Ensure that any floats (carried yarns) are loose enough to prevent the body from cinching when stuffed.
Stuffing: Lightly stuff the parts as you go, paying attention to avoid overstuffing, especially the tail, to maintain the correct shape and flexibility.
Seam Neatness: When sewing parts together, use a whip stitch or ladder stitch for neat, nearly invisible seams.
Enjoy creating your amigurumi kingfisher!