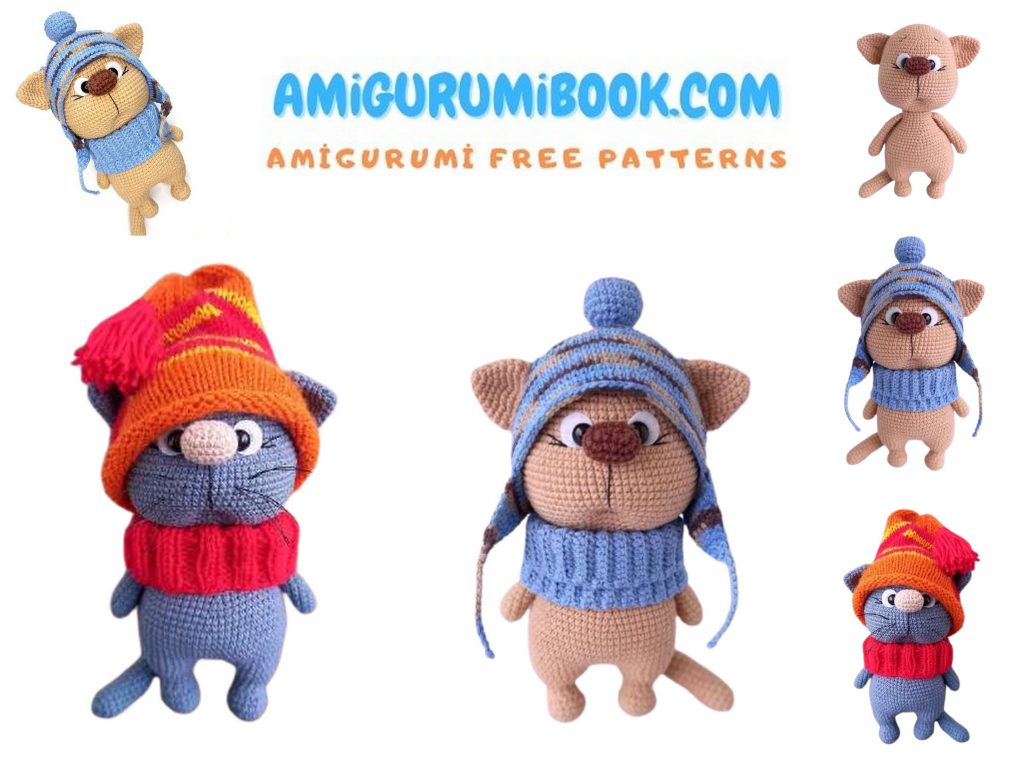
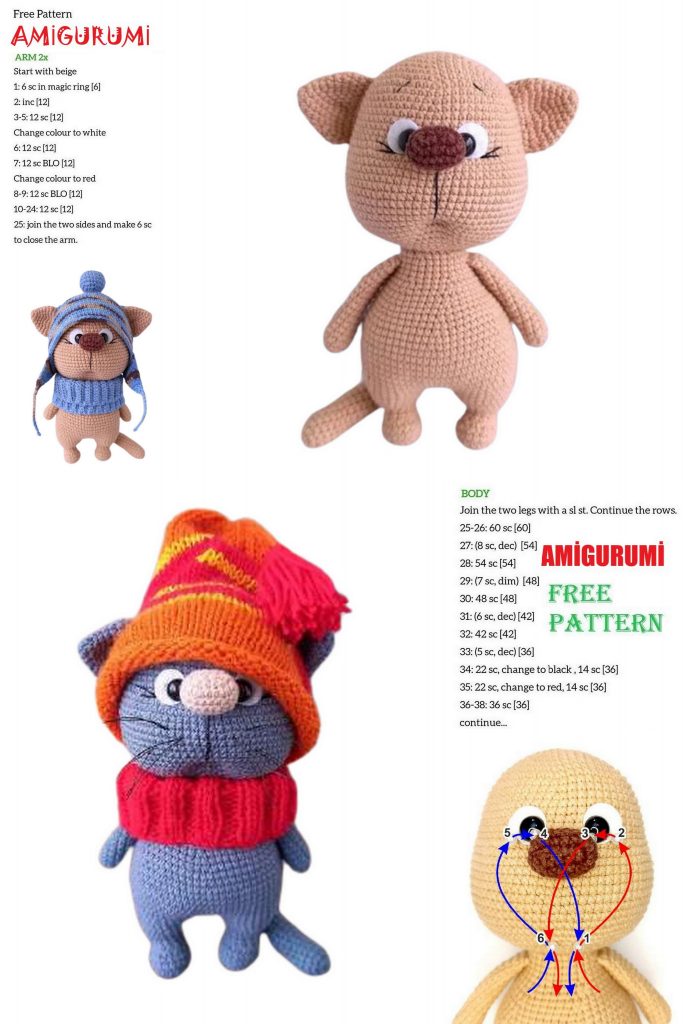
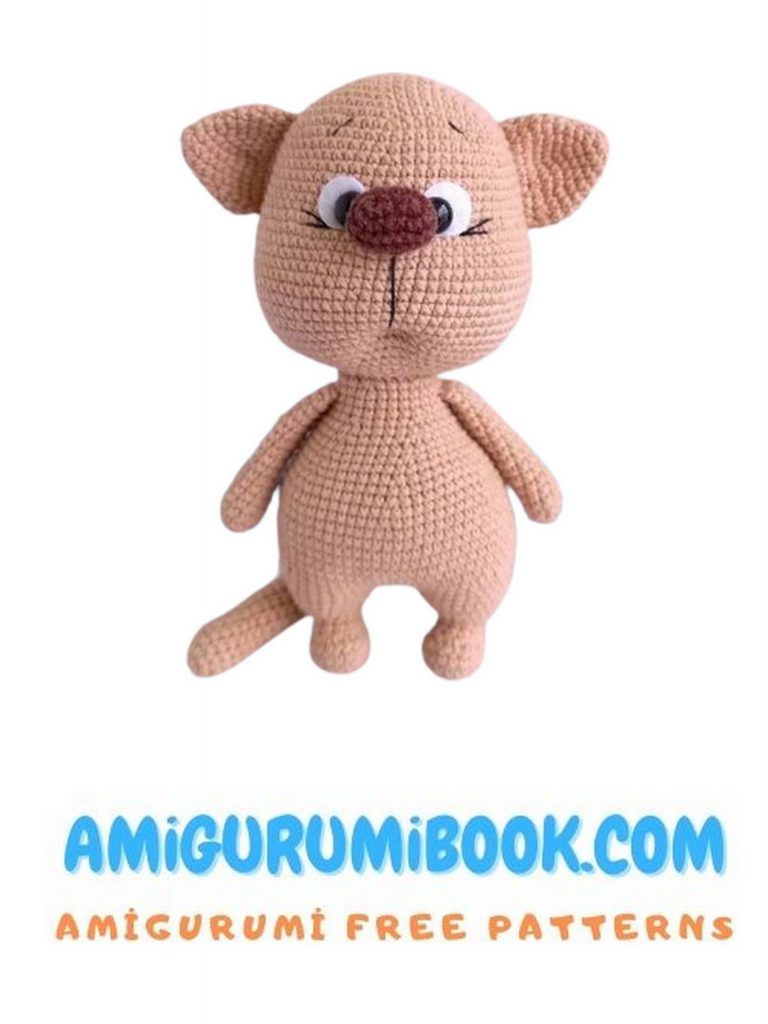
The Tangle Cat Amigurumi Free Pattern offers a fun and creative way to craft an adorable crochet cat with a unique, twisted design. Perfect for both beginners and experienced crafters, this pattern provides clear instructions to bring your own charming Tangle Cat to life. free crochet patterns
You may also like more amigurumi patterns.
Are you ready to embark on a crochet adventure and create your very own adorable feline friend? Look no further! Introducing the Tangle Cat Amigurumi Free Pattern, a delightful project that will bring joy to both your crafting process and the end result.
With this free pattern, you can crochet a charming toy cat that is perfect for cuddling and playtime. Whether you’re a seasoned crocheter or just starting out, this pattern is suitable for all skill levels. Follow the step-by-step instructions and create a unique handmade gift or a cherished addition to your own collection.
“This description includes a complete description of the process of knitting a toy, a hat, a snood, and intermediate photos of the details.
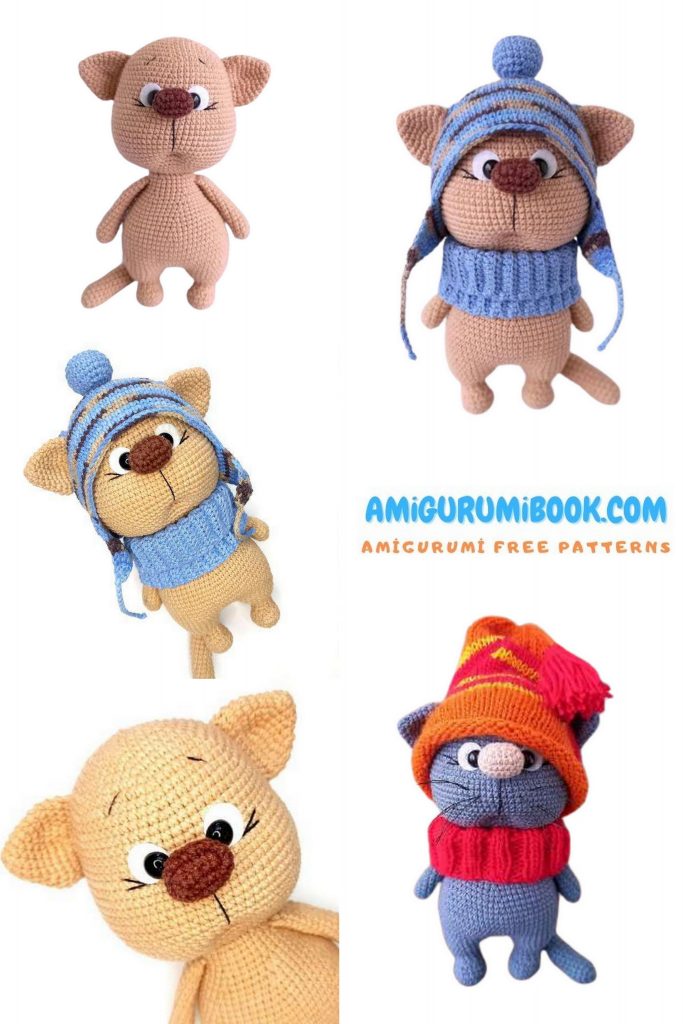
The toy is knitted from bottom to top using “half-cross stitches” in a spiral (unless otherwise specified). The hat and snood are crocheted using “checkmarks.”
The upper paws, tail, and nose are knitted, and the head and ears are sewn on.
When using the specified materials, the height of the finished toy is approximately 20 cm.”
Mark the beginning of each row with a contrasting thread that is thinner than the one you are using to knit the toy.
This description does not contain tutorial lessons and is intended for those who already have basic crochet skills.
This description is my original work and is completely FREE.
You are free to use the toys created from this description as you wish. When publishing photos of finished works, I would appreciate it if you mention me as the author of the description.
Materials and tools needed:
- A crochet hook suitable for your yarn.
- YarnArt JEANS yarn in any colors of your choice. I used No. 07 for the main color and No. 70 for the nose.
- A small amount of black or dark brown thread for facial details. Choose a thinner thread than the main one you’ll be using to knit the toy. I used “Azhurnaya” from “Pekhorka” in No. 02 (black, 280m/50g). Avoid using the full thickness of YarnArt JEANS for embroidery as it may look coarse on the face. You can separate the threads.
- Stuffing material.
- 10mm safety eyes or sew-on or adhesive eyes (beads or half-beads of your choice).
- White felt circles with a diameter of 15mm for the whites of the eyes.
- Strong thread for tightening.
- Fishing line or waxed thread for whiskers (optional).
- Needle for sewing parts, scissors, pins, and marking thread.
- For the hat and snood, I used Yarnart Jeans Crazy No. 7202 and YarnArt JEANS No. 15.

Abbreviations:
MR – magic ring
sc – single crochet
ch – chain stitch
inc – increase
dec – decrease
sl st – slip stitch
(…)*X – repeat the instructions in parentheses X times
The number after the equal sign = indicates the final stitch count in the row.
PATTERN:
Front Paws:
Row 1: 5 sc in MR.
Row 2: 5 inc = 10 stitches.
Rows 3-16: 10 sc.
Only stuff the lower part. Fold it in half and crochet 5 sc through both walls. Fasten off and cut the yarn.
The paws will be knitted on.
Tail:
Row 1: 6 sc in MR.
Row 2: 6 inc = 12 stitches.
Rows 3-27: 12 sc.
Slightly stuff it as you go. Fold it in half and crochet 6 sc through both walls. Fasten off and cut the yarn.
The tail will be knitted on.
Nose:
Chain 5, starting from the second chain from the hook:
Row 1: inc, 2 sc, 4 sc in one stitch, 2 sc, inc = 12 stitches.
Row 2: 2 inc, 2 sc, 4 inc, 2 sc, 2 inc = 20 stitches.
Rows 3-4: 20 sc.
Row 5: 10 dec.
Fasten off and cut the yarn.
The nose will be knitted on.
Head:
Row 1: 6 sc in MR.
Row 2: 6 inc = 12 stitches.
Row 3: (1 sc, inc)*6 = 18 stitches.
Row 4: (2 sc, inc)*6 = 24 stitches.
Row 5: (3 sc, inc)*6 = 30 stitches.
Row 6: (4 sc, inc)*6 = 36 stitches.
Row 7: (5 sc, inc)*6 = 42 stitches.
Row 8: (6 sc, inc)*6 = 48 stitches.
Row 9: (7 sc, inc)*6 = 54 stitches.
Row 10: (8 sc, inc)*6 = 60 stitches.
Rows 11-12: 60 sc.
Row 13: (9 sc, inc)*6 = 66 stitches.
Rows 14-18: 66 sc.
In the next row, we will crochet the cheeks and attach the nose.
Row 19: 19 sc, (1 sc, inc)*6, 5 sc around the 5 stitches of the nose, (inc, 1 sc)*6, 18 sc = 78 stitches.
Row 20: 37 sc, 5 sc around the remaining stitches of the nose, 36 sc = 78 stitches.
Slightly stuff the nose.
Rows 21-30: 78 sc.
If you are using safety eyes, install them at this stage between rows 17 and 18, with 6-7 sc stitches between the placement points (center the eyes relative to the nose).
Take the felt circles, fold them in half carefully to avoid any creases, and make small incisions, slightly offset from the center towards the edge.
Turn the felt circles and make perpendicular incisions (resulting in a cross shape). Insert the eyes into the incisions and secure them in place. Later, after completing the tightening process, the felt can be neatly glued in place.
Row 31: (11 sc, dec)*6 = 72 stitches.
Row 32: (7 sc, dec)*8 = 64 stitches.
Row 33: (6 sc, dec)*8 = 56 stitches.
Row 34: (5 sc, dec)*8 = 48 stitches.
Row 35: (4 sc, dec)*8 = 40 stitches.
Row 36: (3 sc, dec)*8 = 32 stitches.
Row 37: (2 sc, dec)*8 = 24 stitches.
Stuff the head firmly but without overdoing it. Keep in mind that there will be tightening. Fasten off the yarn and hide it inside.
Ears:
Row 1: 6 sc = 6 stitches.
Row 2: (1 sc, inc)*3 = 9 stitches.
Row 3: (2 sc, inc)*3 = 12 stitches.
Row 4: (3 sc, inc)*3 = 15 stitches.
Row 5: (4 sc, inc)*3 = 18 stitches.
Row 6: (2 sc, inc)*6 = 24 stitches.
Row 7: (3 sc, inc)*6 = 30 stitches.
Row 8: 30 sc.
Row 9: 2 sc, 8 dec, 12 sc = 22 stitches.
Row 10: 3 sc, fold in half, crochet 11 sc through both sides of the ear.
Fasten off the yarn, leaving about 45-50 cm for sewing, and cut the yarn.
Lower Legs:
Row 1: 6 sc in magic ring = 6 stitches.
Row 2: 6 inc = 12 stitches.
Row 3: (1 sc, inc)*6 = 18 stitches.
Rows 4-5: 18 sc.
Row 6: 3 sc, 6 dec, 3 sc = 12 stitches.
Rows 7-8: 12 sc.
Row 9: (1 sc, inc)*6 = 18 stitches.
Row 10: 18 sc.
Row 11: (2 sc, inc)*6 = 24 stitches.
Row 12: 24 sc.
Temporarily secure and cut the yarn on the first leg, leaving about 30 cm. Do not cut the yarn on the second leg. Fold the legs together and determine the desired angle for the toy’s “pawness.”
Crochet a few additional stitches on the second leg at the joining point, towards the inner side (in my case, it’s 6 sc, but your degree of shift may vary).
Return to the first leg and crochet the same number of additional stitches. This is to ensure that the legs are the same height. Now you can secure and cut the yarn short. Remove any marker threads. Count back on the first leg the number of additional stitches you added, multiplied by 2. In my case, it’s 12 stitches. This is the joining point of the first and second legs.
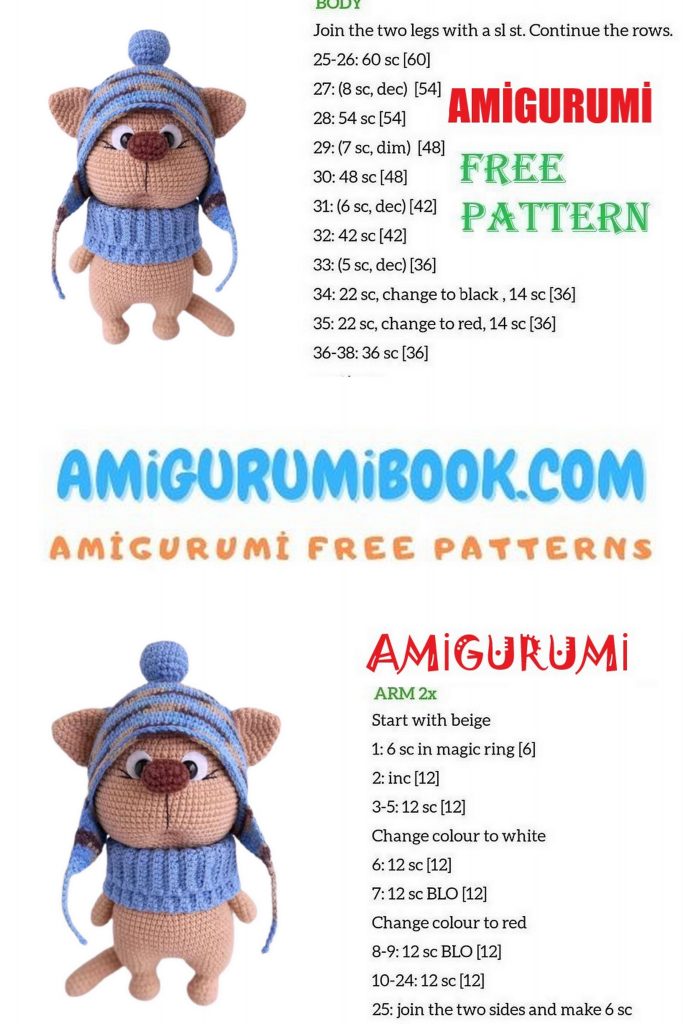
Body:
Stuff the body firmly as you crochet.
Make a chain of 3 ch, and connect the legs.
Row 1: 24 sc on the first leg, 3 sc on the chain, 24 sc on the second leg, 3 sc on the chain.
The total stitch count in the row is 54.
Place a marker thread.
Row 2: (8 sc, inc)*6 = 60 stitches.
Row 3: 60 sc.
Row 4: (9 sc, inc)*6 = 66 stitches.
Rows 5-8: 66 sc.
Row 9: 66 sc. In this row, crochet the tail. To position the tail in the center, I crocheted 62 sc, then 5 sc together with the tail, and caught the next stitch of the following row. Place a marker in row 9 after the 66th stitch.
Note that your stitch count may vary depending on how you shifted the stitches. Position the tail at the back and in the center.
Rows 10-11: 66 sc.
Row 12: (9 sc, dec)*6 = 60 stitches.
Row 13: 60 sc.
Row 14: (8 sc, dec)*6 = 54 stitches.
Row 15: 54 sc.
Row 16: (7 sc, dec)*6 = 48 stitches.
Row 17: 48 sc.
Row 18: (6 sc, dec)*6 = 42 stitches.
Row 19: 42 sc.
Row 20: (5 sc, dec)*6 = 36 stitches.
Row 21: 36 sc.
Row 22: (4 sc, dec)*6 = 30 stitches.
Row 23: 30 sc.
In row 24, we will crochet the upper paws. Stuff the main part of the body tightly but not completely. Leave about 1 cm so that it’s convenient for you to attach the paws and the filling doesn’t get between the stitches. Determine the attachment points strictly on the sides: 5 sc together with the paws, and between them, crochet 10 sc.
Given your bias, let’s proceed as follows:
Row 24: 7 sc, 5 sc together with the paw, 10 sc, 5 sc together with the paw, 3 sc = 30 stitches.
Row 25: 30 sc.
Row 26: (3 sc, dec)*6 = 24 stitches.
Crochet a few more stitches (for example, 1 sc and sl st in the next stitch), and fasten off the yarn at the back, in the center of the back. Leave about 50 cm of yarn for attaching the head. Remove the stitch marker. Stuff the piece tightly all the way to the end. When attaching the head, remember to tuck in some stuffing into the neck area.
Once under the eye and the felt circle, tighten and tie with 2 knots. Without cutting the thread, insert it into point 6, bring it out at point 5, then into point 4, and bring it out at point 1. Tighten and tie with a couple of knots. Hide the threads inside the head. You can apply a small amount of transparent universal glue (such as “Moment Crystal”) to the last knot. Sew on the ears. The upper part of the ears is sewn between rows 10 and 11 from the top of the head. The distance between the ears in row 11 is 32 stitches (considering increases as 2 stitches). That is, there should be 16 stitches on each side of the center of the muzzle. Embroider the eyebrows, folds above the cheeks, and a stripe from the nose to the mouth with thin black thread.
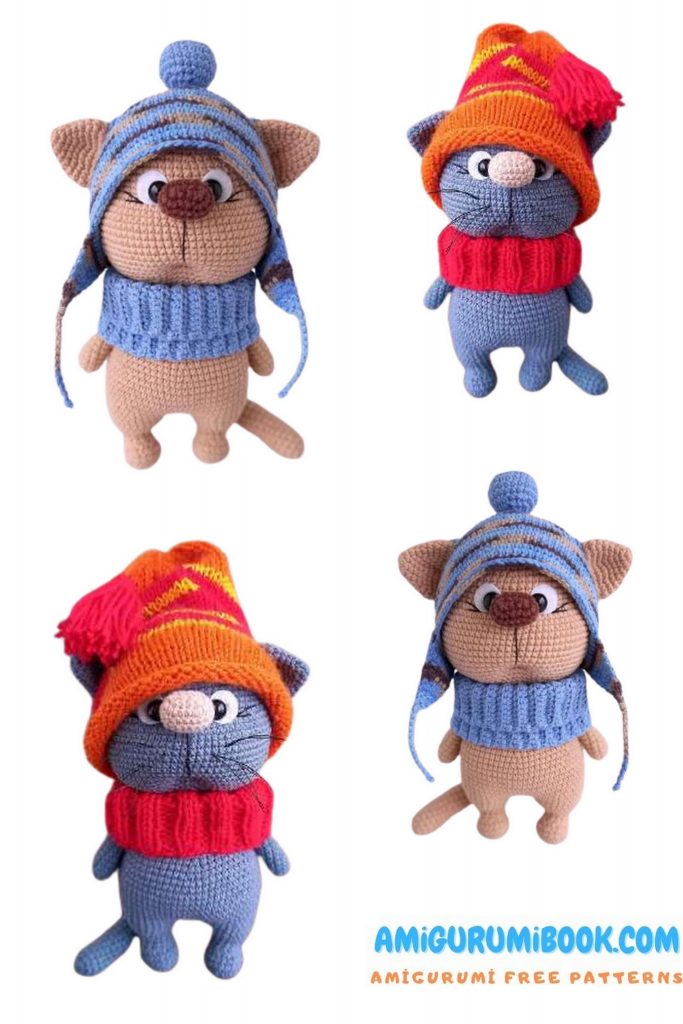
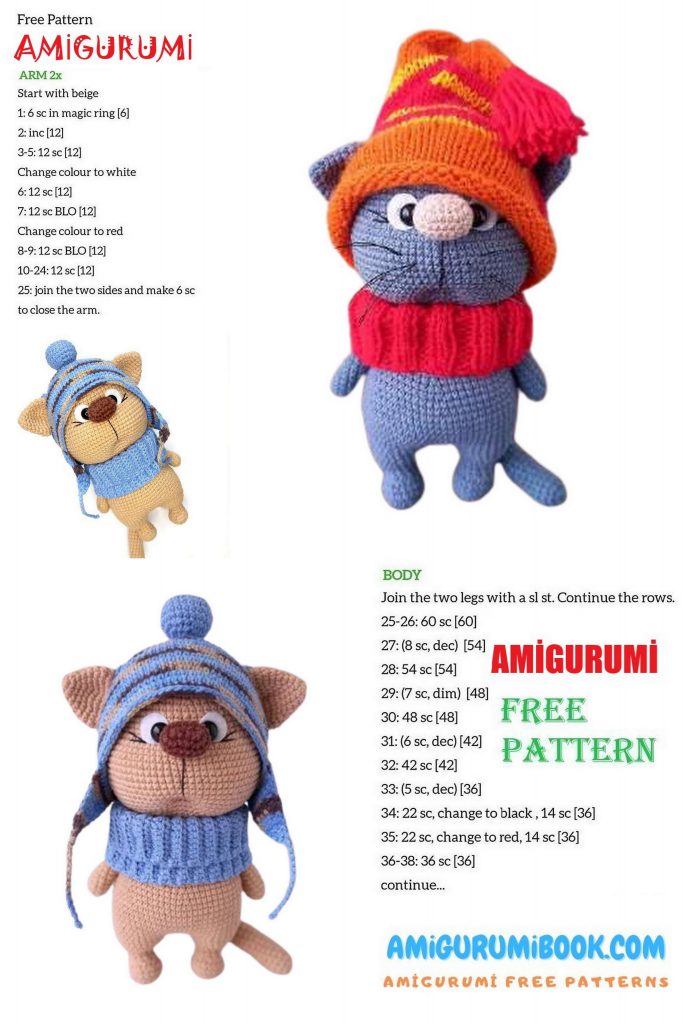
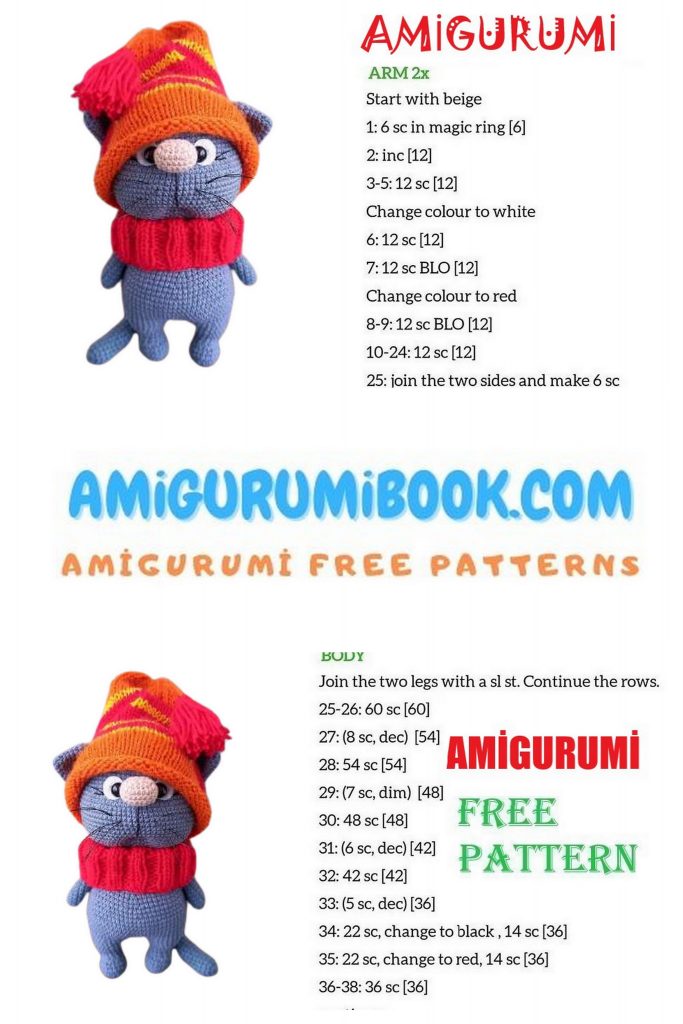
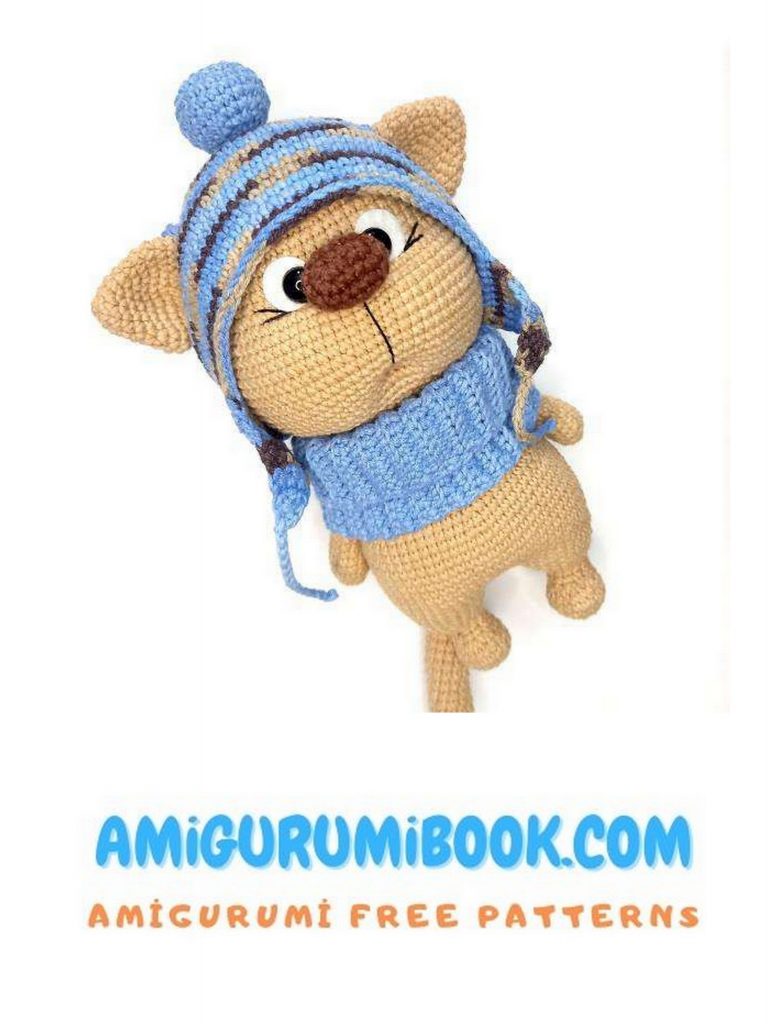
If desired, you can attach or embroider whiskers. In my first version of the cat, I secured whiskers made of thin waxed thread (0.5 mm) using auxiliary thread (similar to wig stitching). This type of thread holds its shape well and doesn’t sag over time. If you have knitting skills, you can knit a fun hat for the cat. For those who don’t use knitting needles, I suggest crochet accessories. Crocheted Hat The hat is crocheted LOOSELY from top to bottom, using “shell” stitches. Take into account your own tension. You may need a larger crochet hook size. Try on the hat during the crocheting process. If you attached the ears according to your own preference, consider this when crocheting the openings for them.
1st row: 6 single crochet (sc) in magic ring
2nd row: 6 increases (inc) = 12
3rd row: (1 sc, inc) repeat 6 times = 18
4th row: (2 sc, inc) repeat 6 times = 24
5th row: (3 sc, inc) repeat 6 times = 30
6th row: (4 sc, inc) repeat 6 times = 36
7th row: (5 sc, inc) repeat 6 times = 42
8th row: (6 sc, inc) repeat 6 times = 48
9th row: (7 sc, inc) repeat 6 times = 54
10th row: (8 sc, inc) repeat 6 times = 60
11th row: (9 sc, inc) repeat 6 times = 66
12th row: (10 sc, inc) repeat 6 times = 72
13th row: (11 sc, inc) repeat 6 times = 78
14th row: 17 sc, chain 10, skip 10 sc from the previous row, 24 sc, chain 10, skip 10 sc from the previous row, 17 sc = 78
15th to 24th rows: 78 sc
25th row: 78 slip stitches (ss)
Now, put the hat on the cat and determine the positions for crocheting the “ears.” For me, there are 34 sc between the ears, at the front. Once you’ve chosen the location, crochet turning rows, attaching the stitches to the edge of the hat from the front side:
1st and 2nd rows: 10 sc
3rd row: 2 decreases (dec) at the edges = 8
4th row: 8 sc
5th row: 2 decreases (dec) at the edges = 6
6th row: 6 sc
7th row: 2 decreases (dec) at the edges = 4
8th row: 4 sc
9th row: 2 decreases (dec) at the edges = 2
10th row: 2 sc
11th row: 1 decrease (dec)
Next, do not cut the yarn. Crochet a cord of chain stitches to your desired length. Tie a knot at the end and cut the yarn. I recommend securing the cut end of the yarn with a small drop of clear glue.
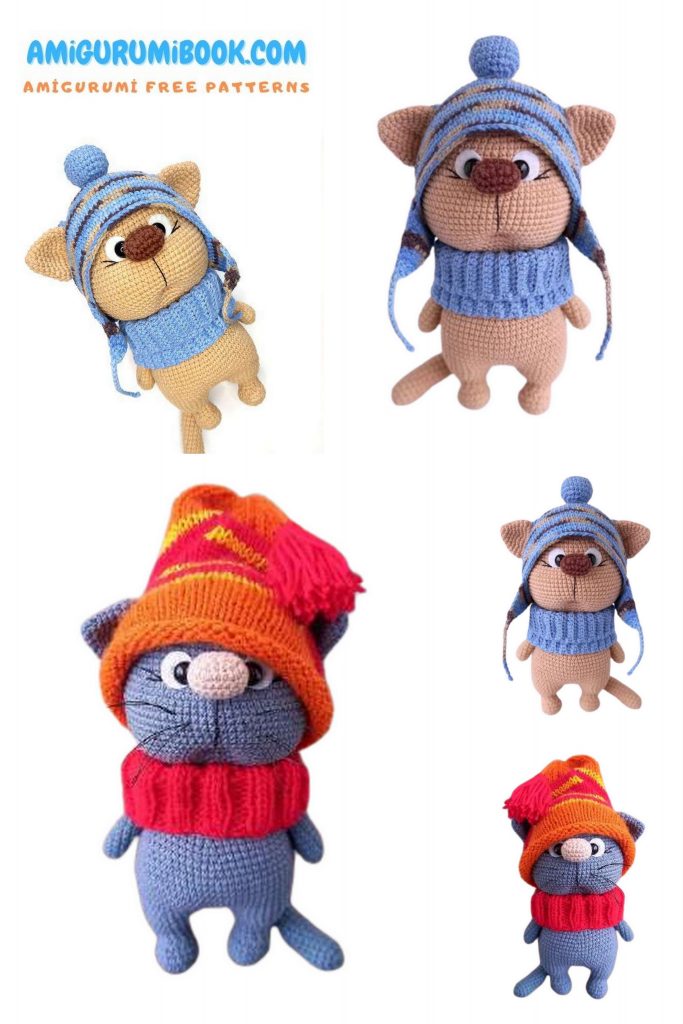
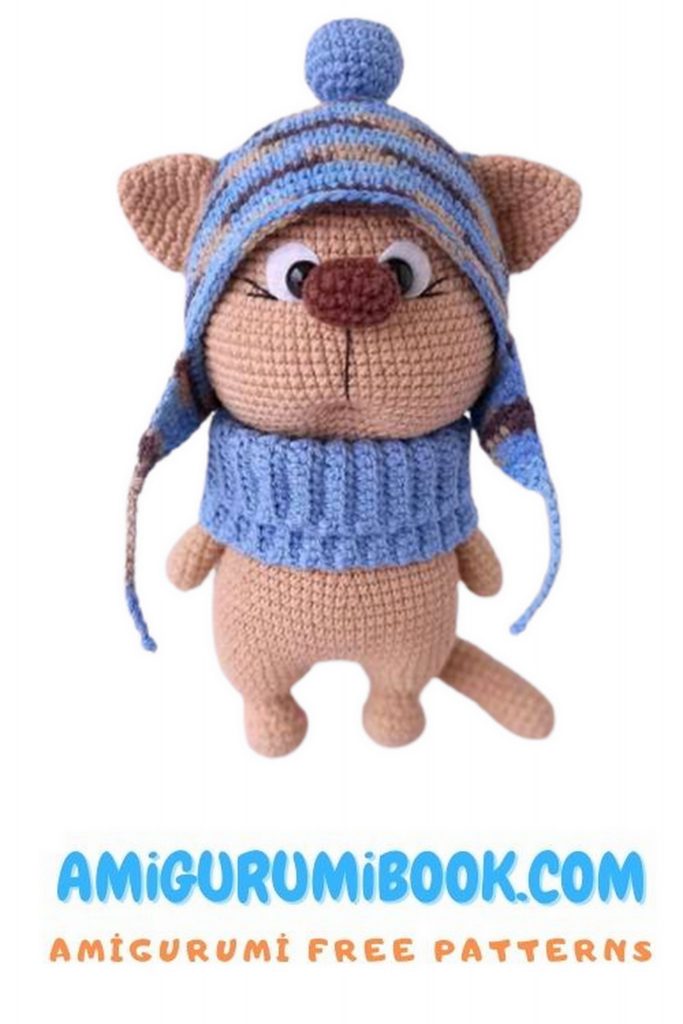
Pom-pom:
1st row: 6 sc in magic ring
2nd row: 6 increases (inc) = 12
3rd row: (1 sc, inc) repeat 6 times = 18
4th row: (2 sc, inc) repeat 6 times = 24
5th to 7th rows: 24 sc
8th row: (2 sc, dec) repeat 6 times = 18
9th row: (1 sc, dec) repeat 6 times = 12
10th row: 6 decreases (dec) = 6
Use a needle to tighten the remaining stitches, secure and sew the pom-pom to the hat with a few stitches. Hide the yarn end inside the pom-pom.
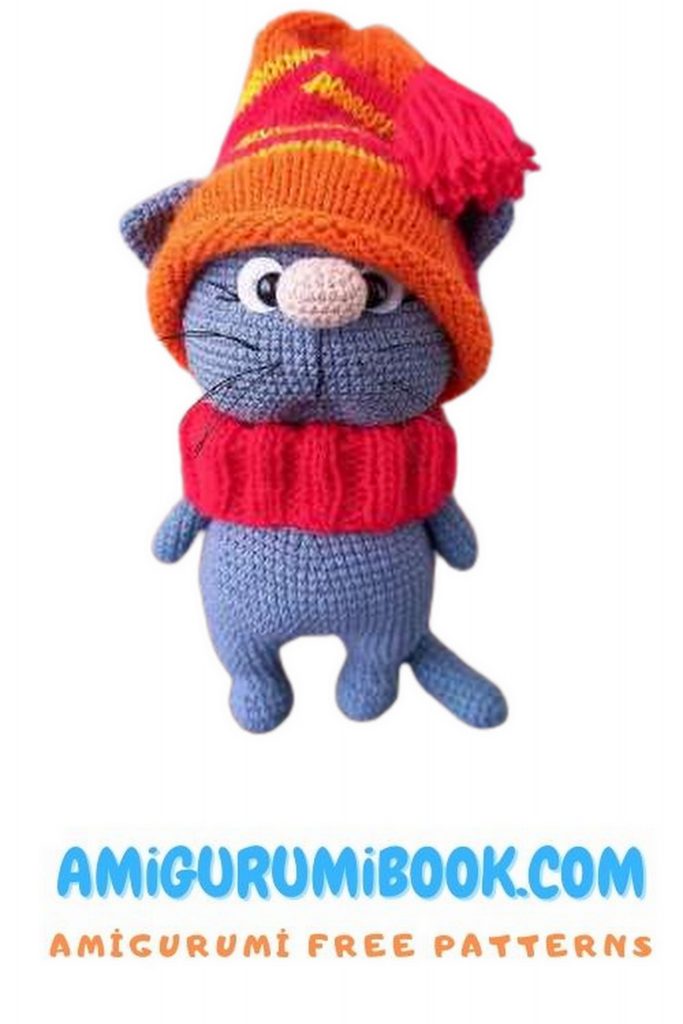
Сowl (Snood)
Start by chaining 20 stitches plus 1 turning chain. Work in rows using the back loops only until you reach your desired length. For me, that’s 20 cm. Close the loop with slip stitches.
Your cat is ready!
I sincerely hope that you enjoyed the process and are pleased with the result!