
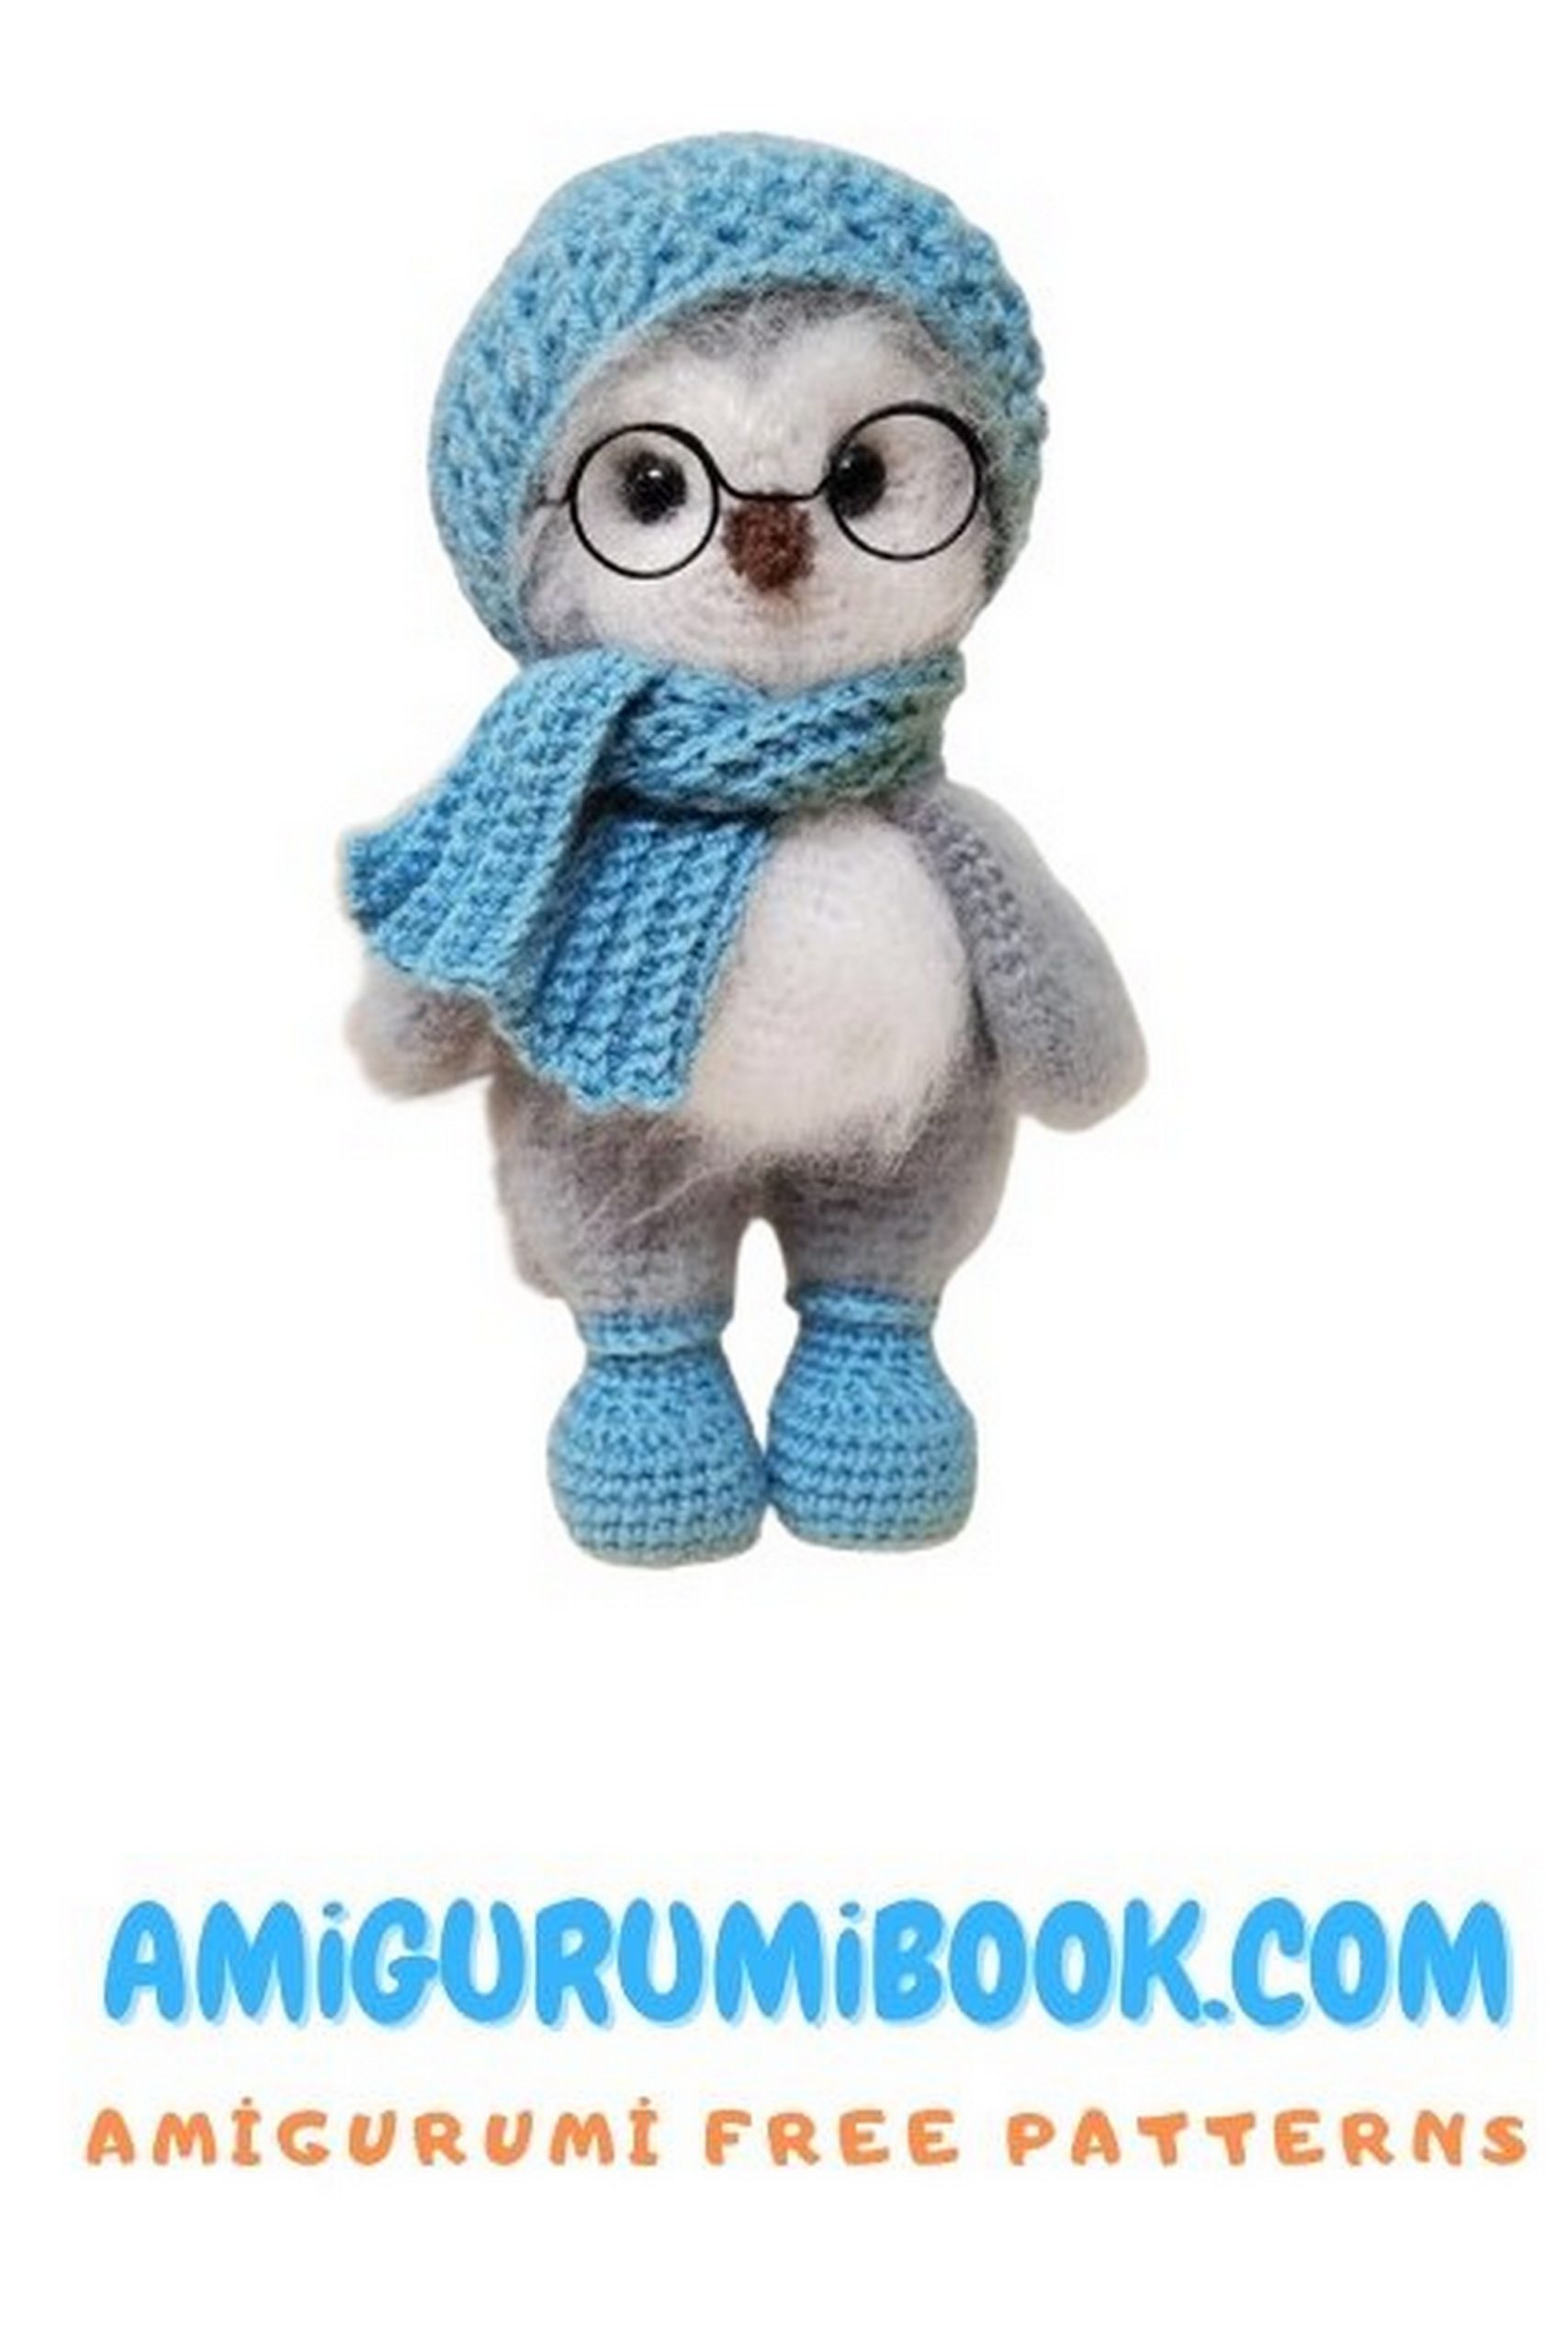
This cute baby owl amigurumi is impossible to resist 🦉 With its big eyes, soft texture, and cozy accessories, it’s one of those crochet projects you’ll want to make again and again.
If you’re looking for an easy and satisfying project, this free crochet pattern is perfect for you. The step-by-step instructions make it beginner-friendly while still delivering a detailed and professional-looking result.
Whether you’re creating a handmade gift or adding a new favorite to your collection, this adorable owl will definitely stand out. Grab your yarn and start crocheting your own charming baby owl today! 🧶
If you want to access 1000+ free amigurumi patterns, you can download our application from this link!
🧶 Materials
- Alize Angora Gold yarn (double strand)
• Gray (21)
• White (62) - Alize Lanagold Classic 800
• Color: 386 (Azure) – for hat, boots, scarf - Crochet hooks:
• 2.0 mm (body)
• 2.5 mm (accessories) - Fiberfill stuffing
- Safety eyes or buttons
- Needle, scissors
👉 Finished size: approx. 22 cm
✂️ Abbreviations
( ) * n: Repeat n times
MR: Magic Ring
sc: Single Crochet
hdc: Half Double Crochet
dc: Double Crochet
inc: Increase (2 sc in same stitch)
dec: Decrease (sc 2 together)

🐾 Legs (Make 2)
Start with shoe color:
1: 6 sc in MR
2: 6 inc (12)
3: (1 sc, inc) * 6 (18)
4: (2 sc, inc) * 6 (24)
5: 24 sc (back loop only)
6–9: 24 sc
10: 6 sc, 6 dec, 6 sc (18)
11: 6 sc, 3 dec, 6 sc (15)
12–14: 15 sc
15: 15 sc (back loop only)
16: 15 sc → change to gray
17: (1 sc, inc) * 7, 1 sc (22)
18–21: 22 sc
👉 Stuff firmly
🐾 Body (Continue from Legs)
Join legs with ch 1
1: 46 sc
2: sc, 3 inc at center (belly), sc (49)
3: sc, 3 inc at center, sc (52)
4–7: 52 sc
8: 10 sc, dec over 3 stitches, 25 sc, dec over 3 stitches, 11 sc (48)
9: 9 sc, dec over 3 stitches, 23 sc, dec over 3 stitches, 10 sc (44)
10: 8 sc, dec over 3 stitches, 21 sc, dec over 3 stitches, 9 sc (40)
11–14: 40 sc
15: (3 sc, dec) * 8 (32)
16: (2 sc, dec) * 8 (24)
🪽 Wings (Make 2)
1: 6 sc in MR
2: 6 inc (12)
3: (1 sc, inc) * 6 (18)
4: (2 sc, inc) * 6 (24)
5–9: 24 sc
10: (2 sc, dec) * 6 (18)
11–17: 18 sc
Fold flat and crochet edges together.
👉 Attach wings symmetrically during next row
🐦 Body Continued
17: Attach wings while crocheting (26 sc)
18: 26 sc
19: 7 sc, dec, 7 sc, dec, 8 sc (24)

🧠 Head
20: (3 sc, inc) * 6 (30)
21: (4 sc, inc) * 6 (36)
22: (5 sc, inc) * 6 (42)
23: (6 sc, inc) * 6 (48)
24–36: 48 sc
👉 Insert eyes between Rows 26–28
👉 Distance: approx. 6–8 stitches
37: (6 sc, dec) * 6 (42)
38: (5 sc, dec) * 6 (36)
39: (4 sc, dec) * 6 (30)
40: (3 sc, dec) * 6 (24)
👉 Stuff firmly
41: (2 sc, dec) * 6 (18)
42: (1 sc, dec) * 6 (12)
43: 6 dec (6)
Close and hide yarn.
🤍 Belly Patch
1: 6 sc in MR
2: 6 inc (12)
3: (1 sc, inc) * 6 (18)
4: (2 sc, inc) * 6 (24)
5: (3 sc, inc) * 6 (30)
6: (4 sc, inc) * 6 (36)
7: (5 sc, inc) * 6 (42)
8: (6 sc, inc) * 6 (48)
Leave yarn for sewing.
🐽 Muzzle
Ch 7
1: 6 sc, 3 sc in last ch, 5 sc, inc (16)
2: inc, 5 sc, 3 inc, 5 sc, 2 inc (22)
3: sc, inc, 5 sc, (sc, inc) * 3, 5 sc, (sc, inc) * 2 (28)
4: 2 sc, inc, 5 sc, (2 sc, inc) * 3, 5 sc, (2 sc, inc) * 2 (34)
Leave yarn for sewing.


🔺 Beak
1: 6 sc in MR
2–4: 6 sc
Leave yarn for sewing.
🧣 Scarf
Ch 75
Work 8 rows: sc in back loop only
🎩 Hat
Ch 60
1: 60 sc
2–4: ribbing (front post & back post dc)
5–10: 60 hdc
11: dec * 30
12: dec * 15
Close and hide yarn.
🧵 Assembly
- Sew belly patch and muzzle
- Attach eyes
- Embroider or attach beak
- Attach wings (if not already)
- Add scarf and hat
👉 Optional: add pompom to hat
👉 Optional: slight tightening for facial shaping