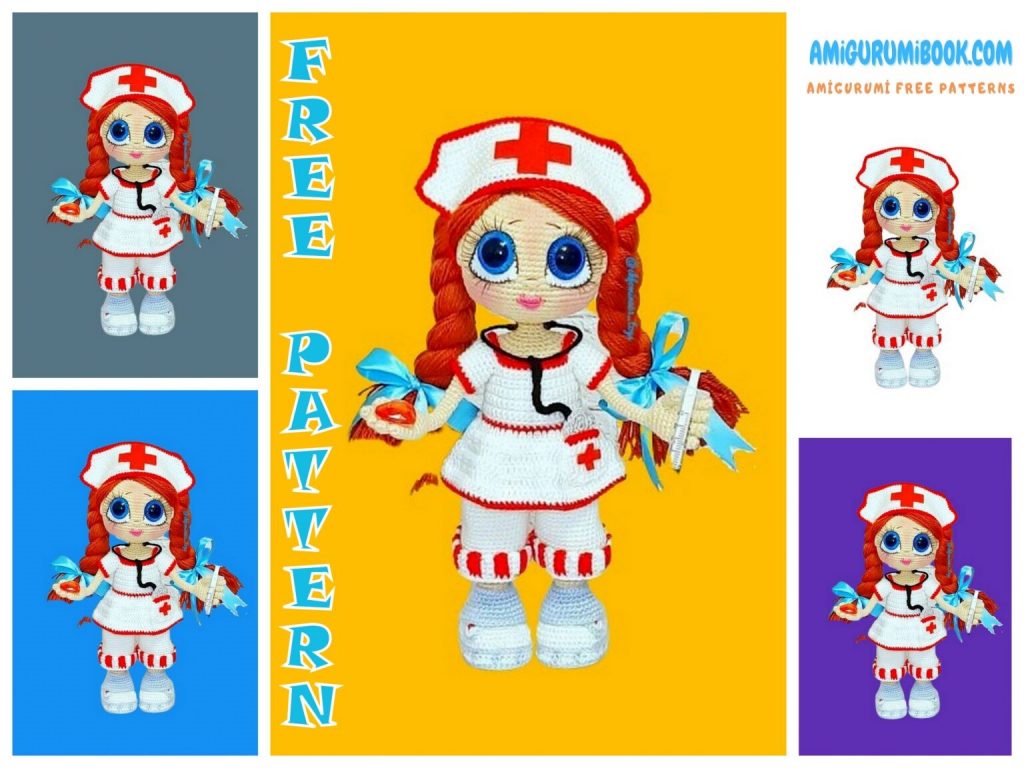
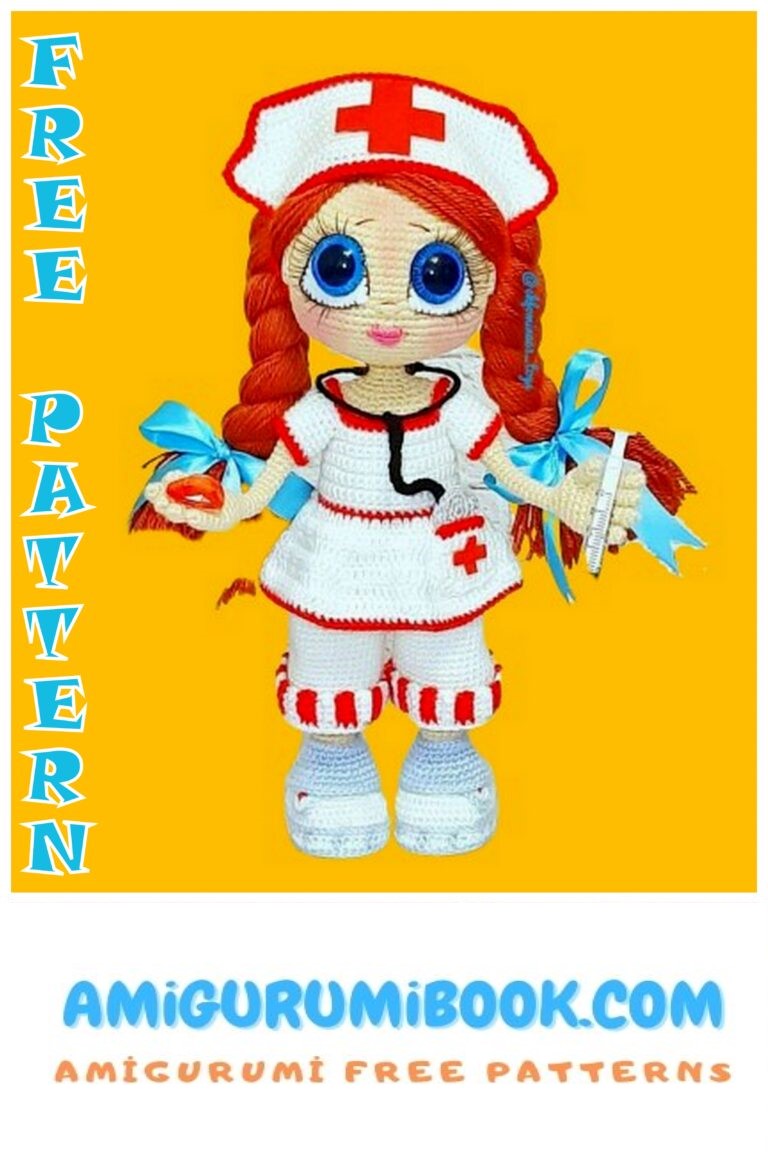
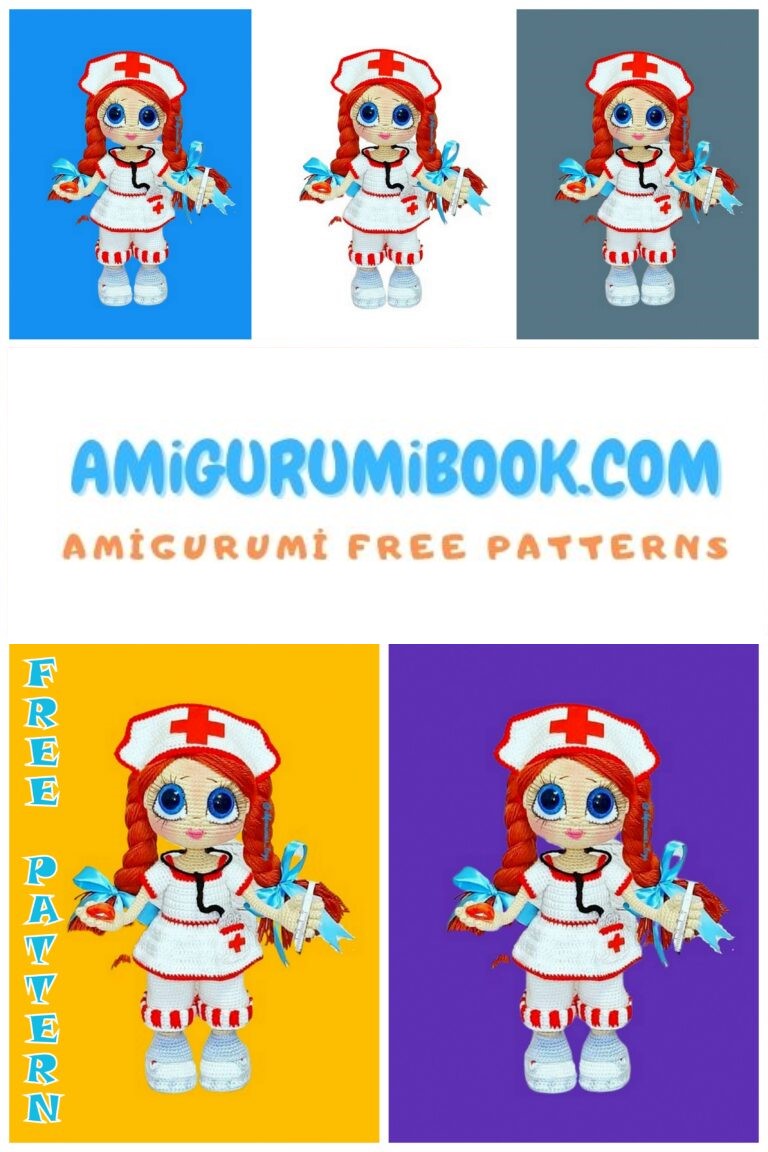
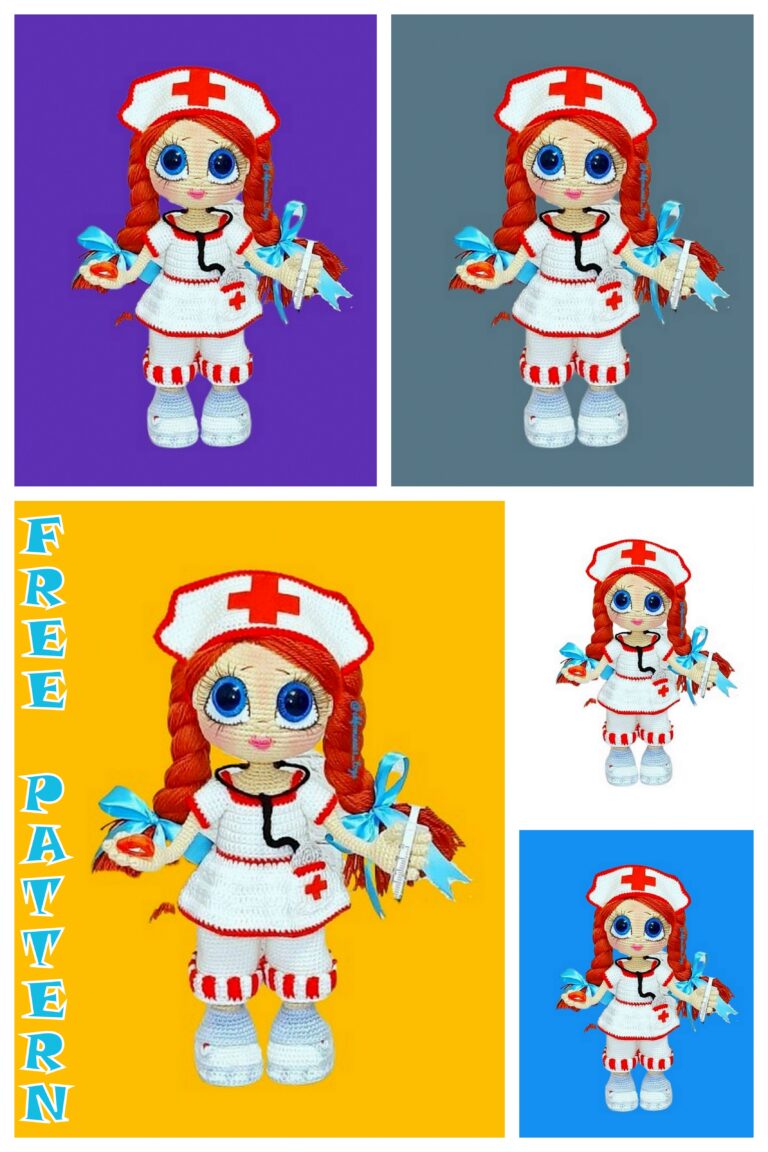
Discover the charm of handmade crafts with this beautiful nurse doll amigurumi free pattern, perfect for both beginners and experienced crocheters. This delightful project combines creativity and care, making it an ideal gift or a unique addition to your collection. free crochet patterns – Sweet Donkey Amigurumi Free Pattern
You may also like more amigurumi patterns.
I am sharing wonderful amigurumi doll patterns with you for free without slowing down. Amigurumi nurse doll pattern is with you in this article.
Required materials and tools:
1) yarn “Podmoskovnaya” from Troitsk (50% wool, 50% acrylic, 250m / 100g) in “champagne” color for the body – 1 piece;
2) Yarn “Bambino” Kamtex (35% wool, 65% acrylic, 150m / 50g) white – 2 pcs .;
3) yarn “Bambino” Kamtex (35% wool, 65% acrylic, 150m / 50g) terracotta, dark beige, beige (or any other) for hair – 1 piece;
4) yarn “Bambino” Kamtex (35% wool, 65% acrylic, 150m / 50g) red – 1 pc .;
5) Yarn “Bambino” Kamtex (35% wool, 65% acrylic, 150m / 50g) light blue – 0.5-1 pcs;
6) thread “Iris” or “Mouline” brown for the eyes – a little;
7) nylon thread or fishing line for tightening – a little;
8) filler (holofiber, or synthetic winterizer, or synthetic fluff) – 150 – 200 g.;
9) aluminum wire for weaving with a diameter of 2 mm for the frame – about 2.5 m;
10) white felt for the eyes – a little;
11) eyes for dolls with a ray of blue or green with a diameter of 25 mm – 1 pair;
12) false or doll eyelashes;
13) transparent super-glue for attaching eyes and eyelashes – a little;
14) a needle with a large eye;
15) hook 93;
16) hook number 2;
17) colored pins for marking;
18) white cloth adhesive plaster or electrical tape for wrapping the ends of the wire;
19) white plastic or thick cardboard for insoles – a little;
20) buttons with a diameter of 8-10 mm – 2-3 pcs.;
21) scissors;
22) blue satin ribbon 25 mm wide (optional);
23) dry pastel pink for Toning (optional).
Important! You can use any thread, picking up the hooks of the required size for them! )
The list of materials is approximate, I can correct it as I work, since I myself will knit this toy for the first time.
Explanation of the conventions that I use:
CH – chain
CHH – chain lifting loop;
SC – single crochet;
INC – increase
DEC – single crochet decrease;
Dc – double crochet;
INCDC – Increase the double crochet
DECDC – double crochet decrease;
HDC – half double crochet;
INCHDC – half double crochet increase;
Dechdc – half double crochet;
sl-st – slip stitch;
BLO – back half loop;
FLO – front half loop.
We start from the simplest stage.

Stage 1. Head.
We knit with flesh-colored threads in a spiral, crochet N93 (or whatever you chose for the main knitting).
1st row: 6 SC into magic ring (6)
2nd row: 6 INC (12)
Z row: (SC, INC) * 6 (18)
4th row: SC, INC, (2 SC, INC) * 5, SC (24)
5 row: (З SC, INC) * 6 (30)
b row: 2 SC, INC, (4 SC, INC) * 5, 2 SC (36)
7 row: (5 SC, INC) * 6 (42)
8 row: 3 SC, INC, (6 SC, INC) * 5, 3 SC (48)
9 row: (7 SC, INC) * 6 (54)
10 row: 4 SC, INC, (8 SC, INC) * 5, 4 SC (60)
11 row: (9 SC, INC) * 6 (66)
12th row: 5 SC, INC, (10 SC, INC) * 5, 5 SC (72)
13 – 18 rows (6 rows): 72 SC (72)
19 row: 36 SC, (INC, 6 SC) * 5, INC (78)
20-24 row (5 rows): 78 SC (78)
25 row: 36 SC, DEC, (6 SC, DEC) * 5 (72)
26 row: 5 SC, DEC, (10 SC, DEC) * 5, 5 SC (66)
27 row: (9 SC, DEC) * 6 (60)
28 row: 4 SC, DEC, (8 SC, DEC) * 5, 4 SC (54)
29 row: (7 SC, DEC) * 6 (48)
30 row: З SC, DEC, (6 SC, DEC) * 5, 3 SC (42)
31 row: (5 SC, DEC) * 6 (36)
32 row: 2 SC, DEC, (4 SC, DEC) * 5, 2 SC (30)
33 row: (3 SC, DEC) * 6 (24)
34 row: SC, DEC, (2 SC, DEC) * 5, SC (18)
35 row: (SC, DEC) * 6 (12) We fasten the thread, cut it off. We fill our head with filler (see photo).
Stage 2. Handles.
We knit the handles with flesh-colored threads, crochet number 2 (or smaller than you chose for the main knitting). First we knit the fingers. For the left and right hands, they fit the same way. Middle, index and ring fingers.
1st row: 5 SC INTO MAGIC RING (5)
Row 2-5 (4 rows): 5 SC (5) Fasten the thread, cut it off.
Thumb and pinky.
1st row: 5 SC INTO MAGIC RING (5)
Row 2 – 4 (3 rows): 5 SC (5) Do not cut the thread on the little finger, continue to knit, joining the fingers into the palm.
Right hand.
Row 1: 2 SC on the little finger, 2 SC on the ring finger, 2 SC on the middle finger, 5 SC on the index finger, 3 SC on the middle finger, 3 SC on the ring finger, 3 SC on the little finger (20)
2nd row: 20 SC (20)
C Note! The marker for the beginning of the row should be located in the middle of the edge of the palm underneath. If necessary, knit offset loops. In the next row we tie a thumb.
Z row: 12 SC in the palm, 1 SC together with the thumb (grab SC of the palm and SC of the thumb at the same time), 7 SC in the palm (20)
4 row: 11 SC in the palm, grab SC of the thumb and SC of the palm and knit them together UB, Z SC in the thumb, 7 SC in the palm (22)
5 row: DEC, 10 SC, DEC, 8 SC (20)
b row: (3 SC, DEC) * 4 (16)
7 row: (2 SC, DEC) * 4 (12) Lightly fill the palm with filler.
8 row: (SC, DEC) * 4 (8) Insert the wire blank into the handle.
9-19 row (11 rows): 8 SC (8)
20 row: (INC, З SC) * 2 (10)
21 – 23 rows (3 rows): 10 SC (10)
24 row: (INC, 4 SC) * 2 (12)
25-30 row (6 rows): 12 SC (12) Fasten the thread, cut it off. We fill the handle with filler.

Stage 3. Legs.
We start to knit with white threads, hook
93 (or the one you chose for the main knit).
Right leg.
1st row: we cast on 10 CH + 2 CHH, in the third loop from the hook we knit 4 DC, then 8 DC along the chain from CH, 5 DC into the last loop, 8 DC on the other side of the chain from CH, Сc (26)
2nd row: 2 CHH, DC in the same loop, 4 Incdc, 8 Dc, 5 INCDC, 8 Dc, SL-ST (36)
3 row: CHH, SC in the same loop, SC, (INC, SC) * 4, 8 SC, (INC, SC) * 5, 8 SC, SL-ST (46) Cut out the insoles from plastic (2 pcs., see photo 1) In the next two rows we alternate white and St.-blue threads.
4 row: behind BLO {2 SC in white, 1 SC in light blue, (3 SC in white, 1 SC in light blue) * 10, 2 SC in white, 1 SC in light blue} ( see photo 2) (46)
5 row: {2 SC in white, 1 SC in light blue, (3 SC in white, 1 SC in light blue) * 10, 2 SC in white, 1 SC in light blue} (46) Then we knit only with white threads.
Then we knit only with white threads.
b row: for BLO 46 SC (46)
7-9 (3 rows): 46 SC (46)
10 row: 9 DEC, (4 SC, DEC) * 4, 4 SC (33) e Note! 9 DECs are located in the center of the toe, if necessary, knit offset loops. Insert the plastic insole into the shoe (see photo 3).
11 row: DEC, 6 SC, DEC, (2 SC, DEC) * 5, З SC (26)
12 row: DEC, 4 SC, DEC, 18 SC (24)
not Note! Hereinafter, the marker for the beginning of the row is located in the middle of the inner side of the leg, if necessary, we knit offset loops. Cut off about 80 cm of wire. Fold the wire in half, make a small loop at the end a little smaller than the knitted foot. We twist the ends of the wire together. We make 2 such blanks (see the photo in the comments under the post). We insert the wire blank into the leg. We fill the leg with filler (see photo 4). We change the thread to bodily.
13 row: for BLO {(2 SC, DEC) * 6} (18)
14 row: (4 SC, DEC) * 3 (15)
15-27 (13 rows): 15 SC (15)
28 row: SC, З INC, 4 SC, 2 DEC, З SC (16)
Note! З INC form a knee; if necessary, we knit offset loops.
29 row: 16 SC (16)
30 row: SC, DEC, 4 SC, DEC, SC, INC, З SC, INC, SC (16)
31 row: (7 SC, INC) * 2 (18)
32 – 38 (7 rows): 18 SC (18) Change the thread to light blue.
39 – 40 row: 18 SC (18) Do not tighten the last loop in the 40th row, it will be useful later. The thread can be cut, leaving a long end. We fill the leg with filler to the end.
Keeping the leg with your foot away from you, we attach the St.-blue thread to the first half-loop of the 4th row, where we knit for BLO, and we tie the sole: 46 sl-st (46) We fasten the thread, cut it, hide the ends.
Keeping the leg with your foot away from you, we attach the St.-blue thread to the first half-loop of the 6th row, where we knitted for BLO, and we tie the sole: 46 sl-st (46) We fasten the thread, cut it, hide the ends.
Holding the leg with the foot towards us, we attach the St.-blue thread to the first half-loop of the 13th row, where we knitted for BLO, and we make a strapping along the top of the shoe: 24 SL-ST (24) We fasten the thread, cut it off, hide the ends.
Decorative element. Knit with white threads, crochet hook for basic knitting.
1st row: we cast on 6 CH +1 CHH, in the second loop from the hook we knit 2 SC, then along the chain of CH we knit 4 SC, in the last loop 3 SC, on the other side of the chain 4 SC, SL-ST (14)
Change the thread to St. blue.
2nd row: 14 SC (14) Thread closewe drink, leave a small end for sewing the decorative element to the shoe, cut it off. We embroider a cross on a decorative element with red threads (see photo 7). We sew a decorative element to the side of the shoe (see photo 8).
Gaiters.
We knit with St.-blue threads, a hook for the main knitting.
1st row: we collect a chain of 24 CH and close into the Ring (24)
2-3 (2 rows): 24 SC (24)
4th row: (3 SC, INC) * 6 (30)
5 row: 2 SC, INC, (4 SC, INC) * 5, 2 SC (36)
row: 36 SC (36)
7 row: (5 SC, INC) * 6 (42) Fix the thread, cut it off. We attach the st.-blue thread to the first half-loop of the 1st row of knitting and make a strapping: 24 SL-ST (24) Fix the thread, cut it off. We put the gaiters on the leg through the top (see photo 9).
We knit the left leg in the same way, but in the 40th row we fix the thread, cut it off.
Note! On the left leg, focus on the marker in the middle of the outer side of the leg.
Step 4. Body.
We attach the St.-blue thread to the leg, where the last loop (right leg) was left untightened, we dial 3 CH and connect it with the second leg.
1st row: 18 SC along the leg, З SC along the chain of CH, 18 SC along the other leg, З SC along the other side of the chain of CH (see photos 1 – 2) (42)
2nd row: (6 SC, INC) * 6 (48) We twist the wire from the legs together, isolate the twist with fabric adhesive tape or tape (see photo 3).
3- 5 (3 rows): 48 SC (48)
b row: (7 SC, INC) * 6 (54)
7-9 (3 rows): 54 SC (54)
10 row: (7 SC, DEC) * 6 (48)
11 row: (6 SC, DEC) * 6 (42) Tie to the middle of the left side, transfer the marker of the beginning of the row here.
Change the thread to the bodily thread (see photo 4).
12 – 18 (7 rows): 42 SC (42) Stuff the body with filler.
19 row: (5 SC, DEC) * 6 (36)
20 – 25 (6 rows): 36 SC (36) Do not tie the 25th row to the middle of the side (beginning of the row) 2 SC. In the next row we tie the handles.
26 row: 4 SC together with the left handle (at the same time grab the SC bodies and SC handles and knit them together), 14 SC along the chest, 4 SC together with the right handle, 14 SC along the back (see photo 6-7) (36)
27 row: 8 SC on the handle, 14 SC on the chest, 8 SC on the second handle, 14 SC on the back (44) We fasten the wire from the handles to the frame coming from the legs. We isolate the twist with tissue adhesive tape or electrical tape (see photo 8).
28 row: (8 SC, DEC, 10 SC, DEC) * 2 (40)
29 row: (8 SC, DEC) * 4 (36)
30 row: (4 SC, DEC) * 6 (30) We fill the body with filler.
31 row: (3 SC, DEC) * 6 (24)
32 row: (2 SC, DEC) * 6 (18) We fill the body and shoulders with filler to the end.
33 row: (SC, DEC) * 6 (12)
34 – 38 (5 rows): 12 SC (12) Fix the thread, leave the end for sewing on the head, cut it off (see photo 9).
Stage 5. Tightening.
Part 1. Eye shaping.
First, using colored pins, we make markings for eye tightening.
1) We count 16 rows of SC down from the top of the head and put a blue pin in the center of the protruding part of the head (see photo).
2) We count from the blue pin 5 SC to the left and 2 SC up, put a green pin (point). 3) We count from the green pin (point) 1 SC up and put the purple pin (point). 4) We count from the blue pin (point) 5 SC to the right and 2 SC up, put a red pin (point).
5) We count from the red pin (point) 1 SC up and put the pink pin (point).
6) In the last row of knitting the head, put a yellow pin (point) perpendicular to the blue pin (see photo).
We make an eye tightening using a long needle and a nylon thread (or fishing line) as follows: we insert the needle at the yellow point, withdraw it at the green point, again insert the needle at the purple point and withdraw it at the pink point, then insert the needle at the red point and bring it out to the open head hole. Tighten the thread slightly, tie the ends into several knots and hide them in the open hole of the head.
Stage 5. Tightening.
Part 2. Chin tightening.
First, we make the markings for tightening the chin using colored pins.
1) The yellow pin (dot) remains in the last row of knitting in the same place where we put it when marking to tighten the eyes.
2) We count from the yellow pin (point) Z row SC up and 3 SC to the left, put a blue pin (point).
3) We count from the blue pin (point) 1 SC to the left and 2 SC up, put a pink pin (point).
4) We count from the yellow pin (point) Z row SC up and 3 SC to the right, put a green pin (point).
5) We count from the green pin (point) 1 SC to the right and 2 SC up, put a purple pin (point) (see photo).
With the help of a long needle and a nylon thread (or fishing line) we tighten the chin as follows: insert the needle at the yellow point, bring it out to the blue one, re-insert the needle at the pink point and draw it out in the purple one, then insert the needle at the green point and bring it out into the open hole of the head. We tighten the thread, tie the ends into several knots, hide them in the open hole of the head.
Stage 6. Face shaping.
Part 1. Eye shaping.
1) Cut out two blanks for the eyes from white felt, look at the shape at 1 photo.
Note! Those who crocheted N93 from threads similar in density to those indicated by me, the size of the felt details is about 30 * 28 mm. The rest adjust the size of the eyes visually to the size of the resulting head.
2) We make small cuts in the center of the resulting blanks.
3) We insert blue eyes-pupils with a diameter of 25 mm into the incisions (see photo 2).
4) We try on the resulting eyes on the head (see photo 3).
5) Sew on the felt details of the eyes with brown “Iris” or “Mouline” threads with small stitches overcasting (see photo 4).
6) We smear the pupils of the eyes on the back with transparent super-glue and glue.
e Note! If you have eyes with a foot or a screw in the back, you do not need to file them. Stretch the loop on the head where the pupils should be, and insert the leg or SCREW inside the head, then glue the pupil. This will keep the eye more secure.
7) Glue false eyelashes along the edge of the eye with transparent super-glue (see photo 5).
Stage 6. Face shaping.
Part 2.
Spout and eyebrow decoration. At the level of the inner corners of the eyes (or departing from the inner corners of the eyes 1 row SC down), embroider a nose 2 SC wide with three or four stitches with flesh-colored threads. Then we embroider the contour of the nose with brown threads “Iris” or “Mouline” (see photo 1 – 2).
We go up 2 rows SC up above the eyes and with brown “Iris” or “Mouline” threads we embroider small eyebrows (see photo 3).
Stage b. Face shaping.
Part 3.
Lip shaping. We step back from the spout 2 rows of SC down and embroider the sponges with dense raspberry threads (or “Mouline” threads in several folds). First we embroider the contour of the lips, then fill the space inside the embroidered contour with horizontal / vertical stitches, apply the satin stitch technique (see photo).
Stage 6. Face shaping.
Part 4.
The design of the ears. We count 14 rows of SC down from the crown and in the middle of the head on the sides with a chain stitch we embroider the contour of the ear (see photo 1). We do not cut the thread, but for the obtained loops we knit SC or hdc, thus we get ears (see photo 2-3).
Stage 7. Hair.
Part 1. Marking and preparation of hair.
First, we make markings on the head, designate the future “hairline”. To do this, take brown threads “Iris” or “Mouline thread” and embroider “hair growth lines” with large stitches (see photo 1 4).
We make the preparation of the hair itself from terracotta yarn, dark beige or any other color that you have prepared for the hair. We take a book or any rectangular object 25 cm high / wide, wrap it in height / width with threads, then cut the threads from one edge with scissors (see photo 5-6). The resulting hairs are about 50 cm long.
C Note! We harvest the hair as needed so as not to spoil the extra THREADS. How to attach hair to the head, we look in the next part on the wall.
Stage 7. Hair.
Part 2. Hair attachment.
We attach the hair to the head like a fringe: holding the hook in the direction “from the crown of the head”, Insert it under SC, grab the hair folded in half, pull out the loop, thread the ends of the Hair Into the loop pulled out, tighten. Thus, we attach the hair first along the contour of the “hairline”, then fill in all the space inside these lines (see photo).
S Note! Hair should be attached under each SC, but across the SC row.
Sew the finished head to the body. We plait two braids, tie them with blue ribbons.
Stage 8. Robe.
Knit with white threads, crochet hook for basic knitting.
1st row: we cast on 42 CH +1 CHH, from the second from the loop hook Knit along a chain of CH 42 SC, CH, turn (42)
2-6 (5 rows): 42 SC, CH, turn (42)
7 row: 3 SC, DEC, (5 SC, DEC) * 5, 2 SC, CH, turn (36)
8 row: 5 SC, 12 CH, 6 SC skip, 14 SC, 12 CH, 6 SC skip, 5 SC, CH, turn (48)
9th row: 5 SC, 12 SC along CH, 14 SC, 12 SC along CH, 5 SC, CH, turn (48) We do not cut the thread, we tie the fabric along the contour SC: 8 SC along the left side, 2 SC in the lower left corner , 42 SC at the bottom, 2 SC at the bottom right corner, 8 SC at the right side (62) Change the thread to red and tie the contour of the canvas:
{4 SC, DEC, 11 SC, DEC, 12 SC, DEC, 11 SC, DEC, 4 SC} on the top, 5 CH (buttonhole), skip the loop, 8 SC on the left side, 5 CH (buttonhole ), skip the loop, SC to the lower left corner, 42 SC to the bottom, 2 SC to the lower right corner, 9 SC to the right side, SL-ST to the upper right corner. We fix the red thread, cut it off.
We attach a white thread to the first loop along the bottom of the knitted part and knit further dc in rotary rows.
1 row: 2 CHH, DC in the same loop, DC, (INCDC, DC) * 21, CH turn (66)
2nd row: 2 CHH, 4 DC, INCDC, (10 dc, INCDC) * 5, 5 DC, CH, turn (72)
3 row: 2 CHH, 5 Dc, INCDC, (11 сCH, Incdc) * 5, 5 DC, CH, turn (78)
4th row: 2 CHH, 5 Dc, Incdc, (12 Dc, Incdc) * 5, 6 dc, CH, turn (84)
5 row: 2 CHH, 6 Dc, Incdc, (13 DC, Incdc) * 5, 6 DC, CH, turn (90)
b row: 2 CHH, 6 Dc, INCDC, (14 DC, INCDC) * 5, 7 DC, CH, turn (96) Change the thread to red.
7 row: 96 SC (96) Fasten the thread, cut it off.
Sew two buttons opposite the loops.
Pocket.
Knit with white threads, crochet hook for basic knitting.
1 row: we collect a chain of 7 CH +1 CHH, from the second from the loop of the hook Knit along the chain 7 SC, CH, turn (7)
2-6 (5 rows): 7 SC, CH, turn (7) Do not cut the thread, tie the pocket along the contour SC: 5 SC on the left side, 2 SC in the lower left corner, 7 SC at the bottom, 2 SC in the lower right corner, 5 SC on the right side.
Change the thread to red and along the top of the pocket. Knit 7 SC. We fasten the red thread, leave a small end for sewing on the pocket, cut it off. Cut out a small cross from red felt and either carefully sew it in the center of the pocket or glue it with hot glue. Sew the pocket to the robe.
Good day to all! Keep going! )
Stage 9. Pants.
Knit with white threads, crochet hook for basic knitting. We start with the legs (2 parts, see photo 1).
1st row: dial 42 CH and close into the Ring (42)
2-17 (16 rows): 42 SC (42) We fasten the thread on one leg, cut it off, and do not tighten on the second last loop in the 17th row of knitting, it will come in handy later.
We knit the lapel on the leg separately (see photo 2).
1 row: we cast on 4 CH + 1 CHH with white threads, from the second from the hook of the loop we knit along the chain 4 SC, CH, turn (4) Then we knit all rows for BLO. Change the thread to red.
2-3 row: 4 SC, CH, turn (4) Change the thread to white.
4-5 row: 4 SC, CH, turn (4) So alternate the red and white threads every 2 rows up to the 42nd row (it should be red). After the 42nd row, we fix the threads, cut them off, hide the ends.
We apply the edge of the lapel, along which the thread was changed, to the Bottom edge of the leg and with white threads tie the lapel to the SC leg (we simultaneously grab the lapel and leg loops and knit them together, see photo 3): 42 SC (42) Fix the thread, cut, we hide the end. Sew the edges of the side seam on the lapel. We do the same with the second leg (see photo 4).
We connect the finished trouser legs with a turn-up (see photo 5-6).
1st row: 42 SC on the left leg (if the buttonhole is left on the right leg), 42 SC on the right leg (84)
2nd row: 6 SC, DEC, (12 SC, DEC) * 5, 6 SC (78)
3rd row: 78 SC (78)
4th row: (11 SC, DEC) * 6 (72)
5-b row: 72 SC (72)
7 row: 5 SC, DEC, (10 SC, DEC) * 5, 5 SC (66)
8-9 row: 66 SC (66)
10 row: (9 SC, DEC) * 6 (60)
11 – 12 row: 60 SC (60) In the 13th row we knit an elastic thread (spandex), laying it along the SC (see photo 7).
Row 13: 60 SC (60) Fix the white thread, cut it off.
We tighten the spandex to fit the waist of your doll, tie the ends into several knots, cut and hide (see photo 8). yes Note! For those who do not have spandex, you can use a lace string by threading it with a needle through the SC at the waist
Pants.
We put the pants on the doll.
Stage 10. Bonnet.
Knit with white threads, crochet hook for basic knitting.
1 row: cast on 36 CH +1 CHH, from the second from the loop hook Knit 36 SC along a chain of CH, CH, turn (36)
2nd row: 36 SC, CH, turn (36)
Z row: INC, 34 SC, INC, CH, turn (38)
4th row: INC, 36 SC, INC, CH, turn (40)
5 row: INC, 38 SC, INC, CH, turn (42)
6-9 (4 rows): 42 SC, CH, turn (42)
10 row: 4 SL-ST, 34 SC, CH, turn (4 loops do not tie to the end of the row and the first 4 SL-STs do not count further) (34)
11 row: DEC, 30 SC, DEC, CH, turn (32)
12 row: DEC, 28 SC, DEC, CH, turn (30)
13 row: 30 SC (30) Do not cut the white thread, tie the cap along the contour SC. We tie it to the upper right corner, change the thread to red and tie the cap around the SC contour again.
We cut out a cross from red felt and either carefully sew it in the center of the cap or glue it with hot glue (see photo 4).
We attach the red thread to the lower left corner of the cap and knit the left tie: 50 CH, fasten the thread, cut it off, put on a red or white bead at the end (optional).
We attach the red thread to the lower right corner of the cap and knit the right tie: 50 CH, fasten the thread, cut it off, put on a red or white bead at the end (optional). We tie the cap on the head of the doll.
Stage 11. Stethoscope.
1) Cut off about 7 cm of wire with a diameter of 2 mm. We make a blank-base of the stethoscope (see photo 1).
2) Tightly wrap the wire base blank with black threads, fix the ends of the threads with glue (see photo 2)
3) Attach the black thread to the center of the stethoscope base and knit the tube: 37 CH, from the second loop from the hook of the loop 36 SL-ST along a chain of CH, fasten the thread, cut it off (see photo 3).
4) St.-blue threads
We knit a membrane (2 parts).
1st row: 6 SC into magic ring (6)
2nd row: 6 INC (12)
Z row: (SC, INC) * 6 (18) On the first part, we fasten the thread, cut it off. On the second part, leave the thread (see photo 4) and connect the two parts together by placing the tip of the stethoscope tube inside between the two parts (see photo 5 – 6): 18 SL-ST behind the loops of both parts, cut the thread, hide the end …
Dress up the doll, blush the cheeks with pink dry pastels (optional).