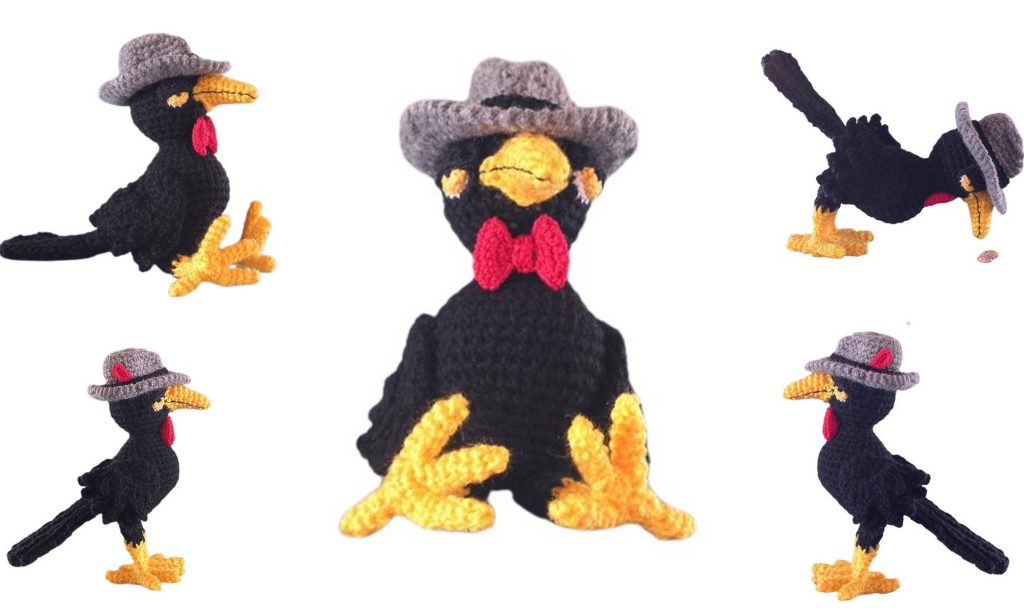
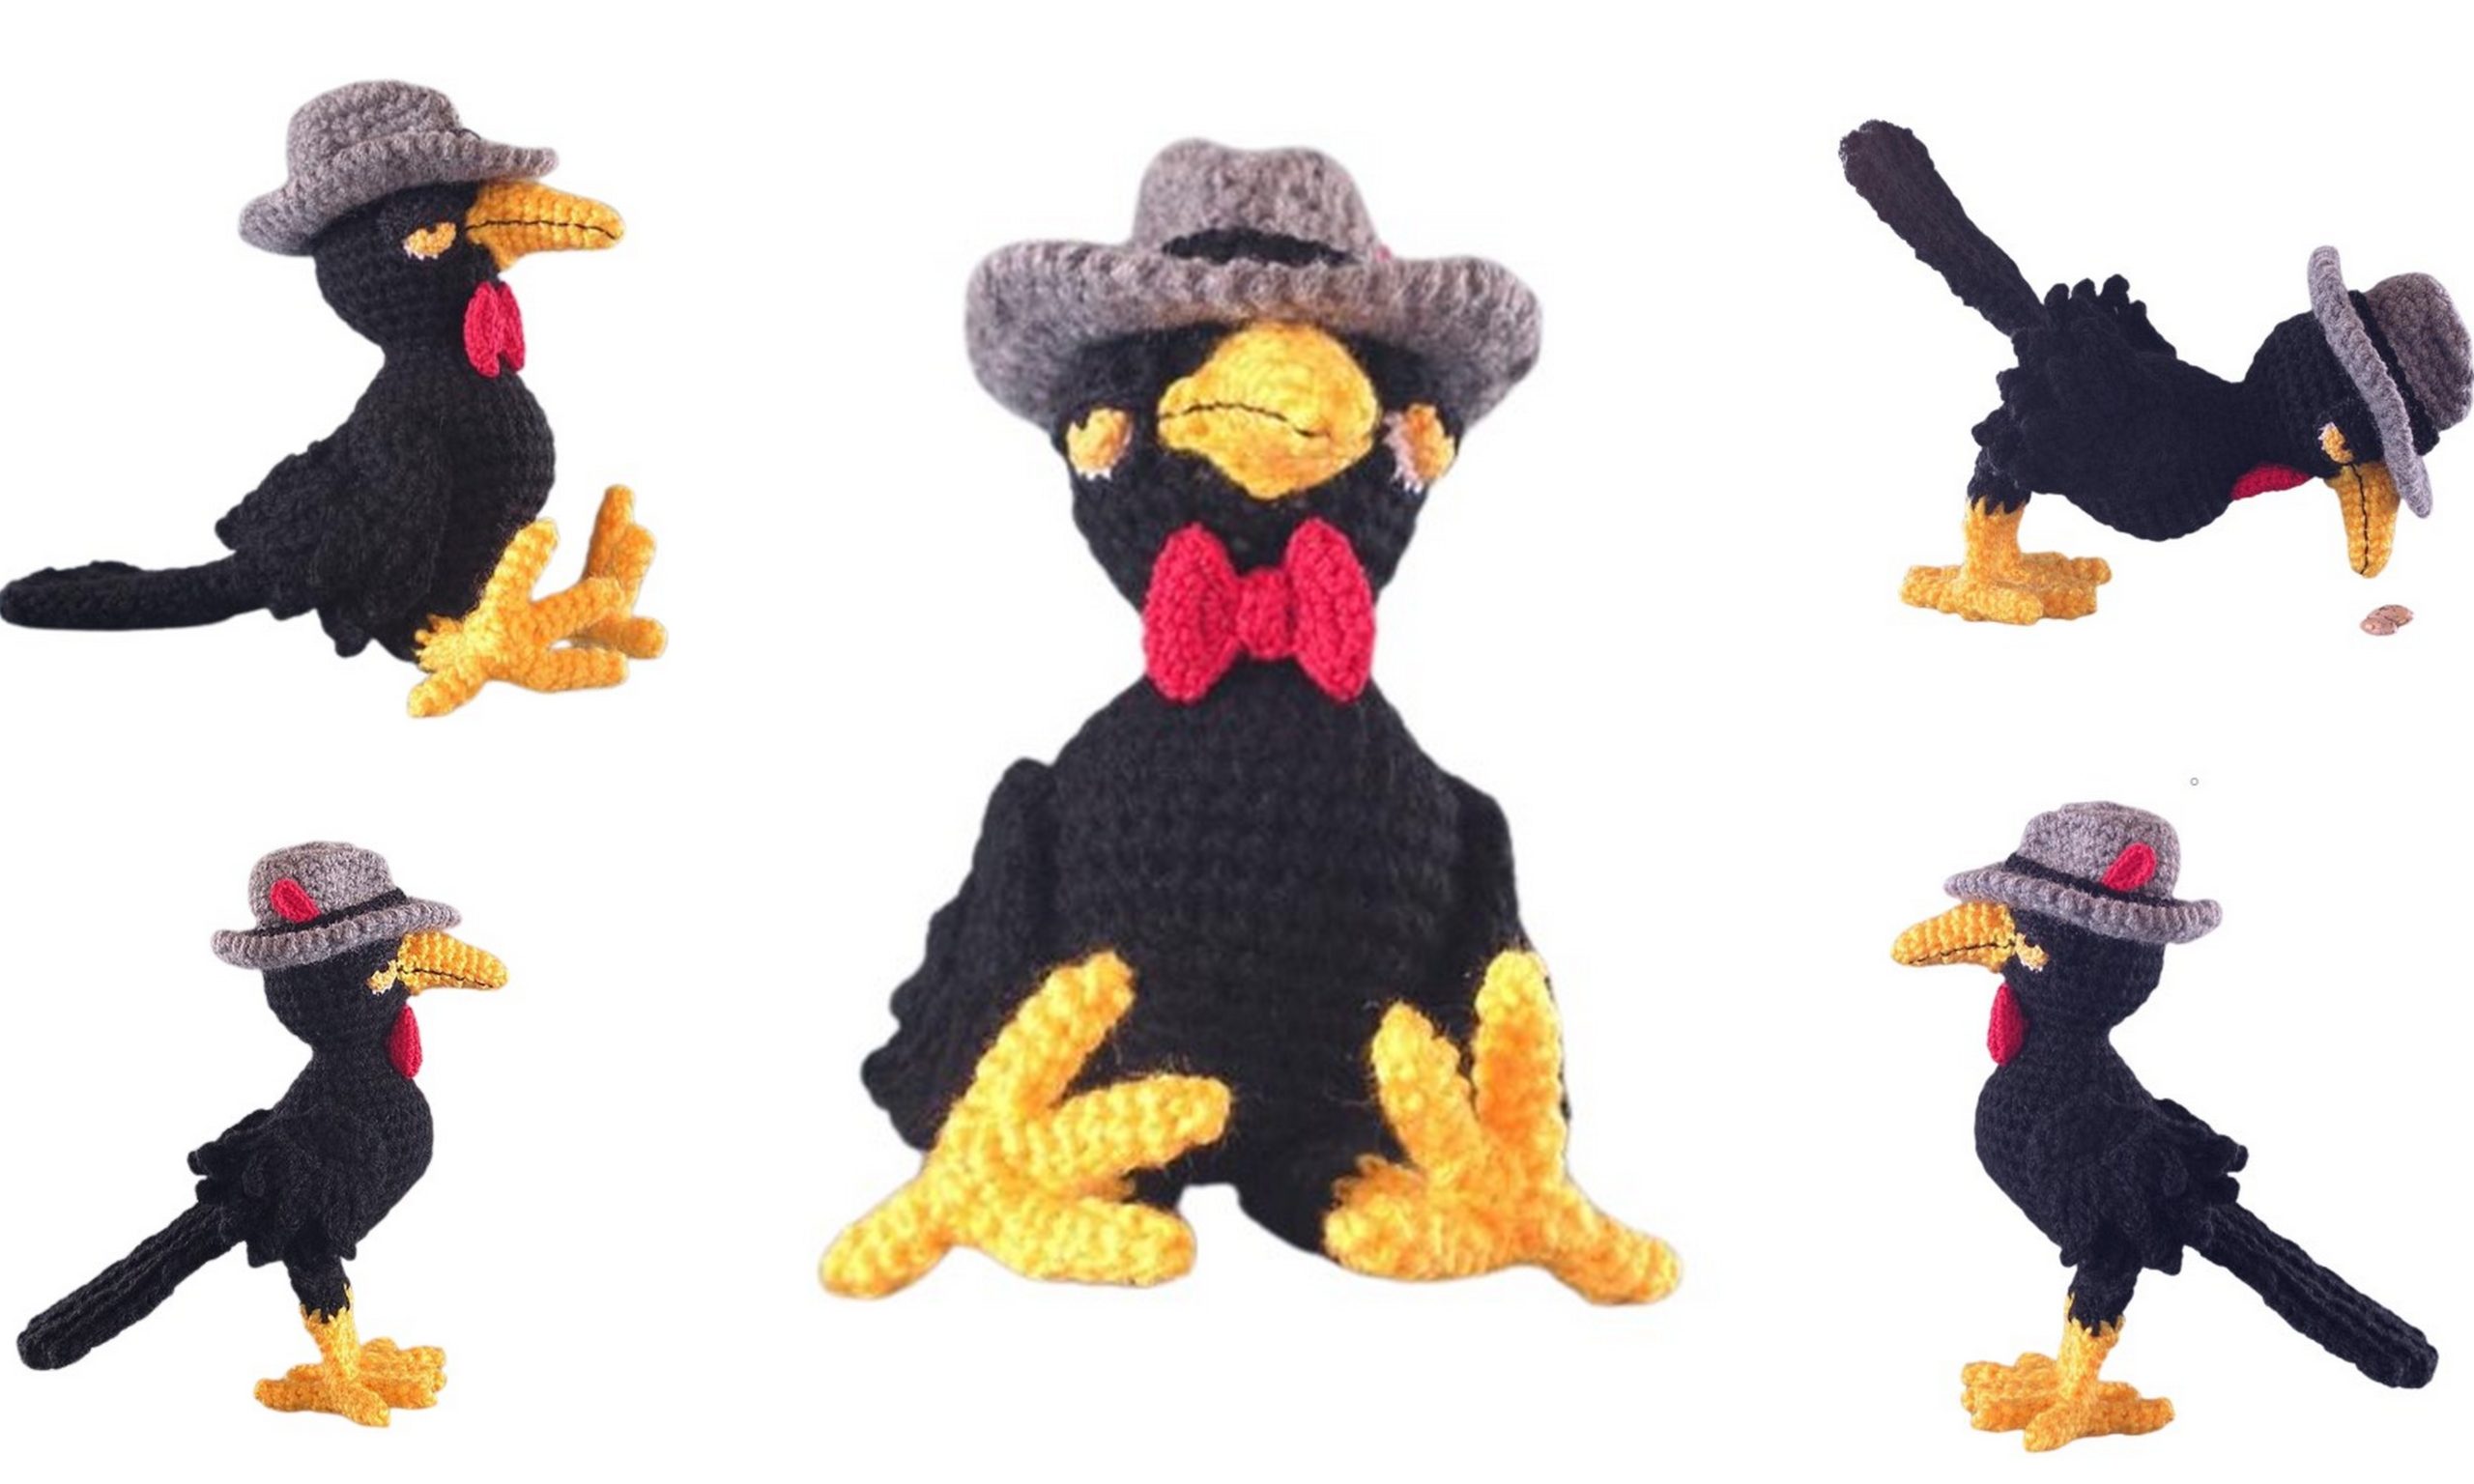
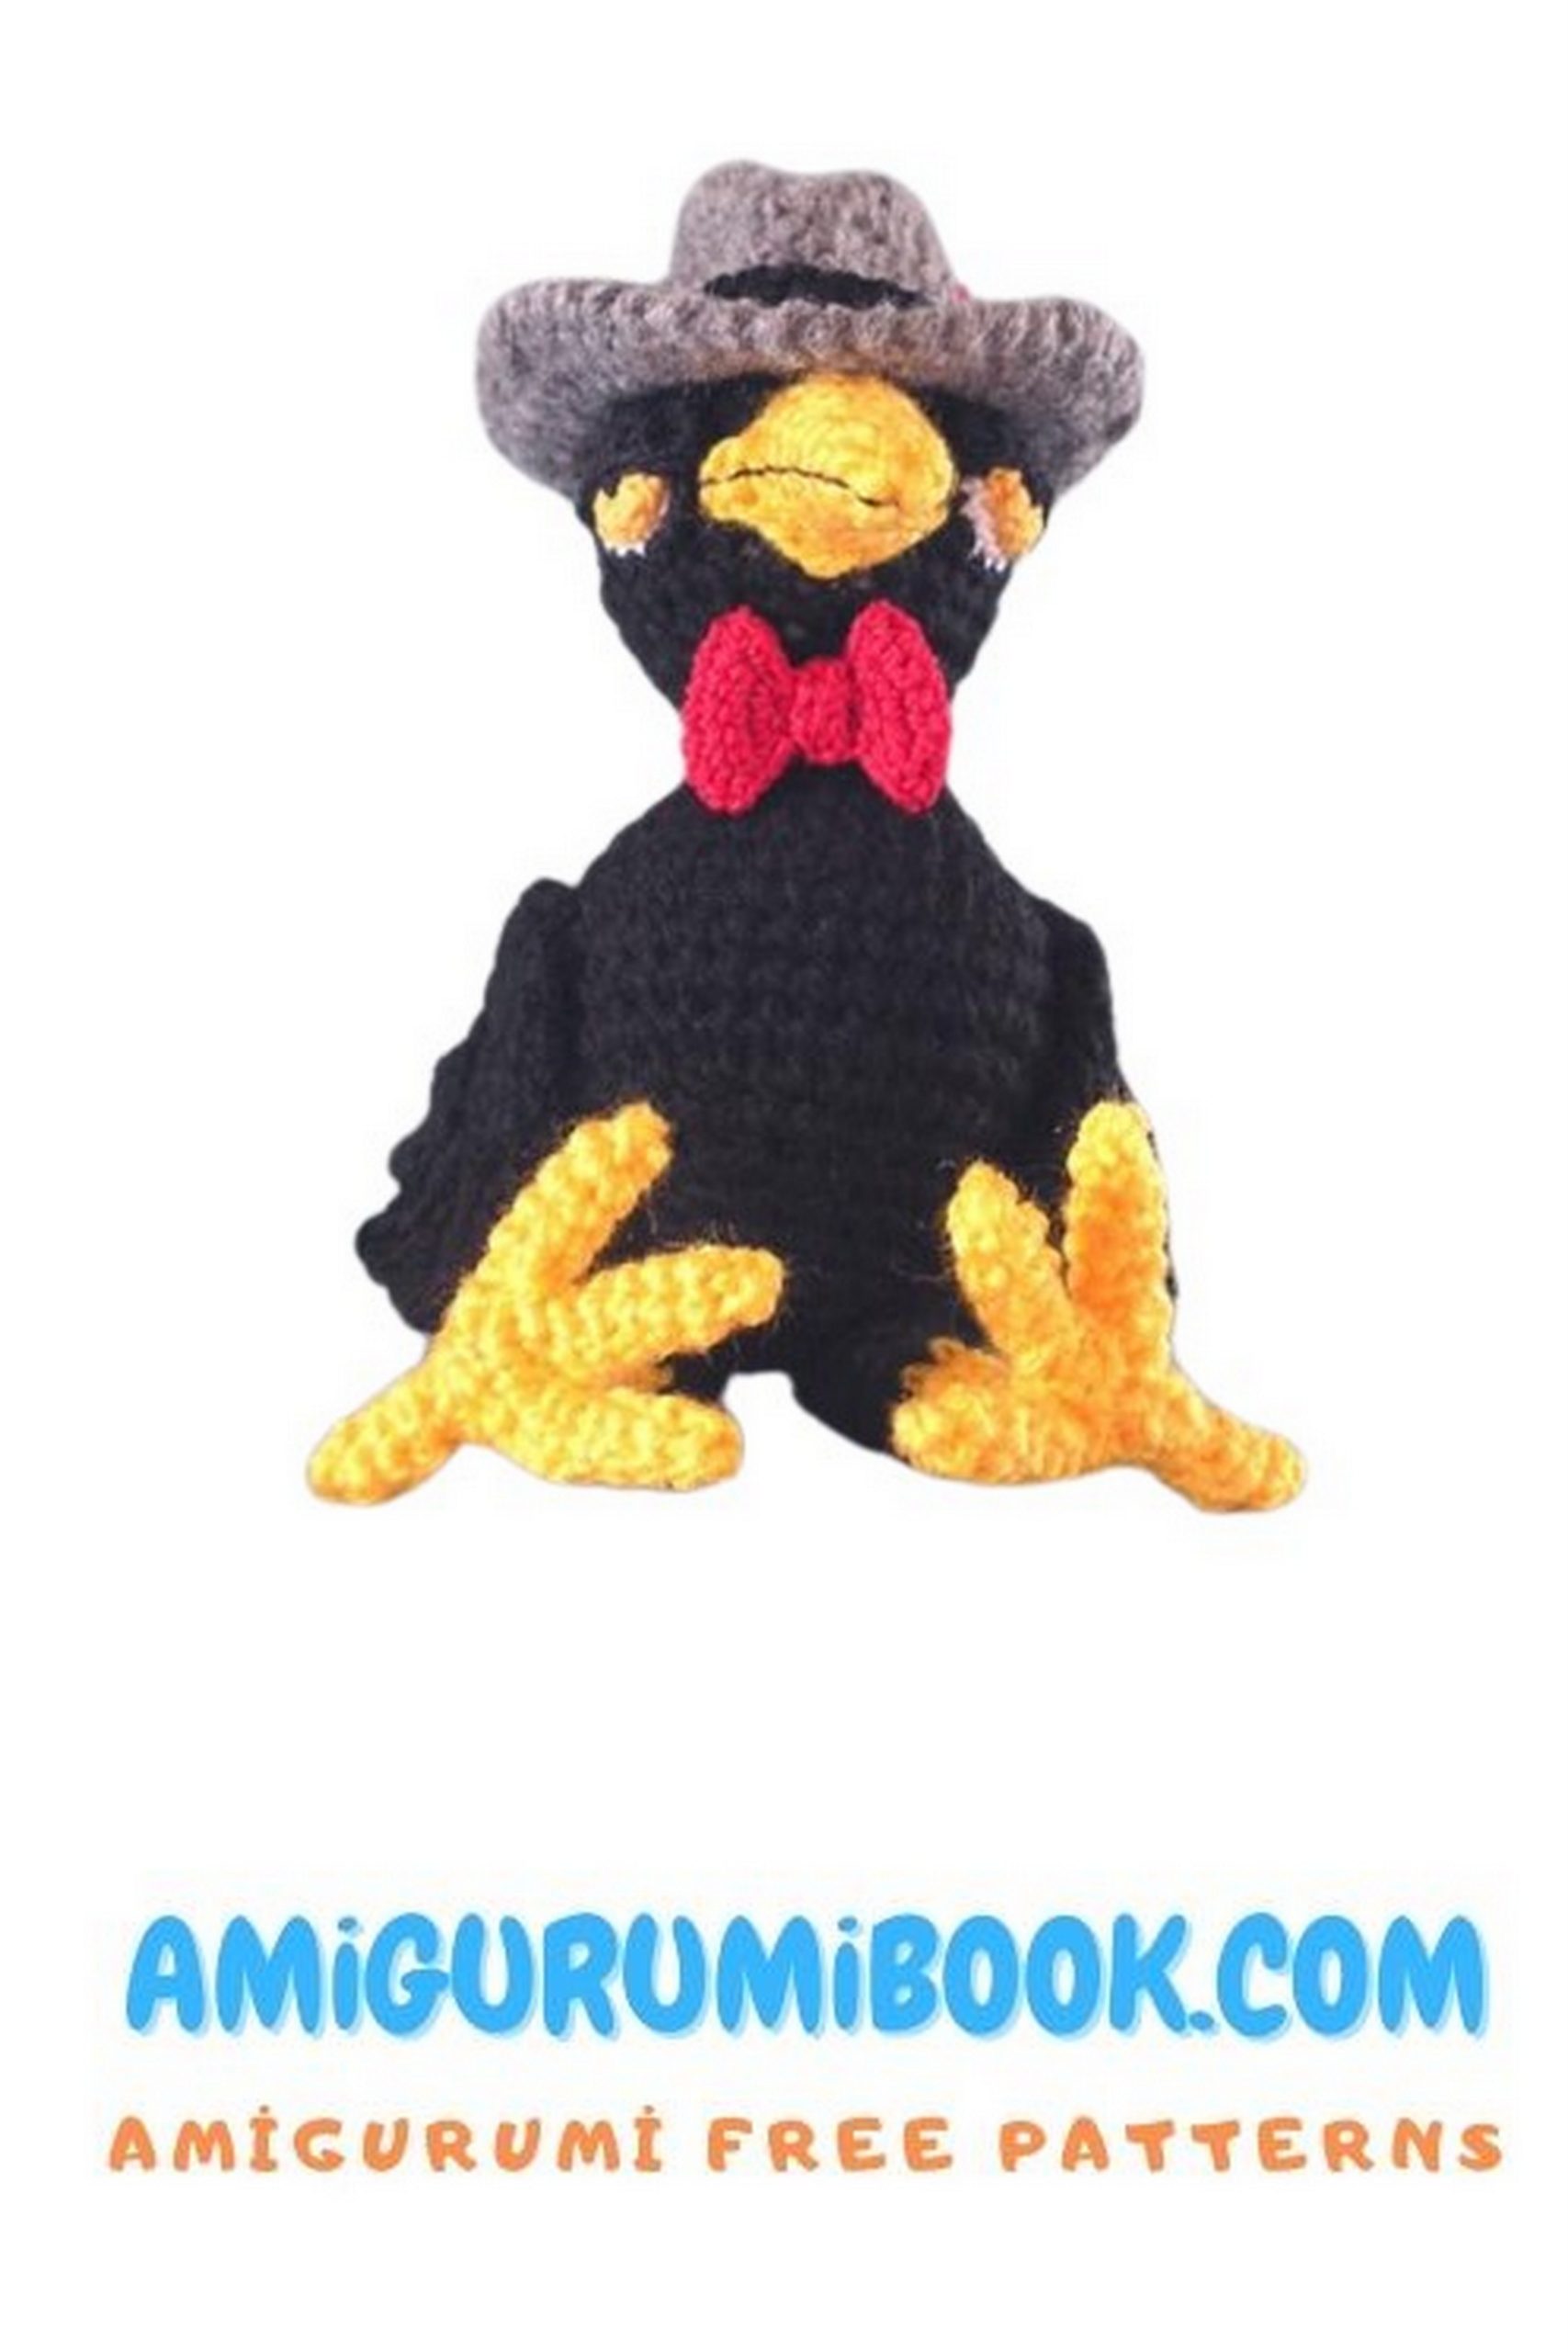
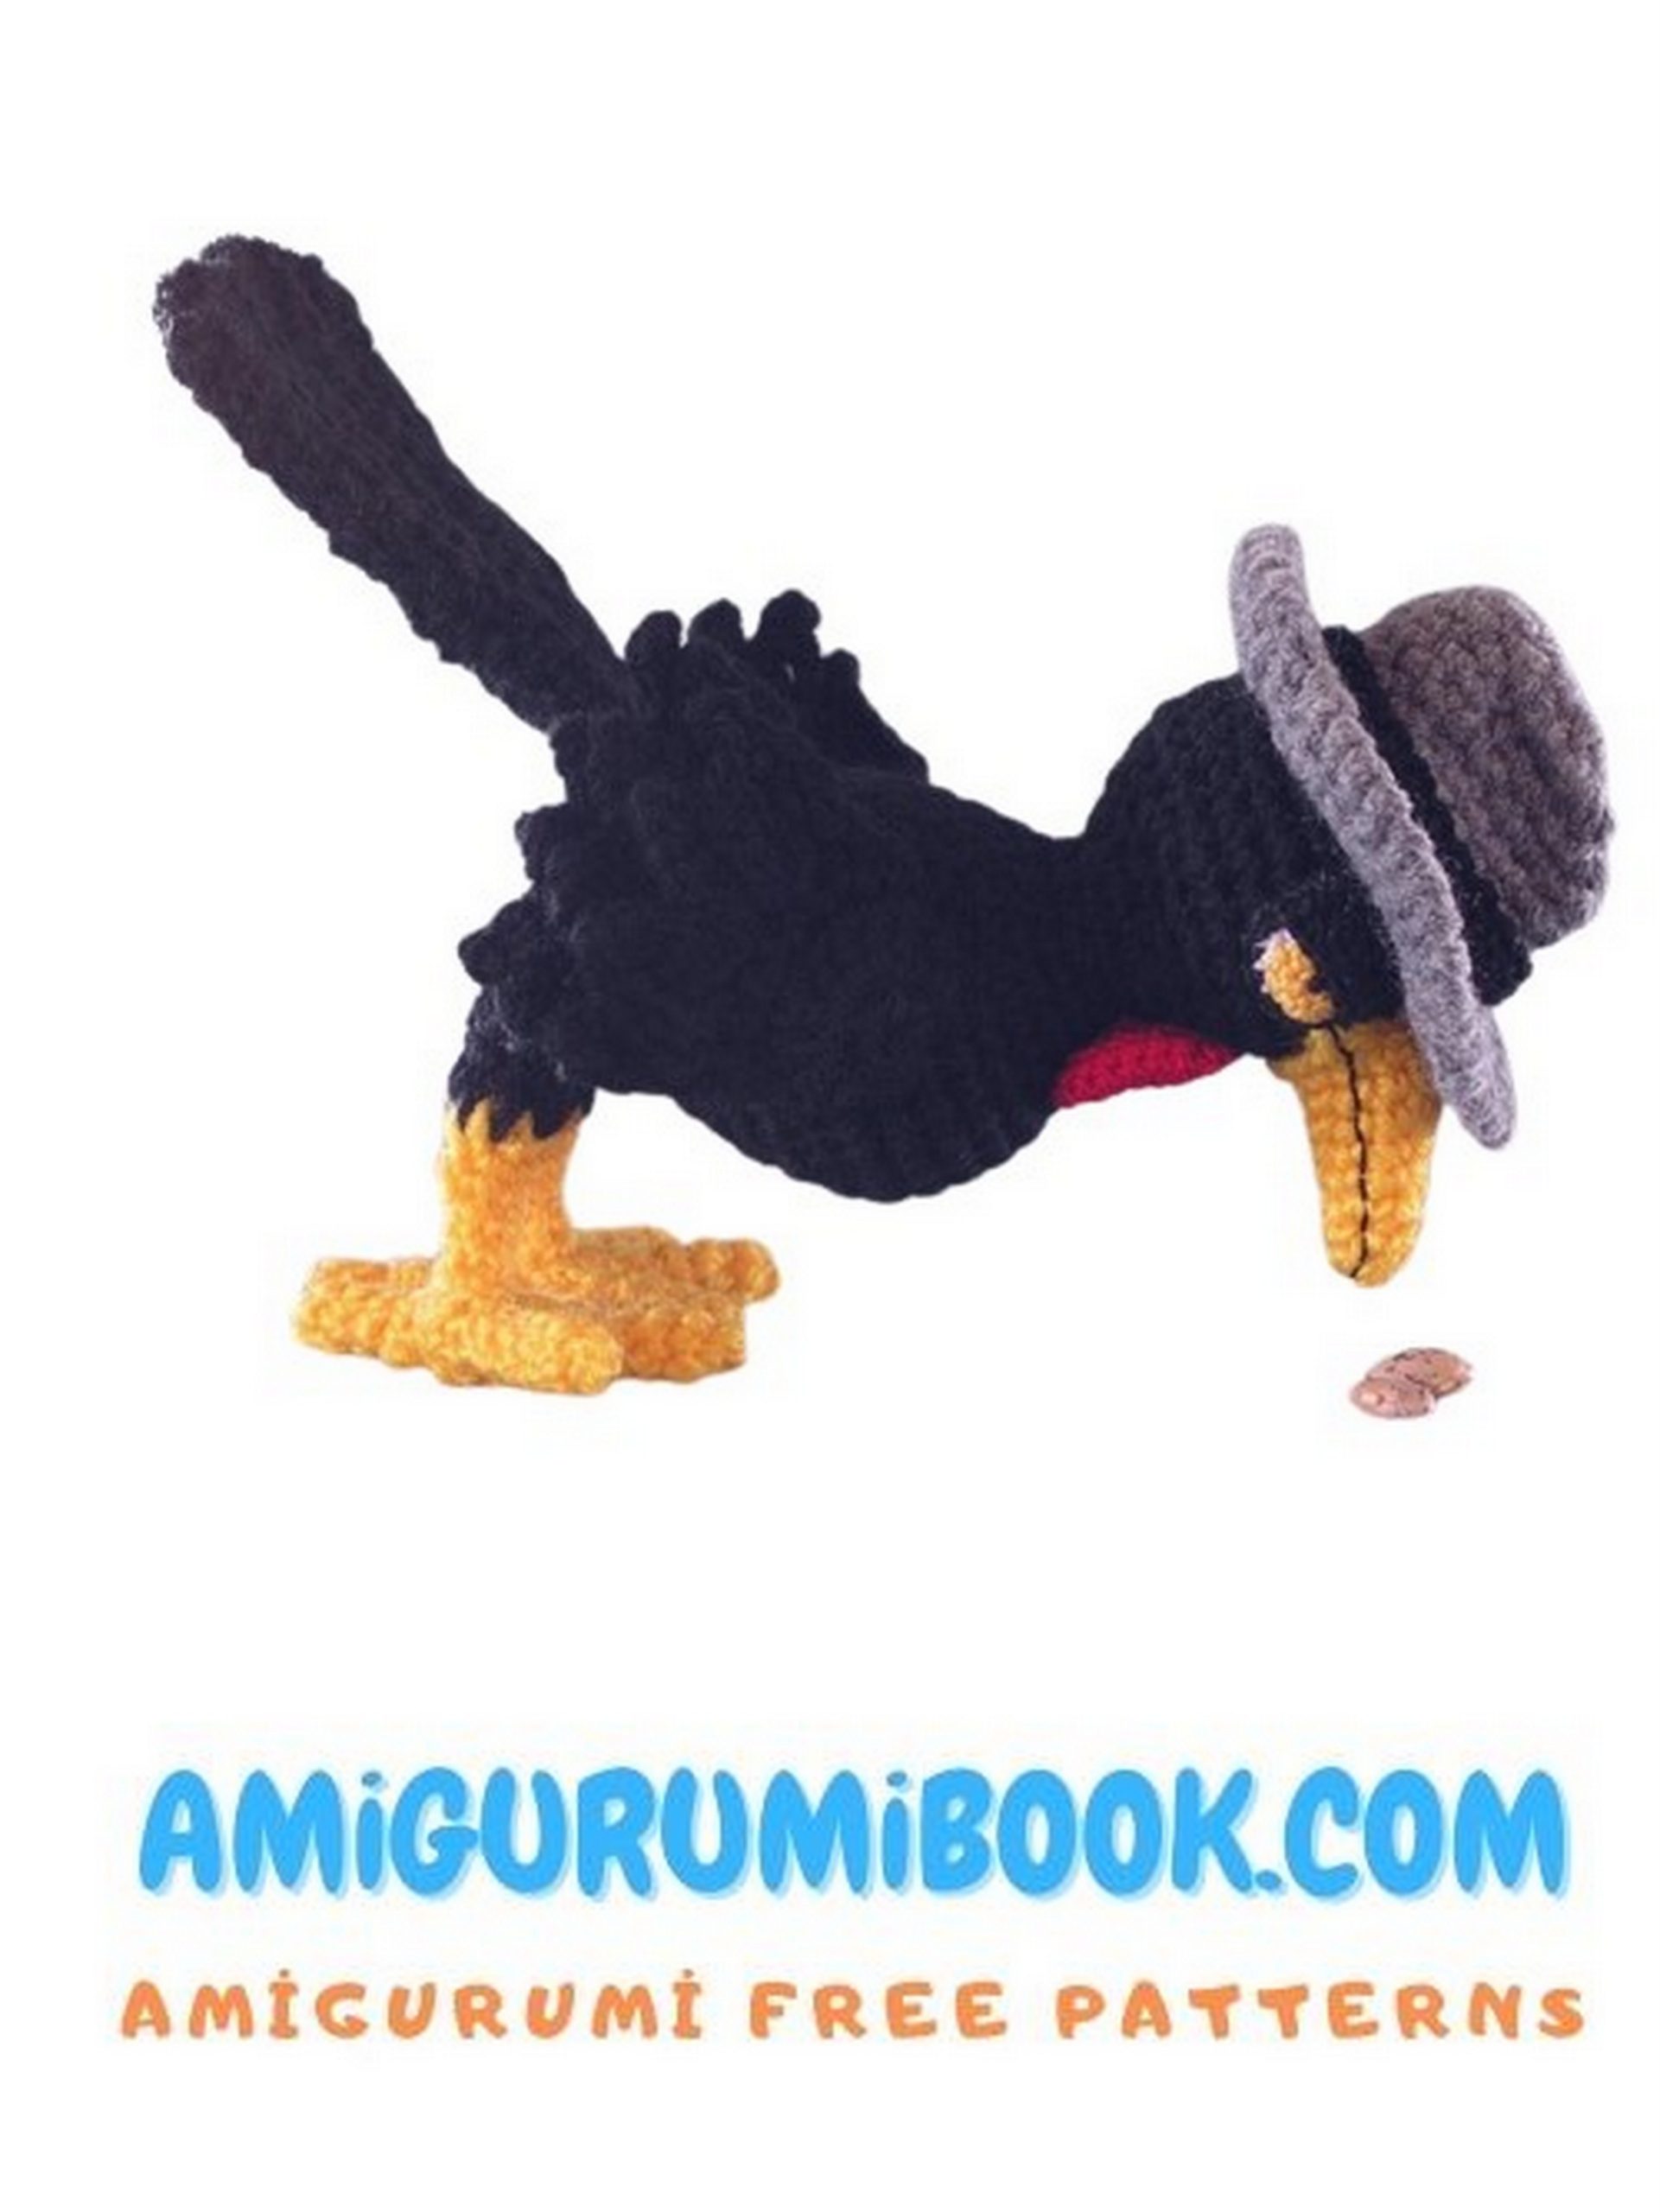
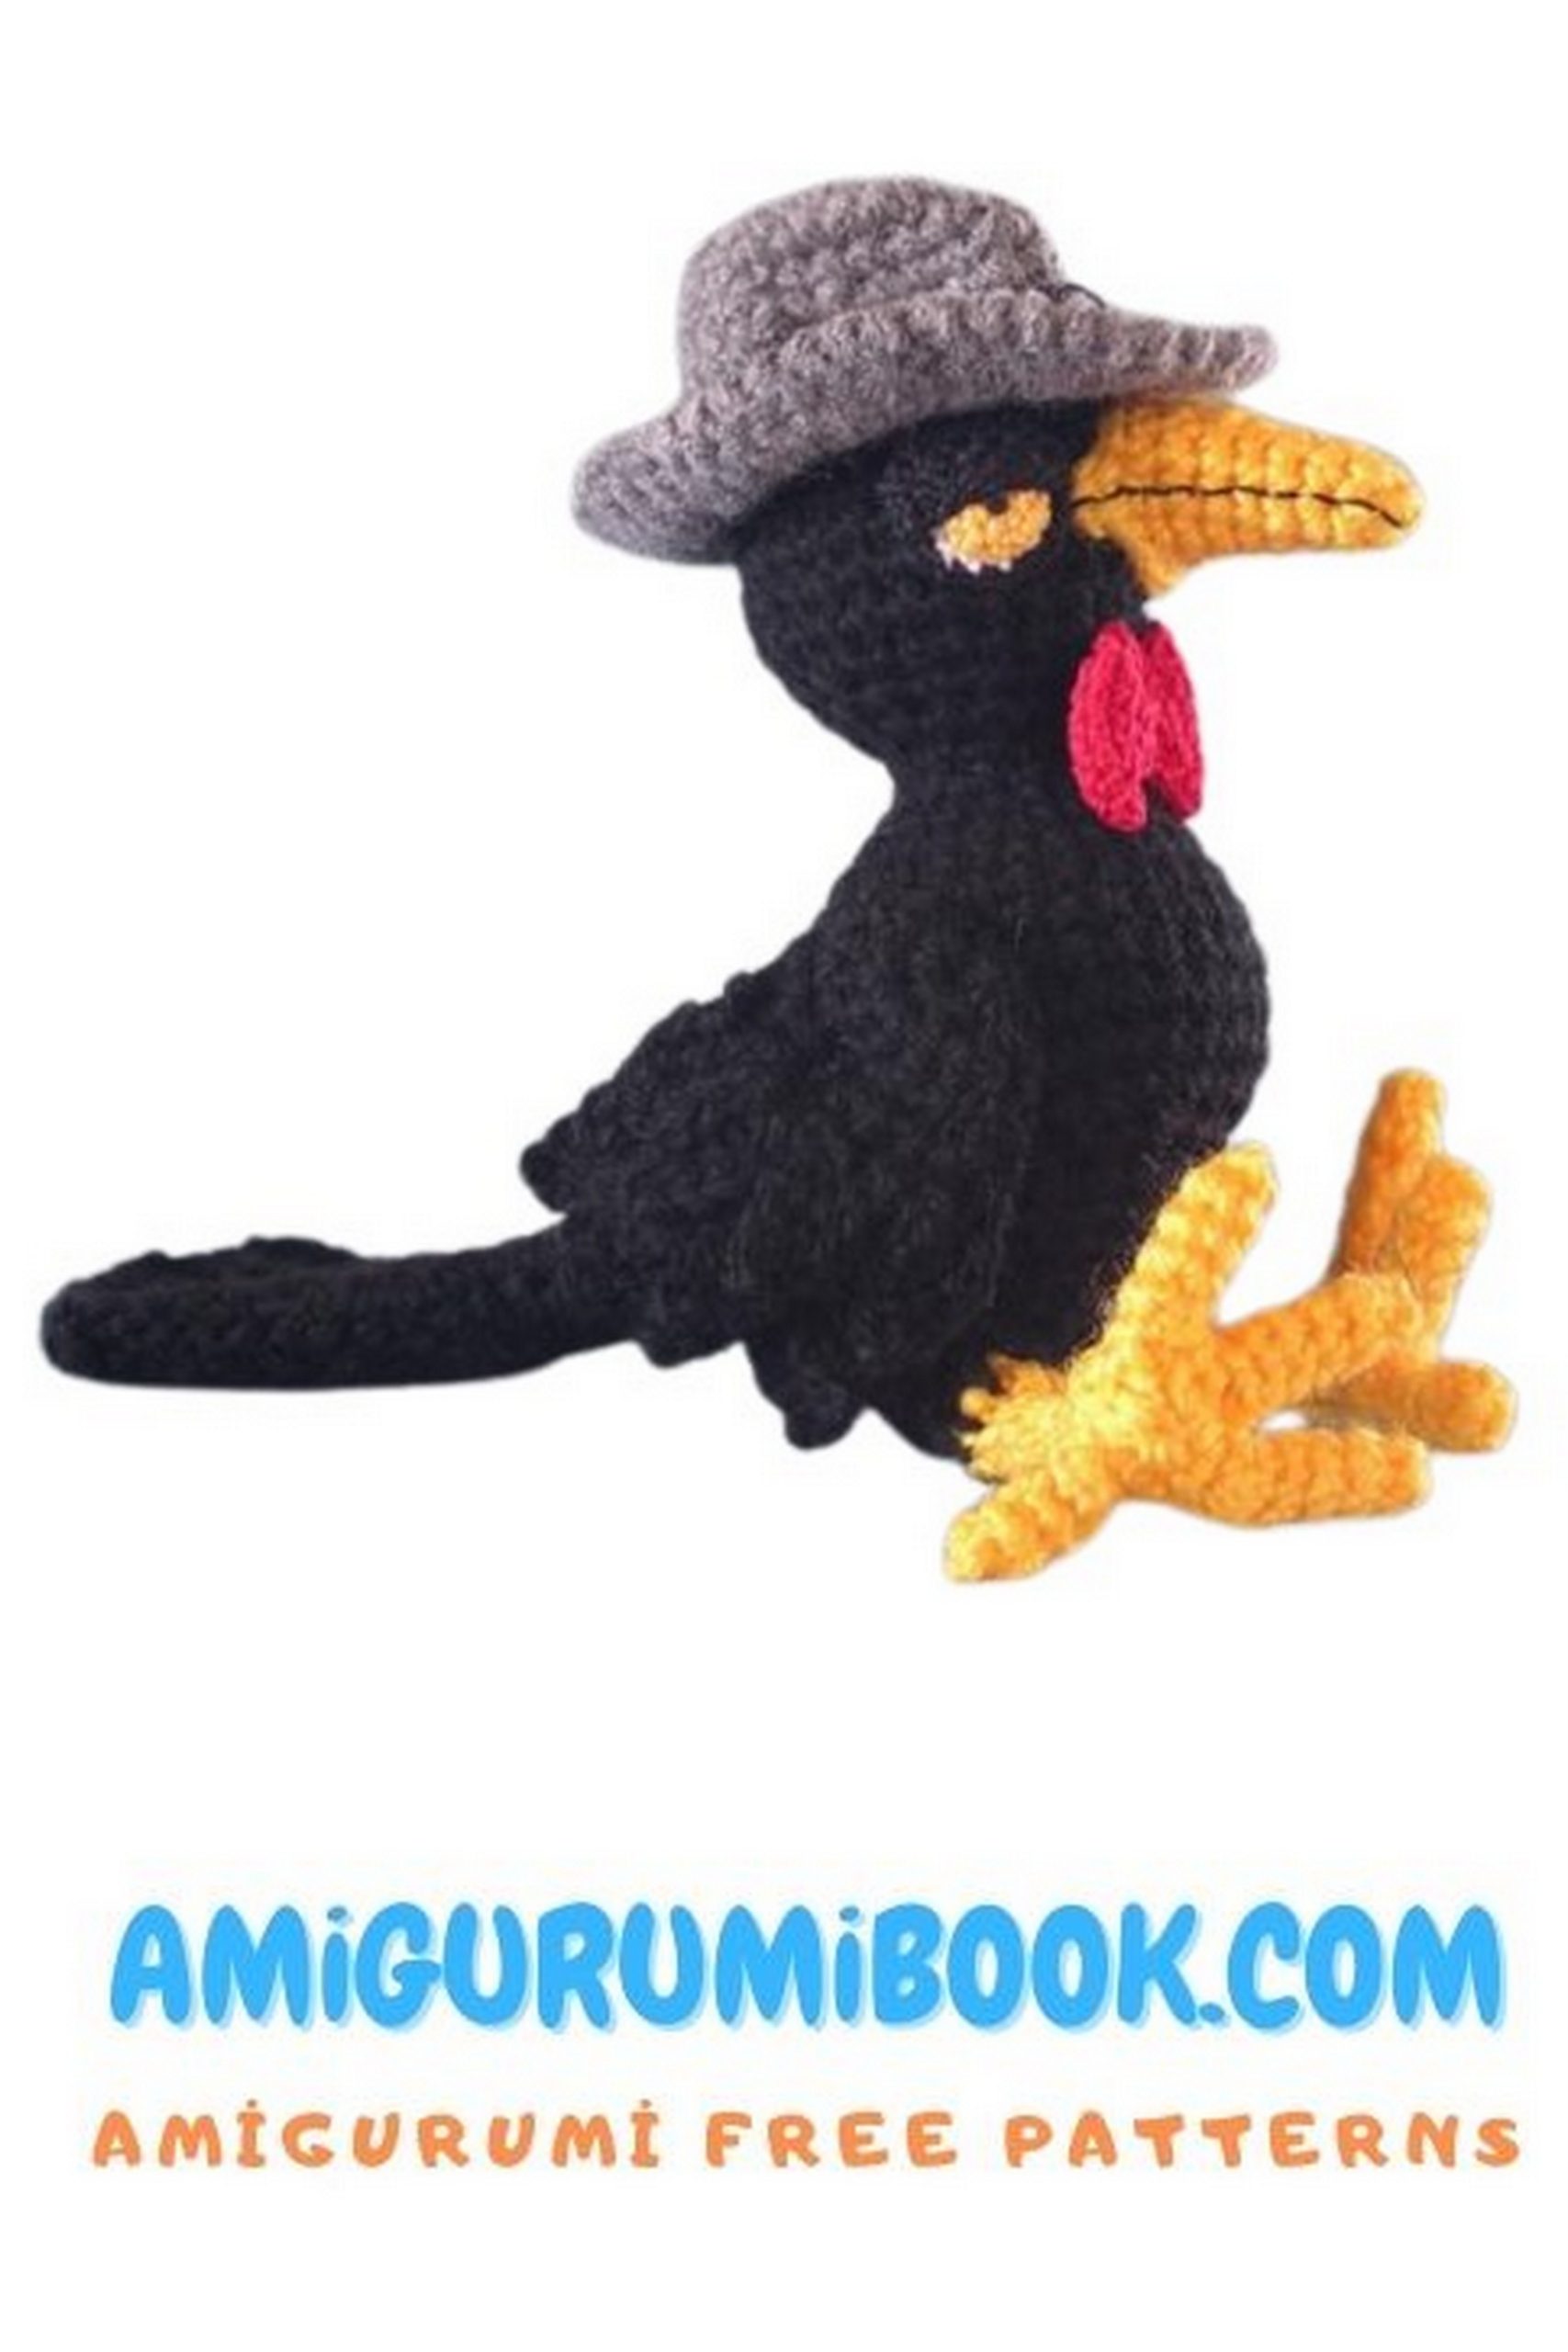
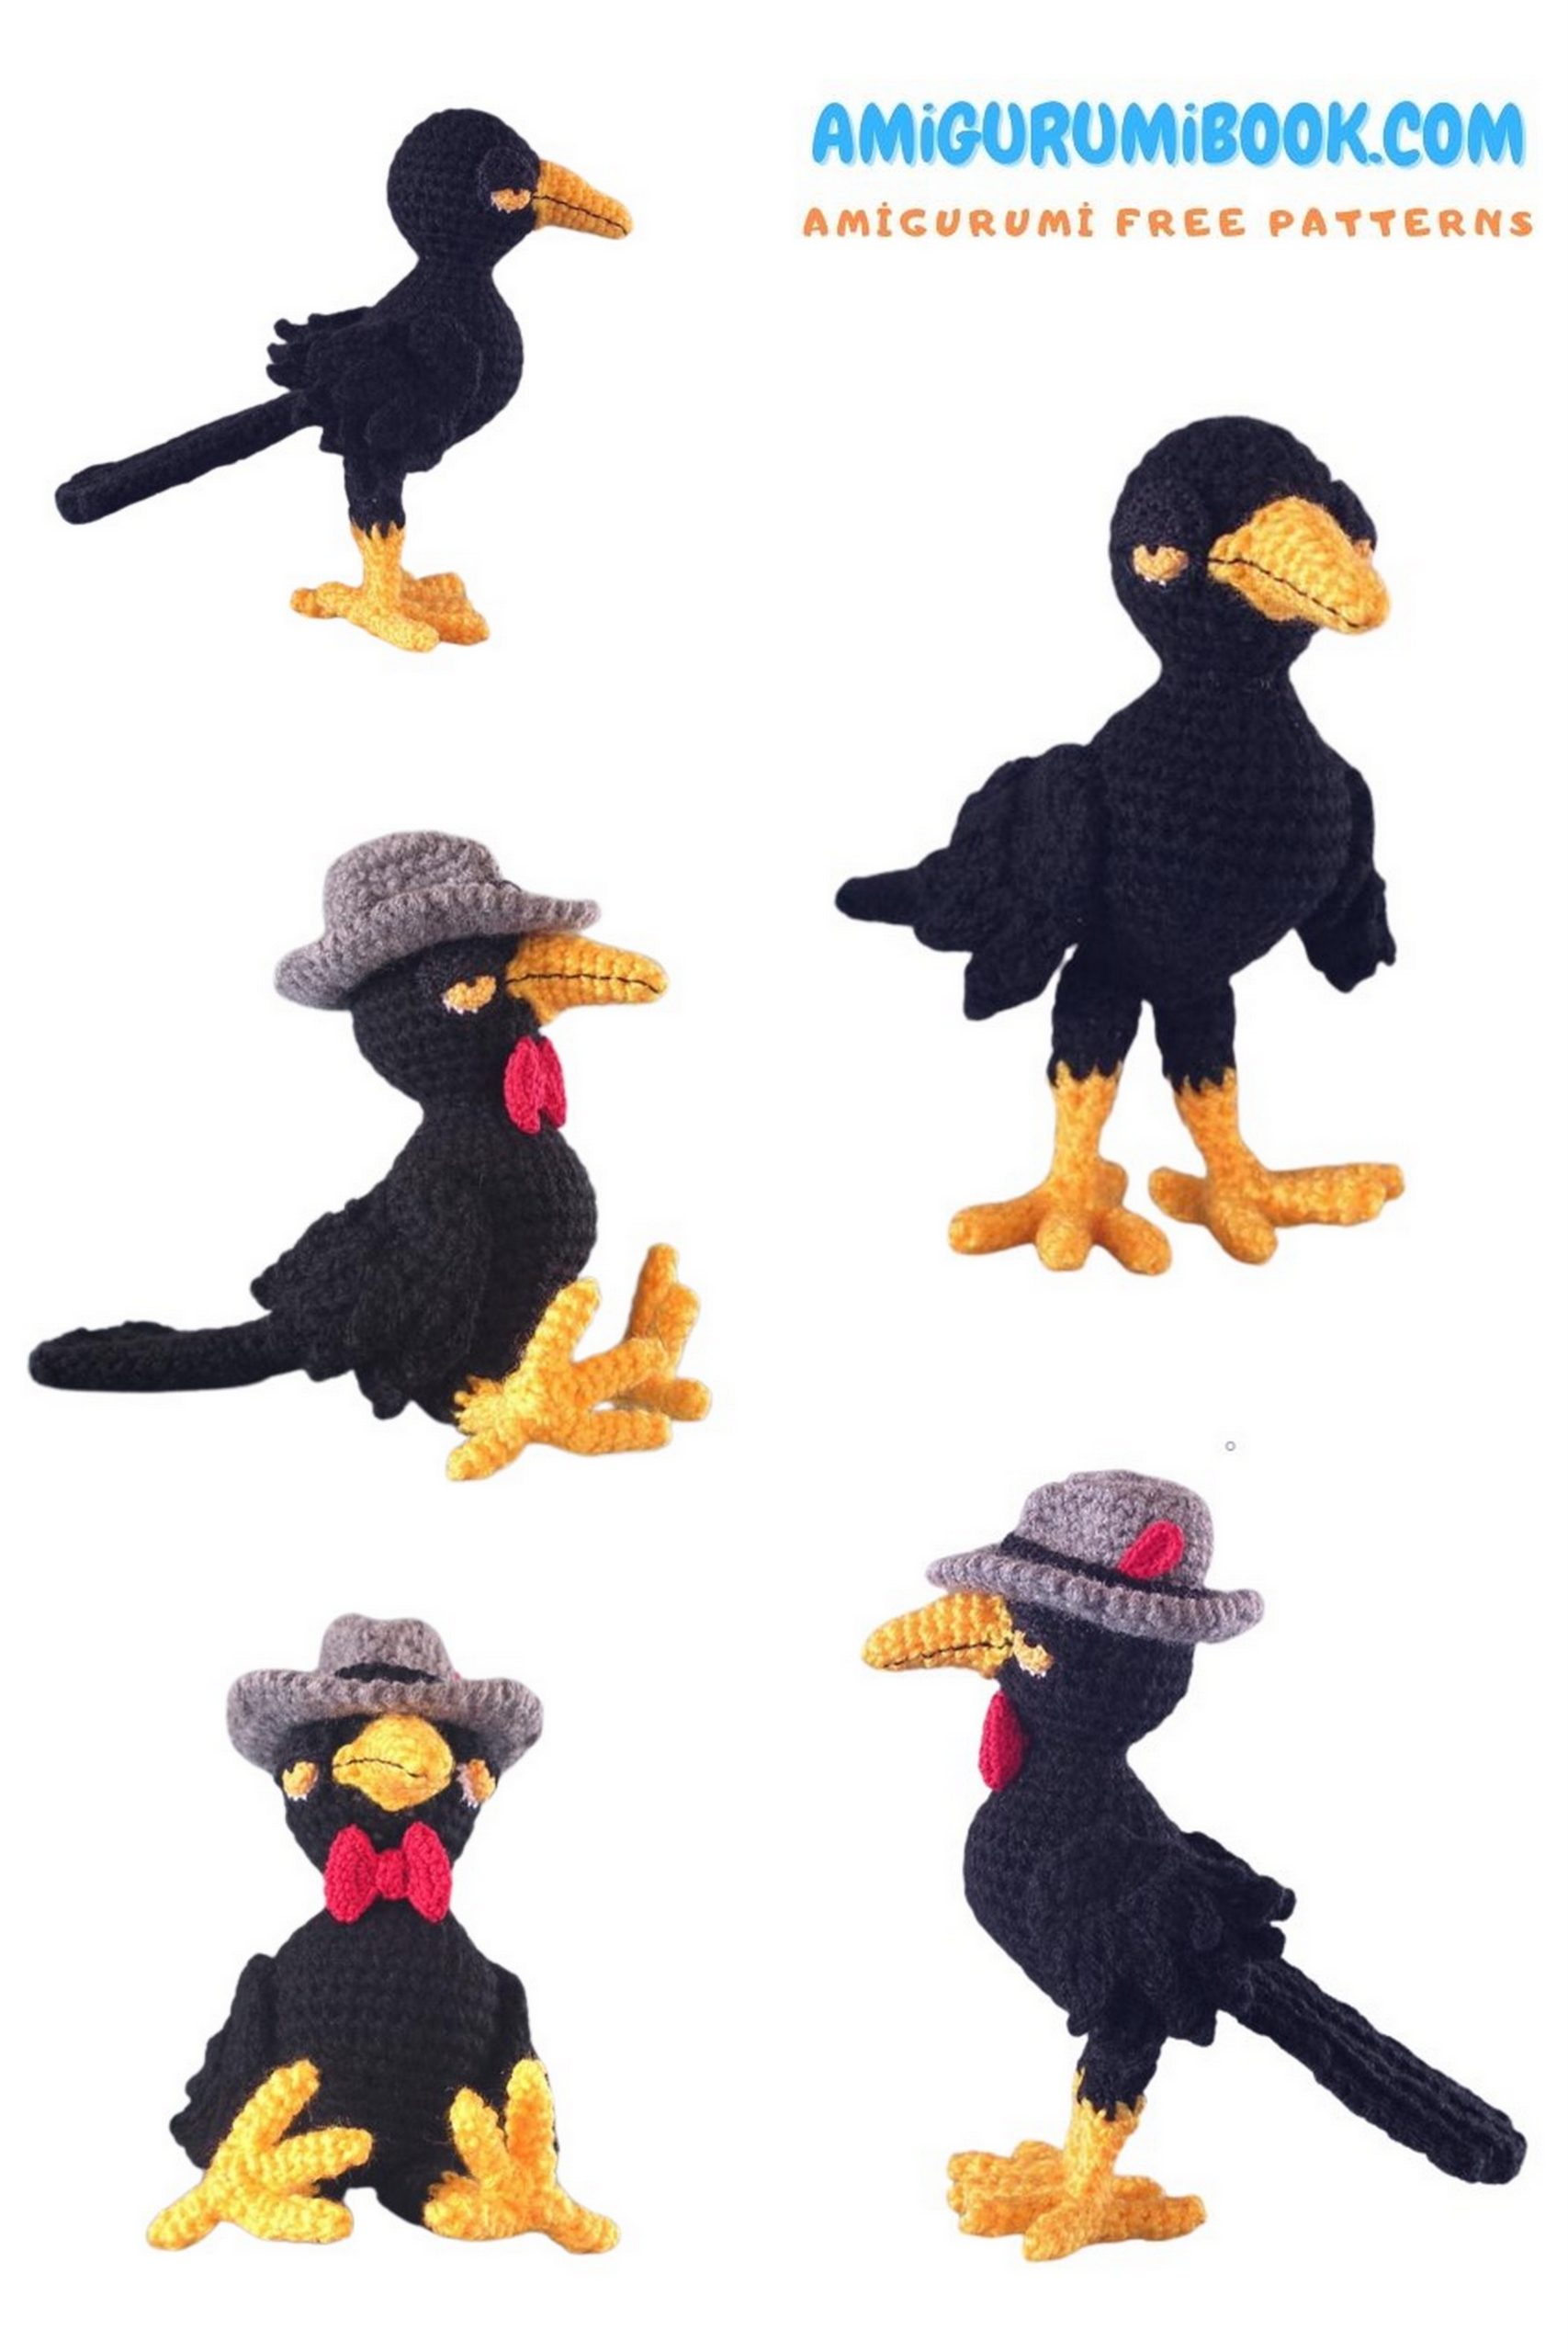
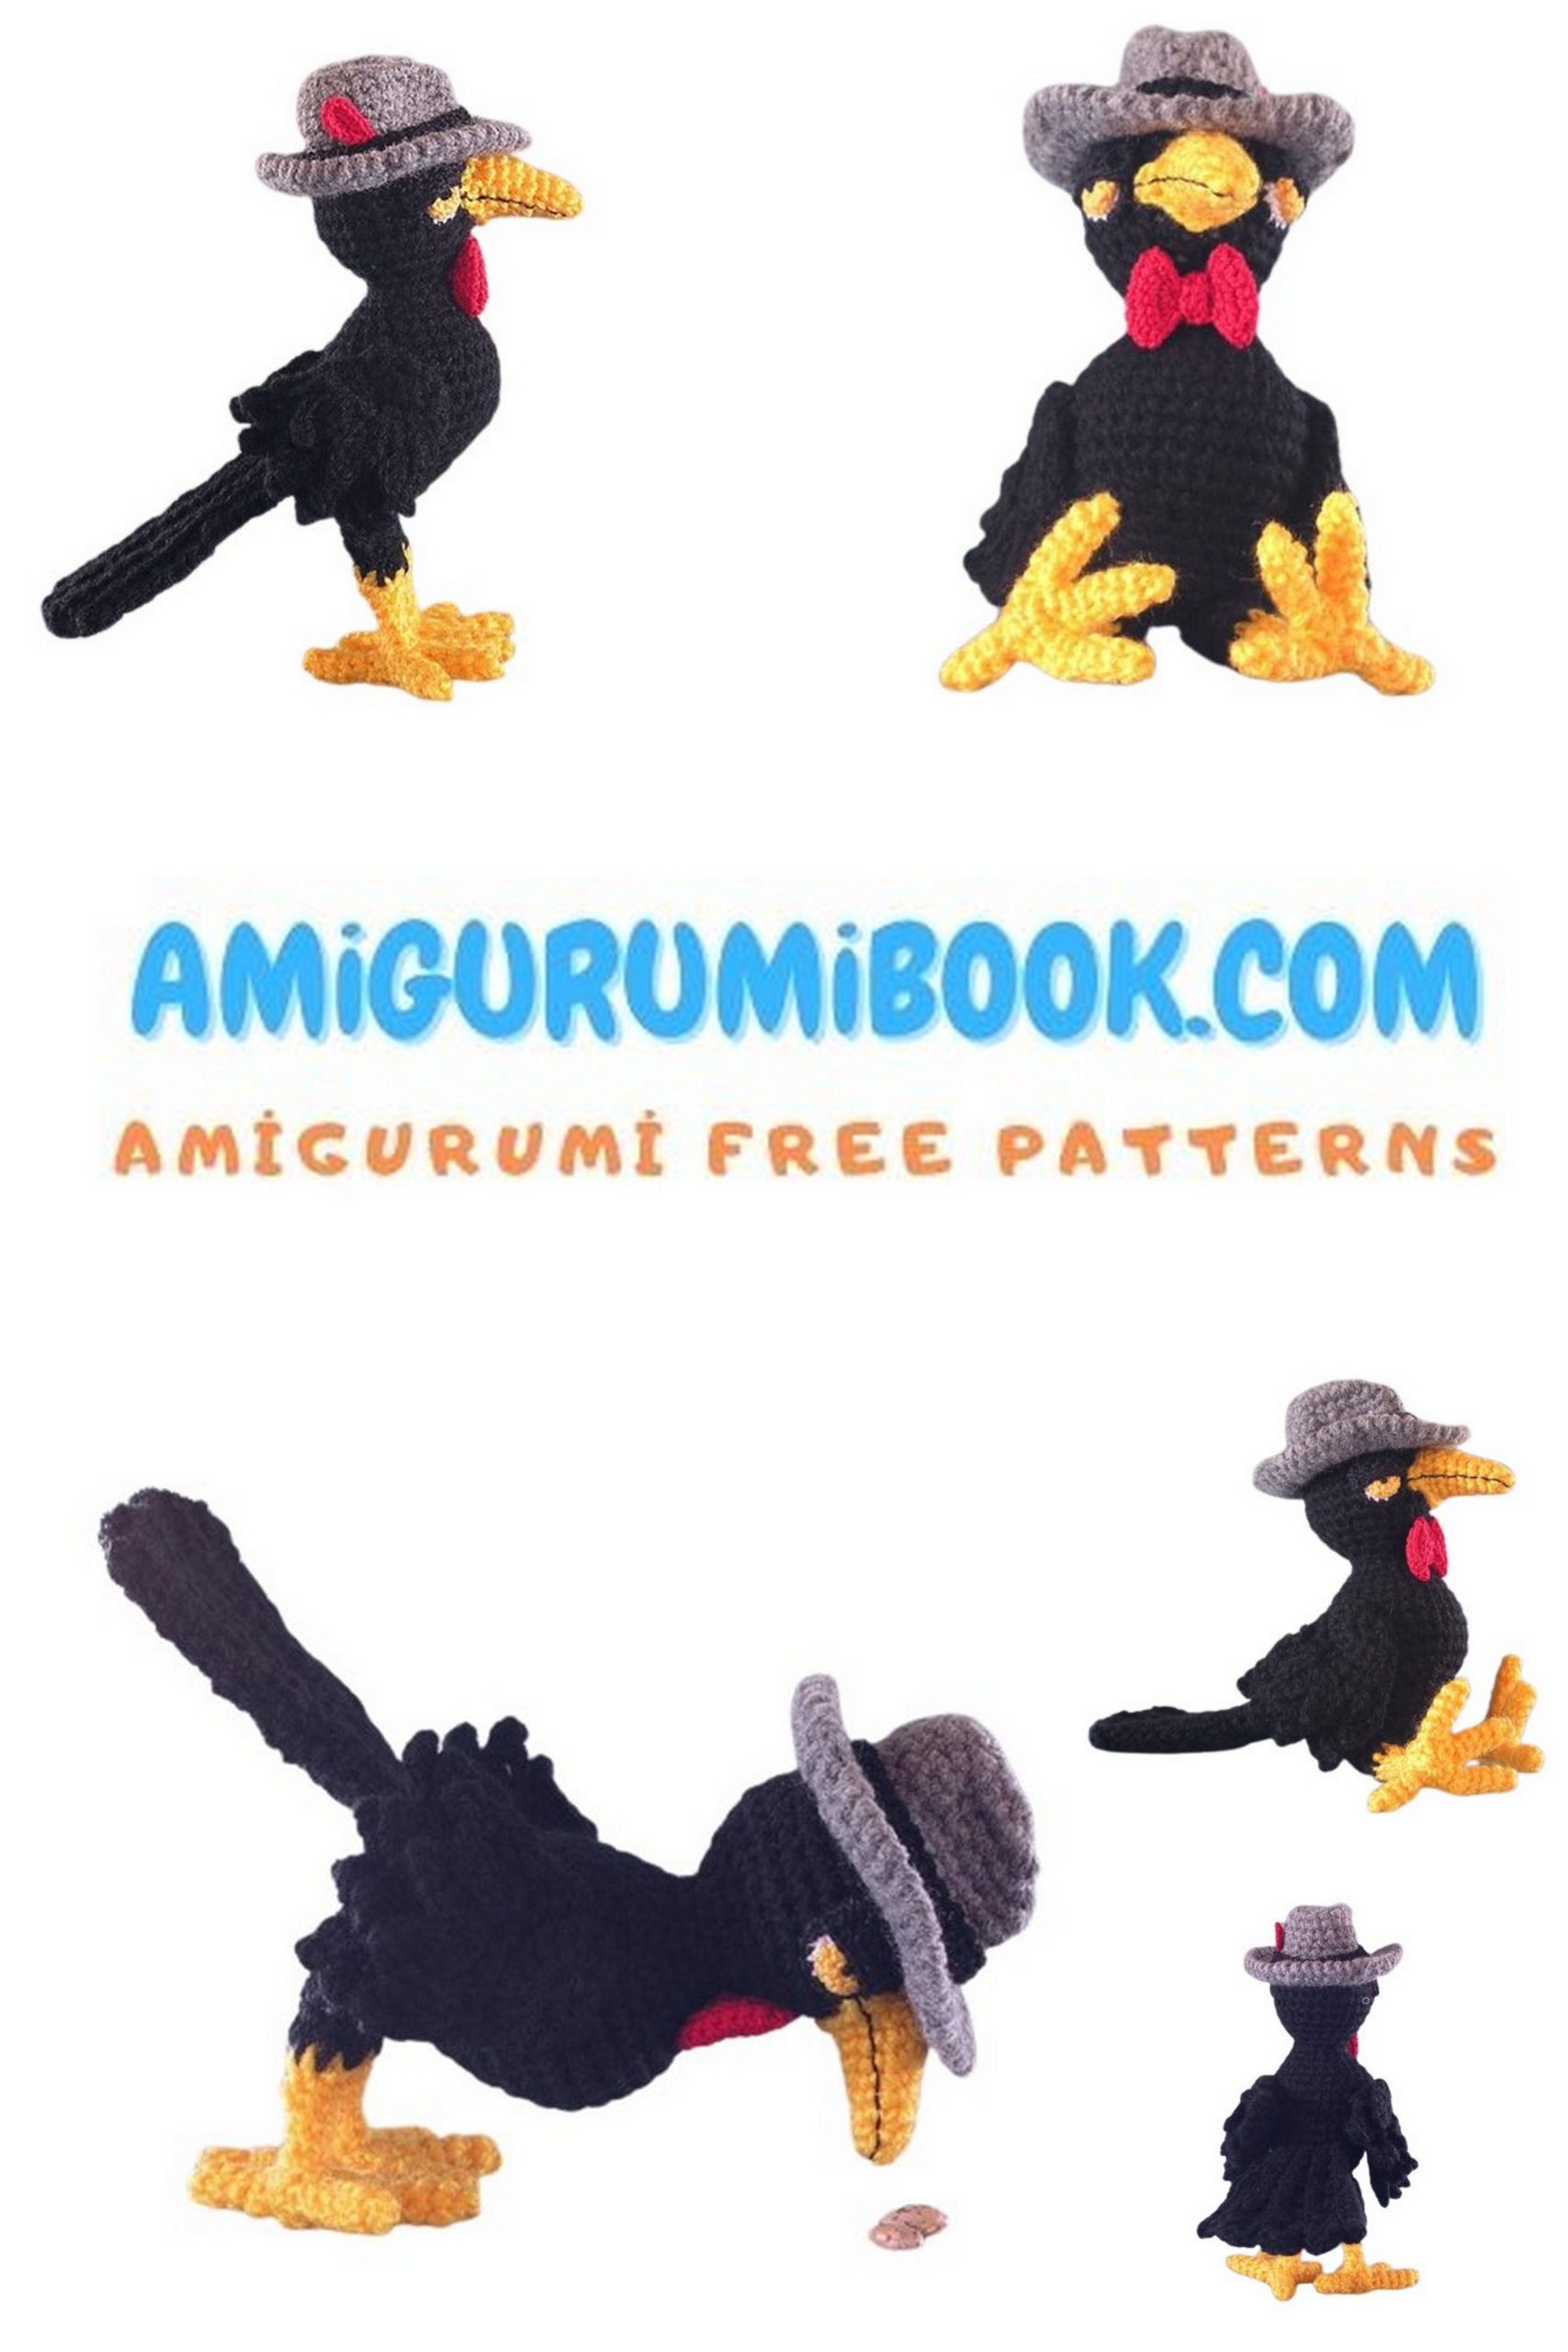
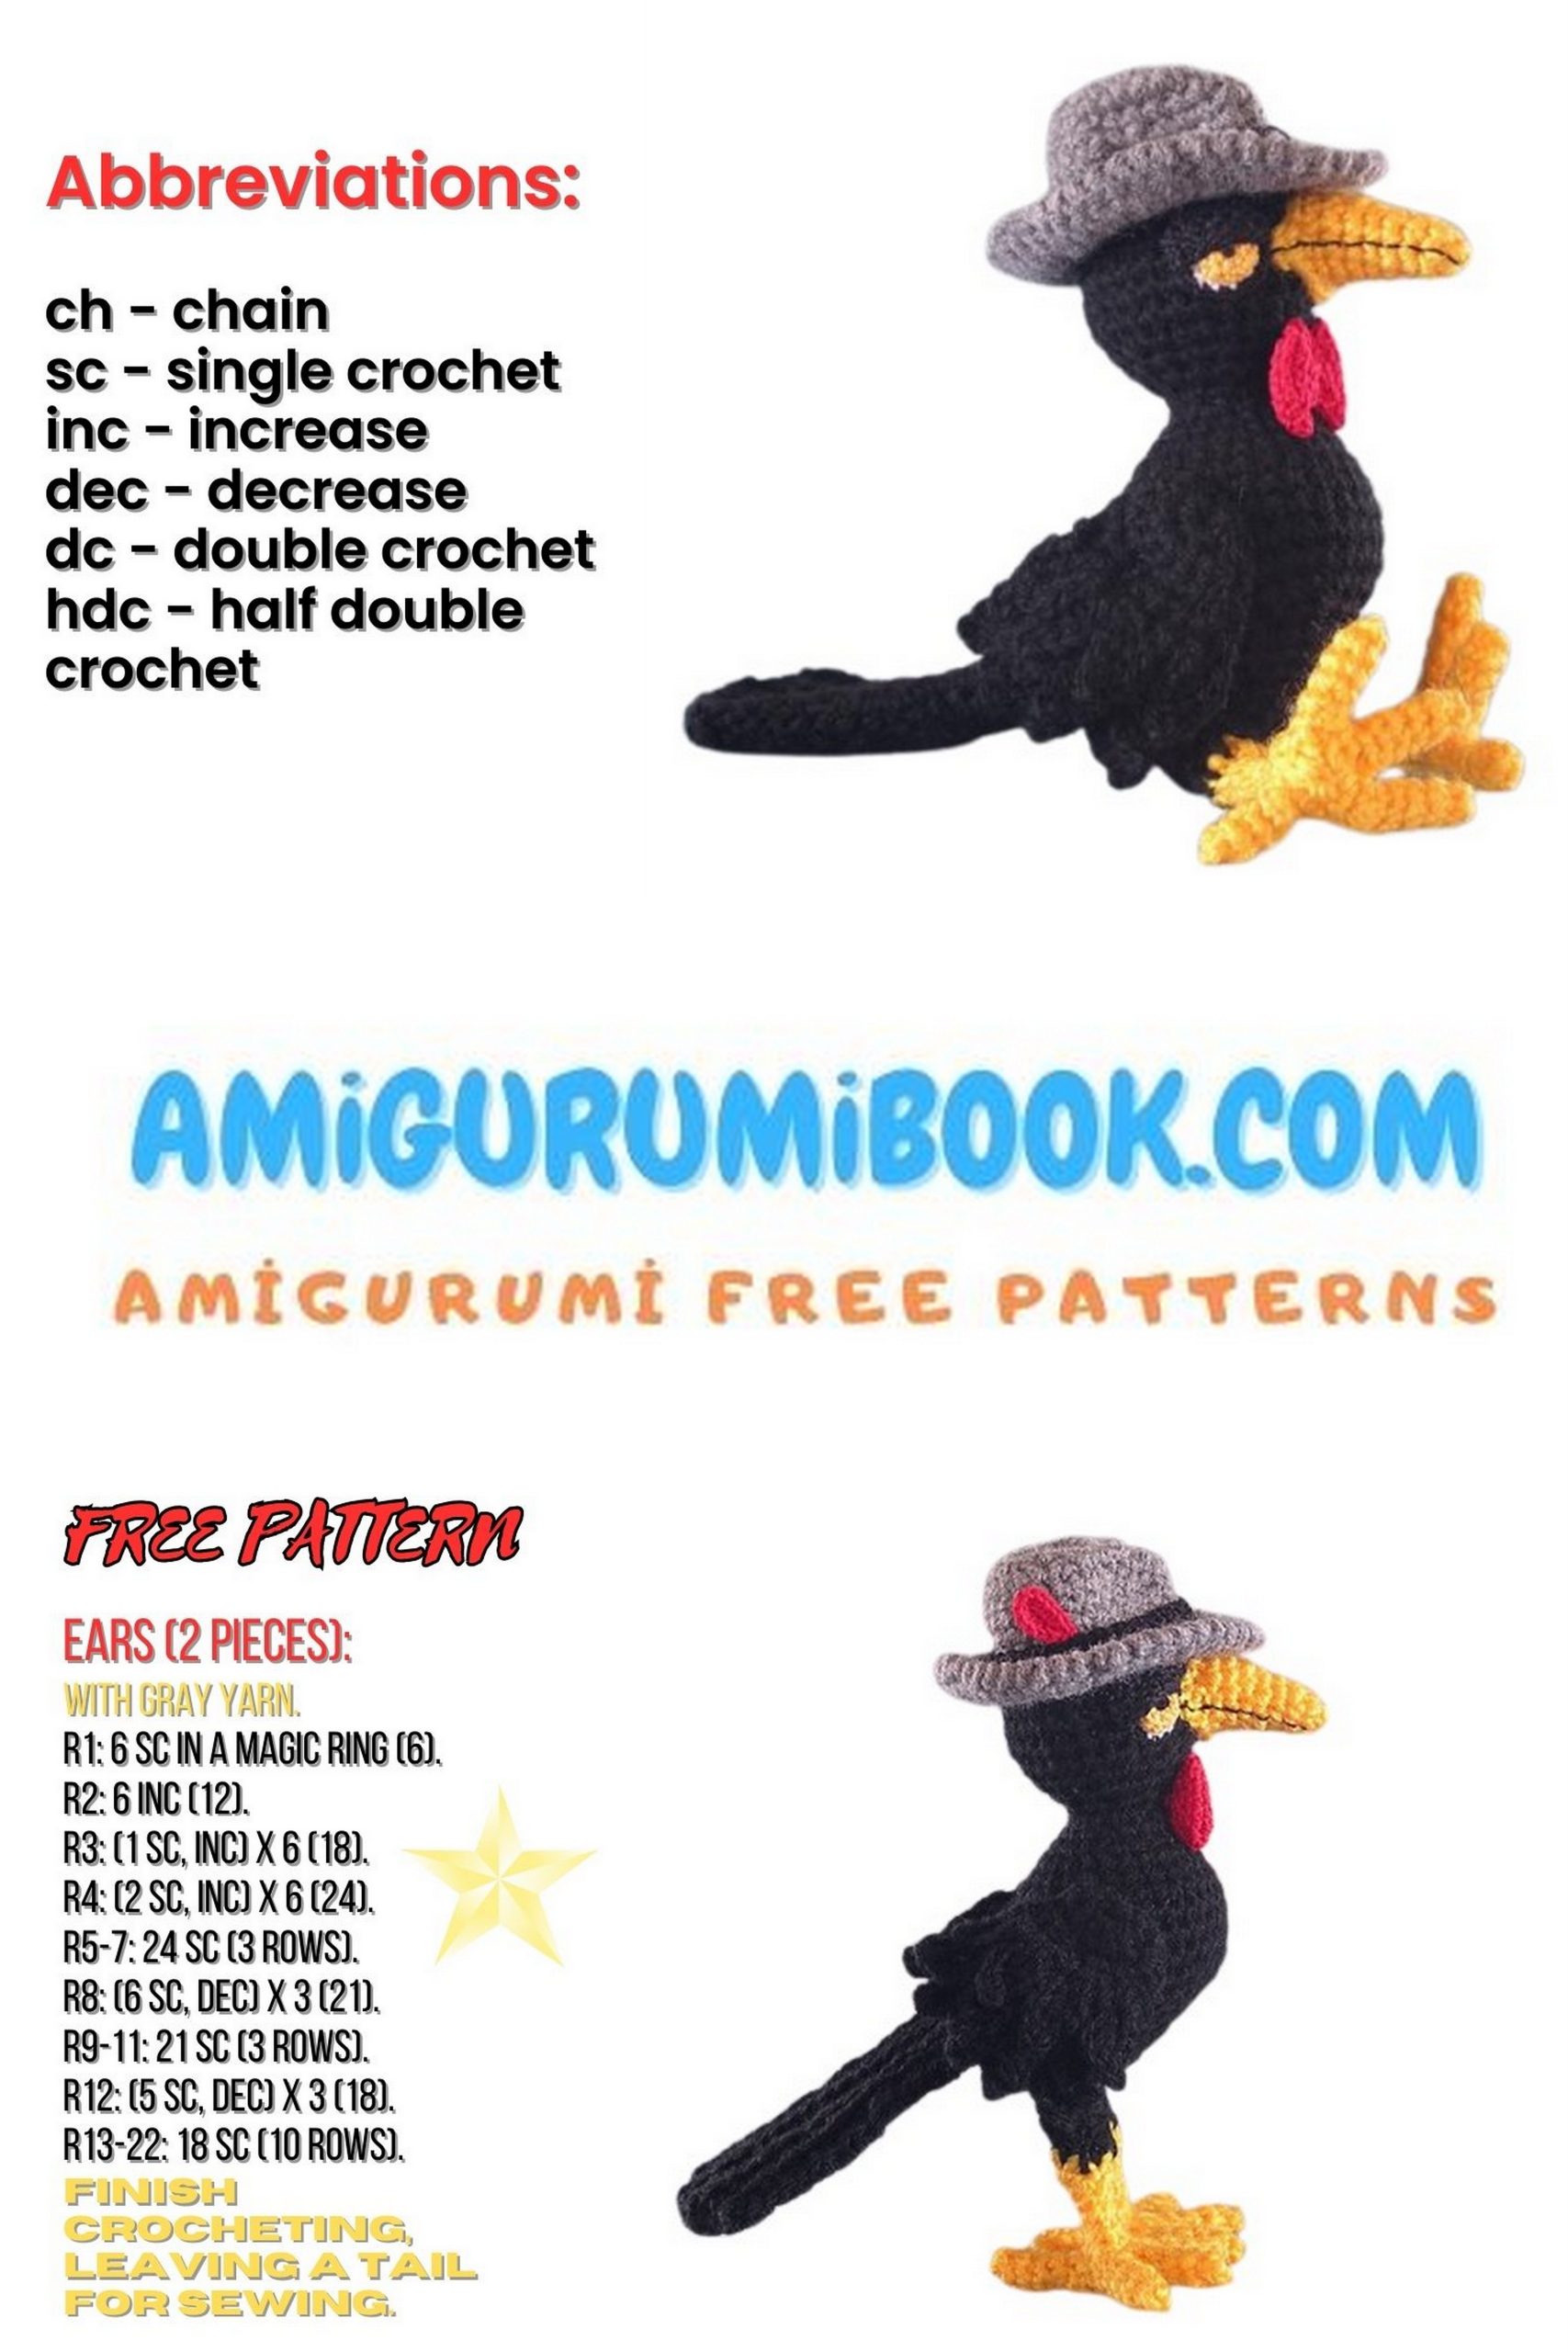
Crow Charlie Amigurumi Bird Free Pattern

Discover the whimsical world of amigurumi with our adorable creation, Amigurumi Crow Charlie! If you’re a crochet enthusiast looking for a fun and amigurumi free pattern, you’re in the right place. Our amigurumi bird is not only a delightful addition to your collection but also a fantastic project for beginners. Join us as we guide you through crafting your very own Crow Charlie. Let’s dive into the world of yarn, hooks, and creativity!

MATERIALS AND SUPPLIES: 

 Sport or DK weight yarn – Black (150 yds), dark yellow (50 yds), charcoal gray 

(25 yds) 

 Size 10 crochet thread – white (5 yds), black (15 yds), yellow (5 yds), and red (30 

yds) 

 Size C (2.5 – 2.75) crochet hook 

 Size 7 crochet hook (1.65mm) 

 Two 12″ (30.5cm) chenille stems (pipe cleaners) 

 Large blunt tapestry needle 

 Sewing needle large enough to accommodate size 10 thread 

 Small sharp scissors 
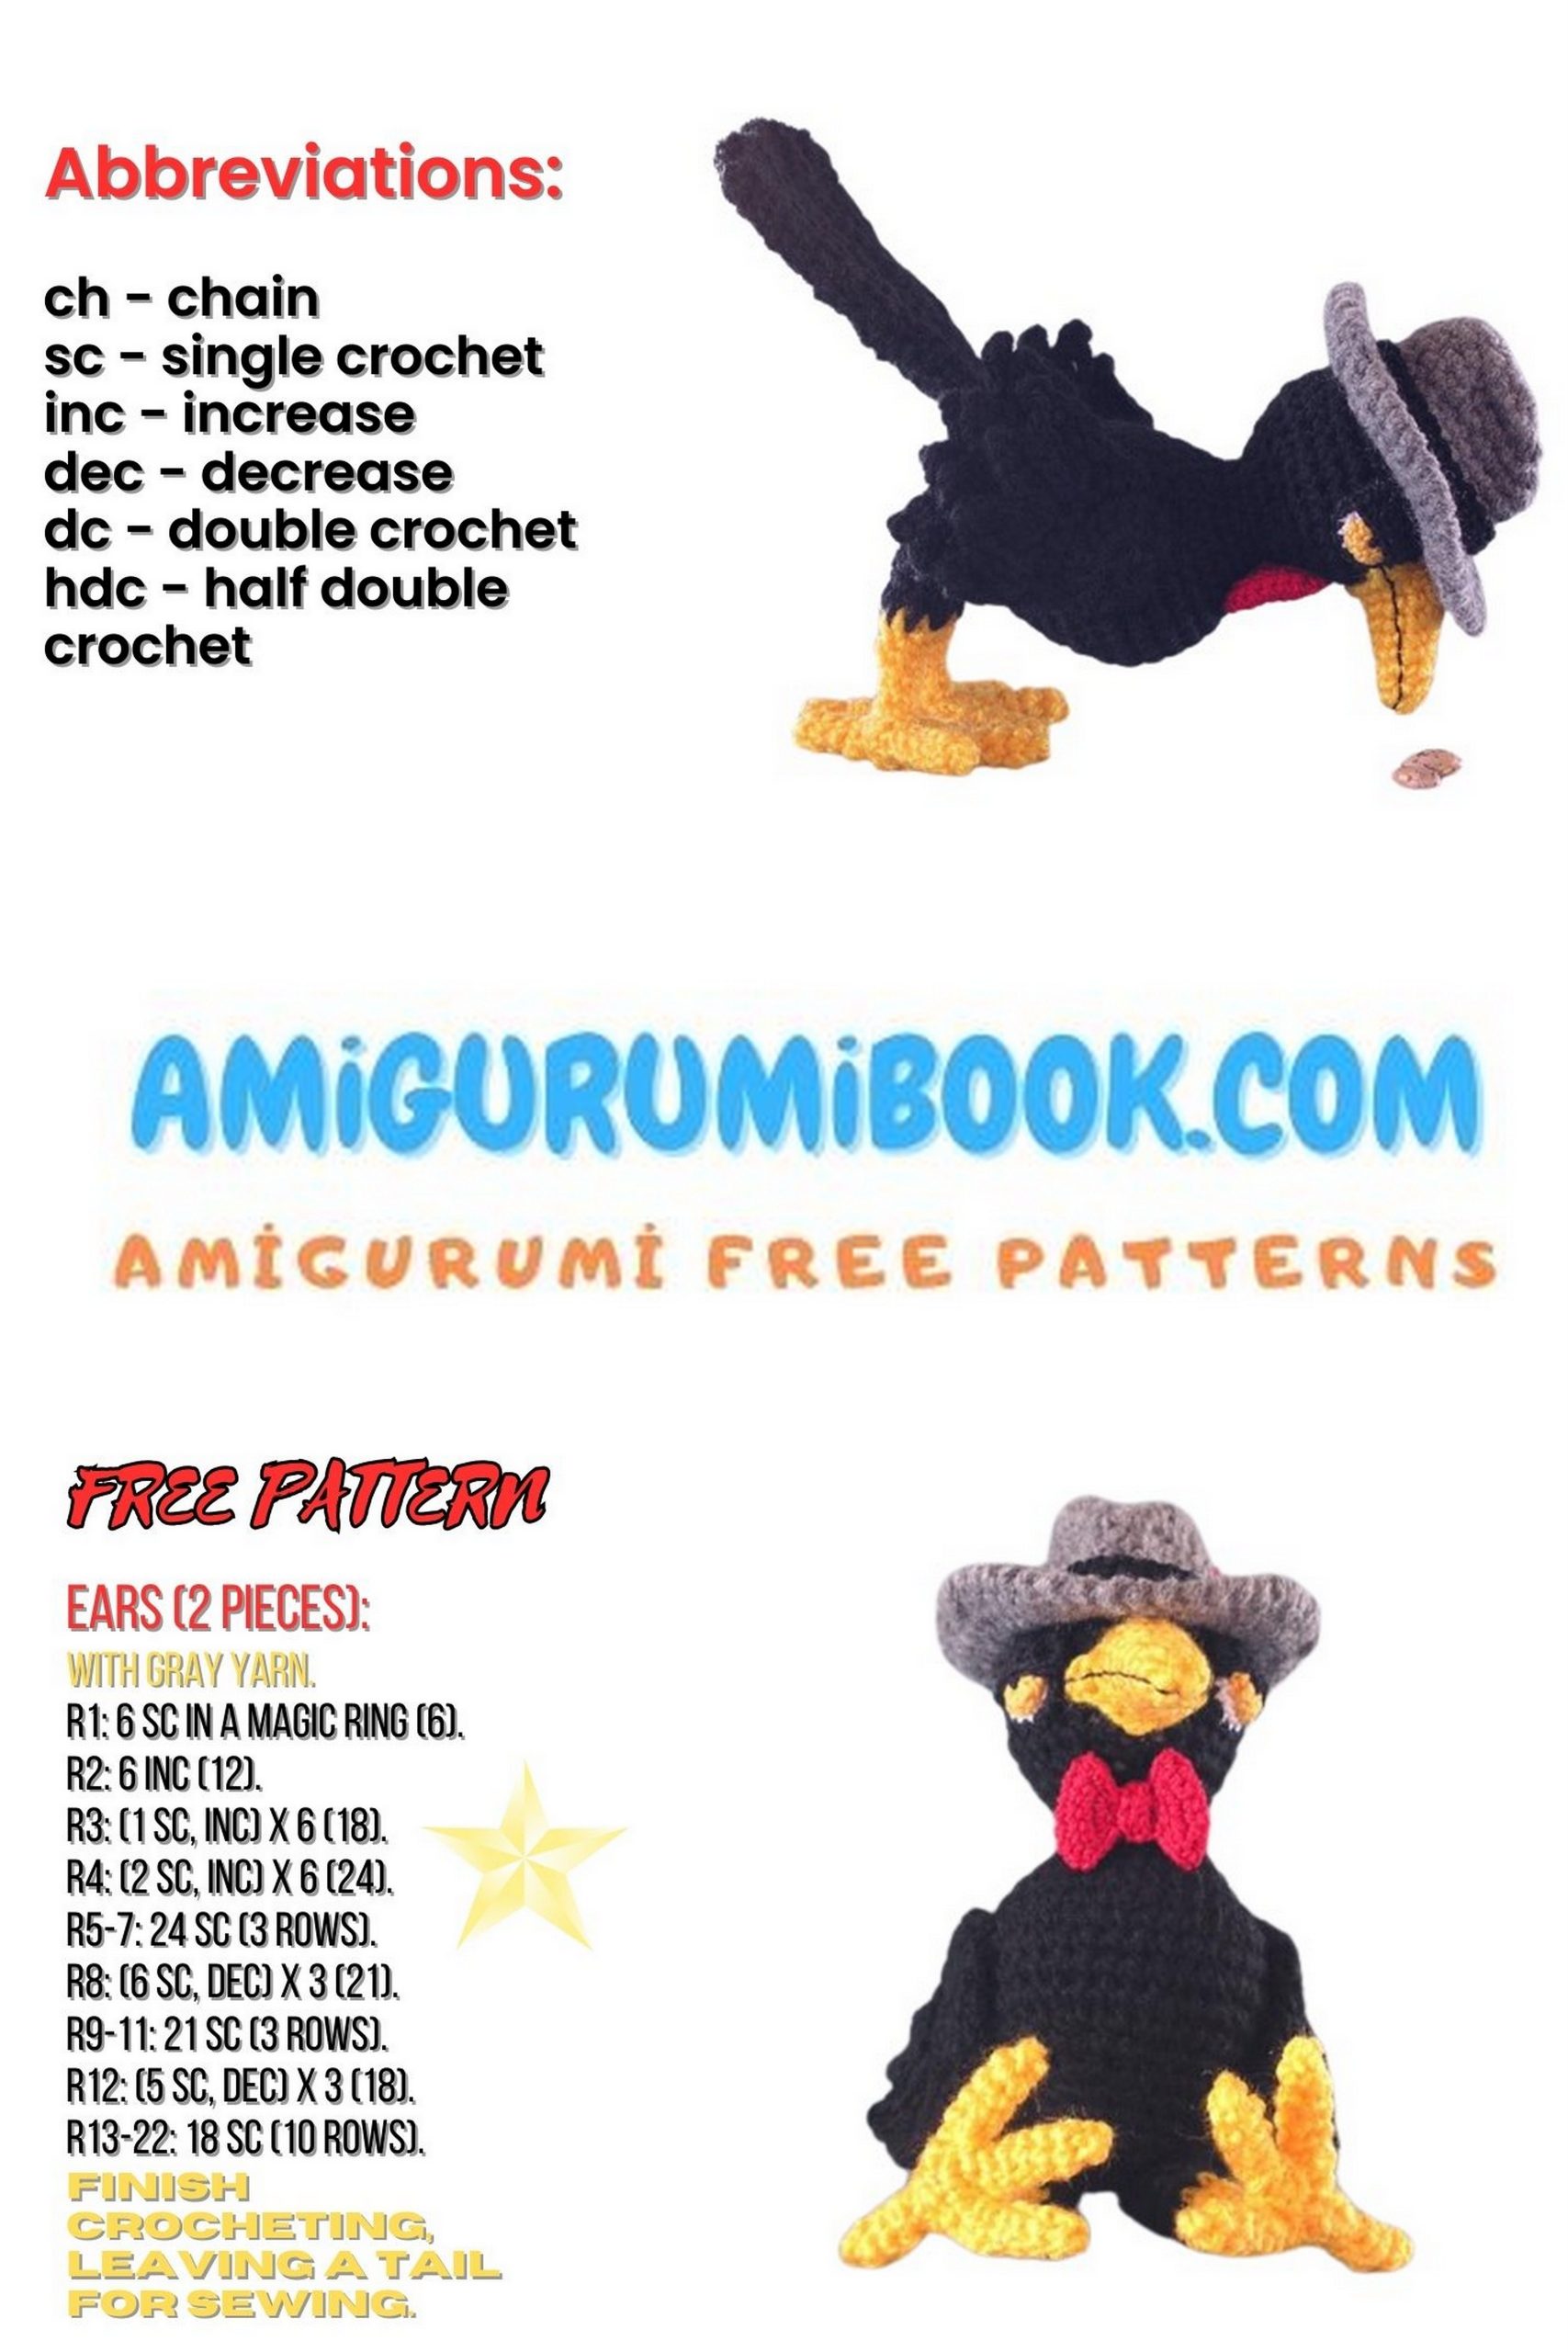
 Hemostat or tweezers to aid with stuffing small spaces 

GAGE: Gage is not important as long as the same size thread and hook called for are 

used for all the pattern pieces. However, since tension can vary in different 

circumstances, it is suggested that when making two pieces that must be the same, such 

as legs, that you complete both in one sitting. 

SPECIAL INSTRUCTIONS: 

Hdc2tog: Yoh, insert hook into next st; YO and pull up a lp, YO and pull thru 2 lps on 

hook; Yoh, insert hook into next st; YO and pull up a lp, YO and pull thru all lps on 

hook. 

Sc2tog: Sc the next 2 sc together (decrease): Insert the hook into the next st and pull up 

a lp; insert the hook into the next st and pull up a lp; YO and pull thread through all 3 

loops on hook. 

Rev-sc: Insert hook into the stitch immediately to the right, yoh and bring up a loop, YO and pull through both loops on hook. 

Adjustable Ring: Leaving a tail at the beginning, wrap thread around index finger and middle finger of left hand; anchor tail between middle finger and ring finger. Insert hook underneath first strand of yarn, then catch second strand with hook and pull a loop up underneath first strand. Remove fingers of left hand from ring and hold working end of yarn. Chain 1, work number of stitches required into ring. Pull up a long loop, then, grasping the stitches just made with right hand and tail with left, pull to tighten ring. 

Insert hook into long loop and tighten back against hook. Making sure tail is to the back, skip ch-1 and continue working pattern. 

Weaving/hiding loose thread ends: When making the bird, you can hide the loose ends by pulling them to the inside of the piece with a tapestry needle. Pass the needle through the piece 2 or 3 times to anchor the thread end (always go in and come out between stitches, being careful not to catch any fabric), and then pull the thread taut, and clip close to the surface so that it disappears inside. 

For other pattern pieces, it’s best to weave all loose ends as you finish each piece. If you can’t hide the beginning tail by working over it for a few stitches, leave a tail that is long enough to enable you to thread it onto a needle to weave it. When you fasten off, always leave a tail that is long enough to thread onto a needle and weave. To weave:  

Thread the tail onto a needle. Working on the WS of the piece and beginning directly beneath the place where you fastened off, insert the needle underneath and through the upper loops of fabric for a length of 4 or 5 stitches, and then turn and repeat through 2 or 3 of the same stitches in the opposite direction. 

ABBREVIATIONS 

alt – alternate 

beg – begin/beginning 

bet — between 

BL – back loop 

ch – chain stitch 

ch- – refers to a ch space previously 

made: e.g., ch-1 space 

ch-sp – refers to chain or space 

cm – centimeter(s) 

cont — continue 

Dc – double crochet (UK treble cr) 

Dc2tog – double crochet 2 stitches 

together (decrease) 

Dec – decreases(s) 

ea – each 

FL – front loop(s) 

FO – fasten off 

hdc – half double crochet 

hdc2tog – half double crochet 2 

stitches together 

inc – increase 

lp(s) – loops 

mm – millimeter(s) 

oz – ounce(s) 

p – picot 

pl – place 

prev – previous 

rem – remaining 

rep – repeat(s) 

rnd(s) – round(s) 

RS – right side 

sc – single crochet (same as UK dc) 

sc2tog – single crochet 2 stitches 

together 

sk – skip 

Sl st – slip stitch (same as UK sc) 

Sp(s) – space(s) 

St – stitch 

tog — together 

Tr – treble crochet 

Trtr – treble treble crochet 

WS — wrong side 

Yd(s) – yard(s) 

YO – yarn over 

Yoh – yarn over hook 

PATTERN

HEAD: 

1. Begin with black DK and the C hook and make an adjustable ring with 6 sc in the ring; OR ch 2, 6 sc in 2nd ch from hook; do not join, pl rnd marker. (6 sc) 

2. 2 sc in ea sc around. (12 sc) 

3. (2 sc in next sc, sc in next sc) 6 times. (18 sc) 

4. Sc in ea sc around. (18 sc) 

5. (2 sc in next sc, sc in next sc) 9 times. (27 sc) 

6 – 10. Sc in ea sc around. (27 sc) 

11. (Sc2tog, sc in next sc) 9 times. (18 sc) 

12. Sc in ea sc around. (18 sc) 

13. (Sc in next sc, sc2tog) 6 times. (12 sc) 

14. Sc in ea sc around. (12 sc) 

 Stuff head. 

BODY: 

15. (2 sc in next sc, sc in next sc) 6 times. (18 sc) 

16. Sc in ea sc around. (18 sc) 

17. (Sc in next sc, 2 sc in next sc) 9 times. (27 sc) 

18 – 19. Sc in ea sc around. (27 sc) 

20. (2 sc in next sc, sc in next sc) 7 times, 2 sc in next sc, sc in next 12 sc. (35 sc) 

21 – 23. Sc in ea sc around. (35 sc) 

24. Sc2tog, sc in next 23 sc, sc2tog 5 times; pl marker in 3rd of last 5 sc to identify center front. (29 sc) 

25. Sc2tog, sc in next sc, sc2tog, sc in next 5, 2 sc in ea of next 4, sc in next 5 sc, sc2tog, sc in next sc, sc2tog, sc in next 5 sc. (29 sc) 

26. Sc in next 8 sc, sc2tog, sc in next sc, sc2tog, sc in next 11 sc, sc2tog, sc in next 3 sc. (26 sc) 

27. Sc in next 23 sc, sc2tog, sc in next sc. (25 sc) 

 Begin stuffing body. Continue stuffing every few rnds as you work. 

28. (Sc2tog, sc in next 3 sc) 5 times. (20 sc) 

29. (Sc in next 2 sc, sc2tog) 5 times. (15 sc) 

30. (Sc2tog, sc in next sc) 5 times. (10 sc) 

31. (Sc2tog, sc in next sc) 3 times; FO with sl st in next sc, leaving long end for closing. (6 sc, sl st) 

 Add more stuffing if needed. 

 Thread long end onto tapestry needle and sew a row of gathering stitches in and out around rnd 31. Pull to tighten and close; FO, secure, and hide the end inside the body. 

LEGS: 

Top of Right Leg: 

1. Ch 7 with black, join to form a ring; ch 1, sc in ea ch around; do not join, pl rnd marker. (7 sc) 

2. Sc in ea sc around. (7 sc) 

3. Row 3 is the top of the leg. 2 sc in next sc, sc in next 6 sc, sl st in next sc; continue on and sc in next 5 sc; FO, leaving a 6″ (15cm) tail. (8 sc) 

Top of Left Leg: 

1 – 2. Work same as Right Leg. 

3. Row 3 is the top of the leg. 2 sc in next sc, sc in next 6 sc, sl st in next sc; continue on and sc in next sc, sl st in next sc, turn, sk next sl st, sc in next 4 sc, sl st in next sc; FO, leaving a 6″ (15cm) tail. (8 sc) 

 Form the foot armature from chenille stems (See Appendix 1). 

Bottom of Leg and Foot: 

1. With bottom of leg piece facing up, join dark yellow on RS with sc in 1st free lp, sc in next 6 free lps, sl st in same pl with 1st sc, ch 1; do not join, pl rnd marker. (7 sc) 

2. Sc in 1st sc, sc2tog, sc in next 4 sc. (6 sc) 

 Insert the center stem of the leg armature into the bottom of the leg opening. You will now be crocheting around the armature. 

3. Sk sl st and ch-1, sc in next sc, sc2tog, sc in next 3 sc. (5 sc) 

4 – 6. Sc in ea sc around. (5 sc) 

7. (2 sc in next sc, sc in next sc) twice, 2 sc in next sc. (8 sc) 

 To be in position to make the 1st toe, make sure that it (the back toe) is positioned just after the last sc made on rnd 7. 

1 st Toe (Back Toe). 

1. Ch 3, bring ch-3 under the back toe from your right to left, sc in 2nd sc after last sc on rnd 7 (joining sc), turn, sc in next 3 ch, sc in next sc at top of toe, sc in joining sc. (5 sc showing) 

2 – 3. Sc in ea sc around. (5 sc) 

4. Sc in ea sc around; FO with sl st in next sc, leaving long end for closing. (5 sc) 

2 nd Toe.  

1. Join dark yellow with sl st in same pl as 2nd sc of 1st toe (this is just before the 1st sc after the 1st toe), ch 3, bring ch-3 under the next toe from your right to left, sc in 2nd sc after joining sl st, turn, sc in next 3 ch, sk joining sl st, sc in next 2 sc. (5 sc showing) 

2 – 4. Sc in ea sc around. (5 sc) 

5. Sc in ea sc around; FO with sl st in next sc, leaving long end for closing. (5 sc) 

3 rd Toe. 

1. Join dark yellow with sl st in same pl as 2nd sc of 2nd toe (this is just before the 1st sc after the 2nd toe), ch 3, bring ch-3 under the next toe, from your right to left; with RS facing, sc in 2nd sc after joining sl st, turn, sc in next 3 ch, sk joining sl st, sc in next 2 sc. (5 sc showing) 

2 – 4. Sc in ea sc around. (5 sc) 

5. Sc in ea sc around; FO with sl st in next sc, leaving long end for closing. (5 sc) 

4 th Toe. 

1. Join dark yellow with sl st in same pl as 2nd sc of 3rd toe (this is just before the 1st sc after the 3rd toe), ch 3, bring ch-3 under the next toe, from your right to left; with RS facing, sc in 2nd sc after joining sl st, turn, sc in next 3 ch, sk joining sl st, sc in next 2 sc. (5 sc showing) 

2 – 4. Sc in ea sc around. (5 sc) 

5. Sc in ea sc around; FO with sl st in next sc, leaving long end for closing. (5 sc) 

Close Bottom of Foot: 

1. With bottom of foot facing you, join dark yellow with sc in the 2nd free lp at the bottom edge of any toe, sc in next free lp of same toe, sc in sp between toes, (sk 1st free lp of next toe, sc in next 2 free lps of same toe, sc in next sp between toes) 3 times; join with sl st in 1st sc, FO, leaving long end for closing. (12 sc) 

 Close end of each toe: Thread long end onto tapestry needle and sew a row of gathering stitches in and out around FL’s of last rnd. Pull to tighten and close; FO, secure, and hide the end inside the toe. 

 Close bottom of foot: Thread long end onto tapestry needle and sew a row of gathering stitches in and out around FL’s of row 1 on bottom of foot. Pull to tighten and close; FO. Pass the needle through the foot 2 or 3 times to secure the yarn. Cut the yarn close to surface so that it disappears inside the foot. 

 Stuff the black portion of the upper leg. 

 Position the legs onto the bottom of the body with the higher side of each leg on the outside. The back toes should point backward, and the 3 front toes forward. Pin the legs in position close to the back of the tail end. There should be about 1/8″ (4mm) between the two legs. 

 Sew legs in place. 

BEAK: 

1. Begin with an adjustable ring using dark yellow, making 6 sc in ring. (6 sc) 

2. Sc in ea sc around. (6 sc) 

3. Sc in next 4 sc, 2 sc in next sc, sc in next sc. (7 sc) 

4. Sc in ea sc around. (7 sc) 

5. Sc in next 3 sc, 2 sc in next sc, sc in next 3 sc. (8 sc) 

6. Sc in next 3 sc, 2 sc in next sc, pl marker to mark center top, 2 sc in next sc, sc in next 3 sc. (10 sc) 

7. Sc in ea sc around. (10 sc) 

8. Sc in next 3 sc, (ch 2, sc in 2nd ch from hook, sc in side of sc where ch-3 begins), sc in next 2 sc, 2 sc in next sc, sc in next 3 sc, repeat within ( ) once, sc in next sc. (15 sc) 

9. Sc in next sc, sl st in next sc; do not work remaining st; FO, leaving long end. (12 sc, sl st showing) 

 Stuff beak. 

 Optional: Using 2 strands of black embroidery floss and a running back stitch, begin at the edge of the ch-2 outcropping from the beak on your right, and sew a straight line across the beak, around the center point (slightly to the bottom of the center point), and across to the end of the outcropping from the beak on you r left. Fasten off and secure end. 

 Pin beak to face, having the bottom edge of the beak placed about the length of 3 rows up from the neck. Bring the two side outcroppings slightly upward at the ends to give the appearance of a smile. 

 Sew the beak in place with the long end of dark yellow. 

TAIL (Make 2 Pieces): 

1. Ch 18, hdc in 3rd ch from hook and in next 8 ch, sc in next 5 ch, sl st loosely in next 2 ch; ch 1, turn. (10 hdc, 5 sc, 2 sl st) 

2. Working in BL, sl st loosely in next 2 sl st, sc in next 5 sc, hdc in next 8 hdc, 4 dc in next hdc; ch 1, turn. (2 sl st, 5 sc, 8 hdc, 4 dc) 

3. Working in BL, sk next dc, sc2tog twice, sc in next 12 st, sl st loosely in next 2 sl st; ch 1, turn. (14 sc, 2 sl st) 

4. Working in BL, sl st loosely in next 2 sl st, sc in next 5 sc, hdc in next 9 sc, 4 dc in same pl with last hdc; ch 3, turn. (2 sl st, 5 sc, 9 hdc, 4 dc) 

5. Dc in next 3 dc, hdc in next 9 hdc, sc in next 5 sc, sl st in next 2 sl st; ch 1, turn. (4 dc, 9 hdc, 5 sc, 2 sl st) 

6. Working in BL, sl st loosely in next 2 sl st, sc in next 13 st, sc2tog twice, ch 3, turn. (2 sl st, 15 sc) 

7. Working in BL, 3 dc in same pl as turning, hdc in next 9 sc, sc in next 5 sc, sl st loosely in next 2 sl st; ch 1, turn. (2 sl st, 5 sc, 9 hdc, 4 dc)  

8. Sl st loosely in next 2 sl st, sc in next 13 sc, sc2tog twice; ch 1, turn. (2 sl st, 15 sc) 

9. Row 9 is RS. Working in BL, hdc in next 10 st, sc in next 5 sc, sl st loosely in next 2 st; FO. (10 hdc, 5 sc, 2 sl st) 

 Holding the two pieces with RS together, sew along each of the two long sides. 

 Turn RS out. Sew the two scalloped edges together, maintaining the scalloped appearance. 

 Quilt the two pieces together by sewing several rows of running straight stitches lengthwise in the grooves between rows. 

 Close the top end with whip stitches. 

 Pin the tail to the crows back about 3 rows above the top edge of the legs. Sew the tail in place. Sewing around the end of the tail, and the row of stitches under it on the body will help the tail stand out a bit. 

BASIC WING (Make 2): 

Leave an 8″ (20cm) tail at the beginning to use later for sewing the wing to the body. 

1. Using black, begin with an adjustable ring and make 6 sc in ring; do not join, ch 1, turn. (6 sc) 

2. 2 sc in ea sc; ch 1, turn. (12 sc) 

3. Sc in ea sc across; ch 1, turn. (12 sc) 

4. (2 sc in next sc, sc in next sc) 6 times; ch 1, turn. (18 sc) 

5. Row 5 is RS of wing. Working in BL, sc in ea sc across; ch 1, turn. (18 sc) 

6. Working in both lps, sc in ea sc across; ch 1, turn. (18 sc) 

7. Working in BL, (sc2tog, sc in next sc) 6 times; ch 1, turn. (12 sc) 

8. Row 8 is the back end of wing. Working in both lps, sc2tog, sc in next 8 sc, sc2tog; FO. (10 sc) 

 Fold the wing in half from front to back, having 3 sc on each side at the front end of 

the wing, and 5 sc on each side at the back end. As it will be positioned on the crow’s 

body, the folded edge will be the top edge of the wing, the open edges along the row 

ends will be the bottom edge of the wing, the beginning adjustable ring will mark the 

front edge of the wing, and row 8 will be the back of the wing. 

Right Wing Feathers: 

1. With open edge of wing (bottom) to your right and row 8 (back end) of wing facing up, join black with sl st in 1st sc on row 8; ch 3, tr in same pl, (ch 1, sl st in top and side bar of tr at same time – picot made), ch 3, sl st in same sc on row 8, [sl st in next sc on row 8, ch 3, tr in same pl, picot, ch 3, sl st in same sc on row 8] 3 times; FO with sl st in next sc. (4 feathers) 

2. With wing in same position as row 1 to begin, and working in free lps from row 6, sk 1 st free lp and sl st in next free lp, ch 3, tr in same pl, picot, ch 3, sl st in same free lp, [sl st in next 2 free lps, ch 3, tr in same pl, picot, ch 3, sl st in same free lp] 3 times; FO with sl st in next sc. (4 feathers) 

3. With wing in same position as rows 1 and 2 to begin, and working in free lps from row 4, repeat row 2. (4 feathers) 

Left Wing Feathers: 

1. With open edge of wing (bottom) to your left and row 8 (back edge) of wing facing up, join black with sl st in 5th sc from left on row 8; (sl st in next sc, ch 3, tr in same pl, picot, ch 3, sl st in same sc on row 8) 4 times; FO. (4 feathers) 

2. With wing in same position as row 1 to begin, and working in free lps from row 6, 

join black with sl st in 8th free lp from left, sl st in next free lp, ch 3, tr in same pl, picot, ch 3, sl st in same free lp, (sl st in next 2 free lps, ch 3, tr in same pl, picot, ch 3, sl st in same free lp] 3 times; FO with sl st in next sc. (4 feathers) 

3. With wing in same position as rows 1 and 2 to begin, and working in free lps from row 4, repeat row 2. (4 feathers) 

 Fold the wing with RS out so that the open edges are together. The open edge is the bottom edge of the wing. Sew the open edge of the wing closed all the way from the adjustable ring to row 8, and then sew the two edges of row 8 together as well. 

 Pull all loose threads except for the beginning tail to the inside. 

 Shape all the feathers by holding onto the front end of the wing with your left hand and pulling the feathers with your right hand. 

Depending on the look you want, you can either tack each layer of feathers to the layer beneath it, leave some of them free, or leave all of them free. The bird in the photo has the layers tacked together. 

 Pin both wings to the body, one on each side. 

Move them around until you are satisfied with the placement. Use the long tail from 

rnd 1 of the basic wing to tack the wing to the body around the top end from where 

the feathers begin on the bottom edge to the feathers on the top edge. 

EYES (Make 2): 

Eyeball: 

1. Using white size 10 thread with a size 7 hook, begin with an adjustable ring, making 6 sc in ring, close ring tightly; do not join, pl rnd marker. (6 sc) 

2. 2 sc in ea sc around. (12 sc) 

3. Sc in ea sc around. (12 sc) 

4. Sc in next sc, do not work in rem sc; FO with sl st in next sc. (12 sc showing) 

5. With RS facing you, join black size 10 thread with sc in sl st on rnd 4, sc in next sc, 2 sc in next sc, (sc in next 2 sc, 2 sc in next sc) 3 times; join with sl st in 1st sc, turn. (16 sc) 

Eyelid: 

1. Working in FL, sk next sl st, 2 sc in ea of next 7 sc, sl st in next sc; turn. (14 sc, 2 sl st) 

2. Sk sl st, sc in next 5 sc, sc2tog twice, sc in next 5 sc, sl st in next sl st; turn. (12 sc, sl st) 

3. Sk sl st, (sc2tog, sc in next sc) 4 times, sl st in next sl st; turn. (10 sc, sl st) 

5. Sk sl st, sc2tog 4 times, sl st in next sl st; turn. (4 sc, sl st) 

6. Sk sl st, sc2tog twice, sl st in next sl st; FO. (2 sc, sl st) 

 Fold eyelid down over the front of the eyeball, making the fold where row 1 of eyelid was worked in the FL of row 6 of eyeball. 

7. With front of eye facing you and bottom edge of eyelid facing upward, join black size 10 thread with a sl st in the 1st row end at right edge (your right) of eyelid, sc in next row end, sc in next sl st, sc in next 2 sc, sc in next sl st, sc in next row end, sl st in last row end; FO. (2 sl st, 6 sc) 

Iris: 

1. Using yellow size 10 thread with a size 7 hook, begin with an adjustable ring, making 6 sc in ring, close ring tightly; do not join, pl rnd marker. (6 sc) 

2. (2 sc in next sc, sc in next sc) 3 times; FO, leaving end for sewing iris to eye. (9 sc) 

 Push the eyelid back so that you can position the iris onto the eye (I like the appearance of having the WS of the iris facing out, but it’s your choice). Center the 

iris over the center of the white eyeball vertically, but more to the right edge of the 

eye (your right) horizontally. 

 Sew the iris to the eyeball using the long end. 

Pupil: 

 Using black size 10 thread, make a French knot in the center of the yellow iris. 

Sew the Eyes to the Face: 

 Pin the eyes to the face, one on each side of the beak (see photos for placement). 

Move the eyes around until you are satisfied with the placement of both eyes. 

 Sew the eyes to the face with black size 10 thread, sewing around the edge of the 

eyelid on the top half, and around the outermost row of black sc on the bottom half. 

FEDORA 

1. Ch 4 with charcoal DK using the C hook, sc in 2nd ch from hook and in next ch, 2 sc in last ch; moving around to opposite side of ch, sc in next 2 free lps, 2 sc in next free lp; do not join; place rnd marker. (8 sc) 

2. (Sc in ea of next 3 sc, 2 sc in next sc) twice. (10 sc) 

3. 2 sc in ea sc around. (20 sc) 

4. (Sc in next 4 sc, 2 sc in next sc) 4 times. (24 sc) 

5. Sc in next 3 sc, sl st in next sc, do not work in rem sc. (23 sc, sl st showing) 

6. Work in FL, sc in next 23 sc, sc in next sl st, sl st in next sc. (24 sc) 

7. Ch 1, sc in same pl as sl st, sc in ea rem sc around. (24 sc) 

8. Sk sl st and ch-1, sc in ea sc around. (24 sc) 

9 – 11. Sc in ea sc around. (24 sc) 

12. Begin Brim. Working in BL for this rnd, sl st in next sc, ch 1, 2 sc in same pl, (sc in 

next sc, 2 sc in next sc) 11 times, sc in next sc; do not join, place rnd marker. (36 sc) 

13. Sk sl st and ch-1, (sc in next 2 sc, 2 sc in next sc) 12 times. (48 sc) 

14. Sc in next 5 sc, hdc in next 21 sc (mark the 11th hdc as center front), sc in next 22 

sc. (27 sc, 21 hdc) 

15. Sl st in next sc, ch 1, do not turn, rev-sc (see Special Instructions) in same pl as 

turning, in next st to the right, and in ea st around; do not join, FO, leaving a 4″ (10cm) tail. (48 rev-sc) 

 Thread the tail onto a tapestry needle. Insert the needle through the 1st rev-sc; pull to join. Bring the tail forward to the underside of the brim in such away that the yarn will appear to be part of a stitch. 

 Weave the tail very neatly across the brim to the inside of the crown. Weave into 2 or 3 stitches inside the crown, then FO. 

 Indent the top of the crown into a teardrop shape, with the front being the more 

pointed end. 

 Prepare your tapestry needle with charcoal gray yarn; indent the front end of the 

crown slightly on each side. Keep the indentation in place by first securing the yarn 

inside the crown, and then take a small stitch in the center of one indentation, and 

another in the center of the opposite indentation; pull to the desired depth. Secure, 

and using the same yarn, take another small stitch in the pointed end of the teardrop indentation on top, and pull it to the desired depth. Secure the yarn so that it will not work loose. 

Hat Band: 

1. With black size 10 thread and size 7 hook, ch 3, sc in 2nd ch from hook and in next ch; ch 1, turn. (2 sc) 

2 – 47. Sc in next 2 sc; ch 1, turn. (2 sc) 

48. Sc in next 2 sc; FO, leaving a 12″ (30.5cm) tail for sewing. 

 Wrap the band around the crown of the hat with the bottom edge of the band touching the free lps before 1st rnd (rnd 12) of the brim. 

 Sew the 2 short ends of the band together, being careful not to twist the band. 

 Sew the band in place just above the bottom edge of the band, using the long tail rem after row 48. 

Feather: 

1. Using red size 10 thread and a 7 (1.65mm) hook, ch 6, sl st in 2nd ch from hook and in next ch, sc in next ch, hdc in next 2 ch, ch 1, hdc in 1st free lp of foundation ch (on your left), ch 1, hdc in same pl, hdc in next 2 free lps, sc in next free lp, sl st in next free lp; FO. (3 sl st, 2 sc, 8 hdc, ch-1 sp) 

BOW TIE: 

1. Using red size 10 thread and a size 7 (1.65mm) hook, ch 3, sc in 2nd ch from hook; sc in next sc; ch 1, turn. (2 sc) 

2. Sc in ea sc across; ch 1, turn. (2 sc) 

3. 2 sc in ea of next 2 sc; ch 1, turn. (4 sc) 

4. 2 sc in next sc, sc in next 2 sc, 2 sc in next sc; ch 1, turn. (6 sc) 

5 – 7. Sc in ea sc across; ch 1, turn. (6 sc) 

8. Sc2tog, sc in next 2 sc, sc2tog; ch 1, turn. (4 sc) 

9. Sc2tog twice; ch 1, turn. (2 sc) 

10 – 11. Sc in next 2 sc; ch 1, turn. (2 sc) 

12. Fold the piece so that the edge of row 1 is even with and on top of the edge of row 11 – this is back side of tie. Sc in the 1st free lp of the top (foundation ch) and the 1st sc of row 11 beneath at the same time, sc in the next free lp of the foundation ch and the next sc of row 11 at the same time; ch 1, turn. (2 sc) 

13. 2 sc in ea of next 2 sc; ch 1, turn. (4 sc) 

14. 2 sc in next sc, sc in next 2 sc, 2 sc in next sc; ch 1, turn. (6 sc) 

15 – 17. Sc in ea sc across; ch 1, turn. (6 sc) 

18. Sc2tog, sc in next 2 sc, sc2tog; ch 1, turn. (4 sc) 

19. Sc2tog twice; FO, leaving a long end. (2 sc) 

 Fold the edge of the 2nd bow loop to the back so that the edge of row 19 is atop row 12; sew in place. 

Bow Edging: 

1. With front facing you, join red with a sl st at top edge at beginning of 1st loop of bow, sc in next 7 row ends, sl st in next row end, ch 2, (turn and begin working on opposite edge of same bow loop; sl st in 1st row end, sc in next 7 row ends, sl st in last row end); sl st in next 2 row ends across center between loops, sl st in 1st row end of next loop, sc in next 7 row ends, sl st in last row end; ch 2, repeat within ( ), sl st in next 2 row ends in center between the 2 loops; FO. 

Center Knot: 

1. Ch 3 with red, sc in 2nd ch from hook and in next ch; ch 1, turn. (2 sc) 

2 – 6. Sc in next 2 sc; ch 1, turn. (2 sc) 

7. Sc in next 2 sc; FO, leaving tail for sewing. (2 sc) 

 Wrap the knot around the center of the bow tie, with the short ends meeting in the back (back is the side where the ch-2’s from bow edging show); sew the ends together. 

 Sew bowtie to crow’s neck. 

To report errors or ask questions, please email the designer at for purposes of mass production. The owner may, however, sell the items he or she makes by hand from this pattern. 

Foot Armature For Charlie Bird 

Bend the stem at a 90 degree angle two inches from the end. Each toe is one inch 

long. Bend the 1st toe back toward the vertical part of the stem. Beginning even 

with the vertical stem, create the second toe in the same way. 

Create the 3rd toe in the same way, but this time when you bend it back, wrap the 

end around the vertical stem to secure it. Press the individual toe wires together to 

close the openings. 

Make a 4th one inch toe facing the opposite direction from the front three. 

Your foot armature should look like this. 

Similar Posts