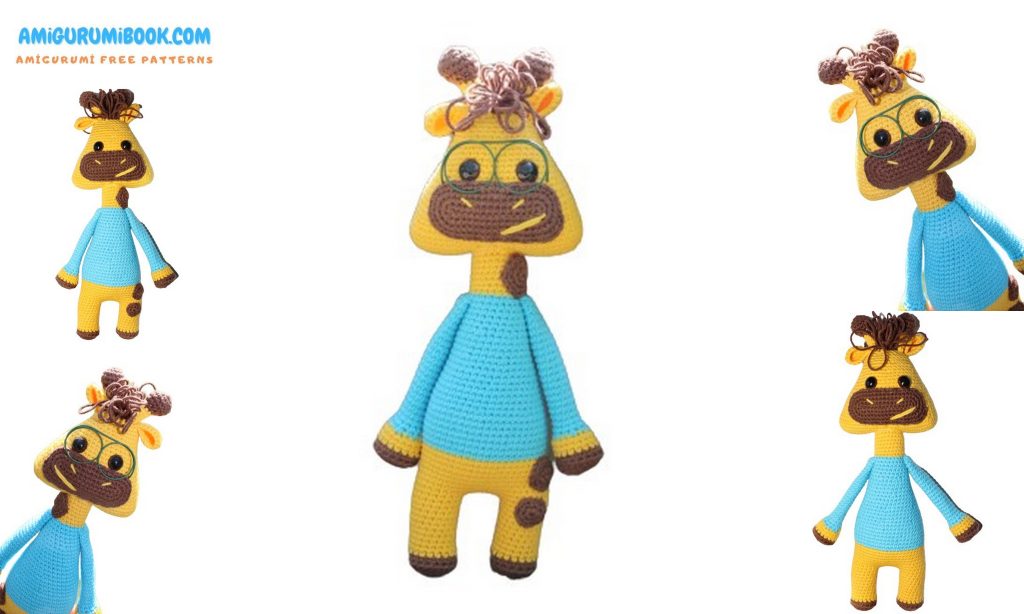
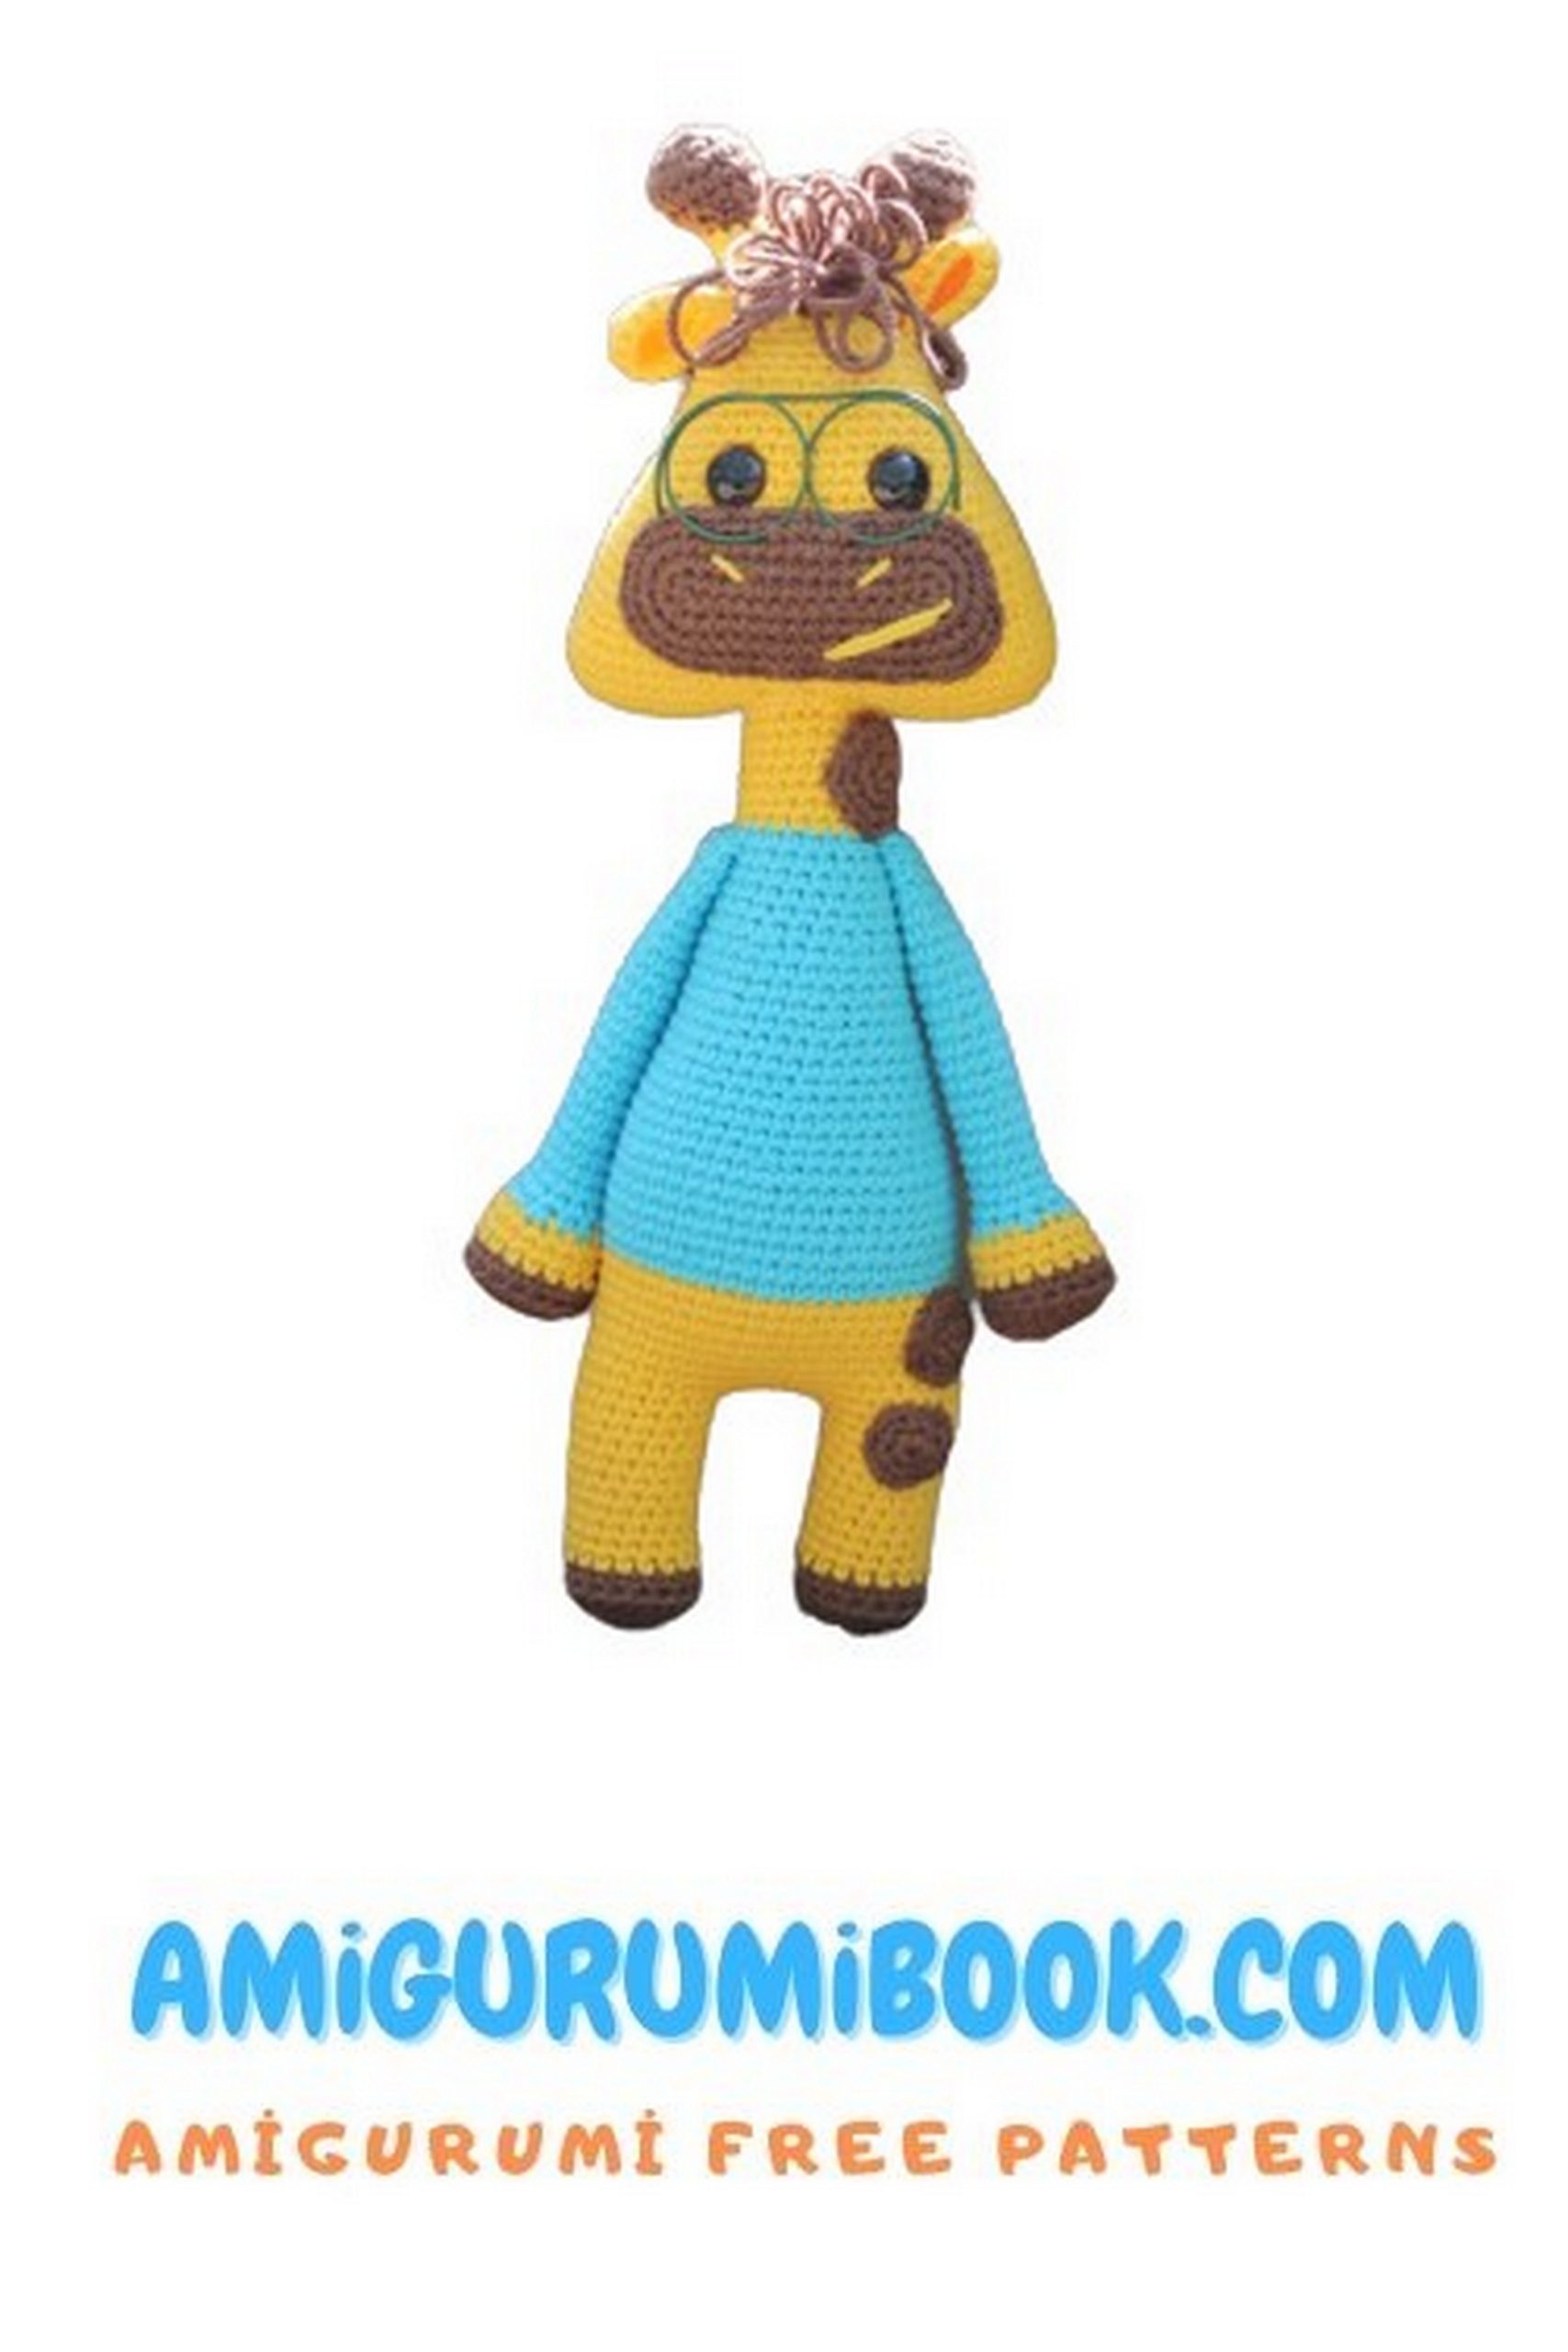
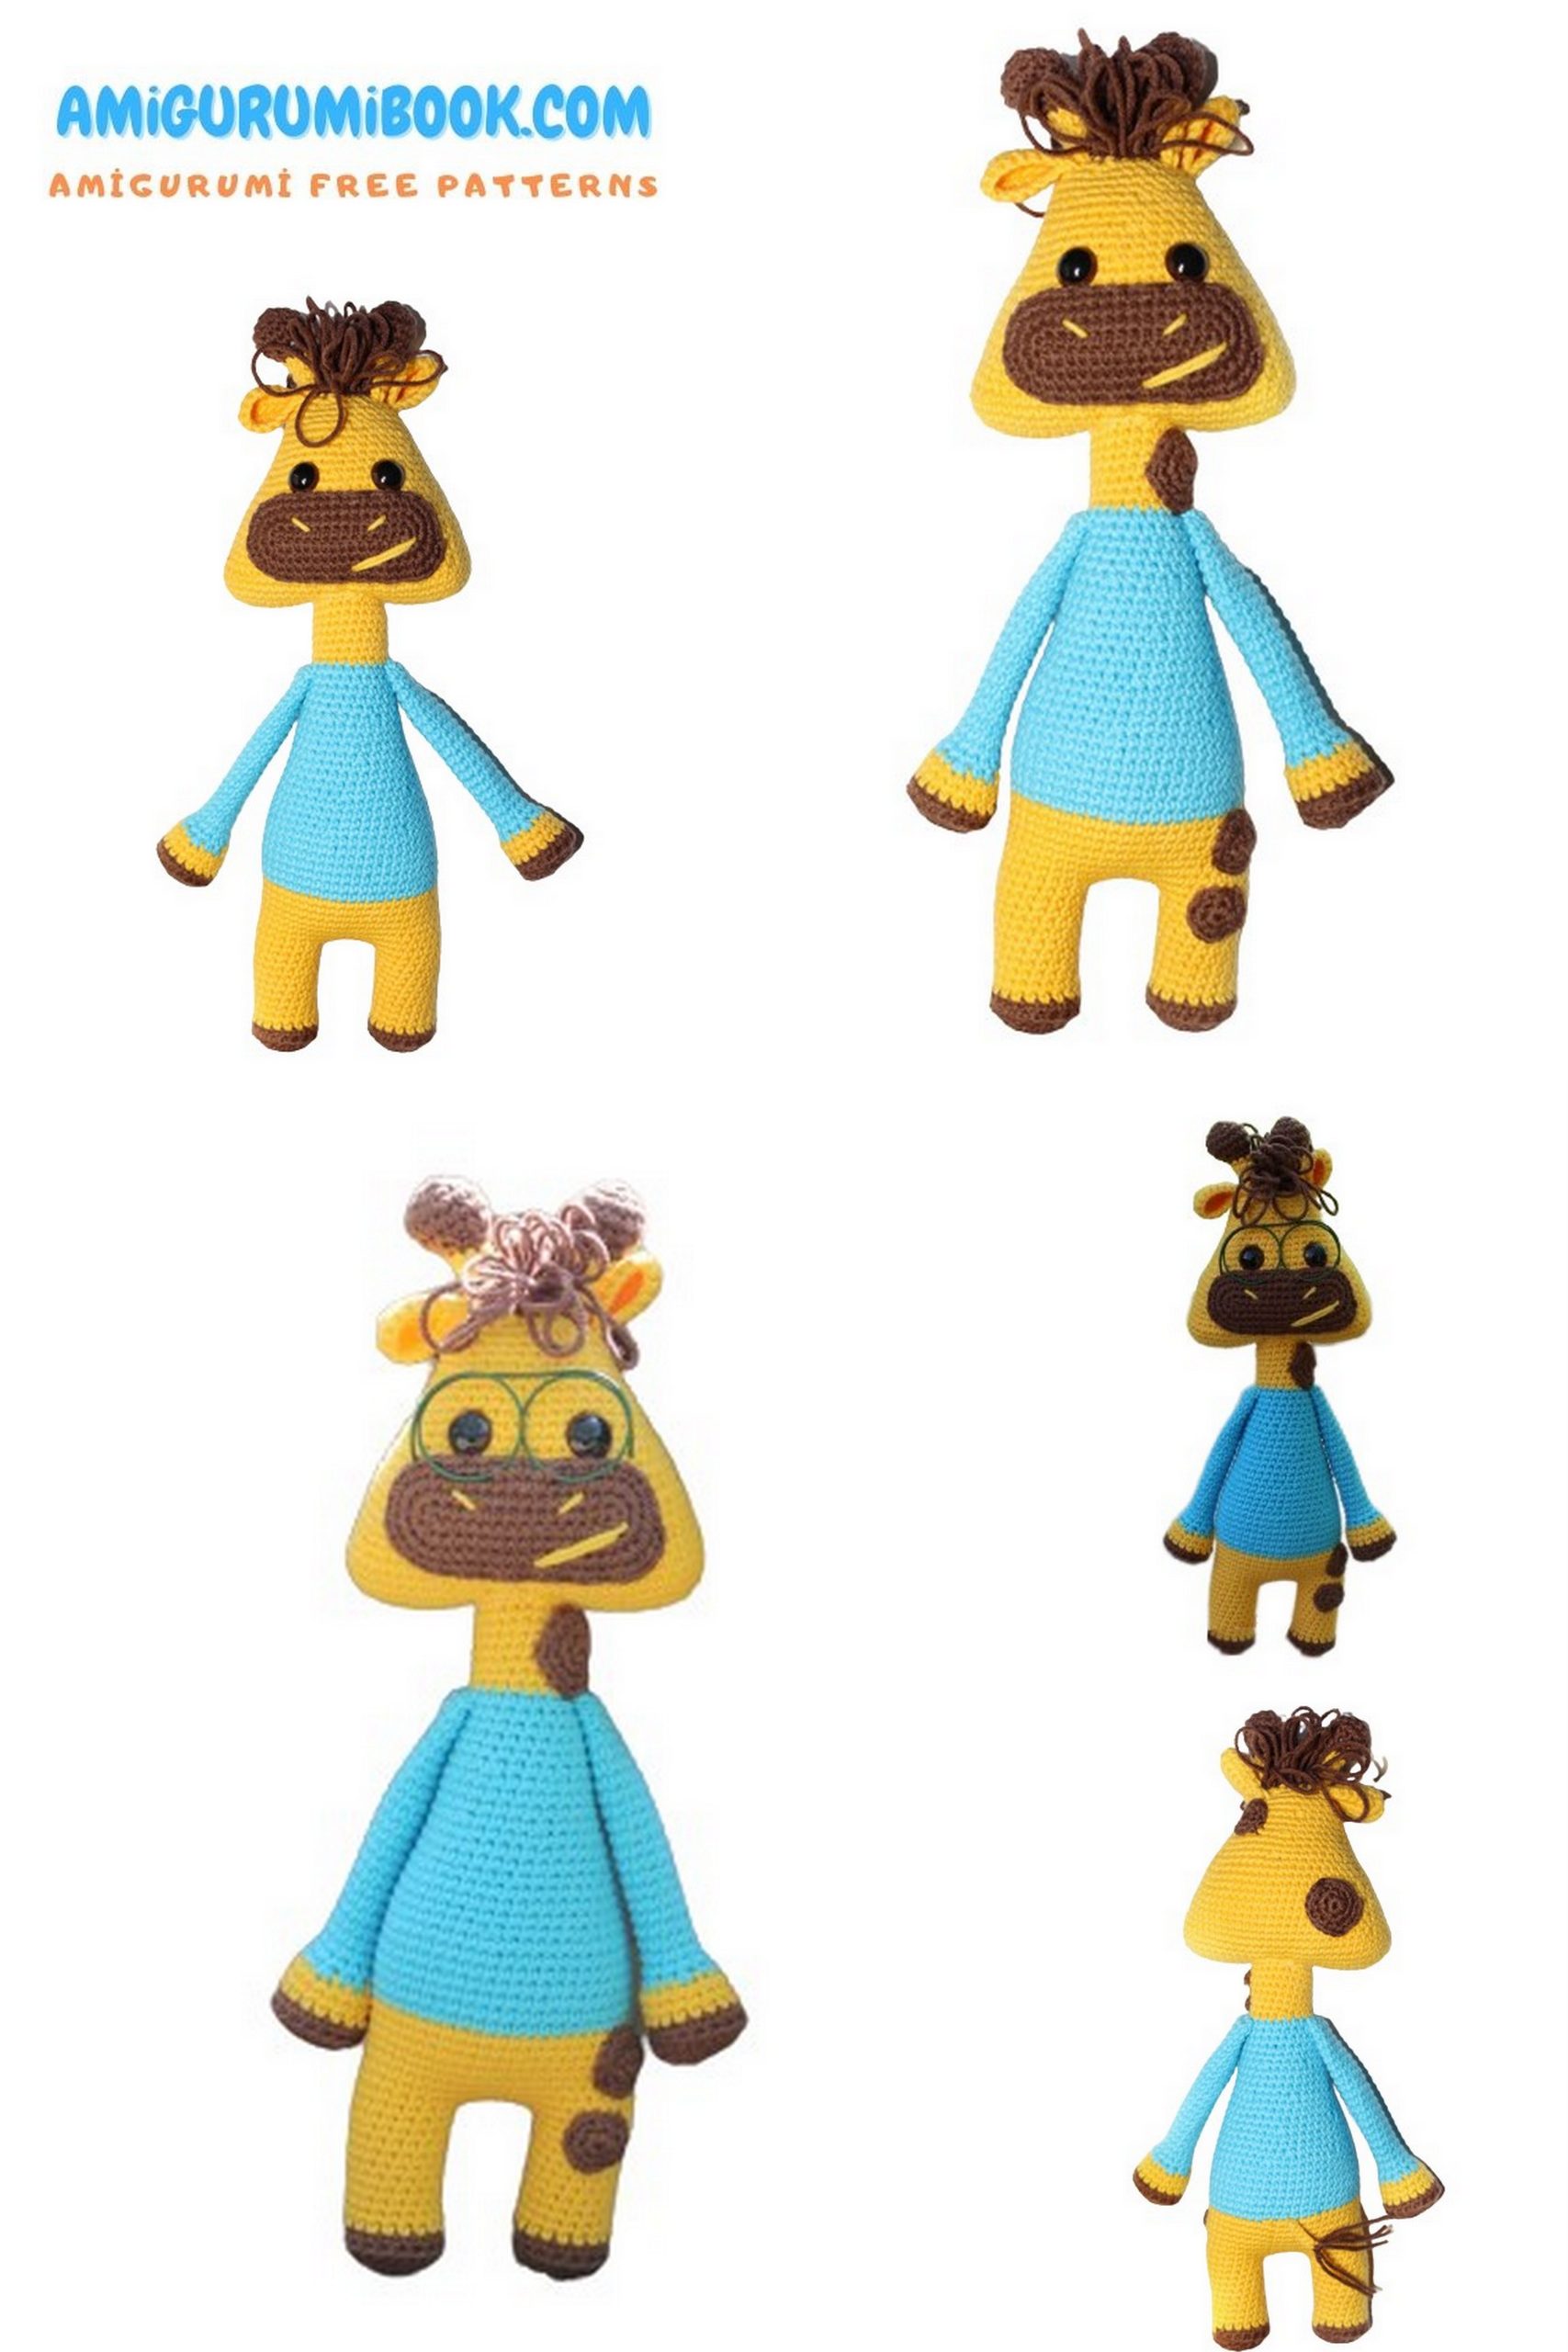
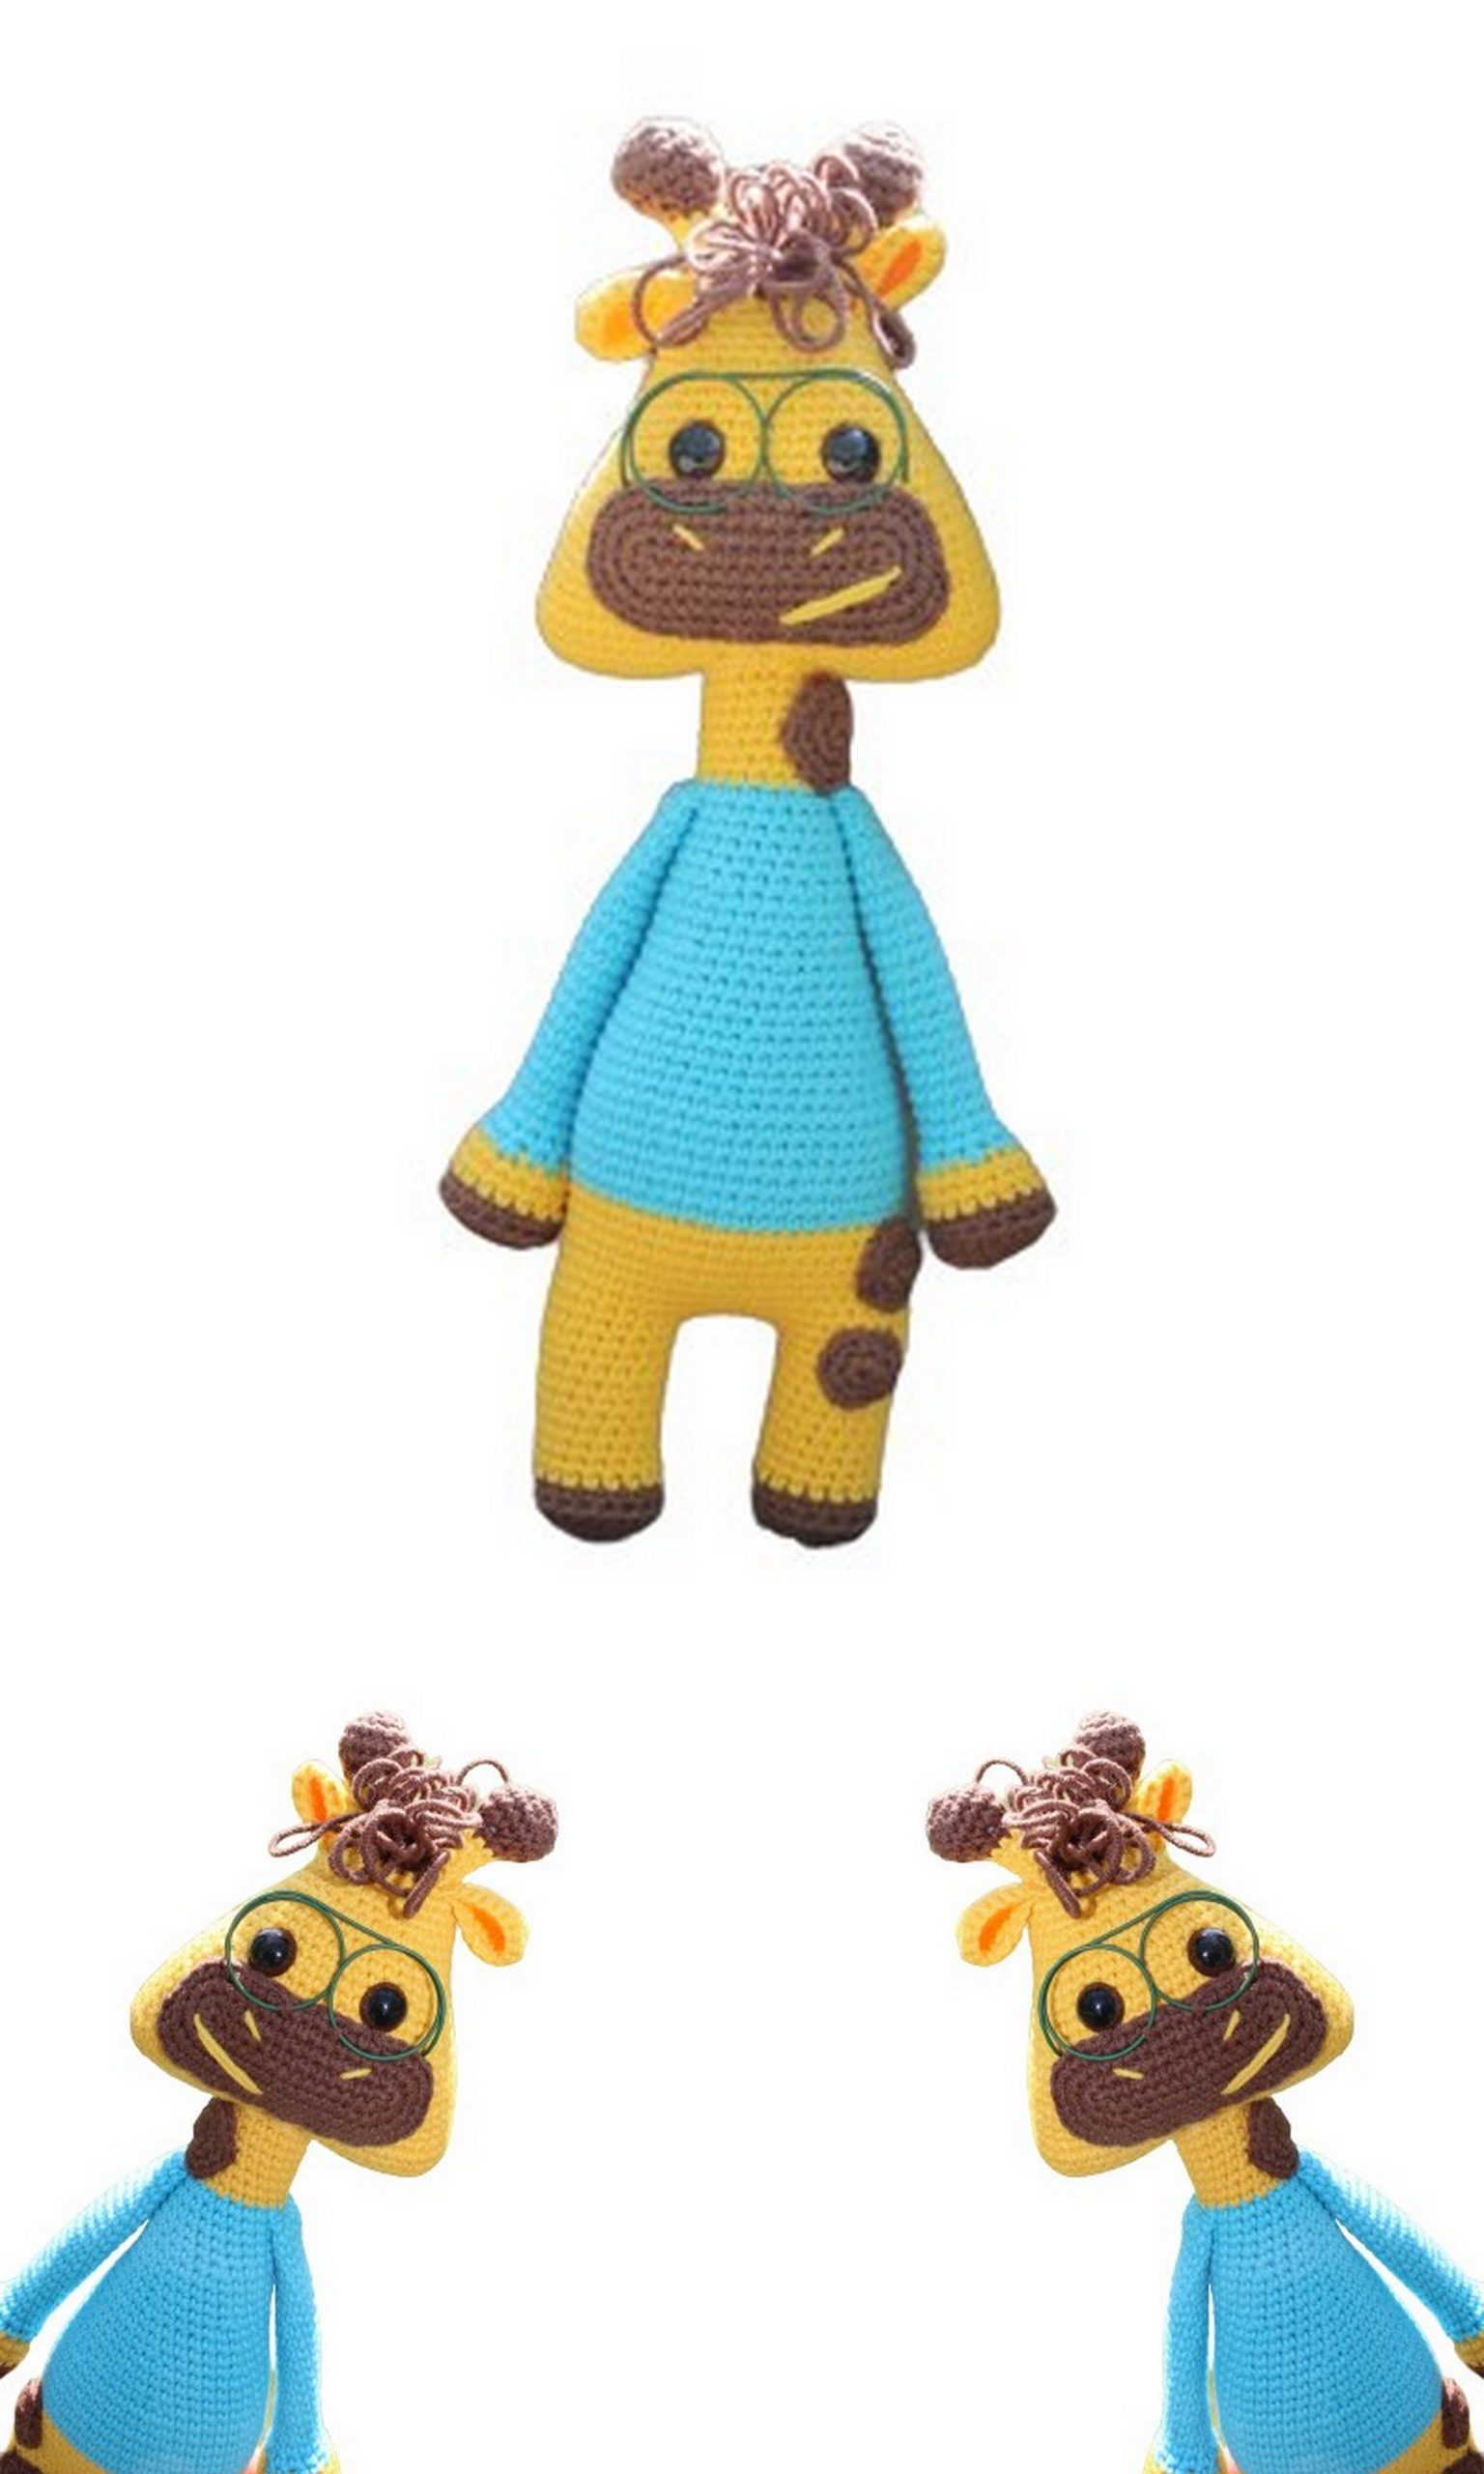
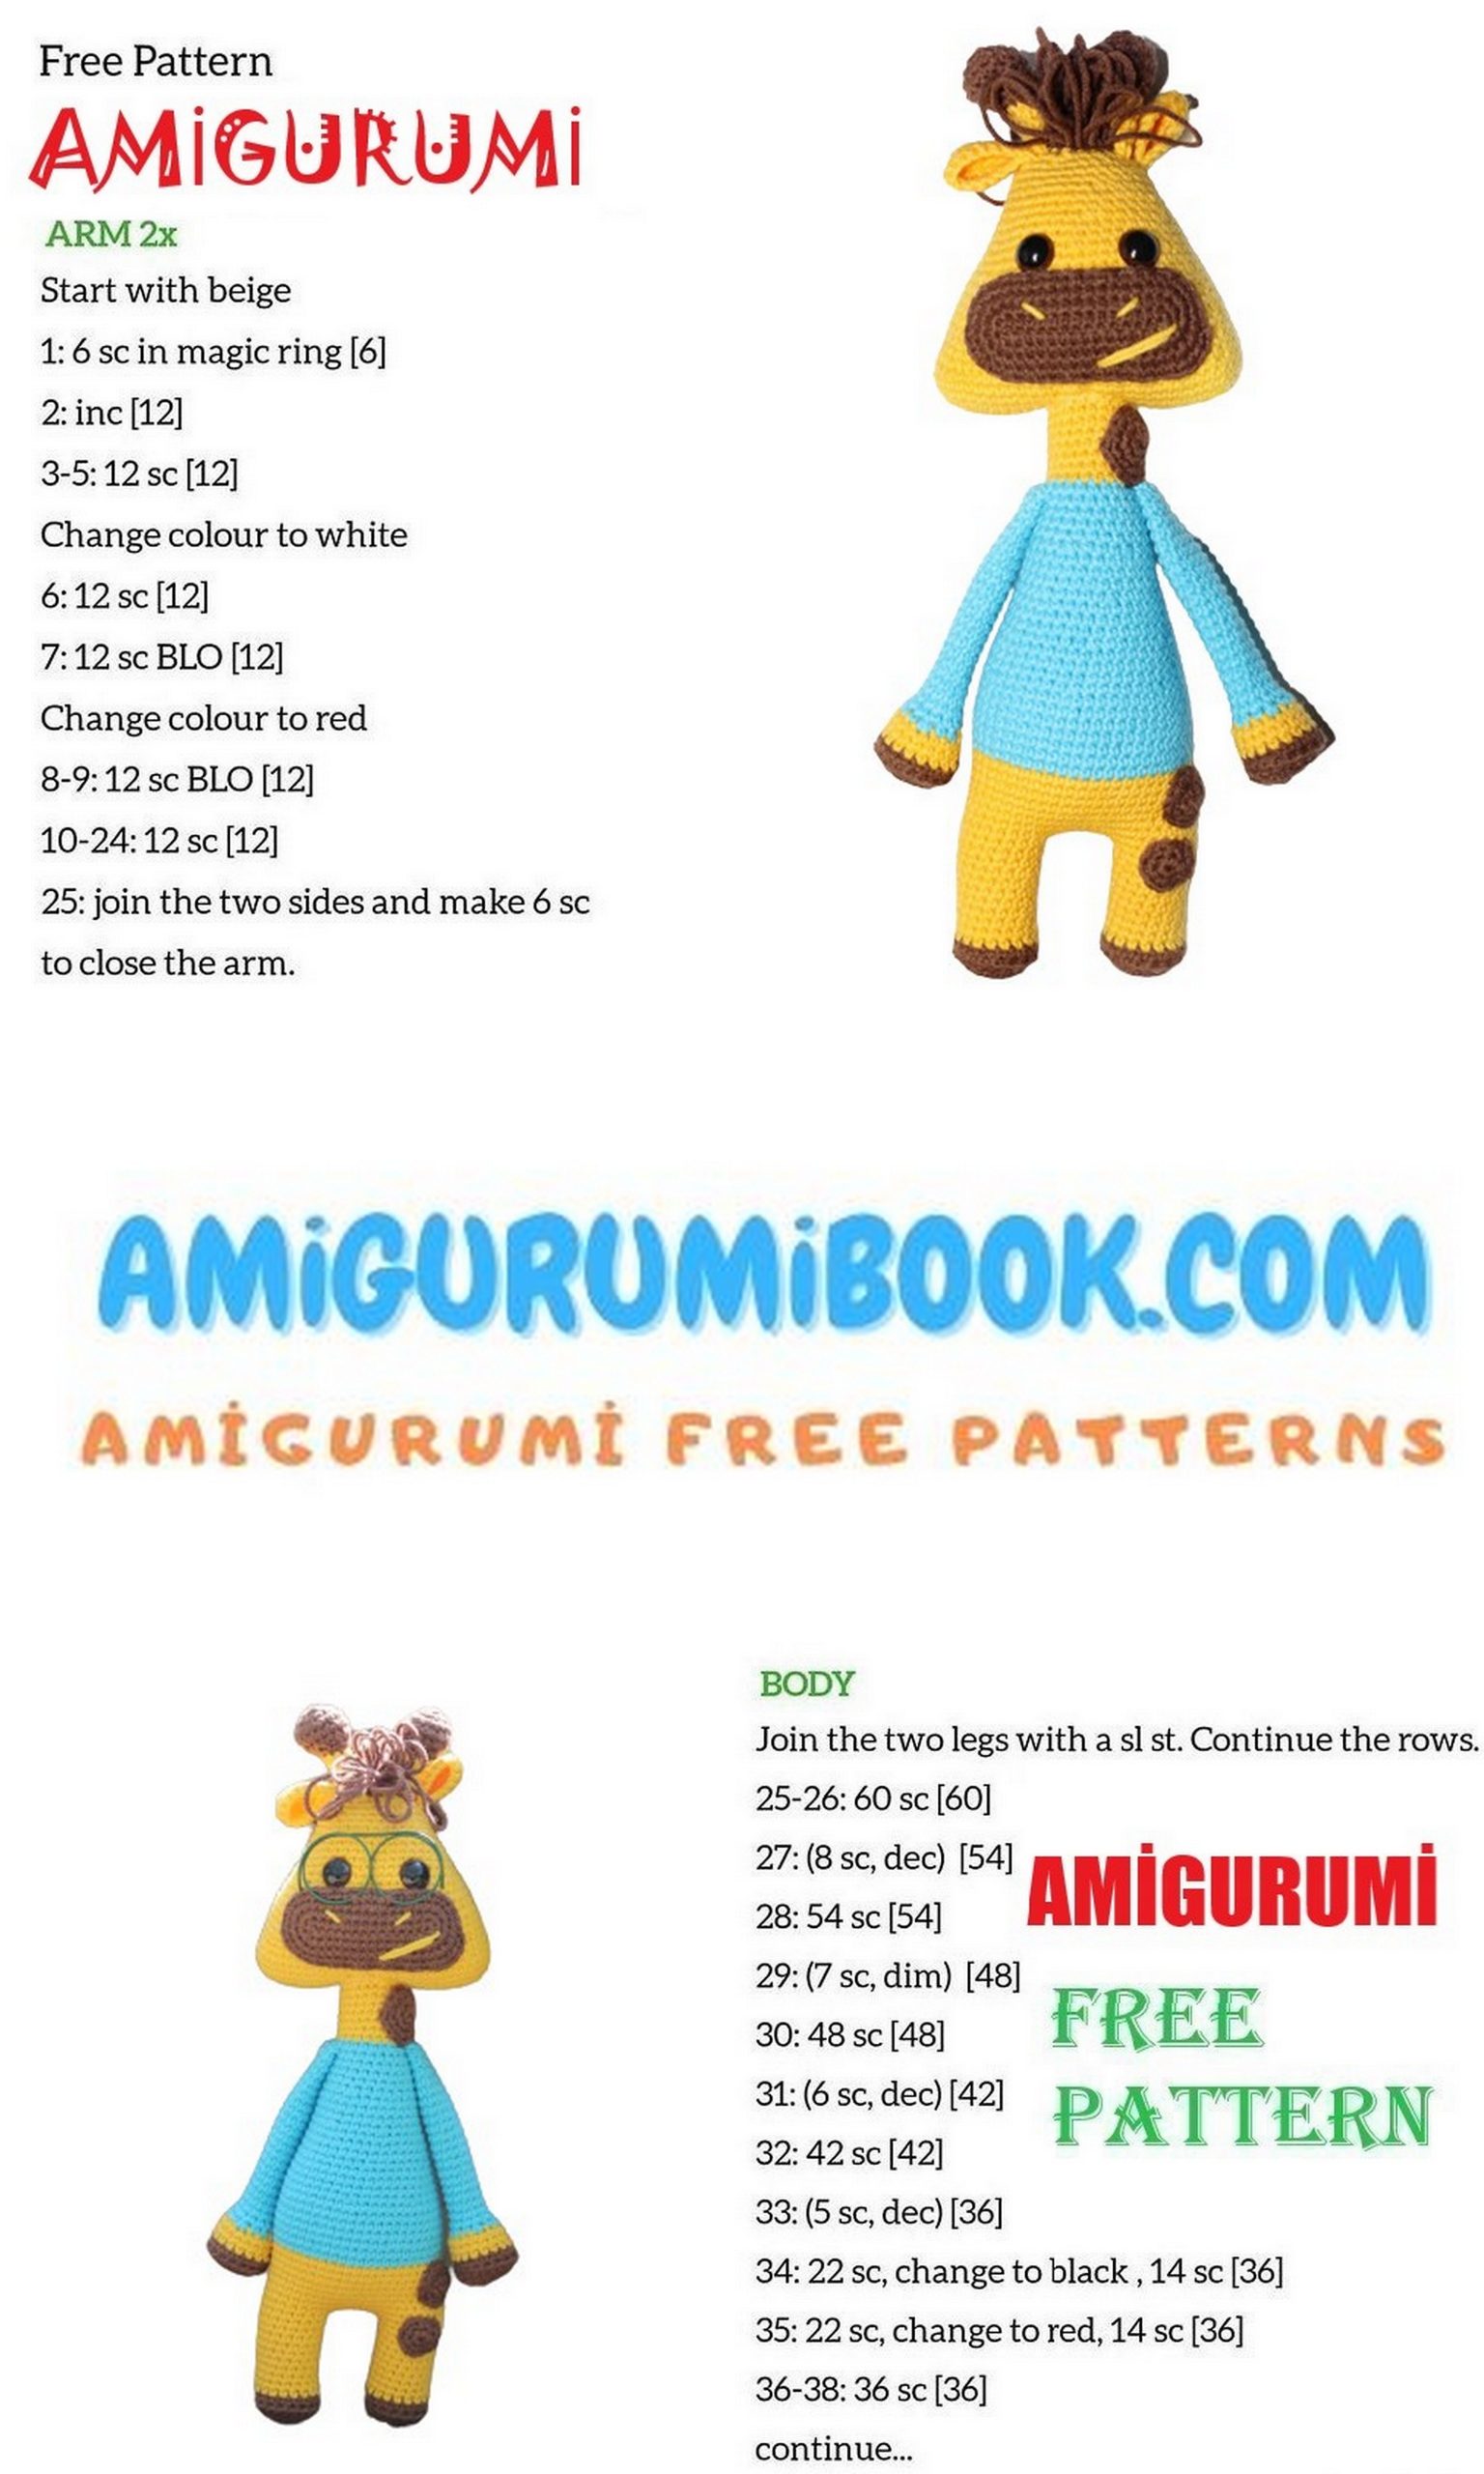
Discover the charm of creating your own adorable amigurumi giraffe complete with stylish glasses using this free crochet pattern. Perfect for both beginners and experienced crafters, this toy makes a delightful handmade gift or a cute addition to your collection. free crochet patterns
You may also like more amigurumi patterns.
Discover the joy of crocheting with our free amigurumi giraffe pattern featuring cute glasses. Create a lovable toy for yourself or a loved one. Perfect for crochet enthusiasts of all skill levels.
Welcome to our adorable crochet world! If you’re a fan of amigurumi and looking for a fun project, you’ve come to the right place. Our free amigurumi giraffe pattern with glasses is the perfect choice for both beginners and experienced crocheters. Craft your own charming giraffe toy with glasses in just a few simple steps. Whether you’re making it for yourself or as a gift, this project is sure to bring smiles to everyone’s faces. Let’s dive into this delightful amigurumi adventure!
DESCRIPTION
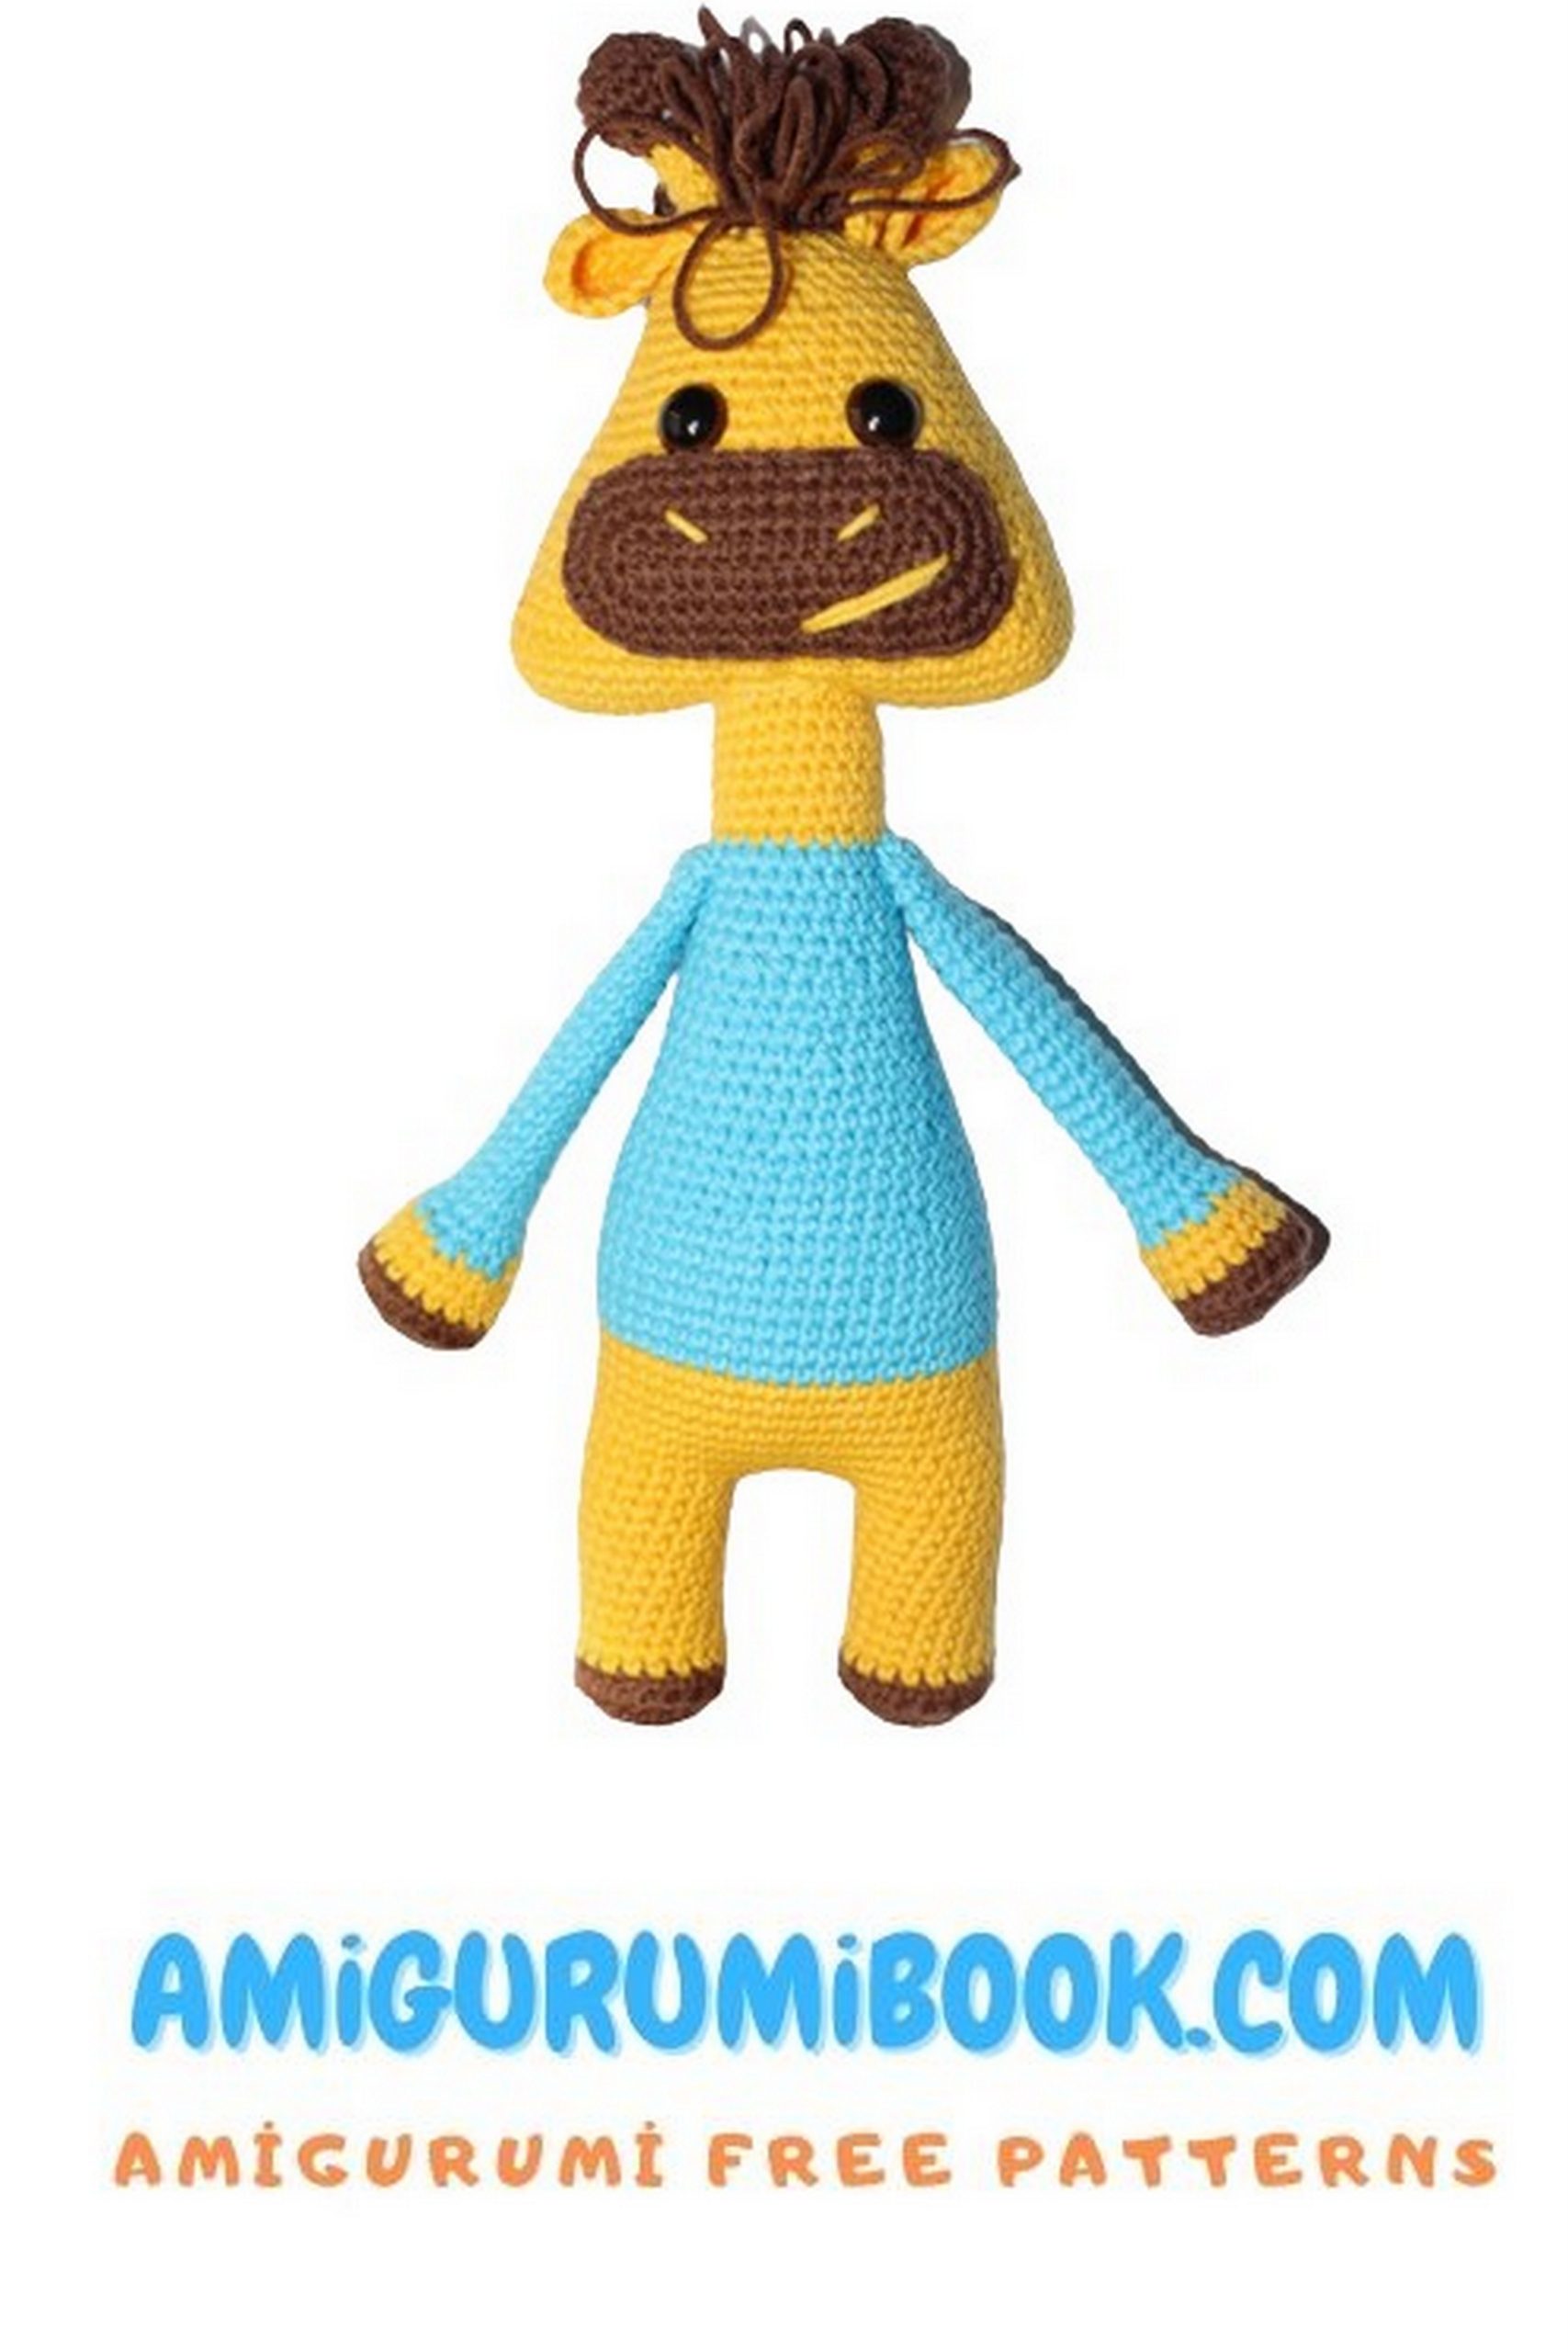
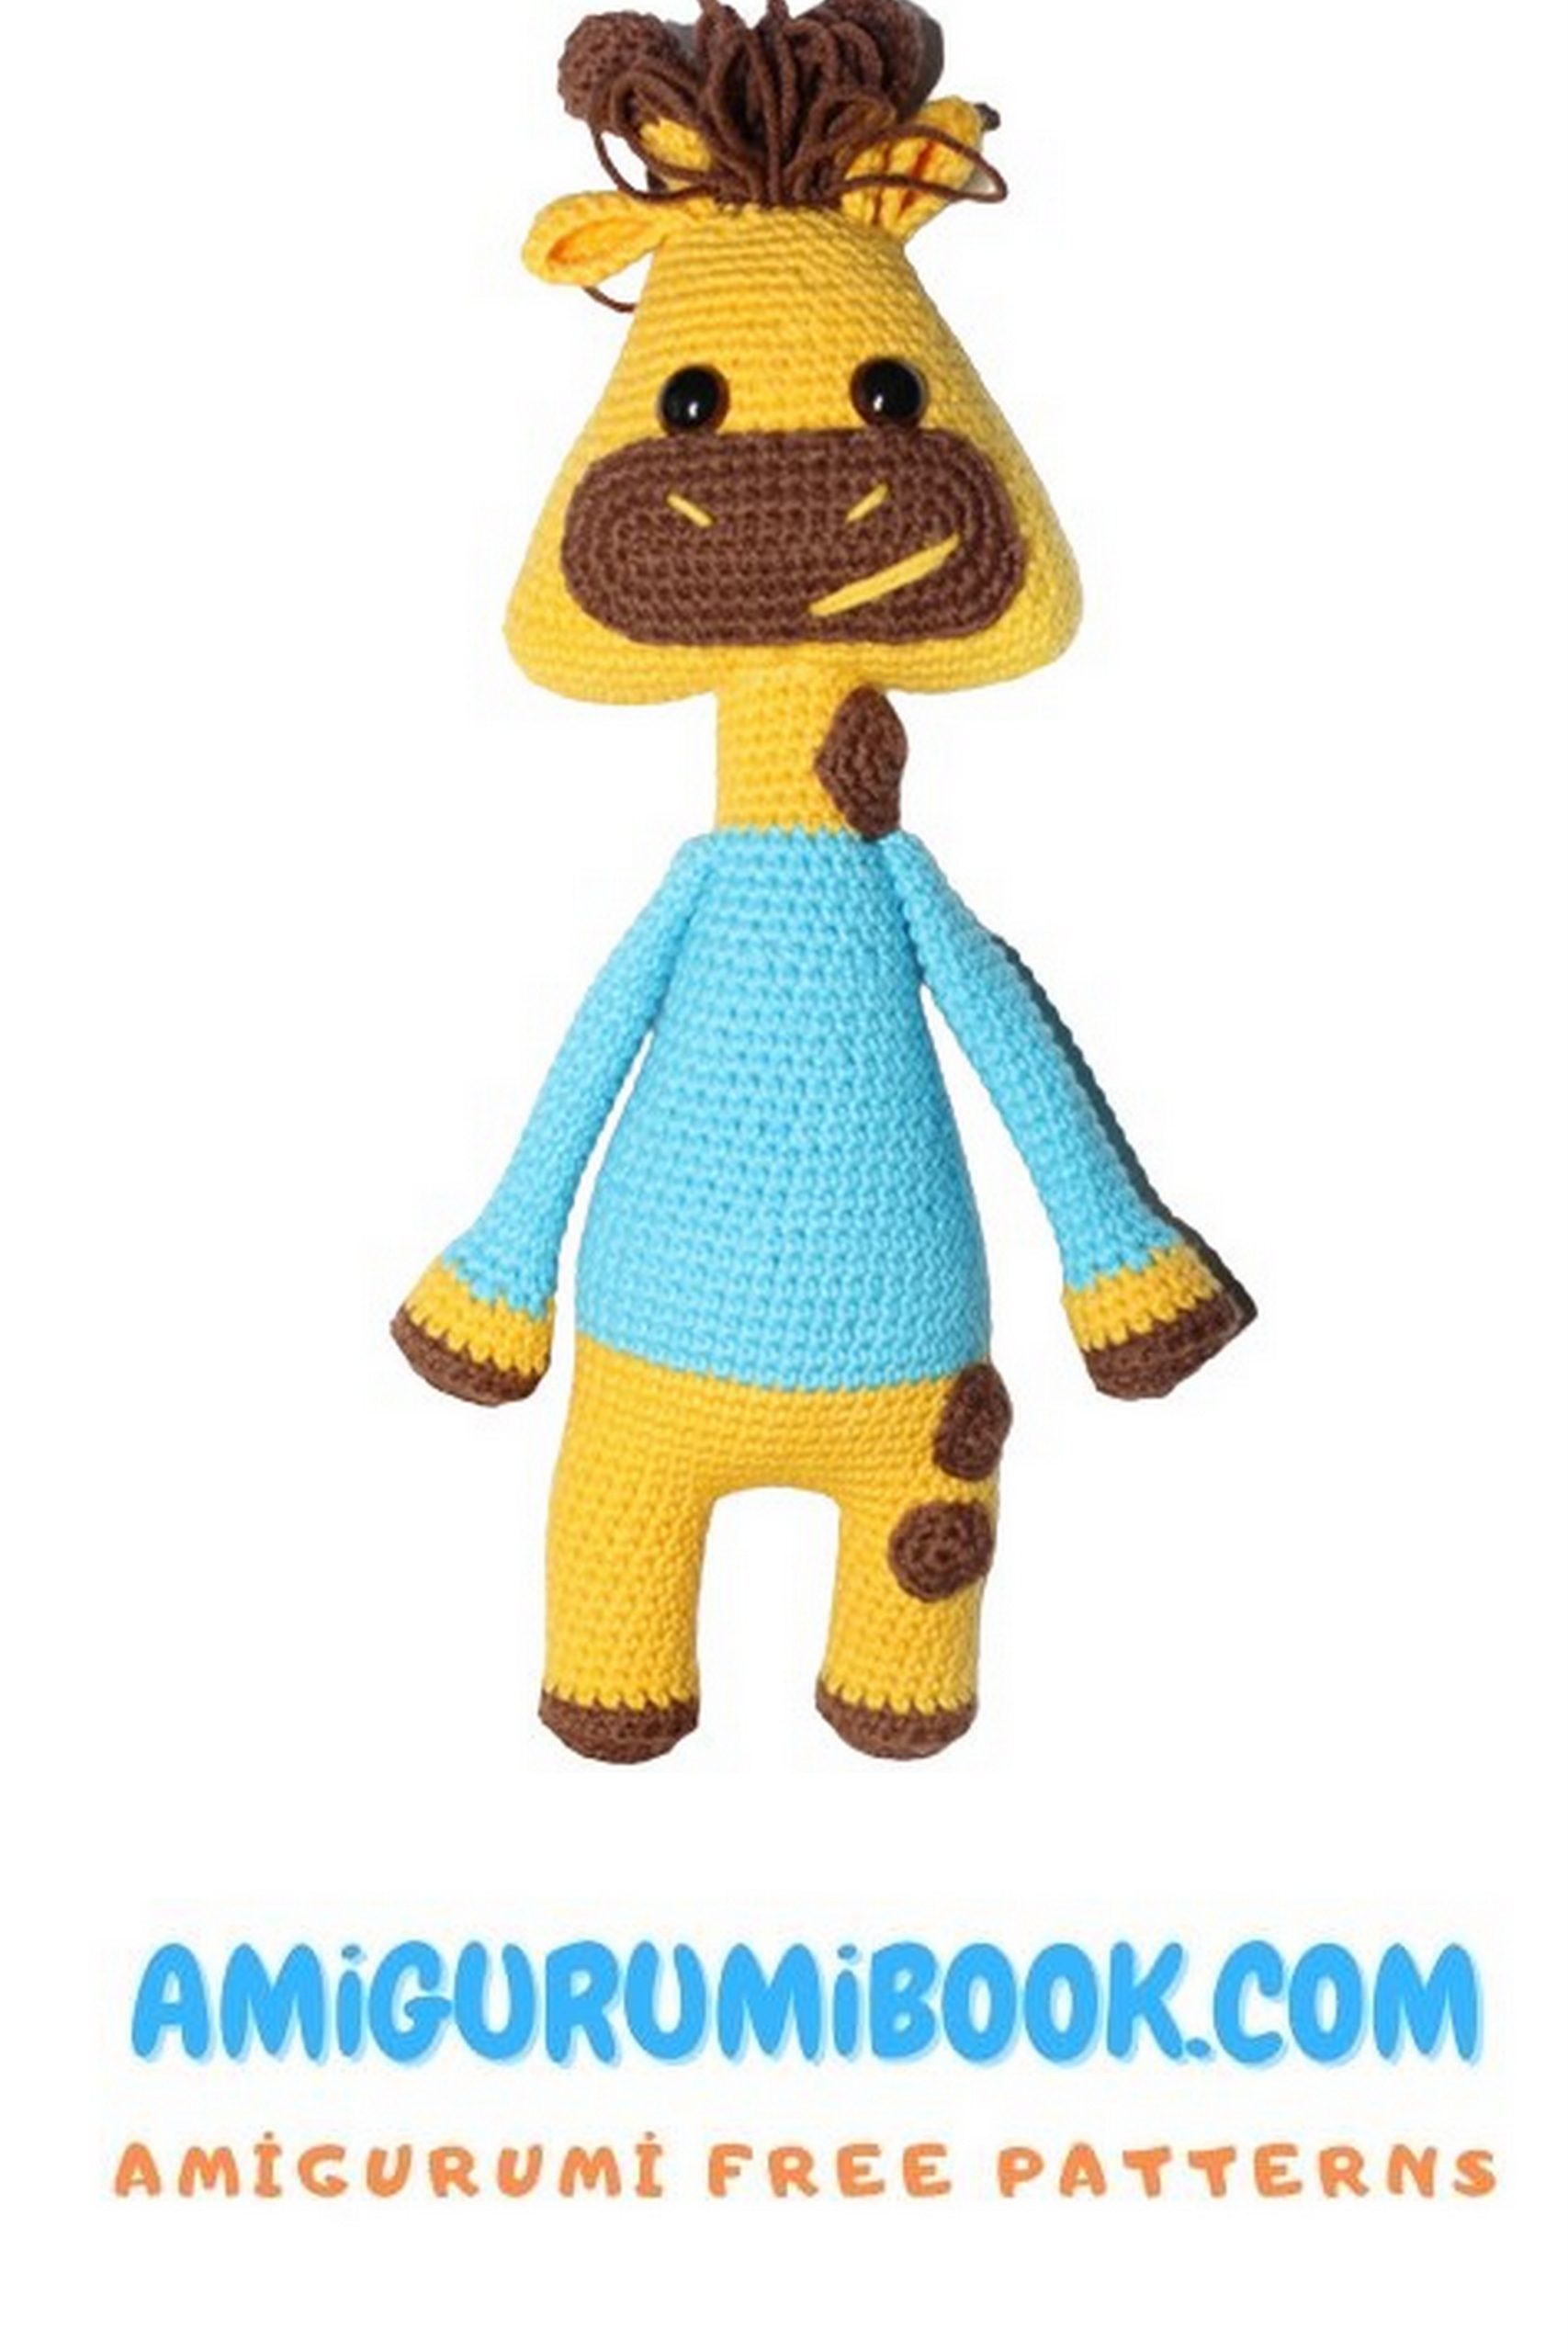
This masterclass spans 13 pages and provides a detailed walkthrough of the crafting process, complete with step-by-step photos for assembly and toy embellishment. The skill level required is intermediate, assuming a foundational knowledge of crochet techniques. When using the specified materials, the finished toy measures between 22 to 26 cm.
MATERIALS AND TOOLS
Yarn: Medium-weight, semi-cotton, in three colors:
Yellow (for the body)
Brown (for giraffe detailing)
A color of your choice (for the sweater)
Recommended yarn: Alize Cotton Gold (330m/100g, Color #493 – Brown) and YarnArt Jeans (160m/50g, Colors #35 – Yellow and #33 – Blue)
Toy stuffing material, such as polyester fiberfill.
Crochet hook suitable for your chosen yarn weight. I use a 2.0mm hook.
Tapestry needle for sewing pieces together and embroidering facial features.
Tailor’s pins.
Safety eyes with a diameter of 10mm.
Scissors.
TIPS
Amigurumi toys are crocheted tightly to prevent the stuffing from showing through the stitches. If your fabric isn’t tight enough, consider using a smaller crochet hook size.
To keep track of the number of stitches in each row, use a stitch marker to denote the beginning of each row.
Distribute the stuffing evenly and avoid creating lumps. Add stuffing in small portions to give the pieces the desired shape.
ABBREVIATIONS
MC: Magic Circle
Ch: Chain
Sc: Single Crochet
Sl st: Slip Stitch
Inc: Increase (2 sc in one stitch)
Dec: Decrease (sc 2 together)
(2 sc, dec) * n: Repeat what’s in parentheses n times
(36): Number of stitches in the row
Unless stated otherwise, crochet in spirals. Work stitches through both loops, except where specified.

PATTERN
HEAD
We’re crocheting with the main (yellow) color.
Begin by chaining 25 chains.
Start the first row of crocheting from the second chain from the hook. Crochet in spirals (in the first row, crochet on one side of the chain, then switch to the other side).
Row 1: 1 inc, 22 sc, 2 inc (in the last chain of the chain), 22 sc, 1 inc (52)
Row 2: 2 inc, 22 sc, 4 inc, 22 sc, 2 inc (60)
Row 3: 3 inc, 25 sc, 5 inc, 25 sc, 2 inc (70)
Rows 4-6: 70 sc
Row 7: 4 sc, dec, 24 sc, dec, 7 sc, dec, 24 sc, dec, 3 sc (66)
Row 8: 66 sc
Row 9: 4 sc, dec, 22 sc, dec, 7 sc, dec, 22 sc, dec, 3 sc (62)
Row 10: 62 sc
Row 11: 4 sc, dec, 20 sc, dec, 7 sc, dec, 20 sc, dec, 3 sc (58)
Row 12: 58 sc
Row 13: 4 sc, dec, 18 sc, dec, 7 sc, dec, 18 sc, dec, 3 sc (54)
Row 14: 54 sc
Row 15: 4 sc, dec, 16 sc, dec, 7 sc, dec, 16 sc, dec, 3 sc (50)
Row 16: Dec, 23 sc, dec, 23 sc (48)
Row 17: (6 sc, dec)*6 (42)
Rows 18-19: 42 sc
Row 20: (5 sc, dec)*6 (36)
Rows 21-22: 36 sc
Row 23: (4 sc, dec)*6 (30)
Rows 24-25: 30 sc
Insert safety eyes between rows 16 and 17 with a distance of 8 sc between them. Stuff the head tightly, shaping it into a triangle.
HEAD
Row 26: (3 sc, dec)*6 (24)
Row 27: (2 sc, dec)*6 (18)
Start crocheting the tuft. Change the thread color.
We will crochet the hairstyle by alternating regular rows with rows of extended stitches. The length of the extended stitches will determine the length of the toy’s hair.
Row 28: 18 sc (extended stitches)
Row 29: (1 sc, dec)*6 (12)
Row 30: 12 sc (extended stitches)
Add stuffing.
Row 31: 6 dec (6)
Finish crocheting with 1 sl st + 1 ch. Pull the thread through and cut, leaving a long end.
Thread the end through a needle with a wide eye. By capturing only the front loops with the needle, tighten the remaining 6 sc. Secure the thread.
Insert the needle at the top of the head and pull it out on the opposite side (around the future neck area). Make a light tightening. Secure the thread and cut the remaining end.
MUZZLE
We’re crocheting with the brown color.
Begin by chaining 15 chains.
Start the first row of crocheting from the second chain from the hook. Crochet in spirals (in the first row, crochet on one side of the chain, then switch to the other side).
Row 1: 1 inc, 12 sc, 2 inc (in the last chain of the chain), 12 sc, 1 inc (32)
Row 2: 2 inc, 12 sc, 4 inc, 12 sc, 2 inc (40)
Row 3: 3 inc, 15 sc, 5 inc, 15 sc, 2 inc (50)
Row 4: 50 sc.
Finish crocheting with 1 sl st + 1 ch. Pull the thread through and cut, leaving a long end.
HORNS (2 PIECES)
Start crocheting with the brown color.
Row 1: 6 sc in MR (magic ring).
Row 2: 6 inc (12)
Row 3: (1 sc, inc)*6 (18)
Row 4: 18 sc
Row 5: 9 dec (9)
Row 6: 9 sc
Stuff the piece.
Change the color to the main (yellow).
Rows 7-10: 9 sc
Finish crocheting with 1 sl st + 1 ch. Pull the thread through and cut, leaving a long end. Thread the end through a needle with a wide eye, fold the piece in half, and sew using a “whipstitch.”
EARS (2 PIECES)
Crochet with the main (yellow) color.
Begin by chaining 8 chains. Start the first row of crocheting from the second chain from the hook.
Row 1: 7 sc + ch for turning.
Turn the work (crochet in the opposite direction).
Row 2: 7 sc.
Turn the work.
Row 3: In the second chain from the hook: 6 sc + ch for turning.
Turn the work (crochet in the opposite direction).
Row 4: 6 sc.
Turn the work.
Row 5: In the second chain from the hook: 5 sc + ch for turning.
Turn the work (crochet in the opposite direction).
Row 6: Work in the round: 15 sc + ch for turning.
Turn the work (crochet in the opposite direction).
Row 7: 15 sc + ch.
Finish crocheting. Pull the thread through and cut, leaving a long end. Thread the end through a needle with a wide eye, fold the piece in half, and sew using a “whipstitch.”
LEGS (2 PIECES)
Start crocheting the leg with the hoof. To do this, we need to crochet two circles of the same size according to the scheme below.
Crochet with the brown color:
Row 1: 6 sc in MR (magic ring).
Row 2: 6 inc (12)
Row 3: (1 sc, inc)*6 (18)
After crocheting the first circle, finish crocheting with 1 sl st + 1 ch. Pull the thread through and cut it. For the second circle, do not cut the thread; continue crocheting with it. Place the first circle on top of the second (inside out) and connect them as indicated in the 4th row. Hide the end of the thread from the first circle inside the piece.
Row 4: 18 sc through both loops of both pieces.
Row 5: 18 sc through the back loop only.
Change the color to the main (yellow).
Rows 6-14: 18 sc
For the second leg:
Row 15: 23 sc
Do not cut the thread, continue crocheting the body. Crochet 7 ch (the distance between the legs). To ensure color transitions are at the back of the toy, remove the crochet marker. Crochet continuously around.
For the first leg:
Row 15: 13 sc
Finish crocheting with 1 sl st + 1 ch. Pull the thread through and cut it, tucking the end inside the piece.
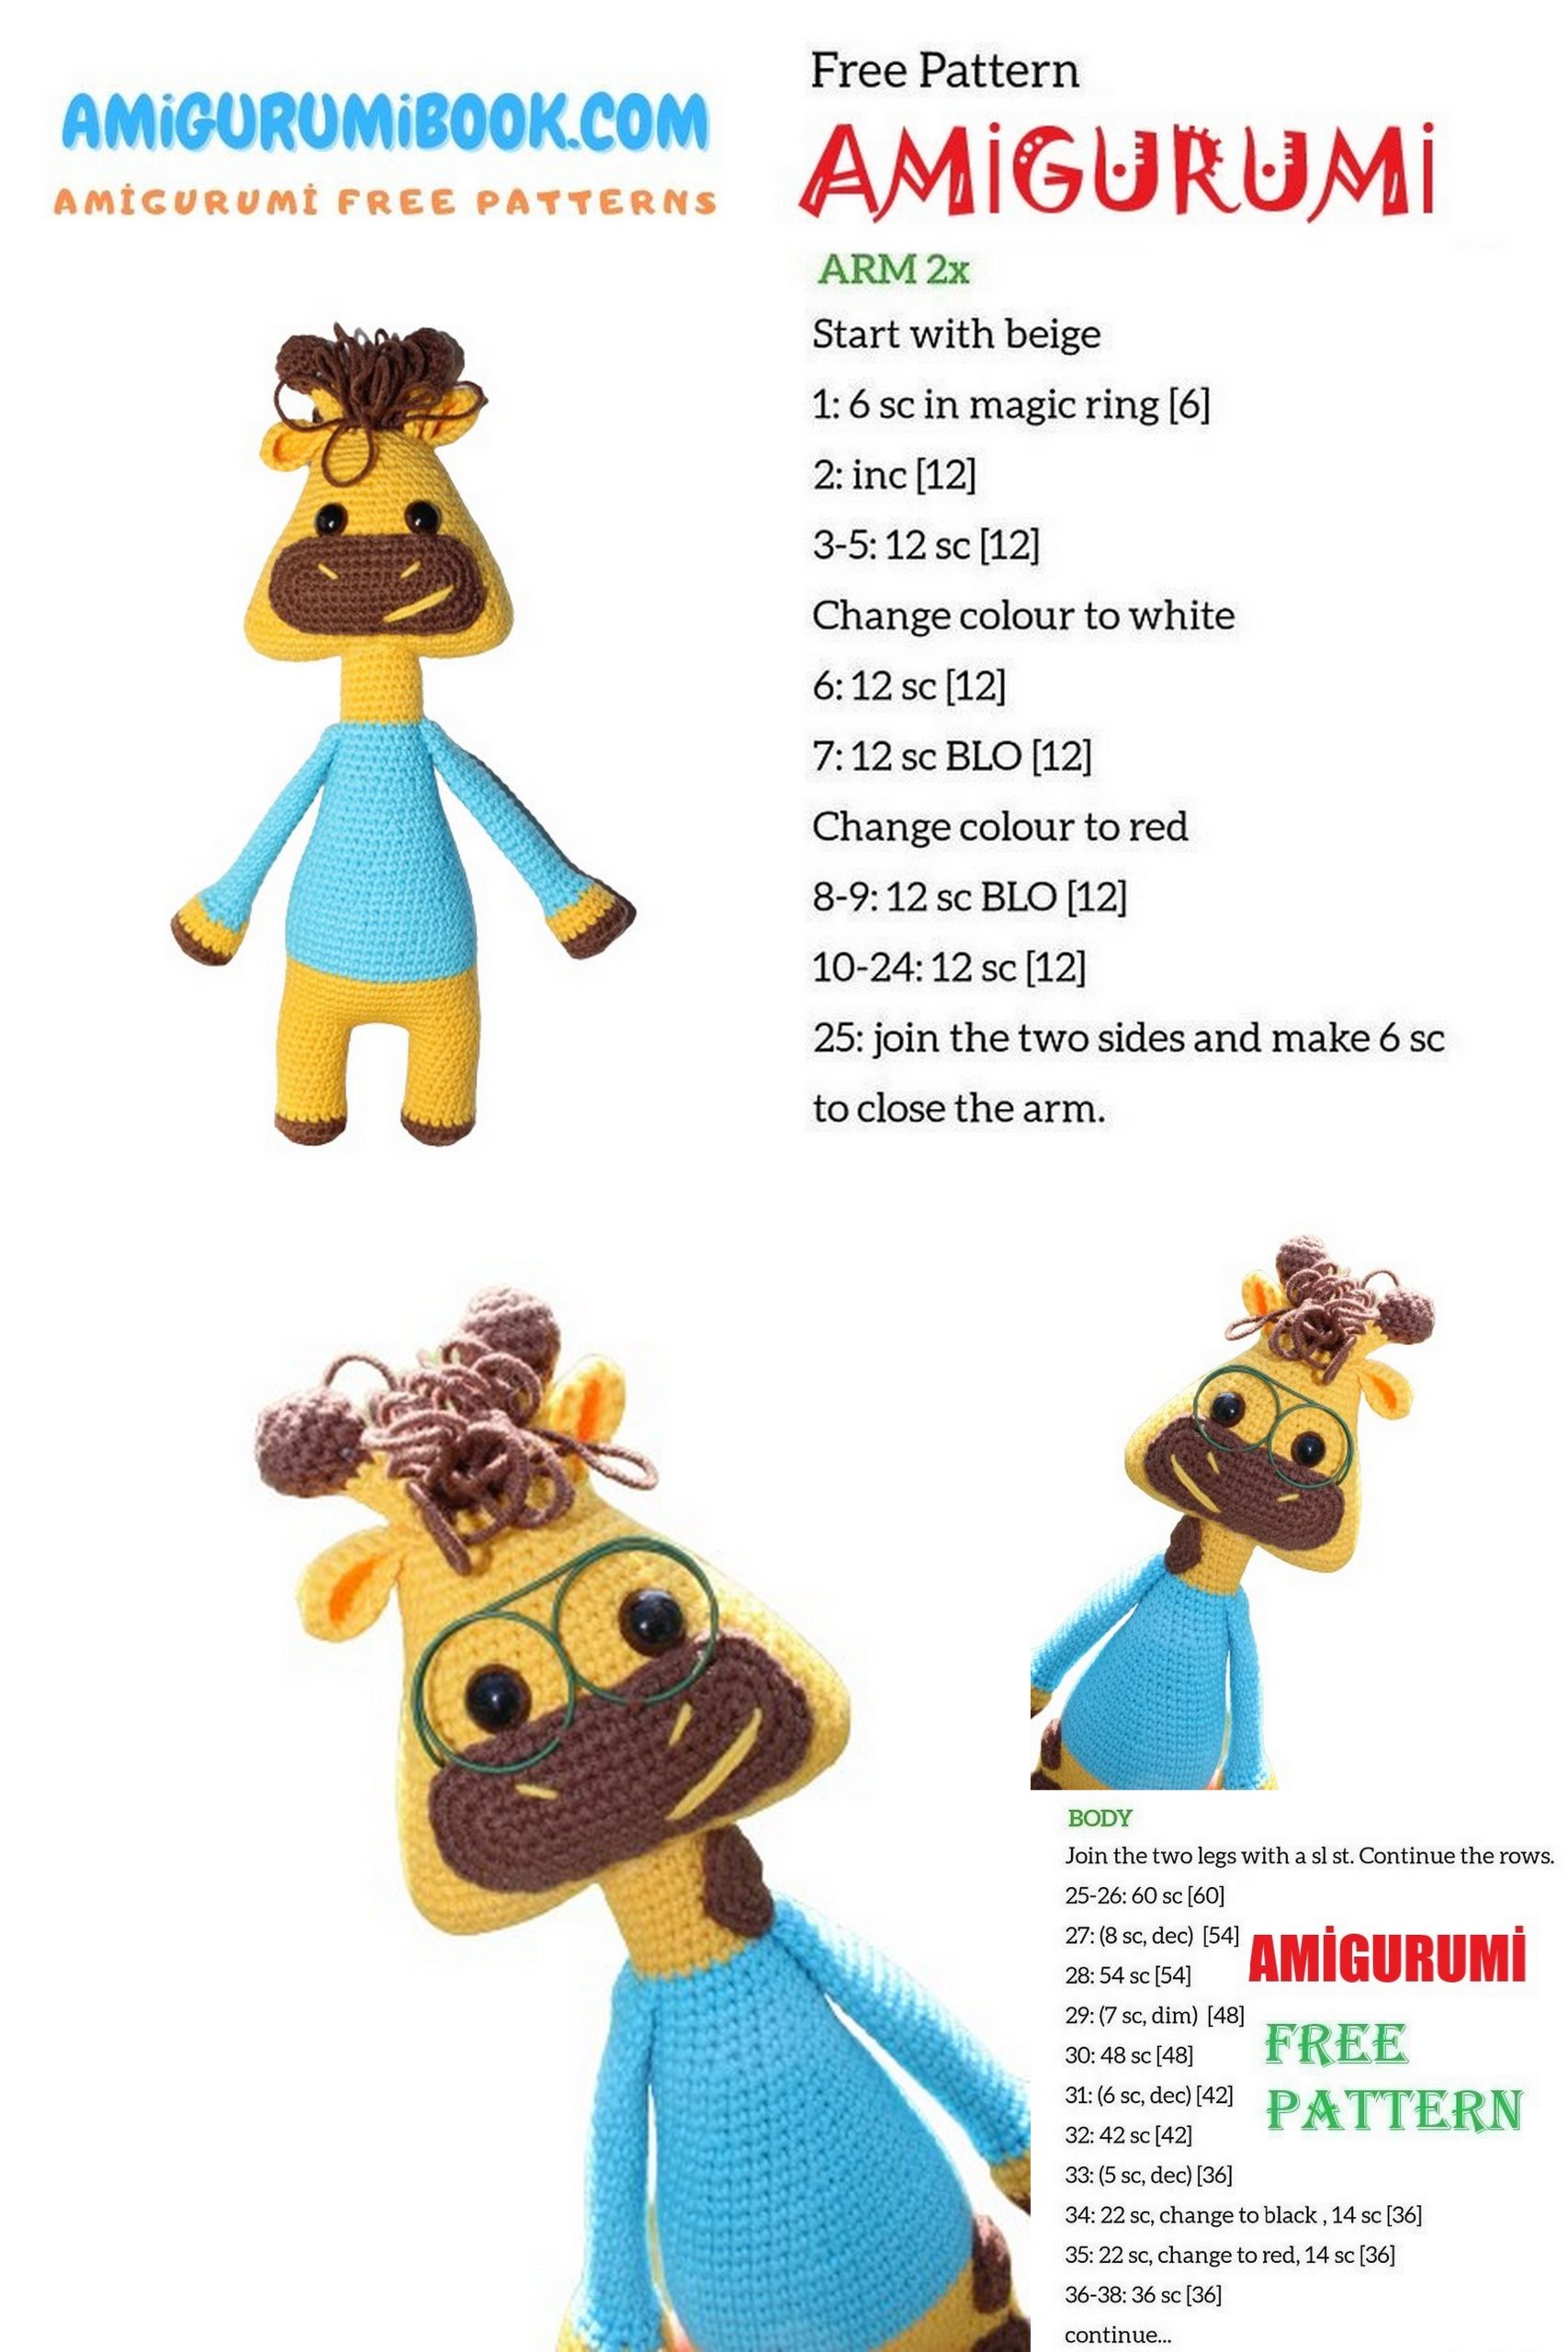
BODY
Attach the second leg to the first with a sl st.
Continue crocheting in spirals with the main (yellow) color.
Row 1: 50 sc (18 sc on one leg + 7 sc on the chain of ch + 18 sc on the second leg + 7 sc on the chain of ch). Place a crochet marker.
Rows 2-8: 50 sc
Row 9: 47 sc + tail (8 ch + 7 sl st worked back along the chain of ch) + 3 sc (50)
Stuff the legs tightly with fiberfill, then continue stuffing the piece as you go.
Start crocheting the sweater. Change the thread color in any convenient way, anywhere on the back.
Row 10: 48 sc (decrease over the tail by skipping 2 loops where the tail comes out)
Rows 11-17: 48 sc
Row 18: (6 sc, dec)*6 (42)
Rows 19-21: 42 sc
Row 22: (5 sc, dec)*6 (36)
Rows 23-25: 36 sc
Row 26: (4 sc, dec)*6 (30)
Rows 27-29: 30 sc
Row 30: (3 sc, dec)*6 (24)
Rows 31-33: 24 sc
Row 34: (dec, 10 sc)*2 (22)
Row 35: 22 sc
Change the color to the main (yellow) and continue crocheting the neck.
Rows 36-43: 22 sc
Finish crocheting with 1 sl st + 1 ch. Pull the thread through and cut, leaving a long end for attaching the head. Stuff the piece.
ARMS (2 PIECES)
Start crocheting the arms with the hoof. To do this, we need to crochet two circles of the same size according to the scheme below.
Crochet with the brown color:
Row 1: 6 sc in MR (magic ring).
Row 2: 6 inc (12)
Row 3: (1 sc, inc)*6 (18)
After crocheting the first circle, finish crocheting with 1 sl st + 1 ch. Pull the thread through and cut it. For the second circle, do not cut the thread; continue crocheting with it. Place the first circle on top of the second (inside out) and connect them as indicated in the 4th row. Hide the end of the thread from the first circle inside the piece.
Row 4: 18 sc through both loops of both pieces.
Row 5: 18 sc through the back loop only.
Change the color to the main (yellow).
Rows 6-8: 18 sc
At this point, stuff the piece tightly with fiberfill. Then, continue crocheting without additional stuffing (usually, I leave the arms unstuffed).
Change the thread color to match the sweater.
Row 9: 18 sc
Row 10: (1 sc, dec)*6 (12)
Rows 11-30: 12 sc
Finish crocheting with 1 sl st + 1 ch. Pull the thread through and cut, leaving a long end. Thread the end through a needle with a wide eye, fold the piece in half, and sew using a “whipstitch.”
ASSEMBLY AND DECORATION
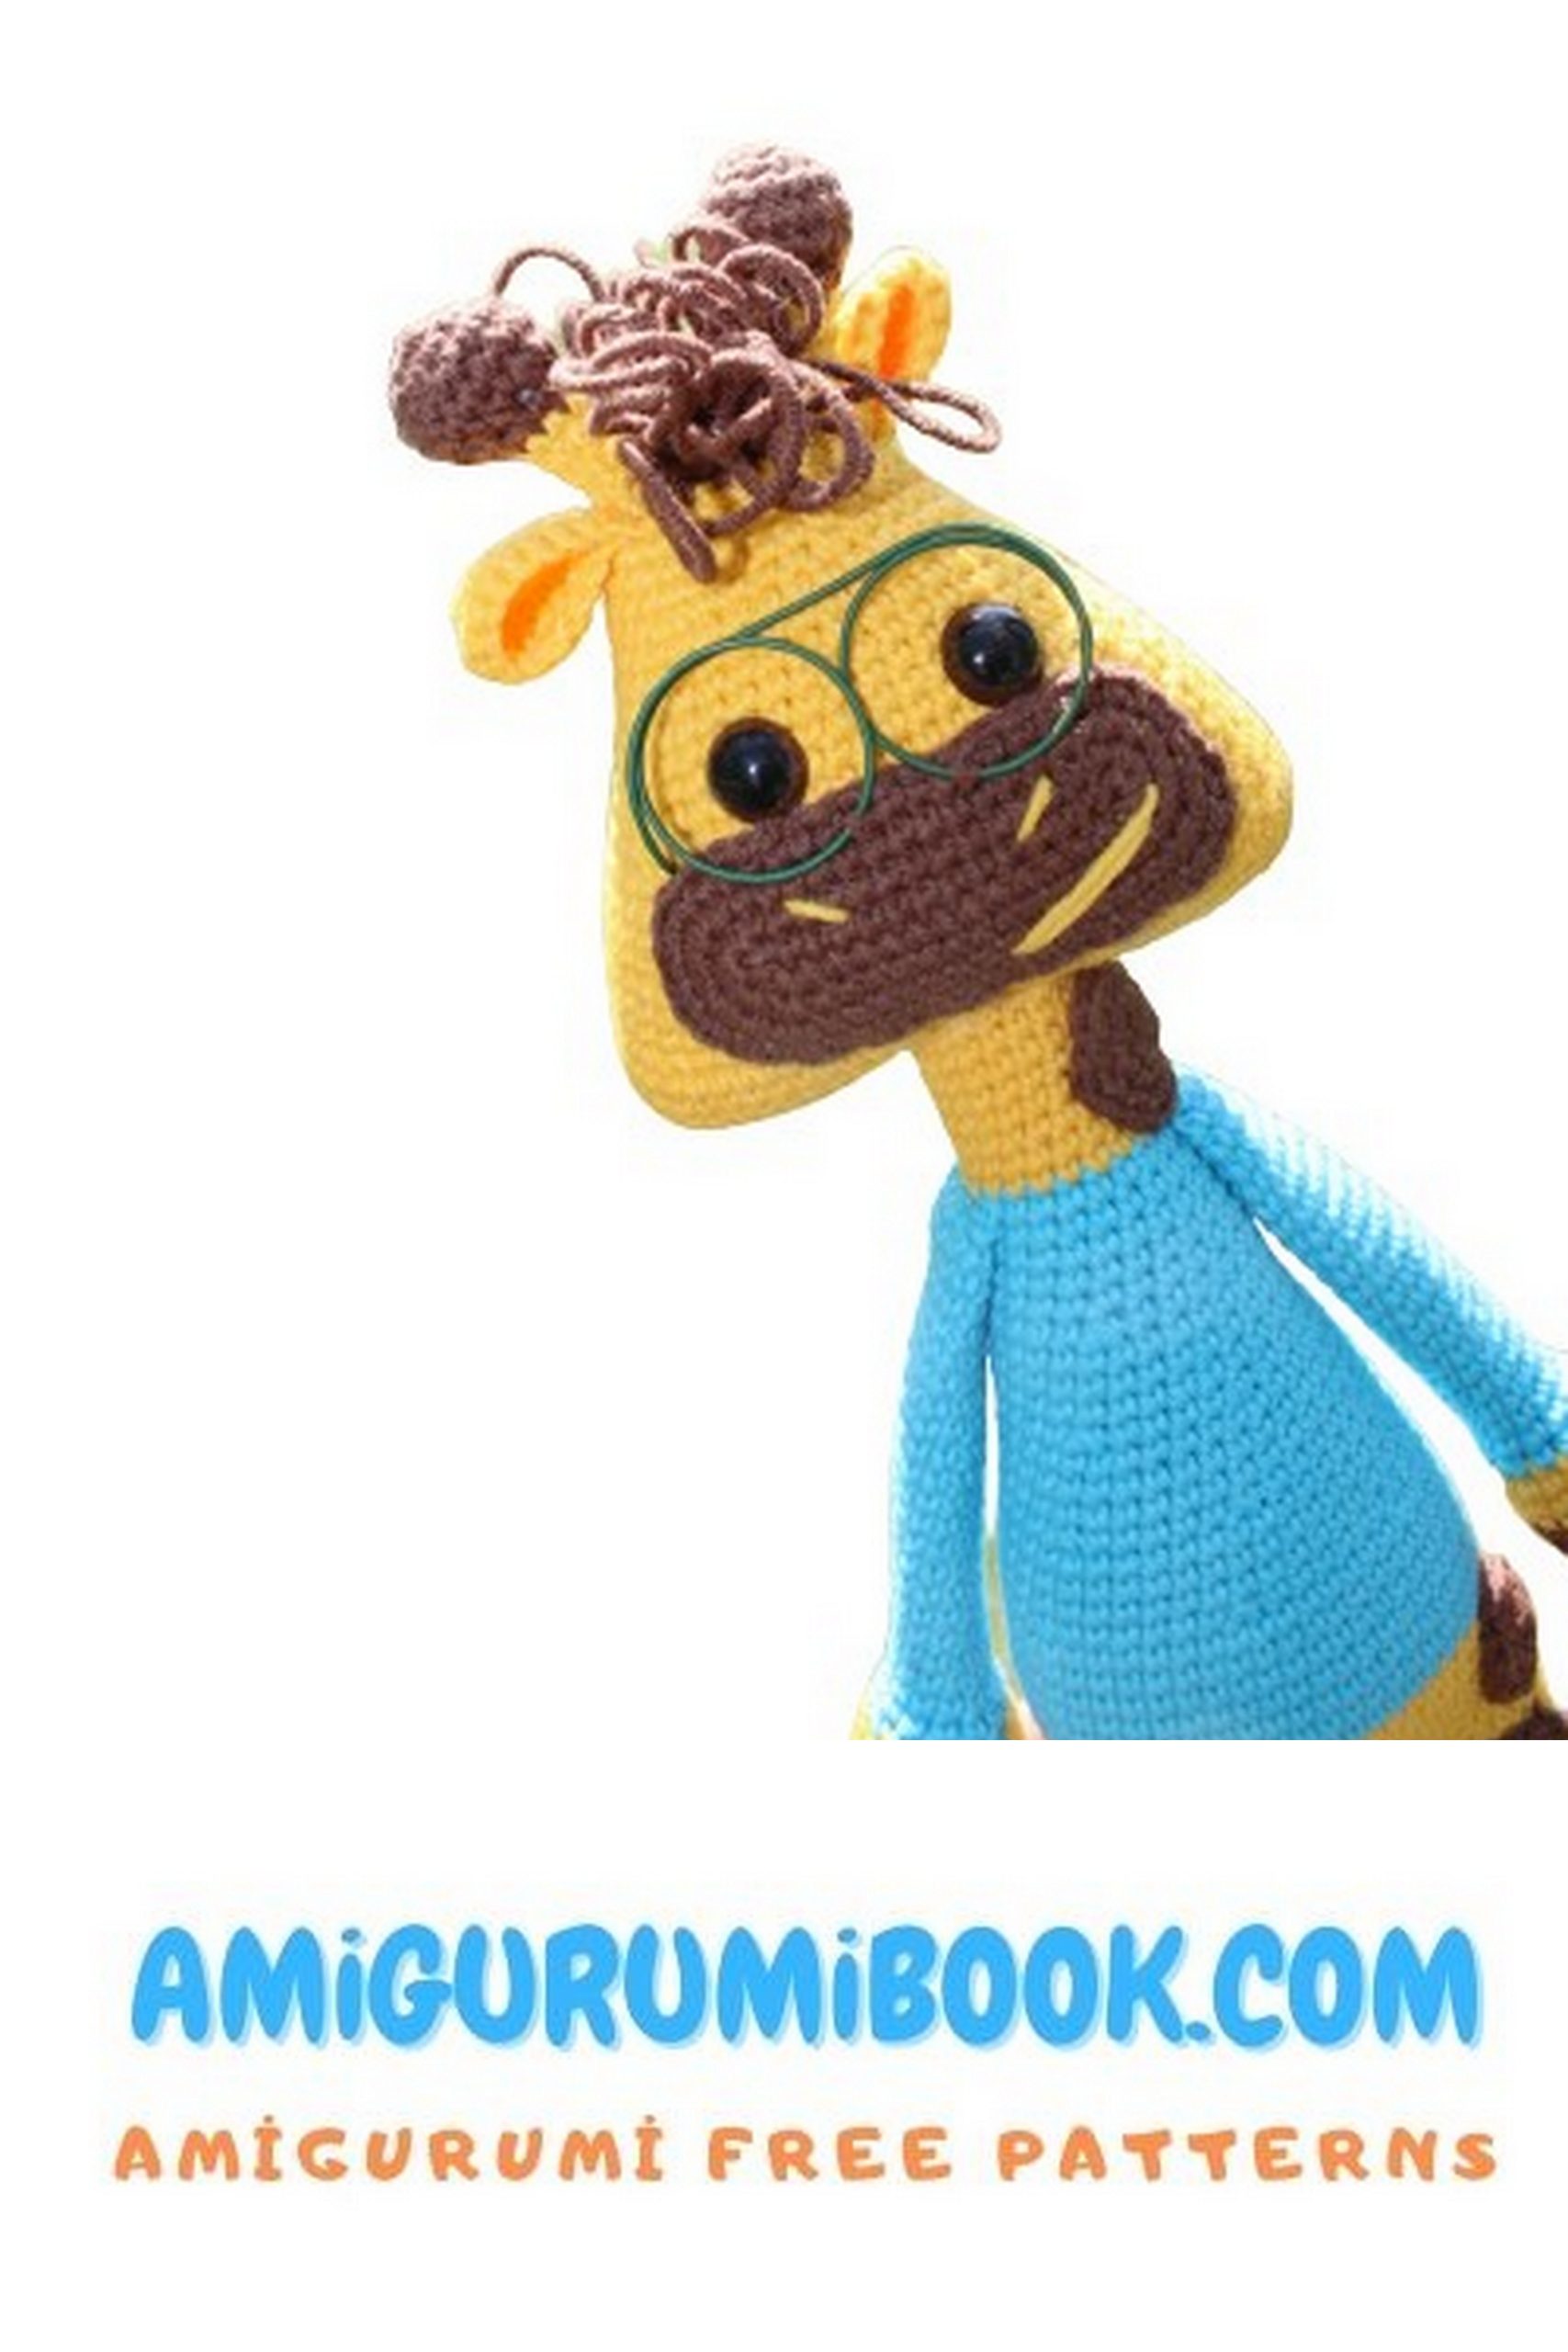
Position the muzzle under the eyes and sew it to the head using the thread left after crocheting. Use pins to temporarily secure the muzzle for convenience.
Symmetrically attach and sew the horns to the sides of the head. Then sew the ears one row below the horns.
Embroider the nostrils and mouth.
To create the nostrils, insert a yellow-threaded needle between rows 1 and 2 of the muzzle, bringing it out between rows 5 and 6, just below the left eye. Move up one row diagonally and insert the needle back inside the muzzle. This will create the first nostril (see the photo). To bring the needle out again, do so in the same row, but 10 stitches to the right. Move down one row diagonally and insert the needle back inside the muzzle. Congratulations! Your perfect nostrils are ready!
To embroider the mouth, you can do so at your discretion. It should be relatively easy without my specific instructions.
Attach the head to the body with the thread left after crocheting the body, right in the center of the head. Secure the pieces so that the threads are hidden after tightening the head. Add stuffing to the neck, packing it firmly. This is necessary to avoid creases and prevent the head from wobbling.
Symmetrically attach and sew the arms to the body, between rows 34 and 35 of the body. Use pins to temporarily secure the arms for convenience.
Attach a tassel, consisting of 3-4 short brown threads, to the tail. Pass each thread through the half-loops and secure them.
Optionally, add spots to the giraffe. To do this, crochet a couple of brown circles of any diameter and place them on the yellow parts of the giraffe’s body.