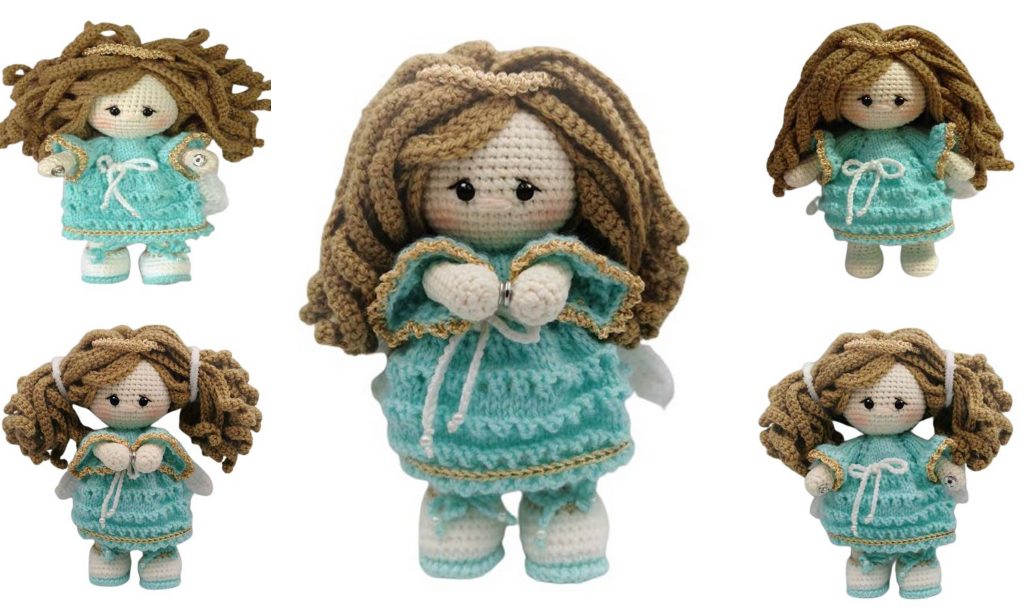
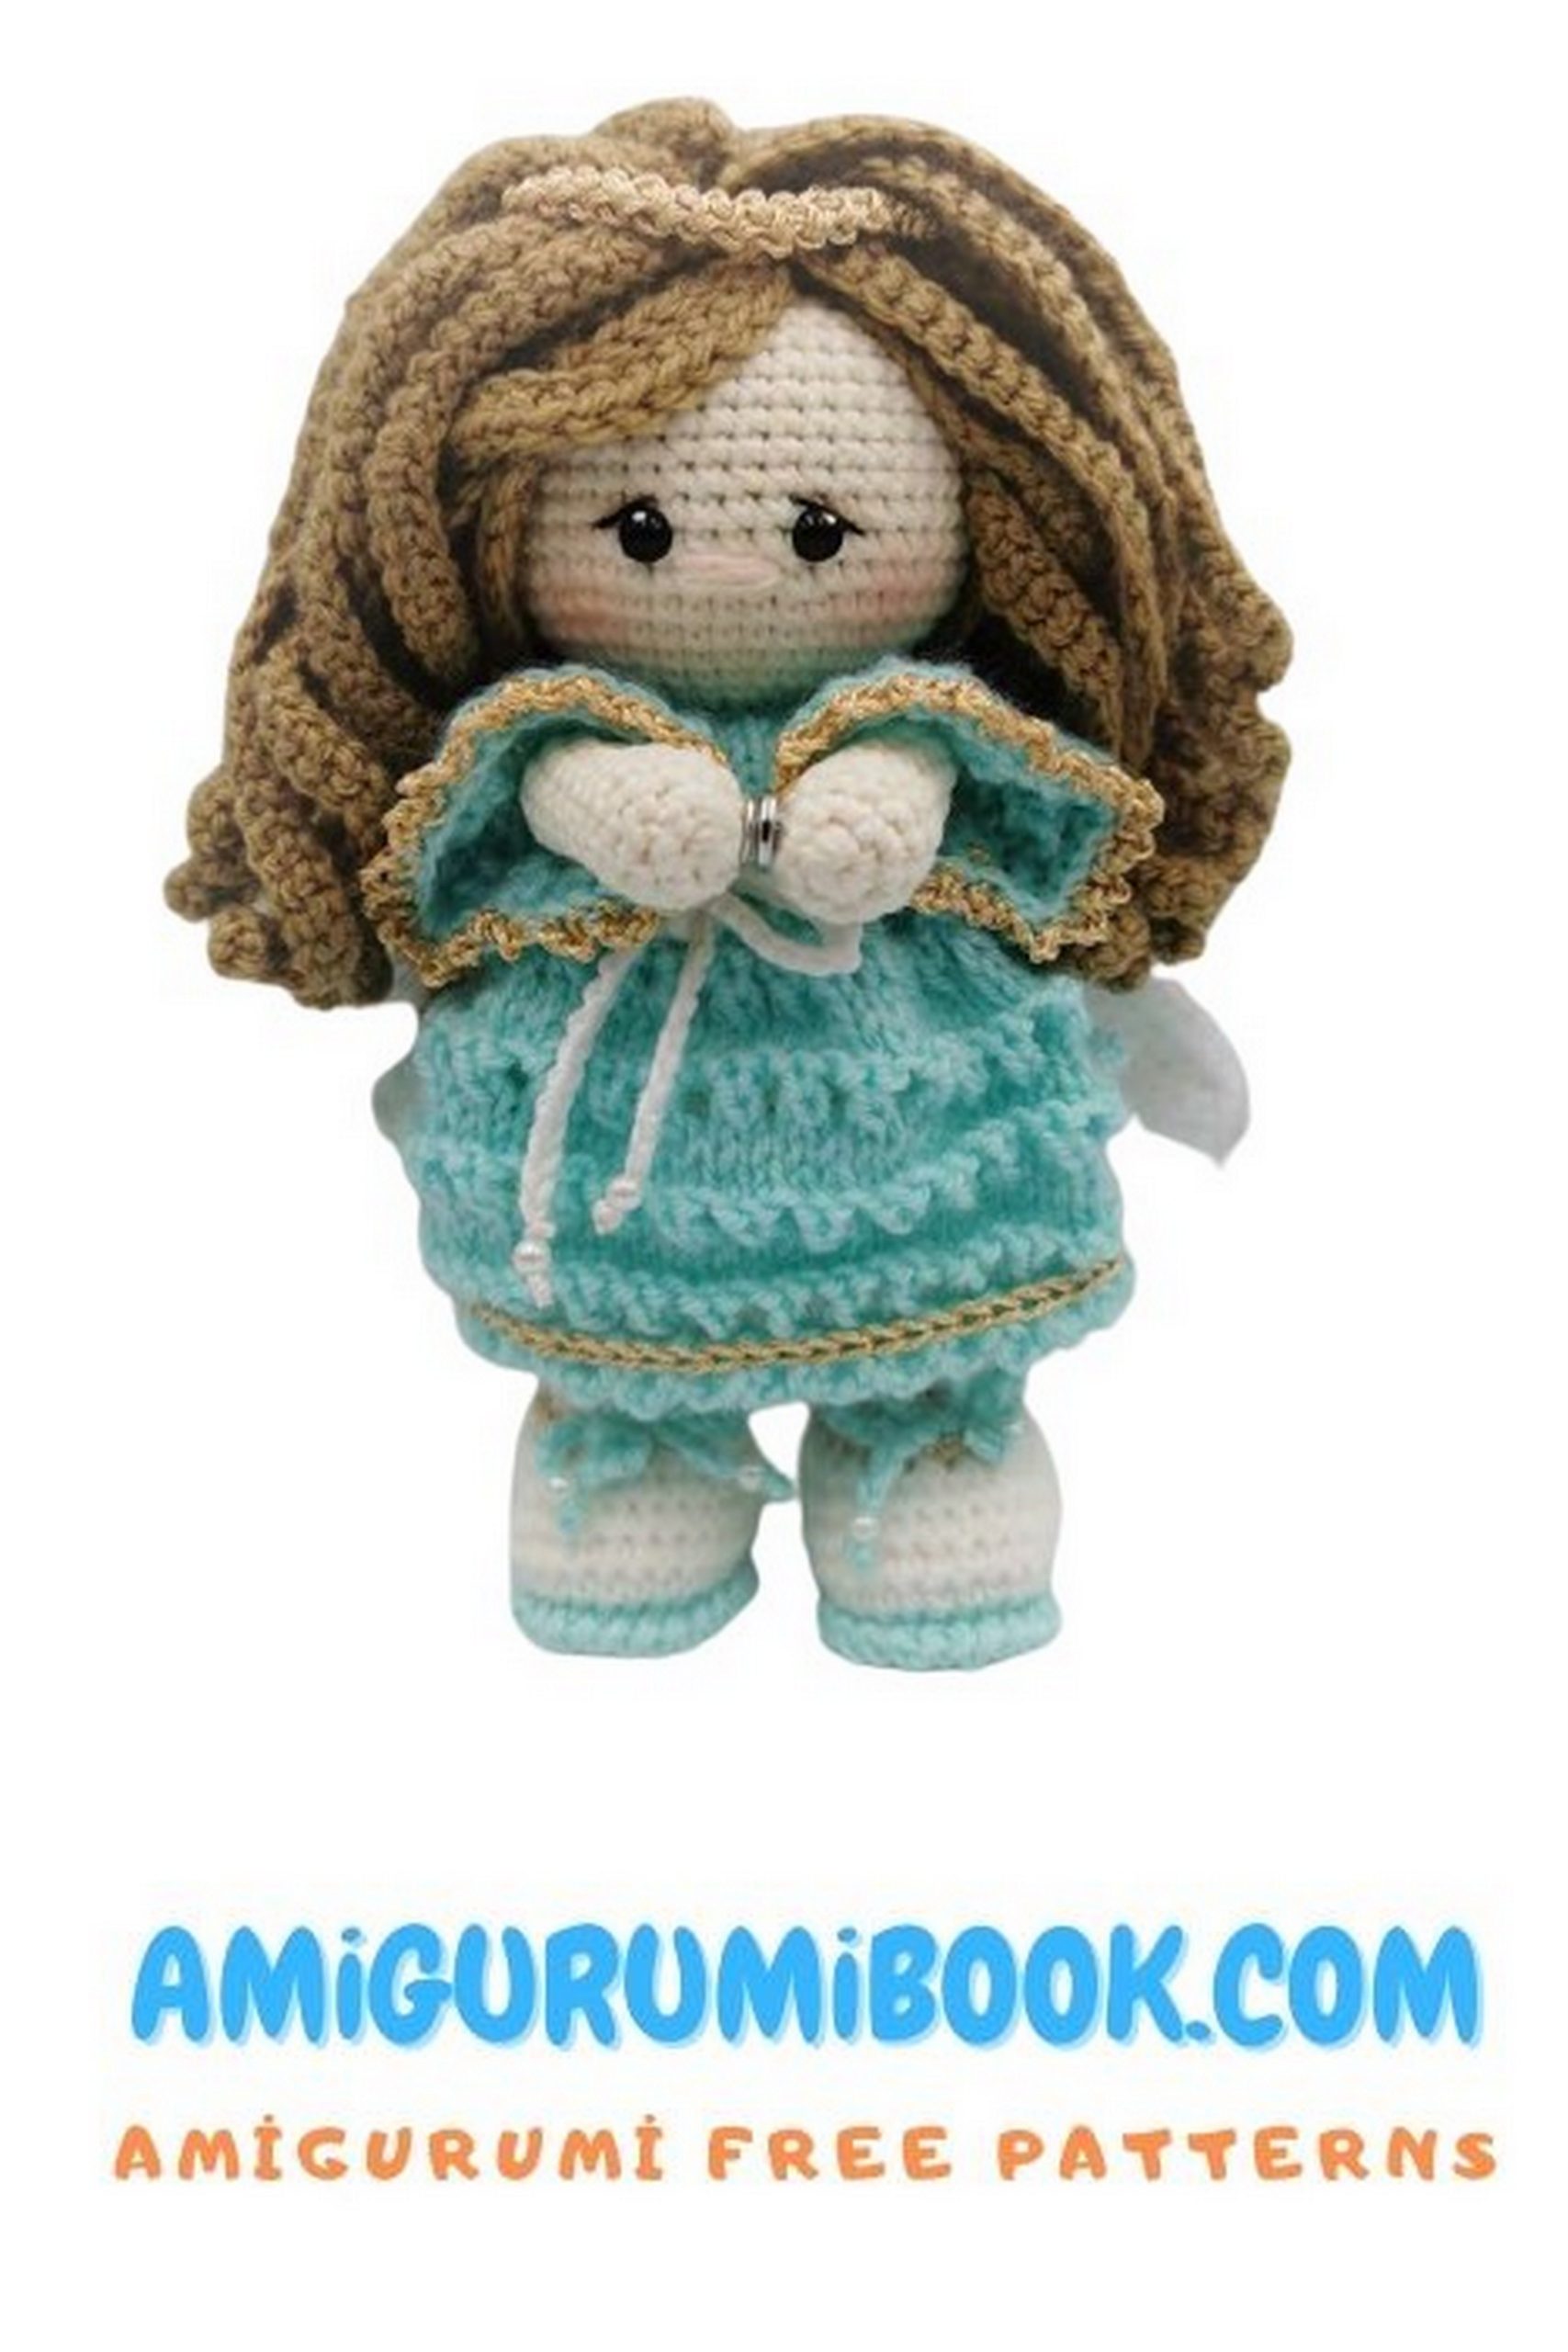
Create something truly special with this beautiful design 👼 This guardian angel amigurumi doll free pattern lets you crochet a soft, elegant, and meaningful handmade toy full of charm and warmth.
With delicate wings, gentle details, and a peaceful expression, this angel doll is more than just a crochet project — it’s a symbol of love, protection, and care. The step-by-step instructions make it easy to follow, whether you’re a beginner or an experienced crocheter.
Perfect as a heartfelt gift or a decorative piece, this lovely angel will bring a cozy and magical touch to your collection. Grab your yarn and start creating your own guardian angel today! 🧶
If you want to access 1000+ free amigurumi patterns, you can download our application from this link!
✂️ Abbreviations
- MR: magic ring
- ch: chain
- sc: single crochet
- inc: increase (2 sc in same stitch)
- dec: decrease (sc 2 stitches together)
- sl st (ss): slip stitch
- FLO: front loop only
- BLO: back loop only
🧶 Materials & Tools
- YarnArt Jeans (Color 03) – body
- Pekhorka Children’s Novelty (Color 165 – beige) – hair/wig
- Pekhorka Children’s Novelty (Color 73 – iceberg) – dress & shoes
- Gazzal Baby Cotton (Color 3410 – white) – wings
- Pekhorka Children’s Novelty (Color 01 – white) – shoe details
- Kamtex Cotton Grass (Color 205 – white) – wing edging
- Metallic embroidery thread (for halo/nimbus)
- Buttons: 5 (dress) + 1 (wings attachment)
- Beads (for shoe & dress ties)
- Crochet hook: 1.9 mm
- Knitting needles: 1.5 mm (if needed for details)
- Fiberfill stuffing
- Sewing needle
- Scissors
🧵 Notes
- Work in continuous spiral rounds unless stated otherwise
- Crochet through both loops unless specified (FLO/BLO)
- Use a stitch marker to track rounds
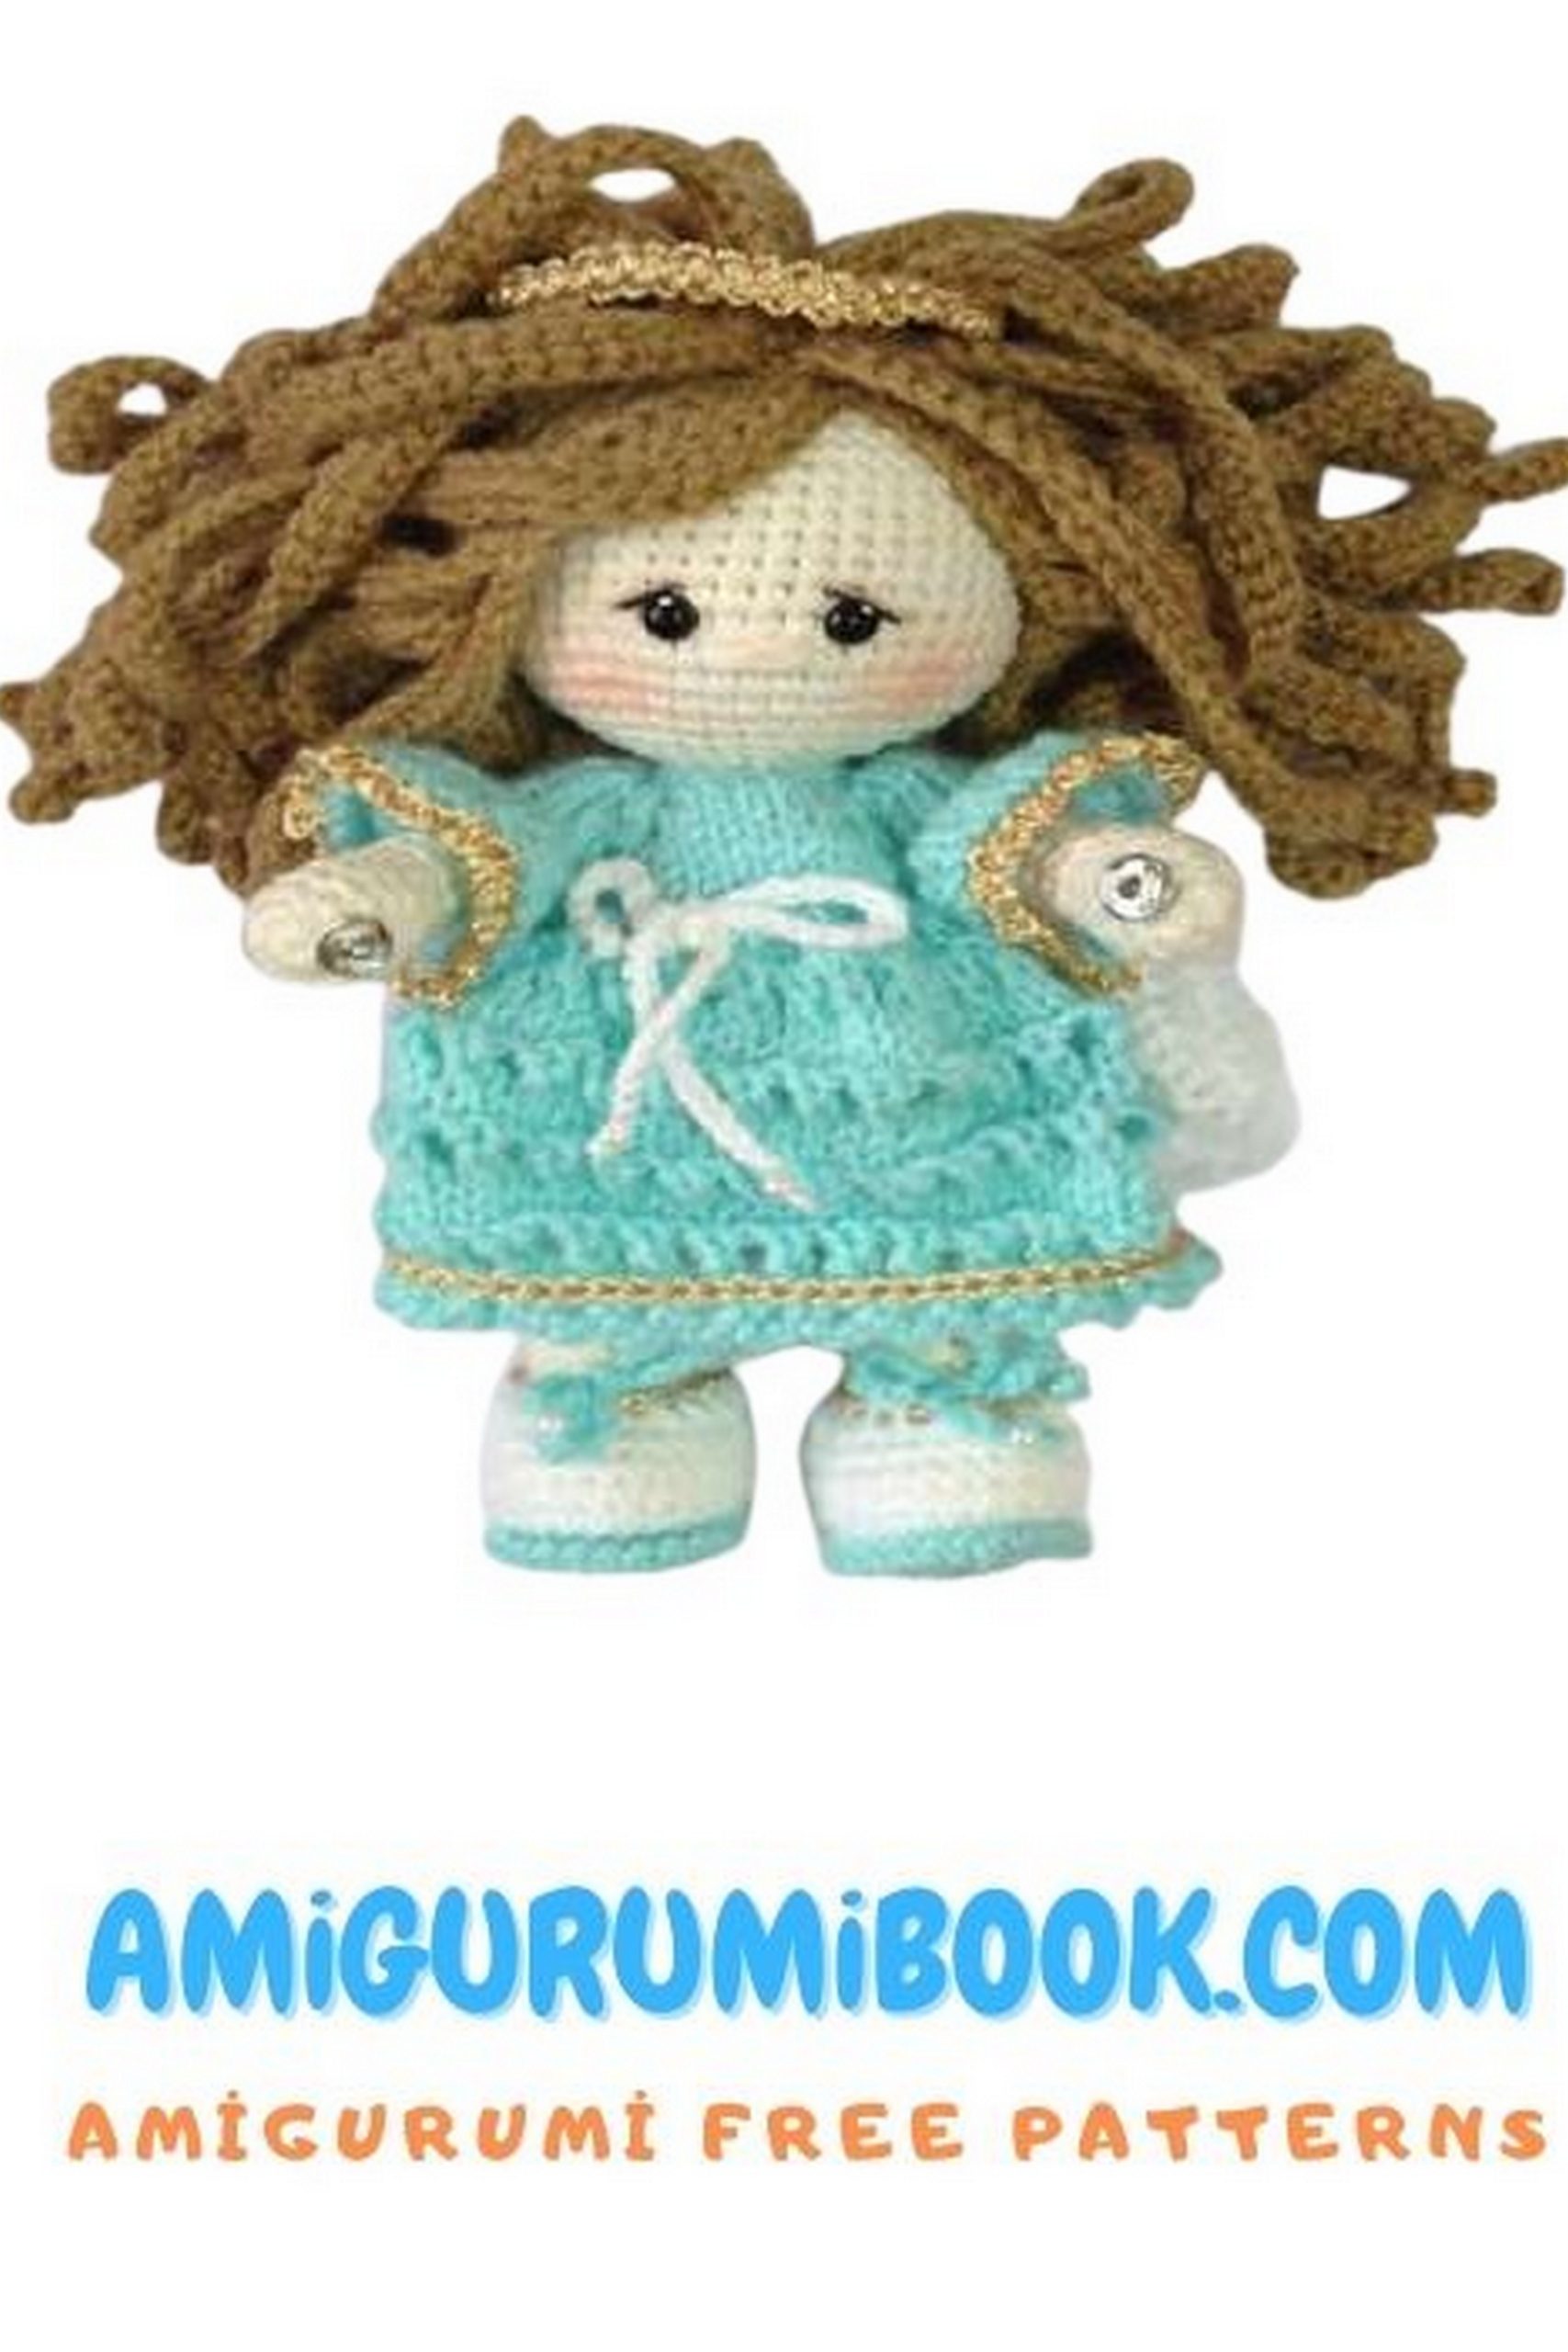
👉 Finished size: approx. 15 cm

🧸 Legs–Body–Head (One Piece)
With YarnArt Jeans (Color 03), hook 1.9 mm
Start with chain:
1: Starting from 2nd ch: 5 sc, 4 sc in last st, 4 sc, inc (16)
Continue working in the round
2: 2 inc, 4 sc, 4 inc, 4 sc, 2 inc (24)
3: 24 sc in BLO (24)
4: 24 sc
5: 8 sc, 4 dec, 8 sc (20)
6: 6 sc, 4 dec, 6 sc (16)
7: 6 sc, 2 dec, 6 sc (14)
👉 Start stuffing
8–17: 14 sc
👉 Continue stuffing as you go
🦵 Joining Legs & Body
Crochet second leg the same way, do not cut yarn
Adjust stitches so the join is at inner side of leg
Join:
- ch 4
- 14 sc (first leg)
- 4 sc on chain
- 14 sc (second leg)
👉 Total: 32 sc
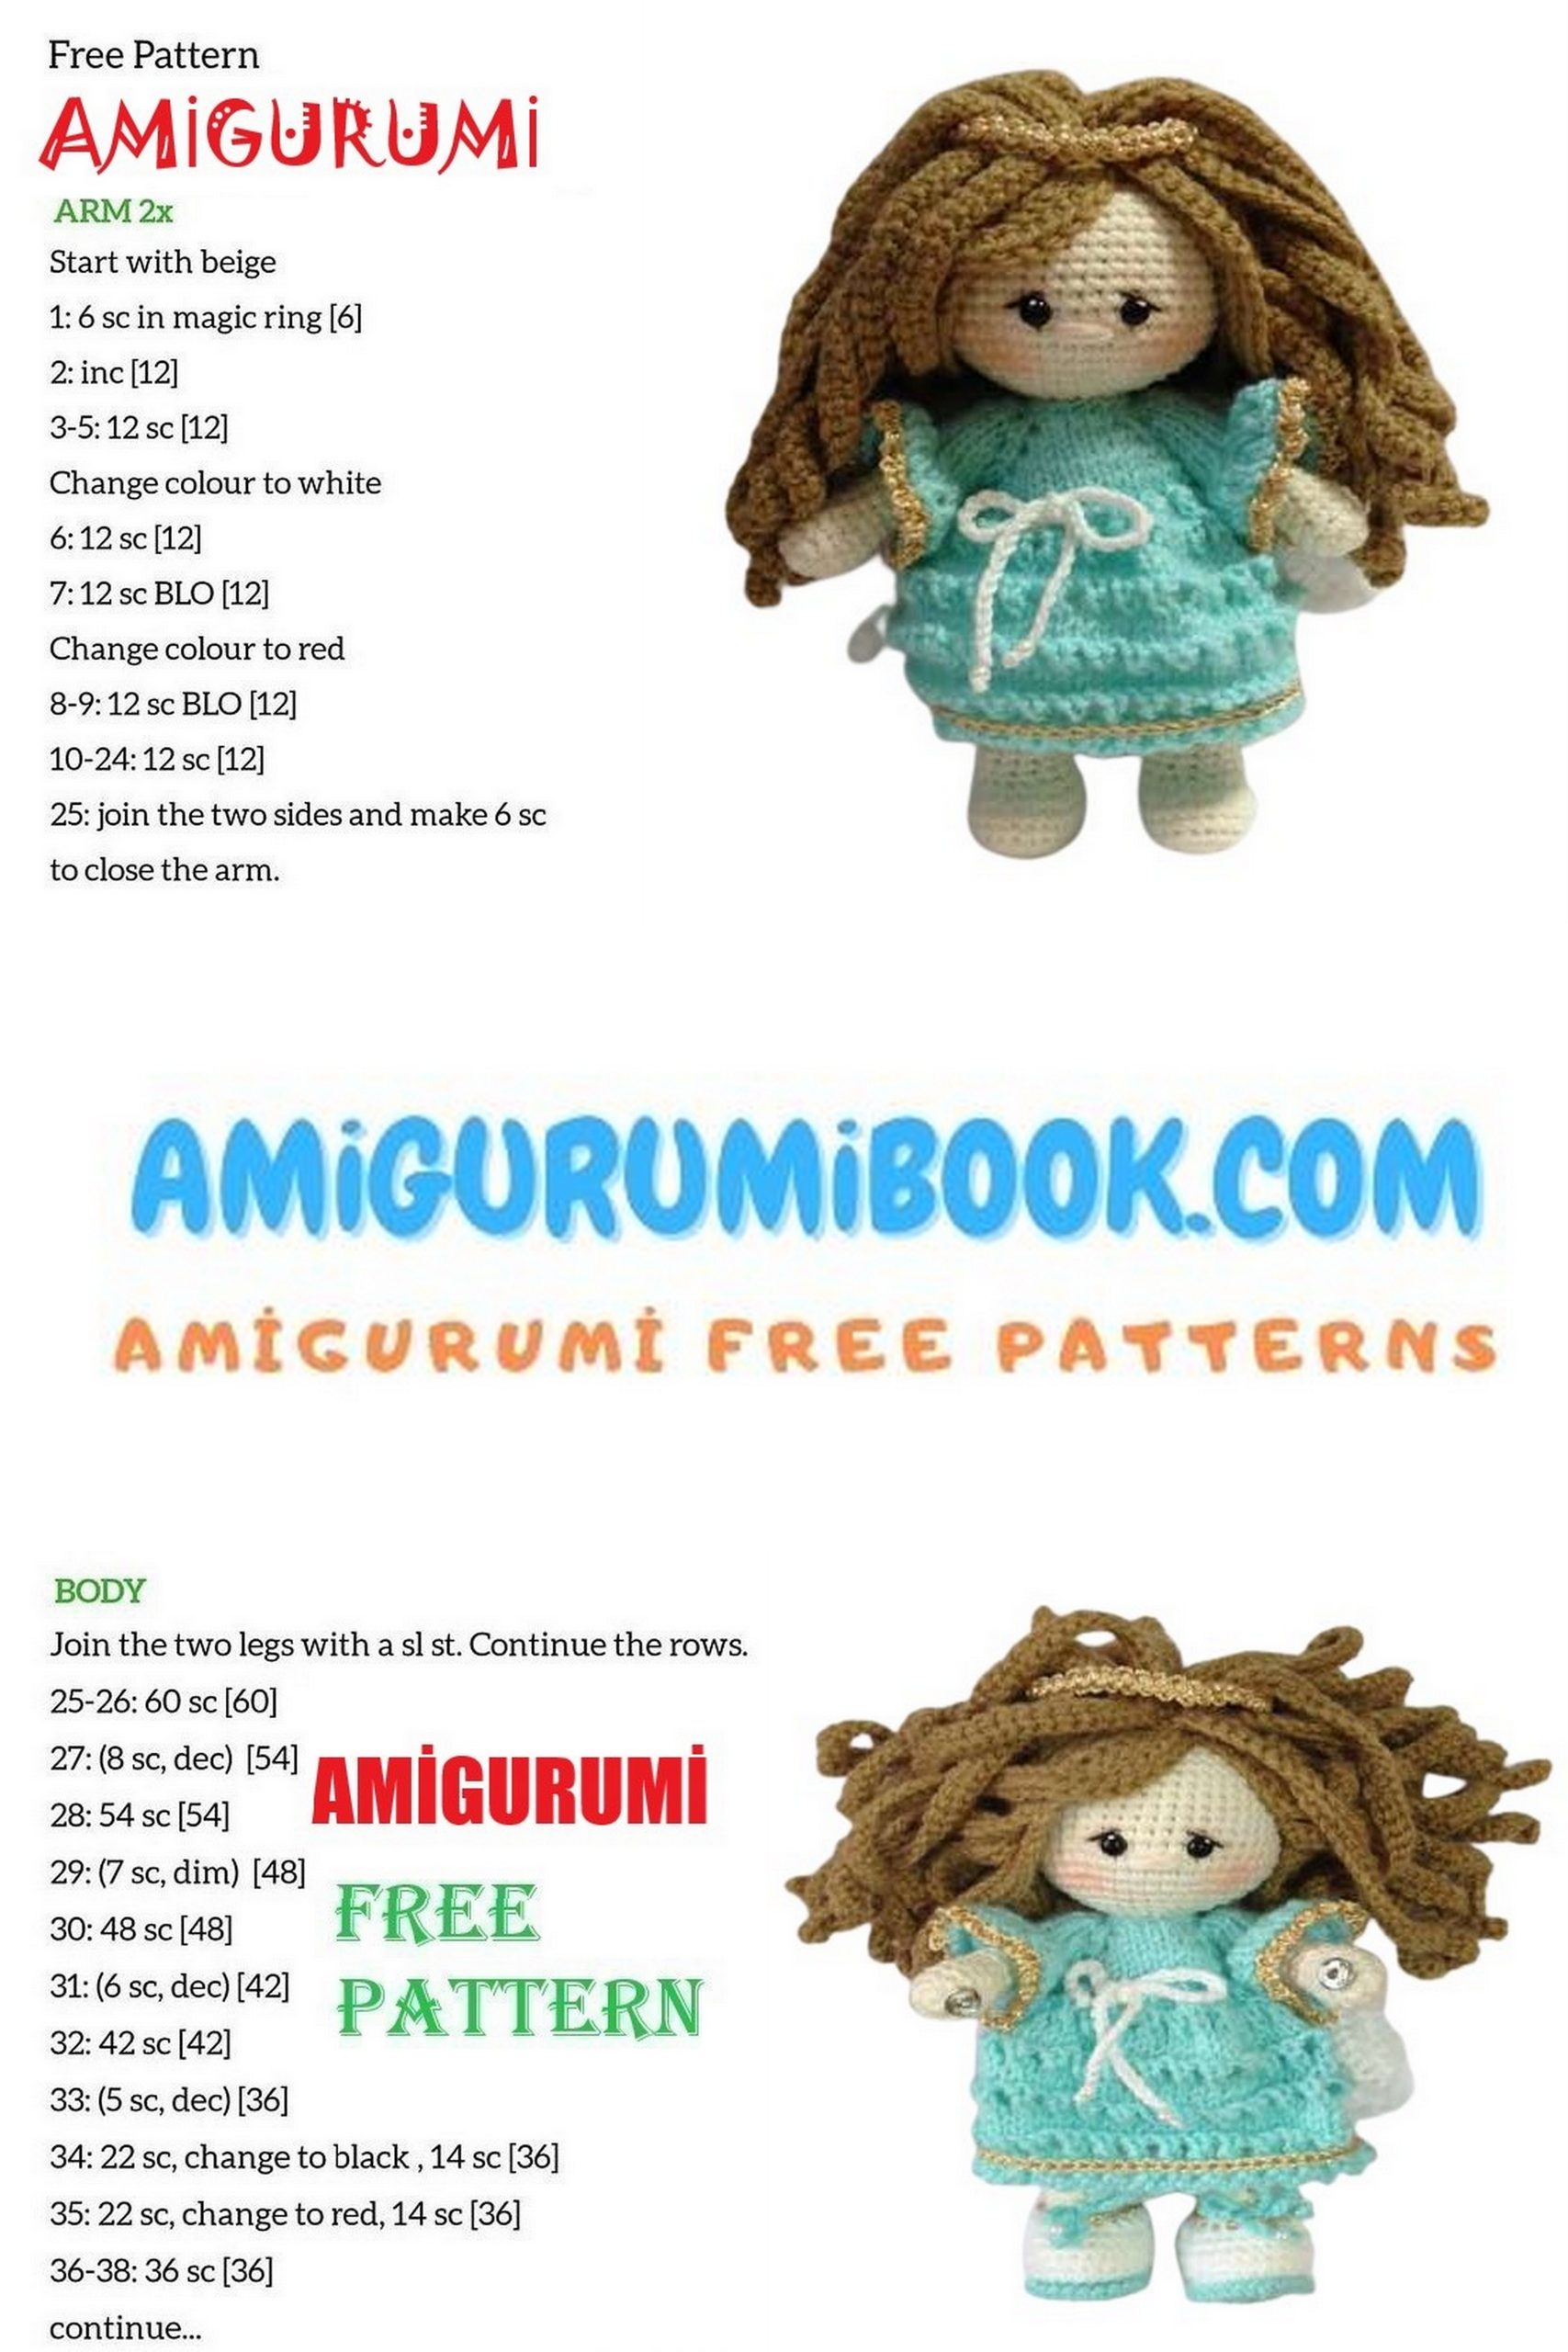
🧸 Body
1: (11 sc, inc) * 3 (39)
2–6: 39 sc
7: (11 sc, dec) * 3 (36)
8: 36 sc
9: (10 sc, dec) * 3 (33)
10: 33 sc
11: (9 sc, dec) * 3 (30)
12: 30 sc
13: (8 sc, dec) * 3 (27)
14: 27 sc
15: (7 sc, dec) * 3 (24)
16: 24 sc
17: (4 sc, dec) * 4 (20)
18: (2 sc, dec) * 5 (15)
19: (3 sc, dec) * 3 (12)
20–21: 12 sc
👉 Stuff as you go
🧸 Head
22: (inc) * 12 (24)
23: (3 sc, inc) * 6 (30)
24: 2 sc, inc, (4 sc, inc) * 5, 2 sc (36)
25: (5 sc, inc) * 6 (42)
26: 3 sc, inc, (6 sc, inc) * 5, 3 sc (48)
27–36: 48 sc
37: 3 sc, dec, (6 sc, dec) * 5, 3 sc (42)
38: (5 sc, dec) * 6 (36)
39: 2 sc, dec, (4 sc, dec) * 5, 2 sc (30)
40: (3 sc, dec) * 6 (24)
👉 Stuff
41: 1 sc, dec, (2 sc, dec) * 5, 1 sc (18)
42: (1 sc, dec) * 6 (12)
43: 6 dec (6)
Finish with sl st, close.
✋ Arms (Make 2)
1: 6 sc in MR (6)
2: (inc) * 6 (12)
3–5: 12 sc
6: (4 sc, dec) * 2 (10)
👉 Light stuffing
7–18: 10 sc
19: (1 sc, dec) * 3, 1 sc (7)
F.o., close.
🧵 Assembly
- Sew or attach arms (thread or button joint)
- Position evenly on body
👩🦰 Wig (Hair)
With beige yarn:
1: 6 sc in MR (6)
Work in BLO
2: (inc) * 6 (12)
3: (1 sc, inc) * 6 (18)
4: 1 sc, inc, (2 sc, inc) * 5, 1 sc (24)
✨ Hair Strands
5:
(ch 35, starting from 2nd ch: 34 sc, sl st in next st) repeat around
👉 Turn and work in FLO
- Alternate strands (every other stitch)
- At crown: work strands in every stitch
🧵 Assembly (Hair)
- Place wig centered on head
- Pin and sew securely
- Arrange strands
- Fix lower row (sew or glue)
- Leave top strands loose
👗 Dress
(Knitted)
Cast on 22 sts (20 + 2 edge)
🔹 Base Rows
1: knit
2: knit edges, purl middle + button loop
3–10: continue pattern with increases (as written)
🧵 Sleeves
- Knit separately
- Join folded with sc
- Attach back to main piece
🔹 Continue Dress
12–36:
- Alternate knit / purl rows
- Add decorative eyelet rows
(ch, yo pattern)
✨ Finishing
- Bind off
- Crochet edge: (ch 3, skip 1, sl st) repeat
- Add metallic thread edging
- Sew 5 buttons
👼 Halo
Sew onto head
Make cord (~14–15 cm) with metallic thread
Shape into circle
🪽 Wings (Make 2)
With white yarn, work in turning rows
Foundation: ch 17
1: starting from 2nd ch → 11 sc, inc, 2 sc, inc, 1 sc, ch 1, turn (18)
2: 18 sc, ch 1, turn
3: inc, 15 sc, ch 1, turn (17)
4: dec, 15 sc, ch 1, turn (16)
5: inc, 13 sc, ch 1, turn (15)
6: dec, 13 sc, ch 1, turn (14)
7: dec, 10 sc, ch 1, turn (11)
8: dec, 9 sc, ch 1, turn (10)
9: dec, 6 sc, ch 1, turn (7)
10: dec, 5 sc, ch 1, turn (6)
11: dec, 2 sc, dec (4)
✨ Edging
- Attach fluffy yarn
- Work sc evenly around
- Make 3 sc in each top point
F.o.
👉 Make second wing mirrored
🧵 Assembly (Wings)
- Sew wings together
- Make ch 100 cord
- Attach button + beads
- Thread through Row 13 openings
👟 Shoes (Make 2)
With light blue yarn:
1: from 2nd ch → 5 sc, 4 sc in last st, 4 sc, inc (16)
2: 2 inc, 4 sc, 4 inc, 4 sc, 2 inc (24)
3: 24 sc in BLO
4: 24 sc
5: 8 sc, 4 dec, 8 sc (20)
6: 6 sc, 4 dec, 6 sc (16)
7: 6 sc, 2 dec, 6 sc (14)
👉 Start stuffing
8–18: 14 sc
🔗 Join Shoes
- Crochet second shoe, don’t cut yarn
- Adjust position
- ch 4 to connect
👉 Continue:
Join round:
14 sc, 4 sc (chain), 14 sc (32)
🧸 Upper Shoe
1: (11 sc, inc) * 3 (39)
2–6: 39 sc
7: (11 sc, dec) * 3 (36)
8: 36 sc
F.o.
✨ Finishing (Shoes)
- Add sole edging with sl st
- Work upper edge in BLO
- Make tie cords (chains)
- Add beads
👉 Repeat for second shoe
🧵 Final Touches
Attach all parts neatly
Sew button to sleeves