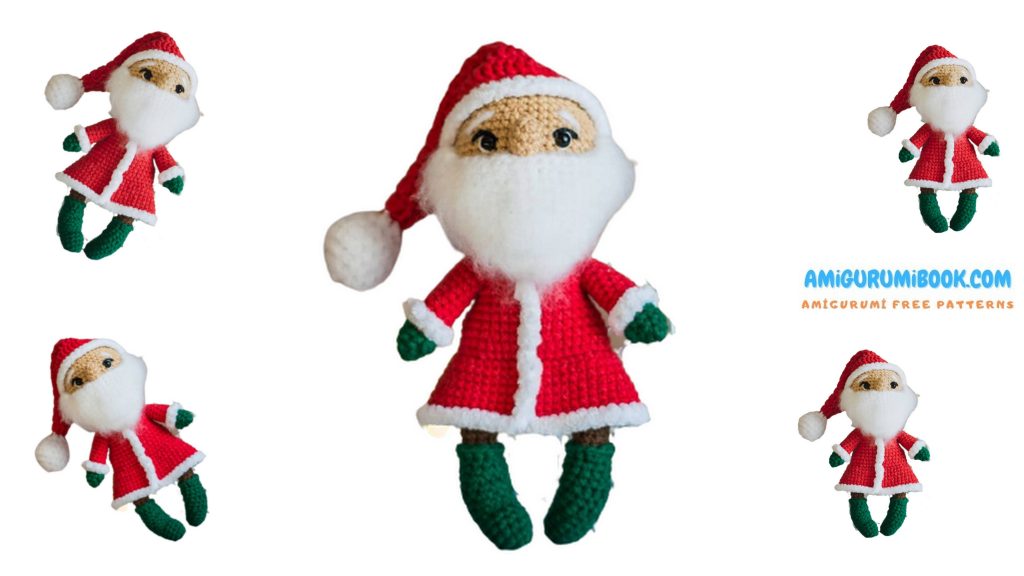
Looking to create an adorable amigurumi Santa Claus for your holiday decorations or as a heartfelt handmade gift? You’re in the right place! Our detailed, step-by-step instructions and free pattern will guide you through the process of making your very own amigurumi Santa Claus. Whether you’re a seasoned crocheter or just starting out, this guide will help you craft a festive Santa Claus amigurumi that will bring joy and cheer to any space. Dive into the world of amigurumi and add a touch of handmade magic to your Christmas celebrations with our free pattern and easy-to-follow instructions.
Materials and Tools:
– YarnArt Jeans main yarn:
05 corporal
o1 white
26 red
40 brown
52 green
a little black (for eyelashes)
– Yarn for pom-pom and fur trim:
YarnArt Velor, you can use any other plush yarn, but not thick.
– hook N92
– eyes on a secure mount 6mm
– filler
– sewing needle
– scissors
– pastel, blush or paint
Abbreviations:
CH-chain
sl-st – slip stitch
sc – single crochet
hdc – double crochet
dc – double crochet
inc-increase
dec – decrease
PATTERN

Amigurumi Santa Claus Arms:
We knit two identical hands, we fill only the palm. We start knitting in green:
1. 6sc into magic ring
2. (inc, sc)*3 – 9sc
3.9sc
4. 4sc, lush column, 4sc – 9 loops, change the thread to red.
5.8sc, inc – 10sc
6. behind the back wall 10sc
7-13 (7 rows) 10sc
Fasten the thread, cut.
Attach white plush thread to the row, knit 10sc behind the front walls of the row, while holding the handle palm down.

Amigurumi Santa Claus Legs:
We knit two identical legs.
We start knitting in green, stuff the leg as we knit:
1. 6sc into magic ring
2.6inc – 12sc
3-5 (3 rows) 12sc
6. 2sc, 4sl-st, 6sc – 12 loops
7. 2sc, 4sl-st, 2sc, 4hdc – 12 loops
8. 2sc, 4sl-st, 6sc – 12 loops
9. 2sc, 4sl-st, 2sc, 4hdc – 12 loops
10.12sc
11. 3sc, 4cc, 5sc – 12 loops
12-13. 12sc, at the end of the 13th row, change the thread to brown.
14. behind the back wall: (2sc, dec) * 3 – 9sc
15-22 (8 rows) 9sc
additionally knit 4-bsc, so that the knitting ends from the side of the nose of the boot, the legs will look inward. Fasten and cut the thread on the first leg, continue knitting from the second leg, do not cut the thread. For the 14th row, attach a green thread and tie 12sc.
From the second leg
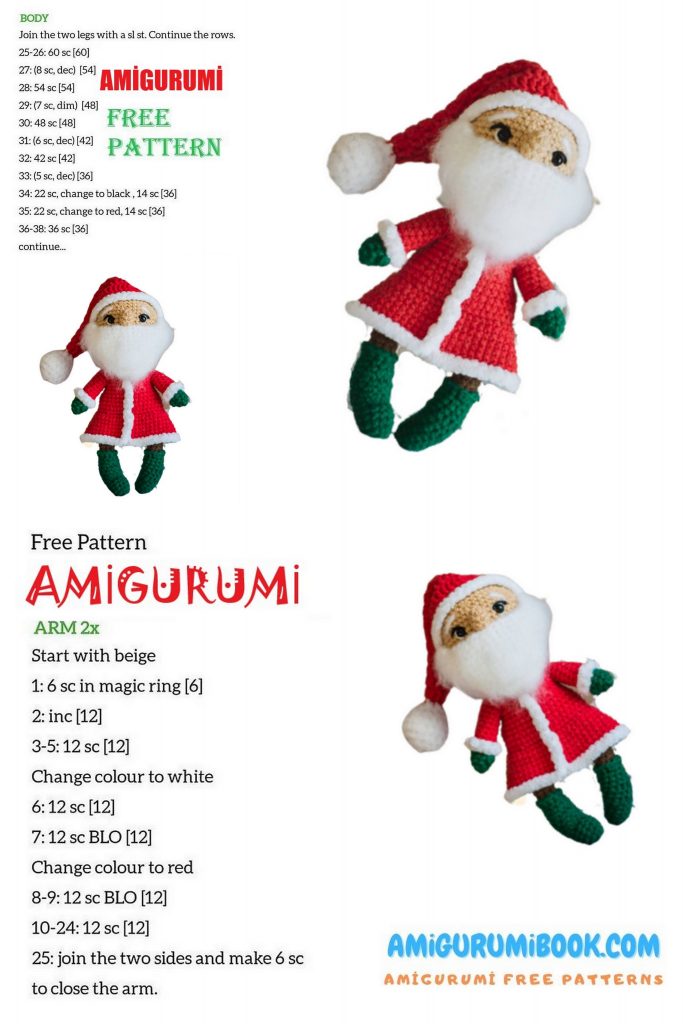
9ch, attach to the first leg, then knit the body in a circle:
1. (9sc on the leg, sc on the ch chain) * 2 times – 36sc
2. (5sc, inc) * 6 – 42sc, change the thread to red.
3. 42sc 4. behind the back wall 42sc
5. 42sc 6. (bsc, dec) * 6 – 36sc
7.36sc
From the next row we make decreases exactly on the sides, move the marker if necessary.
8. 4sc, dec, 16sc, dec, 12sc – 34sc
9. Зsc, dec, 15sc, dec, 12sc – 32sc
10. Зsc, dec, 14sc, dec, 11sc – 30sc
In the next row we join the hands.
Fingers should look forward, attach the parts of the hand and body to each other with the front sides.
Pick up the hand loops from the inside. If necessary, move the marker.
body promotion, avlova:
11. 2sc, 3sc with hand, 12sc, 3sc with hand, 10sc – 30sc
12. 2sc, 7sc on hand, 12sc, 7sc on hand, 10sc – 38sc
13. 5sc, dec, 16sc, dec, 18sc – 36sc
14. 2sc, dec, (4sc, dec)*5, 2sc – 30sc
15. (Зsc, dec) * 6 – 24sc
Make sure the body is well stuffed.
16. sc, dec, (2sc, dec) * 5, sc – 18sc, change the thread to flesh.
Cut the red thread and fasten off.
17. behind the back wall 18sc
18. 18sc Do not break the thread.
We will knit the collar, then because of the Head it will be inconvenient to knit it.
To the middle of the back for the 17th row, attach a plush thread and knit behind the front walls: bsc, 2HDC, Zdc in one loop, ZCH SL-ST in the next loop, zch Zdc in the next loop, 2hdc, 5sc, fasten the thread, cut and hide, continue knit head.
19. inc*18 – 36sc
20. (5sc, inc)*6 – 42sc
21-27 (7 rows) 42sc
In the next row we will make holes for the eyes:
28. 14sc, CH, 7sc (make sure they are clearly in the center of the head), CH, 19sc – 42 loops
29-31 (3 rows) 42sc
32. (5sc, dec)*6 – 36sc, insert eyes
33.36sc
34. 2sc, dec, (4sc, dec) * 5, 2sc – 30sc
Head, promotion:
35.30sc
36. (Зsc, dec) * 6 – 24sc
37. (2sc, dec)*6 – 18sc
38. (sc, dec)*6 – 12sc
39. dec * 6 Cut the thread, pull the hole, fasten the thread and hide.
Fur Coat
K4 row of the body, attach a red thread to the middle of the front. Knit behind the front walls of the 4th row.
1. 3sc, inc, sc, inc, 18sc, inc, sc inc, 9sc – 46sc
2.46sc
3. 10sin, inc, sc, inc, 20sc, inc, sc, inc, 10sc – 50sc
4.50sc
5. 11sc, inc, sc, inc, 22sc, inc, sc, inc, 11sc – 54sc
6-7. 54 sc. Fasten the red thread, cut off, hide the tip.
Attach the plush thread, tie the hem of the sc, then exactly from the middle of the front. Knit sc, capturing the posts in this order: two in a row, skip one. Tie up to the collar, fasten the thread, cut off and hide. So you get a uniform hem of a fur coat.
Amigurumi Santa Claus Nose:
We knit in flesh color, lightly stuff before sewing.
1. 6sc into magic ring
2. (inc, 2sc)*2 – 8sc
3.8sc
4. (2sc, dec)*2 – 6sc
Fasten the thread, leave a long end for sewing.
Sew the nose between the eyes, a row lower than the eyes are inserted.
Embroider the whites of the eyes and eyebrows with white thread, cilia with black thread.
All threads can be fixed on top of the head.
Amigurumi Santa Claus Beards
You can use any yarn for the beard.
You can knit from YarnArt Jeans, you can use fleecy yarn, if it differs in thickness, you will have to adjust the size of the beard yourself.
With fleecy yarn, it is better to knit inside out and comb it after sewing.
5 CH from the second loop from the hook:
1. inc, 2sc, inc * 2 in the last loop, now we knit on the second side, 2sc, inc – 12sc We put a marker.
2. (inc, 4sc, inc)*2 – 16sc
3. (inc, 6sc, inc)*2 – 20sc
4. (inc, 8sc, inc)*2 – 24sc
5. (inc, 10sc, inc)*2 – 28sc
From the next row, all incavkas are knitted with half-columns with a crochet.
6. (inc, 12sc, inc) * 2 – 32 loops
7. (inc, 14sc, inc) * 2 – 36 loops
9. (inc, 16sc, inc) * 2 – 40 loops
10. (inc, 18sc, inc) * 2 – 44 loops
11. (inc, 20sc, inc) * 2 – 48 loops
12. (inc, 22sc, inc) * 2 – 54 loops
13. (inc, 24sc, inc) * 2 – 58 loops
Fasten the thread, leave a long end for sewing.
When folded in half, one side appears to be shorter than the other. We apply the beard to the face with the short side, first sew the short side, 2 rows below the nose, stepping back from the eyes 5sc to the sides, maintaining the anatomical shape. Then sew on the top of the beard.
Amigurumi Santa Claus Cap
We start knitting with plush yarn:
1. 6sc into magic ring
2. inc*6 – 12sc
3. (sc, inc)*6 – 18sc
4-5. 18sc
6. (sc, dec)*6 – 12sc
7.dec*6 – 6sc
Fill the pompom, fasten the thread and cut off.
Attach red thread.
8.6sc
9. (dc, inc)*3 – 9dc
10. (2dc, inc)*3 – 12dc
11. (3dc, inc)*3 – 15dc
12. (4dc, inc)*3 – 18dc
13. (5dc, inc)*3 – 21dc
14. (6dc, inc)* 3 – 24dc
15. (7dc, inc)*3 – 27dc
16. (8dc, inc)*3 – 30dc
17. (9dc, inc)*3 – 33dc
18. (10dc, inc)*3 – 36dc
19. (11dc, inc)*3 – 39dc
20. (12dc, inc)*3 – 42dc
21. (13dc, inc)*3 – 45dc
22.45DC
Fasten the thread, cut.
Tie with plush thread 45sc
Sew the cap to the head, fold the tail of the cap and sew to the head.
Blush the cheeks and nose of the toy with pastels, oil paints or blush.
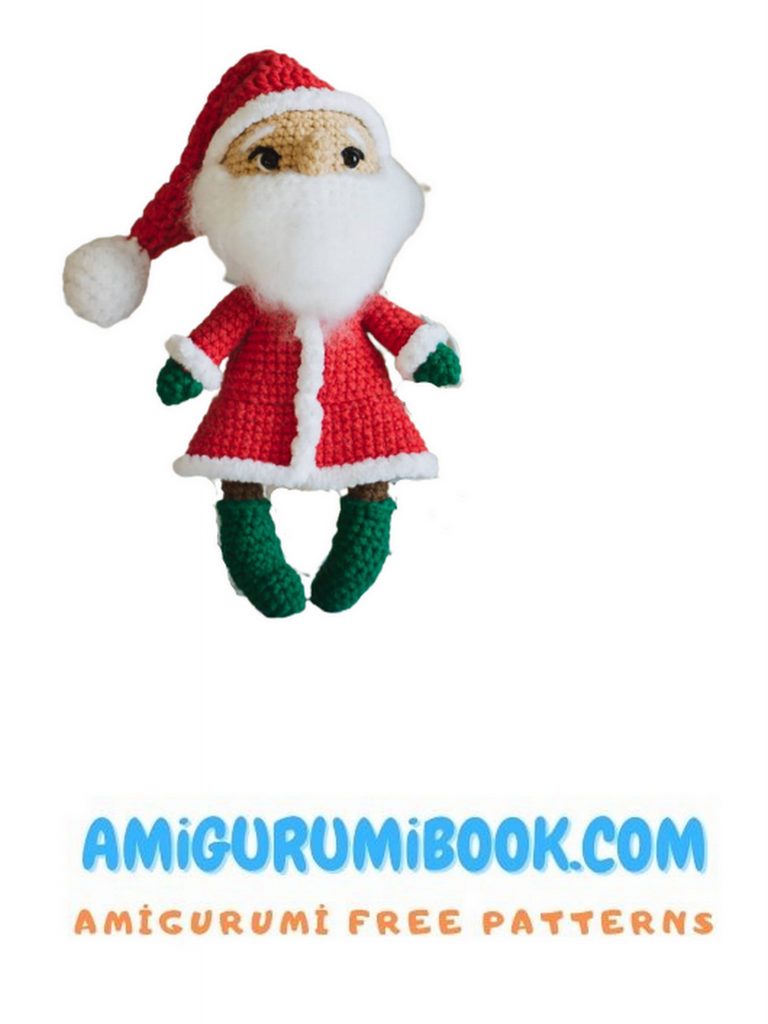
Your Santa Claus is ready!
Do not forget to indicate the author when publishing your toys!