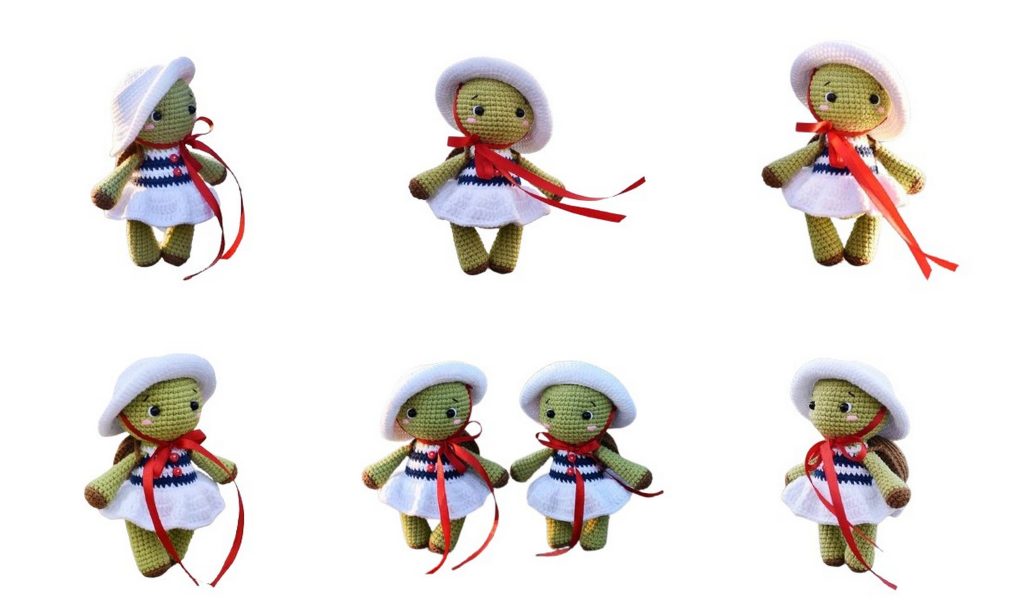
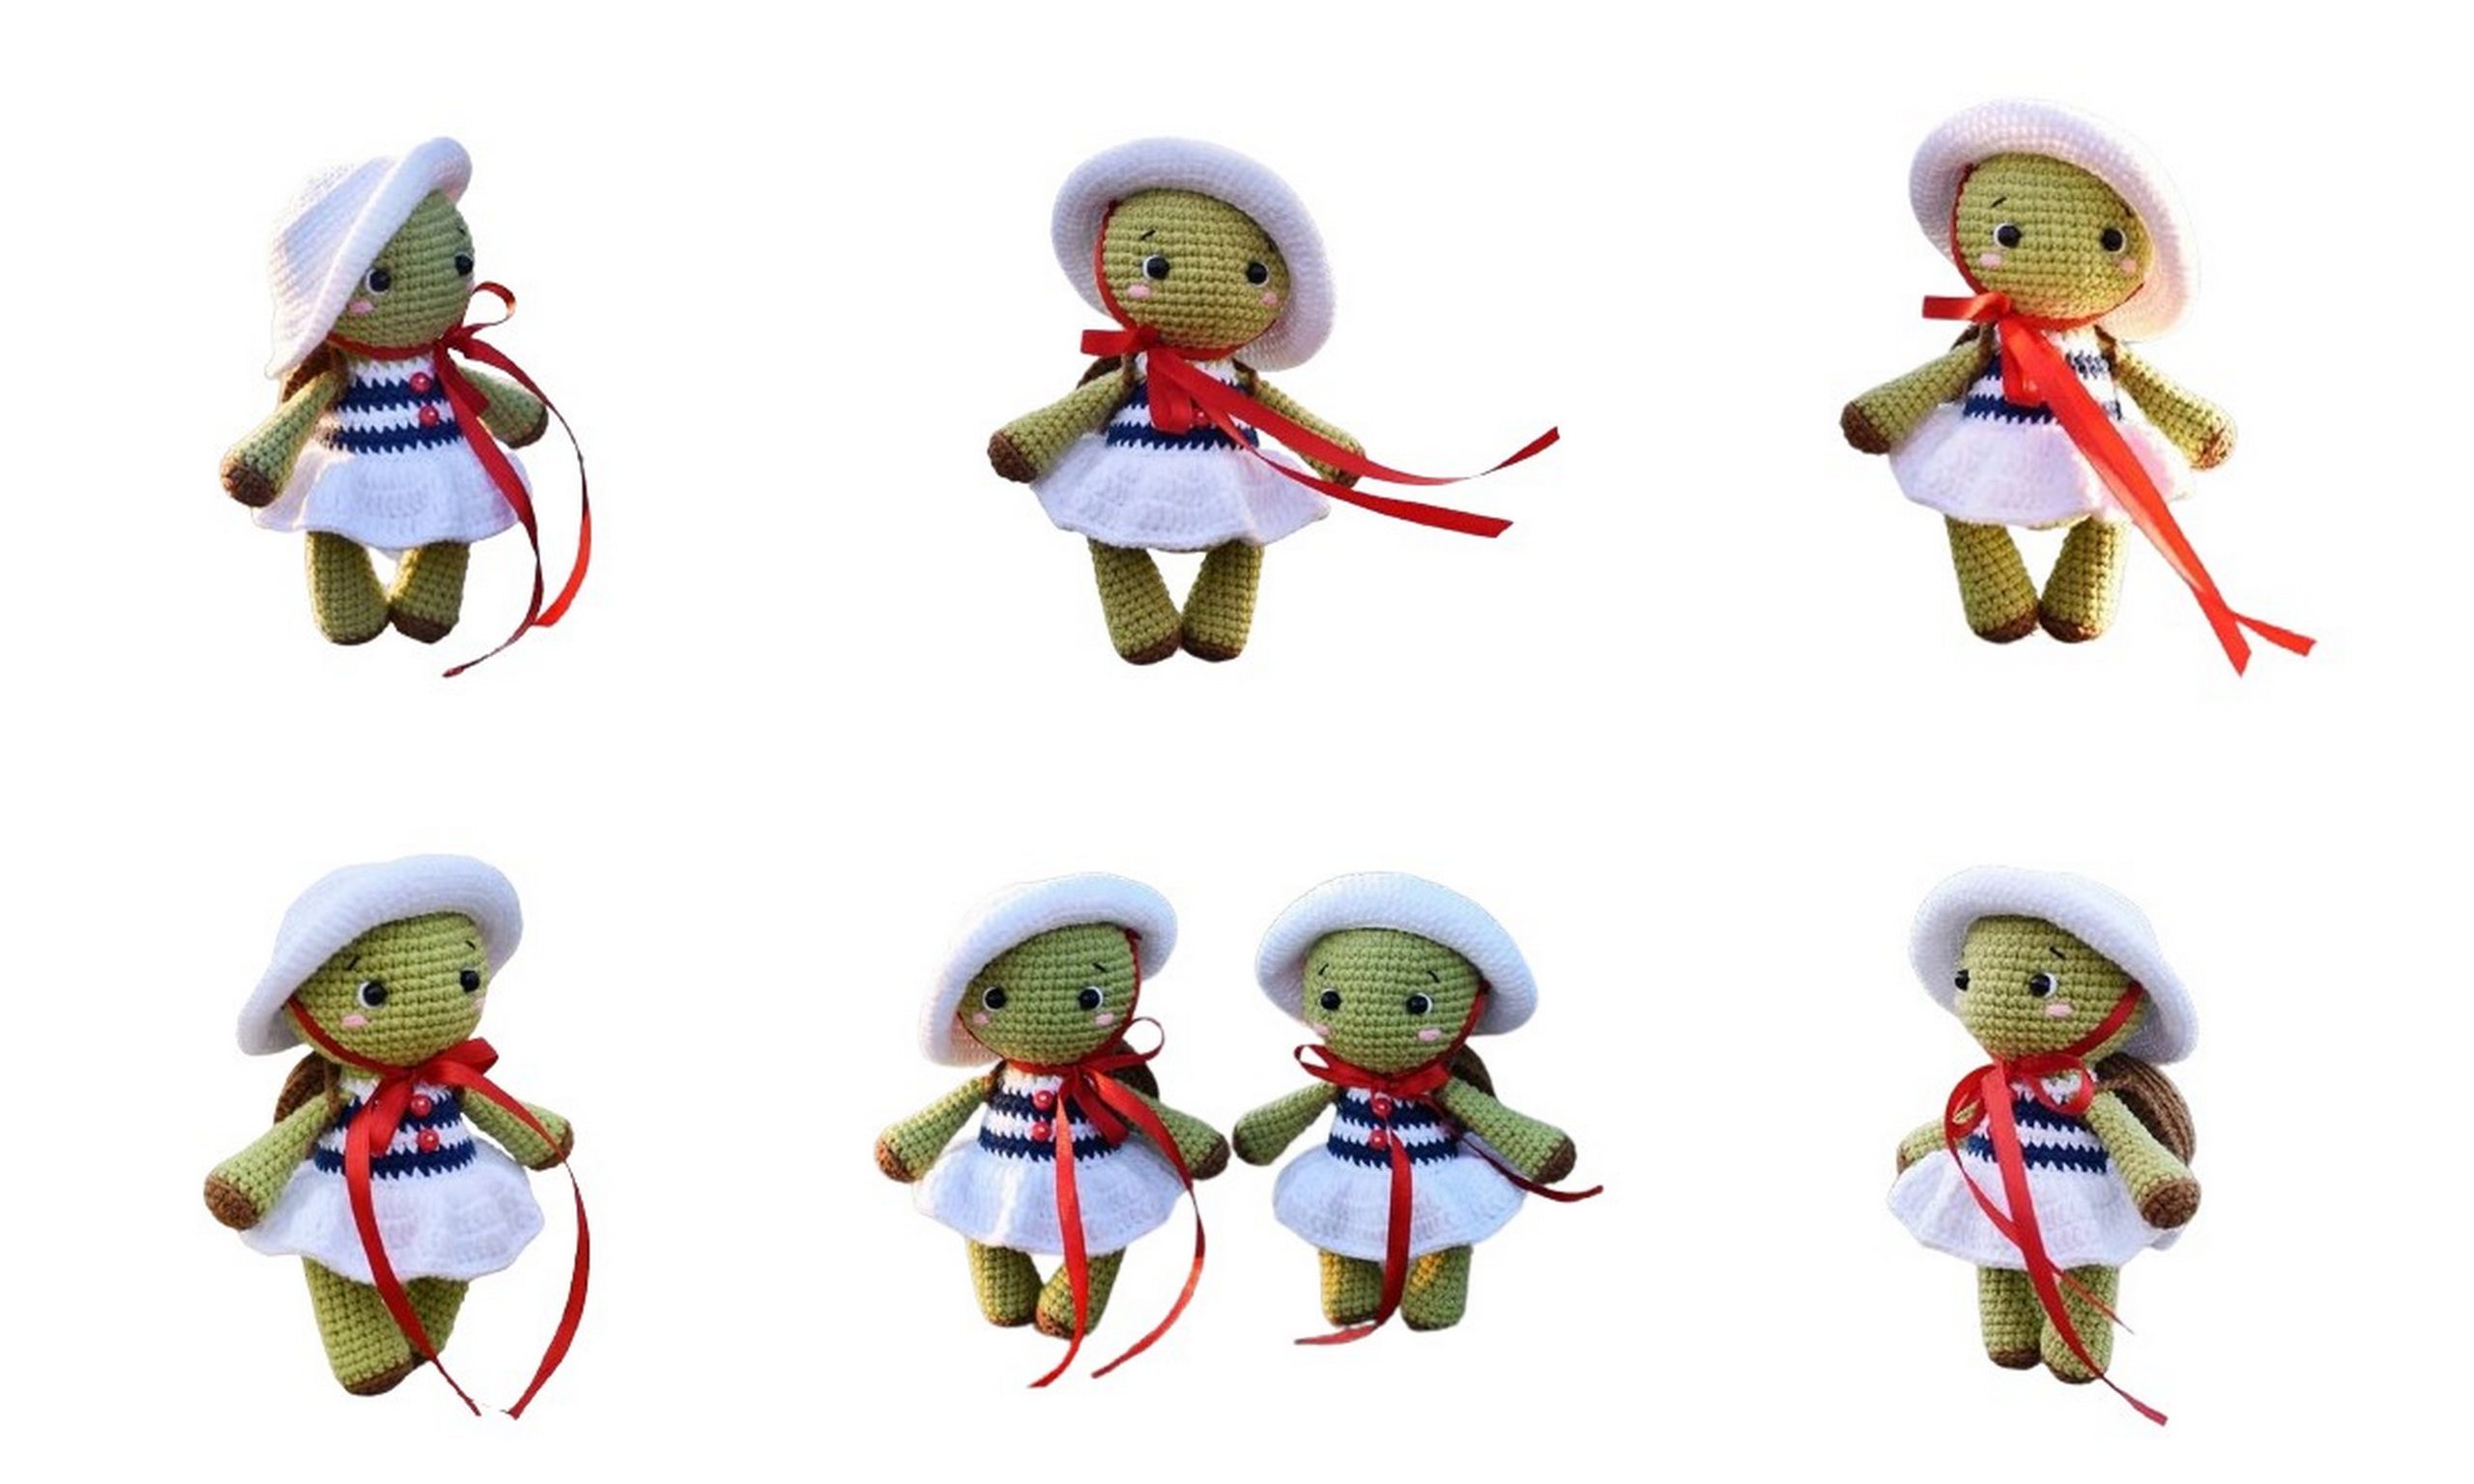
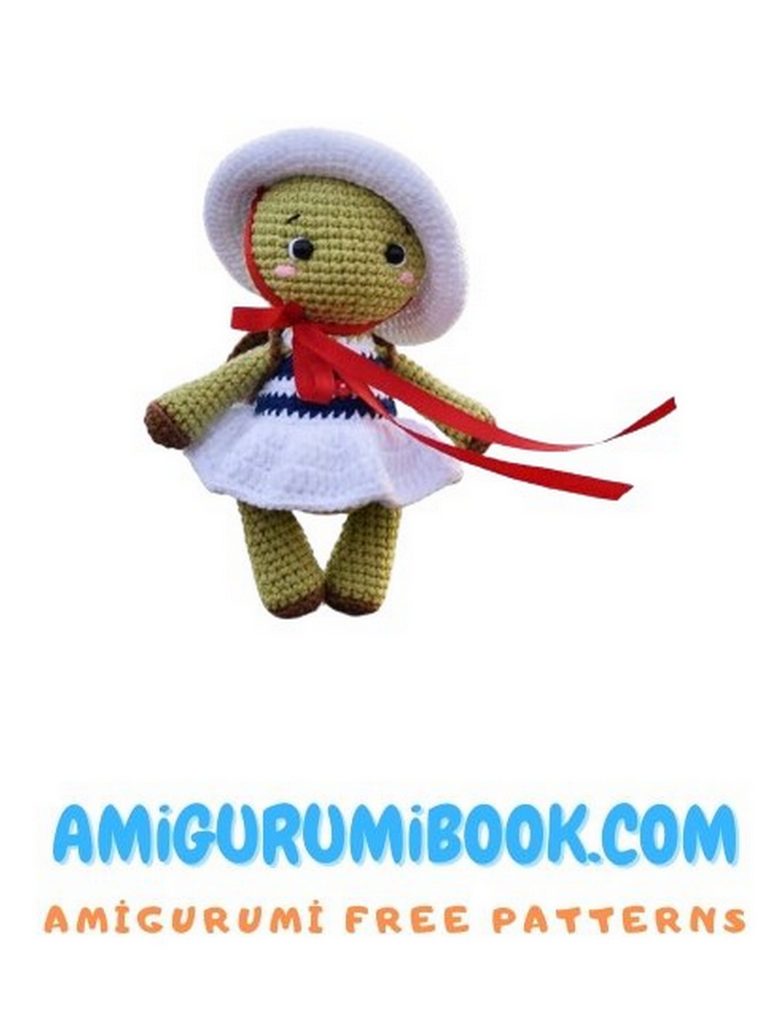
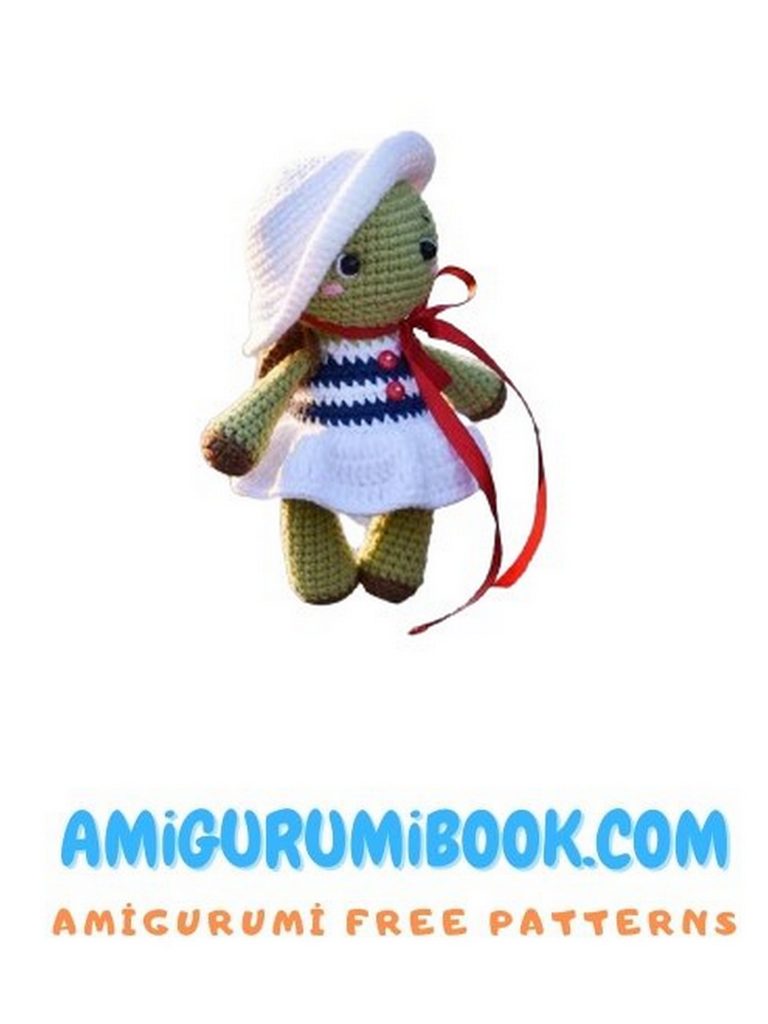
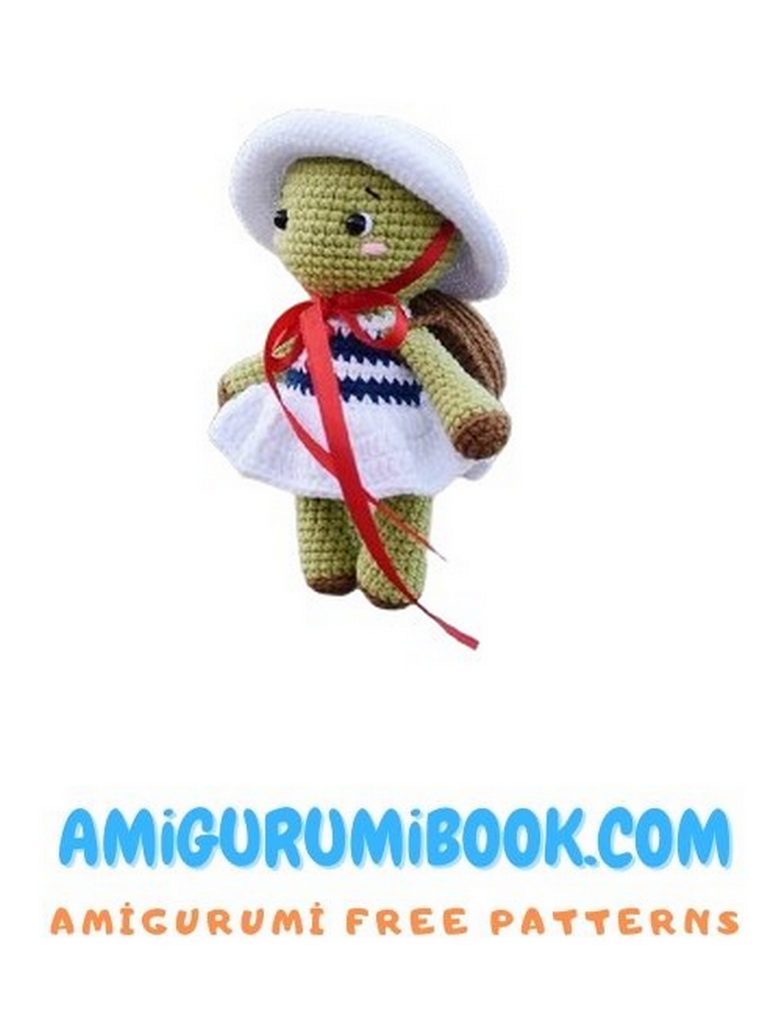
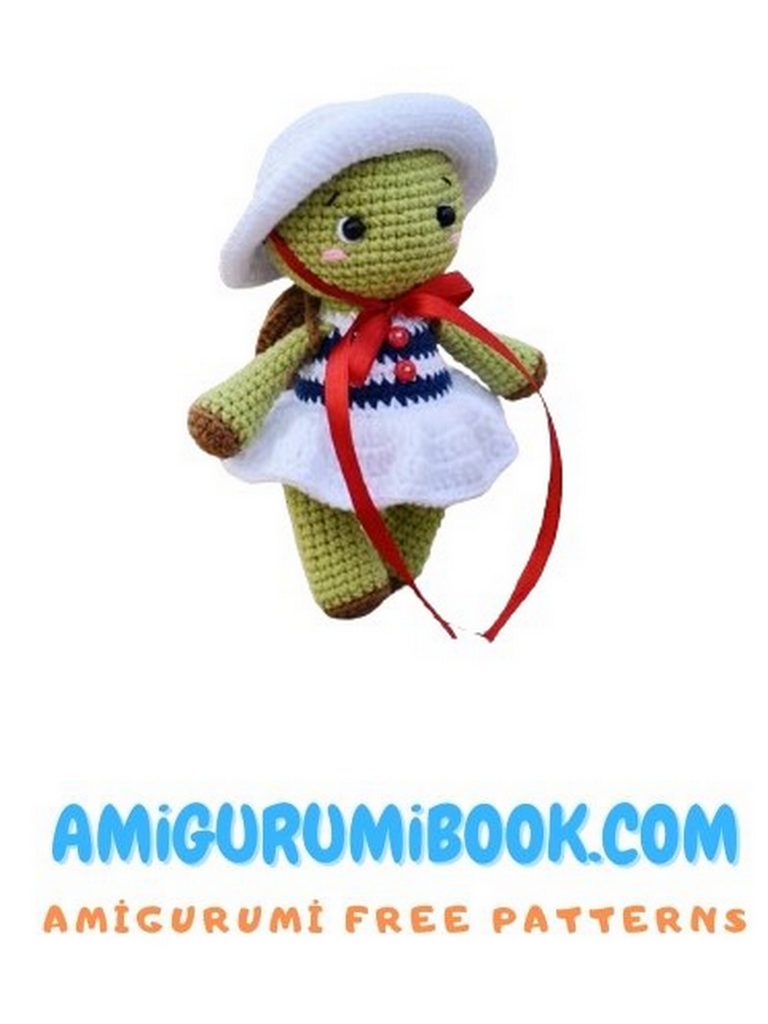
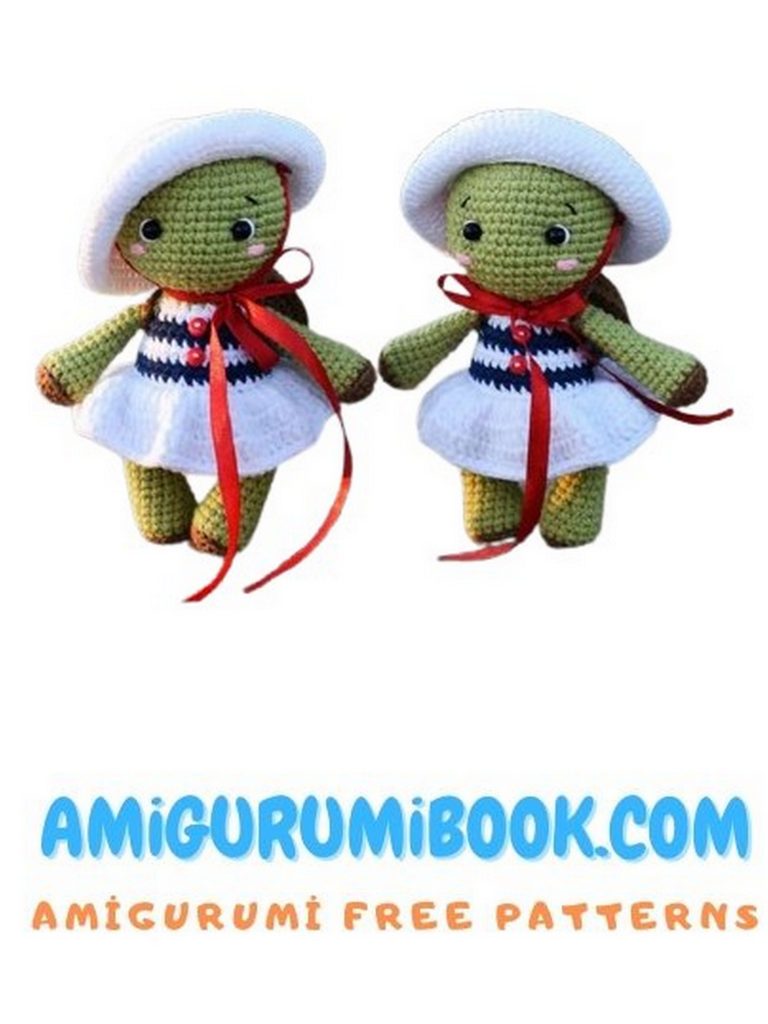
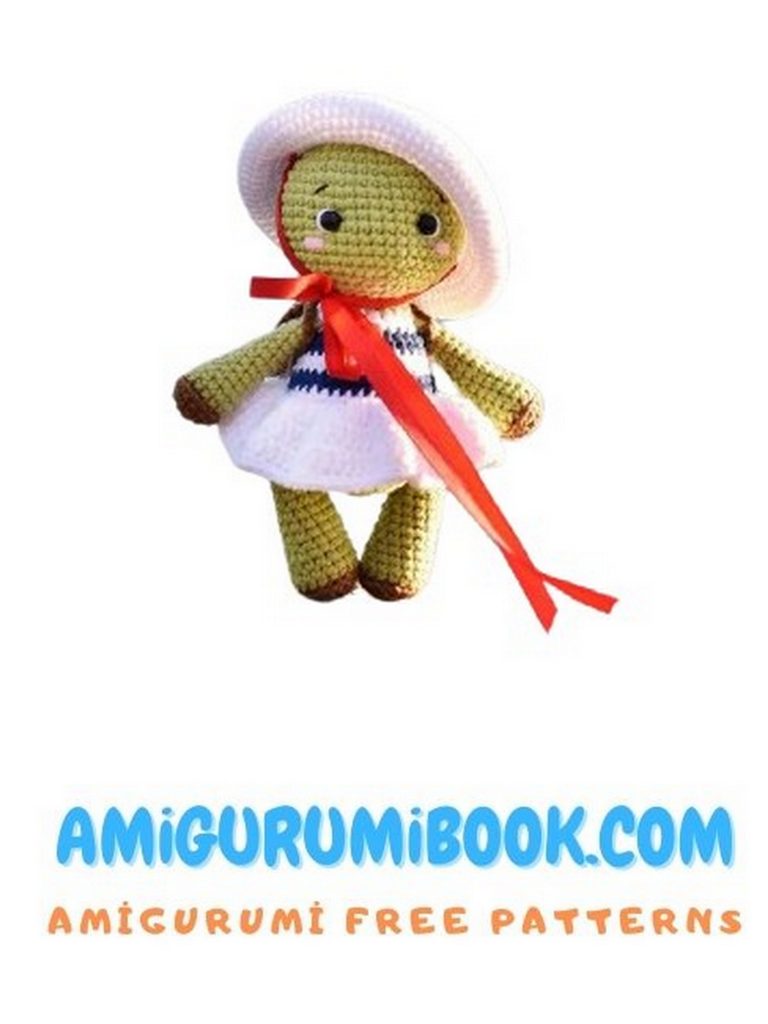
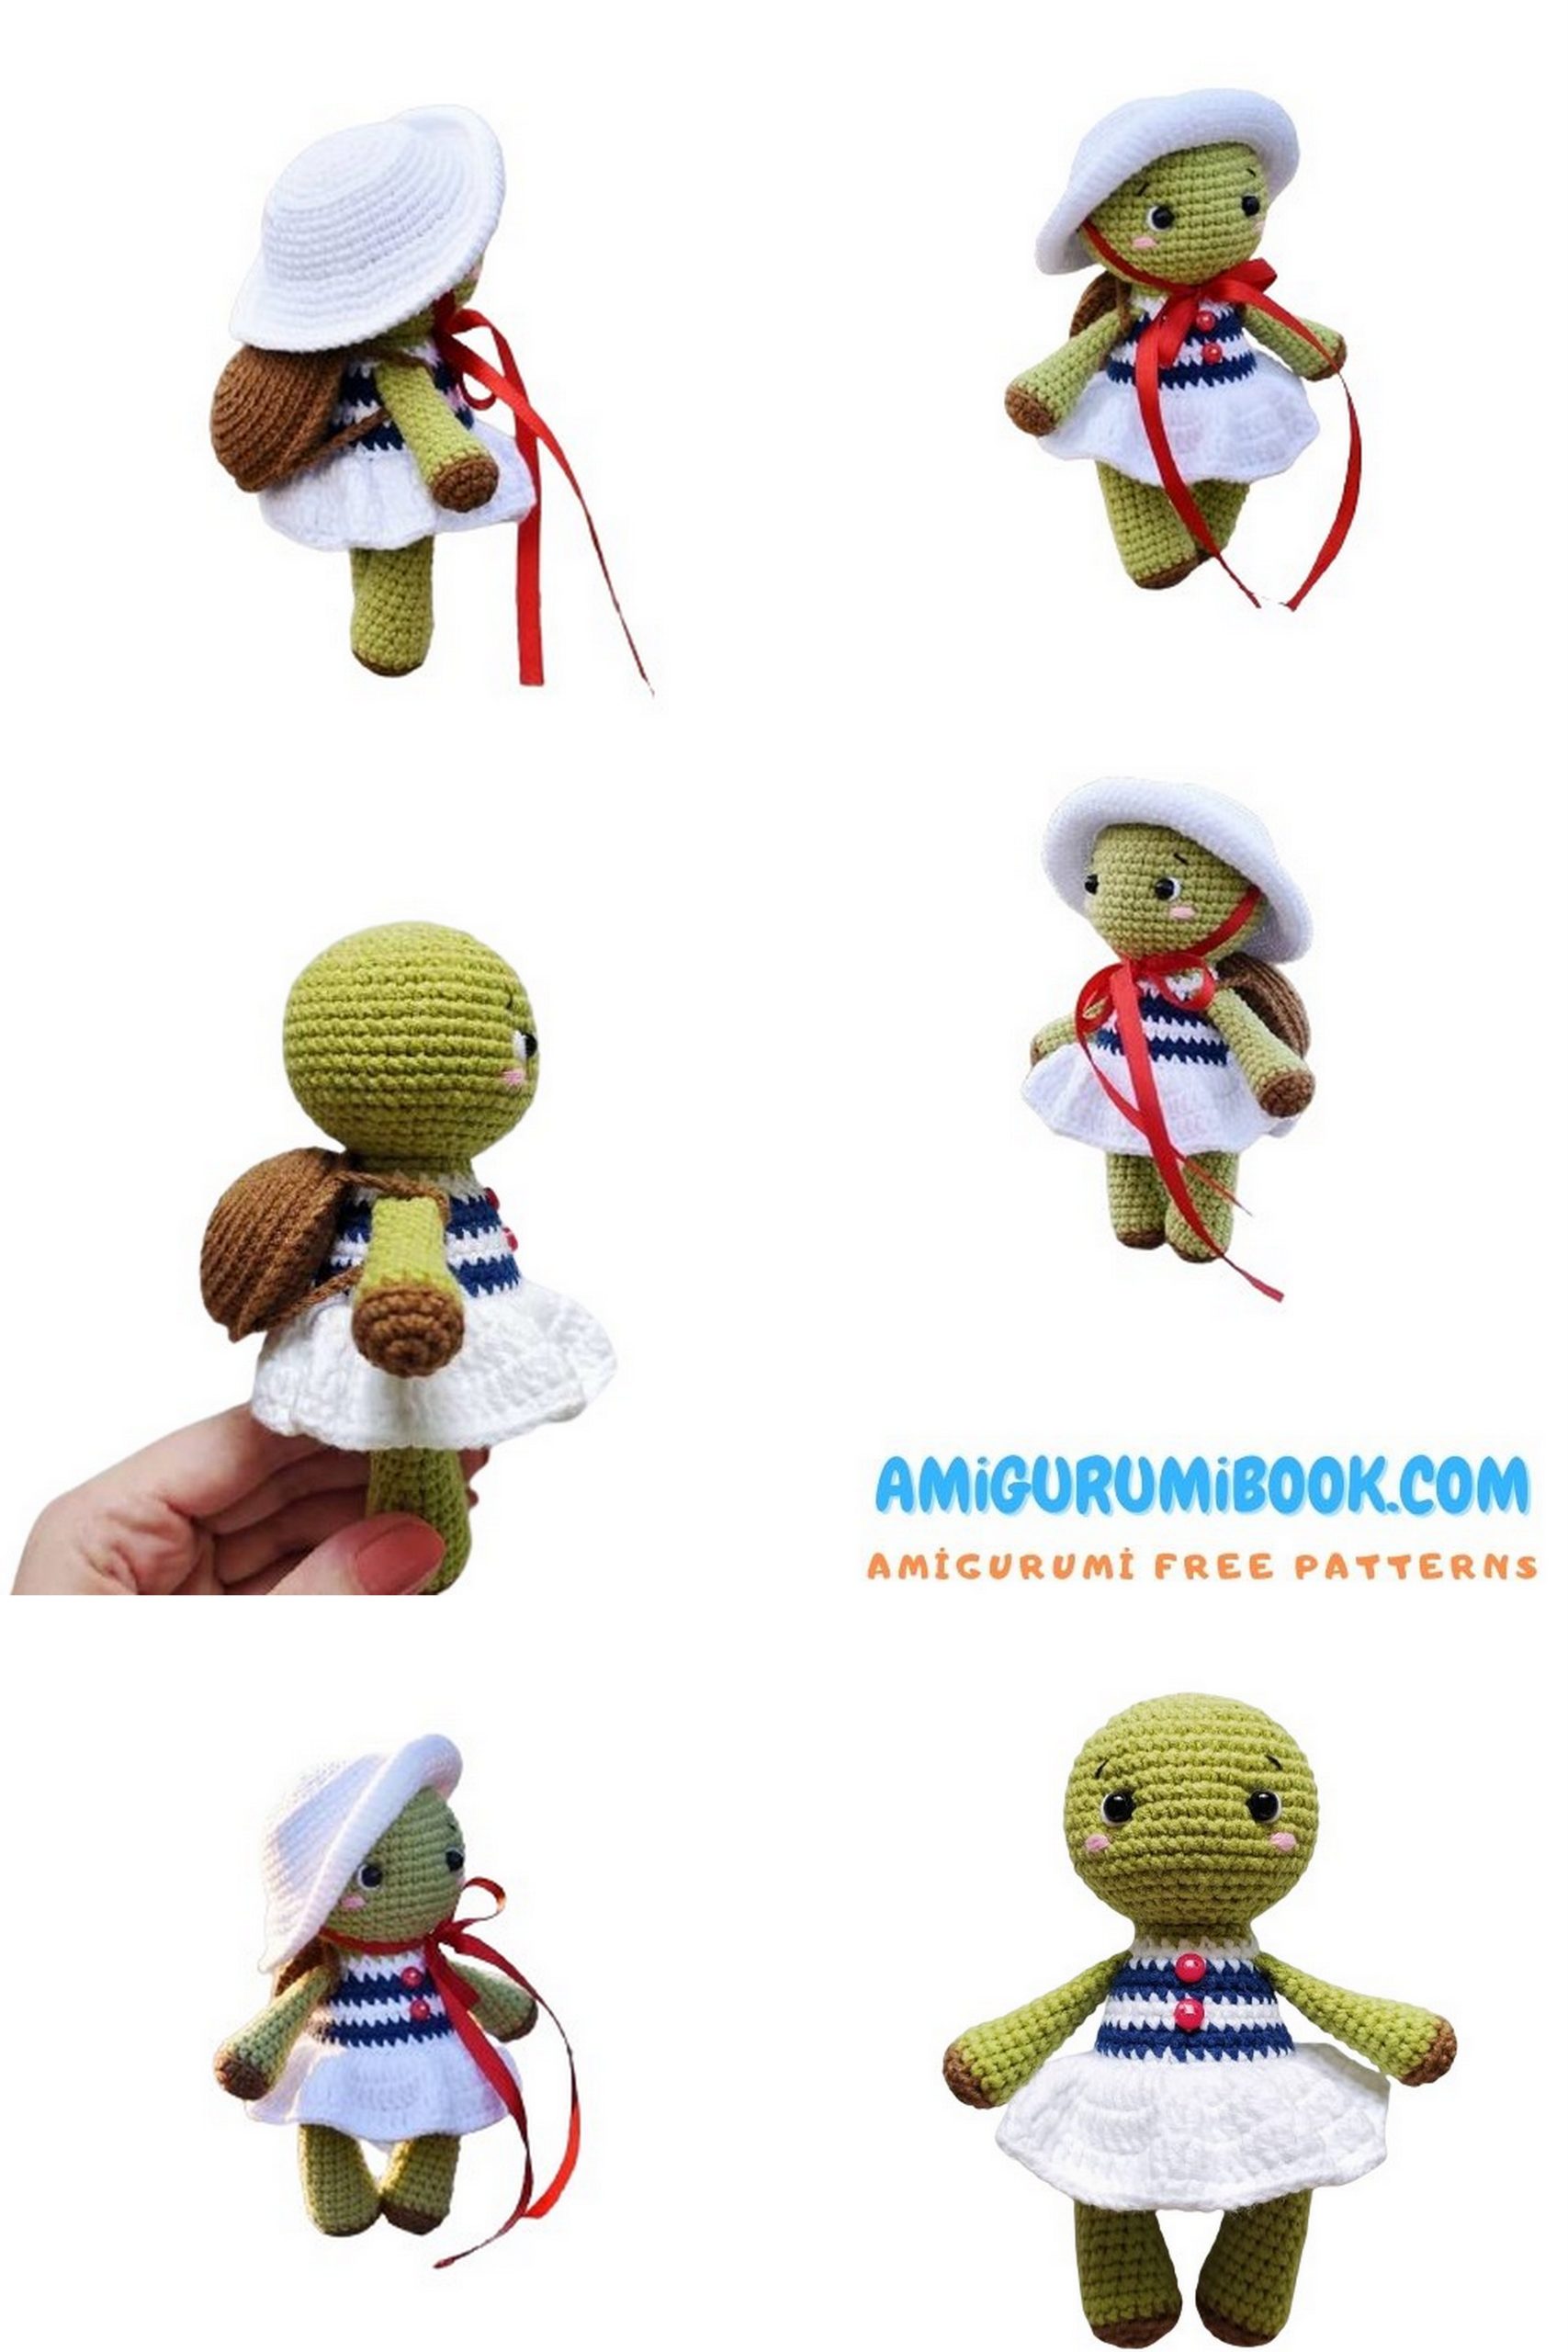
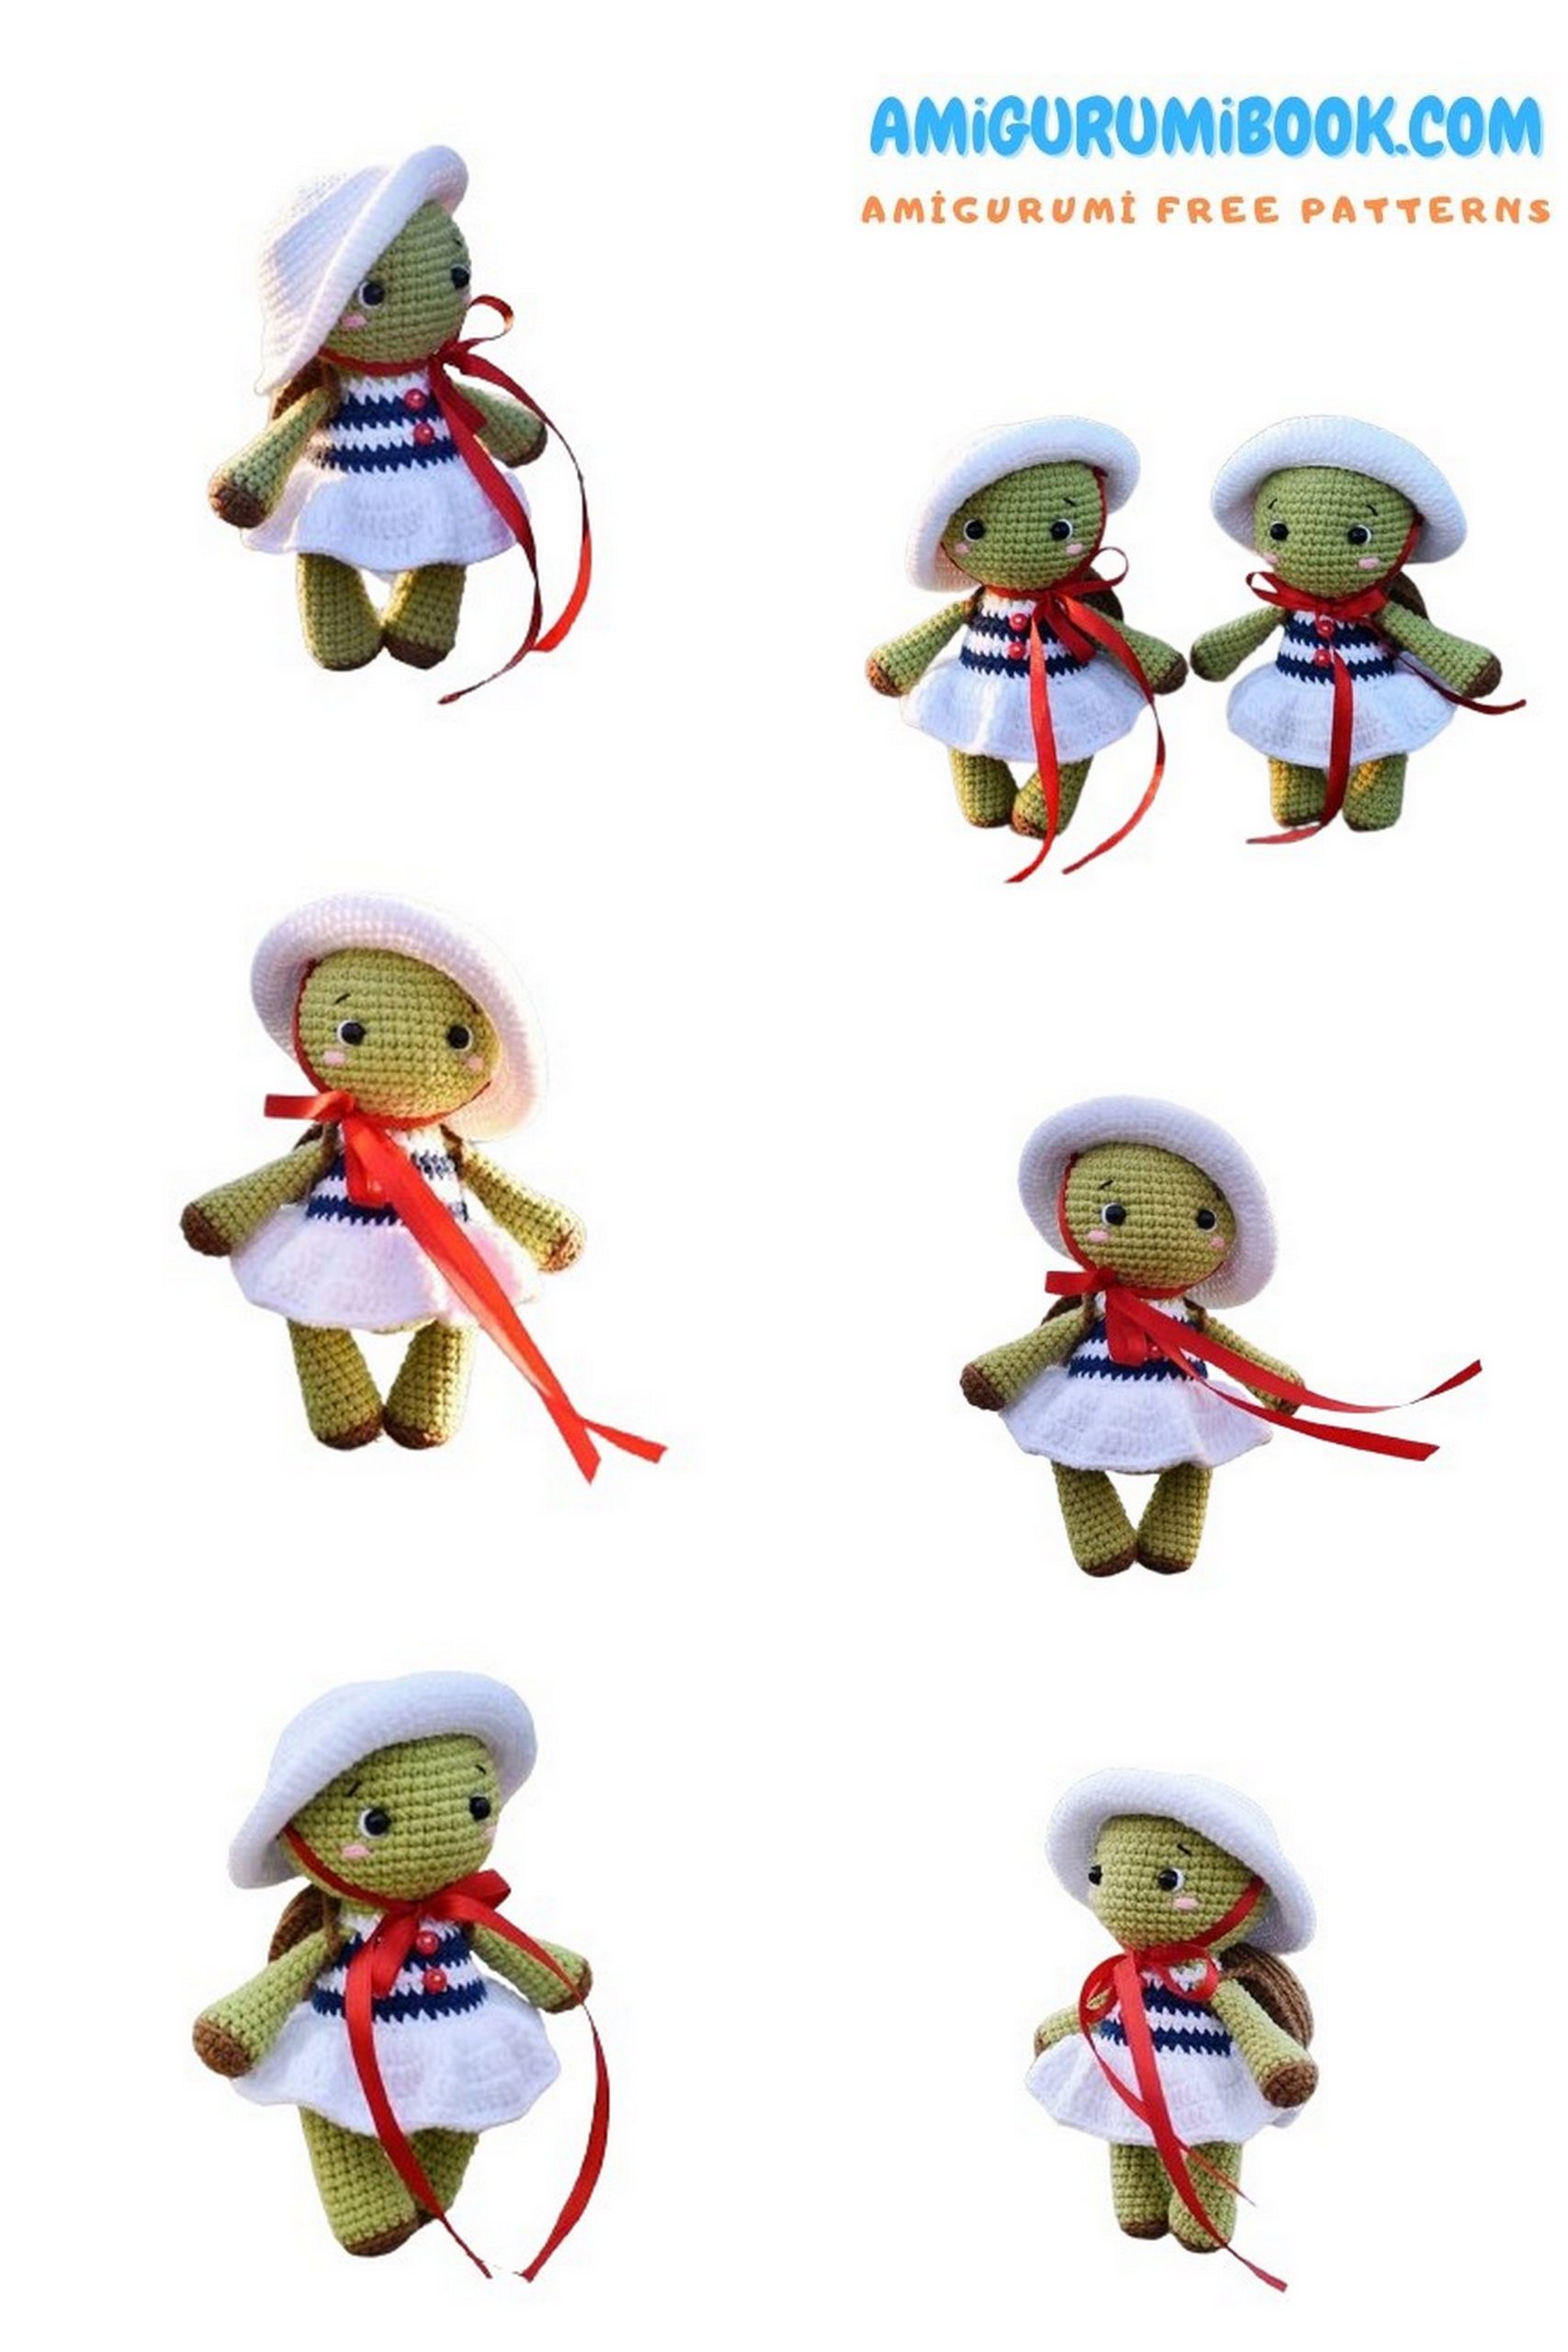
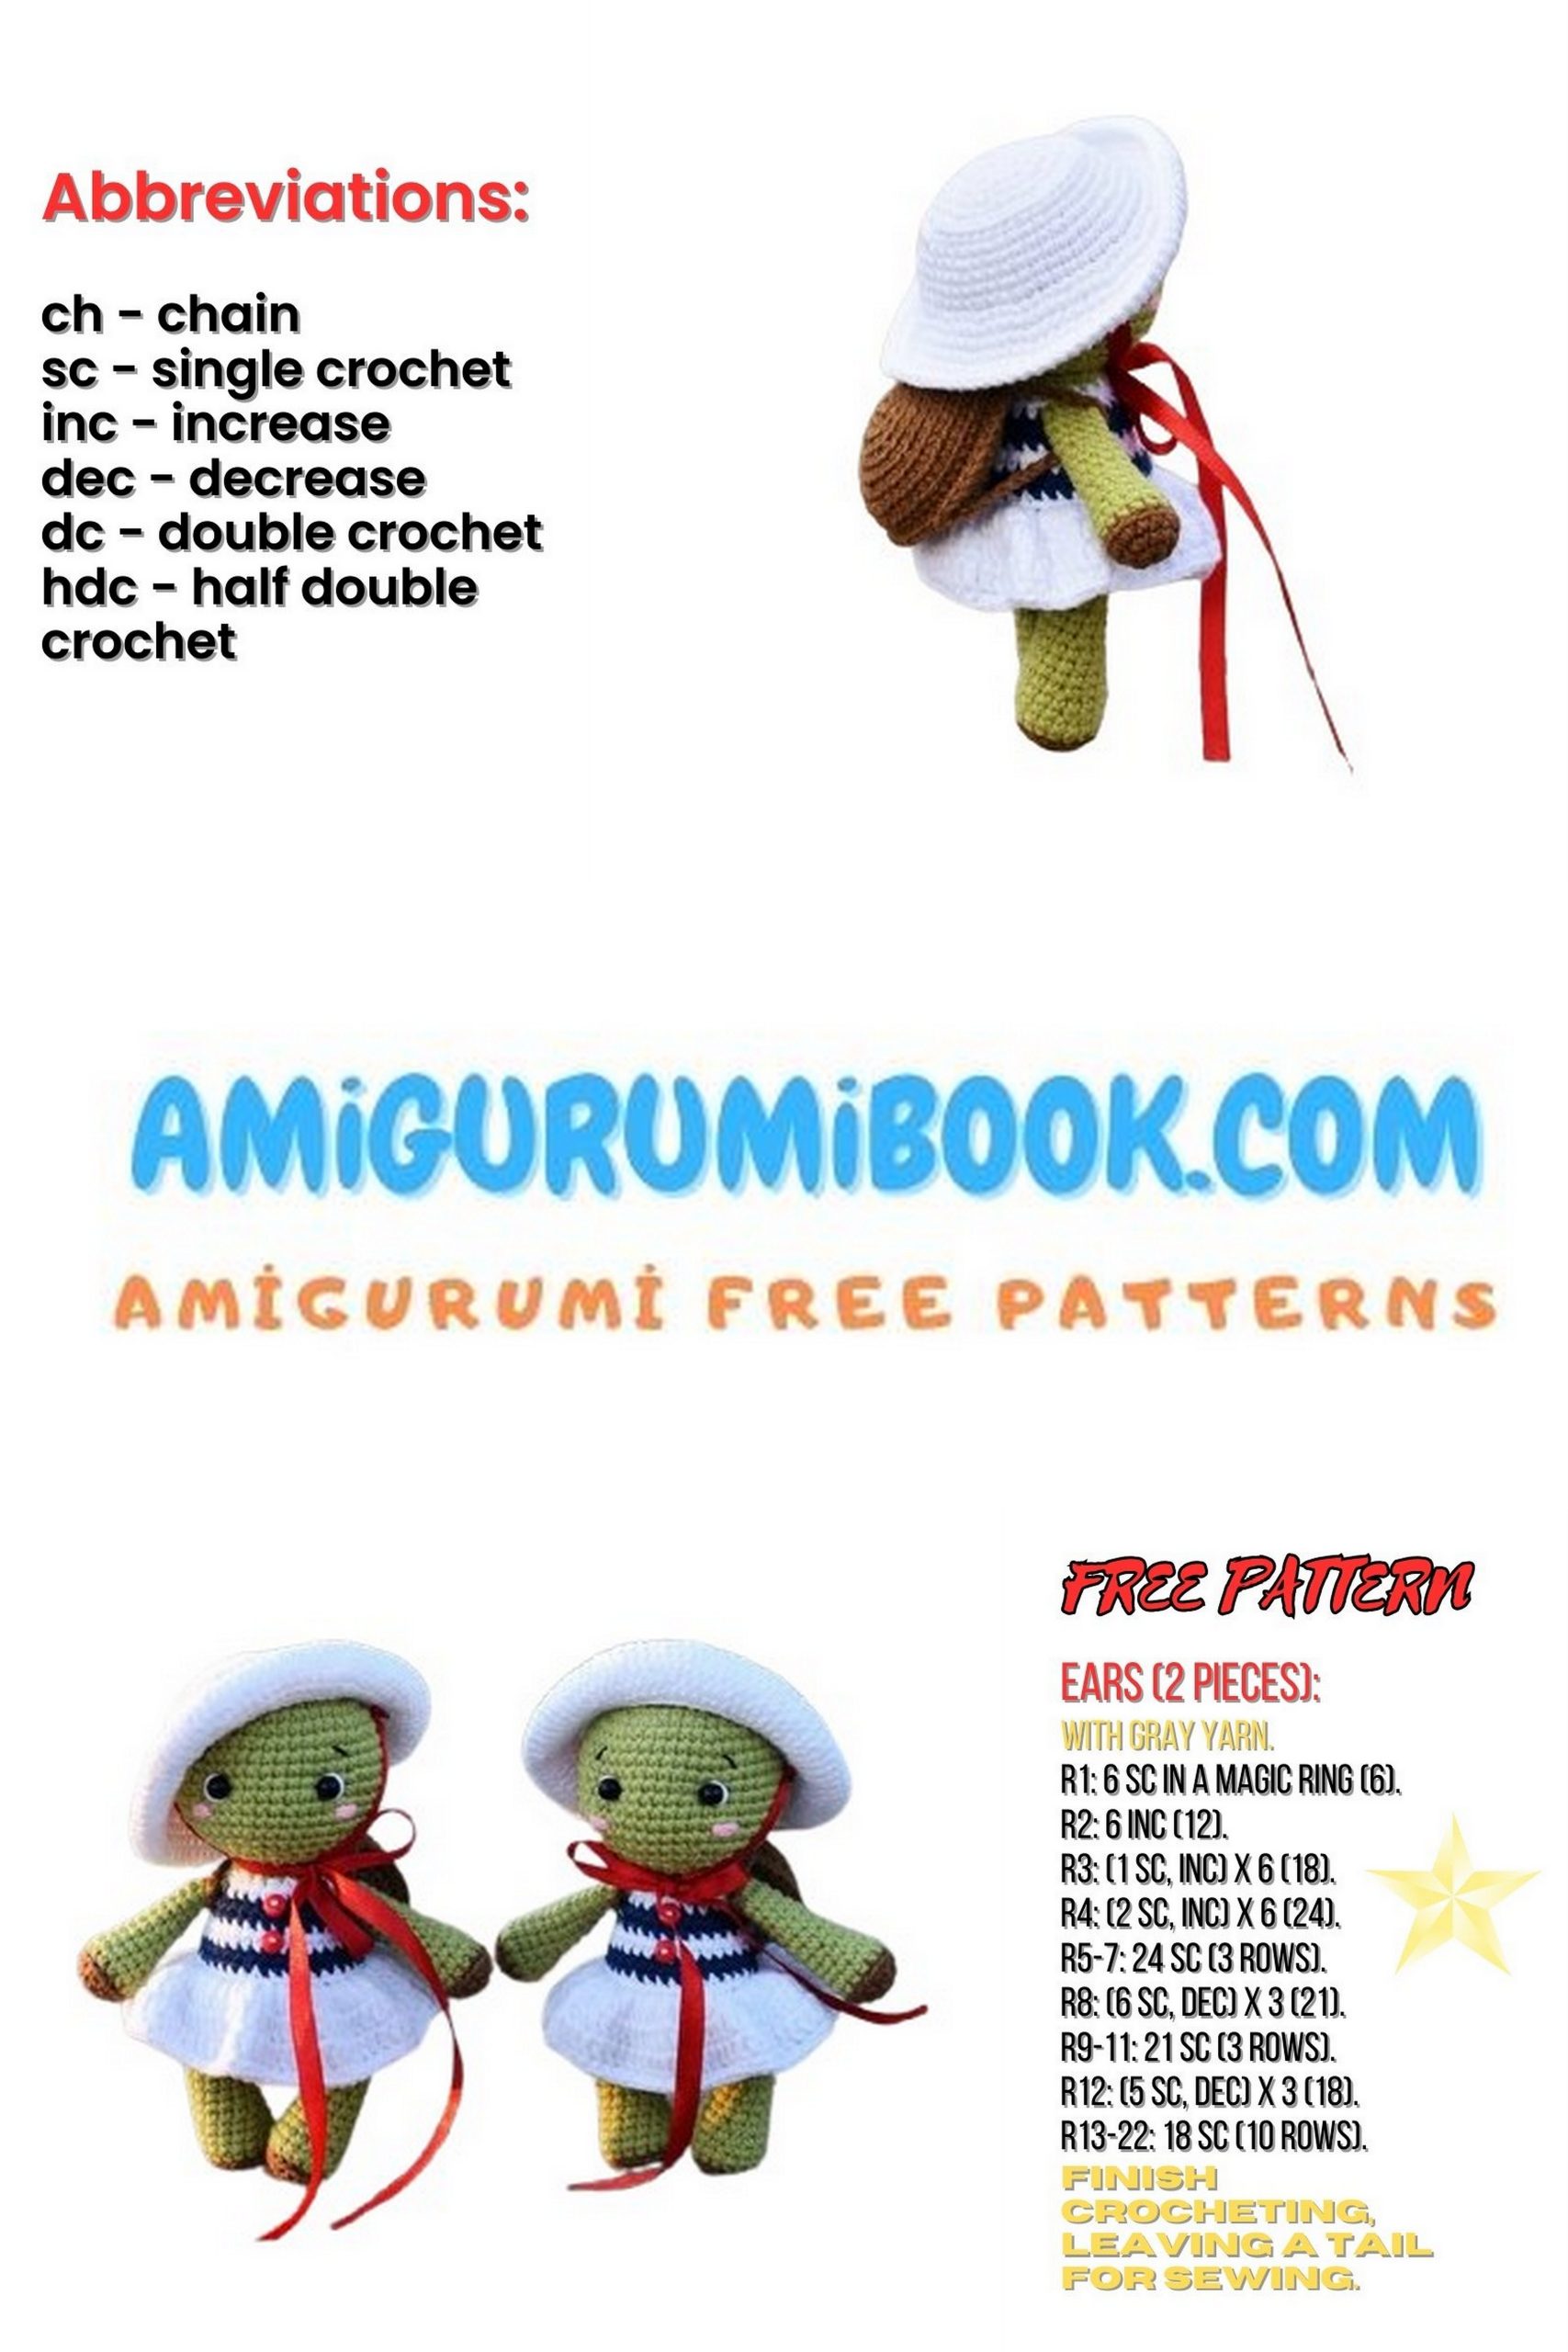
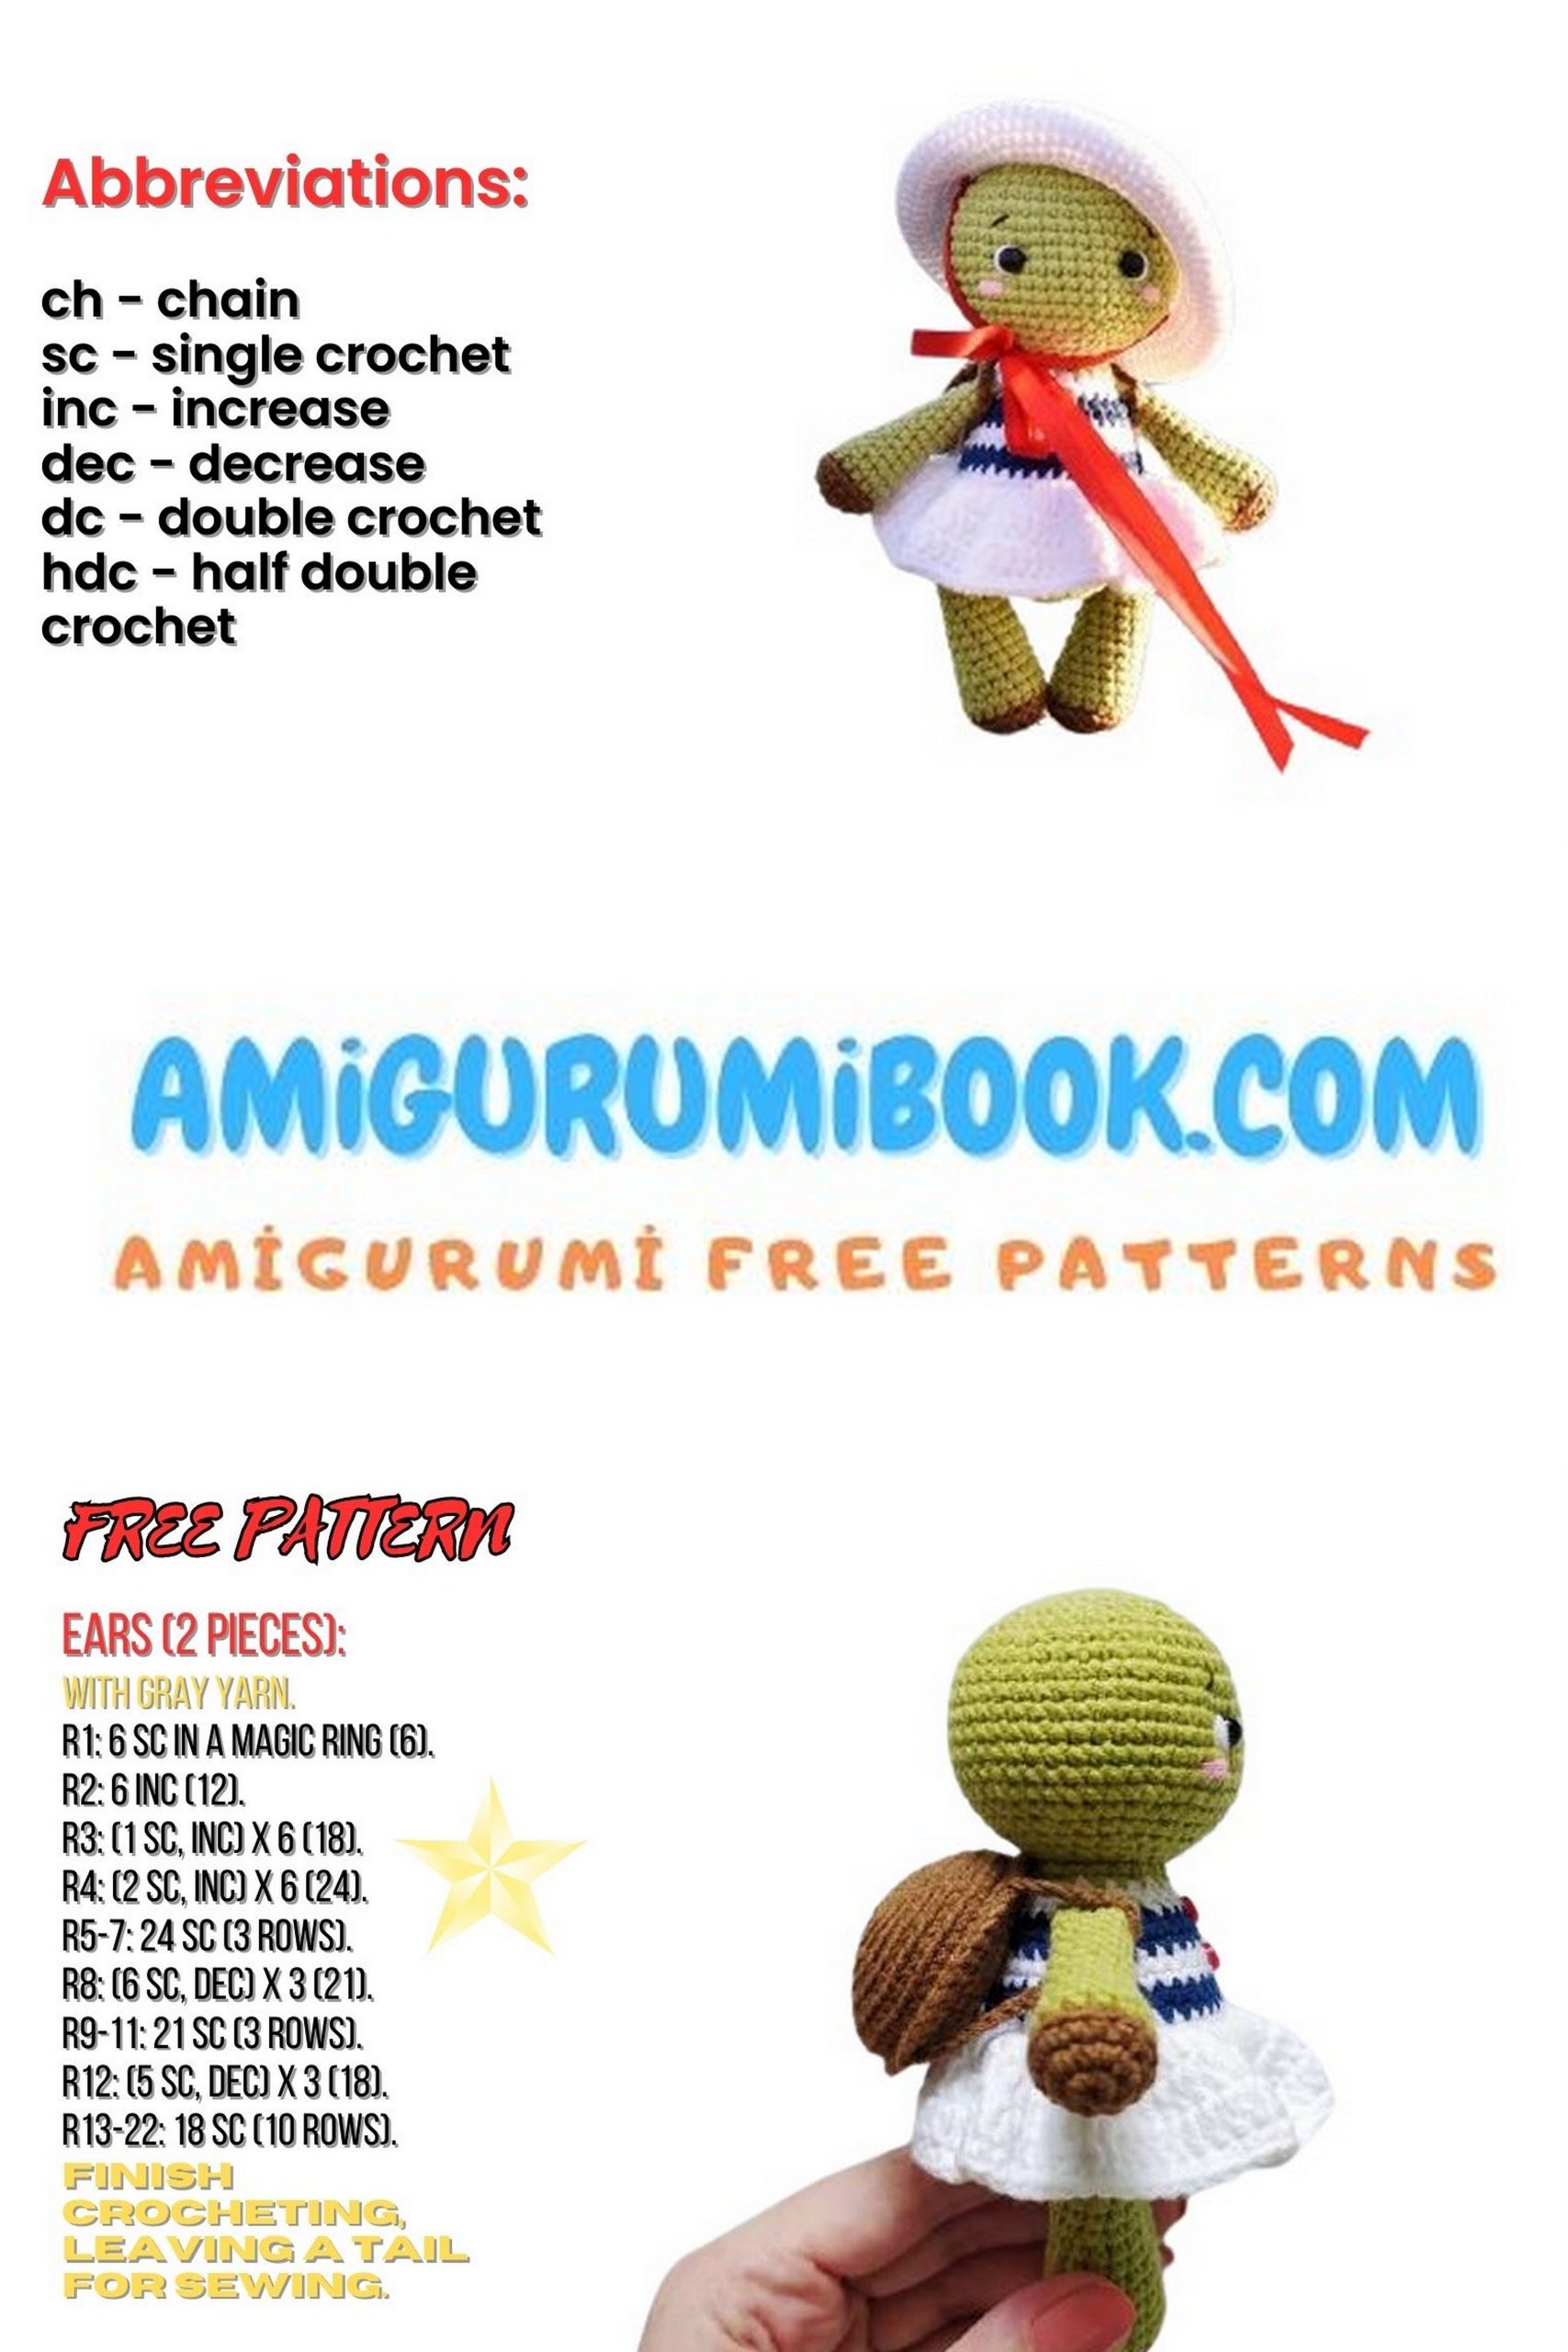
Discover the charm of a stylish Panama hat turtle amigurumi with this delightful free crochet pattern! Perfect for both beginners and experienced crafters, this adorable project combines creativity and fun to bring a unique handmade companion to life. free crochet patterns
You may also like more amigurumi patterns.
Elevate your amigurumi collection with our fashionable free pattern for a Panama hat amigurumi turtle! This adorable crochet project combines the charm of a cute turtle with the elegance of a Panama hat, creating a unique and stylish accessory. Whether you’re a crochet enthusiast looking for a new challenge or a beginner eager to learn, this pattern is perfect for you. Follow our easy-to-understand instructions and crochet your way to a delightful turtle wearing a trendy hat. Add a touch of whimsy to your decor or gift it to a friend who appreciates handmade treasures!
Materials and Tools Needed:
Yarn:
Alize Cotton Gold 100g/330m, color №385 (pistachio), №55 (white)
YarnArt Jeans 50g/160m, color №40 (brown), №54 (dark blue)
Crochet hook No. 2
Filling – polyester fiberfill
6mm diameter beads for eyes
Thick sewing needle, scissors, pins, knitting marker
Some black, white, and pink embroidery thread for facial features
6mm diameter buttons, satin ribbon for decoration
Abbreviations:
mr – amigurumi ring
sc – single crochet
ch – chain stitch
sl st – slip stitch
inc – increase
dec – decrease
dc – double crochet
(…) – number in parentheses indicates the number of stitches in a row
(…) * X – repeat the instruction in parentheses X times
Note:
This tutorial does not include crochet lessons and is intended for those with basic crochet skills. The difficulty level is medium. The finished toy size when using the specified materials is approximately 13.5 cm.
PATTERN
Amigurumi Turtle Head:
Tightly stuff as you crochet.
1: 6 sc in magic ring (6 sc)
2: inc in each stitch (12 sc)
3: (1 sc, inc) * 6 (18 sc)
4: 1 sc, inc, (2 sc, inc) * 5, 1 sc (24 sc)
5: (3 sc, inc) * 6 (30 sc)
6: 2 sc, inc, (4 sc, inc) * 5, 2 sc (36 sc)
7: (5 sc, inc) * 6 (42 sc)
8: 3 sc, inc, (6 sc, inc) * 5, 3 sc (48 sc)
9-16: 48 sc (8 rows)
17: 3 sc, dec, (6 sc, dec) * 5, 3 sc (42 sc)
18: (5 sc, dec) * 6 (36 sc)
19: 2 sc, dec, (4 sc, dec) * 5, 2 sc (30 sc)
20: (3 sc, dec) * 6 (24 sc)
21: 1 sc, dec, (2 sc, dec) * 5, 1 sc (18 sc)
Fasten off and cut the yarn, leaving a long tail to hide inside the head.
Amigurumi Turtle Body:
Start crocheting with pistachio color. Tightly stuff as you crochet.
1: 6 sc in magic ring (6 sc)
2: inc in each stitch (12 sc)
3: (1 sc, inc) * 6 (18 sc)
4: 1 sc, inc, (2 sc, inc) * 5, 1 sc (24 sc)
5: (3 sc, inc) * 6 (30 sc)
6: 2 sc, inc, (4 sc, inc) * 5, 2 sc (36 sc)
7: (5 sc, inc) * 6 (42 sc)
8-11: 42 sc (4 rows)
Switch to white color, cut off the pistachio yarn.
Body:
Start crocheting with pistachio color. Tightly stuff as you crochet.
12: 42 sc
13: work in back loops only, 42 sc
Switch to dark blue color, do not cut off the white yarn.
14: (5 sc, dec) * 6 (36 sc)
15: 36 sc
Switch to white color.
16: 36 sc
Switch to dark blue color.
17: 2 sc, dec, (4 sc, dec) * 5, 2 sc (30 sc)
Switch to white color.
18-19: 30 sc (2 rows)
Switch to dark blue color, cut off the white yarn.
20: (3 sc, dec) * 6 (24 sc)
21: 24 sc
Switch to pistachio color, cut off the dark blue yarn.
22: 1 sc, dec, (2 sc, dec) * 5, 1 sc (18 sc)
23: 18 sc
Secure and cut off the yarn, leaving a long end for sewing.
Amigurumi Turtle Arms:
Make two pieces. Stuff approximately to the middle (the top part does not need stuffing). Start crocheting with brown color.
1: 6 sc in magic ring (6 sc)
2: inc in each stitch (12 sc)
3: (3 sc, inc) * 3 (15 sc)
Switch to pistachio color, cut off the brown yarn.
4: work in back loops only, 15 sc
5: 15 sc
6: dec, 6 sc, dec, 5 sc (13 sc)
7: 13 sc
8: dec, 5 sc, dec, 4 sc (11 sc)
9-11: 11 sc (3 rows)
12: dec, 4 sc, dec, 3 sc (9 sc)
Make the second piece following the same pattern.
13-15: 9 sc (3 rows)
Crochet 4 more sc (or as many as needed so that when attaching the arms, the color change is on the inside). Fold the edges together, crochet 4 sc.
Secure and cut off the yarn, leaving a long end for sewing.
Amigurumi Turtle Legs:
Make two pieces. Stuff tightly while crocheting, stuffing the top part slightly less (to prevent the legs from protruding too much when sewn). Start crocheting with brown color.
1: 6 sc in magic ring (6 sc)
2: inc in each stitch (12 sc)
3: (1 sc, inc) * 6 (18 sc)
Switch to pistachio color, cut off the brown yarn.
4: work in back loops only, 18 sc
5: 18 sc
6: (dec, 7 sc) * 2 (16 sc)
7: 16 sc
8: (dec, 6 sc) * 2 (14 sc)
9-11: 14 sc (3 rows)
12: (dec, 5 sc) * 2 (12 sc)
13-15: 12 sc (3 rows)
16: (dec, 4 sc) * 2 (10 sc)
17: (dec, 3 sc) * 2 (8 sc)
Secure and cut off the yarn, leaving a long end. Use it to close the remaining hole. Hide the yarn tail inside the leg.
Assembly and Decoration:
Shape the face. First, create eye indentations by marking the eye bead placement locations with pins (points 1 and 2 on the photo), located between rows 12 and 13 with a distance of 8 sc between them. Visually mark points 3 and 4, which are located 1 sc away from points 1 and 2, respectively.
Insert a long needle with thread into the base of the head and bring it out at point 1. Then insert the needle into point 3 and bring it out at the base of the head. For added strength, you can repeat this step once more.
Similarly, create the second eye indentation, but this time, bring the needle out of the head at point 2. Then insert the needle into point 4 and bring it out again at the base. Pull the ends and tie a knot.
Attach the eye beads at the indentation points using white thread. Make stitches around the eyes with white thread to make the eyes look more lively. Embroider eyebrows above the eyes with black thread and cheeks (below eye level, between rows 14 and 15) with pink thread.
Pin the head to the body securely. Sew it on in a circular manner, adding more stuffing between the head and neck when there’s a small gap left, then sew it closed.
Mark the spots for the legs between rows 6 and 7 of the body. Attach them using the same yarn used for the body as thread.
Continue sewing the pieces together, then finish sewing up the gap.
Amigurumi Turtle Skirt:
Join white yarn and crochet into the front loops of the 12th row.
Crochet in the round, starting each round from the chain stitches and ending with slip stitches.
1: Ch 3, inc in each sc (84 sc)
2-3: Ch 3, 84 sc (84 sc)
4: Ch 1, 84 sc (84 sc)
Secure and cut off the yarn, hide the yarn tail.
Symmetrically sew the arms between rows 20 and 21 on the sides. Sew decorative buttons on the front for embellishment.
Amigurumi Turtle Shell:
Lower part:
1: 6 sc in magic ring
2: inc in each sc (12 sc)
3: (1 sc, inc) * 6 (18 sc)
4: 1 sc, inc, (2 sc, inc) * 5, 1 sc (24 sc)
5: (3 sc, inc) * 6 (30 sc)
6: 2 sc, inc, (4 sc, inc) * 5, 2 sc (36 sc)
7: (5 sc, inc) * 6 (42 sc)
Finish off with slip stitches, secure and cut off the yarn, hide the yarn tail.
Upper part:
1: 6 sc in magic ring
2: inc in each sc (12 sc)
Starting from the third row, crochet through the back loops only.
3: (1 sc, inc) * 6 (18 sc)
4: 1 sc, inc, (2 sc, inc) * 5, 1 sc (24 sc)
5: (3 sc, inc) * 6 (30 sc)
6: 2 sc, inc, (4 sc, inc) * 5, 2 sc (36 sc)
7: (5 sc, inc) * 6 (42 sc)
8-9: 42 sc (2 rows)
Do not cut the yarn, continue crocheting.
Fold the two shell pieces with the wrong side facing inwards and join them by crocheting 42 sc. When there’s a small hole left, insert the stuffing, not too tightly. Continue crocheting and close the hole completely without cutting the yarn.
Make a chain of 20 chains, count 10 sc along the shell and join the chain with a slip stitch to the 11th sc. Secure and cut off the yarn. From the first point (where you started crocheting the chain of chains), count 8 sc and join a new yarn in this stitch. Similarly, crochet and attach the second strap.
Try the shell on the back; it should fit well (if the shell is loose or too tight, adjust the number of chains in the straps). Hide all yarn tails inside.
Panama Hat:
1: 6 sc in magic ring
2: inc in each sc (12 sc)
Starting from the third row, crochet through the back loops only.
3: (1 sc, inc) * 6 (18 sc)
4: 1 sc, inc, (2 sc, inc) * 5, 1 sc (24 sc)
5: (3 sc, inc) * 6 (30 sc)
6: 2 sc, inc, (4 sc, inc) * 5, 2 sc (36 sc)
7: (5 sc, inc) * 6 (42 sc)
8: work in back loops only, 42 sc
9: 42 sc
10: 3 sc, inc, (6 sc, inc) * 5, 3 sc (48 sc)
11: 48 sc
12: (7 sc, inc) * 6 (54 sc)
13: 54 sc
14: work in front loops only, (2 sc, inc) * 18 (72 sc)
15: 72 sc
16: (11 sc, inc) * 6 (78 sc)
17: 6 sc, inc, (12 sc, inc) * 5, 6 sc (84 sc)
18-19: 84 sc (2 rows)
Secure and cut off the yarn, hide the yarn tail.
To make ties on the inside of the hat, sew (or attach) satin ribbons to the back loops of the 13th row.